using power tools
TRANSCRIPT

Lesson A3–3
Using Power Tools
Unit A. Mechanical Systems and Technology
Problem Area 3. Construction Systems
Lesson 3. Using Power Tools
New Mexico Content Standard:
Pathway Strand: Power, Structural and Technical Systems
Standard: VII: Develop skills required to use construction/fabrication equipment and
tools.
Benchmark: VII-A: Use tools in the workplace to demonstrate safe and proper skills with
construction/fabrication hand tools.
Performance Standard: 3. Demonstrate safe and proper techniques in using hand and
power tools in construction/fabrication. 4. Demonstrate hand and power tools use to
construct/fabricate an actual project according to blueprints or plans.
Student Learning Objectives. Instruction in this lesson should result in students
achieving the following objectives:
1. Explain and compare the power sources used for power tools.
2. Discuss power tool safety.
3. Explain how to operate portable power tools.
4. Discuss the operation of stationary woodworking power tools.
New Mexico Agricultural Mechanics and Technology Lesson Plan Library
Unit A. Problem Area 3. Lesson 3. Page 1.

List of Resources. The following resources may be useful in teaching this lesson:
Recommended Resources. One of the following resources should be selected to accompany the
lesson:
Herren, Ray V., and Elmer L. Cooper. Agricultural Mechanics Fundamentals &
Applications. Albany, New York: Delmar Publishers, 2002. (Textbook, Lab
Manual, and Teacher’s Manual—Units 14 and 15)
Phipps, Lloyd J., et al. Introduction to Agricultural Mechanics, Second Edition. Upper
Saddle River, New Jersey: Prentice Hall Interstate, 2004. (Textbook, Chapter 5)
Power Tool Transparency Set. Danville, Illinois: Interstate Publishers, Inc.
Other Resources. The following resources will be useful to students and teachers:
Burke, Stanley R., and T.J. Wakeman. Modern Agricultural Mechanics. Danville,
Illinois: Interstate Publishers, Inc., 1992. (Textbook, Chapters 13 and 14)
Phipps, Lloyd J., and Reynolds, Carl L. Mechanics in Agriculture. Danville, Illinois:
Interstate Publishers, Inc., 1992. (Textbook Chapters 13 and 14)
List of Equipment, Tools, Supplies, and Facilities
Writing surface
Overhead projector
Transparencies from attached masters
Copies of student lab sheets
Power tools
Terms. The following terms are presented in this lesson (shown in bold italics):
Band saw
Belt sander
Chain saw
Drill chuck
Drill press
Finishing sander
Ground fault interrupter (GFI)
Grounding
Hammer drill
Hydraulic tool
Jointer
Miter gauge
Motorized miter saw
Planer
New Mexico Agricultural Mechanics and Technology Lesson Plan Library
Unit A. Problem Area 3. Lesson 3. Page 2.

Pneumatic tool
Portable circular saw
Portable disc grinder/sander/buffer
Portable drills
Portable power tools
Power nail guns
Power staplers
Power tool
Push stick
Radial arm saw
Reciprocating saw
Rip fence
Router
Sabre saw
Scroll saw
Stationary power tools
Table saw
Interest Approach. Use an interest approach that will prepare the students for the les-
son. Teachers often develop approaches for their unique class and student situations. A possible
approach is included here.
Tour the shop showing the students the portable and stationary power tools available for their use. Ask
students which tools they have used. Talk about the importance of knowing how to use the various tools.
Touring a hardware store or a tool rental business would be helpful in seeing power tools. Use the internet
to compare tools from major tool companies. Some of the major companies are Milwaukee, Delta, Black
& Decker, Dewalt, and Makita.
Summary of Content and Teaching Strategies
Objective 1: Explain and compare the power sources used for power tools.
Anticipated Problem: What are the power sources used with power tools?
I. A power tool is any tool that has power for its operation from a source other than human
force. While humans may move the power tool or parts of the power tool in its operation,
the major power for operating the primary working part(s) is not from human effort. Power
for power tools is from four primary sources: electricity, fuel engines, pneumatics, and hy-
draulics.
A. Electric-powered plug-in power tools are the most commonly used power tools. Saws,
drills, and sanders are the popular tools. Portable battery powered drills have become
very popular. The charger is plugged in to recharge the battery.
New Mexico Agricultural Mechanics and Technology Lesson Plan Library
Unit A. Problem Area 3. Lesson 3. Page 3.

B. Fuel engines are typically gasoline, but diesel and propane are sometimes used. Engines
are used on tools that are not in locations where electricity, pneumatic, or hydraulics can
be used. Chain saws, leaf blowers, post hole diggers, and electrical generators are exam-
ples of fuel engine powered tools.
C. A pneumatic tool uses compressed air as power for operation. Pneumatic powered nailers
and staplers are commonly used in construction.
D. A hydraulic tool uses a compressed liquid, usually oil, to provide the power for tool oper-
ation. Jacks, loaders, lifts, and presses are often hydraulically powered.
E. Frequently, combinations of two power sources are used. Hydraulic pressure is typically
developed by using an electric motor or a fuel engine. Electric motors are used to de-
velop air pressure to operate pneumatic tools. Gasoline engines are used on portable
electric generators to power electric tools.
Either of the recommended texts contains general information on this objective. Have students read the
suggested chapter. Show examples of tools powered by electricity, air pressure, and hydraulics. Use TM:
A3–3A. Discuss situations when each of the power sources make sense.
Objective 2: Discuss power tool safety.
Anticipated Problem: What do I need to know in order to operate power tools safely?
II. A big difference between hand tools and power tools is that power tools are more dangerous.
Accidents with power tools are often more serious. Improper use can result in losing an eye,
finger, hand, or even your life.
A. Never operate a power tool without reading the operator’s manual. An operator’s man-
ual is a written description of how to safely use and maintain a power tool. A manual
usually accompanies a new power tool. Proper assembly, installation, service procedures,
and parts lists as well as operating instructions are given. Check out a new tool before
operating it with special attention given to condition of any shields or guards.
B. Grounding is to prevent electrical shock. All electric-powered tools should be properly
grounded so that if a short develops the operator will not be shocked or electrocuted.
Grounded tools may be identified by the three-prong plug. Double-insulated tools use
two-wire, non-grounded cords with electric parts insulated or separated from the user by
special insulation inside the motor and by the use of a plastic motor housing. Check the
operator’s manual of any power tool with a two prong plug to be sure it is double-
insulated.
C. Avoid damp or wet areas when using electrical power tools. A ground fault interrupter
(GFI) is recommended wherever electricity, people, and water are present. It breaks the
circuit whenever there is a ground fault. This protects the operator from electrical shock
and potential electrocution. Extension cords are now available with GFI protection. If
any moisture is present, wearing rubber sole shoes will increase your resistance to possi-
ble electrical shock.
New Mexico Agricultural Mechanics and Technology Lesson Plan Library
Unit A. Problem Area 3. Lesson 3. Page 4.

D. The operator is responsible for selecting and using personal safety protection devices
appropriate for the tools that are being used. Eye glasses, goggles, or a face shield are a
must. For loud tools ear muffs or ear plugs are important. Leather shoes with steel toes
are recommended in many situations. Some situations call for long sleeves, gloves,
masks, or respirators.
E. Keep tools in good condition. Always check the condition of the tool before using it.
Guards, shields, cords, and hoses should be carefully inspected. Be sure blades and bits
are sharp. Sharp tools will require less pressure to make the tool function resulting in a
safer situation.
F. Study the operator’s manual and the recommended textbook material to learn the pro-
cedures for safe operation of the tool you want to use. In addition to learning proper pro-
cedures, use common sense to help avoid accidents.
Assign students to read the suggested chapters in the recommended resource textbooks. Ask students if
they or anyone they know has ever been injured when using a power tool. Talk about what happened, why
it happened, and how it could be avoided. Review tool operator’s manuals to see the safety instructions.
Look at safety rules posted in your shop near stationary power tools and TM: A3–3B transparency.
Remind students to “think safety”. Stress the importance of the safety attitude and discuss how easily
someone can get hurt. If someone in the community is available who has been injured (lost finger, etc.) use
them as a guest speaker to stress safety.
Objective 3: Explain how to operate portable power tools.
Anticipated Problem: How are portable power tools properly operated?
III. Portable power tools can easily be moved from job to job. They save labor and are relatively
inexpensive to buy. Stationary power tools are too large and bulky to move about so jobs are
brought to the tool. Both portable and stationary models of the power tools are designed to
do the same work. Portable models are lighter and designed with handles to make them easy
to use. Portable power tools with electric cords or air hoses are limited to areas were electric-
ity is present. A cordless power tool is a tool powered by electric energy stored in a battery.
Battery-operated power tools make it possible to complete work quickly and efficiently. Pur-
chase a second battery so that one can be charging while the other one is being used. Porta-
ble power tools commonly used in carpentry are sanders, drills, saws, and routers.
A. A portable disc grinder/sander/buffer is a rotating disc that is used for work where the
material to be ground, sanded, or buffed is too large or heavy to move to a stationary
tool. Secure the work, hold tightly to the tool, wear eye protection, and dust mask. A
portable belt sander uses a rotating sanding belt to rapidly smooth wood. The belt
sanders are usually used for rough sanding but the belts vary in coarseness. Most belt
sanders are equipped with a dust bag. When putting on a new belt be sure to watch the
arrow on the belt so that the belt is installed correctly. Hold the belt sander with both
hands and turn on the switch before the sander touches but when it is very near the sur-
face to be sanded. Sand with the grain gently moving the sander in a straight but slightly
New Mexico Agricultural Mechanics and Technology Lesson Plan Library
Unit A. Problem Area 3. Lesson 3. Page 5.

sideways back-and-forth motion. A finishing sander is used for final sanding. It moves in
a forward and backward motion or in an orbital or circular motion at a high rate of
speed. Move the finish sander back-and-forth with the grain of the wood until the
desired smoothness is achieved. Several fineness grades of sandpaper are available.
B. Portable drills are usually variable speed, reversible, and sized by the maximum size hole
they can drill (ex. ¼ inch, 3/8 inch, or ½ inch). When drilling metal, first mark the loca-
tion to be drilled with a center punch. Be sure to secure the work with a clamp or in a
vise prior to drilling. Exert pressure to help get the twist drill to go into the material.
Relieve the pressure as the point of the bit begins to go through the material. The drill
chuck is the three-jaw part that holds the bit. Older drills have a chuck key to tighten
the bit while the newer drills are usually keyless, self-tightening. A hammer drill is a drill
that not only turns the bit but also provides a rapid striking action on the bit to speed up
drilling in masonry materials.
C. Portable saws include the sabre saw, reciprocating saw, circular saw, and chain saw.
1. A sabre saw has a narrow blade located underneath the base that moves up and
down to cut circles, curves, and holes. Most cuts begin at the edge of the material to
be cut. In cutting a hole in the middle of a piece of material, first drill a hole so that
the blade can be inserted. Be sure the material to be cut is firmly held in position.
Move the saw slowly and carefully to achieve quality cuts. Use slower speeds for
metal and faster speeds for wood. A sabre saw is also known as a jig saw or bayonet
saw.
2. A reciprocating saw (also known as a sawsall or tiger saw) has the blade at the end,
much like the chuck of a drill. Any material to be cut should be carefully held in
position. The reciprocating saw is larger and heavier than a sabre saw. Blades in a va-
riety of lengths and widths can be used. The reciprocating saw is often used in re-
modeling work when holes are cut in walls to install new windows.
3. A portable circular saw is a lightweight, motor-driven, round-bladed saw used where
stationary saws are impractical. It is the most popular saw used in woodworking. This
saw can be used for crosscutting, ripping, and beveling. Because of its high speed
and the tendency to kick back, the portable circular saw can be a dangerous tool.
Before operating a portable circular saw, read the operator’s manual, check the
working condition of the guard, see that the saw is grounded and the blade is sharp.
Saw to the line. When cutting a long board have a helper support the piece being cut
off so that the blade does not kick back when the board is cut.
4. A chain saw is a gas or electric powered saw used in cutting and pruning trees and
cutting large pieces of lumber where precision is not important. Cutting with a chain
saw is by an endless chain that has teeth attached to links of the chain. The chain is
similar to that found on a bicycle. Oil is regularly released onto the chain in small
amounts to assure that it moves with little friction around the guide bar. Proper ten-
sion adjustment is always needed to assure safety and efficient cutting. A loose-
fitting chain can jump from the guide bar and cause injury. Careful attention must be
given to safety. The blade must be kept away from parts of the body, such as the
New Mexico Agricultural Mechanics and Technology Lesson Plan Library
Unit A. Problem Area 3. Lesson 3. Page 6.

arms, legs, and feet. Always stand with good balance and securely grip the handles.
Chain saws sometimes kickback. Without a good grip and balance, the operator
could be cut, knocked down, or otherwise injured. Eye protection is always needed.
Hearing protection is needed with a chain saw powered by a gasoline engine. Chaps
(heavy leg wear), gloves, and steel-toed shoes are recommended. A hardhat is a good
idea too.
D. A router is a power tool that has a smooth base that is moved across the material by the
operator as the protruding bit turns at a high rate of speed to create grooves and orna-
mental shapes on the face or edge of wood. The groove or cut is determined by the type,
shape, and size of the bit. Bits that are dull, rusted, or covered with gum from the wood
are dangerous and should not be used. Clean, sharp bits will provide clean even cuts if
the router is held firmly to the wood. Guides and jigs can be used to help do straight
lines, circular, or contour routing.
E. Power nail guns are either pneumatic or use a battery generated spark to ignite a charge
of gas to drive nails. Power staplers are like the nailers only they shoot staples. The guns
have a safety mechanism that will prevent firing nails or staples unless the gun is in con-
tact with the work to be joined.
Refer students to the appropriate chapters in the recommended texts. Each of them contains general infor-
mation on the content of this objective. Use operator’s manuals and the recommended texts for more infor-
mation about the procedures for using portable power tools. Use TM: A3–3C to show pictures of the por-
table power tools. Use LS: A3–3A to complete skill development shop exercises with portable power tools.
Additional lab sheets are included in the Agricultural Mechanics Fundamentals & Applications Lab
Manual (Unit 14) listed in the recommended resources.
Objective 4: Discuss the operation of stationary woodworking power tools.
Anticipated Problem: How are stationary woodworking power tools operated?
IV. Stationary power tools are large machines that have a permanent location in the shop. Plan
the location of each machine to allow sufficient room to work. Keep guards and shields in
place. Keep blades, knives, and bits sharp. Follow manufacturer’s recommendations for the
installation, use, adjustment, and repair of each machine. Use a safety tape to mark the
safety zone around each machine where only the operator is allowed to stand. Wear safety
glasses and be sure to shut off the machine before leaving the safety zone.
A. A drill press is a stationary drill designed for accurate and heavy drilling jobs. A drill
press gives an operator an easy control mechanism for feeding the drill bit into the work.
Be sure to clamp the work to be drilled securely to prevent accidents. If too much pres-
sure is applied, the bit will overheat or break. Be sure to wear safety glasses and use a
sharp bit.
B. A table saw has a platform or table with a circular blade where the wood to be sawed is
pushed into the blade. Adjust the blade depth so it protrudes ¼ inch through the mate-
rial to be cut. Either the table or the blade may be tilted to cut angles. A miter gauge is
New Mexico Agricultural Mechanics and Technology Lesson Plan Library
Unit A. Problem Area 3. Lesson 3. Page 7.

the guide that is used to line up the wood to be pushed into the blade. The miter gauge
can be set to make square or angle cuts. When cutting long boards they need to be sup-
ported to avoid kickbacks or pinching of the blade with the wood. A rip fence is adjusted
to a desired width to guide the wood being pushed through for ripping. A push stick is a
12 inch long piece of wood with a notch in the end used instead of the fingers to push
the wood when it gets close to the blade. Whenever the table saw is used the guard
should be in place and the kickback fingers set to touch the wood.
C. A radial arm saw has the motor and blade suspended on an arm over the table of the
saw. While the wood is held against the fence, the blade is pulled into the wood to be
cut. The blade/motor unit can be pivoted to cut angles or to rip boards. The most popu-
lar use of the radial arm saw is for cutoff work, including squaring boards, cutting them
to length, and cutting them at angles or bevels.
D. A motorized miter saw (also called cutoff saw and chop saw) has a circular blade that is
lowered into the material that is being cut. Because of its spring-loaded mechanisms
once the cut is made the blade unit returns to the up position. The saw is capable of cut-
ting 45 to 90 degree angles. With a fine-toothed blade this saw is used to cut the angles
for molding. The same saw with a carbide tip blade becomes the chop saw used to cut 2
× 4’s when framing a house.
E. A band saw uses a long continuous blade that moves between guides, pulleys, and
wheels. An electric motor turns the drive wheel using belts and pulleys. The blade has
teeth on one edge that can quickly cut material. Band saws are used to make curved and
straight cuts. The material to be cut is placed on the platform and pushed into the blade.
Care should be taken not to push the material into the blade too rapidly. Band saws may
be equipped with a tilting table, a miter gauge, and a rip fence. A table mount saw simi-
lar to the band saw only smaller with a blade that moves up and down instead of in a cir-
cle is called a scroll saw. It is used mostly for cutting thin material to make craft projects.
F. A planer has sharp knives in a wheel that turns to shave or dress the sides of boards to a
uniform thickness. The planer is an excellent tool to level and smooth wide pieces made
by gluing boards together. The depth of cut is the main adjustment. Trying to remove
too much wood in one pass through the planer is a common problem. Once a board is
started in the machine, the machine is self-feeding. Be sure to carefully examine any
board to be planed for freedom of nails and screws. They can cause major damage to the
cutting knives. Sharp, properly installed knives are essential to successful planning.
G. A jointer uses sharp knives fastened to a cylinder turning at a high rate of speed to
straighten and smooth edges of boards and to cut bevels. The jointer is potentially a very
dangerous tool. The knives can inflict severe cuts and lumber may be thrown if not han-
dled properly. All knives need to be installed so their cutting edges extend to the same
height and leave the board smooth and even as the cutter head rotates. The rear outfeed
table is adjusted so it is level with the cutting edges of the knives. The height of the front
infeed table determines the depth of cut. Be sure the guard is in place and covers the
knives except where the lumber is against the fence.
New Mexico Agricultural Mechanics and Technology Lesson Plan Library
Unit A. Problem Area 3. Lesson 3. Page 8.

Assign classroom reading in the recommended textbooks. Use TM: A3–3D and a tour of the shop to
identify stationary power tools. Demonstrate the proper operation of the tools. Use operator’s manuals
and recommended texts for additional information about adjustments and proper operation. Use
LS: A3–3B to help students develop skills using stationary power tools. Unit 15 of Agricultural Me-
chanics Fundamental & Applications Lab Manual has additional lab sheets.
Review/Summary. Use tools and transparencies to compare power sources for power
tools. Stress the safety attitude and the importance of reading/following the operator’s manual.
Review procedures for operating the various tools.
Application. Using the lab sheets provides the opportunity to use the power tools. Build a
project that would incorporate the use of several power tools. A variety of plans for projects all the
way from tool caddies, bird houses, and sawhorses to utility buildings are readily available.
Evaluation. Complete the written text. Grade lab sheets and the project built by the stu-
dents.
Answers to Sample Test:
Part One: Matching
1 = d, 2 = c, 3 = b, 4 = a, 5 = e, 6 = f, 7 = g, 8 = h, 9 = i, 10 = j
Part Two: Completion
1. pneumatic
2. hydraulic
3. Portable, stationary
4. Belt, finish
5. Drill chuck
6. compressed air, electric
Part Three: Short Answer
1. Electricity, fuel engines, pneumatics (compressed air), hydraulics.
2. Miter gauge is used for pushing the wood for crosscutting. The rip fence is used to set the
width when crosscutting or ripping. The push stick is used to push the wood into the
blade when finishing the ripping of a board.
3. A Sabre saw has a narrow blade located underneath the base while a reciprocating saw
has a blade at the end much like the chuck of a drill. The reciprocating saw is used for
rough cutting and is generally larger with a longer blade.
New Mexico Agricultural Mechanics and Technology Lesson Plan Library
Unit A. Problem Area 3. Lesson 3. Page 9.

Sample Test Name_____________________________________
Test
Lesson A3–3: Using Power Tools
Part One: Matching
Instructions. Match the term with the correct response. Write the letter of the term by the defini-tion.
a. band saw e. motorized miter saw i. scroll saw
b. chain saw f. planer j. table saw
c. drill press g. radial arm saw
d. jointer h. router
_______ 1. Uses sharp knives fastened to a cylinder to straighten and smooth edges of boards.
_______ 2. Stationary tool used to make holes in material.
_______ 3. Used to prune trees and make rough cuts in construction work.
_______ 4. Uses a long continuous blade and the wood is pushed into the blade.
_______ 5. Also called a chop saw and used to cut square or angle cuts.
_______ 6. Used to shave or dress the side of a board.
_______ 7. Blade/motor unit is suspended from an arm and the blade is pulled into the wood.
_______ 8. Used to cut grooves and ornamental shapes by sliding the face of the tool over the
wood.
_______ 9. Usually a table mount saw that has a narrow blade that moves up and down to cut
curves in thin material.
_______ 10. A stationary tool with a circular blade protruding through a platform and the wood
is pushed into the blade.
Part Two: Completion
Instructions. Provide the word or words to complete the following statements.
1. A ___________________power tool is powered by compressed air.
2. A ________________power tool is powered by a compressed liquid, usually oil.
3. _________________ power tools can easily be moved from job to job while
__________________ power tools are too large and bulky to move about so jobs are brought
to the tool.
New Mexico Agricultural Mechanics and Technology Lesson Plan Library
Unit A. Problem Area 3. Lesson 3. Page 10.

4. ______________ sanders are for rough sanding and _____________ sanders are for final
sanding.
5. _____________ ______________ is the three-jaw part that holds the bit.
6. Power nailers are either ______________ or _______________ powered.
Part Three: Short Answer
Instructions. Provide information to answer the following questions.
1. What are the four ways that power tools are powered?
2. How are a miter gauge, rip fence, and push stick used with the table saw?
3. What is the difference between the sabre saw and reciprocating saw?
New Mexico Agricultural Mechanics and Technology Lesson Plan Library
Unit A. Problem Area 3. Lesson 3. Page 11.

TM: A3–3A
POWER TOOL
POWER SOURCES
POWER SOURCE EXAMPLES
1. Electricity Saws
a. Plug-in Drills Sanders
b. Battery Power Drills
2. Fuel Engines(Gasoline & Diesel) Chain saws
Leaf blowersPost hole diggersElectric generators
3. Pneumatics (air power) NailersStaplers
4. Hydraulics Jacks LoadersLiftsPresses
New Mexico Agricultural Mechanics and Technology Lesson Plan Library
Unit A. Problem Area 3. Lesson 3. Page 12.

TM: A3–3B
SAFETY IN USING
POWER TOOLS
1. Read and heed the operator’smanual
2. Use grounded or double insulatedtools
3. Use GFI protection wheremoisture is present
4. Use appropriate personalprotection equipment
a. Eye glasses, goggles, or faceshield
b. Leather shoes with steel toes
c. Ear muffs or ear plugs
d. Long sleeves
New Mexico Agricultural Mechanics and Technology Lesson Plan Library
Unit A. Problem Area 3. Lesson 3. Page 13.

e. Gloves
f. Mask or respirators
5. Check the condition of the toolbefore operating
a. Guards, shields, cords, hoses
b. Sharpness of blades and bits
New Mexico Agricultural Mechanics and Technology Lesson Plan Library
Unit A. Problem Area 3. Lesson 3. Page 14.

TM: A3–3C
EXAMPLES OF
PORTABLE POWER TOOLS
New Mexico Agricultural Mechanics and Technology Lesson Plan Library
Unit A. Problem Area 3. Lesson 3. Page 15.
(Courtesy, Interstate Publishers, Inc.)

TM: A3–3D
COMMON
STATIONARY POWER TOOLS
New Mexico Agricultural Mechanics and Technology Lesson Plan Library
Unit A. Problem Area 3. Lesson 3. Page 16.
(Courtesy, Interstate Publishers, Inc.)

LS: A3–3A Name_____________________________________
Lab Sheet
Portable Power Tool Skill Development
Shop Exercises
… wear safety glasses and inspect the condition of all tools prior to use
_______ 1. Measure, mark, and cut a 2 × 4 twelve inches long with a portable circular saw.
_______ 2. Clamp the board and use a belt sander to smooth one side of the 2 × 4.
_______ 3. Turn the board over, re-clamp, and use the finish sander sand that side smooth.
_______ 4. Use a portable drill to drill a ¼ inch hole centered in a 2 × 4 located two inches
from the end of the board.
_______ 5. Obtain a piece of plywood from the instructor, measure/mark a six inches diameter
hole, and use the sabre saw to cut out the circle.
_______ 6. Cut a 2 × 6 ten inches long with a reciprocating saw.
_______ 7. Cut a 4 × 4 into with a chain saw.
_______ 8. Use the router to round the edge of a 1 × 6 twelve inches long.
_______ 9. Use a power nail gun to drive a nail in the 4 × 4.
_______ 10. Use a power stapler to drive a staple in the 4 × 4.
New Mexico Agricultural Mechanics and Technology Lesson Plan Library
Unit A. Problem Area 3. Lesson 3. Page 17.
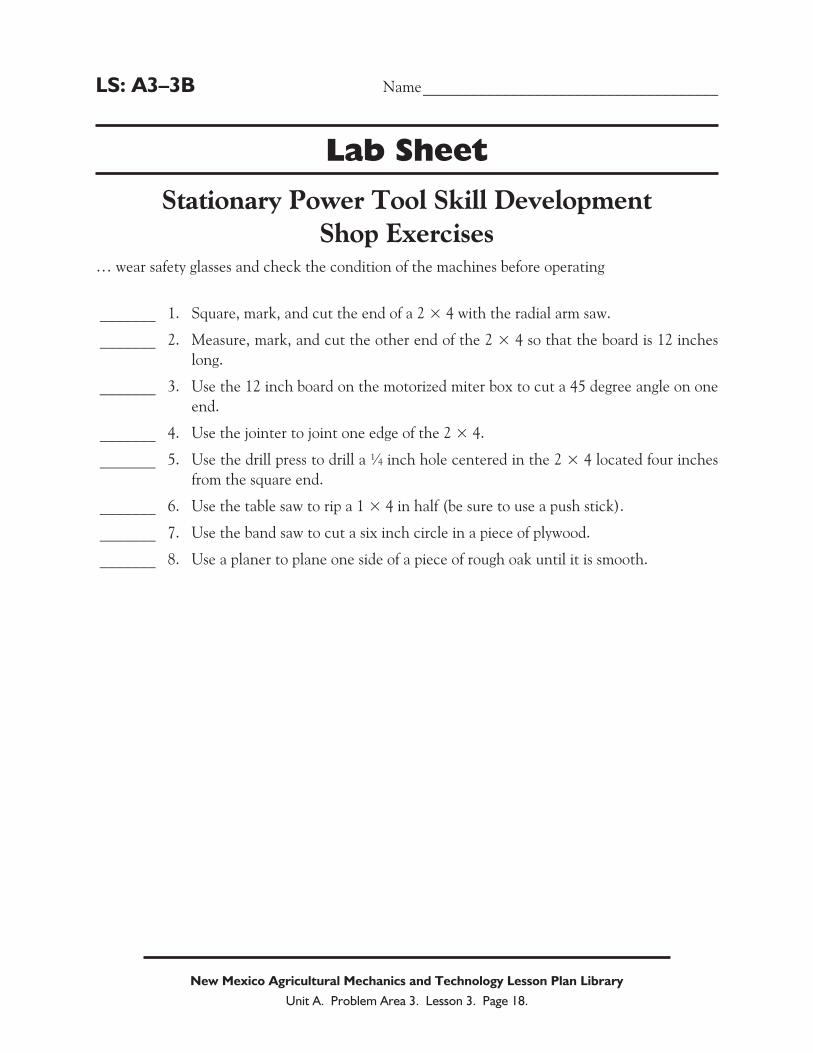
LS: A3–3B Name_____________________________________
Lab Sheet
Stationary Power Tool Skill Development
Shop Exercises… wear safety glasses and check the condition of the machines before operating
_______ 1. Square, mark, and cut the end of a 2 × 4 with the radial arm saw.
_______ 2. Measure, mark, and cut the other end of the 2 × 4 so that the board is 12 inches
long.
_______ 3. Use the 12 inch board on the motorized miter box to cut a 45 degree angle on one
end.
_______ 4. Use the jointer to joint one edge of the 2 × 4.
_______ 5. Use the drill press to drill a ¼ inch hole centered in the 2 × 4 located four inches
from the square end.
_______ 6. Use the table saw to rip a 1 × 4 in half (be sure to use a push stick).
_______ 7. Use the band saw to cut a six inch circle in a piece of plywood.
_______ 8. Use a planer to plane one side of a piece of rough oak until it is smooth.
New Mexico Agricultural Mechanics and Technology Lesson Plan Library
Unit A. Problem Area 3. Lesson 3. Page 18.