using oracle database resource manager · using oracle database resource manager 3 an overview of...
TRANSCRIPT

Using Oracle Database Resource Manager
An Oracle White Paper
April 2010
Using Oracle Database Resource Manager
Using Oracle Database Resource Manager
Introduction ....................................................................................... 1
Part 1: An Introduction to Resource Manager .................................... 2
Scenarios for Resource Manager .................................................. 2
An Overview of Resource Manager ............................................... 3
How Does Resource Manager Work?.................................................... 3
Managing Multiple Workloads ................................................................ 4
Common Misconceptions ....................................................................... 4
Part 2: Configuring Resource Manager for a Healthy Database ........ 6
Instance Caging ............................................................................ 6
Part 3: Configuring Resource Manager for Multiple Workloads.......... 8
Step 1: Obtain Permission to Administer Resource Manager......... 8
Step 2: Create a Pending Area...................................................... 8
Step 3: Create Consumer Groups ................................................. 8
Step 4: Map Sessions to Consumer Groups .................................. 9
Step 5: Add Permissions for Consumer Groups .......................... 10
Step 6: Create a Resource Plan .................................................. 11
Step 7: Add Resource Plan Directives ......................................... 12
Step 8: Submit the Pending Area................................................. 14
Step 9: Enable the Resource Plan............................................... 14
Part 4: Monitoring and Tuning Resource Manager .......................... 15
Enabling Resource Manager ....................................................... 15
Is Resource Manager Currently Enabled? ........................................... 15

Using Oracle Database Resource Manager
When Was Resource Manager Enabled?............................................ 15
How Was Resource Manager Enabled? .............................................. 16
Mapping Sessions to Consumer Groups ..................................... 16
Which Consumer Group Is a Session In? ............................................ 16
Why Is a Session Not In the Expected Consumer Group? .................. 16
Monitoring CPU Management...................................................... 18
How Much Is Resource Manager Throttling the Database Instance?.. 18
How Much Is Resource Manager Throttling the Consumer Groups? .. 20
Conclusion ...................................................................................... 22

Using Oracle Database Resource Manager
1
Introduction One key to a healthy database is maintaining a healthy CPU load. Excessive CPU load
can destabilize the server and expose operating system bugs. Excessive CPU load can
also prevent critical Oracle background processes from running in a timely manner,
resulting in failures such as database instance evictions on a RAC database. At such
times, your response time may be so poor that you may be unable to debug the source of
the excessive CPU load, for example by identifying and fixing a faulty SQL plan.
Using Oracle Database Resource Manager, you can ensure that your database’s CPU
load is always healthy, thus avoiding all of these problems. Resource Manager manages
your CPU load so that all CPUs are fully utilized yet there is no thrashing since no (or
very few) Oracle processes are waiting in the operating system run queue. Using a
database feature called Instance Caging, you can configure Resource Manager to
manage the CPU load to even lower levels.
You can also use Resource Manager to explicitly allocate CPU resources to the multiple
workloads or applications that are sharing the database. For example, you can prioritize
“sys” over regular users and OLTP transactions over reports and batch jobs. Or you can
configure CPU allocations and limits for each application in a consolidated database.
This white paper contains four parts. The first part gives an overview of Resource
Manager and common usage scenarios. The second part shows the single step required
to use Resource Manager to manage overall database load. The third part provides
step-by-step instructions for using Resource Manager to manage multiple workloads
within a database. The fourth part describes how to monitor and tune Resource
Manager.
This white paper describes the Resource Manager in Oracle Database 11g Release 2.
Most of these concepts also apply to Oracle Database 10g and 11g Release 1.
Exceptions are explicitly called out.

Using Oracle Database Resource Manager
2
Part 1: An Introduction to Resource Manager
This section describes common scenarios for Resource Manager and an overview.
Scenarios for Resource Manager
Resource Manager helps solve database problems associated with high CPU loads. The first set
of database problems occur when the overall database load is too high:
� High database loads starve critical background processes. For example, if LMS is
starved, its database instance can be evicted from the RAC cluster group. Or if PMON
is starved, locks associated with dead processes won’t be quickly freed, leading to hangs.
� High database loads destabilize the server. Many operating system vulnerabilities and
bugs are exposed at excessive CPU loads. In addition, excessive CPU loads can starve
critical applications and monitoring tools running on the server.
� At high database loads, the DBA may be unable to diagnose and fix the problem.
Suppose the high database load is caused by a problem, such as a bad SQL plan or a bad
parallel hint, leading to an excessive number of parallel queries. The DBA’s response
time may be so poor that he is unable to login and debug.
� If the database instance is sharing the server with other database instances or
applications, its high database load may impact their performance and stability.
In all of these cases, the database’s load can be managed by Resource Manager, simply by
enabling an out-of-the-box default plan, as described in Part 2.
You may also have multiple workloads within your database that you would like to manage. For
example:
� Different priority workloads on your database are competing for CPU. For example,
ad-hoc queries are interfering with the performance of critical OLTP applications. Or
data loads in a data warehouse are interfering with critical DSS queries.
� Multiple applications on your database are competing for CPU. For example, if you are
consolidating multiple applications onto a single database, a workload surge in one
application may adversely affect the performance of another application. In addition,
you may want to limit an application’s CPU usage to ensure more consistent response
times.
For these scenarios, the workloads within your database can be managed by configuring a
resource plan, as described in Part 3.

Using Oracle Database Resource Manager
3
An Overview of Resource Manager
Resource Manager is a database feature that was introduced in Oracle 8i. It is only available with
Enterprise Edition1.
Resource Manager can manage multiple facets of session behavior on a per workload basis, such
as idle time limits, runaway queries, degree-of-parallelism, etc. In this white paper, we focus on
using Resource Manager to manage CPU.
How Does Resource Manager Work?
Let’s first summarize how an operating system scheduler works. At any time, many processes
may be ready to run. However, the operating system can only run one process per CPU. All
other processes wait on the operating system run queue. The operating system scheduler allows
a process to run for a short amount of time, then deschedules it and selects a new process from
the run queue to run in its place. Because the scheduler uses some sort of round-robin algorithm
to choose between all runnable processes, they all make forward progress.
A server’s load consists of all runnable processes - processes that are running or on the run
queue. Its CPU utilization is under 100% when there are more CPUs than runnable processes.
A server is overloaded when the run queue becomse very large; processes must then wait for a
very long time to run and critical processes are thus starved.
Resource Manager manages CPU usage by controlling the database load to a very precise level.
By default, this level is set to the number of CPUs. That means that on a 4 CPU server,
Resource Manager ensures that no more than 4 Oracle processes (more specifically, foregrounds
and non-critical, CPU-intensive backgrounds) are running at a time. By controlling the database
load, critical backgrounds are able to run in a timely manner and the load on the server is
regulated.
Resource Manager works much like the operating system scheduler. Resource Manager allows
one Oracle process per CPU to run at a given time. All other processes wait on an internal
Resource Manager run queue, under the wait event “resmgr:cpu quantum”. Resource Manager
allows an Oracle process to run for a small quantum of time (100 milliseconds). At the end of
this quantum or when the Oracle process starts a wait (e.g. for a lock or I/O), Resource Manager
selects a new Oracle process to run. Because Resource Manager uses a round-robin algorithm to
choose between all runnable processes, they all make forward progress.
1 In Oracle Database 11g, Resource Manager can also be used with Standard Edition with the out-of-box “default_maintenance_plan” to manage maintenance tasks.

Using Oracle Database Resource Manager
4
Managing Multiple Workloads
In a very basic configuration, Resource Manager treats all sessions alike. However, you can
configure Resource Manager to manage workloads differently by configuring consumer groups
and resource plans.
A consumer group is a collection of sessions that are managed as a unit. You can define
consumer groups for each application in your database. Or you can define consumer groups for
each type of workload, e.g. OLTP, reports, maintenance, etc.
Sessions can be automatically mapped to a consumer group by defining consumer group
mapping rules. For example, a session from the “OLTP” service can be mapped to the
“interactive” consumer group. Or a session with the username “sales” can be mapped to the
“sales_app” consumer group. The attributes that can be used in consumer group mapping rules
include the session’s service, module, action, Oracle username, client username, and program
name.
A resource plan specifies how the CPU should be shared among the consumer groups. It
allocates percentages of the CPU to consumer groups and specifies how unused CPU is
redistributed. A resource plan contains a resource plan directive for each consumer group
that specifies its CPU allocation.
Common Misconceptions
Below are some of the most common misconceptions about Resource Manager.
Binding Processes
Resource Manager does not bind processes to CPUs. Its goal is not to manage the server’s CPUs
but to control its database instance’s CPU usage. If you want to restrict a database instance to a
specific set of CPUs, you should use tools like logical partitions, processor sets, or virtual
machines.
Resource Manager does not manage background processes unless they are non-critical and CPU-
intensive. Critical background processes use CPU judiciously and should not be the cause of
exceessive, runaway CPU consumption. Most of them need quick access to CPU and hence
overall database performance would suffer if they were throttled.
Threaded CPUs
Many of today’s servers use hyper-threaded or CMT processors. For these servers, a single CPU
core may contain multiple threads, or CPUs. For example, a Xeon processor contains two
threads, each of which is counted as a CPU. An UltraSparc T2 core contains 8 threads, each of
which is counted as a CPU.

Using Oracle Database Resource Manager
5
By default, Resource Manager manages the database load based on the total number of threads
on the server. This number is equivalent to the number of CPUs reported by the operating
system. This behavior allows the database instance to fully utilize the server. If you want to
lower the database load, you should enable Instance Caging.
RAC
In a RAC environment, Resource Manager manages each database instance independently. Each
database instance can be configured with its own resource plan that reflects the applications it’s
running. However, most deployments configure the same resource plan for all instances in the
RAC database.

Using Oracle Database Resource Manager
6
Part 2: Configuring Resource Manager for a Healthy Database
Configuring Resource Manager to manage the database load requires just one step: setting the
resource_manager_plan parameter to “DEFAULT_PLAN”. (To persist this change, you must
also update your init.ora or SPFILE.) For example,
SQL> alter system set resource_manager_plan = ‘DEFAULT_PLAN‘ sid = ‘*‘;
By enabling Resource Manager with the out-of-box “DEFAULT_PLAN”, you will get the
following benefits:
� Critical background processes, such as PMON and LMS, won’t be starved for CPU, due
to excessive load from foreground processes.
� SYSTEM and SYS are scheduled at the highest priority. Their response time will not be
affected by runaway CPU activity from normal users, allowing them to always be able to
login and debug database problems.
� Automated maintenance tasks are scheduled at the lowest priority2. These tasks include
gathering optimizer statistics and running the automatic segment and sql tuning
advisors. These tasks will therefore not compete with other sessions for CPU.
However, when the database workload is low, these maintenance tasks will be scheduled
to consume any remaining, otherwise unused CPU resources.
Instance Caging3
Resource Manager manages the database load so that all CPUs are utilized. In some
circumstances, you might want a database instance to use less than 100% of the server’s CPU:
� Other applications or database instances are sharing the server. You want the database
instance to use only a portion of the server’s CPUs.
� Your consolidated server is hosting multiple database instances. You want to limit a
database instance’s CPU usage so the customer sees more consistent response times.
Or you want to limit its CPU usage based on how much the customer paid.
2 The allocation and priority for the automated maintenance tasks can be modified by editing DEFAULT_PLAN. 3 Instance Caging is available from Oracle Database 11g Release 2 onwards.

Using Oracle Database Resource Manager
7
� Your server is more stable at lower CPU utilization levels. You want the database
instance’s load to stay at these lower levels.
In these cases, you can lower the database load by setting the cpu_count parameter to the
number of CPUs you want Resource Manager to use. For example, on an 8 CPU server, if you
want Resource Manager to restrict the database load to no more than 6 active Oracle processes
(and hence use no more than 6 CPUs), you would enable Resource Manager and set the
cpu_count parameter to 6.
For more information, please reference this Oracle white paper on Instance Caging:
http://www.oracle.com/technology/products/manageability/database/pdf/owp_instance_cagin
g.pdf.

Using Oracle Database Resource Manager
8
Part 3: Configuring Resource Manager for Multiple Workloads
This section shows how to configure Resource Manager to manage multiple workloads within a
database. There are 9 steps, some optional:
1. Obtain permission to administer Resource Manager
2. Create a pending area
3. Create consumer groups
4. Map sessions to consumer groups
5. Add permissions for consumer groups
6. Create a resource plan
7. Add resource plan directives
8. Submit the pending area
9. Enable the resource plan
Step 1: Obtain Permission to Administer Resource Manager
Administering Resource Manager requires the “ADMINISTER_RESOURCE_MANAGER”
privilege. This privilege is automatically granted to “SYS”. The following PL/SQL command
grants this privilege to the user “scott”.
SQL> exec dbms_resource_manager_privs.grant_system_privilege( -
grantee_name => 'scott', -
admin_option => true);
Step 2: Create a Pending Area
Creating a pending area is the first step for defining or modifying consumer groups and resource
plans. The pending area is a temporary work area for Resource Management configuration. The
changes in the pending area are not visible until the pending area is submitted (see step 8).
The pending area is created as follows:
SQL> exec dbms_resource_manager.create_pending_area();
At any time, you can abandon the changes in the pending area as follows:
SQL> exec dbms_resource_manager.clear_pending_area();
Step 3: Create Consumer Groups

Using Oracle Database Resource Manager
9
The Oracle database comes preconfigured with multiple consumer groups. Before creating your
own consumer groups, you should consider if any of these consumer groups meet your
requirements.
Table 1 - Preconfigured Consumer Groups
Consumer Group Name Description
INTERACTIVE_GROUP Consumer group for interactive, OLTP operations.
BATCH_GROUP Consumer group for batch operations.
DSS_GROUP Consumer group for decision support system (DSS) queries.
DSS_CRITICAL_GROUP Consumer group for critical DSS queries.
ETL_GROUP Consumer group for data load, or ETL jobs.
SYS_GROUP Consumer group for system administrators.
LOW_GROUP Consumer group for low-priority sessions.
OTHER_GROUPS Default consumer group for all sessions.
If these preconfigured consumer groups do not describe your workloads or you want to create
additional consumer groups, then you should use the following PL/SQL command. This
example creates a consumer group called “SALES_APP”.
SQL> exec dbms_resource_manager.create_consumer_group( -
'SALES_APP', -
'Sessions for the Sales Application');
Step 4: Map Sessions to Consumer Groups
Mapping rules are used to automatically place sessions into a consumer group. For example, the
following rule maps sessions in the “BATCH” service to the “BATCH_GROUP” consumer
group.
SQL> exec dbms_resource_manager.set_consumer_group_mapping( -
attribute => dbms_resource_manager.service_name, -
value => 'BATCH', -
consumer_group => 'BATCH_GROUP');
The session attributes that can be used by mapping rules are listed in the table below.

Using Oracle Database Resource Manager
10
Table 2 - Session Attributes for Creating Consumer Group Mapping Rules
Session Attribute Description
service_module_action A combination of service name, module name, and action name,
in this format:
service_name.module_name.action_name
service_module A combination of service and module names in this format:
service_name.module_name
module_name_action A combination of module and action names in this format:
module_name.action_name
module_name The module name in the currently running application.
service_name The service name used by the client to establish a connection.
oracle_user The Oracle database user name.
client_program The name of the client program used to log onto the server.
client_os_user The operating system user name of the client.
client_machine The name of the computer from which the client is making the
connection.
client_id The client identifier.
Sessions can be explicitly mapped to a consumer group using
dbms_session.switch_consumer_group().
Sessions can also be configured to automatically switch from one consumer group to another,
based on the amount of CPU or I/O consumed or the expected execution time, using the
switch_time, switch_io_megabytes, switch_io_reqs, or switch_estimate directives.
Step 5: Add Permissions for Consumer Groups
In order to switch into a consumer group, a user or role must have permission. The following
PL/SQL command allows the user “scott” to switch into consumer group
“INTERACTIVE_GROUP”.
SQL> exec dbms_resource_manager_privs.grant_switch_consumer_group( -
grantee_name => 'scott', -
consumer_group => 'INTERACTIVE_GROUP', -
grant_option => FALSE);

Using Oracle Database Resource Manager
11
The following PL/SQL command allows any user to switch into the “BATCH_GROUP”
consumer group.
SQL> exec dbms_resource_manager_privs.grant_switch_consumer_group( -
grantee_name => 'public', -
consumer_group => 'BATCH_GROUP', -
grant_option => FALSE);
Step 6: Create a Resource Plan
The Oracle database comes preconfigured with multiple resource plans. Before creating your
own resource plans, you should consider if any of these resource plans meet your requirements.
Table 3 - Preconfigured Resource Plans
Consumer Group Name Description
DEFAULT_PLAN A general purpose plan that prioritizes SYS to allow
the DBA to debug hangs and unexpected heavy loads.
DEFAULT_MAINTENANCE_PLAN Plan for the maintenance windows. Provides some
CPU resources for automated maintenance tasks.
MIXED_WORKLOAD_PLAN Plan for managing mixed workloads (interactive and
batch).
DSS_PLAN Plan for managing DSS workloads (DSS, ETL, and
batch).
ETL_CRITICAL_PLAN Similar to DSS_PLAN but prioritizes ETL over DSS.
You can see the consumer groups that are managed by a resource plan (in this example,
MIXED_WORKLOAD_PLAN):
SQL> select group_or_subplan from dba_rsrc_plan_directives
where plan = 'MIXED_WORKLOAD_PLAN';
In the next step, you can add or remove consumer groups from these preconfigured plans.
If you want to start with a new resource plan, then you can use the following PL/SQL
command. This example creates a resource plan called “DB_CONSOLIDATE_PLAN”.
SQL> exec dbms_resource_manager.create_plan( -
'DB_CONSOLIDATE_PLAN', -
'Plan for database consolidation');

Using Oracle Database Resource Manager
12
Step 7: Add Resource Plan Directives
A resource plan directive specifies how much CPU should be allocated to the consumer group.
You can create a new directive by calling dbms_resource_manager.create_plan_directive(). You
can update or delete a directive by calling update_plan_directive or delete_plan_directive().
The parameter, mgmt_p1, specifies the percentage of the CPU to allocate for the consumer
group. For example, if you have 4 applications, you may want to allocate the CPU as follows.
Note that you are required to provide a directive for OTHER_GROUPS, the default consumer
group.
Consumer Group mgmt_p1
APP_1 40%
APP_2 25%
APP_3 25%
APP_4 5%
OTHER_GROUPS 5%
The PL/SQL for this example is:
SQL> exec dbms_resource_manager.create_plan_directive( -
'DB_CONSOLIDATE_PLAN',
'APP_1', -
'Percentage of CPU for APP_1', -
mgmt_p1 => 40);
SQL> exec dbms_resource_manager.create_plan_directive( -
'DB_CONSOLIDATE_PLAN', -
'APP_2', -
'Percentage of CPU for APP_2', -
mgmt_p1 => 25);
etc.
At any moment, if any CPU is not being used by one or more consumer groups, then Resource
Manager redistributes it to the consumer groups that need it. In the example above, if APP_1 is
the only consumer group running, then Resource Manager will give it 100% of the CPU.
Therefore, mgmt_p1 specifies the amount of CPU that the consumer group is guaranteed to get.
The maximum amount of CPU that the consumer group can consume is 100%.
If you are charging the application owners for their CPU allotment and don’t want them to
consume more than they paid for, you may want to limit their CPU utilization. You can do this

Using Oracle Database Resource Manager
13
by using the max_utilization_limit directive4. In the example below, each consumer group is
allowed to exceed their allocation by 5%:
Consumer Group mgmt_p1 max_utilization_limit
APP_1 40% 45%
APP_2 25% 30%
APP_3 25% 30%
APP_4 5% 10%
OTHER_GROUPS 5%
The PL/SQL for this example is:
SQL> exec dbms_resource_manager.create_plan_directive( -
'DB_CONSOLIDATE_PLAN', -
'APP_1', -
'Percentage of CPU for APP_1', -
mgmt_p1 => 40, max_utilization_limit => 45);
SQL> exec dbms_resource_manager.create_plan_directive( -
'DB_CONSOLIDATE_PLAN', -
'APP_2', -
'Percentage of CPU for APP_2', -
mgmt_p1 => 25, max_utilization_limit => 30);
etc.
In some cases, you may want to allocate CPU resources to a consumer group only if higher
priority consumer groups do not use their allocation. Plan levels allow you to specify how
unused CPU is reallocated. Unused or unallocated CPU from level 1 is used by consumer
groups at level 2, using the mgmt_p2 directive. Unused or unallocated CPU from level 2 is used
by consumer groups at level 3, using the mgmt_p3 directive. And so on.
For example, suppose you have a batch consumer group and you want it to consume 5% of the
CPU, plus any CPU not consumed by the other applications. Such a plan would look like:
4 “max_utilization_limit” is available from Oracle Database 11g Release 2 onwards.

Using Oracle Database Resource Manager
14
Consumer Group mgmt_p1 mgmt_p2
APP_1 35%
APP_2 25%
APP_3 25%
APP_4 5%
BATCH_GROUP 5% 100%
OTHER_GROUPS 5%
The PL/SQL for this example is:
SQL> exec dbms_resource_manager.create_plan_directive( -
'DB_CONSOLIDATE_PLAN', -
'BATCH_GROUP', -
'CPU for batch jobs', -
mgmt_p1 => 5, mgmt_p2 => 100);
Step 8: Submit the Pending Area
Once you have configured the resource plan, you can use the following PL/SQL to persist your
changes in the database. If you are editing a resource plan that is currently active, your changes
will be immediately enabled.
SQL> exec dbms_resource_manager.submit_pending_area();
If your plan has any errors, this command will fail with an error that describes the problem.
Step 9: Enable the Resource Plan
Now that your resource plan is defined, you can enable it by setting the resource_manager_plan
parameter with your resource plan name.
SQL> alter system set resource_manager_plan = 'DB_CONSOLIDATION_PLAN' sid='*';
You can also enable a resource plan for the period of time corresponding to a job scheduler
window. In this example, the DB_CONSOLIDATION_PLAN is enabled when
MONDAY_WINDOW opens and disabled when MONDAY_WINDOW closes.
SQL> exec dbms_scheduler.set_attribute('MONDAY_WINDOW', 'RESOURCE_PLAN', -
'DB_CONSOLIDATION_PLAN');

Using Oracle Database Resource Manager
15
Part 4: Monitoring and Tuning Resource Manager
In this section, we describe how to monitor, debug, and tune Resource Manager. This section is
organized as an FAQ. The questions are grouped into the following categories: enabling
Resource Manager, mapping sessions to consumer groups, and monitoring CPU management.
Enabling Resource Manager
Resource Manager can be enabled by setting the “resource_manager_plan” parameter or by
associating a resource plan with a scheduler window, using the dbms_scheduler PL/SQL
package. This section describes how to tell if Resource Manager is enabled.
Is Resource Manager Currently Enabled?
To determine if Resource Manager is currently enabled:
SQL> select name, cpu_managed from v$rsrc_plan where is_top_plan = 'TRUE';
This query returns the name of the current resource plan. If no rows are returned, Resource
Manager is currently disabled. The column “cpu_managed” specifies if Resource Manager is
managing CPU5.
When Was Resource Manager Enabled?
To determine the history of Resource Manager usage:
SQL> select name,
to_char(start_time, 'MON DD HH24:MI') start_time,
to_char(end_time, 'MON DD HH24:MI') end_time,
window_name
from v$rsrc_plan_history order by start_time;
This query returns the name of the plan, the time that it was enabled and disabled, and the
scheduler window that was used to enable it (if any). Each row corresponds to an occurrence of
Resource Manager being enabled or disabled. A history of up to 16 occurrences is maintained.
5 “cpu_managed” is available from Oracle Database 11g Release 2 onwards. For all releases, you can determine if Resource Manager is managing CPU by seeing whether the current resource plan has CPU directives.

Using Oracle Database Resource Manager
16
How Was Resource Manager Enabled?
In the query above, the window_name indicates the scheduler window that automatically enabled
the resource plan. If the window_name is NULL, then the resource plan was enabled using the
“resource_manager_plan” parameter.
To determine the scheduler windows that have associated resource plans:
SQL> select window_name, resource_plan, active
from dba_scheduler_windows
where resource_plan is not null and enabled = 'TRUE';
If “active” is TRUE for a scheduler window, then that scheduler window is currently open and
its resource plan is enabled.
Mapping Sessions to Consumer Groups
Sessions can be automatically mapped to a consumer group, using the
dbms_resource_manager.set_consumer_group_mapping() procedure. Sessions can also be
manually switched into a consumer group, using the dbms_session.switch_consumer_group()
procedure.
This section describes how to tell if a session is mapped to the right consumer group.
Which Consumer Group Is a Session In?
This query returns the current consumer group for all sessions.
SQL> select sid, resource_consumer_group from v$session;
Why Is a Session Not In the Expected Consumer Group?
A session may not be in the expected consumer group for several reasons.
Missing Privilege
In order for a session to switch into a consumer group, its user or role must have permission to
switch into that consumer group. If a session is mapped to a consumer group but does not have
permission to switch into it, then that mapping rule is ignored.
The query below shows the permissions for all consumer groups. To verify permissions for a
specific user (i.e. the grantee), specify a where clause.
SQL> select grantee, granted_group from DBA_RSRC_CONSUMER_GROUP_PRIVS
order by granted_group;
The following SQL command gives permission for any session to switch into a consumer group.
This example uses the consumer group ‘BATCH_GROUP’.

Using Oracle Database Resource Manager
17
SQL> exec dbms_resource_manager_privs.grant_switch_consumer_group( -
'public', 'BATCH_GROUP', FALSE);
Inactive Consumer Group
If a session maps to or is manually switched to a consumer group that is not part of the current
resource plan, then the session will be switched into the default consumer group,
“OTHER_GROUPS”.
If sessions are being assigned to consumer groups using mapping rules, this query can be used to
determine the consumer group that the mapping rules selected, the mapping attribute that was
used, and the consumer group that the session originally started in. If the mapped consumer
group differs from the original consumer group, then the mapped consumer group was not part
of the resource plan.
SQL> select r.sid,
r.mapped_consumer_group,
r.mapping_attribute,
c.consumer_group original_consumer_group
from v$rsrc_session_info r, dba_rsrc_consumer_groups c
where r.orig_consumer_group_id = c.consumer_group_id;
Consumer Group Switch
If a session’s current consumer group does not match its original consumer group, then the
session has switched consumer groups. This query detects sessions that have been automatically
switched:
SQL> select r.sid,
c1.consumer_group original_consumer_group,
c2.consumer_group current_consumer_group
from v$rsrc_session_info r, dba_rsrc_consumer_groups c1,
dba_rsrc_consumer_groups c2
where r.orig_consumer_group_id = c1.consumer_group_id
and r.current_consumer_group_id = c2.consumer_group_id
and r.orig_consumer_group_id != r.current_consumer_group_id;
A session can switch consumer groups for several reasons:
1. The original consumer group is not part of the current resource plan. If this is the case,
the current consumer group will be “OTHER_GROUPS”.
2. The session can be automatically switched by a resource plan that includes auto-
switching directives: “switch_time”, “switch_io_megabytes”, or “switch_io_reqs”.
This query shows if the current resource plan has any auto-switching directives:

Using Oracle Database Resource Manager
18
SQL> select plan, group_or_subplan, switch_time, switch_io_megabytes, switch_io_reqs
from dba_rsrc_plan_directives
where plan in (select name from v$rsrc_plan)
and (switch_time is not null
or switch_io_megabytes is not null
or switch_io_reqs is not null);
Manual Consumer Group Switch
If a session is manually switched into a consumer group, using the
dbms_session.switch_consumer_group(),
dbms_resource_manager.switch_consumer_group_for_user(), or
dbms_resource_manager.switch_consumer_group_for_sess() procedures, the consumer group
switch does not happen immediately. It occurs when the session executes the next call.
Monitoring CPU Management
This section describes how to monitor the Resource Manager for CPU management. The first
subsection describes how to monitor the effect of Resource Manager on the database instance as
a whole. The next subsection describes how to monitor the effect of Resource Manager on each
consumer group.
How Much Is Resource Manager Throttling the Database Instance?
Oracle provides many different views for monitoring CPU Resource Management.
Amount of Throttling By Wait Event
Throttling by Resource Manager can be monitored by the wait event “resmgr:cpu quantum”.
These waits can be seen by generating an AWR report and examining the “Foreground Wait
Events”.
Resource Manager can also be monitored by the “scheduler” wait class, which includes both
throttling waits and Resource Manager-related concurrency waits. The vast majority of the
“scheduler” waits should be for throttling.
This query monitors the waits in the “scheduler” wait class. “dbtime_in_wait” shows the
percentage of database time spent in Resource Manager waits. “time_waited” shows the actual
wait time in microseconds.
SQL> select to_char(h.begin_time, 'HH:MI') time,
h.average_waiter_count, h.dbtime_in_wait, h.time_waited
from v$waitclassmetric_history h, v$system_wait_class c
where h.wait_class_id = c.wait_class_id and c.wait_class = ' SCHEDULER'
order by h.begin_time;
Using Oracle Database Resource Manager
19
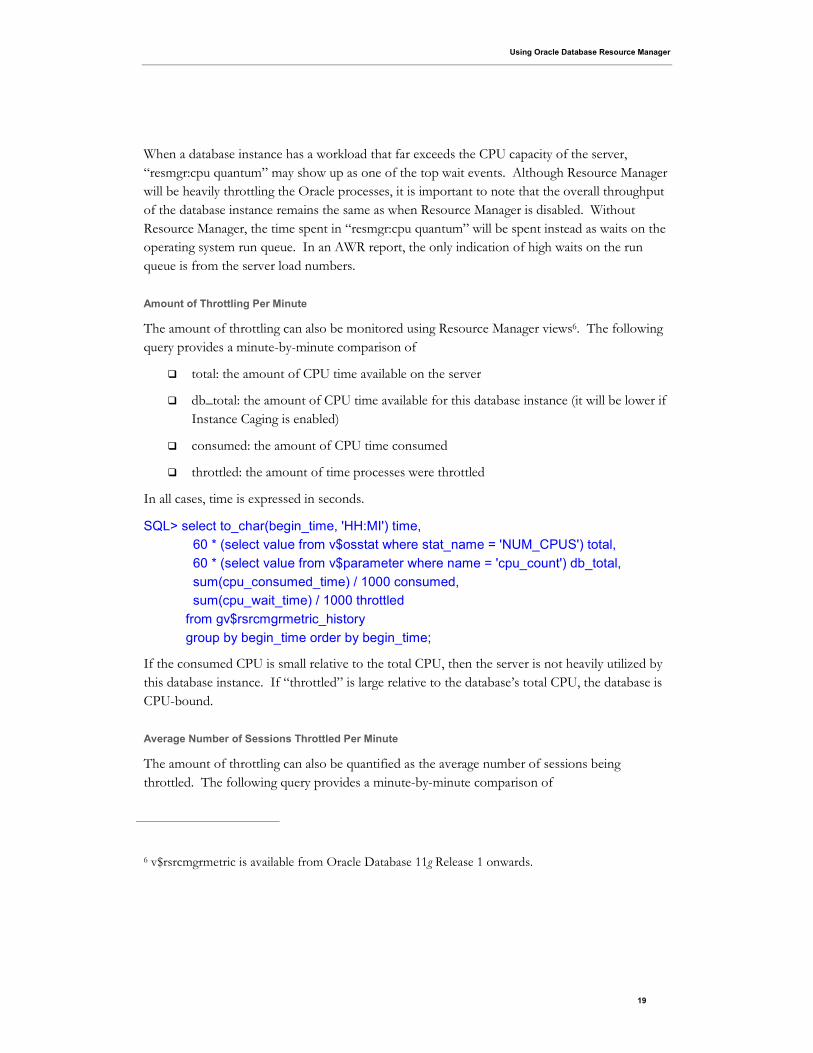
When a database instance has a workload that far exceeds the CPU capacity of the server,
“resmgr:cpu quantum” may show up as one of the top wait events. Although Resource Manager
will be heavily throttling the Oracle processes, it is important to note that the overall throughput
of the database instance remains the same as when Resource Manager is disabled. Without
Resource Manager, the time spent in “resmgr:cpu quantum” will be spent instead as waits on the
operating system run queue. In an AWR report, the only indication of high waits on the run
queue is from the server load numbers.
Amount of Throttling Per Minute
The amount of throttling can also be monitored using Resource Manager views6. The following
query provides a minute-by-minute comparison of
� total: the amount of CPU time available on the server
� db_total: the amount of CPU time available for this database instance (it will be lower if
Instance Caging is enabled)
� consumed: the amount of CPU time consumed
� throttled: the amount of time processes were throttled
In all cases, time is expressed in seconds.
SQL> select to_char(begin_time, 'HH:MI') time,
60 * (select value from v$osstat where stat_name = 'NUM_CPUS') total,
60 * (select value from v$parameter where name = 'cpu_count') db_total,
sum(cpu_consumed_time) / 1000 consumed,
sum(cpu_wait_time) / 1000 throttled
from gv$rsrcmgrmetric_history
group by begin_time order by begin_time;
If the consumed CPU is small relative to the total CPU, then the server is not heavily utilized by
this database instance. If “throttled” is large relative to the database’s total CPU, the database is
CPU-bound.
Average Number of Sessions Throttled Per Minute
The amount of throttling can also be quantified as the average number of sessions being
throttled. The following query provides a minute-by-minute comparison of
6 v$rsrcmgrmetric is available from Oracle Database 11g Release 1 onwards.

Using Oracle Database Resource Manager
20
� num_cpus: the number of CPUs
� num_db_cpus: the number of CPUs available for this database instance (it will be lower
if Instance Caging is enabled)
� avg_running: the average number of running Oracle sessions
� avg_throttled: the average number of throttled Oracle sessions
SQL> select to_char(begin_time, 'HH:MI') time,
(select value from v$osstat where stat_name = 'NUM_CPUS') num_cpus,
(select value from v$parameter where name = 'cpu_count') num_db_cpus,
sum(cpu_consumed_time) / 60000 avg_running,
sum(cpu_wait_time) / 60000 avg_throttled
from v$rsrcmgrmetric_history
group by begin_time order by begin_time;
If the average number of throttled sessions is equal to the number of CPUs, then on average,
each CPU had one session waiting to run. This would be an example of an overloaded database
instance and server.
What Are the Next Steps If Resource Manager Is Heavily Throttling?
If Resource Manager is throttling significantly, then the database instance is CPU-bound. If the
performance of a throttled workload is inadequate, then the resource plan should be tuned to
give a higher CPU allocation to that consumer group. This tuning process is covered in the next
sub-section. If that consumer group has already been allocated all or most of the CPU, then the
only recourse is to add CPU (assuming, of course, that the application and database have been
tuned).
How Much Is Resource Manager Throttling the Consumer Groups?
Once a resource plan has been enabled, the performance of the consumer groups should be
monitored and the CPU allocations should be adjusted as necessary.
The following query provides a minute-by-minute comparison for each consumer group of
� total: the amount of CPU time available on the server
� db_total: the amount of CPU time available for this database instance (it will be lower if
Instance Caging is enabled)
� consumed: the amount of CPU time this consumer group consumed
� cpu_utilization: the percentage of the CPU available to this database consumed by this
consumer group
� throttled: the amount of time this consumer group was throttled

Using Oracle Database Resource Manager
21
In all cases, time is expressed in seconds.
SQL> select to_char(begin_time, 'HH:MI') time,
consumer_group_name,
60 * (select value from v$osstat where stat_name = 'NUM_CPUS') total,
60 * (select value from v$parameter where name = 'cpu_count') db_total,
cpu_consumed_time / 1000 consumed,
cpu_consumed_time / (select value from v$parameter where name =
'cpu_count') / 600 cpu_utilization,
cpu_wait_time / 1000 throttled
from v$rsrcmgrmetric_history
order by begin_time;
Why Doesn’t the Consumer Group’s CPU Utilization Match the Resource Plan?
The query above shows the actual CPU utilization per consumer group. When monitoring
Resource Manager, it is common practice to compare this with the allocation in the resource plan
(i.e. mgmt_p1, mgmt_p2, mgmt_p3, etc.).
If all of the consumer groups have enough load to fully utilize their plan allocations, then the
CPU utilizations should match the plan allocations. However, there are several reasons why the
CPU utilizations may not match the plan allocation:
� A consumer group’s utilization may be higher than its plan allocation because other
consumer groups were unable to utilize their allocation. Their allocation was reallocated
to this consumer group.
� A consumer group’s utilization may be lower than its plan allocation because it was
unable to fully consume it. In this case, it should have no (or very little) throttle time.
� The consumer group has a max_utilization_limit that is lower than the plan allocation.

Using Oracle Database Resource Manager
22
Conclusion
By using Oracle Database Resource Manager to manage the database workload, you keep the
server running at a healthy load, ensure that critical backgrounds do not starve, and ensure that
you can always login and debug database issues.
By enabling a resource plan that allocates CPU among the consumer groups, you can also
manage the CPU usage for each consumer group.
Managing CPU is just one of the functions of Resource Manager. To understand how Resource
Manager can help you manage runaway queries, parallel queries, idle sessions, and undo space,
see the Oracle Database Administrator’s Guide. To understand how Resource Manager can help
you manage I/O, see the Oracle Exadata Storage Server User’s Guide.

Using Oracle Database Resource Manager
April 2010
Author: Sue K. Lee
Oracle Corporation
World Headquarters
500 Oracle Parkway
Redwood Shores, CA 94065
U.S.A.
Worldwide Inquiries:
Phone: +1.650.506.7000
Fax: +1.650.506.7200
oracle.com
Copyright © 2010, Oracle and/or its affiliates. All rights reserved. This document is provided for information purposes only and
the contents hereof are subject to change without notice. This document is not warranted to be error-free, nor subject to any other
warranties or conditions, whether expressed orally or implied in law, including implied warranties and conditions of merchantability or
fitness for a particular purpose. We specifically disclaim any liability with respect to this document and no contractual obligations are
formed either directly or indirectly by this document. This document may not be reproduced or transmitted in any form or by any
means, electronic or mechanical, for any purpose, without our prior written permission.
Oracle is a registered trademark of Oracle Corporation and/or its affiliates. Other names may be trademarks of their respective
owners.
0109