tools, customizing minitab, and setting options (tools …cms3.minitab.co.kr/board/minitab_data/3....
TRANSCRIPT

Tools, Customizing Minitab, and Setting Options (Tools Menu)


Table Of Contents
Copyright © 2003–2005 Minitab Inc. All rights reserved. 3
Table Of Contents Tools Menu ............................................................................................................................................................................ 5
Tools Overview................................................................................................................................................................. 5 Toolbars............................................................................................................................................................................ 5 Status Bar....................................................................................................................................................................... 11 Customize Menus and Toolbars..................................................................................................................................... 11 Options ........................................................................................................................................................................... 15 Manage Profiles.............................................................................................................................................................. 40
Index .................................................................................................................................................................................... 45


Tools Menu
Copyright © 2003–2005 Minitab Inc. All rights reserved. 5
Tools Menu Tools Overview Use the Tools menu to:
• Add new user-defined tools
• Display and hide tool and status bars
• Customize Minitab's menus, toolbars, and shortcut keys
• Change Minitab's default options
• Create user profiles to store multiple Minitab configurations
User-defined tools If you have an application or web address that you access frequently, you can add to the Tools menu using Tools > Customize > Tools. Minitab provides the following default user tools: Microsoft Calculator - opens the Microsoft Calculator application. Notepad - opens Notepad. Windows Explorer - opens Windows Explorer. Answers Database - links to the Answers Database at Minitab's official website where you can get answers to frequently asked customer support questions. Contact Us - links to the contact page of Minitab's official website where you can find information on how to contact Minitab sales, customer support, or training staff.
Minitab tools Toolbars - display or hide available default toolbars. Status Bar - display or hide the Status Bar. Customize - customize and create toolbars, menus, shortcut keys, and more. Options - change your default options for many Minitab commands and functionality. Manage Profiles - manage, import, and export profiles of your Minitab options and customizations settings.
Toolbars Toolbar Overview Tools > Toolbar > choose a toolbar Toolbars are a quick way to issue Minitab commands: just click on a tool button perform an action or open a dialog box. When you first launch Minitab, only the Standard toolbar, the Project Manager toolbar, and the Worksheet toolbar are visible at the top of the screen. Use Tools > Toolbar to show or hide toolbars. You also can show, hide, create, or delete toolbars using Tools > Customize > Toolbars. Minitab provides the following default toolbars:
Standard Project Manager Worksheet Graph Editing Tools Graph Annotation Tools 3D Graph Tools Factorial Designs Response Surface Designs Mixture Designs Taguchi Designs
Note Minitab toolbars are detachable. You can click on them and drag them anywhere within the Minitab environment. Detached toolbars always remain on top of any windows.

Tools, Customizing Minitab, and Setting Options
Copyright © 2003–2005 Minitab Inc. All rights reserved. 6
Tip Move the mouse pointer over the tool and wait for a moment to get more information about the tool: the label of the tool will appear, and the Status Bar will display a description of the tool.
Standard Toolbar Tools > Toolbars > Standard Use this toolbar to access basic Minitab file I/O tools, edit tools, navigation tools, Help, and StatGuide.
Toolbar item Click to…
Open Project
Save Project
Print Window
Cut
Copy
Paste
Undo
Redo
Edit Last Dialog
Previous Command
Next Command
Find
Find Next
Cancel a Find or Replace in progress
Open Help
Open the StatGuide
Project Manager Toolbar Tools > Toolbars > Project Manager Use this toolbar to access Project Manager folders and information. Click a Project Manager toolbar button to open and tile the corresponding Project Manager folder and any related windows. To return to your previous window setup, click the appropriate Project Manager button again.
Toolbar item Keyboard Shortcut Displays…
Session folder
Worksheets folder

Tools Menu
Copyright © 2003–2005 Minitab Inc. All rights reserved. 7
Graphs folder
Worksheet columns folder
History folder
ReportPad
Related Documents
Design folder
Session window
Data window
Project Manager
Close All Graphs
Worksheet Toolbar Tools > Toolbars > Worksheet Use this toolbar to insert or clear cells, rows, and columns, to move columns, and to move to the next or previous brushed row.
Toolbar item Use to…
Insert cell
Insert row
Insert column
Move column
Go to Previous brushed row
Go to Next brushed row
Clear (backspace)
Graph Editing Toolbar Tools > Toolbars > Graph Editing By default, this toolbar only appears when the graph window is active. To hide this toolbar, choose Tools > Toolbars > Graph Tools.
Toolbar item Use to...
Select a graph item for editing.

Tools, Customizing Minitab, and Setting Options
Copyright © 2003–2005 Minitab Inc. All rights reserved. 8
Bring up editing dialogs for the selected item.
Put the active graph in select mode.
Put the active graph in brush mode.
Put the active graph in crosshairs mode.
Put the active DOE contour plot in plant flag mode.
Select a graph item to add. Depending on the item, Minitab may prompt you for more information.
Delete the selected item.
Make the graph appear larger or smaller with the zoom option.
3D Graph Tools Toolbar Tools > Toolbars > 3D Graph Tools Use this toolbar to rotate 3D graphs and 3D surface plot lighting and to resize the data region. By default, this toolbar only appears when a 3D scatterplot, 3D surface plot, or 3D wireframe plot is active. To hide this toolbar, choose Tools > Toolbars > 3D Graph Tools.
Toolbar item Use to...
Rotate the graph clockwise or counterclockwise about the x-axis.
Rotate the graph clockwise or counterclockwise about the y-axis.
Rotate the graph clockwise or counterclockwise about the z-axis.
Rotate all 3D surface plot lighting clockwise or counterclockwise about the x-axis. For additional lighting controls, see Edit Surface − Lights.
Rotate all 3D surface plot lighting clockwise or counterclockwise about the y-axis.
Rotate all 3D surface plot lighting clockwise or counterclockwise about the z-axis.
Increase or decrease the size of the 3D box. (To zoom the graph window in or out, choose Editor > Zoom.)
Return the graph to its original position and zoom.
Return all lights to their original positions. Also returns other surface lighting options, except brightness, to their original settings.
Tip When rotating a graph or graph lighting, click to rotate in small increments; click and hold for continuous rotation.

Tools Menu
Copyright © 2003–2005 Minitab Inc. All rights reserved. 9
Graph Annotation Tools Toolbar Tools > Toolbars > Graph Annotation Tools Use the graph annotation tools to add objects such as lines, rectangles, and text to a graph. By default, this toolbar only appears when the Graph window is active. To hide this toolbar, choose Tools > Toolbars > Graph Annotation Tools.
Toolbar item Use to...
Put the graph in select mode or deselect a selected object.
Add text to a graph.
Draw rectangles and squares on a graph.
Draw ellipses and circles on a graph.
Draw lines on a graph.
Add marker symbols on a graph.
Draw a polyline (a series of connected lines) on a graph.
Draw polygons on a graph.
Factorial Designs Toolbar Tools > Toolbars > Factorial Designs Use this toolbar to create, analyze, and graph factorial designs.
Toolbar item Use to…
Create a factorial design
Define a custom factorial design
Preprocess responses for Analyze Variability
Analyze a factorial design
Analyze the variability in a factorial design
Display factorial plots
Display contour or surface plots
Display overlaid contour plots
Optimize responses
Modify design
Display design
Tools, Customizing Minitab, and Setting Options
Copyright © 2003–2005 Minitab Inc. All rights reserved. 10
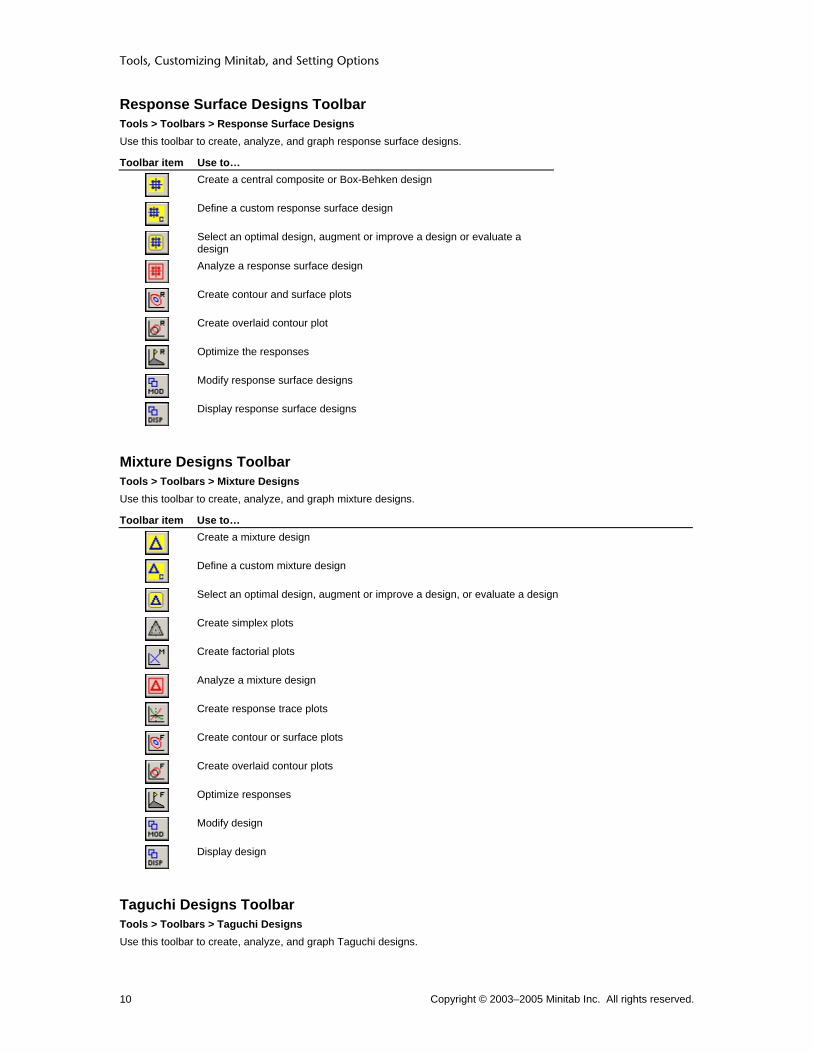
Response Surface Designs Toolbar Tools > Toolbars > Response Surface Designs Use this toolbar to create, analyze, and graph response surface designs.
Toolbar item Use to…
Create a central composite or Box-Behken design
Define a custom response surface design
Select an optimal design, augment or improve a design or evaluate a design
Analyze a response surface design
Create contour and surface plots
Create overlaid contour plot
Optimize the responses
Modify response surface designs
Display response surface designs
Mixture Designs Toolbar Tools > Toolbars > Mixture Designs Use this toolbar to create, analyze, and graph mixture designs.
Toolbar item Use to…
Create a mixture design
Define a custom mixture design
Select an optimal design, augment or improve a design, or evaluate a design
Create simplex plots
Create factorial plots
Analyze a mixture design
Create response trace plots
Create contour or surface plots
Create overlaid contour plots
Optimize responses
Modify design
Display design
Taguchi Designs Toolbar Tools > Toolbars > Taguchi Designs Use this toolbar to create, analyze, and graph Taguchi designs.

Tools Menu
Copyright © 2003–2005 Minitab Inc. All rights reserved. 11
Toolbar item Use to…
Create a Taguchi design
Define a custom Taguchi design
Analyze a Taguchi design
Make predictions with a Taguchi design
Modify design
Display design
To show or hide toolbars To show or hide toolbars from the Tools menu: 1 Choose Tools > Toolbars or right-click on any toolbar. 2 Check or uncheck the toolbar you wish to show or hide.
Note You also can use Tools > Customize > Toolbars to create, delete, show, or hide toolbars.
Status Bar To show or hide the Status Bar The Status Bar at the bottom of the Minitab window displays helpful messages explaining the currently highlighted menu items and current tools on the Toolbar.
To show or hide the status bar 1 Choose Tools > Status Bar. Check or uncheck to control display.
Status Bar Tools > Status Bar Displays or hides the Status Bar. A checkmark next to the command indicates that the Status Bar is open.
Customize Menus and Toolbars Customize Overview Tools > Customize Right-click on any menubar or toolbar and choose Customize
Editing menus and toolbars manually When the Customize dialog box is open, Minitab's menus, toolbars, and toolbar buttons become editable. If you click on a menu, it will open and stay open. You can then click on any menu command, or toolbar button and drag it to other menus or toolbars. Closed menus will open as you drag the menu command or button over them. You also can drag whole menus from one menubar or toolbar to another. When you drag an item over a menu or toolbar, a location bar will indicate where the item will be placed. Right-click on any menu, menu command, or toolbar button while Customize is open to access additional customization tools. Use the right-click menu to:
• Reset menus, as well as menu command and toolbar buttons or names, to their original defaults
• Delete or rename items
• Copy and paste button images from one toolbar button or menu command to another
• Edit button images
• Set menu commands or toolbar buttons to show images, text, or both (menu commands can only show text or text and image)

Tools, Customizing Minitab, and Setting Options
Copyright © 2003–2005 Minitab Inc. All rights reserved. 12
• Add group dividers between groups of menus, menu commands, or toolbar buttons
Editing using the Customize dialog box In addition to manual editing by clicking and dragging or using the right-click menu while Customize is open, you also can use the Customize dialog box to do the following: Add or remove commands to and from or create new menus, submenus, and toolbars Add, remove, hide, or display toolbars Assign shortcut keys to commands Add new external application tools or web addresses to the Tools menu Reset Minitab's menus to their original (pre-customized) defaults Set options for toolbar display Edit a button image
Customizing a Menu, Submenu, Menubar, or Toolbar Tools > Customize > Commands Right-click on any menubar or toolbar and choose Customize > Commands Choose from categories of commands and then click and drag commands from the Commands list box to add them to a menu, submenu, menubar, or toolbar. You also can drag a New Menu command to an menubar or toolbar to create a new custom menu to which you can add commands.
Dialog box items Categories: Choose a command category to display different groups of available commands. Commands: Choose a command to drag to a menu, menu bar, or toolbar. Choose New Menu command to create a new menubar. Description: Displays a description of the selected command.
Show, hide, create, or delete a toolbar or menubar Tools > Customize > Toolbars Right-click on any menubar or toolbar and choose Customize > Toolbars Create new toolbars, delete existing toolbars, or show or hide existing toolbars. You also can reset one or all toolbars to Minitab's default settings.
Dialog box items Toolbars: Highlight a toolbar to reset, rename, or delete. Check or uncheck a toolbar to show or hide in Minitab. Show text labels: Check to have Minitab display text labels below toolbar buttons on any toolbars highlighted in the Toolbars pane.
Name Toolbar Tools > Customize > Toolbar > New Right-click on any menubar or toolbar and choose Customize > Toolbar > New
Dialog box items Toolbar Name: Type a name for your new toolbar.
Add or Remove a User Tool Tools > Customize > Tools Right-click on any menubar or toolbar and choose Customize > Tools Add or remove links to external applications or web addresses on the Tools menu or rearrange the menu order of existing tools.
Dialog box items Menu Contents: Use the buttons to add, delete, or reorder links to external application or web addresses. Command: Enter paths to the external applications or web addresses for new tools you have added to Menu Contents.

Tools Menu
Copyright © 2003–2005 Minitab Inc. All rights reserved. 13
Arguments: Include an argument to be passed to the application you are adding the link for, such as a specific file to be opened automatically by the application. Initial directory: Create an initial save directory for the application for which you are adding the link.
Assign a shortcut key to a command Tools > Customize > Keyboard Right-click on any menubar or toolbar and choose Customize > Keyboard Add a shortcut key to a Minitab command.
Dialog box items Categories: Choose a command category. Set Accelerator for: Choose to make the shortcut active only when a selected Minitab window is active. If Default is selected, the shortcut will be active when any Minitab window is active. Commands: Choose a command to add a shortcut to. Current Keys: Displays the shortcut key currently assigned to the selected command. More than one shortcut can be assigned to a command, but only the first set of keystrokes is displayed. Press New Shortcut Key: Press a new set of keystrokes for the selected command. Description: Displays a description of the selected command.
Reset Menus Tools > Customize > Menu Right-click on any menubar or toolbar and choose Customize > Menu Resets all menus and submenus, including context menus (menus active only when a specific Minitab window is active), to their default settings.
Dialog box items Application Frame Menus: Click <Reset> to return all non-context menus, submenus, and commands to their default settings. Context Menus
Select context menu: Choose a context menu to reset or edit. Context menus are active only when a particular window is active. Edit a context menu by choosing the Command tab after the context menu has been selected and is currently displayed.
Customizing How Toolbars are Displayed Tools > Customize > Options Right-click on any menubar or toolbar and choose Customize > Options Check or uncheck the available boxes to set how toolbars are displayed.
Dialog box items Toolbar
Show ScreenTips on toolbars: Check to display ScreenTips (tooltips) for toolbars. Show shortcut keys in ScreenTips: Check to show shortcut keys in toolbar ScreenTips (tooltips).
Large Icons: Check to have toolbar buttons displayed with large icons.
Editing a Button Image With Customize open, right-click on a toolbar button or menu item and choose Edit Button Image
Use the drawing tools to edit an existing button image or create a new button image for a button or menu item.
Dialog box items Picture: Edit a zoom-size view of the button image. Each square can be edited with the drawing tools.

Tools, Customizing Minitab, and Setting Options
Copyright © 2003–2005 Minitab Inc. All rights reserved. 14
Colors: Select a drawing color.
Tools: Select a drawing tool to edit the picture palette:
Pencil (freehand drawing)
Fill the interior of ellipses and squares with the chosen color.
Copy a color from a square in the picture palette.
Draw a line.
Draw a rectangle.
Draw an ellipse.
Copy the entire button image to paste over another button or to paste into another Edit Button Image picture palette.
Paste a copied button image over a button or paste into an Edit Button Image picture palette.
Clear entire button image from the picture palette.
Preview: View an actual-size preview of the button image you are editing.
Right-click Menu (When Customize is Active) Right click on any menu, menu command, or toolbar button Reset - resets menus, as well as menu command and toolbar buttons or names, to their original defaults. Delete - deletes a menu, menu command, or toolbar button. Name button - type a new name for a menu, menu command, or toolbar button.
Note If you type a new name for a button image, the title displays only if you have chosen Text or Image and Text.

Tools Menu
Copyright © 2003–2005 Minitab Inc. All rights reserved. 15
Tip Add the "&" character before a letter in the title for a menu, menu command, or toolbar button to assign the letter as a shortcut key for the item. If two identical shortcut keys appear on the same menu, only one will be active.
Copy button image - copies a button image from one menu command or button to another. Only the image of the command or toolbar button is copied, not the functionality. Paste button image - pastes a button image from one menu command or button to another. Edit button image - access drawing tools for editing a button image. Image - choose to show button image only on toolbars buttons. Text - choose to show text title only on menu commands and toolbar buttons. Image and Text - choose to show button image and text title on menu commands and toolbar buttons. Start Group - add a group divider bar to menus, menu commands, or toolbar buttons.
Options Options Tools > Options Use to change and save default settings for various operations. Select any of the following:
General − set options for memory allocation, choose to have Minitab display a warning about separators on startup, and set the initial directory.
Data window − set options for data entry arrow direction, column width, and other Data window settings.
DDE Links − set options for Dynamic Data Exchange.
Dialog Box − choose whether or not to have dialog boxes display hidden columns.
Session window − specify automatic saving of the Session window, whether command language is enabled or disabled, how the [Enter] key works in the Session window and the Command Line Editor, and more.
Window Layout − save the current arrangement of Minitab windows.
Graphics − set options for managing and displaying all graphs.
Individual Graphs − set options for individual graphs.
Individual Commands − set options for opening text or spreadsheet files and for displaying descriptive statistics.
Control Charts and Quality Tools − define and choose tests for control charts, how to estimate sigma for control charts, and more.
Stepwise Regression − set the method of stepwise regression to use, parameters, number of alternatives to show, and the display of PRESS and predicted R-square.
General Options − General Tools > Options > General Use to set memory allocation for worksheets, choose to have Minitab display a warning about separators for data on startup, and set the initial directory for opening and saving files.
Note After you click OK in this dialog box, the configuration you specify will activate the next time you start Minitab.
Dialog box items Memory Usage: Use the slider to set memory allocation. Move the slider closer to Share nicely to share more memory with other programs currently running. Move the slider closer to Use as much as necessary to share less memory with other programs currently running.
Note A worksheet can contain up to 4000 columns, 1000 constants, and up to 10,000,000 rows depending on how much memory your computer has.
Display warnings about separators on startup: Check to display warnings about separators when you start Minitab. "Separators" are characters that show how data should be interpreted. Decimal separators show where the decimal point is located between digits. List separators show where one value is distinct from another. The warning message should only display if your International or Regional settings in Windows are not set to English/United States. In the Windows Control Panel under Regional Options, you can change how decimal and list separators appear to match the conventions in your country. If those conventions conflict with Minitab (for example, using semi-colons as list
Tools, Customizing Minitab, and Setting Options
Copyright © 2003–2005 Minitab Inc. All rights reserved. 16
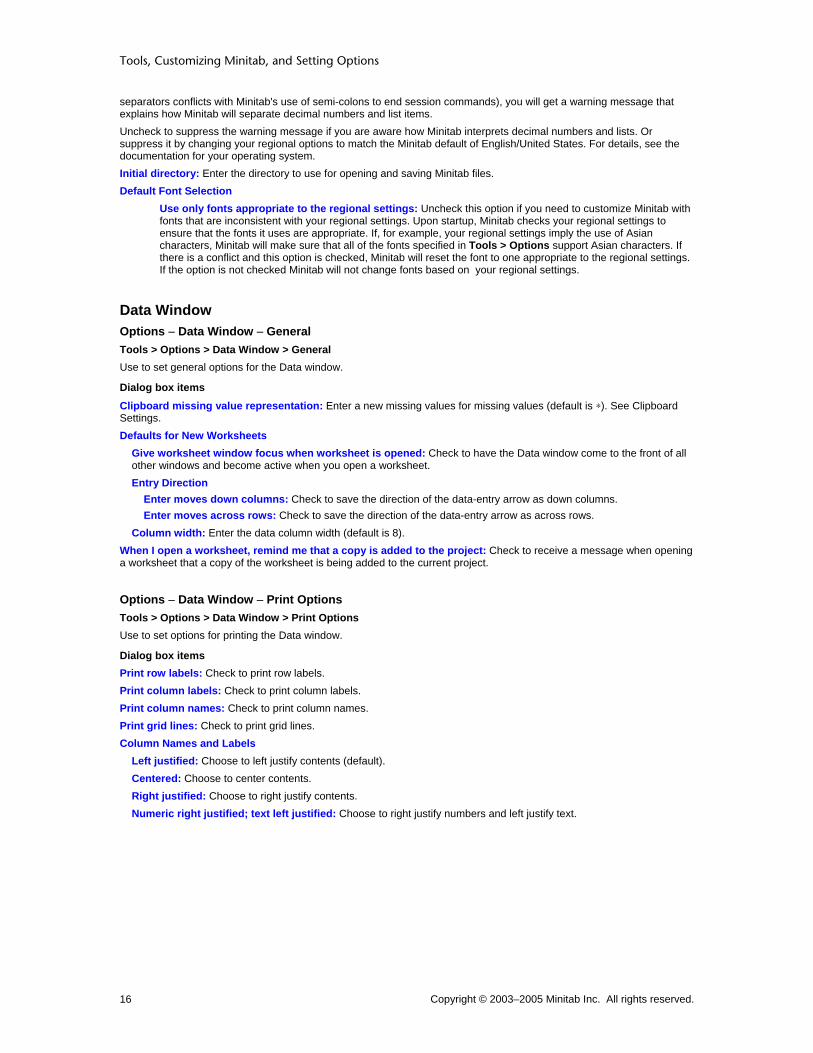
separators conflicts with Minitab's use of semi-colons to end session commands), you will get a warning message that explains how Minitab will separate decimal numbers and list items. Uncheck to suppress the warning message if you are aware how Minitab interprets decimal numbers and lists. Or suppress it by changing your regional options to match the Minitab default of English/United States. For details, see the documentation for your operating system. Initial directory: Enter the directory to use for opening and saving Minitab files. Default Font Selection
Use only fonts appropriate to the regional settings: Uncheck this option if you need to customize Minitab with fonts that are inconsistent with your regional settings. Upon startup, Minitab checks your regional settings to ensure that the fonts it uses are appropriate. If, for example, your regional settings imply the use of Asian characters, Minitab will make sure that all of the fonts specified in Tools > Options support Asian characters. If there is a conflict and this option is checked, Minitab will reset the font to one appropriate to the regional settings. If the option is not checked Minitab will not change fonts based on your regional settings.
Data Window Options − Data Window − General Tools > Options > Data Window > General Use to set general options for the Data window.
Dialog box items Clipboard missing value representation: Enter a new missing values for missing values (default is ∗). See Clipboard Settings. Defaults for New Worksheets
Give worksheet window focus when worksheet is opened: Check to have the Data window come to the front of all other windows and become active when you open a worksheet. Entry Direction
Enter moves down columns: Check to save the direction of the data-entry arrow as down columns. Enter moves across rows: Check to save the direction of the data-entry arrow as across rows.
Column width: Enter the data column width (default is 8). When I open a worksheet, remind me that a copy is added to the project: Check to receive a message when opening a worksheet that a copy of the worksheet is being added to the current project.
Options − Data Window − Print Options Tools > Options > Data Window > Print Options Use to set options for printing the Data window.
Dialog box items Print row labels: Check to print row labels. Print column labels: Check to print column labels. Print column names: Check to print column names. Print grid lines: Check to print grid lines. Column Names and Labels
Left justified: Choose to left justify contents (default). Centered: Choose to center contents. Right justified: Choose to right justify contents. Numeric right justified; text left justified: Choose to right justify numbers and left justify text.

Tools Menu
Copyright © 2003–2005 Minitab Inc. All rights reserved. 17
Options − Font Tools > Options > Data Window > Data Font, Label Font Tools > Options > Graphics > Annotation > Titles, Subtitles, Footnotes, Text, Data Label, Legend, or Table Tools > Options > Graphics > Individual Graphs > Contour Plots > Flag Font Tools > Options > Graphics > Frame Elements > Reference Lines > Font Tools > Options > Graphics > Frame Elements > Scales > Font Tools > Options > Graphics > Frame Elements > Axis Labels Tools > Options > Graphics > Panels > Label Font Tools > Options > Session Window > I/O Font, Title Font, Comment Font Use to set the default font and default font attributes.
Dialog box items Font: Enter a font name. Style
Bold: Check to make the text bold. Italic: Check to italicize the text. Underline: Check to underline the text.
Size: Enter a font size. Color: Choose a text color. Not available in all settings. Preview: Displays sample text with the selected attributes. This box does not accept input.
DDE Links Options − DDE Links Tools > Options > DDE Links Use to set Dynamic Data Exchange (DDE) options when importing data from a Windows application.
Dialog box items MINITAB as Server
Process external requests: Choose to process external requests for data from clients and to update clients when data changes (default). Ignore external requests: Choose to pause activity globally, which stops all servers from updating their client links within Minitab. Notify of ignored requests: Check to be notified when external requests are ignored.
Circular Checking Enable circular checking: Check to enable circular checking. This is the default. See Circular Links for more information.

Tools, Customizing Minitab, and Setting Options
Copyright © 2003–2005 Minitab Inc. All rights reserved. 18
Number of cycles: Enter the number of cycles that must occur before Minitab issues a message telling you it detects a circular link. The default is 3 cycles. Time between cycles: Enter the elapsed time (in milliseconds) between an input to an item and the next input. When consecutive updates are made, each of which is under the time you specify here, Minitab counts them and issues a message when the Number of Cycles number is exceeded. The default is 100 ms.
MINITAB as Client Process external data updates: Choose to process external data updates. Servers update client links within Minitab. This is the default. Ignore external data updates: Choose to pause activity globally, which will stop all servers from updating their client links within Minitab.
Miscellaneous Default priority (1 = high, 32 = low): Enter the default priority for new links when a priority is not specified (default is 16). Priority is important only when you have more than one link attempting a transfer at the same time or have several queued transactions waiting for processing. Minitab completes transfers on higher priority links first, then processes data with a lower priority. Links with the same priority are transferred on a first-in, first-out basis. Missing value sent to clients: Enter the value for missing values when sending from a Minitab worksheet (default is ∗).
Missing value rec'd from servers: Enter the value for missing values when receiving from a server (default is ∗).
Dialog Box Options − Dialog Box Tools > Options > Dialog Box Use to set a default preference for displaying hidden columns in dialog boxes.
Dialog box items Columns Displayed
Use all columns in dialog boxes: Choose to use all columns in dialog boxes, including hidden columns (default). Use only unhidden columns in dialog boxes: Choose to use only unhidden columns in dialog boxes.
Session Window Options − Session Window − Submitting Commands Edit > Tools > Session Window > Submitting Commands Use to set options for submitting commands from the Session window and Command Line Editor.
Dialog box items Command Language
Enable: Choose to enable commands in the Session window when you next start Minitab. Minitab then displays commands in the Session window after you complete dialog boxes. This is the default. You can also execute commands by typing them directly in the Session window or by submitting them from the Command Line Editor. You can temporarily enable commands during an individual work session by choosing Editor when the Session window is active and checking Enable Commands. Disable: Choose to disable commands in the Session window the next time you start Minitab. After you complete dialog boxes, Minitab displays headings and output in the Session window, but not commands. You cannot type commands directly in the Session window, but you can submit them from the Command Line Editor. You can temporarily disable commands during an individual work session by choosing Editor when the Session window is active and unchecking Enable Commands.
Prompt color: Choose a prompt color. An easy way to keep track of which MTB> prompt is active is to change the prompt color. Not only will the MTB> prompt be in color, but any text you type on the prompt line will be in the same color. Submitting Commands from the Session Window Allows you to control the keyboard sequence for submitting commands when typing them in the Session window.
Control + Enter submits input; Enter inserts new line: Choose to use [Ctrl]+[Enter] to submit commands. [Enter] inserts a new line. Enter submits input; Control + Enter inserts new line: Choose to use [Enter] to submit commands. [Ctrl]+[Enter] inserts a new line.
Tools Menu
Copyright © 2003–2005 Minitab Inc. All rights reserved. 19
Submitting Commands from the Command Line Editor Allows you to control the keyboard sequence for submitting commands when typing commands in the Command Line Editor.
Control + Enter submits input; Enter inserts new line: Choose to use [Ctrl] + [Enter] to submit commands. [Enter] inserts a new line. Enter submits input; Control + Enter inserts new line: Choose to use <Enter> to submit commands. [Ctrl]+[Enter] inserts a new line.
Options − Session Window − Output Tools > Options > Session Window > Output Use to set Session window output as read-only and to specify the Session window capacity.
Dialog box items Output should be read-only: Check to make output read-only (so you cannot edit the Session window) when you next start Minitab. This protects you from accidentally editing the Session window contents. You can temporarily allow or disallow editing during an individual work session by choosing Editor when the Session window is active and checking or unchecking Output Editable. Capacity
Number of lines: Enter an integer from 1000 to 60,000 to set the number of lines available in the Session window (default is 15,000). On Session Window Overflow
Save to file "session.txt": Choose to have Minitab automatically save your session without prompting you for a file name when the window is full or you exit Minitab. Your session is always saved in a backup file named SESSION.TXT. This is a plain text file. You can specify whether you want to overwrite or append to the previous file contents with the When Saving on Overflow choices in this dialog box. Prompt for file name: Choose to have Minitab save your session when the window is full or you exit Minitab, after prompting you for a file name. A dialog box appears in which you enter a file name and specify where to save the file. You can specify whether you want to overwrite or append to a previous file's contents with the When Saving on Overflow choices in this dialog box. Discard contents: Choose to automatically discard file contents when the window is full or you exit Minitab.
When Saving on Overflow Allows you to overwrite or append to the file containing the previous Session window's contents when the window is full or you exit Minitab without saving the contents.
Overwrite file contents: Choose to overwrite the file containing the previous Session window's contents when the window is full or you exit Minitab. This is the default. Append to file contents: Choose to append the current Session window contents to the file when the window is full or you exit Minitab.
Line width: Enter an integer value from 30 to 132 to determine the width of the output to your terminal. The default value is 79. If you set the value less than 70, some commands will not obey the width you set. OW 79 or OW 80 works well on most terminals. OW 70 is useful for producing narrow output for use in reports.
Options − Font Tools > Options > Data Window > Data Font, Label Font Tools > Options > Graphics > Annotation > Titles, Subtitles, Footnotes, Text, Data Label, Legend, or Table Tools > Options > Graphics > Individual Graphs > Contour Plots > Flag Font Tools > Options > Graphics > Frame Elements > Reference Lines > Font Tools > Options > Graphics > Frame Elements > Scales > Font Tools > Options > Graphics > Frame Elements > Axis Labels Tools > Options > Graphics > Panels > Label Font Tools > Options > Session Window > I/O Font, Title Font, Comment Font Use to set the default font and default font attributes.
Dialog box items Font: Enter a font name. Style
Bold: Check to make the text bold. Italic: Check to italicize the text. Underline: Check to underline the text.
Size: Enter a font size. Color: Choose a text color. Not available in all settings.

Tools, Customizing Minitab, and Setting Options
Copyright © 2003–2005 Minitab Inc. All rights reserved. 20
Preview: Displays sample text with the selected attributes. This box does not accept input.
Options − Font Tools > Options > Data Window > Data Font, Label Font Tools > Options > Graphics > Annotation > Titles, Subtitles, Footnotes, Text, Data Label, Legend, or Table Tools > Options > Graphics > Individual Graphs > Contour Plots > Flag Font Tools > Options > Graphics > Frame Elements > Reference Lines > Font Tools > Options > Graphics > Frame Elements > Scales > Font Tools > Options > Graphics > Frame Elements > Axis Labels Tools > Options > Graphics > Panels > Label Font Tools > Options > Session Window > I/O Font, Title Font, Comment Font Use to set the default font and default font attributes.
Dialog box items Font: Enter a font name. Style
Bold: Check to make the text bold. Italic: Check to italicize the text. Underline: Check to underline the text.
Size: Enter a font size. Color: Choose a text color. Not available in all settings. Preview: Displays sample text with the selected attributes. This box does not accept input.
Window Layout Options − Window Layout Tools > Options > Window Layout Saves changes you make to the size, location, and state of any Minitab window during your session. The next time you start Minitab, the windows open to the same specifications. By default, the current settings are not saved.
Dialog box items Save the current window layout: Check to save the current window layout for your next Minitab session.

Tools Menu
Copyright © 2003–2005 Minitab Inc. All rights reserved. 21
Graphics Regions
Options − Attributes Tools > Options > Graphics > Annotation > Legend Attributes, Data Label Attributes, Polygons, Ellipses, Table Attributes Tools > Options > Graphics > Data View > Area, Bar, Box, Slice Tools > Options > Graphics > Individual Graphs > Contour Plots > Flag Attributes Tools > Options > Graphics > Regions > Data, Figure, Graph Use to set the default fill pattern, borders, and fill lines.
Dialog box items Fill Pattern
Type: Choose a fill type. Background color: Choose a background color.
Borders and Fill Lines Type: Choose a border line type. Color: Choose a border and fill line color. Size: Choose a border line thickness.

Tools, Customizing Minitab, and Setting Options
Copyright © 2003–2005 Minitab Inc. All rights reserved. 22
Frame Elements
Options − Font Tools > Options > Data Window > Data Font, Label Font Tools > Options > Graphics > Annotation > Titles, Subtitles, Footnotes, Text, Data Label, Legend, or Table Tools > Options > Graphics > Individual Graphs > Contour Plots > Flag Font Tools > Options > Graphics > Frame Elements > Reference Lines > Font Tools > Options > Graphics > Frame Elements > Scales > Font Tools > Options > Graphics > Frame Elements > Axis Labels Tools > Options > Graphics > Panels > Label Font Tools > Options > Session Window > I/O Font, Title Font, Comment Font Use to set the default font and default font attributes.
Dialog box items Font: Enter a font name. Style
Bold: Check to make the text bold. Italic: Check to italicize the text. Underline: Check to underline the text.
Size: Enter a font size. Color: Choose a text color. Not available in all settings. Preview: Displays sample text with the selected attributes. This box does not accept input.
Scales
Options − Scales − Attributes Tools > Options > Graphics > Frame Elements > Scales > Attributes Use to set the default lines, tick orientation, and length of major ticks for scales.
Dialog box items Lines
Type: Choose a type. Color: Choose a color. Size: Choose a size.
Tick Orientation Outside: Choose for an outside tick orientation. Inside: Choose for an inside tick orientation. Out and In: Choose for an out and in tick orientation.
Length of Major Ticks: Enter the length of major ticks (default is 0.0075).
Options − Font Tools > Options > Data Window > Data Font, Label Font Tools > Options > Graphics > Annotation > Titles, Subtitles, Footnotes, Text, Data Label, Legend, or Table Tools > Options > Graphics > Individual Graphs > Contour Plots > Flag Font Tools > Options > Graphics > Frame Elements > Reference Lines > Font Tools > Options > Graphics > Frame Elements > Scales > Font Tools > Options > Graphics > Frame Elements > Axis Labels Tools > Options > Graphics > Panels > Label Font Tools > Options > Session Window > I/O Font, Title Font, Comment Font Use to set the default font and default font attributes.
Dialog box items Font: Enter a font name. Style
Bold: Check to make the text bold. Italic: Check to italicize the text. Underline: Check to underline the text.
Size: Enter a font size.

Tools Menu
Copyright © 2003–2005 Minitab Inc. All rights reserved. 23
Color: Choose a text color. Not available in all settings. Preview: Displays sample text with the selected attributes. This box does not accept input.
Options − Scales − Show Tools > Options > Graphics > Frame Elements > Scales > Show Specify which scale elements to display and where.
Dialog box items Axis line
Low: Check to display axis lines on the low side of the x- and y-scales. High: Check to display axis lines on the high side of the x- and y-scales.
Major Ticks Low: Check to display major tick marks on the low side of the x- and y-scales. High: Check to display major tick marks on the high side of the x- and y-scales.
Major tick labels Low: Check to display major tick marks on the low side of the x- and y-scales. High: Check to display major tick marks on the high side of the x- and y-scales.
Minor ticks Low: Check to display minor tick marks on the low side of the x- and y-scales. High: Check to display minor tick marks on the high side of the x- and y-scales.
Gridlines
Options − Lines Tools > Options > Graphics > Annotation > Lines Tools > Options > Graphics > Data View > Connect, Project, Fits Tools > Options > Graphics > Frame Elements > Gridlines > Attributes Tools > Options > Graphics > Frame Elements > Reference Lines > Attributes Use to set the default line attributes.
Dialog box items Lines
Type: Choose a line type. Color: Choose a line color. Size: Choose a line thickness.
Options − Gridlines − Show Tools > Options > Graphics > Frame Elements > Grid Lines > Show Use to set the default displays of gridlines for minor and major ticks.
Dialog box items Show gridlines for
Z major ticks: Check to display gridlines at the z-axis major tick position. This option is only available with 3D plots. Z minor ticks: Check to display gridlines at the z-axis minor tick position. This option is only available with 3D plots. Y major ticks: Check to display gridlines at the y-axis major tick position. Y minor ticks: Check to display gridlines at the y-axis minor tick position. Y minor ticks are not available with probability plots. X major ticks: Check to display gridlines at the x-axis major tick position. X minor ticks: Check to display gridlines at the x-axis minor tick position. X minor ticks are not available with all graphs.
References Lines
Options − Lines

Tools, Customizing Minitab, and Setting Options
Copyright © 2003–2005 Minitab Inc. All rights reserved. 24
Tools > Options > Graphics > Annotation > Lines Tools > Options > Graphics > Data View > Connect, Project, Fits Tools > Options > Graphics > Frame Elements > Gridlines > Attributes Tools > Options > Graphics > Frame Elements > Reference Lines > Attributes Use to set the default line attributes.
Dialog box items Lines
Type: Choose a line type. Color: Choose a line color. Size: Choose a line thickness.
Options − Font Tools > Options > Data Window > Data Font, Label Font Tools > Options > Graphics > Annotation > Titles, Subtitles, Footnotes, Text, Data Label, Legend, or Table Tools > Options > Graphics > Individual Graphs > Contour Plots > Flag Font Tools > Options > Graphics > Frame Elements > Reference Lines > Font Tools > Options > Graphics > Frame Elements > Scales > Font Tools > Options > Graphics > Frame Elements > Axis Labels Tools > Options > Graphics > Panels > Label Font Tools > Options > Session Window > I/O Font, Title Font, Comment Font Use to set the default font and default font attributes.
Dialog box items Font: Enter a font name. Style
Bold: Check to make the text bold. Italic: Check to italicize the text. Underline: Check to underline the text.
Size: Enter a font size. Color: Choose a text color. Not available in all settings. Preview: Displays sample text with the selected attributes. This box does not accept input.
Data View
Options − Attributes Tools > Options > Graphics > Annotation > Legend Attributes, Data Label Attributes, Polygons, Ellipses, Table Attributes Tools > Options > Graphics > Data View > Area, Bar, Box, Slice Tools > Options > Graphics > Individual Graphs > Contour Plots > Flag Attributes Tools > Options > Graphics > Regions > Data, Figure, Graph Use to set the default fill pattern, borders, and fill lines.
Dialog box items Fill Pattern
Type: Choose a fill type. Background color: Choose a background color.
Borders and Fill Lines Type: Choose a border line type. Color: Choose a border and fill line color. Size: Choose a border line thickness.

Tools Menu
Copyright © 2003–2005 Minitab Inc. All rights reserved. 25
Options − Lines Tools > Options > Graphics > Annotation > Lines Tools > Options > Graphics > Data View > Connect, Project, Fits Tools > Options > Graphics > Frame Elements > Gridlines > Attributes Tools > Options > Graphics > Frame Elements > Reference Lines > Attributes Use to set the default line attributes.
Dialog box items Lines
Type: Choose a line type. Color: Choose a line color. Size: Choose a line thickness.
Options − Symbol Data View Tools > Options > Graphics > Data View > Symbol Use to set the default appearance of symbols, small symbols, and brushed symbols.
Dialog box items Symbols
Type: Choose a symbol type. Color: Choose a symbol color. Size: Type a symbol size.
Small Symbols (Selected Graphs) Size: Type a symbol size.
Brushed Symbols Color: Choose a symbol color.
Data View with Groups
Options − Fill Types for Groups Tools > Options > Graphics > Data View with Groups > Fill Types For graphs with areas, bars, boxes, or pie slices, Minitab may assign a different fill type to each group. You can set the default number and type of fills. If you have more groups than assigned fill types, Minitab cycles through the assigned fill types and repeats them.
Dialog box items Number of types: Choose the number of fill types. Type: Choose the fill type for each group.
Options − Fill Colors for Groups Tools > Options > Graphics > Data View with Groups > Fill Colors For graphs with areas, bars, boxes, or pie slices, Minitab may assign a different fill color to each group. You can set the default number and colors of the fills. You can assign up to 20 colors. If you have more groups than assigned colors, Minitab cycles through the assigned colors and repeats them.
Dialog box items Number of colors: Choose the number of fill colors. Color: Choose the fill color for each group.
Options − Line Types for Groups Tools > Options > Graphics > Data View with Groups > Line Types For graphs with lines, Minitab may assign a different line type to each group. You can set the default number and type of lines. You can assign up to 7 line types. If you have more groups than assigned line types, Minitab cycles through the assigned line types and repeats them.
Tools, Customizing Minitab, and Setting Options
Copyright © 2003–2005 Minitab Inc. All rights reserved. 26
Dialog box items Number of types: Choose the number of line types. Type: Choose the line type for each group.
Options − Symbol Types for Groups Tools > Options > Graphics > Data View with Groups > Symbol Types For graphs with symbols, Minitab may assign a different symbol type to each group. You can set the default number and type of symbols. You can assign up to 12 symbol types. If you have more groups than assigned symbol types, Minitab cycles through the assigned symbol types and repeats them.
Dialog box items Number of types: Choose the number of symbol types. Type: Choose the symbol type for each group.
Options − Symbol and Line Colors for Groups Tools > Options > Graphics > Data View with Groups > Symbol and Line Colors For graphs with symbols or lines, Minitab may assign a different color to each group. You can set the default number and color of symbols and lines. You can assign up to 10 colors. If you have more groups than assigned colors, Minitab cycles through the assigned colors and repeats them.
Dialog box items Number of colors: Choose the number of symbol and line colors. Color: Choose the symbol and line colors for each group.
Annotation
Options − Font Tools > Options > Data Window > Data Font, Label Font Tools > Options > Graphics > Annotation > Titles, Subtitles, Footnotes, Text, Data Label, Legend, or Table Tools > Options > Graphics > Individual Graphs > Contour Plots > Flag Font Tools > Options > Graphics > Frame Elements > Reference Lines > Font Tools > Options > Graphics > Frame Elements > Scales > Font Tools > Options > Graphics > Frame Elements > Axis Labels Tools > Options > Graphics > Panels > Label Font Tools > Options > Session Window > I/O Font, Title Font, Comment Font Use to set the default font and default font attributes.
Dialog box items Font: Enter a font name. Style
Bold: Check to make the text bold. Italic: Check to italicize the text. Underline: Check to underline the text.
Size: Enter a font size. Color: Choose a text color. Not available in all settings. Preview: Displays sample text with the selected attributes. This box does not accept input.

Tools Menu
Copyright © 2003–2005 Minitab Inc. All rights reserved. 27
Options − Font Tools > Options > Data Window > Data Font, Label Font Tools > Options > Graphics > Annotation > Titles, Subtitles, Footnotes, Text, Data Label, Legend, or Table Tools > Options > Graphics > Individual Graphs > Contour Plots > Flag Font Tools > Options > Graphics > Frame Elements > Reference Lines > Font Tools > Options > Graphics > Frame Elements > Scales > Font Tools > Options > Graphics > Frame Elements > Axis Labels Tools > Options > Graphics > Panels > Label Font Tools > Options > Session Window > I/O Font, Title Font, Comment Font Use to set the default font and default font attributes.
Dialog box items Font: Enter a font name. Style
Bold: Check to make the text bold. Italic: Check to italicize the text. Underline: Check to underline the text.
Size: Enter a font size. Color: Choose a text color. Not available in all settings. Preview: Displays sample text with the selected attributes. This box does not accept input.
Options − My Footnote Tools > Options > Graphics > Annotation > My Footnote Use to add a custom footnote to all graphs.
Dialog box items Information to include in my footnote
Project name: Check to display the Minitab project name. Worksheet name: Check to display the Minitab worksheet name. Date the graph was last modified: Check to display the last modified date. Time the graph was last modified: Check to display the last modified time.
Custom text: Type the text you want to appear in the footnote.

Tools, Customizing Minitab, and Setting Options
Copyright © 2003–2005 Minitab Inc. All rights reserved. 28
Options − Lines Tools > Options > Graphics > Annotation > Lines Tools > Options > Graphics > Data View > Connect, Project, Fits Tools > Options > Graphics > Frame Elements > Gridlines > Attributes Tools > Options > Graphics > Frame Elements > Reference Lines > Attributes Use to set the default line attributes.
Dialog box items Lines
Type: Choose a line type. Color: Choose a line color. Size: Choose a line thickness.
Options − Markers Tools > Options > Graphics > Annotation > Markers Use to set the type, color, and size for markers.
Dialog box items Symbols
Type: Choose a marker type. Color: Choose a marker color. Size: Choose a marker size.
Options − Attributes Tools > Options > Graphics > Annotation > Legend Attributes, Data Label Attributes, Polygons, Ellipses, Table Attributes Tools > Options > Graphics > Data View > Area, Bar, Box, Slice Tools > Options > Graphics > Individual Graphs > Contour Plots > Flag Attributes Tools > Options > Graphics > Regions > Data, Figure, Graph Use to set the default fill pattern, borders, and fill lines.
Dialog box items Fill Pattern
Type: Choose a fill type. Background color: Choose a background color.
Borders and Fill Lines Type: Choose a border line type. Color: Choose a border and fill line color. Size: Choose a border line thickness.
Options − Font Tools > Options > Data Window > Data Font, Label Font Tools > Options > Graphics > Annotation > Titles, Subtitles, Footnotes, Text, Data Label, Legend, or Table Tools > Options > Graphics > Individual Graphs > Contour Plots > Flag Font Tools > Options > Graphics > Frame Elements > Reference Lines > Font Tools > Options > Graphics > Frame Elements > Scales > Font Tools > Options > Graphics > Frame Elements > Axis Labels Tools > Options > Graphics > Panels > Label Font Tools > Options > Session Window > I/O Font, Title Font, Comment Font Use to set the default font and default font attributes.
Dialog box items Font: Enter a font name. Style
Bold: Check to make the text bold. Italic: Check to italicize the text. Underline: Check to underline the text.

Tools Menu
Copyright © 2003–2005 Minitab Inc. All rights reserved. 29
Size: Enter a font size. Color: Choose a text color. Not available in all settings. Preview: Displays sample text with the selected attributes. This box does not accept input.
Options − Attributes Tools > Options > Graphics > Annotation > Legend Attributes, Data Label Attributes, Polygons, Ellipses, Table Attributes Tools > Options > Graphics > Data View > Area, Bar, Box, Slice Tools > Options > Graphics > Individual Graphs > Contour Plots > Flag Attributes Tools > Options > Graphics > Regions > Data, Figure, Graph Use to set the default fill pattern, borders, and fill lines.
Dialog box items Fill Pattern
Type: Choose a fill type. Background color: Choose a background color.
Borders and Fill Lines Type: Choose a border line type. Color: Choose a border and fill line color. Size: Choose a border line thickness.
Options − Font Tools > Options > Data Window > Data Font, Label Font Tools > Options > Graphics > Annotation > Titles, Subtitles, Footnotes, Text, Data Label, Legend, or Table Tools > Options > Graphics > Individual Graphs > Contour Plots > Flag Font Tools > Options > Graphics > Frame Elements > Reference Lines > Font Tools > Options > Graphics > Frame Elements > Scales > Font Tools > Options > Graphics > Frame Elements > Axis Labels Tools > Options > Graphics > Panels > Label Font Tools > Options > Session Window > I/O Font, Title Font, Comment Font Use to set the default font and default font attributes.
Dialog box items Font: Enter a font name. Style
Bold: Check to make the text bold. Italic: Check to italicize the text. Underline: Check to underline the text.
Size: Enter a font size. Color: Choose a text color. Not available in all settings. Preview: Displays sample text with the selected attributes. This box does not accept input.
Options − Attributes Tools > Options > Graphics > Annotation > Legend Attributes, Data Label Attributes, Polygons, Ellipses, Table Attributes Tools > Options > Graphics > Data View > Area, Bar, Box, Slice Tools > Options > Graphics > Individual Graphs > Contour Plots > Flag Attributes Tools > Options > Graphics > Regions > Data, Figure, Graph Use to set the default fill pattern, borders, and fill lines.
Dialog box items Fill Pattern
Type: Choose a fill type. Background color: Choose a background color.
Borders and Fill Lines Type: Choose a border line type.

Tools, Customizing Minitab, and Setting Options
Copyright © 2003–2005 Minitab Inc. All rights reserved. 30
Color: Choose a border and fill line color. Size: Choose a border line thickness.
Options − Font Tools > Options > Data Window > Data Font, Label Font Tools > Options > Graphics > Annotation > Titles, Subtitles, Footnotes, Text, Data Label, Legend, or Table Tools > Options > Graphics > Individual Graphs > Contour Plots > Flag Font Tools > Options > Graphics > Frame Elements > Reference Lines > Font Tools > Options > Graphics > Frame Elements > Scales > Font Tools > Options > Graphics > Frame Elements > Axis Labels Tools > Options > Graphics > Panels > Label Font Tools > Options > Session Window > I/O Font, Title Font, Comment Font Use to set the default font and default font attributes.
Dialog box items Font: Enter a font name. Style
Bold: Check to make the text bold. Italic: Check to italicize the text. Underline: Check to underline the text.
Size: Enter a font size. Color: Choose a text color. Not available in all settings. Preview: Displays sample text with the selected attributes. This box does not accept input.
Options − Attributes Tools > Options > Graphics > Annotation > Legend Attributes, Data Label Attributes, Polygons, Ellipses, Table Attributes Tools > Options > Graphics > Data View > Area, Bar, Box, Slice Tools > Options > Graphics > Individual Graphs > Contour Plots > Flag Attributes Tools > Options > Graphics > Regions > Data, Figure, Graph Use to set the default fill pattern, borders, and fill lines.
Dialog box items Fill Pattern
Type: Choose a fill type. Background color: Choose a background color.
Borders and Fill Lines Type: Choose a border line type. Color: Choose a border and fill line color. Size: Choose a border line thickness.
Options − Font Tools > Options > Data Window > Data Font, Label Font Tools > Options > Graphics > Annotation > Titles, Subtitles, Footnotes, Text, Data Label, Legend, or Table Tools > Options > Graphics > Individual Graphs > Contour Plots > Flag Font Tools > Options > Graphics > Frame Elements > Reference Lines > Font Tools > Options > Graphics > Frame Elements > Scales > Font Tools > Options > Graphics > Frame Elements > Axis Labels Tools > Options > Graphics > Panels > Label Font Tools > Options > Session Window > I/O Font, Title Font, Comment Font Use to set the default font and default font attributes.
Dialog box items Font: Enter a font name. Style
Bold: Check to make the text bold. Italic: Check to italicize the text.

Tools Menu
Copyright © 2003–2005 Minitab Inc. All rights reserved. 31
Underline: Check to underline the text. Size: Enter a font size. Color: Choose a text color. Not available in all settings. Preview: Displays sample text with the selected attributes. This box does not accept input.
Panels
Options − Panels You can change some panel display options. Panels can be used to show different groups side-by-side. The changes you make to the defaults remain until you change them again, even after you exit Minitab. See the following topics for more information: Options Label Font
Options − Font Tools > Options > Data Window > Data Font, Label Font Tools > Options > Graphics > Annotation > Titles, Subtitles, Footnotes, Text, Data Label, Legend, or Table Tools > Options > Graphics > Individual Graphs > Contour Plots > Flag Font Tools > Options > Graphics > Frame Elements > Reference Lines > Font Tools > Options > Graphics > Frame Elements > Scales > Font Tools > Options > Graphics > Frame Elements > Axis Labels Tools > Options > Graphics > Panels > Label Font Tools > Options > Session Window > I/O Font, Title Font, Comment Font Use to set the default font and default font attributes.
Dialog box items Font: Enter a font name. Style
Bold: Check to make the text bold. Italic: Check to italicize the text. Underline: Check to underline the text.
Size: Enter a font size. Color: Choose a text color. Not available in all settings. Preview: Displays sample text with the selected attributes. This box does not accept input.
Options − Graph Size Tools > Options > Graphics > Graph Size Use to set the page size, window size, and zooming option for the graph region. A graph's "true size" denotes its dimensions as it is printed, appended to the ReportPad, or copied into another application. Changing a graph's "zoomed size" only affects the way it is displayed in the graph window. If you adjust the default zooomed size, be sure to change the default window size accordingly.
Note The default height and width units are inches. To use metric units, adjust the Control Panel regional settings.
Dialog box items True Size
Height (in.): Enter the height (in inches). Width (in.): Enter the width (in inches).
Window Size Height (in.): Enter the height (in inches). Width (in.): Enter the width (in inches).
Zoomed Size: Choose a percent or specify a size at which to show the page region.

Tools, Customizing Minitab, and Setting Options
Copyright © 2003–2005 Minitab Inc. All rights reserved. 32
Options − Graph Management Tools > Options > Graphics > Graph Management Allows you to control initialization of graphics, closing and saving of graphs, graph updates, and graph appearance. The preferences in this dialog box take effect immediately after you click OK.
Dialog box items Maximum number of graphs: Enter an integer between 1 and 200. This is the number of graphs you can have open at once before Minitab prompts you to close graphs or closes graphs automatically (as determined by your other preferences in this dialog box). When there are too many graphs, Minitab should
Prompt you to close one or more graphs: Choose to have Minitab prompt you to pick the graphs to close when you have more than the maximum number of Graph windows open. Close the oldest graph: Choose to have Minitab choose the first graph you generated when you have more than the maximum number of Graph windows open. Your preference in Before closing a graph, Minitab should prompt you to save the graph when still determines whether you get a prompt once Minitab chooses the oldest graph for closing. Close all graphs: Choose to have Minitab close all graphs when you have more than the maximum number of Graph windows open. Your preference in Before closing a graph, Minitab should prompt you to save the graph when still determines whether you get a prompt once Minitab begins closing the graphs.
Prompt to save a graph before closing If the current version has not been saved Choose to have Minitab prompt you to save your graph before closing it, if it has not been saved since it was created or last edited. Never: Choose if you do not want to be prompted to save your graph regardless of its state.
Confirm Close All Graphs command: Check to receive a confirmation message when you choose Window > Close All Graphs or the corresponding button on the Toolbar. The confirmation message asks "Close All Graphs?" and displays OK and Cancel buttons. If you choose OK, you may still be prompted to save individual graphs, depending on the graph-closing preferences set above. When I open a graph, remind me that a copy is added to the project: Check to receive a message when opening a graph that a copy of the graph is being added to the current project.
Options − Other Graphics Options Tools > Options > Graphics > Other Graphics Options Use to set automatic updating, gamma correction, and GDI for graphs.
Dialog box items On creation, set graph to update automatically when data change: Check to have graphs you create updated automatically whenever the worksheet changes. (Does not affect existing graphs.) Troubleshooting
Use gamma correction: Check to adjust the color values on your screen to produce uniform results. Gamma correction has no effect on how graphs are printed. Do not use gamma correction when:
• You have graphics hardware that uses a system utility to do gamma correction. This is typically the case. • Your screen is set to display 16 colors, and you want to see only solid colors, not dithered colors.
Use GDI for 3D graphs: Check to turn off the graphics card hardware acceleration (OpenGL) used for 3d graphs. You might want to check this if you have trouble creating 3d graphs or doing dynamic 3d graph manipulation, such as rotation.
Individual Graphs Options − Bar Charts Tools > Options > Individual Graphs > Bar Charts Use to set the default display gallery for bar charts.
Dialog box items Default Choice for the Bar Chart Gallery
Counts of unique values: Choose if you have one or more columns of categorical data and you want to chart the frequency of each category. A function of a variable: Choose if you have one or more columns of measurement data and you want to chart a function of the measurement data, such as the mean.

Tools Menu
Copyright © 2003–2005 Minitab Inc. All rights reserved. 33
Values from a table: Choose if you have one or more columns of summary data and you want to chart the summary value for each category.
Options − Boxplots Tools > Options > Individual Graphs > Boxplots Use to set the default interquartile range box endpoints and width, and whisker display on a boxplot.
Dialog box items Interquartile Range Box Endpoints
Quartiles: Choose to display the box bottom at the 1st quartile (25th percentile) and box top at the 3rd quartile (75th percentile). Hinges: Choose to use the hinges for the box endpoints. Percentile: Choose to specify the percentiles for the box bottom and top, then enter one number between 0 and 50 for the percentile.
Whiskers None: Choose to suppress display of whiskers. Show: Choose to display whiskers.
Box width proportional to sample size: Check to make the width of each box proportional to the square root of the number of observations in the box.
Contour Plots
Options − Contour Plot You can change the appearance of contour plots and their labels. The changes you make to the defaults remain until you change them again, even after you exit Minitab. See the following topics for more information: Options Flag Attributes Flag Font
Options − Attributes Tools > Options > Graphics > Annotation > Legend Attributes, Data Label Attributes, Polygons, Ellipses, Table Attributes Tools > Options > Graphics > Data View > Area, Bar, Box, Slice Tools > Options > Graphics > Individual Graphs > Contour Plots > Flag Attributes Tools > Options > Graphics > Regions > Data, Figure, Graph Use to set the default fill pattern, borders, and fill lines.
Dialog box items Fill Pattern
Type: Choose a fill type. Background color: Choose a background color.
Borders and Fill Lines Type: Choose a border line type. Color: Choose a border and fill line color. Size: Choose a border line thickness.
Options − Font Tools > Options > Data Window > Data Font, Label Font Tools > Options > Graphics > Annotation > Titles, Subtitles, Footnotes, Text, Data Label, Legend, or Table Tools > Options > Graphics > Individual Graphs > Contour Plots > Flag Font Tools > Options > Graphics > Frame Elements > Reference Lines > Font Tools > Options > Graphics > Frame Elements > Scales > Font Tools > Options > Graphics > Frame Elements > Axis Labels Tools > Options > Graphics > Panels > Label Font Tools > Options > Session Window > I/O Font, Title Font, Comment Font Use to set the default font and default font attributes.

Tools, Customizing Minitab, and Setting Options
Copyright © 2003–2005 Minitab Inc. All rights reserved. 34
Dialog box items Font: Enter a font name. Style
Bold: Check to make the text bold. Italic: Check to italicize the text. Underline: Check to underline the text.
Size: Enter a font size. Color: Choose a text color. Not available in all settings. Preview: Displays sample text with the selected attributes. This box does not accept input.
Options − Effects Plots Tools > Options > Individual Graphs > Effects Plots
You can set the α-level for the normal probability plot of the effects and the Pareto chart.
Dialog box items Effects Plots
Normal: Check to set the α-level for normal probability plots of the effects. Pareto: Check to set the α-level for Pareto charts. Alpha: Type the α-level to use for effects plots. The default is 0.05.
Options − Histograms Tools > Options > Individual Graphs > Histograms Use to set the default y-scale and interval types for histograms.
Dialog box items Y-Scale Type: Choose a default y-scale type.
Frequency: Choose to use a frequency scale. Percent: Choose to use a percent scale. Density: Choose to use a density scale.
Interval Type: Choose a default interval type. Midpoint: Choose to position ticks at bin midpoints. Cutpoint: Choose to position ticks at bin cutpoints.
Options − Interval Plots Tools > Options > Individual Graphs > Interval Plots Use to customize the interval bar type, display one- or two-sided intervals, and use a pooled standard deviation to calculate the intervals.
Dialog box items Type of Interval Standard error: Choose to display standard error bars, where the error bars extend one or more standard errors away from the mean.
Multiple: Enter a positive number to be used as the multiplier for standard errors (1 is the default). Confidence interval: Choose to display confidence intervals. The confidence intervals assume a normal distribution for the data and use t-distribution critical values.
Level: Enter a number between 0 and 100 to specify the confidence level. The default is 95%. The interval bar endpoints correspond to the values of a confidence interval for the mean. Bonferroni: Check to calculate Bonferroni intervals.
Side: Choose the location of the bars. When you choose two-sided, bars are drawn above and below the mean. Upper one-sided gives bars above; lower one-sided draws bars below the mean. For confidence intervals (default), the one-sided bars are shorter than the same side of the two-sided bars because Minitab uses a one-sided test. For standard error bars, the distance that error bars extend above or below the mean remains the same regardless of the selected side.

Tools Menu
Copyright © 2003–2005 Minitab Inc. All rights reserved. 35
Pool error across groups: Check to use the pooled degrees of freedom to calculate the critical value from the t-distribution for confidence interval bars, or a pooled standard error instead of calculating the error for each subgroup for standard error bars.
Options − Probability Plots Tools > Options > Individual Graphs > Probability Plots Use to set the y-scale type, graph orientation, and default plot point method for probability plots.
Dialog box items Y-Scale Type Choose a default y-scale type.
Percent: Choose to use a percent scale. Probability: Choose to use a probability scale. Score: Choose to use a scores scale (see Method of obtaining probability plot points for calculations).
Graph Orientation Choose a default graph orientation. Show raw data on horizontal scale: Choose to show raw data values on the horizontal scale. Show raw data on vertical scale: Choose to show raw data values on the vertical scale.
Method for Calculating Plot Points: Choose the default plot-point method (see Method of obtaining probability plot points.)
Median Rank (Benard) Mean Rank (Herd-Johnson) Modified Kaplan-Meier (Hazen) Kaplan-Meier
Options − Residual Plots Tools > Options > Individual Graphs > Residual Plots Use to set the residual plot options. Residuals plots are available in ANOVA, Regression, Time Series, and DOE.
Dialog box items Residuals for Plots
Regular: Choose to plot the regular or raw residuals. Standardized: Choose to plot the standardized residuals. Deleted: Choose to plot the Studentized deleted residuals.
Residual Plots Individual plots: Choose to display selected graphs in separate windows. Four in one: Choose to display a layout of a histogram of residuals, a normal plot of residuals, a plot of residuals versus fits, and a plot of residuals versus order in a single window.
When Making Individual Plots Histogram of residuals: Check to display a histogram of the residuals. Normal plot of residuals: Check to display a normal probability plot of the residuals. Residuals versus fits: Check to plot the residuals versus the fitted values. Residuals versus order: Check to plot the residuals versus the order of the data. The row number for each data point is shown on the x-axis − for example, 1 2 3 4... n.
Include Anderson-Darling test with normal plot: Check to display the Anderson-Darling normality test statistic on the normal plot of the residuals. The statistic only appears if the model has three or more degrees of freedom for error. Residuals for Analyze Variability
Ratio: Choose to plot the ratio residuals. Log: Choose to plot the log residuals. Standardized log: Choose to plot the standardized log residuals.

Tools, Customizing Minitab, and Setting Options
Copyright © 2003–2005 Minitab Inc. All rights reserved. 36
Individual Commands Options − Individual Commands You can change options for selected individual commands. The changes you make to the defaults remain until you change them again, even after you exit Minitab. See the following topics for more information: Display Descriptive Statistics Open
Options − Display Descriptive Statistics Tools > Options > Individual Commands > Display Descriptive Statistics Use to set the descriptive statistics to display with Stat > Basic Statistics > Display Descriptive Statistics.
Dialog box items Mean: Choose to display the arithmetic mean. SE of Mean: Choose to display the standard error of the mean. Standard Deviation: Choose to display the standard deviation of the data. Variance: Choose to display the variance of the data. Coefficient of Variation: Choose to display the coefficient of variation. First Quartile: Choose to display the first quartile. Median: Choose to display the median. Third Quartile: Choose to display the third quartile. Interquartile range: Choose to display the difference between the first and third quartiles. Trimmed mean: Choose to display the trimmed mean. Sum: Choose to display the data sum. Minimum: Choose to display the data minimum. Maximum: Choose to display the data maximum. Range: Choose to display the data range. Sum of Squares: Choose to display the sum of the squared data values. This is the uncorrected sums of squares, without first subtracting the mean. Skewness: Choose to display the skewness value. Kurtosis: Choose to display the kurtosis value MSSD: Choose to display half the mean of successive squared differences. N nonmissing: Choose to display the number of nonmissing column entries. N missing: Choose to display the number of missing column entries. N total: Choose to display the total (nonmissing and missing) number of column entries. Cumulative N: Choose to display the cumulative number of entries. Percent: Choose to display the percent of observations that a group constitutes. The percent will be 100 unless you use a By variable. Cumulative percent: Choose to display the cumulative percent.
Open
Options − Open Text Files Tools > Options > Individual Commands > Open > Text Files Use to set options when opening text files.
Dialog box items Variable Names
None: Choose to not include variable names.

Tools Menu
Copyright © 2003–2005 Minitab Inc. All rights reserved. 37
Automatic: Choose to include variable names (default). Ignore blank data rows: Check to ignore blank rows. Decimal Separator
Use my regional options: Choose to use the default decimal separator settings currently active in your Windows Control Panel Regional settings (default). See Microsoft help for more information on regional settings. Period: Choose a period as the decimal separator. Comma: Choose a comma as the decimal separator.
Convert Missing Text Value From: Enter the text value currently used to represent missing values. To: Enter the text value you want to use in the Minitab worksheet.
Convert Missing Numeric Value From: Enter the numeric value currently used to represent missing values. To: Enter the numeric value you want to use in the Minitab worksheet (default is *).
Field Definition Free Format: Choose if the fields are freely formatted in the text file. Single character separator: Choose if a single character is used to separate fields in the text file, then choose the separator below or enter the character in Custom.
Tab: Choose if tabs are used. Comma: Choose if commas are used. Semicolon: Choose if semicolons are used. Space: Choose if a space is used. Period: Choose if a period is used. None: Choose if there is no field separator. Custom: Choose if a custom field separator is used; enter the character.
Text Delimiter Double quote: Choose if double quotes are used. Single quote: Choose if single quotes are used. None: Choose if there is no text delimiter. Custom: Choose if a custom text delimiter is used; enter the character.
Options − Open Spreadsheet Files Tools > Options > Individual Commands > Open > Spreadsheet Files Use to set options when opening spreadsheet files.
Dialog box items Variable Names
None: Choose to not include variable names. Automatic: Choose to include variable names (default).
Ignore blank data rows: Check to ignore blank rows. Convert Missing Text Value
From: Enter the text value currently used to represent missing values. To: Enter the text value you want to use in the Minitab worksheet.
Convert Missing Numeric Value From: Enter the numeric value currently used to represent missing values. To: Enter the numeric value you want to use in the Minitab worksheet (default is *).
Control Charts and Quality Tools Options − Control Charts and Quality Tools You can change options for control charts and capability analysis. The changes you make to the defaults remain until you change them again, even after you exit Minitab. See the following topics for more detail:

Tools, Customizing Minitab, and Setting Options
Copyright © 2003–2005 Minitab Inc. All rights reserved. 38
Estimating Standard Deviation Define Tests Test to Perform Capability Analysis Other
Options − Estimating Standard Deviation Tools > Options > Control Charts and Quality Tools > Estimating Standard Deviation
Use to select the methods to estimate σ for various types of control charts, capability analysis, and capability sixpack.
Dialog box items R and Xbar-R Charts
Rbar: Choose to estimate σ using the average of the subgroup ranges.
Pooled standard deviation: Choose to estimate σ using a pooled standard deviation (default). S and Xbar-S Charts
Sbar: Choose to estimate σ using the average of the subgroup standard deviations.
Pooled standard deviation: Choose to estimate σ using a pooled standard deviation (default). Moving Range and I-MR Charts
Average moving range: Choose to estimate σ using the average of the moving range (default).
Median moving range: Choose to estimate σ using the median of the moving range. All Other Cases
Method for Subgroup Size > 1 Rbar: Choose to estimate σ using the average of the subgroup ranges. Sbar: Choose to estimate σ using the average of the subgroup standard deviations. Pooled standard deviation: Choose to estimate σ using a pooled standard deviation (default).
Method for Subgroup Size = 1 Average moving range: Choose to estimate σ using the average of the moving range (default). Median moving range: Choose to estimate σ using the median of the moving range. Square root of MSSD: Choose to estimate σ using the square root of MSSD (1/2 the mean of the squared successive differences).
All Cases
Use unbiasing constants: Uncheck to use biased estimates of σ. Length of moving range: Type the number of observations used to calculate the moving range. The default is 2, because consecutive values have the greatest chance of being alike. The span must be < 100.
Options − Define Tests Tools > Options > Control Charts and Quality Tools > Define Tests Use to define the sensitivity of the tests for special causes used with control charts, capability analysis, and capability sixpack. The range of acceptable values you can enter depends on the test number. When you change a value in this dialog box, the default value is also changed in the control chart, Capability Sixpack (Normal and Between/Within), and Capability Analysis (Binomial and Poisson) test dialog boxes.
Note R, S, Moving Range, the Attributes Control Charts (P, NP, C, U), and Capability Analysis (Binomial and Poisson) only support tests 1 through 4. Moving Average, EWMA, CUSUM, Tsquared, Generalized Variance, Multivariate EWMA, Tsquared-Generalized Variance, Z-MR, and Zone charts do not support tests.
Dialog box items Test 1
1 point > K standard deviations from center line: Enter an integer from 1-6 (default is 3). Test 2
K points in a row on same side of center line: Enter an integer from 7-11 (default is 9). Test 3
K points in a row, all increasing or all decreasing: Enter an integer from 5-8 (default is 6).

Tools Menu
Copyright © 2003–2005 Minitab Inc. All rights reserved. 39
Test 4 K points in a row, alternating up and down: Enter an integer from 12-14 (default is 14).
Test 5 K out of K+1 points > 2 standard deviations from center line (same side): Enter an integer from 2-4 (default is 2).
Test 6 K out of K+1 points > 1 standard deviation from center line (same side): Enter an integer from 3-6 (default is 4).
Test 7 K points in a row within 1 standard deviation of center line (either side): Enter an integer from 12-15 (default is 15).
Test 8 K points in a row > 1 standard deviation from center line (either side): Enter an integer from 6-10 (default is 8).
Options − Tests to Perform Tools > Options > Control Charts and Quality Tools > Tests to Perform Use to select a subset of the eight tests for special causes shown in Eight Tests for Special Causes. Each test detects a specific pattern in the data plotted on the chart. The occurrence of a pattern suggests a special cause of variation.
Note R, S, Moving Range, the Attributes Control Charts (P, NP, C, U), and Capability Analysis (Binomial and Poisson) only support tests 1 through 4. Moving Average, EWMA, CUSUM, Tsquared, Generalized Variance, Multivariate EWMA, Tsquared-Generalized Variance, Z-MR, and Zone charts do not support tests.
Dialog box items Tests for Special Causes (default definitions)
Perform all eight tests: Choose to perform all eight tests shown below. Choose specific tests to perform: Choose to specify a subset of the eight tests, then check any combination of the tests listed below.
1 point > 3 standard deviations from center line 9 points in a row on same side of center line 6 points in a row, all increasing or all decreasing 14 points in a row, alternating up and down 2 out of 3 points > 2 standard deviations from center line (same side) 4 out of 5 points > 1 standard deviation from center line (same side): 15 points in a row within 1 standard deviation of center line (either side) 8 points in a row > 1 standard deviation from center line (either side)
Options − Capability Analysis Tools > Options > Control Charts and Quality Tools > Capability Analysis Use to set the sigma tolerance for capability statistics and to set a method to calculate the nonnormal capability statistics.
Dialog box items Use tolerence of K*sigma for capability statistics K= Enter a number to calculate the capability statistics using an interval other than 6 standard deviation wide (3 on either side of the process mean). Nonnormal Capability Statistics
ISO method: Choose to calculate the capability statistics using the ISO method (default). MINITAB method: Choose to calculate the capability statistics using the MINITAB method.
Display Capability stats (Cp, Pp): Choose to display the capability statistics (default). Benchmark Z's (sigma level): Choose to display the benchmark Z statistics. CCpk: Check to display the CCpk statistics.
Options − Other Tools > Options > Control Charts and Quality Tools > Other Use to set the color of control charts when the last point fails and the display of the test results in the session window.

Tools, Customizing Minitab, and Setting Options
Copyright © 2003–2005 Minitab Inc. All rights reserved. 40
Dialog box items When the last row of data causes a new test failure for a point:
Change color of chart: Check to change the color of a control chart when the last point fails a test or is out of control.
Color: Choose a color (default is red). Display control chart results in Session window: Check to display the control chart test results in the Session window. If the data change and the control chart is live-linked, the test results are not updated in the Session window. See Updating Graphs for more information.
Use rounded values for Box-Cox transformations when possible: Check to display a rounded λ value for Box-Cox transformations on the Box-Cox plots. When this option is checked (default), Minitab rounds λ to 0.5, -0.5, or the nearest integer, which are commonly used λ values.
Stepwise Regression Options − Stepwise Regression Tools > Options > Stepwise Regression Use to set the stepwise regression method, parameters, number of alternatives to show, and the display of PRESS and predicted R2. Minitab uses the options you set here every time you use Stat > Regression > Stepwise and stepwise methods in Stat > DOE > Mixture > Analyze Mixture Design.
Dialog box items Method
Stepwise (forward and backward): Choose standard stepwise regression (adds and removes variables). Forward selection: Choose forward selection (adds variables). Backward elimination: Choose backward elimination (removes variables).
Use Alpha or F Use alpha: Choose to the use the alpha value as the criterion for adding or removing a variable to or from the model. Use F: Choose to use the F value as the criterion for adding or removing a variable to or from the model.
Stepwise Parameters
Alpha to enter: Enter the value of α for adding a new variable to the model.
Alpha to remove: Enter the value of α for removing a variable from the model. Forward Selection Parameter
Alpha to enter: Enter the value of α for adding a new variable to the model. Backward Elimination Parameter
Alpha to remove: Enter the value of α for removing a variable from the model. Number of alternatives to show: Enter the number of next best alternate predictors to display, up to the number requested. If a new predictor is entered into the model, displays the predictor that was the second best choice, the third best choice, and so on. Display PRESS and predicted R-square: Check to display the PRESS statistic and predicted R2.
Manage Profiles Creating and Managing User Profiles Use Manage Profiles to save and manage multiple profiles of options and customization settings in Minitab. You also can use Manage Profiles to restore your Minitab default settings. Profiles store all user-adjusted settings in Tools > Options and Tools > Customize, as well as custom date/time formats, custom lists for Autofill, and custom value order settings for text data.
Managing Profiles You can have more than one profile either available (inactive) or active at one time. Use Manage Profiles > Manage to activate or deactivate one or more profiles, and to set an order of precedence for your active profiles. You can have different settings in each of your profiles, and if one or more are active (listed under Active Profiles), all of the settings in all the active profiles will be applied to the Minitab environment. However, if a user-defined setting appears in more than one active profile, the settings in higher level active profiles (profiles located above other profiles listed in Active Profiles) will take precedence over settings in any profiles listed below them. Settings saved while multiple profiles are active are saved to the top active profile.

Tools Menu
Copyright © 2003–2005 Minitab Inc. All rights reserved. 41
Import and export profiles You also can import and export profiles, so that users can share the same group of Minitab settings and customizations on multiple machines. See To share identical settings on multiple machines.
Trade toolbars between profiles Use Manage Profiles > Toolbars to trade customized toolbars between your own active or inactive profiles or between profiles with other users without having to import or export profiles.
Manage Profiles Tools > Manage Profiles> Manage Use the Manage tab to create, delete, activate, or deactivate one or more profiles, and also to modify the order of precedence if multiple profiles are active. You also can use Manage to reset your Minitab default settings at any time or export and import profiles to share identical user settings on multiple machines.
Tip To rename a profile, double-click on a profile in either Available Profiles or Active Profiles and type a new name for the profile.
Dialog box items Available Profiles choose from a list of available profiles. Use the buttons to move available profiles to Active Profiles, or to create or delete profiles.
Create a new profile in Available Profiles.
Delete a selected profile in Available Profiles.
Active Profiles lists profiles that are currently active. More than one profile can be active at a time. Use the arrow buttons to remove or move selected profiles up or down in the order of precedence. Higher profiles have precedence over lower profiles.
Move a profile up in order of precedence in Active Profiles. Any user-defined settings stored in higher-level profiles take precedence over user-defined settings in lower level profiles.
Move a profile down in order of precedence in Active Profiles. Any user-defined settings stored in higher-level profiles take precedence over user-defined settings in lower level profiles.
Move a selected profile from Available Profiles to Active Profiles.
Move a selected profile from Active Profiles to Available Profiles.
Move all profiles from Active Profiles to Available Profiles.
Manage Toolbars Tools > Manage Profiles > Toolbars Share one or more toolbars between profiles.
Dialog box items $$Defaults (or currently selected profile) Toolbars currently in available in a selected profile. Use the arrow buttons to copy toolbars from one profile into another.
Toolbars available in Choose a profile to share toolbars between. $$Defaults (or currently selected profile) Toolbars currently in available in a selected profile. Use the arrow buttons to move Toolbars from one profile into another.
Toolbars available in Choose a profile to share toolbars between.
Manage Profiles − Import Profile Tools > Manage Profiles > Manage > Import Import a profile into Minitab.
Dialog box items Look in: Choose a drive and folder to look in. File name: Enter a file name for a Profile.

Tools, Customizing Minitab, and Setting Options
Copyright © 2003–2005 Minitab Inc. All rights reserved. 42
File type: Pick from the list of file types. Profiles are Registry files with the extension *.REG.
Manage Profiles − Export Profile Tools > Manage Profiles> Manage > Export Export a Minitab profile.
Dialog box items Save in: Choose a drive and folder to save in. File name: Enter a file name for a Profile. Save as type: Pick from the list of file types to save as. Profiles are Registry files with the extension *.REG.
To restore Minitab default settings During the course of your Minitab sessions, you may change many default settings in Tools > Options and Tools > Customize, and may also add custom date/time formats, custom lists for Autofill, and custom value order settings for text data. If at any time you wish to restore your original default settings, Minitab provides two methods: Manage Profiles and the RestoreMinitabDefaults.exe application shipped and installed along with the Minitab software. Use Manage Profiles from within the Minitab software to reset your Minitab defaults while preserving any existing profiles. Run the RestoreMinitabDefaults.exe application outside of Minitab to reset Minitab profile defaults, which deletes all profiles stored in Manage Profiles.
To restore defaults while preserving profiles 1 Choose Tools > Manage Profiles > Manage.
2 Highlight a profile in Active Profiles and use to move it from Active Profiles to Available Profiles or click to move all profiles from Active Profiles to Available Profiles. Make sure no profiles remain in Active
Profiles. 3 Click OK to restore your Minitab default settings. A new blank profile (called NewProfile) will automatically be added to Active Profiles and any changes you make to settings in the future will be stored in this profile (unless you remove it). At any time, you can return any profiles in Available Profiles to Active Profiles to restore their settings.
To restore profile defaults (resets defaults and deletes profiles) 1 In Tools > Manage Profiles > Manage, export any profiles you wish to preserve. Profiles must be moved to
Available Profiles before they can be exported. 2 Open the Tools folder located inside Minitab's main program folder on your hard drive. 3 Double-click the application RestoreMinitabDefaults.exe. 4 Click OK to restore your Minitab default profile settings. If you wish to restore the settings in an exported profile, re-import the profile into Minitab using Tools > Manage Profiles > Import.
To share identical settings on multiple machines In Minitab, users can change default settings; modify and create toolbars, menus, and shortcut keys; create new date/time formats and value order settings; and more. Each time you modify one of these Minitab settings, the change is stored in a user profile so that it will be in effect for your next Minitab session. All settings you change during a session are stored in the top-most profile located under Active Profiles in Tools > Manage Profiles. You can export profiles as registry files (*.REG) so that they can be shared with other users to ensure that multiple PCs have identical settings.
To export a profile 1 At a PC, adjust any settings you wish to export. You can use Tools > Options and Tools > Customize to set many
options. 2 Choose Tools > Manage Profiles. 3 Profiles must be under Available Profiles in order to be exported. If you wish to export a currently active profile, click
to move the profile (called MyProfile if it has not been previously renamed) from Active Profiles to Available Profiles or click to move all profiles from Active Profiles to Available Profiles. Any other previously deactivated profiles will already be stored under Available Profiles.

Tools Menu
Copyright © 2003–2005 Minitab Inc. All rights reserved. 43
4 If you wish to rename a profile before exporting, double-click the profile name (in either Active Profiles or Available Profiles) and rename it.
5 With the profile selected, click <Export>. Choose a directory for the file and click Save. You now have a saved registry file (*.REG) that other users can import and activate.
To import and activate a profile 1 Choose Tools > Manage Profiles. 2 Click <Import>. Locate and choose the user profile you want to import and click Open. The new profile appears under
Available Profiles.
3 To activate the profile, choose it and click to move it from Available Profiles to Active Profiles. All profiles in Active Profiles are active, but any altered user settings in higher level (top-most) profiles override settings stored in lower level profiles. If you want your new profile to override existing profiles click to move it upward in the profile hierarchy.
4 Click OK to activate any new profiles in Active Profiles.


Index
Copyright © 2003–2005 Minitab Inc. All rights reserved. 45
Index A
Add external application link to Tools ......................... 12 Add user tool............................................................... 12 Add web address to Tools .......................................... 12 Alpha data................................................................... 12 Assign keyboard shortcut............................................ 13 B
Buttons.......................................................................... 5 On the Toolbar .......................................................... 5
C
Change initial directory ............................................... 15 Commands
On the Toolbar .......................................................... 5 Customize ....................................................... 11, 12, 13 D
Data window Fonts .....17, 19, 20, 22, 24, 26, 27, 28, 29, 30, 31, 33 Options .................................................................... 16 Toolbar ...................................................................... 6
Data window font .17, 19, 20, 22, 24, 26, 27, 28, 29, 30, 31, 33
Data window options................................................... 16 Data window print options........................................... 16 DDE links
Options .................................................................... 17 Default settings ........................................................... 42 Dialog boxes ............................................................... 18
Setting defaults........................................................ 18 Drawing objects on graphs ........................................... 9 E
Edit button image........................................................ 13 Export Profile .............................................................. 42 F
Fonts .........17, 19, 20, 22, 24, 26, 27, 28, 29, 30, 31, 33 in Data window.17, 19, 20, 22, 24, 26, 27, 28, 29, 30,
31, 33 G
Graph Annotation Tools Toolbar................................... 9 Graph Editing Toolbar................................................... 7 Graph toolbars ...................................................... 7, 8, 9 Graph window
Multiple .................................................................... 32 Too many graphs open ........................................... 32
Graphs Multiple graph windows........................................... 32 Too many graphs open ........................................... 32
H
Hide Status Bar (Editor menu).................................... 11 I I/O font...... 17, 19, 20, 22, 24, 26, 27, 28, 29, 30, 31, 33 Import Profiles ............................................................ 41 Initial directory ............................................................ 15 K
Keyboard shortcuts..................................................... 13 Assigning to a command......................................... 13
M
Manage Profiles (Tools menu) ....................... 40, 41, 42 Manage Toolbars........................................................ 41 O
Options ......................................... 15, 17, 18, 20, 36, 37 Control charts and quality tools............................... 37 DDE links ................................................................ 17 Dialog box ............................................................... 18 General ................................................................... 15 Individual commands .............................................. 36 Overview................................................................. 15 Window layout......................................................... 20
Options (Tools menu) ................................................. 15 P
Preferences ................................................................ 15 Profiles............................................................ 40, 41, 42 Profiles, Export ........................................................... 42 Profiles, Import ........................................................... 41 Project Manager Toolbar .............................................. 6
Toolbar...................................................................... 6 R
Registry ...................................................................... 41 Registry file........................................................... 41, 42 Remove user tool ....................................................... 12 Restoring Minitab default settings .............................. 41 S
Session window Options.................................................................... 19 Toolbar...................................................................... 5
Session window output............................................... 19 Set initial directory ...................................................... 15 Shapes on graphs (polygons) ...................................... 9 Share identical settings on multiple machines ........... 42 Shortcut keys.............................................................. 13
Assigning to a command......................................... 13 Show Status Bar (Editor menu) .................................. 11 Show/Hide Status Bar (Window menu) ...................... 11 Show/Hide Toolbar (Tools menu)............................... 11

Tools, Customizing Minitab, and Setting Options
Copyright © 2003–2005 Minitab Inc. All rights reserved. 46
Showing ...................................................................... 11 Status bar ................................................................ 11
Status Bar ................................................................... 11 Show/hide................................................................ 11
Submitting commands ................................................ 18 T
Toolbar.......................................................................... 5
show/hide................................................................ 11 Toolbar options........................................................... 13 Toolbars, Profiles........................................................ 41 W
Windows Management commands ........................................ 15