the reasons for the seasons - wireless @ fauhome.fau.edu/jlambert/web/resources for teching climate...
TRANSCRIPT

Lambert, J. 2007. Draft for Publication. Student Version
1
The Reasons for the Seasons Guiding Question: What causes the seasons on Earth? Vocabulary
astrolabe equinox rotate axis horizon solstice elliptical revolve (orbit) sundial
Materials Exploration (per group) extension cord (per two-three groups)
Styrofoam circular base 4 small Styrofoam balls (Earth models) 1 small craft light protractor
4 toothpicks Elaboration Activities (per student)
sundial parts thick construction paper (per group) scissors magnetic compass glue paper protractor large index card straw string small weight (paper clip)
I. Engage
In January of 1915, Sir Ernest Shackleton and his group of explorers were in the
Southern Hemisphere near the continent of Antarctica. They were within one day of reaching Antarctica when heavy pack ice trapped their ship, Endurance. After several months, Shackleton and two of his crew members hiked out across mountains to find help. Almost two

Lambert, J. 2007. Draft for Publication. Student Version
2
years had gone by since the crew had left London. Miraculously, they were rescued and everyone survived. There are many adventure stories about people experiencing and battling the changes of seasons.
In this lesson, you will learn about the seasons at different locations on the Earth. You will make simple instruments that you can use to tell time and track the path of the sun. Using these instruments will help you understand why the number of hours of daylight changes throughout the year
Make a model of the seasons using the light, four Earth models, and toothpicks. Each Earth model should represent one season. Complete the pre-assessment with your group as you construct your model. Describe your model of the seasons to the class before continuing.
Like the other planets, the Earth rotates on its axis as it revolves around the sun. The Earth’s axis is an imaginary line from the North Pole through the center of the Earth to the South Pole. It takes Earth 24 hours to rotate once on its axis and this amount of time is called a “day.” As the Earth rotates, half of it faces the sun and is lighted as the other half faces away from the sun and is dark. The Earth rotates toward the east, so the sun appears to rise in the east, move across the sky, and disappear in the west.
Earth shares one characteristic with the five other planets that also have seasons (Mars, Saturn, Uranus, Neptune, and possibly Pluto). All of these planets are tilted on their axis. Earth is tilted 23.5° degrees on its axis. We have already learned that planets revolve around the sun. As these planets revolve around the sun, the axis is tilted toward the sun for part of the year and away from the sun for part of the year. In this lesson you will learn how the Earth’s tilt and revolution around the sun causes our seasons.
II. Explore: A Simulation of Earth’s Seasons
In the first activity, you will make a model of the seasons with your team, based on the information in “The Reasons for the Seasons.”
Did you know that people in the Southern Hemisphere are having summer while people in the Northern Hemisphere are having winter?
Lambert, J. 2007. Draft for Publication. Student Version
3
Methods Collect the following materials:
styrofoam circular base 4 small styrofoam balls (Earth models) 1 small craft light protractor 4 toothpicks
Follow the procedures: 1. Place the light in the middle of the Styrofoam circular base through the cut out hole. The small craft light will represent the sun. 2. Prepare the Earth models.
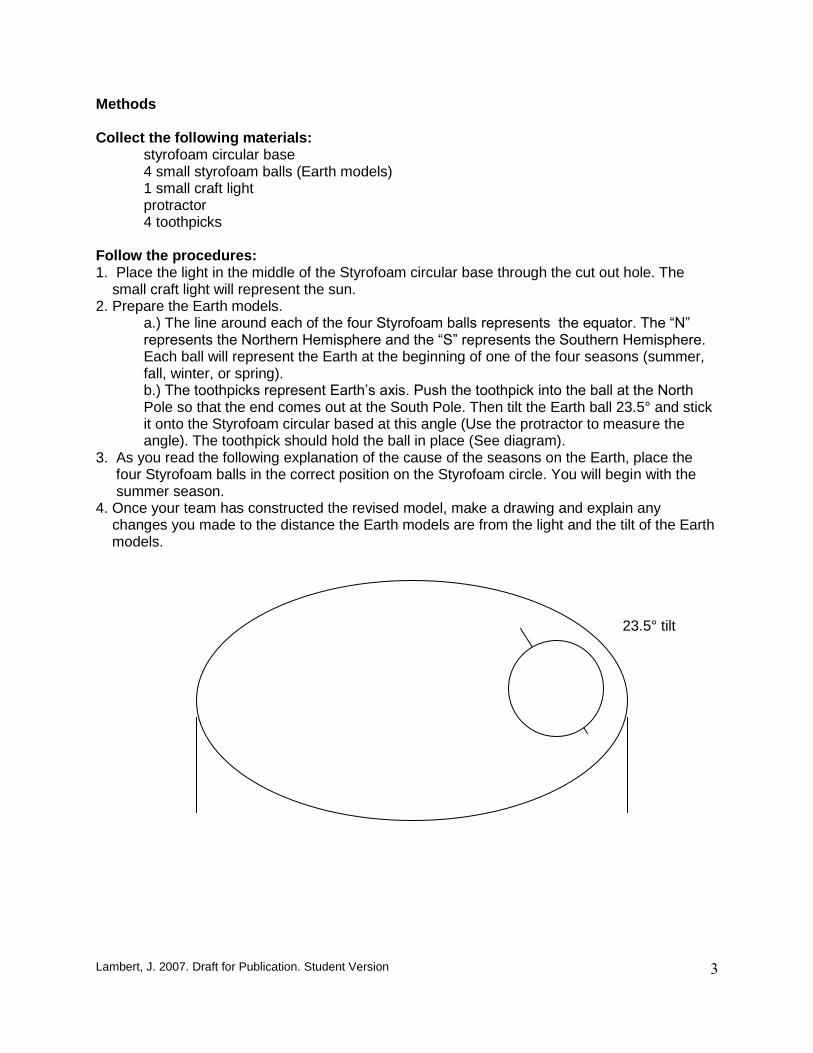
a.) The line around each of the four Styrofoam balls represents the equator. The “N” represents the Northern Hemisphere and the “S” represents the Southern Hemisphere. Each ball will represent the Earth at the beginning of one of the four seasons (summer, fall, winter, or spring). b.) The toothpicks represent Earth’s axis. Push the toothpick into the ball at the North Pole so that the end comes out at the South Pole. Then tilt the Earth ball 23.5° and stick it onto the Styrofoam circular based at this angle (Use the protractor to measure the angle). The toothpick should hold the ball in place (See diagram).
3. As you read the following explanation of the cause of the seasons on the Earth, place the four Styrofoam balls in the correct position on the Styrofoam circle. You will begin with the summer season. 4. Once your team has constructed the revised model, make a drawing and explain any changes you made to the distance the Earth models are from the light and the tilt of the Earth models.
23.5° tilt

Lambert, J. 2007. Draft for Publication. Student Version
4
“The Reasons for the Seasons”
The Earth takes 365 and 1/4 days to complete one revolution around the sun and this amount of time is called a “year.” Every four years, 1/4 of a day will add up to 24-hour day, and we add an extra day (February 29th) to the calendar. This is why we have a “leap year” with one extra day every four years. The Earth’s orbit is nearly circular (or slightly elliptical) and Earth is actually closer to the sun during the northern hemisphere’s winter months. Summer
On the first day of summer, June 20 or 21st, the Earth’s Northern Hemisphere is tilted 23.5° toward the sun. The day is known as the summer solstice. On this day the sun is at its highest point in the Northern Hemisphere sky at noon. Solstice means “sun stop” in Latin. When the Northern Hemisphere is tilted toward the sun, that part of the Earth receives more direct rays of sunlight during the daytime than the Southern Hemisphere does. The Southern Hemisphere is tilted away from the sun and therefore, receives the sun’s rays at an angle. As a result, it is summer in the Northern Hemisphere and winter in the Southern Hemisphere. Conversely, during our winter months when the Northern Hemisphere is tilted away from the sun, it is summer in the Southern Hemisphere.
During the summer, the land, oceans, and atmosphere in the Northern Hemisphere receive more direct rays of sunlight. The hemisphere of the Earth that is tilted toward the sun receives more direct rays of sunlight and also has longer days than the hemisphere that is tilted away from the sun. We call this combination of more direct sunlight and longer days the summer season. Summer begins in the Northern Hemisphere on June 20 or 21 when the North Pole is tilted a full 23.5° toward the sun. On this day, the Northern Hemisphere has the most hours of daylight, while the Southern Hemisphere has the least hours of daylight. The North Pole has 24 hours of daylight on this day, while the South Pole has 24 hours of darkness. Fall or Autumn
The Earth continues on its trip around the sun keeping the same 23.5° tilt of its axis through each season. Fall or autumn in the Northern Hemisphere begins on September 22 or 23 when the Earth is not tilted toward or away from the sun. On this day, the length of day and night are equal (12 hours each) all over the Earth. This day is known as the equinox, which means “equal night” in Latin. In the Southern Hemisphere, spring begins on this day. Winter
Winter in the Northern Hemisphere begins December 21 or 22, when the North Pole is tilted a full 23.5° away from the sun. This day is known as the winter solstice. The angle of the sun is the lowest and the Northern Hemisphere has the least amount of daylight. In the Southern Hemisphere, this is the day with the longest amount of daylight and the beginning of the summer season. The North Pole has 24 hours of darkness on this day, while the South Pole has 24 hours of daylight. Spring
Spring in the Northern Hemisphere begins March 20 or 21 when again the Earth is not tilted toward or away from the sun. There are 12 hours of daylight and 12 hours of darkness on this day. In the Southern Hemisphere, fall begins on this day.

Lambert, J. 2007. Draft for Publication. Student Version
5
III. Explain Label the following diagram based on your model and explanation from your teacher. Include:
the Earth’s axis, showing the tilt
arrows to show the movement of the Earth around the sun,
names of the seasons, and
the date each season begins.
IV. Elaboration Activity 1: Using a Sundial and an Astrolabe to Track the Sun’s Path
In this activity, you will construct a working sundial and astrolabe to measure the time of day and angle of the sun. A sundial is an instrument used to measure the time of day based on the location of the shadow made by the sun. An astrolabe is an instrument used to measure the angle of an object in the sky, such as the sun or moon, above the horizon. In Greek, the word, “astro” means “star,” and “labe” means to “find.” Both of these instruments can be used to track the sun’s path across the sky throughout the day or year. The can also be used to track the moon’s path throughout the night or over a lunar month.

Lambert, J. 2007. Draft for Publication. Student Version
6
Procedure to Construct and Use a Sundial to tell Time
Glue the page with sundial parts onto the sheet of cardboard or thick construction paper. Give the glue time to dry completely. Using the scissors, cut out the three sundial parts and make a cut where each lettered slot is marked. Gently curve the time dial (the long piece with the times) into the shape of a half circle so that the numbers appear on the inside of the circle. Connect the gnomon (the triangle-shaped part of the sundial that makes the shadow) to the support by sliding slot A into slot A’. Attach the time dial by connecting slot B with slot B’; C with C’ and D with D’. If the time of year is Standard Time, which we use from October through April in the continental US, use the slots marked EST. If you are on Daylight Savings Time, which we use from one Saturday in April through one Saturday in October, connect the time dial to the slots marked DST. Take your completed sundial outside. Using a compass, place the sundial on the ground with the gnomon pointed toward the north. The shadow of the gnomon point will cover the current time on the time dial. The sun must be visible in order for the sundial to work.
Record the time indicated on the sundial and check the time on a watch or clock. Do the times agree?
Procedure to Construct and use an Astrolabe
Cut out a rectangular piece of cardboard that is large enough to tape a protractor to.
Lambert, J. 2007. Draft for Publication. Student Version
7
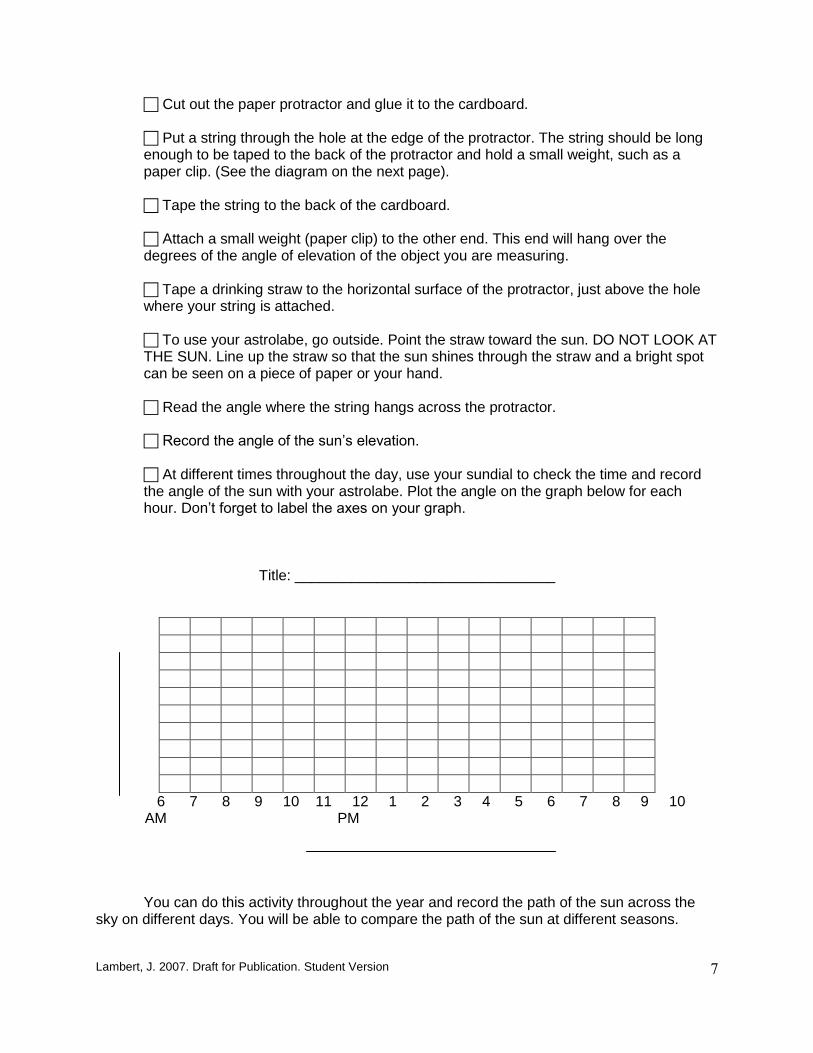
Cut out the paper protractor and glue it to the cardboard. Put a string through the hole at the edge of the protractor. The string should be long enough to be taped to the back of the protractor and hold a small weight, such as a paper clip. (See the diagram on the next page). Tape the string to the back of the cardboard. Attach a small weight (paper clip) to the other end. This end will hang over the degrees of the angle of elevation of the object you are measuring. Tape a drinking straw to the horizontal surface of the protractor, just above the hole where your string is attached. To use your astrolabe, go outside. Point the straw toward the sun. DO NOT LOOK AT THE SUN. Line up the straw so that the sun shines through the straw and a bright spot can be seen on a piece of paper or your hand. Read the angle where the string hangs across the protractor. Record the angle of the sun’s elevation. At different times throughout the day, use your sundial to check the time and record the angle of the sun with your astrolabe. Plot the angle on the graph below for each hour. Don’t forget to label the axes on your graph.
Title: ________________________________
6 7 8 9 10 11 12 1 2 3 4 5 6 7 8 9 10 AM PM
You can do this activity throughout the year and record the path of the sun across the
sky on different days. You will be able to compare the path of the sun at different seasons.

Lambert, J. 2007. Draft for Publication. Student Version
8

Lambert, J. 2007. Draft for Publication. Student Version
9

Lambert, J. 2007. Draft for Publication. Student Version
10
Reflecting on Your Learning
1. Describe the path of the sun on the day you did your measurements. 2. How would the path be different at other times of the year? Explain. Elaboration Activity 2: The Amount of Daylight and Path of the Sun at Different Latitudes
What time does the sun rise in Miami? What time does the sun set in Miami? Sunrise and sunset times for most cities can be found in the local paper, on the weather report, and on the U.S. Naval Observatories Astronomical Applications website: http://aa.usno.navy.mil/data.
In this activity, you will calculate the length of daylight in hours and minutes for these cities at different latitudes on the first day of each of the four seasons. You will also compare the paths of the sun for the three cities on the first day of each season. Procedure Calculate the length of daylight in hours and minutes for the following cities and dates.
Do you think the sun rises and
sets at the same time in Miami,
Florida and Anchorage, Alaska?

Lambert, J. 2007. Draft for Publication. Student Version
11
Miami 25° N, 80°W
Date 2002-2003
First Day of…
Sunrise Sunset Length of Daylight
Angle of Sun’s Elevation
above horizon at Noon
September 22 Fall
7:08 AM 7:17 PM 12 hr, 9 min 65°
December 21
7:02 AM 5:34 PM 40°
March 20
6:24 AM 6:31 PM 63°
June 20
6:30 AM 8:13 PM 85°
San Francisco 37°N, 122°W
Date 2002-2003
First Day of…
Sunrise Sunset Length of Daylight
Angle of Sun’s Elevation
above horizon at Noon
September 22 Fall
6:56 AM 7:00 PM 12 hr, 4 min 53°
December 21
7:19 AM 4:54 PM 28°
March 20
6:14 AM 6:22 PM 51°
June 20
5:48 AM 8:35 PM 76°
Anchorage, Alaska at 61° N, 150°W
Date 2002-2003
First Day of…
Sunrise Sunset Length of Daylight
Angle of Sun’s
Elevation above horizon
at Noon
September 22 Fall
6:42 AM 7:00 PM 12 hr, 17 min 29°
December 21
10:11 AM 3:41PM 5°
March 20
6:59 AM 7:11 PM 29°
June 20
3:20 AM 10:39 PM 52°

Lambert, J. 2007. Draft for Publication. Student Version
12
These graphs show the path of the sun across the sky for the same three cites at different seasons.

Lambert, J. 2007. Draft for Publication. Student Version
13
Reflecting on Your Learning Study the three tables of daylight information and graphs of the sun’s path for the three cities. Based on the data and graphs, answer the following questions. 1. During what season do all three cities have the greatest amount of daylight? 2. During what season do all three cities have the shortest amount of daylight? 3. As the latitude increases from Miami at 25°N to Anchorage at 61°N,
a. how does the length of daylight on December 21 change?
b. how does the length of daylight on June 20 change? 4. As the latitude increases from 25°N at Miami to 61°N at Anchorage,
a. how does the angle and path of the sun change on the first day of summer?
b. how does the angle and path of the sun change on the first day of winter?
V. Evaluation Using what you have learned in these activities, complete the post-assessment with your team. Technology Earth-Sun Relations - Animation http://esminfo.prenhall.com/science/geoanimations/animations/01_EarthSun_E2.html