testo • smart probes€¦ · 4 bluetooth® module . 3. 3 switching on/off . 3.1. switching on ....
TRANSCRIPT
testo • Smart Probes
Startup instruction
2 Overview
2
1 Safety 1.1. Safety with testo 510i
WARNING Magnetic field May be harmful to those with pacemakers. > Keep a minimum distance of 10 cm between pacemaker and
instrument.
1.2. Safety with testo 549i
WARNING Risk of injury caused by pressurized, hot, cold or toxic refrigerants/media! > Only to be used by qualified staff. > Wear protective goggles and safety gloves. > Before applying pressure to the measuring instrument: always fix the
instrument tightly onto the pressure connection. > Comply with the permissible measuring range (0 to 60 bar). Pay
particular attention to this in systems with R744 refrigerant, since these are frequently operated with higher pressures!
1.3. Safety with testo 805i
CAUTION
Laser radiation! Class 2 laser > Do not look into the laser beam!
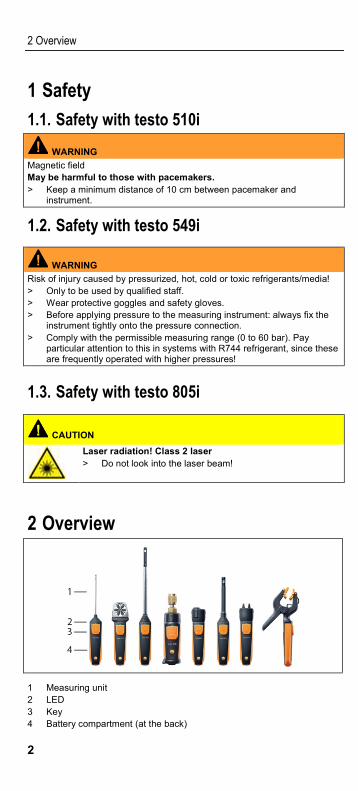
2 Overview
1 Measuring unit 2 LED 3 Key 4 Battery compartment (at the back)
4 Bluetooth® module
3
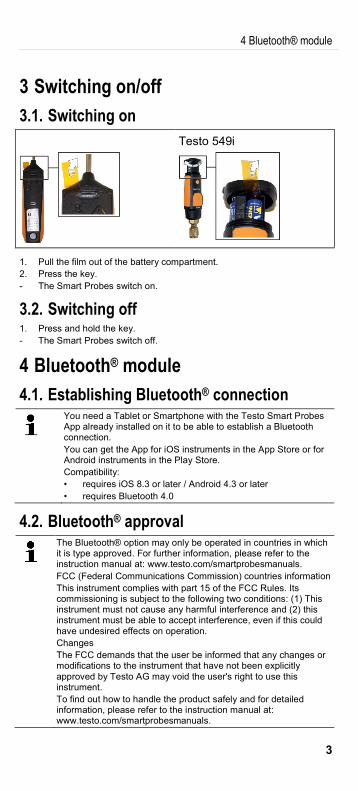
3 Switching on/off 3.1. Switching on
Testo 549i
1. Pull the film out of the battery compartment. 2. Press the key. - The Smart Probes switch on.
3.2. Switching off 1. Press and hold the key. - The Smart Probes switch off.
4 Bluetooth® module 4.1. Establishing Bluetooth® connection
You need a Tablet or Smartphone with the Testo Smart Probes App already installed on it to be able to establish a Bluetooth connection. You can get the App for iOS instruments in the App Store or for Android instruments in the Play Store. Compatibility: • requires iOS 8.3 or later / Android 4.3 or later • requires Bluetooth 4.0
4.2. Bluetooth® approval
The Bluetooth® option may only be operated in countries in which it is type approved. For further information, please refer to the instruction manual at: www.testo.com/smartprobesmanuals. FCC (Federal Communications Commission) countries information This instrument complies with part 15 of the FCC Rules. Its commissioning is subject to the following two conditions: (1) This instrument must not cause any harmful interference and (2) this instrument must be able to accept interference, even if this could have undesired effects on operation. Changes The FCC demands that the user be informed that any changes or modifications to the instrument that have not been explicitly approved by Testo AG may void the user's right to use this instrument. To find out how to handle the product safely and for detailed information, please refer to the instruction manual at: www.testo.com/smartprobesmanuals.
6 Transmitting reading
4
5 LED status LED status Meaning
Flashing red Low battery status
Flashing yellow • Smart Probe is switched on. • Smart Probe searching, but not yet connected.
Flashing green • Smart Probe is switched on. • Bluetooth is connected.
6 Transmitting reading ✓ The Smart Probes are switched on and connected to their mobile
terminal via Bluetooth. 1. The Smart Probes' readings are automatically shown in the standard
display. 2. Press the key. - The reading that is currently present is held. 3. Press the key again. - The instrument again displays the current readings.
These commissioning instructions describe the basic operating steps. To find out how to handle the product safely and for detailed information, please refer to the instruction manual at: www.testo.com/smartprobesmanuals.
www.testo-international.com