testing robots using the vexnet upgrade
TRANSCRIPT

ROBOTC
Testing Robots Using the 75 MHz Crystals • 1© 2010 Carnegie Mellon Robotics Academy / For use with VEX Robotics Systems
Testing Robots Using the VEXnet Upgrade
1.ConnecttheVEXnetUpgradeontheRadioControlTransmittertothecomputerusingtheVEXProgrammingKit.
Youwillneed:• AVEXrobotandtransmitterwithpairedVEXnetUpgrades• AcomputerwithROBOTCforIFI2.0.2(orlater)• AVEXProgrammingKit• Anobjecttoproptherobotup,offofitswheels
This document is an inspection guide for VEX v1.5 microcontroller-based robots. Use this document to test if a robot using the VEXnet Upgrade is competition ready.
1a. ConnecttoTransmitterPlugthe“phonecable”endoftheProgrammingKitintotheSERIALportoftheVEXnetUpgradeontheTransmitter.
1b. ConnecttoPCPlugtheUSBconnectorontheProgrammingKitintothePC.
2. Proptherobotup,sothatitswheelsarenolongertouchingasurface.
Method I. Using the ROBOTC Competition Debug Window
VEX ROBOTICS COMPETITION

ROBOTC
Testing Robots Using the 75 MHz Crystals • 2© 2010 Carnegie Mellon Robotics Academy / For use with VEX Robotics Systems
Testing Robots Using the VEXnet Upgrade (cont.)
4.OpenROBOTCforIFI.
5. EstablishaconnectiontotheVEXMicrocontrollerbygoingtotheRobotmenuandselectingDebugger.
3. TurnontheVEXrobotandtransmitter.AllowtheVEXnetUpgradestopair.
VEX ROBOTICS COMPETITION

ROBOTC
Testing Robots Using the 75 MHz Crystals • 3© 2010 Carnegie Mellon Robotics Academy / For use with VEX Robotics Systems
Testing Robots Using the VEXnet Upgrade (cont.)
6. AfteraconnectionhasbeenestablishedandtheProgram Debugwindowappears,gotoRobot>Debug WindowsandselectCompetition Control.
7. TheVEXnet Competition Controldebugwindowwillappear.
8. PresstheStart buttononthe Program Debugwindow.
Note:AfterpressingtheStart button,therobotwillautomaticallygointoUserControlmode.
VEX ROBOTICS COMPETITION
ROBOTC
Testing Robots Using the 75 MHz Crystals • 4© 2010 Carnegie Mellon Robotics Academy / For use with VEX Robotics Systems
Testing Robots Using the VEXnet Upgrade (cont.)
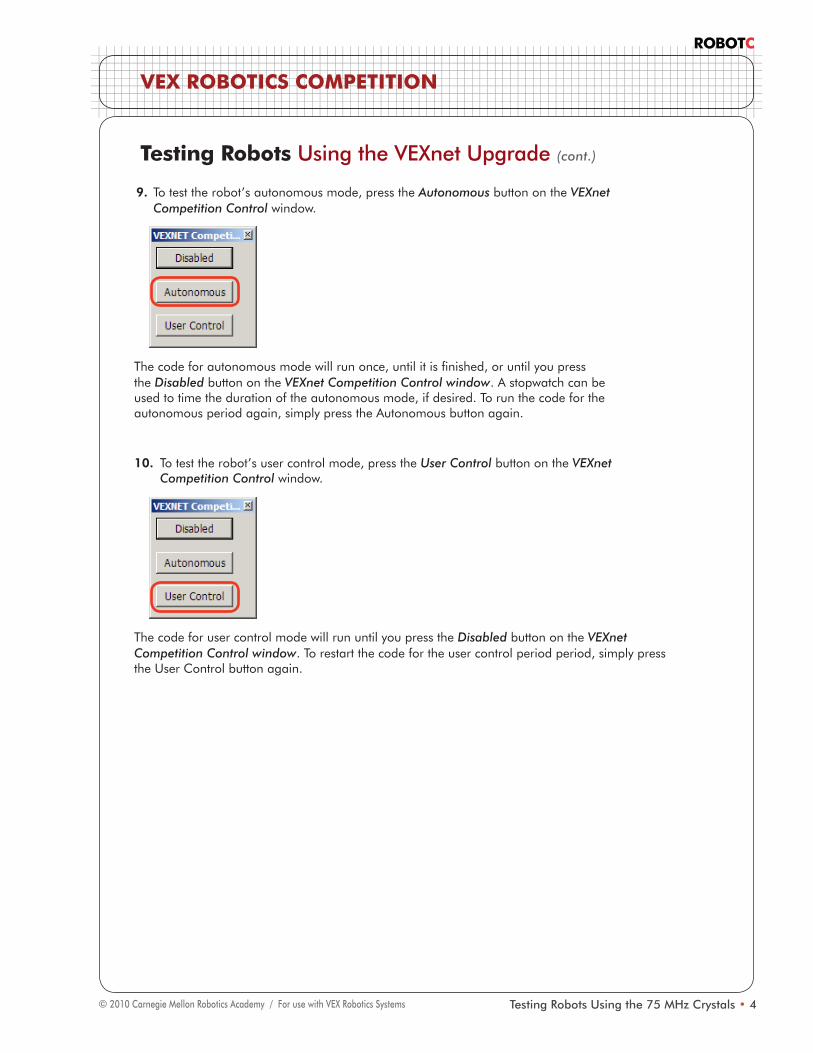
9. Totesttherobot’sautonomousmode,presstheAutonomousbuttonontheVEXnet Competition Controlwindow.
Thecodeforautonomousmodewillrunonce,untilitisfinished,oruntilyoupresstheDisabledbuttonontheVEXnet Competition Control window.Astopwatchcanbeusedtotimethedurationoftheautonomousmode,ifdesired.Torunthecodefortheautonomousperiodagain,simplypresstheAutonomousbuttonagain.
10. Totesttherobot’susercontrolmode,presstheUser ControlbuttonontheVEXnet Competition Controlwindow.
ThecodeforusercontrolmodewillrununtilyoupresstheDisabledbuttonontheVEXnet Competition Control window.Torestartthecodefortheusercontrolperiodperiod,simplypresstheUserControlbuttonagain.
VEX ROBOTICS COMPETITION

ROBOTC
Testing Robots Using the 75 MHz Crystals • 5© 2010 Carnegie Mellon Robotics Academy / For use with VEX Robotics Systems
Youwillneed:• AVEXrobotandtransmitterwithpairedVEXnetUpgrades• AVEXnetCompetitionSwitch• AnEthernetCable• Anobjecttoproptherobotup,offofitswheels
Method II. Using the VEXnet Competition Switch
Testing Robots Using the VEXnet Upgrade (cont.)
1.ConnecttheVEXnetUpgradeontheRadioControlTransmittertotheVEXnetCompetitionSwitchusingtheVEXethernetcable.
1a. ConnecttoTransmitterPlugoneendoftheethernetcableintotheCOMPETITIONportontheVEXnetUpgrade.
1b. ConnecttoSwitchPlugthetheotherendoftheethernetcableintooneoftheportsontheVEXnetCompetitionSwitch.
2. SettheENABLE/DISABLEswitchtoDISABLEandtheDRIVER/AUTONOMOUSswitchtoAUTONOMOUS.
VEX ROBOTICS COMPETITION

ROBOTC
Testing Robots Using the 75 MHz Crystals • 6© 2010 Carnegie Mellon Robotics Academy / For use with VEX Robotics Systems
Testing Robots Using the VEXnet Upgrade (cont.)
3. Proptherobotup,sothatitswheelsarenolongertouchingasurface.
4. TurnontheVEXrobotandtransmitter.AllowtheVEXnetUpgradestopair.
Totesttherobot’sautonomousmode,verifythattheDRIVER/AUTONOMOUSswitchissettoAUTONOMOUSandchangetheENABLE/DISABLEswitchtoENABLE.Thecodefortheautonomousperiodwillrunonce,untilitisfinished,oruntilitisdisabledontheVEXnetCompetitionSwitch.Astopwatchcanbeusedtotimethedurationoftheautonomousmode,ifdesired.Torunthecodefortheautonomousperiodagain,toggletheENABLE/DISABLEswitchtoDISABLEandthentoENABLE.
Totesttherobot’susercontrolmode,firstverifythattheENABLE/DISABLEswitchissettoDISABLE.Then,settheDRIVER/AUTONOMOUSswitchtoDRIVERandchangetheENABLE/DISABLEswitchtoENABLE. ThecodefortheusercontrolperiodwillrununtilitisdisabledontheVEXnetCompetitionSwitch.Torestartthecodefortheusercontrolperiodagain,toggletheENABLE/DISABLEswitchtoDISABLEandthentoENABLE.
VEX ROBOTICS COMPETITION

ROBOTC
Testing Robots Using the 75 MHz Crystals • 7© 2010 Carnegie Mellon Robotics Academy / For use with VEX Robotics Systems
Testing Robots Using the VEXnet Upgrade (cont.)
The ROBOTC Competition Templates are pre-programmed to display status information to the VEX LCD Screen. Even if you don’t have the VEX LCD Screen attached to your robot, you can use the ROBOTC VEX Remote Screen to view the information (along with any other information you choose to display yourself).
Useful Information - The VEX Remote Screen
To open the VEX Remote Screen, first open the ROBOTC Debugger. Then go to Robot > Debug Windows, and select VEX Remote Screen.
Programming help for the VEX LCD Screen / VEX Remote Screen can be found in the ROBOTC Help documentation under ROBOTC Functions > Display.
VEX ROBOTICS COMPETITION