suspension b7 sl install - vivid racing
TRANSCRIPT

STaSIS Engineering Installation Instructions for STaSIS SL Coil Over kit Linear Race Springs/Custom Valved Ohlins Dampers Application: 2004- Audi S4, 2002- Audi A4 Quattro, 2007 Audi RS4 Parts List
Quantity STaSIS Part
Number Description
2 SA02.2300.00 CCJ 1960 Damper Front (assembled with spring
perches) 2 SA02.3130.01 B7 SL Front Clevis Pin 2 HA03.0107.00 M12 x 1.25 Nylock 2 HA01.1203.00 SHCS M12x1.5x30 2 SA02.3010.00 B6 B7 Clevis 50mm Ohlins Lower 2 SA02.3120.00 B7 SL Front Stud Adaptor 2 10" x 2.5" Spring FRONT 2 SA10.0002.00 UHMWPE 2.5" 2 SA02.2310.00 CCJ 1960 Damper Rear (assembled), Bushing included 2 SA02.3101.00 B6 B7 Rear Stud 2 SA02.3104.00 B6 Rear Lower Spacer Long 2 SA02.3103.00 B6 Rear Lower Spacer Short 2 SA01.3018.00 Rear Spring Perch Male 2 SA01.3019.00 Rear Spring Perch Female 6 SA01.3020.00 Set Screw - Rear Perch 2 SA10.0001.00 UHMWPE 2.25" 2 6" x 2.25" Spring REAR 2 SA01.3001.00 Ohlins Perch Wrench
WARNING – These COMMON INSTALLATION ERRORS will adversely affect the handling of the vehicle.
A. DO NOT ADJUST dampers prior to installation as they have been preset for proper initial use.
B. Vulcanized rubber suspension bushings must be tightened at ride height or adverse handling and premature
failure of the bushings will result. (see instructions)
C. Proper ride height is a function of vehicle usage and spring rate. Ride heights below 25” will require proper spring rates and possible alignment corrections to avoid adverse handling. (please call tech support)
Please read ALL instructions prior to attempting installation. Please torque all fasteners to specifications.
Torque Specifications Lower Spring Perch Set Screw 10lb/in Front Upper Spring Perch to Body (Engine Bay) 55lb/ft
Front Lower Shock Clevis Nut 66lb/ft* Front ARB Link to Lower Control Arm 30lb/ft + 1/4 turn Front ARB Link to ARB 30lb/ft + 1/4 turn OEM Wheel Bolts 89lb/ft Rear Upper Damper Mount to Body 26lb/ft Rear Damper Shaft to Mount 20lb/ft Rear Lower Damper Eye to Lower Control Arm 85lb/ft Rear Subframe Assembly to Chassis 65lb/ft
* must be tightened with vehicle at or near ride height.
instructions Before removing any parts, park the car on a secure, stable and level surface, loosen (but do not remove) the wheel lug nuts, jack the vehicle up and place the car on four stable jack stands or use a professional vehicle lift. We recommend having two people available for certain steps of the installation. Before beginning installation, lay out all parts and ensure the kit is complete. 1. Securely support both front corners of the vehicle
(relieving tension on the sway bar)
2. Remove front wheels
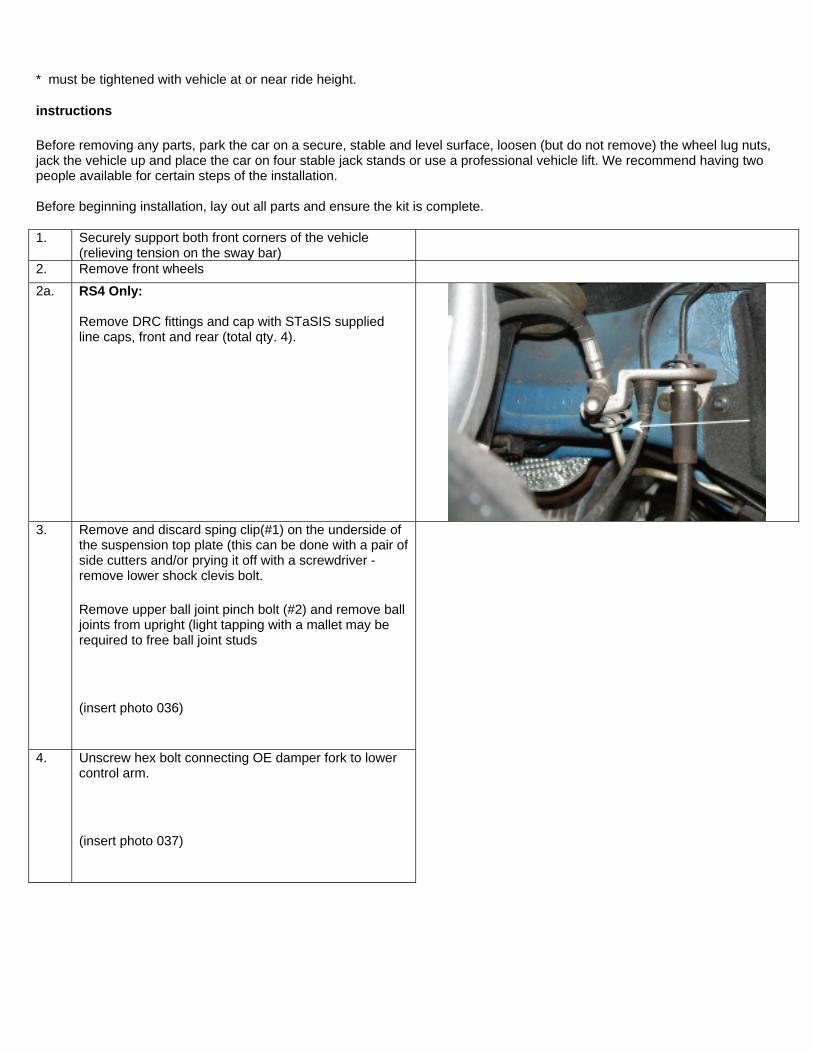
2a. RS4 Only: Remove DRC fittings and cap with STaSIS supplied line caps, front and rear (total qty. 4).
3. Remove and discard sping clip(#1) on the underside of
the suspension top plate (this can be done with a pair of side cutters and/or prying it off with a screwdriver -remove lower shock clevis bolt.
Remove upper ball joint pinch bolt (#2) and remove ball joints from upright (light tapping with a mallet may be required to free ball joint studs
(insert photo 036)
4. Unscrew hex bolt connecting OE damper fork to lower
control arm.
(insert photo 037)

5. In the engine bay, • remove rearward hood seal and rain tray • remove retaining screw for coolant reservoir, lift
coolant reservoir out of mounting tabs at rear of tank and move slightly to the side. Disconnect level sensor plug from bottom of tank.
• remove the six suspension top plate mounting bolts (three per side)
•
6. • remove the six suspension top plate mounting bolts (three per side)
• remove shock/spring/top plate assembly from vehicle
Take care to avoid contact with painted body parts.

7. Use adequate spring compressor to compress spring on shock assembly
Remove shock shaft nut and separate shock and spring from top plate and rubber isolation mount (keep the shock shaft nut and rubber isolation mount for use with Stasis/Ohlins damper assembly)
VAG tools are pictured here. You may also use a deep socket and vice-grips with a hex key holding the shaft in place.
You will be able to do steps 7-11 with the dampers off of the car

8. Remove the following parts to be transferred to the new damper:
#1 Shaft Nut
#2 Shock Strut Mount
#4 Upper Suspension Mount

9. Remove swaged aluminum upper spring seat retainer. Use a small chisel and hammer to bend over swaged lip.
10. Place stud mount of the Stasis/Ohlins damper through the opening in the center of the suspension top mount plate

11. Place rubber isolation mount on stud of the Stasis/Ohlins Damper and secure with the new M12x1.25 nut
The top plate will be loose on the damper assembly. This is normal; it will be secured when bolted into the chassis
12. Install Stasis/Ohlins damper assembly in the car and secure the suspension top mount plate with the six O.E. fasteners.
13. Install bolt through lower clevis assembly.
(insert picture 048)
CAUTION! it is important to loosen and re-torque this fastener with the suspension at final ride height to avoid premature bushing failure.
14. Install upper ball joints and pinch bolt.
Torque pinch bolt to 34 ftlbs.

1. Securely support both rear corners of the car, relieving
tension on the swaybar.
2. Remove rear wheels
3. Support rear subframe assembly as shown
Rear Install Instructions

4. Remove rear subframe bolts, one side only. CAUTION! Only remove subframe bolts one side at a time, make sure two are securely retaining subframe at all times
5. Gently lower rear subframe assembly with jack.
CAUTION: if subframe is lowered to far damage to brake line may occur.
Remove rear spring and lower spring seat isolator

6. Remove fender liner retaining screws around damper to access upper damper mounting bolts. Remove bolts 1 and 2 and remove rear damper assembly.
7. Remove hex nut 1 from upper damper mount, separate
damper. Save hex nut 1 and upper damper mount 2 for reassembly.

8. Assemble new rear damper into mount as shown.

9. Install new Ohlins rear damper assembly into vehicle.
(note the spacers for the lower damper mounts are offset, the longer of the two bushing will fit into the register on the suspension upright)
(insert photo 028)
CAUTION! it is important to loosen and re-torque the lower fastener (#1) with the suspension at final ride height to avoid premature bushing failure.
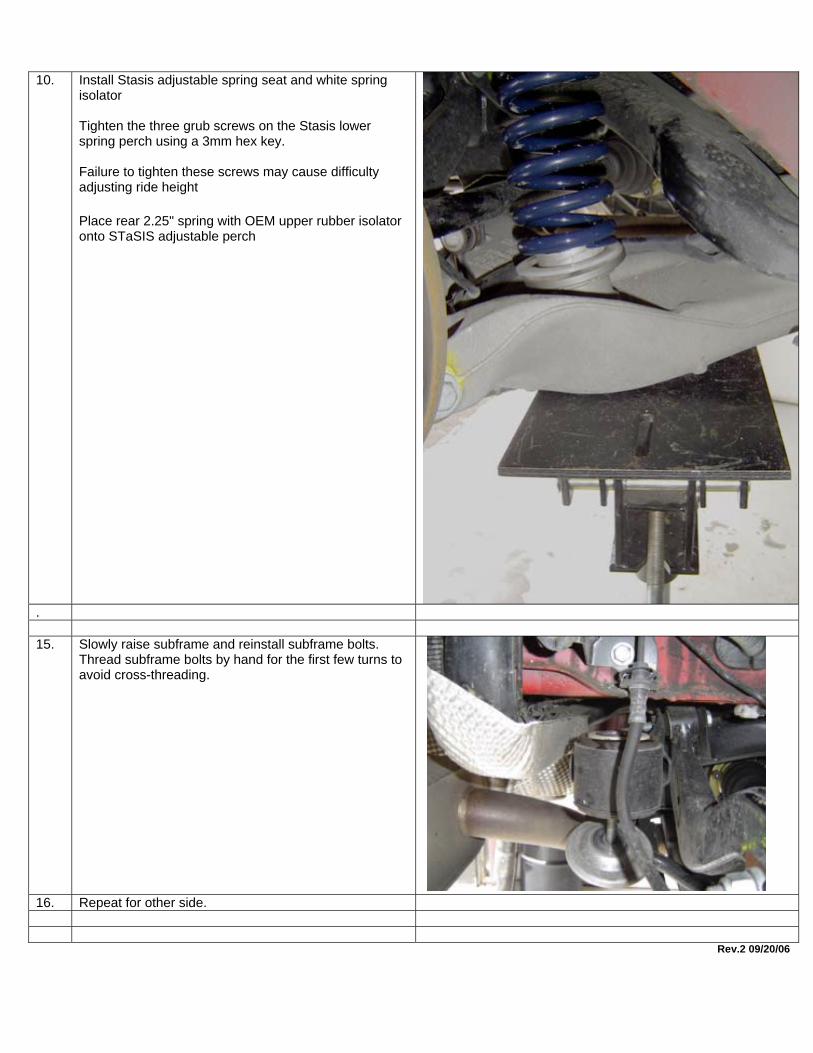
10. Install Stasis adjustable spring seat and white spring isolator Tighten the three grub screws on the Stasis lower spring perch using a 3mm hex key. Failure to tighten these screws may cause difficulty adjusting ride height
Place rear 2.25" spring with OEM upper rubber isolator onto STaSIS adjustable perch
. 15. Slowly raise subframe and reinstall subframe bolts.
Thread subframe bolts by hand for the first few turns to avoid cross-threading.
16. Repeat for other side.
Rev.2 09/20/06