spinnaker furler manual - the sailwarehousethesailwarehouse.com/pdf/spinnaker furler manual.pdf ·...
TRANSCRIPT
CDI Spinnaker Furling System INSTALLATION/OPERATING INSTRUCTIONS
44 James Street, Homer, N.Y. 13077 Tel: 607-749-4599 FAX: 607-749-4604
Website: www.sailcdi.com January 19, 2008
2
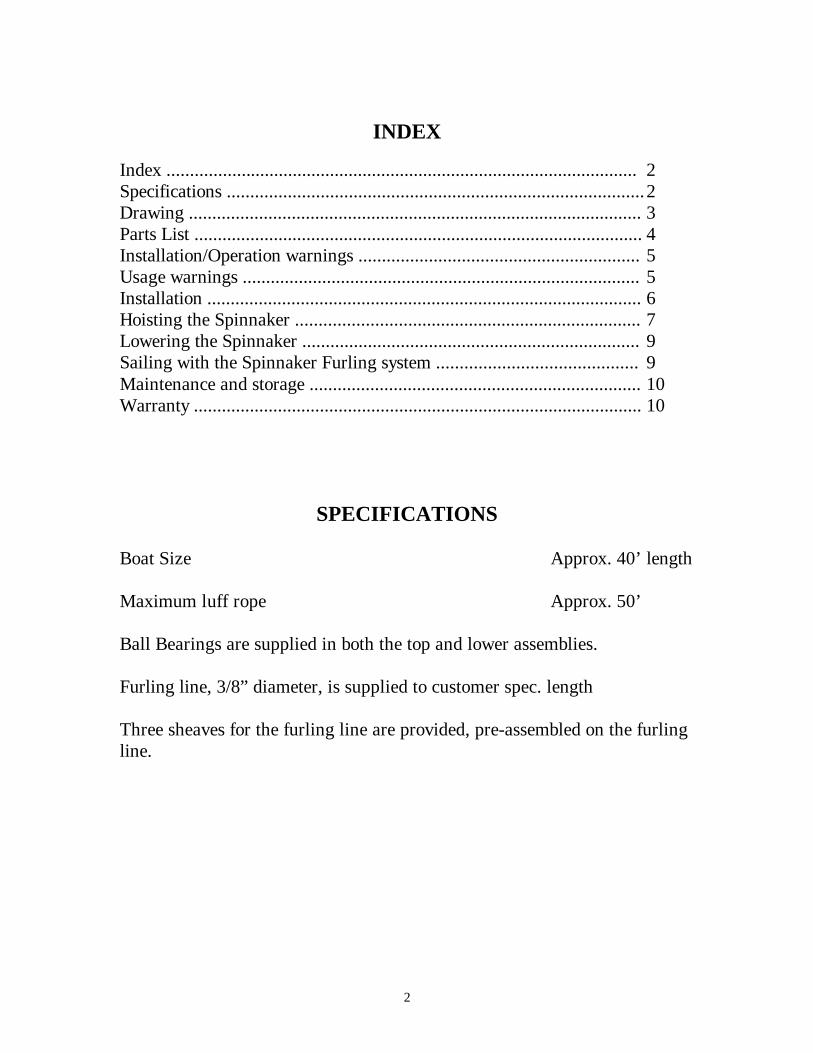
INDEX Index ..................................................................................................... 2 Specifications ......................................................................................... 2 Drawing ................................................................................................. 3 Parts List ................................................................................................ 4 Installation/Operation warnings ............................................................ 5 Usage warnings ..................................................................................... 5 Installation ............................................................................................. 6 Hoisting the Spinnaker .......................................................................... 7 Lowering the Spinnaker ........................................................................ 9 Sailing with the Spinnaker Furling system ........................................... 9 Maintenance and storage ....................................................................... 10 Warranty ................................................................................................ 10
SPECIFICATIONS Boat Size Approx. 40’ length Maximum luff rope Approx. 50’ Ball Bearings are supplied in both the top and lower assemblies. Furling line, 3/8” diameter, is supplied to customer spec. length Three sheaves for the furling line are provided, pre-assembled on the furling line.
3
4
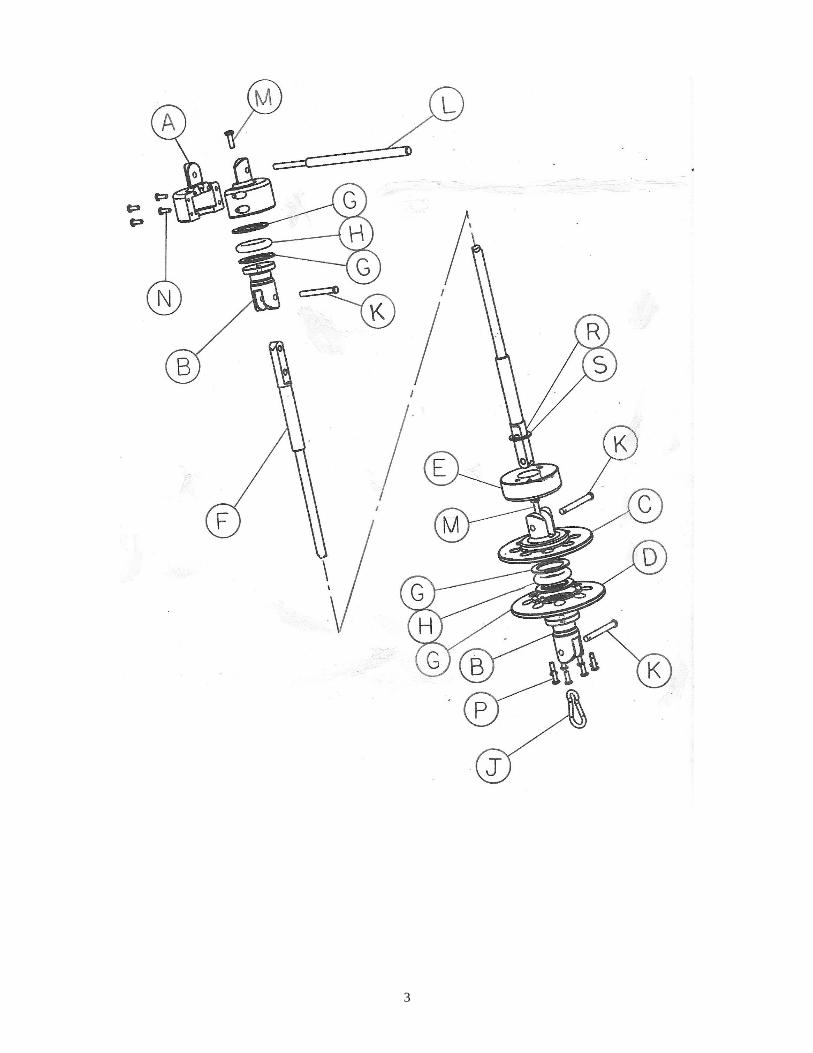
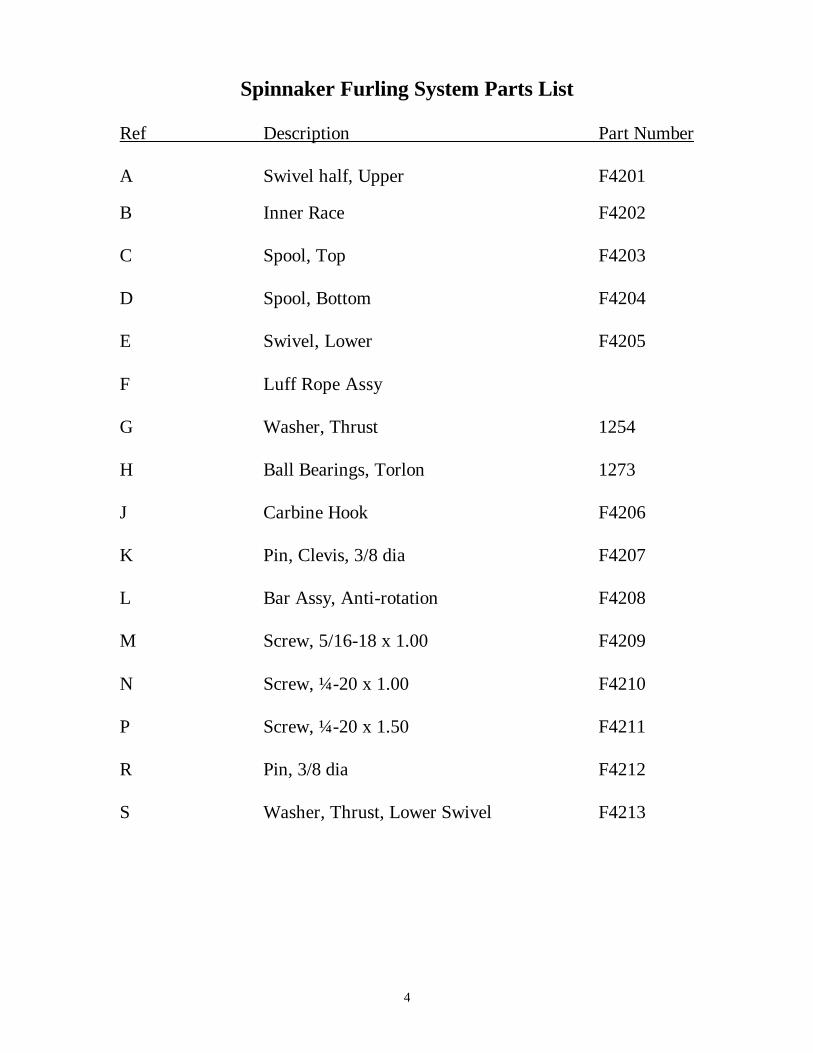
Spinnaker Furling System Parts List Ref Description Part Number A Swivel half, Upper F4201 B Inner Race F4202 C Spool, Top F4203 D Spool, Bottom F4204 E Swivel, Lower F4205 F Luff Rope Assy G Washer, Thrust 1254 H Ball Bearings, Torlon 1273 J Carbine Hook F4206 K Pin, Clevis, 3/8 dia F4207 L Bar Assy, Anti-rotation F4208 M Screw, 5/16-18 x 1.00 F4209 N Screw, ¼-20 x 1.00 F4210 P Screw, ¼-20 x 1.50 F4211 R Pin, 3/8 dia F4212 S Washer, Thrust, Lower Swivel F4213
5
INSTALLATION / OPERATION WARNINGS & SAFETY CHECKLIST
INSTALLATION WARNINGS: Improper installation of the Spinnaker Furling system can result in damage to the system, damage to the headsail, damage to the headstay, or injury to the crewmembers. There MUST BE a minimum of 6” clearance between the headstay and the Spinnaker Furler. If there is not 6” minimum clearance at the top of the system between the Spinnaker Furler Top swivel and the headstay, a Spinnaker crane may need to be fabricated or purchased to provide the necessary clearance. The crane is designed to move the Spinnaker halyard further forward to prevent possible halyard wrap problems with the jib/jib halyard. The attachment point on the bow of the boat must be strong enough to prevent damage to the boat caused by the force of the Spinnaker under sail. If the bow attachment point is not strong enough, damage to the boat, damage to the Spinnaker, or injury to crewmembers is possible. It is the boat owner’s responsibility to ensure the attachment fitting on the boat is suitable before attaching the Spinnaker Furling system. Keep all unused halyards under slight tension, and led away from the Spinnaker furling system. USAGE WARNINGS: The CDI Spinnaker Furling System is intended to furl any asymmetric (cruising) spinnaker easily from the safety of the cockpit, however: 1. Never winch the system without first checking for jams or snarls. Winching against an obstruction can cause damage to the Spinnaker Furling system, the spinnaker, or the boat. 2. If the Spinnaker Furling system becomes difficult to operate, investigate and correct the cause. Failure to do so can lead to damage to the system or injury to crewmembers. 3. The Spinnaker Furling System is designed to furl any Asymmetric (Cruising) Spinnaker. It is NOT intended to reef a Spinnaker.
6
INSTALLATION
1. Attach a “U” bolt, eye fitting or similar attachment fitting to the bow of the boat. The fitting must be of sufficient strength to support the spinnaker loads when sailing and furling. The fitting must be installed at least 6” in front of the headstay on a portion of the boat which is sufficiently strong to support the spinnaker loads when sailing and furling. The fitting will normally be mounted to a bow sprit or anchor roller.
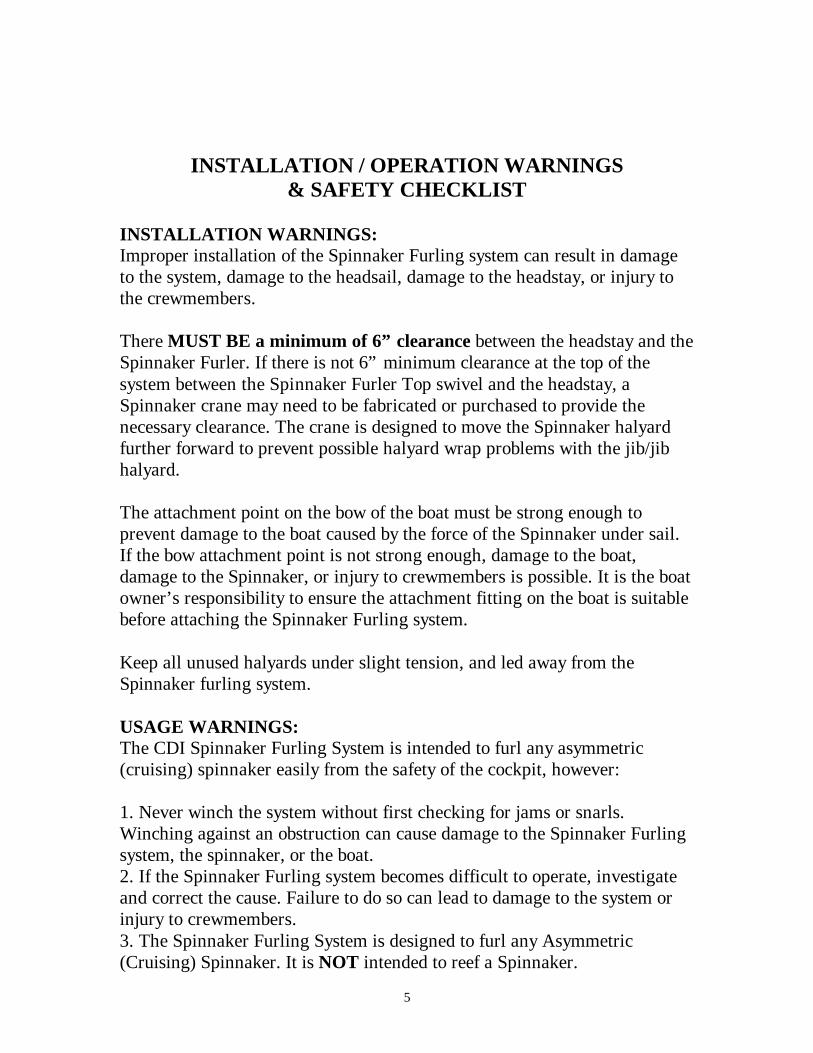
2. With a short piece of 5/16” dia double braid line, tie the head of the spinnaker to the lower hole in the upper luff rope end. (see picture).The length of line used will help determine the sail shape of the spinnaker.
3. With a short piece of ¼” dia. double braid line, attach the tack of the
spinnaker to the holes in the spinnaker swivel. (see picture). The length of line used will help determine the sail shape of the spinnaker.
7
HOISTING THE SPINNAKER
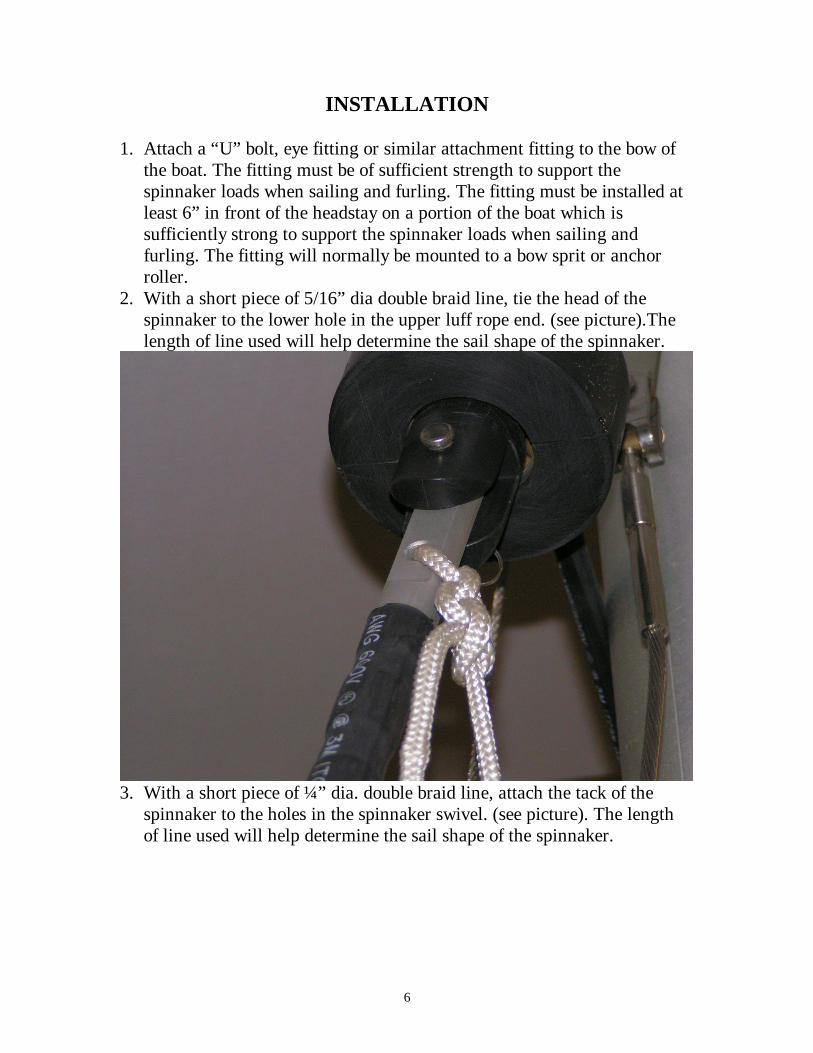
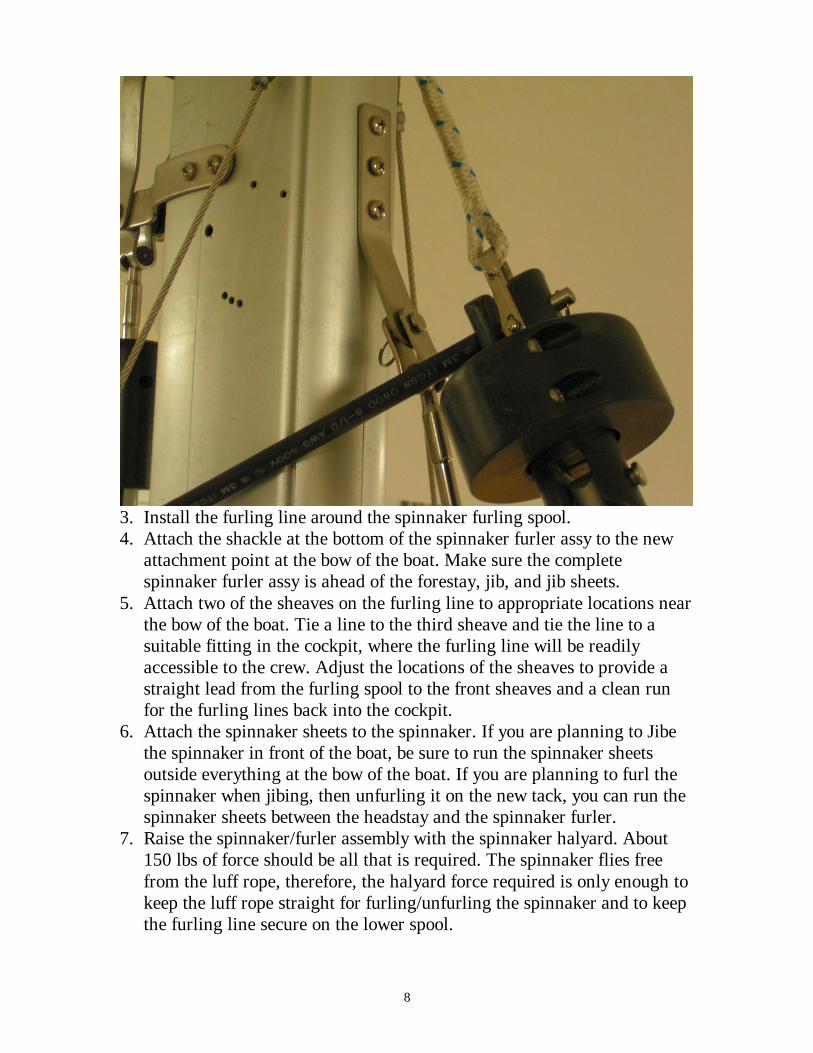
1. On a calm, windless day, 2. Attach the spinnaker halyard to the anti-rotation pin in the center of the
top fitting of the spinnaker furler assembly. The purpose of the anti-rotation pin is only to keep the ship’s rope spinnaker halyard from twisting when the sail is furled/unfurled.
8
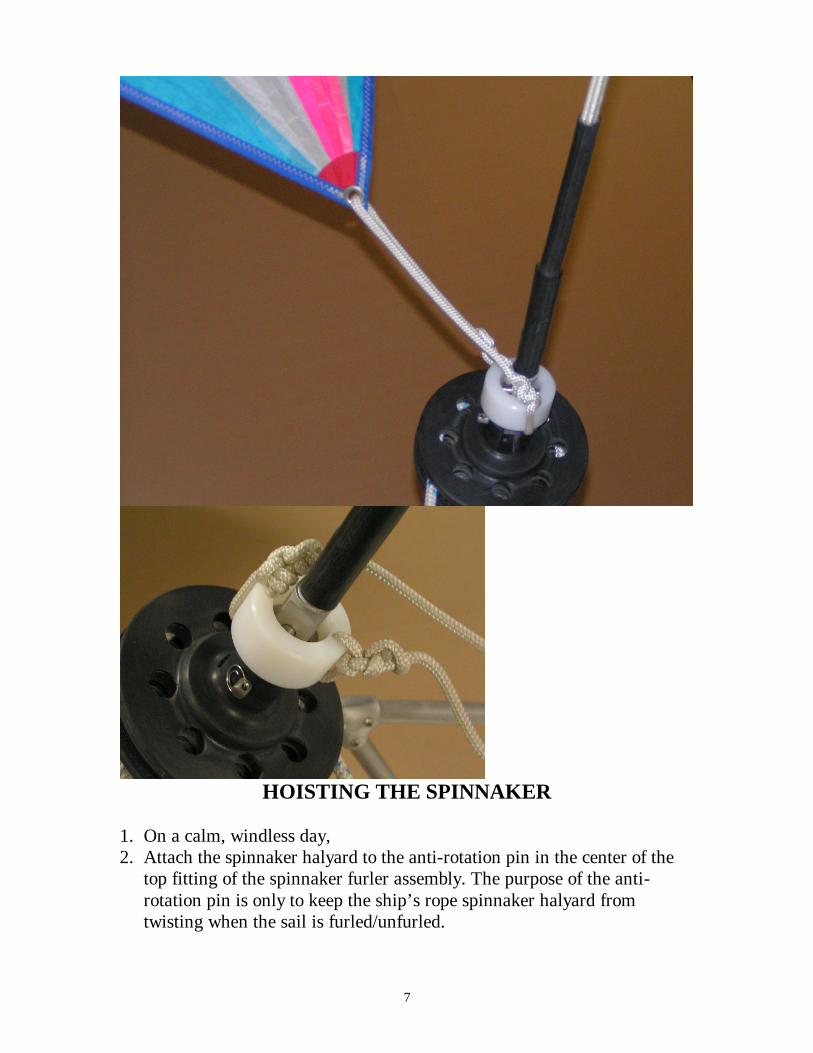
3. Install the furling line around the spinnaker furling spool. 4. Attach the shackle at the bottom of the spinnaker furler assy to the new
attachment point at the bow of the boat. Make sure the complete spinnaker furler assy is ahead of the forestay, jib, and jib sheets.
5. Attach two of the sheaves on the furling line to appropriate locations near the bow of the boat. Tie a line to the third sheave and tie the line to a suitable fitting in the cockpit, where the furling line will be readily accessible to the crew. Adjust the locations of the sheaves to provide a straight lead from the furling spool to the front sheaves and a clean run for the furling lines back into the cockpit.
6. Attach the spinnaker sheets to the spinnaker. If you are planning to Jibe the spinnaker in front of the boat, be sure to run the spinnaker sheets outside everything at the bow of the boat. If you are planning to furl the spinnaker when jibing, then unfurling it on the new tack, you can run the spinnaker sheets between the headstay and the spinnaker furler.
7. Raise the spinnaker/furler assembly with the spinnaker halyard. About 150 lbs of force should be all that is required. The spinnaker flies free from the luff rope, therefore, the halyard force required is only enough to keep the luff rope straight for furling/unfurling the spinnaker and to keep the furling line secure on the lower spool.
9
8. Furl the spinnaker by pulling on the furling line until the sail is completely rolled around the luff rope.
9. You are now ready to go sailing, or store the assembled spinnaker until it’s use is desired.
LOWERING THE SPINNAKER
1. To lower/store the spinnaker assembly, roll the spinnaker up around the luff rope (step 8). Drop the assembly to the deck by lowering the spinnaker halyard. Disconnect the spinnaker halyard from the top swivel assembly. Disconnect the lower shackle from the bow of the boat. Coil the spinnaker assembly and store in a sail bag. Place the spinnaker bag below deck in an appropriate dry storage location.
Suggestion: You may find it easier to install/store the spinnaker furler assembly if you slip the furling line off the spool and attach the line to the bow of the boat. Then, when you next raise the spinnaker furler assembly, the furling line will already be led to the cockpit. The same applies to the spinnaker sheets. If you disconnect them from the spinnaker before storing the sail, they will be led to the cockpit and ready for usage next time you want to fly the spinnaker.
SAILING WITH THE SPINNAKER FURLING SYSTEM 1. Once the spinnaker furler assembly has been raised, to fly the spinnaker,
turn the boat onto a broad reach. 2. Unfurl the sail by pulling on the spinnaker sheet while unwinding the
furling spool by pulling the proper side of the furling line at the sheave in the cockpit. Catching wind in the spinnaker will ease the opening of the spinnaker.
3. Once the spinnaker has been unfurled, sail it as you would a normal asymmetrical (cruising) spinnaker.
4. To jibe the spinnaker, you can jibe outside the headstay if you have run the spinnaker sheets outside the headstay.
5. You can also jibe the spinnaker by furling it, turning the boat to the new heading, then unfurling the spinnaker. If you choose this method of jibing, you should run the spinnaker sheets between the headstay and the spinnaker furling system. Furling and unfurling the spinnaker during a jibe will reduce the possibility of the boat running over the lazy sheet during sailing or jibing.

10
MAINTENANCE AND STORAGE The only maintenance for the Spinnaker Furling System is to annually flush the bearings in the top swivel assembly and the lower spool assembly with flesh water. No disassembly is required. The bearing assemblies have adequate clearance to allow the stream of water to enter and flush any dirt from the bearings. The complete Spinnaker furling system and spinnaker can be stored coiled together during the sailing season in a sail bag. Off-season, when the spinnaker will not be used, the sail should be uncoiled and folded to reduce wrinkling of the sail during prolonged storage. The furling system must be stored in a dry location.
LIMITED 6 YEAR WARRANTY
The Cruising Design Spinnaker Furling System is warranted to remain functional for 6 years from date of purchase. You must be the original purchaser of the unit. If, during this period, any part becomes non-functional (other than normal furling line wear), CDI will repair or replace it, free of charge, except for the freight. The warranty does not cover: Shipwreck, collision, acts of God, being dragged on the ground, or any other abusive acts to the system.