sequencing systems and techniques
DESCRIPTION
Sequencing Systems and Techniques Write upTRANSCRIPT

Sequencing Systems and Techniques!
Above you can see an illustrated drawing of the connections inside of a college midi room, there are many different types of cables which setup certain equipment and without them the studio would not function. It’s critical to know all the sorts of cables used in professional work spaces so that if you are ever faced with setting up gear then you know what connects where and how, this would be a very useful thing to know and thats what i’m going to be explaining now. Using the Legend on the picture i will explain what each piece of equipment does, how it is used, how it is connected and what other connections it may have or be used for. All of these devices apart from the mouse, keyboard and microphone are all connected to the mains so keep that in mind when setting up or using a Midi room. !!1. As you can see in the diagram the first number is in fact the studio monitors which in the case of the MIDI rooms are active monitors meaning there is no need for a power amp as they are not passive and have a built in power supply. They are connected to the MIDI Keyboard through a cable called a Jack Cable. Jack Cables are used for things such as guitars and studio monitors. They are also known as Quarter inch cables.!

2. Number 2 is the computer which in this case is a Mac Mini. This Apple Macintosh computer is the central hub of the whole setup and it is where all the needed DAW’s such as Logic are found and it is also where the Midi Keyboard and peripherals are inputted. This Particular computer has a HDMI port which is great for connecting monitors and TV’s to your system which is the connection we mainly use at college. There are also other ports on the device such as Ethernet, Headphones and Microphone ports and Firewire.!!3. This is the Computer screen and its connected to the mac via a HDMI lead, the monitor is how we actually see our projects and although it is overlooked in many setups its always good to have a decent monitor with a HDMI port as this provides better quality but VGA is sufficient but however can not be used with newer Macintoshes. !!4.This is the Midi Keyboard and in the MIDI rooms in college this is were all the recordings are processed through, usually when recording in studios you will have a separate recording device known as a Audio Interface however in the MIDI rooms these are built into the MIDI keyboards. They provide connections for the studio monitors, Microphones, Guitars and any other form of recordable instruments such as Turntables. As you can see in the surrounding pictures it has many inputs like just mentioned including XLR, Line in and USB. The Midi Keyboard connects to the mac by the USB whereas the monitors connect through a line output. Microphones are connected via XLR and this device provides phantom power for condenser microphones which basically means you can use much more sensitive microphones which pickup a wider frequency range, these condenser microphones are great for acoustic recordings.!!

5.Is the Microphone. In The Midi Rooms there are mainly condenser microphones which are used mainly for vocal recordings for coursework. As previously mentioned they connect via XLR into the microphones input in the MIDI Keyboard. You can view the input levels via the gages on the MIDi Keyboard this is a handy feature and comes in useful like other controls on the MIDI Keyboard. !!6&7. Are the Keyboard and mouse which are self explanatory they are used for operating the computer and are connected to the Mac via USB like the MIDI Keyboard. !!!!
!Starting from scratch this is how you setup a Midi Room and its equipment. Firstly you will need to plug in the computer to the socket and put the screen onto the desk and connect it to the macintosh though HDMI making sure that you have also plugged in the screen to the wall socket. Next you should plug in the computers mouse and keyboard into the computer via the USB ports. Then you should set the MIDI Keyboard onto the desk and connect it again to the computer via USB making sure you have plugged it into the wall. Next plug in your monitors via the line outputs of the MIDI Keyboard with a Jack lead making sure that they are also both plugged into the socket.!Then you should plug the Microphone into the MIDI Keyboard via the Microphone or XLR input of the Keyboard. Once you have done that turn everything on starting with the Monitors and speakers ,switch on the mac and launch logic!!
!!!!!!!!!!

Recording, Editing and Mixing in Logic!!Recording!To put an idea thats in your head down and make it an actual real project you'll need to record it into logic. There are many ways in which to record into Logic and even more tools and manipulation techniques to get the sounds you want. In logic there are 3 main ways to record these different ways are: !!-Audio !-Software Instruments!-External Midi!
!Audio !Audio Recording is one of the main parts in Logic and it allows you to record real life instruments such as your own guitar and drum set via microphones or Direct Input. To Record via microphones you need an audio interface connected to your computer and an XLR cable plugged into your chosen microphone which is going to the audio interface. This allows you to record your chosen instrument. There are a number of basic settings when creating tracks in Logic which you can see in the screenshot to the right.!!!You can see that you can select the number of tracks you want to create, this is especially useful for multi track recordings. You can also select the format of the track, whether you want it to be a Mono, Stereo or Surround track for different types of microphones. You can also select what inputs and outputs it uses and you can select whether to arm the track and if you want input monitoring on your selected track. However you don’t have to use microphones for this audio channel, you could always record via Direct Input (or DI). You can do this by using a jack cable into your chosen instrument such as guitar and record your it into logic. !!Software Instrument!A software instrument track is a track which is run by software on the computer, you don’t need anything for these types of tracks as they are all built in to Logic however to get the best out of them you probably will need a MIDI keyboard hooked up to your setup to create melodies and chord progressions in this channel. You can use plugins like the EXS24 and the ES1 to make sounds for example in this type of track. !!!

!External MIDI!External MIDI is the least relevant channel, it is mainly used for when the sounds are outside of Logic on a different piece of equipment. This can be used for some types of older synthesisers, analogue gear and older keyboards.!!!!!!!
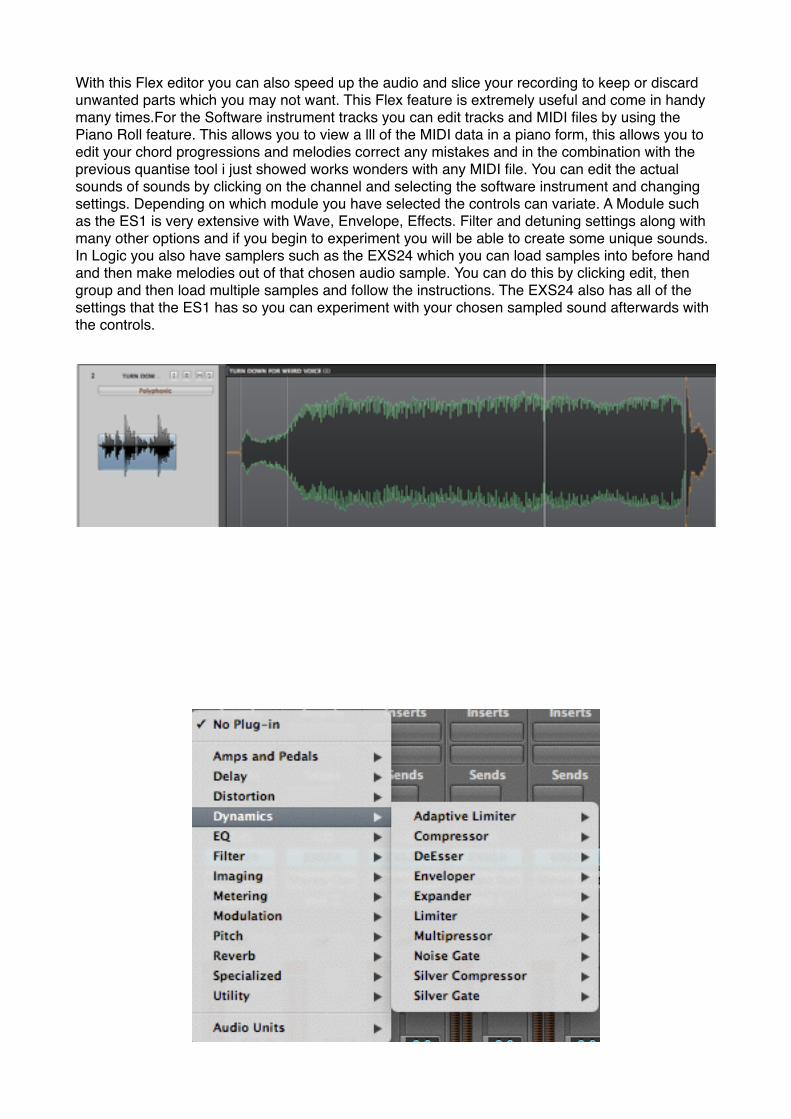
!!!!!!Editing !When editing your recordings there are a few tips and general things to remember to make your time on Logic easier, better and quicker. Editing can be a difficult task and sometimes may take hours of work to get your sounds up to the place which you want them. You can use various tools in logic to get the to sound like what you want and i’m going to explain how this can be done.!!The first set of editing tools i’m going to explain are mainly for audio tracks. When you record audio into logic you are presented with a waveform. In Logic these are typically harder
to manipulate than MIDI tracks as they are recorded by a instrument which isn't software so they require extra editing. You can do this by selecting your audio and clicking the sample editor button and editing your waveform by using tools such as normalise and fade out to customise the more basic tool settings. You can also reverse the waveform and even trim it to your desire.!!However if you need to edit your waveform because of timing reasons there is another extremely handy tool that you can use which is called Quantisation and is done by clicking the waveform and channel of your choice, then clicking the flex tool. Now depending on what type of instrument you have recorded you can select one of the appropriate options. Then you can move your mouse over to the audio clip options on the left and by choosing one of the wanted timings.!!
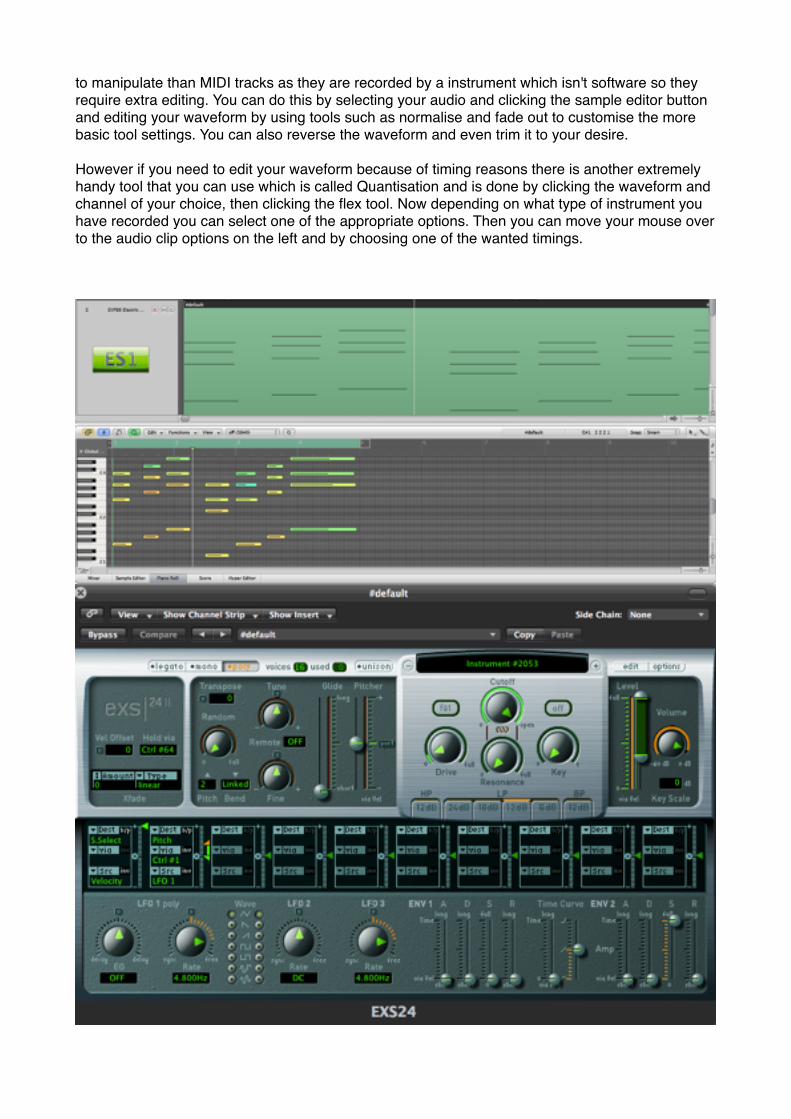
With this Flex editor you can also speed up the audio and slice your recording to keep or discard unwanted parts which you may not want. This Flex feature is extremely useful and come in handy many times.For the Software instrument tracks you can edit tracks and MIDI files by using the Piano Roll feature. This allows you to view a lll of the MIDI data in a piano form, this allows you to edit your chord progressions and melodies correct any mistakes and in the combination with the previous quantise tool i just showed works wonders with any MIDI file. You can edit the actual sounds of sounds by clicking on the channel and selecting the software instrument and changing settings. Depending on which module you have selected the controls can variate. A Module such as the ES1 is very extensive with Wave, Envelope, Effects. Filter and detuning settings along with many other options and if you begin to experiment you will be able to create some unique sounds. In Logic you also have samplers such as the EXS24 which you can load samples into before hand and then make melodies out of that chosen audio sample. You can do this by clicking edit, then group and then load multiple samples and follow the instructions. The EXS24 also has all of the settings that the ES1 has so you can experiment with your chosen sampled sound afterwards with the controls.!
!!!!!

Mixing !Mixing in logic is definitely made easier by certain elements and built in plugins. Its ease of use by simply clicking the mixer button and getting you straight into the action is one of the best parts of Logic in my opinion. There are several areas in Logic that you may want to take major notice in such as the plugins section, panning, levels and buses.!!The Plugins section is where you will find all of Logics effects, here you can find anything from compressors to delays and choruses. Plugins like this are great for mixing and can make your track sound instantly better. Compressors are handy for any types of track but especially audio tracks as they can boost the overall level of the track and make it so that no part is louder or quitter than the other which is great if you have recorded audio which has a lot of volume difference. You can get creative with effects such as reverb and delay to make a sound appear to be being played from a distance or in a large empty space and you can also you tools such as a noise gate to eliminate background noise from any recordings you make. !!Panning is a big part of mixing as your songs should always have a good but balanced stereo field and this can be achieved by panning and the use of effects such as the multi-meter and stereo spread. However panning in Logic is very simple and only uses one control on the mixer for every channel which can be located next to the volume meter and you can turn it either way, left or right, to pan and chose how much you want to pan every instrument by. This is a very useful tool and can make songs sound much wider, panning is a great technique and can improve songs dramatically if applied right. !!Levels are shown by the Volume meters seen in every track on the mixer next to the panning controls, the visually show how loud or quite each track is by presenting the level in decibels.!The Meters are accurate and responsive meaning that if something is too low or high in the mix you can see it instantly and are able to fix it quickly. This may help you in recordings as then you could also apply compression when needed, due to the help of the levels presented by the meters. !!Busses are also very important and offer a way of managing your tracks more easily by putting them into groups meaning that you can put groups of effects and panning on a particular set of tracks and not have to apply all the same effect multiple times, you can do this by chaining the output of the track to a chosen bus.!