ressourcegrupper og allokering af medarbejdere - timelog.dk fileguide to resource planning page 4 of...
TRANSCRIPT

April 2013
WhitepaperGuide to resource managementOptimise your resources and schedule more efficiently. This guide will tell you how to exploit the TimeLog Project resource planner to the full.
1st edition
Written by Søren Lund
TimeLog Inc. Alhambravej 5 1826 Frederiksberg Denmark
Phone +45 70 200 645
© 2013 TimeLog Inc.All rights reserved.
Introduction … 2
From workload to resources … 3
Developing on the previous workload report … 3
New module: Resource management … 3
New menu group: Resource management … 5
The Resource planner in detail … 6
The filter section … 6The resource filter … 6Legend … 7The project filter … 8View options … 8Saved searches … 10
The Resource Planner … 10
Using the Resource Planner … 11Preparing the project list … 11Expanding the project list … 11Reconciling project plans with resource plans … 13Detailed resource planning … 16
Follow up: Booked vs. registered work … 19

Guide to resource planningPage 2 of 20
IntroductionThis document describes the new Resource Management feature, including how to use and incorporate two new interfaces: the Resource Planner tool and the follow-up feature Booked vs. registered work.
This document will appeal to project managers and resource coordinators looking for an easy overview of employee allocations and opportunities to grant employees access to register time and set hourly rates – and to determine the level of detail they wish to allocate.
NoteField and function names and screens-hots are based on TimeLog Project 5.7 as it appeared when this document was written, and can therefore deviate in name and appearance from the cur-rent version of TimeLog Project.

Guide to resource planningPage 3 of 20
From workload to resources
Developing on the previous workload reportThe new Resource Planner is a further development on the previous TimeLog Project workload report from version 5.6 and earlier.
The workload report was originally designed to automate resource workload calculations based on project scheduling, allocated employee hours, registered employee hours and plan-ned absences.
The main strength of the report was in its long-term scheduling, which provided relatively precise estimates of resource workloads for 2–6 months based on a minimum of resources.
The main weakness of the report was in its short-term scheduling for upcoming weeks, which often required highly detailed scheduling on a weekly and daily basis, also within the course of individual stages and where changes to schedules occur constantly in the form of delays or unexpected re-allocations of resources. These are all situations which need to be handled swiftly and seamlessly.
Finally, years of developments on the report had made it too complex and communicatively unfocused.
New module: Resource ManagementWith TimeLog Project 5.6.5, TimeLog’s resource management features have been greatly en-hanced. As a result, these features are now found in a separate menu group called Resource Management (“the Resource Management module” in the following), and the workload report is now called the Resource Planner. The Resource Management module is available for all customers using our TimeLog Project Business and Enterprise Editions.
Our vision for the new Resource Management module has been to include the benefits of the workload report, in particular the principles for automated workload calculations (Figure 1) and merge these with the user experience of Excel resource planning, where scheduling is easily managed without considering time registrations or any underlying project/budget structures.
“”
The resource manage-ment module is available for all customers using our TimeLog Project Business and Enterprise Editions.
Figure 1Factors included in the workload calculation of the previous work-load report. Allocated
hours
Registered hours
Public holidays
Project schedule
Flex/absenceCalculated work

Guide to resource planningPage 4 of 20
Specifically, our aims have been to:1. focusing the module towards the specific user situations involved in efficient resource
management.2. offering a simplified user interface and experience reminiscent of the spreadsheets cur-
rently used by many companies for resource management.3. facilitating the use of SCRUM planning in TimeLog Project, in which follow-ups on last
week’s scheduled deliveries are pivotal.4. simplifying the rescheduling of overdue events, which are now to be included in the
upcoming period.5. strengthening the readability of the report through the use of graphic presentations il-
lustrating key management parameters.6. moving as many project operations as possible into the module, allowing for the project
to be adjusted, reallocated and scheduled directly from the resource plan.
Figure 2The new resource management feature means that the top-left “Project manager” step is bypassed, and that all scheduling is based on work bookings and managing non-scheduled work.
Figure 2 shows the new resource management flow.
As the figure illustrates, two new components have been introduced in the calculation: booked work and non-scheduled work (NPW). Booked work is an old component, which was rather troublesome to use. Non-planned work is a new component in the calculation, ensuring that work scheduled for completion today that has yet to be finished is automatically transferred to the resource plan for rescheduling.
Not all consultancy firms are project-oriented or equipped with in-house project managers. For these companies, the previous workload report was not effective, as opening each project, allocating resources and adapting schedules before being able to start planning resources proved too lengthy a process.
The new resource management module offers improved support for consultancy firms. It is now possible to carry out all relevant tasks directly from the Resource Planner. The Resource Planner lets you attach new projects to consultants and start scheduling per day, week or month without having to open each individual project first. Project schedules are now auto-matically updated with resource plan data, providing a quick and easy overview of project scheduling using TimeLog Project's Gantt charts.
Calculated work
Booked work
Non-planned work
Project manager Resource coordinator
Planned work
Workload

Guide to resource planningPage 5 of 20
New menu group: Resource ManagementIn version 5.6.5, the two resource management tools – Resource Planner and the follow-up tool Booked vs. registered work have been joined in the menu group Resource Management under Project Administration (see Figure 3).
The Resource Planner is the tool for getting an overview of all resource planning parameters and planning resources in detail based on project scheduling.
Booked vs. registered work is the tool for following up on last week’s scheduled and finished work. It’s also the tool for moving work in progress to an upcoming time at the click of a button.
Figure 3Resource Management now has its own menu group in the Project Administration menu.
Guide to resource planningPage 6 of 20
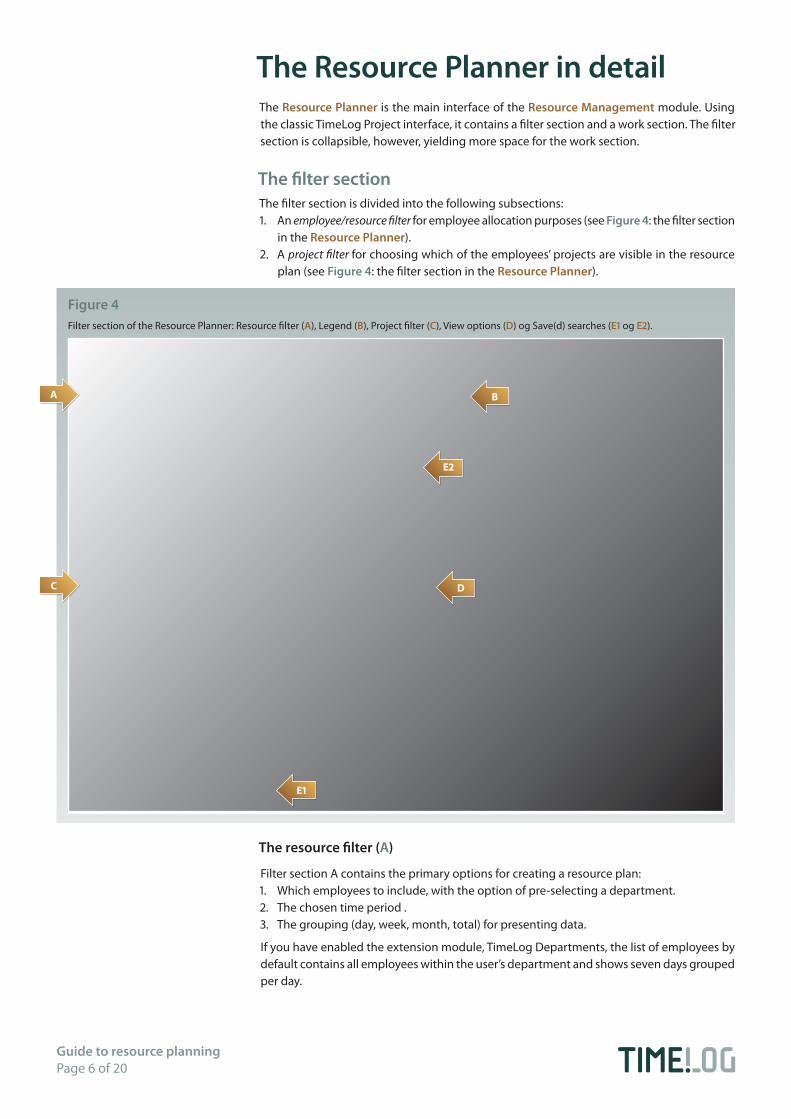
Figure 4Filter section of the Resource Planner: Resource filter (A), Legend (B), Project filter (C), View options (D) og Save(d) searches (E1 og E2).
The Resource Planner in detailThe Resource Planner is the main interface of the Resource Management module. Using the classic TimeLog Project interface, it contains a filter section and a work section. The filter section is collapsible, however, yielding more space for the work section.
The filter sectionThe filter section is divided into the following subsections:1. An employee/resource filter for employee allocation purposes (see Figure 4: the filter section
in the Resource Planner).2. A project filter for choosing which of the employees’ projects are visible in the resource
plan (see Figure 4: the filter section in the Resource Planner).
A
C
B
D
E1
E2
The resource filter (A)
Filter section A contains the primary options for creating a resource plan:1. Which employees to include, with the option of pre-selecting a department.2. The chosen time period .3. The grouping (day, week, month, total) for presenting data.
If you have enabled the extension module, TimeLog Departments, the list of employees by default contains all employees within the user’s department and shows seven days grouped per day.

Guide to resource planningPage 7 of 20
Legend (B)
Filter section B (see Figure 6B) contains a legend on the colour codes of the system. The legend is vital for understanding the background colours used in the resource plan.
The legend consists of four items:
1. Absent during a time period (red background)In the event an employee is absent for an entire time period, e.g. a day or a week, due to ho-liday, leave, time off in lieu, etc., the time period will have a red background. Absent resources cannot be booked during these time periods.
Figure 6A (left)The legend shows the four areas incorporated by the Resource Planner to generate employees’ working hours and absence overview.
Figur 6B (below)The employee’s work load increases as time goes on if no registrations are made on the tasks to which the employee is linked.
Figure 5From this view, you can select employees and (lower down) the time period.
1
2
3
4

Guide to resource planningPage 8 of 20
Figure 7The project filter works for all project factors, just like the additional components of TimeLog Project.
2. Partially absent during a time period (yellow background)In the event an employee is absent for part of a time period, e.g. two days in a week or half a working day, due to holiday, leave, time off in lieu, etc., the time period will have a yellow background. Partially absent resources can be booked during these time periods. In this case, booking the resource pertains to the specific days or hours in which the employee is present.
3. Calculated work (light blue background)When a project is scheduled and resources are allocated, the Resource Planner is capable of automatically calculating resource workloads per task and distributing these across the re-maining duration of the task. This is called calculated work, as it does not require user entries in the resource plan. In addition, calculated work is dynamic, as the numbers are constantly updated based on project progress. Say four working days go by during which an employee does not track their time. This leads to an increase in calculated daily work for the remaining days because the amount of allocated work needs to be finished before the task’s deadline.
4. Booked work (navy background)
Unlike calculated work, booked work is created from user entries in the resource plan only. Booked work can be created on a daily, weekly or monthly basis, and a task can hold any number of bookings during its duration.
Booked workloads in a task will remain unchanged, whether time for this task is registered or not. Similarly, it is possible to follow up on booked work by comparing it with finished work based on employee time registrations.
Project filter (C)
Filter section C (see Figure 7) contains a filtering feature for projects that are to be included in the resource plan. Projects may be filtered using any TimeLog Project parameter, including project manager, salesperson, project type and task type. In this way, you can choose e.g. which project type is relevant for your resource planning, thus creating a simple overview.
View options (D)
Filter section D (see Figure 6B and Figure 8) contains a range of options designed to match the resource plan to your current data needs.
Show projects and tasks
If this view is not selected, the resource plan provides only one line per employee and the total workload of that employee per time period and in total. Booking work within this view is not possible.

Guide to resource planningPage 9 of 20
If this view is selected, underlying projects and tasks are shown too. In this view, you can book resources in the resource plan, as booking is always made at task level. By default, this view is always activated.
Show tasks in which employees are allocated with zero hours
Select this view if you would like to see projects and tasks in which employees are allocated with zero hours. This is typically used for when company resource management is vested in a resource coordinator in charge of managing projects based on the preferences of a project manager. In this case, the project manager typically allocates preferred resources with zero hours, after which the resource coordinator allocates hours as part of prioritising.
Show general projects
This view is for when you wish to include projects that do not require allocation or resource group management by the project manager.
In TimeLog Project, operation projects are typically created as general projects. Operation projects are seldomly relevant in terms of resource management, so omitting general projects facilitates resource planning. By default, this view is deactivated.
Show tasks with timeplans outside the selected period
By default, this view is deactivated. The resource plan shows only projects containing a part of the scheduling within the current filtered view period.
Sometimes, however, it’s necessary to include projects with start or end dates outside the selected view period – for example if you want to move a project to an earlier date due to sudden extra capacity. Simply activate this view to make your project visible for scheduling.
Show start and end dates; Show project manager etc.
These views define whether particular columns are shown or hidden. By default, these opti-ons are deactivated to leave as much space on the screen as possible for resource planning.
Show calculated workload
This view determines whether to include calculated workload in the resource plan. By default, this view is activated. Deactivating it is normally done if you wish to create a resource plan containing only booked work, which is easier to read.
Show allocated work
This view defines whether the resource plan shows two columns with allocated work and remaining work, respectively (remaining work is allocated work minus registered work). These columns are useful if you use the resource plan for allocating employees for projects
Figure 8Customise the data view as needed. The more parameters you select, the more detailed the data – and, consequently, the more detailed the scheduling of projects and tasks.

Guide to resource planningPage 10 of 20
and reconciling planned work with allocated work.
Saved searches (E)
In filter section E (see Figure 6B and Figure 9), you can save an unlimited number of searches as favourites, making future resource planning much easier:
Click Save search, and name your search. Once saved, your search can be opened at the click of a button.
The Resource Planner1. In Figure 10 in the section 1 contains options for selecting the unit used in the calculati-
ons presented in the scheduling area (section 4). Options are % of availability, hours and work days. Work days are calculated by dividing the number of scheduled hours with a
Figure 9You can save and name your search with a single click. A typical example is views based on days or weeks, e.g. per employee.
reference value set in System Administration ->Advanced report settings.2. Section 2 contains the project list, including relevant project and task information. By
default Project number, Project-/task name and Project-/task status are shown. Further in-formations can be added using the view options above or in the System Administration. under Project settings.
3. Section 3 is a key area in the Resource Planner. It contains a summary of how much work
Figure 10Five sections in the resource plan.
1
2 3 4
5

Guide to resource planningPage 11 of 20
Figure 11From this overview, projects can be linked directly to employees, thereby also automatically adding the project to the overview.
is planned using the Resource Planner, divided into calculated and booked work, as well as a column listing any non-scheduled work to be managed. Non-scheduled work covers work that does not fit into the scheduling area, either because the deadline of the task(s) is in the past or because there are no more available calculated work periods in which to place the work (further information below).
4. Section 4 is the scheduling area, where the user prepares detailed schedules and work bookings. The resource coordinator is free to book work per employee, task or period and in work days, hours or % of availability. If the capacity graph is shown, the user can easily identify any unexploited or overallocated capacity at employee (6) or group level.
5. Section 5 contains the totals, including planned work per time period and total capacity for shown employees.
Using the Resource PlannerUsing the Resource Planner is typically done in three steps:1. Preparing the project list (sections 1 and 2)2. Managing budget reconciliations and delayed work (section 3)3. Detailed scheduling per time period (section 4)
Preparing the project list
The project list basically shows the projects with task periods within the chosen time period as well as employees with more than zero-hour allocations. In addition, projects with non-scheduled work requiring management are shown (further information below).
Expanding the project list
If some projects and tasks are missing from the project list, there may be several reasons. These are the most common:
Employees are not allocated to the task(s)
As a minimum, employees must be allocated to a task for the project or task to show on the employee project list in the resource plan. If the employee is not allocated to the project,
allocation is possible directly from the resource plan. Click the context menu next to the employee, and choose Add project to resource plan. Now you can choose which projects and tasks each employee should be allocated to. Please note that if the added project does not have a schedule within the current view period, the project will still not be shown even if the employee has been allocated. The paragraph Schedules are outside the chosen time period below describes how to include projects and tasks in the project list even if the sche-dule is outside the chosen time period.
The project or task is deactivated
Select the project in the project module, and check whether the project and its tasks are set to In progress/Pending/Offer/Paused. The resource plan shows only projects or tasks with these statuses.

Guide to resource planningPage 12 of 20
Schedules are outside the chosen time period
If none of the task schedules overlap the current view period in the Resource Planner, the project is not shown. To show the project, you can: 1. Open the project and adjust scheduling to include one or more tasks in the report’s view
period.2. Activate Zero-hour allocations (Show projects with tasks outside the chosen time period in
the Resource Planner’s view options) - see Figure 8.
Projects and tasks are now shown regardless of whether they contain remaining work (allocated hours minus registered hours above zero).
Project allocations are zero-hour allocations
Projects or tasks including only zero-hour allocations are not shown by default even if the task schedules overlap the Resource Planner’s view period. However, they can be shown by activating Show tasks in which employees are allocated with zero hours in the Resource Plan-ner’s view options (see Figure 8).
Zero-hour allocations are typically used for allocating an event to an employee without con-sidering the amount of time needed. Instead, this is decided in the Resource Planner.
Editable items directly from the Resource Planner
There are a number of options for adjusting projects directly from the Resource Planner, providing the benefit of not having to open projects to make changes.
In the project list, each employee line offers the possibility of adding new projects (see Figure 12):
Each project line on the project list has the following options (see Figure 13):1. Allocate new employee to one or more project tasks.2. Move allocation (the event) to another employee.3. Edit project.
Figure 12This shortcut allows the project manager to allocate employees to multiple projects directly, even if they aren’t already.
Figure 13Editing options at project level.
Each task line on the project list has the following options (see Figure 14):1. Allocate more employees to the task.2. Move allocation (the event) to another employee.3. Edit task.4. Adjust task scheduling (change start and end dates).

Guide to resource planningPage 13 of 20
Reconciling project plans with resource plans
Now that the projects are on the list, we’re ready to move on. Before starting the detailed scheduling of time periods in the resource plan, however, we need to check potential budget conflicts and non-scheduled work. For this purpose, we use the Work in period (h) section.
The section summarises the number of hours allocated to each project within the view period and according to the underlying schedules, booked work and non-scheduled work (see Figure 15).
Figure 15Several factors are grouped in the Work in period (h) section, which expresses timesheets, booked work and non-scheduled work as a single factor indicating the total workload per employee per project.
Figure 14Editing options at task level.
The section contains the following columns:1. Avail. Availability during the time period2. NPW Non-planned work from previous time periods3. Calc. Calculated work during the time period4. Booked Booked work during the time period5. Workload Total workload per employee during the time period

Guide to resource planningPage 14 of 20
Avail. (Availability)
Availability during the time period is the number of hours available to the Resource Plan-ner. Availability is calculated as employee normal working time (working hours per day according to normal working time as per employee timesheets) minus scheduled absence. Scheduled absence includes holiday, leave and similar time registrations for the future made with absence codes. Additionally, public holidays are subtracted according to local calendars.
NPW (Non-planned work)
NPW shows how much work is left for overdue events or where remaining work is not auto-matically placeable in the remaining duration of the task. As such, NPW constitutes work that takes up employee time, but which is not shown in the workload report, as available time periods have not yet been decided on.
NPW ensures that overdue events are not forgotten during future scheduling.
Calc. (calculated work)
Calculated work is a dynamic calculation performed each time the Resource Planner starts. The calculation is based on each task/allocation shown in the resource plan.
The calculation is based on the following three parameters:1. Remaining work for the allocation in question (allocated hours minus registered hours)2. Availability during the remainder of the task (from today until the task ends)3. Booked work during the remainder of the task (supersedes calculated work)
Below, 22.2 employee working hours (40.7 - 18.5h) are distributed across a number of days containing booked work (21, 26 and 28 November - 15 hours), leaving 18.5 available hours for completing the calculated work in question.
Calculated work per net availability hour = (20 – 15 h) / (40.7 – 22.2 h) = 0.27 h.
In the example above, 15 hours of work have been allocated on 21, 26 and 28 November. This leaves just 20, 23 and 27 November to allocate the remaining five hours (20 – 15 h) to the
allocation of the rest of the hours. Allocations are done evenly, like Calculated work.
Assuming the three days mentioned above held booked work as well, e.g. one hour each day, there would have been no days left to place the remaining two hours (22.2 - 20 h). These would therefore be moved to the NPW column for data conflict resolution.
Booked (Booked work)
Booked work is work that has been entered into the resource plan by the resource coordinator. As regards the calculation of daily workload, booked work supersedes calculated work. In other words, if five hours of work are booked at a certain date, the availability of that date will no longer factor in the calculation of calculated task work. Consequently, calculated work is allocated to other non-booked dates.
Table 1An example of the calculated workload:
Start date End date Total
20-11-2012 21-11-2012 22-11-2012 23-11-2012 24-11-2012 25-11-2012 26-11-2012 27-11-2012 28-11-2012
Norm hours 7.4 7.4 7.4 7.4 7.4 7.4 7.4 51.8
Planned absence - Planlagt fravær –7.4 –3.7 –11.1
Available hours, gross 7.4 7.4 0 7.4 0 0 7.4 3.7 7.4 40.7
Booked work 5 5 5 15
Available hours, net 7,4 0 0 7.4 0 0 0 3,7 0 18.5
Calculated working time on task (Available hours, net × 0,27) 2.00 0.00 0.00 2.00 0.00 0.00 0.00 1.00 0.00 5.00
Planned work (booked + calculated) 2.00 5.00 0.00 2.00 0.00 0.00 5.00 1.00 5.00 20.00
“”
NPW shows how much work is left for overdue events or where remaining work is not automatically placeable in the remaining duration of the task.

Guide to resource planningPage 15 of 20
In cases where calculated work is a shortcut to creating long-term resource plans, booked work is the short-term way of increasing the resource plan’s level of precision. As a result, longer lasting projects typically start out as purely calculated projects in the resource plan, as no final decision has been reached regarding which days are booked for which tasks. Rather, a general schedule for the project has been laid out.
Then, as the project’s tasks are nearing completion, it’s time for detailed scheduling. As the pieces of the detailed schedule fall into place, an increasing amount of scheduled project work is moved from the calculated to the booked (confirmed) column.
Workload
The Workload column shown in the figure below contains the sum of NPW, calculated work and booked work. As such, workload is a specific figure of just how many hours each employee is expected to put in during the time period shown.
An employee might show free capacity during individual time periods in the resource plan, but at the same time be severely overloaded according to the figure in the workload column. This type of situation arises when employees have an excess of NPW from previous time periods that has yet to be entered into the resource plan, but is considered a workload on the employee during the coming work period.
Figure 16The Workload column shows the sum of Non-planned work, Calcu-lated work and Booked work.
Data conflict resolution
The Work in period (h) section contains three key figures which are effective in checking for data conflicts in non-matching project budgets and scheduled work as well as NPW to be managed.
NPW column
If a task or project contains NPW, the user must decide when the remainder of the work can be finished or whether it is simply not meant to be finished (the task must be finished).
The Allocated (Alloc.) column - only visible if Allocated work (h) is activated
If the amount of work booked to an allocation exceeds the number of remaining hours on the allocation, the remainder is highlighted in red and shown with a warning triangle indicating that booked work exceeds remaining work.
“ ”Then, as the project’s tasks are nearing completion, it’s time for detailed scheduling.
Guide to resource planningPage 16 of 20
Figure 18The resource schedule provides a complete overview of employee workloads over time. You choose the level of scheduling detail – and whether to view the work in hours, percent or workdays.
Remaining work (Rem.)
If the amount of registered work exceeds the amount of allocated hours, the remainder is highlighted in red and shown with a warning triangle indicating that the number of allocated hours has been exceeded.
Once these data conflicts are resolved, you can proceed with detailed work scheduling.
Detailed resource planning
Once the project list is complete and any data conflicts resolved, it’s time to have a look at the current resource plan and prepare detailed work schedules and enter in data as booked work. Ultimately, resources need to be optimised but not overloaded. Equally important is updating project schedules with end dates for individual tasks.
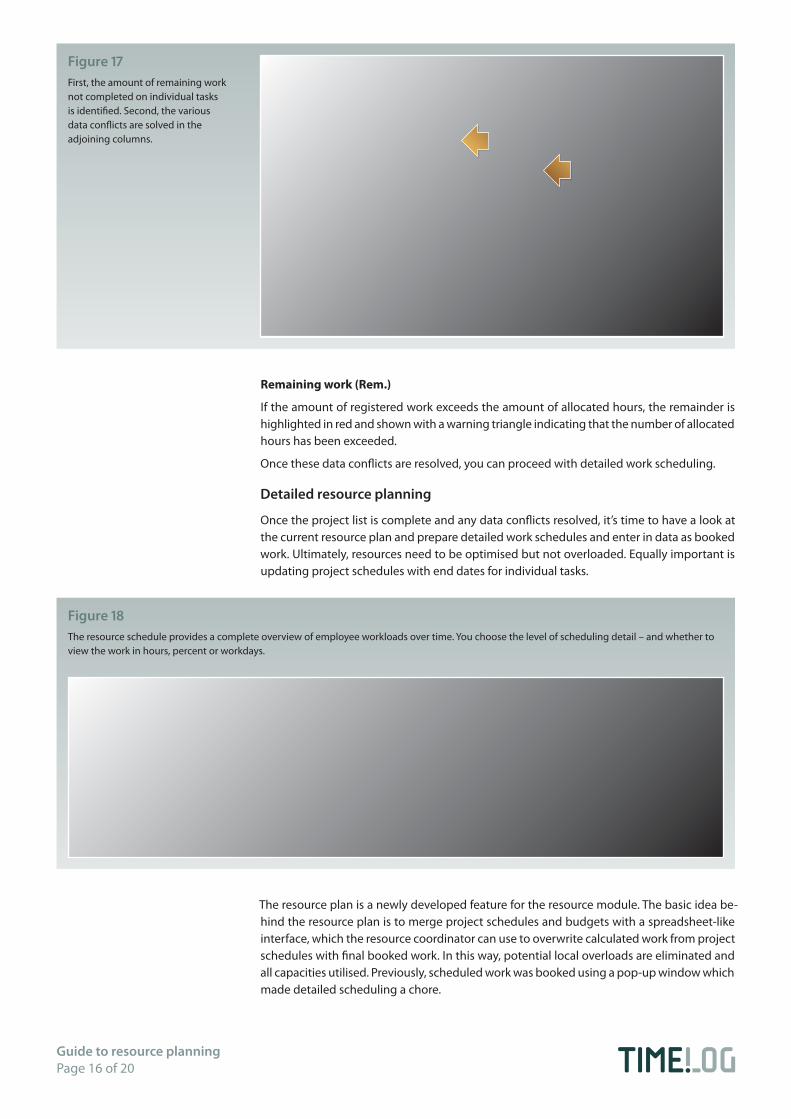
Figure 17First, the amount of remaining work not completed on individual tasks is identified. Second, the various data conflicts are solved in the adjoining columns.
The resource plan is a newly developed feature for the resource module. The basic idea be-hind the resource plan is to merge project schedules and budgets with a spreadsheet-like interface, which the resource coordinator can use to overwrite calculated work from project schedules with final booked work. In this way, potential local overloads are eliminated and all capacities utilised. Previously, scheduled work was booked using a pop-up window which made detailed scheduling a chore.

Guide to resource planningPage 17 of 20
In project-oriented organisations, resource management typically progresses like this:1. The project manager creates the project and breaks it down into tasks (events).2. The project manager adds resources with budgets to the project tasks. 3. Using the Resource Planner, the resource coordinator checks whether calculated work per
day, week or month corresponds with other projects, and then makes any adjustments directly in the Resource Planner (details are described below).
4. In case project schedules start sliding or budgets are exceeded, the resource coordinator can extend deadlines, reallocate tasks, increase budgets and replan work in progress directly from the Resource Planner.
To a certain extent, the resource plan governs the project schedule once it’s up and running and daily prioritisations are made.
Using the Resource Planner
The Resource Planner contains a number of figures and information, and if you’re not familiar with these it can seem a bit confusing. The following is a walkthrough of the elements found in the Resource Planner.
Reconciling total workload in the view period
Before any detailed scheduling, the total workload in the view period needs to be adjusted to prevent exceeding availability. The total workload is shown next to each employee in the Workload column (see Figure 19). If the amount has a red background, the employee’s availability is exceeded– as is the case in Figure 19, where calculated work is 49,69 hours, where availability is 39,69 hours – or close.
To decrease the total workload on the employee, you can do the following:1. Move allocations to other employees (use the context menu in the project list).2. Close tasks that are no longer active.3. Extend/move schedules (use the task context menu in the project list).4. Prioritise the employee’s tasks for the time period by deprioritising other tasks directly in
the resource plan – more on booking work in the resource plan in Figure 20).
Once the total workload for the view period is equal to or below the number of available hours, it’s time to reconcile subperiods (days, weeks or months). Enter the preferred grouping of subperiods into the Resource Planner’s filter section (see Figure 19).
Reconciling subperiods
Reconciling subperiods is done directly in the resource plan by overwriting calculated or booked work with the final number of hours. This is done by booking at task level, which is then summarised at project and employee level.
On each task line, you can book per working hour, working day or workload percentage at subperiod level.
“”
On each task line, you can book per working hour, working day or load per-centage at sub-period level.
Figure 19With a view similar to an Excel spreadsheet, changes are easily made and plans are easily laid for each employee linked to a given project.

Guide to resource planningPage 18 of 20
Light-blue backgrounds (marker 1 in Figure 20) indicate calculated work, while navy back-grounds (marker 2) indicate booked work entered by the user. Light-blue or navy backgrounds also indicate the location of the underlying schedules, allowing you to view any bookings that extend the schedule (as is the case at marker 3 in Figure 20).
For detailed scheduling purposes, the capacity indicator (marker 3 in Figure 20) is a useful tool. Negative figures with red backgrounds indicate that the amount of planned work exceeds the time available, whereas positive figures on green backgrounds indicate free employee capacity.
Next, the user adjusts each task’s planned work during the subperiod to fully optimise emplo-yee capacity (the capacity indicator is neither red nor green) bearing in mind the number of hours allocated for each task.
To delete a booking, simply delete the figure in the field (clear the cell). Finish by clicking Save, which completes the booking of work.
In the event work has been booked outside a task’s time period, the period is automatically extended to make room for the booking.
Finally, the underlying allocations may require adjusting to cover the completed resource plan. Click the Allocated work (h) section, and point your mouse to any red figures; a warning message will inform you if it’s a case of planned work exceeding allocated hours.
Figure 20Bookings can be created and de-leted at task level directly from the Resource planner.
1
3
2
Guide to resource planningPage 19 of 20
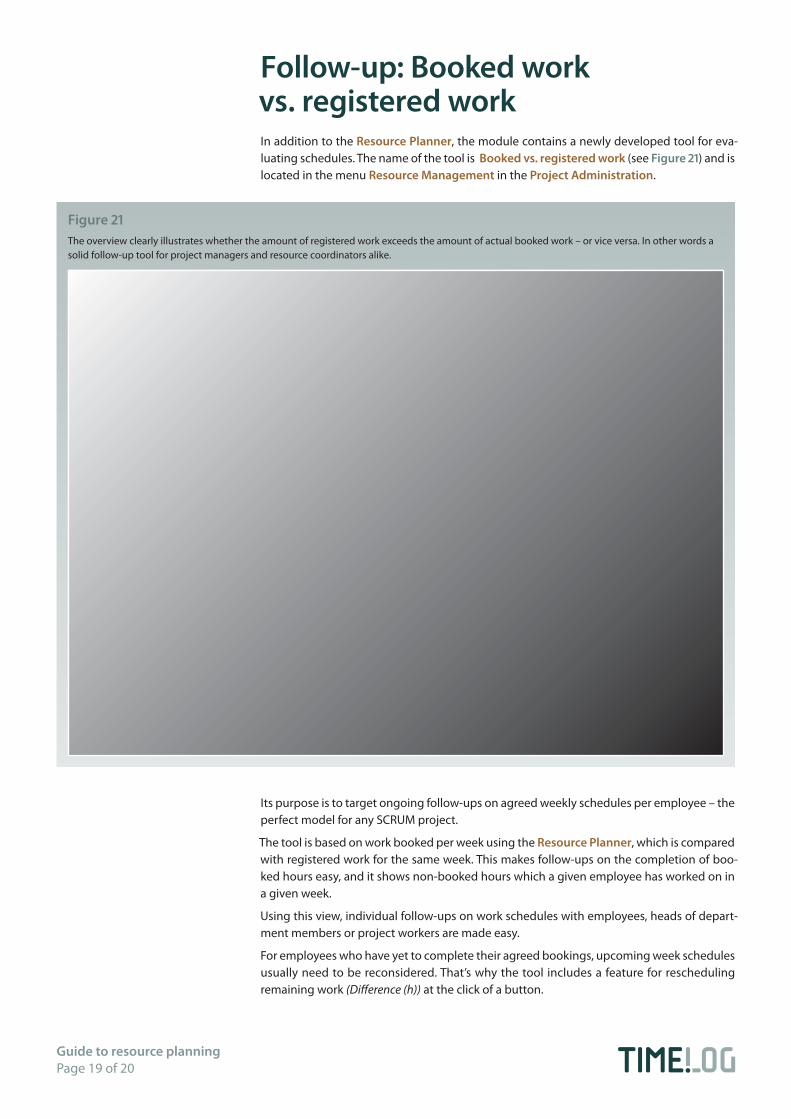
Follow-up: Booked work vs. registered workIn addition to the Resource Planner, the module contains a newly developed tool for eva-luating schedules. The name of the tool is Booked vs. registered work (see Figure 21) and is located in the menu Resource Management in the Project Administration.
Figure 21The overview clearly illustrates whether the amount of registered work exceeds the amount of actual booked work – or vice versa. In other words a solid follow-up tool for project managers and resource coordinators alike.
Its purpose is to target ongoing follow-ups on agreed weekly schedules per employee – the perfect model for any SCRUM project.
The tool is based on work booked per week using the Resource Planner, which is compared with registered work for the same week. This makes follow-ups on the completion of boo-ked hours easy, and it shows non-booked hours which a given employee has worked on in a given week.
Using this view, individual follow-ups on work schedules with employees, heads of depart-ment members or project workers are made easy.
For employees who have yet to complete their agreed bookings, upcoming week schedules usually need to be reconsidered. That’s why the tool includes a feature for rescheduling remaining work (Difference (h)) at the click of a button.

Guide to resource planningPage 20 of 20
Questions?This guide offers specific tips and useful tools for targeted, efficient resource management.
Should you have any questions related to the resource planner, or TimeLog Project in general, please don’t hesitate to contact us.
[email protected] Phone +45 70 200 645.
The feature allows the user to move the work in question to another day or time period, or close the task if the work is completed.
Here’s an outline of the workflow:1. The resource coordinator launches the tool Booked vs. registered work.2. Booked work for the past week which has yet to be completed is transferred to a future
day or time period.3. Booked work for the past week which has not been completed and does not require com-
pletion is not transferred to the coming week. It is possible to ignore NPW by rightclicking the arrow beside the number in the column Remaining (h)
4. The resource coordinator opens the Resource Planner and trims the total and periodic workloads to a suitable schedule, as described earlier in this document.
Please note that only booked work is eligible for follow-ups, as calculated work is automati-cally pushed ahead if not completed. Retrospective analyses will not show whether calculated work is unable to be pushed ahead due to a lack of available time periods. The NPW column in the Resource Planner, on the other hand, will.