professional digital two-way radio system xpr 6580 is ... · contents english iii contents this...
TRANSCRIPT
Display PortableUser Guide
XPRTM 6580 ISProfessional Digital Two-Way Radio System


Declaration of C
onformity
English
i
C logo shown below.
a)
C Rules. Operation is subject to the
ce that may cause undesired operation.
NAG.book Page i Tuesday, October 19, 2010 11:32 AM
Declaration of ConformityThis declaration is applicable to your radio only if your radio is labeled with the FC
DECLARATION OF CONFORMITYPer FCC CFR 47 Part 2 Section 2.1077(a)
Responsible Party Name: Motorola, Inc.Address: 1301 East Algonquin Road, Schaumburg, IL 60196-1078, U.S.A.Phone Number: 1-800-927-2744Hereby declares that the product:
Model Name: XPR 6580 ISconforms to the following regulations:
FCC Part 15, subpart B, section 15.107(a), 15.107(d) and section 15.109(Class B Digital DeviceAs a personal computer peripheral, this device complies with Part 15 of the FCfollowing two conditions:
1. This device may not cause harmful interference, and 2. This device must accept any interference received, including interferen
E
i
a Class B digital device, pursuant to part rotection against harmful interference in a radio frequency energy and, if not ful interference to radio communications. icular installation.
reception, which can be determined by ct the interference by one or more of the
which the receiver is connected.
NAG.book Page ii Tuesday, October 19, 2010 11:32 AM
Dec
lara
tion
of C
onfo
rmity
nglish
i
Note: This equipment has been tested and found to comply with the limits for 15 of the FCC Rules. These limits are designed to provide reasonable presidential installation. This equipment generates, uses and can radiateinstalled and used in accordance with the instructions, may cause harmHowever, there is no guarantee that interference will not occur in a part
If this equipment does cause harmful interference to radio or television turning the equipment off and on, the user is encouraged to try to correfollowing measures:
• Reorient or relocate the receiving antenna.
• Increase the separation between the equipment and receiver.
• Connect the equipment into an outlet on a circuit different from that to
• Consult the dealer or an experienced radio/TV technician for help.

Contents
English
iii
Radio Controls . . . . . . . . . . . . . . . . . . . . 6ntrols You Will Be Using . . . . . . . . . . . . . . 6
mable Buttons . . . . . . . . . . . . . . . . . . . . . . . 8able Radio Functions . . . . . . . . . . . . . . . . . 8able Settings or Utility Functions . . . . . . . . . 9g the Programmed Functions . . . . . . . . . . . 9 Keypad . . . . . . . . . . . . . . . . . . . . . . . . . . 10
-Talk (PTT) Button . . . . . . . . . . . . . . . . . . . 11g Between Conventional and g Mode . . . . . . . . . . . . . . . . . . . . . . . . . . . . 11
Status Indicators . . . . . . . . . . . . . . . . . . 12cons . . . . . . . . . . . . . . . . . . . . . . . . . . . . . . 12s . . . . . . . . . . . . . . . . . . . . . . . . . . . . . . . . 13nu Icons . . . . . . . . . . . . . . . . . . . . . . . . . . . 13Icons . . . . . . . . . . . . . . . . . . . . . . . . . . . . . 13cator . . . . . . . . . . . . . . . . . . . . . . . . . . . . . 14nes . . . . . . . . . . . . . . . . . . . . . . . . . . . . . . 14 Tones . . . . . . . . . . . . . . . . . . . . . . . . . . . . 14
d Receiving Calls . . . . . . . . . . . . . . . . . . 15 a Zone . . . . . . . . . . . . . . . . . . . . . . . . . . . 15 a Radio Channel . . . . . . . . . . . . . . . . . . . 16g and Responding to a Radio Call . . . . . . 16ing and Responding to a Group Call . . . . . 16ing and Responding to a Private Call . . . . 17ing and Responding to a Phone Call . . . . 18
NAG.book Page iii Tuesday, October 19, 2010 11:32 AM
ContentsThis User Guide contains all the information you need to use the MOTOTRBO XPR IS Series Portable Radios.
Declaration of Conformity . . . . . . . . . . . . . . . . . . . . . iImportant Safety Information . . . . . . . . . . . . . . . . . vi
Product Safety and RF Exposure Compliance . . .vi
Software Version . . . . . . . . . . . . . . . . . . . . . . . . . . . viComputer Software Copyrights . . . . . . . . . . . . . . . viiNotes . . . . . . . . . . . . . . . . . . . . . . . . . . . . . . . . . . . . viiiGetting Started . . . . . . . . . . . . . . . . . . . . . . . . . . . . . . 1
How to Use This Guide . . . . . . . . . . . . . . . . . . . . . . . 1What Your Dealer/System Administrator Can Tell You . . . . . . . . . . . . . . . . . . . . . . . . . . . . . . 1
Preparing Your Radio for Use . . . . . . . . . . . . . . . . . . 2Charging the Battery . . . . . . . . . . . . . . . . . . . . . . . . . 2Attaching the Battery . . . . . . . . . . . . . . . . . . . . . . . . . 3Attaching the Antenna . . . . . . . . . . . . . . . . . . . . . . . . 3Attaching the Belt Clip . . . . . . . . . . . . . . . . . . . . . . . . 4Attaching the Universal Connector Cover(Dust Cover) . . . . . . . . . . . . . . . . . . . . . . . . . . . . . . 4
Powering Up the Radio . . . . . . . . . . . . . . . . . . . . . . . 5Adjusting the Volume . . . . . . . . . . . . . . . . . . . . . . . . 5
IdentifyingRadio CoProgram
AssignAssign
AccessinUsing thePush-ToSwitchinTrunkin
IdentifyingDisplay ICall IconMain MeIn-Menu LED IndiAudio ToIndicator
Making anSelectingSelectingReceivin
ReceivReceivReceiv

E
iv
Making a Radio Call . . . . . . . . . . . . . . . . . . . . . . . . 18 Making a Private Call from Contacts . . . . . . . . . . 30 Private Call by Alias Search . . . . . . . . 31
tor Settings . . . . . . . . . . . . . . . . . . . . . . 31g and Deactivating Call Ringers for alls . . . . . . . . . . . . . . . . . . . . . . . . . . . . 31g Alarm Tone Volume . . . . . . . . . . . . . . 32atures . . . . . . . . . . . . . . . . . . . . . . . . . . 32
Recent Calls . . . . . . . . . . . . . . . . . . . . . 32n Alias or ID from the Call List . . . . . . . . . . . . . . . . . . . . . . . . 33a Call from a Call List . . . . . . . . . . . . . . 33peration . . . . . . . . . . . . . . . . . . . . . . . . 34
g and Acknowledging a Call Alert . . . . . 34 Call Alert from the Contacts List . . . . . 34 Call Alert with the One Touch
on . . . . . . . . . . . . . . . . . . . . . . . . . . . . . 35 Operation . . . . . . . . . . . . . . . . . . . . . . 35
g an Emergency Call . . . . . . . . . . . . . . . 36g an Emergency Alarm . . . . . . . . . . . . . 36g an Emergency Alarm with Call . . . . . . 36an Emergency Call . . . . . . . . . . . . . . . . 37an Emergency Alarm . . . . . . . . . . . . . . 37an Emergency Alarm with Call . . . . . . . 38an Emergency Alarm with Follow . . . . . . . . . . . . . . . . . . . . . . . . . . 39ng an Emergency Mode . . . . . . . . . . . . 40
NAG.book Page iv Tuesday, October 19, 2010 11:32 AM
Con
tent
s
nglish
Making a Call with the Channel Selector Knob . . 19Making a Group Call . . . . . . . . . . . . . . . . . . . . 19Making a Private Call . . . . . . . . . . . . . . . . . . . . 19Making an Enhanced Private Call . . . . . . . . . . 20Making a Phone Call . . . . . . . . . . . . . . . . . . . . 21Sending a Status Call . . . . . . . . . . . . . . . . . . . 21Using the Dynamic Regrouping Feature . . . . . 22
Talkaround . . . . . . . . . . . . . . . . . . . . . . . . . . . . . . . 23Monitoring Features . . . . . . . . . . . . . . . . . . . . . . . . 24
Monitoring a Channel . . . . . . . . . . . . . . . . . . . . . 24Permanent Monitor . . . . . . . . . . . . . . . . . . . . . . . 24
Advanced Features . . . . . . . . . . . . . . . . . . . . . . . . . 25Scan Lists . . . . . . . . . . . . . . . . . . . . . . . . . . . . . . . . 25
Viewing an Entry in the Scan List . . . . . . . . . . . . 25Editing the Scan List . . . . . . . . . . . . . . . . . . . . . . 26
Adding a New Entry to the Scan List . . . . . . . . 26Deleting an Entry from the Scan List . . . . . . . . 26Setting and Editing Priority for an Entry in the Scan List . . . . . . . . . . . . . . . . . . . . 27
Scan . . . . . . . . . . . . . . . . . . . . . . . . . . . . . . . . . . . . 27Starting and Stopping Scan . . . . . . . . . . . . . . . . 28Responding to a Transmission During a Scan . . 28Deleting a Nuisance Channel . . . . . . . . . . . . . . . 29Restoring a Nuisance Channel . . . . . . . . . . . . . . 29
Contacts Settings . . . . . . . . . . . . . . . . . . . . . . . . . . 30
Making aCall Indica
ActivatinPrivate CEscalatin
Call Log FeViewing Storing aReceivedDeleting
Call Alert OReceivinMaking aMaking aCall Butt
EmergencyReceivinReceivinReceivinSending Sending Sending Sending Voice to Reinitiati

Contents
English
v
g the LED Indicator On or Off . . . . . . . . . . 47g the Introduction Screen On or Off . . . . . . 47ing General Radio Information . . . . . . . . . 48ssing the Battery Information . . . . . . . . . . 48king the Radio ID . . . . . . . . . . . . . . . . . . . 49king the Firmware Version . . . . . . . . . . . . 49king the Codeplug Version . . . . . . . . . . . . 49
es . . . . . . . . . . . . . . . . . . . . . . . . . . . . . . . 50s . . . . . . . . . . . . . . . . . . . . . . . . . . . . . . . . . 50 . . . . . . . . . . . . . . . . . . . . . . . . . . . . . . . . . 50vices . . . . . . . . . . . . . . . . . . . . . . . . . . . . . 51 . . . . . . . . . . . . . . . . . . . . . . . . . . . . . . . . . 51
Speaker Microphones . . . . . . . . . . . . . . . . 51eous Accessories . . . . . . . . . . . . . . . . . . . 51
nd Chargers Warranty . . . . . . . . . . . . . . 52arranty . . . . . . . . . . . . . . . . . . . . . . . . . . . 53
NAG.book Page v Tuesday, October 19, 2010 11:32 AM
Exiting Emergency Mode . . . . . . . . . . . . . . . . . . . 40Dual-Tone Multi Frequency (DTMF) . . . . . . . . . . . . 41Trunking System Controls . . . . . . . . . . . . . . . . . . . . 41
Using the Failsoft System . . . . . . . . . . . . . . . . . . 41Going Out of Range . . . . . . . . . . . . . . . . . . . . . . . 42Using the Site Trunking Feature . . . . . . . . . . . . . 42Locking and Unlocking a Site . . . . . . . . . . . . . . . 42Viewing and Changing a Site . . . . . . . . . . . . . . . . 43
Viewing and Changing a Site . . . . . . . . . . . . . . 43Changing the Current Site . . . . . . . . . . . . . . . . 43
Utilities . . . . . . . . . . . . . . . . . . . . . . . . . . . . . . . . . . 44Locking and Unlocking the Keypad . . . . . . . . . . . 44Turning Keypad Tones On or Off . . . . . . . . . . . . . 44Setting the Squelch Level . . . . . . . . . . . . . . . . . . 45Controlling the Display Backlight . . . . . . . . . . . . . 45Turning the Radio Tones/Alerts On or Off . . . . . . 46Turning the Talk Permit Tone On or Off . . . . . . . 46
TurninTurninAccess
AcceChecChecChec
AccessoriAntennaBatteriesCarry DeChargersRemote Miscellan
Batteries aLimited W

E
v
For a list of Motorola-approved antennas, batteries, and ories, visit the following website:
otorola.com/governmentandenterprise
safety and regulatory compliance of the , the radio must be repaired only at Motorola ies. Please call Motorola at 800-422-4210 ss and contact information of your nearest r.
Versiones described in the following sections are the radio's software version R01.00.00 or
g the Firmware Version on page 48 to ur radio's software version.
our dealer or system administrator ils of all the features supported.
NAG.book Page vi Tuesday, October 19, 2010 11:32 AM
Impo
rtan
t Saf
ety
Info
rmat
ion
nglish
i
Important Safety Information
Product Safety and RF Exposure Compliance
ATTENTION!
This radio is restricted to occupational use only to satisfy FCC RF energy exposure requirements. Before using this product, read the RF energy awareness information and operating instructions in the Product Safety and RF Exposure booklet enclosed with your radio (Motorola Publication part number 6881095C98) to ensure compliance with RF energy exposure limits.
Keep this User Guide and the Product Safety and RF Exposure booklet in a safe place and make them available to other operators in case the radio is passed on to other people.
other access
http://www.m
To assure theXPR 6580 ISservice facilitfor the addreservice cente
SoftwareAll the featursupported bylater.
See Checkindetermine yo
Check with yfor more deta
Before using this product, read the operating instructions for safe usage contained in the Product Safety and RF Exposure booklet enclosed with your radio.
!C a u t i o n

Com
puter Software C
opyrights
English
vii
+2TM voice coding Technology embodied in t is protected by intellectual property rights atent rights, copyrights and trade secrets of e Systems, Inc.
coding Technology is licensed solely for use Communications Equipment. The user of this is explicitly prohibited from attempting to reverse engineer, or disassemble the Object any other way convert the Object Code into a dable form.
os. #5,870,405, #5,826,222, #5,754,974, , #5,715,365, #5,649,050, #5,630,011, , #5,517,511, #5,491,772, #5,247,579, and #5,195,166.
NAG.book Page vii Tuesday, October 19, 2010 11:32 AM
Computer Software CopyrightsThe Motorola products described in this manual may include copyrighted Motorola computer programs stored in semiconductor memories or other media. Laws in the United States and other countries preserve for Motorola certain exclusive rights for copyrighted computer programs including, but not limited to, the exclusive right to copy or reproduce in any form the copyrighted computer program. Accordingly, any copyrighted Motorola computer programs contained in the Motorola products described in this manual may not be copied, reproduced, modified, reverse-engineered, or distributed in any manner without the express written permission of Motorola. Furthermore, the purchase of Motorola products shall not be deemed to grant either directly or by implication, estoppel, or otherwise, any license under the copyrights, patents or patent applications of Motorola, except for the normal non-exclusive license to use that arises by operation of law in the sale of a product.
The AMBEthis producincluding pDigital Voic
This voice within this Technologydecompile,Code, or inhuman-rea
U.S. Pat. N#5,701,390#5,581,656#5,226,084

Not
es
English
viii
Notes
NAG.book Page viii Tuesday, October 19, 2010 11:32 AM

Getting Started
English
1
Your Dealer/System Administrator ell You
sult your dealer or system administrator about the
dio programmed with any preset conventional
ttons have been programmed to access other
onal accessories may suit your needs?
NAG.book Page 1 Tuesday, October 19, 2010 11:32 AM
Getting StartedTake a moment to review the following:How to Use This Guide . . . . . . . . . . . . . . . . . . . . . . . . . page 1What Your Dealer/System Administrator Can Tell You . page 1
How to Use This Guide
This User Guide covers the basic operation of MOTOTRBO XPR 6580 IS.
However, your dealer or system administrator may have customized your radio for your specific needs. Check with your dealer or system administrator for more information.
Throughout this publication, a note is shown for Conventional mode and Trunking mode only features to differentiate the features according to the two modes.
For features that are available in both Conventional and Trunking modes, no note is shown.
What Can T
You can confollowing:
• Is your rachannels?
• Which bufeatures?
• What opti
E
2
g the Battery
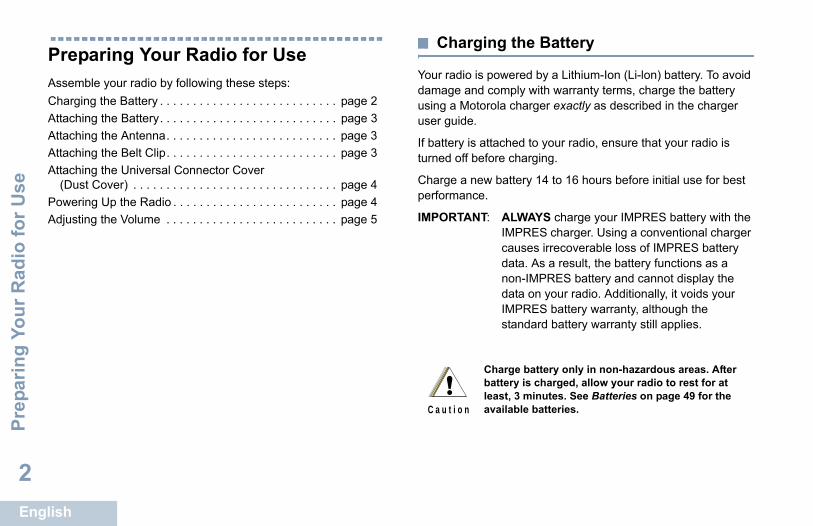
owered by a Lithium-Ion (Li-lon) battery. To avoid omply with warranty terms, charge the battery la charger exactly as described in the charger
ached to your radio, ensure that your radio is re charging.
battery 14 to 16 hours before initial use for best
ALWAYS charge your IMPRES battery with the IMPRES charger. Using a conventional charger causes irrecoverable loss of IMPRES battery data. As a result, the battery functions as a non-IMPRES battery and cannot display the data on your radio. Additionally, it voids your IMPRES battery warranty, although the standard battery warranty still applies.
harge battery only in non-hazardous areas. After ttery is charged, allow your radio to rest for at
ast, 3 minutes. See Batteries on page 49 for the ailable batteries.
NAG.book Page 2 Tuesday, October 19, 2010 11:32 AM
Prep
arin
g Yo
ur R
adio
for U
se
nglish
Preparing Your Radio for UseAssemble your radio by following these steps:Charging the Battery . . . . . . . . . . . . . . . . . . . . . . . . . . . page 2Attaching the Battery. . . . . . . . . . . . . . . . . . . . . . . . . . . page 3Attaching the Antenna. . . . . . . . . . . . . . . . . . . . . . . . . . page 3Attaching the Belt Clip. . . . . . . . . . . . . . . . . . . . . . . . . . page 3Attaching the Universal Connector Cover
(Dust Cover) . . . . . . . . . . . . . . . . . . . . . . . . . . . . . . . page 4Powering Up the Radio . . . . . . . . . . . . . . . . . . . . . . . . . page 4Adjusting the Volume . . . . . . . . . . . . . . . . . . . . . . . . . . page 5
Chargin
Your radio is pdamage and cusing a Motorouser guide.
If battery is attturned off befo
Charge a newperformance.
IMPORTANT:
Cbaleav
!C a u t i o n

Preparing Your Radio for U
se
English
3
ing the Antenna
With the radio turned off, set the antenna in its receptacle and turn clockwise.
To remove the antenna, turn the antenna counterclockwise. Make sure you turn off the radio and remove the universal connector cover first.
ing the Belt Clip
Align the grooves on the clip with those on the battery and press downward until you hear a click.
To remove the clip, press the belt clip tab away from the battery using a key. Then slide the clip upward and away from the radio.
If antenna needs to be replaced, ensure that only MOTOTRBO antennas are used. Neglecting this will damage your radio. See Antennas on page 49 for the available antenna.
NAG.book Page 3 Tuesday, October 19, 2010 11:32 AM
Attaching the Battery
Align the battery with the rails on the back of the radio. Move the battery latch into unlock position and hold, and slide battery upward. Release battery latch into lock position.
To remove the battery, turn the radio off. Move the battery latch into unlock position and hold, and slide the battery down and off the rails.
Attach
Attach
Do not change battery in gas and dust environments. Replace battery only in non-hazardous areas. See Batteries on page 49 for the available batteries.
Battery Latch
!C a u t i o n
!C a u t i o n

E
4
g Up the Radio
/Off/Volume clockwise a click. You and ) on the
momentarily.
s green and en lights up if etting is set matically.
ome screen does not light up during a power-up LED indicator is disabled (see Turning the LED ator On or Off on page 46).
unds, indicating that the power-up test is
is no power-up tone if the radio tones/alerts on is disabled (see Turning the Radio Tones/ On or Off on page 45).
oes not power up, check your battery. Make sure ed and properly attached. If your radio still does contact your dealer or system administrator.
LED Indicator
NAG.book Page 4 Tuesday, October 19, 2010 11:32 AM
Prep
arin
g Yo
ur R
adio
for U
se
nglish
Attaching the Universal Connector Cover(Dust Cover)
The universal connector is located on the antenna side of the radio. It is used to connect MOTOTRBO accessories to the radio.
Place the universal connector cover loop over the attached antenna. Slide it all the way down to the base of the antenna.
Insert the hooked end of the cover into the slots above the universal connector. Press downward on the cover to seat the lower tab properly into the RF connector.
Turn the thumbscrew clockwise to secure the connector cover to the radio.
To remove the universal connector cover, press down on the cover and turn the thumbscrew counterclockwise. Lift the cover up, slide the connector cover loop upwards, and remove it from the attached antenna.
Replace the universal connector cover when the connector is not in use.
Powerin
Rotate the OnControl Knobuntil you hear see MotorolaMOTOTRBO (TM
radio’s display
The LED blinkthe Home screthe backlight sto turn on auto
NOTE: The Hif the Indic
A brief tone sosuccessful.
NOTE: TherefunctiAlerts
If your radio dthat it is chargnot power up,
Universal Connector Cover(Dust Cover)

Identifying Radio C
ontrols
English
5
ing Radio Controlsent to review the following:ols You Will Be Using . . . . . . . . . . . . . . . . .page 6ble Buttons . . . . . . . . . . . . . . . . . . . . . . . . .page 7he Programmed Functions . . . . . . . . . . . . .page 8eypad. . . . . . . . . . . . . . . . . . . . . . . . . . . . . .page 9k (PTT) Button. . . . . . . . . . . . . . . . . . . . . .page 10etween Conventional and Trunking Mode.page 10
NAG.book Page 5 Tuesday, October 19, 2010 11:32 AM
To turn off the radio, rotate this knob counterclockwise until you hear a click. You see a brief Powering Down on the radio’s display.
Adjusting the Volume
To increase the volume, turn the On/Off/Volume Control Knob clockwise.
To decrease the volume, turn this knob counterclockwise.
IdentifyTake a momRadio ContrProgrammaAccessing tUsing the KPush-To-TalSwitching B

E
6
l Selector Knob
Volume Control Knob
icator
tton 1*
-Talk (PTT) Button
one
tton 2*
tton 3*
utton P1*
utton P2*
avigation Keys
al Connector for Accessories
r
ncy Button*
buttons are programmable.
NAG.book Page 6 Tuesday, October 19, 2010 11:32 AM
Iden
tifyi
ng R
adio
Con
trol
s
nglish
Radio Controls You Will Be Using
11
3
17
15
14
13
12
8
76
5
21
9
16
4
10
Channe
On/Off/
LED Ind
Side Bu
Push-to
Microph
Side Bu
Side Bu
Front B
Front B
Keypad
Menu N
Display
Univers
Speake
Emerge
Antenna
* These
1234567891011121314151617

Identifying Radio C
ontrols
English
7
elete – Temporarily removes an unwanted channel n list until the radio is powered off and on again, or urned off and on again.
Call* – Directly initiates a predefined Message, te Call, Phone Call, or a Call Alert to a target radio.
Monitor** – Monitors a selected channel for all until function is turned off.
tiates a phone call by keying in or selecting any d accepts incoming phone calls.
lkaround** – Toggles between using a repeater nicating directly with another radio.
gles scan on or off.
* – Displays current site on the radio display.
n/Off* – Toggles the automatic site roam on or off in operation.
* – Starts site search in SmartZone operation.
ate* – Selects a status update to send to the
hibit – Prevents transmission when enabled.
ws selection from a list of zones.
* A trunking only feature** A conventional only feature
NAG.book Page 7 Tuesday, October 19, 2010 11:32 AM
Programmable Buttons
Your dealer or system administrator can program the programmable buttons as shortcuts to radio functions or preset channels/groups depending on the duration of a button press:
• Press – Pressing and releasing rapidly.
• Long press – Pressing and holding for the programmed duration (between 0.25 seconds and 3.75 seconds).
• Hold down – Keeping the button pressed.
Assignable Radio Functions
Battery Indicator – Checks the battery charge status via the LED.
Call* – Initiates a private call by keying in or selecting any subscriber ID and accepts incoming private calls.
Call Alert* – Allows selection of radio ID number to initiate a call alert.
Contacts – Provides direct access to the Contacts list.
Emergency* – Depending on the programming, initiates or cancels an emergency alarm or call.
Message Update* – Selects a message update to send to the dispatcher.
Monitor** – Monitors a selected channel for activity.
Nuisance Dfrom the scathe scan is t
One TouchStatus, Priva
Permanentradio traffic
Phone – Iniphone ID an
Repeater/Taand commu
Scan – Tog
Site Display
Site Lock OSmart Zone
Site Search
Status Upddispatcher.
Transmit In
Zone – Allo

E
8
ing the Programmed Functions
s various radio functions through one of the :
ng press of the grammable buttons.
OR
u Navigation Buttons as follows:
the menu, press the S button. Press the Menu Scroll button (Por Q) to access
unctions.
function or enter a sub-menu, press the N
one menu level, or to return to the previous ss the R button. Long press the R button the Home screen.
adio automatically exits the menu after a period ctivity and returns to your Home screen.
NAG.book Page 8 Tuesday, October 19, 2010 11:32 AM
Iden
tifyi
ng R
adio
Con
trol
s
nglish
Assignable Settings or Utility FunctionsAll Tones/Alerts – Toggles all tones and alerts on or off.
Backlight – Toggles display backlight and front panel buttons backlight on or off.
Keypad Lock – Toggles keypad between locked and unlocked.
Power Level – Toggles transmit power level between high and low.
Squelch** – Toggles squelch level between tight and normal.
* A trunking only feature** A conventional only feature
Access
You can accesfollowing ways
• A short or lorelevant pro
• Use the Men
1 To access appropriatethe menu f
2 To select abutton.
3 To go backscreen, preto return to
NOTE: Your rof ina

Identifying Radio C
ontrols
English
9
an use the keypad to enter subscriber aliases or shows the number of times a key needs to be
essed
9 10 11 12 13
‘ % - : * #
. Another long press to turn off the CAPS lock.
numeric entry to enter a “*”.
eric entry to enter a “#”.
NAG.book Page 9 Tuesday, October 19, 2010 11:32 AM
Using the Keypad
You can use the 3 x 4 alphanumeric keypad to access your radio’s features. You cIDs. Many characters require that you press a key multiple times. The table belowpressed to generate the required character.
Number of Times Key is Pr
Key 1 2 3 4 5 6 7 8
1 1 . , ? ! @ &
2 A B C 2
3 D E F 3
4 G H I 4
5 J K L 5
6 M N O 6
7 P Q R S 7
8 T U V 8
9 W X Y Z 9
0 0 NOTE: Press to enter “0” and long press to activate the CAPS lock
* * or del NOTE: Press during text entry to delete the character. Press during
# # or space NOTE: Press during text entry to insert a space. Press during num

E
10
ng Between Conventional and g Mode
in your onfigured nal channel hannel. el Selector between a r a trunking
g from trunking to conventional mode, certain navailable. Icons for the trunking features reflect appearing “grayed out’. Disabled features are enu.
has features available in both conventional and . However, the minor differences in the way each does NOT affect the performance of your radio.
Channel Selector Knob
NAG.book Page 10 Tuesday, October 19, 2010 11:32 AM
Iden
tifyi
ng R
adio
Con
trol
s
nglish
Push-To-Talk (PTT) Button
The PTT button on the side of the radio serves two basic purposes:
• While a call is in progress, the PTT button allows the radio to transmit to other radios in the call.
Press and hold down PTT button to talk. Release the PTT button to listen.
The microphone is activated when the PTT button is pressed.
• While a call is not in progress, the PTT button is used to make a new call (see Making a Radio Call on page 17).
If the Talk Permit Tone is enabled (see Turning the Talk Permit Tone On or Off on page 45), wait until the short alert tone ends before talking.
SwitchiTrunkin
Each channel radio can be cas a conventioor a trunking cUse the ChannKnob to switchconventional ochannel.
When switchinfeatures are uthis change byhidden in the m
Your radio alsotrunking modefeature works
PTT Button

Identifying Status Indicators
English
11
ower Leveladio is set at Low power.
adio is set at High power.
ones Disableones are turned off.
cancan feature is enabled.
riority ScanOTE: This is a trunking only feature.adio detects activity on channel/group designated s Priority 1 (if • is blinking) or Priority 2 (if • is teady).
mergencyOTE: This is a trunking only feature.adio is in Emergency mode.
alkaroundOTE: This is a conventional only feature.
n the absence of a repeater, radio is currently onfigured for direct radio to radio communication.
atteryhe number of bars (0 – 4) shown indicates the harge remaining in the battery.links when the battery is low.
NAG.book Page 11 Tuesday, October 19, 2010 11:32 AM
Identifying Status IndicatorsYour radio indicates its operational status through the following:Display Icons . . . . . . . . . . . . . . . . . . . . . . . . . . . . . . . . page 11Call Icons. . . . . . . . . . . . . . . . . . . . . . . . . . . . . . . . . . . page 12Main Menu Icons . . . . . . . . . . . . . . . . . . . . . . . . . . . . . page 12In-Menu Icons . . . . . . . . . . . . . . . . . . . . . . . . . . . . . . . page 12LED Indicator. . . . . . . . . . . . . . . . . . . . . . . . . . . . . . . . page 13Audio Tones. . . . . . . . . . . . . . . . . . . . . . . . . . . . . . . . . page 13Indicator Tones . . . . . . . . . . . . . . . . . . . . . . . . . . . . . . page 13
Display Icons
The full dot matrix, black and white, liquid crystal display (LCD) of your radio shows radio status, text entries, and menu entries.
The following are icons that appear on the radio’s display.
Received Signal Strength Indicator (RSSI)NOTE: This is a trunking only feature.The number of bars displayed represents the radio signal strength. Four bars indicate the strongest signal.
MonitorNOTE: This is a conventional only feature.Selected channel is being monitored.
PR
R
TT
SS
PNRas
ENR
TNIc
BTcB
or

E
12
Icons
are icons that appear on the radio’s display.
Sects the Status and Message menu.
ll Logects the Call Log menu.
litiesects the Utilities menu.
t Arrowvigates to the left of the items in the display.
ht Arrowvigates to the right of the items in the display.
n Priority 1tects activity on channel/group designated as rity 1.
n Priority 2tects activity on channel/group designated as rity 2.
NAG.book Page 12 Tuesday, October 19, 2010 11:32 AM
Iden
tifyi
ng S
tatu
s In
dica
tors
nglish
Call Icons
The following icons appear on the radio’s display during a call. These icons also appear in the Contacts list to indicate ID type.
Main Menu Icons
The following are icons that appear on the radio’s display.
In-Menu
The following
Private CallNOTE: This is a trunking only feature.Indicates a Private Call in progress. In the Contacts list, it indicates a subscriber alias (name) or ID (number).
Dispatcher CallIndicates a Dispatcher Call in progress.
Phone CallIndicates a Phone Call in progress.
ContactsSelects the Contacts menu.
ScanSelects the Scan menu.
ZoneAllows selection from a list of zones.
TMSel
CaSel
UtiSel
LefNa
RigNa
ScaDePrio
ScaDePrio
Identifying Status Indicators
English
13
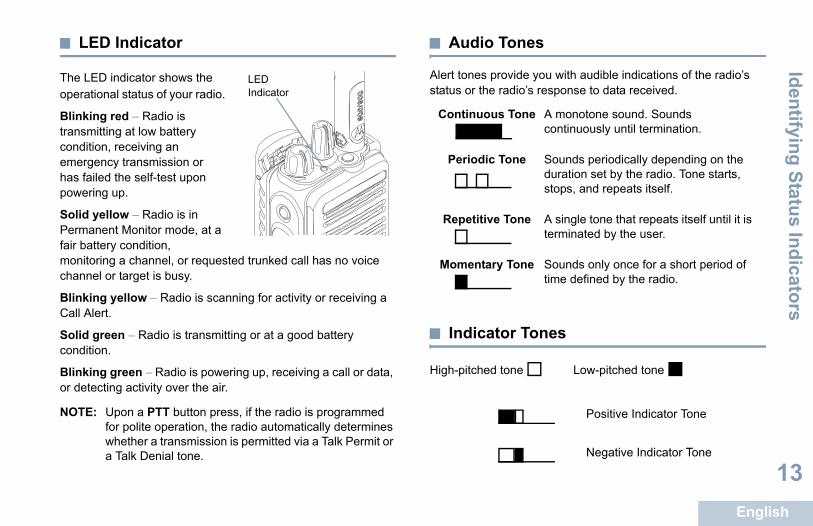
Tones
rovide you with audible indications of the radio’s radio’s response to data received.
tor Tones
tone Low-pitched tone
s Tone A monotone sound. Sounds continuously until termination.
Tone Sounds periodically depending on the duration set by the radio. Tone starts, stops, and repeats itself.
e Tone A single tone that repeats itself until it is terminated by the user.
ry Tone Sounds only once for a short period of time defined by the radio.
Positive Indicator Tone
Negative Indicator Tone
NAG.book Page 13 Tuesday, October 19, 2010 11:32 AM
LED Indicator
The LED indicator shows the operational status of your radio.
Blinking red – Radio is transmitting at low battery condition, receiving an emergency transmission or has failed the self-test upon powering up.
Solid yellow – Radio is in Permanent Monitor mode, at a fair battery condition, monitoring a channel, or requested trunked call has no voice channel or target is busy.
Blinking yellow – Radio is scanning for activity or receiving a Call Alert.
Solid green – Radio is transmitting or at a good battery condition.
Blinking green – Radio is powering up, receiving a call or data, or detecting activity over the air.
NOTE: Upon a PTT button press, if the radio is programmed for polite operation, the radio automatically determines whether a transmission is permitted via a Talk Permit or a Talk Denial tone.
Audio
Alert tones pstatus or the
Indica
High-pitched
LED Indicator
Continuou
Periodic
Repetitiv
Momenta

E
14
g a Zone
oup of channels. Your radio supports up to 130 maximum of 16 channels per zone.
ing procedure to select a zone.
rammed Zone button and proceed to step 3.
cedure below.
cess the menu.
to Zone and press N to select.
t zone is displayed and indicated by a .
to the required zone and press N to select.
y shows <Zone> Selected momentarily and he selected zone screen.
ones appear in alphabetical order, if named.
one main menu option will not appear, if the radio configured for zones.
NAG.book Page 14 Tuesday, October 19, 2010 11:32 AM
Mak
ing
and
Rec
eivi
ng C
alls
nglish
Making and Receiving CallsOnce you understand how your MOTOTRBO Portable is configured, you are ready to use your radio.
Use this navigation guide to familiarize yourself with the basic Call features:Selecting a Zone . . . . . . . . . . . . . . . . . . . . . . . . . . . . . page 14Selecting a Radio Channel . . . . . . . . . . . . . . . . . . . . . page 15Receiving and Responding to a Radio Call. . . . . . . . . page 15Making a Radio Call . . . . . . . . . . . . . . . . . . . . . . . . . . page 17Talkaround . . . . . . . . . . . . . . . . . . . . . . . . . . . . . . . . . page 22Monitoring Features . . . . . . . . . . . . . . . . . . . . . . . . . . page 23
Selectin
A zone is a grzones, with a
Use the follow
Procedure:
Press the prog
OR
Follow the pro
1 S to ac
2 Por Q
3 The curren
4 Por Q
5 The displareturns to t
NOTE: The z
The Zis not

Making and R
eceiving Calls
English
15
ng and Responding to a Group Call
s is a trunking only feature.
call from a group of users, your radio must be s part of that group.
eceive a Group Call (while on the Home screen):
blinks green.
line of the display shows the alias or ID of the caller, RSSI icon. The second line displays the related lity alias.
radio vertically 1 to 2 inches (2.5 to 5.0 cm) from uth.
e PTT button to respond to the call. The LED lights green.
the Talk Permit Tone to finish (if enabled) and early into the microphone.
the PTT button to listen.
s no voice activity for a predetermined period of call ends.
a Group Call on page 18 for details on making a
NAG.book Page 15 Tuesday, October 19, 2010 11:32 AM
Selecting a Radio Channel
Procedure:
Once the required zone is displayed (if you have multiple zones in your radio), turn the programmed Channel Selector Knob to select the channel, subscriber alias or ID, or group alias or ID.
Receiving and Responding to a Radio Call
Once you have selected the required channel and/or zone, you can proceed to receive and respond to calls.
The LED lights up solid green while the radio is transmitting and blinks green when the radio is receiving.
Receivi
NOTE: Thi
To receive aconfigured a
Procedure:
When you r
1 The LED
2 The firstand the persona
3 Hold theyour mo
4 Press thup solid
5 Wait for speak cl
6 Release
7 If there itime, the
See MakingGroup Call.
LED Indicator

E
16
NOTE: If the radio receives a Group Call while not on the 3 Hold the radio vertically 1 to 2 inches (2.5 to 5.0 cm) from .
to select Response.
all button within 20 seconds after the call begin.
e of the display shows the subscriber alias or ID, ivate Call and RSSI icons. The second line ivate Call.
hold the PTT button to respond.
e of the display shows Calling. The second line e subscriber alias or ID, and the Private Call icon.
are connected, the first line of the display shows iber alias or ID, and the Private Call and RSSI second line displays Private Call.
e PTT button to listen.
Private Call on page 18 for details on making a
NAG.book Page 16 Tuesday, October 19, 2010 11:32 AM
Mak
ing
and
Rec
eivi
ng C
alls
nglish
Home screen, it remains on its current screen prior to answering the call.
Long press the R button to go to the Home screen to view the caller alias before replying.
Receiving and Responding to a Private Call
NOTE: This is a trunking only feature.
A Private Call is a call from an individual radio to another individual radio.
There are two types of Private Calls. The first type is called Enhanced Private Call, where a radio presence check is performed prior to setting up the call, while the other, Basic Private Call, sets up the call immediately.
Procedure:
When you receive a Private Call:
1 A tone sounds and the LED blinks green.
2 The first line of the display shows the subscriber alias or ID, and the Private Call and RSSI icons. The second line displays Response.
your mouth
4 Press N ORPress the Cindicators
5 The first linand the Prdisplays Pr
6 Press and
7 The first lindisplays th
8 When you the subscricons. The
9 Release th
See Making aPrivate Call.

Making and R
eceiving Calls
English
17
g a Radio Call
ect a zone, channel, subscriber ID, or group by
nel Selector Knob
med One Touch Call button*
cts list from Contacts menu or via Call button (see Settings on page 29)*
ial (via Call button) – This method is for Private and is dialed using the keypad (see Making a all from Contacts on page 29)*
* A trunking only feature
NAG.book Page 17 Tuesday, October 19, 2010 11:32 AM
Receiving and Responding to a Phone CallA Phone Call is a call similar to a standard phone call from a landline phone.
Procedure:
When you receive a Phone Call:
1 A tone sounds and the LED blinks green.
2 The first line of the display shows Phone Call and the RSSI icon. The second line displays Response.
3 Hold the radio vertically 1 to 2 inches (2.5 to 5.0 cm) from your mouth.
4 Press N to select Response.
5 The first line of the display shows Phone Call. The second line displays Responding.
6 Press and hold the PTT button to talk. Release the PTT button to listen.
See Making a Phone Call on page 20 for details on making a Phone Call.
Makin
You can selusing:
• The Chan
• A program
• The ContaContacts
• Manual DCalls onlyPrivate C
E
18
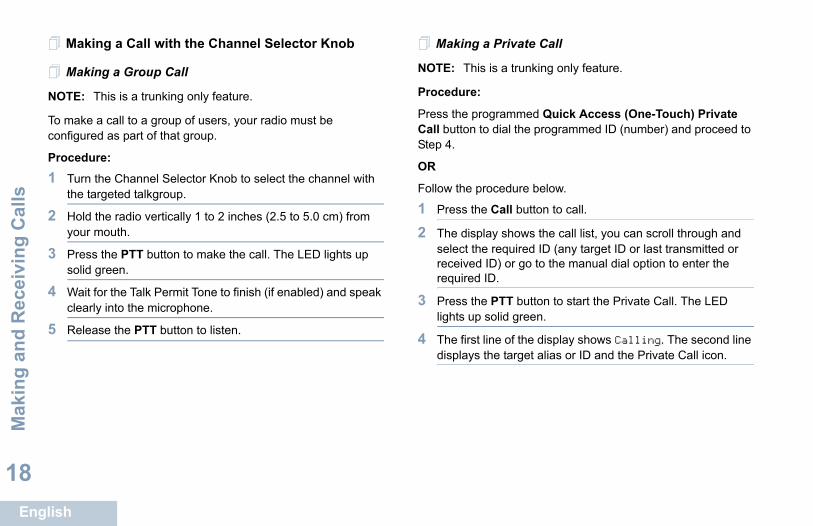
Private Call
s a trunking only feature.
rammed Quick Access (One-Touch) Private dial the programmed ID (number) and proceed to
cedure below.
all button to call.
y shows the call list, you can scroll through and required ID (any target ID or last transmitted or ) or go to the manual dial option to enter the .
TT button to start the Private Call. The LED lid green.
e of the display shows Calling. The second line e target alias or ID and the Private Call icon.
NAG.book Page 18 Tuesday, October 19, 2010 11:32 AM
Mak
ing
and
Rec
eivi
ng C
alls
nglish
Making a Call with the Channel Selector Knob
Making a Group Call
NOTE: This is a trunking only feature.
To make a call to a group of users, your radio must be configured as part of that group.
Procedure:
1 Turn the Channel Selector Knob to select the channel with the targeted talkgroup.
2 Hold the radio vertically 1 to 2 inches (2.5 to 5.0 cm) from your mouth.
3 Press the PTT button to make the call. The LED lights up solid green.
4 Wait for the Talk Permit Tone to finish (if enabled) and speak clearly into the microphone.
5 Release the PTT button to listen.
Making a
NOTE: This i
Procedure:
Press the progCall button to Step 4.
OR
Follow the pro
1 Press the C
2 The displaselect the received IDrequired ID
3 Press the Plights up so
4 The first lindisplays th

Making and R
eceiving Calls
English
19
ogrammed Quick Access (One-Touch) Private to dial the programmed ID (number) and proceed to
rocedure below.
e Call button to Call.
lay shows the call list, you can scroll through and e required ID (any target ID or last transmitted or ID) or go to the manual dial option to enter the ID.
e PTT button to initiate the Private Call request.
line of the display shows Calling. The second line the target alias or ID and the Private Call icon.
u are connected, the first line of the display shows r alias of the target radio and Private Call icon. The line displays Private Call. You may hear the
all voice if the target is talking.
radio vertically 1 to 2 inches (2.5 to 5.0 cm) from uth. Press and hold the PTT button to talk. Release button to listen.
nowledgment is received, the display shows No
NAG.book Page 19 Tuesday, October 19, 2010 11:32 AM
5 Hold the radio vertically 1 to 2 inches (2.5 to 5.0 cm) from your mouth.
6 When you are connected, the first line of the display shows the ID or alias of the target radio and the Private Call icon. The second line displays Private Call. Press and hold the PTT button to talk. Release the PTT button to listen.ORIf no acknowledgment is received, the display shows No Answer.
You can also make a Private Call via Contacts (see Making a Private Call from Contacts on page 29) or perform a quick alphanumeric search for the required alias via a keypad entry (see Making a Private Call by Alias Search on page 30).
Making an Enhanced Private Call
NOTE: This is a trunking only feature.
This feature allows you to send an individual Call Alert page if there is no answer from the target radio.
NOTE: Your radio must be programmed to allow you to use this feature.
Procedure:
Press the prCall button Step 4.
OR
Follow the p
1 Press th
2 The dispselect threceivedrequired
3 Press th
4 The firstdisplays
5 When yothe ID osecond Private C
6 Hold theyour mothe PTTORIf no ackAnswer.
E
20
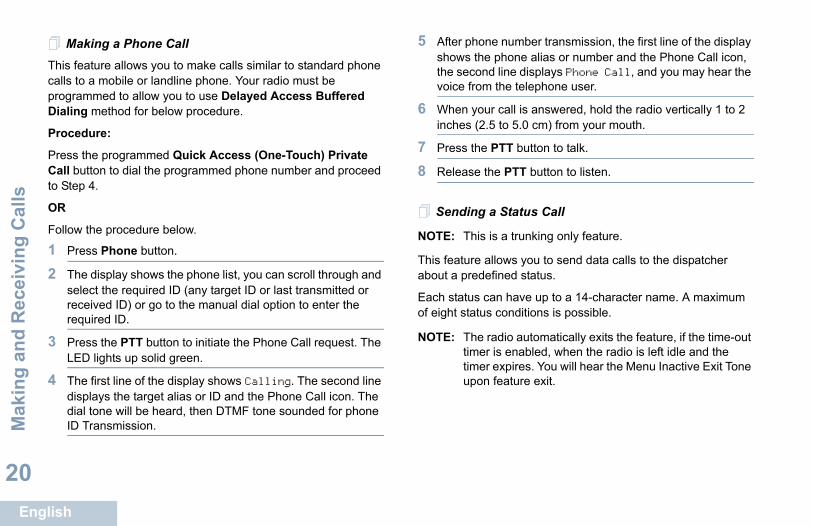
5 After phone number transmission, the first line of the display phone alias or number and the Phone Call icon, line displays Phone Call, and you may hear the the telephone user.
call is answered, hold the radio vertically 1 to 2 to 5.0 cm) from your mouth.
TT button to talk.
e PTT button to listen.
Status Call
s a trunking only feature.
llows you to send data calls to the dispatcher fined status.
n have up to a 14-character name. A maximum conditions is possible.
dio automatically exits the feature, if the time-out is enabled, when the radio is left idle and the expires. You will hear the Menu Inactive Exit Tone feature exit.
NAG.book Page 20 Tuesday, October 19, 2010 11:32 AM
Mak
ing
and
Rec
eivi
ng C
alls
nglish
Making a Phone CallThis feature allows you to make calls similar to standard phone calls to a mobile or landline phone. Your radio must be programmed to allow you to use Delayed Access Buffered Dialing method for below procedure.
Procedure:
Press the programmed Quick Access (One-Touch) Private Call button to dial the programmed phone number and proceed to Step 4.
OR
Follow the procedure below.
1 Press Phone button.
2 The display shows the phone list, you can scroll through and select the required ID (any target ID or last transmitted or received ID) or go to the manual dial option to enter the required ID.
3 Press the PTT button to initiate the Phone Call request. The LED lights up solid green.
4 The first line of the display shows Calling. The second line displays the target alias or ID and the Phone Call icon. The dial tone will be heard, then DTMF tone sounded for phone ID Transmission.
shows the the secondvoice from
6 When yourinches (2.5
7 Press the P
8 Release th
Sending a
NOTE: This i
This feature aabout a prede
Each status caof eight status
NOTE: The ratimer timer upon

Making and R
eceiving Calls
English
21
e Dynamic Regrouping Feature
s is a trunking only feature.
allows the dispatcher to temporarily reassign ios to a single special channel so they can
te with each other. This feature is typically used ial operations and is enabled by a qualified radio
notice whether your radio has this feature enabled mic regrouping command is sent by the dispatcher.
ou try to access a zone or channel that has been erved by the dispatcher as a dynamically regrouped de for other users, an invalid tone sounds.
ur radio is dynamically regrouped, it automatically to the dynamically regrouped channel. A “gurgle” nds and the display shows the dynamically d channel name.
e PTT button to talk. Release PTT button to listen.
ispatcher cancels dynamic regrouping, the radio ly returns to the zone and channel that you were the radio was dynamically regrouped.
NAG.book Page 21 Tuesday, October 19, 2010 11:32 AM
Procedure:
Press the programmed Status button and proceed to Step 3.
OR
Follow the procedure below.
1 PorQ to Status and press N to select.
2 The display shows the last acknowledged status call, or the first status in the list.
3 PorQ to the required status.
4 Press N to send the status.
5 When the dispatcher acknowledges, four tones sound and the display shows Ack Received. The radio returns to normal dispatch operation.ORIf no acknowledgment is received, a low-pitched tone sounds and the display shows No Acknowledge.
No traffic is heard on trunked channels while Status Calls is selected. If the radio detects no Status Call activity for six seconds, an alert tone sounds until you press Home or the PTT button.
Using th
NOTE: Thi
This featureselected radcommunicaduring spectechnician.
You will not until a dyna
NOTE: If yresmo
Procedure:
1 When yoswitchestone souregroupe
2 Press th
When the dautomaticalusing before

E
22
3 Por Q to Radio Settings and press N to select.
to Talkaround and press N to select.
rn On if the radio is currently in Repeater mode.
rn Off if the radio is currently in Talkaround
to select.
y shows Talkaround On.
y shows Talkaround Off.
automatically returns to the previous menu.
d setting is retained even after powering down.
NAG.book Page 22 Tuesday, October 19, 2010 11:32 AM
Mak
ing
and
Rec
eivi
ng C
alls
nglish
Talkaround
NOTE: This is a conventional only feature.
You can continue to communicate when your repeater is not operating, or when your radio is out of the repeater’s range but within talking range of other radios. This is called “talkaround”.Procedure:
Press the programmed Repeater/Talkaround button to toggle between talkaround and repeater modes.
OR
Follow the procedure below.
1 S to access the menu.
2 Por Q to Utilities and press N to select.
4 Por Q
5 You see TuORYou see Tumode.
6 Press N
7 The displaORThe displa
8 The screen
The Talkaroun

Making and R
eceiving Calls
English
23
ent Monitormanent Monitor feature to continuously monitor a nnel for activity.
e programmed Permanent Monitor button.
unds an alert tone, the LED lights up solid yellow, display shows Permanent Monitor On. The icon appears on the display.
e programmed Permanent Monitor button to exit nt Monitor mode.
unds an alert tone, the LED turns off, and display ermanent Monitor Off.
NAG.book Page 23 Tuesday, October 19, 2010 11:32 AM
Monitoring Features
NOTE: This is a conventional only feature.
Monitoring a ChannelUse the Monitor feature to make sure a channel is clear before transmitting.
Procedure:
1 Press and hold the programmed Monitor button and listen for activity. The monitor icon appears on the display.
2 You hear radio activity or total silence, depending on how your radio is programmed.
3 When you hear “white noise” (that is, the channel is free), press the PTT button to talk and release it to listen. The LED lights up solid yellow.
PermanUse the Perselected cha
Procedure:
1 Press th
2 Radio soand the Monitor
3 Press thPermane
4 Radio soshows P
E
24
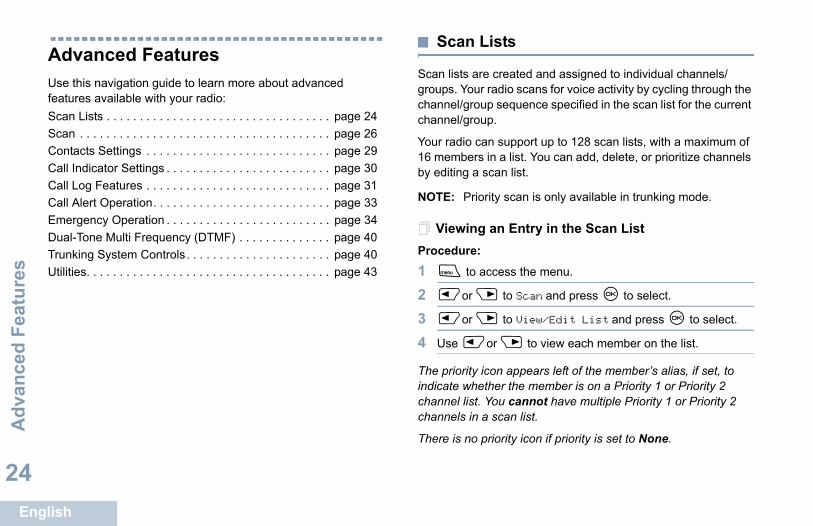
Scan Lists
created and assigned to individual channels/adio scans for voice activity by cycling through the sequence specified in the scan list for the current .
support up to 128 scan lists, with a maximum of a list. You can add, delete, or prioritize channels an list.
ty scan is only available in trunking mode.
n Entry in the Scan List
cess the menu.
to Scan and press N to select.
to View/Edit List and press N to select.
r Q to view each member on the list.
n appears left of the member’s alias, if set, to er the member is on a Priority 1 or Priority 2 ou cannot have multiple Priority 1 or Priority 2 scan list.
iority icon if priority is set to None.
NAG.book Page 24 Tuesday, October 19, 2010 11:32 AM
Adv
ance
d Fe
atur
es
nglish
Advanced FeaturesUse this navigation guide to learn more about advanced features available with your radio:Scan Lists . . . . . . . . . . . . . . . . . . . . . . . . . . . . . . . . . . page 24Scan . . . . . . . . . . . . . . . . . . . . . . . . . . . . . . . . . . . . . . page 26Contacts Settings . . . . . . . . . . . . . . . . . . . . . . . . . . . . page 29Call Indicator Settings . . . . . . . . . . . . . . . . . . . . . . . . . page 30Call Log Features . . . . . . . . . . . . . . . . . . . . . . . . . . . . page 31Call Alert Operation. . . . . . . . . . . . . . . . . . . . . . . . . . . page 33Emergency Operation . . . . . . . . . . . . . . . . . . . . . . . . . page 34Dual-Tone Multi Frequency (DTMF) . . . . . . . . . . . . . . page 40Trunking System Controls. . . . . . . . . . . . . . . . . . . . . . page 40Utilities. . . . . . . . . . . . . . . . . . . . . . . . . . . . . . . . . . . . . page 43
Scan lists are groups. Your rchannel/groupchannel/group
Your radio can16 members inby editing a sc
NOTE: Priori
Viewing aProcedure:
1 S to ac
2 Por Q
3 Por Q
4 Use Po
The priority icoindicate whethchannel list. Ychannels in a
There is no pr

Advanced Features
English
25
an Entry from the Scan List
access the menu.
to Scan and press N to select.
to View/Edit List and press N to select.
to the required alias or ID and press N to
to Delete and press N to select.
e Entry?, Por Q to Yes and press N to delete the entry. The display shows Entry .
to No and press N to select to return to the screen.
teps 4 to 6 to delete other entries.
g all required aliases or IDs, long press R to Home screen.
NAG.book Page 25 Tuesday, October 19, 2010 11:32 AM
Editing the Scan List
Adding a New Entry to the Scan List
Procedure:
1 S to access the menu.
2 Por Q to Scan and press N to select.
3 Por Q to View/Edit List and press N to select.
4 Por Q to Add Member and press N to select.
5 Por Q to the required alias or ID and press N to select.
6 Por Q to the required priority level and press N to select.
7 The display shows Entry Saved, followed immediately by Add Another?.
8 Por Q to Yes and press N to select, to add another entry, and repeat steps 5 and 6.ORPor Q to No and press N to select to save the current list.
Deleting
Procedure:
1 S to
2 Por Q
3 Por Q
4 Por Qselect.
5 Por Q
6 At Deletselect, toDeletedORPor Qprevious
7 Repeat s
After deletinreturn to the

E
26
t a scan, your radio cycles through the can list for the current channel looking for voice
s yellow and you see the scan icon on the display.
ways of initiating scan:
el Scan (Manual): Your radio scans all the oups in your scan list. On entering scan, your depending on the settings – automatically start canned “active” channel/group or on the channel was initiated.
(Automatic): Your radio automatically starts en you select a channel/group that has Auto d.
NAG.book Page 26 Tuesday, October 19, 2010 11:32 AM
Adv
ance
d Fe
atur
es
nglish
Setting and Editing Priority for an Entry in the Scan List
Procedure:
1 S to access the menu.
2 Por Q to Scan and press N to select.
3 Por Q to View/Edit List and press N to select.
4 Por Q to the required alias or ID and press N to select.
5 Por Q to Edit Priority and press N to select.
6 Por Q to the required priority level and press N to select.
7 The display shows Entry Saved before returning to the previous screen.
8 The priority icon appears left of the member’s name.
There is no priority icon if priority is set to None.
Scan
When you starprogrammed sactivity.
The LED blink
There are two
• Main Channchannels/grradio may –on the last swhere scan
• Auto Scan scanning whScan enable

Advanced Features
English
27
ding to a Transmission During a Scanning, your radio stops on a channel/group where tected. The radio stays on that channel for a
d time period known as “hang time”.
radio vertically 1 to 2 inches (2.5 to 5.0 cm) from uth.
e PTT button during hang time. The LED lights up en.
the Talk Permit Tone to finish (if enabled) and speak to the microphone.
the PTT button to listen.
not respond within the hang time, the radio returns ing other channels/groups.
NAG.book Page 27 Tuesday, October 19, 2010 11:32 AM
Starting and Stopping ScanProcedure:
Press the programmed Scan button to start or stop Scan.
OR
Follow the procedure below.
1 Use the Channel Selector Knob to select a channel programmed with a scan list.
2 S to access the menu.
3 Por Q to Scan and press N to select.
4 The display shows Turn On if scan is disabled.ORThe display shows Turn Off if scan is enabled.
5 Press N to select.
6 The LED blinks yellow and the scan icon is displayed when Scan is enabled.ORThe LED turns off and the scan icon is not displayed when Scan is disabled.
ResponDuring scanactivity is deprogramme
Procedure:
1 Hold theyour mo
2 Press thsolid gre
3 Wait for clearly in
4 Release
5 If you doto scann

E
28
a Nuisance Channel
deleted nuisance channel, do ONE of the
io off and then powering it on again, OR
start a scan via the programmed Scan button or
channel via the Channel Selector Knob.
NAG.book Page 28 Tuesday, October 19, 2010 11:32 AM
Adv
ance
d Fe
atur
es
nglish
Deleting a Nuisance ChannelIf a channel continually generates unwanted calls or noise (termed a “nuisance” channel), you can temporarily remove the unwanted channel from the scan list.
This capability does not apply to the channel designated as the Selected Channel.
Procedure:
1 When your radio “locks on to” an unwanted or nuisance channel, press the programmed Nuisance Delete button until you hear a tone.
2 Release the Nuisance Delete button. The nuisance channel is deleted.
Deleting a “nuisance” channel is only possible through the programmed Nuisance Delete button. This feature is not accessible through the menu.
RestoringProcedure:
To restore thefollowing:
• Turn the rad
• Stop and remenu, OR
• Change the

Advanced Features
English
29
a Private Call from Contacts
access the menu.
to Contacts and press N to select.The re alphabetically sorted.
to the required subscriber alias or ID.
e PTT button to start the Private Call. The first line Calling. The second line displays the target alias d the Private Call icon.
u are connected, the display shows the ID or alias rget radio and the Private Call icon. Private Call yed on second line. Talk Permit Tone will be heard if .
radio vertically 1 to 2 inches (2.5 to 5.0 cm) from uth.
d hold the PTT button to talk. Release the PTT listen.
NAG.book Page 29 Tuesday, October 19, 2010 11:32 AM
Contacts Settings
Contacts provides “address-book” capabilities on your radio. Each entry corresponds to an alias or ID that you use to initiate a call.
Additionally, each entry, depending on context, associates with ONE of four types of calls: Phone Call, Private Call, Selective Call or Call Alert.
PC Call and Dispatch Call are data-related. They are only available with the applications. Refer to the data applications documentation for more information.
Your radio supports one Contacts list, with a maximum of 250 members for Radio Call entry and a maximum of 50 members for Phone Call entry.
Each entry within Contacts displays the following information:• Call Type
• Call Alias
• Call ID
NOTE: You can add, delete, or edit subscriber IDs for the Contacts list.
MakingProcedure:1 S to
2 Por Qentries a
3 Por Q
4 Press thdisplaysor ID an
5 When yoof the tais displaenabled
6 Hold theyour mo
7 Press anbutton to

E
30
Call Indicator Settings
g and Deactivating Call Ringers for alls
s a trunking only feature.
n or off the ringing tones for a received Private
cess the menu.
to Utilities and press N to select.
to Radio Settings and press N to select.
to Tones/Alerts and press N to select.
to Call Ringers and press N to select.
to Private Call and press N to select.
y shows Turn On. Press N to enable Call r Private Calls. The display shows Private Call .
y shows Turn Off. Press N to disable Call r Private Calls. The display shows Private Call f.
NAG.book Page 30 Tuesday, October 19, 2010 11:32 AM
Adv
ance
d Fe
atur
es
nglish
Making a Private Call by Alias SearchYou can also use alias or alphanumeric search to retrieve the required subscriber alias.
This feature is only applicable while in Contacts.
Procedure:
1 S to access the menu.
2 Por Q to Contacts and press N to select. The entries are alphabetically sorted.
3 Key in the first character of the alias.
4 Por Q to the required alias.
5 Press the PTT button to start the Private Call. The first line displays Calling. The second line displays the target alias or ID and the Private Call Icon.
6 When you are connected, the display shows the ID or alias of the target radio and the Private Call icon. Private Call is displayed on the second line. Talk Permit Tone will be heard if enabled.
7 Hold the radio vertically 1 to 2 inches (2.5 to 5.0 cm) from your mouth.
8 Press and hold the PTT button to talk. Release the PTT button to listen.
ActivatinPrivate C
NOTE: This i
You can turn oCall.
Procedure:
1 S to ac
2 Por Q
3 Por Q
4 Por Q
5 Por Q
6 Por Q
7 The displaRingers foRinger OnORThe displaRingers foRinger Of

Advanced Features
English
31
og Features
eeps track of all recent incoming and outgoing and outgoing Phone Calls. Use the call log feature manage recent calls.
oming and outgoing Radio Calls are trunking only tures.
form the following tasks in each of your call lists:
o Contacts
Recent Calls Radio Rcvd, Radio Dialed, and Phone Dialed.
access the menu.
to Call Log and press N to select.
to preferred list and press N to select.
lay shows the most recent entry at the top of the
to view the list.
NAG.book Page 31 Tuesday, October 19, 2010 11:32 AM
NOTE: To activate or deactivate call ringer for Selective Call/Call Alert/Phone Call, follow similar steps as above.
Escalating Alarm Tone VolumeYour radio can be programmed to continually alert you when a radio call remains unanswered. This is done by automatically increasing the alarm tone volume over time. This feature is known as Escalert.
Procedure:
1 S to access the menu.
2 Por Q to Utilities and press N to select.
3 Por Q to Radio Settings and press N to select.
4 Por Q to Tones/Alerts and press N to select.
5 Por Q to Escalert and press N to select.
6 The display shows Turn On. Press N to enable Escalert. The display shows Escalert On.ORThe display shows Turn Off. Press N to disable Escalert. The display shows Escalert Off.
Call L
Your radio kRadio Calls,to view and
NOTE: Incfea
You can per
• Store ID t
• Delete
ViewingThe lists are
Procedure:
1 S to
2 Por Q
3 Por Q
4 The displist.
5 Por Q

E
32
a Call from a Call List
cess the menu.
to Call Log and press N to select.
to the required list and press N to select.
to the required alias or ID and press N to
to Delete Entry? and press N to select.
to select Yes to delete the entry. The display ry Deleted.
to No to return to the previous screen.
ct a call list and it contains no entries, the display mpty, and sounds a low tone if Keypad Tones are Turning Keypad Tones On or Off on page 43).
NAG.book Page 32 Tuesday, October 19, 2010 11:32 AM
Adv
ance
d Fe
atur
es
nglish
Storing an Alias or ID from the Received Call ListProcedure:
1 S to access the menu.
2 Por Q to Call Log and press N to select.
3 Por Q to Radio Rcvd and press N to select.
4 Por Q to the required received call alias or ID and press N to select.
5 Por Q to Store and press N to select.
6 A blinking cursor appears. If needed, key in the alias for that ID and press N.
7 The display shows Contact Saved.
You can also store an ID without an alias.
Deleting Procedure:
1 S to ac
2 Por Q
3 Por Q
4 Por Qselect.
5 Por Q
6 Press N shows EntORPor Q
When you seleshows List Eturned on (see

Advanced Features
English
33
a Call Alert from the Contacts List
access the menu.
to Contacts and press N to select.
to the required subscriber alias or ID and press lect.
to Call Alert and press N to select.
lay shows Call Alert: <Subscriber Alias or icating that the Call Alert has been sent.
lights up solid green when your radio is sending Alert.
ll Alert acknowledgment is received, a tone sounds display shows Call Alert Successful.
ll Alert acknowledgment is not received, a tone and the display shows Call Alert Failed.
NAG.book Page 33 Tuesday, October 19, 2010 11:32 AM
Call Alert Operation
NOTE: This is a trunking only feature.
Call Alert paging enables you to alert a specific radio user to call you back when they are able to do so.
This feature is applicable for subscriber aliases or IDs only and is accessible through the menu via Contacts or manual dial.
Receiving and Acknowledging a Call AlertWhen you receive a Call Alert page, you see Call Alert that alternates with the alias or ID of the calling radio on the display.
Procedure:
1 You hear a repetitive tone. The LED blinks yellow.
2 Press and release the PTT button to acknowledge the alert.ORPress N to select Ignore? and to exit the Call Alert.
MakingProcedure:
1 S to
2 Por Q
3 Por QN to se
4 Por Q
5 The dispID>, ind
6 The LEDthe Call
7 If the Caand the ORIf the Casounds

E
34
ncy Operation
s a trunking only feature.
y feature is used to indicate a critical situation. initiate an Emergency at any time on any screen hen there is activity on the current channel.
ports the following Emergency modes:
Call
Alarm
Alarm with Call
Alarm with Voice to Follow
ch mode has the following types:
adio transmits an alarm signal and shows audio l indicators.
io transmits an alarm signal without any audio or tors. There will be no response (call) from the until you press the PTT button to initiate the call.
oice – Radio transmits an alarm signal and is ive an incoming call, without any audio or visual ntil you press the PTT button to initiate, or the call.
he Emergency modes above can be assigned to ed Emergency button.
NAG.book Page 34 Tuesday, October 19, 2010 11:32 AM
Adv
ance
d Fe
atur
es
nglish
Making a Call Alert with the One Touch Call ButtonProcedure:
1 Press the programmed One Touch Call button to make a Call Alert to the predefined alias or ID.
2 The display shows Call Alert: <Subscriber Alias or ID>, indicating that the Call Alert has been sent.
3 The LED lights up solid green when your radio is sending the Call Alert.
4 If the Call Alert acknowledgment is received, a tone sounds and the display shows Call Alert Successful.ORIf the Call Alert acknowledgment is not received, a tone sounds and the display shows Call Alert Failed.
Emerge
NOTE: This i
The EmergencYou are able todisplay even w
Your radio sup
• Emergency
• Emergency
• Emergency
• Emergency
In addition, ea
• Regular – Rand/or visua
• Silent – Radvisual indicatarget radio
• Silent with Vable to receindicators, urespond to,
Only ONE of tthe programm

Advanced Features
English
35
ng an Emergency Alarm with Call
ceiving an Emergency Alarm with Call, the first line splay shows the alias or ID of the sender. The line displays Alarm Rcvd.
ounds and the LED blinks red.
to clear the alarm indication.
ton is pressed, the alarm indication exits ically after a short duration.
r a voice from the Emergency Alarm with Call radio.
radio vertically 1 to 2 inches (2.5 to 5.0 cm) from uth.
T button to initiate a call with the emergency radio. The LED lights up solid green.
the Talk Permit Tone to finish (if enabled) and speak to the microphone.
the PTT button to listen. When the emergency radio responds, the LED blinks green.
NAG.book Page 35 Tuesday, October 19, 2010 11:32 AM
Receiving an Emergency CallProcedure:
1 When receiving an Emergency Call, the first line of the display shows the alias or ID of the caller. The second line displays Emergency.
2 The LED blinks red and you hear a voice from the Emergency Call initiating radio.
3 If the voice channel is lost, the Emergency Call ends.
Receiving an Emergency AlarmProcedure:
1 When receiving an Emergency Alarm, the first line of the display shows the alias or ID of the sender. The second line displays Alarm Rcvd.
2 A tone sounds and the LED blinks red.
3 Press R to clear the alarm indication.ORIf no button is pressed, the alarm indication exits automatically after a short duration.
When your radio receives an Emergency Alarm, it displays the Emergency Alarm received indications for approximately, 10 seconds.
ReceiviProcedure:
1 When reof the disecond
2 A tone s
3 Press RORIf no butautomat
4 You heainitiating
5 Hold theyour mo
6 Press PTinitiating
7 Wait for clearly in
8 Releaseinitiating

E
36
4 Press and hold the PTT button. Speak clearly into the e.
e PTT button to end the transmission and wait for from the dispatcher.
hold the programmed Emergency button for cond to exit the Emergency Call mode.
set to Silent, it will not have any audio or visual ted to the Emergency feature.
an Emergency Alarmllows you to send an Emergency Alarm, a non-hich triggers an alert indication on another radio.
rogrammed Emergency button.
y shows Sending Alarm on the second line. The up solid green and the Emergency icon appears
e screen display. An Emergency Enter Tone on each retry.
NAG.book Page 36 Tuesday, October 19, 2010 11:32 AM
Adv
ance
d Fe
atur
es
nglish
Sending an Emergency CallThis feature gives your radio priority access on a channel.
NOTE: The radio operates in the normal dispatch manner while in Emergency Call, except, if enabled, it returns to one of the following:
• Tactical/Non-Revert – You talk on the channel you selected before you entered the emergency state.
• Non-Tactical/Revert – You talk on a programmed emergency channel. The emergency alarm is sent on this same channel.
Procedure:
1 Press the programmed Emergency button.
2 The display shows Emergency on the second line. The LED lights up solid green and the Emergency icon appears on the Home screen display.ORThe radio sounds a low-pitched tone, if the selected channel does not support emergency. Select a channel that shows Emergency.
3 Hold the radio vertically 1 to 2 inches (2.5 to 5.0 cm) from your mouth.
microphon
5 Release tha response
6 Press and about a se
If your radio isindicators rela
Sending This feature avoice signal, w
Procedure:
1 Press the p
2 The displaLED lightson the Homsounds up

Advanced Features
English
37
lay shows Sending Alarm on the second line. The ts up solid green and the Emergency icon appears ome screen display. An Emergency Enter Tone pon each retry.
Emergency Alarm acknowledgment is received, rgency Acknowledgment Tone sounds and the LED een. The display shows Emergency Alarm ful.
radio vertically 1 to 2 inches (2.5 to 5.0 cm) from uth.
T button to make the call. The display shows cy on the second line. The LED lights up solid d the Emergency icon appears on the Home isplay.
the Talk Permit Tone to finish (if enabled) and speak to the microphone.
the PTT button to listen.
ss the programmed Emergency button to exit the cy mode.
o returns to the Home screen.
NAG.book Page 37 Tuesday, October 19, 2010 11:32 AM
3 When an Emergency Alarm acknowledgment is received, the Emergency Acknowledgment Tone sounds and the LED blinks green. The display shows Emergency Alarm Successful.ORIf your radio does not receive an Emergency Alarm acknowledgment, and after all retries have been exhausted, a tone sounds and the display shows Emergency Alarm Failed.
4 Radio exits the Emergency Alarm mode and returns to the Home screen.
If your radio is set to Silent, it will not have any audio or visual indicators related to the Emergency feature.
Sending an Emergency Alarm with CallThis feature allows you to send an Emergency Alarm to another radio. Upon acknowledgment, both radios can communicate over a programmed Emergency channel.
Procedure:
1 Press the programmed Emergency button.
2 The dispLED lighon the Hsounds u
3 When anthe Emeblinks grSuccess
4 Hold theyour mo
5 Press PTEmergengreen anscreen d
6 Wait for clearly in
7 Release
8 Long preEmergen
9 The radi

E
38
If your radio is set to Silent, it will not have any audio or visual NOTE: If you press the PTT button during hot mic, and ue to press it after the hot mic duration expires, dio continues to transmit until you release the utton.
rogrammed Emergency button.
y shows Sending Alarm. The LED lights up solid the Emergency icon is displayed.
isplay shows Emergency Alarm Successful, rly into the microphone. When hot mic has been e radio automatically transmits without a PTT
the hot mic duration expires.
mitting, the LED lights up solid green and the y icon appears on the display.
ot mic duration expires, the radio automatically mitting. To transmit again, press the PTT button.
NAG.book Page 38 Tuesday, October 19, 2010 11:32 AM
Adv
ance
d Fe
atur
es
nglish
indicators related to the Emergency feature, or receive any response (call) from the target radio, until you press the PTT button to initiate the call.
If your radio is set to Silent with Voice, it will not have any audio or visual indicators related to the Emergency feature, or when you are receiving a call from the target radio. The indicators will only appear once you press the PTT button to initiate, or respond to, the call.
Sending an Emergency Alarm with Voice to FollowThis feature allows you to send an Emergency Alarm to another radio. Upon acknowledgment, your radio’s microphone is automatically activated, allowing you to communicate with the other radio without pressing the PTT button.
This activated microphone state is also known as “hot mic”.
If you press the PTT button during the programmed hot mic transmission period, the radio ignores the PTT press and remains in Emergency mode.
continthe raPTT b
Procedure:
1 Press the p
2 The displagreen and
3 Once the dspeak cleaenabled, thpress until
4 While transEmergenc
5 Once the hstops trans

Advanced Features
English
39
ting an Emergency Modeo instances where this can happen:
ge the channel while the radio is in Emergency is exits the Emergency mode. If Emergency Alarm is n this new channel, the radio reinitiates Emergency. ncy is not supported on this new channel, the radio o Emergency.
the programmed Emergency button during an y initiation/transmission state. This causes the
xit this state, and to reinitiate Emergency.
Emergency Modexits Emergency mode when ONE of the following
y Alarm acknowledgment is receivedgency Alarm only), OR
to send the alarm have been exhaustedgency Alarm only), OR
ammed Emergency button is long pressed.
our radio is powered off, it exits the Emergency de. The radio will not reinitiate the Emergency mode omatically when it is turned on again.
NAG.book Page 39 Tuesday, October 19, 2010 11:32 AM
If your radio is set to Silent, it will not have any audio or visual indicators related to the Emergency feature, or receive any response from the target radio, until the programmed hot mic transmission period is over, and you press the PTT button.
If your radio is set to Silent with Voice, it will not have any audio or visual indicators related to the Emergency feature when you are making the call with hot mic, or when the target radio responds after the programmed hot mic transmission period is over. The indicators will only appear when you press the PTT button.
NOTE: If the Emergency Alarm request fails, the radio returns to the Home screen.
ReinitiaThere are tw
• You chanmode. Thenabled oIf Emergedisplays N
• You pressEmergencradio to e
ExitingYour radio eoccurs:
• Emergenc(for Emer
• All retries(for Emer
• The progr
NOTE: If ymoaut

E
40
g System Controls
s a trunking only feature.
Failsoft Systemstem ensures continuous radio communications ed system failure. If a trunking system fails radio goes into failsoft operation and
switches to its failsoft channel.
oft operation, your radio transmits and receives ional operation on a predetermined frequency.
pitched tone sounds every 10 seconds and the ws Failsoft, which alternates with the alias.
king system returns to normal operation, your ically leaves failsoft operation and returns to tion.
NAG.book Page 40 Tuesday, October 19, 2010 11:32 AM
Adv
ance
d Fe
atur
es
nglish
Dual-Tone Multi Frequency (DTMF)
The Dual-Tone Multi Frequency (DTMF) feature allows the radio to operate in a radio system with an interface to telephone systems.
Procedure:
To initiate a DTMF call.
1 Press and hold the PTT button.
2 Enter the desired number.
You can turn off the DTMF tone by disabling all radio tones and alerts (see Turning the Radio Tones/Alerts On or Off on page 45).
Trunkin
NOTE: This i
Using theThe failsoft syduring a trunkcompletely, theautomatically
Procedure:
1 During failsin convent
2 A medium-display shopersonality
When the trunradio automattrunked opera

Advanced Features
English
41
and Unlocking a Site allows your radio to lock onto a specific site and not wide-area talkgroup sites. This feature should be ution, since it inhibits roaming to another site in a
ystem.
programmed Site Lock/Unlock button to toggle the tween locked and unlocked.
rocedure below.
access the menu.
to Utilities and press N to select.
to Radio Settings and press N to select.
to Site Lock and press N to select.
Turn On if the site is currently in unlocked state.
Turn Off if the site is currently in locked state.
to select.
lay shows Site Locked.
lay shows Site Unlocked.
NAG.book Page 41 Tuesday, October 19, 2010 11:32 AM
Going Out of RangeWhen your radio goes out of the range of the system, it can no longer lock onto a control channel.
Procedure:
1 A low-pitched tone sounds.AND/ORThe display shows the currently selected channel combination and Out of Range.
2 Your radio remains in this out-of-range condition until:It locks onto a control channel.ORIt locks onto a failsoft channel.ORIt is turned off.
Using the Site Trunking FeatureIf the zone controller loses communication with any site, that site reverts to site trunking.
The display shows the currently selected channel combination and Site Trunking.
NOTE: When this occurs, you can communicate only with other radios within your trunking site.
LockingThis featureroam amongused with cawide-area s
Procedure:
Use the prelock state be
OR
Follow the p
1 S to
2 Por Q
3 Por Q
4 Por Q
5 You seeORYou see
6 Press N
7 The dispORThe disp

E
42
8 The radio saves the new site lock state and returns to the the Current Site
reprogrammed Site Search button (it could be or long press based on the configuration of the
able button).
nds and the display momentarily shows Scanning
radio finds a new site, it returns to the Home
NAG.book Page 42 Tuesday, October 19, 2010 11:32 AM
Adv
ance
d Fe
atur
es
nglish
Home screen.
Viewing and Changing a SiteThis feature allows you to view the number of the current site or force your radio to change to a new one.
Viewing and Changing a SiteProcedure:
1 Press the preprogrammed Site Display button (it could be short press or long press based on the configuration of the programmable button).
2 The display momentarily shows the name of the current site and its corresponding received signal strength indicator (RSSI).
ChangingProcedure:
1 Press the pshort pressprogramm
2 A tone sousite.
3 When the screen.

Advanced Features
English
43
Keypad Tones On or Offble and disable keypad tones if needed.
access the menu.
to Utilities and press N to select.
to Radio Settings and press N to select.
to Tones/Alerts and press N to select.
to Keypad Tones and press N to select.
lay shows Turn On. Press N to enable keypad he display shows Keypad Tone On.
lay shows Turn Off. Press N to disable keypad he display shows Keypad Tone Off.
NAG.book Page 43 Tuesday, October 19, 2010 11:32 AM
Utilities
Locking and Unlocking the KeypadYou can lock your radio’s keypad to avoid inadvertent key entry.
Procedure:
1 S to access the menu.
2 Por Q to Utilities and press N to select.
3 Por Q to Radio Settings and press N to select.
4 Por Q to Keypad Lock and press N to select.
5 The display shows Keypad Locked and returns to the Home screen.
6 To unlock the keypad, press S followed by *.
7 The display shows Keypad Unlocked and returns to the Home screen.
TurningYou can ena
Procedure:
1 S to
2 Por Q
3 Por Q
4 Por Q
5 Por Q
6 The disptones. TORThe disptones. T

E
44
g the Display Backlighte or disable the radio’s display backlight as etting also affects the Menu Navigation Buttons cklighting accordingly.
rammed Backlight button to toggle the backlight
cedure below.
cess the menu.
to Utilities and press N to select.
to Radio Settings and press N to select.
to Backlight and press N to select.
y shows Auto On. Press N to enable the cklight. The display shows Backlight Auto On.
y shows Turn Off. Press N to disable the klight. The display shows Backlight Turn Off.
cklight and keypad backlighting are automatically LED indicator is disabled (see Turning the LED
or Off on page 46).
NAG.book Page 44 Tuesday, October 19, 2010 11:32 AM
Adv
ance
d Fe
atur
es
nglish
Setting the Squelch Level
NOTE: This is a conventional only feature.
You can adjust your radio's squelch level to filter out unwanted calls with low signal strength or channels that have a higher than normal background noise.
Settings: Normal is the default. Tight filters out (unwanted) calls and/or background noise. However, calls from remote locations may also be filtered out.
Procedure:
Press the programmed Squelch button to toggle squelch level between normal and tight.
OR
Follow the procedure below.
1 S to access the menu.
2 Por Q to Utilities and press N to select.
3 Por Q to Radio Settings and press N to select.
4 Por Q to Squelch and press N to select.
5 Choose either Tight or Normal and press N to select.
6 Screen returns to the previous menu.
ControllinYou can enablneeded. The sand keypad ba
Procedure:
Press the progsettings.
OR
Follow the pro
1 S to ac
2 Por Q
3 Por Q
4 Por Q
5 The displadisplay baORThe displadisplay bac
The display baturned off if theIndicator On

Advanced Features
English
45
the Talk Permit Tone On or Offble and disable the Talk Permit Tone if needed.
access the menu.
to Utilities and press N to select.
to Radio Settings and press N to select.
to Tones/Alerts and press N to select.
to Talk Permit and press N to select.
lay shows Turn On. Press N to enable the Talk one. The display shows Talk Permit Tone On.
lay shows Turn Off. Press N to disable the Talk one. The display shows Talk Permit Tone Off.
NAG.book Page 45 Tuesday, October 19, 2010 11:32 AM
Turning the Radio Tones/Alerts On or OffYou can enable and disable all radio tones and alerts (except for the incoming Emergency alert tone) if needed.
Procedure:
Press the programmed All Tones/Alerts button to toggle all tones on or off.
OR
Follow the procedure below.
1 S to access the menu.
2 Por Q to Utilities and press N to select.
3 Por Q to Radio Settings and press N to select.
4 Por Q to Tones/Alerts and press N to select.
5 Por Q to All Tones and press N to select.
6 The display shows Turn On. Press N to enable all tones and alerts. The display shows All Tones On.ORThe display shows Turn Off. Press N to disable all tones and alerts. The display shows All Tones Off.
TurningYou can ena
Procedure:
1 S to
2 Por Q
3 Por Q
4 Por Q
5 Por Q
6 The dispPermit TORThe dispPermit T

E
46
he Introduction Screen On or Offe and disable the Introduction Screen if needed.
cess the menu.
to Utilities and press N to select.
to Radio Settings and press N to select.
to Intro Screen and press N to select.
y shows Turn On. Press N to enable the n Screen. The display shows Intro Screen On.
y shows Turn Off. Press N to disable the n Screen. The display shows Intro Screen
NAG.book Page 46 Tuesday, October 19, 2010 11:32 AM
Adv
ance
d Fe
atur
es
nglish
Turning the LED Indicator On or OffYou can enable and disable the LED Indicator if needed.
Procedure:
1 S to access the menu.
2 Por Q to Utilities and press N to select.
3 Por Q to Radio Settings and press N to select.
4 Por Q to LED Indicator and press N to select.
5 The display shows Turn On. Press N to enable the LED Indicator. The display shows All LEDs On.ORThe display shows Turn Off. Press N to disable the LED Indicator. The display shows All LEDs Off.
The display backlight, buttons, and keypad backlighting are automatically turned off if the LED indicator is disabled (see Controlling the Display Backlight on page 44).
Turning tYou can enabl
Procedure:
1 S to ac
2 Por Q
3 Por Q
4 Por Q
5 The displaIntroductioORThe displaIntroductioOff.

Advanced Features
English
47
lay shows the battery information.
RES batteries ONLY: The display reads tion Battery if the battery requires
ioning in an IMPRES charger. reconditioning process, the display then shows the nformation.
batteries ONLY:
r Q to access the Remaining Capacity, First vice Life option screen:
maining Capacity to view battery capacity level, by a horizontal bar and percentage reading.
rst Used to view the date when battery is first
rvice Life to view the potential and current f the battery.
NAG.book Page 47 Tuesday, October 19, 2010 11:32 AM
Accessing General Radio InformationYour radio contains information on the following:
• Battery
• Radio ID
• Software Version
• Codeplug Version
NOTE: Press R at any time to return to the previous screen or long press R to return to the Home screen.
Accessing the Battery InformationDisplays information on your radio battery.
Procedure:
1 S to access the menu.
2 Por Q to Utilities and press N to select.
3 Por Q to Radio Info and press N to select.
4 Por Q to Battery Info and press N to select.
5 The dispORFor IMPRecondireconditAfter thebattery i
For IMPRES
Press PoUsed, or Ser
• Select Reindicated
• Select Fiused.
• Select Secapacity o

E
48
3 Por Q to Radio Info and press N to select.
to Firmware Ver. and press N to select.
y shows the current firmware version.
the Codeplug Version
odeplug version on your radio.
cess the menu.
to Utilities and press N to select.
to Radio Info and press N to select.
to CP Ver. and press N to select.
y shows the current codeplug version.
NAG.book Page 48 Tuesday, October 19, 2010 11:32 AM
Adv
ance
d Fe
atur
es
nglish
Checking the Radio ID
NOTE: This is a trunking only feature.
Displays the ID of your radio.
Procedure:
1 S to access the menu.
2 Por Q to Utilities and press N to select.
3 Por Q to Radio Info and press N to select.
4 Por Q to My Number and press N to select.
5 The display shows the radio ID.
Checking the Firmware Version
Displays the firmware version on your radio.
Procedure:
1 S to access the menu.
2 Por Q to Utilities and press N to select.
4 Por Q
5 The displa
Checking
Displays the c
Procedure:
1 S to ac
2 Por Q
3 Por Q
4 Por Q
5 The displa
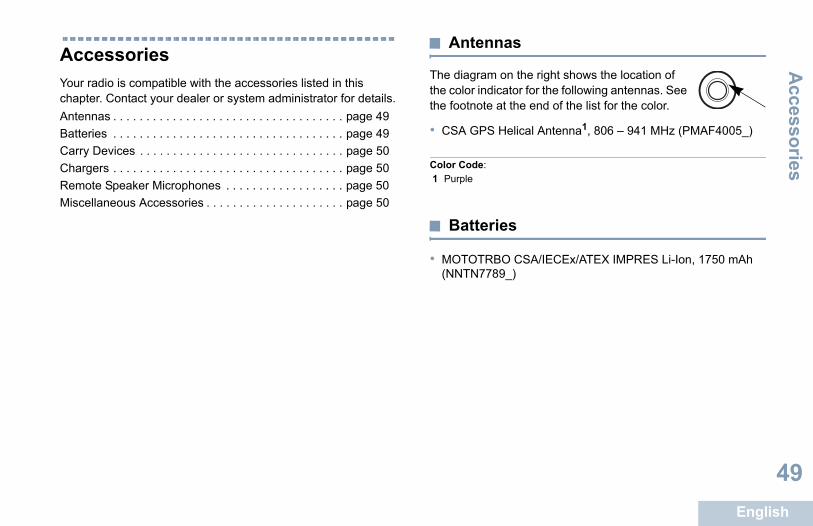
Accessories
English
49
nas
on the right shows the location of icator for the following antennas. See at the end of the list for the color.
Helical Antenna1, 806 – 941 MHz (PMAF4005_)
ies
BO CSA/IECEx/ATEX IMPRES Li-Ion, 1750 mAh 89_)
NAG.book Page 49 Tuesday, October 19, 2010 11:32 AM
AccessoriesYour radio is compatible with the accessories listed in this chapter. Contact your dealer or system administrator for details.Antennas . . . . . . . . . . . . . . . . . . . . . . . . . . . . . . . . . . . page 49Batteries . . . . . . . . . . . . . . . . . . . . . . . . . . . . . . . . . . . page 49Carry Devices . . . . . . . . . . . . . . . . . . . . . . . . . . . . . . . page 50Chargers . . . . . . . . . . . . . . . . . . . . . . . . . . . . . . . . . . . page 50Remote Speaker Microphones . . . . . . . . . . . . . . . . . . page 50Miscellaneous Accessories . . . . . . . . . . . . . . . . . . . . . page 50
Anten
The diagramthe color indthe footnote
• CSA GPS
Color Code:
Batter
• MOTOTR(NNTN77
1 Purple

E
50
Speaker Microphones
EX CSA Remote Speaker Microphone _)
neous Accessories
onnector Dust Cover for MOTOTRBO ATEX CSA _)
NAG.book Page 50 Tuesday, October 19, 2010 11:32 AM
Acc
esso
ries
nglish
Carry Devices
• Hard Leather Carry Case with 3-Inch Swivel Belt Loop for Display Radio (PMLN5606_)
• Soft Leather Carry Case with 3-Inch Swivel Belt Loop for Display Radio (PMLN5607_)
• 2.5-Inch Swivel Belt Loop (For Use with PMLN5606_ and PMLN5607_) (PMLN5610_)
• 3-Inch Replacement Swivel Belt Loop (PMLN5611_)
• ATEX CSA Belt Clip for 2.5-Inch Belt Width (PMLN5134_)
Chargers
• IMPRES Multi-Unit Charger (WPLN4211_)
• IMPRES Multi-Unit Charger with Display (WPLN4218_)
• IMPRES Single-Unit Charger (WPLN4226_)
Remote
• IMPRES AT(PMMN4067
Miscella
• Universal C(PMLN5649

Batteries and C
hargers Warranty
English
51
ity Warranty warranty guarantees 80% of the rated capacity for the ation.
O CSA/IECEx/ATEX Lithium-Ion atteries 18 Months
NAG.book Page 51 Tuesday, October 19, 2010 11:32 AM
Batteries and Chargers Warranty
The Workmanship Warranty The workmanship warranty guarantees against defects in workmanship under normal use and service.
The CapacThe capacitywarranty dur
All MOTOTRBO Batteries Two (2) Years
IMPRES Chargers (Single-Unit and Multi-Unit, Non-Display) Two (2) Years
IMPRES Chargers (Multi-Unit with Display) One (1) Year
MOTOTRBIMPRES B

E
52
obligations or liability for additions or modifications to this warranty writing and signed by an officer of MOTOROLA.
a separate agreement between MOTOROLA and user purchaser, MOTOROLA does not warrant the intenance or service of the Product.
annot be responsible in any way for any ancillary furnished by MOTOROLA which is attached to or tion with the Product, or for operation of the Product ry equipment, and all such equipment is expressly this warranty. Because each system which may use nique, MOTOROLA disclaims liability for range, eration of the system as a whole under this
PROVISIONS:ets forth the full extent of MOTOROLA'S regarding the Product. Repair, replacement or rchase price, at MOTOROLA’s option, is the
dy. THIS WARRANTY IS GIVEN IN LIEU OF ALL ESS WARRANTIES. IMPLIED WARRANTIES, ITHOUT LIMITATION, IMPLIED WARRANTIES OF ILITY AND FITNESS FOR A PARTICULAR E LIMITED TO THE DURATION OF THIS LIMITED NO EVENT SHALL MOTOROLA BE LIABLE FOR
EXCESS OF THE PURCHASE PRICE OF THE R ANY LOSS OF USE, LOSS OF TIME, CE, COMMERCIAL LOSS, LOST PROFITS OR THER INCIDENTAL, SPECIAL OR IAL DAMAGES ARISING OUT OF THE USE OR
NAG.book Page 52 Tuesday, October 19, 2010 11:32 AM
Lim
ited
War
rant
y
nglish
Limited Warranty
MOTOROLA COMMUNICATION PRODUCTS
I. WHAT THIS WARRANTY COVERS AND FOR HOW LONG:
MOTOROLA INC. (“MOTOROLA”) warrants the MOTOROLA manufactured Communication Products listed below (“Product”) against defects in material and workmanship under normal use and service for a period of time from the date of purchase as scheduled below:
MOTOROLA, at its option, will at no charge either repair the Product (with new or reconditioned parts), replace it (with a new or reconditioned Product), or refund the purchase price of the Product during the warranty period provided it is returned in accordance with the terms of this warranty. Replaced parts or boards are warranted for the balance of the original applicable warranty period. All replaced parts of Product shall become the property of MOTOROLA.
This express limited warranty is extended by MOTOROLA to the original end user purchaser only and is not assignable or transferable to any other party. This is the complete warranty for the Product manufactured by MOTOROLA. MOTOROLA assumes no
unless made in
Unless made inthe original endinstallation, ma
MOTOROLA cequipment not used in connecwith any ancillaexcluded from the Product is ucoverage, or opwarranty.
II. GENERALThis warranty sresponsibilitiesrefund of the puexclusive remeOTHER EXPRINCLUDING WMERCHANTABPURPOSE, ARWARRANTY. INDAMAGES IN PRODUCT, FOINCONVENIENSAVINGS OR OCONSEQUENT
XPR IS Series Portable Radios Two (2) Years
Product Accessories (Excluding Batteries and Chargers) One (1) Year

Limited W
arranty
English
53
damage from improper testing, operation, ce, installation, alteration, modification, or adjustment.
or damage to antennas unless caused directly by material workmanship. subjected to unauthorized Product modifications, les or repairs (including, without limitation, the addition
duct of non-MOTOROLA supplied equipment) which affect performance of the Product or interfere with LA's normal warranty inspection and testing of the verify any warranty claim.hich has had the serial number removed or made
able batteries if:the seals on the battery enclosure of cells are broken vidence of tampering.
age or defect is caused by charging or using the quipment or service other than the Product for which it
d.sts to the repair depot. which, due to illegal or unauthorized alteration of the irmware in the Product, does not function in e with MOTOROLA’s published specifications or the ication labeling in effect for the Product at the time the as initially distributed from MOTOROLA. or other cosmetic damage to Product surfaces that ffect the operation of the Product.d customary wear and tear.
NAG.book Page 53 Tuesday, October 19, 2010 11:32 AM
INABILITY TO USE SUCH PRODUCT, TO THE FULL EXTENT SUCH MAY BE DISCLAIMED BY LAW.
III. STATE LAW RIGHTS:SOME STATES DO NOT ALLOW THE EXCLUSION OR LIMITATION OF INCIDENTAL OR CONSEQUENTIAL DAMAGES OR LIMITATION ON HOW LONG AN IMPLIED WARRANTY LASTS, SO THE ABOVE LIMITATION OR EXCLUSIONS MAY NOT APPLY.
This warranty gives specific legal rights, and there may be other rights which may vary from state to state.
IV. HOW TO GET WARRANTY SERVICE:You must provide proof of purchase (bearing the date of purchase and Product item serial number) in order to receive warranty service and, also, deliver or send the Product item, transportation and insurance prepaid, to an authorized warranty service location. Warranty service will be provided by MOTOROLA through one of its authorized warranty service locations. If you first contact the company which sold you the Product (e.g., dealer or communication service provider), it can facilitate your obtaining warranty service. You can also call MOTOROLA at 1-800-927-2744 US/Canada.
V. WHAT THIS WARRANTY DOES NOT COVER:A) Defects or damage resulting from use of the Product in other
than its normal and customary manner.B) Defects or damage from misuse, accident, water, or neglect.
C)Defects ormaintenan
D)Breakagedefects in
E) A Productdisassembto the ProadverselyMOTOROProduct to
F) Product willegible.
G)Recharge(1) any of or show e(2) the dambattery in eis specifie
H)Freight coI) A Product
software/faccordancFCC certifProduct w
J) Scratchesdoes not a
K) Normal an

E
54
VI. PATENT AND SOFTWARE PROVISIONS: with respect to infringement of patents by the Product or any parts
ited States and other countries preserve for ertain exclusive rights for copyrighted MOTOROLA s the exclusive rights to reproduce in copies and s of such MOTOROLA software. MOTOROLA e used in only the Product in which the software was died and such software in such Product may not be d, distributed, modified in any way, or used to rivative thereof. No other use including, without tion, modification, reproduction, distribution, or
ering of such MOTOROLA software or exercise of OTOROLA software is permitted. No license is
lication, estoppel or otherwise under MOTOROLA copyrights.
ING LAW:s governed by the laws of the State of Illinois, U.S.A.
afety and regulatory compliance of the XPR 6580 ust be repaired only at Motorola service facilities. torola at 800-422-4210 for the address and contact our nearest service center.
NAG.book Page 54 Tuesday, October 19, 2010 11:32 AM
Lim
ited
War
rant
y
nglish
MOTOROLA will defend, at its own expense, any suit brought against the end user purchaser to the extent that it is based on a claim that the Product or parts infringe a United States patent, and MOTOROLA will pay those costs and damages finally awarded against the end user purchaser in any such suit which are attributable to any such claim, but such defense and payments are conditioned on the following:A) that MOTOROLA will be notified promptly in writing by such
purchaser of any notice of such claim;B) that MOTOROLA will have sole control of the defense of such
suit and all negotiations for its settlement or compromise; andC)should the Product or parts become, or in MOTOROLA’s opinion
be likely to become, the subject of a claim of infringement of a United States patent, that such purchaser will permit MOTOROLA, at its option and expense, either to procure for such purchaser the right to continue using the Product or parts or to replace or modify the same so that it becomes non-infringing or to grant such purchaser a credit for the Product or parts as depreciated and accept its return. The depreciation will be an equal amount per year over the lifetime of the Product or parts as established by MOTOROLA.
MOTOROLA will have no liability with respect to any claim of patent infringement which is based upon the combination of the Product or parts furnished hereunder with software, apparatus or devices not furnished by MOTOROLA, nor will MOTOROLA have any liability for the use of ancillary equipment or software not furnished by MOTOROLA which is attached to or used in connection with the Product. The foregoing states the entire liability of MOTOROLA
thereof.
Laws in the UnMOTOROLA csoftware such adistribute copiesoftware may boriginally emboreplaced, copieproduce any delimitation, alterareverse enginerights in such Mgranted by imppatent rights or
VII. GOVERNThis Warranty i
To assure the sIS, the radio mPlease call Moinformation of y


*68009410001*68009410001-A
Motorola, Inc. 1301 E. Algonquin Rd. Schaumburg, IL 60196-1078, U.S.A.
MOTOROLA and the Stylized M Logo are registered in the U.S. Patent and Trademark Office. All other product or service names are the property of their respective owners. © 2010 by Motorola, Inc. All rights reserved. Printed in the U.S.A. August 2010
www.motorola.com/mototrbo