phpmyedit 5.7 - platon technologiesopensource.platon.sk/projects/phpmyedit/doc/pdf/phpmyedit.pdf ·...
TRANSCRIPT

phpMyEdit 5.7.1
instant MySQL table editor and code generator
Ondrej Jombik
Doug Hockinson

phpMyEdit 5.7.1: instant MySQL table editor and code generatorby Ondrej Jombik and Doug Hockinson
Copyright © 2002, 2003, 2004, 2005, 2006 Platon Group (http://platon.sk/)

Table of Contents1. Introduction............................................................................................................................................1
1.1. Overview .....................................................................................................................................11.2. Features .......................................................................................................................................11.3. Requirements ..............................................................................................................................1
2. Installation..............................................................................................................................................22.1. Getting started .............................................................................................................................22.2. Table selection.............................................................................................................................22.3. ID selection .................................................................................................................................22.4. Result script.................................................................................................................................3
3. General options ......................................................................................................................................43.1. Database connection ...................................................................................................................43.2. Unique key ..................................................................................................................................43.3. Common options .........................................................................................................................53.4. Permission options ......................................................................................................................83.5. Sorting.........................................................................................................................................93.6. Navigation ...................................................................................................................................93.7. Filters ........................................................................................................................................123.8. Triggers .....................................................................................................................................133.9. Logging user actions .................................................................................................................173.10. Languages ...............................................................................................................................183.11. CGI variables ..........................................................................................................................193.12. Javascript and DHTML...........................................................................................................203.13. CSS classes policy...................................................................................................................21
4. Fields options........................................................................................................................................234.1. Definition overview...................................................................................................................234.2. Basic options .............................................................................................................................234.3. Booleans....................................................................................................................................264.4. JavaScript validation .................................................................................................................274.5. Input restrictions .......................................................................................................................284.6. Output control ...........................................................................................................................314.7. URL linking ..............................................................................................................................344.8. SQL expressions........................................................................................................................364.9. PHP expressions........................................................................................................................374.10. TABs feature ...........................................................................................................................374.11. Options variability...................................................................................................................39
5. Extensions.............................................................................................................................................415.1. Overview ...................................................................................................................................415.2. phpMyEdit-slide........................................................................................................................415.3. phpMyEdit-report......................................................................................................................425.4. phpMyEdit-htmlarea .................................................................................................................425.5. phpMyEdit-calpopup ................................................................................................................445.6. phpMyEdit-mce-cal ..................................................................................................................46
iii

6. Hints & tips ..........................................................................................................................................476.1. Overview ...................................................................................................................................476.2. Handling national characters.....................................................................................................476.3. Data removal protection ............................................................................................................476.4. Integration into other systems ...................................................................................................48
7. Other information................................................................................................................................507.1. Authors and homepage..............................................................................................................507.2. License ......................................................................................................................................50
7.2.1. Open Source License....................................................................................................517.2.2. Commercial License.....................................................................................................51
7.3. Support and feedback................................................................................................................517.4. CVS access................................................................................................................................52
iv

List of Examples3-1. Database connection options ................................................................................................................43-2. Supplying allocated connection............................................................................................................43-3. Unique key definition ...........................................................................................................................53-4. Unique key type definition ...................................................................................................................53-5. Setting up the page name......................................................................................................................63-6. Displayed records .................................................................................................................................63-7. Multiple selections option ....................................................................................................................63-8. Special page elements ..........................................................................................................................73-9. Images URL .........................................................................................................................................73-10. Turning off default execution .............................................................................................................83-11. Full permissions .................................................................................................................................83-12. Full permissions without delete..........................................................................................................83-13. Read only permissions........................................................................................................................83-14. Sort field option ..................................................................................................................................93-15. Multiple sort fields..............................................................................................................................93-16. Navigation possibilities ....................................................................................................................103-17. Default buttons .................................................................................................................................113-18. Custom buttons.................................................................................................................................123-19. Buttons with large number of pages.................................................................................................123-20. Filter examples .................................................................................................................................123-21. Select triggers ...................................................................................................................................153-22. Insert triggers....................................................................................................................................153-23. Update triggers .................................................................................................................................153-24. Delete triggers ..................................................................................................................................153-25. Chained update before triggers.........................................................................................................173-26. Logging ............................................................................................................................................173-27. Log table schema..............................................................................................................................173-28. Languages selection .........................................................................................................................183-29. CGI variables appending ..................................................................................................................193-30. CGI variables overwriting ................................................................................................................193-31. Persistent CGI variables ...................................................................................................................203-32. Custom prefix for operation links.....................................................................................................203-33. Custom name prefix for CGI variables.............................................................................................203-34. Custom name prefix for JS and DHTML .........................................................................................213-35. CSS class name schema ...................................................................................................................213-36. CSS class name examples ................................................................................................................224-1. Basic field definition...........................................................................................................................234-2. Field name examples ..........................................................................................................................244-3. Field guidance ....................................................................................................................................244-4. Field guidance hyperlink ....................................................................................................................244-5. Filter selections...................................................................................................................................254-6. Field display options ..........................................................................................................................254-7. Other display options..........................................................................................................................264-8. Field CSS customization ....................................................................................................................264-9. Field sorting........................................................................................................................................264-10. Stripping tags....................................................................................................................................27
v

4-11. Field escaping...................................................................................................................................274-12. Required fields..................................................................................................................................274-13. Regular expression example.............................................................................................................284-14. JavaScript hint ..................................................................................................................................284-15. Simple input restriction ....................................................................................................................294-16. Table lookup restriction....................................................................................................................294-17. Advanced table lookup .....................................................................................................................294-18. Complex table lookup example ........................................................................................................304-19. Input restriction using additional values...........................................................................................304-20. Table lookup with advanced joining.................................................................................................314-21. Cell attribute example.......................................................................................................................314-22. Input field size ..................................................................................................................................324-23. Field sizes .........................................................................................................................................324-24. Textarea field height & width ...........................................................................................................324-25. Character length limit .......................................................................................................................334-26. Wrapping ..........................................................................................................................................334-27. Print mask field definition ................................................................................................................334-28. Date mask field definitions ...............................................................................................................344-29. Number format example...................................................................................................................344-30. Simple URL examples......................................................................................................................354-31. URL target example .........................................................................................................................354-32. URL display example .......................................................................................................................354-33. URL prefix and postfix .....................................................................................................................354-34. Read SQL expressions......................................................................................................................364-35. Write SQL expressions.....................................................................................................................364-36. Storing NULL instead of empty string...............................................................................................374-37. Storing password’s MD5 hash..........................................................................................................374-38. PHP execution file ............................................................................................................................374-39. TAB definition ..................................................................................................................................384-40. Default TAB definition .....................................................................................................................384-41. Display options below the first TAB ................................................................................................384-42. Turning TAB feature off ...................................................................................................................394-43. Init without options variability .........................................................................................................394-44. Init with options variability ..............................................................................................................395-1. htmlArea extension enabling..............................................................................................................435-2. htmlArea field enabling ......................................................................................................................435-3. CalPopup javascript............................................................................................................................445-4. CalPopup javascript............................................................................................................................445-5. CalPopup extension enabling .............................................................................................................445-6. CalPopup field enabling .....................................................................................................................455-7. CalPopup advanced field ....................................................................................................................456-1. Charset defined with META tag .........................................................................................................476-2. Charset defined with HTTP header ....................................................................................................476-3. Non-deleted records listing ................................................................................................................486-4. Trigger for marking records as deleted ..............................................................................................486-5. phpMyEdit integrated into PHP-Nuke ...............................................................................................49
vi

Chapter 1. Introduction
1.1. Overview
How many times have you hand coded a MySQL table editor in PHP? phpMyEdit application providesan instant table editor.
phpMyEdit generates PHP code for displaying/editing MySQL tables in HTML. All you need to do is towrite a simple calling program (a utility to do this is included). It includes a huge set of tablemanipulation functions (record addition, change, view, copy, and removal), table sorting, filtering, tablelookups, and more.
1.2. Features
The most important features offered by phpMyEdit are:
• table manipulation code generation• record addition, change, view, copy and removal• table paging, sorting and filtering• lookups into other tables (1:M bindings)• permission configuration• multiple navigation style possibilities• output design control using CSS• logging user actions• multilanguage support• ability to extend base class
and many others.
1.3. Requirements
phpMyEdit requires web server (we recommend Apache), PHP interpreter without any special modulesand MySQL relational database management system.
Product is developed and tested using Apache 1.3.23, PHP 4.1.2 and MySQL 3.23.47 under LinuxMandrake 8.2. It should work well on the same or similar, but also some different configurations. Pleasenotify phpMyEdit developers in the event you encounter problems with program’s compatibilities orcapabilities.
1

Chapter 2. Installation
In this chapter are detailed installation notes written.
2.1. Getting started
phpMyEdit enables PHP scripters to quickly create forms used to interact with data stored in a MySQLdatabase table. The procedure described below will enable you to generate the calling script containingthe database logon and a variety of options. An included file phpMyEdit.class.php will latermanipulate MySQL records based on user options which are configurable in the calling script. Thecalling script essentially generates one form which facilitates actions that include add record, changerecord, copy record, view record, delete record, etc.
phpMyEdit is available for download from Platon.SK (http://platon.sk/projects/phpMyEdit/). Extract, orunzip, the program files to your computer’s hard disk. The download file includes icons and variouslanguage files which should be extracted into sub-folders below the file named phpMyEdit.class.php.
Important: Before uploading the program files to your server, make certain that your FTP client isnot configured to force filenames to lower case letters.
With the program files uploaded to your server, point your web browser to the file namedphpMyEditSetup.php. You will be prompted to enter your MySQL database logon (hostname,username, and password) and click the Submit button. The logon screen should resemble the picturebelow.
phpMyEdit logon screen
2.2. Table selection
After successfully logging on to a MySQL database, a list of MySQL tables will be displayed. Select atable and click the Submit button.
phpMyEdit table selection screen
2

Chapter 2. Installation
2.3. ID selection
After selecting a table, a list of its MySQL columns will be displayed. Select a column that is a uniquenumeric identifier. The unique numeric identifier is typically that column which is the uniqueauto-incremented record ID. Although non-numeric unique identifiers are also supported, werecommend you to use numeric one.
Below the list of column names you will find two input boxes containing a suggested Page Title andsuggested Base Filename. Either accept or change the content of the input boxes. An attempt will bemade to generate a script, write the script to the base filename, and then display the script in the webbrowser.
phpMyEdit ID selection screen
2.4. Result script
After clicking the Submit button, the script should appear in your web browser along with a messageindicating whether or not the attempted disk write was successful.
Depending on your system configuration, the script may or may not have been written to the directoryfrom which phpMyEditSetup.php was run. You will need to either open the file that was written todisk or else highlight and copy the script from the web browser and paste it into a blank document inyour text editor.
phpMyEdit result script screen
If the proposed Base Filename was "employees" and the disk write was successful, a file namedemployees.php would exist in the directory from which phpMyEditSetup.php was run.
If the disk write was NOT successful and you’ve pasted the script into your text editor, save the file in thesame directory which contains the phpMyEdit program files. Save the file with the .php extension.
Because HTML header and footer requirements vary between users, no header or footer is generated.Add or include appropriate HTML markup as necessary (e.g. <HTML><HEAD> [headers]</HEAD><BODY> [script] </BODY></HTML>). By default the table will be enclosed by <divclass="main"> ... </div> which offers a degree of formatting in terms of using CSS (cascading stylesheets).
Once the header and footer are in place, there are script configuration options that you should review andpossibly change.
3

Chapter 3. General options
Open the script in your text editor. No HTML header or footer is created, thus you may want to include aheader at the top of the script, and include a footer at the end of the script.
3.1. Database connection
Various options are configured near the top of the script, most notably the database logon. For securityreasons, you may want to copy/paste the logon options to a separate, included file.
MySQL logon options host name, user name, password, database, and table appear in the followingformat.
Example 3-1. Database connection options
$opts[’hn’] = ’localhost’;$opts[’un’] = ’username’;$opts[’pw’] = ’password’;$opts[’db’] = ’database’;$opts[’tb’] = ’table’;
Recommended usage is, that the first four options shown above should be moved to a separate, includedfile.
It is a rather common situation to use phpMyEdit inside larger project. To prevent phpMyEdit fromcreating an additional persistent database connection, supply the $opts[’dbh’] option. In the examplebelow, $your_project_db_handle represents a previously allocated MySQL database handle. When$opts[’dbh’] is specified, the first four options appearing above are ignored.
Example 3-2. Supplying allocated connection
$opts[’dbh’] = $your_project_db_handle;
4

Chapter 3. General options
3.2. Unique key
Assuming that ’id’ is the name of the MySQL column selected as the unique identifier whenphpMyEditSetup.php script was run, the key will appear in the script as:
Example 3-3. Unique key definition
// Name of field which is the unique key$opts[’key’] = ’id’;
Important: There were problems reported by phpMyEdit users regarding the usage of MySQLreserved word as an unique key name (the example for this is "key" name). Thus we recommendusing another name of unique key. Usage of "id" or "ID" names should be safe and good idea.
The column type for the unique numeric identifier should appear as:
Example 3-4. Unique key type definition
// Type of key field (int, real, string, date, etc.)$opts[’key_type’] = ’int’;
The argument ’int’ shown above indicates the column type is an integer. If the column type was a datethen ’date’ would appear above instead of ’int’. Other possible unique key types are ’real’ or ’string’.
Important: If you are using ’real’ key type and some problems with record manipulaton haveoccured, it is probably because your MySQL key datatype is ’float’. Comparsions with this datatype isa common problem in most computer languages (including SQL), because floating-point values arenot exact values. In most cases, changing the MySQL datatype from ’float’ to ’double’ and preserving’real’ as phpMyEdit key type should solve this problem.
For more information about this issue, read Solving Problems with No Matching Rows(http://www.mysql.com/doc/en/No_matching_rows.html) chapter in the MySQL manual (in version3.23.47 it was A.5.6).
5

Chapter 3. General options
3.3. Common options
Page name
The page name option defines the variable used for constructing page and form links. If not defined, thedefault value $PHP_SELF will be used.
Example 3-5. Setting up the page name
$opts[’page_name’] = ’index.php’;
Displayed records
This option controls the number of records displayed on the screen. Change the argument for$opts[’inc’] in order to specify the maximum number of rows to display at one time. The default is15 rows. To display all found records, specify a value of -1 (negative 1).
Example 3-6. Displayed records
$opts[’inc’] = 20; // list 20 records per page
$opts[’inc’] = -1; // list all found records
Multiple selections
This option affects the display of <SELECT MULTIPLE> boxes. If the MySQL column type is "set",the number of lines displayed on multiple selection filters is specified as:
Example 3-7. Multiple selections option
$opts[’multiple’] = ’4’; // default is 4
Setting $opts[’multiple’] to a large number may adversely affect the appearance of your form. Four(4) is the default.
6

Chapter 3. General options
Special page elements
There are some special page elements, that may be turned on or off by changing $opts[’display’]
array.
Setting the query or sort values to true will display the current query or sort order near the top of thetable. To display the execution time of the query below the table, change the time value from false totrue. Setting sort to true is very helpful in understanding how cumulative sorting takes place. Settingnum_pages or num_records to false will stop displaying corresponding values next to buttons. Thesevalues can be displayed also using $opts[’buttons’] configuration array.
To display these three page elements use:
Example 3-8. Special page elements
$opts[’display’] = array(’query’ => true,’sort’ => true,’time’ => true);
There is also one special $opts[’display’][’tabs’] variable, which generally controls the TABsfeature. For more information see TABs feature section.
Another special variable is $opts[’display’][’form’], which controls displaying <FORM> and</FORM> HTML tags. If this variable is not defined, its value is considered as true. By default, formtags are displayed.
Images URL
If graphic links are selected with navigation (for example by setting $opts[’navigation’] to ’GD’)then $opts[’url’] can be used to specify the folder containing images. The default image location isnormally one folder (or directory level) below the location of the phpMyEdit.class.php file.
Example 3-9. Images URL
$opts[’url’] = array(’images’ => ’images/’);
Other URLs for another elements may be added into this array in future.
7

Chapter 3. General options
Code execution
Since version 4.0, phpMyEdit automatically starts its execution. You can turn this feature off by setting:
Example 3-10. Turning off default execution
$opts[’execute’] = 0;
If variable $opts[’execute’] is not defined, its value is considered as 1.
3.4. Permission options
Commonly used options include:
A -- addC -- changeP -- copyV -- viewD -- deleteF -- filter (search)I -- initial sort suppressed
Table listing is always enabled, since all actions are executed from this screen. But it is possible to getspecific behaviours without table listing using appropriate phpMyEdit extension. See Extensions chapterfor more information.
Full privileges to manipulate records are configured as:
Example 3-11. Full permissions
$opts[’options’] = ’ACPVDF’;
To deny the user the ability to delete records use:
Example 3-12. Full permissions without delete
$opts[’options’] = ’ACPVF’;
To limit the user to view, sort, list, or filter records use this:
8

Chapter 3. General options
Example 3-13. Read only permissions
$opts[’options’] = ’VFL’;
In a multi-user environment, it would be wise to only provide the system administrator with the ability todelete records.
3.5. Sorting
phpMyEdit offers powerful default and/or additional sorting capabilities via $opts[’sort_field’]option. You can define the column name or column field number that you’d prefer to sort on when thescript is first loaded. To get descending sort order, prefix the column name or field number with dash (-)sign. Look at the following examples:
Example 3-14. Sort field option
$opts[’sort_field’] = ’company’; // sorting according company field$opts[’sort_field’] = 3; // sorting according 4th field$opts[’sort_field’] = ’-id’; // descending sorting according id field
Now, let’s assume you want to sort your table according to the ’company’ column, but in addition alsoaccording to the ’department’ column. So the default sort order should be by company first, thendepartment. For this purpose, you can set an array with column names and/or field numbers to$opts[’sort_field’] variable.
Example 3-15. Multiple sort fields
$opts[’sort_field’] = array(’company’, ’department’);
Also note that phpMyEdit’s sorting feature is cumulative. This means, that if default sort fields arespecified and the user selects (clicks) to sort by another column in table listing screen, the resultingscreen will be sorted by user selected column first and then by specified default sort fields. Next click onanother sort column will again force to sort table by selected column first. Previously selected fields ordefault ones will follow up in sorting sequence.
This feature enables selecting more than one sort field on the fly. To clear sort fields sequence and toinitialize the default one, click on Clear link in left upper corner. This link could be enabled by setting$opts[’display’][’sort’] to true. See Special page elements subsection for more information.We also recommend you to enable this option to see how this described sorting feature works.
9
Chapter 3. General options
3.6. Navigation
The style and location of navigational links is a combined setting. The generated form will have variousbuttons, such as Next, Prev, Save, Cancel, etc. Their location relative to the table can be changed.Button positions are:
U -- up / above tableD -- down / below table (default)
Button possitions should be combined with navigation styles. The style of navigational links may be text,buttons, or graphic images (icons):
B -- buttons (default)T -- text linksG -- graphic links
Possible combinations include:
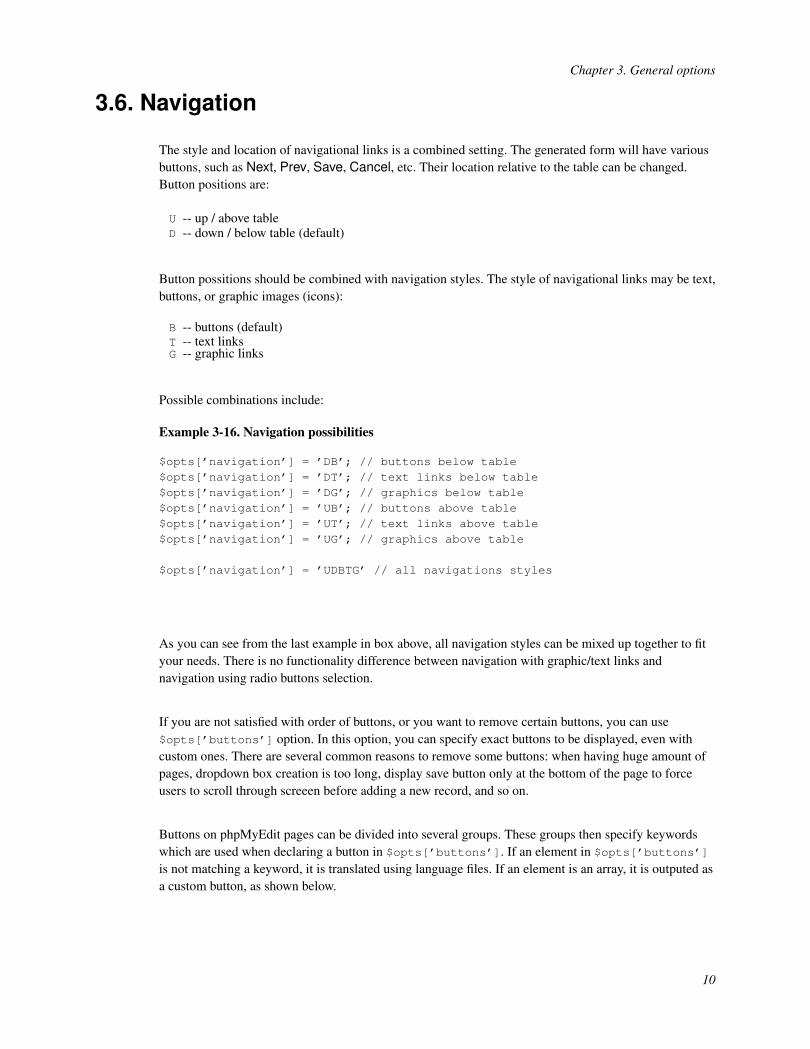
Example 3-16. Navigation possibilities
$opts[’navigation’] = ’DB’; // buttons below table$opts[’navigation’] = ’DT’; // text links below table$opts[’navigation’] = ’DG’; // graphics below table$opts[’navigation’] = ’UB’; // buttons above table$opts[’navigation’] = ’UT’; // text links above table$opts[’navigation’] = ’UG’; // graphics above table
$opts[’navigation’] = ’UDBTG’ // all navigations styles
As you can see from the last example in box above, all navigation styles can be mixed up together to fityour needs. There is no functionality difference between navigation with graphic/text links andnavigation using radio buttons selection.
If you are not satisfied with order of buttons, or you want to remove certain buttons, you can use$opts[’buttons’] option. In this option, you can specify exact buttons to be displayed, even withcustom ones. There are several common reasons to remove some buttons: when having huge amount ofpages, dropdown box creation is too long, display save button only at the bottom of the page to forceusers to scroll through screeen before adding a new record, and so on.
Buttons on phpMyEdit pages can be divided into several groups. These groups then specify keywordswhich are used when declaring a button in $opts[’buttons’]. If an element in $opts[’buttons’]
is not matching a keyword, it is translated using language files. If an element is an array, it is outputed asa custom button, as shown below.
10

Chapter 3. General options
navigation first, <<, prev, <, next, >, last, >>go to goto, goto_combo, goto_textoperation add, view, change, delete, copyconfirmation save, more, cancelstatistics current_page, total_pages, total_recs
Navigation and go to group can be used in list or filter mode to jump several pages ahead or back.Operation group moves user to another mode, namely one of ACPDV. Confirmation buttons are used toconfirm actions in ACPDV. While cancel is self explanatory, save and more might be confusing. Save isused to confirm action and return to L mode. More means confirming action and return to current mode.Save button is usually displayed as Save, however in D mode it is as Delete and in A mode as Add. Moreis displayed as either More or Apply. Keywords in the statistics group display numbers as their namessuggest.
Example 3-17. Default buttons
$opts[’buttons’][’L’][’up’] = array(’<<’,’<’,’add’,’view’,’change’,’copy’,’delete’,’>’,’>>’,’goto’,’goto_combo’);
$opts[’buttons’][’L’][’down’] = $opts[’buttons’][’L’][’up’];
$opts[’buttons’][’F’][’up’] = array(’<<’,’<’,’add’,’view’,’change’,’copy’,’delete’,’>’,’>>’,’goto’,’goto_combo’);
$opts[’buttons’][’F’][’down’] = $opts[’buttons’][’F’][’up’];
$opts[’buttons’][’A’][’up’] = array(’save’,’more’,’cancel’);$opts[’buttons’][’A’][’down’] = $opts[’buttons’][’A’][’up’];
$opts[’buttons’][’C’][’up’] = array(’save’,’more’,’cancel’);$opts[’buttons’][’C’][’down’] = $opts[’buttons’][’C’][’up’];
$opts[’buttons’][’P’][’up’] = array(’save’, ’cancel’);$opts[’buttons’][’P’][’down’] = $opts[’buttons’][’P’][’up’];
$opts[’buttons’][’D’][’up’] = array(’save’,’cancel’);$opts[’buttons’][’D’][’down’] = $opts[’buttons’][’D’][’up’];
$opts[’buttons’][’V’][’up’] = array(’change’,’cancel’);$opts[’buttons’][’V’][’down’] = $opts[’buttons’][’V’][’up’];
A button can be disabled for two reasons. A navigation button when there are no next or previous pagesor an operation button if certain operation is not permitted to the user. By default, all disabled buttons aredisplayed and marked as disabled. If you do not want to show disabled buttons at all, prepend ’-’ tokeyword. If you want a disabled button to show as enabled, prepend ’+’. This will allow users tosuccessfully push this button, however no meaningfull action will be taken.
next -- show next button and mark disabled if appropriate-next -- do not show next button if disabled
You may also specify custom buttons, which values can be used outside of phpMyEdit. The first way tospecify a custom button is to use phpMyEdit htmlSubmit method. In this way, value of this submit button
11
Chapter 3. General options
is translated using language files into user specified language. Possible configuration is name, value, cssclass name, java script and disabled.name -- name of the submit buttonvalue -- value of submit buttoncss -- css class namejs -- any other string place within button tags, mostly java scriptdisabled -- 1 button is disabled, 0 button is not disabled
Second way of declaring custom buttons, is to declare actuall html code of the button. Note that usingthis method, any html entity can be outputted.
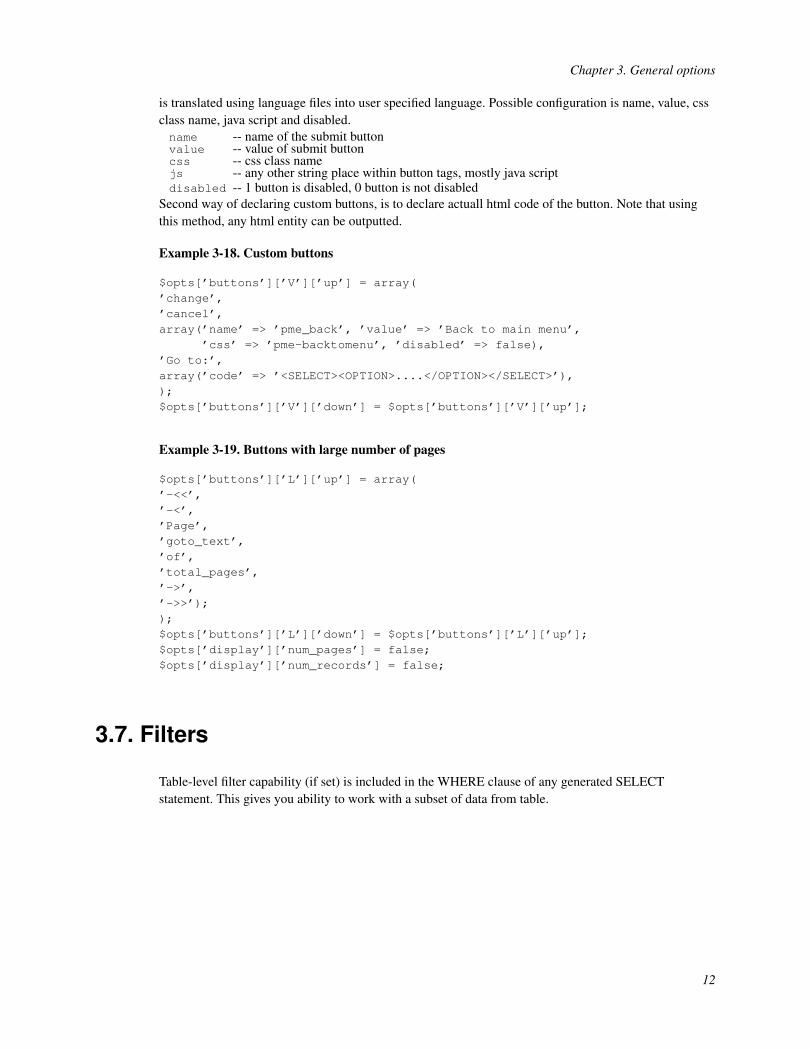
Example 3-18. Custom buttons
$opts[’buttons’][’V’][’up’] = array(’change’,’cancel’,array(’name’ => ’pme_back’, ’value’ => ’Back to main menu’,
’css’ => ’pme-backtomenu’, ’disabled’ => false),’Go to:’,array(’code’ => ’<SELECT><OPTION>....</OPTION></SELECT>’),);$opts[’buttons’][’V’][’down’] = $opts[’buttons’][’V’][’up’];
Example 3-19. Buttons with large number of pages
$opts[’buttons’][’L’][’up’] = array(’-<<’,’-<’,’Page’,’goto_text’,’of’,’total_pages’,’->’,’->>’););$opts[’buttons’][’L’][’down’] = $opts[’buttons’][’L’][’up’];$opts[’display’][’num_pages’] = false;$opts[’display’][’num_records’] = false;
3.7. Filters
Table-level filter capability (if set) is included in the WHERE clause of any generated SELECTstatement. This gives you ability to work with a subset of data from table.
12

Chapter 3. General options
Example 3-20. Filter examples
$opts[’filters’] = ’column1 like "%11%" AND column2 < 17’;
$opts[’filters’] = ’section_id = 9’;
$opts[’filters’] = ’PMEtable0.sessions_count > 200’;
You can also pass an array to this option. If you do so, than array items are put together with "AND"SQL statement.
When generating a query, phpMyEdit redefines/aliases the table names for easy accessing of particulartable fields in the main table and in the tables used in JOIN clauses as well. The main table name ischanged to PMEtable0, tables used in JOIN clauses have their name like PMEjoinN where N is JOINtable order.
We recommend that you look at the generated SQL queries in your MySQL log file in order to know howdatabase the table was aliased. Finally, the described approach is needed only if you are accessing a fieldname which occurs in more than one table of SQL query (thus MySQL cannot exactly determine what ismeant by "field_name").
For future development is planned an initialization like the following one.
$opts[’filters’] = array(’col_name_1’ => ’value_1’,’col_name_2’ => ’value_2’);
The main advantage of this approach will be that col_name_1 and col_name_2 fields are automaticallyconsidered as read-only on display record pages with pre-set value_1, value_2 and without the needto enter them manually.
3.8. Triggers
Triggers overview
Triggers provide advanced users with the ability to write their own PHP scripts for such things asvalidating user input, and to have their code executed at the appropriate time. Triggers are files that areincluded via an include() statement and conditionally executed by phpMyEdit.class.php. SQLtriggers are included before or after insert, update, or delete of record. FORM triggers are included beforedisplaying the form that will allow the corresponding operation, or after the user canceled this form.
13

Chapter 3. General options
• View form is related to the ’select’ operation.• Add and Copy forms are related to the ’insert’ operation• Edit form is related to the ’update’ operation.• Delete form is related to the ’delete’ operation.
For SQL triggers, the operation sequence is this: before, main, after. If any operation fails, not onlyshould the next operation(s) not be executed, but the previous ones are ’rolled back’ as if they neverhappened. If a database is not able to do this, it is not ’transaction-safe’.
Triggers are risky in basic MySQL as there is no native transaction support. It is not transaction-safe bydefault. There are transaction-safe table types in MySQL that can be conditionally built (seeMySQL-Max), but phpMyEdit is currently not set up to support real transactions. What that means isthat if an operation fails, the database may be left in an intermediate and invalid state.
The programmer must understand and accept these risks prior to using the phpMyEdit triggersmechanism. If the triggers are used, they execute within the namespace or scope of the phpMyEdit class.
Triggers must return true or false to indicate success or failure.
Triggers types
There are following types of phpMyEdit triggers:
• ’pre’ triggers are usually used to check conditions before displaying the operation’s page. Forexample, users may be allowed to View all records but can only Edit a subset of them. Another usageis to lock the record in order to avoid other users to start to change it at the same time.
• ’before’ triggers are usually used to verify conditions prior to executing the main operation. Forexample, they can be of some use for input validation.
• ’after’ triggers are usually used to perform follow-up operations after the main operation. Forexample, to update secondary tables to enforce referential integrity or to update aggregate tables.
• ’cancel’ triggers are usually used to perform follow-up operations after users cancel the form. Forexample, if a record is locked using a ’pre’ triggers, then a ’cancel’ trigger can unlock it.
If ’pre’ triggers fail, users are sent back to the list, except for the ’update’ case, where users are sent backto view page if the pre-update trigger fails.
14

Chapter 3. General options
Trigger examples
Example 3-21. Select triggers
// Before displaying the view page$opts[’triggers’][’select’][’pre’] = ’categories.TSP.inc’;// After canceling the view page$opts[’triggers’][’select’][’cancel’] = ’categories.TSC.inc’;
Example 3-22. Insert triggers
// Before displaying the add/copy page$opts[’triggers’][’insert’][’pre’] = ’categories.TIP.inc’;// After requesting save or more in the add/copy page$opts[’triggers’][’insert’][’before’] = ’categories.TIB.inc’;$opts[’triggers’][’insert’][’after’] = ’categories.TIA.inc’;// After canceling the add/copy page$opts[’triggers’][’insert’][’cancel’] = ’categories.TIC.inc’;
Example 3-23. Update triggers
// Before displaying the edit page$opts[’triggers’][’update’][’pre’] = ’categories.TUP.inc’;// After requesting save or apply in the edit page$opts[’triggers’][’update’][’before’] = ’categories.TUB.inc’;$opts[’triggers’][’update’][’after’] = ’categories.TUA.inc’;// After canceling the edit page$opts[’triggers’][’update’][’cancel’] = ’categories.TUC.inc’;
Example 3-24. Delete triggers
// Before displaying the delete page$opts[’triggers’][’delete’][’pre’] = ’categories.TDP.inc’;// After requesting delete in the delete page$opts[’triggers’][’delete’][’before’] = ’categories.TDB.inc’;$opts[’triggers’][’delete’][’after’] = ’categories.TDA.inc’;// After canceling the delete page$opts[’triggers’][’delete’][’cancel’] = ’categories.TDC.inc’;
Please note that [’select’][’after’] and [’select’][’before’] triggers currently do not exist.
In the following sample are steps during a View, Edit, Apply and Cancel operation described. Allinvolved triggers return true.
• user starts from the list page
15

Chapter 3. General options
• user asks to view a record• [’select’][’pre’] trigger is included (if defined)• if true is returned then continue, else go back to list page• user is now in the view page• user asks to edit the record• [’update’][’pre’] trigger is included (if defined)• if true is returned then continue, else go back to view page• user is now in the edit page• user makes some changes and asks to apply (save and continue)• [’update’][’before’] trigger is included (if defined)• if true is returned then continue, else, back to list without updating• record is updated in the database• [’update’][’after’] trigger is included (if defined)• [’update’][’pre’] trigger is included (if defined)• if true is returned then continue, else go back to view page• user is now back to the edit page• user makes some other changes but asks to cancel them• [’update’][’cancel’] trigger is included (if defined)• user is back to the list page
Triggers variables
In every trigger file you have available following usable variables. Some of them affect only a particularaction.
$this object reference$this->dbh initialized MySQL database handle$this->key primary key name$this->key_type primary key type$this->key_delim primary key deliminator$this->rec primary key value (update and delete only)$newvals associative array of new values (update and insert only)$oldvals associative array of old values (update and delete only)$changed array of keys with changed values
There are also other variables available. For example every class property can be accessed using $this
object reference. All variables occur in ’before’ triggers as well as in ’after’ triggers. Only classproperties occurs in ’pre’ and ’cancel’ triggers currently.
It is recommended to use the $this->myQuery() method in order to perform database queries forfetching additional data or doing inserts or updates to other database tables.
16

Chapter 3. General options
Chained triggers
You may set several triggers for the same operation. This allows to isolate code, to share more easilytriggers between multiple calling scripts and to reuse code produced by another phpMyEdit users.
The order triggers are executed in is important. It is set by the keys of the chained triggers. As soon asone of the chained trigger fail, the overall return value is set to false, and following triggers are notexecuted. If none of chained triggers failed, then the return value is true.
Example 3-25. Chained update before triggers
$opts[’triggers’][’update’][’before’][1] = ’lock.TUA.inc’;$opts[’triggers’][’update’][’before’][0] = ’check.TUB.inc’;
In this example, when the user clicks on the Save button during editing a record, check.TUB.inc willbe run first. If it returns true, then lock.TUB.inc will be run as well. If one of these triggers fails,update of the database won’t be performed, just like if a simple [’update’][’before’] trigger failed.Note that although the overall return value of ’cancel’ triggers does not inluence phpMyEdit behavior,the return value of each chained trigger is important.
3.9. Logging user actions
You can log user actions into a special "changelog" table. You must have table created and specified forphpMyEdit using the $opts[’logtable’] option.
Example 3-26. Logging
$opts[’logtable’] = ’changelog’;
Example 3-27. Log table schema
CREATE TABLE changelog (updated timestamp(14) default NULL,user varchar(255) default NULL,host varchar(255) default NULL,operation varchar(255) default NULL,tab varchar(255) default NULL,rowkey varchar(255) default NULL,col varchar(255) default NULL,oldval blob default NULL,newval blob default NULL);
17

Chapter 3. General options
phpMyEdit provides also the possibility of notifying about performed user actions by sendinginformational e-mail. This feature configuration is done via $opts[’notify’] array with followingvariables notation. Note that on every place where one e-mail address should be written, it is possible tohave array of multiple e-mail addresses there. This feature is provided for informing more than one userabout particular performed action.$opts[’notify’][’from’] sender envelope e-mail address (webmaster@SERVER_NAME by default)$opts[’notify’][’prefix’] prefix of e-mail messages subject (no prefix by default)$opts[’notify’][’wrap’] maximum width of e-mail message body (by default 72 will be used)$opts[’notify’][’insert’] e-mail address for insert action notification$opts[’notify’][’update’] e-mail address for update action notification$opts[’notify’][’delete’] e-mail address for delete action notification$opts[’notify’][’all’] e-mail address for all actions notification
In both cases, changelog table and e-mail notyfing are values of "user" extracted from the variables infollowing order: $_SERVER[’REMOTE_USER’], $_SERVER[’REMOTE_USER’] and global variable$REMOTE_USER. Similary "host" variable is checked in $_SERVER[’REMOTE_ADDR’], than in$_SERVER[’REMOTE_ADDR’] and at the end in global variable $REMOTE_ADDR.
3.10. Languages
The default language setting is the user’s web browser language setting. Use it if possible. The followingexample forces the English language version, and the last forces the Slovak language version.
Example 3-28. Languages selection
// client language (default)$opts[’language’] = $_SERVER[’HTTP_ACCEPT_LANGUAGE’];
$opts[’language’] = ’EN’; // forces english language$opts[’language’] = ’SK-UTF8’; // slovak language in UTF-8 encoding
Available languages are:
CZ czechDE german (standard)DK danishEL greek (hellenic)EN englishEN-US english (United States)ES spanishES-AR spanish (argentinian)ES-MX spanish (mexican)EU basqueFR french (standard)ID indonesianIT italian (standard)JP japanese
18

Chapter 3. General options
NL dutch (standard)PL polishPT portuguese (standard)PT-BR portuguese (brazilian)RU russianSE swedishSK slovakTR turkishZH chinese (traditional)ZH-SG chinese (Singapore)
Language codes are based on ISO-3166 standard, which is available on many places, for example here(http://www.samspade.org/d/iso3166.html).
You can append encoding strings to your language, such as -UTF8 or -LATIN2. If no encoding isspecified, backward compatible default one will be used.
Warning
Default encoding will be switched in next release to UTF-8 in every availablelanguage.
3.11. CGI variables
Using CGI variables
You can optionally append or overwrite individual variables returned from the CGI environment(GET/POST HTTP protocol data). Use these two arrays for this purpose, where array key means CGIvariable name, and array value means CGI variable value.
This will activate the search filter on script initialization. However, it is still possible to turn it off byexplicit click on Hide or Clear button.
Example 3-29. CGI variables appending
$opts[’cgi’][’append’][’PME_sys_fl’] = 1;
The next example shows how to cause descending sorting according first field in all cases. Because[’overwrite’] is used, sorting column cannot be altered by the user by clicking on column heading.
19

Chapter 3. General options
Example 3-30. CGI variables overwriting
$opts[’cgi’][’overwrite’][’PME_sys_sfn’] = ’-0’;
Using the $opts[’cgi’][’persist’] option you can tell phpMyEdit names and values of CGIvariables which should be persistent during various pages reloading and serving. They will be includedinto all links and also into all forms as appropriate hidden inputs. This feature is provided especially foradvanced and experienced users using phpMyEdit in their medium-size and large-size projects. If you donot understand what does this thing do, feel free to skip it. You will surely do not need it.
Example 3-31. Persistent CGI variables
$opts[’cgi’][’persist’] = array(’article_id’ => $article_id,’session_id’ => $SESSION_ID);
Prefixing CGI variables
The type of performed operation such as Add, Change, Delete and so on, is passed using a CGI variablenamed operation. When passed through a link, for example when $opts[’navigation’] is setto ’G’ or ’T’, the value is an untranslated label prefixed with PME_op_. This prefix can be changed bysetting the $opts[’cgi’][’prefix’][’operation’] variable in the calling script.
Example 3-32. Custom prefix for operation links
$opts[’cgi’][’prefix’][’operation’] = ’op-prefix-’;
If you already use in your project some CGI variables used internally by phpMyEdit, like ’operation,you may want to prefix phpMyEdit’s variables to avoid collision. For the same reason, you may want toprefix the names of input fields.
Example 3-33. Custom name prefix for CGI variables
$opts[’cgi’][’prefix’][’sys’] = ’sys_prefix_’;$opts[’cgi’][’prefix’][’data’] = ’data_prefix_’;
20

Chapter 3. General options
3.12. Javascript and DHTML
CGI sys and data name prefixing may especially be useful if you want to display two instance ofphpMyEdit on the same page. But you will require to prefix Javascript and DHTML tags as well, tomake phpMyEdit forms truely independant.
Javascript functions are default prefixed by PME_js_ string. DHTML ID tags are defaultly prefixed byPME_dhtml_ string. You may change this using the syntax below.
Example 3-34. Custom name prefix for JS and DHTML
$opts[’js’][’prefix’] = ’js_prefix_’;$opts[’dhtml’][’prefix’] = ’dhtml_prefix_’;
3.13. CSS classes policy
CSS classes policy in phpMyEdit is one from the most complicated and complex features. The goal is toreach almost any possible classification of HTML elements with the possibility to simplify classificationto lower number of classes.
The phpMyEdit CSS class schema is displayed here:
Example 3-35. CSS class name schema
<prefix>-<element>-<page_type>-<position>-<divider>-<postfix>
Particular parts are described here:
• The prefix part is straighforward. Every phpMyEdit CSS class has a user configurable prefix. It canbe empty.
• The element represents the name or type of element. The examples are form, row, value, inputand others.
• In order to distinguish between different types of pages there is a page_type. The possible values forthis part are add, view, change, copy, delete. This part is empty for table listing and table filteringpages.
• There are also some elements, which occur on the top and on the bottom of page as well. For thismatter there is position part present with possible values up and down.
• The divider aim is to provide difference between even and odd table listing rows. This part, ifpresent, is always numeric with values starting from 0.
• At the end of CSS class name is postfix. This part is related to a particular field. Every field canhave its own postfix. See field’s CSS customization for more information.
21

Chapter 3. General options
• The default separator between parts is dash (-) and can be changed if desired.
CSS class names configuration is handled via $opts[’css’] associative array. Here are possibleconfiguration options related to this issue.
$opts[’css’][’prefix’] prefix of every phpMyEdit CSS class (pme by default)$opts[’css’][’page_type’] if page type should occur in class name (disabled by default)$opts[’css’][’position’] if position on the page should occur in class name (disabled by default)$opts[’css’][’divider’] how many list table rows should have their own number before starting counting again from 0 (by default 2; value of -1 means every row has its own number and value of 0 means disabled)$opts[’css’][’separator’] separator between CSS class name parts (dash - by default)
For concrete names of CSS classes look into HTML source code of your generated page. In thefollowing box are examples of how CSS class names may appear. However your CSS class names candiffer according to your fields and configuration respectively.
Example 3-36. CSS class name examples
pme-navigation-uppme-row-0pme-cell-DateTimepme-cancel-viewpme-input-changepme-key-ArticleID
22

Chapter 4. Fields options
This chapter deal with options related to particular database columns. Later there will be often used termfield, what means exactly the same thing as column.
4.1. Definition overview
Fields will be displayed in table columns left to right on the screen in the order in which they appear inthe script. Re-arrange the order of the arrays in order to alter the order in which columns are displayed.
Display of a particular column can also be suppressed. Below is an example of the array for a columnnamed ’topic’:
Example 4-1. Basic field definition
$opts[’fdd’][’topic’] = array(’name’ => ’Topic’,’select’ => ’T’,’maxlen’ => 100,’nowrap’ => false,’sort’ => true);
Because so many questions related to PHP programming language semantics and basis are often asked,please point on the following explanation of "two" ways of possible field options initialization. If you areenough experienced and familiar with PHP, feel free to skip to the next section.
As it was mentioned, there are two ways how to initialize array in PHP.
1. Direct one using $opts[’fdd’][’col_name’] = array(’option’ => ’value’) which isshowed above.
2. Postinitialization one using $opts[’fdd’][’col_name’][’option’] = ’value’ which isused in many examples in this documentation.
You may realize, that it is the same if you will change or add option into basic field definition (seeexample array() and notes in first point above) or you will add separated option initialization after thisfield definition as it is described in second case.
23
Chapter 4. Fields options
4.2. Basic options
Field name
When the MySQL column name is not appropriate for display as the title of the column in the displayedtable, alternate text can be specified. To display the word "Subject" instead of the name "Topic" for theexample column from previous chapter, add the following option to the script:
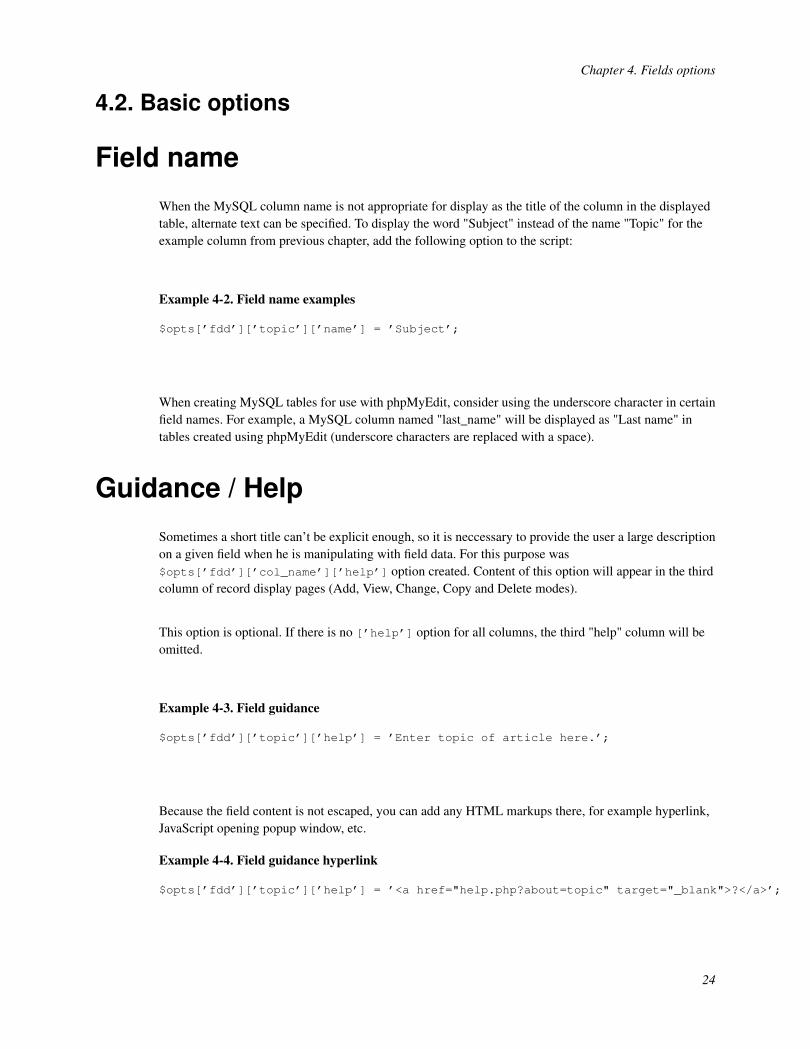
Example 4-2. Field name examples
$opts[’fdd’][’topic’][’name’] = ’Subject’;
When creating MySQL tables for use with phpMyEdit, consider using the underscore character in certainfield names. For example, a MySQL column named "last_name" will be displayed as "Last name" intables created using phpMyEdit (underscore characters are replaced with a space).
Guidance / Help
Sometimes a short title can’t be explicit enough, so it is neccessary to provide the user a large descriptionon a given field when he is manipulating with field data. For this purpose was$opts[’fdd’][’col_name’][’help’] option created. Content of this option will appear in the thirdcolumn of record display pages (Add, View, Change, Copy and Delete modes).
This option is optional. If there is no [’help’] option for all columns, the third "help" column will beomitted.
Example 4-3. Field guidance
$opts[’fdd’][’topic’][’help’] = ’Enter topic of article here.’;
Because the field content is not escaped, you can add any HTML markups there, for example hyperlink,JavaScript opening popup window, etc.
Example 4-4. Field guidance hyperlink
$opts[’fdd’][’topic’][’help’] = ’<a href="help.php?about=topic" target="_blank">?</a>’;
24

Chapter 4. Fields options
Selection boxes
Specify field input type as text box, numeric comparison text box, drop-down selection, or multipleselection. The same input type will be used also for table filtering.
Example 4-5. Filter selections
$opts[’fdd’][’col_name’][’select’] = ’T’; // text box$opts[’fdd’][’col_name’][’select’] = ’N’; // numeric$opts[’fdd’][’col_name’][’select’] = ’D’; // drop down$opts[’fdd’][’col_name’][’select’] = ’M’; // multiple selection$opts[’fdd’][’col_name’][’select’] = ’O’; // radio buttons$opts[’fdd’][’col_name’][’select’] = ’C’; // checkboxes
Display options
An optional parameter to control whether a field is displayed in the add, change, copy, delete, view, list,or filter views.
A -- addC -- changeP -- copyV -- viewD -- deleteL -- table listF -- table filter
Example 4-6. Field display options
$opts[’fdd’][’col_name’][’options’] = ’LF’; // shows only in table list/filter
Input settings
There are also additional column-specific options. These apply to certain views or modes (add, change,delete, list). In the previous versions of phpMyEdit these flags was part of [’options’] option. In thecurrent 5.7.1 version, the backward compatibility (BC) is preserved. However this will be removed in thefuture. Thus specify these flags as a part of [’input’] options. Some other flags may be added into this
25
Chapter 4. Fields options
option as well.
R -- indicates a field is read onlyW -- indicates a field is a password fieldH -- indicates a field is to be hidden and marked as hidden
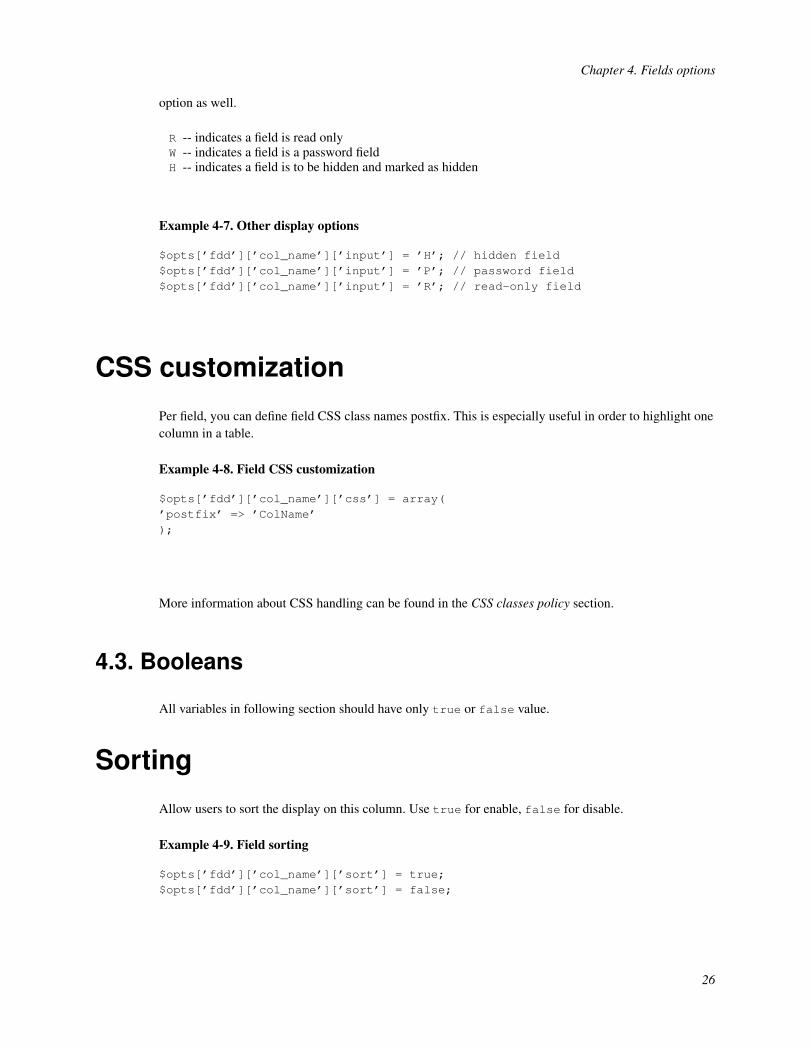
Example 4-7. Other display options
$opts[’fdd’][’col_name’][’input’] = ’H’; // hidden field$opts[’fdd’][’col_name’][’input’] = ’P’; // password field$opts[’fdd’][’col_name’][’input’] = ’R’; // read-only field
CSS customization
Per field, you can define field CSS class names postfix. This is especially useful in order to highlight onecolumn in a table.
Example 4-8. Field CSS customization
$opts[’fdd’][’col_name’][’css’] = array(’postfix’ => ’ColName’);
More information about CSS handling can be found in the CSS classes policy section.
4.3. Booleans
All variables in following section should have only true or false value.
Sorting
Allow users to sort the display on this column. Use true for enable, false for disable.
Example 4-9. Field sorting
$opts[’fdd’][’col_name’][’sort’] = true;$opts[’fdd’][’col_name’][’sort’] = false;
26

Chapter 4. Fields options
Stripping tags
If you are storing HTML and/or PHP content in you database columns, you may want to have$opts[’fdd’][’col_name’][’strip_tags’] variable turned on for particular fields. It will stripHTML and PHP tags from field content, when displaying column in table listing.
Example 4-10. Stripping tags
$opts[’fdd’][’col_name’][’strip_tags’] = true;$opts[’fdd’][’col_name’][’strip_tags’] = false;
HTML escaping
By default are all field values escaped using htmlspecialchars()
(http://www.php.net/htmlspecialchars) PHP function. However, this is not always desirable. You can turnescaping off by setting $opts[’fdd’][’col_name’][’escape’] to false.
Example 4-11. Field escaping
$opts[’fdd’][’col_name’][’escape’] = true;$opts[’fdd’][’col_name’][’escape’] = false;
4.4. JavaScript validation
phpMyEdit users can benefit from the JavaScript scripting language, when validating input values beforethe form is submited.
Required fields
Simple validation JavaScript can be generated to prevent null entries by the user. If an entry is requiredfor a particular field, set the [’js’][’required’] option to true.
Example 4-12. Required fields
$opts[’fdd’][’col_name’][’js’][’required’] = true;$opts[’fdd’][’col_name’][’js’][’required’] = false;
27

Chapter 4. Fields options
Regular expressions
JavaScript regular expressions can be a powerful way to make interactive input validation. When used,input must match the desired regular expression definedin the $opts[’fdd’][’col_name’][’js’][’regexp’]. If a field does not match, a JavaScript alertwill be invoked to force the user to change entered value.
Example 4-13. Regular expression example
$opts[’fdd’][’col_name’][’js’][’regexp’] = ’/^[0-9]*$/’;
Regular expressions are written in Perl compatible style. The expression above allows the form to submitonly when numeric characters 0-9 are entered in the field. An empty value is also allowed, but you canuse [’js’][’regexp’] in combination with [’js’][’required’] to prevent empty entries.
Hints
When the [’js’][’required’] option is used and the value entered is empty, or the charactersentered do not match the defined [’js’][’regexp’], a warning with the default message is displayed.This message can be changed using [’js’][’hint’]. This is especially useful for advising the userabout field-specific data input restrictions.
Example 4-14. JavaScript hint
$opts[’fdd’][’col_name’][’js’][’hint’]= ’Please enter only numbers in the "col_name" field.’;
4.5. Input restrictions
You can restrict user input for selected fields to selected values. There are several ways to do this. Avariety of methods and examples appear below.
28
Chapter 4. Fields options
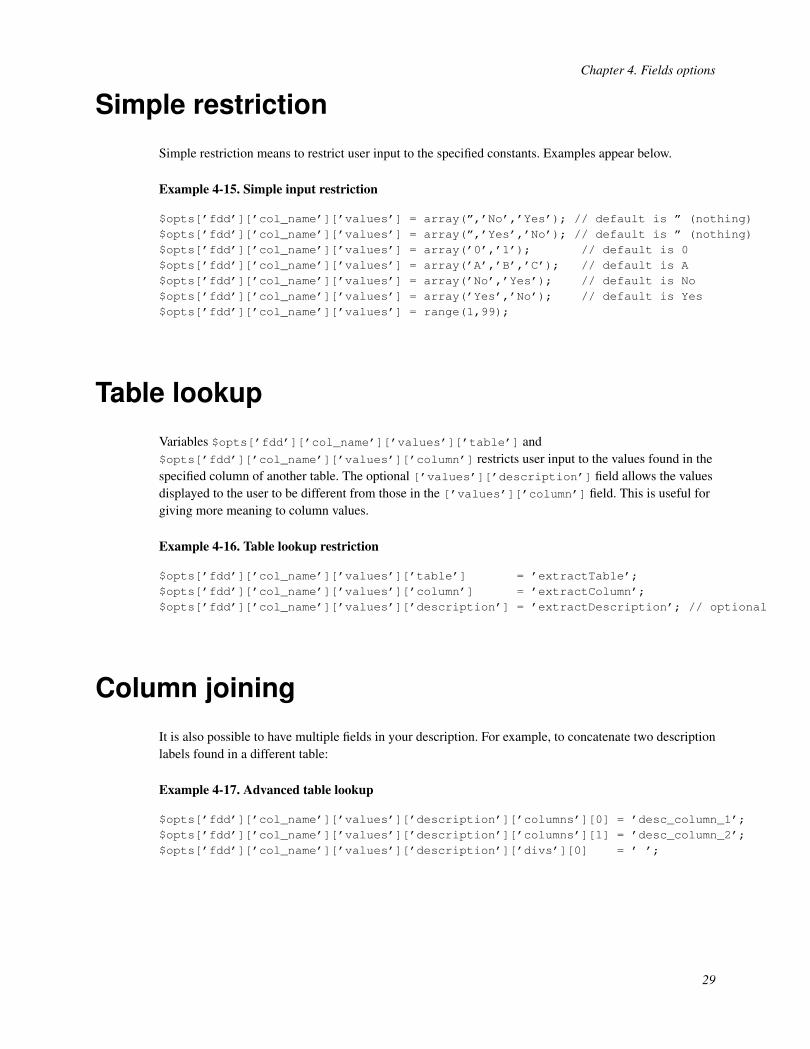
Simple restriction
Simple restriction means to restrict user input to the specified constants. Examples appear below.
Example 4-15. Simple input restriction
$opts[’fdd’][’col_name’][’values’] = array(”,’No’,’Yes’); // default is ” (nothing)$opts[’fdd’][’col_name’][’values’] = array(”,’Yes’,’No’); // default is ” (nothing)$opts[’fdd’][’col_name’][’values’] = array(’0’,’1’); // default is 0$opts[’fdd’][’col_name’][’values’] = array(’A’,’B’,’C’); // default is A$opts[’fdd’][’col_name’][’values’] = array(’No’,’Yes’); // default is No$opts[’fdd’][’col_name’][’values’] = array(’Yes’,’No’); // default is Yes$opts[’fdd’][’col_name’][’values’] = range(1,99);
Table lookup
Variables $opts[’fdd’][’col_name’][’values’][’table’] and$opts[’fdd’][’col_name’][’values’][’column’] restricts user input to the values found in thespecified column of another table. The optional [’values’][’description’] field allows the valuesdisplayed to the user to be different from those in the [’values’][’column’] field. This is useful forgiving more meaning to column values.
Example 4-16. Table lookup restriction
$opts[’fdd’][’col_name’][’values’][’table’] = ’extractTable’;$opts[’fdd’][’col_name’][’values’][’column’] = ’extractColumn’;$opts[’fdd’][’col_name’][’values’][’description’] = ’extractDescription’; // optional
Column joining
It is also possible to have multiple fields in your description. For example, to concatenate two descriptionlabels found in a different table:
Example 4-17. Advanced table lookup
$opts[’fdd’][’col_name’][’values’][’description’][’columns’][0] = ’desc_column_1’;$opts[’fdd’][’col_name’][’values’][’description’][’columns’][1] = ’desc_column_2’;$opts[’fdd’][’col_name’][’values’][’description’][’divs’][0] = ’ ’;
29

Chapter 4. Fields options
The ’div’ component is what will be used as a divider between the columns in the display. You don’tneed to define the last ’div’ field if it isn’t required. So, for example if you have a series of people in atable, with a separate column for id, first name, and last name, you could use:
Example 4-18. Complex table lookup example
$opts[’fdd’][’col_name’][’values’][’db’] = ’mydb’; // optional$opts[’fdd’][’col_name’][’values’][’table’] = ’mytable’;$opts[’fdd’][’col_name’][’values’][’column’] = ’id’;$opts[’fdd’][’col_name’][’values’][’description’][’columns’][0] = ’name_last’;$opts[’fdd’][’col_name’][’values’][’description’][’divs’][0] = ’, ’;$opts[’fdd’][’col_name’][’values’][’description’][’columns’][1] = ’name_first’;$opts[’fdd’][’col_name’][’values’][’filters’] = ’id IN (1,2,3)’; // optional WHERE clause$opts[’fdd’][’col_name’][’values’][’orderby’] = ’last_name’; // optional ORDER BY clause
If prefixation with some string in column description is desired, the$opts[’fdd’][’col_name’][’values’][’description’][’divs’][-1] can be used. It willprecede $opts[’fdd’][’col_name’][’values’][’description’][’columns’][0] column.
Note that the above example contains additional features, such as filtering values using [’filters’],and ordering values using [’orderby’].
Additional values
Additional values to table lookup could be stored in [’values2’] array. The main difference betweensimple [’values’] usage is, that array keys will be stored into database and array values will beprinted out in input section boxes. This is especially useful for MySQL enumerations when you do notwant to print out enumeration keys, but rather some more user-friendly texts. See example:
Example 4-19. Input restriction using additional values
$opts[’fdd’][’col_name’][’values2’] = array(’displayed’ => ’Displayed Article’,’hidden’ => ’Hidden Article’,’disabled’ => ’Disabled Article’,’deleted’ => ’Deleted Article’);
In the example above, keywords ’displayed’, ’hidden’, ’disabled’ and ’deleted’ will be stored in database,but user-friendly expressions will appear in select box for user. Usage of [’values2’] can becombined with [’values’] usage.
30

Chapter 4. Fields options
Advanced joining
Sometimes you want to restrict table joining on the output. This is important in case where[’values’][’column’] is not unique in [’values’][’table’]. For this purpose, you can use$opts[’fdd’][’col_name’][’values’][’join’] option. Using the [’values’][’filters’]simply will not work, because it is not applied at join time, but only when filling values in the drop downmenu.
These variables are available in this option.
$main_table -- alias of the main table$main_column -- join column in the main table$join_table -- alias of the values table$join_column -- join column in the values table$join_description -- description column in the values table
phpMyEdit will create by default $main_table.$main_column = $join_table.$join_column
join, what is sufficient the most cases. However you may extend it with additional conditions as well.
Example 4-20. Table lookup with advanced joining
$opts[’fdd’][’col_name’][’values’][’join’]= ’$main_table.$main_column = $join_table.$join_column AND ’. ’$main_table.another_col = $join_table.another_col’
Please note that [’values’][’filters’] is used for filtering items in dropdown during Add/Editmode (with a SQL WHERE clause) while [’values’][’join’] is useful for having a correct LEFTJOIN against the main table in List/View mode.
4.6. Output control
Cell attributes
For setting simple HTML attributes of displayed field cells, there is a [’colattrs’] option provided.
For example the alignment of the text inside a column can be controlled using the usual HTML align
attribute of the cell tag. The text in the column will be placed in the center. Useful if you have numbers ina column and the title of the column is long.
31

Chapter 4. Fields options
Example 4-21. Cell attribute example
$opts[’fdd’][’col_name’][’colattrs’] = ’align="center"’;
Please note, that recommended and probably also better approach for displayed columns design controlis to use CSS classes policy. Particulary point at CSS customization for more information how tocustomize selected field appearance.
Field size
A size of input field can be defined. Note this does affect also table filtering page. If you want differentvalue for this type of page, use Options variability feature.
Example 4-22. Input field size
$opts[’fdd’][’col_name’][’size’] = ’10’;$opts[’fdd’][’col_name’][’size|F’] = ’5’; // only 5 for filter
Maximum field length
Maximum length of input boxes displayed for Add / Change record mode may be set.
Example 4-23. Field sizes
$opts[’fdd’][’col_name’][’maxlen’] = ’8’;$opts[’fdd’][’col_name’][’maxlen’] = ’24’;
Textarea sizes
If the above setting does not work for you, you are probably attempting to change textarea size. It is alsopossible to specify the size of a textarea used to give multi-line input. Try something like:
Example 4-24. Textarea field height & width
$opts[’fdd’][’col_name’][’textarea’][’rows’] = 1;$opts[’fdd’][’col_name’][’textarea’][’cols’] = 40;
32

Chapter 4. Fields options
Character length limit
If a table contains a number of text columns which each contain quite a bit of text, the table will likelyscroll off the screen. This can be prevented by displaying only a portion of the content from a particularcolumn.
For example, to display only the first 30 characters from a column named ’explanation’, add thefollowing:
Example 4-25. Character length limit
$opts[’fdd’][’explanation’][’trimlen’] = 30;
You may find it useful to limit the number of characters displayed for one or more columns. This optionis approximately equivalent to the following PHP statement:
if (strlen($value) > $trimlen) {echo substr($value, 0, $trimlen - 3) . ’...’;}
Wrapping
The ’nowrap’ option is essentially equivalent to the HTML markup <td nowrap>.
Example 4-26. Wrapping
$opts[’fdd’][’col_name’][’nowrap’] = true;$opts[’fdd’][’col_name’][’nowrap’] = false;
Print mask
A string that is used by sprintf() to format field output. For more information about this functionusage, please refer to its manual page (http://www.php.net/sprintf) in PHP documentation.
33

Chapter 4. Fields options
Example 4-27. Print mask field definition
$opts[’fdd’][’col_name’][’mask’] = ’%%’; // a literal percent character$opts[’fdd’][’col_name’][’mask’] = ’%01.2f’; // currency or floating-point number$opts[’fdd’][’col_name’][’mask’] = ’%.10s’; // trim string to 10 characters
Date masks
Date mask is string that is used to format date and/or time fields using PHP’s function call. You can use[’datemask’] option to format date and time using date() (http://www.php.net/date) function or youcan use [’strftimemask’] option to format date and time using strftime()
(http://www.php.net/strftime) function. See function’s manual pages for valid formatting characters.
These date and time formatting functions are applied only if selected value from database has non-zerolength and is a valid date. This prevents empty strings, NULL fields and invalid dates from beingdisplayed as date of 1st January 1970.
Example 4-28. Date mask field definitions
$opts[’fdd’][’col_name’][’datemask’] = ’r’;
Note that currently only fields displaying is implemented. Entering date fields concerning to these maskswill be implemented in the nearly future.
Number format
Use this option to get a formatted version of number. It uses number_format()(http://www.php.net/number_format) PHP function. Option accepts an array with one or three elements.
The first array member defines the number of decimals in formatted number, the second memberspecifies the character before decimals and the last array member means separator between every groupof thousands.
Example 4-29. Number format example
$opts[’fdd’][’col_name’][’number_format’] = array(2, ’.’, ’,’);
34

Chapter 4. Fields options
4.7. URL linking
Fields can be made ’clickable’ in the display using [’URL’] variable. Primary examples follows:
Example 4-30. Simple URL examples
$opts[’fdd’][’col_name’][’URL’] = ’http://$link’;$opts[’fdd’][’col_name’][’URL’] = ’mailto:$value’;
Note that the following are available as variables for usage in [’URL’]:
$key -- key field for record$name -- name of the field$value -- value of the field$link -- not modified raw value$css -- CSS class name$page -- this HTML page$url -- CGI variables
To open a link in a new web browser window use:
Example 4-31. URL target example
$opts[’fdd’][’col_name’][’URLtarget’] = ’_blank’;
To display alternative link text use:
Example 4-32. URL display example
$opts[’fdd’][’col_name’][’URLdisp’] = ’Launch Page’;
Old 3.5 behaviour is also supported via [’URLprefix’]. It will prepend string before if it is not alreadypresent there. Variable [’URLpostfix’] similary to [’URLprefix’] will append string after if it isnot already present there.
Example 4-33. URL prefix and postfix
$opts[’fdd’][’col_name’][’URLprefix’] = ’mailto:’;$opts[’fdd’][’col_name’][’URLprefix’] = ’http://’;$opts[’fdd’][’col_name’][’URLprefix’] = array(’http://’, ’ftp://’);
35

Chapter 4. Fields options
In the third example you can see that array of prefixes or postfixes are supported. First member of arrayis added to URL value only if none from the elements was matched. This is especially useful in havingintelligent URL links with added ability to enter addresses like "www.platon.sk" without preceding"http://".
4.8. SQL expressions
There is a possibility to define a SQL expression that should be applied to particular field when readingor writting data from database. This is very useful when you want to interpret the field’s content indifferent way than it is stored in database. To be more clear, see following examples.
Example 4-34. Read SQL expressions
$opts[’fdd’][’surname’][’sql’] = ’CONCAT(surname, ’, ’, firstname)’;$opts[’fdd’][’title’][’sql’] = ’IF(TRIM(title) != "", title, title2)’;
The first example appends content of the firstname field to the surname field. Because this is done onthe database level, sorting and searching (in table filtering page) on this field will properly work.Similarly in the second example, the title2 field will be used if the title field is empty. In thismanner you can define a special static string, which should be printed in case a field is empty. Justsubstitute a quoted string in place of title2.
Similarly, you can use SQL expression for storing data into database.
Example 4-35. Write SQL expressions
$opts[’fdd’][’surname’][’sqlw’] = ’UPPER($val_qas)’;$opts[’fdd’][’title’][’sqlw’] = ’TRIM("$val_as")’;
The first example above makes surname uppercase when storing field into database. The second onetrims all whitespace characters around title before writing it to database.
As a placeholder for the field’s content, there are three variables available.
$val -- value of the field$val_as -- value with addslashes() function applied$val_qas -- same as $val_as with quotes around
If the $val is some"nice"thing, then $val_as becomes some\"nice\"thing and $val_qas
becomes "some\"nice\"thing". You have to use these variables correctly in your [’sqlw’]expressions, otherwise a MySQL parsing error could occur. We recommend you use the $val_qas
36

Chapter 4. Fields options
variable whenever possible, as it is the safest one from the mentioned alternatives.
A very useful and favourite usage of the [’sqlw’] option is to explicitly tell phpMyEdit to store a NULLvalue instead of an empty string for the particular column. Empty string and NULL are two differentvalues. Many people really do not like empty strings in their tables, thus now they have possibility tochange them to NULL when user simply enters nothing into form input field.
Example 4-36. Storing NULL instead of empty string
$opts[’fdd’][’col_name’][’sqlw’] = ’IF($val_qas = "", NULL, $val_qas)’;
Another example of the [’sqlw’] usage is the storage of user passwords. It is good idea to process userpassword using some well-known hash function before saving it in the database. Following statement isused in order to avoid re-hashing an already hashed string. This means, if col_name value was notchanged, then do not apply MD5() on it. If col_name value was changed, then apply MD5() function.
Example 4-37. Storing password’s MD5 hash
$opts[’fdd’][’col_name’][’sqlw’] = ’IF(col_name = $val_qas, $val_qas, MD5($val_qas))’;
4.9. PHP expressions
PHP feature allows user to display any HTML code in place of a value. Behavior is the same as intriggers.
If PHP option is set, a file of that name is included (and executed). All variables avaliable in the coreclass are available in the included PHP file.
Example 4-38. PHP execution file
<?phpif ($this->operation == $this->labels[’Add’]) {return ’add mode selected’;} else {return ’<img src="tt.png" alt="TT">’;}?>
This option is indended for advanced usage. Together with pre and before triggers, it allows tweaking thecore class without the need to hack it. To change input, use before triggers or [’sqlw’] option.
37

Chapter 4. Fields options
4.10. TABs feature
Because the TABs feature is one of the most important phpMyEdit features, it deserves its owndocumentation section.
Tabbed groups of fields appear in specific page modes: Add, Change, coPy, View, or Delete. In Listmode, when TAB settings are combined with Display options, users can suppress the display of fieldsbelow the first TAB group.
This feature is for tables, which have more than a few fields. It enables you to group fields together intogroups. Every group of fields then becomes accessible via TAB on the top or the bottom of the page,what is based on the [’navigation’] settings. TAB has its own label, which can describe fields in aparticular group.
TAB is defined in the first field of group. Every following field will belong to the same group under thesame TAB untill the next TAB is defined. The first field must have its own TAB definition. If thisdefinition is omitted, fields will belong to first default group and this group will be a permanent tab thatwill be always visible.
TAB definition is very simple. Just define the label on the TAB (1st field, 5th field, 10th field, and so on).
Example 4-39. TAB definition
$opts[’fdd’][’col_name’][’tab’] = ’Counts’;
There is also possibility to define the default TAB. In this case, the array style initialization is required.
Example 4-40. Default TAB definition
$opts[’fdd’][’col_name’][’tab’] = array(’name’ => ’Personal data’,’default’ => true);
In List mode, to initially display individual fields from only the first TAB group, apply Display options toall fields below the first TAB group, for example:
Example 4-41. Display options below the first TAB
$opts[’fdd’][’col_name’][’options’] = ’AVCPD’; // or possibly ’AVCPDF’
38

Chapter 4. Fields options
For users with non-compliant JavaScript browsers, you can turn TABs feature off. The general control isachieved via $opts[’display’][’tabs’] variable. If not specified, its value is considered as true.Variable $opts[’display’] is described in Special page elements sebsection.
Example 4-42. Turning TAB feature off
$opts[’display’][’tabs’] = false;
4.11. Options variability
This section does not descibe new field options. It just extends the possibility of their initialization.Options variability can be applied to each field option.
There is often a situation when you want to have some field option in effect only on particular page(s).But on other pages you do not want to have this option in effect. There are pages where a field optionshould be taken into consideration, but there are also pages where the option should not appear.
A good example for this is the [’trimlen’] option. Imagine you set something like this:
Example 4-43. Init without options variability
$opts[’fdd’][’col_name’][’trimlen’] = 30;
This will trim the maximum length of text to 30 characters on all possible pages, which in this case are:
• table list• table filter• record view• record delete
This is nice and it will work as expected, however on the record view page it may be desirable to see thewhole field content, not only first 30 characters. Similarly we could want this also for delete page.
Thus there is a possiblity to restrict a particular option to affect only selected types of pages. In our casewe want to resctrict the [’trimlen’] option to affect the table listing and table filtering pages. This canbe done in the following way. Take a look at "|LF" string in the definition.
Example 4-44. Init with options variability
$opts[’fdd’][’col_name’][’trimlen|LF’] = 30;
39

Chapter 4. Fields options
Each restriction letter stands for particular page type. They are the same as those described in list underDisplay options subsection.
40

Chapter 5. Extensions
There are often situations, when more specific functionality is needed from phpMyEdit. You will surelyagree, that it will be really strange to hardcode all these particular requirements into the core phpMyEditclass. For this reason the extension mechanism is provided.
5.1. Overview
Extensions are phpMyEdit_<something> classes, where <something> is an appropriate extensionname. They not only extend base phpMyEdit class, but they also add new functionality. But they may notonly add new things. It is possible also to disable such features, simply to get the desirable behaviour.
In addition to common phpMyEdit configuration options, extension configuration is usually provided by$opts[’ext’] associative array. Possible keys are described on particular extension pages in thismanual. Please refer to them to get more information.
Extensions are currently not part of phpMyEdit distribution. They are only in CVS repository(http://platon.sk/cvs/cvs.php/phpMyEdit/extensions/), because they are still under development and theyare changing a lot. This manual chapter is provided for letting phpMyEdit users know, that somethinglike this exists. The only way how to get extension files is to fetch them from CVS. All extensions needto be placed under the extensions/ subdirectory below the phpMyEdit core class location.
Several new extensions are planned to create or handle more or less specific tasks, especially those whichare not appropriate for the phpMyEdit core class. You can feel absolutely free to improve existingextensions, suggest new improvements for them, or create new extensions to fit your own needs. We willbe happy to add them to repository.
5.2. phpMyEdit-slide
phpMyEdit-slide can create slideshow with ability to view and/or edit records. Everytime is exactly onerecord shown. Record can be displayed in view or edit mode. View mode looks like "view" functionalityin normal phpMyEdit, change mode looks like "change" functionality in normal phpMyEdit.
The only difference is that two buttons, Prev and Next, are displayed in addition to common view/editbuttons to provide ability of going to the next or previous record. This extension purpously disable "add","copy", "delete", and "table listing" functionalities.
Here are configuration variables related to extension. All of these phpMyEdit-slide options are optional.
41

Chapter 5. Extensions
$opts[’ext’][’rec’] -- primary key value of record to display initially$opts[’ext’][’next_disable’] -- disable Next button$opts[’ext’][’prev_disable’] -- disable Prev button
Following variables are not options, but they are used internally by extension. They can be used forgetting some information for example in triggers.
$opts[’ext’][’next’] -- primary key value of next record$opts[’ext’][’prev’] -- primary key value of previous record
To use this extension you have to include extensions/phpMyEdit-slide.class.php file and callnew phpMyEdit_slide($opts) instead of common phpMyEdit class file.
5.3. phpMyEdit-report
phpMyEdit-report extension is provided for easy table report creation. There is often a need for selectingparticular fields from table with applying specific filter options and finally write out chosen subset of data(report) to HTML page.
Navigation is easy to use. Field selection menu would be displayed if fields_select parameter ispassed by GET or POST HTTP method to PHP script and it has non-empty value. This field selectionmenu contains list of checkboxes connected with columns, list of filtering input fields and also button forreport creation. Every report page has ability to return back into field selection. It is possible to specifyamount of records on report page, what is by default set to unlimited.
Extension can completelly work without cookies. However it uses cookies to have a memory, where lastselected report is stored. When user leaves report PHP script and comes back after some time, a lastselected report should be predefined in checkboxes and input fields on fields selection screen. Detectionfor cookie usage is done automatically. If HTTP headers was already sent, cookies are not used, becausethey will cause an ugly warning. Otherwise cookies are used for described kind of memory.
To use this extension simply include extensions/phpMyEdit-report.class.php file and call newphpMyEdit_report($opts) instead of common phpMyEdit class file. Extension specificconfiguration parameters currently do not exist, thus all table columns are allowed to be selected in finalreport. This will surely change in future, because table could have columns that need to be unselectablefor final report (such as password column or similar).
42

Chapter 5. Extensions
5.4. phpMyEdit-htmlarea
Warning
This extension is obsolete. Use integrated phpMyEdit-mce-cal extension instead.
phpMyEdit-htmlarea extension provides support for htmlArea. htmlArea is a free WYSIWYG editorreplacement for <textarea> fields. For full source code and documentation, visithttp://www.interactivetools.com/ website.
htmlArea requires Microsoft Internet Explorer 5.5 or better on Windows to run. This is because it makesuse of some advanced features of IE5.5 that aren’t available in other browsers yet. It is backwardscompatible with other browsers, though. They will get a regular textarea field instead of a WYSIWYGeditor.
The extension requires a properly installed htmlArea script as it is described on the metioned website.This extension enables WYSIWYG editing of a textarea field. In order to use it, you should:
1. Load htmlArea script in the <head>...</head> section of your phpMyEdit calling program asdescribed in the htmlArea manual.
2. Call to phpMyEdit-htmlarea.class.php instead of phpMyEdit.class.php.
Example 5-1. htmlArea extension enabling
require_once ’extensions/phpMyEdit-htmlarea.class.php’;new phpMyEdit_htmlarea($opts);
3. Add ’html’=>true parameter to the textarea field definition in your phpMyEdit calling program.
Example 5-2. htmlArea field enabling
$opts[’fdd’][’col_name’] = array(’name’ => ’Column’,’select’ => ’T’,’options’ => ’ACPVD’,’required’ => true,’textarea’ => array(’html’ => true,’rows’ => 11,’cols’ => 81)
);
43

Chapter 5. Extensions
This extension is contribution of Ezudin Kurtowich <[email protected]> from Sarajevo.
5.5. phpMyEdit-calpopup
Warning
This extension is obsolete. Use integrated phpMyEdit-mce-cal extension instead.
phpMyEdit-calpopup extension provides support for a calendar popup helper to be put on any text field.This extension uses the free jsCalendar code from http://dynarch.com/mishoo/calendar.epl website.
The requirement is a properly installed jsCalendar script. All browsers supported by jsCalendar aresupported by this extension.
This extension enables the display of a popup calendar selection against selected fields. In order to use it,you should:
1. Load the jsCalendar scripts in the <head>...</head> section of your phpMyEdit calling program,substituting the correct paths:
Example 5-3. CalPopup javascript
<script type="text/javascript" src="js/calendar.js"></script><script type="text/javascript" src="js/lang/calendar-en.js"></script><script type="text/javascript" src="js/calendar-setup.js"></script>
2. Choose your preferred jsCalendar CSS file (see jsCalendar documentation) and add the following inthe <head>...</head> section of your phpMyEdit calling program, substituting the correct path:
Example 5-4. CalPopup javascript
<link rel="stylesheet" type="text/css" media="screen"href="css/calendar-system.css">
Note: To avoid an unwanted side effect in the CSS style produced by phpMyEditSetup.php, adda ’width:auto’ property into the ’.calendar table’ entry in your selected jsCalendar style sheet.
3. Call to phpMyEdit-calpopup.class.php instead of phpMyEdit.class.php.
44

Chapter 5. Extensions
Example 5-5. CalPopup extension enabling
require_once ’extensions/phpMyEdit-calpopup.class.php’;new phpMyEdit_calpopup($opts);
4. Add calendar parameter to the field definitions where you want a calendar popup in yourphpMyEdit calling program.
Example 5-6. CalPopup field enabling
$opts[’fdd’][’col_name’] = array(’name’ => ’Column’,’select’ => ’T’,’options’ => ’ACPVD’,’required’ => true,’calendar’ => true
);
This is will display a button next to the field which pops up a calendar when clicked. If that field hasa strftimemask parameter set, it will use this for the date format.
For more advanced usage, you can set the calendar parameter to an array of valid jsCalendarCalendar.setup options (see jSCalendar document for details). Note that not all of these optionsmake sense to use in phpMyEdit, and some of them will actively break the function.
Example 5-7. CalPopup advanced field
$opts[’fdd’][’col_name’] = array(’name’ => ’Column’,’select’ => ’T’,’options’ => ’ACPVD’,’required’ => true,’calendar’ => array(’ifFormat’ => ’%Y/%m/%d’, // defaults to the [’strftimemask’]’firstDay’ => 1, // 0 = Sunday, 1 = Monday’singleClick’ => true, // single or double click to close’weekNumbers’ => true, // Show week numbers’showsTime’ => false, // Show time as well as date’timeFormat’ => ’24’, // 12 or 24 hour clock’label’ => ’...’, // button label (used by phpMyEdit)’date’ => ’2003-12-19 10:00’ // Initial date/time for popup
// (see notes below))
);
45

Chapter 5. Extensions
The popup will normally set the initial value to the current field value or to current date/time. dateoption will always override this, even if there is a current date/time value in the field. If you want adefault value only if the field is currently empty, use the phpMyEdit default option.
Only the options listed above may be set by the user, any other options will be ignored.
This extension is contribution of Adam Hammond <[email protected]> from London.
5.6. phpMyEdit-mce-cal
phpMyEdit-mce-cal is a merge of HTML textarea and calendar popup extensions. This extension shouldbe used instead of phpMyEdit-htmlarea and phpMyEdit-calpopup extensions. See extension source codecomments for full documentation.
To use this extension you have to include extensions/phpMyEdit-mce-cal.class.php file andcall new phpMyEdit_mce_cal($opts) instead of common phpMyEdit class file.
This extension is again contribution of Adam Hammond <[email protected]> from London.
46

Chapter 6. Hints & tips
6.1. Overview
In this chapter you can find several useful tips, hints and other advices on how to accomplish more orless difficult database tasks using phpMyEdit project.
phpMyEdit is an open-source application developed by open community. This community is proud ofthis project and is happy to share its knowledge with others. Please share with us your knowledge andcontribute interesting examples of phpMyEdit usage, if you found some. You can do so by using ourBug-tracking system.
6.2. Handling national characters
phpMyEdit is used across the whole world by many users of various nationalities speaking and writingseveral different languages. The most common problem that occured for people located in the east,central or north Europe, Asia and other countries is, that phpMyEdit does not handle their nationallanguage characters correctly.
The reason for this is very simple. In order to simplify phpMyEdit integration into larger productionsystems, the generated code does not contain by default any HTML header or footer. But even if theHTML header and footer is turned on, the generated META tags do not contain any entry defining theproper type of content and character set. It’s up to you to send this kind information with the served page.You can do this using HTTP protocol headers or HTML META tags.
Below are two examples how to define an iso-8859-2 character set for the HTML page. This charset ismost suitable for countries in central Europe, such as Slovakia, Czech republic, Poland, and so on. Foryour country you will certainly need to determine the appropriate character set.
Example 6-1. Charset defined with META tag
<meta http-equiv="Content-Type" content="text/html; charset=iso-8859-2">
Example 6-2. Charset defined with HTTP header
<?phpheader(’Content-Type: text/html; charset=iso-8859-2’);
?>
47

Chapter 6. Hints & tips
6.3. Data removal protection
One very old database maintenance rule basically says:
No entry should by removed from a database, but just marked as deleted.
—unknown author
According to this rule, we may want to implement similar functionality also in phpMyEdit and it ispossible, of course.
First of all we need to set-up phpMyEdit to list only valid non-deleted records. This can be accomplishedusing $opts[’filters’] configuration option. We suppose that we have table where a column nameddeleted indicates if record is deleted or not.
Example 6-3. Non-deleted records listing
$opts[’filters’] = ’deleted IS NULL OR deleted = 0’;
Than we have to create a "delete before" trigger and we are done. Trigger PHP code should look similarto this example:
Example 6-4. Trigger for marking records as deleted
$query2 = sprintf(’UPDATE %s SET deleted = 1 WHERE id = %d’,$this->tb, $newvals[’id’]);
$this->MyQuery($query2);return false;
To recover a particular record just change the value in the deleted column from 1 to 0 using your SQLclient or interface (for example using phpMyAdmin).
6.4. Integration into other systems
PHP-Nuke integration
To integrate phpMyEdit into PHP-Nuke (http://www.phpnuke.org/) content management system, just
48

Chapter 6. Hints & tips
add a name variable with a $module_name value into a set of phpMyEdit persistent variables.
Example 6-5. phpMyEdit integrated into PHP-Nuke
$opts[’cgi’][’persist’][’name’] = $module_name;
PostNuke integration
Integration into PostNuke (http://www.postnuke.com/) content management system is most likely verysimilar to PHP-Nuke integration.
other systems
If you know useful information about how to integrate phpMyEdit with a particular system, please notifyproject developers.
49

Chapter 7. Other information
7.1. Authors and homepage
phpMyEdit had amount of project maintainers.
• John McCreesh <[email protected]> founded project and developed all versions 0.x, 1.x, 2.xand 3.x.
• Jim Kraai <[email protected]> maintains phpMyEdit versions 4.x.
• Ondrej Jombik <[email protected]> is current project maintainer. He develops version 5.0and laters.
Many thanks to various project contributors. See doc/ChangeLog file for credits. Special thanksbelongs to these contributors (in alphabetical order):
• Pau Aliagas <[email protected]> who converted phpMyEdit to PHP class in version 3.0.
• Hugues Bernard <[email protected]> who implemented some important phpMyEditfeatures and contributed several bugfixes.
• Adam Hammond <[email protected]> who contributed several phpMyEdit extensions relatedwork.
• Doug Hockinson <[email protected]> who helped to create exhaustive official phpMyEditdocumentation and donate phpMyEdit.org (http://phpMyEdit.org/) domain.
• Michal Palenik <[email protected]> who did quality testing and implemented some nicephpMyEdit features.
Please do not write previous maintainers support questions, suggestions, bug reports or patches. UsePlaton.SK bug-tracking system, support forum or phpMyEdit mailinglist for these purposes.
Copyright (c) 2002-2006 Platon Group, http://platon.sk/
The official phpMyEdit homepage is: http://platon.sk/projects/phpMyEdit/
The phpMyEdit project management page is: http://platon.sk/projects/main_page.php?project_id=5
This documentation is related to phpMyEdit version 5.7.1 which was released in 16th September 2007.
50

Chapter 7. Other information
7.2. License
In this section are licensing possibilities written.
7.2.1. Open Source License
This program is free software; you can redistribute it and/or modify it under the terms of the GNUGeneral Public License (http://www.gnu.org/licenses/gpl.html) as published by the Free SoftwareFoundation; either version 2, or (at your option) any later version.
This program is distributed in the hope that it will be useful, but WITHOUT ANY WARRANTY;without even the implied warranty of MERCHANTABILITY or FITNESS FOR A PARTICULARPURPOSE. See the GNU General Public License for more details.
You should have received a copy of the GNU General Public License along with this program; if not,write to the Free Software Foundation, Inc., 59 Temple Place - Suite 330, Boston, MA 02111-1307, USA.
7.2.2. Commercial License
Using this commercial license you can use phpMyEdit in your projects and these projects no longer needto be an open-source software. You can also sell your product to the public without releasing your sourcecodes. Basically all the GNU GPL obligations can be omitted withthe "phpMyEdit Commercial License". You do not need to worry about them, anymore!
See Commercial section (http://www.phpmyedit.org/article.php?commercial) at the phpMyEdit.org(http://www.phpmyedit.org/) website for conditions and pricing.
7.3. Support and feedback
Bug-tracking system
We are happy to accept bug reports, suggestions for improvement, or improved code, preferably via ourPlaton.SK (http://platon.sk/) bug-tracking system where everyone can see them. When submitting a newbug report, make sure the same bug is not already submitted. If not, go straight to the new bugsubmission link and enter exhaustive details by filling out all the required fields.
All bugs listing page: http://platon.sk/projects/view_all_bug_page.php?project_id=5
51

Chapter 7. Other information
New bug submission: http://platon.sk/projects/bug_report_advanced_page.php?project_id=5
Support forum
A web based forum has been established to provide support for phpMyEdit. There you can discuss andconsult general issues related to this project. Installation, configuration and usage questions can be askedthere. The forum is also the right place for brainstorming about new features, since more opinions andpoints of view can be presented. The whole matter needs to be completelly re-thought before it will besubmitted into bug-tracking system, marked as a feature request and finally implemented.
http://platon.sk/forum/projects/?c=5
Feedback
Feel free to correct the text of the documents and messages in this project if you find a mistake or typo.
Usage of mentioned services is prefered, however if you need to contact authors directly, use thefollowing <[email protected] (mailto:[email protected]?subject=phpMyEdit)> e-mail address and write’phpMyEdit’ keyword in the Subject line.
Donation
If you appreciate phpMyEdit application, you can send a donation to the Platon Group via PayPal.All the major credit cards are accepted. Please use the e-mail address <[email protected](mailto:[email protected])> as the recipient.
PayPal logoThank you!
Translations
If you don’t find in lang/ subdirectory a translation into your language, you can make one. Beforespending time creating a translation, check http://platon.sk/cvs/cvs.php/phpMyEdit/lang/ to see ifdevelopment for that translation has already begun.
7.4. CVS access
Whole phpMyEdit project is provided in Platon Group (http://platon.sk/) CVS repository. It is possible to
52

Chapter 7. Other information
review our CVS repository using CVSweb interface (http://platon.sk/cvs/cvs.php/phpMyEdit/), but it isalso possible to checkout files using anonymous access.
Particular CVS instructions follows. Platon Group CVS repository can be checked out throughanonymous (pserver) CVS with the following instruction set. When prompted for a password foranonymous, simply press the Enter key.
export CVSROOT=:pserver:[email protected]:/home/cvs
cvs login
cvs checkout phpMyEdit
These commands should work with no problems on any UNIX-like system with cvs client installed. Forcheckouting on MS-Windows platform you can use one from several free available CVS client softwares.
53