photo ssay - how to build an albion - spira · pdf filephoto ssay - how to build an ......
TRANSCRIPT
Photo Essay - How to build an
Albion
Pacific Power Dory
Plans available in Imperial or Metric Dimensions and Materials at:
http://www.spirainternational.com/
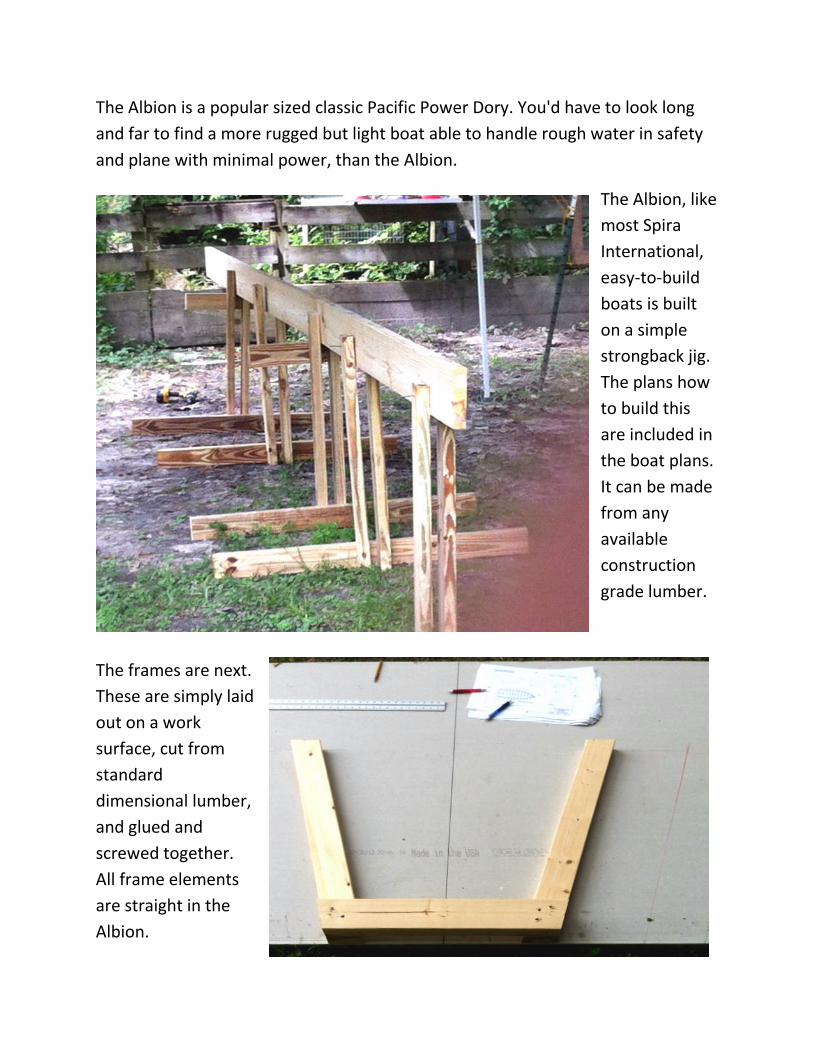
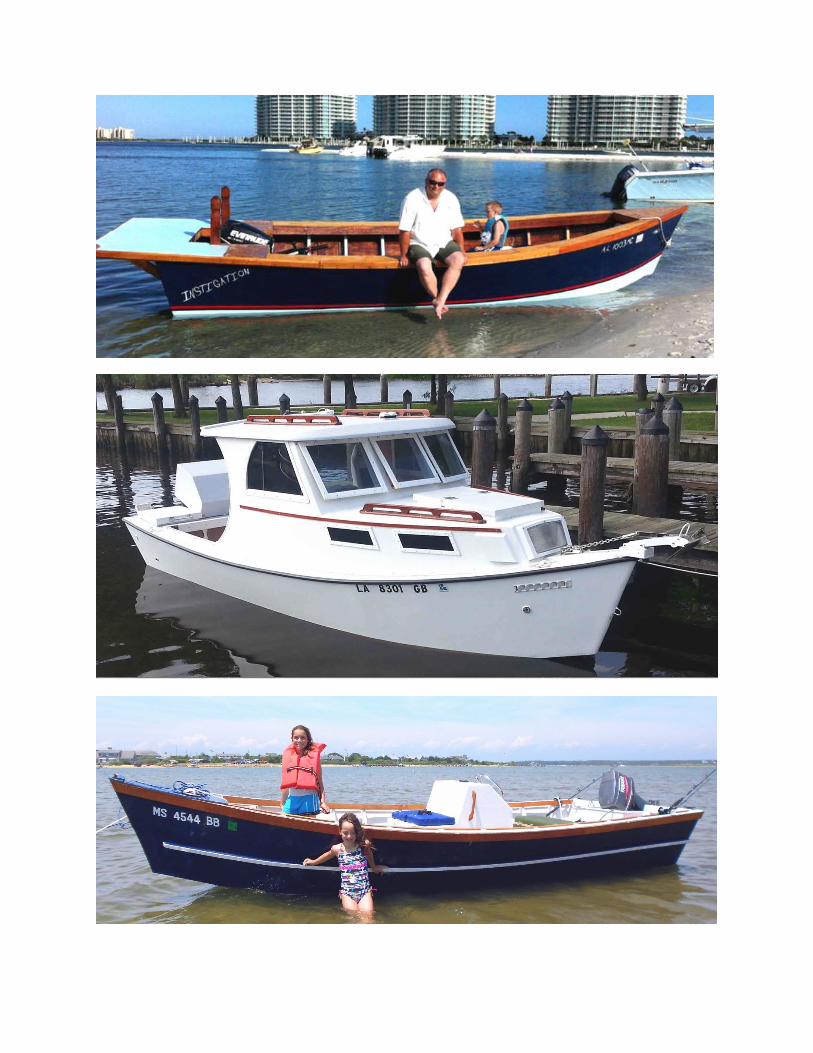
The Albion is a popular sized classic Pacific Power Dory. You'd have to look long
and far to find a more rugged but light boat able to handle rough water in safety
and plane with minimal power, than the Albion.
The Albion, like
most Spira
International,
easy-to-build
boats is built
on a simple
strongback jig.
The plans how
to build this
are included in
the boat plans.
It can be made
from any
available
construction
grade lumber.
The frames are next.
These are simply laid
out on a work
surface, cut from
standard
dimensional lumber,
and glued and
screwed together.
All frame elements
are straight in the
Albion.
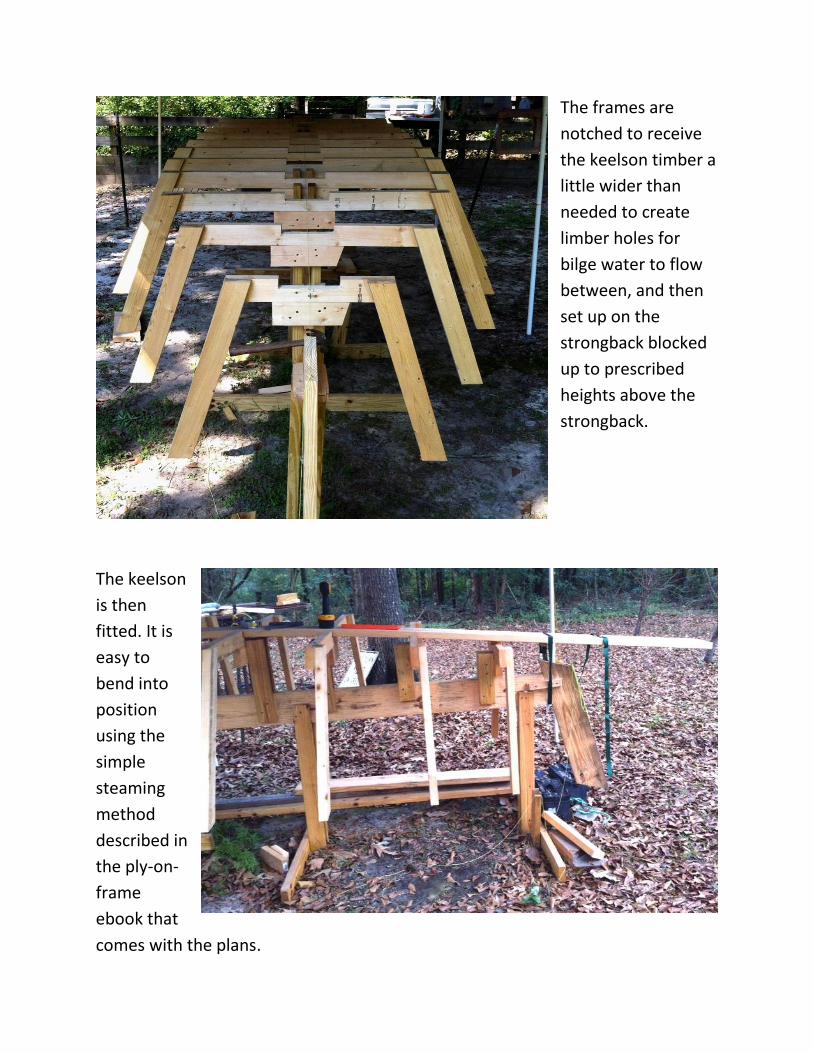
The frames are
notched to receive
the keelson timber a
little wider than
needed to create
limber holes for
bilge water to flow
between, and then
set up on the
strongback blocked
up to prescribed
heights above the
strongback.
The keelson
is then
fitted. It is
easy to
bend into
position
using the
simple
steaming
method
described in
the ply-on-
frame
ebook that
comes with the plans.
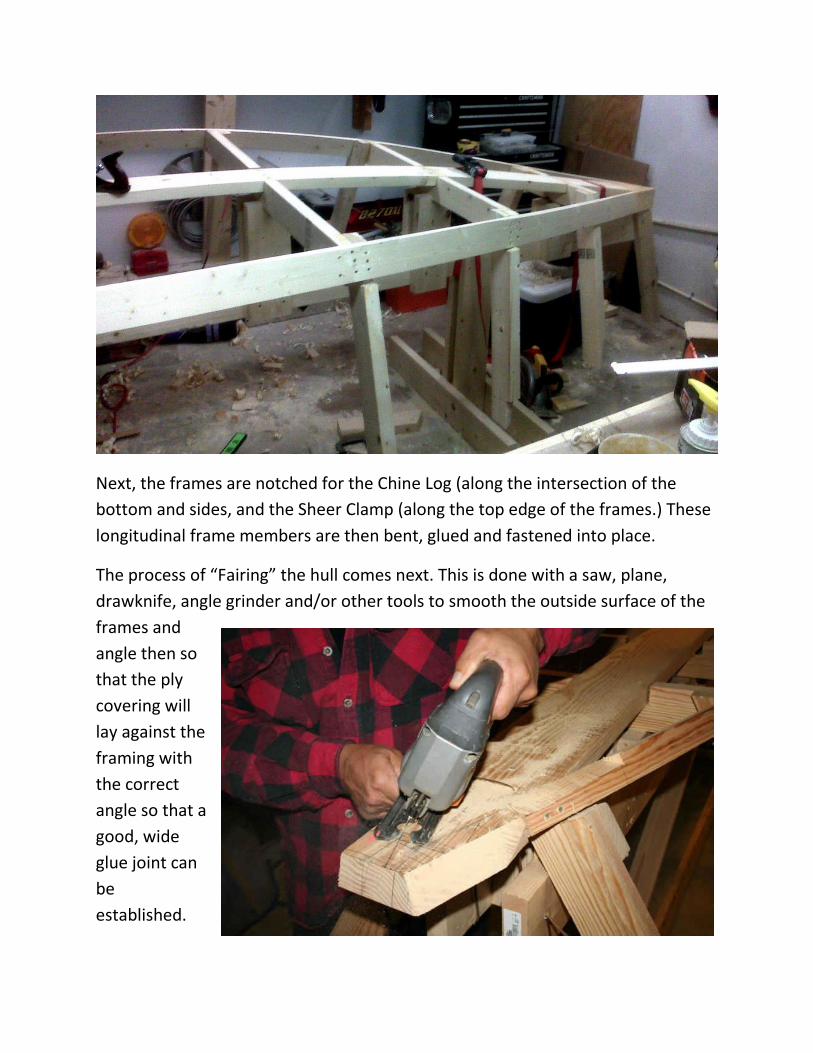
Next, the frames are notched for the Chine Log (along the intersection of the
bottom and sides, and the Sheer Clamp (along the top edge of the frames.) These
longitudinal frame members are then bent, glued and fastened into place.
The process of “Fairing” the hull comes next. This is done with a saw, plane,
drawknife, angle grinder and/or other tools to smooth the outside surface of the
frames and
angle then so
that the ply
covering will
lay against the
framing with
the correct
angle so that a
good, wide
glue joint can
be
established.
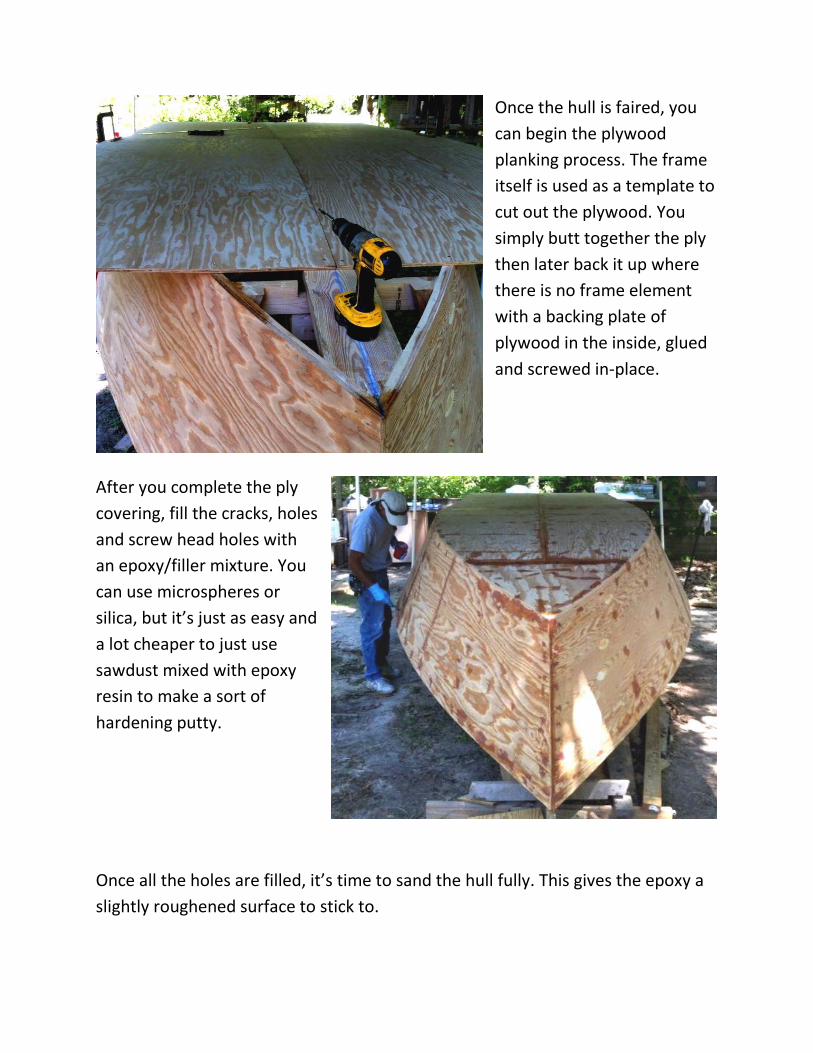
Once the hull is faired, you
can begin the plywood
planking process. The frame
itself is used as a template to
cut out the plywood. You
simply butt together the ply
then later back it up where
there is no frame element
with a backing plate of
plywood in the inside, glued
and screwed in-place.
After you complete the ply
covering, fill the cracks, holes
and screw head holes with
an epoxy/filler mixture. You
can use microspheres or
silica, but it’s just as easy and
a lot cheaper to just use
sawdust mixed with epoxy
resin to make a sort of
hardening putty.
Once all the holes are filled, it’s time to sand the hull fully. This gives the epoxy a
slightly roughened surface to stick to.
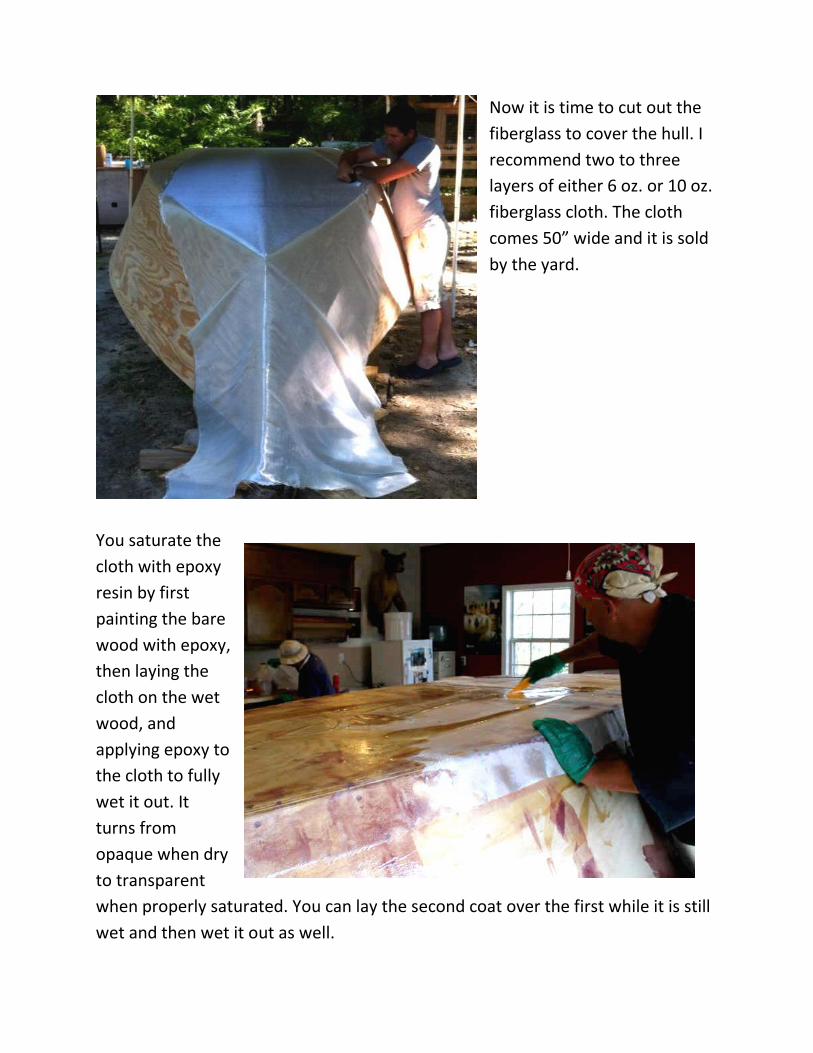
Now it is time to cut out the
fiberglass to cover the hull. I
recommend two to three
layers of either 6 oz. or 10 oz.
fiberglass cloth. The cloth
comes 50” wide and it is sold
by the yard.
You saturate the
cloth with epoxy
resin by first
painting the bare
wood with epoxy,
then laying the
cloth on the wet
wood, and
applying epoxy to
the cloth to fully
wet it out. It
turns from
opaque when dry
to transparent
when properly saturated. You can lay the second coat over the first while it is still
wet and then wet it out as well.

All glassed. Now it’s time to
sand, sand, and sand. Not an
easy task but unless you want
your boat looking like a rough
burlap sack, a necessary one.
When you’re done it should look something like this:
Though not
detailed in the
plans, some
builders elect
to use bottom
strakes to serve
as wear strips
when you
beach the boat,
and to improve
the turning at
low speeds.
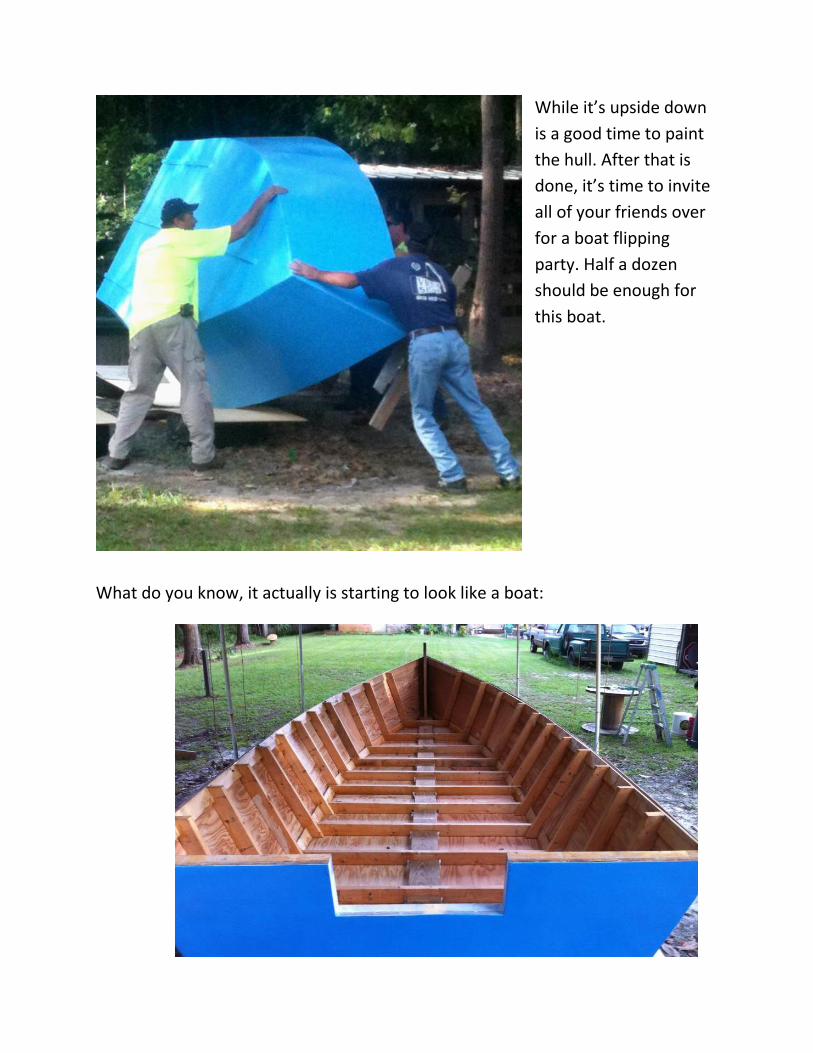
While it’s upside down
is a good time to paint
the hull. After that is
done, it’s time to invite
all of your friends over
for a boat flipping
party. Half a dozen
should be enough for
this boat.
What do you know, it actually is starting to look like a boat:
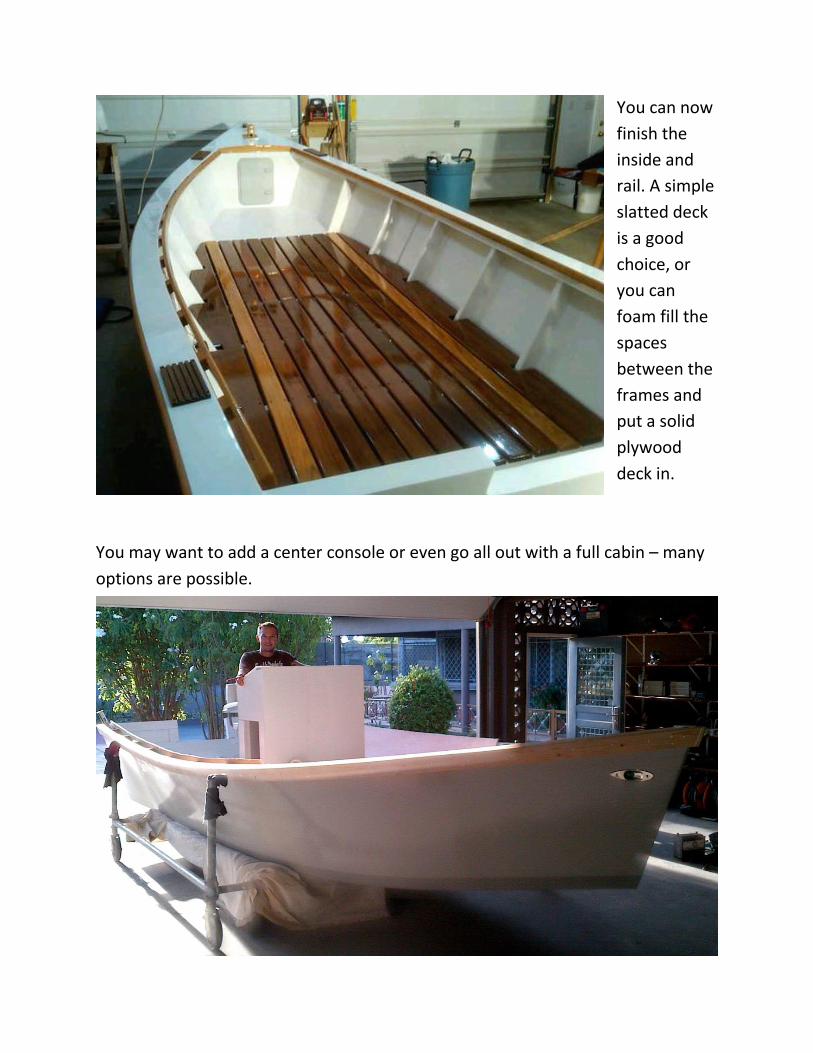
You can now
finish the
inside and
rail. A simple
slatted deck
is a good
choice, or
you can
foam fill the
spaces
between the
frames and
put a solid
plywood
deck in.
You may want to add a center console or even go all out with a full cabin – many
options are possible.