parksbird patterns instructions for: dog diaper in 6 sizes xxs-xl
TRANSCRIPT

Parksbird Patterns Instructions for: Dog Diaper in 6 sizes XXS-XL
This diaper is washable and reusable and holds a maxi or mini pad to absorb urine.
1. Measure your dog all the way around its waist (narrowest part). For male dogs, measure in front of the penis. If you do not have a measuring tape, use string and then measure the string length - Snug, but NOT tight.
2. Suggested fabrics: Outer: Cotton or Cotton Blends Inner: Lightweight Cotton Flannel You will need: outer fabric lining flannel elastic velcro thread
Check the chart below to determine the diaper size you need and fabric, velcro and elastic requirements. There are 6 separate accompanying pattern files for diaper sizes XXS to XL. You only need to print the size you are making.
3 4
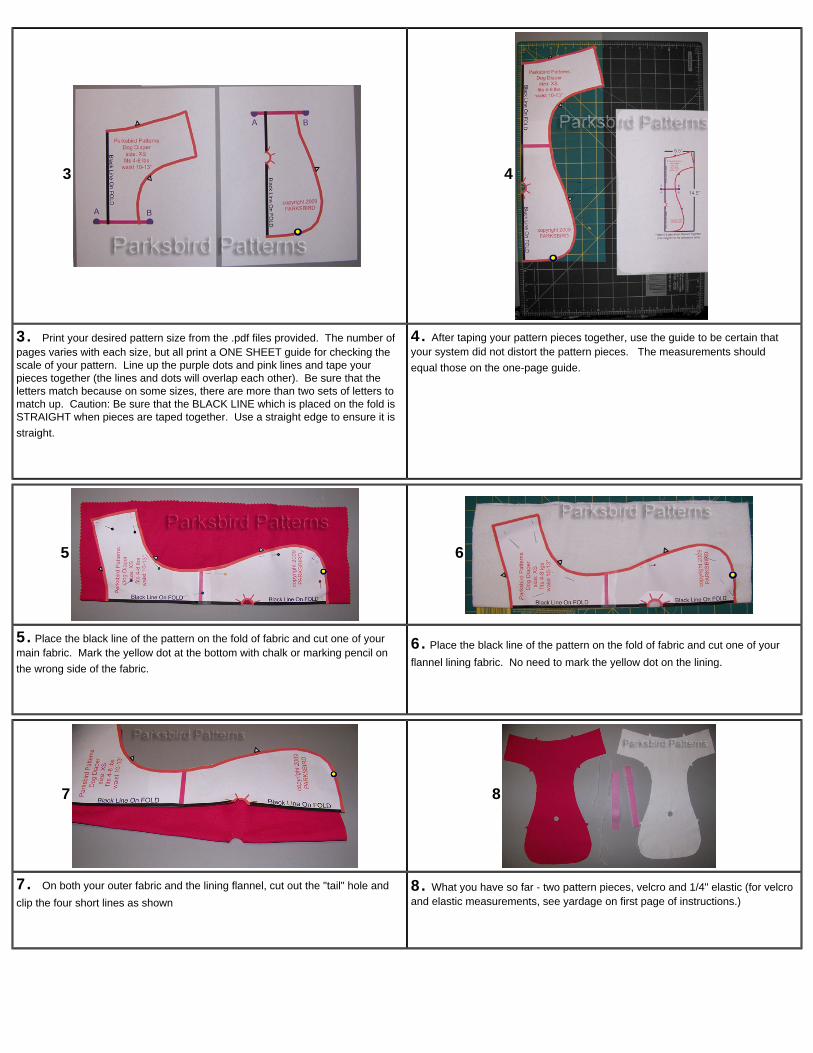
3. Print your desired pattern size from the .pdf files provided. The number of pages varies with each size, but all print a ONE SHEET guide for checking the scale of your pattern. Line up the purple dots and pink lines and tape your pieces together (the lines and dots will overlap each other). Be sure that the letters match because on some sizes, there are more than two sets of letters to match up. Caution: Be sure that the BLACK LINE which is placed on the fold is STRAIGHT when pieces are taped together. Use a straight edge to ensure it is straight.
4. After taping your pattern pieces together, use the guide to be certain that your system did not distort the pattern pieces. The measurements should equal those on the one-page guide.
5 6
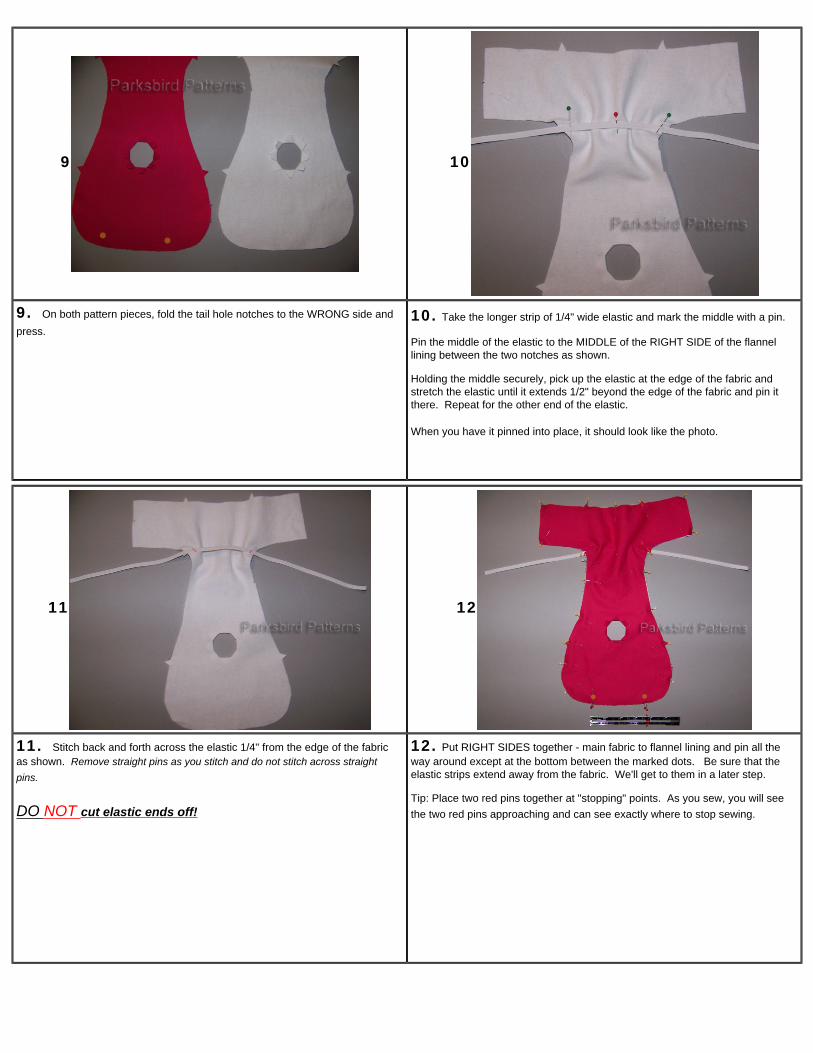
5. Place the black line of the pattern on the fold of fabric and cut one of your main fabric. Mark the yellow dot at the bottom with chalk or marking pencil on the wrong side of the fabric.
6. Place the black line of the pattern on the fold of fabric and cut one of your flannel lining fabric. No need to mark the yellow dot on the lining.
7 8
7. On both your outer fabric and the lining flannel, cut out the "tail" hole and clip the four short lines as shown
8. What you have so far - two pattern pieces, velcro and 1/4" elastic (for velcro and elastic measurements, see yardage on first page of instructions.)
9 10
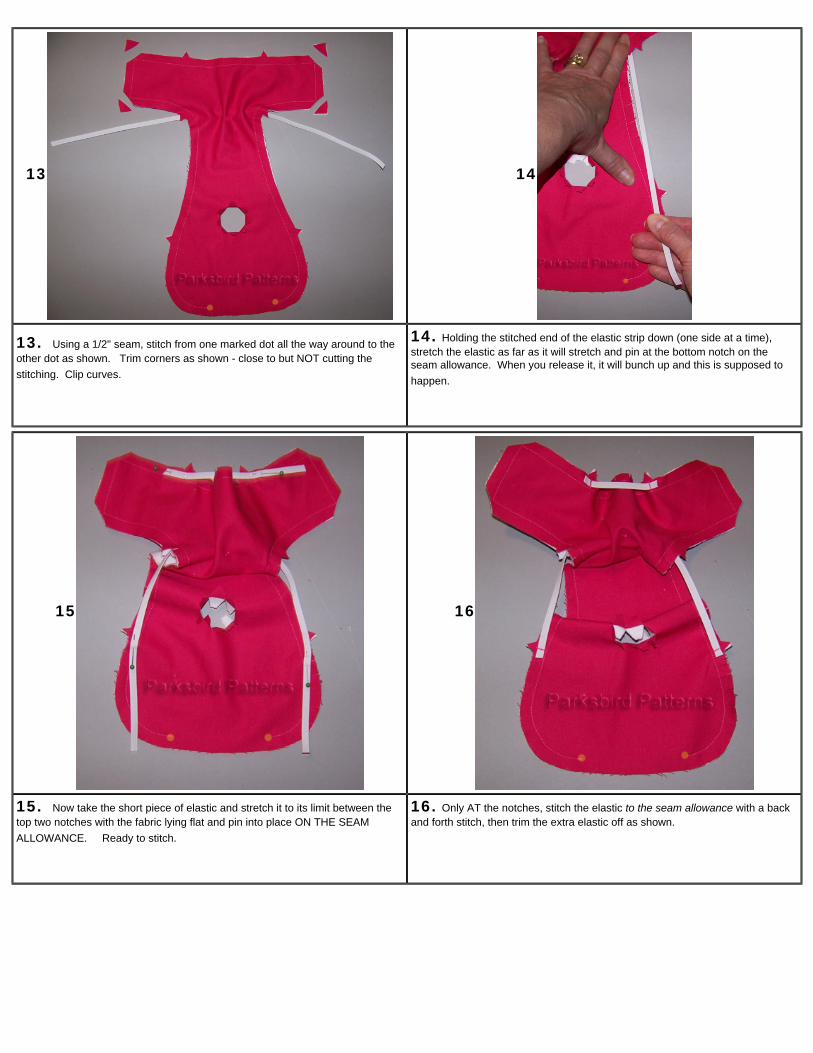
9. On both pattern pieces, fold the tail hole notches to the WRONG side and press.
10. Take the longer strip of 1/4" wide elastic and mark the middle with a pin. Pin the middle of the elastic to the MIDDLE of the RIGHT SIDE of the flannel lining between the two notches as shown. Holding the middle securely, pick up the elastic at the edge of the fabric and stretch the elastic until it extends 1/2" beyond the edge of the fabric and pin it there. Repeat for the other end of the elastic. When you have it pinned into place, it should look like the photo.
11 12
11. Stitch back and forth across the elastic 1/4" from the edge of the fabric as shown. Remove straight pins as you stitch and do not stitch across straight pins.
DO NOT cut elastic ends off!
12. Put RIGHT SIDES together - main fabric to flannel lining and pin all the way around except at the bottom between the marked dots. Be sure that the elastic strips extend away from the fabric. We'll get to them in a later step. Tip: Place two red pins together at "stopping" points. As you sew, you will see the two red pins approaching and can see exactly where to stop sewing.
13 14
13. Using a 1/2" seam, stitch from one marked dot all the way around to the other dot as shown. Trim corners as shown - close to but NOT cutting the stitching. Clip curves.
14. Holding the stitched end of the elastic strip down (one side at a time), stretch the elastic as far as it will stretch and pin at the bottom notch on the seam allowance. When you release it, it will bunch up and this is supposed to happen.
15 16
15. Now take the short piece of elastic and stretch it to its limit between the top two notches with the fabric lying flat and pin into place ON THE SEAM ALLOWANCE. Ready to stitch.
16. Only AT the notches, stitch the elastic to the seam allowance with a back and forth stitch, then trim the extra elastic off as shown.
17 18
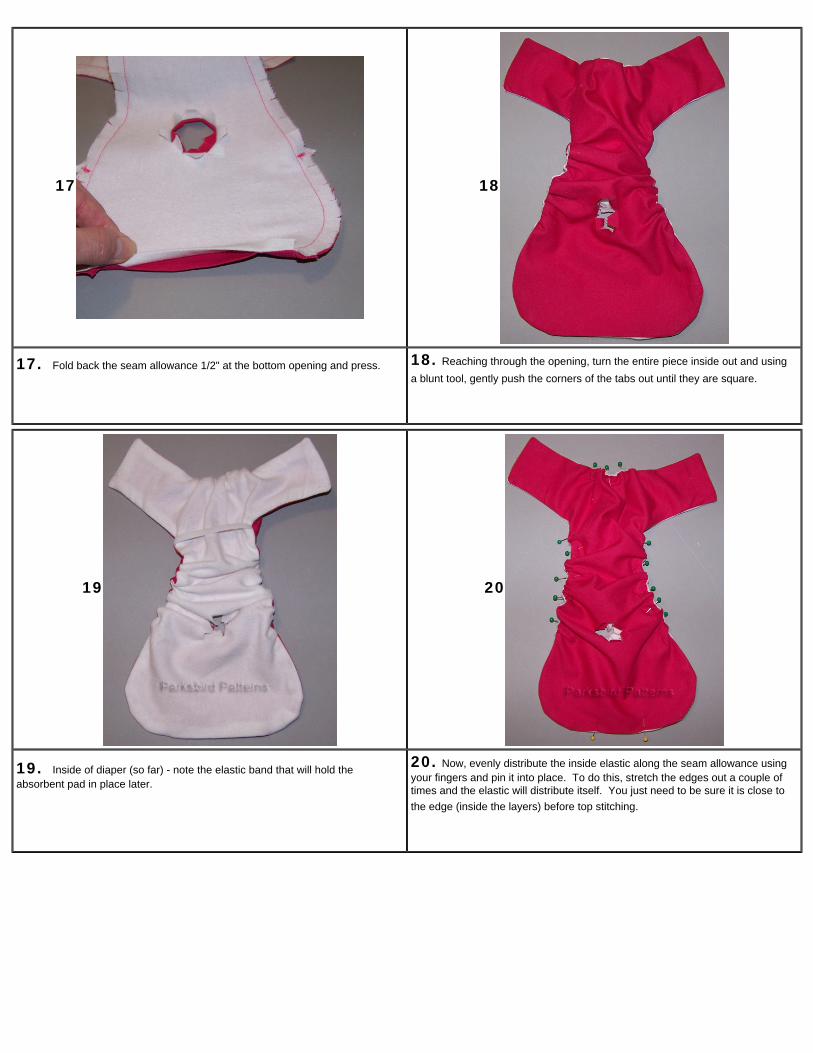
17. Fold back the seam allowance 1/2" at the bottom opening and press.
18. Reaching through the opening, turn the entire piece inside out and using a blunt tool, gently push the corners of the tabs out until they are square.
19 20
19. Inside of diaper (so far) - note the elastic band that will hold the absorbent pad in place later.
20. Now, evenly distribute the inside elastic along the seam allowance using your fingers and pin it into place. To do this, stretch the edges out a couple of times and the elastic will distribute itself. You just need to be sure it is close to the edge (inside the layers) before top stitching.
21 22
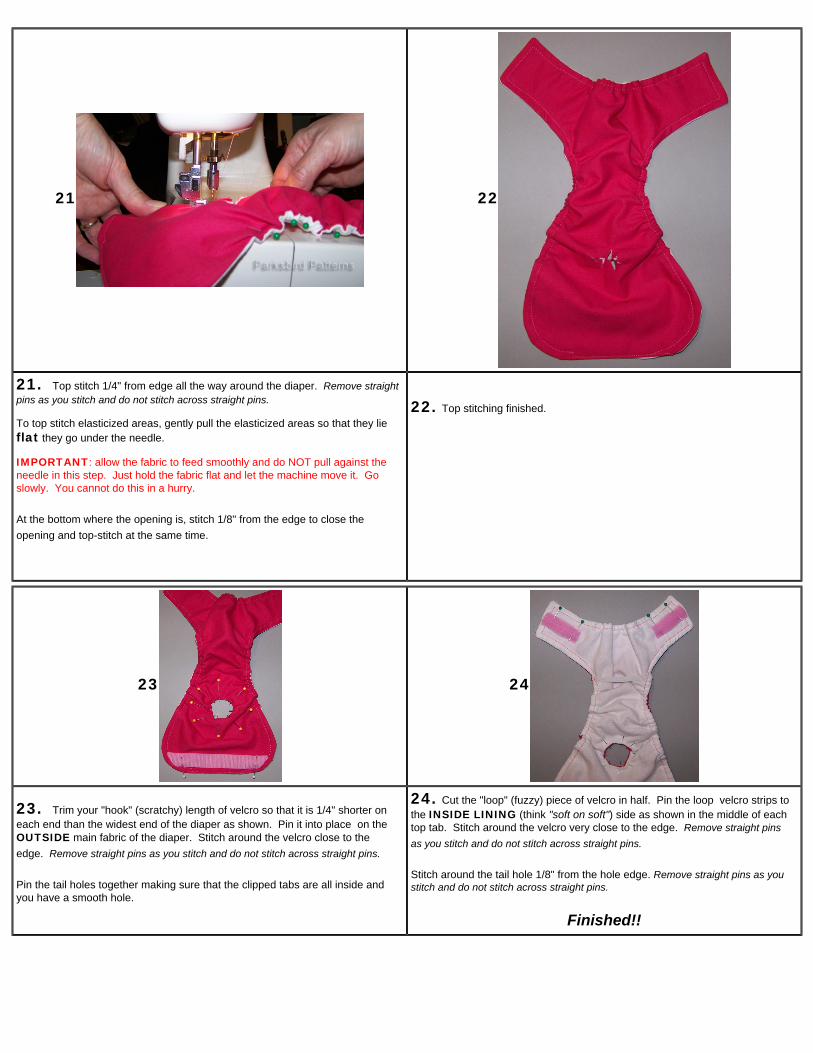
21. Top stitch 1/4" from edge all the way around the diaper. Remove straight pins as you stitch and do not stitch across straight pins. To top stitch elasticized areas, gently pull the elasticized areas so that they lie flat they go under the needle. IMPORTANT: allow the fabric to feed smoothly and do NOT pull against the needle in this step. Just hold the fabric flat and let the machine move it. Go slowly. You cannot do this in a hurry.
At the bottom where the opening is, stitch 1/8" from the edge to close the opening and top-stitch at the same time.
22. Top stitching finished.
23 24
23. Trim your "hook" (scratchy) length of velcro so that it is 1/4" shorter on each end than the widest end of the diaper as shown. Pin it into place on the OUTSIDE main fabric of the diaper. Stitch around the velcro close to the edge. Remove straight pins as you stitch and do not stitch across straight pins.
Pin the tail holes together making sure that the clipped tabs are all inside and you have a smooth hole.
24. Cut the "loop" (fuzzy) piece of velcro in half. Pin the loop velcro strips to the INSIDE LINING (think "soft on soft") side as shown in the middle of each top tab. Stitch around the velcro very close to the edge. Remove straight pins as you stitch and do not stitch across straight pins.
Stitch around the tail hole 1/8" from the hole edge. Remove straight pins as you stitch and do not stitch across straight pins.
Finished!!
Important information regarding use of dog diapers
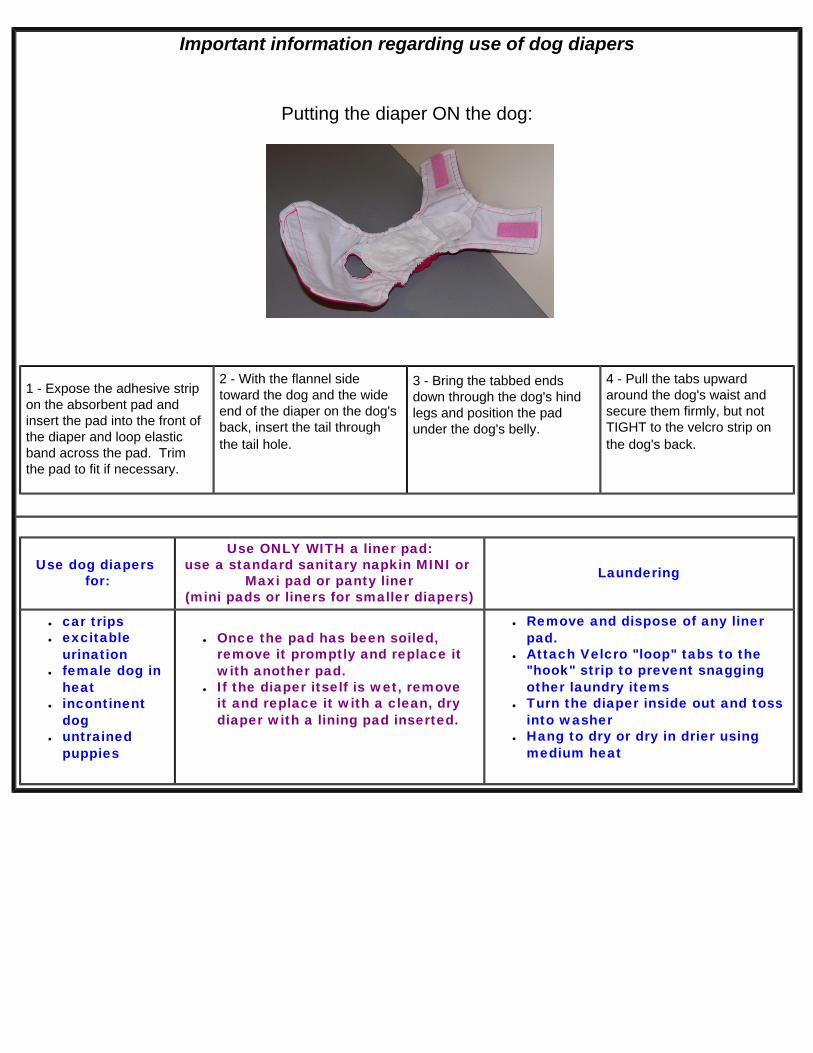
Putting the diaper ON the dog:
1 - Expose the adhesive strip on the absorbent pad and insert the pad into the front of the diaper and loop elastic band across the pad. Trim the pad to fit if necessary.
2 - With the flannel side toward the dog and the wide end of the diaper on the dog's back, insert the tail through the tail hole.
3 - Bring the tabbed ends down through the dog's hind legs and position the pad under the dog's belly.
4 - Pull the tabs upward around the dog's waist and secure them firmly, but not TIGHT to the velcro strip on the dog's back.
Use dog diapers for:
Use ONLY WITH a liner pad: use a standard sanitary napkin MINI or
Maxi pad or panty liner (mini pads or liners for smaller diapers)
Laundering
● car trips ● excitable
urination ● female dog in
heat ● incontinent
dog ● untrained
puppies
● Once the pad has been soiled, remove it promptly and replace it with another pad.
● If the diaper itself is wet, remove it and replace it with a clean, dry diaper with a lining pad inserted.
● Remove and dispose of any liner pad.
● Attach Velcro "loop" tabs to the "hook" strip to prevent snagging other laundry items
● Turn the diaper inside out and toss into washer
● Hang to dry or dry in drier using medium heat