owner’s manual en p02 - worx€¦ · owner’s manual en 4 or replacing the blades. a) keep all...
TRANSCRIPT

Owner’s Manual P02EN
Owner’s Manual EN
2
TABLE OF CONTENTS1. Product Safety1.1 General & Additional Safety Instruction 1.2 Information on the Landroid®
2. Component list
3. Technical data and noise data3.1 Technical data3.2 Noise data
4. Control Panel
5. Understanding Your Landroid®
5.1 How does my Landroid® know what to mow?5.2 How does my Landroid® know where to go? A. Finding the charging base B. Rain sensors C. Sensing the boundary wire D. Starting and stopping while mowing5.3 Cut to Edge5.4 Setting5.5 How efficiently will my Landroid® mow the grass?
6. App
7. Boundary Wire Basics7.1 Pegging the Boundary Wire7.2 Burying the Boundary Wire7.3 Joining the Boundary Wire
8. Software update
9. Maintenance9.1 Keep it Sharp A. Replace the Blades9.2 Keep it Clean A. Cleaning the Body B. Cleaning the Underside C. Cleaning the contact pins and the charging strips9.3 Battery Life9.4 Winter Hibernation9.5 Replacing the battery
10. Function messages
11. Error Messages
12. Security
13. Troubleshooting
3
6
8
10
11
15
17
18
19
22
22
23
24
ORIGINAL INSTRUCTIONS

Owner’s Manual EN
3
1. Product Safety1.1 General & Additional Safety Instruction
WARNING: Read all safety warnings and all instructions. Failure to follow the warnings and instructions may result in electric shock, fire and/or serious injury.
Carefully read the instructions for the safe operation of the machine.Save all warnings and instructions for future reference.• This appliance is not intended for use by persons (including children) with reduced physical, sensory or mental
capabilities, or lack of experience and knowledge, unless they have been given supervision or instruction concerning use of the appliance by a person responsible for their safety.
• Children should be supervised to ensure that they do not play with the appliance.• The appliance is only to be used with the power supply unit provided with the appliance.
WARNING: To reduce the risk of injury to persons and damage to the machine, do not remove battery pack before switching off the machine.
IMPORTANTREAD CAREFULLY BEFORE USEKEEP FOR FUTURE REFERENCE
SAFE OPERATION PRACTICESTraininga) Read the instructions carefully. Make sure you understand the instructions and be familiar with the controls and the
proper use of the appliance;b) Never allow people unfamiliar with these instructions or children to use the appliance. Local regulations can restrict the
age of the operator;c) The operator or user is responsible for accidents or hazards occurring to other people or their property.
Preparationa) Ensure the correct installation of the boundary wire as instructed.b) Periodically inspect the area where the appliance is to be used and remove all stones, sticks, wires, bones, and other
foreign objects.c) Periodically visually inspect to see that the blades, blade bolts and cutter assembly are not worn or damaged. Replace
worn or damaged blades and bolts in sets to preserve balance.d) On multi-spindle appliances, take care as rotating one blade can cause other blades to rotate.e) WARNING! The lawnmower shall not be operated without the guard in place.
OPERATION1. GENERALa) Never operate the appliance with defective guards, or without safety devices, for example deflectors, in place.b) Do not put hands or feet near or under rotating parts. Keep clear of the discharge opening at all times.c) Never pick up or carry an appliance while the motor is running.d) Remove the disabling device from the appliance.– Before clearing a blockage;– Before checking, cleaning or working on the appliance.e) It is not permitted to modify the original design of robotic lawnmower. All modifications are made at your own risk.f) Start robotic lawnmower according to the instructions. When the power key is switched on, make sure you keep your
hands and feet away from the rotating blades. Never put your hands and feet under the mower.g) Do not let persons who do not know how robotic lawnmower works and behaves use the mower.h) Do not put anything on top of robotic lawnmower or its charging station.i) Do not allow robotic lawnmower to be used with a defective blade disc or body. Neither should it be used with defective
blades, screws, nuts or cables.j) Do not allow robotic lawnmower to be used with a defective blade disc or body. Neither should it be used with defective
blades, screws, nuts or cables.k) Keep your hands and feet away from the rotating blades. Never place your hands or feet close to or under the body
when robotic lawnmower is in operation.l) To avoid using the machine and its peripherals in bad weather conditions especially when there is a risk of lightning.m) Dot to touch moving hazardous parts before these have come to a complete stop.n) Dot to touch moving hazardous parts before these have come to a complete stop.o) For machines used in public areas, that warning signs shall be placed around the working area of the machine. They
shall show the substance of the following text:WARNING! Automatic lawnmower! Keep away from the machine! Supervise children!
2. ADDITIONALLY WHEN THE APPLIANCE IS OPERATING AUTOMATICALLYa) Do not leave the machine to operate unattended if you know that there are pets, children or people in the vicinity.
MAINTENANCE AND STORAGEWhen the mower is turned upside down the power key must always be switched off.The power key should be switched off during all work on the mower’s underframe, such as cleaning

Owner’s Manual EN
4
or replacing the blades.a) Keep all nuts, bolts and screws tight to be sure the appliance is in safe working condition.b) Inspect the robotic lawnmower each week and replace worn or damaged parts for safety.c) Check especially that the blades and blade disc are not damaged. Replace all blades and screws at the same time if
necessary so that the rotating parts are balanced.d) Ensure that only replacement cutting means of the right type are used.e) Ensure that batteries are charged using the correct charger recommended by the manufacturer. Incorrect use may
result in electric shock, overheating or leakage of corrosive liquid from the battery.f) In the event of leakage of electrolyte flush with water/neutralizing agent, seek medical help if it comes into contact with
the eyes etc.g) Servicing of the appliance should be according to manufacturers’ instructions.
RecommendationTo connect the machine and/or its peripherals only to a supply circuit protected by a residual current device (RCD ) with a tripping current of not more than 30 mA.
Residual risksTo avoid injuries, wear protective gloves when replacing the blades.
TransportThe original packaging should be used when transporting robotic lawnmower over long distances.To safely move from or within the working area:a) Press the STOP button to stop the mower. You select the four digit PIN code when you start the mower for the first time.b) Always switch off robotic lawnmower if you intend to carry the mower.c) Carry the mower by the handle at the front under the mower. Carry the mower with the blade disc away from the body.
RF exposure requirementsTo satisfy RF exposure requirements, a separation distance of 200mm or more should be maintained between this device and persons during device operation.To ensure compliance, operations at closer than this distance is not recommended. The antenna used for this transmitter must not be co-located in conjunction with any other antenna or transmitter.
Safety Warnings for battery packa) Do not dismantle, open or shred cells or battery pack. b) Do not short-circuit a battery pack. Do not store battery packs haphazardly in a box or drawer where
they may short-circuit each other or be short-circuited by conductive materials. When battery pack is not in use, keep it away from other metal objects, like paper clips, coins, keys, nails, screws or other small metal objects, that can make a connection from one terminal to another. Shorting the battery terminals together may cause burns or a fire.
c) Do not expose battery pack to heat or fire. Avoid storage in direct sunlight.d) Do not subject battery pack to mechanical shock.e) In the event of battery leaking, do not allow the liquid to come into contact with the skin or eyes.
If contact has been made, wash the affected area with copious amounts of water and seek medical advice.
f) Seek medical advice immediately if a cell or battery pack has been swallowed.g) Keep battery pack clean and dry.h) Wipe the battery pack terminals with a clean dry cloth if they become dirty.i) Battery pack needs to be charged before use. Always refer to this instruction and use the correct
charging procedure.j) Do not maintain battery pack on charge when not in use.k) After extended periods of storage, it may be necessary to charge and discharge the battery pack
several times to obtain maximum performance.l) Battery pack gives its best performance when it is operated at normal room temperature (20 °C ±
5 °C).m) When disposing of battery packs, keep battery packs of different electrochemical systems
separate from each other.n) Recharge only with the charger specified by WORX. Do not use any charger other than that
specifically provided for use with the equipment. A charger that is suitable for one type of battery pack may create a risk of fire when used with another battery pack.
o) Do not use any battery pack which is not designed for use with the equipment.p) Keep battery pack out of the reach of children.q) Retain the original product literature for future reference.r) Remove the battery from the equipment when not in use.s) Dispose of properly.

Owner’s Manual EN
5
1.2 Information on the Landroid®
WARNING - Robotic lawnmower can be dangerous if incorrectly used.Read through the Operator’s manual carefully and understand the content before using your robotic lawnmower.
WARNING - Keep a safe distance from the machine when operating.
WARNING – Operate the disabling device before working on or lifting the machine.
WARNING - Do not ride on the machine.
Do not burn
Do not expose to rain or water.
Do not dispose of batteries. Return exhausted batteries to your local collection or recycling point.
Do not wash the machine with a high pressure washer
Class III appliance
Waste electrical products must not be disposed of with household waste. Please recycle where facilities exist. Check with your local authorities or retailer for recycling advice.

Owner’s Manual EN
6
2. Component List
1012 11
1 2
3
25
20
18
18
15
13
9
19
23
24
21
22
8 7 6
17
16
14
WR141E WR144E
WR130E WR131E
WR130E WR131E
4
5
12

Owner’s Manual EN
7
1. STOP BUTTON
2. REAR DRIVING WHEEL
3. BATTERY PACK
4. DISPLAY
5. LIGHT SENSOR
6. HOME BUTTON
7. START KEY
8. ON/OFF KEY
9. USB PORT
10. RAIN SENSOR
11. CHARGING STRIPS
12. CUTTING HEIGHT ADJUSTMENT KNOB
13. FRONT WHEEL
14. BLADE TURNING DISC
15. CUTTING BLADE
16. CONTACT PINS
17. CHARGING BASE
18. POWER ADAPTER
19. WIRE PEGS
20. BOUNDARY WIRE
21. CHARGING BASE FIXING NAILS
22. BOUNDARY WIRE DISTANCE GAUGE
23. HEX KEY
24. CONNECTOR
25. HANDLE
Not all the accessories illustrated or described are included in standard delivery.

Owner’s Manual EN
8
3. Technical data and noise data
3.1 Technical dataType WR130E WR131E WR141E WR144E (100-199 - designation of machinery, representative of Robotic Lawnmower)
WR130E WR131E WR141E WR144E
Rated voltage 20V Max.*
No load speed 2800/min
Cutting area 300m2 500m2
Cutting diameter 18cm
Cutting height 20-50mm 30-60mm
Cutting height positions 4
Battery type Lithium-ion
Battery model WA3551.3
Charging time approx. 4hrs 1.5hrs
Charger model WA3766 WA3750.1 / WA3755.1
Charger rating Input: 100-240V~50/60Hz, 11W,Output: 20V , 0.5A
Input: 100-240V~50/60Hz, 38W,Output: 20V , 1.5A
Machinery weight 8.0kg 9.1kg
Protection degree III
App Y
Frequency band of embedded WLAN module 2.412GHz-2.484GHz
Max. radio-frequency power of embedded WLAN module
802.11b:+16±2dBm(@11Mbps)802.11g:+14±2dBm(@54Mbps)
802.11n:+13±2dBm(@HT20,MCS7)
*Voltage measured at no load. Initial battery voltage reaches maximum of 20 volts. Nominal voltage is 18 volts.
ACCESSORIES
WR130E WR131E WR141E WR144E
Screw 9 9
Charging base 1 1
Charging base fixing nails 8 8
Boundary wire 100m 130m
Wire pegs 130 180
Hex key 1 1

Owner’s Manual EN
9
Boundary wire distance gauge 2 2
Blade 9 9
Connector 2 2
Battery pack (WA3551.3) 1 1
Charger (WA3766) 1 /
Charger (WA3750.1 / WA3755.1) / 1
We recommend that you purchase genuine accessories listed in the above list from the same store that sold you the tool. Refer to the accessory packaging for further details. Store personnel can assist you and offer advice. Your Landroid® can be used with other WORX functional accessories. Visit www.worx.com to learn more about these available accessory options.
3.2 Noise data
WR130E WR131E WR141E WR144E
A weighted sound pressure LpA = 44.2 dB(A) LpA = 45.5 dB(A)
KPA = 0.4 dB(A) KPA = 0.6 dB(A)
A weighted sound powerLwA = 64.2 dB(A) LwA = 65.5 dB(A)
KwA = 0.4 dB(A) KwA = 0.6 dB(A)
Wear ear protection when sound pressure is over 80 dB (A).
A degree of noise from the machine is not avoidable. Route noisy work is to be licensed and limits for certain periods. Keep rest periods and they may need to restrict the working hours to a minimum. For their personal protection and protection of people working nearby, an appropriate hearing protection shall be worn.
Intended Use The garden product is intended for domestic lawn mowing. It is designed to mow often, maintaining a healthier and better looking lawn than ever before. Depending on the size of your lawn, your Landroid® may be programmed to operate at any time or frequency. It is impossible for digging, sweeping or snow cleaning.

Owner’s Manual EN
10
4. Control panel
Start1) After the boundary wire installation, you can start using Landroid® (Please refer to Installation Guide for boundary wire
installation).2) Press until Landroid® turns on. For the first use, input the default PIN code 0000 by pressing for four times when
the number 0 is blinking. (The PIN code can be changed, please refer to “Setting” in the Installation Guide). NOTE: Landroid® will turn off if it does not receive any input within 30 seconds after it is turned on. If you enter wrong
PIN code three times, Landroid® will raise the alarm “di-di” and then turn off.3) Press , then press to start mowing.4) Press then to make Landroid® go to the charging base.Landroid® will work continuously until reaching low battery power level and then it will return to the charging base. Once charging is complete, Landroid® will automatically resume mowing or it stay in the charging base according to the mowing schedule.
NOTE: When Landroid® turns on, all lights on the display will be illuminated and then turn off. Check if there is any light damaged. It is recommended to shield the display with your hand when the outdoor light gets too strong.
POWER ON/OFFTurns Landroid® on and off
Wi-Fi
LOCK
BATTERY CAPACITY
WORKING TIME
STARTStarts mowing/Selects up
STANDBY PAGE:Landroid® is not in the working hours.
SLEEP PAGE:Landroid® is fully charged and is not in the working hours.
DISPLAYDisplays the state of your setting
STOPStops Landroid® during operation
HOMESends Landroid® to its charging base during operation and activates charging/Selects down
OKConfirms any setting/Enters Wi-Fi connection mode

Owner’s Manual EN
11
5. Understanding Your Landroid®
Congratulations on your new purchase of Landroid® and welcome to the care-free life of automatic mowing. In the following, we want to help you to better understand how your Landroid® thinks.
5.1 How does my Landroid® know what to mow?Landroid® chooses its direction at random. It will make sure your entire lawn is evenly mowed without leaving unattractive mowing paths (See Fig. A).
A

Owner’s Manual EN
12
5.2 How does my Landroid® know where to go?Your Landroid® is made to work on its own. Landroid® knows when it needs to go to its charging base to charge, can sense when it is raining, can stop itself if it senses a problem, and knows to stop, draw back, and turn around when it bumps into something blocking its path. Landroid® will also automatically stop its blade turning disc from rotating if it is lifted off the ground to prevent an accident.
A. Finding the Charging BaseWhen your Landroid® needs to recharge, it will stop mowing and follow the boundary wire in an anti-clockwise direction back to its charging base. Landroid® is pre-programmed to mow the grass near the boundary wire once a week. By default, Landroid® will mow near the boundary wire every Monday after it is powered on.If you don’t want to enable boundary cut, deactivate it via your smartphone.
B. Rain sensorsLandroid® is equipped with a rain sensor which detects rain and tells Landroid® to stop mowing and follow the boundary wire back to its charging base (See Fig. B). Landroid® will resume mowing after passing the delay time. The default delay time is 180mins. The delay time setting can be changed via Landroid® APP. When the rain sensors are wet, Landroid® returns to its charging base. When the rain sensors are dry, Landroid® will begin the delay time countdown or return to mowing (depending on the saved settings). If you want to exit from the rain delay, dry the sensor area, and perform a power cycle by operating the on/off key. After the power cycle has been performed, you can operate again. Or you can activate or deactivate the rain delay by using mobile App.
C. Sensing the boundary wireLandroid® always obeys the border set by the boundary wire and uses sensors at its front to detect it. (See Fig. C) D. Starting and stopping while mowing (See Fig. D, E1, E2)To start mowing, press the on/off key and input the PIN code. Press , then press . If you would like Landroid® to stop mowing, simply press the STOP button on top of the mower. If Landroid® senses something is wrong, it will display a fault message on the display. For information on these messages, refer to the Error Messages. Landroid® will turn off if it does not receive any input from the user within 20 minutes.
To resume:• Press , then press • Now Landroid® will begin to mow!
C DD
B

Owner’s Manual EN
13
5.3 Cut to edge (only for WR141E WR144E)Off-centered blade turning disc design provides a clean cut with narrowest distance to the boundary or wall. It helps minimize the amount and frequency of manual trimming along the boundary. Additionally, Landroid® is designed with a protective cover underneath that prevents objects from touching the turning blades and/or injury. (See Fig. F)
5.4 Setting
First please set the height to a desired grass level after cut and you can do the program setting manually or using mobile App.NOTE: When doing the program setting manually, Landroid® will enter the standby page if it does not receive any input from the user within 30 seconds.
(1) Change PIN codeTo change the PIN code, keep pressing both and buttons at the same time for 5 seconds. The icon will be blinking, and “ ” will be rolling flashing. After that, the first number will be blinking, use or to select the number you want and press to confirm. The next number will be blinking. Use the same method to complete other numbers. For example, the new PIN code is set to be 0326. After that, “ ” will be rolling flashing and the first number will be blinking again. Use the same method to input the new PIN code you set just now (in this example, ). Then “ ” will be rolling flashing on the display. Your PIN code has been changed successfully.
(2) Set year, date and timeSet year, date and time are compulsory setting items. If you don’t set these items, it will influence the schedule time in the following setting. These items should be set in the order of year, date and time. For the year setting, keep pressing for 3 seconds until the icon and a number are blinking on the display, for example, . Use or to select the year you want. Then press to confirm to finish the year setting.
Meanwhile, the icon will be flashing again and a number will be displayed to indicate the date, for example, , meaning September 29. When is flashing, use or to select the number and press to confirm. Then will be flashing. Use the same method to select the number and press to confirm to finish the date setting.Meanwhile, the icon will be flashing and the time will be displayed, for example, . When is blinking, use or
“Cut to Edge” Tech
F
E1
Only for reference
E2
Only for reference
Only for reference

Owner’s Manual EN
14
Only for reference
to to select the number and press to confirm. Then will be blinking, use the same method to select the number and press to confirm. Now the time setting is completed and Landroid® will enter the standby page.
(3)Set work areaKeep pressing for 3 seconds. When the icon is blinking, press . A number will be blinking on the display, for example, , which is the lawn area. The working time will be automatically set according to the size of your garden. Use
or to set the lawn area (the area will increase / decrease by 50m2 each time the / is pressed), and press to confirm. Then Landroid® will enter the standby page.
Only for reference
(4)Change default start timeThe default start time of 8:00 can be changed to anytime by keep pressing both and buttons at the same time until a ding sound is heard.For example, keep pressing both and buttons at 14:05, and your Landroid® will start mowing from 14:05.
STOPOnly for reference
4hrs
Only for reference Only for reference
Only for reference
Standby page
Owner’s Manual EN
15
5.5 How efficiently will my Landroid® mow the grass?Mowing times are different for every lawn depending on the factors mentioned below. Gradually adjust the time you allow Landroid® to mow each day until you find the most suitable setting. Your Landroid® is capable of mowing areas of different sizes, although this depends on various factors, such as:• Species of grass in your lawn and its growth rate• Sharpness of the cutting blades• Humidity• Surrounding temperature• Amount of obstacles in your Lawn
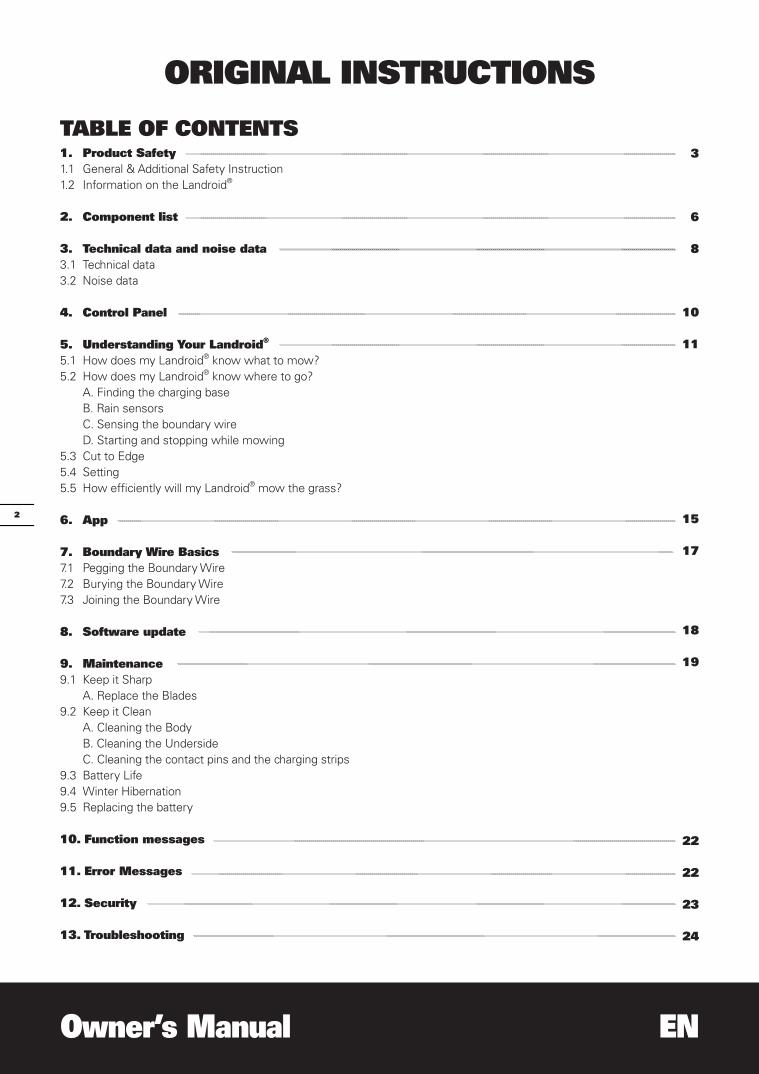
Unlike most other mowers, Landroid® uses a side charging system, which is able to cut the surrounding grass as much as possible. The holes on the bottom of the charging base allow the grass to grow through the base to help disguise it and create an elegant appearance.Landroid®’s cutting height can be adjusted between 2cm-5cm(WR130E WR131E) / 3cm-6cm(WR141E WR144E). Before starting your Landroid® for the first time, you should cut the grass to the height no more than 9 cm with your manual lawnmower. Then, set the cutting height of your Landroid® to its maximum setting (5cm/6cm) for its first time mowing. (See Fig. G)Your Landroid® will cut best in dry weather. Wet grass can build up on the blade turning disc and within the motor, and can also cause loose traction and slippage while working.Your Landroid® is afraid of lightning storms. In case of a lightning storm, protect Landroid® by unplugging the charging base, disconnecting the boundary wire, and making sure Landroid® is not allowed to charge. Your Landroid® loves mowing grass and requires the cutting blades to be kept in good condition to cut at its best. Landroid® can do most things by itself, but will sometimes need your help to prevent damage to itself. • Never let Landroid® travel over gravel.• Remove or prevent access to obstacles that Landroid® could accidentally climb on and damage its blade turning disc.• Remove all debris and foreign objects from your lawn.
6. App Your Landroid® is able to connect with smartphone. Using Landroid® App for your smartphone, you can change your Landroid®’s general settings, and view the machine’s status and error messages.
Checklist before connecting your App to Landroid®
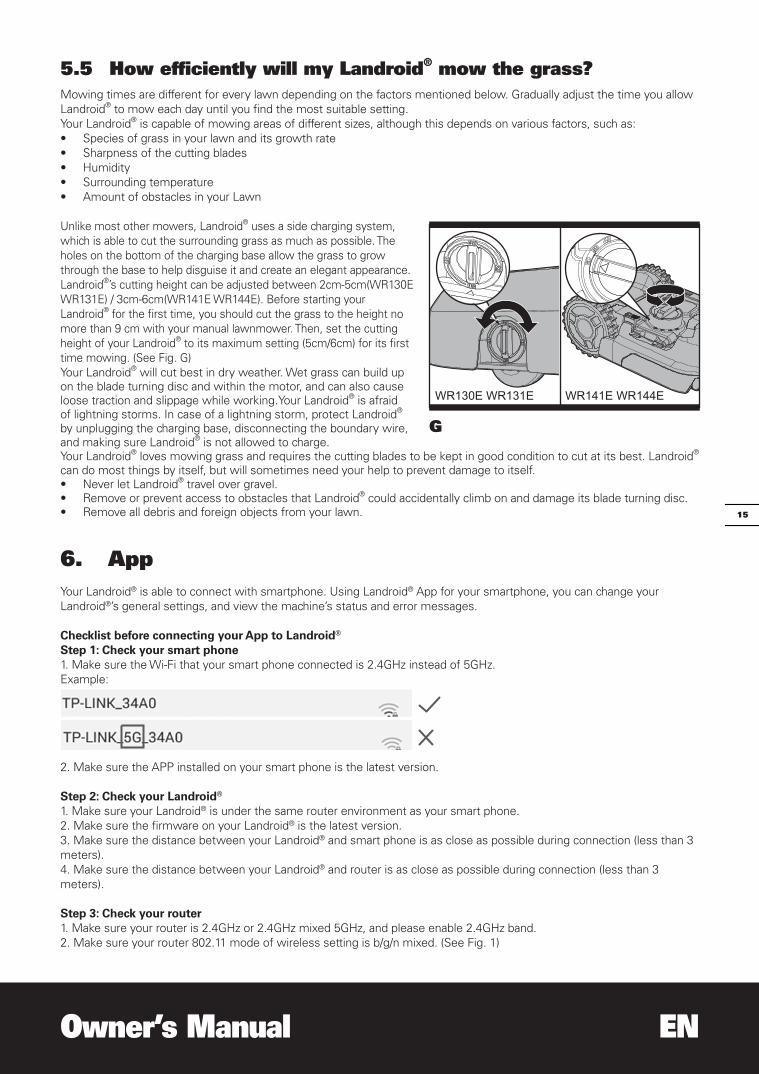
Step 1: Check your smart phone1. Make sure the Wi-Fi that your smart phone connected is 2.4GHz instead of 5GHz.Example:
2. Make sure the APP installed on your smart phone is the latest version.
Step 2: Check your Landroid® 1. Make sure your Landroid® is under the same router environment as your smart phone.2. Make sure the firmware on your Landroid® is the latest version.3. Make sure the distance between your Landroid® and smart phone is as close as possible during connection (less than 3 meters).4. Make sure the distance between your Landroid® and router is as close as possible during connection (less than 3 meters).
Step 3: Check your router1. Make sure your router is 2.4GHz or 2.4GHz mixed 5GHz, and please enable 2.4GHz band.2. Make sure your router 802.11 mode of wireless setting is b/g/n mixed. (See Fig. 1)
WR130E WR131E WR141E WR144E
G

Owner’s Manual EN
16
3. Make sure your router channel/ band width of wireless setting is Auto or 20M or 20M mixed 40M. (See Fig. 1)4. Make sure your router Enable the SSID Broadcast function when you connect the machine with the APP. And you can close it after you connect successfully. (See Fig. 1)
Fig. 1
5. Make sure DHCP function is enabled. (See Fig. 2)
Fig. 2
6. If you have a “Fritz!box” Router, please make sure activate “Allow communication between devices in same network” in the settings.7. Mare sure Port 8883 TCP is open. If it’s blocked (See Fig. 3), please modify the setting.
Fig. 3
To connect smartphone to your Landroid®:Step 1: To download the Landroid® App, scan the QR code below or download it from Playstore (Google-Android), AppleStore (Apple-iOS) or our website www.worx.com. Step 2: Keep pressing for 3 seconds, the icon will be blinking. Use or to choose the icon , then press
to confirm. The connection will begin automatically. When “ ” is displayed, the connection is completed. Then it will go to the standby page.

Owner’s Manual EN
17
Step 3: Enter the Landroid® APP, and then follow the instructions to connect to your Wi-Fi.*The Serial No. can be found at the rear of Landroid® as shown (See Fig. H) .
NOTE: 1. If your Wi-Fi information changes, Landroid® needs to be re-set according to Step 3.2. When Landroid® is located in an area with low or no Wi-Fi signal, instructions sent from the mobile App may not be executed immediately. Landroid® will receive instructions when it returns to an area with good Wi-Fi signal.3. For strong Wi-Fi signal to ensure stable connection, it is recommended to install Wi-Fi extenders to cover areas with weak or no Wi-Fi signal.
7. Boundary Wire Basics7.1 Pegging the Boundary WireUse the boundary wire distance gauge to set the correct distance between the wire and the border of your lawn (more than 26cm).This is the recommended distance. The provided distance gauge ensures proper installation.If your neighbor also uses a Landroid®, keep a spacing of at least 1 metre between your boundary wire and your neighbor’s.The boundary wire must outline the intended mowing area exactly. Your Landroid® will become confused by extra bends or coils of boundary wire that are not part of its mowing area (See Fig. I). If there is excess boundary wire after the mowing area has been outlined, cut it off and store this additional wire in a separate location. It is important to leave the necessary length where it connects to the charging base so it can be connected and still remain buried.
H
I

Owner’s Manual EN
18
7.2 Burying the Boundary WireIf you are planning to bury the boundary wire, it is recommended to first peg it down. This allows you to easily change the layout if necessary before burying the wire. When the boundary wire installation is complete, have Landroid® follow and check the path by pressing and . This allows your Landroid® to adjust to its new environment. . While observing Landroid® you can easily make alterations to the boundary wire to ensure Landroid®'s trouble-free tracking when locating the charging station. Confirm that Landroid® docks in the charging station successfully, and bury the wire if desired.
7.3 Joining the boundary wireIf you want to extend and splice the boundary wire, use a connector. The connector is waterproof and provides optimal connection.Insert both wire ends in any two of the three holes of the connector. Insert the wires fully until both wire ends are visible on the other side of the connector. (See Fig. J1) Press the connector together by using a pair of pliers. (See Fig. J2, J3)
WARNING! It is not recommended to simply splice the boundary wire with insulating tape or use a screw terminal block for connection. A broken circuit may occur after a period of time as soil moisture can oxidize the wire.
8. Software updateThe software can be updated when new versions become available. The latest software can be downloaded from our website www.worx.com. There are two methods to update software.
Method 1: Update via USB. See below for download and installation instructions:(1) Locate the latest software version at: www.worx.com. Save the file to an empty FAT32 formatted USB (flash drive).
Delete any other files on the drive and check the format. If the drive is not formatted in FAT32, please reformat the drive.
NOTE: the software update is downloaded as a zipped file. You will need to unzip or extract it before proceeding.
J1 J2
J3

Owner’s Manual EN
19
(2) Place Landroid® on a secure and level surface. Press to turn off your Landroid®.(3) Insert the USB drive (flash drive) in the port. (See Fig. K1)(4) Turn Landroid® on. The update will begin automatically. Wait until the display shows “ ” (See Fig. K2), then remove
the USB drive (flash drive) and tightly close the protective cover. When the display shows “ ”, the update is complete and Landroid® will enter the PIN page.
Method 2: Update via your smartphone.If your Landroid® is connected to your smartphone via the Landroid® App, you can check the software version.
The manual included with your Landroid® is based on the default software at the time of production. Some new features/functions in the new version may not exist in the manual. If you found some settings not in the manual, please visit www.worx.com to download the latest manual.
9. MaintenanceYour Landroid® works hard and needs to be cleaned and checked from time to time. Some parts will require replacement as they become worn. Never use your Landroid® with defective main switch.Switch off the machine before carrying out any service or maintenance. Here's how to take care of your Landroid®.
9.1 Keep it sharpWARNING: Before cleaning, adjusting, or replacing the blades, turn your Landroid® OFF and put on protective gloves.WARNING: When fitting new blades, make sure you replace ALL the blades. Always use new screws when fitting blades. This is important to ensure blade retention and balance the blade
turning disc. Failure to use new screws could cause serious injury. Landroid® does not cut grass like other mowers. Its cutting blades are razor sharp on 2 edges and rotate in both directions for maximum cutting capacity (See Fig. L). Each blade of your Landroid® has 2 cutting edges. The blade turning disc will
K2K1
K3

Owner’s Manual EN
20
N
M
make forward and reverse rotation at random to use both cutting edges and minimize the frequency of replacing the blades. Each cutting blade will last up to 2 months when it is programmed to mow everyday. Always check to see if the blades are chipped or damaged and replace them if they are. When the cutting blades are dull and worn out, they should be replaced with the spare blades provided with your Landroid®. Spare blades are also available at your nearest WORX retailer.
A. Replace the BladesAfter some time, usually every season, your Landroid®’s Blades will need to be replaced. When replacing the blades, make sure to replace ALL of them at the same time. You can replace them with one of the spare blade kits and extra blade screws supplied with your Landroid®.Before attempting to replace your Landroid®’s blades, turn the power off and put on protective gloves and follow these steps:1. Open the battery cover and remove the battery.2. Take the screws off the blades with a screwdriver. (See Fig. M) 3. Firmly screw on the new blades.4. Refit the battery and the battery cover.IMPORTANT: After screwing the blade to the blade disc, make sure the blade is able to spin freely.
9.2 Keep it cleanWARNING: Before cleaning, turn your Landroid® OFF. Put on protective gloves before cleaning the
blade turning disc and do not rinse or flush with water.A. Cleaning the bodyYour Landroid® will live a much happier and longer life if it is cleaned regularly. Although, since your Landroid® is an electric machine, you will need to take care when cleaning. DO NOT use a hose, high pressure washers and do not pour running water on your Landroid®. It is best to use a spray bottle filled with water. When cleaning the machine body, use a soft brush or clean cloth and avoid using solvents or polishes (See Fig. N). Lastly, remove all build up of grass clippings and debris.
B. Cleaning the UndersideAgain, it is important that you power Landroid® OFF and wear protective gloves before touching the blade turning disc. First, flip your Landroid® upside down to expose its underside. Here you will see the blade disc, the chassis, and the front wheel and driving wheels. Clean everything thoroughly with a soft brush or moist rag.
WARNING: NEVER clean the underside of Landroid® with running water. Component damage can occur. (See Fig. O1, O2)
Rotate the blade disc to ensure it rotates freely. Check the blades spin freely around the fixing screws. Remove any obstructions.IMPORTANT: Remove any lodged debris so that it does not cause a crack in the blade disc. Even the tiniest crack can decrease your Landroid®'s mowing output.
1
2
L

Owner’s Manual EN
21
O1 O2
P
C. Clean the contact pins and the charging stripsClean the contact pins located on the charging base and the charging strips located on Landroid® using a cloth. Remove any built up grass clippings or debris around the contact pins and charge strips periodically to ensure Landroid® successfully charges each time.
9.3 Battery lifeThe heart of Landroid® is its 20V Li-Ion battery. For proper storage of the battery, make sure it is fully charged and kept in a cool dry place. NOTE: The recommended Landroid® operation temperature is between 0-550C.The life-span of Landroid®’s battery depends on various factors, such as:• The length of the mowing season in your region• Amount of hours Landroid® mows per day• Battery maintenance during storage
Landroid® can be charged manually without the boundary wire.1. Connect the charging base to a suitable power supply. The green light on the charging base will turn on. 2. Manually dock Landroid® into the charging base while Landroid® is powered off. (See Fig. P)3. The green light on the charging base will turn to red. Landroid® will begin to charge.
9.4 Winter hibernationYour Landroid® will live longer and healthier if it is allowed to hibernate. So even though it is troublesome, we recommend storing your Landroid® in your shed or garage during the winter. Before you prepare your Landroid® for winter hibernation, we recommend you:• Thoroughly clean your Landroid®
• Fully charge the battery and remove it from Landroid®
• Turn power offTo maximize the battery life, fully charge the battery and remove it from Landroid® before storage during winter.
WARNING: Protect the underside of Landroid® from water. NEVER store Landroid® upside down outdoors.
The boundary wire can be left in the ground but its ends should be protected, such as placed in a tin can with grease. If the charging base is left outside for the winter, leave the boundary wire connected.NOTE: When bringing Landroid® back to work after winter hibernation, make sure the charging strips and contact pins are clean. We recommend using a fine grade emery cloth to clean the contacts. Using the App, make sure the date and time are correct and send Landroid® back to what it loves doing: mowing.
Owner’s Manual EN
22
9.5 Replacing the batteryWARNING: Power off before attempting any adjustment, replacement or repair.
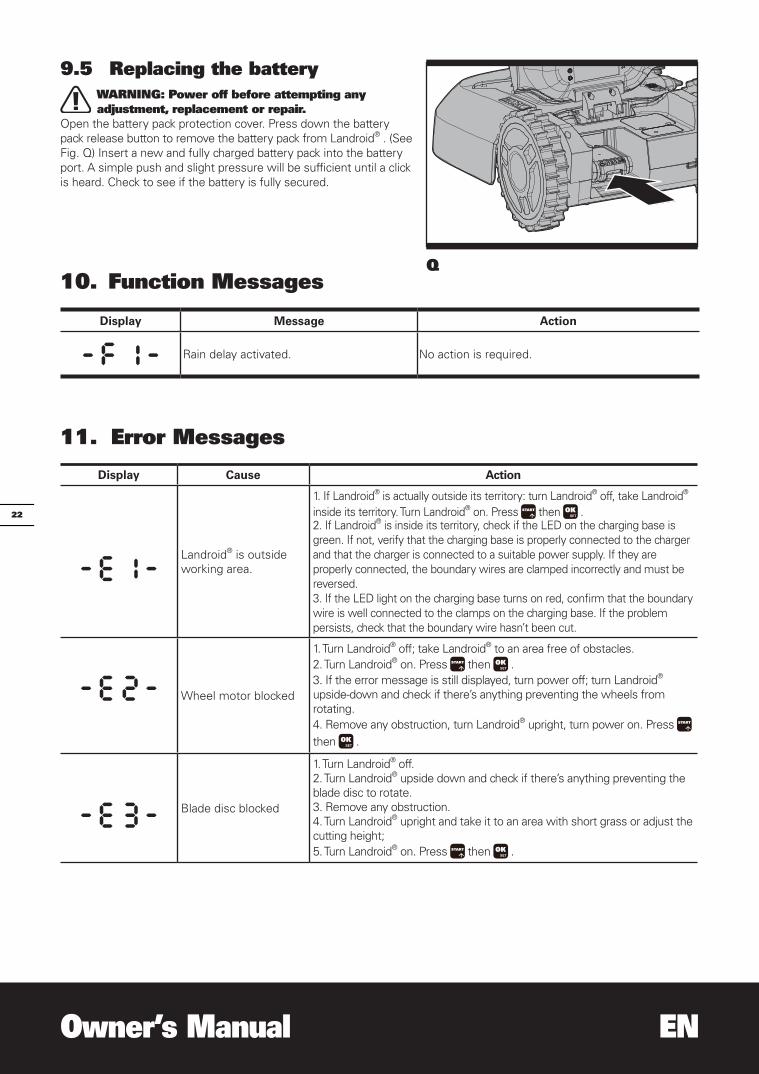
Open the battery pack protection cover. Press down the battery pack release button to remove the battery pack from Landroid® . (See Fig. Q) Insert a new and fully charged battery pack into the battery port. A simple push and slight pressure will be sufficient until a click is heard. Check to see if the battery is fully secured.
10. Function Messages
Display Message Action
Rain delay activated. No action is required.
11. Error Messages
Display Cause Action
Landroid® is outside working area.
1. If Landroid® is actually outside its territory: turn Landroid® off, take Landroid® inside its territory. Turn Landroid® on. Press then .2. If Landroid® is inside its territory, check if the LED on the charging base is green. If not, verify that the charging base is properly connected to the charger and that the charger is connected to a suitable power supply. If they are properly connected, the boundary wires are clamped incorrectly and must be reversed.3. If the LED light on the charging base turns on red, confirm that the boundary wire is well connected to the clamps on the charging base. If the problem persists, check that the boundary wire hasn’t been cut.
Wheel motor blocked
1. Turn Landroid® off; take Landroid® to an area free of obstacles.2. Turn Landroid® on. Press then .3. If the error message is still displayed, turn power off; turn Landroid® upside-down and check if there’s anything preventing the wheels from rotating. 4. Remove any obstruction, turn Landroid® upright, turn power on. Press then .
Blade disc blocked
1. Turn Landroid® off.2. Turn Landroid® upside down and check if there’s anything preventing the blade disc to rotate. 3. Remove any obstruction.4. Turn Landroid® upright and take it to an area with short grass or adjust the cutting height;5. Turn Landroid® on. Press then .
Q

Owner’s Manual EN
23
Landroid® is trapped.
1. Turn Landroid® off; 2. Take Landroid® to an area in your lawn free of obstacles obstacles.3. Turn Landroid® on. Press then .4. If the error message is still displayed; turn power off; turn Landroid® upside-down. Check if there is anything preventing the wheels from rotating.5. Remove any obstruction, turn Landroid® upright, turn power on. Press then .
Landroid® is lifted up.
1. Turn Landroid® off. 2. Take Landroid® to a lawn area clear of obstacles, turn Landroid® on. Press
then .3. If the error message is still displayed: turn Landroid® off, turn Landroid® upside-down and check if there’s anything preventing the front wheels from rotating.4. Remove any possible object, turn Landroid® upright, turn Landroid® on. Press then .
Landroid® is upside down. Turn Landroid® upright. Press then .
Battery charging error
1. Check the battery temperature. If the temperature is too high, wait until the temperature has cooled down. Press then .2. If the error message is still displayed, replace a new battery. Restart Landroid®. Press then .
It takes too long for Landroid® to go back to the charging base.
Manually dock Landroid® in the charging base for charging. After Landroid® is fully charged, Press then .
Landroid® is locked. Contact a service agent for help.
Error unknown. Restart Landroid®. Press then . If the error message is still displayed, contact a service agent for help.
NOTES• Before turning power on, always return Landroid® to its territory. If not, “ ” will be displayed. This message is also
displayed when Landroid® is sitting over the boundary wire when turned on.• If for any reason—i.e. a party, children playing...—you want to park your Landroid® in the charging base: Press then
. Landroid® will go to its charging base and stay there. Press to turn Landroid® off.• If an error repeatedly occurs in the same area of your lawn, you might have a problem with the boundary wire. Please
refer to the Installation Guide and check your set up with its help.• If your lawn is divided in two separate areas connected by a corridor less than 1m, one of which is not provided with
the charging base: when Landroid® runs out of charge, take it manually to the charging base, the charge process will start.
• If Landroid® runs abnormally once in a while, please try to restart it. If the problem is not resolved, try to removing and reinstalling the battery . If the problem is still not resolved, please contact a WORX service agent for help.
• Do not wash your Landroid® with a high pressure washer. This could cause damage to the battery or the machine.
12. SecurityIf Landroid® is connected to your smartphone, you can lock it on your smartphone. This prevents unauthorized people from being able to use it.

Owner’s Manual EN
24
13. TroubleshootingIf your Landroid® does not work correctly, follow the troubleshooting guide below. If the issue persists, contact your Dealer.
Symptom Cause Action
The LED light on the charging base does not turn on.
There is no power.
Check the charging base is connected properly to the power adapter and the power adapter is connected to a suitable power supply.
Red light turns on the charging base.
The boundary wire isn’t connected or boundary wire is broken.
Check that the boundary wire has been connected correctly to the charging base.Check there are no breaks in the boundary wire, especially in the wire ends.
Landroid® turns on, but the blade disc does not move.
Landroid® is searching for the charging base (unless you press then button to make it go to the charging base)
This is normal. Landroid® needs to recharge, the blade disc does not rotate while it is searching for the charging base automatically.
Landroid® vibrates. Blades may be damaged. Check condition of the blade disc.
Check the blades, and replace them if damaged.Remove debris and foreign objects from the blades and blade disc.
Grass is being cut unevenly.
Landroid® does not work enough hours per day.
Add more hours to the scheduled mowing time.
Mowing area is too big.Try decreasing the size of the mowing area or adding more hours to the mowing time.
Blades are dull. Change all the blades and screws in order to balance the blade disc.
The cutting height is too low for the length of the grass.
Raise the cutting height and then gradually lower.
Grass or other object has wrapped around the blade disc.
Check the blade disc and remove the grass or other object.
There is a build-up of grass in the blade disc or motor frame box.
Make sure the blade disc rotates easily. If need be, you may take off the blade disc and remove the debris.
Your Landroid® is inside its territory and the boundary wire is connected. And “ “ is displayed.
The boundary wire ends are clamped incorrectly.
Reverse the boundary wire ends.
The boundary wire is broken. Repair damaged boundary wire with connectors.
The charging time is far more than the rated charging time.
Poor connection caused by debris on the charging strip.
Clean the contact pins located on the charging base and the charging strip on Landroid® using a cloth.
The charging protection program has activated due to high or low temperature.
Place the charging base in a right place or wait until the temperature has cooled down or warmed up.
The mower does not charge.
There is no power.Check the LED on charging base is turned on.
Landroid® does not connect correctly with contact pins while manually charging.
Try again. Make sure both the charging strips on the mower touch the centre of the contact pins on the charging base.
The battery voltage is over 18.85V. This is normal.

Owner’s Manual EN
25
Landroid® is starting to have shorter run-times between charges.
Something is clogging in the blade disc.
Take off the blade disc and clean it.
The grass is too high and too thick.Check the Blade Disc and blades, remove debris and foreign objects from the blades and Blade Disc.
Landroid® is shaking heavily.Check the blade disc and blades, remove debris and foreign objects from the blades and blade disc.
Landroid® is not operating at the correct time.
The clock is not set to the correct time.
Set the clock to the correct time (refer to Section 5.4) or by using App.
Programmed cutting times for Landroid® are not correct.
Change the time settings for the mower to start and stop.
Landroid® is manually docked in the charging base.
Press then .
The total working time ratio has been adjusted via mobile App.
Check if the total working time ratio has been changed.
The battery does not charge as its temperature rises above 550C in hot weather or the temperature is below 00C.
Wait until the battery has cooled down or warmed up.
Landroid® cannot correctly dock with the charging base.
Environmental influences.Reposition the charging base. Avoid of a wall, metal or other objects.
Poor connection caused by debris on the charging strip.
Clean the contact pins located on the charging base and the charging strip on Landroid® using a cloth.
The boundary wire on both sides of the charging base is not long enough.
Make sure the boundary wire on both sides of the charging base is straight for at least 0.8m.
The green light on the charging base turns on before charging is complete.
The charging base is overheated or the temperature is too low.
Place the charging base in a right place or wait until the temperature has cooled down or warmed up.
Landroid® runs outside the boundary wire. Landroid® does not mow an area within a boundary wire zone. Landroid® reverses or rotates erratically near the boundary wire.
The lawn is wet, uneven or there are obstacles.
Wait until the lawn is dry. Make the lawn even and remove obstacles.
The boundary wire has been installed with tight corners.
Check the boundary wire to ensure the corners are smooth.
In wet conditions, the boundary wire electric signal may leak were wire has been joined or repaired.
Check boundary wire joints. Insulate to provide a fully waterproof connection.
The cutting area is larger than the allowable cutting area for Landroid®.
Reduce the cutting area or use Landroid® with a larger allowable cutting area.
Landroid® wheels skid or damage lawn.
Foreign obstacles, such as twigs and branches may be lodged under Landroid®.
Remove foreign objects from underside of Landroid®.
The lawn is too wet. Wait until lawn has dried.
The boundary wire has been installed with tight corners.
Check the boundary wire to ensure the corners are smooth.
Landroid® exits the boundary wire due to high speed when going down a hill.
The boundary wire is placed on a slope steeper than 17% (10°).
Reposition the boundary wire away from slopes that are steeper than 17% (10°). Please refer Installation Guide for details.
Wi-Fi connection failure occurs. Reconnect Wi-Fi according to section “APP”.
Software update failure occurs. Try again according to section “Software update”.

Owner’s Manual EN
26
Environmental ProtectionWaste electrical products should not be disposed of with household waste. Please recycle where facilities exist. Check with your Local Authority or retailer for recycling advice.

Owner’s Manual EN
27
Declaration of ConformityWe,Positec Germany GmbHGrüner Weg 10, 50825 Cologne, Germany
Declare that the product,Description Robotic LawnmowerType WR130E WR131E WR141E WR144E (100-199- designation of machinery, representative of Robotic Lawnmower) (Year, article number and month of serial number are placed on the back page. The complete serial number is clearly stated on the enclosure of lawnmower) with battery charger WA3766 / WA3750.1 / WA3755.1 and charging base WA0510 / WA4002.1Function Cutting grass
Complies with the following Directives,2006/42/EC, 2014/30/EU, 2014/35/EU, 2011/65/EU, 2000/14/EC amended by 2005/88/EC, 2014/53/EU
WR130E WR131E:2000/14/EC amended by 2005/88/EC- Conformity Assessment Procedure as per Annex V- Measured Sound Power Level 64.2 dB (A)- Declared Guaranteed Sound Power Level 65 dB (A)
WR141E WR144E:2000/14/EC amended by 2005/88/EC- Conformity Assessment Procedure as per Annex V- Measured Sound Power Level 65.5 dB (A)- Declared Guaranteed Sound Power Level 67 dB (A)
The notified body involvedName: Intertek Testing & Certification Ltd. (notified body 0359)Address: Cleeve Road, Leatherhead, Surrey, KT22 7SB United KingdomCertification No. : 181000439SHA-V1 (WR130E WR131E) 181000469SHA-V1 (WR141E WR144E)
Standards conform to,EN 60335-1:2012+A11+A13:2017, EN 50636-2-107:2015+A1:2018, EN 60335-2-29:2004+A2:2010, EN 62233:2008, EN ISO 3744:2005, EN 55014-1:2017, EN 55014-2:2015,EN 61000-3-2:2014,EN 61000-3-3:2013, EN 300 328 V2.1.1, EN 301 489-1 V2.1.1, EN 301 489-17 V3.1.1, EN 62311:2008, EN 61558-1:2005+A1:2009, EN 61558-2-16:2009+A1:2013,EN 55011:2016, EN 303 447 V1.1.1, EN 55032:2015, EN 55035:2017
The person authorized to compile the technical file, Name Marcel FilzAddress Positec Germany GmbH, Grüner Weg 10, 50825 Cologne, Germany
2019/02/26Allen DingDeputy Chief Engineer, Testing & CertificationPositec Technology (China) Co., Ltd.18, Dongwang Road, Suzhou IndustrialPark, Jiangsu 215123, P. R. China

Copyright © 2018, Positec. All Rights Reserved.