ossec documentation · ossec documentation, release 2.7.1 architecture this diagram shows the...
TRANSCRIPT

OSSEC DocumentationRelease 2.7.1
Jeremy Rossi
Jul 21, 2017


Contents
1 Manual & FAQ 31.1 Manual . . . . . . . . . . . . . . . . . . . . . . . . . . . . . . . . . . . . . . . . . . . . . . . . . . 31.2 Frequently asked questions . . . . . . . . . . . . . . . . . . . . . . . . . . . . . . . . . . . . . . . . 851.3 User submitted Cookbooks . . . . . . . . . . . . . . . . . . . . . . . . . . . . . . . . . . . . . . . . 99
2 Development 1012.1 oRFC: 1 The Collective Code Construction Contract (C4) . . . . . . . . . . . . . . . . . . . . . . . 1012.2 oRFC: 2 Coding Style Guide . . . . . . . . . . . . . . . . . . . . . . . . . . . . . . . . . . . . . . . 104
3 Reference 1073.1 Syntax and Options . . . . . . . . . . . . . . . . . . . . . . . . . . . . . . . . . . . . . . . . . . . . 1073.2 Output Formats . . . . . . . . . . . . . . . . . . . . . . . . . . . . . . . . . . . . . . . . . . . . . . 1493.3 Man pages . . . . . . . . . . . . . . . . . . . . . . . . . . . . . . . . . . . . . . . . . . . . . . . . 1503.4 What’s new . . . . . . . . . . . . . . . . . . . . . . . . . . . . . . . . . . . . . . . . . . . . . . . . 1773.5 Rootcheck / Syscheck Reference . . . . . . . . . . . . . . . . . . . . . . . . . . . . . . . . . . . . . 1783.6 Glossary . . . . . . . . . . . . . . . . . . . . . . . . . . . . . . . . . . . . . . . . . . . . . . . . . 183
4 Indices and tables 185
i

ii

OSSEC Documentation, Release 2.7.1
OSSEC is an Open Source Host-based Intrusion Detection System. It performs log analysis, integrity checking,Windows registry monitoring, rootkit detection, real-time alerting and active response. It runs on most operatingsystems, including Linux, OpenBSD, FreeBSD, Mac OS X, Solaris and Windows. A list with all supported platformsis available at: Supported Systems
Contents 1

OSSEC Documentation, Release 2.7.1
2 Contents

CHAPTER 1
Manual & FAQ
Manual
Getting started with OSSEC
OSSEC is a full platform to monitor and control your systems. It mixes together all the aspects of HIDS (host-basedintrusion detection), log monitoring and SIM/SIEM together in a simple, powerful and open source solution. It is alsobacked and fully supported by Trend Micro.
Key Benefits
Compliance Requirements
OSSEC helps customers meet specific compliance requirements such as PCI, HIPAA etc. It lets customers detect andalert on unauthorized file system modifications and malicious behavior embedded in the log files of COTS products aswell as custom applications. For PCI, it covers the sections of file integrity monitoring (PCI 11.5, 10.5), log inspectionand monitoring (section 10) and policy enforcement/checking.
Multi platform
OSSEC lets customers implement a comprehensive host based intrusion detection system with fine grained applica-tion/server specific policies across multiple platforms such as Linux, Solaris, AIX, BSD, Windows, Mac OS X andVMware ESX.
Real-time and Configurable Alerts
OSSEC lets customers configure incidents they want to be alerted on which lets them focus on raising the priority ofcritical incidents over the regular noise on any system. Integration with smtp, sms and syslog allows customers to be
3

OSSEC Documentation, Release 2.7.1
on top of alerts by sending these on to e-mail and handheld devices such as cell phones and pagers. Active responseoptions to block an attack immediately is also available.
Integration with current infrastructure
OSSEC will integrate with current investments from customers such as SIM/SEM (Security Incident Manage-ment/Security Events Management) products for centralized reporting and correlation of events.
Centralized management
OSSEC provides a simplified centralized management server to manage policies across multiple operating systems.Additionally, it also lets customers define server specific overrides for finer grained policies.
Agent and agentless monitoring
OSSEC offers the flexibility of agent based and agentless monitoring of systems and networking components suchas routers and firewalls. It lets customers who have restrictions on software being installed on systems (such as FDAapproved systems or appliances) meet security and compliance needs.
Key Features
File Integrity checking
There is one thing in common to any attack to your networks and computers: they change your systems in some way.The goal of file integrity checking (or FIM - file integrity monitoring) is to detect these changes and alert you whenthey happen. It can be an attack, or a misuse by an employee or even a typo by an admin, any file, directory or registrychange will be alerted to you.
Covers PCI DSS sections 11.5 and 10.5.5.
Log Monitoring
Your operating system wants to speak to you, but do you know how to listen? Every operating system, application,and device on your network generate logs (events) to let you know what is happening. OSSEC collects, analyzes andcorrelates these logs to let you know if something wrong is going on (attack, misuse, errors, etc). Do you want to knowwhen an application is installed on your client box? Or when someone changes a rule in your firewall? By monitoringyour logs, OSSEC will let you know of that.
Covers PCI DSS section 10 in a whole.
Rootkit detection
Criminals (also known as hackers) want to hide their actions, but using rootkit detection you can be notified when they(or trojans, viruses, etc) change your system in this way.
4 Chapter 1. Manual & FAQ

OSSEC Documentation, Release 2.7.1
Active response
Take immediate and automatic responses when something happens. Why wait for hours when you can alert youradmin and block an attack right way?
OSSEC Architecture
OSSEC is composed of multiple pieces. It has a central manager for monitoring and receiving information fromagents, syslog, databases, and from agentless devices.
Manager (or Server)
The manager is the central piece of the OSSEC deployment. It stores the file integrity checking databases, the logs,events, and system auditing entries. All the rules, decoders, and major configuration options are stored centrally in themanager; making it easy to administer even a large number of agents.
Note: The manager may be called the OSSEC server, or even just server in this documentation.
Agents
The agent is a small program, or collection of programs, installed on the systems to be monitored. The agent willcollect information and forward it to the manager for analysis and correlation. Some information is collected in realtime, others periodically. It has a very small memory and CPU footprint by default, not affecting the system?x80x99susage.
Agent security: It runs with a low privilege user (generally created during the installation) and inside a chroot jailisolated from the system. Most of the agent configuration can be pushed from the manager.
Agentless
For systems that an agent cannot be installed on, the agentless support may allow integrity checks to be performed.Agentless scans can be used to monitor firewalls, routers, and even Unix systems.
Virtualization/VMware
OSSEC allows you to install the agent on the guest operating systems. It may also be installed inside some versionsof VMWare ESX, but this may cause support issues. With the agent installed inside VMware ESX you can get alertsabout when a VM guest is being installed, removed, started, etc. It also monitors logins, logouts and errors inside theESX server. In addition to that, OSSEC performs the Center for Internet Security (CIS) checks for VMware, alertingif there is any insecure configuration option enabled or any other issue.
Firewalls, switches and routers
OSSEC can receive and analyze syslog events from a large variety of firewalls, switches and routers. It supportsall Cisco routers, Cisco PIX, Cisco FWSM, Cisco ASA, Juniper Routers, Netscreen firewall, Checkpoint and manyothers.
1.1. Manual 5

OSSEC Documentation, Release 2.7.1
Architecture
This diagram shows the central manager receiving events from the agents and system logs from remote devices. Whensomething is detected, active responses can be executed and the admin is notified.
Internal Architecture
For technical and deep detailed information on how it works, please read the following documents:
OSSEC log analysis/inspection architecture (PDF) - by Daniel Cid
Support
Everyone knows that support and technical expertise are critical in ensuring the success of any product deployment.With an open source project this is not different. If you need enterprise-class commercial support for OSSEC, TrendMicro, the company behind this great open source project, offers this option to our users. For more information, visit
the OSSEC commercial support page.
Supported Systems
OSSEC supports the following operating systems and log formats.
Operating Systems
The following operating systems are supported by the OSSEC agent:
• GNU/Linux (all distributions, including RHEL, Ubuntu, Slackware, Debian, etc)
• Windows XP, 2003, Vista, 2008
• VMWare ESX 3.0,3.5 (including CIS checks)
• FreeBSD (all current versions)
• OpenBSD (all current versions)
• NetBSD (all current versions)
6 Chapter 1. Manual & FAQ

OSSEC Documentation, Release 2.7.1
• Solaris 2.7, 2.8, 2.9 and 10
• AIX 5.2 and 5.3
• Mac OS X 10.x
• HP-UX 11
Devices supported via Syslog
These systems/devices are also supported via remote syslog:
• Cisco PIX, ASA and FWSM (all versions)
• Cisco IOS routers (all versions)
• Juniper Netscreen (all versions)
• SonicWall firewall (all versions)
• Checkpoint firewall (all versions)
• Cisco IOS IDS/IPS module (all versions)
• Sourcefire (Snort) IDS/IPS (all versions)
• Dragon NIDS (all versions)
• Checkpoint Smart Defense (all versions)
• McAfee VirusScan Enterprise (v8 and v8.5)
• Bluecoat proxy (all versions)
• Cisco VPN concentrators (all versions)
• VMWare ESXi 4.x
Devices and Operating Systems via Agentless
Using OSSEC agentless options, the following systems are also supported (for log analysis and file integrity checking):
• Cisco PIX, ASA and FWSM (all versions)
• Cisco IOS routers (all versions)
• Juniper Netscreen (all versions)
• SonicWall firewall (all versions)
• Checkpoint firewall (all versions)
• All operating systems specified in the “operating systems” section
Installation
The best installation tutorial is available in the OSSEC book.
Installations requirements
For UNIX systems, OSSEC only requires gcc, libc, and preferably OpenSSL. However, you always have the option topre-compile it on one system and move the binaries to the final box.
1.1. Manual 7

OSSEC Documentation, Release 2.7.1
Ubuntu
On Ubuntu you will need the build-essential package in order to compile and install OSSEC.
To install the package run the following command.
# apt-get install build-essential
If database support is needed mysql-dev or postgresql-dev should be installed. Run the following command to installthese packages.
# apt-get install mysql-dev postgresql-dev
RedHat
RedHat should have all packages needed by default, but if database support is needed the package mysql-devel and/orpostgresql-devel will need to be installed.
# yum install mysql-devel postgresql-devel
Debian
Debian has replaced bash with dash, and this may cause issues during installation. Dash does not appear to support allof the features available in other shells, and may display an error when trying to set the server’s IP address on an agentsystem. The error can be ignored, but the server ip address will need to be set.
Do this by making sure something like the following information is in the agent’s ossec.conf:
<ossec_config><client><server-ip>SERVER'S IP</server-ip>
</client>
This can also be avoided by using bash to run install.sh:
# bash ./install.sh
Manager/Agent Installation
Installation of OSSEC HIDS is very simple, the install.sh shell script automating most of it. There are a fewquestions to be answered before the installation will occur, one of the most important being which type of installationis desired. It is important to choose the correct installation type: server, agent, local, or hybrid. More information onthse can be found on the OSSEC Architecture page.
Note: In the following installation the commands follow the #. Everything else is either comments out output.
1. Download the latest version and verify its checksum.
Note: On some systems, the command md5, sha1, or wget may not exist. Try md5sum, sha1sum orlynx respectively instead.
8 Chapter 1. Manual & FAQ

OSSEC Documentation, Release 2.7.1
# wget http://www.ossec.net/files/ossec-hids-2.7.1.tar.gz# wget http://www.ossec.net/files/ossec-hids-2.7.1_checksum.txt# cat ossec-hids-2.7.1_checksum.txtMD5 (ossec-hids-2.7.1.tar.gz) = f4140ecf25724b8e6bdcaceaf735138aSHA1 (ossec-hids-2.7.1.tar.gz) = 258b9a24936e6b61e0478b638e8a3bfd3882d91eMD5 (ossec-agent-win32-2.7.1.exe) = 7d2392459aeab7490f28a10bba07d8b5SHA1 (ossec-agent-win32-2.7.1.exe) =→˓fdb5225ac0ef631d10e5110c1c1a8aa473e62ab4# md5sum ossec-hids-2.7.1.tar.gzMD5 (ossec-hids-2.7.1.tar.gz) = f4140ecf25724b8e6bdcaceaf735138a# sha1sum ossec-hids-2.7.1.tar.gzSHA1 (ossec-hids-2.7.1.tar.gz) = 258b9a24936e6b61e0478b638e8a3bfd3882d91e
2. Extract the compressed package and run the install.sh script. It will guide you through the installation.
# tar -zxvf ossec-hids-*.tar.gz (or gunzip -d; tar -xvf)# cd ossec-hids-*# ./install.sh
3. The OSSEC manager listens on UDP port 1514. Any firewall sbetween the agents and the manager will need toallow this traffic.
4. The server, agent, and hybrid installations will require additional configuration. More information can be foundon the Managing the agents page.
5. Start OSSEC HIDS by running the following command:
# /var/ossec/bin/ossec-control start
Windows Agent Installation
Binary Installation
OSSEC is typically compiled on each system it is installed on, but this may not always be easy. To help in these casesthere are a few methods of binary installation available. OSSEC can be compiled on one system, and copied to thedestination systems. There are also plans for RPM and Debian packages.
Note: OSSEC has very limited cross compiling facilities. Windows binaries can be built on Linux systems, butbinaries for other systems should be built on a system of the same OS and CPU platform.
Compiling OSSEC for install on a second server
First download the OSSEC package corresponding to the version you want to install and unpack it (on the system witha compiler).
# wget http://www.ossec.net/files/ossec-hids-latest.tar.gz# tar -zxvf ossec-hids-latest.tar.gz
Enter in the source directory of the downloaded package, and configure OSSEC to build the agent version. Themake commands should compile the correct binaries.
1.1. Manual 9
OSSEC Documentation, Release 2.7.1
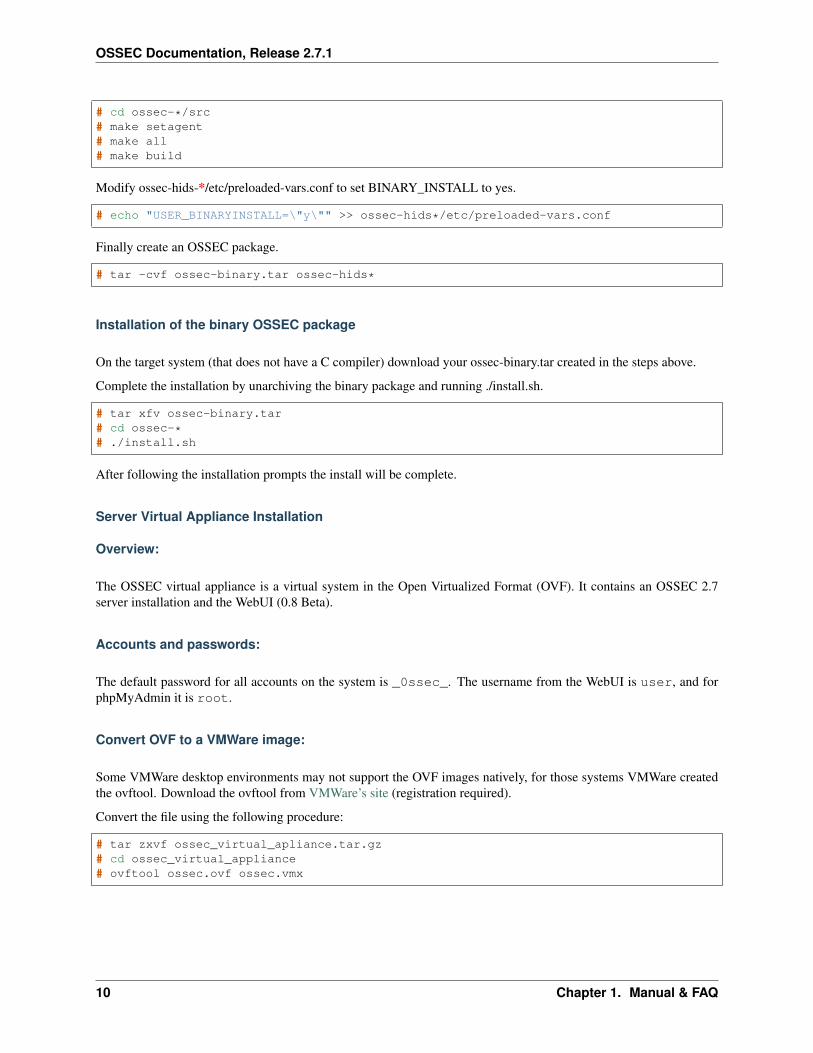
# cd ossec-*/src# make setagent# make all# make build
Modify ossec-hids-*/etc/preloaded-vars.conf to set BINARY_INSTALL to yes.
# echo "USER_BINARYINSTALL=\"y\"" >> ossec-hids*/etc/preloaded-vars.conf
Finally create an OSSEC package.
# tar -cvf ossec-binary.tar ossec-hids*
Installation of the binary OSSEC package
On the target system (that does not have a C compiler) download your ossec-binary.tar created in the steps above.
Complete the installation by unarchiving the binary package and running ./install.sh.
# tar xfv ossec-binary.tar# cd ossec-*# ./install.sh
After following the installation prompts the install will be complete.
Server Virtual Appliance Installation
Overview:
The OSSEC virtual appliance is a virtual system in the Open Virtualized Format (OVF). It contains an OSSEC 2.7server installation and the WebUI (0.8 Beta).
Accounts and passwords:
The default password for all accounts on the system is _0ssec_. The username from the WebUI is user, and forphpMyAdmin it is root.
Convert OVF to a VMWare image:
Some VMWare desktop environments may not support the OVF images natively, for those systems VMWare createdthe ovftool. Download the ovftool from VMWare’s site (registration required).
Convert the file using the following procedure:
# tar zxvf ossec_virtual_apliance.tar.gz# cd ossec_virtual_appliance# ovftool ossec.ovf ossec.vmx
10 Chapter 1. Manual & FAQ

OSSEC Documentation, Release 2.7.1
Unattended Source Installation
OSSEC has the capability to be compiled and installed without the interactivity of install.sh. The install scriptcan collect the answers to its questions from the etc/preloaded-vars.conf configuration file.
Most of the questions asked by the installer are present in the configuration file, along with the default answers.Uncommenting each variable will allow the script to know the answer. Any changes from the default install should bemade in the configuration file.
Note: If USER_NO_STOP="y" is not set, install.sh may prompt for confirmation.
Example preloaded-vars.conf:
# preloaded-vars.conf, Daniel B. Cid (dcid @ ossec.net).## Use this file to customize your installations.# It will make the install.sh script pre-load some# specific options to make it run automatically# or with less questions.
# PLEASE NOTE:# When we use "n" or "y" in here, it should be changed# to "n" or "y" in the language your are doing the# installation. For example, in portuguese it would# be "s" or "n".
# USER_LANGUAGE defines to language to be used.# It can be "en", "br", "tr", "it", "de" or "pl".# In case of an invalid language, it will default# to English "en"#USER_LANGUAGE="en" # For english#USER_LANGUAGE="br" # For portuguese
# If USER_NO_STOP is set to anything, the confirmation# messages are not going to be asked.#USER_NO_STOP="y"
# USER_INSTALL_TYPE defines the installation type to# be used during install. It can only be "local",# "agent" or "server".#USER_INSTALL_TYPE="local"#USER_INSTALL_TYPE="agent"#USER_INSTALL_TYPE="server"
# USER_DIR defines the location to install ossec#USER_DIR="/var/ossec"
# If USER_DELETE_DIR is set to "y", the directory# to install OSSEC will be removed if present.#USER_DELETE_DIR="y"
1.1. Manual 11

OSSEC Documentation, Release 2.7.1
# If USER_ENABLE_ACTIVE_RESPONSE is set to "n",# active response will be disabled.#USER_ENABLE_ACTIVE_RESPONSE="y"
# If USER_ENABLE_SYSCHECK is set to "y",# syscheck will be enabled. Set to "n" to# disable it.#USER_ENABLE_SYSCHECK="y"
# If USER_ENABLE_ROOTCHECK is set to "y",# rootcheck will be enabled. Set to "n" to# disable it.#USER_ENABLE_ROOTCHECK="y"
# If USER_UPDATE is set to anything, the update# installation will be done.#USER_UPDATE="y"
# If USER_UPDATE_RULES is set to anything, the# rules will also be updated.#USER_UPDATE_RULES="y"
# If USER_BINARYINSTALL is set, the installation# is not going to compile the code, but use the# binaries from ./bin/#USER_BINARYINSTALL="x"
### Agent Installation variables. ###
# Specifies the IP address or hostname of the# ossec server. Only used on agent installations.# Choose only one, not both.# USER_AGENT_SERVER_IP="1.2.3.4"# USER_AGENT_SERVER_NAME
# USER_AGENT_CONFIG_PROFILE specifies the agent's config profile# name. This is used to create agent.conf configuration profiles# for this particular profile name. Only used on agent installations.# Can be any string. E.g. LinuxDBServer or WindowsDomainController#USER_AGENT_CONFIG_PROFILE="generic"
### Server/Local Installation variables. ###
# USER_ENABLE_EMAIL enables or disables email alerting.#USER_ENABLE_EMAIL="y"
# USER_EMAIL_ADDRESS defines the destination e-mail of the alerts.#USER_EMAIL_ADDRESS="[email protected]"
# USER_EMAIL_SMTP defines the SMTP server to send the e-mails.#USER_EMAIL_SMTP="test.ossec.net"
12 Chapter 1. Manual & FAQ

OSSEC Documentation, Release 2.7.1
# USER_ENABLE_SYSLOG enables or disables remote syslog.#USER_ENABLE_SYSLOG="y"
# USER_ENABLE_FIREWALL_RESPONSE enables or disables# the firewall response.#USER_ENABLE_FIREWALL_RESPONSE="y"
# Enable PF firewall (OpenBSD and FreeBSD only)#USER_ENABLE_PF="y"
# PF table to use (OpenBSD and FreeBSD only).#USER_PF_TABLE="ossec_fwtable"
# USER_WHITE_LIST is a list of IPs or networks# that are going to be set to never be blocked.#USER_WHITE_LIST="192.168.2.1 192.168.1.0/24"
#### exit ? ###
Compiling the OSSEC Windows Agent on Windows
Note: Originally posted Compiling the OSSEC Windows Agent on Windows by mstarks, duplicated here withpermission.
Most people that use the OSSEC Windows agent download a pre-compiled copy from the OSSEC site. While thatis a good option for many individual users, it may not suit those with more specific needs and/or those in enterpriseenvironments. Users who fall into those categories could benefit from customizing the agent and maintaining internalbuilds in order to suit their individual needs.
There are already instructions on how to compile the Windows agent on Linux, but ironically the process doesn’t workso well on Windows. I had a need to make this work on Windows, so I thought I would share the process with you.
Requirements:
• The Nullsoft Scriptable Install System (NSIS)
• The ‘Minimalist GNU for Windows (MinGW) compiler http://sourceforge.net/downloads/mingw/>‘_
• My batch file. Simply rename from gen_win.txt to gen_win.cmd.
• 7-Zip for Windows
• The public domain Unix2DOS utility
• The latest OSSEC for Unix/Linux <http://www.ossec.net/main/downloads/>‘_ (this contains the Windowssource code)
1.1. Manual 13

OSSEC Documentation, Release 2.7.1
Here are the steps:
1. Download and install the required programs. Be sure to pay special attention to the steps for properly installingand configuring MinGW, particularly the part about modifying the PATH environment variable.
2. Next, we.re going to extract OSSEC using 7-Zip. To do so, simply right-click on the file and select 7-Zip, extractto “folder name.tar,” where folder name is the name of the package. This decompresses the archive. Navigatewithin that folder and repeat this step to untar the archive. At this point, you should see all of the files in thepackage.
3. Place gen_win.txt in the srcwin32 folder and rename the extension to .cmd.
4. Download Unix2DOS and place it in the srcwin32 folder
5. Open a command prompt. Navigate to srcwin32, make any desired customizations, and execute gen_win.cmd.This should gather all of the required files and place them in srcwin-pkg.
6. Next, we compile the Windows agent by navigating to srcwin-pkg and executing make.bat (I assume you havethe chops to know how to change directories :) ).
7. Now we have all of the files we need but no way to effectively install it. To generate the installer, simply executethe NSIS compiler like so: "c:\Program Files\NSIS\makensis.exe" ossec-installer.nsi
If you see no errors and a binary named ossec-win32-agent.exe, everything was successful. Congratulations, you nowhave a custom-made version of OSSEC!
Compiling OSSEC with ming:
OSSEC’s Windows agent is compiled using MinGW
It has always been a pain to generate snapshots for Windows because it required me to open up my Windows VM(slow), push the code there, compile, etc. Well, until this week when I started to play with MinGW cross-compilationfeature to completely build an Windows agent from Linux.
How it works? First, you need to install MinGW and nsis (to build the installer). For OpenSSL support, an OpenSSLMinGW package will also be necessary.
After that, download the source and generate the Windows package directory (replace 2.6 with the latest version ordownload the latest source here):
# wget http://www.ossec.net/files/ossec-hids-2.6.tar.gz# tar -zxvf ossec-hids-2.6.tar.gz# cd ossec-hids-2.6/src/win32# ./gen-win.sh
Now, you will have the win-pkg directory under src. Just go there and run make.sh. Your Windows agent packageshould be created in a few minutes:
# cd ../win-pkg
The following script may need to be modified depending on which Linux distribution is being used.
# sh ./make.sh
You will see the following in the screen:
Making windows agentrootcheck/win-common.c: In function "__os_winreg_querykey":rootcheck/win-common.c:279: warning: pointer targets in passing argument 7 of→˓"RegEnumValueA" differ in signedness
14 Chapter 1. Manual & FAQ

OSSEC Documentation, Release 2.7.1
win-registry.c: In function "os_winreg_querykey":...
Output: "ossec-win32-agent.exe"Install: 7 pages (448 bytes), 3 sections (3144 bytes), 379 instructions (10612 bytes),→˓ 247 strings (42580 bytes), 1 language table (346 bytes).Uninstall: 5 pages (320 bytes),1 section (1048 bytes), 301 instructions (8428 bytes), 166 strings (2646 bytes), 1→˓language table (290 bytes).Datablock optimizer saved 8371 bytes (~0.7%).
Which means that your agent executable ossec-win32-agent.exe has been created properly.
This document is a copy of Daniel Cid’s blogpost Compiling the Windows Agent from a Linux system
Intergration and Deployment with cfengine
I recently required a larger deployment of OSSEC-HIDS without too much manual intervention. Almost everyOSSEC-HIDS tutorial I’ve across says this is possible, yet I was unable to find a tutorial demonstrating it. So, inthe spirit of open source, I’m contributing a brief overview.
Prerequisites:
In order to facilitate the key request, I chose to generate a file with the relevant information and copy it back to mycfmaster server. I developed the following tutorial to demonstrate a cfengine copy back scenario: Copy Back withcfengine.
Configuring the cfengine clients:
I added a group to my cfagent.conf for my ossec server named: hg_ossec_server (host group). I thencreated an ossec-hids.cf containing the following:
• control
My control sections sets up the variables I’ll be using in the rest of the file.
control:any::ossec_key_dir = (/usr/local/cfkeys/ossec)ossec_req_dir = ( $(util_updir)/ossec )
• package
I’m using yum to automatically install OSSEC-HIDS from my local RPM Repository.
packages:!hg_ossec_server::
ossec-hids action=installossec-hids-client action=install
• links
The Links section just links ossec-agent.conf to ossec.conf on the clients.
1.1. Manual 15

OSSEC Documentation, Release 2.7.1
links:!hg_ossec_server::/var/ossec/etc/ossec.conf -> /var/ossec/etc/ossec-agent.conf
• copy
I manage the ossec-agent.conf in cfengine, because my cfengine configurations are all stored in a subversionrepository. The first stanza in copy just pushes the most recent copy of the ossec-agent.conf file to my network,setting the dynamic class dc_restart_ossec if the copy occurs.
copy:!hg_ossec_server::
$(distribute)/ossec-agent.conf dest=/var/ossec/etc/ossec-agent.confserver=$(policyhost)mode=640group=ossectype=sumdefine=dc_restart_ossec
This second stanza in the copy section copies a file from our ossec key directory to the client.keys file on the client.This copy only happens if the two files are different. It also sets dc_restart_ossec if the copy occurs.
$(ossec_key_dir)/$(host).ossec dest=/var/ossec/etc/client.keysserver=$(policyhost)mode=640group=ossectype=sumdefine=dc_restart_ossec
• processes
My processes block checks to ensure that OSSEC-HIDS is running the correct daemons.
processes:!hg_ossec_server::
"ossec-agentd" elsedefine=dc_restart_ossec``hg_ossec_server``::
"ossec-remoted" elsedefine=dc_restart_ossec
• shellcommands
This section is where the certificate request occurs through some devious mechanisms I designed for no other rea-son than to amuse myself. Hopefully, it amuses others as well. The first thing it does is issue a command thatecho’s the client eth0 ipv4 address to a file named ‘’host.ossec” in the ossec request directory I defined. Thehg_ossec_server class will use this to generate a cert to place in the aforementioned copy block.
shellcommands:!hg_ossec_server::
"/usr/bin/ssh util@$(policyhost) -i $(util_privkey) 'echo $(global.ipv4[eth0]) >→˓ $(ossec_req_dir)/$(host).ossec'"
The last statement checks to see if anyone defined dc_restart_ossec, and restart ossec-hids if it was defined.
dc_restart_ossec::"/sbin/service ossec-hids restart"
16 Chapter 1. Manual & FAQ

OSSEC Documentation, Release 2.7.1
Ok, so who cares?
Well, now, our clients are setup to install, configure, and run OSSEC-HIDS as well as issuing a request for theircertificate. However, the certificate directory on the server is empty and so none of them will actually run. This is aproblem.
Configuring the OSSEC Server w/cfengine
The cfengine part of this was a pain for me because of the order of the actions I had defined and the extent of work Ihad done incorrectly in the past. I could have figured out an interesting way to handle this, but I didn’t want to scrap myentire cfengine config and start from scratch. So I created a perl script that allowed me to use the manage_agentsscript without interaction. It does require the Expect.pm & Regexp::Common from CPAN, but is otherwise stockPerl 5.8.x. I also wrote a shell script wrapper to handle running the perl script and culminating the results. I savedthese two scripts in /root/security, so if you put them elsewhere, make sure to update the shell script wrapper.
The scripts for managing keys can be downloaded ‘here < http://db0.us/~brad/cfengine-ossec-scripts.tar.gz>‘_
The cfengine bit was really simple, it just had to call my wrapper shell script and set the class. I did this with a controlblock:
control:hg_ossec_server::AddClasses = ( ExecResult(/root/security/ossec-scan.sh) )
The combination of the two scripts and this one line in the cfengine configuration handle creating, removing, andexporting the keys, as well as configuring the dc_restart_ossec class if there have been changes.
OSSEC Updates
Updating OSSEC is as easy as it can get. Just download the latest package and follow the installation instructions asusual. It will detect that you already have it installed and ask:
- You already have OSSEC installed. Do you want to update it? (y/n): y
Just answer yes to this question and the script will update the OSSEC binaries. local_rules.xml andlocal_decoder.xml will not be modified during this upgrade.
The script will also prompt for an answer to the following question:
- Do you want to update the rules? (y/n): y
Answering yes to this question updates the <rules> section of the system’s ossec.conf.
Agents
There are two types of agents within OSSEC: installable agents and agentless agents. Installable agents are installedon hosts, and they report back to a central OSSEC server via the OSSEC encrypted message protocol. Agentlessagents require no installation on remote hosts. They are processes initiated from the OSSEC manager, which gatherinformation from remote systems, and use any RPC method (e.g. ssh, snmp rdp, wmi).
Agent
1.1. Manual 17

OSSEC Documentation, Release 2.7.1
Managing Agents
To add an agent to an OSSEC manager with manage_agents you need to follow the steps below.
1. Run manage_agents on the OSSEC server.
2. Add an agent.
3. Extract the key for the agent.
4. Copy that key to the agent.
5. Run manage_agents on the agent.
6. Import the key copied from the manager.
7. Restart the manager’s OSSEC processes.
8. Start the agent.
manage_agents on the OSSEC server
The server version of manage_agents provides an interface to:
• add an OSSEC agent to the OSSEC server
• extract the key for an agent already added to the OSSEC server
• remove an agent from the OSSEC server
• list all agents already added to the OSSEC server.
Running manage_agents and start screen
manage_agents should be run as a user with the appropriate privileges (e.g. root).
Run manage_agents:
# /var/ossec/bin/manage_agents
The manage_agents menu:
***************************************** OSSEC HIDS v2.5-SNP-100809 Agent manager. ** The following options are available: *****************************************
(A)dd an agent (A).(E)xtract key for an agent (E).(L)ist already added agents (L).(R)emove an agent (R).(Q)uit.
Choose your action: A,E,L,R or Q:
Typing the appropriate letter and hitting enter will initiate that function.
Adding an agent
To add an agent type a in the start screen:
18 Chapter 1. Manual & FAQ
OSSEC Documentation, Release 2.7.1
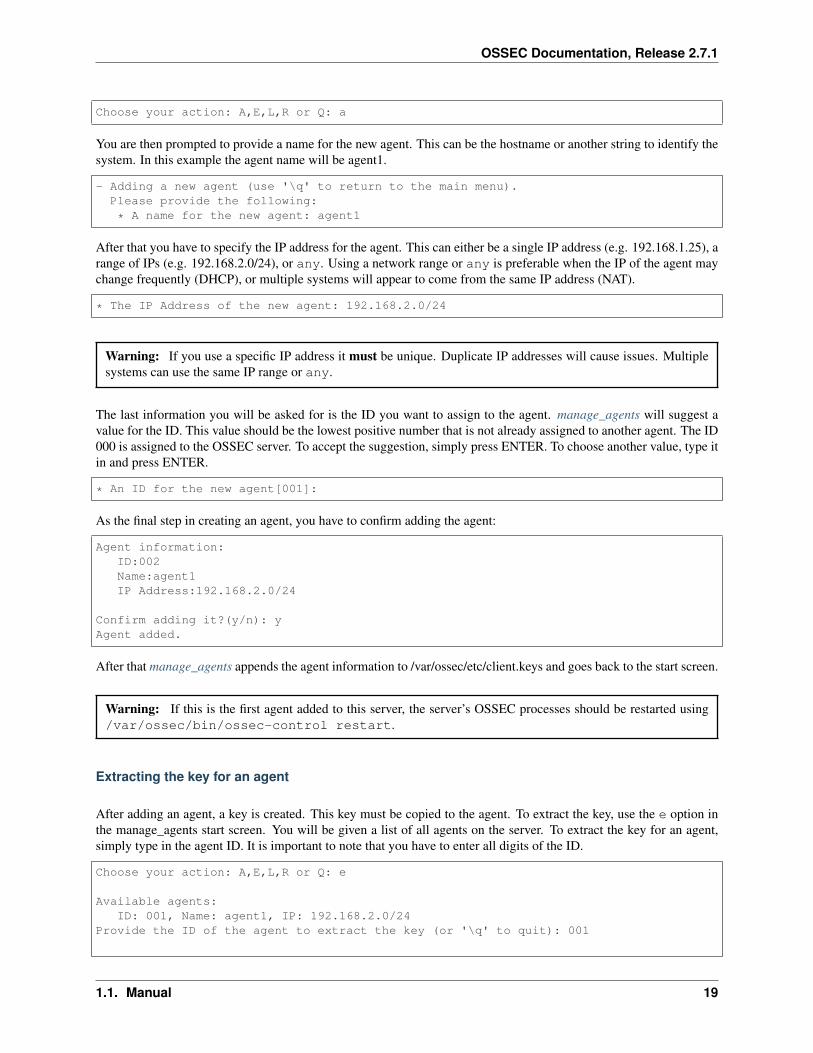
Choose your action: A,E,L,R or Q: a
You are then prompted to provide a name for the new agent. This can be the hostname or another string to identify thesystem. In this example the agent name will be agent1.
- Adding a new agent (use '\q' to return to the main menu).Please provide the following:
* A name for the new agent: agent1
After that you have to specify the IP address for the agent. This can either be a single IP address (e.g. 192.168.1.25), arange of IPs (e.g. 192.168.2.0/24), or any. Using a network range or any is preferable when the IP of the agent maychange frequently (DHCP), or multiple systems will appear to come from the same IP address (NAT).
* The IP Address of the new agent: 192.168.2.0/24
Warning: If you use a specific IP address it must be unique. Duplicate IP addresses will cause issues. Multiplesystems can use the same IP range or any.
The last information you will be asked for is the ID you want to assign to the agent. manage_agents will suggest avalue for the ID. This value should be the lowest positive number that is not already assigned to another agent. The ID000 is assigned to the OSSEC server. To accept the suggestion, simply press ENTER. To choose another value, type itin and press ENTER.
* An ID for the new agent[001]:
As the final step in creating an agent, you have to confirm adding the agent:
Agent information:ID:002Name:agent1IP Address:192.168.2.0/24
Confirm adding it?(y/n): yAgent added.
After that manage_agents appends the agent information to /var/ossec/etc/client.keys and goes back to the start screen.
Warning: If this is the first agent added to this server, the server’s OSSEC processes should be restarted using/var/ossec/bin/ossec-control restart.
Extracting the key for an agent
After adding an agent, a key is created. This key must be copied to the agent. To extract the key, use the e option inthe manage_agents start screen. You will be given a list of all agents on the server. To extract the key for an agent,simply type in the agent ID. It is important to note that you have to enter all digits of the ID.
Choose your action: A,E,L,R or Q: e
Available agents:ID: 001, Name: agent1, IP: 192.168.2.0/24
Provide the ID of the agent to extract the key (or '\q' to quit): 001
1.1. Manual 19

OSSEC Documentation, Release 2.7.1
Agent key information for '001' is:MDAyIGFnZW50MSAxOTIuMTY4LjIuMC8yNCBlNmY3N2RiMTdmMTJjZGRmZjg5YzA4ZDk5m
** Press ENTER to return to the main menu.
The key is encoded in the string (shortened for this example) MDAyIGFnZW50MSAxOTIuMTY4LjIuMC8yNCBlNmY3N2RiMTdmMTJjZGRmZjg5YzA4ZDk5Mmand includes information about the agent. This string can be added to the agent through the agent version ofmanage_agents.
Removing an agent
If you want to remove an OSSEC agent from the server, use the r option in the manage_agents start screen. You willbe given a list of all agents already added to the server. To remove an agent, simply type in the ID of the agent, pressenter, and finally confirm the deletion. It is important to note that you have to enter all digits of the ID.
Choose your action: A,E,L,R or Q: e
Available agents:ID: 001, Name: agent1, IP: 192.168.2.0/24
Provide the ID of the agent to extract the key (or '\q' to quit): 001Confirm deleting it?(y/n): yAgent '001' removed.
manage_agents then invalidates the agent information in /var/ossec/etc/client.keys. Only the valuesfor ID and the key are kept to avoid conflicts when adding agents. The deleted agent can no longer communicate withthe OSSEC server.
manage_agents on OSSEC agents
The agent version provides an interface for importing authentication keys.
***************************************** OSSEC HIDS v2.5-SNP-100809 Agent manager. ** The following options are available: *****************************************
(I)mport key from the server (I).(Q)uit.
Choose your action: I or Q: i
* Provide the Key generated by the server.
* The best approach is to cut and paste it.
*** OBS: Do not include spaces or new lines.
Paste it here (or '\q' to quit): [key extracted via manage_agents on the server]
Agent information:ID:001Name:agent1IP Address:192.168.2.0/24
Confirm adding it?(y/n): yAdded.
** Press ENTER to return to the main menu.
For the changes to be in effect you have to restart the server and start the agent.
20 Chapter 1. Manual & FAQ

OSSEC Documentation, Release 2.7.1
Agent systems behind NAT or with dynamic IPs (DHCP)
If you want to install the agent on systems without a static IP address or behind a NAT device, you need to configurethe agent using a CIDR address or the ip address of any.
DHCP Example
To add an agent that can receive any IP address in the 192.168.2.0/24 network, just provide the IP address of the agentas 192.168.2.0/24. Example (taken from manage_agents):
Please provide the following:
* A name for the new agent: test
* The IP Address of the new agent: 192.168.2.0/24
NAT Example
The same applies to systems behind a NAT device. The OSSEC server will see all agents behind the NAT as if theyhave the same IP address.
For example, you have systems 192.168.1.2, 192.168.1.3 and 192.168.1.4 behind a nat server that connects to network10.1.1.0/24 with the ossec server on it.
In this case, you need to config the agents as if their IP was 10.1.1.0/24, because this is the IP that the server is seeing(not their original IP). Using any instead of an IP address or range is also a valid option, allowing the agent to connectfrom any IP address.
On the manage_agents tool, add each one of those agents on the server using the following format:
Please provide the following:
* A name for the new agent: agent-1
* The IP Address of the new agent: 10.1.1.0/24
Please provide the following:
* A name for the new agent: agent-2
* The IP Address of the new agent: any
Note: Make sure to use one separate key for each agent.
Centralized agent configuration
If you ever wanted to be able to configure your agents remotely, you will be happy to know that starting on version 2.1you will be able to do so. We allow centralized configuration for file integrity checking (syscheckd), rootkit detection(rootcheck) and log analysis.
This is how it works.
Create agent configuration
First Create the file /var/ossec/etc/shared/agent.conf.
Inside the file you can configure the agent just as you would normally at ossec.conf
1.1. Manual 21

OSSEC Documentation, Release 2.7.1
<agent_config><localfile>
<location>/var/log/my.log</location><log_format>syslog</log_format>
</localfile></agent_config>
But you have a few more options. You can restrict the config by agent name, operating system, or profile:
<agent_config name="agent1"><localfile>
<location>/var/log/my.log</location><log_format>syslog</log_format>
</localfile></agent_config>
<agent_config os="Linux"><localfile>
<location>/var/log/my.log2</location><log_format>syslog</log_format>
</localfile></agent_config>
<agent_config os="Windows"><localfile>
<location>C:\myapp\my.log</location><log_format>syslog</log_format>
</localfile></agent_config>
And only the proper agent will read them, giving us great granularity to push the configuration to all your agents.
After you configured, the manager will push it to the agents. Note that it can take a while for it to complete (since themanager caches the shared files and only re-reads them every few hours). If you restart the manager the configurationwill be pushed much quicker.
Restart the agent
Once the configuration file is pushed, you can run the command agent_control to see if the agent received the configand restart the agent remotely.
# md5sum /var/ossec/etc/shared/agent.confMD5 (/var/ossec/etc/shared/agent.conf) = ee1882236893df851bd9e4842007e7e7# /var/ossec/bin/agent_control -i 200
OSSEC HIDS agent_control. Agent information:Agent ID: 200Agent Name: ourhomeIP address: 192.168.0.0/16Status: Active
Operating system: Linux ourhome 2.6.24-23-generic #1 SMP Mon Jan 26 00..Client version: OSSEC HIDS v2.1 / ee1882236893df851bd9e4842007e7e7Last keep alive: Tue Jun 30 08:29:17 2009
Syscheck last started at: Tue Jun 30 04:29:32 2009Rootcheck last started at: Tue Jun 30 06:03:08 2009
22 Chapter 1. Manual & FAQ

OSSEC Documentation, Release 2.7.1
When the agent received the configuration, the “Client Version” field will have the md5sum of the agent.conf file.
Note: Linux systems generally use md5sum, but other systems may use md5 as the name of the application to checkthe hash of the file.
To restart the agent:
# /var/ossec/bin/agent_control -R 200 (where 200 is the agent id)
OSSEC HIDS agent_control: Restarting agent: 200
Agentless
Agentless Monitoring
Agentless monitoring allows you to run integrity checking on systems without an agent installed (including routers,firewalls, switches and even Linux/BSD systems). It can be executed just like our normal file integrity checking(alerting of checksum changes) or doing diffs and showing exactly what has changed.
Agentless configuration options
agentlessThis is the section that will contain the agentless configuration.
frequencyThis controls the number of seconds between each run.
hostThis defines the username and agentless host.
Example:
<host>[email protected]</host>
stateThis determines whether the checks are periodic or periodic_diff.
•periodic: The output from the scripts is processed by the OSSEC processes.
•periodic_diff: The output from the scripts is compared to the output of previous runs.
argumentsThis defines the arguments passed to the script.
Check _manual-agentless-scripts for more information.
Getting started with agentless
After you installed OSSEC, you need to enable the agentless monitoring:
# /var/ossec/bin/ossec-control enable agentless
1.1. Manual 23

OSSEC Documentation, Release 2.7.1
And provide the SSH authentication to the host you want to access. For Cisco devices (PIX, routers, etc), you needto provide an additional parameter for the enable password. The same thing applies if you want to add support for“su”, it must be the additional parameter. In this example, I am adding a Linux box (example.net) and a PIX firewall(pix.fw.local):
# /var/ossec/agentless/register_host.sh add [email protected] mypass1
*Host [email protected] added.# /var/ossec/agentless/register_host.sh add [email protected] pixpass enablepass
*Host [email protected] added.
# /var/ossec/agentless/register_host.sh list
*Available hosts:[email protected]@example.net
Note: register_host.sh is a shell script, special characters may need to be escaped to not be interpreted by theshell.
If you want to use public key authentication instead of passwords, you need to provide NOPASS as the password andcreate the public key:
# sudo -u ossec ssh-keygen
It will create the public keys inside /var/ossec/.ssh . After that, just scp the public key to the remote box and yourpassword less connection should work.
Configuring agentless
Once you have added all your systems, you need to configure OSSEC to monitor them. By default, we have 4 agentlesstypes (but we plan to add more soon):
• ssh_integrity_check_bsd
• ssh_integrity_check_linux
• ssh_generic_diff
• ssh_pixconfig_diff
For the first two, you give a list of directories in the configuration and OSSEC will do the integrity checking of them onthe remote box. On the ssh_generic_diff, you give a set of commands to run on the remote box and OSSEC will alertwhen the output of them changes. The ssh_pixconfig_diff will alert when a Cisco PIX/router configuration changes.
So, for my first system ([email protected]), I will monitor the /bin, /etc and /sbin directories every 10 hours (if I wasusing the ssh_integrity_check_bsd, the argument would be the directories as well):
<agentless><type>ssh_integrity_check_linux</type><frequency>36000</frequency><host>[email protected]</host><state>periodic</state><arguments>/bin /etc/ /sbin</arguments>
</agentless>
For my PIX, the configuration looks like:
24 Chapter 1. Manual & FAQ

OSSEC Documentation, Release 2.7.1
<agentless><type>ssh_pixconfig_diff</type><frequency>36000</frequency><host>[email protected]</host><state>periodic_diff</state>
</agentless>
And just to exemplify the ssh_generic_diff I will also monitor ls -la /etc; cat /etc/passwd on the [email protected] that if you want to monitor any network firewall or switch, you can use the ssh_generic_diff and just specifythe commands in the arguments option. To use “su”, you need to set the value “use_su” before the hostname (eg:<host>use_su [email protected]</host>).
<agentless><type>ssh_generic_diff</type><frequency>36000</frequency><host>[email protected]</host><state>periodic_diff</state><arguments>ls -la /etc; cat /etc/passwd</arguments>
</agentless>
Running the completed setup
Once the configuration is completed, you can restart OSSEC. You should see something like “Started ossec-agentlessd”in the output. Before each agentless connection is started, OSSEC will do a configuration check to make sure every-thing is fine. Look at /var/ossec/logs/ossec.log for any error. If you see:
2008/12/12 15:20:06 ossec-agentlessd: ERROR: Expect command not found (or bad→˓arguments) for 'ssh_integrity_check_bsd'.2008/12/12 15:20:06 ossec-agentlessd: ERROR: Test failed for 'ssh_integrity_check_bsd→˓' (127). Ignoring.'
It means that you don’t have the expect library installed on the server (it is not necessary to install anything on theagentless systems to monitor). On Ubuntu you can do the following to install:
# apt-get install expect
After installing expect, you can restart OSSEC and you should see:
2008/12/12 15:24:12 ossec-agentlessd: INFO: Test passed for 'ssh_integrity_check_bsd'.→˓'
When it connects to the remote system, you will also see:
2008/12/12 15:25:19 ossec-agentlessd: INFO: ssh_integrity_check_bsd: root@example.→˓net: Starting.2008/12/12 15:25:46 ossec-agentlessd: INFO: ssh_integrity_check_bsd: root@example.→˓net: Finished.
Alerts
These are some of the alerts you will get:
For the ssh_generic_diff:
1.1. Manual 25

OSSEC Documentation, Release 2.7.1
OSSEC HIDS Notification.2008 Dec 12 01:58:30
Received From: (ssh_generic_diff) [email protected]>agentlessRule: 555 fired (level 7) -> "Integrity checksum for agentless device changed."Portion of the log(s):
ossec: agentless: Change detected:35c35< -rw-r-r- 1 root wheel 34 Dec 10 03:55 hosts.deny--> -rw-r-r- 1 root wheel 34 Dec 11 18:23 hosts.deny-END OF NOTIFICATION
For the PIX:
OSSEC HIDS Notification.2008 Dec 01 15:48:03
Received From: (ssh_pixconfig_diff) [email protected]>agentlessRule: 555 fired (level 7) -> "Integrity checksum for agentless device changed."Portion of the log(s):
ossec: agentless: Change detected:48c48< fixup protocol ftp 21--> no fixup protocol ftp 21100c100< ssh timeout 30--> ssh timeout 50More changes..
-END OF NOTIFICATION
Contents
• Writing Agentless Scripts
– Agentless Script Types
* Periodic diff Specification
* Periodic Specification
· Example of real FWD: command.
– Agentless Script: ssh_integrity_check_linux
– Modifying to make own Agentless Script: ssh_dmz_linux
Writing Agentless Scripts
All scripts that work with OSSEC agentless security monitoring use stdout for communication and reporting to theOSSEC server. This makes writing scripts for OSSEC simple as you do not need to do anything more then print or
26 Chapter 1. Manual & FAQ

OSSEC Documentation, Release 2.7.1
echo to stdout. The format of the output does need to meet the OSSEC specification, but that is a very simple thing todo.
Agentless Script Types
Before we move to the specification details I need to explain that OSSEC agentless runs to different types of scripts.Namely the following:
• periodic_diff
– Scripts output data to the OSSEC agentless process that will then be compared to past runs and if there aredifferences an OSSEC alert will be generated.
• periodic
– Scripts output controlled messages to the OSSEC agentless process that will then be processed accordingly.
Periodic diff Specification
The output for periodic_diff is very simple, any and all output after the agentless command STORE: now and beforethe next OSSEC Command will be stored and compared for differences. This type of script is mostly used for hardwaredevices such as Cisco IOS, Juniper JunOS, and other products.
Scripts that use the periodic_diff make use of the following commands:
• INFO:
– The string following INFO will be logged to /var/ossec/logs/ossec.log by OSSEC for debugging.
• ERROR:
– Error needs to be reported. The string following this command is forwarded to the OSSEC manager, andthe OSSEC process closes down the script.
• STORE:
– All the lines that follows this command will be added stored and compared to previous runs of the script
Here is an example of a periodic_diff script that comes with OSSEC. (Please note with all agentless scripts you mustbe in the root of the OSSEC install for them to function correctly.)
obsd46#( cd /var/ossec && ./agentless/ssh_pixconfig_diff [email protected] 'show→˓hardware' )spawn ssh -c des [email protected] valid ciphers for protocol version 2 given, using defaults.Password:
a.zfw.tss>INFO: Starting.enablePassword:a.zfw.tss#ok on enable pass
STORE: nowno pager
^% Invalid input detected at '^' marker.
a.zfw.tss#term len 0a.zfw.tss#terminal pager 0
1.1. Manual 27

OSSEC Documentation, Release 2.7.1
^% Invalid input detected at '^' marker.
a.zfw.tss#show version | grep -v Configuration last| up^
% Invalid input detected at '^' marker.
a.zfw.tss#show running-configBuilding configuration...
Current configuration : 14631 bytes!version 12.4
[................SNIP CONFIG.................]
a.zfw.tss#show hardwareCisco IOS Software, 3800 Software (C3845-ADVENTERPRISEK9-M), Version 12.4(24)T1,→˓RELEASE SOFTWARE (fc3)Technical Support: http://www.cisco.com/techsupportCopyright (c) 1986-2009 by Cisco Systems, Inc.Compiled Fri 19-Jun-09 19:21 by prod_rel_team
ROM: System Bootstrap, Version 12.3(11r)T2, RELEASE SOFTWARE (fc1)
a.zfw.tss uptime is 1 week, 5 days, 7 hours, 29 minutesSystem returned to ROM by reload at 13:34:26 UTC Thu Oct 22 2009System image file is "flash:c3845-adventerprisek9-mz.124-24.T1.bin"
This product contains cryptographic features and is subject to UnitedStates and local country laws governing import, export, transfer anduse. Delivery of Cisco cryptographic products does not implythird-party authority to import, export, distribute or use encryption.Importers, exporters, distributors and users are responsible forcompliance with U.S. and local country laws. By using this product youagree to comply with applicable laws and regulations. If you are unableto comply with U.S. and local laws, return this product immediately.
A summary of U.S. laws governing Cisco cryptographic products may be found at:http://www.cisco.com/wwl/export/crypto/tool/stqrg.html
If you require further assistance please contact us by sending email [email protected].
Cisco 3845 (revision 1.0) with 1007615K/40960K bytes of memory.Processor board ID FTX1043A2CR2 Gigabit Ethernet interfaces1 ATM interface1 Virtual Private Network (VPN) Module4 CEM T1/E1 portsDRAM configuration is 64 bits wide with parity enabled.479K bytes of NVRAM.492015K bytes of USB Flash usbflash0 (Read/Write)62720K bytes of ATA System CompactFlash (Read/Write)
Configuration register is 0x2102
28 Chapter 1. Manual & FAQ

OSSEC Documentation, Release 2.7.1
a.zfw.tss#exitConnection to 172.17.0.1 closed by remote host.Connection to 172.17.0.1 closed.
INFO: Finished.
In this example above the script would store the contents between STORE: now and INFO: Finished.. If thisis the first time that OSSEC agentless has run this command no alerts would be generated and the contents would havebeen saved for later comparisons. If OSSEC agentless has a stored copy from a previous execution it will compare thefiles and if there are any differences it will generate an alert.
Periodic Specification
The periodic specification has more options and gives more control to the script writer on what actions OSSEC willtake. Once again stdout is used for communication so script writing is easy.
• INFO:
– The string following INFO will be logged to /var/ossec/logs/ossec.log by OSSEC for debugging.
• ERROR:
– Error needs to be reported. The string following this command is forwarded to the OSSEC manager, andthe OSSEC process closes down the script.
• FWD:
– The string following FWD is a colon delimited list of stats on a given file.
• LOG:
– The string following LOG: will be passed into ossec-analysisd and processed like all other log messages.
Example of real FWD: command.
FWD:→˓19419:600:0:0:fb30de5b02029950ae05885a3d407c8c:017cd6118cdc166ee8eba8af1b7fdad6763203d3→˓./.bash_history
The Fields break down in to the following:
• FWD:
– The OSSEC Command
• 19419
– Total size of file, in bytes
• 600
– Access rights of file in octal
• 0
– User ID of file owner
• 0
1.1. Manual 29

OSSEC Documentation, Release 2.7.1
– Group ID of file owner
• fb30de5b02029950ae05885a3d407c8c
– MD5 Hash of file
• 017cd6118cdc166ee8eba8af1b7fdad6763203d3
– SHA1 Hash of file
• ./.bash_history
– Path and name of file
Using this format OSSEC can store the information about a file and then in the future run compare that they are thesame. If for some reason they are not the same an alert will be generated. Here is an example of a password changeon a linux system:
OSSEC HIDS Notification.2009 Sep 21 15:19:00
Received From: (ssh_integrity_check_linux) [email protected]>syscheckRule: 550 fired (level 7) -> "Integrity checksum changed."Portion of the log(s):
Integrity checksum changed for: '/etc/shadow'Old md5sum was: '0d92e12c92f3edcf9d8876ea57c5f677'New md5sum is : '2bd51b61dea17c5682fb2c0cf4f92c63'Old sha1sum was: '2270c03a920ef8dd50e11cefdef046a8660f7a29'New sha1sum is : 'd9518ea9022b10d07f81925c6d7f2abb4364b548'
--END OF NOTIFICATION
Agentless Script: ssh_integrity_check_linux
Now that we have an understanding of how agentless scripts communicate with the parent OSSEC process, let’s moveon to a working example. The OSSEC supplied script ssh_integrity_check_linux is a great place to start,so lets open it up and see what is going on.
obsd46# cat /var/ossec/agentless/ssh_integrity_check_linux#!/usr/bin/env expect
# @(#) $Id: ssh_integrity_check_linux,v 1.11 2009/06/24 17:06:21 dcid Exp $# Agentless monitoring## Copyright (C) 2009 Trend Micro Inc.# All rights reserved.## This program is a free software; you can redistribute it# and/or modify it under the terms of the GNU General Public# License (version 3) as published by the FSF - Free Software# Foundation.
# Main script.source "agentless/main.exp"
# SSHing to the box and passing the directories to check.
30 Chapter 1. Manual & FAQ

OSSEC Documentation, Release 2.7.1
if [catch {spawn ssh $hostname
} loc_error] {send_user "ERROR: Opening connection: $loc_error.\n"exit 1;
}
source $sshsrcsource $susrc
set timeout 600send "echo \"INFO: Starting.\"; for i in `find $args 2>/dev/null`;do tail \$i >/dev/→˓null 2>&1 &&md5=`md5sum \$i | cut -d \" \" -f 1` && sha1=`sha1sum \$i | cut -d \" \" -f1` && echo FWD: `stat --printf \"%s:%a:%u:%g\" \$i`:\$md5:\$sha1 \$i; done; exit\r"
send "exit\r"
expect {timeout {
send_user "ERROR: Timeout while running commands on host: $hostname .\n"exit 1;
}eof {
send_user "\nINFO: Finished.\n"exit 0;
}}
exit 0;
The comments in the script hints to what is going on, but everything up to and including set timeout 600 is related tosetting up the expect functions and code for handling the ssh subprocess and connecting to the remote host. I am notgoing to spend any time with this section, I am just going to make use of it.
The meat of what is getting processed on the remote end all happens in two lines.
send "echo \"INFO: Starting.\"; for i in `find $args 2>/dev/null`;do tail \$i >/dev/→˓null 2>&1 &&md5=`md5sum \$i | cut -d \" \" -f 1` && sha1=`sha1sum \$i | cut -d \" \" -f1` && echo FWD: `stat --printf \"%s:%a:%u:%g\" \$i`:\$md5:\$sha1 \$i; done; exit\r"
Let’s break this down to see what is happening.
The send command pushes the following string to the ssh subprocess which gets run on the remote end of the con-nection. Before the script is sent to the remote host expect internally processes the string. This includes searching forvariables and removing any control characters.
The control characters are first taken into account, and in the case of our example all escaped special characters areprocessed. ”, r, and $ would be replaced with ”, “carriage return“, and & respectively. The reason the escape charactersare needed so that they will not interfere with expects own string processing and control. We will need to handle controlcharacters in this way when we begin writing our own script.
While special characters were being handled by expect it also looked for variables to replace, in this case it willfind $args and replace it with what ever arguments were passed to the script by the OSSEC agentless process. Ifwe specified the following in /var/ossec/etc/ossec.conf the $args variable would be replaced with /bin/etc /sbin.
1.1. Manual 31

OSSEC Documentation, Release 2.7.1
<agentless><type>ssh_integrity_check_linux</type><frequency>3600</frequency><host>[email protected]</host><state>periodic</state><arguments>/bin /etc /sbin</arguments>
</agentless>
Back to the commands that get run. Once expect has completed replacement we are left with this command.
echo "INFO: Starting."; for i in `find /bin /etc /sbin 2>/dev/null`;do tail $i >/dev/→˓null 2>&1 &&md5=`md5sum $i | cut -d " " -f 1` && sha1=`sha1sum $i | cut -d " " -f1` && echo FWD: `stat --printf "%s:%a:%u:%g" $i`:$md5:$sha1 $i; done; exit
exit
This script then goes and uses the Unix find command to locate all files in the specified path (from the argumentspassed) and generates an OSSEC FWD: command for each one and prints it to stdout. Making use of the commandsstat, md5sum, and sha1sum to generate the data needed. Here is an example of the output checking.
spawn ssh [email protected] login: Wed Nov 4 11:32:51 2009 from 172.17.20.131^M[linux26 ~]#INFO: Started.echo "INFO: Starting."; for i in `find {/bin /etc /sbin} 2>/dev/null`;do tail $i >/→˓dev/null 2>&1 &&md5=`md5sum $i | cut -d " " -f 1` && sha1=`sh a1sum $i | cut -d " " -f1` && echo FWD: `stat --printf "%s:%a:%u:%g" $i`:$md5:$sha1 $i; done; exit
INFO: Starting.FWD:→˓833:644:0:0:4148adea745af5121963f6b731b60013:60877a6f6981b16c0d53d32bcd3f07d41cfb5bd4→˓/etc/modprobe.d/glib2.sh[...........SNIP............]FWD:→˓1696:644:0:0:c2bd306b205ad9e81fb02ce6b225d384:5244d65815cb228a4fac7bc4c1c7774508fb7505→˓/etc/nsswitch.confFWD:→˓85179:644:0:0:8db574225cd1068b47e77ceccd96f8ff:b5ef6183b35ee9d1b66ed2cefe98003c5bd99192→˓/etc/sensors.confFWD:→˓49:644:0:0:52c3df2f1edf30ca3db82174be3a68d2:1934648f2429b70b1f729d343a6956fb0ea73136→˓/etc/php.d/imap.iniFWD:→˓873:644:0:0:04559d1fe27ecd079b69df8b319f937e:e5cab1bf1f9e4bc4386309f4e00a9b7be3e543a2→˓/etc/php.d/memcache.iniFWD:→˓59:644:0:0:94636ba6c4bac9d8d49d9de1a513ae0c:41d5164a2c6e332e40edf55c59a2d0df8a260964→˓/etc/php.d/pdo_mysql.iniFWD:→˓49:644:0:0:917dbbafbfaaa20f660063d627123dae:0e829d4ffc69f58dc258510b4b8452412e31ccc5→˓/etc/php.d/json.iniFWD:→˓0:644:0:0:d41d8cd98f00b204e9800998ecf8427e:da39a3ee5e6b4b0d3255bfef95601890afd80709→˓/etc/wvdial.conflogoutConnection to 172.17.20.20 closed.
32 Chapter 1. Manual & FAQ
OSSEC Documentation, Release 2.7.1
INFO: Finished.
Modifying to make own Agentless Script: ssh_dmz_linux
Using the built in OSSEC agentless scripts are great, but sometimes we need more focused scanning and checking. Solet’s modify the ssh_integrity_check_linux for our environment.
The goals for this new script will be to watch for changes to files based on the following criteria:
• All setuid and setgid files
• All files related to authentication (including .htaccess and ssh files)
• All application specific files (apache, ssh)
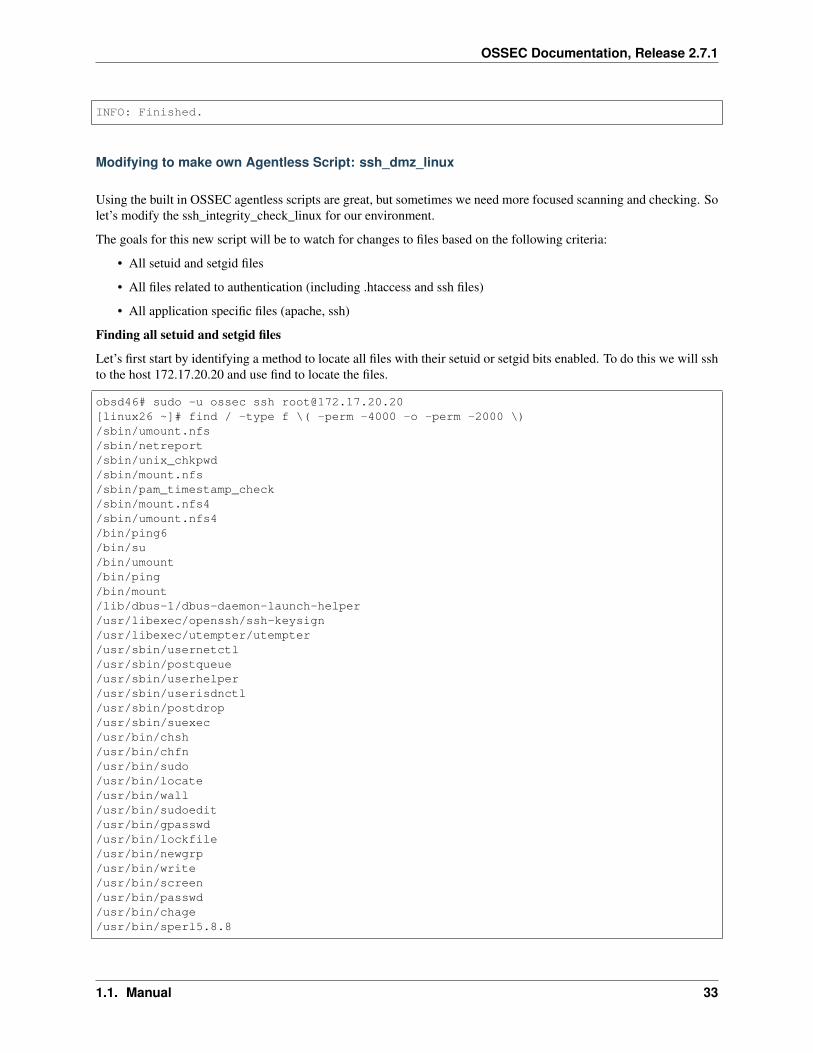
Finding all setuid and setgid files
Let’s first start by identifying a method to locate all files with their setuid or setgid bits enabled. To do this we will sshto the host 172.17.20.20 and use find to locate the files.
obsd46# sudo -u ossec ssh [email protected][linux26 ~]# find / -type f \( -perm -4000 -o -perm -2000 \)/sbin/umount.nfs/sbin/netreport/sbin/unix_chkpwd/sbin/mount.nfs/sbin/pam_timestamp_check/sbin/mount.nfs4/sbin/umount.nfs4/bin/ping6/bin/su/bin/umount/bin/ping/bin/mount/lib/dbus-1/dbus-daemon-launch-helper/usr/libexec/openssh/ssh-keysign/usr/libexec/utempter/utempter/usr/sbin/usernetctl/usr/sbin/postqueue/usr/sbin/userhelper/usr/sbin/userisdnctl/usr/sbin/postdrop/usr/sbin/suexec/usr/bin/chsh/usr/bin/chfn/usr/bin/sudo/usr/bin/locate/usr/bin/wall/usr/bin/sudoedit/usr/bin/gpasswd/usr/bin/lockfile/usr/bin/newgrp/usr/bin/write/usr/bin/screen/usr/bin/passwd/usr/bin/chage/usr/bin/sperl5.8.8
1.1. Manual 33

OSSEC Documentation, Release 2.7.1
/usr/bin/crontab/usr/bin/ssh-agent
Finding all files related to authentication and applications specific files
Finding all files with setuid and setgid was simple, but finding all files related to authentication is more involved. Thisof course will vary from system to system, but this should be good starting point.
obsd46# sudo -u ossec ssh [email protected][linux26 ~]# find / \( -name ".ssh" -o -name "ssh" -o -name "sshd" -o -name "httpd" -→˓o -name ".htaccess"-o -name "pam.d" \) -exec find {} \;/var/www/html/admin/modules/framework/var/www/html/admin/modules/.htaccess/etc/httpd/etc/httpd/conf/etc/httpd/conf.d/etc/httpd/conf.d/php.conf/etc/httpd/conf.d/proxy_ajp.conf/etc/httpd/conf.d/README/etc/httpd/conf.d/ssl.conf/etc/httpd/conf.d/welcome.conf/etc/httpd/conf/httpd.conf/etc/httpd/conf/magic/etc/httpd/logs/etc/httpd/modules/etc/httpd/run/etc/logrotate.d/httpd/etc/pam.d/etc/pam.d/authconfig[...................SNIP PAM Files.....................]/etc/pam.d/system-config-network-cmd/etc/pam.d/vsftpd/etc/rc.d/init.d/httpd/etc/rc.d/init.d/sshd/etc/ssh/etc/ssh/ssh_config/etc/ssh/sshd_config/etc/ssh/ssh_host_dsa_key/etc/ssh/ssh_host_dsa_key.pub/etc/ssh/ssh_host_key/etc/ssh/ssh_host_key.pub/etc/ssh/ssh_host_rsa_key/etc/ssh/ssh_host_rsa_key.pub/etc/sysconfig/httpd/root/.ssh/root/.ssh/authorized_keys/usr/bin/ssh/usr/lib/httpd/usr/lib/httpd/modules/usr/lib/httpd/modules/libphp5.so[...................SNIP Apache modules................]
/usr/lib/httpd/modules/mod_vhost_alias.so/usr/sbin/httpd/usr/sbin/sshd/usr/src/tbm-pbxconfig-5.5.1/amp_conf/htdocs/admin/modules/framework/htdocs/admin/→˓modules/.htaccess/usr/src/tbm-pbxconfig-5.5.1/amp_conf/htdocs/admin/modules/.htaccess
34 Chapter 1. Manual & FAQ

OSSEC Documentation, Release 2.7.1
/var/empty/sshd/var/empty/sshd/etc/var/empty/sshd/etc/localtime/var/www/html/admin/modules/framework/var/www/html/admin/modules/.htaccess/var/www/html/admin/modules/.htaccess
Merging finds
Now we have two basic find methods that identify the files we want to monitor for changes, but our finds were a littlegreedy so we should create a way to strip out unwanted files from the list. As this is a unix system egrep is the king forfinding or removing items from a list. To simplify things we can use egrep with the -v command line argument whichtells egrep NOT to print any matching items.
Just to make sure that we do not end up double processing files we can make use of the sort command with -u argumentto remove any duplicates.
Here is how we would put together both finds, egrep, and sort to locate and filter what is needed.
( find / -type f \( -perm -4000 -o -perm -2000 \) && \find / \( -name ".ssh" -o -name→˓"ssh" -o -name "sshd"-o -name "httpd" -o -name ".htaccess" -o -name "pam.d" \) -exec find {} \; ) 2>/dev/→˓null | egrep-v "known_hosts|moduli|var\/log|var\/lock" | sort -u
The above command we have found all files and paths that we would like to monitor, but this still needs to be integratedinto a script on the OSSEC server.
Creating ssh_dmz_linux
We don’t want to make changes to ssh_integrity_check_linux directly so we will need to make a copy.
obsd46# (cd /var/ossec/agentless && cp ssh_integrity_check_linux ssh_dmz_linux)
Integrating our new command line into the script we must pay close attention to special characters that expect willprocess. Due to this we will need to escape all / and ” by proceeding them with . Once we are done escaping we justinsert our new line in place of find $args 2>/dev/null in our new file.
Here is what the completed script will look like.
obsd56# cat /var/ossec/agentless/ssh_dmz_linux#!/usr/bin/env expect
# @(#) $Id: ssh_integrity_check_linux,v 1.11 2009/06/24 17:06:21 dcid Exp $# Agentless monitoring## Copyright (C) 2009 Trend Micro Inc.# All rights reserved.## This program is a free software; you can redistribute it# and/or modify it under the terms of the GNU General Public# License (version 3) as published by the FSF - Free Software# Foundation.
# Main script.source "agentless/main.exp"
# SSHing to the box and passing the directories to check.
1.1. Manual 35
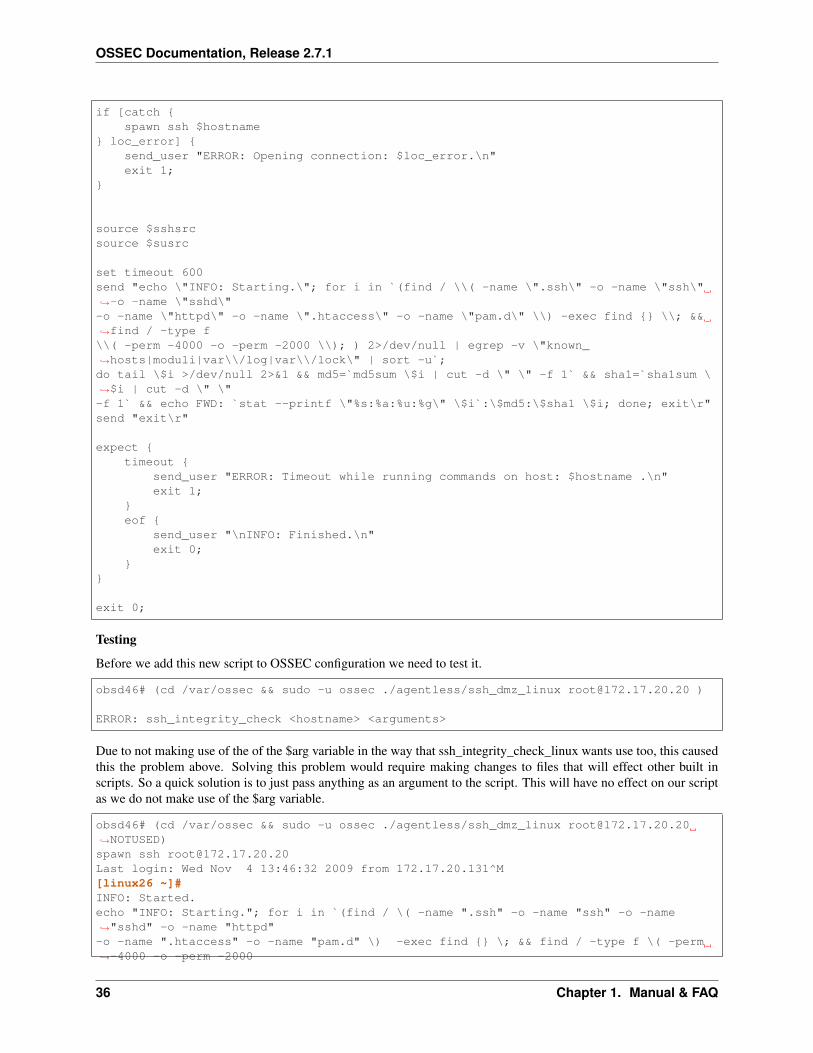
OSSEC Documentation, Release 2.7.1
if [catch {spawn ssh $hostname
} loc_error] {send_user "ERROR: Opening connection: $loc_error.\n"exit 1;
}
source $sshsrcsource $susrc
set timeout 600send "echo \"INFO: Starting.\"; for i in `(find / \\( -name \".ssh\" -o -name \"ssh\"→˓-o -name \"sshd\"-o -name \"httpd\" -o -name \".htaccess\" -o -name \"pam.d\" \\) -exec find {} \\; &&→˓find / -type f\\( -perm -4000 -o -perm -2000 \\); ) 2>/dev/null | egrep -v \"known_→˓hosts|moduli|var\\/log|var\\/lock\" | sort -u`;do tail \$i >/dev/null 2>&1 && md5=`md5sum \$i | cut -d \" \" -f 1` && sha1=`sha1sum \→˓$i | cut -d \" \"-f 1` && echo FWD: `stat --printf \"%s:%a:%u:%g\" \$i`:\$md5:\$sha1 \$i; done; exit\r"send "exit\r"
expect {timeout {
send_user "ERROR: Timeout while running commands on host: $hostname .\n"exit 1;
}eof {
send_user "\nINFO: Finished.\n"exit 0;
}}
exit 0;
Testing
Before we add this new script to OSSEC configuration we need to test it.
obsd46# (cd /var/ossec && sudo -u ossec ./agentless/ssh_dmz_linux [email protected] )
ERROR: ssh_integrity_check <hostname> <arguments>
Due to not making use of the of the $arg variable in the way that ssh_integrity_check_linux wants use too, this causedthis the problem above. Solving this problem would require making changes to files that will effect other built inscripts. So a quick solution is to just pass anything as an argument to the script. This will have no effect on our scriptas we do not make use of the $arg variable.
obsd46# (cd /var/ossec && sudo -u ossec ./agentless/ssh_dmz_linux [email protected]→˓NOTUSED)spawn ssh [email protected] login: Wed Nov 4 13:46:32 2009 from 172.17.20.131^M[linux26 ~]#INFO: Started.echo "INFO: Starting."; for i in `(find / \( -name ".ssh" -o -name "ssh" -o -name→˓"sshd" -o -name "httpd"-o -name ".htaccess" -o -name "pam.d" \) -exec find {} \; && find / -type f \( -perm→˓-4000 -o -perm -2000
36 Chapter 1. Manual & FAQ

OSSEC Documentation, Release 2.7.1
\); ) 2>/dev/null | egrep -v "known_hosts|moduli|var\/log|var\/lock"`;do tail $i >/→˓dev/null 2>&1 &&md5=`md5s ^Mum $i | cut -d " " -f 1` && sha1=`sha1sum $i | cut -d " " -f 1` && echo→˓FWD: `stat --printf"%s:%a:%u:%g" $i`:$md5:$sha1 $i; done; exitINFO: Starting.FWD:→˓14:775:100:101:3bc0a3e92f8170084dd102eda9a474b1:25a1783a3c6bdd9745ec245ec1bfa0414ee05d23→˓/var/www/html/admin/modules/.htaccessmodules/.htaccessFWD:→˓3519:644:0:0:e4ca381035a34b7a852184cc0dd89baa:6e43d0b5a46ed5ba78da5c7e9dcf319b27d769e7→˓/var/empty/sshd/etc/localtimeFWD:→˓560:644:0:0:58370830ecfa056421ad21aff9c18905:d115bb5aeefaab97c53fbbd5df84ebcb9170d796→˓/etc/httpd/conf.d/php.conf[...................SNIP.............................]FWD:→˓392:644:0:0:e92bea7e9d70a9ecdc61edd7c0a2f59a:d77b61dac010c60589b4d8a2039e3b8a5bed18b2→˓/etc/httpd/conf.d/READMEFWD:→˓70888:4711:0:0:9046bd13339e7ef22266067b633e601a:3fc41029ddb14fe4ed613f479fa9e89c944f04dd→˓/usr/bin/sperl5.8.8FWD:→˓315416:6755:0:0:4c63a9709fb7f0f97c30aa29d204859c:c379efa658de72866b8f6de5767906ff78d127b0→˓/usr/bin/crontabFWD:→˓88964:2755:0:99:baf3ebef6377d6ef42858776c33621b0:62394bf57d18c3fd49adeb39a1da61661cabc3c8→˓/usr/bin/ssh-agentlogoutConnection to 172.17.20.20 closed.
INFO: Finished.
Log monitoring/analysis
Log Analysis (or log inspection) is done inside OSSEC by the logcollector and analysisd processes. The first onecollects the events and the second one analyzes (decodes, filters and classifies) them.
It is done in real time, so as soon as an event is written OSSEC will process them. OSSEC can read events frominternal log files, from the Windows event log and also receive them directly via remote syslog.
What is log analysis?
Inside OSSEC we call log analysis a LIDS, or log-based intrusion detection. The goal is to detect attacks, misuse orsystem errors using the logs.
LIDS - Log-based intrusion detection or security log analysis are the processes or techniques used to detect attackson a specific network, system or application using logs as the primary source of information. It is also very useful todetect software misuse, policy violations and other forms of inappropriate activities.
Quick Facts
• How often are logs monitored?
– In real time.
1.1. Manual 37
OSSEC Documentation, Release 2.7.1
• Where are the events analyzed?
– In the manager.
• How long are they stored?
– For as long as your policy dictates (it is user configurable).
• Where does this help me with compliance?
– (PCI DSS, etc) It helps with the whole section 10 (log monitoring) of PCI.
• How much CPU does it use?
– On the agent, it uses very little CPU/memory since it just read the events and forwards them to the manager.
– On the manager, it depends on the number of events per second (EPS).
• How does it deal with false positives?
– False positives can be eliminated using local rules.
Configuration Options
These options should be specified locally in each agent’s ossec.conf file or the share agent.conf. Inside the<localfile> element, you can have the following options.
localfile
locationSpecify the location of the log to be read. strftime formats may be used for log file names. For instance,a log file named file.log-2011-01-22 could be referenced with file.log-%Y-%m-%d. Wildcardsmay be used on non-Windows systems. When wildcards are used, the log files must exist at the timeossec-logcollector is started. It will not automatically begin monitoring new log files. strftimeand wildcards cannot be used on the same entry.
Default: Multiple (eg /var/log/messages)
Allowed: Any log file
log_formatThe format of the log being read.
Note: If the log has one entry per line, use syslog.
Default: syslog
Allowed:
•syslog This format is for plain text files in a syslog-like format. It can also be used when thereis no support for the logging format, and the logs are single line messages.
•snort-full This is used for Snort’s full output format.
•snort-fast This is used for Snort’s fast output format.
•squid
•iis
38 Chapter 1. Manual & FAQ

OSSEC Documentation, Release 2.7.1
•eventlog This is used for Microsoft Windows eventlog format.
•eventchannel This is used for Microsoft Windows eventlogs, using the new EventApi. Thisallows OSSEC to monitor both standard “Windows” eventlogs and more recent “Applicationand Services” logs.
Warning: eventchannel cannot be used on Windows systems older than Vista.
•mysql_log This is used for MySQL logs. It does not support multi-line logs.
•postgresql_log This is used for PostgreSQL logs. It does not support multi-line logs.
•nmapg This is used for monitoring files conforming to the grepable output from nmap.
•apache
This format is for apache’s default log format.
Example:
•command This format will be the output from the command (as run by root) defined by com-mand. Each line of output will be treated as a separate log.
•full_command This format will be the output from the commandi (as run by root) defined bycommand. The entire output will be treated as a single log.
Warning: command and full_command cannot be used in the agent.conf, and must beconfigured in each system’s ossec.conf.
•djb-multilog
•multi-line This option will allow applications that log multiple lines per event to be monitored.This format requires the number of lines to be consistent. multi-line: is followed bythe number of lines in each log entry. Each line will be combined with the previous linesuntil all lines are gathered. There may be multiple timestamps in a finalized event.
Allowed: <log_format>multi-line: NUMBER</log_format>
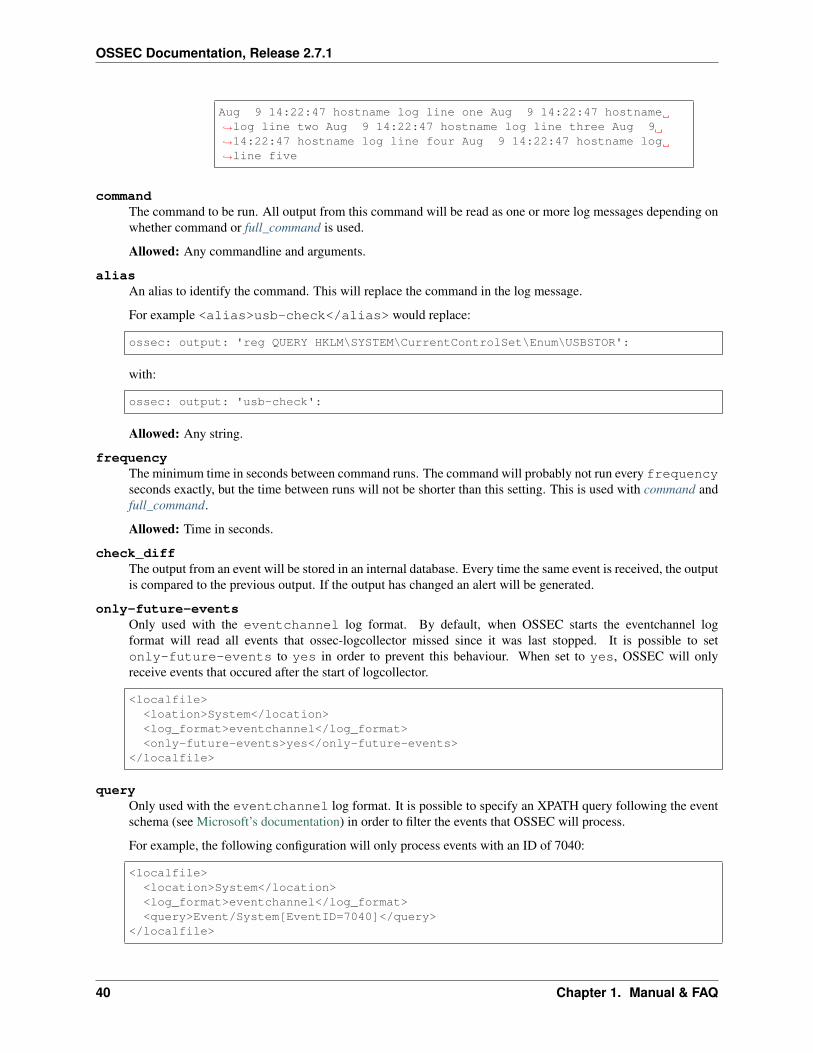
Example: Log messages:
Aug 9 14:22:47 hostname log line oneAug 9 14:22:47 hostname log line twoAug 9 14:22:47 hostname log line threeAug 9 14:22:47 hostname log line fourAug 9 14:22:47 hostname log line five
Log message as analyzed by ossec-analysisd_:
1.1. Manual 39
OSSEC Documentation, Release 2.7.1
Aug 9 14:22:47 hostname log line one Aug 9 14:22:47 hostname→˓log line two Aug 9 14:22:47 hostname log line three Aug 9→˓14:22:47 hostname log line four Aug 9 14:22:47 hostname log→˓line five
commandThe command to be run. All output from this command will be read as one or more log messages depending onwhether command or full_command is used.
Allowed: Any commandline and arguments.
aliasAn alias to identify the command. This will replace the command in the log message.
For example <alias>usb-check</alias> would replace:
ossec: output: 'reg QUERY HKLM\SYSTEM\CurrentControlSet\Enum\USBSTOR':
with:
ossec: output: 'usb-check':
Allowed: Any string.
frequencyThe minimum time in seconds between command runs. The command will probably not run every frequencyseconds exactly, but the time between runs will not be shorter than this setting. This is used with command andfull_command.
Allowed: Time in seconds.
check_diffThe output from an event will be stored in an internal database. Every time the same event is received, the outputis compared to the previous output. If the output has changed an alert will be generated.
only-future-eventsOnly used with the eventchannel log format. By default, when OSSEC starts the eventchannel logformat will read all events that ossec-logcollector missed since it was last stopped. It is possible to setonly-future-events to yes in order to prevent this behaviour. When set to yes, OSSEC will onlyreceive events that occured after the start of logcollector.
<localfile><loation>System</location><log_format>eventchannel</log_format><only-future-events>yes</only-future-events>
</localfile>
queryOnly used with the eventchannel log format. It is possible to specify an XPATH query following the eventschema (see Microsoft’s documentation) in order to filter the events that OSSEC will process.
For example, the following configuration will only process events with an ID of 7040:
<localfile><location>System</location><log_format>eventchannel</log_format><query>Event/System[EventID=7040]</query>
</localfile>
40 Chapter 1. Manual & FAQ

OSSEC Documentation, Release 2.7.1
Monitoring logs
With in OSSEC their is two major methods for monitoring logs: file and process. Each method has it’s own page andexamples.
Process Monitoring
Overview
We love logs. Inside OSSEC we treat everything as if it is a log and parse it appropriately with our rules. However,some information is not available in log files but we still want to monitor it. To solve that gap, we added the ability tomonitor the output of commands via OSSEC, and treat the output of those commands just like they were log files.
Configuration examples
Disk space utilization (df -h) example
For example, if you wanted to monitor the disk space utilization, you would need to setup a cron job to dump theoutput of df -h to a log file (maybe /var/log/df.log) and configure OSSEC to look at it.
As of OSSEC version 2.3 you can monitor commands directly in OSSEC following configuration (in/var/ossec/etc/ossec.conf):
<localfile><log_format>command</log_format><command>df -h</command>
</localfile>
Since we already have a sample rule for df -h included with OSSEC you would see the following when any partitionreached 100%:
** Alert 1257451341.28290: mail - ossec,low_diskspace,2009 Nov 05 16:02:21 (home-ubuntu) 192.168.0.0->df -h
Rule: 531 (level 7) -> "Partition usage reached 100% (disk space monitor)."Src IP: (none)User: (none)ossec: output: 'df -h': /dev/sdb1 24G 12G 11G 100% /var/backup
Load average (uptime) Example
Another example, if you want to monitor the load average, you can configure OSSEC to monitor the “uptime” com-mand and alert when it is higher than 2, for example:
<localfile><log_format>command</log_format><command>uptime</command>
</localfile>
And in the rule (in /var/ossec/rules/local_rules.xml):
1.1. Manual 41

OSSEC Documentation, Release 2.7.1
<rule id="100101" level="7" ignore="7200"><if_sid>530</if_sid><match>ossec: output: 'uptime': </match><regex>load averages: 2.</regex><description>Load average reached 2..</description>
</rule>
There are lots of possibilities with this feature. If you have ideas for commands to monitor and rules, please comment.
Alerting when output of a command changes
If you want to create alerts when a log or the output of a command changes, take a look at the new <check_diff />option in the rules (available on the latest snapshot).
To demonstrate with an example, we will create a rule to alert when there is a new port open in listening mode on ourserver.
First, we configure OSSEC to run the netstat -tan |grep LISTEN command by adding the following toossec.conf:
<localfile><log_format>full_command</log_format><command>netstat -tan |grep LISTEN|grep -v 127.0.0.1</command>
</localfile>
After that, I add a rule to alert when its output changes:
<rule id="140123" level="7"><if_sid>530</if_sid><match>ossec: output: 'netstat -tan |grep LISTEN</match><check_diff /><description>Listened ports have changed.</description>
</rule>
Note that we use the <check_diff /> option. The first time it receives the event, it will store in an internaldatabase. Every time it receives the same event, it will compare against what we have store and only alert if the outputchanges.
In our example, after configuring OSSEC, I started netcat to listen on port 23456 and that’s the alert I got:
OSSEC HIDS Notification.2010 Mar 11 19:56:30
Received From: XYZ->netstat -tan |grep LISTEN|grep -v 127.0.0.1Rule: 140123 fired (level 7) -> "Listened ports have changed."Portion of the log(s):
ossec: output: 'netstat -tan |grep LISTEN|grep -v 127.0.0.1':tcp4 0 0 *.23456 *.* LISTENtcp4 0 0 *.3306 *.* LISTENtcp4 0 0 *.25 *.* LISTENPrevious output:ossec: output: 'netstat -tan |grep LISTEN|grep -v 127.0.0.1':tcp4 0 0 *.3306 *.* LISTENtcp4 0 0 *.25 *.* LISTEN
42 Chapter 1. Manual & FAQ

OSSEC Documentation, Release 2.7.1
Detecting USB Storage Usage
Xavier Mertens wrote a very interesting article on Detecting USB Storage Usage with OSSEC. He used our policyauditing module for that, but I think USB monitoring can be done in a much easier way with our new check_difffeature.
To get started, first configure your Windows agents to monitor the USBSTOR registry entry using the reg command:
<agent_config os="windows"><localfile>
<log_format>full_command</log_format><command>reg QUERY HKLM\SYSTEM\CurrentControlSet\Enum\USBSTOR</command>
</localfile></agent_config>
Next create a local rule for that command:
<rule id="140125" level="7"><if_sid>530</if_sid><match>ossec: output: 'reg QUERY</match><check_diff /><description>New USB device connected</description>
</rule>
Now after a few minutes you will see a directory at /var/ossec/queue/diff/[agent_name]/[rule_id]with the current snapshot of this command. Once someone adds a new USB device you will get this alert:
** Alert 1268687754.35062: mail - local,syslog,2010 Mar 15 18:15:54 (xx-netbook) any->reg QUERY→˓HKLMSYSTEMCurrentControlSetEnumUSBSTORRule: 140125 (level 7) -> 'New USB device connected'Src IP: (none)User: (none)ossec: output: 'reg QUERY HKLMSYSTEMCurrentControlSetEnumUSBSTOR':! REG.EXE VERSION 3.→˓0
HKEY_LOCAL_MACHINESYSTEMCurrentControlSetEnumUSBSTORHKEY_LOCAL_MACHINESYSTEMCurrentControlSetEnumUSBSTORDisk&Ven_&Prod_USB_Flash_Memory&→˓Rev_5.00HKEY_LOCAL_MACHINESYSTEMCurrentControlSetEnumUSBSTORDisk&Ven_Generic&Prod_Flash_Disk&→˓Rev_8.0HKEY_LOCAL_MACHINESYSTEMCurrentControlSetEnumUSBSTORDisk&Ven_Hitachi&Prod_→˓HTS543225L9A300&Rev_HKEY_LOCAL_MACHINESYSTEMCurrentControlSetEnumUSBSTORDisk&Ven_LEXAR&Prod_JD_FIREFLY&→˓Rev_1100HKEY_LOCAL_MACHINESYSTEMCurrentControlSetEnumUSBSTORDisk&Ven_SAMSUNG&Prod_HM160JC&Rev_→˓0000HKEY_LOCAL_MACHINESYSTEMCurrentControlSetEnumUSBSTORDisk&Ven_Sony&Prod_DSC&Rev_1.00HKEY_LOCAL_MACHINESYSTEMCurrentControlSetEnumUSBSTORDisk&Ven_TomTom&Prod_ONE_XXL_IQ_→˓RtsHKEY_LOCAL_MACHINESYSTEMCurrentControlSetEnumUSBSTORDisk&Ven_USB_2.0&Prod_USB_Flash_→˓Drive&Rev_0.00
Previous output:
ossec: output: 'reg QUERY HKLMSYSTEMCurrentControlSetEnumUSBSTOR':! REG.EXE VERSION 3.0HKEY_LOCAL_MACHINESYSTEMCurrentControlSetEnumUSBSTOR
1.1. Manual 43
OSSEC Documentation, Release 2.7.1
HKEY_LOCAL_MACHINESYSTEMCurrentControlSetEnumUSBSTORDisk&Ven_&Prod_USB_Flash_Memory&→˓Rev_5.00HKEY_LOCAL_MACHINESYSTEMCurrentControlSetEnumUSBSTORDisk&Ven_Generic&Prod_Flash_Disk&→˓Rev_8.07HKEY_LOCAL_MACHINESYSTEMCurrentControlSetEnumUSBSTORDisk&Ven_Hitachi&Prod_→˓HTS543225L9A300&Rev_HKEY_LOCAL_ACHINESYSTEMCurrentControlSetEnumUSBSTORDisk&Ven_SAMSUNG&Prod_HM160JC&Rev_→˓0000HKEY_LOCAL_MACHINESYSTEMCurrentControlSetEnumUSBSTORDisk&Ven_Sony&Prod_DSC&Rev_1.00HKEY_LOCAL_MACHINESYSTEMCurrentControlSetEnumUSBSTORDisk&Ven_TomTom&Prod_ONE_XXL_IQ_→˓RtsHKEY_LOCAL_MACHINESYSTEMCurrentControlSetEnumUSBSTORDisk&Ven_USB_2.0&Prod_USB_Flash_→˓Drive&Rev_0.00
File Monitoring
Overview
OSSEC has a process named ossec-logcollector that monitors the configured log files for new events. Whennew log messages arrive, it forwards them to other processes for analysis or transport to an OSSEC server.
Configuration
The configuration for ossec-logcollector exists in /var/ossec/etc/ossec.conf in the <ossec_config>section. The syntax can be found in the localfile syntax page
Configuration examples
Simple example
Configuring a log file to be monitored is simple. Just provide the name of the file to be monitored and the format:
<localfile><location>/var/log/messages</location><log_format>syslog</log_format>
</localfile>
Windows EventLog Example
To monitor a Windows event log, you need to provide the format as “eventlog” and the location is the name of theevent log. Example:
<localfile><location>Security</location><log_format>eventlog</log_format>
</localfile>
44 Chapter 1. Manual & FAQ

OSSEC Documentation, Release 2.7.1
Windows EventChannel Example
To monitor a Windows event log on Windows Vista or later, you have the possibility to use the “eventchannel” logformat. The location is the name of the event log. This is the only way to monitor Applications and Services logs. Ifthe file name contains a “%4”, replace it with “/”. Example:
<localfile><location>Microsoft-Windows-PrintService/Operational</location><log_format>eventchannel</log_format>
</localfile>
Multiple Files Example
To check multiple files, OSSEC supports posix regular expressions. For example, to analyze every file that ends witha .log inside the /var/log directory, use the following configuration:
<localfile><location>/var/log/*.log</location><log_format>syslog</log_format>
</localfile>
Date Based Example
For log files that change according to the date, you can also specify a strftime format to replace the day, month, year,etc. For example, to monitor the log C:\Windows\app\log-08-12-15.log, where 08 is the year, 12 is the month and 15the day (and it is rolled over every day), do:
<localfile><location>C:\Windows\app\log-%y-%m-%d.log</location><log_format>syslog</log_format>
</localfile>
Warning: Wildcards cannot be combined with the date based format.
IIS Logs Example
Support for IIS (5 and 6) is available for the NCSA format (web only) and the W3C extended format (for Web, FTPand SMTP). By default, the installation scripts will attempt to configure OSSEC to monitor the first virtual hosts forweb (W3SVC1 to W3SVC254), ftp (MSFTPSVC1 to MSFTPSVC254) and smtp (SMTPSVC1 to SMTPSVC254).To monitor any other file you need to add a new entry manually.
In addition to that, make sure to set the log time period to daily.
1.1. Manual 45

OSSEC Documentation, Release 2.7.1
And using the local time for file naming and rollover.
46 Chapter 1. Manual & FAQ

OSSEC Documentation, Release 2.7.1
In the extended logging properties, configure it to log the Date, Time and all the extended properties.
The following is an example of configuration to monitor the virtual server 2 of IIS web
1.1. Manual 47

OSSEC Documentation, Release 2.7.1
<localfile><location>%WinDir%\System32\LogFiles\W3SVC3\ex%y%m%d.log</location><log_format>iis</log_format>
</localfile>
Syscheck
Syscheck is the name of the integrity checking process inside OSSEC. It runs periodically to check if any configuredfile (or registry entry on Windows) has changed.
Why Integrity checking?
This is the explanation from the OSSEC book:
There are multiple types of attacks and many attack vectors, but there is one thing unique about all ofthem: they leave traces and always change the system in some way. From viruses that modify a few files,to kernel-level rootkits that alters the kernel, there is always some change in the integrity of the system.
Integrity checking is an essential part of intrusion detection, that detects changes in the integrity of thesystem. OSSEC does that by looking for changes in the MD5/SHA1 checksums of the key files in thesystem and on the Windows registry.
The way it works is that the agent scans the system every few hours (user defined) and send all thechecksums to the server. The server stores the checksums and look for modifications on them. An alert issent if anything changes.
Quick facts
• How often does it run?
– By default every 6 hours, but the frequency or time/day are configurable.
• Where is the database stored?
– On the manager in /var/ossec/queue/syscheck.
• How does it help with compliance? (PCI DSS, etc)
– It helps with sections 11.5 (install FIM software) and 10.5 (integrity checking of log files) of PCI.
• How much CPU does it use?
– The scans are performed slowly to avoid using too much CPU/memory.
• How are false positives handled?
– Files can be ignored manually in the configuration or using rules. By default when a file has changed 3times further changes are automatically ignored.
Realtime options
ossec-syscheckd is able to check file integrity in near realtime on Windows and modern Linux distros. Windowscomes with support out of the box, but on Linux systems inotify packages may need to be installed. Check for inotifydev packages, and possibly an inotify-tools package.
48 Chapter 1. Manual & FAQ

OSSEC Documentation, Release 2.7.1
Configuration options
These configuration options can be specified in each agent’s ossec.conf file, except for the auto_ignore andalert_new_file which apply to manager and local installs. The ignore option applies to all agents if spec-ified on the manager.
directoriesUse this option to add or remove directories to be monitored (they must be comma separated). All files andsubdirectories will also be monitored. Drive letters without directories are not valid. At a minimum the ‘.’should be included (D:\.). This should be set on the system you wish to monitor (or in the agent.conf ifappropriate).
Default: /etc,/usr/bin,/usr/sbin,/bin,/sbin
Attributes:
•realtime: Value=yes
–This will enable realtime/continuous monitoring on Linux (using the inotify system calls) and Win-dows systems.
•report_changes: Value=yes
–Report diffs of file changes. This is limited to text files at this time.
Note: This option is only available on Unix-like systems.
•check_all: Value=yes
–All the following check_* options are used together.
•check_sum: Value=yes
–Check the md5 and sha1 hashes of the of the files will be checked.
This is the same as using both check_sha1sum=”yes” and check_md5sum=”yes”
•check_sha1sum: Value=yes
–When used only the sha1 hash of the files will be checked.
•check_md5sum: Value=yes
–The md5 hash of the files will be checked.
•check_size: Value=yes
–The size of the files will be checked.
•check_owner: Value=yes
–Check the owner of the files selected.
•check_group: Value=yes
–Check the group owner of the files/directories selected.
•check_perm: Value=yes
–Check the UNIX permission of the files/directories selected. On windows this will only check thePOSIX permissions.
•restrict: Value=string
1.1. Manual 49

OSSEC Documentation, Release 2.7.1
–A string that will limit checks to files containing that string in the file name.
Allowed: Any directory or file name (but not a path)
ignoreList of files or directories to be ignored (one entry per element). The files and directories are still checked, butthe results are ignored.
Default: /etc/mtab
Attributes:
•type: Value=sregex
–This is a simple regex pattern to filter out files so alerts are not generated.
Allowed: Any directory or file name
frequencyFrequency that the syscheck is going to be executed (in seconds).
The default is 6 hours or 21600 seconds
Default: 21600
Allowed: Time in seconds
scan_timeTime to run the scans (can be in the formats of 21pm, 8:30, 12am, etc)
Allowed: Time to run scan
scan_dayDay of the week to run the scans (can be in the format of sunday, saturday, monday, etc)
Allowed: Day of the week
auto_ignoreSpecifies if syscheck will ignore files that change too often (after the third change)
Default: yes
Allowed: yes/no
Valid: server, local
alert_new_filesSpecifies if syscheck should alert on new files created.
Default: no
Allowed: yes/no
Valid: server, local
Note: New files will only be detected on a full scan, this option does not work in realtime.
scan_on_startSpecifies if syscheck should do the first scan as soon as it is started.
Default: yes
Allowed: yes/no
50 Chapter 1. Manual & FAQ

OSSEC Documentation, Release 2.7.1
windows_registryUse this option to add Windows registry entries to be monitored (Windows-only).
Default: HKEY_LOCAL_MACHINESoftware
Allowed: Any registry entry (one per element)
Note: New entries will not trigger alerts, only changes to existing entries.
registry_ignoreList of registry entries to be ignored.
Default: ..CryptographyRNG
Allowed: Any registry entry (one per element)
refilter_cmdCommand to run to prevent prelinking from creating false positives.
Example:
<prefilter_cmd>/usr/sbin/prelink -y</prefilter_cmd>
Note: This option can potentially impact performance negatively. The configured command will be run foreach and every file checked.
Configuration Examples
To configure syscheck, a list of files and directories must be provided. The check_all option checks md5, sha1, owner,and permissions of the file.
Example:
<syscheck><directories check_all="yes">/etc,/usr/bin,/usr/sbin</directories><directories check_all="yes">/root/users.txt,/bsd,/root/db.html</directories>
</syscheck>
Files and directories can be ignored using the ignore option (or registry_ignore for Windows registry entries):
<syscheck><ignore>/etc/random-seed</ignore><ignore>/root/dir</ignore><ignore type="sregex">.log$|.tmp</ignore>
</syscheck>
The type attribute can be set to sregex to specify a Regular Expression Syntax in the ignore option.
<syscheck><ignore type="sregex">^/opt/application/log</ignore>
</syscheck>
A local rule can be used to modify the severity for changes to specific files or directories:
1.1. Manual 51

OSSEC Documentation, Release 2.7.1
<rule id="100345" level="12"><if_matched_group>syscheck</if_matched_group><match>/var/www/htdocs</match><description>Changes to /var/www/htdocs - Critical file!</description>
</rule>
In the above example, a rule was created to alert with high severity (12) for changes to the files in the htdocs directory.
Real time Monitoring
OSSEC supports realtime (continuous) file integrity monitoring on Linux (support was added kernel version 2.6.13)and Windows systems.
The configuration is very simple. In the <directories> option where you specify what directories to monitor,adding realtime="yes" will enable it. For example:
<syscheck><directories realtime="yes" check_all="yes">/etc,/usr/bin,/usr/sbin</directories><directories check_all="yes">/bin,/sbin</directories>
</syscheck>
In this case, the directories /etc, /usr/bin and /usr/sbin will be monitored in real time. The same applies to Windowstoo.
Warning: The real time monitoring will not start immediately. First ossec-syscheckd needs to scan the filesystem and add each sub-directory to the realtime queue. It can take a while for this to finish (wait for the log“ossec-syscheckd: INFO: Starting real time file monitoring” ).
Note: Real time only works with directories, not individual files. So you can monitor the /etc or C:\program filesdirectory, but not an individual file like /etc/file.txt.
Note: Both rootcheck and syscheck runs on the same thread, so when rootcheck is running, the inotify events wouldget queued until it finishes.
Report Changes
OSSEC supports sending diffs when changes are made to text files on Linux and unix systems.
Configuring syscheck to show diffs is simple, add report_changes="yes" to the <directories option. Forexample:
<syscheck><directories report_changes="yes" check_all="yes">/etc</directories><directories check_all="yes">/bin,/sbin</directories>
</syscheck>
Note: Report Changes can only work with text files, and the changes are stored on the agent inside /var/ossec/queue/diff/local/dir/file.
52 Chapter 1. Manual & FAQ
OSSEC Documentation, Release 2.7.1
If OSSEC has not been compiled with libmagic support, report_changes will copy any file designated, e.g. mp3, iso,executable, /chroot/dev/urandom (which would fill your hard drive). So unless libmagic is used, be very carefull onwhich directory you enable report_changes.
Syscheck: FAQ
• How to force an immediate syscheck scan?
• How to tell syscheck not to scan the system when OSSEC starts?
• How to ignore a file that changes too often?
• Why does OSSEC still scan a file even though it’s been ignored?
• How to know when the syscheck scan ran?
• How to get detailed reporting on the changes?
• Syscheck not sending any file data to the server?
• Why aren’t new files creating an alert?
• Can OSSEC include information on who changed a file in the alert?
How to force an immediate syscheck scan?
Run agent control tool to perform a integrity checking immediately (option -a to run on all the agents and-u to specify an agent id)
# /var/ossec/bin/agent_control -r -a# /var/ossec/bin/agent_control -r -u <agent_id>
For more information see the agent_control documentation.
How to tell syscheck not to scan the system when OSSEC starts?
Set the option <scan_on_start> to “no” on ossec.conf
How to ignore a file that changes too often?
Set the file/directory name in the <ignore> option or create a simple local rule.
The following one will ignore files /etc/a and /etc/b and the directory /etc/dir for agents mswin1 andubuntu-dns:
<rule id="100345" level="0" ><if_group>syscheck</if_group><description>Changes ignored.</description><match>/etc/a|/etc/b|/etc/dir</match><hostname>mswin1|ubuntu-dns</hostname>
</rule>
1.1. Manual 53

OSSEC Documentation, Release 2.7.1
Why does OSSEC still scan a file even though it’s been ignored?
No idea. So if there are some directories you do not want scanned at all, make sure they are not includedin a <directories> configuration.
How to know when the syscheck scan ran?
Use the agent_control tool on the manager, to see this information.
More information see the agent_control documentation.
How to get detailed reporting on the changes?
Use the syscheck_control tool on the manager or the web ui for that.
More information see the syscheck_control documentation.
Syscheck not sending any file data to the server?
With ossec 1.3 and Fedora you may run into this problem:
You have named files you’d like ossec to monitor so you add:
<ossec_config><syscheck>
<directories check_all="yes">/var/named</directories>
to ossec.conf on the client. Fedora – at least as of version 7 – runs named in a chroot jail under /var/named/chroot.However, part of that chroot jail includes /var/named/chroot/proc. The contents of that directory are purely ephemeral;there is no value to checking their integrity. And, at least in ossec 1.3, your syscheck may stall trying to read thosefiles.
The symptom is a syscheck database on the server that never grows beyond a file or two per restart of the client. Thelog monitoring continues to work, so you know it’s not a communication issue, and you will often see a slight increasein syscheck database file size after the client has restarted (in one case about 20 minutes after). But the database willnever be completely built; there will only be a couple files listed in datebase.
The solution is to add an ignore clause to ossec.conf on the client:
<ossec_config><syscheck>
<ignore>/var/named/chroot/proc</ignore>
Why aren’t new files creating an alert?
By default OSSEC does not alert on new files. To enable this functionlity, <alert_new_files> must be set to yes insidethe <syscheck> section of the manager’s ossec.conf. Also, the rule to alert on new files (rule 554) is set to level 0 bydefault. The alert level will need to be raised in order to see the alert. Alerting on new files does not work in realtime,a full scan will be necessary to detect them.
Add the following to local_rules.xml:
54 Chapter 1. Manual & FAQ

OSSEC Documentation, Release 2.7.1
<rule id="554" level="10" overwrite="yes"><category>ossec</category><decoded_as>syscheck_new_entry</decoded_as><description>File added to the system.</description><group>syscheck,</group>
</rule>
The <alert_new_files> entry should look something like this:
<syscheck><frequency>7200</frequency><alert_new_files>yes</alert_new_files><directories check_all="yes">/etc,/bin,/sbin</directories>
</syscheck>
Can OSSEC include information on who changed a file in the alert?
In short, no. OSSEC does not track this information. You could use your OS’s auditing facilities to track this informa-tion, and create a rule to alert when an appropriate log is created.
Rootcheck Manual
Rootcheck
OSSEC HIDS will perform rootkit detection on every system where the agent is installed. The rootcheck (rootkitdetection engine) will be executed every X minutes (user specified - by default every 2 hours) to detect any possi-ble rootkit installed. Used with the log analysis and the integrity checking engine, it will become a very powerfulmonitoring solution.
Checks that rootcheck preforms
1. Read the rootkit_files.txt which contains a database of rootkits and files commonly used by them. It will try tostats, fopen and opendir each specified file. We use all these system calls because some kernel-level rootkitshide files from some system calls. The more system calls we try, the better the detection. This method is morelike an anti-virus rule that needs to be updated constantly. The chances of false-positives are small, but falsenegatives can be produced by modifying the rootkits.
2. Read the rootkit_trojans.txt which contains a database of signatures of files trojaned by rootkits. This techniqueof modifying binaries with trojaned versions was commonly used by most of the popular rootkits available. Thisdetection method will not find any kernel level rootkit or any unknown rootkit.
3. Scan the /dev directory looking for anomalies. The /dev should only have device files and the Makedev script.A lot of rootkits use the /dev to hide files. This technique can detect even non-public rootkits.
4. Scan the whole filesystem looking for unusual files and permission problems. Files owned by root, with writepermission to others are very dangerous, and the rootkit detection will look for them. Suid files, hidden directo-ries and files will also be inspected.
5. Look for the presence of hidden processes. We use getsid() and kill() to check if any pid is being used or not.If the pid is being used, but “ps” can’t see it, it is the indication of kernel-level rootkit or a trojaned version of“ps”. We also verify that the output of kill and getsid are the same.
6. Look for the presence of hidden ports. We use bind() to check every tcp and udp port on the system. If we can’tbind to the port (it’s being used), but netstat does not show it, we probably have a rootkit installed
1.1. Manual 55

OSSEC Documentation, Release 2.7.1
7. Scan all interfaces on the system and look for the ones with “promisc” mode enabled. If the interface is inpromiscuous mode, the output of “ifconfig” should show that. If not, we probably have a rootkit installed.
Configuration options
These configuration options can be specified in each agent’s ossec.conf, except auto_ignore andalert_new_file which are manager side options. If the ignore option is specified on the manager the set-ting becomes global for all agents.
base_directoryThe base directory that will be appended to the following options:
•rootkit_files
•rootkit_trojans
•windows_malware
•windows_audit
•windows_apps
•systems_audit
Allowed: Path to a directory Default: /var/ossec
rootkit_filesThis option can be used to change the location of the rootkit files database.
Allowed: A file with the rootkit files signatures
Default: /etc/shared/rootkit_files.txt
rootkit_trojansThis option can be used to change the location of the rootkit trojans database.
Default: /etc/shared/rootkit_trojans.txt
Allowed: A file with the trojans signatures
windows_audit
system_audit
windows_apps
windows_malware
scanallTells rootcheck to scan the whole system (may lead to some false positives).
Default: no
Allowed: yes/no
frequencyFrequency that the rootcheck is going to be executed (in seconds).
Defaults: 36000 (10 hours)
Allowed: Time (in seconds)
disabledDisables the execution of rootcheck.
Default: no
56 Chapter 1. Manual & FAQ

OSSEC Documentation, Release 2.7.1
Allowed: yes/no
check_devEnable or disable the checking of something
Default: yes
Allowed: yes or no
check_filesEnable or disable the checking of something
Default: yes
Allowed: yes or no
check_ifEnable or disable the checking of something
Default: yes
Allowed: yes or no
check_pidsEnable or disable the checking of something
Default: yes
Allowed: yes or no
check_policyEnable or disable the checking of something
Default: yes
Allowed: yes or no
check_portsEnable or disable the checking of network ports.
Default: yes
Allowed: yes or no
check_sysEnable or disable the checking of something
Default: yes
Allowed: yes or no
check_trojansEnable or disable the checking of trojans.
Default: yes
Allowed: yes or no
check_unixauditEnable or disable the checking of something
Default: yes
Allowed: yes or no
check_winappsEnable or disable the checking of something
1.1. Manual 57

OSSEC Documentation, Release 2.7.1
Default: yes
Allowed: yes or no
check_winauditEnable or disable the checking of something
Default: 1
Allowed: 1 or 0
check_winmalwareEnable or disable the checking of Windows malware.
Default: yes
Allowed: yes or no
Understanding the Unix policy auditing on OSSEC
OSSEC’s policy monitor allows you to verify that all your systems conform to a set of policies regarding configurationsettings and applications usage. They are configured centrally on the ossec server and pushed down to the agents. Italso checks if a system in in compliance with the CIS Security Benchmarks and VMware security hardening guidelines.
The following systems are tested for the CIS and VMware guidelines:
• Debian and Ubuntu
• Red Hat and Fedora
• Red Hat Enterprise Linux 5
• VMWare ESX 3.0 and 3.5
Receiving Audit and Application alerts via Email
By default, both the policy auditing and application checks are logged as level 3, so you will not receive any e-mailalerts with the original configuration.
If you wish to receive e-mail alerts for any (or both of the two) types of events, you need to create local rules with ahigher severity or with the alert_by_email option set.
Example1: Sending e-mail for every Audit event
Add to your local_rules.xml the following:
<pre><rule id="512" level="9" overwrite="yes"><if_sid>510</if_sid><match>^System Audit</match><description>System Audit event.</description><group>rootcheck,</group>
</rule></pre>
58 Chapter 1. Manual & FAQ

OSSEC Documentation, Release 2.7.1
Listing entries per agent
To control the policy database, use the ‘’‘rootcheck_control’‘’ tool.
This page was originally authored by Daniel Cid for the OSSEC wiki.
Rules and Decoders
Testing OSSEC rules/decoders
The first problem most people have when troubleshooting OSSEC or trying to write new rules and decoders is how totest them. In the past, this would require manually restarting OSSEC or creating a testing installation. As of version1.6, there is a tool to simplify this task (ossec-logtest).
Testing using ossec-logtest
The tool ossec-logtest is installed into /var/ossec/bin. It will read the current rules and decoder (from /var/ossec ) and accept log input from stdin:
# /var/ossec/bin/ossec-logtest2008/07/04 09:57:28 ossec-testrule: INFO: Started (pid: 12683).ossec-testrule: Type one log per line.
Jul 4 09:42:16 enigma sshd[11990]: Accepted password for dcid from 192.168.2.10 port→˓35259 ssh2
**Phase 1: Completed pre-decoding.full event: "Jul 4 09:42:16 enigma sshd[11990]: Accepted password for dcid from 192.→˓168.2.10 port 35259 ssh2"hostname: "enigma"program_name: "sshd"log: "accepted password for dcid from 192.168.2.10 port 35259 ssh2"
**Phase 2: Completed decoding.decoder: ’sshd’dstuser: ‘dcid’srcip: ‘192.168.2.10
**Phase 3: Completed filtering (rules).Rule id: ‘10100Level: ‘4Description: ‘First time user logged in.’
**Alert to be generated.
In the above example, we provided an authentication success log and ossec-logtest showed us how it would be decoded,what information was extracted and which rule fired. In the next example, we can see how it would extract a user logoffmessage from Windows:
# /var/ossec/bin/ossec-logtest2008/07/04 09:57:28 ossec-testrule: INFO: Started (pid: 12683).ossec-testrule: Type one log per line.
WinEvtLog: Security: AUDIT_SUCCESS(538): Security: lac: OSSEC-HM: OSSEC-HM: User→˓Logoff: User Name: lac Domain: OSSEC-HM Logon ID: (0×0,0xF784D5) Logon Type: 2
1.1. Manual 59

OSSEC Documentation, Release 2.7.1
**Phase 1: Completed pre-decoding.full event: ‘WinEvtLog: Security: AUDIT_SUCCESS(538): Security: lac: OSSEC-HM: OSSEC-→˓HM: User Logoff: User Name: lac Domain: OSSEC-HM Logon ID: (0×0,0xF784D5) Logon→˓Type: 2hostname: ‘enigma’program_name: ‘(null)’log: ‘WinEvtLog: Security: AUDIT_SUCCESS(538): Security: lac: OSSEC-HM: OSSEC-HM:→˓User Logoff: User Name: lac Domain: OSSEC-HM Logon ID: (0×0,0xF784D5) Logon Type: 2
**Phase 2: Completed decoding.decoder: ‘windows’status: ‘AUDIT_SUCCESS’id: ‘538extra_data: ‘Security’dstuser: ‘lac’system_name: ‘OSSEC-HM’
**Phase 3: Completed filtering (rules).Rule id: ‘18149Level: ‘3Description: ‘Windows User Logoff.’
**Alert to be generated.
In addition to the information above, ossec-logtest -f can be used to follow the log through the rule path:
# /var/ossec/bin/ossec-logtest -f2008/07/04 10:05:43 ossec-testrule: INFO: Started (pid: 23007).ossec-testrule: Type one log per line.
Jul 4 10:05:30 enigma sshd[27588]: Failed password for invalid user test2 from 127.0.→˓0.1 port 19130 ssh2
**Phase 1: Completed pre-decoding.full event: ‘Jul 4 10:05:30 enigma sshd[27588]: Failed password for invalid user→˓test2 from 127.0.0.1 port 19130 ssh2hostname: ‘enigma’program_name: ’sshd’log: ‘Failed password for invalid user test2 from 127.0.0.1 port 19130 ssh2
**Phase 2: Completed decoding.decoder: ’sshd’srcip: ‘127.0.0.1
**Rule debugging:Trying rule: 1 - Generic template for all syslog rules.
*Rule 1 matched.
*Trying child rules.Trying rule: 5500 - Grouping of the pam_unix rules.Trying rule: 5700 - SSHD messages grouped.
*Rule 5700 matched.
*Trying child rules.Trying rule: 5709 - Useless SSHD message without an user/ip.Trying rule: 5711 - Useless SSHD message without a user/ip.Trying rule: 5707 - OpenSSH challenge-response exploit.Trying rule: 5701 - Possible attack on the ssh server (or version gathering).Trying rule: 5706 - SSH insecure connection attempt (scan).Trying rule: 5713 - Corrupted bytes on SSHD.Trying rule: 5702 - Reverse lookup error (bad ISP or attack).
60 Chapter 1. Manual & FAQ

OSSEC Documentation, Release 2.7.1
Trying rule: 5710 - Attempt to login using a non-existent user
*Rule 5710 matched.
*Trying child rules.Trying rule: 5712 - SSHD brute force trying to get access to the system.
**Phase 3: Completed filtering (rules).Rule id: ‘5710Level: ‘5Description: ‘Attempt to login using a non-existent user’
**Alert to be generated.
CDB List lookups from within Rules
Allow for CDB lookups from within rules in OSSEC (ossec-analysisd) of all possible fields.
Use cases
Anything that has a large number of items. Some examples:
• named with recursive logs checking the www.malwaredomains.com list for suspicious domains
• lists of approved users by server
• mstark (on irc) originally came up with suggestion for approved software based on a md5 list
• IP address lookups - there are a large number of lists of suspicious or known bad IP addresses to match insideof ossec rules
Syntax for Lists
Rules
A rule would use the following syntax to look up a key within a CDB database.
Positive key match
This example is a search for the key within the rules/cdb_record_file and will match if they key is present:
<list field="program_name" lookup="match_key">rules/records</list>
The lookup="match_key" is the default and can be left out as in this example:
<list field="program_name">rules/records</list>
Negative key match
This example is a search for the key stored in field attribute and will match if it IS NOT present in the database:
<list field="program_name" lookup="not_match_key">rules/records</list>
1.1. Manual 61

OSSEC Documentation, Release 2.7.1
Key and Value match
This example is a search for a key stored in the field attribute, and on a positive match the returned value of the keywill be processed using the regex in the check_value attribute:
<list field="program_name" lookup="match_key_value" check_value="^reject">rules/→˓records</list>
Positive IP address match
This example is a search for the IP address stored in the field attribute and will match if it IS present in the database.
<list field="srcip" lookup="address_match_key">rules/records</list>
Negative IP address match
This example is a search for the IP address stored in the field attribute and will match if it IS NOT present in thedatabase.
<list field="srcip" lookup="not_address_match_key">rules/records</list>
Key and Value Address Match
This example is a search for a key stored in the field attribute, and on a positive match the returned value of the keywill be processed using the regex in the check_value attribute:
<list field="srcip" lookup="address_match_key_value" check_value="^reject">rules/→˓records</list>
ossec.conf
Each list will need to be defined and told to be available using the ossec.conf file. Using the following syntax:
<ossec_config><rules>
<list>rules/records</list>
Commands
CDB files must be compiled before they can be used. ossec-makelists is used to compile lists.
The command ossec-makelists will process and compile all lists if the master text rules have been changed. Basiclylogic is as follows:
• Read ossec.conf for all lists
• Check the mtime of each list and compare it to the mtime of the compiled .cdb file
• if mtime is newer create new database file ending in .tmp
62 Chapter 1. Manual & FAQ

OSSEC Documentation, Release 2.7.1
• use atomic rename to change the .tmp to .cdb. This will invalidate all mmap pages currently in use by ossec-analysisd and will cause them to be reloaded with the new data as needed
List text file format
Creating cdb lists the following file format is specified:
key1:valuekey2:valuekey3:diff value
Each key must be unique and is terminated with a colon :.
For IP addresses the dot notation is used for subnet matches
key CIDR Possible matches10.1.1.1 10.1.1.1/32 10.1.1.1192.168. 192.168.0.0/16 192.168.0.0 - 192.168.255.255172.16.19. 172.16.19.0/24 172.16.19.0 - 172.16.19.255
Due to address lookups being based on the class boundary extra scripts are suggested for creating lists that need finecontrol. Example of IP address list file:
192.168.: RFC 1918 Address space172.16.:RFC 1918 Address space172.17.:RFC 1918 Address space172.18.:RFC 1918 Address space172.19.:RFC 1918 Address space172.20.:RFC 1918 Address space172.21.:RFC 1918 Address space172.22.:RFC 1918 Address space172.23.:RFC 1918 Address space172.24.:RFC 1918 Address space172.25.:RFC 1918 Address space172.26.:RFC 1918 Address space172.27.:RFC 1918 Address space172.28.:RFC 1918 Address space172.29.:RFC 1918 Address space172.30.:RFC 1918 Address space172.31.:RFC 1918 Address space10.:RFC 1918 Address space
Note: Previous versions of this page page orginally was created by @j_hen on her blog http://jentalkstoomuch.blogspot.com/2010/09/writing-custom-ossec-rules-for-your.html Some content may be the same, but examples havebeen updated.
Note: In the xml based examples, any text between <!-- and --> are comments. In the console based examples,anything after # may be an example. For more information on OSSEC’s non-standard regular expression (regex)syntax, refer to the regex page.
1.1. Manual 63

OSSEC Documentation, Release 2.7.1
Create Custom decoder and rules
One of the main features of OSSEC is monitoring system and application logs. Many popular services have logs anddecoders, but there are hundreds that are not covered. Custom applications and services will also not be covered.Adding decoders and rules for services is generally very easy.
Adding a File to be Monitored
Adding a log file to the configuration for monitoring is simple. In the system’s ossec.conf add an entry like this:
<localfile><log_format>syslog</log_format><location>/path/to/log/file</location>
</localfile>
syslog is a generic format, consisting of a singular line of text appended to the log file. There are other formatsavailable, they are detailed on the localfile syntax page.
Note: Additional examples can be found here. More detailed syntax can be found here.
After adding a localfile entry, the OSSEC processes must be restarted.
Create a Custom Decoder
The following log messages will be used for most of the examples in this section:
2013-11-01T10:01:04.600374-04:00 arrakis ossec-exampled[9123]: test connection from→˓192.168.1.1 via test-protocol12013-11-01T10:01:05.600494-04:00 arrakis ossec-exampled[9123]: successful→˓authentication for user test-user from 192.168.1.1 via test-protocol1
The first log message is broken down as follows:
• 2013-11-01T10:01:04.600374-04:00 - timestamp from rsyslog
• arrakis - hostname of the system
• ossec-exampled - daemon creating the log
• [9123] - process ID of the ossec-exampled instance
• test connection from 192.168.1.1 via test-protocol1 - log message
ossec-logtest will be used to test the custom decoder and any custom rules.
Custom decoders are added to the local_decoder.xml file, typically found in /var/ossec/etc on a standardinstallation. The basic syntax is listed here, but this page is not well documented at the moment.
Using ossec-logtest on this sample rule results in the following output:
# /var/ossec/bin/ossec-logtest2013/11/01 10:39:07 ossec-testrule: INFO: Reading local decoder file.2013/11/01 10:39:07 ossec-testrule: INFO: Started (pid: 32109).ossec-testrule: Type one log per line.
2013-11-01T10:01:04.600374-04:00 arrakis ossec-exampled[9123]: test connection from→˓192.168.1.1 via test-protocol1
64 Chapter 1. Manual & FAQ

OSSEC Documentation, Release 2.7.1
**Phase 1: Completed pre-decoding.full event: '2013-11-01T10:01:04.600374-04:00 arrakis ossec-exampled[9123]:
→˓test connection from 192.168.1.1 via test-protocol1'hostname: 'arrakis'program_name: 'ossec-exampled'log: 'test connection from 192.168.1.1 via test-protocol1'
**Phase 2: Completed decoding.No decoder matched.
There is not a lot of output here because OSSEC does not understand this log. Creating a decoder for this log messagewill provide OSSEC much more information.
Phase 1 “pre-decodes” some information. The hostname is the system that generated the log message, program_nameis the name of the application that created the log, and log is the rest of the log message.
The following is a very basic decoder for ossec-exampled:
<decoder name="ossec-exampled"><program_name>ossec-exampled</program_name>
</decoder>
This decoder simply looks for any log messages generated by ossec-exampled. Using a very generic decoder likethis can allow an OSSEC user to create more specific child decoders for services with less consistant log messages.
Here is the ossec-logtest output after adding this decoder:
# /var/ossec/bin/ossec-logtest2013/11/01 10:52:09 ossec-testrule: INFO: Reading local decoder file.2013/11/01 10:52:09 ossec-testrule: INFO: Started (pid: 25151).ossec-testrule: Type one log per line.
2013-11-01T10:01:04.600374-04:00 arrakis ossec-exampled[9123]: test connection from→˓192.168.1.1 via test-protocol1
**Phase 1: Completed pre-decoding.full event: '2013-11-01T10:01:04.600374-04:00 arrakis ossec-exampled[9123]:
→˓test connection from 192.168.1.1 via test-protocol1'hostname: 'arrakis'program_name: 'ossec-exampled'log: 'test connection from 192.168.1.1 via test-protocol1'
**Phase 2: Completed decoding.decoder: 'ossec-exampled'
Phase 2 now correctly identifies this log message as coming from ossec-exampled. There is still some very importantinformation in the log message that should be decoded, namely the source IP and test-protocol1. To decodethese a child decoder will be added. It will set the ossec-exampled decoder as a parent, and use prematch tolimit its use to the correct log message.
<decoder name="ossec-exampled-test-connection"><parent>ossec-exampled</parent><prematch offset="after_parent">^test connection </prematch> <!-- offset="after_
→˓parent" makes OSSEC ignore anything matched by the parent decoder and before --><regex offset="after_prematch">^from (\S+) via (\S+)$</regex> <!-- offset="after_
→˓prematch" makes OSSEC ignore anything matched by the prematch and earlier-->
1.1. Manual 65

OSSEC Documentation, Release 2.7.1
<order>srcip, protocol</order></decoder>
Breaking this down piece by piece:
• <decoder name="ossec-exampled-test-connection"> - Declaring this to be a decoder and giv-ing it a name.
• <parent>ossec-exampled</parent> - This decoder will only be checked if ossec-exampled alsomatched.
• <prematch offset="after_parent">^test connection </prematch> - If a log messagedoes not contain the data in the prematch, it will not use that decoder. Setting the offset tells OSSEC to onlylook at data after the parent (ossec-exampled[9123]: in this case), in an effort to speed up matches.
• <regex offset="after_prematch">^from (\S+) via (\S+)$</regex> - The regex linecan be used to pull data out of the log message for use in rules. In this instance the first \S+ matches theIP address, and the second matches the protocol. Anything between the parenthesis will be able to be used inrules.
• <order>srcip, protocol</order> - Defines what the entries in the regex line are labeled as. The IPaddress will be labeled as srcip, and the protocol by proto.
ossec-logtest output after adding this decoder:
# /var/ossec/bin/ossec-logtest2013/11/01 11:03:25 ossec-testrule: INFO: Reading local decoder file.2013/11/01 11:03:25 ossec-testrule: INFO: Started (pid: 6290).ossec-testrule: Type one log per line.
2013-11-01T10:01:04.600374-04:00 arrakis ossec-exampled[9123]: test connection from→˓192.168.1.1 via test-protocol1
**Phase 1: Completed pre-decoding.full event: '2013-11-01T10:01:04.600374-04:00 arrakis ossec-exampled[9123]:
→˓test connection from 192.168.1.1 via test-protocol1'hostname: 'arrakis'program_name: 'ossec-exampled'log: 'test connection from 192.168.1.1 via test-protocol1'
**Phase 2: Completed decoding.decoder: 'ossec-exampled'srcip: '192.168.1.1'proto: 'test-protocol1'
Note: The decoderwill be labeled as the parent decoder, not the child. It’s common to think a child decoder doesn’twork because the parent decoder’s name is listed, but that may not be a problem.
Now that the first sample log message is decoded, how does the second message fare? ossec-logtest output:
2013-11-01T10:01:05.600494-04:00 arrakis ossec-exampled[9123]: successful→˓authentication for user test-user from 192.168.1.1 via test-protocol1
**Phase 1: Completed pre-decoding.full event: '2013-11-01T10:01:05.600494-04:00 arrakis ossec-exampled[9123]:
→˓successful authentication for user test-user from 192.168.1.1 via test-protocol1'
66 Chapter 1. Manual & FAQ

OSSEC Documentation, Release 2.7.1
hostname: 'arrakis'program_name: 'ossec-exampled'log: 'successful authentication for user test-user from 192.168.1.1 via test-
→˓protocol1'
**Phase 2: Completed decoding.decoder: 'ossec-exampled'
The decoded fields added in ossec-exampled-test-connection do not get decoded in this log message. Thisis expected because the prematch does not match. In this log message there are 4 fields that would be useful: status(successful), srcuser, srcip, and protocol. Adding a decoder for this should also be simple:
<decoder name="ossec-exampled-auth"><parent>ossec-exampled</parent><prematch offset="after_parent"> authentication </prematch><regex offset="after_parent">^(\S+) authentication for user (\S+) from (\S+) via
→˓(\S+)$</regex> <!-- Using after_parent here because after_prematch would eliminate→˓the possibility of matching the status (successful) --><order>status, srcuser, srcip, protocol</order>
</decoder>
ossec-logtest output:
2013-11-01T10:01:05.600494-04:00 arrakis ossec-exampled[9123]: successful→˓authentication for user test-user from 192.168.1.1 via test-protocol1
**Phase 1: Completed pre-decoding.full event: '2013-11-01T10:01:05.600494-04:00 arrakis ossec-exampled[9123]:
→˓successful authentication for user test-user from 192.168.1.1 via test-protocol1'hostname: 'arrakis'program_name: 'ossec-exampled'log: 'successful authentication for user test-user from 192.168.1.1 via test-
→˓protocol1'
**Phase 2: Completed decoding.decoder: 'ossec-exampled'status: 'successful'srcuser: 'test-user'srcip: '192.168.1.1'proto: 'test-protocol1'
Now the useful fields have been extracted for this log message as well. Double checking the original log message, tomake sure there were no regressions:
2013-11-01T10:01:04.600374-04:00 arrakis ossec-exampled[9123]: test connection from→˓192.168.1.1 via test-protocol1
**Phase 1: Completed pre-decoding.full event: '2013-11-01T10:01:04.600374-04:00 arrakis ossec-exampled[9123]:
→˓test connection from 192.168.1.1 via test-protocol1'hostname: 'arrakis'program_name: 'ossec-exampled'log: 'test connection from 192.168.1.1 via test-protocol1'
**Phase 2: Completed decoding.decoder: 'ossec-exampled'
1.1. Manual 67

OSSEC Documentation, Release 2.7.1
srcip: '192.168.1.1'proto: 'test-protocol1'
Directory path loading of rules and decoders
To allow whole directories of files to be loaded as decoders, lists, or rules by ossec-anaylistd.
Use case
Great simplifies working with decoders as their can be as many files as needed. Also will make packaging of rulesand decoders a simple unzip/untar and restart operations. This will also greatly reduce the amount of code needed tomanage the upgrade scripts of ossec.
Details
Syntax for OSSEC
All Directory loading is done in alphabetical form. This is much like init.d where the use of numeric prefixes on filenames can effect the order of loading. Example of file names and the order they would be loaded:
1. 00_sshd_rules.xml
2. 01_local_sshd_rules.xml
3. 99_shun_rules.xml
Directory loading
The basic for selection of rules file is as follows. This will load all files in the rules dir that match the regex _rules.xml$
<ossec_config><rules>
<rule_dir pattern="_rules.xml">rules</rule_dir>
The pattern is optional and defaults to _rules.xml for rules loading so this could be writen as:
<ossec_config><rules>
<rule_dir>rules</rule_dir>
Order of the directives in ossec.conf is still respected, and duplicate files will not be loaded. In the following example00_setup_rules.xml is always loaded first, and will NOT be loaded a second time by the rule_dir directive.
<ossec_config><rules>
<include>rules/00_setup_rules.xml</include><rule_dir>rules</rule_dir>
For full details on all the Syntax see rule_dir and decoder_dir
68 Chapter 1. Manual & FAQ

OSSEC Documentation, Release 2.7.1
Compete Examples of syntax
This is an example where the decoders and rules have been broken out into subdirectories.
• rules/
– 00_rules_config.xml
– 50_apache_rules.xml
– 50_arpwatch_rules.xml
– plugins/
* 50_wimax_rules.xml
* 50_wimax_decoders.xml
• etc/
– decoder.xml
– local_decoder.xml
<ossec_config><rules>
<decoder>etc/decoder.xml</decoder><decoder_dir>rules/plugins</decoder_dir>
<rule>rules/rules/00_rules_config.xml</rule><rule_dir pattern=".xml$">rules/</rule_dir><rule_dir>rules/plugins</rule_dir>
</rules></ossec_config>
Rules Classification
The rules are classified in multiple levels. From the lowest (00) to the maximum level 16. Some levels are not usedright now. Other levels can be added between them or after them.
The rules will be read from the highest to the lowest level.
00 - Ignored - No action taken. Used to avoid false positives. These rulesare scanned before all the others. Theyinclude events with no security relevance.
01 - None -
02 - System low priority notification - System notification or status messages. They have no security relevance.
03 - Successful/Authorized events - They include successful login attempts, firewall allow events, etc.
04 - System low priority error - Errors related to bad configurations or unused devices/applications. They have nosecurity relevance and are usually caused by default installations or software testing.
05 - User generated error - They include missed passwords, denied actions, etc. By itself they have no securityrelevance.
06 - Low relevance attack - They indicate a worm or a virus that have no affect to the system (like code red for apacheservers, etc). They also include frequently IDS events and frequently errors.
07 - “Bad word” matching. They include words like “bad”, “error”, etc. These events are most of the time unclassifiedand may have some security relevance.
1.1. Manual 69

OSSEC Documentation, Release 2.7.1
08 - First time seen - Include first time seen events. First time an IDS event is fired or the first time an user logged in.If you just started using OSSEC HIDS these messages will probably be frequently. After a while they should go away,It also includes security relevant actions (like the starting of a sniffer or something like that).
09 - Error from invalid source - Include attempts to login as an unknown user or from an invalid source. May havesecurity relevance (specially if repeated). They also include errors regarding the “admin” (root) account.
10 - Multiple user generated errors - They include multiple bad passwords, multiple failed logins, etc. They mayindicate an attack or may just be that a user just forgot his credencials.
11 - Integrity checking warning - They include messages regarding the modification of binaries or the presence ofrootkits (by rootcheck). If you just modified your system configuration you should be fine regarding the “syscheck”messages. They may indicate a successful attack. Also included IDS events that will be ignored (high number ofrepetitions).
12 - High importancy event - They include error or warning messages from the system, kernel, etc. They may indicatean attack against a specific application.
13 - Unusual error (high importance) - Most of the times it matches a common attack pattern.
14 - High importance security event. Most of the times done with correlation and it indicates an attack.
15 - Severe attack - No chances of false positives. Immediate attention is necessary.
Rules Group
We can specify groups for specific rules. It’s used for active response reasons and for correlation.
We currently use the following groups:
• invalid_login
• authentication_success
• authentication_failed
• connection_attempt
• attacks
• adduser
• sshd
• ids
• firewall
• squid
• apache
• syslog
Output and Alert options
Contents:
Sending alerts via syslog
Syslog output allows an OSSEC manager to send the OSSEC alerts to one or more syslog servers. Because OSSEConly sends the alerts via syslog, these options are for server or local installations only.
70 Chapter 1. Manual & FAQ

OSSEC Documentation, Release 2.7.1
OSSEC also supports sending alerts via cef, json, and to Splunk.
Configuration options
These configurations options require a server or local installation.
syslog_output
server
•IP Address of the syslog server.
•Allowed: any valid IP address
port
•Port to forward alerts to.
•Default 514
•Allowed: Any valid port
level
•Minimum alert level of the alerts to be forwarded.
•Allowed: 1 - 16
group
•Alerts belonging to this group will be forwarded.
•Allowed: Any valid group. Separate multiple groups with the pipe (|) character.
•Examples:
<group>syscheck</group><group>authentication_failure|authentication_success</group>
rule_id
•Alerts matching this rule_id will be forwarded.
•Allowed: Any valid rule_id
location
•Alerts from this location will be forwarded.
•Allowed: Any valid logfile location
format
•Format of alert output. The default format is “default”, or full syslog output.
•CEF is the ArcSight Common Event Format.
•json can be used with a variety of tools.
•The splunk option is for sending data to a Splunk server.
•Allowed default, cef, splunk, json
1.1. Manual 71

OSSEC Documentation, Release 2.7.1
<syslog_output><server>10.0.0.1</server><port>514</port><format>cef</format>
</syslog_output>
Enabling Syslog output
An OSSEC server can be configured to send the alerts via syslog. In this example all alerts are sent to 192.168.4.1,and alerts of level 10 and above are also sent to 10.1.1.1:
<ossec_config>...
<syslog_output><server>192.168.4.1</server>
</syslog_output>
<syslog_output><level>10</level><server>10.1.1.1</server>
</syslog_output>
...</ossec_config>
After this change is made, the client-syslog process should be enabled:
# /var/ossec/bin/ossec-control enable client-syslog
And finally restart the OSSEC processes:
# /var/ossec/bin/ossec-control restart
ossec-csyslog should start along with the other OSSEC processes:
Starting OSSEC HIDS v2.7.1 (by Trend Micro Inc.)......Started ossec-csyslogd......
And in the logs:
# tail -n 1000 /var/ossec/logs/ossec.log | grep csyslog2008/07/25 12:55:16 ossec-csyslogd: INFO: Started (pid: 19412).2008/07/25 12:55:16 ossec-csyslogd: INFO: Forwarding alerts via syslog to: ‘192.168.4.→˓1:514.2008/07/25 12:55:16 ossec-csyslogd: INFO: Forwarding alerts via syslog to: ‘10.1.1.→˓1:514.
Here is an example of what the listening syslog daemon should receive (every log separated by level, rule, locationand the actual event that generated it):
Jul 25 12:17:41 enigma ossec: Alert Level: 3; Rule: 5715 - SSHD authentication→˓success.; Location: (jul) 192.168.2.0->/var/log/messages;srcip: 192.168.2.190; user: root; Jul 25 13:26:24 slacker sshd[20440]: Accepted→˓password for root from 192.168.2.190 port 49737 ssh2
72 Chapter 1. Manual & FAQ

OSSEC Documentation, Release 2.7.1
Examples:
Send all alerts to 10.10.10.125:
<syslog_output><server>10.10.10.125</server>
</syslog_output>
Send all alerts to 10.10.10.126 in CEF:
<syslog_output><server>10.10.10.126</server><format>cef</format>
</syslog_output>
Send all alerts level 6 and above to 10.10.10.127 on port 515:
<syslog_output><server>10.10.10.127</server><port>515</port><level>6</level>
</syslog_output>
Sending alerts via E-Mail
There are currently three types of email alerts:
• Single Notification E-Mail addresses
• Granular Notifications to any number of E-mail addresses
• Daily E-mail Reports
Warning: Single E-Mail Notification must be setup before Granular Notification will work.
Alerts to a single E-Mail Address
In order to send notifications to a single address three items need to be setup within ossec.conf
Global E-Mail address destination
The destination email address and mail host should be configured inside the <global> section of the/var/ossec/etc/ossec.conf.
1.1. Manual 73

OSSEC Documentation, Release 2.7.1
<ossec_config><global>
<email_notification>yes</email_notification><email_to>[email protected]</email_to><smtp_server>mx.example.com..</smtp_server><email_from>[email protected]</email_from>
Full details on all the options are avaiable at ossec.conf: Global options
Set the alert levels that will send notifications
The minimum email_alert_level can be set inside the <alerts> section of the /var/ossec/etc/ossec.conf file.
<ossec_config><alerts>
<email_alert_level>10</email_alert_level>
Full details on all the options are avaiable at ossec.conf: Alerts Options
Restart OSSEC to complete the changes
OSSEC needs to be restarted for the change to take effect.
# /var/ossec/bin/ossec-control restart
Granular E-Mail alerts to many E-Mail addresses
OSSEC allows very granular options for the e-mail alerting and its format (full or SMS).
Note: Note that there must be at least one <email_to> recipient mentioned in the <global> section of the configurationor no emails will be sent at all.
Daily E-Mail Reports
Daily E-Mail reports are summaries of the OSSEC alerts for the day.
Configuration options
All of these configuration options should be specified in the /var/ossec/etc/ossec.conf.
reports
groupFilter by group/category.
Allowed: Any category used within OSSEC Rules.
74 Chapter 1. Manual & FAQ

OSSEC Documentation, Release 2.7.1
categoriesFilter by group/category.
Note: This is the same as the group option above.
Allowed: Any category used within OSSEC Rules.
ruleRule ID to Filter for.
Allowed: Any Rule ID in OSSEC Rules.
levelAlert level to filter for. This is an inclusive option so all higher level alerts will also match.
Allowed: Any Alert level 1 to 16
locationFilter by the log location or agent name.
Allowed: Any file path or hostname or network.
srcipFilter by the source ip of the event.
Allowed: Any hostname or network
userFilter by the user name. This will match on either srcuser or dstuser
Allowed: Any username
titleThe name of the report.
This is a required field for reports to function.
Allowed: Any Text
email_toThe email address to send the completed report.
This is a required field for a report to function.
Allowed: Any email address
showlogsInclude logs when creating the report
Allowed: yes/no
Default: no
Sending output to a Database
OSSEC supports MySQL and PostgreSQL database outputs.
Configuration options
These configurations options can be specified in the server or local install ossec.conf file.
1.1. Manual 75

OSSEC Documentation, Release 2.7.1
database_output
hostnameIP Address of the database server.
Allowed: any valid IP address
usernameUsername to access the database.
Allowed: Any Valid Username
passwordPassword to access the database.
Allowed: Any Password
databaseDatabase name to store the alerts.
Allowed: database name
typeType of database (Mysql or PostgreSQL).
Note: OSSEC must be compiled with the database type that is to be used.
Allowed: mysql/postgresql
Enabling Database Support
Note: You must have the MySQL or PgSQL Client libraries installed on the OSSEC server.
Before you run the ”./install.sh” script execute the following to compile OSSEC with database support.
# cd ossec-hids-*# cd src; make setdb; cd ..# ./install.sh
Enable Database output in the configuration
After installation is complete database support needs to be enabled. The following command will enable the databasedaemon on the next restart.
# /var/ossec/bin/ossec-control enable database
Database Specific Setup
Configuring MySQL
76 Chapter 1. Manual & FAQ

OSSEC Documentation, Release 2.7.1
Database Setup
Create a database, setup the database user, and add the schema (located in the src/os_dbd directory of the distribu-tion) with the following commands.
# mysql -u root -p
mysql> create database ossec;
mysql> grant INSERT,SELECT,UPDATE,CREATE,DELETE,EXECUTE on ossec.* to ossecuser@→˓<ossec ip>;Query OK, 0 rows affected (0.00 sec)
mysql> set password for ossecuser@<ossec ip>=PASSWORD('ossecpass');Query OK, 0 rows affected (0.00 sec)
mysql> flush privileges;Query OK, 0 rows affected (0.00 sec)
mysql> quit
# mysql -u root -p ossec < mysql.schema
OSSEC Setup
In order for ossec to output alerts and other data into the database the /var/ossec/etc/ossec.conf will need to have a<database_output> section added.
<ossec_config><database_output>
<hostname>192.168.2.30</hostname><username>ossecuser</username><password>ossecpass</password><database>ossec</database><type>mysql</type>
</database_output></ossec_config>
The values will need to be corrected for your installations hostname, mysql user, password, and database.
Complete MySQL Output
All that is left is to enable the database daemon and restart ossec for the changes to take effect.
# /var/ossec/bin/ossec-control enable database# /var/ossec/bin/ossec-control restart
Configuring PgSQL
Database Setup
Create a user for OSSEC within PgSQL
1.1. Manual 77

OSSEC Documentation, Release 2.7.1
$ sudo -u postgres createuser -D -A -P ossec_userEnter password for new role:Enter it again:Shall the new role be allowed to create more new roles? (y/n) nCREATE ROLE
Create a database for OSSEC
$ sudo -u postgres createdb -O ossec_user ossecdbCREATE DATABASE
Create the necessary tables from the PostgreSQL schema located in the src/os_dbd directory of the distribution.
$ psql -h 127.0.0.1 -U ossec_user -d ossecdb -f postgresql.schema
OSSEC Setup
In order for ossec to output alerts and other data into the database the /var/ossec/etc/ossec.conf will need to be updatedand a <database_output> section will need to be added.
<ossec_config><database_output>
<hostname>192.168.2.30</hostname><username>ossecuser</username><password>ossecpass</password><database>ossec</database><type>postgresql</type>
</database_output></ossec_config>
The values will need to be corrected for your installation’s hostname, postgresql user, password, and database.
Complete PgSQL Output
All that is left is to enable the database daemon and restart ossec for the changes to take effect.
# /var/ossec/bin/ossec-control enable database# /var/ossec/bin/ossec-control restart
Sending alerts to picviz
Warning: PicViz support is very experimental, and not fully supported. Bug reports and improvements areneeded.
Installation of PicViz
This is out of the scope for this document, but the development version from svn is required for PicViz to work withOSSEC.
78 Chapter 1. Manual & FAQ

OSSEC Documentation, Release 2.7.1
Setup OSSEC for PicViz
Configure OSSEC to send events to PicViz. The following configuation needs to be added to /var/ossec/etc/ossec.conf.
<ossec_config><global>
<picviz_output>yes</picviz_output><picviz_socket>/var/ossec/picviz.socket</picviz_socket>
For more full details on this section of the config see ossec.conf: Global options.
Start up PicViz
On the picviz side, an OSSEC template is available in the template directory and Picviz should be run like this:
# pcv -Tpngcairo -o ossec.png -s /var/ossec/picviz.socket -t templates/ossec.pgdt -a
Sending output to prelude
Prelude is a Hybrid IDS that uses IDMEF to receive alert information from external devices. If you are a Prelude userand wish to send your OSSEC alerts to Prelude, do the following:
Enabling Prelude Support
Note: You must have the Prelude libraries installed on the OSSEC server.
Before you run the ”./install.sh” script execute the following to compile OSSEC with prelude support.
# cd ossec-hids-*# cd src; make setprelude; cd ..# ./install.sh
Enable Prelude output in the configuration
Just add the following entry to your ossec.conf inside the <global> section.
<prelude_output>yes</prelude_output>
Prelude extra options
You can define your own profile and set the log level from which you can send alerts to prelude with those parameters.Once again in the <global> section.
<prelude_profile>MyOssecProfile</prelude_profile><prelude_log_level>6</prelude_log_level>
1.1. Manual 79

OSSEC Documentation, Release 2.7.1
Overview:
OSSEC includes a number of ways to send alerts to other systems or applications. Syslog, email, and sending thealerts to an SQL database are the typical methods. These output methods send only alerts, not full log data. Since theagents do not generate alerts, these options are server side only.
Active Response
The Active Response feature within OSSEC can run applications on an agent or server in response to certain triggers.These triggers can be specific alerts, alert levels, or rule groups.
The active response framework is also what allows an OSSEC administrator to start a syscheck scan or restart OSSECon a remote agent.
Creating Customized Active Responses
OSSEC by default comes with a few active response scripts, but if you ever need to expand them, this tutorial can beof help.
As always, learning via examples is easier and faster. We will write a simple active response script to e-mail the alertto a specific address.
Creating the command
The first thing we need to do is to create a new “command” entry in the ossec config.
<command><name>mail-test</name><executable>mail-test.sh</executable><timeout_allowed>no</timeout_allowed><expect />
</command>
Since our script does not need a timeout, we set it to no. We also don’t expect any input (like srcip or username), sowe leave the “expect” tag empty. In the executable tag, we specify the name of the script to be executed (it must beinside /var/ossec/active-response/bin/ ).
Note: If you do need a srcip or username, just add it, eg: <expect>srcip</expect>
Configure the Active response
Next, we need to configure ossec to run the active response. In my case, I want to run it on the ossec server (so Ichoose location server) and every time the rule 1002 is fired (see rules_id 1002). You can also specify the level ordifferent locations.
<active-response><command>mail-test</command><location>server</location><rules_id>1002</rules_id>
</active-response>
80 Chapter 1. Manual & FAQ
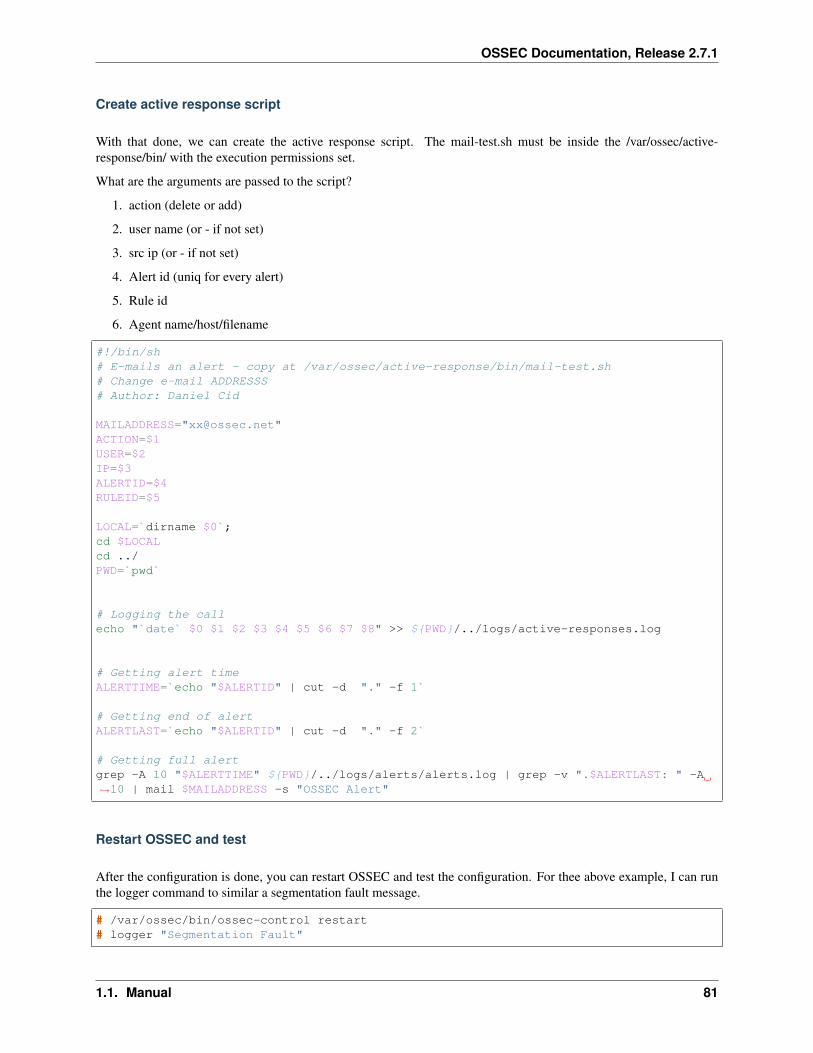
OSSEC Documentation, Release 2.7.1
Create active response script
With that done, we can create the active response script. The mail-test.sh must be inside the /var/ossec/active-response/bin/ with the execution permissions set.
What are the arguments are passed to the script?
1. action (delete or add)
2. user name (or - if not set)
3. src ip (or - if not set)
4. Alert id (uniq for every alert)
5. Rule id
6. Agent name/host/filename
#!/bin/sh# E-mails an alert - copy at /var/ossec/active-response/bin/mail-test.sh# Change e-mail ADDRESSS# Author: Daniel Cid
MAILADDRESS="[email protected]"ACTION=$1USER=$2IP=$3ALERTID=$4RULEID=$5
LOCAL=`dirname $0`;cd $LOCALcd ../PWD=`pwd`
# Logging the callecho "`date` $0 $1 $2 $3 $4 $5 $6 $7 $8" >> ${PWD}/../logs/active-responses.log
# Getting alert timeALERTTIME=`echo "$ALERTID" | cut -d "." -f 1`
# Getting end of alertALERTLAST=`echo "$ALERTID" | cut -d "." -f 2`
# Getting full alertgrep -A 10 "$ALERTTIME" ${PWD}/../logs/alerts/alerts.log | grep -v ".$ALERTLAST: " -A→˓10 | mail $MAILADDRESS -s "OSSEC Alert"
Restart OSSEC and test
After the configuration is done, you can restart OSSEC and test the configuration. For thee above example, I can runthe logger command to similar a segmentation fault message.
# /var/ossec/bin/ossec-control restart# logger "Segmentation Fault"
1.1. Manual 81

OSSEC Documentation, Release 2.7.1
You should get in the /var/ossec/logs/active-response.log, the following:
Fri Jul 27 23:48:31 BRT 2007 /var/ossec/active-response/bin/mail-test.sh add - -→˓1185590911.25916 1002 /var/log/messages
And in your e-mail:
from: root <[email protected]>to: [email protected]: Jul 27,27 2007 11:48 PMsubject: OSSEC Alert
** Alert 1185590911.25661: mailsl - syslog,errors,2007 Jul 27 23:48:31 xx->/var/log/messagesRule: 1002 (level 7) -> 'Unknown problem somewhere in the system.'Src IP: (none)User: (none)Jul 27 23:48:30 xx dcid: Segmentation Fault 123
UNIX: Active Response Configuration
The Active response configuration is divided into two parts. In the first one you configure the commands you want toexecute. In the second one, you bind the commands to rules or events.
Commands Configuration
In the commands configuration you create new “commands” to be used as responses. You can have as many commandsas you want. Each one should be inside their own “command” element. You can see an example here (for the host-deny.sh) and one here (for disable-account.sh).
<command><name>The name (A-Za-Z0-9)</name><executable>The command to execute (A-Za-z0-9.-)</executable><expect>Comma separated list of arguments (A-Za-z0-9)</expect><timeout_allowed>yes/no</timeout_allowed>
</command>
• name: Used to link the command to the response.
• executable: It must be a file (with exec permissions) inside “/var/ossec/active-response/bin”.
You don’t need to provide the whole path.
• expect: The arguments this command is expecting (options are srcip and username).
• timeout_allowed: Specifies if this command supports timeout.
Responses Configuration
In the active-response configuration, you bind the commands (created) to events. You can have as many responses asyou want. Each one should be inside their own “active-response” element. Examples are here (for blocking based onthe severity) and here (for blocking on specific rules).
In the active-response configuration, you bind the commands (created) to events. You can have as many responses asyou want. Each one should be inside their own “active-response” element. Examples are here (for blocking based onthe severity) and here (for blocking on specific rules).
82 Chapter 1. Manual & FAQ

OSSEC Documentation, Release 2.7.1
<active-response><disabled>Completely disables active response if "yes"</disabled><command>The name of any command already created</command><location>Location to execute the command</location><agent_id>ID of an agent (when using a defined agent)</agent_id><level>The lower level to execute it (0-9)</level><rules_id>Comma separated list of rules id (0-9)</rules_id><rules_group>Comma separated list of groups (A-Za-z0-9)</rules_group><timeout>Time to block</timeout>
</active-response>
• disabled: Disables active response if set to yes.
• command: Used to link the response to the command
• location: Where the command should be executed. You have four options:
– local: on the agent that generated the event
– server: on the OSSEC server
– defined-agent: on a specific agent (when using this option, you need to set the agent_id to use)
– all: or everywhere.
• agent_id: The ID of the agent to execute the response (when defined-agent is set).
• level: The response will be executed on any event with this level or higher.
• timeout: How long until the reverse command is executed (IP unblocked, for example).
Active Response Tools
By default, the ossec hids comes with the following pre-configured active-response tools:
• host-deny.sh: Adds an IP to the /etc/hosts.deny file (most Unix systems).
• firewall-drop.sh (iptables): Adds an IP to the iptables deny list (Linux 2.4 and 2.6).
• firewall-drop.sh (ipfilter): Adds an IP to the ipfilter deny list (FreeBSD, NetBSD and Solaris).
• firewall-drop.sh (ipfw): Adds an IP to the ipfw deny table (FreeBSD).
Note: On IPFW we use the table 1 to add the IPs to be blocked. We also set this table as deny in thebeginning of the firewall list. If you use the table 1 for anything else, please change the script to usea different table id.
• firewall-drop.sh (ipsec): Adds an IP to the ipsec drop table (AIX).
• firewall-drop.sh (pf): Adds an IP to a pre-configured pf deny table (OpenBSD and FreeBSD).
Note: On PF, you need to create a table in your config and deny all the traffic to it. Add thefollowing lines at the beginning of your rules and reload pf (pfctl -F all && pfctl -f /etc/pf.conf):table <ossec_fwtable> persist #ossec_fwtable
block in quick from <ossec_fwtable> to any block out quick from any to <ossec_fwtable>
1.1. Manual 83

OSSEC Documentation, Release 2.7.1
Windows: Active Response Configuration
To start, you need to enable active response on Windows (disabled by default). To do that, just add the following tothe agent’s ossec.conf:
<active-response><disabled>no</disabled>
</active-response>
After that, you need to go to the manager and specify when to run the response. Adding the following to ossec.confwill enable the responses for alerts above level 6:
<command><name>win_nullroute</name><executable>route-null.cmd</executable><expect>srcip</expect><timeout_allowed>yes</timeout_allowed>
</command>
<active-response><command>win_nullroute</command><location>local</location><level>6</level><timeout>600</timeout>
</active-response>
With the configuration completed (and the manager restarted), you can test the active response by running the agent-control script (in this case, I am running it on agent id 185 to block ip 2.3.4.5):
# /var/ossec/bin/agent_control -L
OSSEC HIDS agent_control. Available active responses:
Response name: host-deny600, command: host-deny.shResponse name: firewall-drop600, command: firewall-drop.shResponse name: win_nullroute600, command: route-null.cmd
# /var/ossec/bin/agent_control -b 2.3.4.5 -f win_nullroute600 -u 185
OSSEC HIDS agent_control: Running active response "win_nullroute600 "n: 185
And looking at the agent you should see the new entry in the route table:
C:\>route print..Active Routes:Network Destination Netmask Gateway Interface Metric2.3.4.5 255.255.255.255 x.y.z x.y.z 1..
If you run into any issues, look at the ossec.log file (on the agent) for any entry for ossec-execd. If you enabled itcorrectly, you will see:
2008/08/20 11:53:49 ossec-execd: INFO: Started (pid: 3896).
84 Chapter 1. Manual & FAQ

OSSEC Documentation, Release 2.7.1
Understanding Active Response with FreeBSD
There are currently 3 options for firewalls in FreeBSD: IPF, IPFW, and PF. Each is configured differently on FreeBSD.OSSEC will attempt to check for IPFW and then PF, falling back to IPF if neither of these was found at the time ofinstallation.
How does OSSEC know which firewall is being used?
The OSSEC install script will check rc.conf to determine which firewall is currently active. It first greps forfirewall_enable="YES", and enables IPFW if this is found. IPFW support is enabled by copying the ipfw.sh to /var/ossec/active-response/bin/firewall-drop.sh. The installation script will then look for‘‘pf_enable=”YES”‘ in the rc.conf, and will enable PF instead if this is found. The script for pf is pf.sh. If neither ofthese is found, the default firewall-drop.sh script will be installed. This script will use attempt to use IPF to block IPs.
How do I change which script is used by an agent?
Copy the appropriate script from the OSSEC source to /var/ossec/active-response/bin/firewall-drop.sh on the agent.
Frequently asked questions
Agents: FAQ
• Why can’t agent IDs be re-used?
Why can’t agent IDs be re-used?
When looking at historical alerts you don’t want to associate alerts from one system to be attributed to another,especially if the those alerts are from an unrelated and retired system.
Alerts: FAQ
• How do you monitor for usb storage?
• Why do I see alerts for agent2 in an email about agent1?
• Alerts for different sensors are appearing in the same email, how do I stop this from happening?
• How do I ignore rule 1002?
• I set the <email_alert_level> to 10, why do I keep seeing rules with lower levels?
1.2. Frequently asked questions 85

OSSEC Documentation, Release 2.7.1
How do you monitor for usb storage?
The first step is to configure the agents to check a registry entry with the reg command:
<agent_config os="Windows"><localfile>
<log_format>full_command</log_format><command>reg QUERY HKLM\SYSTEM\CurrentControlSet\Enum\USBSTOR</command><alias>usb-check</alias>
</localfile></agent_config>
Next create a local rule for that command:
<rule id="140125" level="7"><if_sid>530</if_sid><match>ossec: output: 'usb-check':</match><check_diff /><description>New USB device connected</description>
</rule>
When a USB drive is inserted into a Windows machine, an alert will not be triggered. The alert willcontain a diff of the registry entry before the USB device was inserted and after.
Originally from: ‘http://dcid.me/2010/03/detecting-usb-storage-usage-with-ossec/‘
Additional data from: ‘http://blog.rootshell.be/2010/03/15/detecting-usb-storage-usage-with-ossec/‘
Why do I see alerts for agent2 in an email about agent1?
When an email is being prepared alerts will be grouped together. The only real criteria for groupingalerts together is the timeframe. To prevent alerts from being grouped together you can set maild.groupping to 0 in /var/ossec/etc/internal_options.conf. If this is set, alerts will besent out individually. By default OSSEC will only send 12 emails per hour. To increase this limit,modify or add the <email_maxperhour> setting in the <global> section of the ossec.conf. (see:email_maxperhour .)
<global><email_maxperhour>100</email_maxperhour>
Alerts for different sensors are appearing in the same email, how do I stop this from happening?
Read the previous FAQ entry.
How do I ignore rule 1002?
Rule 1002 is a catch-all rule. It looks for keywords that are generally considered “bad.” It also meansthere is not currently a rule that deals with the log message. It is configured to always send an emailwhen it’s triggered, and many users have found it annoying. The best thing to do when you encountersomething that triggers rule 1002 is write a rule. Contributing the logs and/or rules back to the project isalso encouraged. Unless the application creating the log is an internal application, someone else may findthe rule useful.
86 Chapter 1. Manual & FAQ

OSSEC Documentation, Release 2.7.1
I set the <email_alert_level> to 10, why do I keep seeing rules with lower levels?
Some rules have an option set to force OSSEC into sending an alert email. This option is<options>alert_by_email</options>. One of these rules is 1002. To ignore these rules youwill have to create a rule to specifically ignore it, or overwrite the rule without the alert_by_emailoption.
Installation: FAQ
• Chown errors during installation on AIX:
Chown errors during installation on AIX:
AIX does not accept /bin/false as a valid shell by default. It must be added to the SHELLS line in /etc/security/login.cfg before running install.sh.
OSSEC: FAQ
• Can an OSSEC manager have more than 256 agents?
• Where are OSSEC’s logs stored?
• Where can I view the logs sent to an OSSEC manager (or on a local install)?
• Can OSSEC’s logs be saved to a different directory?
• I’m getting an error when starting OSSEC: “OSSEC analysisd: Testing rules failed. Configuration error.Exiting.” Why?
• The rules aren’t on my agents, they’re only on the server!
• Do the rules get pushed to the agents automatically?
• How can I get ossec.log to rotate daily?
Can an OSSEC manager have more than 256 agents?
By default OSSEC limits the number of agents to 256 per manager. This limitation is set in the code, butcan be modified at compile time. Depending on the event load, a manager running on modern hardwarecan handle many more agents. Some users have more than 1000 agents on a single manager. To changethe maximum number of agents, cd into the src directory and run the following command:
make setmaxagents
You should be prompted for the number of agents to allow.
One issue you may face after changing this setting is the number of files allowed to be open for a singleuser. The users ossec and ossecr both open at least 1 file (syscheck database and rids file) per agent.Raising this limit is operating system specific.
1.2. Frequently asked questions 87

OSSEC Documentation, Release 2.7.1
Some Linux distributions support a /etc/security/limits.conf. Set the limits to be at least afew files above what the max agents is set to.
ossec soft nofile 2048ossec hard nofile 2048ossecr soft nofile 2048ossecr hard nofile 2048
Where are OSSEC’s logs stored?
On OSSEC server and local installs there are several classes of OSSEC logs. There are the logs createdby the OSSEC daemons, the log messages from the agents, and the alerts. Agent installs do not have logsfrom other agents or alerts, but do have logs created by the OSSEC processes.
All logs are stored in subdirectories of /var/ossec/logs. OSSEC’s log messages are stored in /var/ossec/logs/ossec.log.
Log messages from the agents are not stored by default. After analysis they are deleted unless the <logall>option is included in the manager’s ossec.conf. If set all log messages sent to the manager are stored in/var/ossec/logs/archives/archives.log and rotated daily.
Alerts are stored in /var/ossec/logs/alerts/alerts.log, and rotated daily.
Where can I view the logs sent to an OSSEC manager (or on a local install)?
OSSEC does not store the logs sent to it by default. If a log does not trigger an alert it is discarded, andlogs that do trigger alerts are stored with the alerts in /var/ossec/logs/alerts.
The <log-all> option can be added to the <global> section (see: ossec.conf: Global options) of themanager’s ossec.conf. The manager’s OSSEC processes should be restarted. The raw logs will then besaved to files, organized by date, in /var/ossec/logs/archives.
The headers attached to these log messages are in the format of "YYYY Month dd HH:MM:ssagent_name->/path/to/log/file ".
2011 Aug 04 00:00:01 server->/var/log/local7 Aug 4 00:00:26 server→˓named[29909]: client 192.168.1.7#39323: query: fake.example.net IN AAAA +
Can OSSEC’s logs be saved to a different directory?
As a protection mechanism, OSSEC chroots most of its processes to the install directory (typically /var/ossec). Due to this chroot, logs must be saved to a location under /var/ossec. OSSEC doesrotate its logs, but will not be able to move them from /var/ossec.
Be sure to allocate enough space to /var/ossec.
I’m getting an error when starting OSSEC: “OSSEC analysisd: Testing rules failed. Configurationerror. Exiting.” Why?
There was a small bug in the ossec-control script that was not caught in time for 2.6. The error comesfrom the script trying to run ossec-logtest from the wrong directory. The solution is to change the linewhere ossec-logtest is running to look like this:
88 Chapter 1. Manual & FAQ

OSSEC Documentation, Release 2.7.1
echo | ${DIR}/bin/ossec-logtest > /dev/null 2>&1;
The rules aren’t on my agents, they’re only on the server!
That’s not a question. Also, that’s the way it is. Only the server has the rules. Agents do not get a copy ofthe rules.
Do the rules get pushed to the agents automatically?
The rules only exist on the manager. All analysis is done on the manager. Agents do not send alerts to themanager, they only send the raw logs.
How can I get ossec.log to rotate daily?
Currently OSSEC does not rotate the ossec.log, use logrotate.d or newsyslog to rotate it for now.
OSSEC-WUI: FAQ
• Why does the OSSE-WUI appear to be dead?
• Why does the src ip field contain strange information instead of an IP?
Why does the OSSE-WUI appear to be dead?
Because it is. No one has worked on it for quite a while. There may be some ongoing work with it, but asof this writing it is considered a dead project.
Why does the src ip field contain strange information instead of an IP?
Users who have installed OSSEC-WUI 0.3, have not applied the necessary patches, and are using OSSEC2.6 or later may see alerts like the following:
2013 Feb 02 10:48:42 Rule Id: 2901 level: 3Location: ubuntu->/var/log/dpkg.logSrc IP: 02 10:48:41 install libapr1 <none> 1.4.6-1New dpkg (Debian Package) requested to install.
** Alert 1359830922.3553: - syslog,dpkg,2013 Feb 02 10:48:42 ubuntu->/var/log/dpkg.logRule: 2901 (level 3) -> 'New dpkg (Debian Package) requested to install.'2013-02-02 10:48:41 install libaprutil1 <none> 1.3.12+dfsg-3
The alert format changed in 2.6, and since OSSEC-WUI is essentially abandonware it was not updated tohandle the changes. A number of users have provided patches to correct the issues, and the OSSEC teamis planning on releasing an updated WUI containing these patches. You can find a patched version of theOSSEC-WUI at a bitbucket repository <https://bitbucket.org/jbcheng/ossec-wui>_.
1.2. Frequently asked questions 89

OSSEC Documentation, Release 2.7.1
Syscheck: FAQ
• How to force an immediate syscheck scan?
• How to tell syscheck not to scan the system when OSSEC starts?
• How to ignore a file that changes too often?
• Why does OSSEC still scan a file even though it’s been ignored?
• How to know when the syscheck scan ran?
• How to get detailed reporting on the changes?
• Syscheck not sending any file data to the server?
• Why aren’t new files creating an alert?
• Can OSSEC include information on who changed a file in the alert?
How to force an immediate syscheck scan?
Run agent control tool to perform a integrity checking immediately (option -a to run on all the agents and-u to specify an agent id)
# /var/ossec/bin/agent_control -r -a# /var/ossec/bin/agent_control -r -u <agent_id>
For more information see the agent_control documentation.
How to tell syscheck not to scan the system when OSSEC starts?
Set the option <scan_on_start> to “no” on ossec.conf
How to ignore a file that changes too often?
Set the file/directory name in the <ignore> option or create a simple local rule.
The following one will ignore files /etc/a and /etc/b and the directory /etc/dir for agents mswin1 andubuntu-dns:
<rule id="100345" level="0" ><if_group>syscheck</if_group><description>Changes ignored.</description><match>/etc/a|/etc/b|/etc/dir</match><hostname>mswin1|ubuntu-dns</hostname>
</rule>
Why does OSSEC still scan a file even though it’s been ignored?
No idea. So if there are some directories you do not want scanned at all, make sure they are not includedin a <directories> configuration.
90 Chapter 1. Manual & FAQ

OSSEC Documentation, Release 2.7.1
How to know when the syscheck scan ran?
Use the agent_control tool on the manager, to see this information.
More information see the agent_control documentation.
How to get detailed reporting on the changes?
Use the syscheck_control tool on the manager or the web ui for that.
More information see the syscheck_control documentation.
Syscheck not sending any file data to the server?
With ossec 1.3 and Fedora you may run into this problem:
You have named files you’d like ossec to monitor so you add:
<ossec_config><syscheck>
<directories check_all="yes">/var/named</directories>
to ossec.conf on the client. Fedora – at least as of version 7 – runs named in a chroot jail under /var/named/chroot.However, part of that chroot jail includes /var/named/chroot/proc. The contents of that directory are purely ephemeral;there is no value to checking their integrity. And, at least in ossec 1.3, your syscheck may stall trying to read thosefiles.
The symptom is a syscheck database on the server that never grows beyond a file or two per restart of the client. Thelog monitoring continues to work, so you know it’s not a communication issue, and you will often see a slight increasein syscheck database file size after the client has restarted (in one case about 20 minutes after). But the database willnever be completely built; there will only be a couple files listed in datebase.
The solution is to add an ignore clause to ossec.conf on the client:
<ossec_config><syscheck>
<ignore>/var/named/chroot/proc</ignore>
Why aren’t new files creating an alert?
By default OSSEC does not alert on new files. To enable this functionlity, <alert_new_files> must be set to yes insidethe <syscheck> section of the manager’s ossec.conf. Also, the rule to alert on new files (rule 554) is set to level 0 bydefault. The alert level will need to be raised in order to see the alert. Alerting on new files does not work in realtime,a full scan will be necessary to detect them.
Add the following to local_rules.xml:
<rule id="554" level="10" overwrite="yes"><category>ossec</category><decoded_as>syscheck_new_entry</decoded_as><description>File added to the system.</description><group>syscheck,</group>
</rule>
The <alert_new_files> entry should look something like this:
1.2. Frequently asked questions 91

OSSEC Documentation, Release 2.7.1
<syscheck><frequency>7200</frequency><alert_new_files>yes</alert_new_files><directories check_all="yes">/etc,/bin,/sbin</directories>
</syscheck>
Can OSSEC include information on who changed a file in the alert?
In short, no. OSSEC does not track this information. You could use your OS’s auditing facilities to track this informa-tion, and create a rule to alert when an appropriate log is created.
When the unexpected happens: FAQ
• How do I troubleshoot ossec?
• How to debug ossec?
• The communication between my agent and the server is not working. What to do?
• What does “1403 - Incorrectly formated message” means?
• What does “1210 - Queue not accessible?” mean?
– Check queue/ossec/queue
– Check queue/alerts/ar
• Remote commands are not accepted from the manager. Ignoring it on the agent.conf
• Errors when dealing with multiple agents
• Fixing Duplicate Errors
• Agent won’t connect to the manager or the agent always shows never connected
• I am seeing high CPU utilization on a Windows agent
How do I troubleshoot ossec?
If you are having problems with ossec, the first thing to do is to look at your logs.
• Unix/Linux: The logs will be at /var/ossec/logs/ossec.log
• Windows: The logs are at C:Program Filesossec-agentossec.log.
If by looking at them, you can’t find out the error, we suggest you to send an e-mail to one of our mailinglists with the following information:
• OSSEC version number.
Run the following to get the version installation.
# /var/ossec/bin/ossec-analysisd -V
• Content of /etc/ossec-init.conf
• Content of /var/ossec/etc/ossec.conf or (or C:Program Filesossec-agentossec.log if Windows)
92 Chapter 1. Manual & FAQ

OSSEC Documentation, Release 2.7.1
• Content of /var/ossec/logs/ossec.log
• Operating system name/version (uname -a if Unix)
• Any other relevant information.
How to debug ossec?
Warning: Only read this section if you tried to troubleshoot ossec already, but didn’t have luckysolving your problem. Most of the users will never need to enable debugging, since it can significantlyhurt performance.
Debug Logging
You can also enable debugging mode on ossec to extract more data about what is going on. To doso, you will need to modify the file /var/ossec/etc/internal_options.conf (or C:\Program Files\ossec-agent\internal_options.conf on Windows) and change the debug level from the default “0” to “1” or “2”.
For example, if you wish to debug your windows agent, just change the option windows.debug from 0 to2. Bellow is the list of all the debug options:
# Debug options.# Debug 0 -> no debug# Debug 1 -> first level of debug# Debug 2 -> full debugging
# Windows debug (used by the windows agent)windows.debug=0
# Syscheck (local, server and unix agent)syscheck.debug=0
# Remoted (server debug)remoted.debug=0
# Analysisd (server or local)analysisd.debug=0
# Log collector (server, local or unix agent)logcollector.debug=0
# Unix agentdagent.debug=0
If this is on an OSSEC server you can enable debug by running:
# /var/ossec/bin/ossec-control enable debug
Enable debug mode and restart the OSSEC processes to view more verbose logs.
Getting more log data
If you are up to editing the source and recompiling, you can use the verbose() function to add entries tothe log. This has been helpful on at least one occasion to help pinpoint where a problem was occurring.Something along these lines should work (at least in 1.3):
1.2. Frequently asked questions 93

OSSEC Documentation, Release 2.7.1
verbose("MyName: inside the_file.c the_function() %s ..", the_string);
• If you tag all your extra logs with something, MyName, in this example, they stand out better.
• If you need to get information from several source files, including the file name the_file.c, in thisexample is helpful.
• You will almost surely want information from more than one fuction, including the name,the_fuction() will show which function sent the log.
• Finally, you can include a variable string with the printf format specifier %s in the log entry andthe_string is the name of the string variable to send to the log.
With some calls to verbose, recompile and replace the stock binary with your edited one. Restart ossecand tail the log.
The communication between my agent and the server is not working. What to do?
There are multiple reasons for it to happen. First, you should look at your agent and server logs to seewhat they say. If you don’t know where they are, go to our Troubleshooting page for more information.
In addition to that, follow the step by step at the end, if you need to add/re-add the authentication keys.
There is a firewall between the agent and the server.
If you have the following message on the agent log:
2007/04/19 12:42:54 ossec-agentd(4101): Waiting for server reply (not→˓started).2007/04/19 12:43:10 ossec-agentd(4101): Waiting for server reply (not→˓started).2007/04/19 12:43:41 ossec-agentd(4101): Waiting for server reply (not→˓started).2007/04/19 12:44:27 ossec-agentd(4101): Waiting for server reply (not→˓started).
And nothing on the server log, you probably have a firewall between the two devices. Make sure to openport 1514 UDP between them (keeping state –the agent connects to the server and expects a reply back).
Note: The way the agent/server communication works is that the agent starts a connection to the serverusing any random high port. So, the only port that OSSEC opens is in the server side (port 1514 UDP). Itworks similar to DNS, where the DNS client connects to UDP port 53 and expects a reply back.
Wrong authentication keys configured (you imported a key from a different agent).
If that’s the case, you would be getting logs similar to the above on the agent and the following on theserver (see also Errors:1403):
2007/05/23 09:27:35 ossec-remoted(1403): Incorrectly formated message from→˓'xxx.xxx.xxx.xxx'.2007/05/23 09:27:35 ossec-remoted(1403): Incorrectly formated message from→˓'xxx.xxx.xxx.xxx'.''
The IP address you configured the agent is different from what the server is seeing.
Same as above (see also see Errors:1403).
Step by Step – adding the authentication keys
94 Chapter 1. Manual & FAQ

OSSEC Documentation, Release 2.7.1
For most of the errors (except the firewall issue), removing and re-adding the authentication keys fix theproblem. Do the following if you are having issues:
1. ‘Stop the server and the agent.’
• Make sure they are really stopped (ps on Unix or sc query ossecsvc on Windows)
2. Run the manage-agents tool on the server and remove the agent.
3. Still on the server, add the agent using manage-agents. Make sure the IP is correct.
4. Start the server.
5. Run manage-agents on the agent and import the newly generated key.
6. Start the agent.
If after that, it still doesn’t work, contact our mailing list for help.
What does “1403 - Incorrectly formated message” means?
It means that the server (or agent) wasn’t able to decrypt the message from the other side of the connection. See Thecommunication between my agent and the server is not working. What to do?
The main reasons for this to happen are:
• Wrong authentication keys configured (you imported a key from a different agent).
• The IP address you configured the agent is different from what the server is seeing.
How to fix it:
• Check if you imported the right authentication keys into the agent.
• Check if the IP address is correctly.
• You can also try to remove the agent (using manage_agents), add it back again and re-import the keys into theagent. Make sure to restart the server (first) and then the agent after that.
What does “1210 - Queue not accessible?” mean?
Check queue/ossec/queue
If you have logs similar to the following in /var/ossec/queue/ossec/queue:
2008/04/29 15:40:39 ossec-syscheckd(1210): ERROR: Queue '/var/ossec/queue/ossec/queue→˓' not accessible: 'Connection refused'.2008/04/29 15:40:39 ossec-rootcheck(1210): ERROR: Queue '/var/ossec/queue/ossec/queue→˓' not accessible: 'Connection refused'.2008/04/29 15:40:45 ossec-logcollector(1210): ERROR: Queue '/var/ossec/queue/ossec/→˓queue' not accessible: 'Connection refused'.2008/04/29 15:40:45 ossec-logcollector(1211): ERROR: Unable to access queue: '/var/→˓ossec/queue/ossec/queue'. Giving up..2008/04/29 15:41:00 ossec-syscheckd(1210): ERROR: Queue '/var/ossec/queue/ossec/queue→˓' not accessible: 'Connection refused'.2008/04/29 15:41:00 ossec-rootcheck(1211): ERROR: Unable to access queue: '/var/ossec/→˓queue/ossec/queue'. Giving up..
It means that ossec-analysisd is not running for some reason.
The main reasons for this to happen are:
1.2. Frequently asked questions 95

OSSEC Documentation, Release 2.7.1
• ossec-analysisd didn’t start properly. Look at the logs for any error from it.
• ossec-analysisd didn’t start at all. There is a bug in the init scripts that during system reboot, it may not start ifthe PID is already in use (we are working to fix it).
• ossec-analysisd cannot access /queue/fts/fts-queue. Look for the error messageossec-analysisd(1103): ERROR: Unable to open file '/queue/fts/fts-queue'.This can be fixed by ensuring that the ossec user owns /var/ossec/queue/fts/fts-queue.
How to fix it:
Stop OSSEC and start it back again:
# /var/ossec/bin/ossec-control stop(you can also check at /var/ossec/var/run that there is not PID file in there)# /var/ossec/bin/ossec-control start
If there is any configuration error, fix it.
Check queue/alerts/ar
If you have logs similar to the following in /var/ossec/queue/alerts/ar:
2009/02/17 12:03:04 ossec-analysisd(1210): ERROR: Queue '/queue/alerts/ar' not→˓accessible: 'Connection refused'.2009/02/17 12:03:04 ossec-analysisd(1301): ERROR: Unable to connect to active→˓response queue.
It means that there is nothing listening on the other end of the socket the ossec-analysisd deamon would want to writeto. This can happen in an ossec server installation. The deamon that should be listening on this socket is ossec-remoted.
How to fix it:
Add an OSSEC client (agent) with the manage_agents utility on both agent and server. Then restart OSSEC. ossec-remoted should now be listening on the socket.
Remote commands are not accepted from the manager. Ignoring it on the agent.conf
This error message is caused by command or full_command log types in the agent.conf. Originally OSSECsupported running commands from the agent.conf by default. Thie was later changed as a security precaution due tothe commands being run as root. When a command is encountered on an agent in the agent.conf this error will beproduced and the agent may not fully start. This error may also accompany the above error message:
ERROR: Configuration error at '/var/ossec-agent/etc/shared/agent.conf'. Exiting.
Errors when dealing with multiple agents
When you have hundreds (or even thousands) of agents, OSSEC may not work properly by default. There are a fewchanges that you will need to do:
Increase maximum number of allowed agents
To increase the number of agents, before you install (or update OSSEC), just do:
96 Chapter 1. Manual & FAQ
OSSEC Documentation, Release 2.7.1
#cd src; make setmaxagents (it will ask how many do you want.. )
Specify maximum number of agents: 2048 (to increase to 2048)Maximum number of agents set to 20.
#cd ..; ./install.sh
Increase your system’s limits
Most systems have limits regarding the maximum number of files you can have. A few commands you should try are(to increase to 2048):
# ulimit -n 2048# sysctl -w kern.maxfiles=2048
Fixing Duplicate Errors
Ossec agents and server keep a counter of each message sent and received in files in .../ossec/queue/rids. This is atechnique to prevent replay attacks. If the counters between agent and server don’t match you’ll see errors like this inthe agents ossec.log file:
2007/10/24 11:19:21 ossec-agentd: Duplicate error: global: 12, local: 3456, saved→˓global: 78, saved local: 910112007/10/24 11:19:21 ossec-agentd(<pid>): Duplicated counter for '<host name>'.2007/10/24 11:19:21 ossec-agentd(<pid>): Problem receiving message from www.xxx.yyy.→˓zzz.
This normally happens when you restore the ossec files from a backup or you reinstall server or agents withoutperforming an upgrade, this can also be caused by duplicate agent ID’s. The fix for this problem is:
1. On every agent:
1. stop ossec
2. go to: .../ossec/queue/rids (or ossec-agent/rids on Windows) and remove every file in there.
2. Go to the server:
1. Stop ossec
2. Remove the rids file with the same name as the agent id that is reporting errors.
3. Restart the server
4. Restart the agents.
To avoid this problem from ever happening again, make sure to:
• Always use the update option (when updating). Do not remove and reinstall the ossec server, unless youplan to do the same for all agents.
• Do not re-use the same agent key between multiple agents or the same agent key after you remove/re-installan agent. If you use the “update” options everything should just work.
Agent won’t connect to the manager or the agent always shows never connected
The following log messages may appear in the ossec.log file on an agent when it is having issues connecting to amanager:
1.2. Frequently asked questions 97

OSSEC Documentation, Release 2.7.1
2011/11/13 18:05:13 ossec-agent: WARN: Process locked. Waiting for permission...2011/11/13 18:05:24 ossec-agent(4101): WARN: Waiting for server reply (not started).→˓Tried: '10.10.134.241'.2011/11/13 18:05:26 ossec-agent: INFO: Trying to connect to server (10.10.134.→˓241:1514).2011/11/13 18:05:26 ossec-agent: INFO: Using IPv4 for: 10.10.134.241 .2011/11/13 18:05:47 ossec-agent(4101): WARN: Waiting for server reply (not started).→˓Tried: '10.10.134.241'.
If the agent’s packets are making it to the manager, the manager will also include error messages in its ossec.logrelated to that agent. Some possible issues:
• The agent may not be using the correct IP address. Some systems with multiple IP addresses may not choosethe correct one to communicate with the OSSEC manager. Using any or a CIDR address (192.168.1.0/24) forthe agent may be one solution, and adjusting the system’s route settings is another.
• Every agent must be using a unique key. If 2 agents look like they’re coming from the same IP (possibly from aNAT gateway), then any or the CIDR address should be used to identify them on the manager.
• There may be a firewall blocking the OSSEC traffic, udp 1514 should be allowed to and from the manager.
• UAC may be blocking the OSSEC service from communicating with the manager on Windows 7.
I am seeing high CPU utilization on a Windows agent
Some OSSEC HIDS users who have deployed the Windows agent have experienced situations where the windowsOSSEC agent causes high CPU utilization. In some cases, this may be due to syscheck having to do integrity checkingon a large number of files and the frequency with which this is done. The high CPU utilization could also take placewhen the OSSEC agent has to analyze Windows Event logs with very large numbers of generated events.
A clue to what may be happening are alerts like these:
OSSEC HIDS Notification.2006 Oct 24 03:18:07
Received From: (ACME-5) 10.23.54.40->WinEvtLogRule: 11 fired (level 8) -> "Excessive number of events (above normal)."Portion of the log(s):
The average number of logs between 3:00 and 4:00 is 268689. We reached 270690.
--END OF NOTIFICATION
The above alert indicates the condition where a large number of events are being generated in the Windows eventlogs. In Windows, setting the Windows audit policy to Audit Object Access or Audit Process Tracking can cause thegeneration of many event log entries. This gives the OSSEC agent much more work to do in log analysis, and thuscauses the consumption of much more CPU cycles. To reduce the CPU utilization in this case, the solution is to disableauditing of object access and/or process tracking. Typically, these audit settings aren’t required except for debuggingpurposes, or situations in which you absolutely have to track everything.
98 Chapter 1. Manual & FAQ

OSSEC Documentation, Release 2.7.1
User submitted Cookbooks
Warning: These recipes are user submitted, please reciew them thoroughly before implementing them in yourown environment. No one cares about your environment more than you.
How to restart an agent after changes to the agent.conf:
OSSEC agents require a restart after the agent.conf has been updated. Active response can do this automatically whenit notices the file has changed.
Requirements:
• Active response must be enabled.
• This only works for *nix based systems
Details:
The idea behind this is to have active response restart the OSSEC processes when the agent.conf file changes. A rulemust be created to notice the change to that specific file, and an active response setup to react to that rule.
rules:
<rule id="710001" level="1"><if_group>syscheck</if_group><match>/var/ossec/etc/shared/agent.conf</match><description>agent.conf was modified</description>
</rule>
active response configuration:
<command><name>restart-ossec</name><executable>restart-ossec.sh</executable><expect></expect>
</command>
<active-response><command>restart-ossec</command><location>local</location><rules_id>710001</rules_id>
</active-response>
1.3. User submitted Cookbooks 99

OSSEC Documentation, Release 2.7.1
100 Chapter 1. Manual & FAQ

CHAPTER 2
Development
oRFC: 1 The Collective Code Construction Contract (C4)
The Collective Code Construction Contract (C4) is an evolution of the github.com Fork + Pull Model, aimed atproviding an optimal collaboration model for free software projects. This is revision 1 of the C4 specification.
Name C4.1Editor Jeremy Rossi <jeremy at jeremyrossi dot com>State AcceptedOrigin http://rfc.zeromq.org/spec:22
Language
The key words “MUST”, “MUST NOT”, “REQUIRED”, “SHALL”, “SHALL NOT”, “SHOULD”, “SHOULDNOT”, “RECOMMENDED”, “MAY”, and “OPTIONAL” in this document are to be interpreted as described in RFC2119[#f1]_.
Goals
C4 is meant to provide a reusable optimal collaboration model for open source software projects. It has these specificgoals:
• To maximize the scale of the community around a project, by reducing the friction for new Contributors andcreating a scaled participation model with strong positive feedbacks;
• To relieve dependencies on key individuals by separating different skill sets so that there is a larger pool ofcompetence in any required domain;
• To allow the project to develop faster and more accurately, by increasing the diversity of the decision makingprocess;
• To support the natural life cycle of project versions from experimental through to stable, by allowing safeexperimentation, rapid failure, and isolation of stable code;
101
OSSEC Documentation, Release 2.7.1
• To reduce the internal complexity of project repositories, thus making it easier for Contributors to participateand reducing the scope for error;
• To enforce collective ownership of the project, which increases economic incentive to Contributors and reducesthe risk of hijack by hostile entities.
Design
Preliminaries
• The project SHALL use the git distributed revision control system.
• The project SHALL be hosted on github.com or equivalent, herein called the “Platform”.
• The project SHALL use the Platform issue tracker.
• The project SHOULD have clearly documented guidelines for code style.
• A “Contributor” is a person who wishes to provide a patch, being a set of commits that solve some clearlyidentified problem.
• A “Maintainer” is a person who merge patches to the project. Maintainers are not developers; their job is toenforce process.
• Contributors SHALL NOT have commit access to the repository unless they are also Maintainers.
• Maintainers SHALL have commit access to the repository.
• Everyone, without distinction or discrimination, SHALL have an equal right to become a Contributor under theterms of this contract.
Licensing and Ownership
• The project SHALL use the GPLv2 or a variant thereof (LGPL, AGPL).
• All contributions to the project source code (“patches”) SHALL use the same license as the project.
• All patches are owned by their authors. There SHALL NOT be any copyright assignment process.
• The copyrights in the project SHALL be owned collectively by all its Contributors.
• Each Contributor SHALL be responsible for identifying themselves in the project Contributor list.
Patch Requirements
• Maintainers and Contributors MUST have a Platform account and SHOULD use their real names or a well-known alias.
• A patch SHOULD be a minimal and accurate answer to exactly one identified and agreed problem.
• A patch MUST adhere to the code style guidelines of the project if these are defined.
• A patch MUST adhere to the “Evolution of Public Contracts” guidelines defined below.
• A patch SHALL NOT include non-trivial code from other projects unless the Contributor is the original authorof that code.
• A patch MUST compile cleanly and pass project self-tests on at least the principle target platform.
• A patch commit message SHOULD consist of a single short (less than 50 character) line summarizing thechange, optionally followed by a blank line and then a more thorough description.
102 Chapter 2. Development

OSSEC Documentation, Release 2.7.1
• A “Correct Patch” is one that satisfies the above requirements.
Development Process
• Change on the project SHALL be governed by the pattern of accurately identifying problems and applyingminimal, accurate solutions to these problems.
• To initiate changes, a user SHOULD log an issue on the project Platform issue tracker.
• The user SHOULD write the issue by describing the problem they face or observe.
• The user SHOULD seek consensus on the accuracy of their observation, and the value of solving the problem.
• Users SHALL NOT log feature requests, ideas, suggestions, or any solutions to problems that are not explicitlydocumented and provable.
• Thus, the release history of the project SHALL be a list of meaningful issues logged and solved.
• To work on an issue, a Contributor SHALL fork the project repository and then work on their forked repository.
• To submit a patch, a Contributor SHALL create a Platform pull request back to the project.
• A Contributor SHALL NOT commit changes directly to the project.
• To discuss a patch, people MAY comment on the Platform pull request, on the commit, or elsewhere.
• To accept or reject a patch, a Maintainer SHALL use the Platform interface.
• Maintainers SHALL NOT accept their own patches.
• Maintainers SHALL NOT make value judgments on correct patches.
• Maintainers SHALL merge correct patches rapidly.
• The Contributor MAY tag an issue as “Ready” after making a pull request for the issue.
• The user who created an issue SHOULD close the issue after checking the patch is successful.
• Maintainers SHOULD ask for improvements to incorrect patches and SHOULD reject incorrect patches if theContributor does not respond constructively.
• Any Contributor who has value judgments on a correct patch SHOULD express these via their own patches.
• Maintainers MAY commit changes to non-source documentation directly to the project.
Creating Stable Releases
• The project SHALL have one branch (“master”) that always holds the latest in-progress version and SHOULDalways build.
• The project SHALL NOT use topic branches for any reason. Personal forks MAY use topic branches.
• To make a stable release someone SHALL fork the repository by copying it and thus become maintainer of thisrepository.
• Forking a project for stabilization MAY be done unilaterally and without agreement of project maintainers.
• A stabilization project SHOULD be maintained by the same process as the main project.
• A patch to a stabilization project declared “stable” SHALL be accompanied by a reproducible test case.
2.1. oRFC: 1 The Collective Code Construction Contract (C4) 103

OSSEC Documentation, Release 2.7.1
Evolution of Public Contracts
• All Public Contracts (APIs or protocols) SHOULD be documented.
• All Public Contracts SHOULD have space for extensibility and experimentation.
• A patch that modifies a stable Public Contract SHOULD not break existing applications unless there is overrid-ing consensus on the value of doing this.
• A patch that introduces new features to a Public Contract SHOULD do so using new names.
• Old names SHOULD be deprecated in a systematic fashion by marking new names as “experimental” until theyare stable, then marking the old names as “deprecated”.
• When sufficient time has passed, old deprecated names SHOULD be marked “legacy” and eventually removed.
• Old names SHALL NOT be reused by new features.
• When old names are removed, their implementations MUST provoke an exception (assertion) if used by appli-cations.
Project Administration
• The project founders SHALL act as Administrators to manage the set of project Maintainers.
• The Administrators SHALL ensure their own succession over time by promoting the most effective Maintainers.
• A new Contributor who makes a correct patch SHALL be invited to become a Maintainer.
• Administrators MAY remove Maintainers who are inactive for an extended period of time, or who repeatedlyfail to apply this process accurately.
Further Reading
• Argyris’ Models 1 and 2 - the goals of C4.1 are consistent with Argyris’ Model 2.
• Toyota Kata - covering the Improvement Kata (fixing problems one at a time) and the Coaching Kata (helpingothers to learn the Improvement Kata).
References
License
Original content licensed under the Creative Commons Attribution-Share Alike 3.0 License. (c) Copyright (c) 2007-2011 iMatix Corporation and Contributors.
oRFC: 2 Coding Style Guide
OSSEC Coding Style Guide
104 Chapter 2. Development

OSSEC Documentation, Release 2.7.1
Name OSSEC Style GuideEditor
• Jeremy Rossi <jeremy at jeremyrossi dot com>• Christian Göttsche <cgzones at googlemail dot
com>
State DraftOrigin
• http://zeromq.org/docs:style• https://www.kernel.org/doc/Documentation/
CodingStyle
Language
The key words “MUST”, “MUST NOT”, “REQUIRED”, “SHALL”, “SHALL NOT”, “SHOULD”, “SHOULD NOT”,“RECOMMENDED”, “MAY”, and “OPTIONAL” in this document are to be interpreted as described in RFC 21191.
Goals
The OSSEC Style Guide is meant to provide framework and guide of formating code contributer to OSSEC. Theoverall goals are:
• Maximize Readability of code in OSSEC;
• Reduction in the number of bugs by removing ambiguity in code and logic flow;
• Be as minimally invasive as possible while achieving the stated goals;
• Trust the contributor.
Code Style
Formatter
• Artistic Style should be used to format the source code.
• Every code style should be achieved by a astyle command argument.
Indentation
• 4 spaces shall be used per indentation level. –indent=spaces=4
• Switch and case blocks shall be indented. –indent-switches
• Preprocessor conditional statements shall be indeted to the same level as the source code. –indent-preproc-cond
File endings
• Every files shall end with a newline.
• Every files shall have linux like line endings (\n). –lineend=linux
1 “Key words for use in RFCs to Indicate Requirement Levels” - http://tools.ietf.org/html/rfc2119
2.2. oRFC: 2 Coding Style Guide 105

OSSEC Documentation, Release 2.7.1
Breaking long lines and strings
Placing Braces and Spaces
• Braces shall be placed accoriding to the stroustrup style. –style=stroustrup
• Operators shall be padded by a space. –pad-oper
• Every branch of conditional statements shall be surrounded by brackets. –add-brackets
• Pointer and reference operators shall be attached to the variable name. –align-pointer=name
Typedefs & Struct
Naming
• Variables
• Functions
• Typedefs
• Structs
References
106 Chapter 2. Development

CHAPTER 3
Reference
Syntax and Options
Regular Expression Syntax
Currently OSSEC supports to regex syntax:
• OS_Regex or regex
• OS_Match or sregex
OR_Regex/regex Syntax
Fast and simple library for regular expressions in C.
This library is designed to be simple, but support the most common regular expressions. It was designed with intrusiondetection systems in mind, where having all options is not crucial, but speed is. Supported expressions:
\w -> A-Z, a-z, 0-9 characters\d -> 0-9 characters\s -> For spaces " "\t -> For tabs.\p -> ()*+,-.:;<=>?[] (punctuation characters)\W -> For anything not \w\D -> For anything not \d\S -> For anything not \s\. -> For anything
Modifiers:
+ -> To match one or more times (eg \w+ or \d+)
* -> To match zero or more times (eg \w* or \p*)
Special Characters:
107

OSSEC Documentation, Release 2.7.1
^ -> To specify the beginning of the text.$ -> To specify the end of the text.| -> To create an "OR" between multiple patterns.
Characters Escaping
To utilize the following characters they must be escaped:
$ -> \$( -> \() -> \)\ -> \\| -> \|
OS_Match/sregex Syntax
Faster than the OS_Regex/regex, but only supports simple string matching and the following special characters.
Special Characters:
^ -> To specify the beginning of the text.$ -> To specify the end of the text.| -> To create an "OR" between multiple patterns.
Log Analysis Syntax: Rules and Decoders
Rules Syntax
Overview
Options
ruleDefines a rule
Attributes:
•level
–Specifies the level of the rule. Alerts and responses use this value.
–Allowed: Any number (0 to 16)
•id
–Specifies the ID of the rule.
–Allowed: Any number from 100 to 99999
•maxsize
–Specifies the maximum size of the event.
–Allowed: Any number from 1 to 99999
108 Chapter 3. Reference

OSSEC Documentation, Release 2.7.1
•frequency
–Specifies the number of times the rule must have matched before firing. The number thattriggers the rule is actually 2 more than this setting.
–Allowed: Any number from 1 to 999
–Example: frequency=”2” would mean the rule must be matched 4 times
Note: More information about how frequency is counted can be found in this thread.
•timeframe
–The timeframe in seconds.
–This option is intended to be used with the frequency option.
–Allowed: Any number from 1 to 9999
•ignore
–The time (in seconds) to ignore this rule after firing it (to avoid floods).
–Allowed: Any number from 1 to 9999
•overwrite
– Used to supercede an OSSEC rule with local changes.
– This is useful to change the level or other options of rules included with OSSEC.
– Allowed yes
match
•Any string to match against the log event.
•Allowed: Any OS_Match/sregex Syntax
regex
•Any regex to match against the log event.
•Allowed: Any OR_Regex/regex Syntax
decoded_as
•Any decoder name (see Decoders Syntax)
•Allowed: Any decoder name
category
•The decoded category to match (ids, syslog, firewall, web-log, squid or windows).
•Allowed: Any category categories
srcip
•Any IP address or CIDR block to be compared to an IP decoded as srcip.
•Use ”!” to negate it.
•Allowed: Any srcip
3.1. Syntax and Options 109
OSSEC Documentation, Release 2.7.1
dstip
•Any IP address or CIDR block to be compared to an IP decoded as dstip.
•Use ”!” to negate it.
•Allowed: Any dstip
user
•Any username (decoded as the username).
•Allowed: any OS_Match/sregex Syntax
program_name
•Program name is decoded from syslog process name.
•Allowed: any OS_Match/sregex Syntax
hostname
•Any hostname (decoded as the syslog hostname) or log file.
•Allowed: any OS_Match/sregex Syntax
time
•Time that the event was generated.
•Allowed: Any time range (hh:mm-hh:mm)
•Example: <time>6 am - 6 pm</time>
weekday
•Week day that the event was generated.
•Allowed: monday - sunday, weekday, weekend
id
•Any ID (decoded as the ID).
•Allowed: any OS_Match/sregex Syntax
url
•Any URL (decoded as the URL).
•Allowed: any OS_Match/sregex Syntax
if_sid
•Matches if the ID has matched.
•Allowed: Any rule id
if_group
•Matches if the group has matched before.
•Allowed: Any Group
if_level
•Matches if the level has matched before.
•Allowed: Any level from 1 to 16
if_matched_sid
110 Chapter 3. Reference
OSSEC Documentation, Release 2.7.1
•Matches if an alert of the defined ID has been triggered in a set number of seconds.
•This option is used in conjunction with frequency and timeframe.
Note: Rules at level 0 are discarded immediately and will not be used with the if_matched_ rules. Thelevel must be at least 1, but the <no_log> option can be added to the rule to make sure it does not get logged.
•Allowed: Any rule id
if_matched_group
•Matches if an alert of the defined group has been triggered in a set number of seconds.
•This option is used in conjunction with frequency and timeframe.
•Allowed: Any group
if_matched_level
•Matches if an alert of the defined level has been triggered in a set number of seconds.
•This option is used in conjunction with frequency and timeframe.
•Allowed: Any level from 1 to 16
same_id
•Specifies that the decoded id must be the same.
•This option is used in conjunction with frequency and timeframe.
•Example: <same_id />
same_source_ip
•Specifies that the decoded source ip must be the same.
•This option is used in conjunction with frequency and timeframe.
•Example: <same_source_ip />
same_source_port
•Specifies that the decoded source port must be the same.
•This option is used in conjunction with frequency and timeframe.
•Example: <same_source_port />
same_dst_port
•Specifies that the decoded destination port must be the same.
•This option is used in conjunction with frequency and timeframe.
•Example: <same_source_port />
same_location
•Specifies that the location must be the same.
•This option is used in conjunction with frequency and timeframe.
•Example: <same_location />
same_user
3.1. Syntax and Options 111

OSSEC Documentation, Release 2.7.1
•Specifies that the decoded user must be the same.
•This option is used in conjunction with frequency an timeframe.
•Example: <same_user />
description
•Rule description.
•Allowed: Any string
listPreform a CDB lookup using an ossec list. This is a fast on disk database which will always find keys withintwo seeks of the file.
Attributes:
•field
Field that is used as the key to look up in the CDB file:
–Value: srcip
–Value: srcport
–Value: dstip
–Value: dstport
–Value: user
–Value: url
–Value: id
–Value: hostname
–Value: program_name
–Value: status
–Value: action
•lookup
This is the type of lookup that is preformed:
–Value: match_key
*Positive key match: field is the key to search within the cdb and will match if they key ispresent.
*This is the default if no lookup is specified.
–Value: not_match_key
*Negative key match: field is the key to search and will match if it IS NOT present in thedatabase.
–Value: match_key_value
*Key and Value Match: field is searched for in the cdb and if found the value will becompared with regex from attribute check_value.
Note: This feature is not yet complete.
112 Chapter 3. Reference

OSSEC Documentation, Release 2.7.1
–Value: address_match_key
*Positive key match: field is an IP address and the key to search within the cdb and willmatch if they key is present.
–Value: not_address_match_key
*Negative key match: field is an IP address the key to search and will match if it IS NOTpresent in the database.
–Value: address_match_key_value
*Key and Value Match: field is an IP address searched for in the cdb and if found thevalue will be compared with regex from attribute check_value.
Note: This feature is not yet complete.
•check_value
–regex pattern for matching on the value pulled out of the cdb when using lookup types: ad-dress_match_key_value, match_key_value
Allowed:
Path to the CDB file to be used for lookup from the OSSEC directory. This file must also be includedin the ossec.conf file.
Example:
<rule id="100000" level="7"><list lookup="match_key" field="srcip">path/to/list/file</list><description>Checking srcip against cdb list file</description>
</rule>
infoExtra information may be added through the following attributes:
Attributes:
•type
–Value: text
This is the default when no type is selected. Just used for additional information about thealert/event.
–Value: link
Link to more information about the alert/event.
–Value: cve
The CVE Number related to this alert/event.
–Value: ovsdb
The osvdb id related to this alert/event.
Allowed: String but content is dependent on the type attribute.
Example:
3.1. Syntax and Options 113

OSSEC Documentation, Release 2.7.1
<rule id="502" level="3"><if_sid>500</if_sid><options>alert_by_email</options><match>Ossec started</match><description>Ossec server started.</description><info type="link">http://ossec.net/wiki/Rule:205</info><info type="cve">2009-1002</info><info type="osvdb"> 61509</info><info type="text">Internal Why we are running this run in our company</info><info>Type text is the default</info>
</rule>
optionsAdditional rule options
Allowed:
•alert_by_email
– Always alert by email.
– Example: <options>alert_by_email</options>
•no_email_alert
– Never alert by email.
– Example: <options>no_email_alert</options>
•no_log
– Do not log this alert.
– Example: <options>no_log</options>
check_diffUsed to determine when the output of a command changes.
Usage: <check_diff />
Additional info: Daniel Cid has written a blog post about the feature.
group
•Add additional groups to the alert. Groups are optional tags added to alerts. They can be used by otherrules by using if_group or if_matched_group, or by alert parsing tools to categorize alerts.
Example: <group>group1, group2</group>
Decoders Syntax
Overview
Options
decoderAttributes:
•id::
•name:
114 Chapter 3. Reference

OSSEC Documentation, Release 2.7.1
•type:
•status:
decoder.parent
decoder.program_nameAllowed: Any OS_Match/sregex Syntax
decoder.prematchAllowed: Any OS_Match/sregex Syntax
decoder.regexAllowed: Any OR_Regex/regex Syntax
decoder.orderAllowed:
•location - where the log came from (only on FTS)
•srcuser - extracts the source username
•dstuser - extracts the destination (target) username
•user - an alias to dstuser (only one of the two can be used)
•srcip - source ip
•dstip - dst ip
•srcport - source port
•dstport - destination port
•protocol - protocol
•id - event id
•url - url of the event
•action - event action (deny, drop, accept, etc)
•status - event status (success, failure, etc)
•extra_data - Any extra data
decoder.fts
decoder.ftscommentUnused at this time.
ossec.conf: syntax and options
ossec.conf: Active Response Options
Overview
Supported types
Active-reponse options are available in the the following installation types:
• server
• local
3.1. Syntax and Options 115

OSSEC Documentation, Release 2.7.1
Configuration pieces
There are two pieces to an active-response configuration. The first is the <command> section. This details thecommand to be run, and the options it will use. There can be any number of command options.
The second is the <active-response> section. This section defines when the command will be run.
Location
All active-response options must be configured in the /var/ossec/etc/ossec.conf and used within the <ossec_config>tag.
XML excerpt to show location:
<ossec_config><command>
<!--Command options here-->
</command><active-response>
<!--active-response options here-->
</active-response></ossec_config>
Command Options
commandIn the commands configuration you create new “commands” to be used as responses. You can have as manycommands as you want. Each one should be inside their own “command” element. command is required.
nameUsed to link the command to the response. name is required.
executableIt must be a file (with exec permissions) inside /var/ossec/active-response/bin. executable isrequired.
You don’t need to provide the whole path.
expectThe arguments this command is expecting (options are srcip and username). If a field is not within the expectoption it will be passed as a dash (-) instead of the actual value. For instance, if srcip is required for anactive-response script to work it must be inside of an expect option. expect is required.
Note: expect is required, but it is not reqiured to populate it. <expect></expect> is valid if no optionsneed to be passed to the active-response script.
timeout_allowedSpecifies if this command supports a timeout. This is optional, and defaults to yes.
116 Chapter 3. Reference

OSSEC Documentation, Release 2.7.1
Active-response Options
active-responseIn the active-response configuration, you bind the commands (created) to events. You can have as many re-sponses as you want. Each one should be inside their own “active-response” element.
disabledDisables active response if set to yes. If this is not defined active response is enabled.
commandUsed to link the response to the command
locationWhere the command should be executed. You have four options:
Allowed:
•local: on the agent that generated the event
•server: on the OSSEC server
•defined-agent: on a specific agent (when using this option, you need to set the agent_id to use)
•all: or everywhere.
agent_idThe ID of the agent to execute the response (when defined-agent is set).
levelThe response will be executed on any event with this level or higher.
rules_groupThe response will be executed on any event in the defined group. Multiple groups can be defined if separated bya comma.
rules_idThe response will be executes on any event with the defined ID. Multiple IDs can be specified if separated by acomma.
timeoutHow long in seconds until the reverse command is executed (IP unblocked, for example).
repeated_offendersA comma separated list of increasing timeouts in minutes for repeat offenders. There can be a maximum of 5entries. This should be set in the ossec.conf of an agent in an agent/server setup.
Example:
<active-response><command>firewall-block</command><location>defined-agent</location><agent_id>001</agent_id><rules_group>authentication_failed,authentication_failures</rules_group><timeout>600</timeout><repeated_offenders>30,60,120</repeated_offenders>
</active-response>
<active-response><repeated_offenders>30,60,120</repeated_offenders>
</active-response>
3.1. Syntax and Options 117

OSSEC Documentation, Release 2.7.1
Example active response configurations:
Command: Restart OSSEC on *nix systems:
This command can be used to restart the OSSEC processes. It’s commonly used to automatically restart agent pro-cesses when an agent.conf is modified. Since no parameters are necessary the <expect> is empty.
<command><name>restart-ossec</name><executable>restart-ossec.sh</executable><expect></expect>
</command>
Active-Response: Restart the OSSEC processes:
This active response will restart the OSSEC processes using the restart-ossec command above. It is runs whenrule 510010 is triggered, and it runs on the system where the rule was triggered.
<active-response><command>restart-ossec</command><location>local</location><rules_id>510010</rules_id>
</active-response>
Here is an example rule checking for changes to the agent.conf.
<rule id="510011" level="10"><if_sid>550</if_sid><match>/var/ossec/etc/shared/agent.conf</match><description>agent.conf has been modified</description>
</rule>
Command: Block an IP with pf.sh:
pf.sh adds an ip (srcip) to an ossec_fwtable packet filter table. Information on pf tables can be found here.
<command><name>pf-block</name><executable>pf.sh</executable><expect>srcip</expect>
</command>
This is the minimum configuration necessary to utilize pf.sh:
table <ossec_fwtable> persist #ossec_fwtableblock in log quick from <ossec_fwtable>
Active-Response: Block an IP with pf:
This active-response blocks an IP triggering an authentication_failed or authentication_failuresalert. This active-response will run on agent 001 only.
118 Chapter 3. Reference

OSSEC Documentation, Release 2.7.1
<active-response><command>pf-block</command><location>defined-agent</location><agent_id>001</agent_id><rules_group>authentication_failed,authentication_failures</rules_group>
</active-response>
Command: Run the makelists.sh script:
The makelists.sh script runs /var/ossec/bin/ossec-makelists to update cdb lists. This command canbe triggered by changes in configured cdb lists.
<command><name>makelists</name><executable>makelists.sh</executable><expect>hostname</expect>
</command>
Active-Response: Update cdb lists:
This active-response will run the makelists command to update the cdb lists. This active-response should run onlyon the OSSEC server since agents do not have cdb lists.
<active-response><command>makelists</command><location>server</location><rules_id>510011</rules_id>
</active-response>
Rule 510011: This example rule looks for changes to /var/ossec/lists/blocked.txt based on syscheckalerts.
<rule id="510011" level="10"><if_sid>550</if_sid><match>/var/ossec/lists/blocked.txt</match><description>blocked.txt has been modified</description>
</rule>
Command: firewall-drop:
This is a command to run the firewall-drop.sh script to block the srcip.
<command><name>firewall-drop</command><executable>firewall-drop.sh</executable><expect>srcip</expect>
</command>
3.1. Syntax and Options 119

OSSEC Documentation, Release 2.7.1
Active-Response: Block a srcip:
This active-response will use the firewall-drop command to block an IP address that has triggered anauthentication_failed or authentication_failures alert. It will run on all agents, and has a time-out of 600 seconds. It also uses the repeated_offenders option blocking an IP for 30 minutes on the secondinfraction, 60 minutes on the third, etc.
<active-response><command>firewall-block</command><location>all</location><rules_group>authentication_failed,authentication_failures</rules_group><timeout>600</timeout><repeated_offenders>30,60,120</repeated_offenders>
</active-response>
ossec.conf: Agentless Options
Overview
Supported types
Agentless options are available in the the following installation types:
• server
• local
Location
All agentless options must be configured in the /var/ossec/etc/ossec.conf and used within the <ossec_config> tag.
XML excerpt to show location:
<ossec_config><agentless>
<!--agentless options here-->
</agentless></ossec_config>
Options
agentlessThis is the section that will contain the agentless configuration.
frequencyThis controls the number of seconds between each run.
hostThis defines the username and agentless host.
Example:
120 Chapter 3. Reference
OSSEC Documentation, Release 2.7.1
<host>[email protected]</host>
stateThis determines whether the checks are periodic or periodic_diff.
•periodic: The output from the scripts is processed by the OSSEC processes.
•periodic_diff: The output from the scripts is compared to the output of previous runs.
argumentsThis defines the arguments passed to the script.
ossec.conf: Alerts Options
Overview
Supported types
Alerts options are available in the the following installation types:
• server
• local
Location
All alerts options must be configured in the /var/ossec/etc/ossec.conf and used within the <ossec_config> tag.
XML excerpt to show location:
<ossec_config><alerts>
<!--alerts options here-->
</alerts></ossec_config>
Options
alerts
email_alert_levelMinimum alert level to send e-mail notifications.
Default: 7
Allowed: Any level from 1 to 16
Note: This is the minumum level for an alert to trigger an email. This overrides granular email alert levels.Setting this to 10 would prevent emails for alerts at levels lower than 10 to be sent despite settings in the granularemail configuration. Individual rules can override this with the alert_by_email option.
3.1. Syntax and Options 121

OSSEC Documentation, Release 2.7.1
log_alert_levelMinimum alert level to store the log messages.
Default: 1
Allowed: Any level from 1 to 16
use_geoipEnable or disable GeoIP lookups.
Default: Disabled
Allowed: yes/no
ossec.conf: Client Options
Overview
Supported types
client options are available in the the following installation types:
• agent
Location
All client options must be configured in the /var/ossec/etc/ossec.conf and used within the <ossec_config> tag.
XML excerpt to show location:
<ossec_config><client>
<!--client options here-->
</client></ossec_config>
Options
server-ipSpecify the IP address of the analysis server
Allowed: Any Valid IP Address
server-hostnameSpecify the hostname of the analysis server
Allowed: Any Valid hostname
portSpecifies the port to send the events (must be the same to the one used by the analysis server).
Default: 1514
Allowed: Any port number from 1 to 65535
122 Chapter 3. Reference
OSSEC Documentation, Release 2.7.1
config-profileSpecifies the agent.conf profiles to be used by the agent.
notify_timeSpecifies the time in seconds between information messages sent by the agents to the server.
time-reconnectTime in seconds until a reconnection attempt. This should be set to a higher number than notify_time.
ossec.conf: Database Output options
Overview
Supported types
Database Output options are available in the the following installation types:
• server
• local
Location
All database_output options must be configured in the /var/ossec/etc/ossec.conf and used within the <ossec_config>tag.
XML excerpt to show location:
<ossec_config><database_output>
<!--Database Output options here-->
</database_output></ossec_config>
Options
database_output
hostnameIP Address of the database server.
Allowed: any valid IP address
usernameUsername to access the database.
Allowed: Any Valid Username
passwordPassword to access the database.
Allowed: Any Password
3.1. Syntax and Options 123

OSSEC Documentation, Release 2.7.1
databaseDatabase name to store the alerts.
Allowed: database name
typeType of database (Mysql or PostgreSQL).
Note: OSSEC must be compiled with the database type that is to be used.
Allowed: mysql/postgresql
ossec.conf: Granular Email options
Overview
Supported types
Global options are available in the the following installation types:
• server
• local
Notes
Global email configuration is necessary to use the granular email options.
Location
All global options must be configured in the /var/ossec/etc/ossec.conf and used within the <ossec_config> tag.
XML excerpt to show location:
<ossec_config><email_alerts>
<!--Email_alerts options here-->
</email_alerts></ossec_config>
Options
email_alerts
email_toE-Mail recipients of alerts
Allowed: Any valid e-mail address
124 Chapter 3. Reference

OSSEC Documentation, Release 2.7.1
levelMinimum alerting level to forward the e-mails.
Allowed: Any alert level 0 to 16
Note: level should be set at or above the email_alert_level in the <alerts> section of the configuration.
groupThe alert that must match this group to be forwarded.
Allowed: One group or category
event_locationThe alert must match this event location to be forwarded. If multiple <event_location> options are speci-fied, the last will be used.
Allowed: Any single agent name, hostname, ip address, or log file
formatSpecifies the format of the e-mail
•full: for normal e-mails
•sms: for reduced size suitable for SMS
Default: full
Allowed: full/sms
rule_idOption to send granular emails based on rule id.
Allowed:* One or more rule IDs can be used here, separated by a comma and space (‘‘, ‘‘).
Example:
<rule_id>5701, 5702</rule_id>
do_not_delayOption to send the e-mail right away (no delay).
Example:
<do_not_delay />
do_not_groupOption to do not group alerts for this e-mail.
Example:
<do_not_group />
Examples
Example email alerts configurations:
3.1. Syntax and Options 125

OSSEC Documentation, Release 2.7.1
Global Configuration:
<global><email_notification>yes</email_notification><email_to>[email protected]</email_to><smtp_server>127.0.0.1</smtp_server><email_from>[email protected]</email_from>
</global>
Global Configuration with a larger maximum emails per hour:
<global><email_notification>yes</email_notification><email_to>[email protected]</email_to><smtp_server>127.0.0.1</smtp_server><email_from>[email protected]</email_from><email_maxperhour>100</email_maxperhour>
</global>
Granular Email alert: Level 12 and above:
<email_alerts><email_to>[email protected]</email_to><level>12</level>
</email_alerts>
Syscheck alerts to syscheck admin address:
<email_alerts><email_to>[email protected]</email_to><group>syscheck</group>
</email_alerts>
Level 15 alerts from agent007 without delay or grouping:
<email_alerts><email_to>[email protected]</email_to><event_location>agent007</event_location><level>15</level><do_not_delay /><do_not_group />
</email_alerts>
ossec.conf: Global options
Overview
126 Chapter 3. Reference

OSSEC Documentation, Release 2.7.1
Supported types
Global options are available in the the following installation types:
• server
• local
Location
All global options must be configured in the /var/ossec/etc/ossec.conf and used within the <ossec_config> tag.
XML excerpt to show location:
<ossec_config><global>
<!--Global options here-->
</global></ossec_config>
Options
global
email_notificationEnable or disable e-mail alerting.
Default: no
Allowed: yes/no
email_toE-mail recipient of the alerts.
Allowed: Any valid e-mail address
Note: To use granular email configurations, a base configuration is necessary in the <global> section.
email_fromE-mail “source” of the alerts.
Allowed: Any valid e-mail address
smtp_serverSMTP server.
Allowed: Any valid hostname or IP Address
email_maxperhourSpecifies the maximum number of e-mails to be sent per hour. All emails in excess of this setting will be queuedfor later distribution.
Default: 12
Allowed: Any number from 1 to 9999
3.1. Syntax and Options 127

OSSEC Documentation, Release 2.7.1
Note: At the end of the hour any queued emails will be sent together in one email. This is true whether themail grouping is enabled or disabled.
email_idsnameIf set, “X-IDS-OSSEC: ” will be added to the email headers with the specified value.
Allowed: Any name
custom_alert_outputSpecifies the format of alerts written to the logfile.
Variables:"$TIMESTAMP" - The time the event was processed by OSSEC."$FTELL" - Unknown"$RULEALERT" - Unknown"$HOSTNAME" - Hostname of the system generating the event."$LOCATION" - The file the log messages was saved to."$RULEID" - The rule id of the alert."$RULELEVEL" - The rule level of the alert."$RULECOMMENT" - Unknown"$SRCIP" - The source IP specified in the log message."$DSTUSER" - The destination user specified in the log message."$FULLLOG" - The original log message."$RULEGROUP" - The groups containing the rule.
statsAlerting level for the events generated by the statistical analysis.
Default: 8
Allowed: Any level from 0 to 16
logallStates if we should store all the events received.
Default: no
Allowed: yes/no
memory_sizeSets the memory size for the event correlation.
Default: 1024
Allowed: Any size from 16 to 5096
white_listList of IP addresses that should never be blocked by the active response (one per element). This option is onlyvalid in server and local installs.
Multiples Allowed: yes
Allowed: Any IP address or netblock
host_infomationAlerting level for the events generated by the host change monitor.
Default: 8
Allowed: Any level from 0 to 16
128 Chapter 3. Reference
OSSEC Documentation, Release 2.7.1
prelude_outputEnables or disables prelude output.
Default: no
Allowed: yes/no
picviz_outputEnable picviz output.
Warning: PicViz is experimental.
Allowed: yes
picviz_socketThe full path of the socket that ossec will write alerts/events to. This will then be read by picviz for processing.
Allowed: File and path that ossec will create and feed events to.
zeromq_outputEnable ZeroMQ Output
Warning: ZeroMQ is experimental and will likely change drasticly from vesion to version.
Allowed: yes/no
zeromq_uriThis is zeromq URI that the publisher socket will bind to.
Warning: This URI format is defined by the ZeroMQ project.
<zeromq_uri>tcp://localhost:11111/</zeromq_uri>
This will listen for zeromq subscribers on ip address 127.0.0.1 port 11111
<zeromq_uri>tcp://eth0:21212/</zeromq_uri>
This will listen for zeromq subscribers on the ip address assiged to eth0 port 21212
<zeromq_uri>ipc:///alerts-zmq</zeromq_uri>
This will listen for zeromq on the Unix Domain socket /alerts-zmq.
geoip_db_pathThe full path to the GeoIP IPv4 database file location.
Example:
<geoip_db_path>/etc/GeoLiteCity.dat</geoip_db_path>
ossec.conf: Localfile options
Overview
3.1. Syntax and Options 129

OSSEC Documentation, Release 2.7.1
Supported types
Localfile options are available in the the following installation types:
• server
• local
Location
All localfile options must be configured in the /var/ossec/etc/ossec.conf or /var/ossec/etc/shared/agent.conf and usedwithin the <ossec_config> or <agent_config> tags.
XML excerpt to show location:
<ossec_config><localfile>
<!--Localfile options here-->
</localfile></ossec_config>
Options
localfile
locationSpecify the location of the log to be read. strftime formats may be used for log file names. For instance,a log file named file.log-2011-01-22 could be referenced with file.log-%Y-%m-%d. Wildcardsmay be used on non-Windows systems. When wildcards are used, the log files must exist at the timeossec-logcollector is started. It will not automatically begin monitoring new log files. strftimeand wildcards cannot be used on the same entry.
Default: Multiple (eg /var/log/messages)
Allowed: Any log file
log_formatThe format of the log being read.
Note: If the log has one entry per line, use syslog.
Default: syslog
Allowed:
•syslog This format is for plain text files in a syslog-like format. It can also be used when thereis no support for the logging format, and the logs are single line messages.
•snort-full This is used for Snort’s full output format.
•snort-fast This is used for Snort’s fast output format.
130 Chapter 3. Reference

OSSEC Documentation, Release 2.7.1
•squid
•iis
•eventlog This is used for Microsoft Windows eventlog format.
•eventchannel This is used for Microsoft Windows eventlogs, using the new EventApi. Thisallows OSSEC to monitor both standard “Windows” eventlogs and more recent “Applicationand Services” logs.
Warning: eventchannel cannot be used on Windows systems older than Vista.
•mysql_log This is used for MySQL logs. It does not support multi-line logs.
•postgresql_log This is used for PostgreSQL logs. It does not support multi-line logs.
•nmapg This is used for monitoring files conforming to the grepable output from nmap.
•apache
This format is for apache’s default log format.
Example:
•command This format will be the output from the command (as run by root) defined by com-mand. Each line of output will be treated as a separate log.
•full_command This format will be the output from the commandi (as run by root) defined bycommand. The entire output will be treated as a single log.
Warning: command and full_command cannot be used in the agent.conf, and must beconfigured in each system’s ossec.conf.
•djb-multilog
•multi-line This option will allow applications that log multiple lines per event to be monitored.This format requires the number of lines to be consistent. multi-line: is followed bythe number of lines in each log entry. Each line will be combined with the previous linesuntil all lines are gathered. There may be multiple timestamps in a finalized event.
Allowed: <log_format>multi-line: NUMBER</log_format>
Example: Log messages:
3.1. Syntax and Options 131

OSSEC Documentation, Release 2.7.1
Aug 9 14:22:47 hostname log line oneAug 9 14:22:47 hostname log line twoAug 9 14:22:47 hostname log line threeAug 9 14:22:47 hostname log line fourAug 9 14:22:47 hostname log line five
Log message as analyzed by ossec-analysisd_:
Aug 9 14:22:47 hostname log line one Aug 9 14:22:47 hostname→˓log line two Aug 9 14:22:47 hostname log line three Aug 9→˓14:22:47 hostname log line four Aug 9 14:22:47 hostname log→˓line five
commandThe command to be run. All output from this command will be read as one or more log messages depending onwhether command or full_command is used.
Allowed: Any commandline and arguments.
aliasAn alias to identify the command. This will replace the command in the log message.
For example <alias>usb-check</alias> would replace:
ossec: output: 'reg QUERY HKLM\SYSTEM\CurrentControlSet\Enum\USBSTOR':
with:
ossec: output: 'usb-check':
Allowed: Any string.
frequencyThe minimum time in seconds between command runs. The command will probably not run every frequencyseconds exactly, but the time between runs will not be shorter than this setting. This is used with command andfull_command.
Allowed: Time in seconds.
check_diffThe output from an event will be stored in an internal database. Every time the same event is received, the outputis compared to the previous output. If the output has changed an alert will be generated.
only-future-eventsOnly used with the eventchannel log format. By default, when OSSEC starts the eventchannel logformat will read all events that ossec-logcollector missed since it was last stopped. It is possible to setonly-future-events to yes in order to prevent this behaviour. When set to yes, OSSEC will onlyreceive events that occured after the start of logcollector.
<localfile><loation>System</location><log_format>eventchannel</log_format><only-future-events>yes</only-future-events>
</localfile>
queryOnly used with the eventchannel log format. It is possible to specify an XPATH query following the eventschema (see Microsoft’s documentation) in order to filter the events that OSSEC will process.
132 Chapter 3. Reference
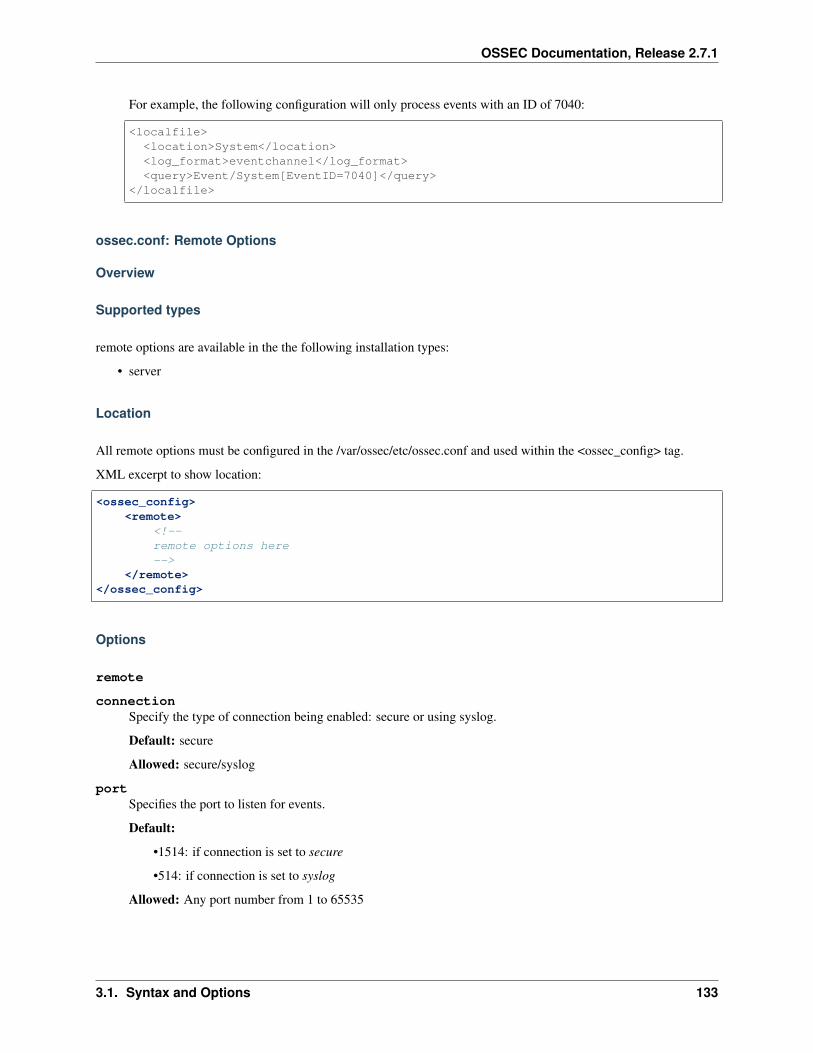
OSSEC Documentation, Release 2.7.1
For example, the following configuration will only process events with an ID of 7040:
<localfile><location>System</location><log_format>eventchannel</log_format><query>Event/System[EventID=7040]</query>
</localfile>
ossec.conf: Remote Options
Overview
Supported types
remote options are available in the the following installation types:
• server
Location
All remote options must be configured in the /var/ossec/etc/ossec.conf and used within the <ossec_config> tag.
XML excerpt to show location:
<ossec_config><remote>
<!--remote options here-->
</remote></ossec_config>
Options
remote
connectionSpecify the type of connection being enabled: secure or using syslog.
Default: secure
Allowed: secure/syslog
portSpecifies the port to listen for events.
Default:
•1514: if connection is set to secure
•514: if connection is set to syslog
Allowed: Any port number from 1 to 65535
3.1. Syntax and Options 133
OSSEC Documentation, Release 2.7.1
protocolSpecifies the protocol to use for syslog events.
Default: udp
Allowed: udp or tcp
allowed-ipsList of IP addresses that are allowed to send syslog messages to the server (one per element).
Allowed: Any IP address or network
Note: It is necessary to allow at least one IP address when using the syslog connection type.
deny-ipsList of IP addresses that are not allowed to send syslog messages to the server(one per element).
Allowed: Any IP address or network
local_ipLocal ip address to listen for connections.
Default: all interfaces
Allowed: Any internal ip address
ipv6Local ipv6 address to listen for connections.
Default: None
Allowed: Any IPv6 address.
Note: This is not well tested. For the time being I recommend using the full IPv6 address instead of one of themany shortcuts.
ossec.conf: Reports options
Overview
Supported types
Reports options are available in the the following installation types:
• server
• local
Location
All reports options must be configured in the /var/ossec/etc/ossec.conf and used within the <ossec_config> tag.
XML excerpt to show location:
134 Chapter 3. Reference

OSSEC Documentation, Release 2.7.1
<ossec_config><reports>
<!--Reports options here-->
</reports></ossec_config>
Options
reports
groupFilter by group/category.
Allowed: Any category used within OSSEC Rules.
categoriesFilter by group/category.
Note: This is the same as the group option above.
Allowed: Any category used within OSSEC Rules.
ruleRule ID to Filter for.
Allowed: Any Rule ID in OSSEC Rules.
levelAlert level to filter for. This is an inclusive option so all higher level alerts will also match.
Allowed: Any Alert level 1 to 16
locationFilter by the log location or agent name.
Allowed: Any file path or hostname or network.
srcipFilter by the source ip of the event.
Allowed: Any hostname or network
userFilter by the user name. This will match on either srcuser or dstuser
Allowed: Any username
titleThe name of the report.
This is a required field for reports to function.
Allowed: Any Text
email_toThe email address to send the completed report.
This is a required field for a report to function.
3.1. Syntax and Options 135

OSSEC Documentation, Release 2.7.1
Allowed: Any email address
showlogsInclude logs when creating the report
Allowed: yes/no
Default: no
ossec.conf: Rootcheck options
Overview
Supported types
rootcheck options are available in the the following installation types:
• server
• local
• agent
Location
All rootcheck options must be configured in the /var/ossec/etc/ossec.conf or /var/ossec/etc/shared/agents.conf and usedwithin the <ossec_config> tag.
XML excerpt to show location if part of ossec.conf:
<ossec_config><rootcheck>
<!--rootcheck options here-->
</rootcheck></ossec_config>
XML excerpt to the Location if part of agent.conf
<agent_config><rootcheck>
<!--rootcheck options here-->
</rootcheck></agent_config>
Options
base_directoryThe base directory that will be appended to the following options:
•rootkit_files
•rootkit_trojans
136 Chapter 3. Reference

OSSEC Documentation, Release 2.7.1
•windows_malware
•windows_audit
•windows_apps
•systems_audit
Allowed: Path to a directory Default: /var/ossec
rootkit_filesThis option can be used to change the location of the rootkit files database.
Allowed: A file with the rootkit files signatures
Default: /etc/shared/rootkit_files.txt
rootkit_trojansThis option can be used to change the location of the rootkit trojans database.
Default: /etc/shared/rootkit_trojans.txt
Allowed: A file with the trojans signatures
windows_audit
system_audit
windows_apps
windows_malware
scanallTells rootcheck to scan the whole system (may lead to some false positives).
Default: no
Allowed: yes/no
frequencyFrequency that the rootcheck is going to be executed (in seconds).
Defaults: 36000 (10 hours)
Allowed: Time (in seconds)
disabledDisables the execution of rootcheck.
Default: no
Allowed: yes/no
check_devEnable or disable the checking of something
Default: yes
Allowed: yes or no
check_filesEnable or disable the checking of something
Default: yes
Allowed: yes or no
3.1. Syntax and Options 137

OSSEC Documentation, Release 2.7.1
check_ifEnable or disable the checking of something
Default: yes
Allowed: yes or no
check_pidsEnable or disable the checking of something
Default: yes
Allowed: yes or no
check_policyEnable or disable the checking of something
Default: yes
Allowed: yes or no
check_portsEnable or disable the checking of network ports.
Default: yes
Allowed: yes or no
check_sysEnable or disable the checking of something
Default: yes
Allowed: yes or no
check_trojansEnable or disable the checking of trojans.
Default: yes
Allowed: yes or no
check_unixauditEnable or disable the checking of something
Default: yes
Allowed: yes or no
check_winappsEnable or disable the checking of something
Default: yes
Allowed: yes or no
check_winauditEnable or disable the checking of something
Default: 1
Allowed: 1 or 0
check_winmalwareEnable or disable the checking of Windows malware.
Default: yes
138 Chapter 3. Reference

OSSEC Documentation, Release 2.7.1
Allowed: yes or no
ossec.conf: Rules options
Overview
Supported types
Rules options are available in the the following installation types:
• server
• local
Location
All global options must be configured in the /var/ossec/etc/ossec.conf and used within the <ossec_config> tag.
XML excerpt to show location:
<ossec_config><rules>
<!--Rules options here-->
</rules></ossec_config>
Options
includeLoad a single rule file.
Allowed: Path and file name of rule to load example: rules/config.xml
ruleLoad a single rule file.
Allowed: Path and file name of rule to load example: rules/config.xml
Note: This is the same as include, but created to keep the syntax constant with other sections of the rules config.
rule_dirLoad a directory of rules. The order of loaded files will be in alphebical order and will not load any files thathave been loaded before.
Attributes:
•pattern: is a regex match string use to determine if a file needs to be loaded.
–Defaults: regex “_rules.xml$” is used unless another one is specified.
Allowed: Path to a directory of rule files
Example:
3.1. Syntax and Options 139

OSSEC Documentation, Release 2.7.1
1.Loading all rules in directory /var/ossec/rules ending ending with _rules.xml
<ossec_config><rules>
<rule_dir>rules</rule_dir></rules>
</ossec_config>
2.Loading all rules in directory /var/ossec/rules/plugins ending with .xml
<ossec_config><rules>
<rule_dir pattern=".xml$">rules</rule_dir></rules>
</ossec_config>
decoderLoad a single decoder file. The path should be relative to the install directory, typically /var/ossec.
Note: If no decoders are specified in ossec.conf the legacy etc/decoder.xml and etc/local_decoder.xml are loaded
Warning: If <decoder> or <decoder_dir> are used, the default decoder.xml will not be used. Itmust be specified explicitly.
Allowed: Path and file name of decoder to load example: rules/decoder/decoder.xml
decoder_dirLoad a directory of decoders. The order of loaded files will be in alphebics order and will not load any files thathave been loaded before. The path should be relative to the install directory, typically /var/ossec.
Attributes:
•pattern: is a regex match string use to detemine if a file needs to be loaded.
–Defaults: regex “_decoder.xml$” is used unless another one is specified.
Allowed: Path to a directoy of decoder files
Example:
1.Loading all decoders in directory /var/ossec/rules ending ending with _decoder.xml
<ossec_config><rules>
<decoder_dir>rules</decoder_dir></rules>
</ossec_config>
2.Loading all decoders in directory /var/ossec/rules/plugins/plugins/decoders ending with .xml
<ossec_config><rules>
<decoder_dir pattern=".xml$">rules/plugins/decoders</decoder_→˓dir>
</rules></ossec_config>
140 Chapter 3. Reference

OSSEC Documentation, Release 2.7.1
Warning: If <decoder> or <decoder_dir> are used, the default decoder.xml will not be used. Itmust be specified explicitly.
listLoad a single cdb references for inclusion by other rules.
Note: Due to the way cdb files are compiled using tmp files by the ossec-makelists program the file extensionshould not be include in this directive. ossec’s tools will correctly append the correct .cdb or .txt extension asneeded.
Allowed: Path to a list file to be loaded and compiled.
ossec.conf: Syscheck Options
Overview
Supported types
Syscheck options are available in the the following installation types:
• server
• local
• agent
Location
All global options must be configured in the /var/ossec/etc/ossec.conf and used within the <ossec_config> tag.
XML excerpt to show location:
<ossec_config><syscheck>
<!--Syscheck options here-->
</syscheck></ossec_config>
Options
directoriesUse this option to add or remove directories to be monitored (they must be comma separated). All files andsubdirectories will also be monitored. Drive letters without directories are not valid. At a minimum the ‘.’should be included (D:\.). This should be set on the system you wish to monitor (or in the agent.conf ifappropriate).
Default: /etc,/usr/bin,/usr/sbin,/bin,/sbin
Attributes:
3.1. Syntax and Options 141
OSSEC Documentation, Release 2.7.1
•realtime: Value=yes
–This will enable realtime/continuous monitoring on Linux (using the inotify system calls) and Win-dows systems.
•report_changes: Value=yes
–Report diffs of file changes. This is limited to text files at this time.
Note: This option is only available on Unix-like systems.
•check_all: Value=yes
–All the following check_* options are used together.
•check_sum: Value=yes
–Check the md5 and sha1 hashes of the of the files will be checked.
This is the same as using both check_sha1sum=”yes” and check_md5sum=”yes”
•check_sha1sum: Value=yes
–When used only the sha1 hash of the files will be checked.
•check_md5sum: Value=yes
–The md5 hash of the files will be checked.
•check_size: Value=yes
–The size of the files will be checked.
•check_owner: Value=yes
–Check the owner of the files selected.
•check_group: Value=yes
–Check the group owner of the files/directories selected.
•check_perm: Value=yes
–Check the UNIX permission of the files/directories selected. On windows this will only check thePOSIX permissions.
•restrict: Value=string
–A string that will limit checks to files containing that string in the file name.
Allowed: Any directory or file name (but not a path)
ignoreList of files or directories to be ignored (one entry per element). The files and directories are still checked, butthe results are ignored.
Default: /etc/mtab
Attributes:
•type: Value=sregex
–This is a simple regex pattern to filter out files so alerts are not generated.
Allowed: Any directory or file name
142 Chapter 3. Reference

OSSEC Documentation, Release 2.7.1
frequencyFrequency that the syscheck is going to be executed (in seconds).
The default is 6 hours or 21600 seconds
Default: 21600
Allowed: Time in seconds
scan_timeTime to run the scans (can be in the formats of 21pm, 8:30, 12am, etc)
Allowed: Time to run scan
scan_dayDay of the week to run the scans (can be in the format of sunday, saturday, monday, etc)
Allowed: Day of the week
auto_ignoreSpecifies if syscheck will ignore files that change too often (after the third change)
Default: yes
Allowed: yes/no
Valid: server, local
alert_new_filesSpecifies if syscheck should alert on new files created.
Default: no
Allowed: yes/no
Valid: server, local
Note: New files will only be detected on a full scan, this option does not work in realtime.
scan_on_startSpecifies if syscheck should do the first scan as soon as it is started.
Default: yes
Allowed: yes/no
windows_registryUse this option to add Windows registry entries to be monitored (Windows-only).
Default: HKEY_LOCAL_MACHINESoftware
Allowed: Any registry entry (one per element)
Note: New entries will not trigger alerts, only changes to existing entries.
registry_ignoreList of registry entries to be ignored.
Default: ..CryptographyRNG
Allowed: Any registry entry (one per element)
3.1. Syntax and Options 143

OSSEC Documentation, Release 2.7.1
refilter_cmdCommand to run to prevent prelinking from creating false positives.
Example:
<prefilter_cmd>/usr/sbin/prelink -y</prefilter_cmd>
Note: This option can potentially impact performance negatively. The configured command will be run foreach and every file checked.
ossec.conf: Syslog Output options
Overview
Supported types
Syslog Output options are available in the the following installation types:
• server
• local
Location
All syslog_output options must be configured in the /var/ossec/etc/ossec.conf and used within the <ossec_config> tag.
XML excerpt to show location:
<ossec_config><syslog_output>
<!--Syslog Output options here-->
</syslog_output></ossec_config>
Options
syslog_output
server
•IP Address of the syslog server.
•Allowed: any valid IP address
port
•Port to forward alerts to.
•Default 514
•Allowed: Any valid port
level
144 Chapter 3. Reference

OSSEC Documentation, Release 2.7.1
•Minimum alert level of the alerts to be forwarded.
•Allowed: 1 - 16
group
•Alerts belonging to this group will be forwarded.
•Allowed: Any valid group. Separate multiple groups with the pipe (|) character.
•Examples:
<group>syscheck</group><group>authentication_failure|authentication_success</group>
rule_id
•Alerts matching this rule_id will be forwarded.
•Allowed: Any valid rule_id
location
•Alerts from this location will be forwarded.
•Allowed: Any valid logfile location
format
•Format of alert output. The default format is “default”, or full syslog output.
•CEF is the ArcSight Common Event Format.
•json can be used with a variety of tools.
•The splunk option is for sending data to a Splunk server.
•Allowed default, cef, splunk, json
<syslog_output><server>10.0.0.1</server><port>514</port><format>cef</format>
</syslog_output>
agent.conf
Overview
More information on using the agent.conf can be found here
Supported types
The agent.conf is valid on the server install only.
Location
The agent.conf exists in /var/ossec/etc/shared. It should be readable by the ossec user.
XML excerpt to show location:
3.1. Syntax and Options 145

OSSEC Documentation, Release 2.7.1
<agent_config>...
</agent_config>
Options
agent_config_options
agent_configDefines the beginning or end of an agent configuration block.
name
This option to agent_config allows you to assign the block the one particular agent by using the agent’sname.
Example: <agent_config name=”agent007”>
os
This option to agent_config allows you to assign the block to an operating system.
Example: <agent_config os=”Windows”>
Allowed: Any OS family (Windows, Linux, OpenBSD, etc.)
profile
This option to agent_config allows you to assign a profile name to the the block. Any agent may use thisblock if it is configured to use the defined profile.
Example: <agent_config profile=”webservers”>
internal_options.conf: syntax and options
internal_options.conf: analysisd
analysisd.default_timeframeAnalysisd default rule timeframe
Default: 360
Allowed: Any interger
analysisd.stats_maxdiffDefault: 25000
Allowed: Any interger
analysisd.stats_mindiffDefault: 250
Allowed: Any interger
analysisd.stats_percent_diffDefault: 30
Allowed: Any interger
146 Chapter 3. Reference

OSSEC Documentation, Release 2.7.1
analysisd.fts_list_sizeDefault: 32
Allowed: Any interger
analysisd.fts_min_size_for_strDefault: 14
Allowed: Any interger
analysisd.log_fwDefault: 1
Allowed: Any interger
analysisd.debugDefault: 0
Allowed: Any interger
internal_options.conf: agent
agent.debugRun the agent’s processes in debug mode.
Default: 0
internal_options.conf: dbd
dbd.reconnect_attemptsThe number of times ossec-dbd will attempt to reconnect to the database.
Default: 10
internal_options.conf: logcollector
logcollector.loop_timeoutDefault: 2
logcollector.open_attemptsDefault: 8
logcollector.remote_commands=0Allow the agents to run commands defined in agent.conf.
Allowed: 0,1
Default: 0
Note: This option first appeared in OSSEC 2.7.
internal_options.conf: maild
maild.strict_checkingDefault: 1
Allowed: 0 or 1
3.1. Syntax and Options 147

OSSEC Documentation, Release 2.7.1
maild.grouppingIf set to 1 alerts will be grouped together in one email. These alerts may be of different types or levels, and maybe from different systems.
Default: 1
Allowed: 0 or 1
maild.full_subjectIf set to 1 maild will use a full subject when sending alert emails. If set to 0 the subject is shortened.
Default: 0
Allowed: 0 or 1
maild.geoipIf set to 1 mails will display GeoIP data in alert emails.
Default: 1
Allowed: 0 or 1
internal_options.conf: monitord
monitord.day_waitAmount of time OSSEC will wait before compressing/signing log files.
Default: 10
monitord.compressIf set to 1 ossec-monitord will compress old log files.
Default: 1
Available: 0 or 1
monitord.signIf set to 1 ossec-monitord will sign old log files.
Default: 1
monitord.monitor_agentsDefault: 1
internal_options.conf: remoted
remoted.recv_counter_flushDefault: 128
remoted.comp_average_printoutDefault: 19999
remoted.verify_msg_idDefault: 1
remoted.debugDefault: 0
148 Chapter 3. Reference

OSSEC Documentation, Release 2.7.1
internal_options.conf: syscheck
syscheck.sleepossec-syscheckd uses this setting to determine how long to sleep after reading syscheck.sleep_after number of files. By default ossec-syscheckd sleeps for 2 seconds after checking 15files.
Default: 2
syscheck.sleep_afterossec-syscheckd reads this many files before sleeping for syscheck.sleep seconds.
Default: 15
internal_options.conf: windows
windows.debugDefault: 0 Allowed: 0 or 1
Output Formats
JSON Format
At this time we have one alert JSON formatted messages.
{"rule":1000,"level":1,"comment":"This is a comment","sidid":1111,"cve":"cve-1001-1000","action":"drop","srcip":"10.1.1.1","srcport":"1000","srcuser":"root","dstip":"10.2.2.2","dstport":"2000","dstuser":"root","location":"/var/log/auth.log","full_log":"This is the full log message","file":{"path":"/etc/","md5_before":"XXXXXXXXXXXXXXXXXXXX","md5_after":"YYYYYYYYYYYYYYYYYYYY","sha1_before":"XXXXXXXXXXXXXXXXXXXXXXXXXXXXXXXXXXXXXXXXXXXXXXXXX","sha1_after":"YYYYYYYYYYYYYYYYYYYYYYYYYYYYYYYYYYYYYYYYYYYYYYY","owner_before":"root","owwer_after":"nobody","gowner_before":"root","gowner_after":"nodody","perm_before":660,"perm_after":777,
}}
3.2. Output Formats 149
OSSEC Documentation, Release 2.7.1
Man pages
agent-auth
The agent-auth program is the client application used with ossec-authd to automatically add agents to an OSSECmanager.
Warning: There is no authentication or authorization involved in this transaction, so it is recommended that thisdaemon only be run when a new agent is being added.
agent-auth argument options
-hDisplay the help message
-m <manager_ip>IP address of the manager.
-p <port>Port ossec-authd is running on. Default 1515
-A <agent_name>Agent name to be used. Default hostname
-DDirectory where OSSEC is installed. Default /var/ossec
agent-auth example usage
Example: Adding an agent with a hostname
# /var/ossec/bin/agent-auth -m 192.168.1.1 -p 1515 -A example-agentINFO: Connected to 192.168.1.1:1515INFO: Using agent name as: melanciaINFO: Send request to manager. Waiting for reply.INFO: Received response with agent keyINFO: Valid key created. Finished.INFO: Connection closed.
agent_control
The agent_control tool allows you to query and get information from any agent you have configured on your serverand it also allows you to restart (run now) the syscheck/rootcheck scan on any agent.
Enabling active response will be necessary to start scans remotely and possibly other functions.
agent_control argument options
-hDisplay the help message
150 Chapter 3. Reference

OSSEC Documentation, Release 2.7.1
-lList available (active or not) agents
-lcList active agents
-i <agent_id>Extracts information from an agent
-R <agent_id>Restarts the OSSEC processes on the agent
Note: Requires active response to be enabled.
-rRun the integrity/rootcheck checking on agents. Must be utilized with agent_control -a oragent_control -u
Note: Requires active response to be enabled.
-aUtilizes all agents.
-u <agent_id><agent_id> that will perform the requested action.
agent_control example usage
Example 1: Listing all active agents
The first interesting argument is agent_control -lc, to list the connected (active agents). To list all of them, useagent_control -l only.
# /var/ossec/bin/agent_control -lcOSSEC HIDS agent_control. List of available agents:ID: 000, Name: enigma.ossec.net (server), IP: 127.0.0.1, Active/LocalID: 002, Name: winhome, IP: 192.168.2.190, ActiveID: 005, Name: jul, IP: 192.168.2.0/24, ActiveID: 165, Name: esqueleto2, IP: 192.168.2.99, ActiveID: 174, Name: lili3win, IP: 192.168.2.0/24, Active
Example 2: Querying information from agent 002
To query an agent, just use the agent_control -i option followed by the agent id.
# /var/ossec/bin/agent_control -i 002
OSSEC HIDS agent_control. Agent information:Agent ID: 002Agent Name: winhomeIP address: 192.168.2.190Status: Active
3.3. Man pages 151

OSSEC Documentation, Release 2.7.1
Operating system: Microsoft Windows XP Professional (Build 2600)Client version: OSSEC HIDS v1.5-SNP-080412Last keep alive: Fri Apr 25 14:33:03 2008
Syscheck last started at: Fri Apr 25 05:07:13 2008Rootcheck last started at: Fri Apr 25 09:04:12 2008
Example 3: Executing syscheck and rootcheck scan immediately
To execute the syscheck/rootcheck scan immediately, use the agent_control -r option followed by theagent_control -u with the agent id.
# /var/ossec/bin/agent_control -r -u 000
OSSEC HIDS agent_control: Restarting Syscheck/Rootcheck locally.
clear_stats
Clear the events stats
clear_stats argument options
-hPrint and display a help message of all available options to clear_stats
-aClear all the stats (averages).
-dClear the daily averages.
-wClear the weekly averages.
list_agents
OSSEC HIDS list_agents: List available agents.
list_agents is only available on OSSEC servers or local mode installations. It can be used to retrieve
• a list of all OSSEC agents that successfully connected to the server in the past
• a list of all OSSEC agents currently connected to the server
• a list of all OSSEC agents that were connected to the server in the past but are currently not connected.
If an agent was added via the manage_agents tool but has not yet been connected to the server, it will not show up inthe output of list_agents.
list_agents argument options
-hDisplay the help message.
152 Chapter 3. Reference

OSSEC Documentation, Release 2.7.1
-aList all agents.
-cList the connected (active) agents.
-nList the not connected (active) agents.
manage_agents
manage_agents is available in two versions:
• a version for OSSEC server installations
• a version for OSSEC agent installations
The purpose of manage_agents is to provide an easy-to-use interface to handle authentication keys for OSSEC agents.These authentication keys are required for secure (encrypted and authenticated) communication between the OSSECserver and its affiliated agent instances.
manage_agents argument options
-hDisplay the help message.
-VDisplay OSSEC Version.
-lList available agents.
-e <agent_id>Extracts key for an agent (Manager only).
-i <key>Import authentication key (Agent only).
-f <file>Generate clients in bulk from <file> (Manager only). The file is a comma delimited file containing the IPaddresses and agent names to be added. This file should be located within /var/ossec, and referenced by itspath relative to /var/ossec.
Example:
# cat /var/ossec/k192.168.1.2,host02192.168.1.3,host03
# /var/ossec/bin/manage_agents -f /kBulk load file: /kOpening: [/k]Agent information:
ID:002Name:host02IP Address:192.168.1.2
Agent added.Agent information:
3.3. Man pages 153

OSSEC Documentation, Release 2.7.1
ID:003Name:host03IP Address:192.168.1.3
Agent added.
Usage
The OSSEC manual goes into details on usage of this command at Managing Agents
ossec-agentd
ossec-agentd is the client side daemon that communicates with the server. It runs as ossec and is chrooted to/var/ossec by default.
ossec-agentd argument options
-dRun in debug mode.
-VVersion and license information.
-hDisplay the help message.
-tTest configuration.
-fRun ossec-agentd in the foreground.
-u <user>Run ossec-agentd as <user>.
Default: ossecm
-g <group>Run ossec-agentd as <group>.
-c <config>Run ossec-agentd using <config> as the configuration file.
Default: /var/ossec/etc/ossec.conf
-D <dir>Chroot to <dir>.
Default: /var/ossec
ossec-agentlessd
ossec-analysisd
ossec-analysisd recveives the log messages and compares them to the rules. It will create alerts when a log
154 Chapter 3. Reference

OSSEC Documentation, Release 2.7.1
message matches an applicable rule.
ossec-analysisd argument options
-VVersion and license message
-hHelp message.
-dExecute in debug mode
-tTest configuration
-c <config>Configuration file ossec-analysisd should use
-D <dir>Chroot to <dir>
ossec-authd
The ossec-authd daemon will automatically add an agent to an OSSEC manager and provide the key to the agent.The agent-auth application is the client application used with ossec-authd. ossec-authd will create an agent with an ipaddress of any instead of using its actual IP.
Warning: There is no authentication or authorization involved in this transaction, so it is recommended that thisdaemon only be run when a new agent is being added.
ossec-authd argument options
-dRun in debug mode.
-iAdd agents with a specific IP address instead of using any.
-p <port>Listen on port.
Default 1515
Creating SSL keys
ossec-authd requires SSL keys to run. This process will create the necessary keys in /var/ossec/etc andallow ossec-authd to start:
# openssl genrsa -out /var/ossec/etc/sslmanager.key 2048# openssl req -new -x509 -key /var/ossec/etc/sslmanager.key -out /var/ossec/etc/→˓sslmanager.cert -days 365
Without the key ossec-authd will give the following error:
3.3. Man pages 155
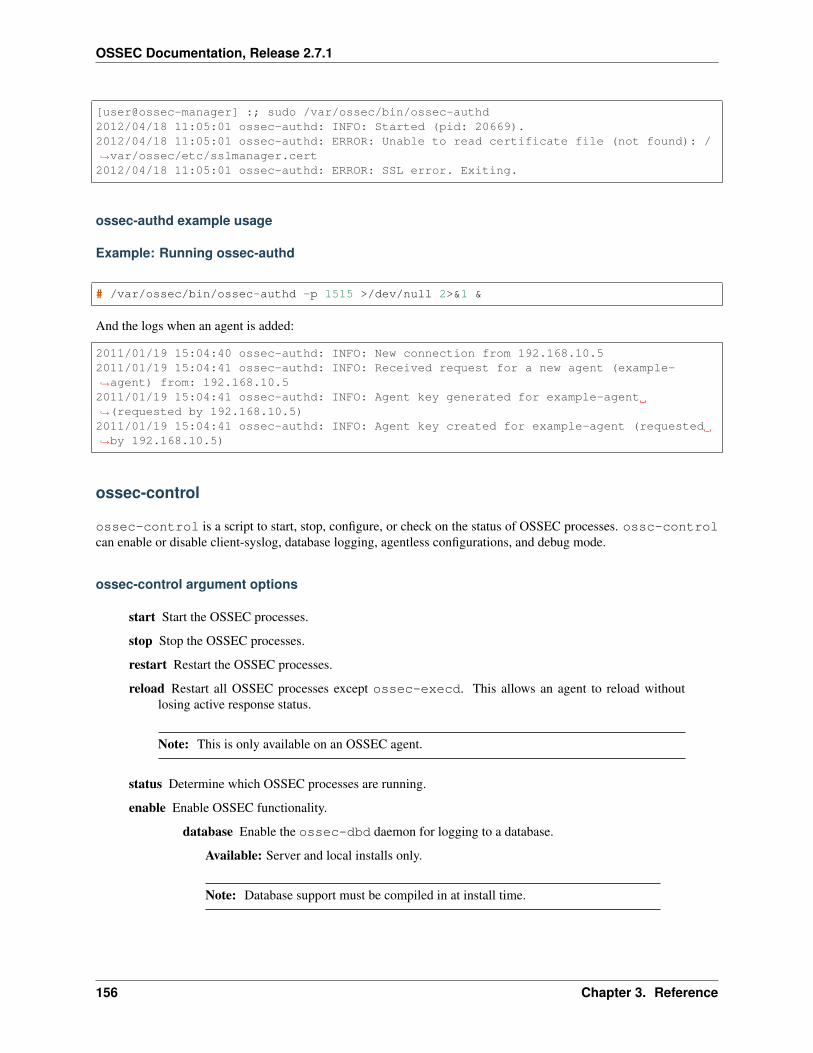
OSSEC Documentation, Release 2.7.1
[user@ossec-manager] :; sudo /var/ossec/bin/ossec-authd2012/04/18 11:05:01 ossec-authd: INFO: Started (pid: 20669).2012/04/18 11:05:01 ossec-authd: ERROR: Unable to read certificate file (not found): /→˓var/ossec/etc/sslmanager.cert2012/04/18 11:05:01 ossec-authd: ERROR: SSL error. Exiting.
ossec-authd example usage
Example: Running ossec-authd
# /var/ossec/bin/ossec-authd -p 1515 >/dev/null 2>&1 &
And the logs when an agent is added:
2011/01/19 15:04:40 ossec-authd: INFO: New connection from 192.168.10.52011/01/19 15:04:41 ossec-authd: INFO: Received request for a new agent (example-→˓agent) from: 192.168.10.52011/01/19 15:04:41 ossec-authd: INFO: Agent key generated for example-agent→˓(requested by 192.168.10.5)2011/01/19 15:04:41 ossec-authd: INFO: Agent key created for example-agent (requested→˓by 192.168.10.5)
ossec-control
ossec-control is a script to start, stop, configure, or check on the status of OSSEC processes. ossc-controlcan enable or disable client-syslog, database logging, agentless configurations, and debug mode.
ossec-control argument options
start Start the OSSEC processes.
stop Stop the OSSEC processes.
restart Restart the OSSEC processes.
reload Restart all OSSEC processes except ossec-execd. This allows an agent to reload withoutlosing active response status.
Note: This is only available on an OSSEC agent.
status Determine which OSSEC processes are running.
enable Enable OSSEC functionality.
database Enable the ossec-dbd daemon for logging to a database.
Available: Server and local installs only.
Note: Database support must be compiled in at install time.
156 Chapter 3. Reference

OSSEC Documentation, Release 2.7.1
client-syslog Enable ossec-csyslogd for logging to remote syslog.
Available: Server and local installs only.
agentless Enable ossec-agentlessd for running commands on systems without OS-SEC agents.
Available: Server and local installs only.
debug Run all OSSEC daemons in debug mode.
disable Disable OSSEC functionality.
database Disable the ossec-dbd daemon for logging to a database.
Available: Server and local installs only.
Note: Database support must be compiled in at install time.
client-syslog
Disable ossec-csyslogd for logging to remote syslog.
Available: Server and local installs only.
agentless Disable ossec-agentlessd for running commands on systems without OS-SEC agents.
Available: Server and local installs only.
debug Turn off debug mode.
ossec-control example usage
Example: Running ossec-control
# /var/ossec/bin/ossec-control
Usage: /var/ossec/bin/ossec-control {start|stop|restart|status|enable|disable}
ossec-csyslogd
ossec-csyslogd is a daemon that forwards the OSSEC alerts via syslog. Configuration is done in the<syslog_output> section of the ossec.conf. (see ossec.conf: Syslog Output options)
ossec-csyslogd argument options
-dRun in debug mode.
-VVersion and license information.
-hDisplay the help message.
3.3. Man pages 157

OSSEC Documentation, Release 2.7.1
-tTest configuration.
-fRun ossec-csyslogd in the foreground.
-u <user>Run ossec-csyslogd as <user>.
Default: ossecm
-g <group>Run ossec-csyslogd as <group>.
-c <config>Run ossec-csyslogd using <config> as the configuration file.
Default: /var/ossec/etc/ossec.conf
-D <dir>Chroot to <dir>.
Default: /var/ossec
ossec-dbd
The ossec-dbd daemon inserts the alert logs into a database, either postgresql or mysql. ossec-dbd is configuredin ossec.conf. (see ossec.conf: Database Output options)
ossec-dbd argument options
-dRun in debug mode.
-VVersion and license information.
-hDisplay the help message.
-tTest configuration.
-fRun ossec-dbd in the foreground.
-u <user>Run ossec-dbd as <user>.
Default: ossecm
-g <group>Run ossec-dbd as <group>.
-c <config>Run ossec-dbd using <config> as the configuration file.
Default: /var/ossec/etc/ossec.conf
158 Chapter 3. Reference

OSSEC Documentation, Release 2.7.1
-D <dir>Chroot to <dir>.
Default: /var/ossec
ossec-execd
ossec-execd executes active responses by running the configured scripts. ossec-execd is configured in theossec.conf. (see ossec.conf: Active Response Options)
ossec-execd argument options
-dRun in debug mode.
-VVersion and license information.
-hDisplay the help message.
-tTest configuration.
-fRun ossec-execd in the foreground.
-c <config>Run ossec-execd using <config> as the configuration file.
Default: /var/ossec/etc/ossec.conf
-D <dir>Chroot to <dir>.
Default: /var/ossec
ossec-logcollector
The ossec-logcollector daemon monitors configured files and commands for new log messages.ossec-logcollector is configured in ossec.conf. (see ossec.conf: Localfile options)
ossec-logcollector argument options
-dRun in debug mode.
-VVersion and license information.
-hDisplay the help message.
-tTest configuration.
3.3. Man pages 159

OSSEC Documentation, Release 2.7.1
-fRun ossec-logcollector in the foreground.
-c <config>Run ossec-logcollector using <config> as the configuration file.
Default: /var/ossec/etc/ossec.conf
-D <dir>Chroot to <dir>.
Default: /var/ossec
ossec-logtest
ossec-logtest is the single most useful tool when working with ossec. This tool allows oneself to test and verify logfiles in the exact same way that ossec-anaylistd does.
Something ossec-logtest can help with:
• Writing rules (Debugging your custom rules)
• Troubleshooting false positives or false negatives
ossec-logtest accepts standard input for all log to test.
osssec-logtest argument options
-dPrint debug output to the terminal.
-VPrint the Version and license message for OSSEC and ossec-logtest.
-hPrint the help message to the console.
-tTest configuration. This will print file details on the ossec-anaylistd rules, decoders, and lists as they are loadedand the order they were processed.
-vFull output of all details and matches.
Note: This the key argument to troubleshoot a rule, decoder problem.
Note: This is argument was incorrectly displayed as running in the foreground in all version before version 2.5
-u <user>Run as <user>: ossec-logtest will change uid to the user specified as part of this argument.
Often used with ossec-logtest -g
-g <group>Run as <group>: ossec-logtest will change gid to the group specified as part of this argument.
Often used with ossec-logtest -u
160 Chapter 3. Reference

OSSEC Documentation, Release 2.7.1
-c <config><config> is the path and filename to load in place of the default /var/ossec/etc/ossec.conf.
-D <dir>This is the path that ossec-logtest will chroot to before it completes loading all rules, decoders, and lists andprocessing standard input.
-aAnalyze of input lines as if they are live events.
-U <rule-id:alert-level:decoder-name>This option will cause ossec-logtest to return with an exit status other then zero unless the last line tested matchesthe arguments passed.
Note: This only works for the last, line so passing many lines into ossec-logtest with this argument may notprovide the desired results.
Note: This ossec-logtest code requires access to all ossec configuation files. This is a bug andwill be corrected. It is documented in issue #‘61 <https://bitbucket.org/jbcheng/ossec-hids/issue/61/ossec-logtest-must-be-used-with-a-full>‘_
% echo "Aug 29 15:33:13 ns3 named[464]: client 217.148.39.3#1036: query (cache)→˓denied" | sudo /va/ossec/bin/ossec-logtest -U 12108:0:named 2&>1 > /dev/null% echo $?0% echo "Aug 29 15:33:13 ns3 XXXXXX[464]: client 217.148.39.3#1036: query (cache)→˓denied" | sudo /var/ossec/bin/ossec-logtest -U 12108:0:named 2&>1 > /dev/null% echo $?3
Caveats
Some log formats will be processed differently than they appear in the log file. MySQL log files for instance will have‘‘MySQL log: ‘‘ prepended to the log message before analysis. If using ossec-logtest to test MySQL logs, please addthis string to the beginning.
Example:
Given the following MySQL log message:
130218 12:07:52 [Warning] Unsafe statement written to the binary log using statement→˓format since BINLOG_FORMAT = STATEMENT. The statement is unsafe because it uses a→˓LIMIT clause. This is unsafe because the set of rows included cannot be predicted.→˓Statement: DELETE FROM `emailQueue` WHERE `emailQueueID` = '12207' LIMIT 1
The message that should be pasted into ossec-logtest is:
MySQL log: 130218 12:07:52 [Warning] Unsafe statement written to the binary log using→˓statement format since BINLOG_FORMAT = STATEMENT. The statement is unsafe because→˓it uses a LIMIT clause. This is unsafe because the set of rows included cannot be→˓predicted. Statement: DELETE FROM `emailQueue` WHERE `emailQueueID` = '12207' LIMIT→˓1
3.3. Man pages 161

OSSEC Documentation, Release 2.7.1
ossec-logtest example usage
Example 1: Testing standard rules
# echo "Aug 29 15:33:13 ns3 named[464]: client 217.148.39.3#1036: query (cache) denied→˓" | /var/ossec/bin/ossec-logtest -f2010/08/10 06:57:06 ossec-testrule: INFO: Reading decoder file loadables/decoders/00_→˓decoders.xml.2010/08/10 06:57:06 ossec-testrule: INFO: Reading decoder file loadables/decoders/50_→˓named.xml.2010/08/10 06:57:06 ossec-testrule: INFO: Reading decoder file loadables/decoders/50_→˓pam.xml.2010/08/10 06:57:06 ossec-testrule: INFO: Reading decoder file loadables/decoders/50_→˓sshd.xml.2010/08/10 06:57:06 ossec-testrule: INFO: Reading loading the lists file: 'loadables/→˓lists/rfc1918-privateaddresses'2010/08/10 06:57:06 ossec-testrule: INFO: Started (pid: 78828).ossec-testrule: Type one log per line.
**Phase 1: Completed pre-decoding.full event: 'Aug 29 15:33:13 ns3 named[464]: client 217.148.39.3#1036: query
→˓(cache) denied'hostname: 'ns3'program_name: 'named'log: 'client 217.148.39.3#1036: query (cache) denied'
**Phase 2: Completed decoding.decoder: 'named'srcip: '217.148.39.3'
**Rule debugging:Trying rule: 1 - Generic template for all syslog rules.
*Rule 1 matched.
*Trying child rules.Trying rule: 30100 - Apache messages grouped.Trying rule: 7200 - Grouping of the arpwatch rules.Trying rule: 6200 - Asterisk messages grouped.Trying rule: 9600 - cimserver messages grouped.Trying rule: 4700 - Grouping of Cisco IOS rules.Trying rule: 3900 - Grouping for the courier rules.Trying rule: 9700 - Dovecot Messages Grouped.Trying rule: 11100 - Grouping for the ftpd rules.Trying rule: 9300 - Grouping for the Horde imp rules.Trying rule: 3600 - Grouping of the imapd rules.Trying rule: 3700 - Grouping of mailscanner rules.Trying rule: 3800 - Grouping of Exchange rules.Trying rule: 6300 - Grouping for the MS-DHCP rules.Trying rule: 6350 - Grouping for the MS-DHCP rules.Trying rule: 11500 - Grouping for the Microsoft ftp rules.Trying rule: 50100 - MySQL messages grouped.Trying rule: 12100 - Grouping of the named rules
*Rule 12100 matched.
*Trying child rules.Trying rule: 12107 - DNS update using RFC2136 Dynamic protocol.Trying rule: 12101 - Invalid DNS packet. Possibility of attack.Trying rule: 12109 - Named fatal error. DNS service going down.
162 Chapter 3. Reference

OSSEC Documentation, Release 2.7.1
Trying rule: 12102 - Failed attempt to perform a zone transfer.Trying rule: 12103 - DNS update denied. Generally mis-configuration.Trying rule: 12104 - Log permission misconfiguration in Named.Trying rule: 12105 - Unexpected error while resolving domain.Trying rule: 12106 - DNS configuration error.Trying rule: 12108 - Query cache denied (maybe config error).
*Rule 12108 matched.
**Phase 3: Completed filtering (rules).Rule id: '12108'Level: '4'Description: 'Query cache denied (maybe config error).'Info - Link: 'http://www.reedmedia.net/misc/dns/errors.html'
**Alert to be generated.
Example 2: Using OSSEC for the forensic analysis of log files
If you have one old log file that you want to check or if you are doing a forensics analysis of a box and wants to checkthe logs with OSSEC, we now have a solution too.
Let’s say you have a file /var/log/secure that you want to analyze with OSSEC. You need to use the ossec-logtest toolwith the “-a” flag to reproduce the alerts:
# cat /var/log/secure | /var/ossec/bin/ossec-logtest -a
** Alert 1264788284.11: - syslog,sshd,authentication_success,2010 Jan 29 14:04:44 enigma->stdinRule: 5715 (level 3) -> ‘SSHD authentication success.’Src IP: a.b.2.15User: dcidJan 15 10:25:01 enigma sshd[17594]: Accepted password for dcid from a.b.2.15 port→˓47526 ssh2
** Alert 1264788284.12: - syslog,sshd,authentication_success,2010 Jan 29 14:04:44 enigma->stdinRule: 5715 (level 3) -> ‘SSHD authentication success.’Src IP: 127.0.0.1User: dcidJan 15 11:19:20 enigma sshd[18853]: Accepted publickey for dcid from 127.0.0.1 port→˓6725 ssh2
You will get the alerts just like you would at /var/ossec/logs/alerts.log. The benefit now is that you can pipe this outputto ossec-reported to get a better view of what is going on:
# cat /var/log/secure | /var/ossec/bin/ossec-logtest -a |/var/ossec/bin/ossec-reportedReport completed. ==--------------------------------->Processed alerts: 522->Post-filtering alerts: 522
Top entries for ‘Source ip’:--------------------------------89.200.169.170 |41 |127.0.0.1 |33 |83.170.106.142 |20 |204.232.206.109 |16 |
3.3. Man pages 163

OSSEC Documentation, Release 2.7.1
..
Top entries for ‘Username’:--------------------------------root |247 |
Top entries for ‘Level’:--------------------------------Severity 5 |406 |Severity 3 |41 |Severity 10 |32 |
Top entries for ‘Group’:--------------------------------syslog |522 |sshd |509 |authentication_failed |369 |invalid_login |146 |
Top entries for ‘Rule’:--------------------------------5716 - SSHD authentication failed. |223 |5710 - Attempt to login using a non-existent.. |146 |5715 - SSHD authentication success. |41 |5702 - Reverse lookup error (bad ISP or atta.. |37 |
To get a report of all brute force attacks (for example) that scanned my box:
# cat /var/log/secure | /var/ossec/bin/ossec-logtest -a |/var/ossec/bin/ossec-→˓reported -f group authentication_failures
Report completed. ==--------------------------------->Processed alerts: 522->Post-filtering alerts: 25
Top entries for ‘Source ip’:--------------------------------83.170.106.142 |2 |89.200.169.170 |2 |114.255.100.163 |1 |117.135.138.183 |1 |124.205.62.36 |1 |173.45.108.230 |1 |200.182.99.59 |1 |202.63.160.50 |1 |210.21.225.202 |1 |211.151.64.220 |1 |213.229.70.12 |1 |218.30.19.48 |1 |221.12.12.3 |1 |59.3.239.114 |1 |61.168.227.12 |1 |61.233.42.47 |1 |67.43.61.80 |1 |72.52.75.228 |1 |77.245.148.196 |1 |79.125.35.214 |1 |
164 Chapter 3. Reference

OSSEC Documentation, Release 2.7.1
85.21.83.170 |1 |92.240.75.6 |1 |94.198.49.185 |1 |
Top entries for ‘Username’:--------------------------------root |24 |
Top entries for ‘Level’:--------------------------------Severity 10 |25 |
Top entries for ‘Group’:--------------------------------authentication_failures |25 |sshd |25 |syslog |25 |
Top entries for ‘Location’:--------------------------------enigma->stdin |25 |
Top entries for ‘Rule’:--------------------------------5720 - Multiple SSHD authentication failures. |24 |5712 - SSHD brute force trying to get access.. |1 |
ossec-maild
The ossec-maild daemon sends OSSEC alerts via email. ossec-maild is started by ossec-control. Configura-tion for ossec-maild is handled in the ossec.conf. (see ossec.conf: Global options)
ossec-maild argument options
-dRun in debug mode.
-VVersion and license information.
-hDisplay the help message.
-tTest configuration.
-fRun ossec-maild in the foreground.
-u <user>Run ossec-maild as <user>.
Default: ossecm
-g <group>Run ossec-maild as <group>.
3.3. Man pages 165

OSSEC Documentation, Release 2.7.1
-c <config>Run ossec-maild using <config> as the configuration file.
Default: /var/ossec/etc/ossec.conf
-D <dir>Chroot to <dir>.
Default: /var/ossec
ossec-makelists
The ossec-makelists utility to compile cdb databases. ossec-makelists will scan ossec.conf for databasefiles, check the mtime, and recompile all out of date databases.
See CDB List lookups from within Rules for more information.
ossec-makelists argument options
-hDisplay the help message.
-VDiplay the version and license information.
-dExecute in debug mode.
-fForce rebuild of all databases.
-u <user>Run as <user>.
-g <group>Run as <group>.
-c <config>Run with configuration file of <config>.
Default /var/ossec/etc/ossec.conf
-D <dir>Chroot to <dir>.
Default /var/ossec
ossec-makelists example usage
Example: Running ossec-makelists and an update is necessary
# /var/ossec/bin/ossec-makelists
* File lists/blocked.txt.cdb need to be updated
166 Chapter 3. Reference
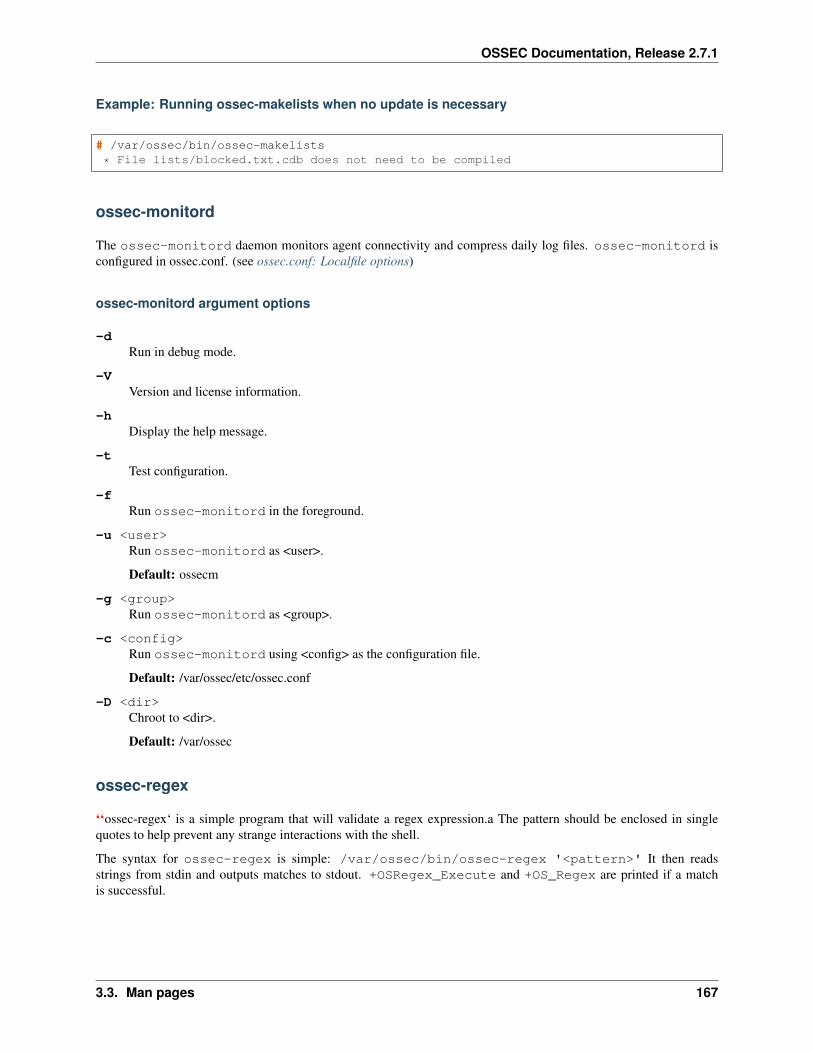
OSSEC Documentation, Release 2.7.1
Example: Running ossec-makelists when no update is necessary
# /var/ossec/bin/ossec-makelists
* File lists/blocked.txt.cdb does not need to be compiled
ossec-monitord
The ossec-monitord daemon monitors agent connectivity and compress daily log files. ossec-monitord isconfigured in ossec.conf. (see ossec.conf: Localfile options)
ossec-monitord argument options
-dRun in debug mode.
-VVersion and license information.
-hDisplay the help message.
-tTest configuration.
-fRun ossec-monitord in the foreground.
-u <user>Run ossec-monitord as <user>.
Default: ossecm
-g <group>Run ossec-monitord as <group>.
-c <config>Run ossec-monitord using <config> as the configuration file.
Default: /var/ossec/etc/ossec.conf
-D <dir>Chroot to <dir>.
Default: /var/ossec
ossec-regex
‘‘ossec-regex‘ is a simple program that will validate a regex expression.a The pattern should be enclosed in singlequotes to help prevent any strange interactions with the shell.
The syntax for ossec-regex is simple: /var/ossec/bin/ossec-regex '<pattern>' It then readsstrings from stdin and outputs matches to stdout. +OSRegex_Execute and +OS_Regex are printed if a matchis successful.
3.3. Man pages 167
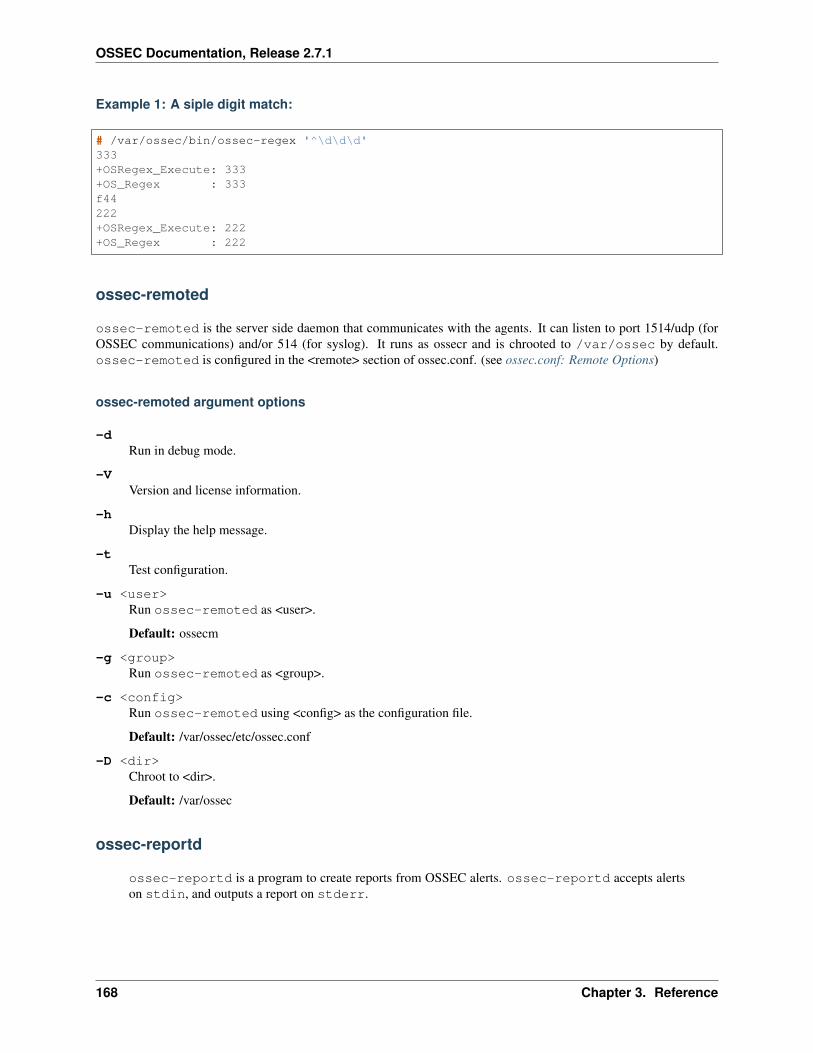
OSSEC Documentation, Release 2.7.1
Example 1: A siple digit match:
# /var/ossec/bin/ossec-regex '^\d\d\d'333+OSRegex_Execute: 333+OS_Regex : 333f44222+OSRegex_Execute: 222+OS_Regex : 222
ossec-remoted
ossec-remoted is the server side daemon that communicates with the agents. It can listen to port 1514/udp (forOSSEC communications) and/or 514 (for syslog). It runs as ossecr and is chrooted to /var/ossec by default.ossec-remoted is configured in the <remote> section of ossec.conf. (see ossec.conf: Remote Options)
ossec-remoted argument options
-dRun in debug mode.
-VVersion and license information.
-hDisplay the help message.
-tTest configuration.
-u <user>Run ossec-remoted as <user>.
Default: ossecm
-g <group>Run ossec-remoted as <group>.
-c <config>Run ossec-remoted using <config> as the configuration file.
Default: /var/ossec/etc/ossec.conf
-D <dir>Chroot to <dir>.
Default: /var/ossec
ossec-reportd
ossec-reportd is a program to create reports from OSSEC alerts. ossec-reportd accepts alertson stdin, and outputs a report on stderr.
168 Chapter 3. Reference

OSSEC Documentation, Release 2.7.1
Note: Since ossec-reportd outputs to stderr some utilities like less will not work if you do notredirect the output. End the ossec-reportd with 2>&1 to redirect stderr to stdout. more or less can beeasily used after the stderr redirect.
ossec-reportd argument options
-hDisplay the help message
-f <filter> <value>Filter the results.
-r <filter> <value>Show related entries.
-n <string>Create a description for the report.
-sShow the alerts related to the summary.
ossec-reportd example usage
Example 1: Show Successful Logins
# cat /var/ossec/logs/alerts/alerts.log | /var/ossec/bin/ossec-reportd -f group→˓authentication_success
Example 2: Show Alerts Level 10 and Greater
# cat /var/ossec/logs/alerts/alerts.log | /var/ossec/bin/ossec-reportd -f level 10
Example 3: Show the srcip for all users
# cat /var/ossec/logs/alerts/alerts.log | /var/ossec/bin/ossec-reportd -f group→˓authentication -r user srcip
Example 4: Show Changed files as reported by Syscheck
# cat /var/ossec/logs/alerts/alerts.log | /var/ossec/bin/ossec-reportd -f group→˓syscheck -r location filename
Example output
3.3. Man pages 169

OSSEC Documentation, Release 2.7.1
# cat /var/ossec/logs/alerts/alerts.log | /var/ossec/bin/ossec-reportd 2>&1 | more2011/07/11 21:01:36 ossec-reportd: INFO: Started (pid: 1444).2011/07/11 21:01:41 ossec-reportd: INFO: Report completed. Creating output...
Report completed. ==------------------------------------------------->Processed alerts: 17->Post-filtering alerts: 17->First alert: 2011 Jul 11 00:00:46->Last alert: 2011 Jul 11 00:16:52
Top entries for 'Username':------------------------------------------------_nrpe |6 |SYSTEM |2 |
Top entries for 'Level':------------------------------------------------Severity 3 |13 |Severity 2 |4 |
Top entries for 'Group':------------------------------------------------syslog |10 |sudo |6 |dropbearrecon |4 |ossec |4 |sshd |4 |authentication_success |2 |windows |2 |clamd |1 |freshclam |1 |virus |1 |
Top entries for 'Location':------------------------------------------------ix->/var/log/secure |4 |ix->ossec-logcollector |3 |(vistapc) 192.168.17.0->WinEvtLog |2 |buffalo1->/var/log/secure |2 |buffalo2->/var/log/secure |2 |(junction) 192.168.17.17->/var/log/secure |1 |(junction) 192.168.17.17->ossec-logcollector |1 |ix->/var/log/local6 |1 |junction->/var/log/secure |1 |
Top entries for 'Rule':------------------------------------------------5402 - Successful sudo to ROOT executed |6 |51006 - Client exited before authentication. |4 |591 - Log file rotated. |4 |18107 - Windows Logon Success. |2 |52507 - ClamAV database update |1 |
170 Chapter 3. Reference

OSSEC Documentation, Release 2.7.1
ossec-syscheckd
The ossec-syscheckd daemon checks configured files for changes to the checksums, permissions or ownership.ossec-syscheckd is started by ossec-control. Configuration for ossec-syscheckd is handled in the ossec.conf.
See Syscheck for more detailed configuration information.
ossec-syscheckd argument options
-dRun in debug mode.
-VVersion and license information.
-hDisplay the help message.
-tTest configuration.
-fRun ossec-syscheckd in the foreground.
-c <config>Run ossec-syscheckd using <config> as the configuration file.
Default: /var/ossec/etc/ossec.conf
-D <dir>Chroot to <dir>.
Default: /var/ossec
rootcheck_control
The rootcheck_control tool allows you to manage the policy monitoring and system auditing database that is storedon the server (manager) side. You can list anomalies detected by the rootcheck functionality, categorized into resolvedand outstanding issues. Moreover you can find out when ossec-rootcheck was run the last time.
rootcheck_control argument options
-hDisplay the help message.
-lList available agents.
-lcList only currently connected agents.
-u <id>Updates (clear) the database for the agent.
-u allUpdates (clear) the database for all agents.
-i <agent_id>Prints database for the agent.
3.3. Man pages 171

OSSEC Documentation, Release 2.7.1
-rUsed with -i, prints all the resolved issues.
-qUsed with -i, prints all the outstanding issues.
-LUsed with -i, prints the last scan.
-sChanges the output to CSV (comma delimited).
rootcheck_control example usage
Example 1: Getting a list of system auditing/policy monitoring events
To get a list of all auditing/policy monitoring events for a specific agent, you can run rootcheck_control -i.To retrieve the agent id you can use any of the following commands:
• rootcheck_control -l,
• agent_control -l
• syscheck_control -l
• syscheck_update -l
• manage_agents -l
# /var/ossec/bin/rootcheck_control -i 002
Policy and auditing events for agent 'ossecagent (002) - 192.168.1.86':
Resolved events:
2010 Jun 15 13:01:22 (first time detected: 2009 Dec 10 18:48:43)System Audit: System Audit: CIS - Debian Linux 8.8 - GRUB Password not set. File: /→˓boot/grub/menu.lst. Reference: http://www.ossec.net/wiki/index.php/CIS_DebianLinux .
Outstanding events:
2010 Jun 17 17:34:37 (first time detected: 2009 Dec 10 18:48:43)System Audit: System Audit: CIS - Testing against the CIS Debian Linux Benchmark v1.0.→˓ File: /etc/debian_version. Reference: http://www.ossec.net/wiki/index.php/CIS_→˓DebianLinux .
2010 Jun 17 17:34:37 (first time detected: 2009 Dec 10 18:48:43)System Audit: System Audit: CIS - Debian Linux 1.4 - Robust partition scheme - /tmp→˓is not on its own partition. File: /etc/fstab. Reference: http://www.ossec.net/wiki/→˓index.php/CIS_DebianLinux .
2010 Jun 17 17:34:37 (first time detected: 2009 Dec 10 18:48:43)System Audit: System Audit: CIS - Debian Linux 2.3 - SSH Configuration - Root login→˓allowed. File: /etc/ssh/sshd_config. Reference: http://www.ossec.net/wiki/index.php/→˓CIS_DebianLinux .
As you can see the detected events are shown in two categories, resolved events and outstanding event. To only showresolved events, run rootcheck_control -ri. To only show outstanding events, run rootcheck_control
172 Chapter 3. Reference

OSSEC Documentation, Release 2.7.1
-ri. To only show the results of the last scan and time of that scan, run rootcheck_control -Li.
To gain that kind of information for the OSSEC server, run rootcheck_control -i 000.
Example 2: Clearing the system auditing/policy database
To clear the system auditing/policy monitoring database for a certain agent run the following command:
# /var/ossec/bin/rootcheck_control -u 002
** Policy and auditing database updated.
To clear the database for all agents and the server run the following command:
# /var/ossec/bin/rootcheck_control -u all
** Policy and auditing database updated.
The next time rootcheck is run, the database will be populated again.
syscheck_control
syscheck_control provides an interface for managing and viewing the integrity checking database.
syscheck_control argument options
-hDisplay the help message.
-lList available agents.
-lcList only currently connected agents.
-u <agent_id>Updates (clear) the database for the agent.
-u allUpdates (clear) the database for all agents.
-i <agent_id>Prints database for the agent.
-r -iList modified registry entries for the agent (Windows only).
-f <file>Used with -i. Prints information about a modified file.
-zUsed with -f, zeroes the auto-ignore counter.
-dUsed with -f, ignores that file.
-sChanges the output to CSV (comma delimited).
3.3. Man pages 173

OSSEC Documentation, Release 2.7.1
syscheck_control example usage
Example 1: Getting a list of modified files for an agent
To retrieve information about files that were monitored by OSSEC and modified after OSSEC was deployed, runsyscheck_control -i.
# /var/ossec/bin/syscheck_control -i 002
Integrity changes for agent 'ossec-agent (002) - 192.168.1.86':
Changes for 2009 Dec 21:2009 Dec 21 13:52:40,0 - /etc/authorization2009 Dec 21 13:52:42,0 - /etc/cups/printers.conf2009 Dec 21 13:52:42,0 - /etc/cups/printers.conf.O2009 Dec 21 13:52:58,0 - /etc/postfix/main.cf.default
Changes for 2010 Jan 04:2010 Jan 04 10:13:58,0 - /etc/authorization
Changes for 2010 Jan 06:2010 Jan 06 09:45:43,0 - /etc/postfix/main.cf.default
Changes for 2010 Jan 18:2010 Jan 18 09:18:51,0 - /etc/cups/printers.conf2010 Jan 18 09:18:51,0 - /etc/cups/printers.conf.O
Changes for 2010 Feb 23:2010 Feb 23 09:17:22,2 - /etc/cups/printers.conf2010 Feb 23 09:17:22,2 - /etc/cups/printers.conf.O
Changes for 2010 Mar 24:2010 Mar 24 08:42:52,3 - /etc/cups/printers.conf2010 Mar 24 08:42:52,3 - /etc/cups/printers.conf.O
As you can see this command provides an overview about file modifications.
Example 2: Getting more detailed information about a modified file
If you need to get more detailed information about a file that was modified you can use syscheck_control to view
• the time stamp when the file was added to the syscheck database
• the integrity checking values when the file was added to the syscheck database
• the time stamps when OSSEC detected a modification
• the integrity checking values for every time OSSEC detected a modification.
The integrity checking values include
• how often the file has changed
• file size
• file permissions
• owner and group id of the file
• MD5 and SHA1 hashes of the file.
174 Chapter 3. Reference

OSSEC Documentation, Release 2.7.1
To retrieve this information, run syscheck_control -i:
# /var/ossec/bin/syscheck_control -i 002 -f /etc/authorization
Integrity changes for agent 'ossec-agent (002) - 192.168.1.86':Detailed information for entries matching: '/etc/authorization'
2009 Dec 21 13:52:40,0 - /etc/authorizationFile added to the database.Integrity checking values:
Size: 27771Perm: rw-r--r--Uid: 0Gid: 0Md5: dd62912576ae05d611d7469be809cf1dSha1: 530df0283df52f0152b9e7ce1a518119b06ceebc
2010 Jan 04 10:13:58,0 - /etc/authorizationFile changed. - 1st time modified.Integrity checking values:
Size: >28050Perm: rw-r--r--Uid: 0Gid: 0Md5: >50da55def41bcede7d42ac5ee8fe12c9Sha1: >97f4b2b48a97321a3e245221e0ea4353cf4fa8ef
Example 3: Clearing the syscheck database
To clear the syscheck database for a certain agent run the following command:
# /var/ossec/bin/syscheck_control -u 002
** Integrity check database updated.
syscheck_control -i 002 will now show that no modified files for that agent are in the database:
# /var/ossec/bin/syscheck_control -i 002
Integrity changes for agent 'ossec-agent (002) - 192.168.1.86':
** No entries found.
To clear the database for all agents and the server run the following command:
# /var/ossec/bin/syscheck_control -u all
** Integrity check database updated.
The next time syscheck is run, the database will be populated again.
syscheck_update
syscheck_update: Updates the integrity check database. This means that all information about files that were addedto the integrity check database will be dismissed and leave an empty database which will be populated again the nexttime the syscheck daemon runs on agents or the server.
3.3. Man pages 175
OSSEC Documentation, Release 2.7.1
It does the same thing as syscheck_control -u`(cf. :ref:`syscheck_control).
syscheck_update argument options
-hDisplay the help message.
-lList available agents.
-aUpdates the database for all agents.
-u <agent_id>Updates the database for the agent.
-u localUpdates the local database.
util.sh
The util.sh shell script can add a file to be monitored by ossec-logcollector. It can also add afull_command to check for changes to a website, or for changes to the name server of a domain.
A blogpost from Daniel Cid (for 3WoO) introduced this utility.
util.sh argument options
addfile <filename> [<format>]Add a file to be monitored by ossec-logtest. A localfile will be added to the ossec.conf.
addsite <domain>Monitor a website for changes. A full_command will be added to the ossec.conf using lynx to dump theinitial page. A rule can be written to monitor this output for changes.
Note: Requires lynx.
Warning: This may not be useful on pages with dynamic content.
adddns <domain>Monitor the name server of a domain for changes. A full_command will be added to the ossec.conf usinghost
Note: Requites the host command.
util.sh example usage
176 Chapter 3. Reference

OSSEC Documentation, Release 2.7.1
Example: Running util.sh
Running the following command:
# /var/ossec/bin/util.sh adddns ossec.net
will add the folling to that system’s ossec.conf:
<ossec_config><localfile>
<log_format>full_command</log_format><command>host -W 5 -t NS ossec.net; host -W 5 -t A ossec.net | sort</command>
</localfile></ossec_config>
verify-agent-conf
verify-agent-conf verifies the OSSEC agent.conf configuration. It exits silently if the configuration is correct.
verify-agent-conf example usage
Example 1: Running verify-agent-conf on a working agent.conf
# /var/ossec/bin/verify-agent-conf#
Example 2: Running verify-agent-conf on a non-working agent.conf
# /var/ossec/bin/verify-agent-conf2011/07/12 21:22:07 ossec-config(1226): ERROR: Error reading XML file '/var/ossec/etc/→˓shared/agent.conf': XML ERR: Bad formed XML. Element not opened (line 13).
What’s new
2.x
• 2/28/2014: Removed the Bro-IDS decoders and rules. These were never finished, and are very outdated. Newdcoders and rules for current versions of Bro-IDS would be appreciated.
• ZeroMQ JSON output
• cJSON used for JSON output
2.7.1
• Bug fixes
• Extended filesize from an integer to a long integer in syscheck
3.4. What’s new 177

OSSEC Documentation, Release 2.7.1
• Heartbeat interval is now configurable:
– notify_time
– time-reconnect
• custom_alert_output added
• ip-customblock.sh active-response script added
• ossec2snorby scripts added to contrib
2.7
• agent profiles
– ossec.conf
– agent.conf
• Allow the agents to run remote commands in agent.conf again internal_options.conf
• New utility: util.sh
• New hybrid mode: server + agent functionality on the same system (NOT REALLY DOCUMENTED, AREANY OF THE INSTALLATION TYPES WELL DOCUMENTED?)
• contrib/ossec2rss.php: ossec alerts in an rss format
• GeoIP data in alerts
• OSSEC server can be specified by hostname in the agent’s ossec.conf server-hostname
• ossec-authd can now add IP addresses to the client.keys file instead of using any with the -i flag from JasonStelzer
• support for prelink to reduce false positives refilter_cmd
• Added knowbs to turn on or off rootcheck features check_*
• Added support for json and splunk output (along with syslog and cef) format
• Changed -f to -v in ossec-logtest
• Added -f to manage_agents to create agent keys in bulk
Rootcheck / Syscheck Reference
Information about the Beastkit Rootkit
This rootkit was found on a RedHat 7.2 System in 01/2002. The rootkit setup script includes the line “#Beastkit 7.0 -X-Org edition”. Due to this fact, we call it as “Beastkit 7.0”.
More Information
For more info, look at this analyse (author unknown): analysis-beastkit
178 Chapter 3. Reference

OSSEC Documentation, Release 2.7.1
Files
• usr/include/rpc/ ../kit
• usr/include/rpc/ ../kit2
• usr/doc/.sl
• usr/doc/.sp
• usr/doc/.statnet
• usr/doc/.logdsys
• usr/doc/.dpct
• usr/doc/.gifnocfi
• usr/doc/.dnif
• usr/doc/.nigol
• *biba
• *sniff/lins
Note: All files with an “*” need to be search in all system
If you have any more Information about this rootkits sent to rootkits at ossec.net
Information about the Knark Rootkit
Knark is a kernel-based rootkit for Linux 2.2/2.4. It hide ports, files and processes from the administrator. This rootkitis very powerfull and had been used by “crackers” in a lot of compromised machines.
More Information
• A complete analysis, done by Toby Miller, can be found here: analysis-knack
• Knark README can be found readme-knack
• Download: http://www.ossec.net/rootkits/files/knark-2.4.3.tgz MD5: ca1ebe26ab1138ebe431751f526df817
Files
• /dev/.pizda
• /dev/.pula
• /proc/knark
• */taskhack
• */rootme
• */nethide
• */hidef
• */ered
3.5. Rootcheck / Syscheck Reference 179

OSSEC Documentation, Release 2.7.1
Note: All files with an “*” need to be search in all system
If you have any more Information about this rootkits sent to rootkits at ossec.net
Information about Old Rootkits
These “Old Rootkits” are some old (obvious) rootkits, found in some systems years ago. They are not very welldocumented and because of that we call them only as “Old”.
Files
• usr/include/rpc/ ../kit
• usr/include/rpc/ ../kit2
• usr/doc/.sl
• usr/doc/.sp
• usr/doc/.statnet
• usr/doc/.logdsys
• usr/doc/.dpct
• usr/doc/.gifnocfi
• usr/doc/.dnif
• usr/doc/.nigol
• *biba
• *sniff/lins
Note: All files with an “*” need to be search in all system
If you have any more Information about this rootkits sent to rootkits at ossec.net
Information about Suspicious files
The files listed here were found in some infected/owned machines. They are not part of any rootkit, but some “crack-ers” use them. They can be a log of some sniffer, a sniffer or a lot of other things.
Take a careful look if you find any of these files in your system.
More Information
N/A
Origin of Rule
N/A
180 Chapter 3. Reference

OSSEC Documentation, Release 2.7.1
File
• etc/rc.d/init.d/rc.modules
• lib/ldd.so
• usr/man/muie
• usr/X11R6/include/pain
• usr/bin/sourcemask
• usr/bin/ras2xm
• usr/bin/ddc
• usr/bin/jdc
• usr/sbin/in.telnet
• sbin/vobiscum
• usr/sbin/jcd
• usr/sbin/atd2
• usr/bin/ishit
• usr/bin/.etc
• usr/bin/xstat
• var/run/.tmp
• usr/man/man1/lib/.lib
• usr/man/man2/.man8
• var/run/.pid
• lib/.so
• lib/.fx
• lib/lblip.tk
• usr/lib/.fx
• var/local/.lpd
• dev/rd/cdb
• dev/.rd/
• usr/lib/pt07
• usr/bin/atm
• tmp/.cheese
• dev/.arctic
• dev/.xman
• dev/srd0
• dev/ptyzx
• dev/ptyzg
• dev/xdf1
3.5. Rootcheck / Syscheck Reference 181

OSSEC Documentation, Release 2.7.1
• dev/ttyop
• dev/ttyof
• dev/hd5
• dev/hd6
• dev/hd7
• dev/hdx1
• dev/hdx2
• dev/xdf2
• dev/ptyp
• dev/ptyr
• */.src
• *last.cgi
• *nobody.cgi
• *void.cgi
• *all4one.cgi
• *xntps
• */.xman
• */.arctic
• *psybnc
• *mech.session
• *sshdu
Note: All files with an “*” need to be search in all system
If you have any more Information about this rootkits sent to rootkits at ossec.net
Information about the T.R.K rootkit
This rootkit as a mix of some others.
More Information
No more information is available.
Orgin of Rule
This rootkit was taken from chkrootkit:
### T.R.Kexpertmode_output "${find} ${ROOTDIR}usr/bin -name soucemask -o -name ct"
182 Chapter 3. Reference

OSSEC Documentation, Release 2.7.1
File
• usr/bin/soucemask
• usr/bin/sourcemask
Note: All files with an “*” need to be search in all system
If you have any more Information about this rootkits sent to rootkits at ossec.net
Information about the Tuxkit Rootkit
This is a rootkit written by a Dutch group called Tuxtendo. It was found in some infected Redhat 6.0/7.0 systems.
More Information
A complete analyse of Tuxkit, done by Spoonfork ([email protected]). For more info, look at this analyse(author unknown): analysis-tuxkit
Files
– dev/tux – usr/bin/xsf – usr/bin/xchk – */.log – */.file – */.addr
Entries to search on file “/etc/rc.d/rc.sysinit”:
– /usr/bin/xsf – /usr/bin/xchk
Note: All files with an “*” need to be search in all system
If you have any more Information about this rootkits sent to rootkits at ossec.net
Glossary
HIDS First of all, Intrusion Detection is the process or techniques used to detect attacks on a specific network, systemor application. Most intrusion detection tools not only detect attacks, but also software misuse, policy violationsand other forms of inappropriate activities.
A Host-based IDS performs intrusion detection from within the systems you want to protect. Some of thesetools perform log analysis, others spyware detection, while others perform virus detection.
LIDS LIDS (Log-based intrusion detection systems) is just a fancy term for tools that perform security log analysis(specified above). It’s goal is to detect misuse (or attacks) using logs as the primary source of information. It isnot a replacement for NIDS (Network-based IDS) or any other security solution, but an addition to them.
3.6. Glossary 183

OSSEC Documentation, Release 2.7.1
184 Chapter 3. Reference

CHAPTER 4
Indices and tables
• genindex
• modindex
• search
185

OSSEC Documentation, Release 2.7.1
186 Chapter 4. Indices and tables

Index
Symbols-A <agent_name>
agent-auth command line option, 150-D
agent-auth command line option, 150-D <dir>
ossec-agentd command line option, 154ossec-analysisd command line option, 155ossec-csyslogd command line option, 158ossec-dbd command line option, 158ossec-execd command line option, 159ossec-logcollector command line option, 160ossec-logtest command line option, 161ossec-maild command line option, 166ossec-makelists command line option, 166ossec-monitord command line option, 167ossec-remoted command line option, 168ossec-syscheckd command line option, 171
-Lrootcheck_control command line option, 172
-R <agent_id>agent_control command line option, 151
-U <rule-id:alert-level:decoder-name>ossec-logtest command line option, 161
-Vmanage_agents command line option, 153ossec-agentd command line option, 154ossec-analysisd command line option, 155ossec-csyslogd command line option, 157ossec-dbd command line option, 158ossec-execd command line option, 159ossec-logcollector command line option, 159ossec-logtest command line option, 160ossec-maild command line option, 165ossec-makelists command line option, 166ossec-monitord command line option, 167ossec-remoted command line option, 168ossec-syscheckd command line option, 171
-a
agent_control command line option, 151clear_stats command line option, 152manage_agents command line option, 152ossec-logtest command line option, 161syscheck_update command line option, 176
-cmanage_agents command line option, 153
-c <config>ossec-agentd command line option, 154ossec-analysisd command line option, 155ossec-csyslogd command line option, 158ossec-dbd command line option, 158ossec-execd command line option, 159ossec-logcollector command line option, 160ossec-logtest command line option, 160ossec-maild command line option, 165ossec-makelists command line option, 166ossec-monitord command line option, 167ossec-remoted command line option, 168ossec-syscheckd command line option, 171
-dclear_stats command line option, 152ossec-agentd command line option, 154ossec-analysisd command line option, 155ossec-authd command line option, 155ossec-csyslogd command line option, 157ossec-dbd command line option, 158ossec-execd command line option, 159ossec-logcollector command line option, 159ossec-logtest command line option, 160ossec-maild command line option, 165ossec-makelists command line option, 166ossec-monitord command line option, 167ossec-remoted command line option, 168ossec-syscheckd command line option, 171syscheck_control command line option, 173
-e <agent_id>manage_agents command line option, 153
-fossec-agentd command line option, 154
187

OSSEC Documentation, Release 2.7.1
ossec-csyslogd command line option, 158ossec-dbd command line option, 158ossec-execd command line option, 159ossec-logcollector command line option, 159ossec-maild command line option, 165ossec-makelists command line option, 166ossec-monitord command line option, 167ossec-syscheckd command line option, 171
-f <file>manage_agents command line option, 153
-f <file>syscheck_control command line option, 173
-f <filter> <value>ossec-reportd command line option, 169
-g <group>ossec-agentd command line option, 154ossec-csyslogd command line option, 158ossec-dbd command line option, 158ossec-logtest command line option, 160ossec-maild command line option, 165ossec-makelists command line option, 166ossec-monitord command line option, 167ossec-remoted command line option, 168
-hagent-auth command line option, 150agent_control command line option, 150clear_stats command line option, 152manage_agents command line option, 152, 153ossec-agentd command line option, 154ossec-analysisd command line option, 155ossec-csyslogd command line option, 157ossec-dbd command line option, 158ossec-execd command line option, 159ossec-logcollector command line option, 159ossec-logtest command line option, 160ossec-maild command line option, 165ossec-makelists command line option, 166ossec-monitord command line option, 167ossec-remoted command line option, 168ossec-reportd command line option, 169ossec-syscheckd command line option, 171rootcheck_control command line option, 171syscheck_control command line option, 173syscheck_update command line option, 176
-iossec-authd command line option, 155
-i <agent_id>agent_control command line option, 151rootcheck_control command line option, 171syscheck_control command line option, 173
-i <key>manage_agents command line option, 153
-lagent_control command line option, 150
manage_agents command line option, 153rootcheck_control command line option, 171syscheck_control command line option, 173syscheck_update command line option, 176
-lcagent_control command line option, 151rootcheck_control command line option, 171syscheck_control command line option, 173
-m <manager_ip>agent-auth command line option, 150
-nmanage_agents command line option, 153
-n <string>ossec-reportd command line option, 169
-p <port>agent-auth command line option, 150ossec-authd command line option, 155
-qrootcheck_control command line option, 172
-ragent_control command line option, 151rootcheck_control command line option, 172
-r -isyscheck_control command line option, 173
-r <filter> <value>ossec-reportd command line option, 169
-sossec-reportd command line option, 169rootcheck_control command line option, 172syscheck_control command line option, 173
-tossec-agentd command line option, 154ossec-analysisd command line option, 155ossec-csyslogd command line option, 157ossec-dbd command line option, 158ossec-execd command line option, 159ossec-logcollector command line option, 159ossec-logtest command line option, 160ossec-maild command line option, 165ossec-monitord command line option, 167ossec-remoted command line option, 168ossec-syscheckd command line option, 171
-u <agent_id>agent_control command line option, 151syscheck_control command line option, 173syscheck_update command line option, 176
-u <id>rootcheck_control command line option, 171
-u <user>ossec-agentd command line option, 154ossec-csyslogd command line option, 158ossec-dbd command line option, 158ossec-logtest command line option, 160ossec-maild command line option, 165
188 Index

OSSEC Documentation, Release 2.7.1
ossec-makelists command line option, 166ossec-monitord command line option, 167ossec-remoted command line option, 168
-u allrootcheck_control command line option, 171syscheck_control command line option, 173
-u localsyscheck_update command line option, 176
-vossec-logtest command line option, 160
-wclear_stats command line option, 152
-zsyscheck_control command line option, 173
Aactive-response, 117adddns <domain>
util.sh command line option, 176addfile <filename> [<format>]
util.sh command line option, 176addsite <domain>
util.sh command line option, 176agent-auth command line option
-A <agent_name>, 150-D, 150-h, 150-m <manager_ip>, 150-p <port>, 150
agent.debug, 147agent_config, 146agent_config_options, 146agent_control command line option
-R <agent_id>, 151-a, 151-h, 150-i <agent_id>, 151-l, 150-lc, 151-r, 151-u <agent_id>, 151
agent_id, 117agentless, 23, 120alerts, 121alias, 40, 132allowed-ips, 134analysisd.debug, 147analysisd.default_timeframe, 146analysisd.fts_list_size, 146analysisd.fts_min_size_for_str, 147analysisd.log_fw, 147analysisd.stats_maxdiff, 146analysisd.stats_mindiff, 146analysisd.stats_percent_diff, 146
arguments, 23, 121
Bbase_directory, 56, 136
Ccategories, 74, 135category, 109check_dev, 57, 137check_diff, 40, 114, 132check_files, 57, 137check_if, 57, 137check_pids, 57, 138check_policy, 57, 138check_ports, 57, 138check_sys, 57, 138check_trojans, 57, 138check_unixaudit, 57, 138check_winapps, 57, 138check_winaudit, 58, 138check_winmalware, 58, 138clear_stats command line option
-a, 152-d, 152-h, 152-w, 152
command, 40, 116, 117, 132config-profile, 122connection, 133custom_alert_output, 128
Ddatabase, 76, 123database_output, 75, 123dbd.reconnect_attempts, 147decoded_as, 109decoder, 114, 140decoder.fts, 115decoder.ftscomment, 115decoder.order, 115decoder.parent, 115decoder.prematch, 115decoder.program_name, 115decoder.regex, 115decoder_dir, 140deny-ips, 134description, 112disabled, 56, 117, 137do_not_delay, 125do_not_group, 125dstip, 109
Eemail_alert_level, 121
Index 189

OSSEC Documentation, Release 2.7.1
email_alerts, 124email_from, 127email_idsname, 128email_maxperhour, 127email_notification, 127email_to, 75, 124, 127, 135event_location, 125executable, 116expect, 116
Fformat, 71, 125, 145frequency, 23, 40, 56, 120, 132, 137
Ggeoip_db_path, 129global, 127group, 71, 74, 114, 125, 135, 145
HHIDS, 183host, 23, 120host_infomation, 128hostname, 76, 110, 123
Iid, 110if_group, 110if_level, 110if_matched_group, 111if_matched_level, 111if_matched_sid, 110if_sid, 110include, 139info, 113ipv6, 134
Llevel, 71, 75, 117, 124, 135, 144LIDS, 183list, 112, 141local_ip, 134localfile, 38, 130location, 38, 71, 75, 117, 130, 135, 145log_alert_level, 121log_format, 38, 130logall, 128logcollector.loop_timeout, 147logcollector.open_attempts, 147logcollector.remote_commands=0, 147
Mmaild.full_subject, 148
maild.geoip, 148maild.groupping, 147maild.strict_checking, 147manage_agents command line option
-V, 153-a, 152-c, 153-e <agent_id>, 153-f <file>, 153-h, 152, 153-i <key>, 153-l, 153-n, 153
match, 109memory_size, 128monitord.compress, 148monitord.day_wait, 148monitord.monitor_agents, 148monitord.sign, 148
Nname, 116, 146notify_time, 123
Oonly-future-events, 40, 132options, 114os, 146ossec-agentd command line option
-D <dir>, 154-V, 154-c <config>, 154-d, 154-f, 154-g <group>, 154-h, 154-t, 154-u <user>, 154
ossec-analysisd command line option-D <dir>, 155-V, 155-c <config>, 155-d, 155-h, 155-t, 155
ossec-authd command line option-d, 155-i, 155-p <port>, 155
ossec-csyslogd command line option-D <dir>, 158-V, 157-c <config>, 158-d, 157
190 Index

OSSEC Documentation, Release 2.7.1
-f, 158-g <group>, 158-h, 157-t, 157-u <user>, 158
ossec-dbd command line option-D <dir>, 158-V, 158-c <config>, 158-d, 158-f, 158-g <group>, 158-h, 158-t, 158-u <user>, 158
ossec-execd command line option-D <dir>, 159-V, 159-c <config>, 159-d, 159-f, 159-h, 159-t, 159
ossec-logcollector command line option-D <dir>, 160-V, 159-c <config>, 160-d, 159-f, 159-h, 159-t, 159
ossec-logtest command line option-D <dir>, 161-U <rule-id:alert-level:decoder-name>, 161-V, 160-a, 161-c <config>, 160-d, 160-g <group>, 160-h, 160-t, 160-u <user>, 160-v, 160
ossec-maild command line option-D <dir>, 166-V, 165-c <config>, 165-d, 165-f, 165-g <group>, 165-h, 165-t, 165-u <user>, 165
ossec-makelists command line option
-D <dir>, 166-V, 166-c <config>, 166-d, 166-f, 166-g <group>, 166-h, 166-u <user>, 166
ossec-monitord command line option-D <dir>, 167-V, 167-c <config>, 167-d, 167-f, 167-g <group>, 167-h, 167-t, 167-u <user>, 167
ossec-remoted command line option-D <dir>, 168-V, 168-c <config>, 168-d, 168-g <group>, 168-h, 168-t, 168-u <user>, 168
ossec-reportd command line option-f <filter> <value>, 169-h, 169-n <string>, 169-r <filter> <value>, 169-s, 169
ossec-syscheckd command line option-D <dir>, 171-V, 171-c <config>, 171-d, 171-f, 171-h, 171-t, 171
Ppassword, 76, 123picviz_output, 129picviz_socket, 129port, 71, 122, 133, 144prelude_output, 128profile, 146program_name, 110protocol, 133
Qquery, 40, 132
Index 191

OSSEC Documentation, Release 2.7.1
Rregex, 109remote, 133remoted.comp_average_printout, 148remoted.debug, 148remoted.recv_counter_flush, 148remoted.verify_msg_id, 148repeated_offenders, 117reports, 74, 135rootcheck_control command line option
-L, 172-h, 171-i <agent_id>, 171-l, 171-lc, 171-q, 172-r, 172-s, 172-u <id>, 171-u all, 171
rootkit_files, 56, 137rootkit_trojans, 56, 137rule, 75, 108, 135, 139rule_dir, 139rule_id, 71, 125, 145rules_group, 117rules_id, 117
Ssame_dst_port, 111same_id, 111same_location, 111same_source_ip, 111same_source_port, 111same_user, 111scanall, 56, 137server, 71, 144server-hostname, 122server-ip, 122showlogs, 75, 136smtp_server, 127srcip, 75, 109, 135state, 23, 121stats, 128syscheck.sleep, 149syscheck.sleep_after, 149syscheck_control command line option
-d, 173-f <file>, 173-h, 173-i <agent_id>, 173-l, 173-lc, 173-r -i, 173
-s, 173-u <agent_id>, 173-u all, 173-z, 173
syscheck_update command line option-a, 176-h, 176-l, 176-u <agent_id>, 176-u local, 176
syslog_output, 71, 144system_audit, 56, 137
Ttime, 110time-reconnect, 123timeout, 117timeout_allowed, 116title, 75, 135type, 76, 124
Uurl, 110use_geoip, 122user, 75, 110, 135username, 76, 123util.sh command line option
adddns <domain>, 176addfile <filename> [<format>], 176addsite <domain>, 176
Wweekday, 110white_list, 128windows.debug, 149windows_apps, 56, 137windows_audit, 56, 137windows_malware, 56, 137
Zzeromq_output, 129zeromq_uri, 129
192 Index