nwa digital duplicator- revised - next wave … microsoft word - nwa digital duplicator- revised.doc...
TRANSCRIPT

Digital Duplicator Manual

March 30, 2017 2 | P a g e
Copyright Next Wave Automation All Rights Reserved.
Version 2 May 4, 2017
Updates of this manual are available at www.nextwaveautomation.com.
*Information in this manual is subject to change without notice*
CNC Shark is a registered trademark of Next Wave Automation.
Software copyright by Next Wave Automation. All rights reserved.
All other trademarks are the property of their respective owners.
*Information in this manual is subject to change without notice*
Digital Duplicator is a registered trademark of Next Wave Automation.
Software copyright by Next Wave Automation. All rights reserved.
All other trademarks are the property of their respective owners.

March 30, 2017 3 | P a g e
To Our Customers Thank you for purchasing the CNC Digital Duplicator Accessory! CNC Digital Duplicator Accessory brings enhanced CNC machining capabilities to your CNC system. This manual tells you how to install and use your CNC Digital Duplicator Accessory. Please read the manual carefully. The manual also includes our warranty and important safety information.
This manual has been written with the assumption that the owner is familiar with the basic operation of a computer as well as the basic aspects of techniques for the safe operation of woodworking power tools. Information in this manual is subject to change without notice.
Warranty Next Wave Automation warrants to the original retail purchaser of a CNC Digital Duplicator Accessory and purchased from an authorized CNC Shark distributor will be free from defects in material and workmanship for ONE YEAR from the date of purchase. This warranty is for parts and labor to correct the defect, and does not cover the cost of shipping the defective item(s) to Next Wave Automation for repair.
This warranty does not apply to defects arising from normal wear and tear, misuse, abuse, negligence, accidents, unauthorized repair or alteration, or lack of maintenance. This warranty is void if the CNC Digital Duplicator Accessory is modified without the prior written permission of Next Wave Automation, LLC, or if the CNC Digital Duplicator Accessory is located or has been used outside the country of residence of the authorized CNC Shark distributor.
Please contact Next Wave Automation to take advantage of this warranty. If Next Wave Automation determines the CNC Digital Duplicator Accessory is defective in material or workmanship, and not due to normal wear and tear, misuse, abuse, negligence, accidents, unauthorized repair or alteration, or lack of maintenance, then Next Wave Automation will, at its expense and upon proof of purchase, send replacement parts to the original retail purchaser necessary to cure the defect.
PLEASE NOTE
The following Instruction Manual is broken into two distinct machine differences.
Section 1 - Pendant models starting with Piranha Models, CNC Shark HD4 including the HD4 Extended
Section 2 – Earlier CNC Shark non-pendant machines (must have one piece controllers)

March 30, 2017 4 | P a g e
Section 1 – CNC Pendant Models (HD4, Piranha FX/XL)
Mounting the Digital duplicator in the router Insert and secure the duplicator into the ¼” collet Make sure the router is unplugged from power
Setting up the Digital Duplicator Open apps on the Pendant LCD Select “Digitizer”
Press to open the digitizer setup menu Set your scan speed (the speed at which the digitizer will run) IMPORTANT: Make sure Scan Speed is set at 15
March 30, 2017 5 | P a g e
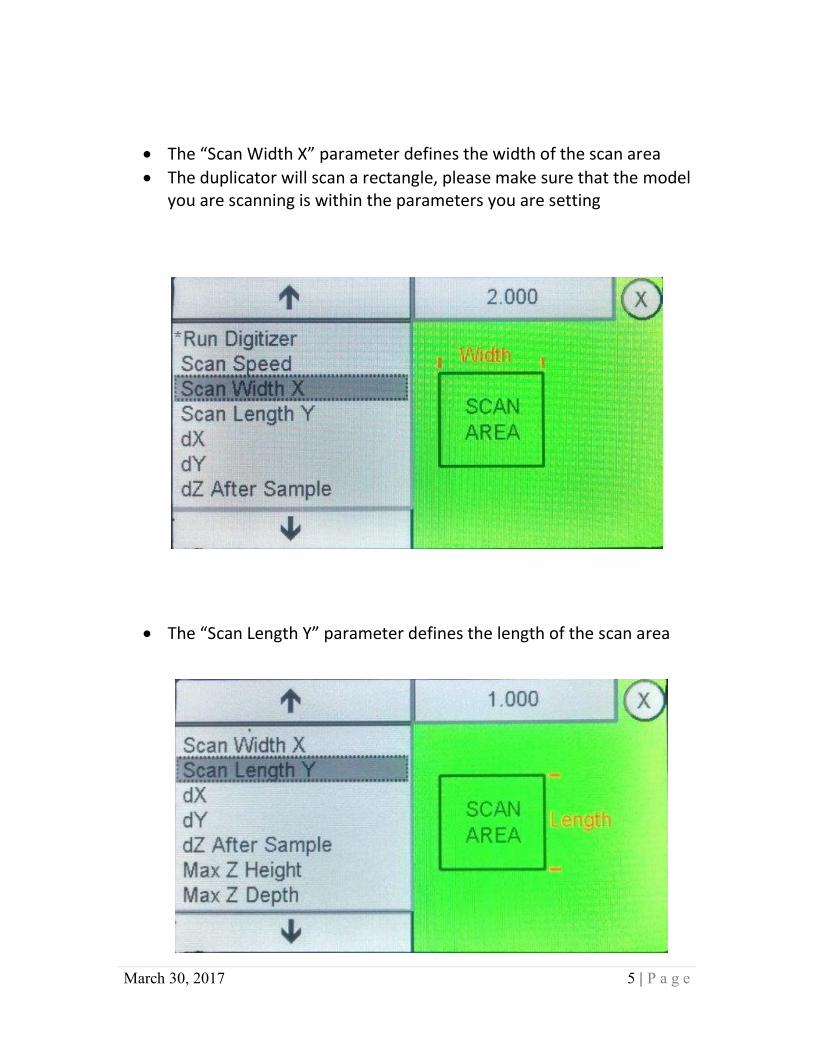
The “Scan Width X” parameter defines the width of the scan area The duplicator will scan a rectangle, please make sure that the model
you are scanning is within the parameters you are setting
The “Scan Length Y” parameter defines the length of the scan area

March 30, 2017 6 | P a g e
The “dX” parameter is the distance between X samples of your scan area. The lower the dX value, the more precise the scan will be. However, lowering the dX value increases run times significantly
The “dY” parameter is the distance between Y samples of your scan area. The lower the dY value, the more precise the scan will be. However, lowering the dY value increases run time significantly
March 30, 2017 7 | P a g e
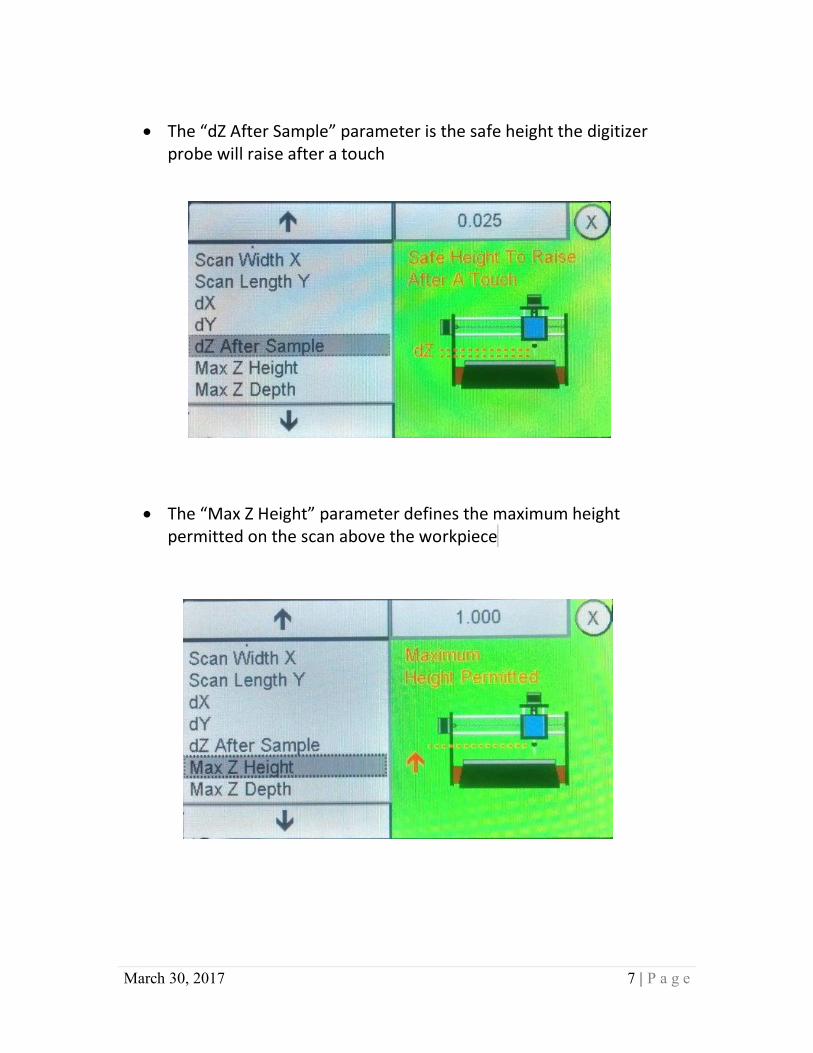
The “dZ After Sample” parameter is the safe height the digitizer
probe will raise after a touch
The “Max Z Height” parameter defines the maximum height
permitted on the scan above the workpiece f

March 30, 2017 8 | P a g e
The “Max Z Depth” parameter defines the lowest depth permitted of the scan. Anything lower will appear flat.
Running the Digitizer Secure the item you want to scan on the CNC bed. If connecting the Digitizer when power is off to the unit, make sure to
press and hold on the digitizer end (ruby tip) while powering the unit up. Failure to do this will put the controller into Firmware Update mode.
o Digitizer can also be plugged into the unit after power has been applied.

March 30, 2017 9 | P a g e
Make sure there is a flash drive connected to the LCD Pendant as the digitizer will not work without it
o The flash drive will need to plugged into the LCD after power has been established.
Jog the digitizer until it is barely touching the bottom left corner of the target item
Zero all axis’ (X,Y,Z) Select “Run Digitizer” on the Digitizer setup menu
Registering your Digital Duplicator Before being able to use your scan file, you will need to register your
Digital Duplicator with the Control Panel. (Universal Control Panel or Shark Control Panel 2.1)
Download the CNC Control Panel 3.0 or the Shark Control Panel (included with your machine)
Connect the controller for your machine via USB cable to your computer.
Power on the controller
Open the CNC CP v3.0 or the CNC Shark Control Panel If you have already registered your CNC, the CNC product registration
will not automatically open. Simply go to Help>Register your Next Wave Product and proceed with the registration form.
You will be asked to register your CNC and accessories.
Select the CNC model you own Enter your Digital Duplicator serial number in one of the “Accessory
Serial #” slots

March 30, 2017 10 | P a g e
Serial number is located on the Duplicator Click “Next” Fill in all areas of the “Customer Owner” tab, and click “Next” when
done.
You will then be asked “How would you like to submit your registration?”
o If you have internet connection, the Submit option will automatically send your file, generate registration keys and immediately send them back to you.
o If you do not have internet access, please choose the 3rd option to Save. Save the file to your computer, transfer the file to a computer with internet, attach it in an email and send it to: [email protected]. Once the file is received, registration keys will be generated and emailed back

March 30, 2017 11 | P a g e
Once submitted, you should receive a Success message
Converting a scan file (.DNW) to STL
Open the Universal Control Panel Select File > Convert Scan file (.DNW) to STL
o Digital Duplicator must be registered for this option to be functional
Select your .dnw file, and it will be saved as an STL that can be imported directly into any Vectric Program

March 30, 2017 12 | P a g e
Section 2 – CNC Control Panel Models Install the new scan software
Mounting the Digital duplicator in the router Insert and secure the duplicator into the ¼” collet Make sure the router is unplugged from power
Open the Scan tab for the CNC Shark Control Panel. (your panel may look slightly different depending on version)

March 30, 2017 13 | P a g e
Next measure the size of your piece you want to scan. Enter the Scan limits into the X Y and Z locations. The Z needs to be slightly larger then what you are planning to scan.
It is suggested that if you are scanning a piece that is .5 of an inch in height you do at most 1 inch in the Z location. This will prevent the probe from descending too far down where it might be damaged.
Use the Step Size area to determine how large of steps you want to do in the scan. Entering .04 is a roughing step that gives a rough result but not a lot of fine detail. Every time you half the size of the step from .04 for instance to .02 will quadruple the time it takes to do the scan. It is recommended to run it at a larger step at first, then you can load it in and check if you want to make smaller scan steps.
Scan Velocity is how fast the scan will move. Make sure Scan Velocity is set at maximim 10 in/min. Depending on the material or how detailed you are doing your scan, you might want to slow the scan down. This will be a trial and error process. Try different speeds to see what the scan looks like when you load it into your viewing software.
You need to move the probe to the start location which is in the lower left hand corner of the area to be scanned.
You need to have the probe tip higher than the highest point you are going to scan.

March 30, 2017 14 | P a g e
After you have it in position press the XYZ0 button to set the Zero start point.
Next enter all the scan limits Z, step sizes, and scan velocity Next press the start scan. You'll be prompted to save the file which will automatically default to
an STL format and will be saved in a folder of your choice on the drive
Once the scan is finished you can now load the file into a 3D software program like Vcarve Desktop or Pro, Aspire, or a CAD program like Sketchup, Bob CAD or AutoCAD.
The program must be a 3D-program in order for it to be shown correctly

March 30, 2017 15 | P a g e
Check out these other great NWA accessories
20010 - 4th Axis

March 30, 2017 16 | P a g e
20002 – Laser Module
20028 – Laser Module
20035 – Pendant Mount