naepex help draft revised082312 version 2.0 beta two tutorial and user guide august 2012 draft not...
TRANSCRIPT

NAEPEX Version 2.0
Beta Two
Tutorial and User Guide
August 2012
DRAFT
Not for Distribution
Please note: Descriptions of functions highlighted in yellow are under development and will be available in the next version.
Prepared by Educational Testing Service for the U.S. Department of Education, Institute of Education Sciences, National Center for Education Statistics.

ii
Contents Introduction .............................................................................................................................. 1 I. System Requirements ....................................................................................................... 1 II. Installation .......................................................................................................................... 2 III. Program Startup and Data Loading ................................................................................. 4
1. Data Loading .................................................................................................................................. 4 2. Available Data SourcesAdd New .............................................................................................. 5
3. Open Data Set ................................................................................................................................ 8 4. Choose Data File ........................................................................................................................... 9 5. Create a New Data Selection ........................................................................................................ 9 6. Selection Description. ................................................................................................................. 10 7. Selection File Name ..................................................................................................................... 10
8. School Data Included .................................................................................................................. 10
9. Preselected Data Used ................................................................................................................ 10
10. Choose Data File or Selection ................................................................................................... 10
11. Completed Selection Information .............................................................................................. 11 IV. Tabbed Interface .............................................................................................................. 12
1. First TabSelection Information ............................................................................................... 12 2. Second TabSelect Variables ................................................................................................... 13 3. Third TabFilter Data ................................................................................................................. 18 4. Fourth TabGenerate Files ....................................................................................................... 20

1
Introduction Each National Assessment of Educational Progress (NAEP) restricted-use data product contains the data for a complete set of samples within a subject area in an assessment year. Each data file contains all of the responses, scores, weights, demographic data variables, and derived variables collected for the related sample, typically numbering in the thousands of data variables. The NAEPEX program facilitates the identification and selection of data samples and variables for study, providing the means to create a customized data file and the necessary information to define it to AM1, SPSS, SAS, STATA, or another user-specified data management and analysis system. (Note: NAEPEX software is only for use on restricted-use data products from 1990 forward. Its structure will not support the public-use data products that were available prior to 1990.) For each customized data selection that the user defines, NAEPEX can produce:
a choice of syntax/script files to generate including AM, SAS, SPSS, and STATA;
the most recent data sets containing separate school files that include the school questionnaire data and school weights;
(if a combination of school and student variables are selected,) the syntax files containing
appropriate commands to match the files and produce a single merged file of variables;
the data extract file, with or without the following transformations:
scored item responses for use in DESI2 or AM, and
dummy-coded categories of discrete variables for use in DESI or AM (AM provides a facility for creating dummy-coded variables); and
auxiliary metadata files specially formatted for DESI including IRT parameter files and an independent variable list file.
The following sections provide step-by-step instructions for installation and use of the NAEPEX program.
I. System Requirements
NAEPEX requires the following system configuration to operate properly. (Note: Administrator rights for the workstation are not required in order to install.)
A workstation not connected to a network;
Windows NT or higher; .NET Framework 3.5 and .NET Framework 3.5 Service Pack 1; The program itself is less than one MB; however, some data sets that may be copied to the
computer system can require as much as 10 GB of hard-drive space.
1AM is a statistical software program developed by the American Institutes for Research (http://am.air.org/).
2 Direct Estimation Software Interactive (DESI) is a software program developed by Educational Testing Service for analyzing data from NAEP and other large scale assessments. Questions and further information can be obtained by sending e-mail to [email protected].

2
II. Installation
1. Installation does not require that a user have administrative rights for the computer system.
2. If the appropriate framework is not detected, the user is directed to the download on the Microsoft Download site: http://www.microsoft.com/download/en/details.aspx?id=25150.
3. Double-click on “deploy.exe.” As displayed in figure 1, the deployment utility automatically installs to the user’s My Documents folder on the computer.
4. Installation of the program includes establishing a repository folder to be used as a storage area for all NAEP data files, as well as NAEPEX program products. To ensure security of the data products from other users of the computer system, the default path is established under the My Documents folder associated with the user.
5. Click Finish to proceed.
Figure 1. NAEPEX Deployment Utility
C:\Users\YourName\Documents\NAEPData

3
6. As shown in figure 2, the installer detects that the workstation successfully installed NAEPEX. Click Yes to continue.
Figure 2. NAEPEX Deployment Successful
7. The NAEPEX window and first screen will now open and is ready to load data (figure 3).
4
III. Program Startup and Data Loading
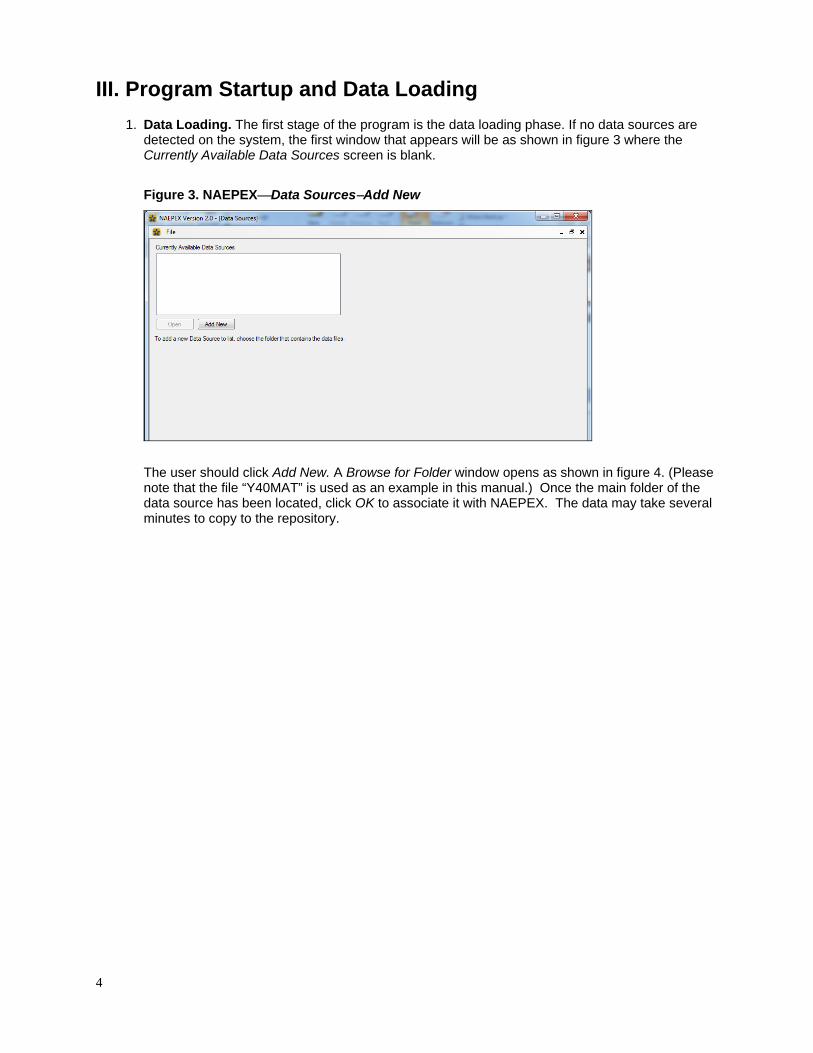
1. Data Loading. The first stage of the program is the data loading phase. If no data sources are detected on the system, the first window that appears will be as shown in figure 3 where the Currently Available Data Sources screen is blank.
Figure 3. NAEPEXData SourcesAdd New
The user should click Add New. A Browse for Folder window opens as shown in figure 4. (Please note that the file “Y40MAT” is used as an example in this manual.) Once the main folder of the data source has been located, click OK to associate it with NAEPEX. The data may take several minutes to copy to the repository.

5
Figure 4. NAEPEXBrowse For Folder: Add New from Hard Drive
2. Available Data Sources—Add New. When the user clicks OK, the program automatically proceeds as follows:
Legacy data products on the hard drive that were previously copied from CD/DVD media must be identified by the user in the Browse For Folder window as above. These data are then moved into the repository.
Non-encrypted legacy data products (prior to 2009) on CD/DVD can be added to the repository by clicking Add New. If these data are detected in the CD/DVD media on the system, the program notifies the user that there is a “new data source available in the CD drive” and the user can click the Add New button (figure 5). The Browse For Folder window will appear (figure 6) to allow the user to select the desired folder. This may take several minutes.

6
Figure 5. NAEPEXData SourcesAdd New Data from CD/DVD Media
Figure 6. NAEPEX Browse For Folder: Data Sources from CD/DVD
New data products on encrypted CD/DVD should be unzipped to a location specified by the user on his or her hard drive when the correct password is entered per instructions provided by the National Center For Education Statistics (NCES). Identify the folder when the Browse For Folder window appears.
The pop-up message shown in figure 7 appears to notify the user that data loading was initiated. The user should wait to use other applications on his or her computer until data loading is complete. This may take several minutes. Another pop-up message will appear to notify the user this was accomplished (figure 8).

7
Figure 7. Loading Data Files
Figure 8. Loading Complete
Once the data product has been copied into the repository, it is not needed by the program. All program processing operates on data in the repository under the Documents\NAEPData folder. The NAEPEX program reads from the repository a list of current data sources available and displays these in the Data Sources window (figure 9).

8
Figure 9. NAEPEXCurrently Available Data Sources
3. Open Data Set. Select the desired data set to work with and click Open (figure 10).
Figure 10. NAEPEXOpen Currently Available Data Sources

9
4. Choose Data File. Four data sets appear for selectiongrade 4 or grade 8 student and teacher data and grade 4 or grade 8 school data. Select the desired data file to work with and click Open Data File (figure 11).
Figure 11. NAEPEXChoose Data File or a Current Selection
5. Create a New Data Selection. A new Selection Information screen appears (figure 12) and must
be filled in to continue. Follow steps 6 through 11.
Figure 12. NAEPEXSelection 1

10
6. Selection Description. In the Selection Description text box, type in an appropriate description (figure 13) for the data, e.g., “New Jersey extract.” The description is text that NAEPEX writes at the beginning of each file later generated. It is there to provide the user with an opportunity to write something that helps in identifying the analysis sometime in the future. It is not necessary to include the entire data set name (2009 National Mathematics Grade 8 Student & Teacher Data) since this will automatically appear in the output.
Figure 13. NAEPEXSelection
7. Selection File Name. A default name is provided by NAEPEX (e.g., Selection 1, 2, 3, etc.) but can be modified by up to 20 characters by the user.
8. School Data Included. Placing a checkmark in the School Data Included checkbox allows the user to choose from more variables later in the process. In the NAEP design, teachers and school administrators are given the opportunity to answer a series of questions about the characteristics of their particular school. A checkmark in the School Data Included checkbox allows NAEPEX to correctly match the student to the school when it generates the various files required for an analysis. If left unchecked, there would not be an opportunity to select school level variables for student level analysis.
9. Preselected Data Used. There are certain NAEP variables that are used often and are required for analyses. For example, the student replicate weights are almost always selected in order to do a proper NAEP analysis. If preselected variables are chosen, NAEPEX will automatically flag a number of commonly used NAEP variables as selected from the hundreds that are available. If preselected variables are not chosen, these essential variables must be chosen later in the process.
10. Choose Data File or Selection. Now that a selection has been created and associated with this data set, future sessions will give the user a choice of reusing a selection or creating a new one as in figure 14. Clicking on a data file will present a new selection screen. To use a current selection, highlight the specific selection (e.g., Selection 1 in figure 14) and click Open Current Selections.

11
Figure 14. NAEPEXChoose Data File or a Current Selection
11. Completed Selection Information. The completed selection information appears as in figure 15, and three more tabs become available to the user, as described in section IV.

12
IV. Tabbed Interface
Once data selection information is entered, a tabbed interface appears that follows a prescribed order for the selection process yet allows the user to easily go back to a previous dialog to modify criteria for the selection, as shown in figure 15 below.
1. First TabSelection Information
Upon selection of a new or previous data selection, the program will present the first tab of the interface to process the identified selection.
Figure 15. NAEPEXSelection Information
The user can go back and forth between tabs and add options, e.g., select or deselect School Data Included or Preselected Data Used. (Note: The user will be prompted later to save the selection if changes were made, except in the case of the School Data Included and Preselected Data Used checkboxes. The system does not prompt the user to save when changes are made only to these boxes.)
13
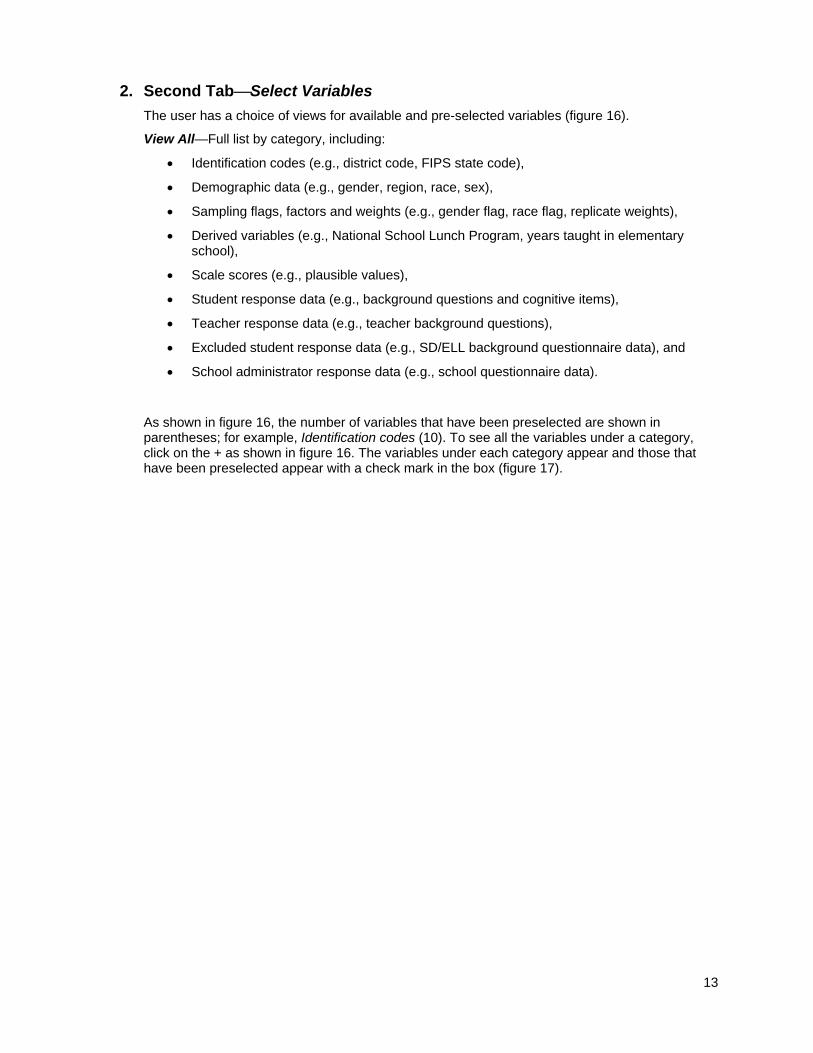
2. Second TabSelect Variables
The user has a choice of views for available and pre-selected variables (figure 16).
View All—Full list by category, including:
Identification codes (e.g., district code, FIPS state code),
Demographic data (e.g., gender, region, race, sex),
Sampling flags, factors and weights (e.g., gender flag, race flag, replicate weights),
Derived variables (e.g., National School Lunch Program, years taught in elementary school),
Scale scores (e.g., plausible values),
Student response data (e.g., background questions and cognitive items),
Teacher response data (e.g., teacher background questions),
Excluded student response data (e.g., SD/ELL background questionnaire data), and
School administrator response data (e.g., school questionnaire data).
As shown in figure 16, the number of variables that have been preselected are shown in parentheses; for example, Identification codes (10). To see all the variables under a category, click on the + as shown in figure 16. The variables under each category appear and those that have been preselected appear with a check mark in the box (figure 17).

14
2. Second TabSelect Variables (continued)
Figure 16. NAEPEXSelect Variables
15
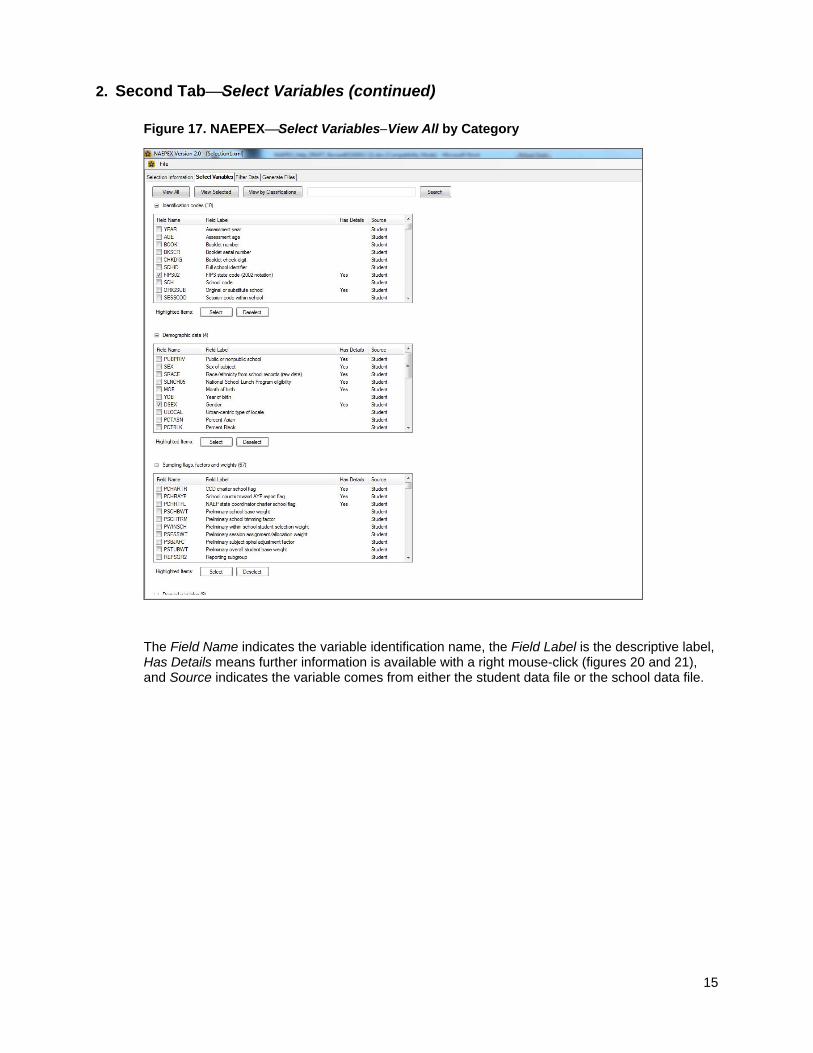
2. Second TabSelect Variables (continued)
Figure 17. NAEPEXSelect VariablesView All by Category
The Field Name indicates the variable identification name, the Field Label is the descriptive label, Has Details means further information is available with a right mouse-click (figures 20 and 21), and Source indicates the variable comes from either the student data file or the school data file.
16
2. Second TabSelect Variables (continued)
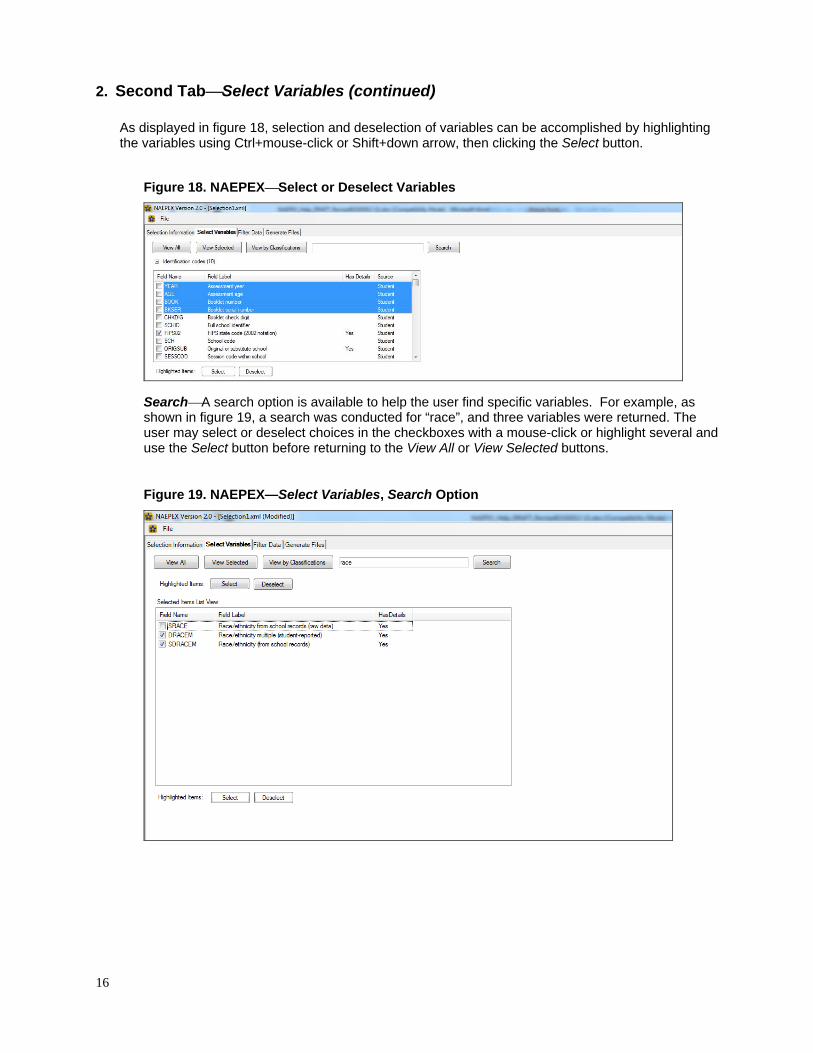
As displayed in figure 18, selection and deselection of variables can be accomplished by highlighting the variables using Ctrl+mouse-click or Shift+down arrow, then clicking the Select button.
Figure 18. NAEPEXSelect or Deselect Variables
SearchA search option is available to help the user find specific variables. For example, as shown in figure 19, a search was conducted for “race”, and three variables were returned. The user may select or deselect choices in the checkboxes with a mouse-click or highlight several and use the Select button before returning to the View All or View Selected buttons.
Figure 19. NAEPEX—Select Variables, Search Option
17
2. Second TabSelect Variables (continued)
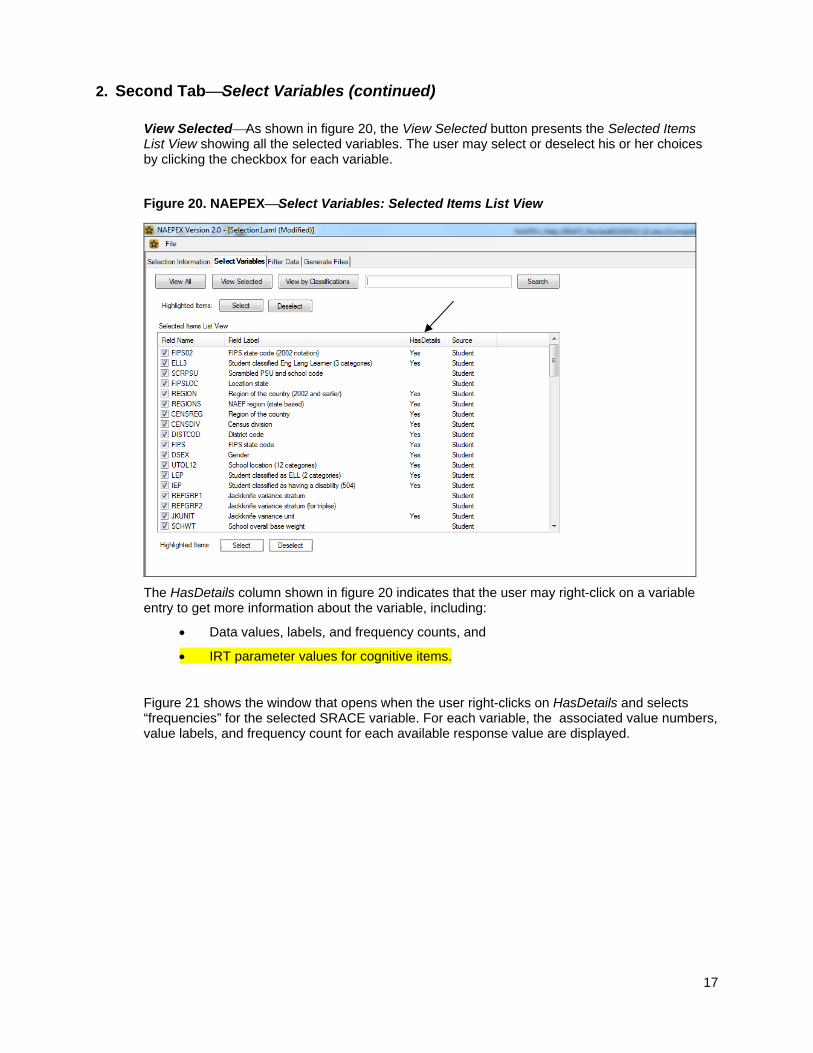
View SelectedAs shown in figure 20, the View Selected button presents the Selected Items List View showing all the selected variables. The user may select or deselect his or her choices by clicking the checkbox for each variable.
Figure 20. NAEPEXSelect Variables: Selected Items List View
The HasDetails column shown in figure 20 indicates that the user may right-click on a variable entry to get more information about the variable, including:
Data values, labels, and frequency counts, and
IRT parameter values for cognitive items.
Figure 21 shows the window that opens when the user right-clicks on HasDetails and selects “frequencies” for the selected SRACE variable. For each variable, the associated value numbers, value labels, and frequency count for each available response value are displayed.

18
Figure 21. NAEPEX—Information for SRACE
3. Third TabFilter Data
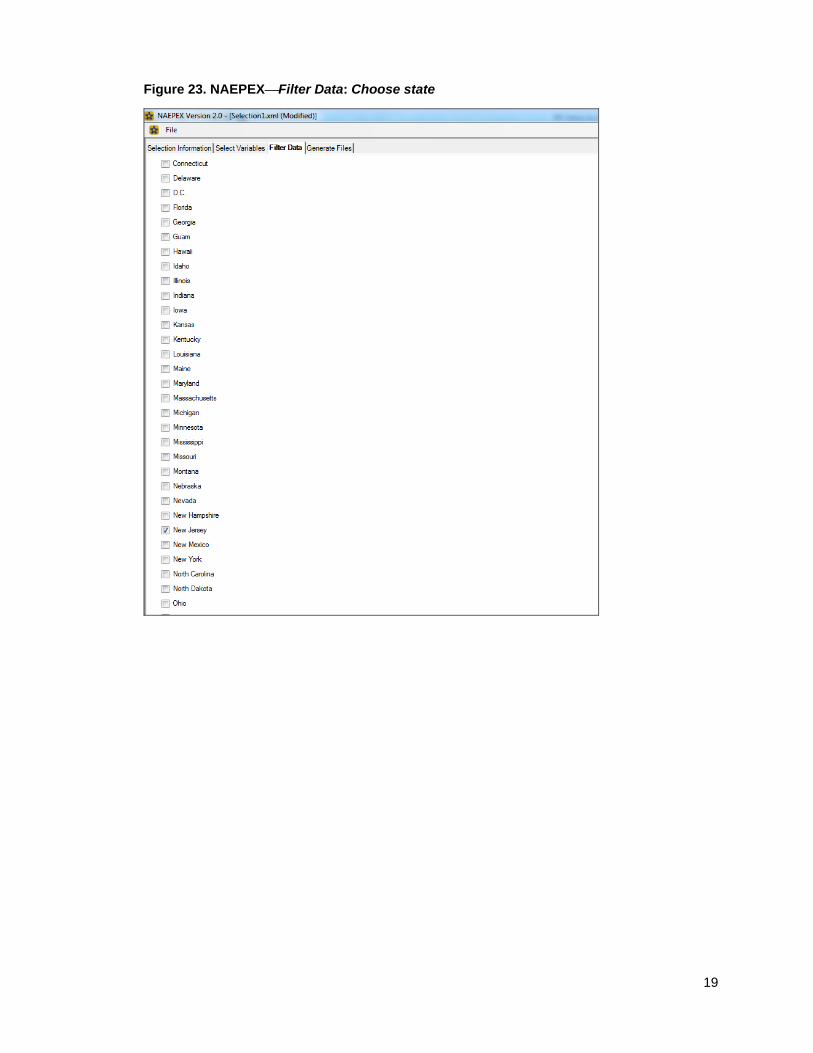
A small subset of variables is available as filtering criteria depending on the data set chosen (figure 22). For example, in this Selection, New Jersey should be chosen from the FIPS state code by clicking on the + and selecting New Jersey, as shown in figure 23.
Figure 22. NAEPEXFilter Data
19
Figure 23. NAEPEXFilter Data: Choose state
20
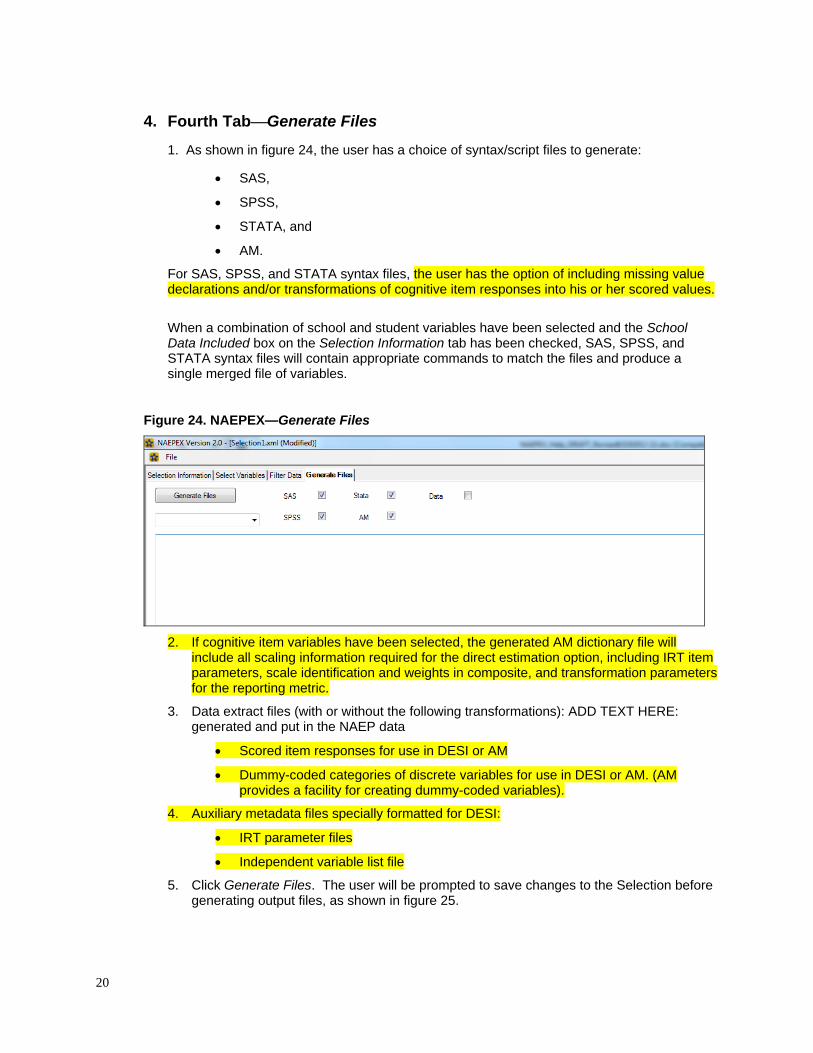
4. Fourth TabGenerate Files
1. As shown in figure 24, the user has a choice of syntax/script files to generate:
SAS,
SPSS,
STATA, and
AM.
For SAS, SPSS, and STATA syntax files, the user has the option of including missing value declarations and/or transformations of cognitive item responses into his or her scored values.
When a combination of school and student variables have been selected and the School Data Included box on the Selection Information tab has been checked, SAS, SPSS, and STATA syntax files will contain appropriate commands to match the files and produce a single merged file of variables.
Figure 24. NAEPEX—Generate Files
2. If cognitive item variables have been selected, the generated AM dictionary file will include all scaling information required for the direct estimation option, including IRT item parameters, scale identification and weights in composite, and transformation parameters for the reporting metric.
3. Data extract files (with or without the following transformations): ADD TEXT HERE: generated and put in the NAEP data
Scored item responses for use in DESI or AM
Dummy-coded categories of discrete variables for use in DESI or AM. (AM provides a facility for creating dummy-coded variables).
4. Auxiliary metadata files specially formatted for DESI:
IRT parameter files
Independent variable list file
5. Click Generate Files. The user will be prompted to save changes to the Selection before generating output files, as shown in figure 25.
21
Figure 25. NAEPEX—Save Selection
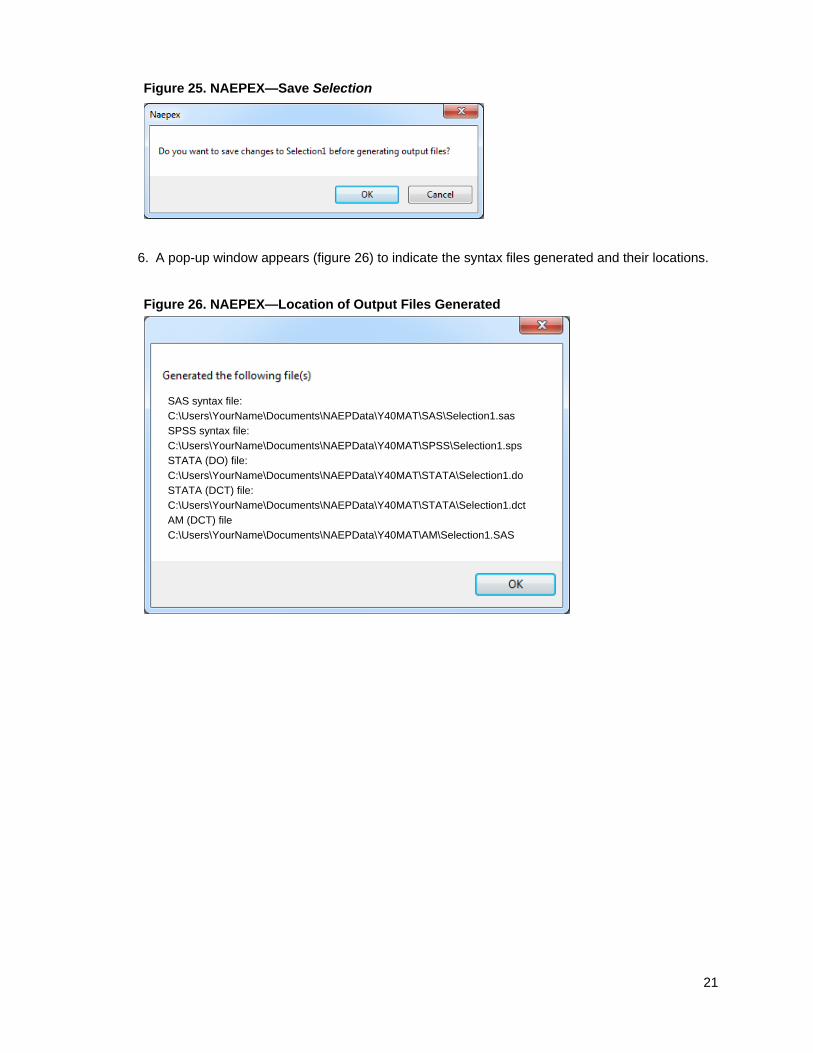
6. A pop-up window appears (figure 26) to indicate the syntax files generated and their locations.
Figure 26. NAEPEX—Location of Output Files Generated
Name \
Name \
Name \
Name \
Name \
SAS syntax file:
C:\Users\YourName\Documents\NAEPData\Y40MAT\SAS\Selection1.sas
SPSS syntax file:
C:\Users\YourName\Documents\NAEPData\Y40MAT\SPSS\Selection1.sps
STATA (DO) file:
C:\Users\YourName\Documents\NAEPData\Y40MAT\STATA\Selection1.do
STATA (DCT) file:
C:\Users\YourName\Documents\NAEPData\Y40MAT\STATA\Selection1.dct
AM (DCT) file
C:\Users\YourName\Documents\NAEPData\Y40MAT\AM\Selection1.SAS

22
7. The drop-down menu (figure 27) shows the files generated. To go directly to a specific output, highlight and click on the desired file.
Figure 27. NAEPEX—Output Files Generated
8. To run an analysis from the syntax files:
open the desired syntax with the appropriate software program;
generate a data set containing all of the variables you selected on the Select Variables tab by running the syntax as it was generated by NAEPEX (as in figure 27);
edit the "MISSING VALUES" section if appropriate; and
modify the code to include analyses to be run on this data set.
Your Name
Your Name