n-205 fundamentals of nursing laboratory (lynn 130-143, 380-426; taylor 718-725, 732-741, 1181-1214,...
TRANSCRIPT

N-205 Fundamentals of Nursing
LABORATORY
(Lynn 130-143, 380-426; Taylor 718-725, 732-741, 1181-1214, CD2; Study Guide Assignment) 6 hours
By: Dr. Maria Leah L. Regalado-Gulfan, RN

State principles of surgical asepsis. State & demonstrate safety in the use of
universal precautions Demonstrate preparations of a sterile
field. State purpose of surgical scrub. Demonstrate sterile gloving technique
without contamination. Demonstrate opening of sterile package
without contamination.
Demonstrate setting up a sterile tray. Demonstrate pouring sterile liquids to
sterile field. Demonstrate the cleaning of a wound
and applying sterile dressing. Demonstrate proper documentation of
sterile dressing change. Discuss the use of heat and cold
applications to wounds.

Also called “Surgical Asepsis” Goal: to render and keep objects and
areas free from microorganisms. Use of Surgical Asepsis
Operating room, labor and delivery areas Certain diagnostic testing areas Patient bedside
e.g., for procedures that involve insertion of urinary catheter, sterile dressing changes, or preparing and injecting medicine

Only a sterile object touches another sterile object.
Open sterile packages so that the first edge of the wrapper is directed away from the worker to avoid the sterile package touching unsterile clothing.
Outside of a sterile package is considered unsterile.

Avoid spilling any solution on the sterile field. A wet field is considered contaminated.
Hold sterile objects above the level of the waist.
Avoid talking, coughing, sneezing or reaching over a sterile field or object.
Never walk away or turn your back on a sterile field.
Keep all items sterile that are brought in contact with broken skin, or used to penetrate the skin to inject substances into the body.

Use dry, sterile forceps when necessary. Consider the edge (outer 1 inch) of a
sterile field to be contaminated. Consider an object contaminated if you
have any doubts as to its sterility.

Techniques & Procedure

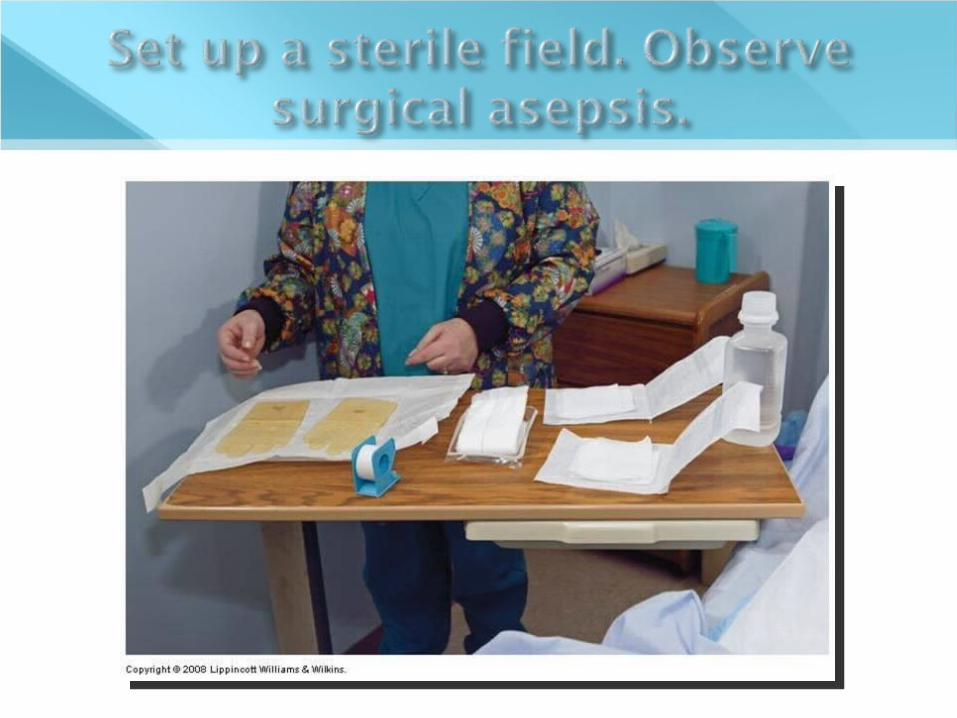
• Drape should ideally be waterproof• Touch only the outer 1 inch of the drape.

• Holding drape on the corners and allowing to unfold away from the body and surfaces• Positioning the drape on the work table with the moisture-proof side down • Do not reach over.

Agency-wrapped package


Commercially Packaged items


Opening a sterile package & Preparing a sterile field

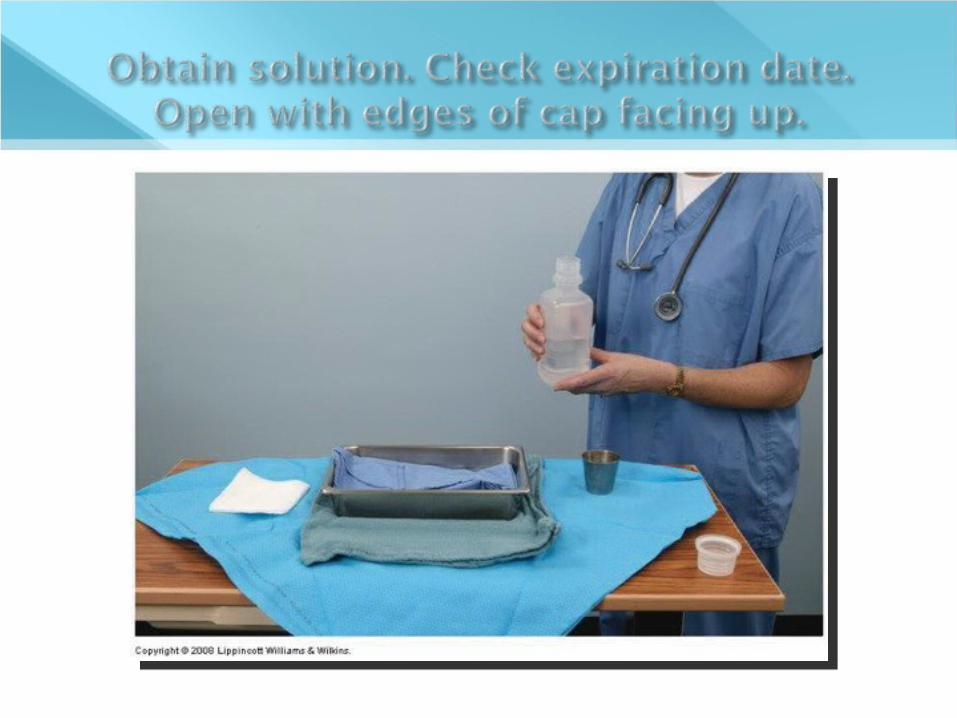


Be sure to hold the label of the solution facing up. This ensures the label being dry.
Pour required amount of solution steadily into the sterile container.
Avoid splashing to avoid moisture and contamination of sterile field.

Donning Gloves


Removing soiled gloves
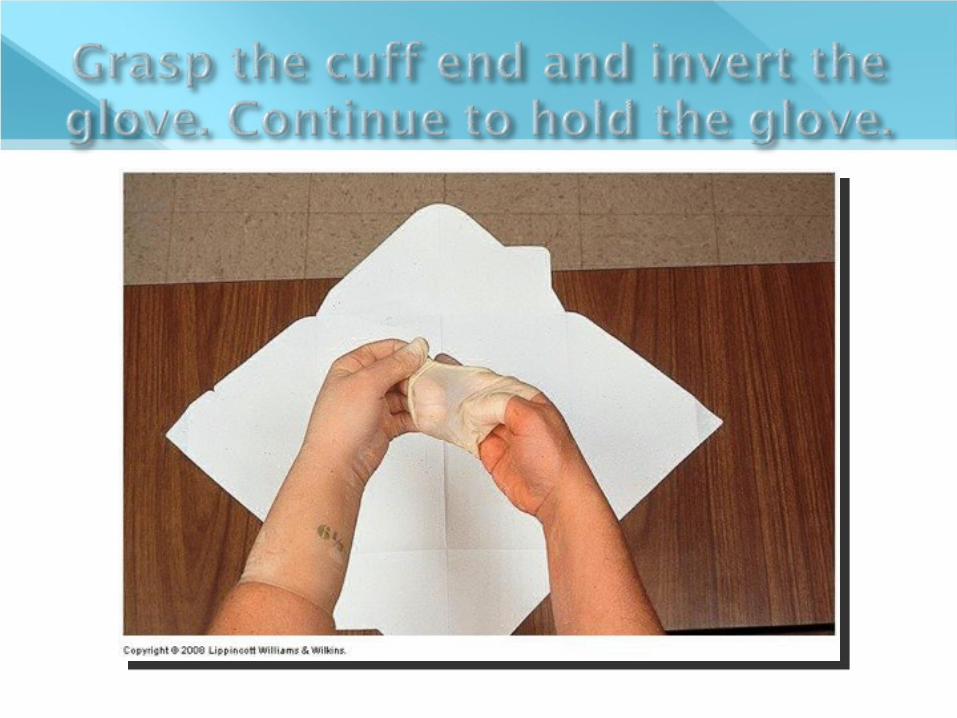


Donning sterile gloves Removing soiled gloves

Sterile techniques in Wound dressing

One of the body’s vital organs and is essential for maintaining life.
Has two layers: Epidermis – the superficial portion; stratified
epithelial cells. Regenerates relatively easily and quickly.
Dermis – the deeper layer which consists of smooth muscular tissue; nerves, hair follicles, certain glands and their ducts, arteries, veins, capillaries, fibrous and elastic tissue.


Protection Body temperature regulation Sensation Excretion Maintenance of fluid & electrolyte
balance Vitamin D production and absorption

Person’s Developmental Stage Infant’s skin & mucous membranes are easily injured Child’s skin becomes increasingly resistant to injury &
infection. Adolescent’s skin has enlarged sebaceous glands and
increased glandular secretions and continues to about age 50.
Older adults: brown spots or liver spots, dry.
Stage of Health Very thin or Obese – susceptible to irritation Fluid loss – loose & flabby Jaundice Eczema and psoriasis

Culture Socioeconomic Class Spiritual Practices Developmental Level Health State Personal preferences

A break or disruption in the normal integrity of the skin and tissues.
Range from superficial cuts to deep third degree burn
Causes: Mechanical force – surgical incisions Physical injury – burns Chemical injury

Intentional Wounds vs. Unintentional Wounds
Open vs. Close Wounds Acute vs. Chronic Wounds Partial Thickness, full thickness or
complex wounds

Type Cause
Incision Cutting or sharp instrument; wound edges in close approximation & aligned
Contusion Blunt instrument; usually disrupting skin surface; possible bruising
Abrasion Rubbing or scraping epidermal layers
Laceration Tearing of skin & tissue w/ blunt or irregular instrument
Puncture Pointed instrument puncturing the skin
Penetrating FB entering skin at high velocity; fragments possibly scattered thru out tissues

Type Cause
Avulsion Tearing a structure from normal anatomic position; possible damage to blood vessels, nerves & other structures
Microbial Secretion of exotoxins or endotoxins
Chemical Toxic agents and substances released from cellular necrosis
Thermal High or low temperature; cellular necrosis as possible result
Irradiation UV light or radiation exposure


Intact skin = 1st line of defense against microorganisms
Break in skin integrity increases risk for infection.
Body responds systematically to trauma. Adequate circulation is essential in
wound healing. Absence of foreign body, microorganisms
promotes normal and faster wound healing.

The extent of damage and the person’s state of health affects wound healing.
Response to wound is more effective if proper nutrition is maintained.

Primary Intention Healing with immediate approximation of
incisional wounds Secondary Intention
Contraction & granulation of wound Delayed primary healing
Healing and approximation after 4th day


Inflammatory Phase Proliferative Phase Remodeling Phase

Begins at the time of injury. Prepares for wound for healing. Two activities:
Hemostasis (Vascular Phase) – vasoconstriction, platelet activation & clustering. Exudate – leakage of plasma & blood components Scab formation – if wound is small.
Cellular Phase –WBCs movement, phagocytosis of debris
Symptoms: fever, leukocytosis, gen. malaise

Begins 2 – 3 days of injury, lasting up to 2 – 3 weeks.
Fibroblasts helps build new tissue to fill the wound space.
Granulation tissue forms which is the foundation for scar tissue development.
Collagen synthesis and accumulation continues.
Adequate nutrition and proper oxygenation are important in this phase.

Final stage of healing; begins approx. 3 weeks after injury and may last for as long as 6 months. (if wound is large)
New collage tissue continues to be deposited which compresses the blood vessels. (So the scar is usually avascular.)
Wounds that heal by second intention take longer to remodel and form a scar smaller than the original wound.

Age Circulation & Oxygenation Nutritional Status Wound Condition Health Status

Infection Hemorrhage Dehiscence and Evisceration
Dehiscence is the partial or total disruption of wound layers.
Evisceration is the protrusion of viscera through the incisional area.
Fistula Formation Abnormal passage from an internal organ to
the skin or from one internal organ to another.


Pain Anxiety & Fear Changes in body image

Appearance, Drainage, Pain, & Types of Drains

Inspection for sight and smell Palpation for appearance, drainage, and
pain Sutures, drains or tube, manifestation of
complications

Serous drainage Clear and watery Composed mainly by serous portion of blood and
from serous membranes Sanguineous drainage
Looks like blood Serosanguineous – mixture of blood and clear,
watery fluid. Purulent drainage
Made up of WBCs, liquefied dead tissue and bacteria
Thick, musty or foul-odor, usually yellow or greenish in color

Wound is swollen Wound is deep red in color Wound feels hot on palpation Drainage is increased and possibly
purulent Foul odor may be noted Wound edges may be separated with
dehiscence present

Steri-strips Gauze

Roller bandages Circular turn Spiral turn Figure-of-eight turn Recurrent-stump bandage


Open systems Penrose drain
Closed systems Jackson-Pratt drain Hemovac drain

Penrose drain A Hemovac


Proper Techniques & Procedures

Provide physical, psychological, and aesthetic comfort
Remove necrotic tissue Prevent, eliminate, or control infection Absorb drainage Maintain a moist wound environment Protect wound from further injury Protect skin surrounding wound

Explain procedure to the patient first. Gather all necessary equipment. Do hand hygiene. Check physician orders for dressing
change. Note for presence of drains, etc. Provide privacy to the patient. Assist patient to a comfortable position. Ensure sterile technique.

• Don clean and disposable gloves.• Use PPE.


Clean from top to bottom or from center outward in circular motions.
Clean around drains if present.
Use one gauze for each motion.
Dry wound using dry gauze sponge.


Remove gloves.
Apply tape to secure dressing.

Cleaning a wound & Applying Sterile Dressing

Pressure Ulcers, Draining drains, Surgical Scrubbing
and Application of Heat & Cold

A wound with a localized area of tissue necrosis.
Underlying cause is compression of soft tissue between a body prominence and an external surface for a prolonged period of time.
“Decubitus ulcer” or “bedsore” One of the most common skin and tissue
disruptions.

External Pressure – over body prominences where body weight is distributed over a small area without much subQ tissue.
Friction & Shearing Forces – two surfaces rubbing against each other; one tissue slides over another layer Wrinkled sheets Positioning of patient – semi-sitting


Immobility Nutrition & Hydration
Vit C deficiency = fragile capillaries Moisture Mental Status Age

First symptoms: Blanching of the skin reactive hyperemia
Stage I — non-blanchable erythema of intact skin
Stage II — partial-thickness skin loss Stage III — full-thickness skin loss; not
involving underlying fascia Stage IV — full-thickness skin loss with
extensive destruction

Staging has limitations especially when an eschar formation is present.
Eschars are thick, leathery scabs or dry crusts that are necrotic and should be removed.

Size of the wound Draw the shape & describe it
Depth of the wound Presence of Undermining, Tunneling or
Sinus Tract

Clean with each dressing change Use careful, gentle motions to minimize
trauma Use 0.9 normal saline solution to irrigate
and clean the ulcer Report any drainage or necrotic tissue

Keep ulcer tissue moist and surrounding skin dry
Place moist dressings only on the wound surface
Use dressing that absorbs exudate but maintains moist environment
Use skin sealant or moisture-barrier ointment on surrounding skin
Secure dressing with the least amount of tape possible
Use wet-to-dry dressings for debridement, when ordered
Pack wound cavities loosely with dressing material

Stage I None, frequent turning, pressure-relieving
devices and positioning Stage II
Saline or occlusive dressing Stage III
Wet-to-dry dressings, (surgical intervention & proteolytic enzymes)
Stage IV Non-adherent dressing every 8-12 hours Requires skin grafts


Explain procedure. Position patient so
that solution will flow from upper to lower end.
Provide privacy. Set up a sterile
field and put on sterile gloves.

Position sterile basin below the wound.
Irrigate with warm sterile saline.
Position syringe with tip 1 inch above the wound.


Irrigating a Sterile Wound

Draining drains


Surgical Scrubbing

Hand antisepsis done before assisting a surgical procedure.
Involves a more lengthy scrub, reducing resident and transient flora from forearms and hands.
Incorporates surgical asepsis. The cleanest parts are the fingertips and
the dirtiest parts are the elbows.

Heat & Cold Therapy

Applied on a specific part or all of a patient’s body to bring about a local or systemic change in body temperature.
Responses to heat and cold therapy depend on: Method Duration Degree of heat or cold Patient’s age Amount of body surface covered

Dilates peripheral blood vessels Increases tissue metabolism Reduces blood viscosity and increases
capillary permeability Reduces muscle tension Helps relieve pain Systemic Effects due to prolonged heat:
Inc CO Sweating Increased pulse rate and dec BP

Constricts peripheral blood vessels Release of histamine, serotonin and
bradykinins reduces edema Reduces muscle spasms Promotes comfort
Slows transmission of pain stimuli Systemic effects due to prolonged
exposure: Increase blood pressure Shivering and goose bumps

Rebound phenomenon Heat produces maximum vasodilation in 20-
30 minutes. With cold, maximum vasoconstriction is reach
when temperature of the skin reaches 15 ˚C or 60 ˚F.
Beyond those maximum periods, the reverse effect happens.

Hot water bags or bottles Electric heating pads Aquathermia pads Heat lamps Heat cradles Hot packs Moist heat Sitz baths Warm soaks


Ice bags Cold packs Hypothermia blankets Moist cold
Assess the patient’s physical & mental status before applying heat or cold therapy. Obtaining a health history and completing a PE.
Assess the body area to be treated Assess the condition of the equipment to
be used. Dry heat should not be applied to open
wounds, to an acutely inflammed area, to abdomen of pregnant women or over metallic implants.

Cold should not be used over open wounds or patients with impaired peripheral circulation or allergy to cold.
Always explain before initiating therapy.

Application of Warm Sterile Compress

Review of Skin integrity Unexpected situations

Yipee!!