mtn-016: abdominal examination in pregnancy exam in... · objectives review mtn-016 protocol and...
TRANSCRIPT

MTN-016: Abdominal examination
in pregnancy
Lisa Noguchi and Katie Bunge
MTN Regional Meeting
Capetown, South Africa
DATE

Objectives
Review MTN-016
protocol and CRF
requirements related to
abdominal examination in
pregnancy
Review steps
Discuss do’s and don’ts
Optional clinical skills
practice: measuring
fundal height

Protocol Section 5.2
Individuals who meet the following criteria are eligible…:
2. During participation in a parent protocol, has/had a known
confirmed pregnancy, meeting at least one of the following
sets of criteria in A or B:
A: Two consecutive monthly visits with + pregnancy tests
B: One or more of the following assessments:
Auscultation of fetal heart tones
Positive pregnancy test confirmed by clinic staff in the presence
of clinically confirmed enlarged uterus
Positive pregnancy test confirmed by clinic staff in the presence
of missed menses by participant report
Clinical assessment of fetal movement
Demonstration of pregnancy by ultrasound

4
N:\hivnet\forms\MTN_016\forms\forms_woman\m016_wom_enroll.fm
Version 1.0, 08-JUL-09
Woman Enrollment (WEN-1)
Purpose: This form is used to document a woman participant’s study enrollment. This form is completed at the
Enrollment Visit for participants determined to be eligible for the study.
General Information/Instructions: This form is faxed to SCHARP DataFax only if the participant is enrolled
(that is, she is eligible and provides informed consent), and only after completion of the Enrollment Visit.
Note: There is no visit code field on this form since this form is only completed at the Enrollment Visit.
Item-specific Instructions:
• Item 1: If response to this item is “no” (the participant does not meet all eligibility criteria), end the form.
Do NOT fax this or any other forms completed for this participant to SCHARP DataFax.
• Item 2: If the participant marks the informed consent using her thumbprint, record the date the thumbprint
was made.
• Item 3: If response to this item is “no” (the participant did/does not have a known confirmed pregnancy
from the parent protocol), end the form. This participant is not eligible. Do NOT fax this or any other forms
completed for this participant to SCHARP DataFax.
• Items 3a–3b5: These items document which criteria within A or B were met to determine the confirmed
pregnancy. If item 3a1 is marked, record the dates of the two positive pregnancy tests, and go to item 4. If
the confirmed pregnancy was made using criteria B, skip 3a1 and mark all that apply for items 3b1–3b5.
• Item 4: If the pregnancy outcome for this pregnancy has already been diagnosed, mark item 4 “yes.”
Complete a Pregnancy Outcome form.
• Item 4a: Record the date of the pregnancy outcome. All efforts should be made to obtain a complete
pregnancy outcome date. If a complete date (day, month, and year) is not available, record the best estimate
possible. At a minimum try to record the month and year of the pregnancy outcome. If the pregnancy
outcome date is more than one year ago, the participant is not eligible. End the form and do NOT fax this
or any other forms completed for this participant to SCHARP DataFax.
• Item 5: Record the participant’s HIV status.
• Item 5a: Record the date and source of the most recent HIV test result. If the HIV test result is available
from source documentation of the parent protocol mark the “parent protocol” box. Otherwise, mark the
“self-report” box.
Note: All efforts should be made to obtain HIV test result information from laboratory source
documentation.
MTN-016 Data Collection
29 July 2009 Version 1.0 13-23

5
N:\hivnet\forms\MTN_016\forms\forms_woman\m016_wom_std_pg_report_13jun07.fm
Version 1.0, 08-JUL-09
Pregnancy Report and History (PR-1)
Purpose: This form is used to report a pregnancy of a study participant. This form will be completed one time
for each “pregnancy cycle.” Refer to the Study-Specific Procedures (SSP) Manual for more specific
information about pregnancy cycles.
General Information/Instructions: This form is completed at the participant’s Enrollment Visit and with each
subsequent consent.
• Pregnancy # and Visit Code: Record the Pregnancy #. The Pregnancy # refers to the pregnancy number
corresponding to MTN 016 participation. Only pregnancies enrolled into MTN 016 should be counted for
data purposes. The Visit Code has been pre-filled with 1.0 because this form will always be completed at
the first visit of a pregnancy cycle. Refer to the SSP Manual for more specific information on assigning visit
codes.
Item-specific instructions:
• Item 1: Complete date required. Record best estimate if date not known.
• Item 2: Complete date required.
• Item 3d: Physical examination includes fundal height, uterine size by pelvic exam, and/or fetal heart rate.
• Item 5: Include information on pregnancy complications and fetal/infant congenital anomalies experienced
prior to enrolling in the study as well as any conditions experienced/reported during the study.
MTN-016 Data Collection
29 July 2009 Version 1.0 13-49

Rationale
Gestational age data in MTN-016
Study product adherence measures
(e.g., PK data) in parent
study
Estimate timing &
duration of study product exposure in pregnancy
6

Why not just use LMP?
If everyone had normal, regular menstrual
periods every 28 days AND
If all could remember LMP date, AND
If ovulation ALWAYS occurred on cycle day
14, THEN
Gestation age calculation could be easy! BUT
that’s not real life…
Bleeding can be irregular, esp. with use of
hormonal contraception or anovulatory cycles,
and we are only forgetful humans! 7
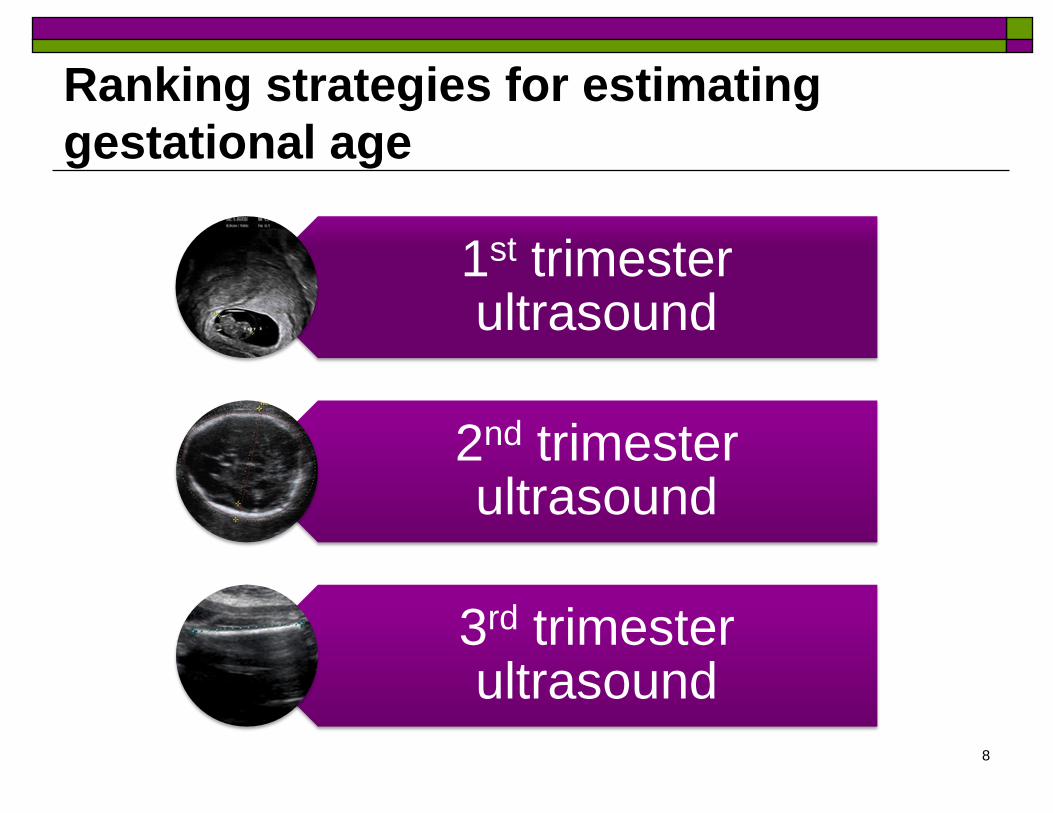
Ranking strategies for estimating
gestational age
1st trimester ultrasound
2nd trimester ultrasound
3rd trimester ultrasound
8

Steps (the obvious stuff!)
Introduce yourself
Confirm the participant’s identity
Confirm the participant has emptied her
bladder!
Wash your hands
Explain the exam

Steps (cont.)
Participant flat as possible on the exam
table, without making her too uncomfortable
Keep draped, but able to be exposed from the
pubic bone to below breasts
Note
Obesity or other nutritional status problems
Previous operative scars, e.g., previous caesarean
delivery
Uterine size/shape

Uterine size <20 weeks gestation
Anatomical landmarks are used, i.e., the
symphysis pubis and the umbilicus
Gently palpate abdomen with left hand
If fundus palpable just above symphysis pubis,
gestational age approximately 12 weeks
If fundus reaches half way between symphysis and
umbilicus, gestational age ~16 weeks
If fundus at same height as umbilicus, gestational age
~20 weeks (one finger under umbilicus = 18 weeks
and one finger above umbilicus = 22 weeks)
Standards/guidance may vary by country!

Palpation Maternal Care: Skills 1-2: 1/2006
3
Figure 1-2 A: Determining the fundal height.
1-2 E DETERMINING THE SIZE OF THE UTERUS BEFORE 18 WEEKS GESTATION. 1. Anatomical landmarks are used, i.e. the symphysis pubis and the umbilicus. 2. Gently palpate the abdomen with the left hand to determine the height of the fundus of the uterus: (i) If the fundus is palpable just above the symphysis pubis, the gestational age is probably 12 weeks. (ii) If the fundus reaches half way between the symphysis and the umbilicus, the gestational age is
probably 16 weeks. (iii) If the fundus is at the same height as the umbilicus, the gestational age is probably 22 weeks (one
finger under the umbilicus = 20 weeks and one finger above the umbilicus = 24 weeks). Figure 1-2 B. Determining the uterine size before 24 weeks.
PERINATAL EDUCATION PROGRAMME
Lower edge of
sternum
Left hand
Uterus
Pelvic Inlet

Measurement by tape
Feel for uterine fundus
Gently palpate from lower end of the sternum
Continue to palpate down abdomen
If uterus is rotated away from midline, highest point will not
be in midline but will be to left or right!
Palpate away from midline to make sure you mark highest
point at which fundus can be palpated
Hold end of tape at top of symphysis pubis
Lay tape over curve of uterus to point marking top
Measure distance in cm from symphysis pubis to top
of the fundus (symphysis-fundus height)

Tricky measurements
Maternal Care: Skills 1-2: 1/2006
4
1-2 F DETERMINING THE HEIGHT OF THE FUNDUS FROM 18 WEEKS GESTATION. The symphysis-fundus height should be measured as follows: 1. FEEL FOR THE FUNDUS OF THE UTERUS. This is done by starting to gently palpate from the
lower end of the sternum. Continue to palpate down the abdomen until the fundus is reached. When the highest part of the fundus has been identified, mark the skin at this point with a pen. If the uterus is rotated away from the midline, the highest point of the uterus will not be in the midline but will be to the left or right of the midline. Therefore, also palpate away from the midline to make sure that you mark the highest point at which the fundus can be palpated. Do not move the fundus into the midline before marking the highest point.
Figure 1-2 C: Measuring the symphysis-fundus height.
2. MEASURE THE SYMPHYSIS-FUNDUS (S-F) HEIGHT. Having marked the fundal height, hold the
end of the tape measure at the top of the symphysis pubis. Lay the tape measure over the curve of the uterus to the point marking the top of the uterus. The tape measure must not be stretched while doing the measurement. Measure this distance in centimetres from the symphysis pubis to the top of the fundus. This is the symphysis-fundus height.
3. If the uterus does not lie in the midline but, for example, lies to the right, then the distance to the highest point of the uterus must still be measured WITHOUT moving the uterus into the midline.
Having determined the height of the fundus, you need to assess whether the height of the fundus corresponds to the patient's dates, and to the size of the fetus. From 18 weeks, the S-F height must be plotted on the SF growth curve to determine the gestational age. This method is, therefore, only used once the fundal height has reached 18 weeks. In other words when the S-F height has reached two fingers width under the umbilicus. Charting of the symphysis-fundus height is discussed in skills workshop 2 of the PEP manual. 1-2 G PALPATION OF THE FETUS. The lie and presenting part of the fetus only becomes important when the gestational age reaches 34 weeks. The following must be determined: 1. THE LIE OF THE FETUS. This is the relationship of the long axis of the fetus to that of the mother.
The lie may be longitudinal, transverse, or oblique.
PERINATAL EDUCATION PROGRAMME
14
Incorrect measurement
of uterus rotated away from midline
Correct

Do’s and Don’ts
Do
Distinguish your exam from antenatal care! Some of
these assessments are components of antenatal visits,
but study visits CANNOT substitute for antenatal care.
Don’t Don’t move fundus into midline before marking highest point
Don’t stretch the tape measure

Estimating gestational age
McDonald’s rule
Fundal Height (>22 cm) = Gestational age in
weeks
Remember: this is a rough estimation
and is subject to inter-rater variability!
Measurements can vary from provider to
provider
Aim for careful consistency
16

Fetal heart rate
17

Fetal vs. Maternal
Fetal heart rate (FHR) : 110-180
180 is on the high side, but may be seen
briefly during normal FHR acceleration
Maternal heart rate: 60-90
When in doubt, palpate maternal HR
while listening to fetal HR
18

FHR auscultation
If 016 eligibility assessment occurs
initially in late pregnancy…
19

Help!
In general
Includes several clinicians, including Chair and
Co-chair
Medical Officer Jeanna Piper: [email protected]
Protocol Chair & Co-chair Richard Beigi: [email protected]
Samuel Kabwigu: [email protected]
20

Acknowledgements
MTN is funded by NIAID (AI068633), NICHD and
NIMH, all of the U.S. National Institutes of Health