mobile programming lecture 2ww2.cs.fsu.edu/~yannes/lectures/lect02.layouts.widgets.toasts.and... ·...
TRANSCRIPT
Mobile ProgrammingLecture 2
Layouts, Widgets, Toasts, and Event Handling

Lecture 1 Review
● How to edit XML files in Android Studio?● What holds all elements (Views) that appear
to the user in an Activity?● When should you make changes to R.java?● Give an example of a View (something in
Android that extends View)● How to add a new XML Layout file?
Today's Agenda
● Layouts○ LinearLayout, RelativeLayout, TableLayout
● Widgets○ TextView, EditText, Buttons, SeekBar,
NumberPicker● Toasts● Event Handling
Views
Every UI component in Android is a View
Layouts
● Layouts are ViewGroups○ Special types of Views that contain other Views or
ViewGroups● Your XML file will contain a hierarchy of
Views○ You can add multiple Layouts to the canvas!
● Properties/Attributes of Views are configurable○ normally prefixed with “android:”
■ e.g. android:id, android:text
Layouts
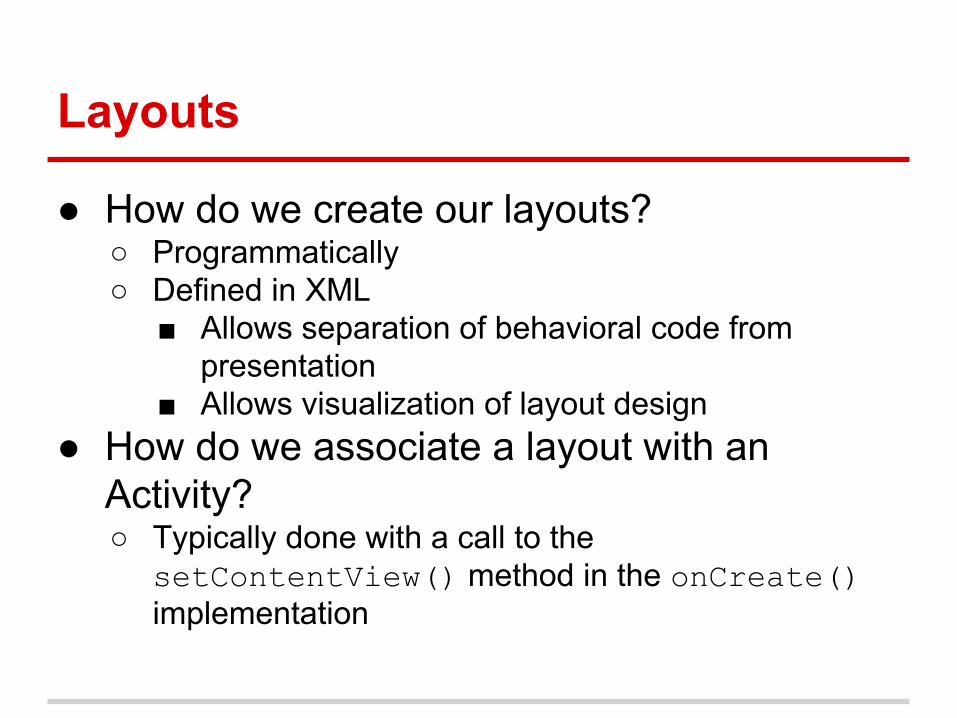
● How do we create our layouts?○ Programmatically○ Defined in XML
■ Allows separation of behavioral code from presentation
■ Allows visualization of layout design● How do we associate a layout with an
Activity?○ Typically done with a call to the
setContentView() method in the onCreate() implementation

Layouts
● LinearLayout● RelativeLayout● TableLayout● TabLayout
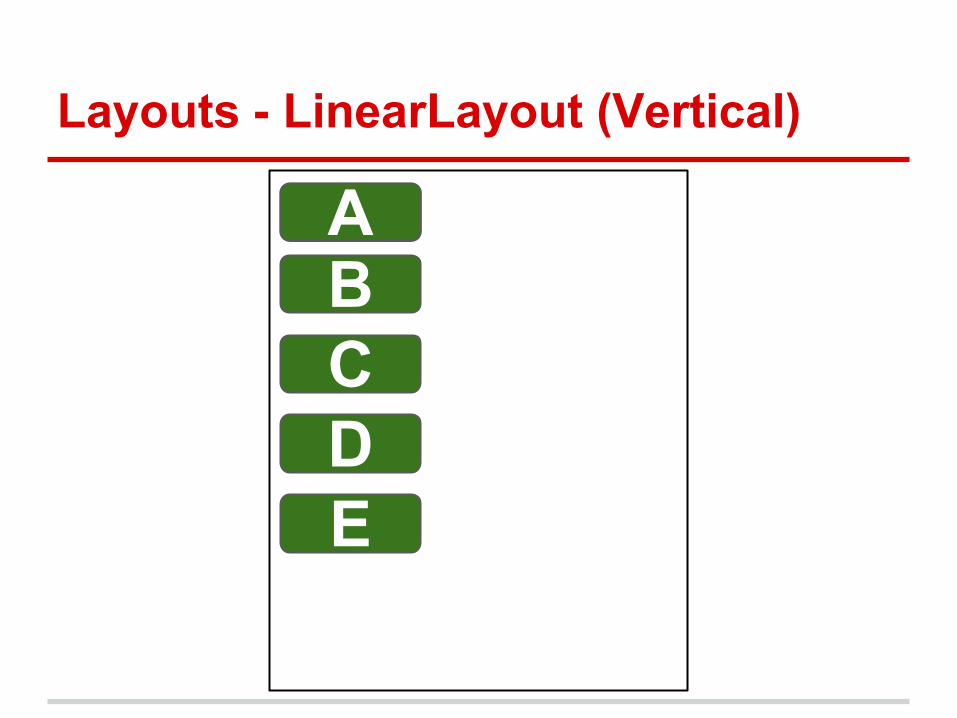
Layouts - LinearLayout Review
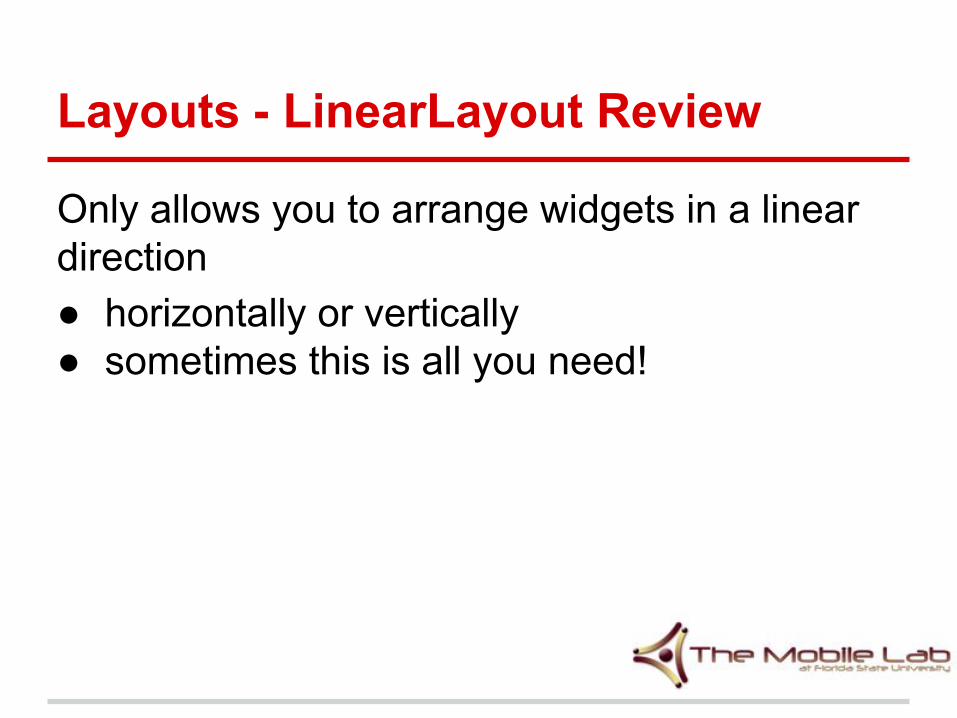
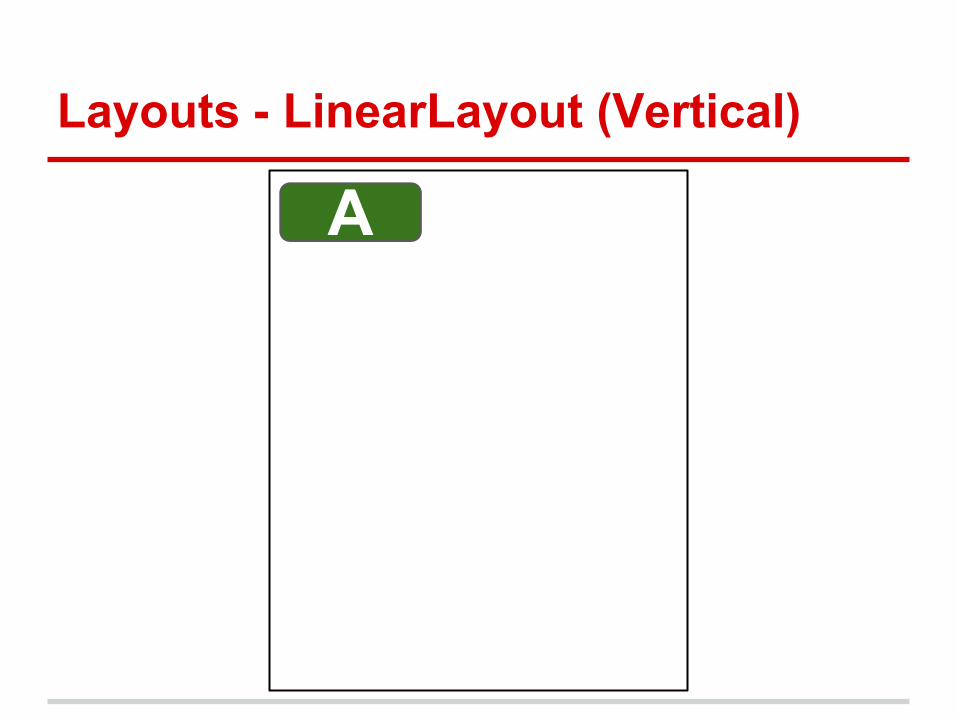
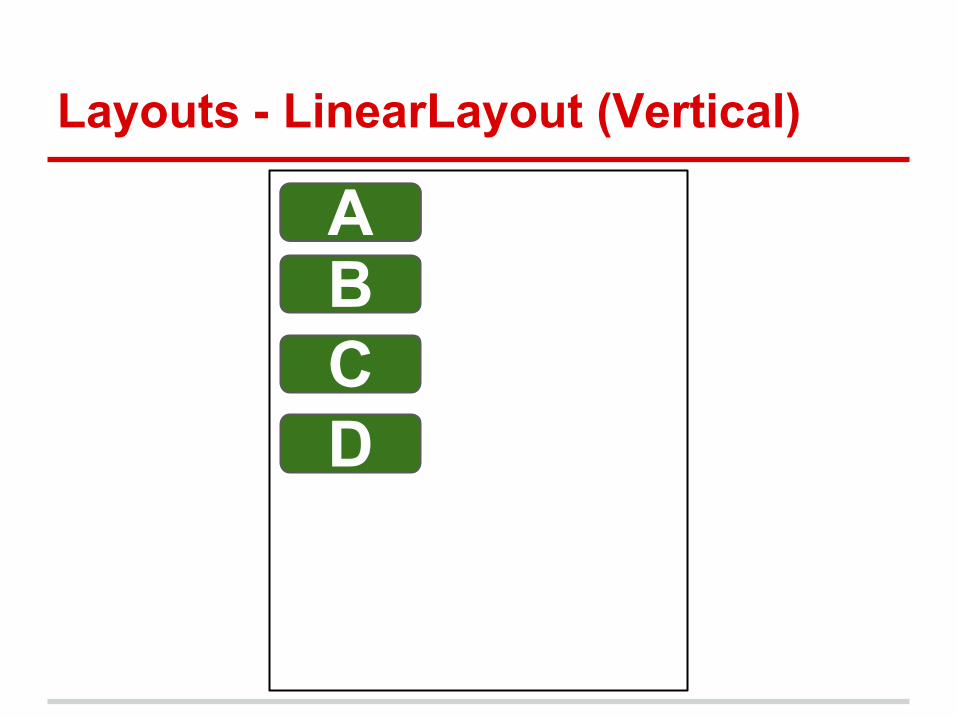
Only allows you to arrange widgets in a linear direction● horizontally or vertically● sometimes this is all you need!
Layouts - LinearLayout (Vertical)
A

Layouts - LinearLayout (Vertical)
AB

Layouts - LinearLayout (Vertical)
ABC
Layouts - LinearLayout (Vertical)
ABCD
Layouts - LinearLayout (Vertical)
ABCDE
Layouts - LinearLayout
● Nesting LinearLayouts can degrade performance
● For your homeworks and projects, only use LinearLayout when you have good reason to do so
Layouts
● Try not to waste too much time on editing the Layout in the XML editor
● If you want to switch from LinearLayout to another Layout○ Right click canvas○ Change Layout...○ Select a different Layout
Layouts
● Want to add an entirely new UI?● Right click your project
○ New > Android Resource File○ Resource Type: Layout○ File: xml_file_name.xml○ Root Element: e.g. RelativeLayout○ This stores the new XML file in res/layout
■ Android Studio will automatically set layout as the directory that the resource file should be created in
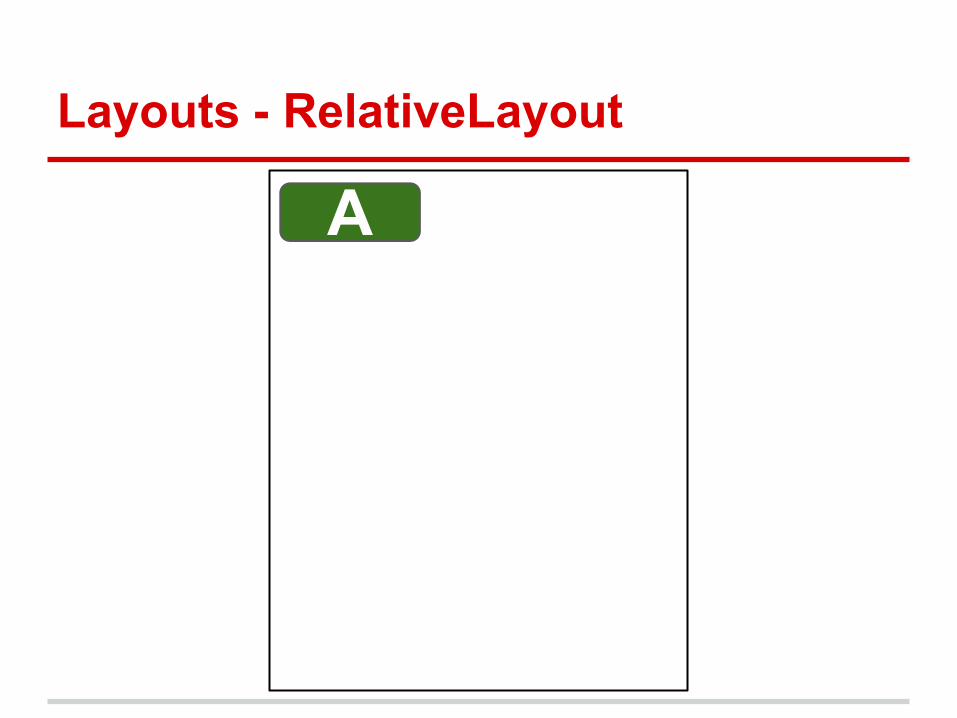
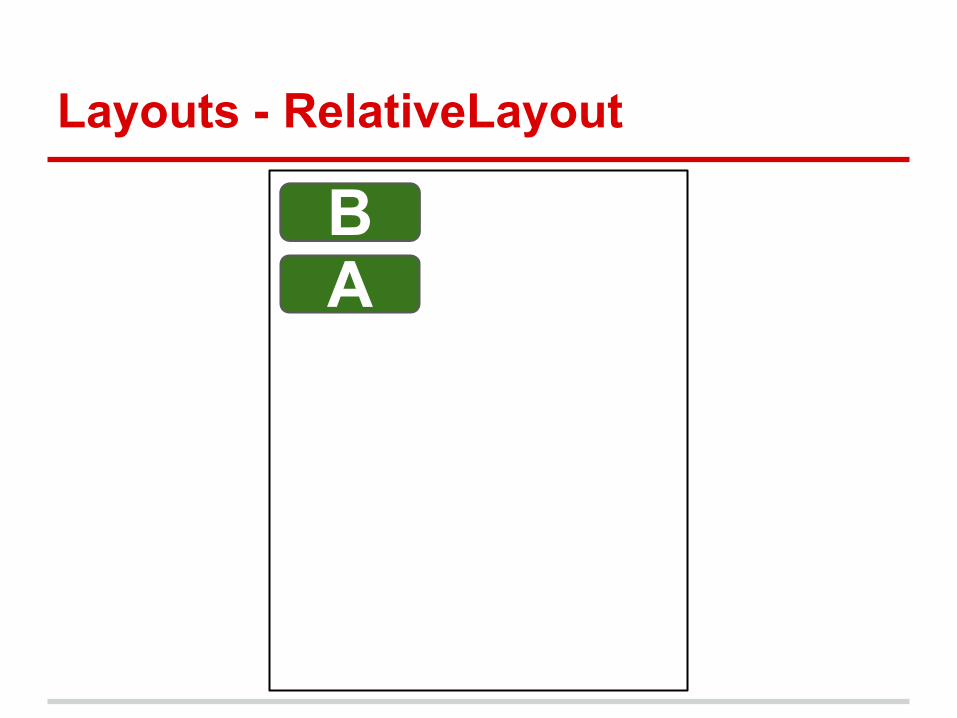
● Allows you to specify the position of one View B relative to another View A
Layouts - RelativeLayout
Layouts - RelativeLayout
A

Layouts - RelativeLayout
AB

Layouts - RelativeLayout
A B
Layouts - RelativeLayout
BA

Layouts - RelativeLayout
B A

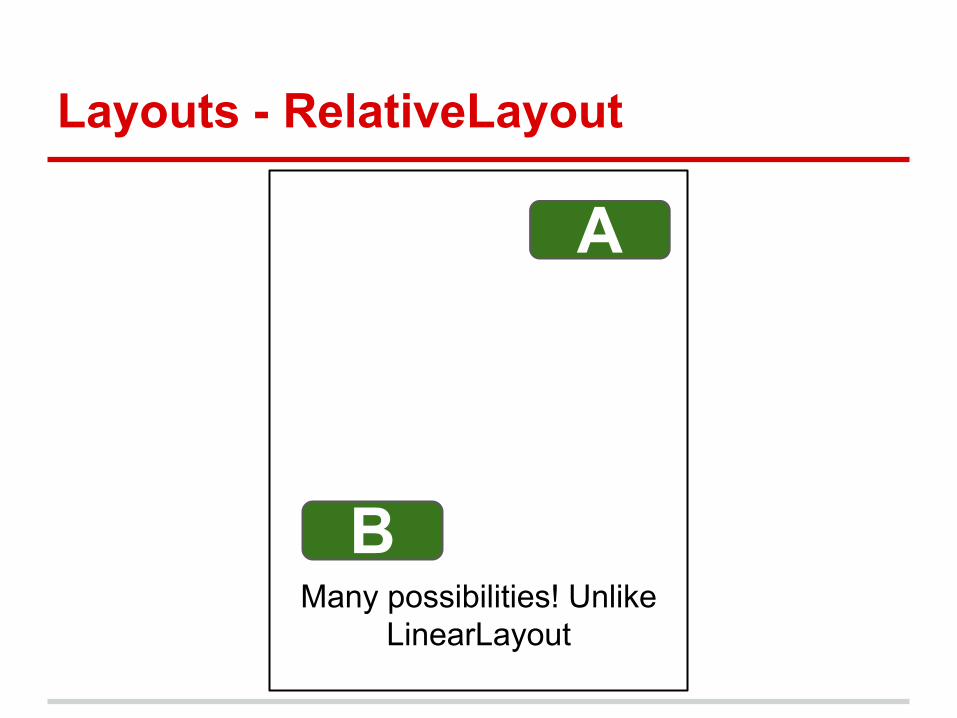
Layouts - RelativeLayout
A
B
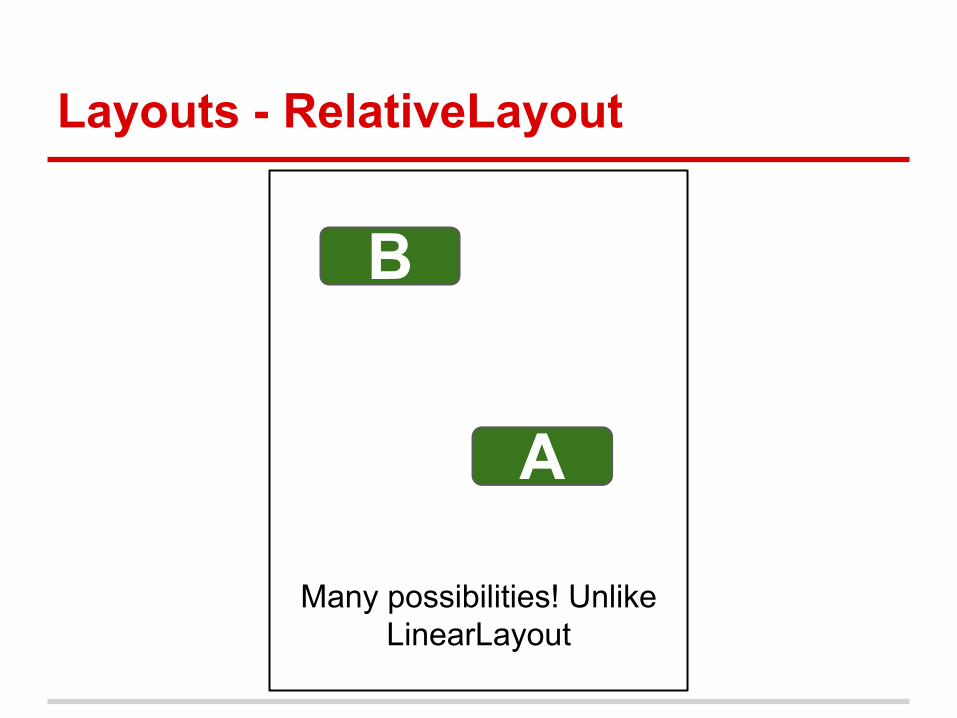
Many possibilities! Unlike LinearLayout
Layouts - RelativeLayout
A
BMany possibilities! Unlike
LinearLayout
Layouts - RelativeLayout
A
B
Many possibilities! Unlike LinearLayout
Layouts - RelativeLayout
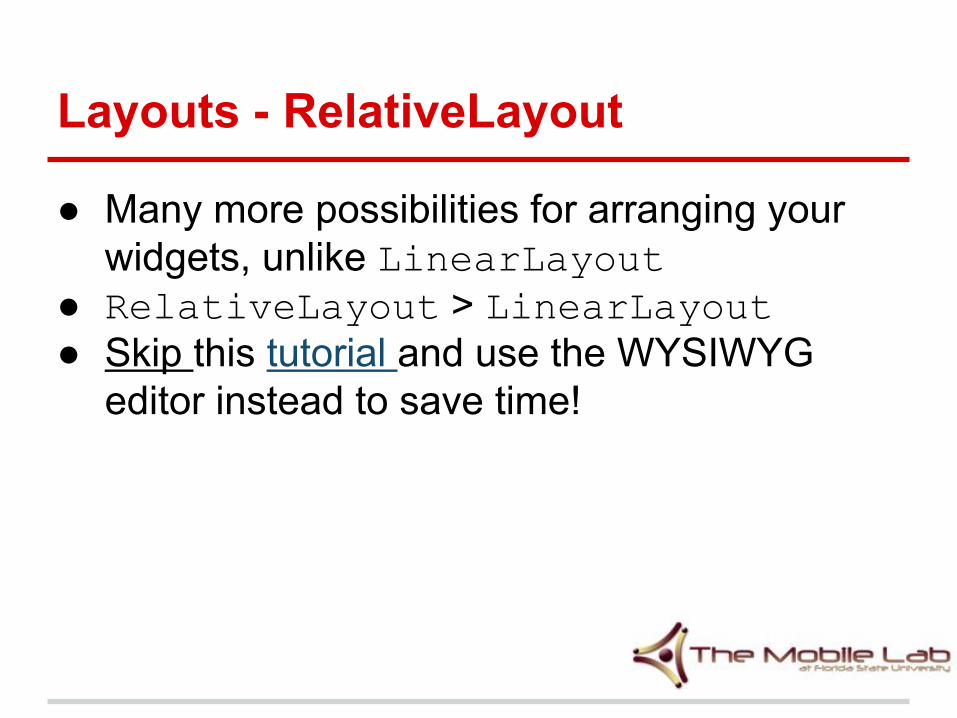
● Many more possibilities for arranging your widgets, unlike LinearLayout
● RelativeLayout > LinearLayout● Skip this tutorial and use the WYSIWYG
editor instead to save time!
Layouts - TableLayout
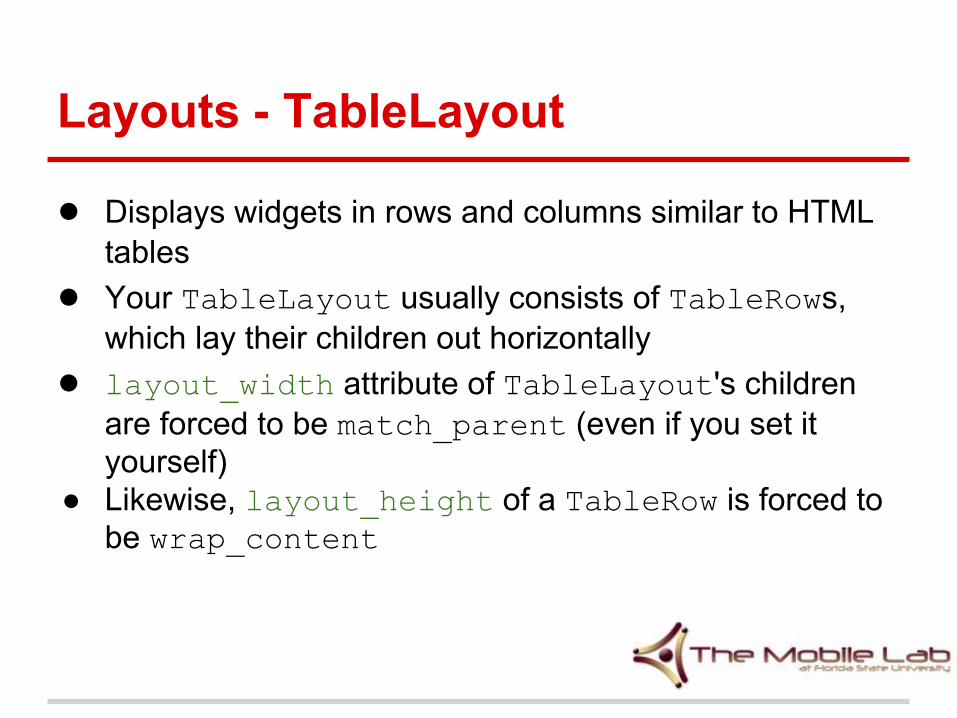
● Displays widgets in rows and columns similar to HTML tables
● Your TableLayout usually consists of TableRows, which lay their children out horizontally
● layout_width attribute of TableLayout's children are forced to be match_parent (even if you set it yourself)
● Likewise, layout_height of a TableRow is forced to be wrap_content
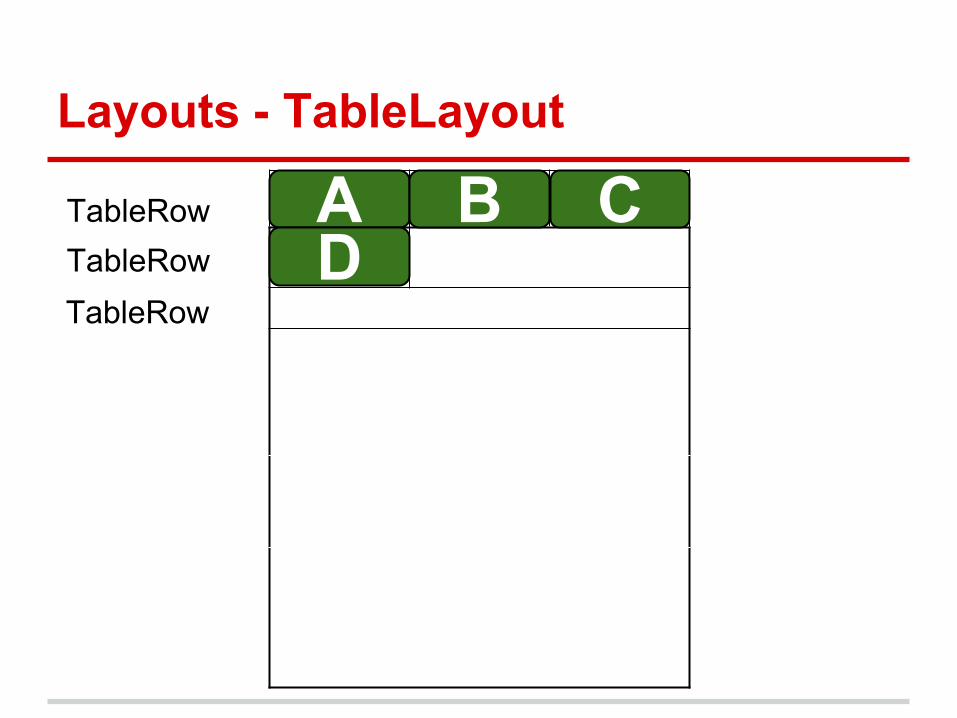
Layouts - TableLayout
AD
BTableRowTableRow
CTableRow

Layouts - Oversized Layouts
● If you have some widgets that aren't being displayed on the screen, it could be because there isn't enough space on the screen to show them all
● You won't be able to scroll by default
Layouts - ScrollView
To solve this:● Add a ScrollView view to the root of your
root layout (can be LinearLayout)● Move your main Layout to root of the
ScrollView (e.g. RelativeLayout)

Widgets - Finding Available Widgets
● To see some of the available Widgets, open one of the XML files in res/layout
● View the XML file as Graphical Layout using the tabs at the bottom of the window
● Select a category in the left pane if necessary (e.g. Text Fields)
Widgets
● All of these widgets are subclasses of the View class (i.e., View is the base class for widgets)
● Try to avoid modifying XML files directly if you can○ use Forms or WYSIWYG "wizzy wig" instead

Widgets - Examples
● TextViews○ Displays text in your Activity
● EditText○ Allows the user to input text
● Button○ Can be pressed by the user to perform an action○ CheckBox○ RadioGroup○ ToggleButton
Widgets - Id's
● Id's are not required for each widget● R.java stores the id's for your widgets. How
do the id's get set?○ Remember, don't edit the R.java file!

Widgets - Id's
2 ways to add a widget and set its android:id value1. Using the Graphical Layout editor
a. Drag and drop a widget onto the canvasb. Set the id property in the Properties section of the
Component Tree2. Using the XML editor
a. Type the XML code needed for the widget that you want
b. add android:id="@+id/id_name"to its attributes
Widgets - Id's
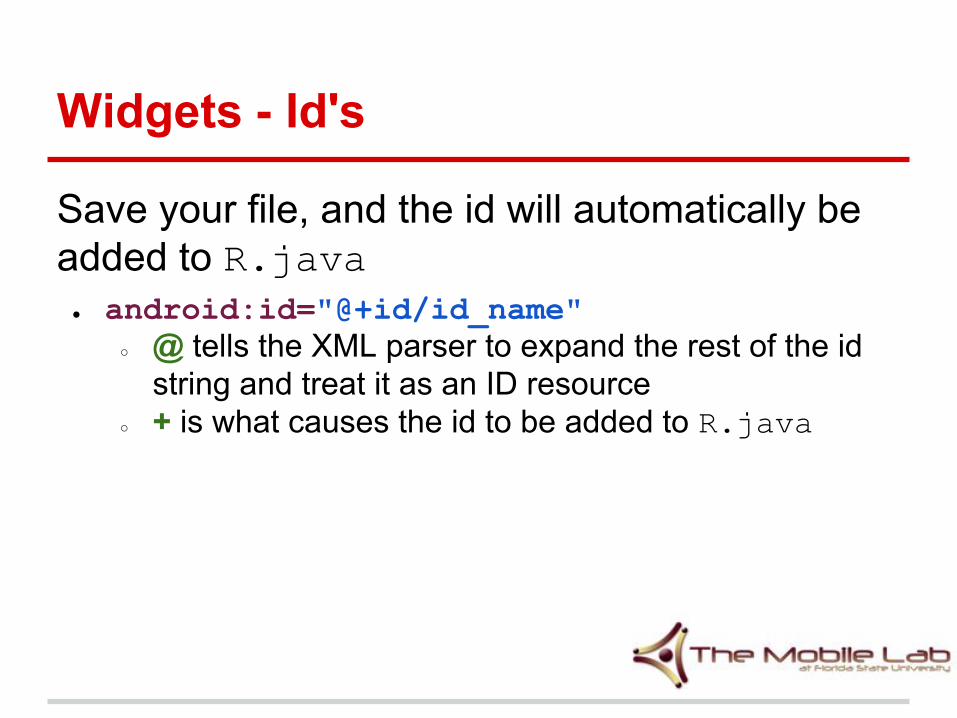
Save your file, and the id will automatically be added to R.java
● android:id="@+id/id_name"○ @ tells the XML parser to expand the rest of the id
string and treat it as an ID resource○ + is what causes the id to be added to R.java
Widgets
● As you may have noticed, you can do this for attributes other than the android:id attribute
● You can explore your options by right clicking on anything on the canvas
Widgets - layout_height/width
Always set the android:layout_height and android:layout_width attributes in the XML file for your widgets.
● NOT doing so is an easy way to get a Force close
● Drag and drop onto the canvas so that you don't have to worry about this
Widgets - layout_height/width
Values for android:layout_height and android:layout_width● "wrap_content"
○ big enough to hold its contents● "match_parent"
○ make the specified dimension as big as its parent● "fill_parent"
○ being deprecated, replaced by "match_parent"
Widgets - TextView
We will experiment with some of the attributes for the TextView widget● android:text
○ e.g. "Hello World!"● android:textSize
○ e.g. "20sp"○ sp = scale-independent pixels, it helps when writing apps
to be run across a variety of device configurations● android:textStyle
○ e.g. "italic"● android:textColor
○ e.g. “#FFFFFF”

Widgets - EditText
Experimenting with the EditText widget. EditText is a subclass of TextView - adds the ability to edit text.● android:hint
○ e.g. "Enter your name"● android:inputType
○ textCapWords○ textMultiLine○ textNoSuggestions (doesn't work for me, try
textVisiblePassword as a workaround)○ textPassword○ number
Can be combined using ‘|’e.g. android:inputType=“textCapWords | textMultiLine”

Widgets - Button
Experimenting with the Button widget. Button is a subclass of TextView.● android:onClick
○ e.g. “doSomething”● Different button types
○ Button for a button with text○ ImageButton for a button with just an icon○ Button for a button with an icon and text
■ add android:drawableLeft attribute

Widgets - CheckBox
Experimenting with the CheckBox widget. CheckBox is a subclass of Button
● android:text○ e.g. "I agree to the terms and conditions"
● android:checked○ "true" or "false"○ sets the default value of the CheckBox
Widgets - RadioGroup / RadioButton
● You usually want to drag a RadioGroup onto the canvas first
● It's easy to drag and drop or remove RadioButtons to/from the RadioGroup
Widgets - RadioButton
Experimenting with the RadioButton widget. RadioButton is a subclass of Button
● android:text○ e.g. "Female"
● android:checked○ "true" or "false"○ sets the default state/value of the RadioButton

Widgets - ToggleButton
Experimenting with the ToggleButton widget. ToggleButton is a subclass of Button
● android:textOn○ e.g. "GPS Enabled"○ default value is "On"
● android:textOff○ e.g. "GPS Disabled"○ default value is "Off"
● android:checked○ "true" or "false"○ sets the default state/value of the ToggleButton
Widgets - Switch
Introduced in Android 4.0 as an alternative to ToggleButton
Requires the minimum supported API to be Android 4.0
Widgets - SeekBar
Experimenting with the SeekBar widget. ● android:max
○ e.g. "100"○ you can't set the min, it's always 0
● android:progress○ e.g. "50"○ sets the current position of the slider on the SeekBar

Widgets - RatingBar
Experimenting with the RatingBar widget. ● android:numStars
○ e.g. "6"● android:rating
○ e.g. "3"○ sets the default rating
● android:stepSize○ e.g. "2"○ rating is set in groups of stepSize○ default = "1"
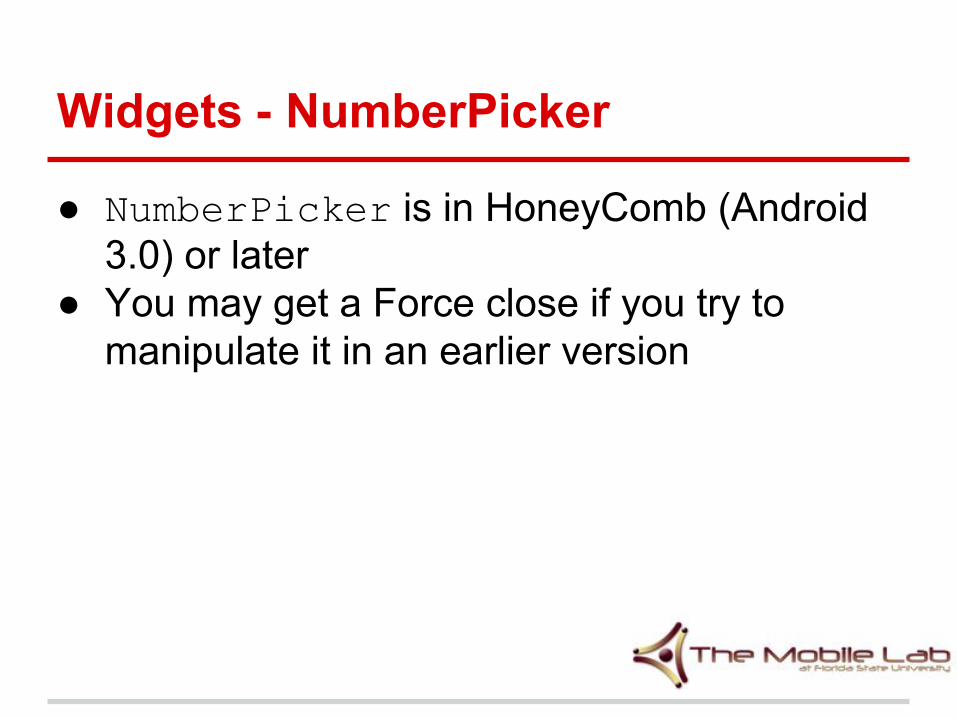
Widgets - NumberPicker
● NumberPicker is in HoneyComb (Android 3.0) or later
● You may get a Force close if you try to manipulate it in an earlier version
Widgets - NumberPicker
For some reason, it doesn't seem like NumberPicker attributes can be set in XML ...
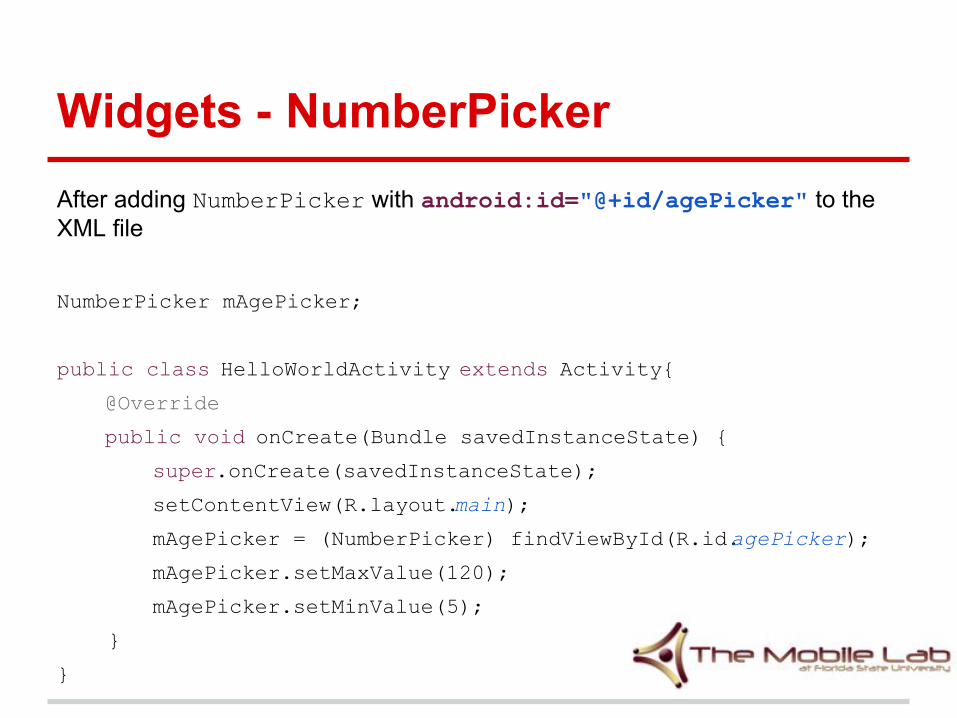
Widgets - NumberPickerAfter adding NumberPicker with android:id="@+id/agePicker" to the XML file
NumberPicker mAgePicker;
public class HelloWorldActivity extends Activity{
@Override
public void onCreate(Bundle savedInstanceState) {
super.onCreate(savedInstanceState);
setContentView(R.layout.main);
mAgePicker = (NumberPicker) findViewById(R.id.agePicker);
mAgePicker.setMaxValue(120);
mAgePicker.setMinValue(5);
}
}

Widgets
Most, of a widget's XML attributes can be set and get programmatically
Example widget XML attribute set method get method
EditText android:text setText(String) getText()
Button android:onClick setOnClickListener(OnClickListener) -
CheckBox android:checked setChecked() isChecked()
SeekBar android:progress setProgress() getProgress()
SeekBar android:max setmax() getMax()
Toast
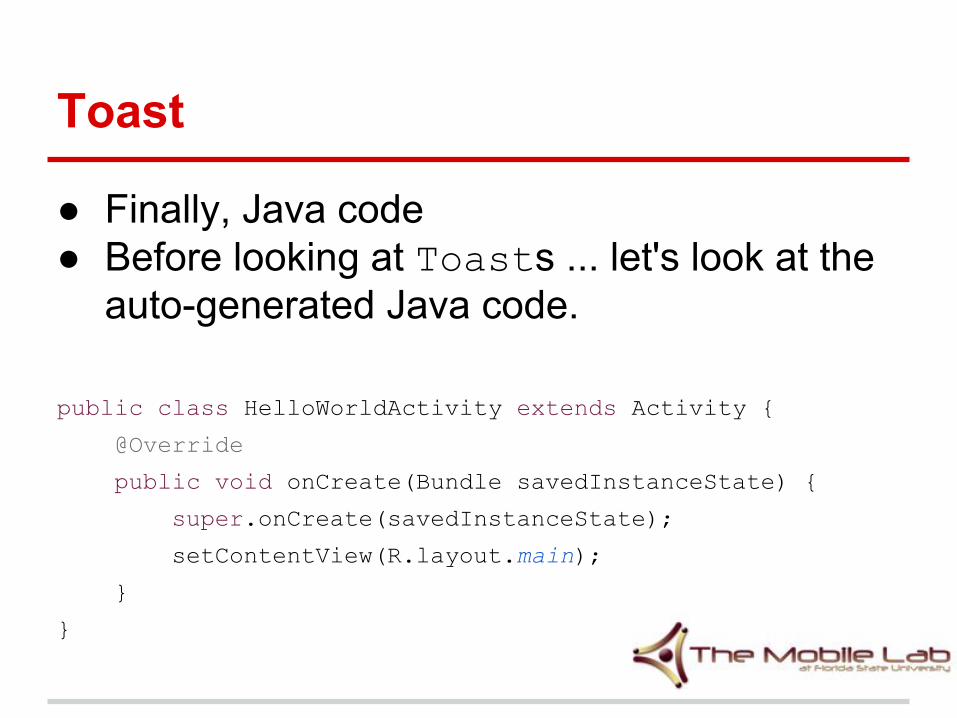
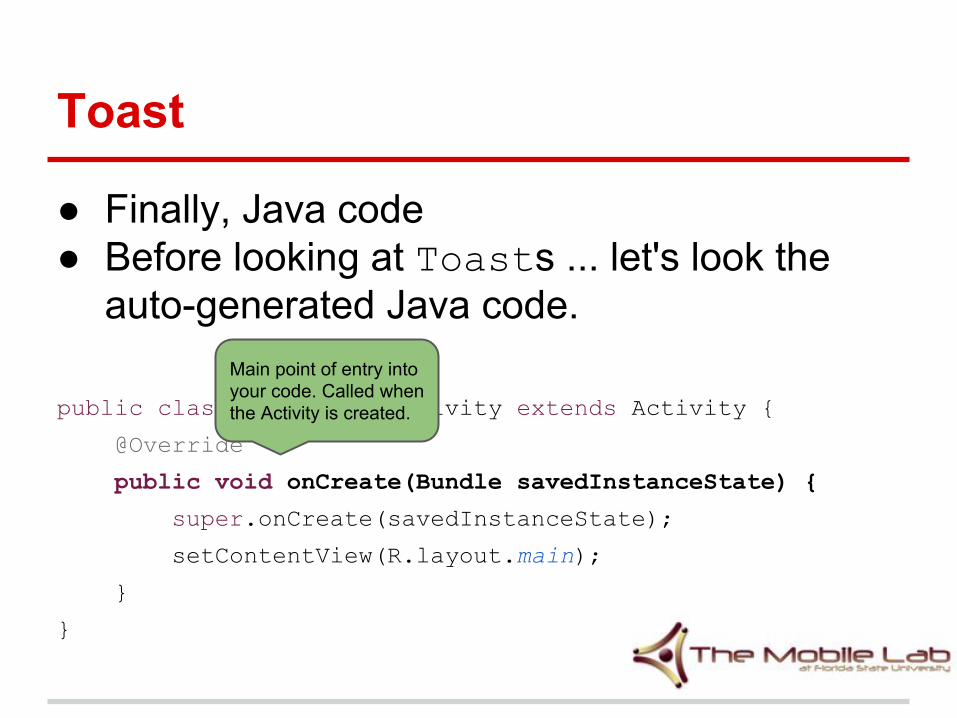
● Finally, Java code● Before looking at Toasts ... let's look at the
auto-generated Java code.
public class HelloWorldActivity extends Activity {
@Override
public void onCreate(Bundle savedInstanceState) {
super.onCreate(savedInstanceState);
setContentView(R.layout.main);
}
}
Toast
● Finally, Java code● Before looking at Toasts ... let's look the
auto-generated Java code.
public class HelloWorldActivity extends Activity {
@Override
public void onCreate(Bundle savedInstanceState) {
super.onCreate(savedInstanceState);
setContentView(R.layout.main);
}
}
Main point of entry into your code. Called when the Activity is created.

Toast
● Finally, Java code● Before looking at Toasts ... let's look the
auto-generated Java code.
public class HelloWorldActivity extends Activity {
@Override
public void onCreate(Bundle savedInstanceState) {
super.onCreate(savedInstanceState);
setContentView(R.layout.main);
}
}
Android needs to do who knows what before you can do anything.

Toast
● Finally, Java code● Before looking at Toasts ... let's look the
auto-generated Java code.
public class HelloWorldActivity extends Activity {
@Override
public void onCreate(Bundle savedInstanceState) {
super.onCreate(savedInstanceState);
setContentView(R.layout.main);
}
}
Set the layout that you want to use. This one corresponds to res/layout/main.xml
Toast
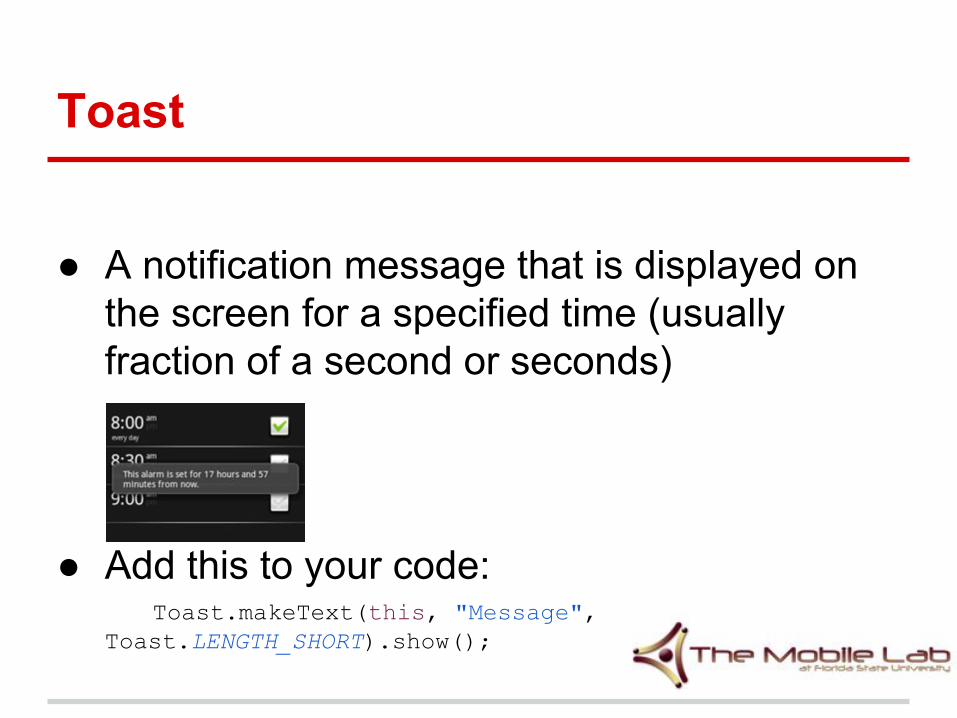
● A notification message that is displayed on the screen for a specified time (usually fraction of a second or seconds)
● Add this to your code:Toast.makeText(this, "Message",
Toast.LENGTH_SHORT).show();

Toast
● There are several reasons why your Toast won't show up on the screen
● One reason is that you probably forgot the .show() part of the Toast code.

Events - Event driven programming
● Android is event-driven● The flow of code depends on events, unlike
programs you normally write in C++● If you've written JavaScript code before then
you've probably done event-driven programming

Events - examples events
● Call a method when the user○ clicks a button○ checks a checkbox○ pulls back on and lets go of slingshot in Angry Birds
● Call a method when the system○ receives an SMS○ receives a phone call○ completely loads a web page in the browser

Events - View
● Every View can react to the onClick event● Layouts are also Views!
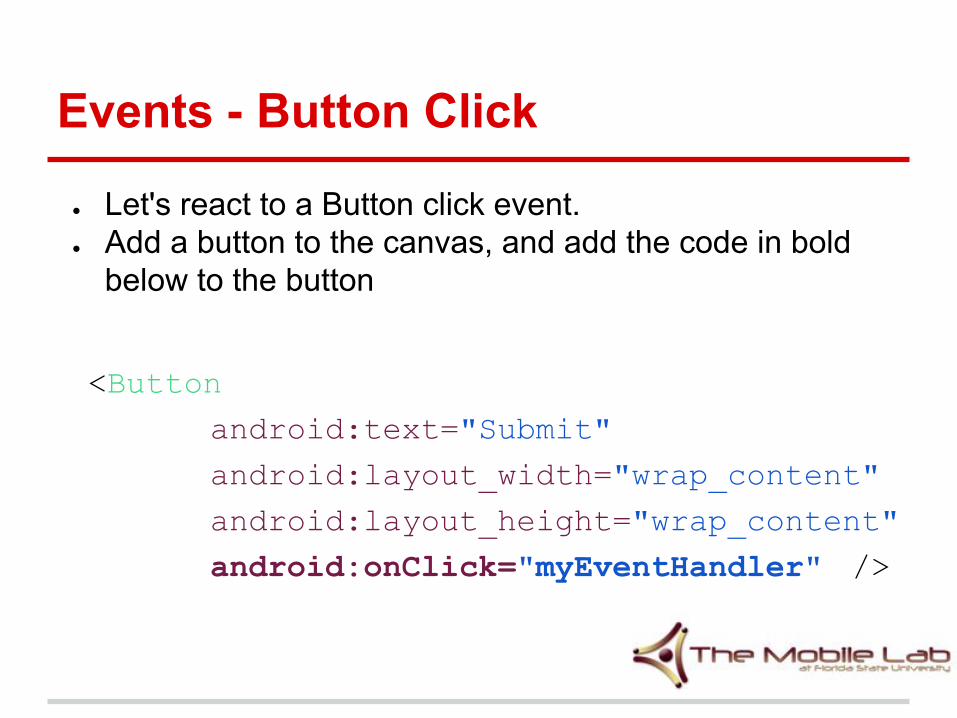
● Let's react to a Button click event. ● Add a button to the canvas, and add the code in bold
below to the button
<Button android:text="Submit"
android:layout_width="wrap_content"
android:layout_height="wrap_content"
android:onClick="myEventHandler" />
Events - Button Click
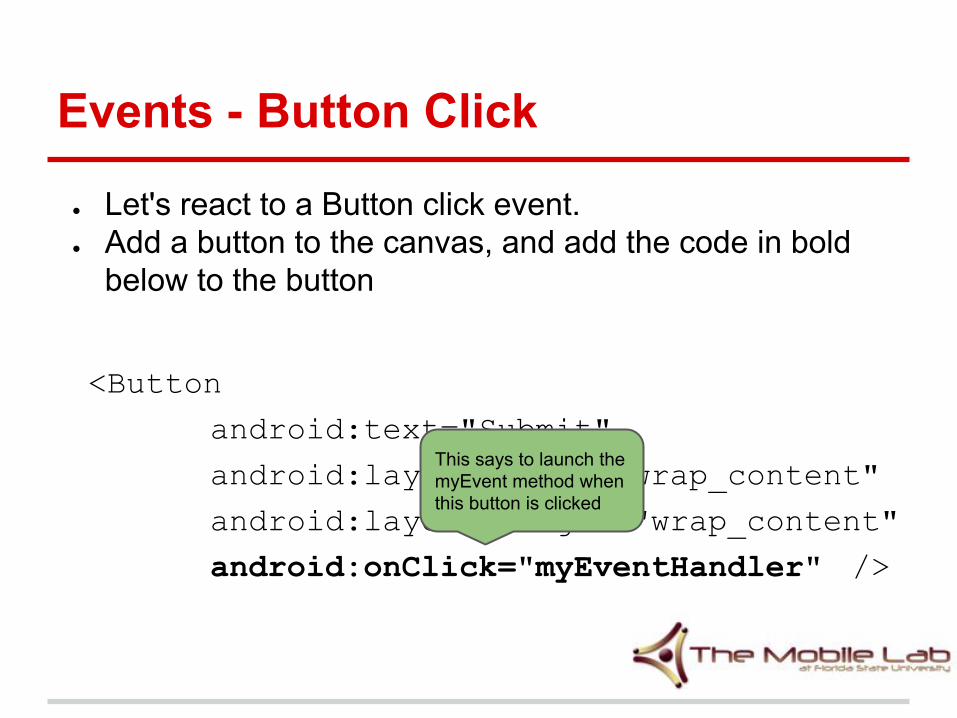
● Let's react to a Button click event. ● Add a button to the canvas, and add the code in bold
below to the button
<Button android:text="Submit"
android:layout_width="wrap_content"
android:layout_height="wrap_content"
android:onClick="myEventHandler" />
Events - Button Click
This says to launch the myEvent method when this button is clicked
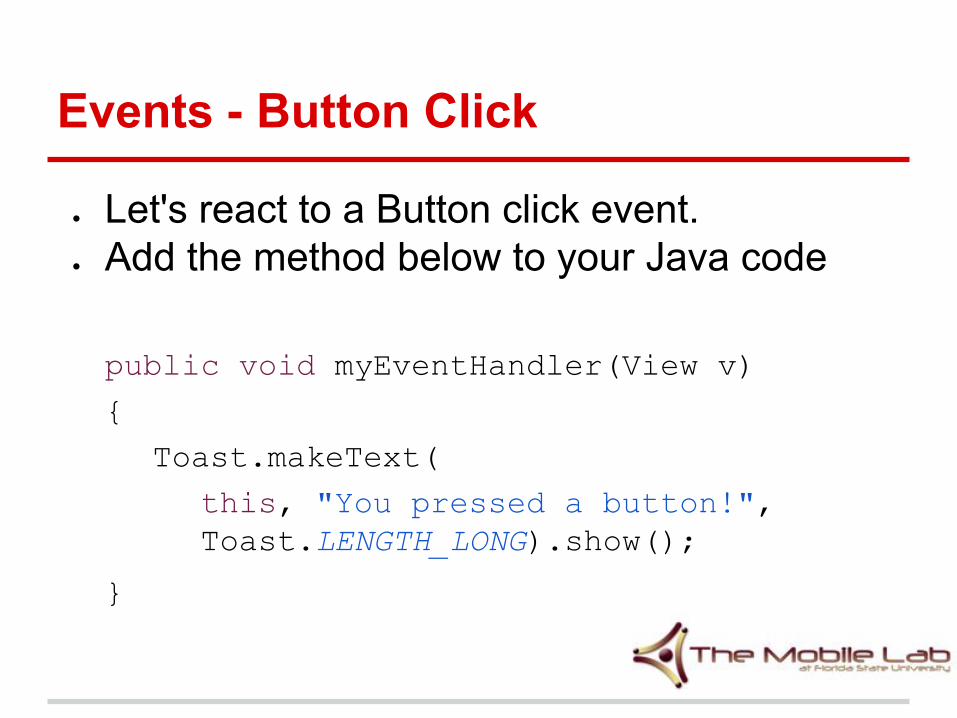
● Let's react to a Button click event. ● Add the method below to your Java code
public void myEventHandler(View v)
{
Toast.makeText(
this, "You pressed a button!", Toast.LENGTH_LONG).show();
}
Events - Button Click

● Let's react to a Button click event. ● Add the method below to your Java code
public void myEventHandler(View v){
Toast.makeText(
this, "You pressed a button!",
Toast.LENGTH_LONG).show();
}
Events - Button Click
Name of the method must match the android:onClick attribute in the XML file
● Let's react to a Button click event. ● Add the method below to your Java code
public void myEventHandler(View v){
Toast.makeText(
this, "You pressed a button!",
Toast.LENGTH_LONG).show();
}
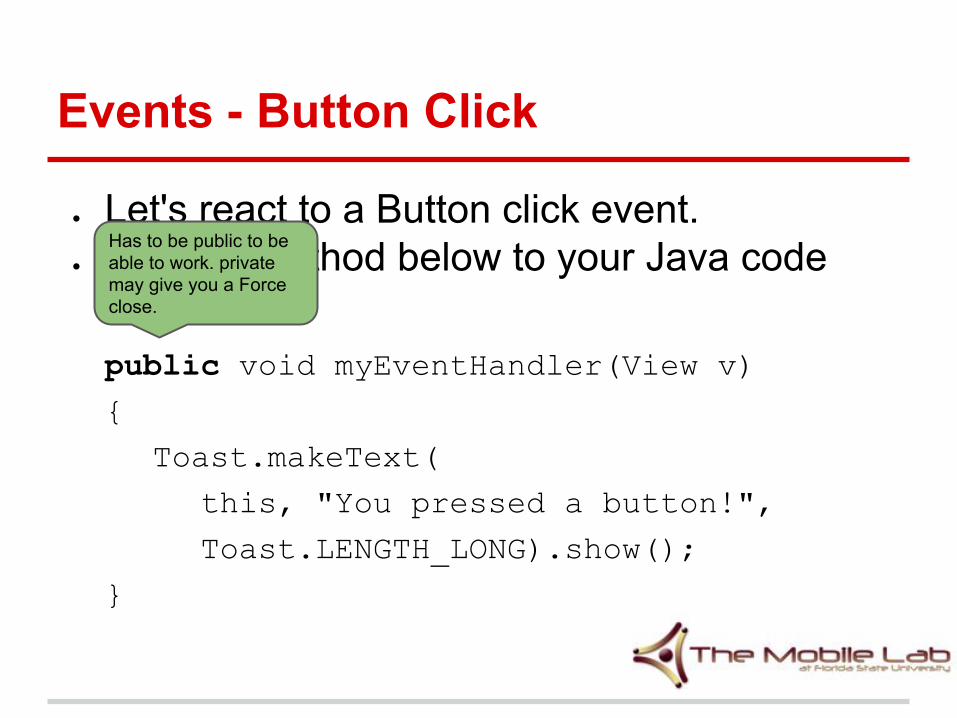
Events - Button Click
Has to be public to be able to work. private may give you a Force close.
● Let's react to a Button click event. ● Add the method below to your Java code
public void myEventHandler(View v){
Toast.makeText(
this, "You pressed a button!",
Toast.LENGTH_LONG).show();
}
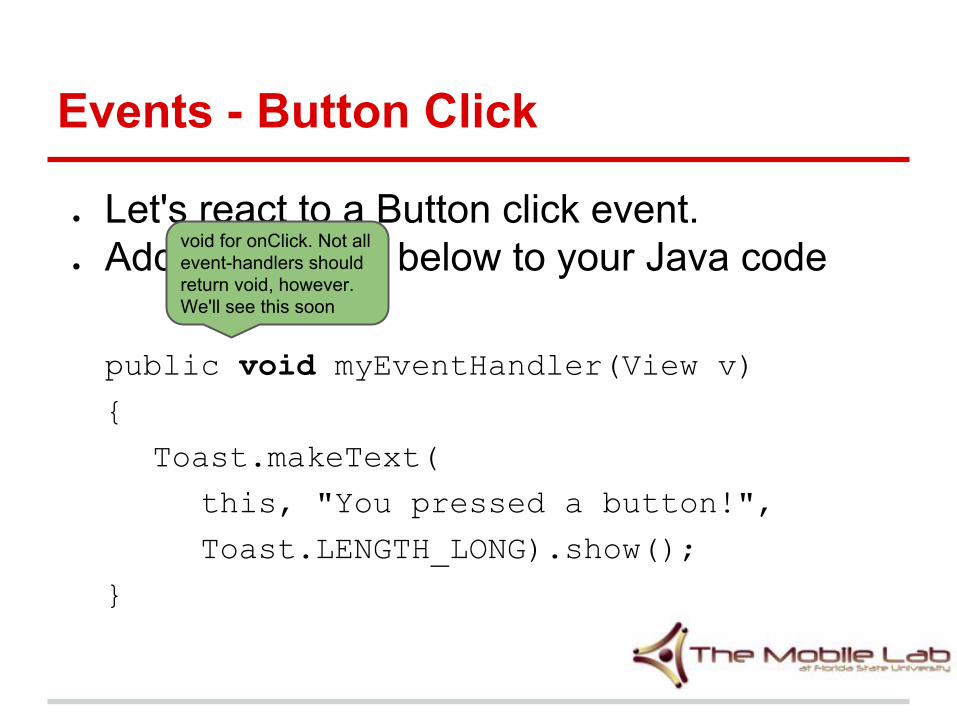
Events - Button Click
void for onClick. Not all event-handlers should return void, however. We'll see this soon

● Let's react to a Button click event. ● Add the method below to your Java code
public void myEventHandler(View v){
Toast.makeText(
this, "You pressed a button!",
Toast.LENGTH_LONG).show();
}
Events - Button Click
View parameter is required. You may use myEventHandler to handle multiple events.
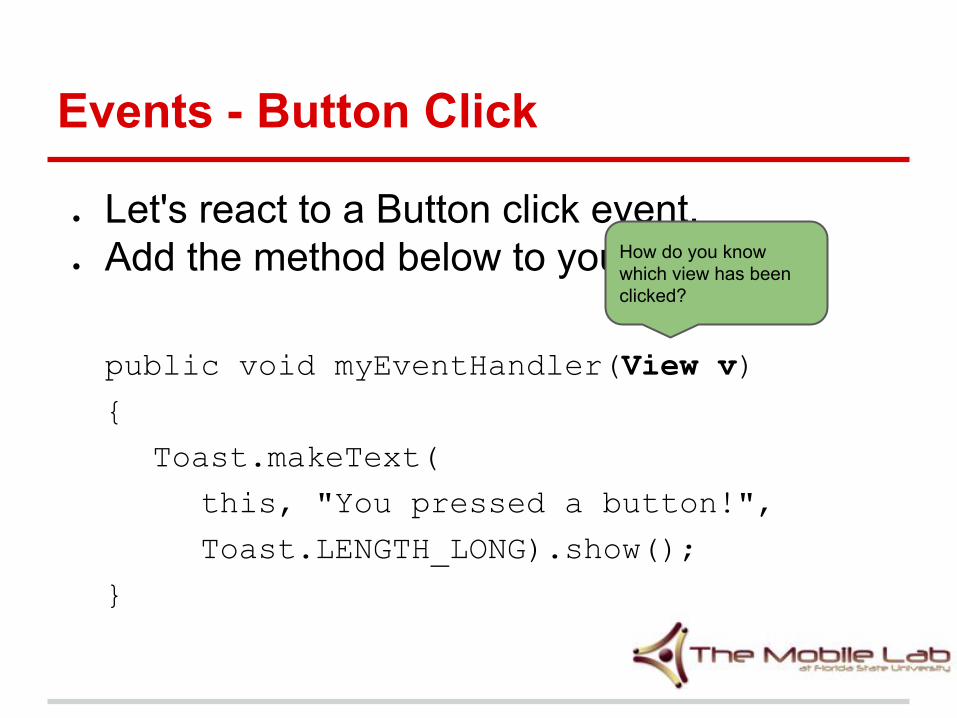
● Let's react to a Button click event. ● Add the method below to your Java code
public void myEventHandler(View v){
Toast.makeText(
this, "You pressed a button!",
Toast.LENGTH_LONG).show();
}
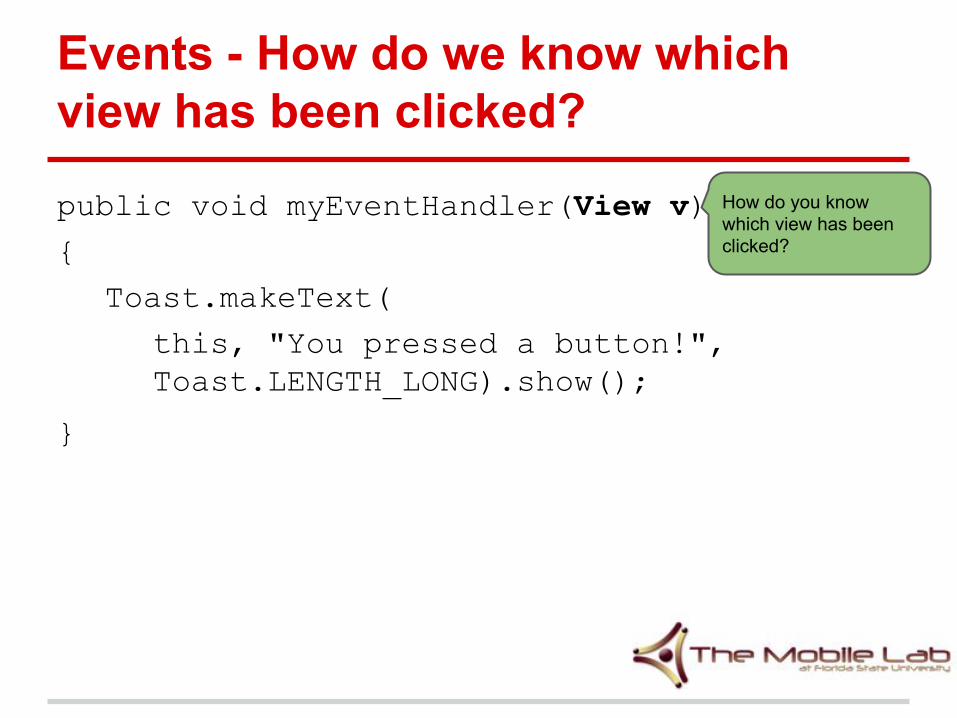
Events - Button Click
How do you know which view has been clicked?

● So far we've done most of our development using XML. Now we're going to really start looking at Java code.
● We need to be able to reference our views (specified in the XML file) using Java
● In the Graphical Layout, use the Properties view to set the ID of the Button to "submitButton"
Events - How do we know which view has been clicked?

● Add an EditText to the canvas● Set the ID to "firstname"● Set android:onClick="myEventHandler"
Events - How do we know which view has been clicked?
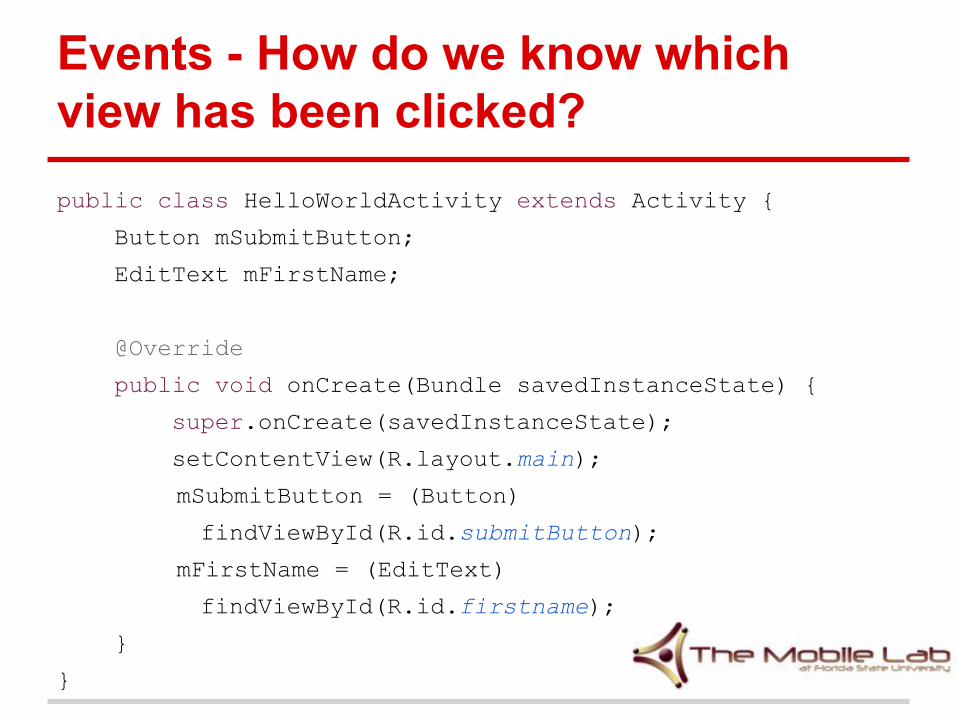
public class HelloWorldActivity extends Activity {
Button mSubmitButton;
EditText mFirstName;
@Override
public void onCreate(Bundle savedInstanceState) {
super.onCreate(savedInstanceState);
setContentView(R.layout.main);
mSubmitButton = (Button)
findViewById(R.id.submitButton);
mFirstName = (EditText)
findViewById(R.id.firstname);
}
}
Events - How do we know which view has been clicked?
public class HelloWorldActivity extends Activity {
Button mSubmitButton;
EditText mFirstName;
@Override
public void onCreate(Bundle savedInstanceState) {
super.onCreate(savedInstanceState);
setContentView(R.layout.main);
mSubmitButton = (Button)
findViewById(R.id.submitButton);
mFirstName = (EditText)
findViewById(R.id.firstname);
}
}
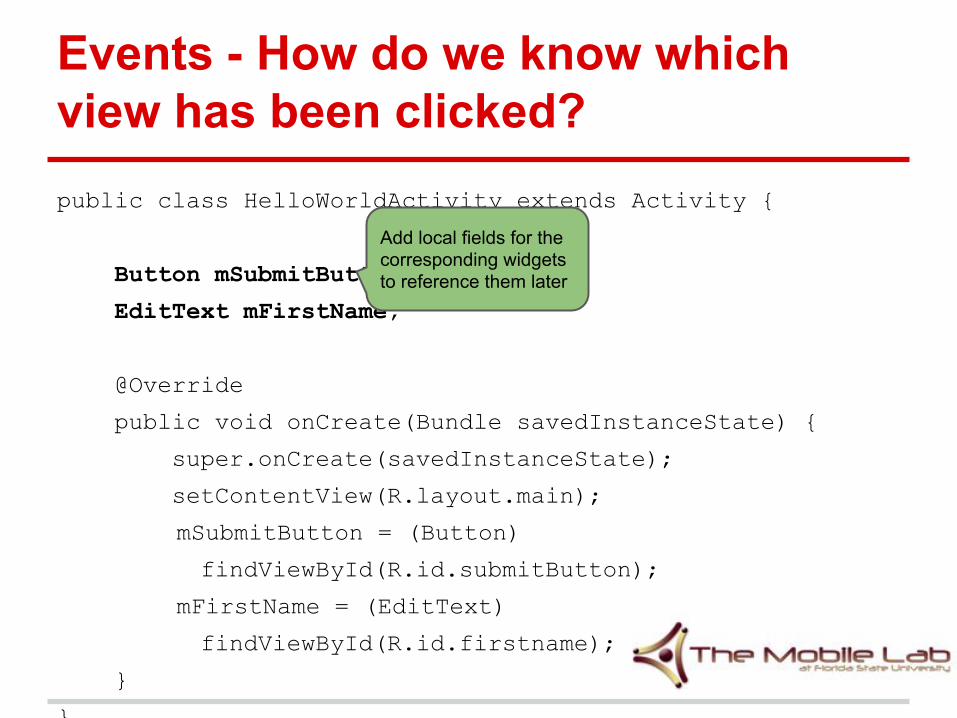
Events - How do we know which view has been clicked?
Add local fields for the corresponding widgets to reference them later

public class HelloWorldActivity extends Activity {
Button mSubmitButton;
EditText mFirstName;
@Override
public void onCreate(Bundle savedInstanceState) {
super.onCreate(savedInstanceState);
setContentView(R.layout.main);
mSubmitButton = (Button)
findViewById(R.id.submitButton);
mFirstName = (EditText)
findViewById(R.id.firstname);
}
}
Events - How do we know which view has been clicked?
Set the widgets. Remember we set the unique IDs for these widgets previously.

public class HelloWorldActivity extends Activity {
Button mSubmitButton;
EditText mFirstName;
@Override
public void onCreate(Bundle savedInstanceState) {
super.onCreate(savedInstanceState);
setContentView(R.layout.main);
mSubmitButton = (Button)
findViewById(R.id.submitButton);
mFirstName = (EditText)
findViewById(R.id.firstname);
}
}
Events - How do we know which view has been clicked?
Cast it to the correct View subclass, since findViewById returns a View.
public class HelloWorldActivity extends Activity {
Button mSubmitButton;
EditText mFirstName;
@Override
public void onCreate(Bundle savedInstanceState) {
super.onCreate(savedInstanceState);
setContentView(R.layout.main);
mSubmitButton = (Button)
findViewById(R.id.submitButton);
mFirstName = (EditText)
findViewById(R.id.firstname);
}
}
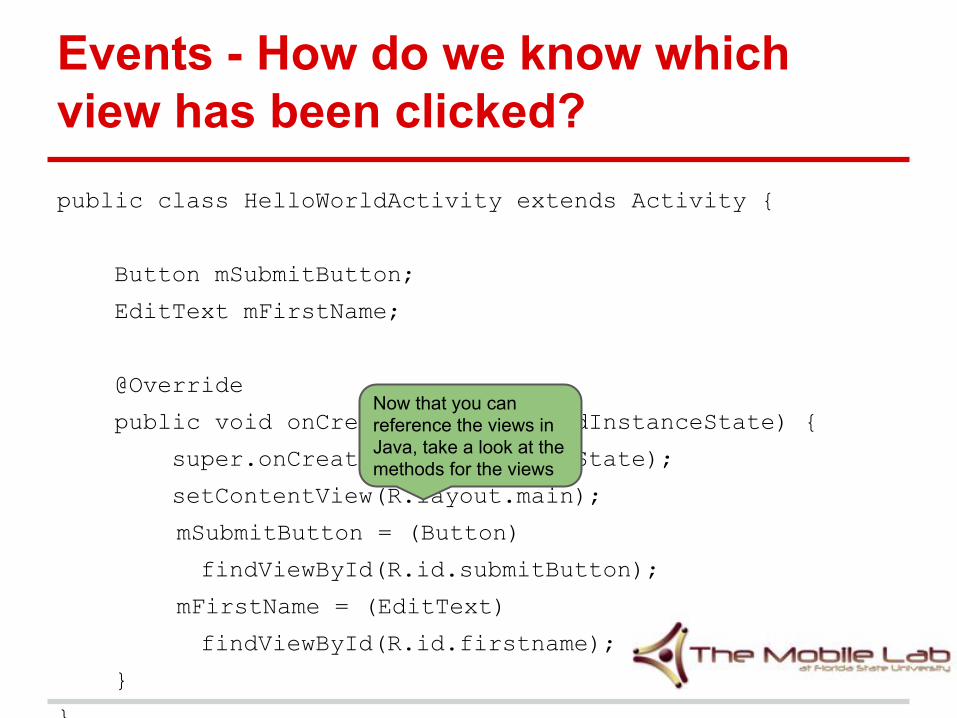
Events - How do we know which view has been clicked?
Now that you can reference the views in Java, take a look at the methods for the views
public class HelloWorldActivity extends Activity {
Button mSubmitButton;
EditText mFirstName;
@Override
public void onCreate(Bundle savedInstanceState) {
super.onCreate(savedInstanceState);
setContentView(R.layout.main);
mSubmitButton = (Button)
findViewById(R.id.submitButton);
mFirstName = (EditText)
findViewById(R.id.firstname);
}
}
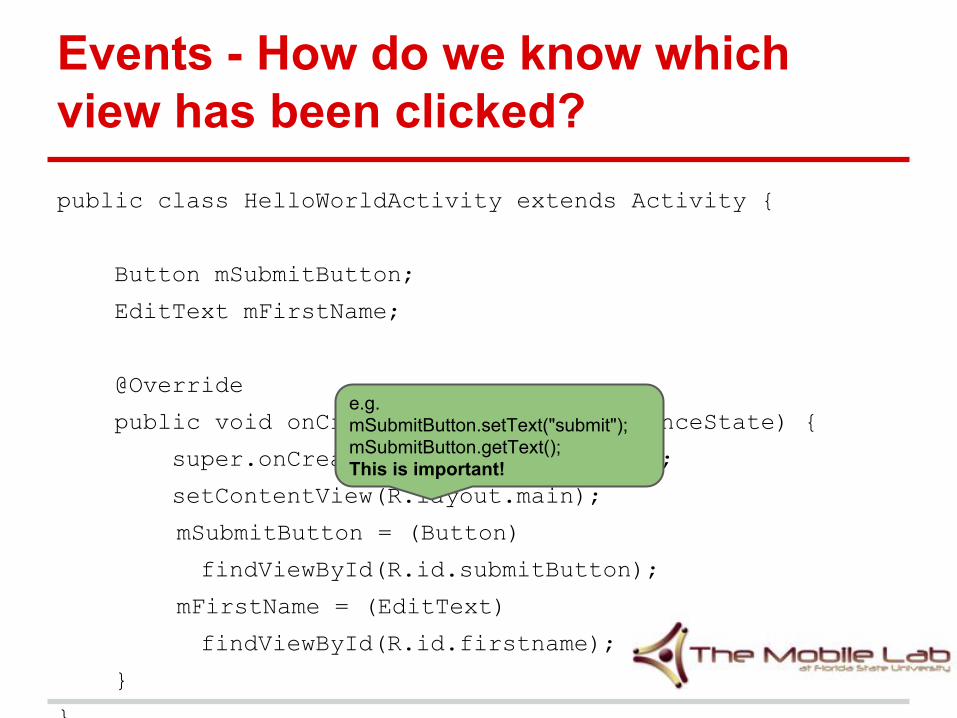
Events - How do we know which view has been clicked?
e.g. mSubmitButton.setText("submit");mSubmitButton.getText();This is important!
public void myEventHandler(View v){
Toast.makeText(
this, "You pressed a button!", Toast.LENGTH_LONG).show();
}
Events - How do we know which view has been clicked?
How do you know which view has been clicked?

public void myEventHandler(View v){
if (v == mSubmitButton) { /*
submitButton clicked */ }
else if(v == mFirstName) { /* first name
clicked */ }
}
Events - How do we know which view has been clicked?

public void myEventHandler(View v){
if(v == mSubmitButton) { /* submitButton
clicked */ }
else if(v == mFirstName) { /* first name
clicked */ }
}
Events - How do we know which view has been clicked?
Add this method to your class

You can also create a different method to handle events for different views if you want to.
Events
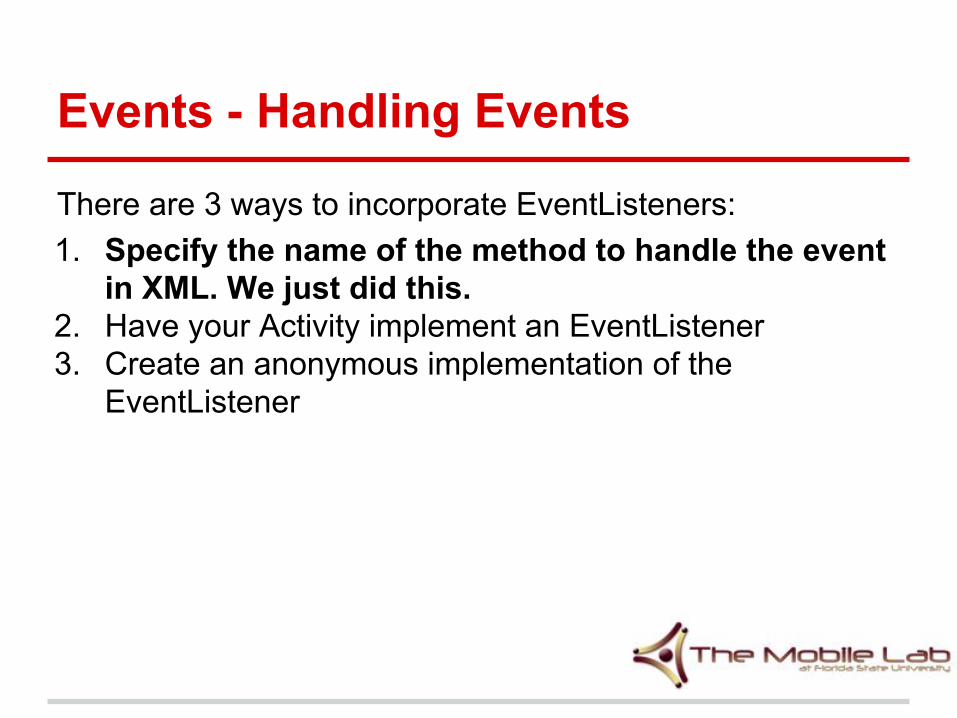
Events - Handling Events
There are 3 ways to incorporate EventListeners:1. Specify the name of the method to handle the event
in XML. We just did this.2. Have your Activity implement an EventListener3. Create an anonymous implementation of the
EventListener
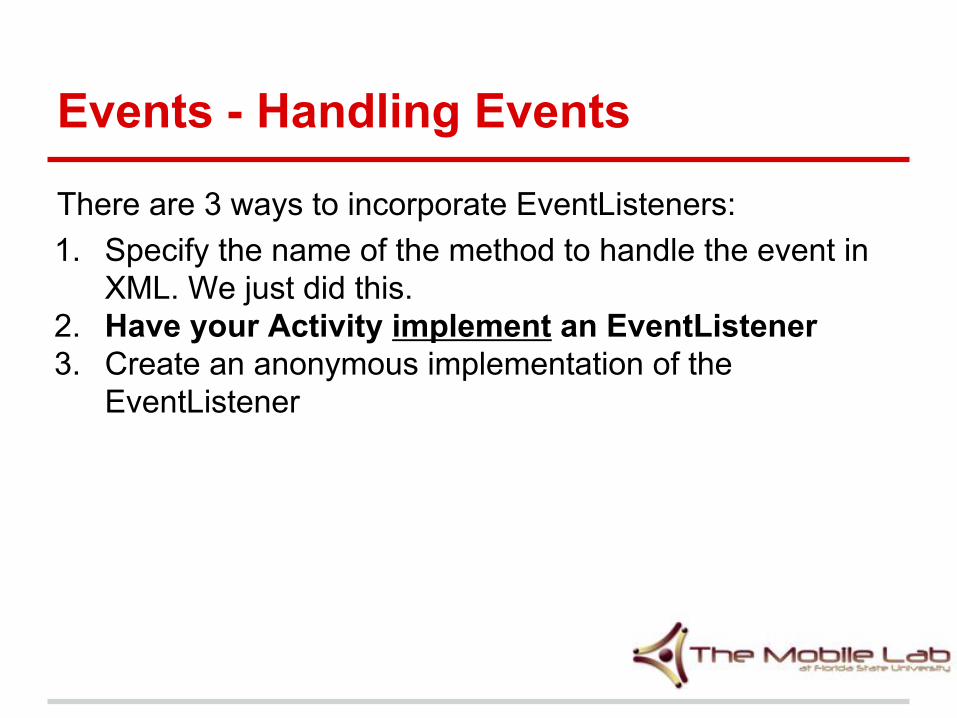
Events - Handling Events
There are 3 ways to incorporate EventListeners:1. Specify the name of the method to handle the event in
XML. We just did this.2. Have your Activity implement an EventListener3. Create an anonymous implementation of the
EventListener

Events - Implement EventListenerpublic class HelloWorldActivity extends Activity {
@Override
public void onCreate(Bundle savedInstanceState) {
super.onCreate(savedInstanceState);
setContentView(R.layout.main);
Button mSubmitButton = (Button)
findViewById(R.id.submitButton);
EditText mFirstName = (EditText)
findViewById(R.id.firstName);
}
}
You should remove the android:onClick attribute from the submitButton in the XML file
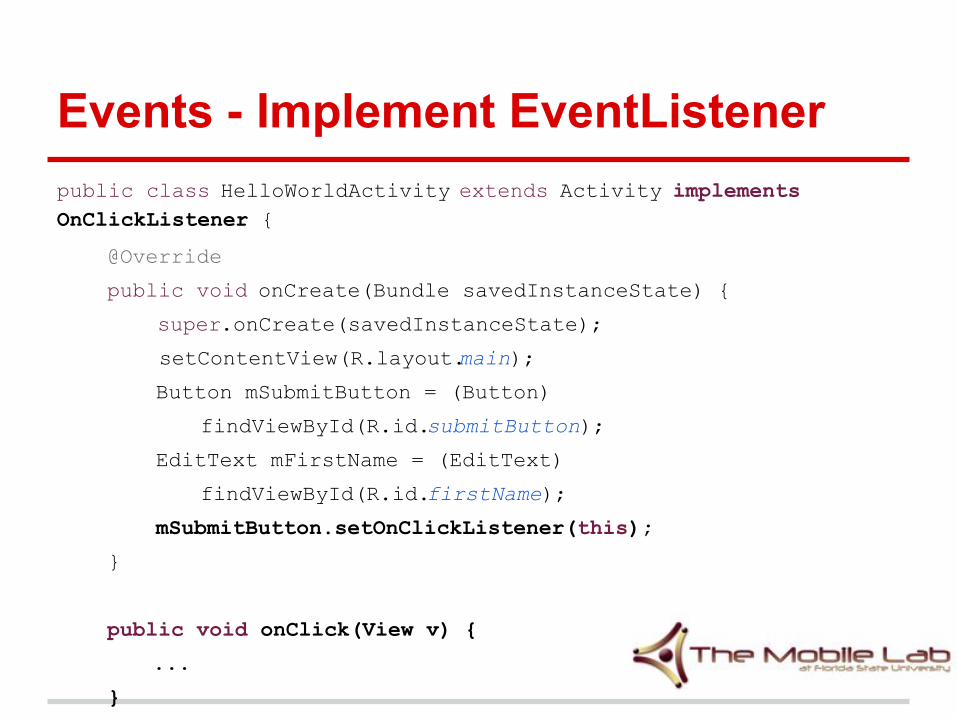
Events - Implement EventListenerpublic class HelloWorldActivity extends Activity implements OnClickListener {
@Override
public void onCreate(Bundle savedInstanceState) {
super.onCreate(savedInstanceState);
setContentView(R.layout.main);
Button mSubmitButton = (Button)
findViewById(R.id.submitButton);
EditText mFirstName = (EditText)
findViewById(R.id.firstName);
mSubmitButton.setOnClickListener(this);
}
public void onClick(View v) {
...
}
}
What if I remove this? Try it.

Events - Handling Events
There are 3 ways to incorporate EventListeners:1. Specify the name of the method to handle the event in
XML. We just did this.2. Have your Activity implement an EventListener3. Create an anonymous implementation of the
EventListener
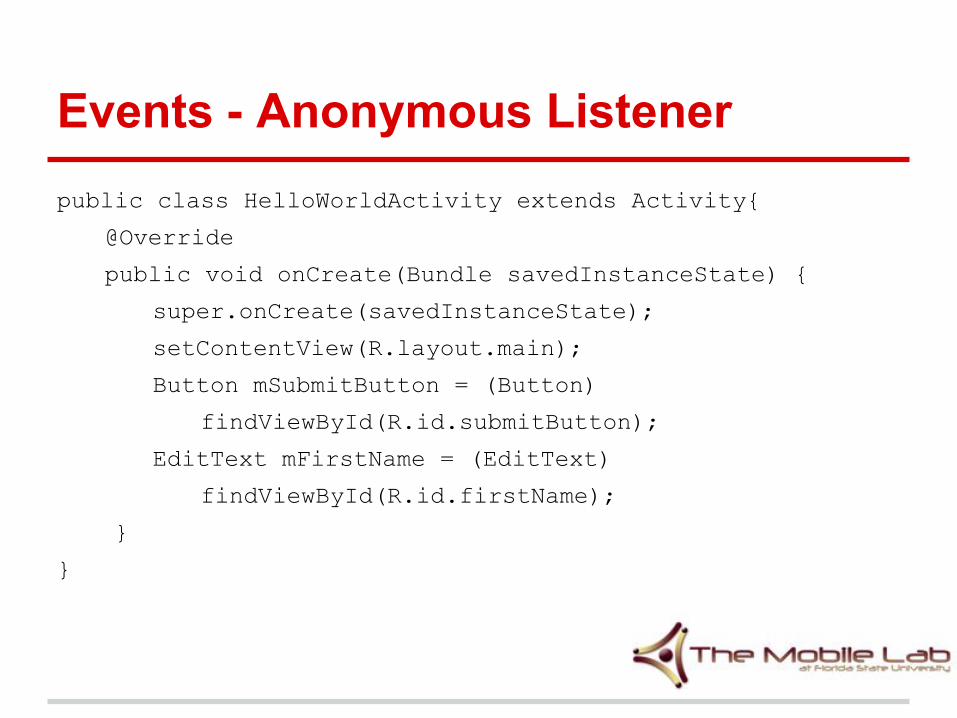
Events - Anonymous Listenerpublic class HelloWorldActivity extends Activity{
@Override
public void onCreate(Bundle savedInstanceState) {
super.onCreate(savedInstanceState);
setContentView(R.layout.main);
Button mSubmitButton = (Button)
findViewById(R.id.submitButton);
EditText mFirstName = (EditText)
findViewById(R.id.firstName);
}
}
Doesn't need to implement OnClickListener this time!

Events - Anonymous Listenerpublic class HelloWorldActivity extends Activity{
@Override
public void onCreate(Bundle savedInstanceState) {
super.onCreate(savedInstanceState);
setContentView(R.layout. main);
Button mSubmitButton = (Button) findViewById(R.id. submitButton);
EditText mFirstName = (EditText) findViewById(R.id. firstName);
mSubmitButton.setOnClickListener( new OnClickListener() {
public void onClick(View v) {
/* submitButton clicked */
}
});
}
}
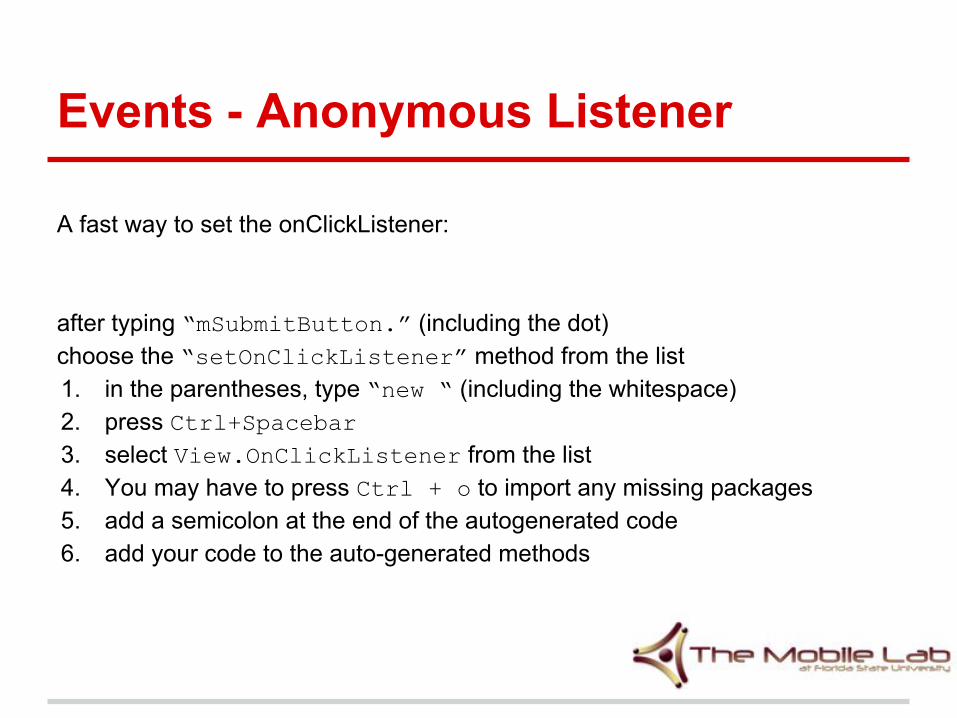
Events - Anonymous Listener
A fast way to set the onClickListener:
after typing “mSubmitButton.” (including the dot)choose the “setOnClickListener” method from the list1. in the parentheses, type “new “ (including the whitespace)2. press Ctrl+Spacebar3. select View.OnClickListener from the list4. You may have to press Ctrl + o to import any missing packages5. add a semicolon at the end of the autogenerated code6. add your code to the auto-generated methods

References
● Android Developers● The Mobile Lab at Florida State University