mini hifi system fw798w 5 speaker dolby pro logic hifi system 5 speaker dolby pro logic fw768p...
TRANSCRIPT
1
3139 116 18531
mini hifi system
5 speaker dolby pro logic
FW768PFW798W
Untitled-7 6/15/00, 12:50 PM1
2
3139 116 18881
Deutsch∂ÏÏËÓÈο
PortuguêsSuomi
DanskSvenska
ItalianoNederlands
EspañolFrançais
English
Important notes for users in the U.K.
Mains plugThis apparatus is fitted with an approved 13 Amp plug. To change afuse in this type of plug proceed as follows:1 Remove fuse cover and fuse.2 Fix new fuse which should be a BS1362 5 Amp, A.S.T.A. or BSI
approved type.3 Refit the fuse cover.If the fitted plug is not suitable for your socket outlets, it should becut off and an appropriate plug fitted in its place.If the mains plug contains a fuse, this should have a value of 5Amp. If a plug without a fuse is used, the fuse at the distributionboard should not be greater than 5 Amp.
Note: The severed plug must be disposed of to avoid a possibleshock hazard should it be inserted into a 13 Amp socket elsewhere.
How to connect a plugThe wires in the mains lead are coloured with the following code:blue = neutral (N), brown = live (L).As these colours may not correspond with the colour markingsidentifying the terminals in your plug, proceed as follows:• Connect the blue wire to the terminal marked N or coloured
black.• Connect the brown wire to the terminal marked L or coloured
red.• Do not connect either wire to the earth terminal in the plug,
marked E (or e) or coloured green (or green and yellow).Before replacing the plug cover, make certain that the cord grip isclamped over the sheath of the lead - not simply over the twowires.
Copyright in the U.K.Recording and playback of material may require consent. SeeCopyright Act 1956 and The Performer’s Protection Acts 1958 to1972.
NorgeTypeskilt finnes på apparatens underside.
Observer: Nettbryteren er sekundert innkoplet.Den innebygde netdelen er derfor ikke frakopletnettet så lenge apparatet er tilsluttetnettkontakten.
For å redusere faren for brann eller elektriskstøt, skal apparatet ikke utsettes for regn ellerfuktighet.
Italia
DICHIARAZIONE DI CONFORMITA’
Si dichiara che l’apparecchio FW768P eFW798W Philips risponde alle prescrizionidell’art. 2 comma 1 del D.M. 28 Agosto 1995n. 548.
Fatto a Eindhoven , il 15/02/1999
Philips Consumer ElectronicsPhilips, Glaslaan 2
5616 JB Eindhoven, The Netherlands
ItaliaCEPT-LPD IAutorizzazione P.P.T.T. all' impiego nr.:DGPGF/4/2/03/338569/FO/0001625del 15/02/99
Untitled-7 6/15/00, 12:50 PM2
3
3139 116 18881
Engli
shFra
nçais
Espa
ñol
Nede
rland
sIta
liano
Sven
ska
Dans
kSu
omi
Portu
guês
∂ÏÏË
ÓÈο
Deuts
ch
INDEX
CLASS 1
LASER PRODUCT
English .....................................5
Français .................................31
Español ..................................57
Deutsch ..................................83
Nederlands ..........................109
Italiano .................................135
Svenska ...............................161
Dansk ...................................187
Suomi ...................................213
Português ............................239
∂ÏÏËÓÈο ............................ 265
Untitled-7 6/15/00, 12:50 PM3
4
3139 116 18531
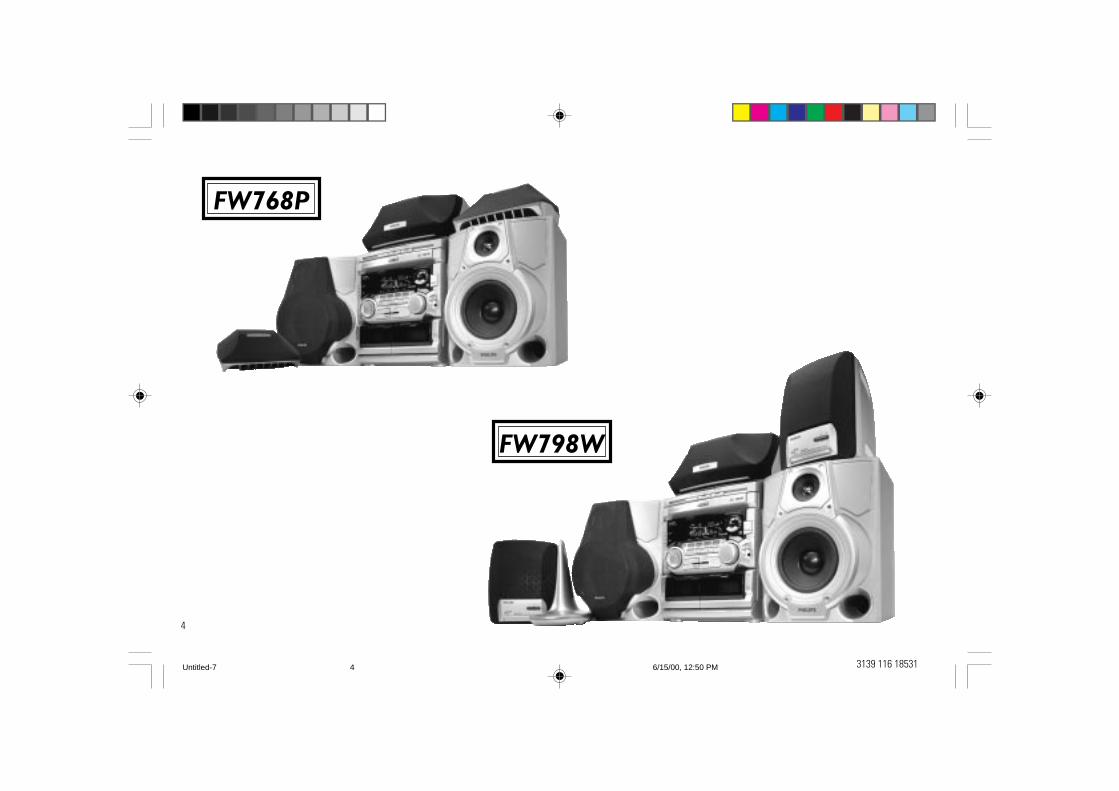
FW798W
FW768P
Untitled-7 6/15/00, 12:50 PM4
5
Engli
sh
3139 116 18884
General Information• The typeplate (which contains the
serial number) is located at the rearof the system.
• Recording is permissible ifcopyright or other rights of thirdparties are not infringed.
• This product complies with theradio interference requirements ofthe European Community.
Environmental InformationAll unnecessary packaging has beenomitted. We have tried to make thepackaging easy to separate into threematerials: cardboard (box), polystyrenefoam (buffer) and polyethylene (bags,protective foam sheet).
Your system consists of materials whichcan be recycled and reused if disassembledby a specialized company. Please observethe local regulations regarding the disposalof packaging materials, exhaustedbatteries and old equipment.
Acknowledgement
Dolby Pro-Logic and the double-D symbold are trademarks of Dolby LaboratoriesLicensing Corporation.Manufactured under license from DolbyLaboratories Licensing Corporation.
Accessories (Supplied)– Remote control– Batteries (two AA size) for remote
control– AM loop antenna– FM wire antenna– AC power cord– For model FW768P only - FB3 speaker
package (includes one pair of surroundspeakers and one center speaker)
– For model FW798W only - FB219Wspeaker package (includes one pair ofwireless surround speakers and onecenter speaker)
Safety Information• Before operating the system, check that
the operating voltage indicated on thetypeplate (or the voltage indicationbeside the voltage selector) of yoursystem is identical with the voltage ofyour local power supply. If not, pleaseconsult your dealer. The typeplate islocated at the rear of your system.
• When the system is switched on, do notmove it around.
• Place the system on a solid base (e.g. acabinet).
• Place the system in a location withadequate ventilation to prevent internalheat build-up in your system.
• The system incorporates a built-insafety feature that prevents overheating.
CONTENTS GENERAL INFORMATION SAFETY INFORMATION
General Information ........................ 5
Safety Information ........................... 5
Preparation ................................. 6 - 7
Controls ..................................... 8 - 10
Operating The System ........... 10 - 12
Setting up FW219W ............... 13 - 15
Dolby Pro Logic ....................... 15 - 16
CD ............................................. 17 - 19
Tuner ......................................... 19 - 21
Tape ........................................... 22 - 23
AUX/CDR .......................................... 23
Karaoke ........................................... 23
Recording ................................. 24 - 25
Clock ................................................ 26
Timer ......................................... 26 - 27
Sleep Timer .................................... 27
Maintenance .................................. 27
Specifications ................................ 28
Troubleshooting ..................... 29 - 30
• Do not expose the system to excessivemoisture, rain, sand or heat sources.
• Under no circumstances should yourepair the system yourself, as this willinvalidate the warranty!
• If the system is brought directly from acold to a warm location, or is placed in avery damp room, moisture maycondense on the lens of the CD unitinside the system. Should this occur, theCD player will not operate normally.Leave the power on for about one hourwith no disc in the system until normalplayback is possible.
• Electrostatic discharge may causeunexpected problems. See whetherthese problems disappear if you unplugthe AC power cord and plug it in againafter a few seconds.
• To disconnect the system from thepower supply completely, removethe AC power plug from the wallsocket.
Untitled-7 6/15/00, 12:50 PM5
6
English
3139 116 18884
PREPARATION
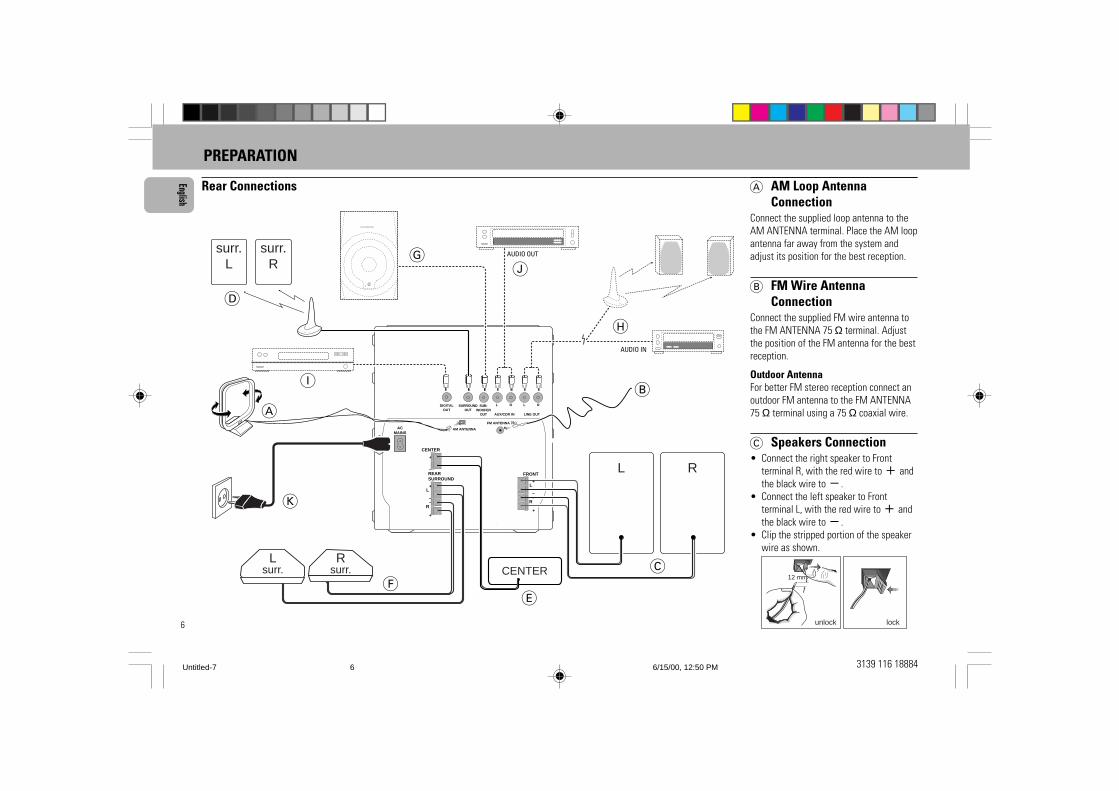
Rear Connections
AM ANTENNAACMAINS
~
A
B
H
C
FRONT
AUX/CDR IN
G
SUB-WOOFER
OUT
F
LINE OUT
AUDIO OUT
L RL
+–
R
–+
L R L R
E
D
AUDIO IN
SURROUNDOUT
J
K
ACTIVE SUBWOOFER
FM ANTENNA 75Ω
I
CENTER
REARSURROUND
CENTER
L
+–
R
–+
+–
surr.L
surr.R
DIGITALOUT
Lsurr.
Rsurr.
A AM Loop AntennaConnection
Connect the supplied loop antenna to theAM ANTENNA terminal. Place the AM loopantenna far away from the system andadjust its position for the best reception.
B FM Wire AntennaConnection
Connect the supplied FM wire antenna tothe FM ANTENNA 75 Ω terminal. Adjustthe position of the FM antenna for the bestreception.
Outdoor AntennaFor better FM stereo reception connect anoutdoor FM antenna to the FM ANTENNA75 Ω terminal using a 75 Ω coaxial wire.
C Speakers Connection• Connect the right speaker to Front
terminal R, with the red wire to + andthe black wire to -.
• Connect the left speaker to Frontterminal L, with the red wire to + andthe black wire to -.
• Clip the stripped portion of the speakerwire as shown.
unlock lock
12 mm
Untitled-7 6/15/00, 12:50 PM6
7
Engli
sh
3139 116 18884
D Wireless Surround OutConnection
You may connect transmitter unit of thewireless rear speakers (supplied withmodel FW798W only) to the SURROUNDOUT terminal. See section on 'Setting upFB219W'.
Note:– Availability of wireless transmitter and
its peripherals are subjected to theapproval of local authorities. Pleasecheck with respective local safety orapproving authority.
E Center Speaker ConnectionConnect the black (non-marked) wires tothe black CENTER terminal and the blue(marked wires) to the blue CENTERterminal.
F Rear Speakers’ Connection(for model FW768P only)
Connect the black (non-marked) wires tothe black REAR SURROUND terminals andthe white (marked wires) to the grey REARSURROUND terminals.
PREPARATION
G Subwoofer Out ConnectionConnect the optional active subwoofer tothe SUBWOOFER OUT terminal. Thesubwoofer reproduces just the low basseffect (e.g. explosions, the rumble ofspaceships, etc.). Be sure to follow theinstructions supplied with the subwoofer.
H Line Out Connection (wirelessready)
You can connect the audio left and rightLINE OUT terminals to a optional CDRecorder ANALOGUE IN terminals. Thisallows you to record in an analogue format.
You can also install additional optionalfront active speakers away from thesystem (e.g. in another room) to reduce theinconvenience of running long speakerwires across rooms. You can place as manyremote speakers as you like provided theyoperate at the same radio frequency.Connect the wireless radio frequencytransmitter to the LINE OUT terminals.Place the active speakers at your preferredlocation. Be sure to follow the instructionssupplied with the active speakers.
I Digital Out ConnectionYou can record the digital sound from theCD, through this output, on any audioequipment with digital input (e.g. CDRecorder, Digital Audio Tape (DAT) deck,Digital to Analog Converter and DigitalSignal Processor).
Connect one end of the cinch cable (notsupplied) to the DIGITAL OUT socket andthe other end to the audio equipment withdigital input.When connecting the cinchcable, make sure it is fully inserted.
J Connecting otherequipment to your system
You can connect the audio left and rightOUT terminals of a TV, VCR, Laser Discplayer, DVD player or CD-Recorder to theAUX/CDR IN terminals at the rear of thesystem.
K AC Power SupplyAfter all other connections have beenmade, connect the AC power cord to thesystem and to the wall outlet.
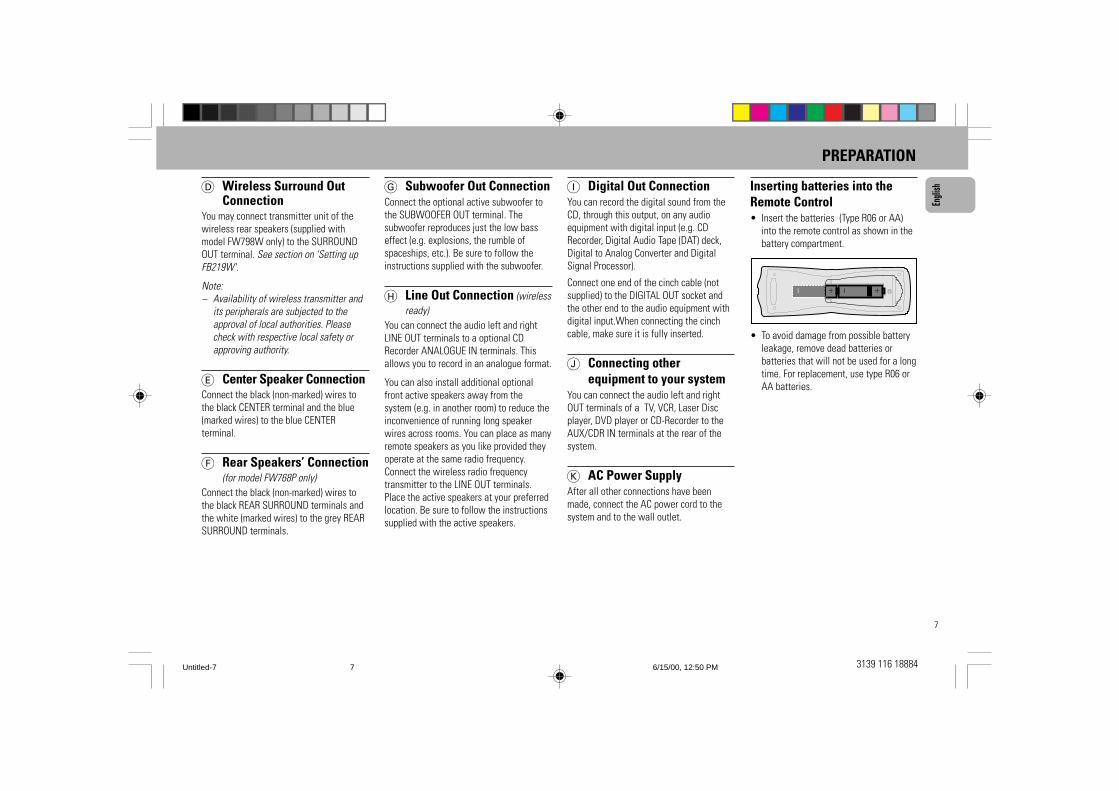
Inserting batteries into theRemote Control• Insert the batteries (Type R06 or AA)
into the remote control as shown in thebattery compartment.
+-+-
• To avoid damage from possible batteryleakage, remove dead batteries orbatteries that will not be used for a longtime. For replacement, use type R06 orAA batteries.
Untitled-7 6/15/00, 12:50 PM7

8
English
3139 116 18884
CONTROLS
DOLBY BNR
STEREO
FMBACK
HSDREPEAT REC
LWMWAMT.A.NEWS
SOUND NAVIGATION
INCREDIBLESURROUND
DIGITALSOUND CONTROL
DISC CHANGE
DISC 1 DISC 2 DISC 3
OPEN•CLOSE
DYNAMIC BASSBOOST
TAPECD
PROG
DUB(HSD)
REC
SIDE A•B A. REV
TUNER AUX
PRESET
STOP •CLEARSEARCH • TUNING PLAY PAUSE PREV NEXT
DC3C H A N G E R
MINI HIFI SYSTEM
CD1 • 2 • 3 CDRBAND TAPE 1 • 2
TIMER FRONT
60Hz 500Hz250Hz 1KHz 2KHz 4KHz 8KHz
VOLUME
SHUFFLEPROGRAM
NEWS/TA
RDS
MIC
MIC
LEVEL
™
£
CLOCK/TIMER
STANDBY
ON
2
TAPE 1/2 AUXTUNERTV
CD
21 3DBBIS / VEC DSC
PROGRAMREPEAT SHUFFLE
DPL TESTTONEMUTE
BALANCE
L R
CENTER
REAR
SIDE PAUSE SLEEP TIMER
Å
- +
- +
CD DIRECT
VOLUME
á à
ë í
É
Ç TV VOLTV VOL
S S
L R
C
PRO LOGIC
%
¡
32º
fi
›
‹
¤
&
⁄
¡
≤
¡
fl
‡
¡
¡
°
≤
@
8
1
2
•
ª
4
3
5
6
9
8
7
0
!
@
# $
*
^
%
(
¡
≤
∞
§
≥
∞
&
)
Untitled-7 6/15/00, 12:50 PM8

9
Engli
sh
3139 116 18884
Controls on the system andremote control
1 STANDBY ON– to switch the system on or to standby
mode.– to use for EASY SET.2 DIGITAL SOUND CONTROL (DSC)– to select the desired sound effect :
OPTIMAL, CLASSIC, TECHNO, JAZZ,ROCK or VOCAL.
3 INCREDIBLE SURROUND– to switch on or off the surround sound
effect.4 n– to connect headphones.5 REC (RECORD)– to start recording on tape deck 2.6 DUB (HIGH SPEED DUBBING
[HSD])– to dub a tape in normal or fast speed.7 JOG– to select the desired equalizer display.– to select the desired DSC setting. You
must select the DSC feature first.– to select the desired level of
Incredible Surround Sound. You mustselect the Incredible Surround Soundfeature first.
8 PROG (PROGRAM)– to program CD tracks in CD mode or
preset radio stations in tuner mode.9 CLOCK/TIMER– to view the clock, set the clock or set
the timer.
0 DISPLAY– to view the current setting of the
system.! CD CAROUSEL TRAY@ CD DIRECT PLAY (DISC 1 / DISC 2 /
DISC 3)– to select a CD tray for playback.# DISC CHANGE– to change CD(s).$ OPEN•CLOSE– to open or close the CD carousel.% SOURCE : to select the following:
CD / (CD 1•2•3)– to select CD mode. When CD playback
is stopped, press to select the disctray 1, 2 or 3.TUNER / (BAND)
– to select Tuner mode. When in Tunermode, press to select the waveband:FM, MW or LW.TAPE / (TAPE 1• 2)
– to select Tape mode. When tapeplayback is stopped, press to selecteither tape deck 1 or 2.AUX / (CDR)
– to select sound from an externalsource (e.g. TV, VCR, Laser Disc player,DVD player or CD Recorder). When inAux mode, press to select either AUXor CDR.TV (only on the remote control)
– to select TV mode.^ DPL DISPLAY PANEL– to view the selected Dolby Pro Logic
setting.
CONTROLS
& DOLBY PRO LOGIC (DPL)– to select Dolby Surround, Dolby Center
Phantom, Dolby 3 Stereo or Stereomode.
* RDS– to select RDS data in the following
order: station name, program type,radio text and frequency.
( NEWS/TA– to hear News or Traffic Announcement
data automatically.) A. REV (AUTO REVERSE)– available in tape deck 2 only.– to select the desired play modes ( å /
∂ / ∫ ).¡ MODE SELECTION
SEARCH à á (TUNING à á)for CD ............ to search backward/
forward.for TUNER ..... to tune to a lower or
higher radio frequency. for TAPE ....... to rewind or fast
forward a tape on tapedeck 2 only.
for TV VOL. .... to adjust the TV volumeif the remote operatesyour TV.
STOP•CLEAR Çfor CD ............ to stop CD playback or
to clear a program.for TUNER ..... to stop programming.for TAPE ........ to stop playback or
recording.DEMO ........... (on the system only) to
start or stopdemonstration mode.
PLAY É / PAUSEÅ(SIDE A•B)for CD ............ to start or interrupt
playback.for TAPE ........ to start playback....................... SIDE : when playing in
Tape 2 mode, to changeside.
PREV í / NEXT ë (PRESET 4 3 )for CD ............ to skip to the beginning
of the current, previous,or next track.
for TUNER ..... to select a presetstation in memory.
™ MIC LEVEL– to adjust the mixing level for karaoke
or microphone recording.£ MIC– to connect microphone jack.≤ VOLUME– to adjust the volume.∞ DYNAMIC BASS BOOST (DBB)– to select a bass boost level or to
switch off bass boost.§ OPEN– to open tape deck 2.≥ TAPE DECK 2• TAPE DECK 1ª OPEN– to open tape deck 1.º REPEAT– to repeat a CD track.⁄ BALANCE L/R– to balance the sound level of the Front
Left and Right speakers.
Untitled-7 6/15/00, 12:50 PM9
10
English
3139 116 18884
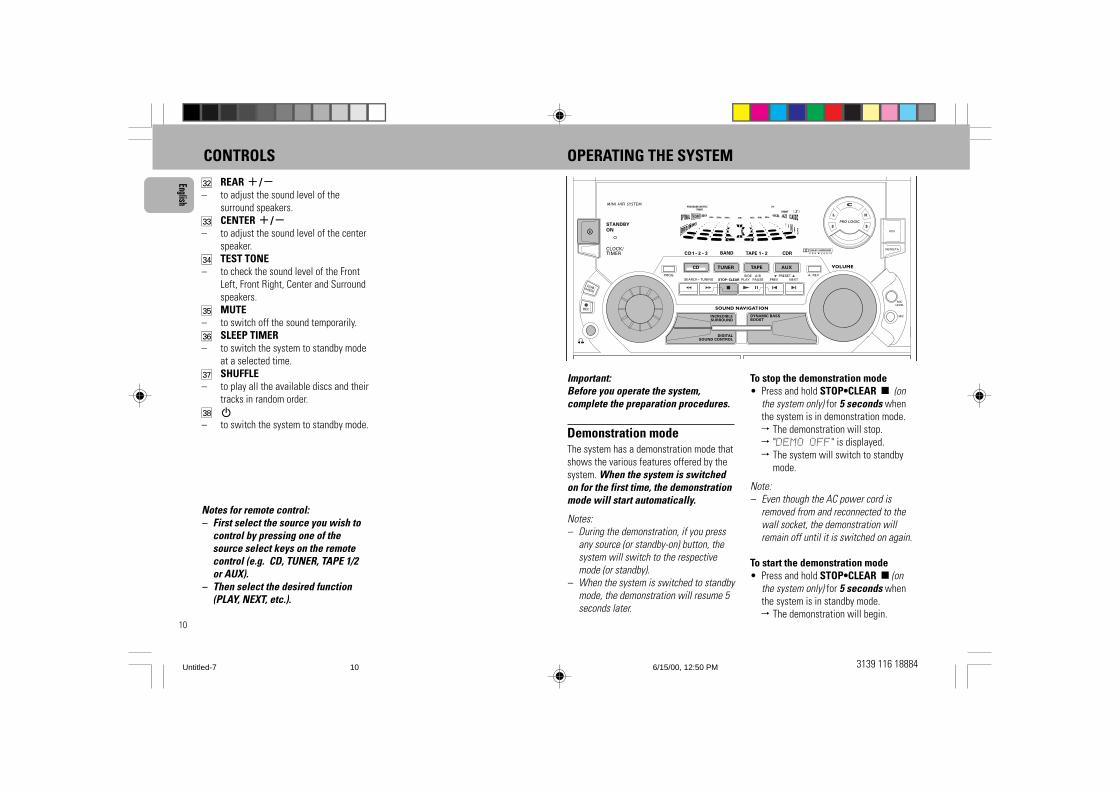
Important:Before you operate the system,complete the preparation procedures.
Demonstration modeThe system has a demonstration mode thatshows the various features offered by thesystem. When the system is switchedon for the first time, the demonstrationmode will start automatically.
Notes:– During the demonstration, if you press
any source (or standby-on) button, thesystem will switch to the respectivemode (or standby).
– When the system is switched to standbymode, the demonstration will resume 5seconds later.
To stop the demonstration mode• Press and hold STOP•CLEAR Ç (on
the system only) for 5 seconds whenthe system is in demonstration mode.™ The demonstration will stop.™ "DEMO OFF" is displayed.™ The system will switch to standby
mode.
Note:– Even though the AC power cord is
removed from and reconnected to thewall socket, the demonstration willremain off until it is switched on again.
To start the demonstration mode• Press and hold STOP•CLEAR Ç(on
the system only) for 5 seconds whenthe system is in standby mode.™ The demonstration will begin.
CONTROLS OPERATING THE SYSTEM
FM
STEREOBACK
HSDREPEAT REC
LWMWAMT.A.NEWS
SOUND NAVIGATION
INCREDIBLESURROUND
DIGITALSOUND CONTROL
DYNAMIC BASSBOOST
TAPECD
PROG
NEWS!
RDS
DOLBY BNR
DUB(HSD)
REC
SIDE A•B A. REV
TUNER AUX
PRESET
STOP •CLEARSEARCH • TUNING PLAY PAUSE PREV NEXT
MINI HIFI SYSTEM
CD1 • 2 • 3 CDRTAPE 1 • 2
TIMER FRONT
60Hz 500Hz250Hz 1KHz 2KHz 4KHz 8KHz
VOLUME
SHUFFLEPROGRAM
S S
L R
C
PRO LOGIC
CLOCK/TIMER
STANDBY
ON
NEWS/TA
BAND
RDS
MIC
MICLEVEL
Notes for remote control:– First select the source you wish to
control by pressing one of thesource select keys on the remotecontrol (e.g. CD, TUNER, TAPE 1/2or AUX).
– Then select the desired function(PLAY, NEXT, etc.).
¤ REAR +/-– to adjust the sound level of the
surround speakers.‹ CENTER +/-– to adjust the sound level of the center
speaker.› TEST TONE– to check the sound level of the Front
Left, Front Right, Center and Surroundspeakers.
fi MUTE– to switch off the sound temporarily.fl SLEEP TIMER– to switch the system to standby mode
at a selected time.‡ SHUFFLE– to play all the available discs and their
tracks in random order.° B– to switch the system to standby mode.
Untitled-7 6/15/00, 12:50 PM10
11
Engli
sh
3139 116 18884
Easy SetEASY SET allows you to store all availableradio stations and RDS stationsautomatically.
1 Press and hold STANDBY ON (on thesystem only) for 5 seconds; when thesystem is in standby or demonstrationmode.™ “EASY SET” will be displayed,
and followed by “TUNER” and then“AUTO”.
™ EASY SET will start searching for allradio stations with RDS and thenfollowed by radio stations on FM,MW and LW band respectively.
™ All available RDS and radio stationswith sufficient signal strength will bestored. Up to 40 presets may bestored.
2 The system will search once again forthe first available RDS station in orderto set the RDS time automatically.
• If no RDS station is available, theprogram will exit automatically.™ After a radio station is found,
“EASY SET” will be displayedand followed by “TIME”
• When searching RDS time;™ “SEARCH RDS TIME” will be
displayed.™ When RDS time is read, “RDS
TIME” will be displayed. Thecurrent time will be displayed for 2seconds and stored automatically.
OPERATING THE SYSTEM
Notes:– EASY SET will start with the RDS
station, if there are still presetsavailable, it will continue to store theFM, MW and LW bands respectively.
– When EASY SET is used, all previouslystored radio stations will be replaced.
– The last preset radio station or the firstavailable RDS station will appear on thedisplay when EASY SET is completed.
– If RDS station does not transmit RDStime within 90 seconds, the programwill exit automatically and the displaywill show “NO RDS TIME”.
Switching the system ON• Press STANDBY ON (on the system
only), CD, TUNER, TAPE or AUX.
You can also switch on the system bypressing any one of the CD DIRECT PLAYbuttons.
Switching the system tostandby mode• Press STANDBY ON again or B on the
remote control.™ The system will switch to standby
mode.
Selecting the Source• Press the respective source selection
button: CD, TUNER, TAPE or AUX.™ The display indicates the selected
source.
Note:– For an external source, make sure you
have connected the audio left and rightOUT terminals of the externalequipment (TV, VCR, Laser Disc player,DVD player or CD Recorder) to theAUX/CDR IN terminals.
Selecting the EqualizerDisplayYou can select the desired equalizer displayfor the system. You must not press the DSCor INCREDIBLE SURROUND button on thesystem before using the JOG.
• Rotate the JOG to select the desiredEqualizer Display, NORMAL, TOPDOWN, or NITE MODE.™ The selected display will be shown.
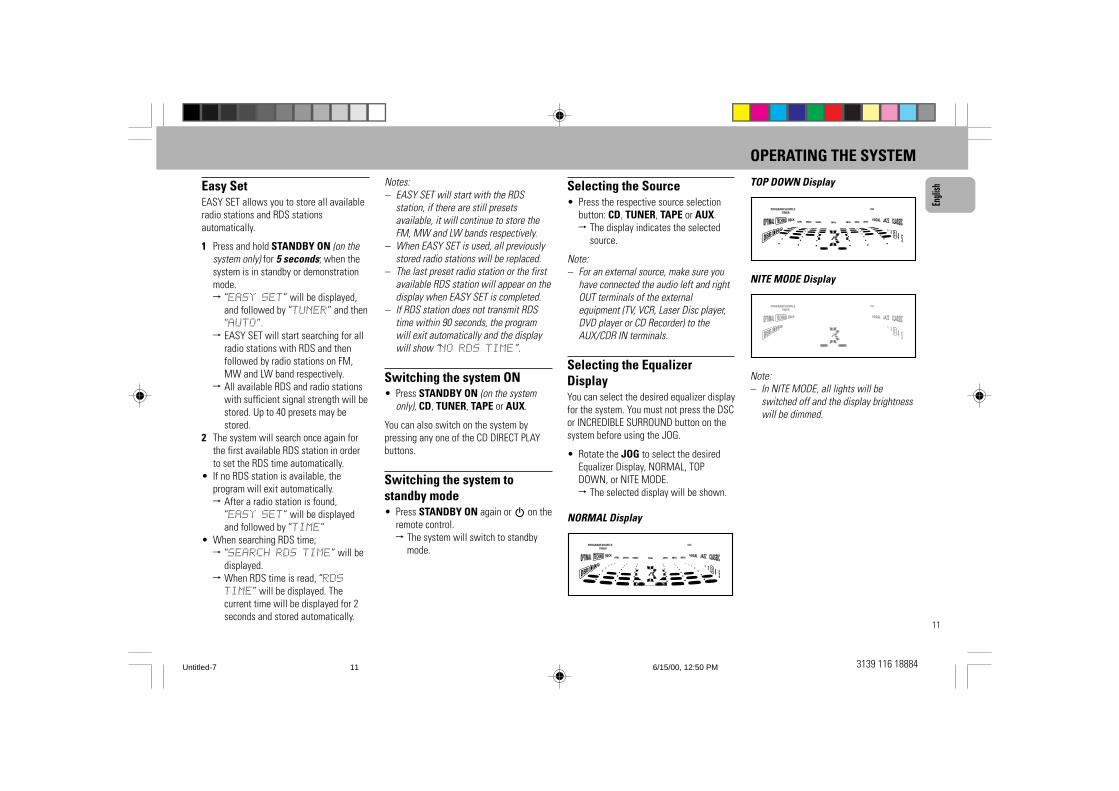
NORMAL Display
FRONTFM
STEREOBACK
HSDREPEAT REC
LWMWAMT.A.NEWSTIMER
60Hz 500Hz250Hz 1KHz 2KHz 4KHz 8KHz
SHUFFLEPROGRAM
TOP DOWN Display
FRONTFM
STEREOBACK
HSDREPEAT REC
LWMWAMT.A.NEWSTIMER
60Hz 500Hz250Hz 1KHz 2KHz 4KHz 8KHz
SHUFFLEPROGRAM
NITE MODE Display
60Hz 500Hz250Hz 1KHz 2KHz 4KHz 8KHz
FRONTFM
STEREOBACK
HSDREPEAT REC
LWMWAMT.A.NEWSTIMER
SHUFFLEPROGRAM
Note:– In NITE MODE, all lights will be
switched off and the display brightnesswill be dimmed.
Untitled-7 6/15/00, 12:50 PM11
12
English
3139 116 18884
Sound ControlVOLUME ADJUSTMENTAdjust VOLUME to increase or decreasethe sound level.
For Personal ListeningConnect the headphones plug to the nsocket at the front of the system. Thespeakers will be muted.
INCREDIBLE SURROUNDNormal stereo sound is determined by thedistance between the front speakers.When Incredible Surround is switched on,it magnifies the virtual distance betweenthe front speakers for an incredibly wide,enveloping, stereo effect. There are 12different Incredible Surround levelsavailable for selection.
• Press INCREDIBLE SURROUND toswitch on.™ The INCREDIBLE SURROUND display lights
up.™ “IS XX” will be displayed.
Note:– "XX" is the last selected Incredible
Surround level.
OPERATING THE SYSTEM
You can change the Incredible Surroundlevel with the JOG.
• Rotate the JOG to select the desiredIncredible Surround level immediatelyafter selecting the Incredible Surroundfeature.™ The Incredible Surround level will
increase or decrease between level 1and 12.
To switch off Incredible Surround• Press INCREDIBLE SURROUND again.
™ The INCREDIBLE SURROUND display isswitched off.
™ “IS OFF” will be displayed.
DIGITAL SOUND CONTROL (DSC)The DSC feature enables you to adjust thesystem to suit your type of music.
• Press DIGITAL SOUND CONTROL(DSC) to select OPTIMAL, CLASSIC,TECHNO, JAZZ , ROCK or VOCAL.™ The selected digital sound is
encircled.™ “OPTIMAL X, CLASSIC,
TECHNO X, JAZZ X, ROCKX or VOCAL X” will be displayed."X" is the pre-selected level.
You can change the digital sound settinglevel for all but CLASSIC with the JOG.
• First select the DSC feature, then rotatethe JOG until the desired digital soundsetting level is reached.™ The digital sound setting level will
increase or decrease between level 1and 5.
Note:– For neutral setting, select CLASSIC and
switch off DBB.
DYNAMIC BASS BOOST (DBB)There are three DBB settings to enhancethe bass response.
• Press DBB briefly to select a bass boostlevel.™ The respective DBB level is being
encircled and lit.™ “BEAT, PUNCH or BLAST” will
be displayed.
To switch off DBB• Press DBB briefly until “DBB OFF” is
displayed.
Note:– Some CDs or tapes might be recorded in
high modulation. It may cause adistortion at high volume. If this occurs,switch off DBB or reduce the volume.
Automatic DSC-DBB selectionThe best DBB setting is generatedautomatically for each DSC selection. Youcan manually select the DBB setting thatbest suits your listening environment.
MUTE (on remote control only)This feature allows you to temporarilyswitch off the sound without switching offthe system when you require a moment ofsilence.
• Press MUTE on the remote control toswitch off the sound.™ “MUTE” will be displayed.
• Press MUTE again on the remotecontrol or increase the VOLUME levelto switch on the sound.
Untitled-7 6/15/00, 12:50 PM12
13
Engli
sh
3139 116 18884
SETTING UP FB219W (for model FW798W only)
The following equipment are supplied withthe FB219W package:– AC/DC adapter– transmitter unit– 2 wireless surround speakers– 2 power cables for the surround
speakers– 1 center speaker– 1 cinch cable
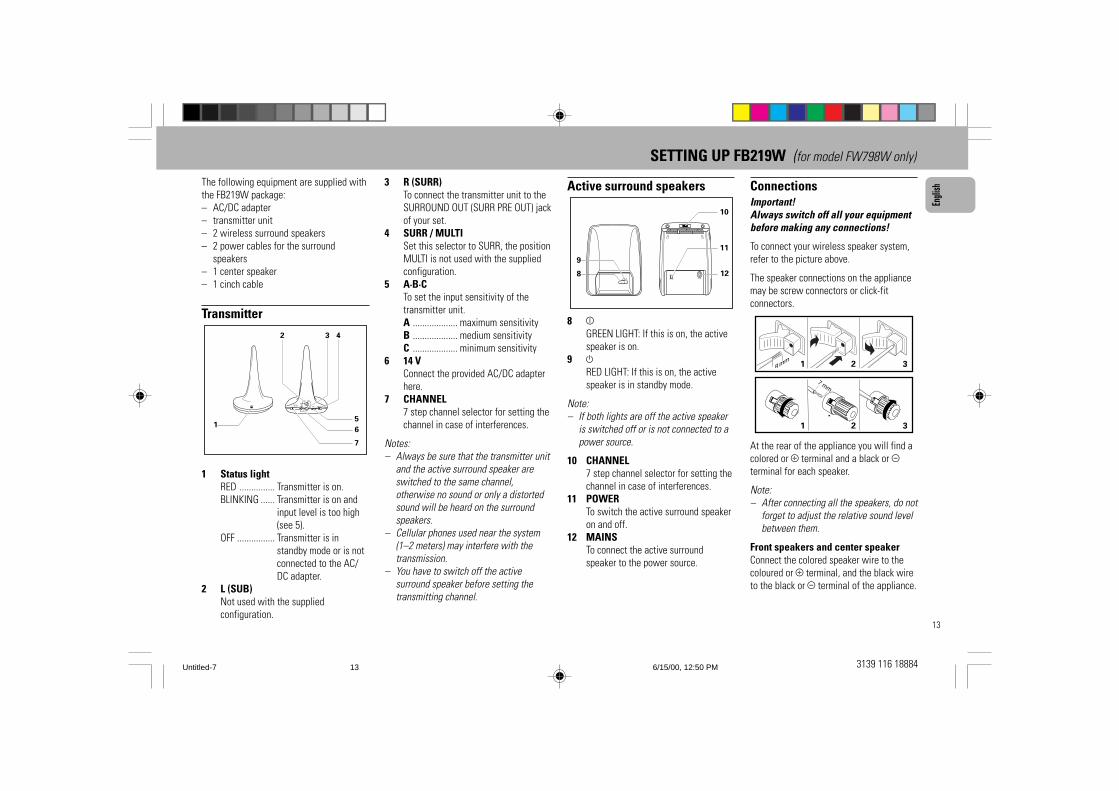
Transmitter
7
5
6
7 5 3 1CHANNEL 12V
+
(SUB) (SURR)L R
A B C SURR. MULTI
1
2 3 4
1 Status lightRED ............... Transmitter is on.BLINKING ...... Transmitter is on and
input level is too high(see 5).
OFF ................ Transmitter is instandby mode or is notconnected to the AC/DC adapter.
2 L (SUB)Not used with the suppliedconfiguration.
3 R (SURR)To connect the transmitter unit to theSURROUND OUT (SURR PRE OUT) jackof your set.
4 SURR / MULTISet this selector to SURR, the positionMULTI is not used with the suppliedconfiguration.
5 A·B·CTo set the input sensitivity of thetransmitter unit.A ................... maximum sensitivityB ................... medium sensitivityC ................... minimum sensitivity
6 14 VConnect the provided AC/DC adapterhere.
7 CHANNEL7 step channel selector for setting thechannel in case of interferences.
Notes:– Always be sure that the transmitter unit
and the active surround speaker areswitched to the same channel,otherwise no sound or only a distortedsound will be heard on the surroundspeakers.
– Cellular phones used near the system(1–2 meters) may interfere with thetransmission.
– You have to switch off the activesurround speaker before setting thetransmitting channel.
Active surround speakers
POWER
ON OFF.MAINS
1 3 5 7
8
9
10
11
12
8 zGREEN LIGHT: If this is on, the activespeaker is on.
9 yRED LIGHT: If this is on, the activespeaker is in standby mode.
Note:– If both lights are off the active speaker
is switched off or is not connected to apower source.
10 CHANNEL7 step channel selector for setting thechannel in case of interferences.
11 POWERTo switch the active surround speakeron and off.
12 MAINSTo connect the active surroundspeaker to the power source.
ConnectionsImportant!Always switch off all your equipmentbefore making any connections!
To connect your wireless speaker system,refer to the picture above.
The speaker connections on the appliancemay be screw connectors or click-fitconnectors.
8 mm 1 2 3
1 2 3
7 mm
At the rear of the appliance you will find acolored or + terminal and a black or -terminal for each speaker.
Note:– After connecting all the speakers, do not
forget to adjust the relative sound levelbetween them.
Front speakers and center speakerConnect the colored speaker wire to thecoloured or + terminal, and the black wireto the black or - terminal of the appliance.
Untitled-7 6/15/00, 12:50 PM13

14
English
3139 116 18884
Surround speakersConnect the active speakers to the powersource with the power cable provided.Switch on the active speaker with thePOWER switch.
Transmitter unitConnect the SURR terminal of thetransmitter with the PRE OUT (SURROUND)terminal of the appliance using thesupplied cinch cable. Connect the AC/DCadapter supplied to the 14 V socket of thetransmitter. Then connect the AC/DCadapter to the power source.
Note:– The SUB terminal of the transmitter is
not used with this set.
PositioningPosition the unit in a way that you are ableto ”see” the active surround speaker fromthe position of the unit.
To avoid sound distortions caused bymagnetic fields do not place thetransmitter on your TV set.
Positioning the speakers
Important!To avoid overheating do not cover anyvents and leave a minimum distance of5 centimeters (2 inches) forventilation.
General hints for positioningAvoid positioning the speakers in a corneror on the floor, as this will boost the basstones too much. Placing the speakersbehind curtains, furniture etc. will reducethe treble response, thus reducing thestereo effect considerably. The listenershould always be able to ”see” thespeakers.
Each room has different acousticcharacteristics and the positioningpossibilities are often limited. You can findthe best position for your speakers byfollowing the picture above. The speakersshould always be arranged assymmetrically as possible in the room.
Positioning the center speakerThe center speaker should be placed in thecenter between both front speakers, e. g.underneath or on top of the TV. The bestheight for the center speaker is at theheight of the listener’s ears (while seated).
Positioning the surround speakersThe surround speakers should face eachother and be in line with, or at most 1.5m(4ft 6ins) behind the listener.
SetupAdjusting the relative sound levelAfter installing your speakers, you willhave to find a good sound balance betweenthe surround, center and front speakers.
In the instruction booklet of your applianceyou will find a section describing how toadjust the sound of the different speakers.Follow those instructions to get the mostout of your new speakers.
Setting the input sensitivity A.B.CDepending on which sound source you use,the signals delivered have differentstrengths.
If the red light on the front of thetransmitter unit starts to blink, theincoming signal is too strong. This willcause distortions. Set the A·B·C switch toadjust the input sensitivity to a lower level.If the red light on the front of thetransmitter unit goes off during play, theincoming signal is not strong enough. Setthe A·B·C switch to adjust the inputsensitivity to a higher level.
Setting the transmitting channelIn case of signal interference from thetransmitter it is possible to change toanother transmitting channel.
1 Switch off both active surroundspeakers.
2 Set the CHANNEL slide at the back ofthe transmitter to another number.
SETTING UP FB219W (for model FW798W only)
L
CENTER
RFRONT
TVFRONT
SURR PRE OUT
SURR
14 V
SURROUNDREAR
MAINS
SURROUNDREAR
MAINS
STEREO
FMBACK
HSDREPEAT REC
LWMWAMT.A.NEWS
SOUND NAVIGATION
INCREDIBLE SURROUND
DIGITAL SOUND CONTROL
DISC CHANGE
DISC 1 DISC 2 DISC 3
OPEN•CLOSE
DYNAMIC BASSBOOST
TAPECD
PROG
CLOCK/TIMER
NEWS!
RDS
DOLBY BNR
DUB(HSD)
REC
STANDBY•ON
SIDE A•B REVERSE
TUNER AUX
PRESET
DEMOSTOP •CLEARSEARCH • TUNING PLAY PAUSE PREV NEXT
DC3C H A N G E R
MINI HIFI SYSTEM
CD1 • 2 • 3 CDRBAND TAPE 1 • 2
TIMER FRONT
60Hz 500Hz250Hz 1KHz 2KHz 4KHz 8KHz
VOLUME
SHUFFLEPROGRAM
S S
L R
C
PRO LOGIC
Untitled-7 6/15/00, 12:50 PM14
15
Engli
sh
3139 116 18884
3 Set the CHANNEL slide at the back ofboth active surround speakers to thesame number as on the transmitter.
4 Switch on both active surroundspeakers.
Note:– Always be sure that the transmitter and
the active surround speakers areswitched to the same transmittingchannel, otherwise no sound or only adistorted sound will be heard on thesurround speakers.
Switching On.Standby.OffThe transmitter is equipped with asensitive input. If there is no signal on theSUB and SURR input the transmitter andthe surround speakers will switch tostandby after approximately 100 seconds.
The green light on the front of the activesurround speakers shows that the speakersare on. If the red light is on, the speakershas switched to standby. To switch theactive speakers off, use the POWER switch.
If the red light on the front of thetransmitter is off, it has switched tostandby. To switch the transmitter off,unplug the AC/DC adapter from the powersource.
General InformationAny amplifier or receiver used at highpower can produce distortions which mayseriously damage your speakers. Ifdistortion occurs, reduce the volume andthe tone control to a level where the soundis acceptable again.
When using microphones, avoid feedbackwhich occurs when a microphone picks upsound from the speakers, resulting in ahowling noise. Keep the microphone awayfrom the speakers or reduce the volume.
More wireless products …The transmitter is also equipped to drive anoptional wireless subwoofer, wirelessstereo speakers or wireless headphones.
Please ask your dealer about theseproducts. Refer to the instructions providedwith these products before using themwith your transmitter.
SETTING UP FB219W (for model FW798W only) DOLBY PRO LOGIC
Dolby Pro LogicThis state of the art Dolby Pro Logic minisystem enables you to experience andenjoy a Home Cinema sound ambience. ThePro Logic system allows more accuratedefinition of the individual sound sources.It produces greater sound separationbetween channels and provides pinpointsound localization. Pro Logic provides foursound outputs: Left, Center, Right andSurround (Rear). Front sounds are producedfrom the pair of Left and Right speakersand a Center speaker. The surround soundis reproduced by two speakers placed atthe rear of the listening area. Although thesurround sound is monaural (single-source),a pair of speakers is necessary to producethe correct diffused sound.
This Pro Logic decoder enables you todecode the following modes: DolbySurround, Center Phantom, Dolby 3Stereo or normal Stereo.
Test ToneThis feature enables you to adjust the FrontLeft, Front Right, Center and SurroundSound levels of the respective speakers inDolby Pro Logic mode.
You must sit at the ideal sittingposition and use the remote control toperform this operation.
1 Press CD, TUNER, TAPE or AUX toswitch on the system.
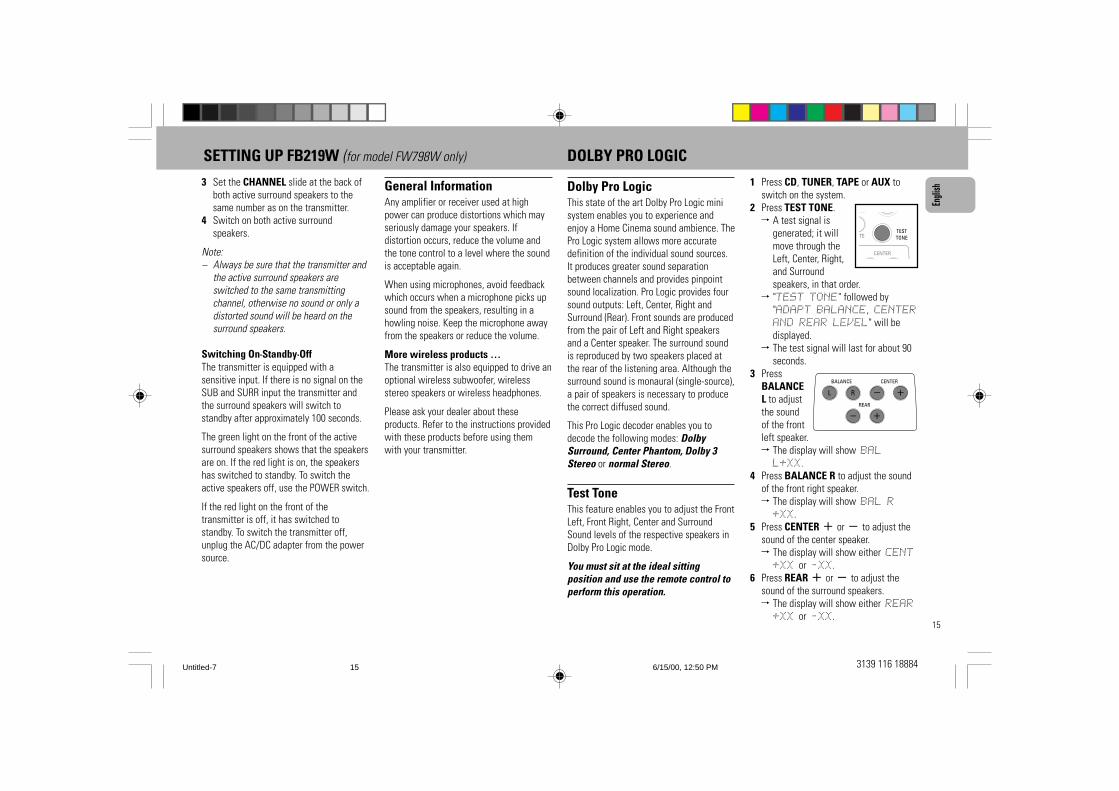
2 Press TEST TONE.™ A test signal is
generated; it willmove through theLeft, Center, Right,and Surroundspeakers, in that order.
™ "TEST TONE" followed by"ADAPT BALANCE, CENTERAND REAR LEVEL" will bedisplayed.
™ The test signal will last for about 90seconds.
3 PressBALANCEL to adjustthe soundof the frontleft speaker.™ The display will show BAL
L+XX.4 Press BALANCE R to adjust the sound
of the front right speaker.™ The display will show BAL R
+XX.5 Press CENTER + or - to adjust the
sound of the center speaker.™ The display will show either CENT
+XX or -XX.6 Press REAR + or - to adjust the
sound of the surround speakers.™ The display will show either REAR
+XX or -XX.
TESTTONEUTE
CENTER
BALANCE
L R
CENTER
REAR
- +
+-
Untitled-7 6/15/00, 12:50 PM15
16
English
3139 116 18884
7 Adjust the sound of all the speakersuntil they are equal. When you aresatisfied with the setting, press TESTTONE again to switch off the testsignal.
Note:– It is advisable to set the speakers’ level
at normal listening level. "XX" denotesthe sound level.
When you have completed the Dolby ProLogic setup, you are ready to enjoy HomeCinema sound.
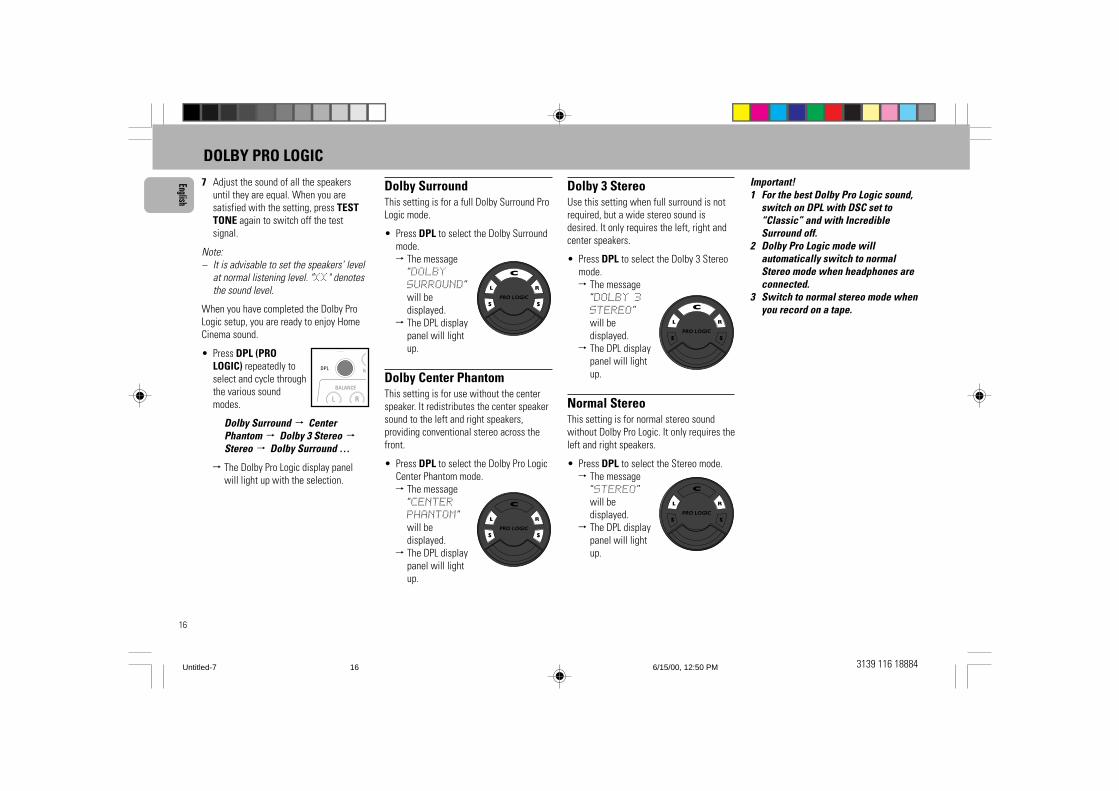
• Press DPL (PROLOGIC) repeatedly toselect and cycle throughthe various soundmodes.
Dolby Surround ™ CenterPhantom ™ Dolby 3 Stereo ™Stereo ™ Dolby Surround …
™ The Dolby Pro Logic display panelwill light up with the selection.
Dolby SurroundThis setting is for a full Dolby Surround ProLogic mode.
• Press DPL to select the Dolby Surroundmode.™ The message
“DOLBYSURROUND”will bedisplayed.
™ The DPL displaypanel will lightup.
Dolby Center PhantomThis setting is for use without the centerspeaker. It redistributes the center speakersound to the left and right speakers,providing conventional stereo across thefront.
• Press DPL to select the Dolby Pro LogicCenter Phantom mode.™ The message
“CENTERPHANTOM”will bedisplayed.
™ The DPL displaypanel will lightup.
Dolby 3 StereoUse this setting when full surround is notrequired, but a wide stereo sound isdesired. It only requires the left, right andcenter speakers.
• Press DPL to select the Dolby 3 Stereomode.™ The message
“DOLBY 3STEREO”will bedisplayed.
™ The DPL displaypanel will lightup.
Normal StereoThis setting is for normal stereo soundwithout Dolby Pro Logic. It only requires theleft and right speakers.
• Press DPL to select the Stereo mode.™ The message
“STEREO”will bedisplayed.
™ The DPL displaypanel will lightup.
S S
L R
C
PRO LOGIC
S S
L R
C
PRO LOGIC
S S
L R
C
PRO LOGIC
S S
L R
C
PRO LOGIC
DPL M
BALANCE
L R
Important!1 For the best Dolby Pro Logic sound,
switch on DPL with DSC set to“Classic” and with IncredibleSurround off.
2 Dolby Pro Logic mode willautomatically switch to normalStereo mode when headphones areconnected.
3 Switch to normal stereo mode whenyou record on a tape.
DOLBY PRO LOGIC
Untitled-7 6/15/00, 12:50 PM16
17
Engli
sh
3139 116 18884
Playing a CD1 Press PLAY É to start playback.
™ The disc tray, track number andelapsed playing time of the currenttrack appear on the display.
• To interrupt playback, press PAUSE Å.™ The playing time flashes.
• To resume playback, press PLAYÉagain.
2 To stop playback, press STOP•CLEARÇ.
Note:– All the available discs will play once,
then stop.
Disc ChangeYou can change the outer two discs whilethe third inner disc is stopped or is playing.
1 Press DISC CHANGE.™ The CD carousel slides out.
2 Replace the discs in the left and rightdisc trays.
• If you press DISC CHANGE againduring playback, the CD will stopplaying.™ The CD carousel will rotate until the
inner tray is rotated out and is readyfor loading.
3 Press OPEN•CLOSE to close the CDcompartment.
Warning!1) This system is designed for
conventional CDs. Do not use anyaccessories such as disc stabilizerrings or CD treatment sheets, etc.,which may damage the CDmechanism.
2) Do not load more than one disc intoeach tray.
3) When the CD changer is loadedwith CDs, do not turn over or shakethe system. This may jam thechanger.
CD
FM
STEREOBACK
HSDREPEAT REC
LWMWAMT.A.NEWS
SOUND NAVIGATION
INCREDIBLESURROUND
DIGITALSOUND CONTROL
DISC CHANGE
DISC 1 DISC 2 DISC 3
OPEN•CLOSE
DYNAMIC BASSBOOST
TAPECD
PROG
NEWS!
RDS
DOLBY BNR
DUB(HSD)
REC
SIDE A•B A. REV
TUNER AUX
PRESET
STOP •CLEARSEARCH • TUNING PLAY PAUSE PREV NEXT
MINI HIFI SYSTEM
CD1 • 2 • 3 CDRTAPE 1 • 2
TIMER FRONT
60Hz 500Hz250Hz 1KHz 2KHz 4KHz 8KHz
VOLUME
SHUFFLEPROGRAM
S S
L R
C
PRO LOGIC
NEWS/TACLOCK/TIMER
STANDBYON
BAND
RDS
MIC
MICLEVEL
You may load three discs in the CDchanger for continuous playbackwithout interruption.
Disc for playbackThis system can playback all audio CD,finalized audio CD-Recorder and finalizedaudio CD-Rewritable format discs.
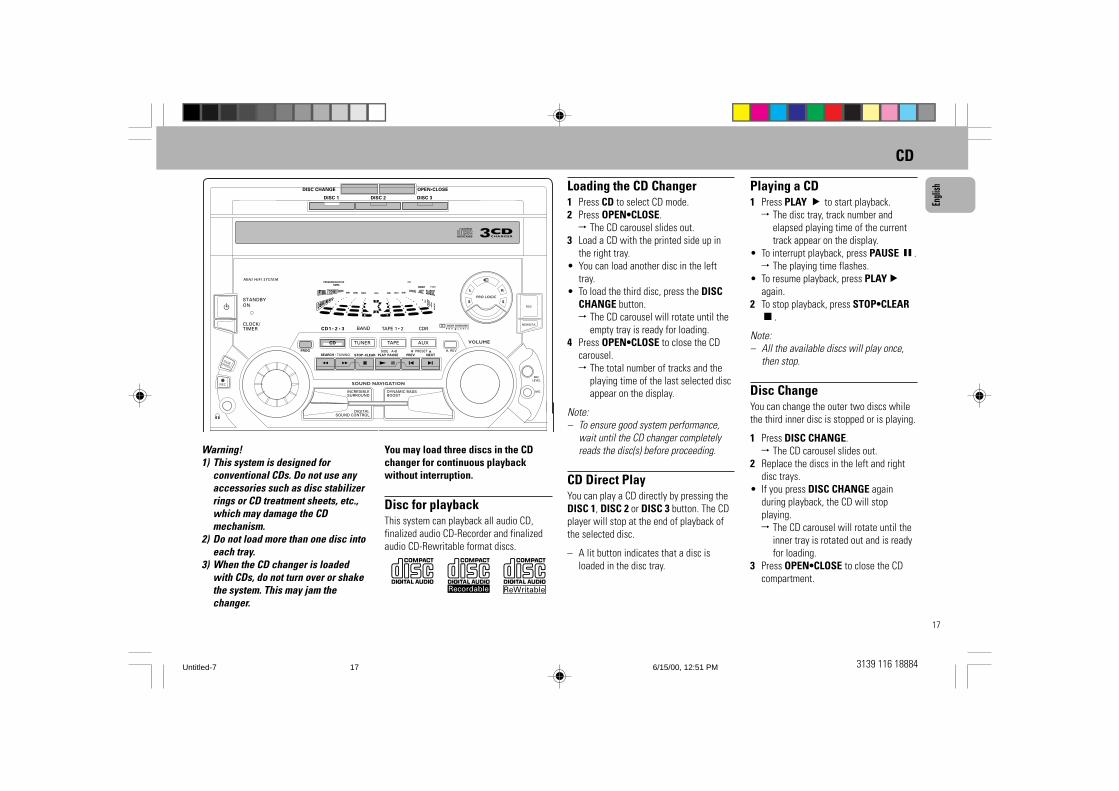
Loading the CD Changer1 Press CD to select CD mode.2 Press OPEN•CLOSE.
™ The CD carousel slides out.3 Load a CD with the printed side up in
the right tray.• You can load another disc in the left
tray.• To load the third disc, press the DISC
CHANGE button.™ The CD carousel will rotate until the
empty tray is ready for loading.4 Press OPEN•CLOSE to close the CD
carousel.™ The total number of tracks and the
playing time of the last selected discappear on the display.
Note:– To ensure good system performance,
wait until the CD changer completelyreads the disc(s) before proceeding.
CD Direct PlayYou can play a CD directly by pressing theDISC 1, DISC 2 or DISC 3 button. The CDplayer will stop at the end of playback ofthe selected disc.
– A lit button indicates that a disc isloaded in the disc tray.
Untitled-7 6/15/00, 12:51 PM17
18
English
3139 116 18884
Selecting a desired trackSelecting a desired track whenplayback is stopped1 Press PREV í or NEXT ë until the
desired track appears on the display.2 Press PLAY É to start playback.
™ The selected track number andelapsed playing time appear on thedisplay.
Selecting a desired track duringplayback• Press PREV í or NEXT ë until the
desired track appears on the display.™ The selected track number and
elapsed playing time appear on thedisplay.
• If you press PREV í once it will skipto the beginning of the current track andplay the track again.
Searching for a particularpassage during playback• Press and hold à or á until the
desired passage is located.™ The volume will be reduced.
• Play returns to normal when à or áis released.
Programming TracksProgramming tracks of a loaded CD ispossible when playback is stopped. Thedisplay will indicate the total tracks storedin the program. Up to 40 tracks can bestored in the memory in any order. When40 tracks are stored and you attempt tostore another track, the display will show“FULL”.
1 Load the desired discs in the disc trays.2 Press PROGRAM to start programming.
™ The PROGRAM flag starts flashing.™ It will cancel any previously selected
repeat mode.3 Press the CD (CD 1•2•3) button to
select the disc.4 Press PREV í or NEXT ë to select
the desired track.5 Press PROGRAM to store the track.• Repeat steps 3 to 5 to store other discs
and tracks.6 Press STOP•CLEAR Ç once to end
programming.™ The total number of tracks
programmed and total playing timeappear on the display.
Notes:– If the total playing time is more than
“99:59” or if one of the programmedtracks has a number greater than 30,then “--:--” appears on the displayinstead of the total playing time.
– During programming, if no button ispressed within 20 seconds, the systemwill exit program mode automatically.
Reviewing the programReviewing of the program is possible onlywhen playback is stopped.• Press PREV í or NEXT ë repeatedly
to review the programmed tracks.• Press STOP•CLEAR Ç to exit review
mode.
Playing the program1 Press PLAY É to start program
playback.™ “PLAY PROGRAM” appears on
the display.™ The track number and elapsed
playing time of the current track willappear on the display.
• If you press REPEAT during programplayback, the current track will beplayed repeatedly.™ The REPEAT and PROGRAM flags will be
displayed.2 Press STOP•CLEAR Ç to stop
program playback.
Note:– If you press any of the CD DIRECT PLAY
buttons, the system will play theselected disc or track and the storedprogram will be ignored temporarily. ThePROGRAM flag also will disappeartemporarily from the display. It will
CD
reappear when playback of the selecteddisc ends.
Erasing the program (whenplayback is stopped)• Press STOP•CLEAR Ç.
™ “PROGRAM CLEARED” will bedisplayed.
Note:– The program will be erased when the
system is disconnected from the powersupply or when the CD carousel isopened. If the CD carousel is opened,the tracks belonging to the outer twotrays will be erased and the display willshow “TRACKS CLEARED”.
Shuffle (only on remote control)In shuffle mode, the system plays all theavailable discs and their tracks in randomorder. Shuffle may be used also whentracks are programmed.
To shuffle all the discs and tracks1 Press SHUFFLE.
™ “SHUFFLE” will be displayed.™ The SHUFFLE flag, the disc and the
track selected at random appear onthe display.
• The discs and the tracks will be playedin random order until you pressSTOP•CLEAR Ç.
Untitled-7 6/15/00, 12:51 PM18
19
Engli
sh
3139 116 18884
CD TUNER
Note:– For 'EASY SET' feature, please refer to
page 11.
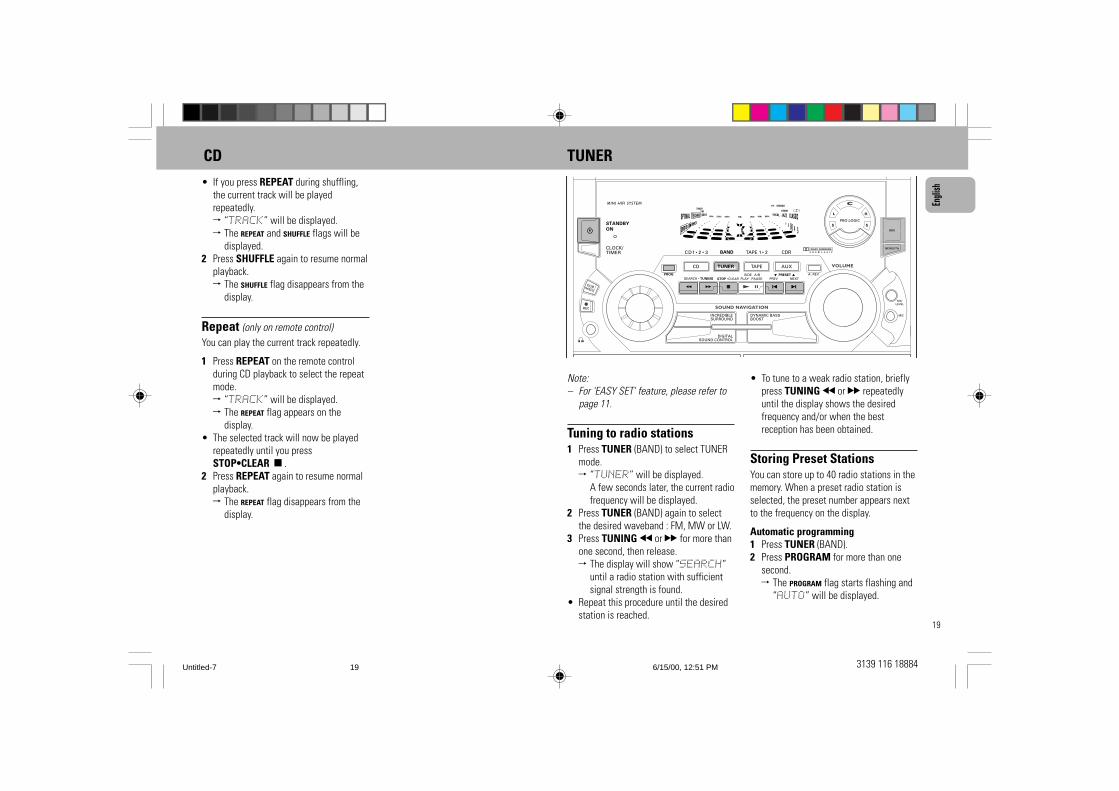
Tuning to radio stations1 Press TUNER (BAND) to select TUNER
mode.™ “TUNER” will be displayed.
A few seconds later, the current radiofrequency will be displayed.
2 Press TUNER (BAND) again to selectthe desired waveband : FM, MW or LW.
3 Press TUNING à or á for more thanone second, then release.™ The display will show “SEARCH”
until a radio station with sufficientsignal strength is found.
• Repeat this procedure until the desiredstation is reached.
• To tune to a weak radio station, brieflypress TUNING à or á repeatedlyuntil the display shows the desiredfrequency and/or when the bestreception has been obtained.
Storing Preset StationsYou can store up to 40 radio stations in thememory. When a preset radio station isselected, the preset number appears nextto the frequency on the display.
Automatic programming1 Press TUNER (BAND).2 Press PROGRAM for more than one
second.™ The PROGRAM flag starts flashing and
“AUTO” will be displayed.
BACKHSD
REPEATSHUFFLEPROGRAM
RECLWMWAMT.A.NEWS
SOUND NAVIGATION
INCREDIBLESURROUND
DIGITALSOUND CONTROL
DYNAMIC BASSBOOST
TAPECD
PROG
NEWS!
RDS
DOLBY BNR
DUB(HSD)
REC
SIDE A•B A. REV
TUNER AUX
PRESET
STOP •CLEARSEARCH • TUNING PLAY PAUSE PREV NEXT
MINI HIFI SYSTEM
CD1 • 2 • 3 CDRTAPE 1 • 2
TIMER FM FRONT
STEREO
60Hz 500Hz250Hz 1KHz 2KHz 4KHz 8KHz
VOLUME
S S
L R
C
PRO LOGIC
CLOCK/TIMER
STANDBY
ON
NEWS/TA
BAND
RDS
MIC
MICLEVEL
• If you press REPEAT during shuffling,the current track will be playedrepeatedly.™ “TRACK” will be displayed.™ The REPEAT and SHUFFLE flags will be
displayed.2 Press SHUFFLE again to resume normal
playback.™ The SHUFFLE flag disappears from the
display.
Repeat (only on remote control)You can play the current track repeatedly.
1 Press REPEAT on the remote controlduring CD playback to select the repeatmode.™ “TRACK” will be displayed.™ The REPEAT flag appears on the
display.• The selected track will now be played
repeatedly until you pressSTOP•CLEAR Ç.
2 Press REPEAT again to resume normalplayback.™ The REPEAT flag disappears from the
display.
Untitled-7 6/15/00, 12:51 PM19

20
English
3139 116 18884
™ The system will search for everyavailable station in the FM wavebandfirst, then search by the MW and LWwavebands.
™ All available radio stations will bestored automatically. The frequencyand preset number will be displayedbriefly.
™ The system will stop searching whenall the available radio stations arestored or when the memory for 40preset radio stations is used.
™ The system will remain tuned to thelast stored preset radio station.
Notes:– You can cancel the automatic
programming by pressing PROGRAM orSTOP•CLEAR Ç (on the system only).
– If you want to reserve a section ofpreset numbers, for example presetnumbers 1 to 9, select preset 10 beforestarting automatic programming: onlythe preset numbers 10 to 40 will beprogrammed.
Manual programming1 Press TUNER (BAND).2 Press TUNER (BAND) again to select
the desired waveband : FM, MW or LW.3 Press PROGRAM for less than one
second.™ The PROGRAM flag starts flashing.™ The next available preset number will
be displayed for selection.
TUNER
4 Press TUNING à or á to tune to thedesired frequency.
• If you wish to store the radio station toanother preset number, press PRESET4 or 3 to select the desired presetnumber.
5 Press PROGRAM again.™ The PROGRAM flag disappears and the
radio station will be stored.
• Repeat the steps 3 to 5 to store otherpreset radio stations.
Notes:– When 40 radio stations are stored and
you attempt to store another radiostation, the display will show" FULL”.If you want to change an existing presetnumber, repeat steps 3 – 5.
– You can cancel manual programming bypressing STOP•CLEAR Ç (on thesystem only).
– During programming, if no button ispressed within 20 seconds, the systemwill exit program mode automatically.
Tuning to Preset RadioStations• Press PRESET 4 or 3 to select the
desired preset number.™ The preset number, radio frequency,
and waveband appear on the display.
Receiving RDS Radio StationÇ
RDS (Radio Data System) is a broadcastingservice that allows FM stations to sendadditional information along with theregular FM radio signal. This additionalinformation can contain:
• STATION NAME: The radio stationname is displayed.
• FREQUENCY: The frequency of theradio station is displayed.
• PROGRAM TYPE: The followingprogram types exist and can be receivedby your tuner: News, Affairs, Info, Sport,Educate, Drama, Culture, Science,Varied, Pop M, Rock M, M.O.R. (middleof the road music), Light M, Classics,Other M, No type.
• RADIO TEXT (RT): text messagesappear in the display.
When you have tuned to a RDS station, theRDS logo (Ç) and the radio station namewill appear on the display:
• The display normally shows the radiostation name if available.By repeatedly pressing RDS button youcan change the type of displayinformation:
™ The display shows in turn:STATION NAME ™
PROGRAM TYPE ™ RADIO
TEXT ™ FREQUENCY ™
STATION NAME ...
Note:– When you press the RDS button and the
display shows "NO RDS", it indicatesthat either the tuned station is nottransmitting RDS signal or it is a nonRDS station.
RDS ClockSome RDS station may be transmitting areal clock time at an interval of everyminute.
Setting the time with RDS clock1 Press CLOCK/TIMER.
™ "--:--" or current time appears onthe display.
2 Press CLOCK/TIMER once more toenter clock setting mode.™ "00:00" or current time starts
flashing.3 Press RDS.
™ The message "SEARCH RDSTIME" will be displayed.
™ If the station does not transmit RDSclock, "NO RDS TIME" will bedisplayed.
™ When the RDS clock is read, "RDSTIME" will be displayed. Thecurrent clock time is displayed for 2seconds and will be storedautomatically.
™ If within 90 seconds, the RDS time isnot detected, "NO RDS TIME"will be displayed.
Untitled-7 6/15/00, 12:51 PM20
21
Engli
sh
3139 116 18884
TUNER
News/TA (TrafficAnnouncement) (only available inRadio Station with RDS)You can activate NEWS or TA function inStandby, Demonstration or any sourcemode except Tuner mode. Once the NewsProgram Type (for NEWS function) or TrafficAnnouncement data (for TA function) isdetected in any of the selected RDSstations, it will switch to TUNER modeautomatically.
NEWS/TA key toggles in the followingsequence :
NEWS ™ TA ™ OFF ™ NEWS
To start NEWS or TA function1 Press NEWS/TA to select NEWS
function.™ The NEWS flag and "NEWS" will be
displayed.• If you want to select TA function, press
NEWS/TA again.™ The TA flag and "TA" will be
displayed.2 When NEWS or TA is selected;• It will search for the first 5 preset RDS
stations and wait for the News ProgramType / Traffic Announcement data to beavailable in any of these RDS stations.During the search :™ The current source activity will
remain uninterrupted.
™ If no RDS station is found in the first5 presets after the search, theNEWS/TA function will be switchedoff. The display will show "NORDS NEWS" or "NO RDS TA"and NEWS or TA flag will disappearfrom the display.
• When NEWS/TA transmission isdetected, the system will switch toTuner mode.™ The NEWS or TA flag starts flashing.
To cancel NEWS or TA function• Press NEWS/TA until the NEWS or TA
flag disappears and "TA OFF" isdisplayed.
Notes:– If you are listening to a non RDS TUNER
radio station and should you decide tohear NEWS or TA, first select othersource (e.g. CD, TAPE or AUX), thenpress NEWS/TA.
– Before using the NEWS or TA feature,ensure that the first 5 presets are RDSstations.
– The NEWS/TA works only once for eachactivation.
– During News bulletin or TrafficAnnouncement, you can press anyavailable source or Tuner function keysto cancel NEWS/TA function andexecute the relevant source mode.
– If set is switched to Tuner source, theNEWS/TA function will be cancelled,"NEWS OFF" or "TA OFF" will bedisplayed immediately after the"TUNER" message.
Untitled-7 6/15/00, 12:51 PM21
22
English
3139 116 18884
TAPE
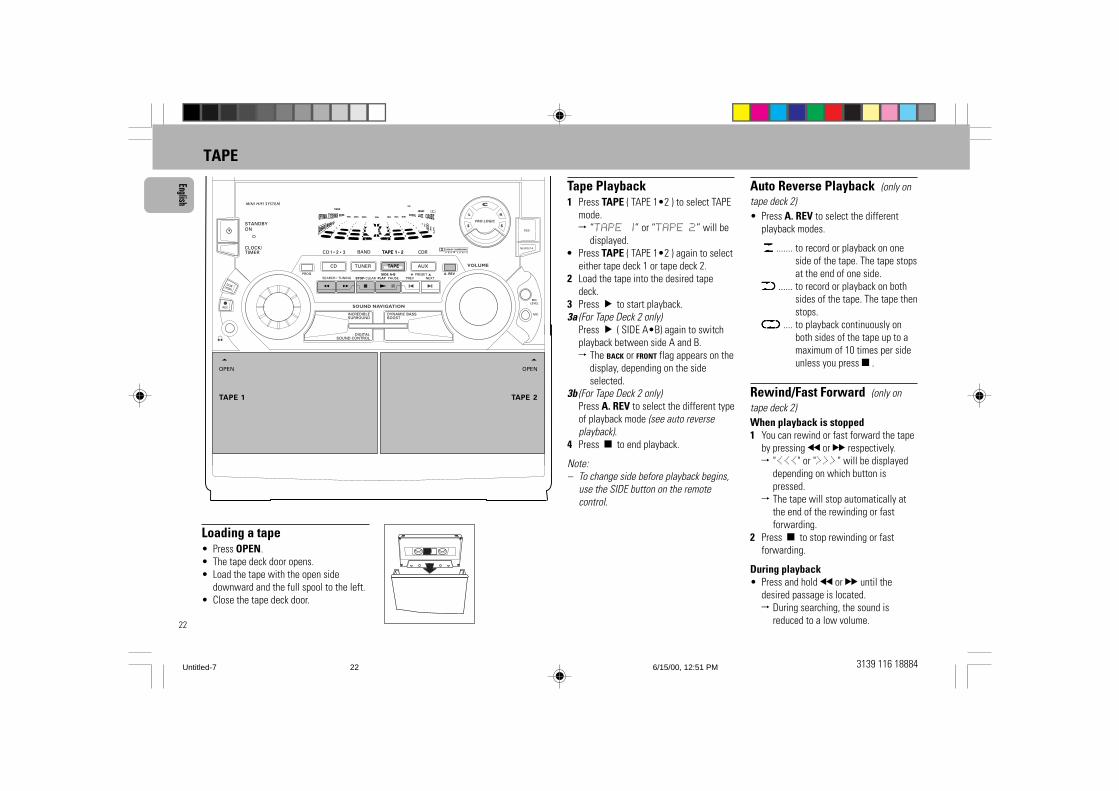
Loading a tape• Press OPEN.• The tape deck door opens.• Load the tape with the open side
downward and the full spool to the left.• Close the tape deck door.
Tape Playback1 Press TAPE ( TAPE 1•2 ) to select TAPE
mode.™ “TAPE 1” or “TAPE 2” will be
displayed.• Press TAPE ( TAPE 1•2 ) again to select
either tape deck 1 or tape deck 2.2 Load the tape into the desired tape
deck.3 Press É to start playback.3a (For Tape Deck 2 only)
Press É ( SIDE A•B) again to switchplayback between side A and B.™ The BACK or FRONT flag appears on the
display, depending on the sideselected.
3b (For Tape Deck 2 only)Press A. REV to select the different typeof playback mode (see auto reverseplayback).
4 Press Ç to end playback.
Note:– To change side before playback begins,
use the SIDE button on the remotecontrol.
Auto Reverse Playback (only ontape deck 2)• Press A. REV to select the different
playback modes.
ååååå ....... to record or playback on oneside of the tape. The tape stopsat the end of one side.
∂∂∂∂∂ ...... to record or playback on bothsides of the tape. The tape thenstops.
∫∫∫∫∫ .... to playback continuously onboth sides of the tape up to amaximum of 10 times per sideunless you pressÇ.
Rewind/Fast Forward (only ontape deck 2)When playback is stopped1 You can rewind or fast forward the tape
by pressing à or á respectively.™ "<<<" or ">>>" will be displayed
depending on which button ispressed.
™ The tape will stop automatically atthe end of the rewinding or fastforwarding.
2 Press Ç to stop rewinding or fastforwarding.
During playback• Press and hold à or á until the
desired passage is located.™ During searching, the sound is
reduced to a low volume.
STEREO
FMBACK
HSDREPEAT
SHUFFLEPROGRAMRECLWMWAMT.A.NEWS
SOUND NAVIGATION
INCREDIBLESURROUND
DIGITALSOUND CONTROL
DYNAMIC BASSBOOST
TAPECD
PROG
NEWS!
RDS
DOLBY BNR
DUB(HSD)
REC
SIDE A•B A. REV
TUNER AUX
PRESET
STOP•CLEARSEARCH • TUNING PLAY PAUSE PREV NEXT
MINI HIFI SYSTEM
CD1 • 2 • 3 CDRTAPE 1 • 2
TIMER FRONT
60Hz 500Hz250Hz 1KHz 2KHz 4KHz 8KHz
VOLUME
S S
L R
C
PRO LOGIC
CLOCK/TIMER
STANDBYON
NEWS/TA
BAND
RDS
MIC
MICLEVEL
Untitled-7 6/15/00, 12:51 PM22
23
Engli
sh
3139 116 18884
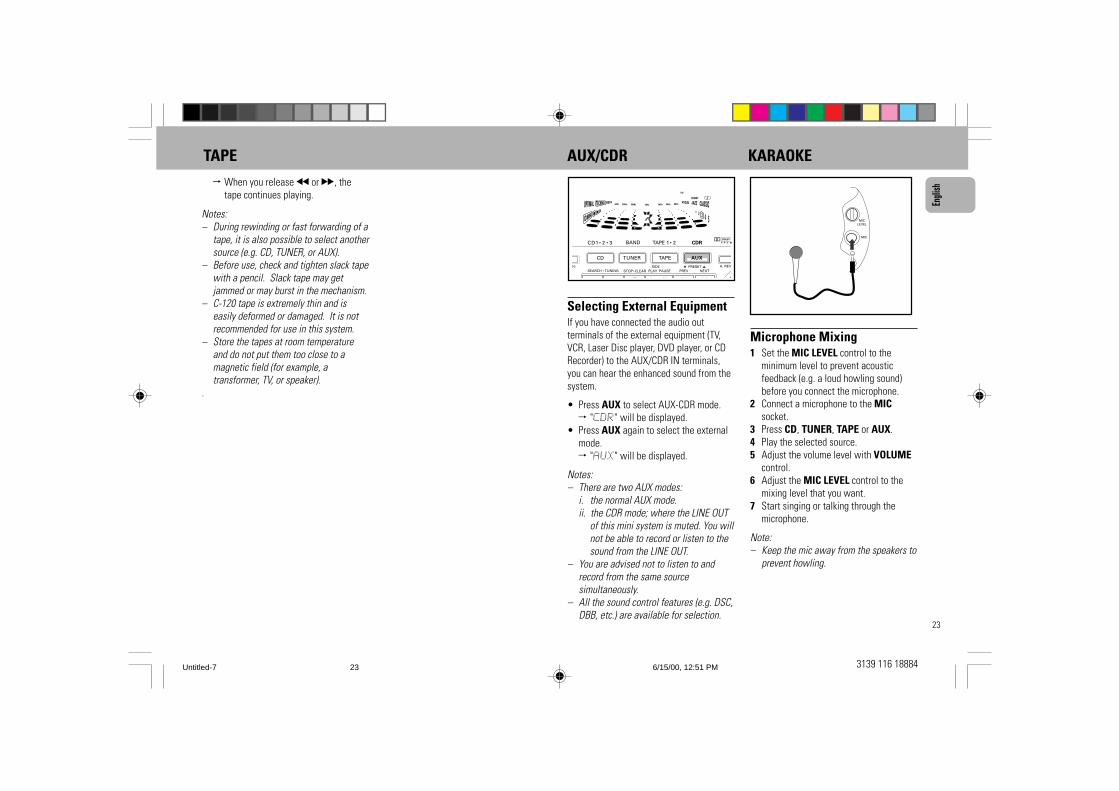
Selecting External EquipmentIf you have connected the audio outterminals of the external equipment (TV,VCR, Laser Disc player, DVD player, or CDRecorder) to the AUX/CDR IN terminals,you can hear the enhanced sound from thesystem.
• Press AUX to select AUX-CDR mode.™ "CDR" will be displayed.
• Press AUX again to select the externalmode.™ "AUX" will be displayed.
Notes:– There are two AUX modes:
i. the normal AUX mode.ii. the CDR mode; where the LINE OUT
of this mini system is muted. You willnot be able to record or listen to thesound from the LINE OUT.
– You are advised not to listen to andrecord from the same sourcesimultaneously.
– All the sound control features (e.g. DSC,DBB, etc.) are available for selection.
TAPE AUX/CDR KARAOKE
Microphone Mixing1 Set the MIC LEVEL control to the
minimum level to prevent acousticfeedback (e.g. a loud howling sound)before you connect the microphone.
2 Connect a microphone to the MICsocket.
3 Press CD, TUNER, TAPE or AUX.4 Play the selected source.5 Adjust the volume level with VOLUME
control.6 Adjust the MIC LEVEL control to the
mixing level that you want.7 Start singing or talking through the
microphone.
Note:– Keep the mic away from the speakers to
prevent howling.
RECSHUFFLE
TIMER STEREO
FMBACK
HSDREPEATPROGRAM
LWMWAMT.A.NEWS
TAPECD
OG SIDE A•B A. REV
TUNER AUX
PRESET
STOP •CLEARSEARCH • TUNING PLAY PAUSE PREV NEXT
CD1 • 2 • 3 CDRTAPE 1 • 2
FRONT
60Hz 500Hz250Hz 1KHz 2KHz 4KHz 8KHz
BANDMIC
MICLEVEL
™ When you release à or á, thetape continues playing.
Notes:– During rewinding or fast forwarding of a
tape, it is also possible to select anothersource (e.g. CD, TUNER, or AUX).
– Before use, check and tighten slack tapewith a pencil. Slack tape may getjammed or may burst in the mechanism.
– C-120 tape is extremely thin and iseasily deformed or damaged. It is notrecommended for use in this system.
– Store the tapes at room temperatureand do not put them too close to amagnetic field (for example, atransformer, TV, or speaker).
.
Untitled-7 6/15/00, 12:51 PM23
24
English
3139 116 18884
RECORDING
TIMER STEREO
FMBACK
HSDREPEAT
LWMWAMT.A.NEWS
SOUND NAVIGATION
INCREDIBLESURROUND
DIGITALSOUND CONTROL
DYNAMIC BASSBOOST
TAPECD
PROG
NEWS!
RDS
DOLBY BNR
DUB(HSD)
REC
SIDE A•B A. REV
TUNER AUX
PRESET
STOP•CLEARSEARCH • TUNING PLAY PAUSE PREV NEXT
MINI HIFI SYSTEM
CD1 • 2 • 3 CDRTAPE 1 • 2
FRONT
60Hz 500Hz250Hz 1KHz 2KHz 4KHz 8KHz
VOLUME
RECSHUFFLEPROGRAM
S S
L R
C
PRO LOGIC
CLOCK/TIMER
STANDBYON
NEWS/TA
BAND
RDS
MIC
MICLEVEL
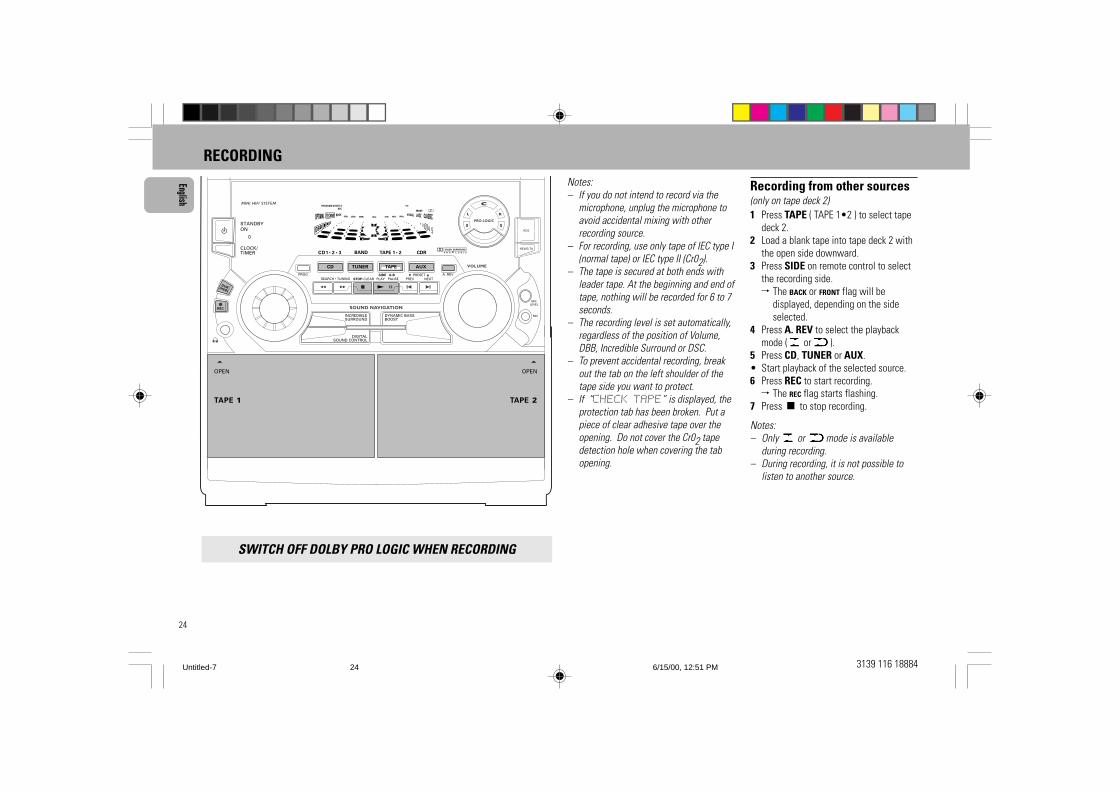
Notes:– If you do not intend to record via the
microphone, unplug the microphone toavoid accidental mixing with otherrecording source.
– For recording, use only tape of IEC type I(normal tape) or IEC type II (Cr02).
– The tape is secured at both ends withleader tape. At the beginning and end oftape, nothing will be recorded for 6 to 7seconds.
– The recording level is set automatically,regardless of the position of Volume,DBB, Incredible Surround or DSC.
– To prevent accidental recording, breakout the tab on the left shoulder of thetape side you want to protect.
– If “CHECK TAPE” is displayed, theprotection tab has been broken. Put apiece of clear adhesive tape over theopening. Do not cover the Cr02 tapedetection hole when covering the tabopening.
Recording from other sources(only on tape deck 2)1 Press TAPE ( TAPE 1•2 ) to select tape
deck 2.2 Load a blank tape into tape deck 2 with
the open side downward.3 Press SIDE on remote control to select
the recording side.™ The BACK or FRONT flag will be
displayed, depending on the sideselected.
4 Press A. REV to select the playbackmode ( å å å å å or ∂∂∂∂∂ ).
5 Press CD, TUNER or AUX.• Start playback of the selected source.6 Press REC to start recording.
™ The REC flag starts flashing.7 Press Ç to stop recording.
Notes:– Only ååååå or ∂∂∂∂∂ mode is available
during recording.– During recording, it is not possible to
listen to another source.
SWITCH OFF DOLBY PRO LOGIC WHEN RECORDING
Untitled-7 6/15/00, 12:51 PM24
25
Engli
sh
3139 116 18884
RECORDING
Dubbing tapes (from tape deck 1 totape deck 2)1 Press TAPE ( TAPE 1•2 ) to select tape
deck 2.2 Load the prerecorded tape into tape
deck 1 and a blank tape into tape deck2.™ Make sure the tape in tape deck 1
has its full spool to the left.3 (For Tape Deck 2 only)
Press SIDE on the remote control toselect the recording side.
4 Press DUB (HSD) once for normalspeed dubbing or twice (within 2seconds) for high speed dubbing.™ “NORMAL” (normal speed) or
“FAST” (high speed) will bedisplayed, followed by“DUBBING”.
™ The HSD flag appears on the displayduring high speed dubbing.
• Dubbing will start immediately.™ The REC flag starts flashing.
5 Press Ç to stop dubbing.
Notes:– At the end of side A, flip the tapes to
side B and repeat the procedure.– Dubbing of tapes is only possible from
tape deck 1 to tape deck 2.– To ensure good dubbing, use tapes of
the same length.– During high speed dubbing in Tape
mode, the sound is reduced to a lowvolume.
– You can listen to another source whiledubbing.
CD Synchro Start Recording1 Load a blank tape into tape deck 2 and a
disc into a disc tray.2 Press CD to select CD mode.• You can program the tracks in the order
you want them to be recorded (seeProgramming Tracks). If you do not, thetracks are recorded according to theorder on the selected disc.
3 Press REC to start recording.™ The REC flag starts flashing.
• CD will start playback automatically.4 Press Ç to stop recording.
Recording the mixed sound /One Touch Recording• During microphone mixing, you can
record the mixed sound on a tape intape deck 2 except dubbing mode.
• For One Touch Recording, as soon as youpress REC, the current source (CD,TUNER or AUX) will be recorded on tapedeck 2
1 Load a blank tape in tape deck 2.2 Press REC to start recording.
™ The REC flag starts flashing.3 Press Ç to stop recording.
Note:– When you press RECORD while in TAPE
mode, "SELECT SOURCE" will bedisplayed. One Touch Recording is notpossible in TAPE mode.
Digital Recording via DigitalOutFor CD digital recording, please refer to theInstructions Manual of the CD Recorder,digital audio equipment, etc.
Untitled-7 6/15/00, 12:51 PM25
26
English
3139 116 18884
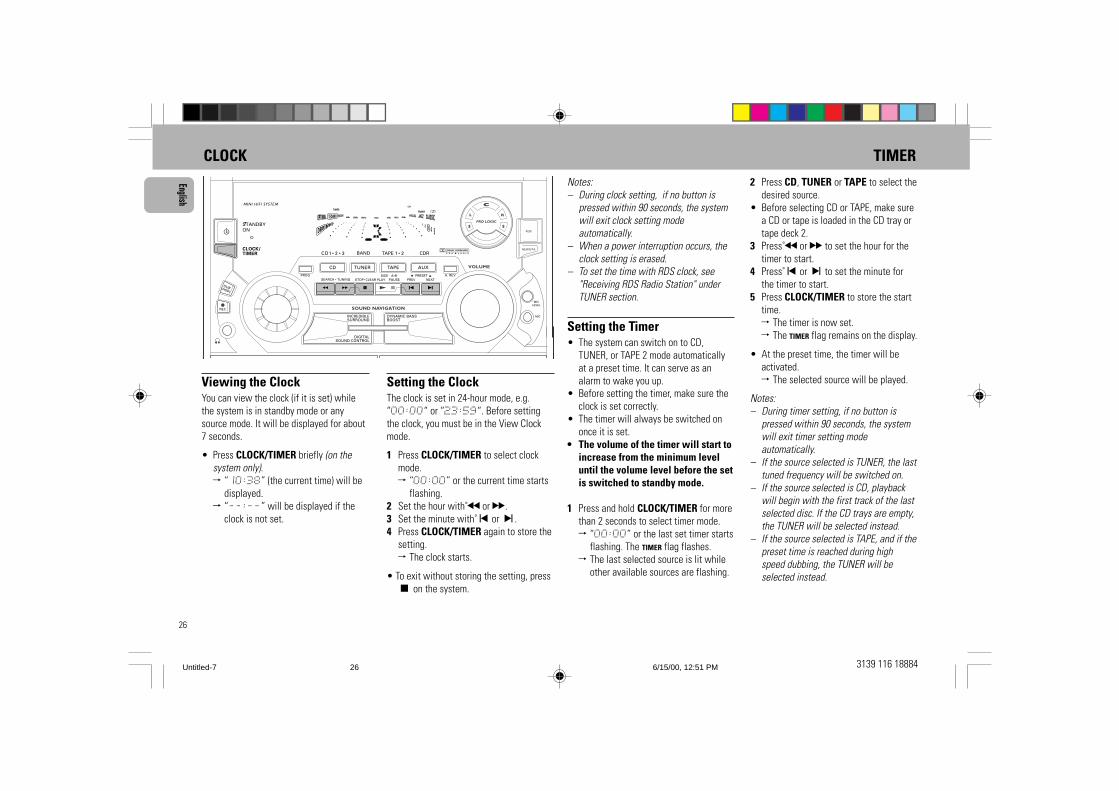
CLOCK TIMER
Viewing the ClockYou can view the clock (if it is set) whilethe system is in standby mode or anysource mode. It will be displayed for about7 seconds.
• Press CLOCK/TIMER briefly (on thesystem only).™ “10:38” (the current time) will be
displayed.™ “--:--” will be displayed if the
clock is not set.
Setting the ClockThe clock is set in 24-hour mode, e.g.“00:00“ or “23:59“. Before settingthe clock, you must be in the View Clockmode.
1 Press CLOCK/TIMER to select clockmode.™ “00:00” or the current time starts
flashing.2 Set the hour withà or á.3 Set the minute withí or ë.4 Press CLOCK/TIMER again to store the
setting.™ The clock starts.
• To exit without storing the setting, pressÇ on the system.
SHUFFLEPROGRAM
FM
STEREOBACK
HSDREPEAT REC
LWMWAMT.A.NEWS
SOUND NAVIGATION
INCREDIBLESURROUND
DIGITALSOUND CONTROL
DYNAMIC BASSBOOST
TAPECD
PROG
NEWS!
RDS
DOLBY BNR
DUB(HSD)
REC
SIDE A•B A. REV
TUNER AUX
PRESET
STOP •CLEARSEARCH • TUNING PLAY PAUSE PREV NEXT
MINI HIFI SYSTEM
CD1 • 2 • 3 CDRTAPE 1 • 2
TIMER FRONT
60Hz 500Hz250Hz 1KHz 2KHz 4KHz 8KHz
VOLUME
S S
L R
C
PRO LOGIC
CLOCK/TIMER
STANDBYON
NEWS/TA
BAND
RDS
MIC
MICLEVEL
Notes:– During clock setting, if no button is
pressed within 90 seconds, the systemwill exit clock setting modeautomatically.
– When a power interruption occurs, theclock setting is erased.
– To set the time with RDS clock, see"Receiving RDS Radio Station" underTUNER section.
Setting the Timer• The system can switch on to CD,
TUNER, or TAPE 2 mode automaticallyat a preset time. It can serve as analarm to wake you up.
• Before setting the timer, make sure theclock is set correctly.
• The timer will always be switched ononce it is set.
• The volume of the timer will start toincrease from the minimum leveluntil the volume level before the setis switched to standby mode.
1 Press and hold CLOCK/TIMER for morethan 2 seconds to select timer mode.™ “00:00” or the last set timer starts
flashing. The TIMER flag flashes.™ The last selected source is lit while
other available sources are flashing.
2 Press CD, TUNER or TAPE to select thedesired source.
• Before selecting CD or TAPE, make surea CD or tape is loaded in the CD tray ortape deck 2.
3 Pressà or á to set the hour for thetimer to start.
4 Pressí or ë to set the minute forthe timer to start.
5 Press CLOCK/TIMER to store the starttime.™ The timer is now set.™ The TIMER flag remains on the display.
• At the preset time, the timer will beactivated.™ The selected source will be played.
Notes:– During timer setting, if no button is
pressed within 90 seconds, the systemwill exit timer setting modeautomatically.
– If the source selected is TUNER, the lasttuned frequency will be switched on.
– If the source selected is CD, playbackwill begin with the first track of the lastselected disc. If the CD trays are empty,the TUNER will be selected instead.
– If the source selected is TAPE, and if thepreset time is reached during highspeed dubbing, the TUNER will beselected instead.
Untitled-7 6/15/00, 12:51 PM26
27
Engli
sh
3139 116 18884
To switch off the TIMER1 Press CLOCK/TIMER for more than 2
seconds.2 Press Ç on the system to cancel the
timer.™ The timer is now switched off.™ The display will show "OFF" and the
TIMER flag disappears.
To start the TIMER again (for the samepreset time and source)1 Press CLOCK/TIMER for more than 2
seconds.2 Press CLOCK/TIMER again to store the
start time.™ The timer is now switched on.™ The TIMER flag appears on the display.
TIMER SLEEP TIMER MAINTENANCE
Sleep Timer (only on remote control)This feature allows you to select a lengthof time after which the system will switchto the standby mode automatically.
• Press SLEEP TIMER on the remotecontrol repeatedly to select a period oftime.™ The selections are as follows (time in
minutes):60 ™ 45 ™ 30 ™ 15 ™ OFF ™60 …
™ “SLEEP XX” or “OFF” will bedisplayed. "XX" is the time inminutes.
• When you reach the desired length oftime, stop pressing the SLEEP TIMERbutton.™ After this amount of time passes, the
system will switch to the standbymode.
To switch off the sleep timer• Press SLEEP TIMER repeatedly until
"OFF" is displayed, or press theSTANDBY ON button.
MaintenanceCleaning the Cabinet• Use a soft cloth slightly moistened with
a mild detergent solution. Do not use asolution containing alcohol, spirits,ammonia or abrasives.
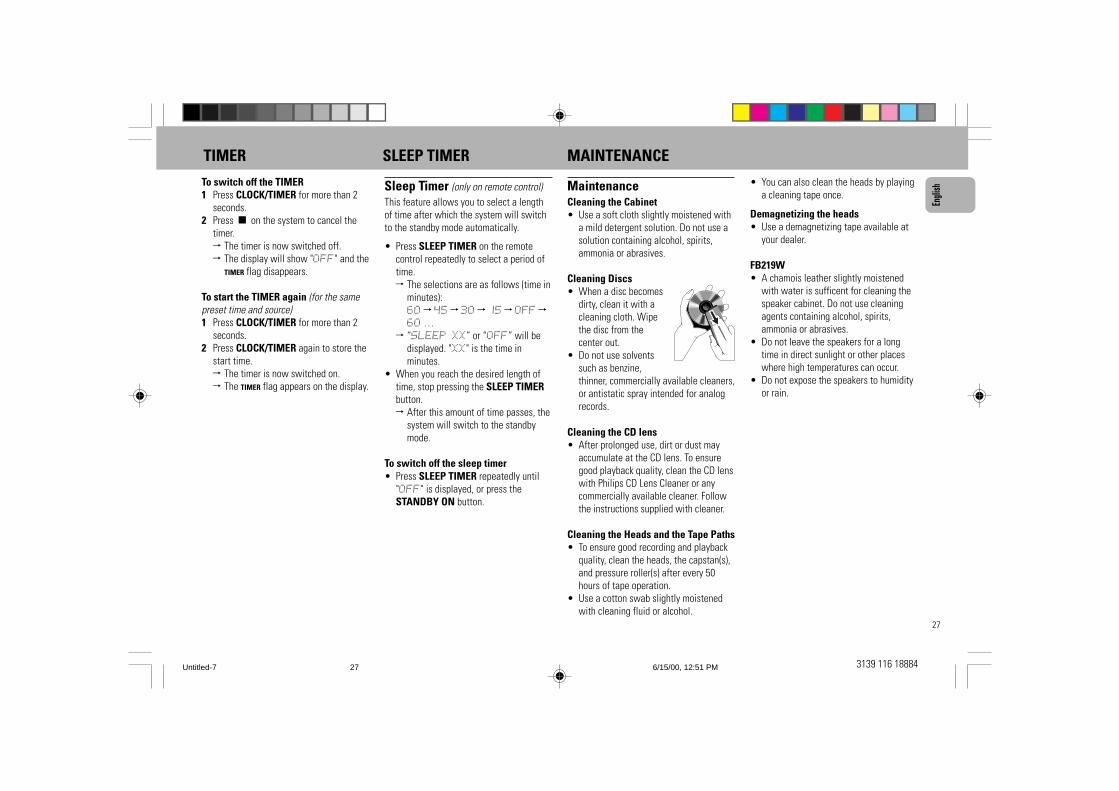
Cleaning Discs• When a disc becomes
dirty, clean it with acleaning cloth. Wipethe disc from thecenter out.
• Do not use solventssuch as benzine,thinner, commercially available cleaners,or antistatic spray intended for analogrecords.
Cleaning the CD lens• After prolonged use, dirt or dust may
accumulate at the CD lens. To ensuregood playback quality, clean the CD lenswith Philips CD Lens Cleaner or anycommercially available cleaner. Followthe instructions supplied with cleaner.
Cleaning the Heads and the Tape Paths• To ensure good recording and playback
quality, clean the heads, the capstan(s),and pressure roller(s) after every 50hours of tape operation.
• Use a cotton swab slightly moistenedwith cleaning fluid or alcohol.
• You can also clean the heads by playinga cleaning tape once.
Demagnetizing the heads• Use a demagnetizing tape available at
your dealer.
FB219W• A chamois leather slightly moistened
with water is sufficent for cleaning thespeaker cabinet. Do not use cleaningagents containing alcohol, spirits,ammonia or abrasives.
• Do not leave the speakers for a longtime in direct sunlight or other placeswhere high temperatures can occur.
• Do not expose the speakers to humidityor rain.
Untitled-7 6/15/00, 12:51 PM27
28
English
3139 116 18884
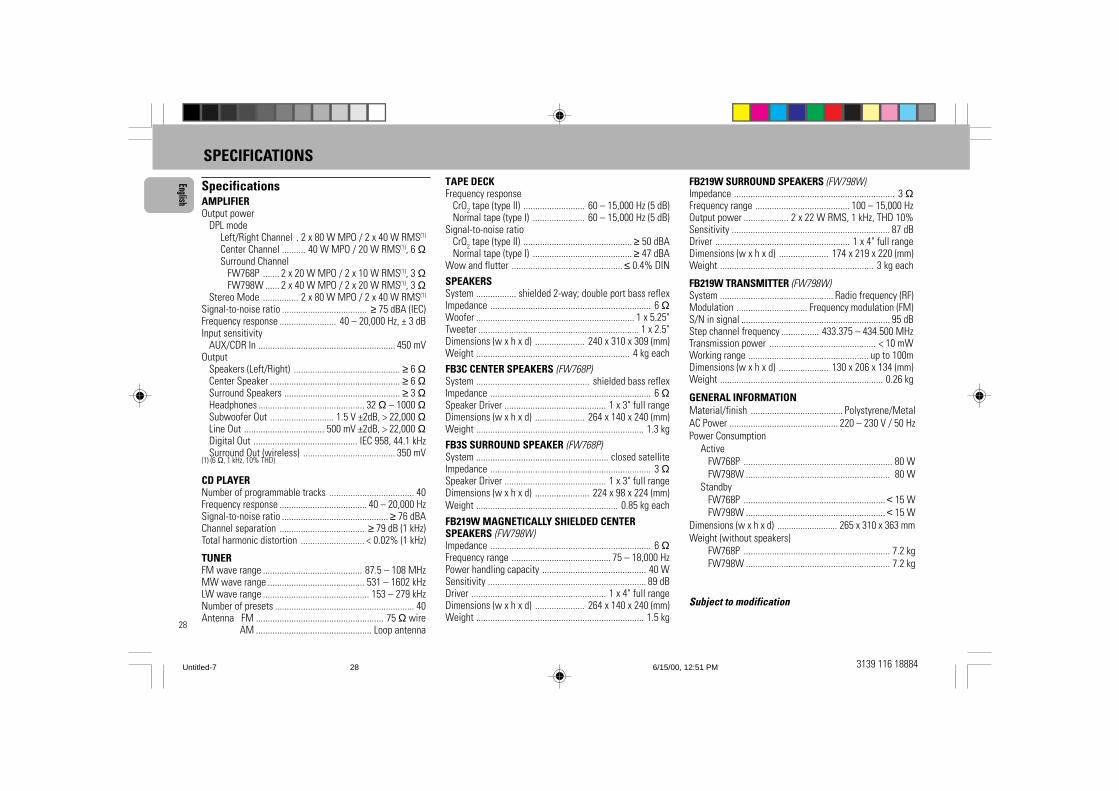
SpecificationsAMPLIFIEROutput power
DPL modeLeft/Right Channel . 2 x 80 W MPO / 2 x 40 W RMS(1)
Center Channel .......... 40 W MPO / 20 W RMS(1), 6 ΩSurround Channel FW768P ....... 2 x 20 W MPO / 2 x 10 W RMS(1), 3 Ω FW798W ...... 2 x 40 W MPO / 2 x 20 W RMS(1), 3 Ω
Stereo Mode ............... 2 x 80 W MPO / 2 x 40 W RMS(1)
Signal-to-noise ratio .................................... ≥ 75 dBA (IEC)Frequency response ........................ 40 – 20,000 Hz, ± 3 dBInput sensitivity
AUX/CDR In .......................................................... 450 mVOutput
Speakers (Left/Right) ............................................. ≥ 6 ΩCenter Speaker ....................................................... ≥ 6 ΩSurround Speakers ................................................. ≥ 3 ΩHeadphones ............................................. 32 Ω – 1000 ΩSubwoofer Out ........................... 1.5 V ±2dB, > 22,000 ΩLine Out .................................. 500 mV ±2dB, > 22,000 ΩDigital Out ............................................ IEC 958, 44.1 kHzSurround Out (wireless) ....................................... 350 mV
(1) (6 Ω, 1 kHz, 10% THD)
CD PLAYERNumber of programmable tracks .................................... 40Frequency response ..................................... 40 – 20,000 HzSignal-to-noise ratio ............................................. ≥ 76 dBAChannel separation .................................... ≥ 79 dB (1 kHz)Total harmonic distortion ........................... < 0.02% (1 kHz)
TUNERFM wave range .......................................... 87.5 – 108 MHzMW wave range ......................................... 531 – 1602 kHzLW wave range ............................................. 153 – 279 kHzNumber of presets ........................................................... 40Antenna FM ...................................................... 75 Ω wire
AM ................................................. Loop antenna
TAPE DECKFrequency response
CrO2 tape (type II) .......................... 60 – 15,000 Hz (5 dB)Normal tape (type I) ...................... 60 – 15,000 Hz (5 dB)
Signal-to-noise ratioCrO2 tape (type II) .............................................. ≥ 50 dBANormal tape (type I) .......................................... ≥ 47 dBA
Wow and flutter ............................................... ≤ 0.4% DINSPEAKERSSystem ................. shielded 2-way; double port bass reflexImpedance .................................................................... 6 ΩWoofer ................................................................... 1 x 5.25"Tweeter .................................................................... 1 x 2.5"Dimensions (w x h x d) ..................... 240 x 310 x 309 (mm)Weight ................................................................. 4 kg eachFB3C CENTER SPEAKERS (FW768P)System ................................................ shielded bass reflexImpedance .................................................................... 6 ΩSpeaker Driver ........................................... 1 x 3" full rangeDimensions (w x h x d) ..................... 264 x 140 x 240 (mm)Weight ....................................................................... 1.3 kgFB3S SURROUND SPEAKER (FW768P)System ........................................................ closed satelliteImpedance .................................................................... 3 ΩSpeaker Driver ........................................... 1 x 3" full rangeDimensions (w x h x d) ....................... 224 x 98 x 224 (mm)Weight ............................................................ 0.85 kg each
FB219W MAGNETICALLY SHIELDED CENTERSPEAKERS (FW798W)Impedance .................................................................... 6 ΩFrequency range .......................................... 75 – 18,000 HzPower handling capacity ............................................ 40 WSensitivity ................................................................... 89 dBDriver ......................................................... 1 x 4" full rangeDimensions (w x h x d) ..................... 264 x 140 x 240 (mm)Weight ....................................................................... 1.5 kg
SPECIFICATIONSFB219W SURROUND SPEAKERS (FW798W)Impedance .................................................................... 3 ΩFrequency range ........................................ 100 – 15,000 HzOutput power ................... 2 x 22 W RMS, 1 kHz, THD 10%Sensitivity ................................................................... 87 dBDriver ......................................................... 1 x 4" full rangeDimensions (w x h x d) ..................... 174 x 219 x 220 (mm)Weight ................................................................. 3 kg each
FB219W TRANSMITTER (FW798W)System ................................................ Radio frequency (RF)Modulation .............................. Frequency modulation (FM)S/N in signal ............................................................... 95 dBStep channel frequency ................ 433.375 – 434.500 MHzTransmission power ............................................. < 10 mWWorking range ................................................... up to 100mDimensions (w x h x d) ..................... 130 x 206 x 134 (mm)Weight ..................................................................... 0.26 kg
GENERAL INFORMATIONMaterial/finish ....................................... Polystyrene/MetalAC Power .............................................. 220 – 230 V / 50 HzPower Consumption
ActiveFW768P ............................................................... 80 WFW798W ............................................................. 80 W
StandbyFW768P ............................................................ < 15 WFW798W ........................................................... < 15 W
Dimensions (w x h x d) .......................... 265 x 310 x 363 mmWeight (without speakers)
FW768P .............................................................. 7.2 kgFW798W ............................................................. 7.2 kg
Subject to modification
Untitled-7 6/15/00, 12:51 PM28
29
Engli
sh
3139 116 18884
Warning! Under no circumstancesyou should try to repair the setyourself as this will invalidate theguarantee. Do not open the set asthere is a risk of electric shock.
• If a fault occurs, check the points listedbelow before taking the system forrepair.
• Should any problems persist after youhave made these checks, consult yournearest dealer or service center.
CD Player Operation“NO DISC” is displayed.• The disc is inserted upside down.™ Place CD with printed side up.• Moisture condensation at the lens.™ Wait until lens has adjusted to normal
room temperature.• There is no disc in the CD tray.™ Insert a CD.• The CD is dirty, badly scratched or
warped.™ Clean or replace the CD.• The CD lens is dirty or dusty.™ See section under Maintenance.
TROUBLESHOOTING
“DISC NOT FINALIZED” isdisplayed.• The CD-RW or CD-R disc is not properly
recorded for the use of a standard CDplayer.
™ Read the instruction booklet of your CD-Rewritable or CD-Recorder on how tofinalize a recording.
• The CD is badly scratched or dirty.™ Replace or clean CD.
Radio ReceptionPoor radio reception.• The signal is too weak.™ Adjust the antenna.™ Connect an external antenna for better
reception.• The TV or VCR is too close to the stereo
system.™ Separate the stereo system from the TV
or VCR.
“NO RDS TEXT” is displayed.• RDS text message is not available.™ Select another RDS station.
Tape Deck OperationRecording or playback cannot bemade or there is a decrease in audiolevel.• Dirty tape heads, capstans or pressure
rollers.™ See section on tape deck maintenance.• Magnetic build-up in the record/
playback head.™ Use demagnetizing tape.
GeneralSystem does not react when anybutton is pressed.• Electrostatic discharge.™ Press STANDBY-ON to switch the
system off. Remove the AC power plugfrom the wall outlet, then reconnect thepower plug and switch on the systemagain.
No or poor sound.• Volume is not turned up.™ Adjust VOLUME.• The headphones are connected.™ Disconnect the headphones.• Speakers are not connected or are
connected wrongly.™ Check that the speakers are connected
correctly.™ Make sure the stripped speaker wire is
clamped.
Reversed left and right sound.• Speakers are connected wrongly.™ Check the speaker connections and
location.
Lack of bass sound or apparentlyimprecise physical location of musicalinstruments.• Speakers are connected wrongly.™ Check the speaker connection for
proper phasing, red/black wires to red/black terminals.
Remote control has no effect on thesystem.• Wrong source is selected.™ Select the source (CD, TUNER, etc.)
before pressing the function button,(PLAY, PREV/NEXT, etc.).
• The distance to the system is too large.™ Reduce the distance.• Batteries are inserted incorrectly.™ Insert the batteries with their polarities
(+/– signs) as indicated.• Batteries are exhausted.™ Replace the batteries.
Timer not working.• Clock is not set.™ Set the clock.• Timer is not switched on.™ Press CLOCK/TIMER to switch on the
timer.• Dubbing/recording is in progress.™ Stop dubbing/recording.
Untitled-7 6/15/00, 12:51 PM29
30
English
3139 116 18884
Clock setting is erased.• There was a power failure.™ Reset the clock.
System displays featuresautomatically; buttons flashcontinuously.• Demonstration mode is switched on.™ Press and hold Ç (on the system only)
for 5 seconds to switch off thedemonstration.
A howling sound at external source.• You hear feedback when you are
listening and recording from the samesource simultaneously.
™ Press AUX to select CDR mode.
All lighted buttons are not lit.• Equalizer Display is switched on in NITE
mode.™ Rotate JOG to other Equalizer Display.
TROUBLESHOOTING
FB219WNo sound.• VOLUME is not correctly adjusted.™ Adjust the VOLUME.• Headphones are connected to the
appliance.™ Disconnect headphones.
Poor sound or no sound at the centeror surround speakers.• SURROUND mode is not switched on.™ Switch to the surround mode on the
appliance.• Surround and/or center speakers are
not (properly) connected.™ Connect the speakers properly.• Transmitter or active surround speakers
are switched off.™ Switch on transmitter and active
surround speakers.• Transmitter and/or active surround
speakers are not securely connected tothe power source.
™ Connect the power cables properly.• CHANNEL slides of the transmitter and
the active speakers are not switched tothe same number.
™ Set the CHANNEL slides on thetransmitter and on both active speakersto the same number.
• Transmitter is connected to the wrongterminal on the appliance.
™ Connect the transmitter to the correctterminal on the appliance.
• SURR/MULTI switch of the transmitteris in the wrong position.
™ Set the SURR/MULTI switch to theSURR position.
• The signal from the transmitter isinterferred through electric appliances.
™ Set the transmitter and the activesurround speakers to anothertransmitting channel.
• The signal from your appliance is toostrong.
™ Set the input sensitivity of thetransmitter to the next level.
Bad sound.• Setting does not match for the given
type of music or sound.™ Correct the sound settings on the
appliance.
Surround sound level is too low or toohigh.• The level of the surround sound is not
properly adjusted.™ Adjust the level of the surround sound
on the appliance.
Center sound level is too low or toohigh.• The sound level of the center channel is
not properly adjusted.™ Adjust the level of the center channel
on the appliance.
Untitled-7 6/15/00, 12:51 PM30