member’s workbook
TRANSCRIPT
Member’s Workbook
Florida 4-H Energy Education Program
4H EGM 30
TTaabbllee ooff CCoonntteennttss
Pages 1. Understanding Electricity 2-5
Atoms Electron Action Chemical Energy
2. How Electricity Travels 6-9
Electron Flow A Current Discovery Electric Circuit
3. Electricity's Silent Partner 10-15
The Silent Partner Making an Electromagnet Construct a Simple Motor
4. Energy in Action 16-18
Watts The Big Deal! Is It Worth It?
5. Energy and the Environment 19-20
Rechargeable = Recyclable For the Power of Electricity Leader’s Guide [4H ELL 40 or DLN126] to support this project is available at: http://edis.ifas.ufl.edu/4h126 For other related 4-H Projects go to the Florida 4-H website at: www.Florida4h.org.
University of Florida, Power of Energy ACTIVITY PAGE н
Understanding ElectricityUnderstanding Electricity
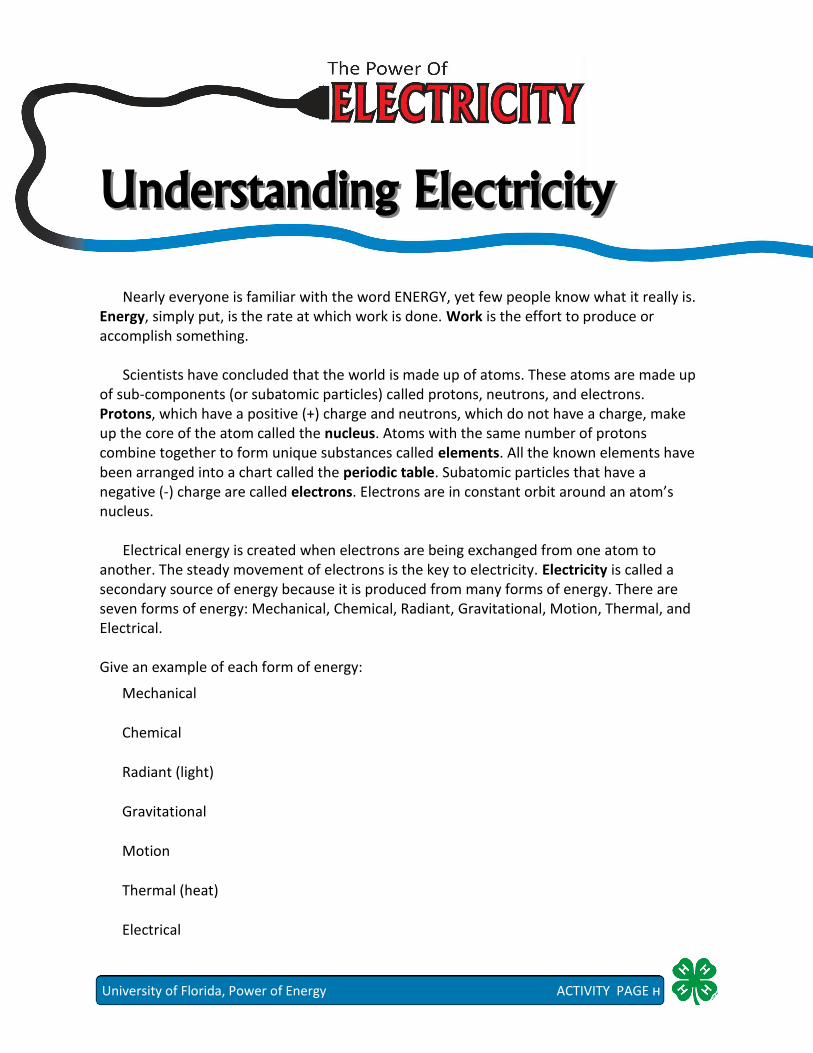
Nearly everyone is familiar with the word ENERGY, yet few people know what it really is. Energy, simply put, is the rate at which work is done. Work is the effort to produce or accomplish something. Scientists have concluded that the world is made up of atoms. These atoms are made up of sub-components (or subatomic particles) called protons, neutrons, and electrons. Protons, which have a positive (+) charge and neutrons, which do not have a charge, make up the core of the atom called the nucleus. Atoms with the same number of protons combine together to form unique substances called elements. All the known elements have been arranged into a chart called the periodic table. Subatomic particles that have a negative (-) charge are called electrons. Electrons are in constant orbit around an atom’s nucleus. Electrical energy is created when electrons are being exchanged from one atom to another. The steady movement of electrons is the key to electricity. Electricity is called a secondary source of energy because it is produced from many forms of energy. There are seven forms of energy: Mechanical, Chemical, Radiant, Gravitational, Motion, Thermal, and Electrical. Give an example of each form of energy:
Mechanical
Chemical
Radiant (light)
Gravitational
Motion
Thermal (heat)
Electrical
University of Florida, Power of Energy ACTIVITY PAGE о
Atoms and ElectricityAtoms and Electricity
What You Need:
8 black jelly beans 8 green jelly beans 8 red jelly beans Styrofoam ball Toothpicks/bamboo skewers Glue
What You Do:
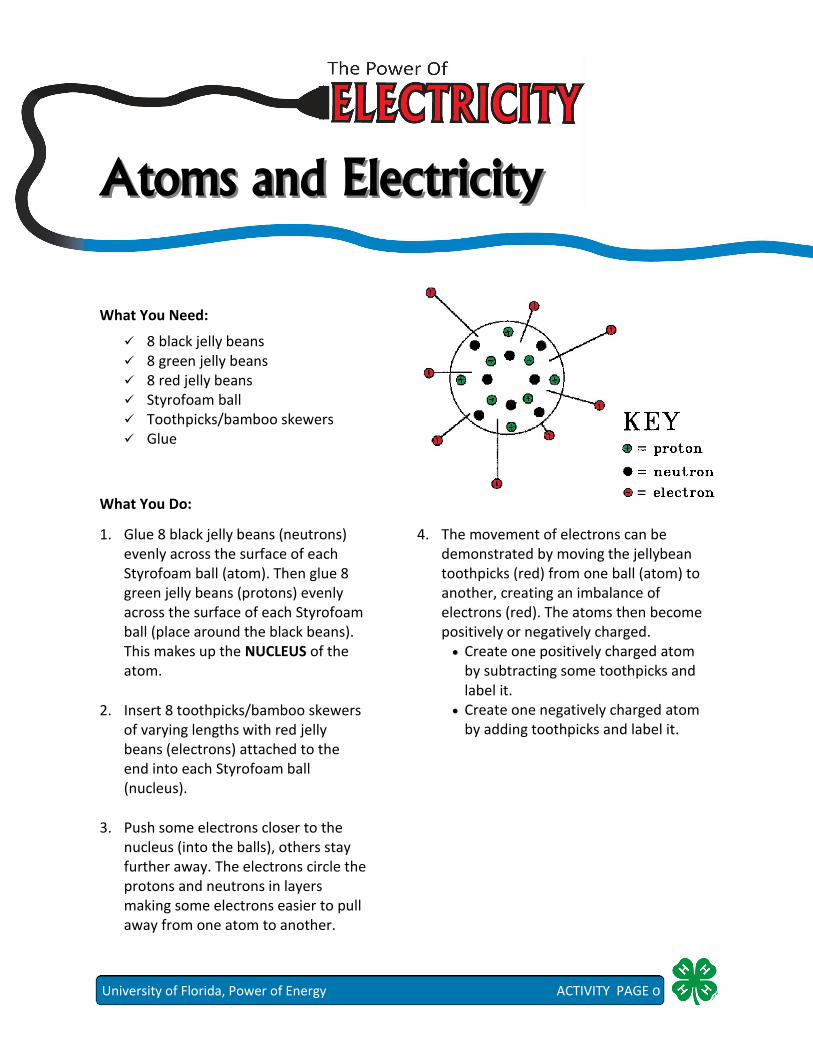
1. Glue 8 black jelly beans (neutrons) evenly across the surface of each Styrofoam ball (atom). Then glue 8 green jelly beans (protons) evenly across the surface of each Styrofoam ball (place around the black beans). This makes up the NUCLEUS of the atom.
2. Insert 8 toothpicks/bamboo skewers of varying lengths with red jelly beans (electrons) attached to the end into each Styrofoam ball (nucleus).
3. Push some electrons closer to the nucleus (into the balls), others stay further away. The electrons circle the protons and neutrons in layers making some electrons easier to pull away from one atom to another.
4. The movement of electrons can be demonstrated by moving the jellybean toothpicks (red) from one ball (atom) to another, creating an imbalance of electrons (red). The atoms then become positively or negatively charged.
Create one positively charged atom by subtracting some toothpicks and label it.
Create one negatively charged atom by adding toothpicks and label it.
University of Florida, Power of Energy ACTIVITY PAGE п
Electron ActionElectron Action
Electric HairElectric Hair
What You Need:
Plastic comb ½ inch cut-out paper squares
What You Do:
Using the plastic comb, comb through your hair for about 1 minute.
Put the teeth of the comb on the pieces of paper and lift carefully.
Balloon MagicBalloon Magic
What You Need:
Balloon What You Do:
Inflate and knot the end of the balloon.
Rub the balloon in your hair for about 1 minute.
Place the rubbed side of the balloon against the wall.
Now, try this… Now, try this…
Tie two balloons together with a long piece of thread.
Charge each balloon by rubbing them with nylon, wool, or on your clothing for 1 minute.
Hold the thread in the middle with your arm stretched out so that the balloons are equal distance from the middle of the thread.
Let the balloons hang freely.
Describe what you saw and explain why you think it happened:
University of Florida, Power of Energy ACTIVITY PAGE р
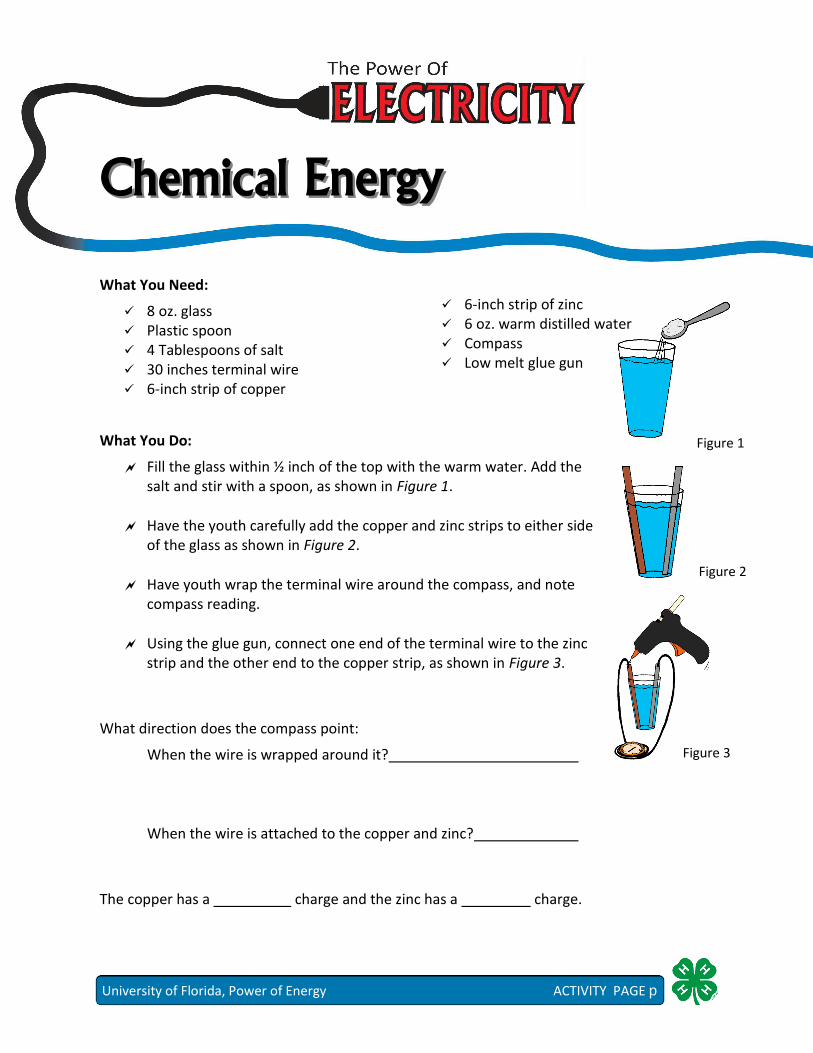
Figure 1
Figure 3
Figure 2
Chemical EnergyChemical Energy
What You Need:
8 oz. glass Plastic spoon 4 Tablespoons of salt 30 inches terminal wire 6-inch strip of copper
6-inch strip of zinc 6 oz. warm distilled water Compass Low melt glue gun
What You Do:
Fill the glass within ½ inch of the top with the warm water. Add the salt and stir with a spoon, as shown in Figure 1.
Have the youth carefully add the copper and zinc strips to either side of the glass as shown in Figure 2.
Have youth wrap the terminal wire around the compass, and note compass reading.
Using the glue gun, connect one end of the terminal wire to the zinc strip and the other end to the copper strip, as shown in Figure 3.
What direction does the compass point:
When the wire is wrapped around it?
When the wire is attached to the copper and zinc?
The copper has a charge and the zinc has a charge.
University of Florida, Power of Energy ACTIVITY PAGE с
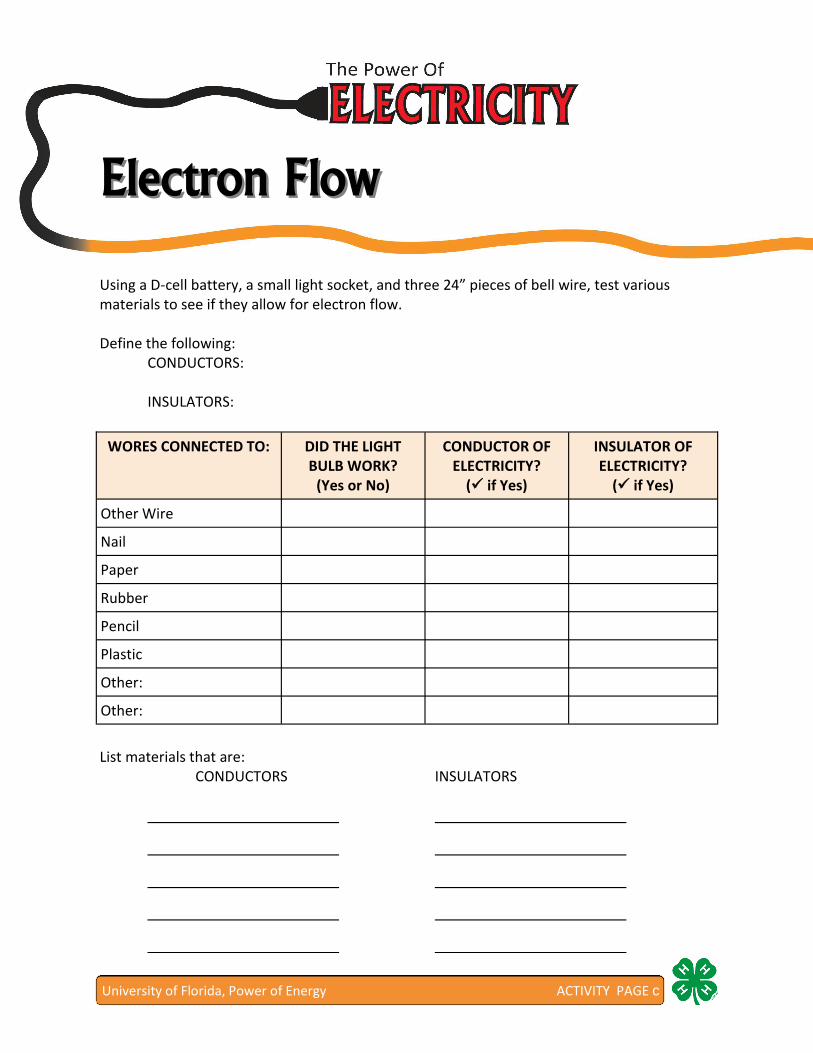
Electron FlowElectron Flow Using a D-cell battery, a small light socket, and three 24” pieces of bell wire, test various materials to see if they allow for electron flow. Define the following: CONDUCTORS: INSULATORS:
List materials that are: CONDUCTORS INSULATORS
WORES CONNECTED TO: DID THE LIGHT BULB WORK?
(Yes or No)
CONDUCTOR OF ELECTRICITY?
( if Yes)
INSULATOR OF ELECTRICITY?
( if Yes)
Other Wire
Nail
Paper
Rubber
Pencil
Plastic
Other:
Other:

University of Florida, Power of Energy ACTIVITY PAGE т
A Current Discovery!A Current Discovery!
What You Need:
D-cell battery 1 inch x 5 inch strip of aluminum foil Flashlight bulb
What You Do:
Using ONLY the materials listed above, make the light bulb “light up.” Record each attempt by drawing and labeling a detailed picture below.
Explain what had to take place for the light bulb to “light up.”
1.1. 2.2.
3.3. 4.4.
University of Florida, Power of Energy ΦACTIVITY PAGE у
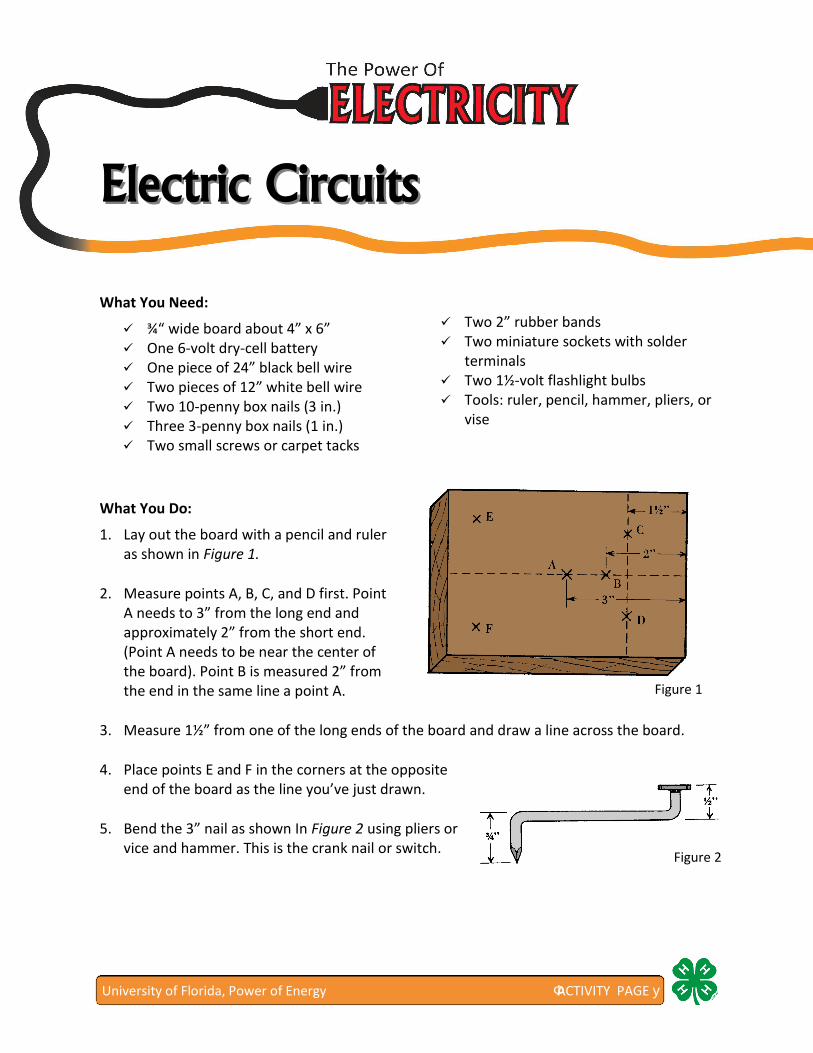
Electric CircuitsElectric Circuits
What You Do:
1. Lay out the board with a pencil and ruler as shown in Figure 1.
2. Measure points A, B, C, and D first. Point A needs to 3” from the long end and approximately 2” from the short end. (Point A needs to be near the center of the board). Point B is measured 2” from the end in the same line a point A.
3. Measure 1½” from one of the long ends of the board and draw a line across the board.
4. Place points E and F in the corners at the opposite end of the board as the line you’ve just drawn.
5. Bend the 3” nail as shown In Figure 2 using pliers or vice and hammer. This is the crank nail or switch.
What You Need:
¾“ wide board about 4” x 6” One 6-volt dry-cell battery One piece of 24” black bell wire Two pieces of 12” white bell wire Two 10-penny box nails (3 in.) Three 3-penny box nails (1 in.) Two small screws or carpet tacks
Two 2” rubber bands Two miniature sockets with solder
terminals Two 1½-volt flashlight bulbs Tools: ruler, pencil, hammer, pliers, or
vise
Figure 1
Figure 2
University of Florida, Power of Energy ACTIVITY PAGE ф
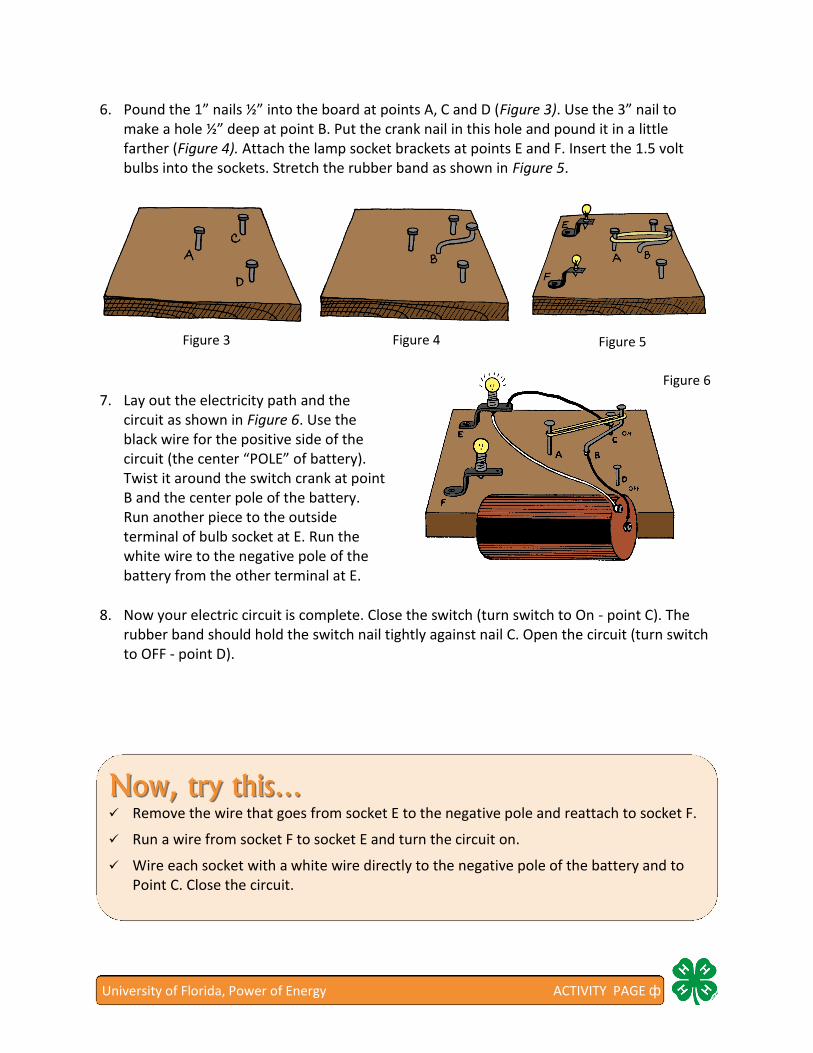
6. Pound the 1” nails ½” into the board at points A, C and D (Figure 3). Use the 3” nail to make a hole ½” deep at point B. Put the crank nail in this hole and pound it in a little farther (Figure 4). Attach the lamp socket brackets at points E and F. Insert the 1.5 volt bulbs into the sockets. Stretch the rubber band as shown in Figure 5.
7. Lay out the electricity path and the circuit as shown in Figure 6. Use the black wire for the positive side of the circuit (the center “POLE” of battery). Twist it around the switch crank at point B and the center pole of the battery. Run another piece to the outside terminal of bulb socket at E. Run the white wire to the negative pole of the battery from the other terminal at E.
8. Now your electric circuit is complete. Close the switch (turn switch to On - point C). The rubber band should hold the switch nail tightly against nail C. Open the circuit (turn switch to OFF - point D).
Figure 3 Figure 4 Figure 5
Figure 6
Now, try this… Now, try this…
Remove the wire that goes from socket E to the negative pole and reattach to socket F.
Run a wire from socket F to socket E and turn the circuit on.
Wire each socket with a white wire directly to the negative pole of the battery and to Point C. Close the circuit.
University of Florida, Power of Energy ACTIVITY PAGE мл
Electricity’s Silent PartnerElectricity’s Silent Partner
The flow of electrons is only one part of the story in the production of electricity. We already know that electricity is the flow of electrons from one atom to another atom. However, an important fact when studying electricity is that charges that are alike will repel one another, while unlike charges will attract one another. This principle is the same in magnets and the world of magnetism, which also contribute to the world of electricity. The ends of magnets have charges - we call these ends “poles.” This is where the strength of the magnet is the strongest. These poles, “north” and “south,” have forces that surround them. We call these areas magnetic fields. Magnetic fields that have alike charges (N & N or S & S) will repel each other, while unlike charges (N & S) will be attracted to one another. In fact, the earth, itself, is a large natural magnet, having a north pole and south pole. Modern scientists believe that magnets are made of millions of small particles, called molecules. These molecules are in turn made of atoms. Each molecule is itself a tiny magnet. In an unmagnified bar of iron, the molecules have no rectangular arrangement and produce no magnetic field outside the bar. However, under the influence of a magnet the molecules arrange themselves so that their magnetic fields are aligned in the same direction. Now the bar of iron has become a temporary magnet. Only certain types of metal can be made into magnets. These include iron, steel, nickel, cobalt, and special combinations of metals (called alloys). Magnets made of steel or special metals hold their magnetism for a long time. These are called “permanent” magnets. There are magnets that are much more useful than permanent magnets. These electromagnets can be made much stronger than permanent magnets and can be controlled by changing the current (or flow of electrons). One of the most simple uses of electromagnets comes form their ability to switch magnetic fields on and off very quickly, such as in doorbells or buzzers.
University of Florida, Power of Energy !/¢L±L¢¸ t!D9 мм
The Silent PartnerThe Silent Partner
What objects are attracted to a magnet?
Using magnets suspended by the middle, determine the north “poles” of the magnets. Use the magnets to determine if “like” poles attract or repel each other. What about opposite poles? Do these ATTRACT or REPEL?
North and North North and South South and South South and North
MAGNETIC ATTRACTION
NO MAGNETIC ATTRACTION

University of Florida, Power of Energy ACTIVITY PAGE мн
Making an ElectromagnetMaking an Electromagnet
What You Need:
Magnet 6-volt lantern battery 24” piece of bell wire Penknife
One 3” to 4” iron nail or screw Transparent tape Steel paper clips, small nails, etc. Wire strippers
Figure 1
Figure 2
What You Do:
1. Using the wire strippers, remove ½” of the plastic covering from both ends of a 24” piece of bell wire.
2. Wind the wire tightly around a 3” or 4” nail of screw about 20 times and leave about 3” of wire free on each end of the nail.
3. Use a piece of tape to hold the stripped ends of the wire against the two terminals of the battery, as shown in Figures 1 and 2.
4. Try to pick up paper clips, small nails, or any tiny metal objects that a magnet would normally pick up.
5. “Disconnect” one of the ends of the wire from the battery and record what happens:
6. Place the north pole of the permanent magnet next to the south pole of the electromagnet.
Switch the ends or leads to the battery. What happens?
Now, switch the ends or leads a second time. What happens?
University of Florida, Power of Energy ACTIVITY PAGE мо
Construct a Simple MotorConstruct a Simple Motor
What You Need:
One roll of No. 24 enameled wire One roll of electric tape Three 4-inch (20-penny) nails Four 2 ½” (8-penny) nails Four 3“ brads (10-penny) Board for motor base, 4”x 6”x ¾”
Two staples or 4 small brads Two tracks Two 3-volt dry-cell batteries
(or one 6-volt transformer) Pocket knife, vise (or 2 pairs of pliers) Compass
What You Do:
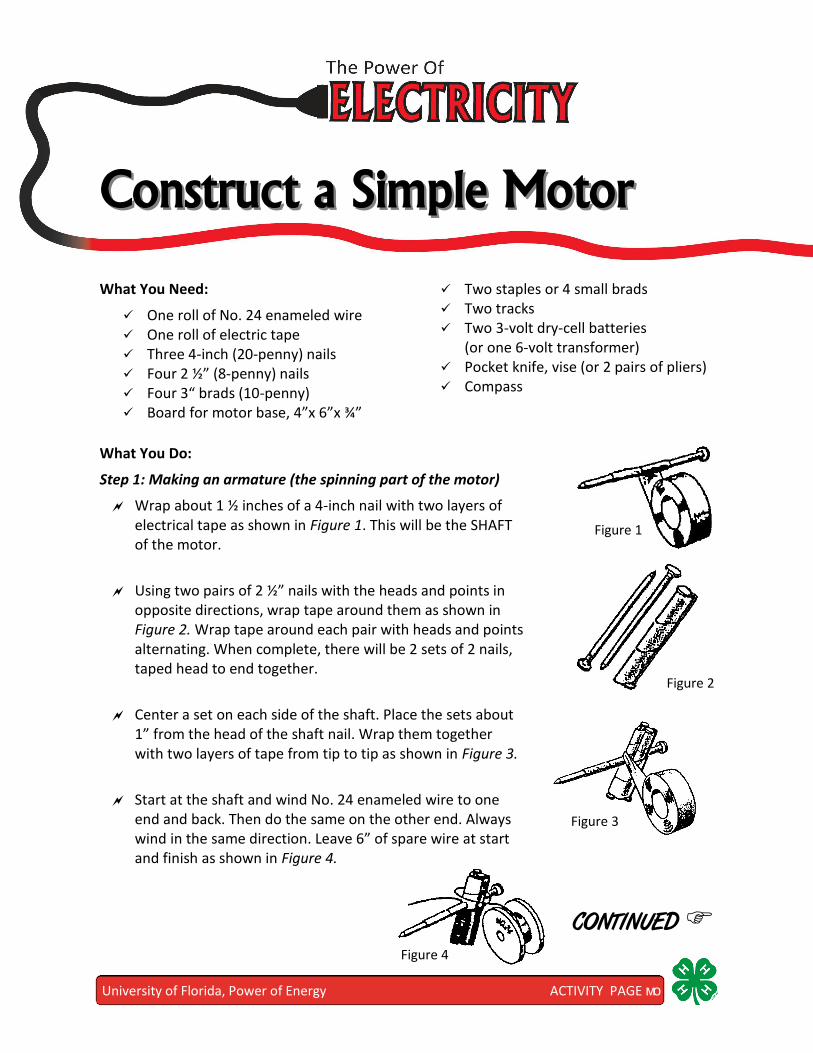
Step 1: Making an armature (the spinning part of the motor)
Wrap about 1 ½ inches of a 4-inch nail with two layers of electrical tape as shown in Figure 1. This will be the SHAFT of the motor.
Using two pairs of 2 ½” nails with the heads and points in opposite directions, wrap tape around them as shown in Figure 2. Wrap tape around each pair with heads and points alternating. When complete, there will be 2 sets of 2 nails, taped head to end together.
Center a set on each side of the shaft. Place the sets about 1” from the head of the shaft nail. Wrap them together with two layers of tape from tip to tip as shown in Figure 3.
Start at the shaft and wind No. 24 enameled wire to one end and back. Then do the same on the other end. Always wind in the same direction. Leave 6” of spare wire at start and finish as shown in Figure 4.
Figure 1
Figure 2
Figure 3
Figure 4
CONTINUED
University of Florida, Power of Energy ACTIVITY PAGE мп
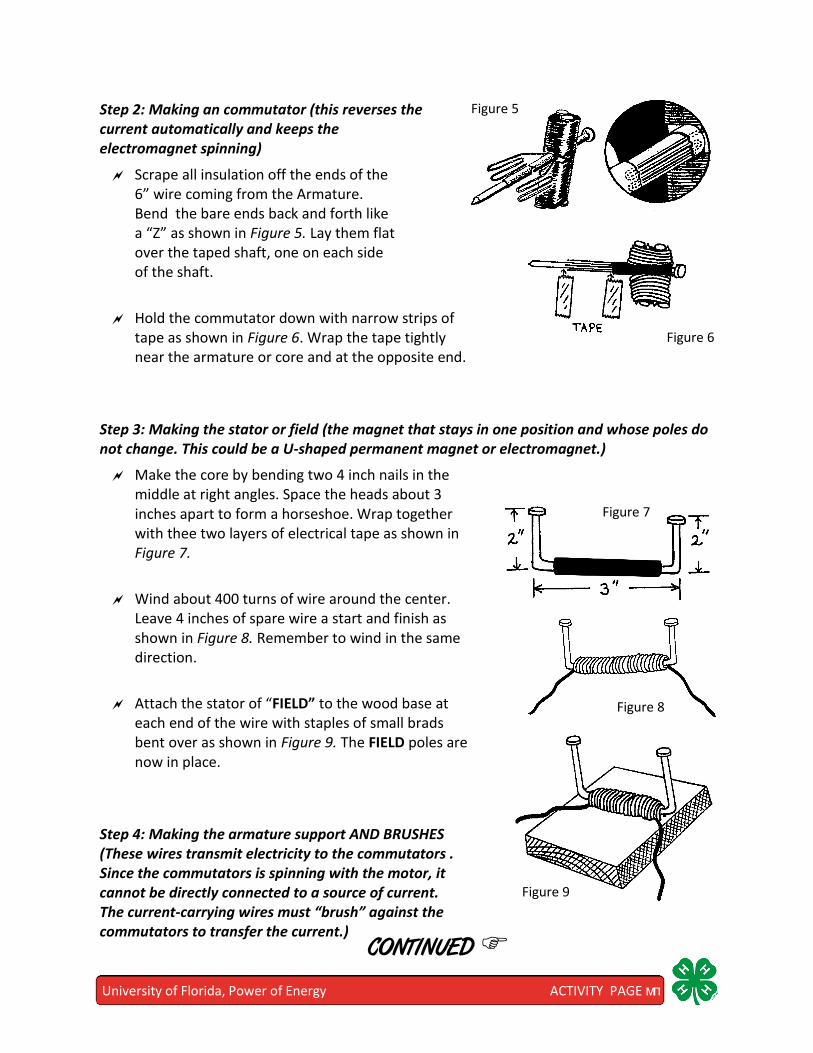
Step 2: Making an commutator (this reverses the current automatically and keeps the electromagnet spinning)
Scrape all insulation off the ends of the 6” wire coming from the Armature. Bend the bare ends back and forth like a “Z” as shown in Figure 5. Lay them flat over the taped shaft, one on each side of the shaft.
Hold the commutator down with narrow strips of tape as shown in Figure 6. Wrap the tape tightly near the armature or core and at the opposite end.
Step 3: Making the stator or field (the magnet that stays in one position and whose poles do not change. This could be a U-shaped permanent magnet or electromagnet.)
Make the core by bending two 4 inch nails in the middle at right angles. Space the heads about 3 inches apart to form a horseshoe. Wrap together with thee two layers of electrical tape as shown in Figure 7.
Wind about 400 turns of wire around the center. Leave 4 inches of spare wire a start and finish as shown in Figure 8. Remember to wind in the same direction.
Attach the stator of “FIELD” to the wood base at each end of the wire with staples of small brads bent over as shown in Figure 9. The FIELD poles are now in place.
Step 4: Making the armature support AND BRUSHES (These wires transmit electricity to the commutators . Since the commutators is spinning with the motor, it cannot be directly connected to a source of current. The current-carrying wires must “brush” against the commutators to transfer the current.)
Figure 5
Figure 6
Figure 7
Figure 8
Figure 9
CONTINUED
University of Florida, Power of Energy ACTIVITY PAGE мр
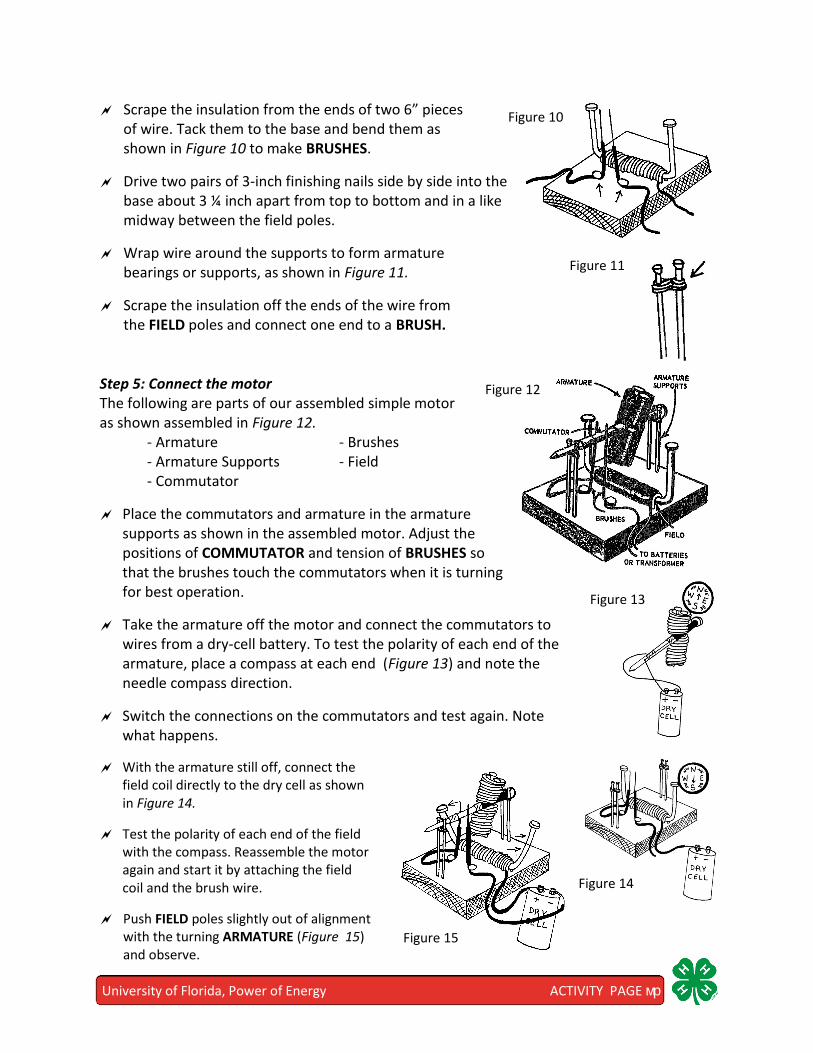
Scrape the insulation from the ends of two 6” pieces of wire. Tack them to the base and bend them as shown in Figure 10 to make BRUSHES.
Drive two pairs of 3-inch finishing nails side by side into the base about 3 ¼ inch apart from top to bottom and in a like midway between the field poles.
Wrap wire around the supports to form armature bearings or supports, as shown in Figure 11.
Scrape the insulation off the ends of the wire from the FIELD poles and connect one end to a BRUSH.
Step 5: Connect the motor The following are parts of our assembled simple motor as shown assembled in Figure 12.
- Armature - Brushes - Armature Supports - Field - Commutator
Place the commutators and armature in the armature supports as shown in the assembled motor. Adjust the positions of COMMUTATOR and tension of BRUSHES so that the brushes touch the commutators when it is turning for best operation.
Take the armature off the motor and connect the commutators to wires from a dry-cell battery. To test the polarity of each end of the armature, place a compass at each end (Figure 13) and note the needle compass direction.
Switch the connections on the commutators and test again. Note what happens.
With the armature still off, connect the field coil directly to the dry cell as shown in Figure 14.
Test the polarity of each end of the field with the compass. Reassemble the motor again and start it by attaching the field coil and the brush wire.
Push FIELD poles slightly out of alignment with the turning ARMATURE (Figure 15) and observe.
Figure 10
Figure 11
Figure 12
Figure 13
Figure 14
Figure 15
University of Florida, Power of Energy ACTIVITY PAGE мс
Energy in ActionEnergy in Action
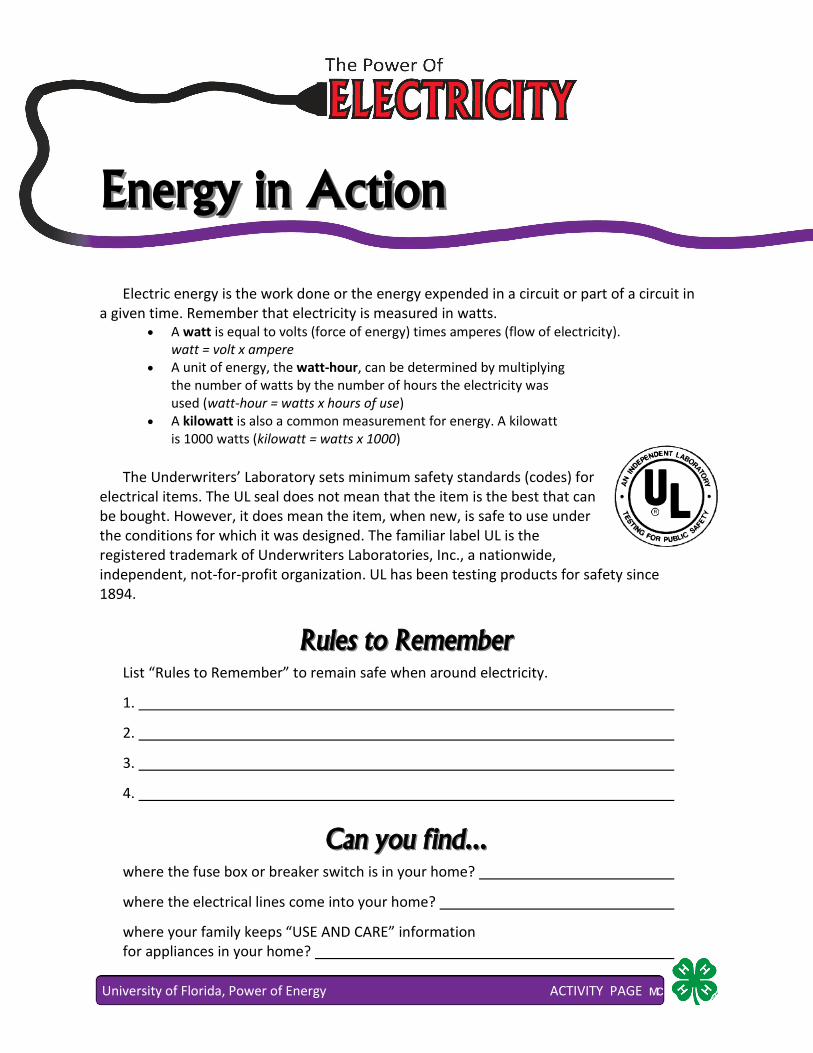
Electric energy is the work done or the energy expended in a circuit or part of a circuit in a given time. Remember that electricity is measured in watts.
A watt is equal to volts (force of energy) times amperes (flow of electricity).watt = volt x ampere
A unit of energy, the watt-hour, can be determined by multiplyingthe number of watts by the number of hours the electricity wasused (watt-hour = watts x hours of use)
A kilowatt is also a common measurement for energy. A kilowattis 1000 watts (kilowatt = watts x 1000)
The Underwriters’ Laboratory sets minimum safety standards (codes) for electrical items. The UL seal does not mean that the item is the best that can be bought. However, it does mean the item, when new, is safe to use under the conditions for which it was designed. The familiar label UL is the registered trademark of Underwriters Laboratories, Inc., a nationwide, independent, not-for-profit organization. UL has been testing products for safety since 1894.
Rules to RememberRules to Remember List “Rules to Remember” to remain safe when around electricity.
1.
2.
3.
4.
Can you find...Can you find... where the fuse box or breaker switch is in your home?
where the electrical lines come into your home?
where your family keeps “USE AND CARE” information for appliances in your home?

University of Florida, Power of Energy ACTIVITY PAGE мт
Where’s the Mark?Where’s the Mark?
To ensure that electrical appliances that are sold are safe for us to use, they are tested. What would an electrical engineer be testing for? To identify that the appliance is safe for us to use a symbol is placed on the appliance.
List electrical appliances that are used everyday and check to see if a UL symbol is on the
appliance.
Appliance
Where Located
Is a UL Symbol
Present? ()
YES NO

University of Florida, Power of Energy ACTIVITY PAGE му
Is It Worth It?Is It Worth It?
Given: 1 Kilowatt = 1,000 Watts Formula: kW x hr x kWh cost
What is the electric cost of a 1,000 watt toaster operated for 5 minutes with a kilowatt-
hour costing 0.08 cents? What is the electric cost of a 5,000 watt appliance that runs 24 hours a day? List some appliances and the watt use required for them to “run.”
APPLIANCE WATTS NEEDED If a kilowatt-hour costs 0.08 cents, how much does it cost to run each of the appliances above for 3 hours?
APPLIANCE COST TO RUN 3 HOURS

University of Florida, Power of Energy ACTIVITY PAGE мф
Energy and the EnvironmentEnergy and the Environment
We have become very dependent on electricity. Just imagine what it would be like not to have the POWER of electricity! When your “power” goes off at home, it can be rather annoying. The cost for electricity varies from place to place, but we really pay very little for each kWh of electricity we use. It’s not free, but it’s a necessity that we are willing to pay for. However, there are additional costs of using energy and natural resources for the production of electricity.
Electricity is generated at power plants and can be produced from a number of different resources. Power plants typically use coal, natural gas, or nuclear fission to generate electricity. Other resources such as solar panels, wind mills, and biomass sources can also be used, but at a higher cost.
There are effects of using these resources on the natural environment. How do you think the following effect the environment when used to generate electricity?
Coal:
Natural Gas:
Nuclear Fission:
Water (hydropower):
Regardless of the resources used to generate electricity, there are effects to the environment as a result. How we discard used energy resources also impacts the environment.
University of Florida, Power of Energy ACTIVITY PAGE нл
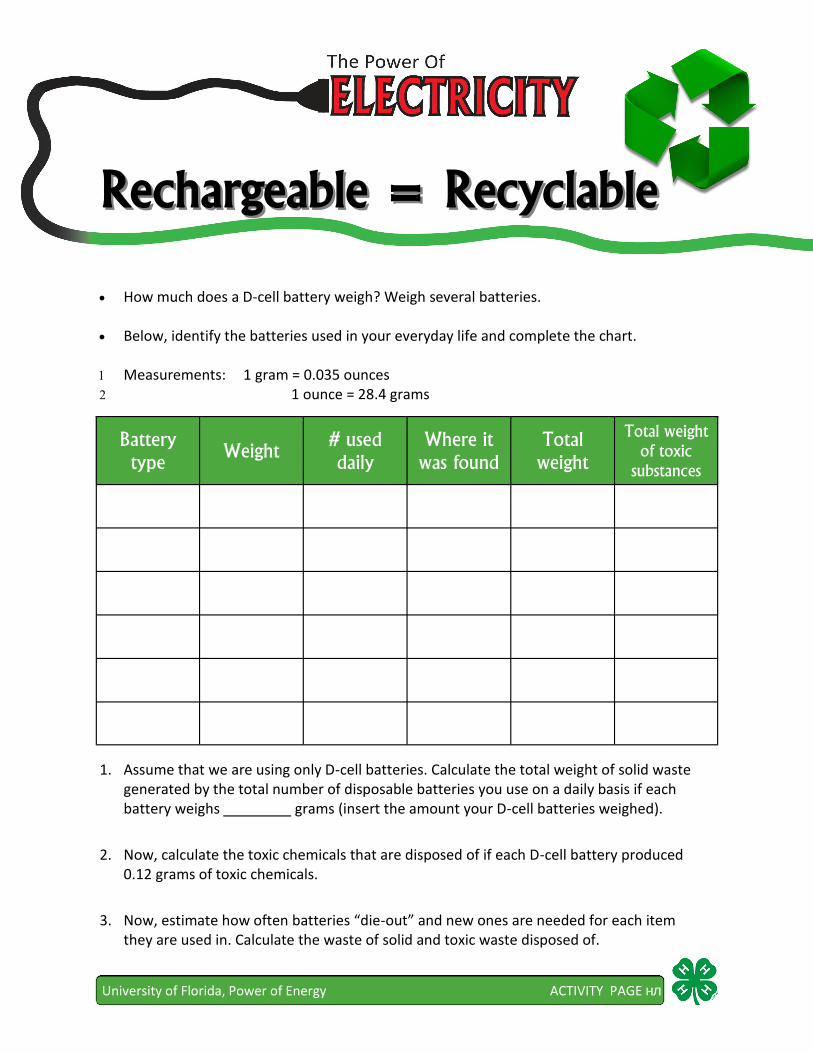
Rechargeable = RecyclableRechargeable = Recyclable
How much does a D-cell battery weigh? Weigh several batteries.
Below, identify the batteries used in your everyday life and complete the chart.
Measurements: 1 gram = 0.035 ounces 1 ounce = 28.4 grams
1. Assume that we are using only D-cell batteries. Calculate the total weight of solid wastegenerated by the total number of disposable batteries you use on a daily basis if eachbattery weighs grams (insert the amount your D-cell batteries weighed).
2. Now, calculate the toxic chemicals that are disposed of if each D-cell battery produced0.12 grams of toxic chemicals.
3. Now, estimate how often batteries “die-out” and new ones are needed for each itemthey are used in. Calculate the waste of solid and toxic waste disposed of.
Battery
type Weight
# used
daily
Where it
was found
Total
weight
Total weight
of toxic
substances
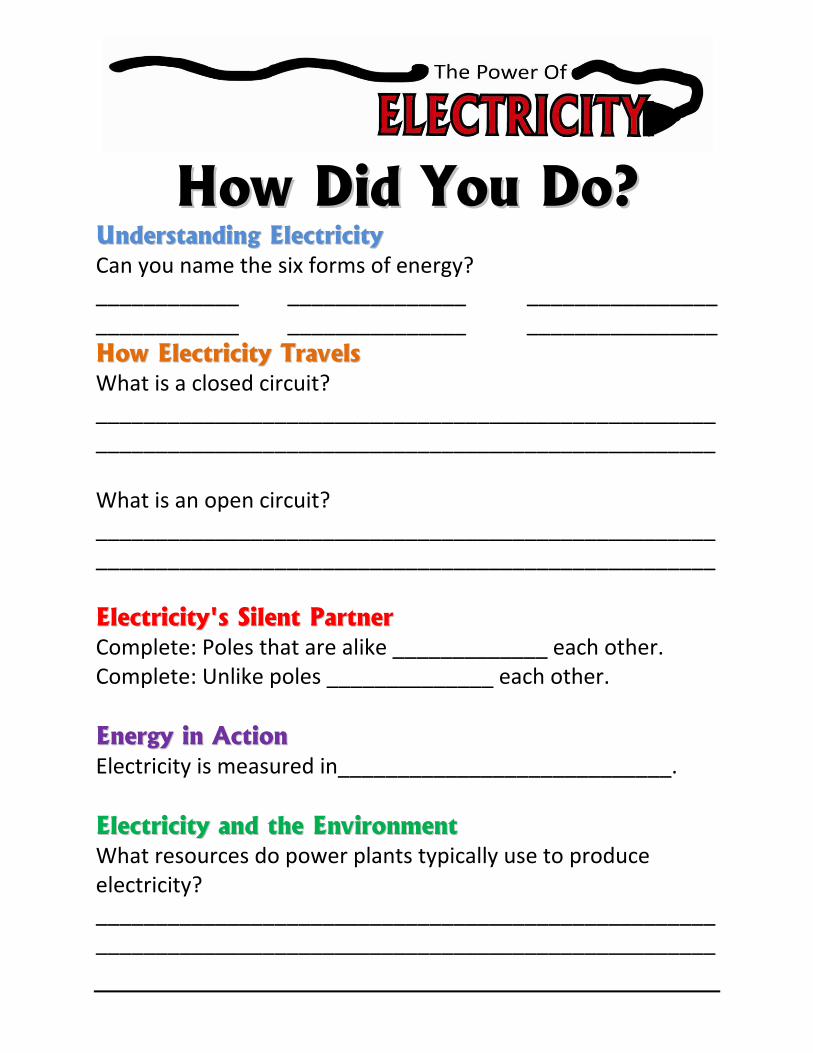
HHooww DDiidd YYoouu DDoo??UUnnddeerrssttaannddiinngg EElleeccttrriicciittyy
Can you name the six forms of energy? ____________ _______________ ________________ ____________ _______________ ________________
HHooww EElleeccttrriicciittyy TTrraavveellss
What is a closed circuit? ________________________________________________________________________________________________________
What is an open circuit? ________________________________________________________________________________________________________
EElleeccttrriicciittyy''ss SSiilleenntt PPaarrttnneerr
Complete: Poles that are alike _____________ each other. Complete: Unlike poles ______________ each other.
EEnneerrggyy iinn AAccttiioonn
Electricity is measured in____________________________.
EElleeccttrriicciittyy aanndd tthhee EEnnvviirroonnmmeenntt
What resources do power plants typically use to produce electricity? ____________________________________________________ ____________________________________________________
Member’s Workbook
Florida 4-H Energy Education Program
.
The 4-H Motto To make the best better.
The 4-H Pledge I pledge
my head to clearer thinking,
my heart to greater loyalty,
my hands to larger service, and
my health to better living,
for my club, my community,
my country and my world.
Visit the 4-H web site for more information: http://www.florida4h.org
The Power of Electricity Youth Manual 4H ELM 30 [DLN 127] curriculum package was originally created by
Sandra Fry, former 4-H Agent-Palm Beach County and Lucinda Harris, 4-H Agent, Martin County and
produced through a team effort of the Florida 4-H Youth Development Program , Institute of Food and
Agricultural Sciences, University of Florida. Reviewed and revised March, 2011 by Jessica Kockert, 4-H
Curriculum Assistant, Joy Jordan, 4-H Curriculum Specialist, Lucinda Harris, Extension 4-H Agent, Martin
County, and Heather Kent, 4-H Regional Specialized Agent, Science, Engineering and Technology
Programs, Florida 4-H Youth Development Program.
The Institute of Food and Agricultural Sciences (IFAS) is an Equal Opportunity Institution authorized to provide research, educational information and other services only to individuals and institutions that function with non-discrimination with respect to race, creed, color, religion, age, disability, sex, sexual orientation, marital status, national origin, political opinions or affiliations. For more information on obtaining other UF/IFAS Extension publications, contact your county’s UF/IFAS Extension office.
U.S. Department of Agriculture, UF/IFAS Extension Service, University of Florida, IFAS, Florida A & M University Cooperative Extension Program, and Boards of County Commissioners Cooperating. Nick T. Place, dean for UF/IFAS Extension.