magic for the masses - shroomery - magic …files.shroomery.org/attachments/24915218-magic for...
TRANSCRIPT
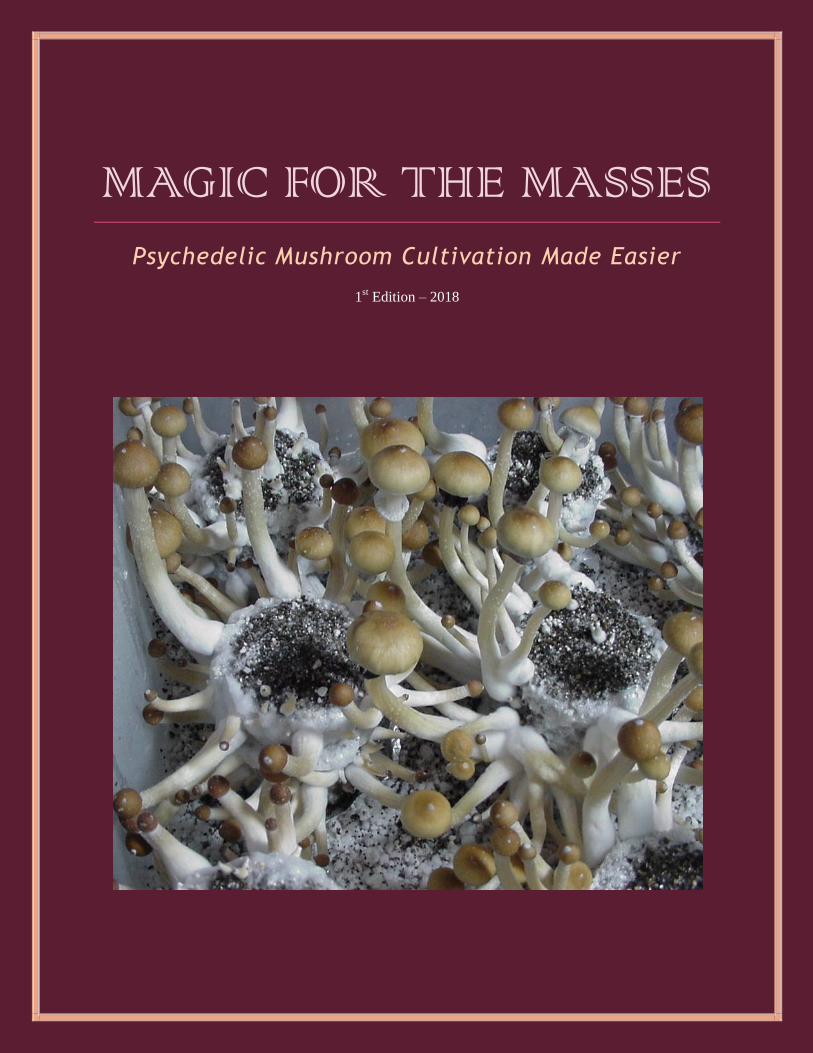
MAGIC FOR THE MASSES
Psychedelic Mushroom Cultivation Made Easier
1st Edition – 2018
Magic for the Masses
2
TABLE OF CONTENTS
INTRODUCTION
PF-TEK
DRYING AND STORAGE
DOSAGE
RECIPES
GLOVE BOXES
SPORE PRINTS
SPORE WATER
LIQUID CULTURE
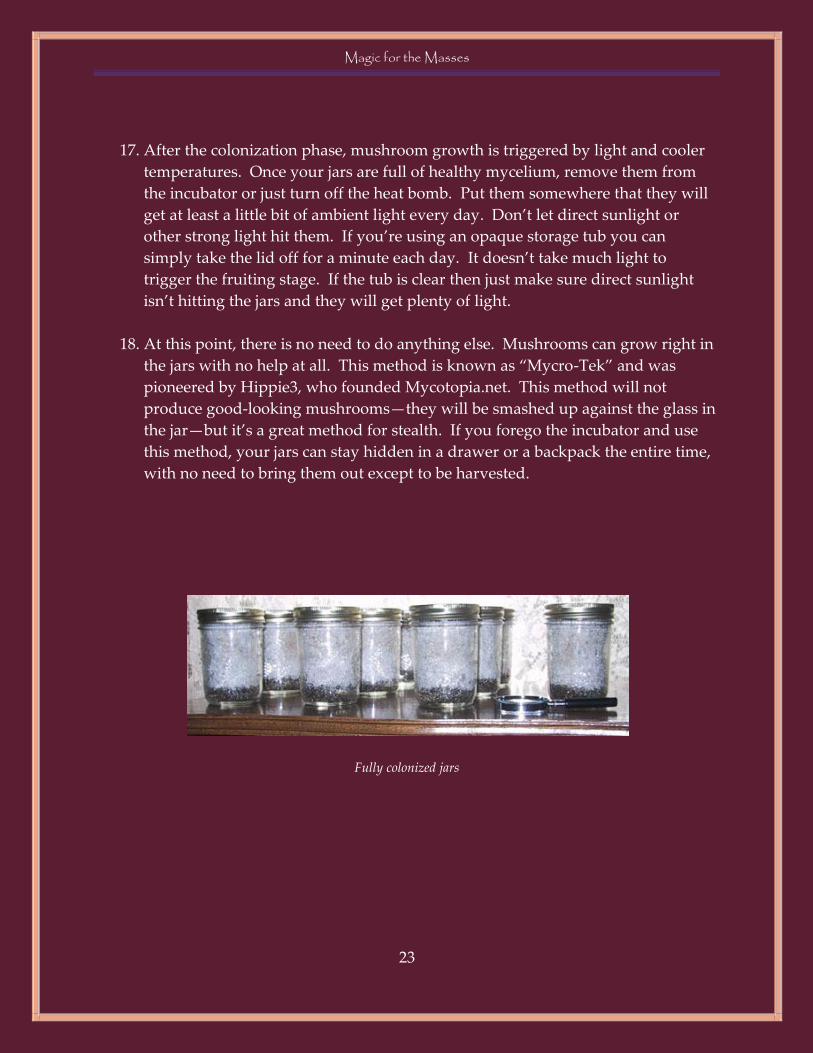
CLONES
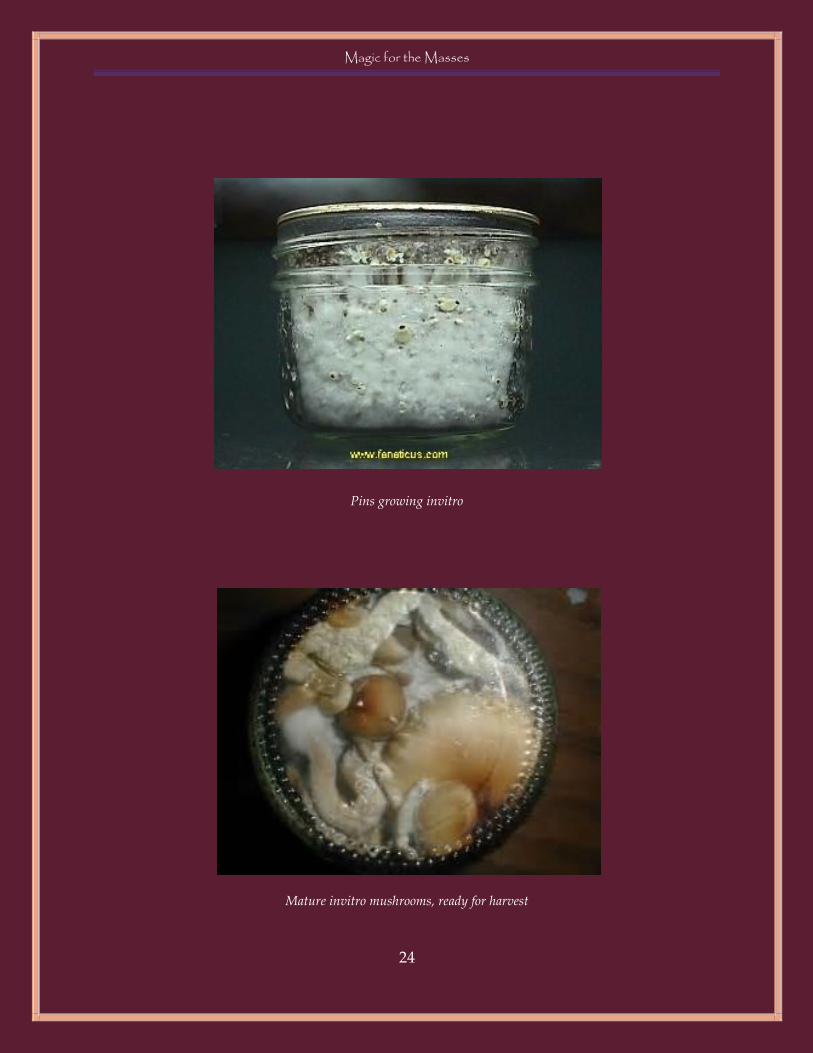
THE BEGINNING
Magic for the Masses
3
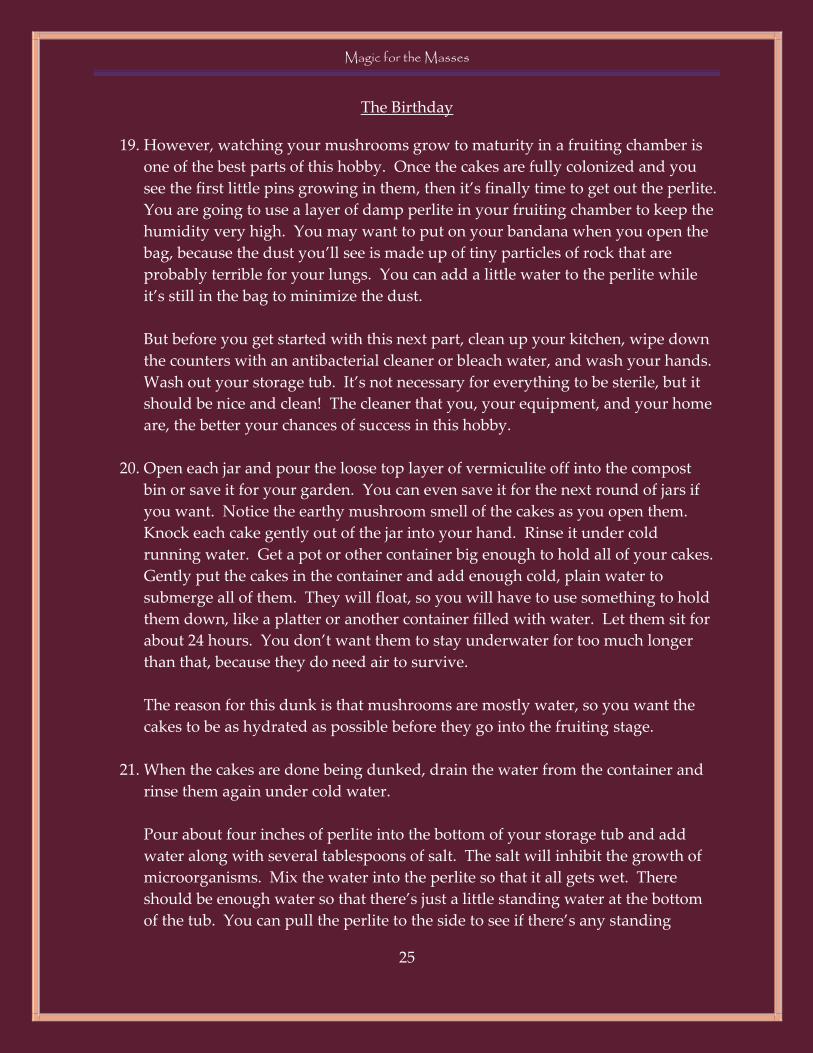
Introduction This guide is an all-in-one primer for people who are interested in growing
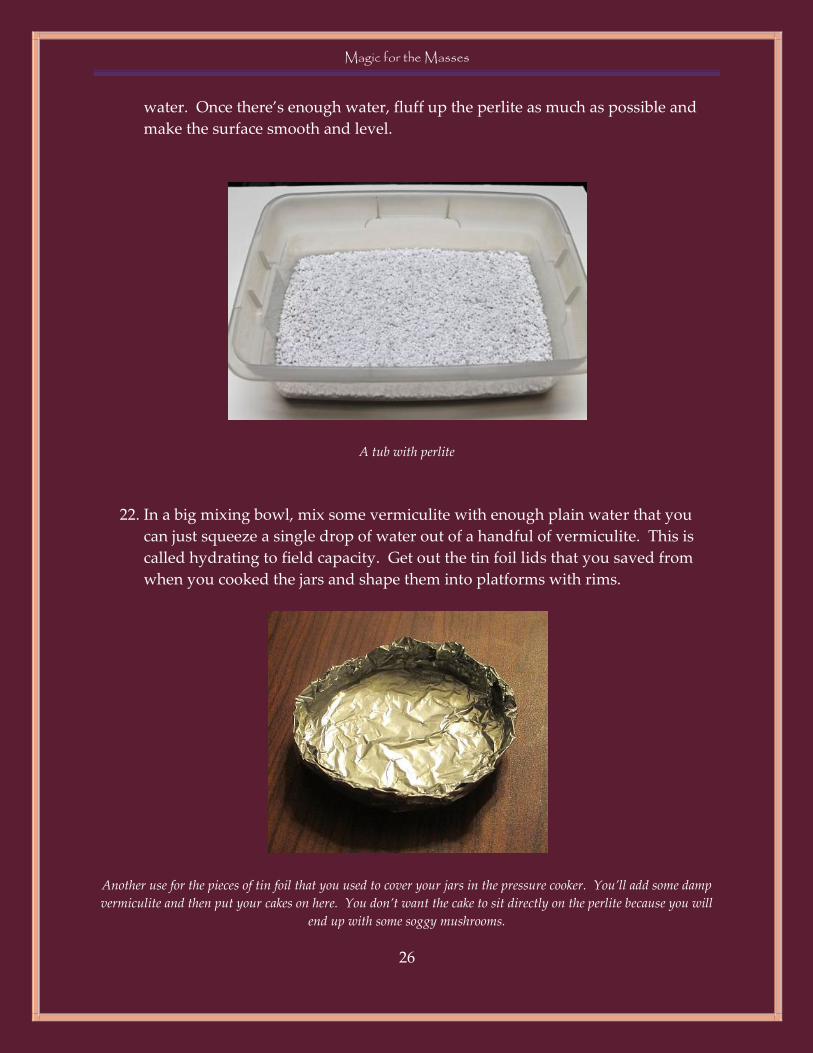
Psilocybe Cubensis. It contains enough basic information to become a self-sufficient
grower, with no need for kits or spore vendors. At the same time, it contains a simple
way of doing things.
It’s organized so that you can follow along in order of the chapters. They go
from growing mushrooms to eating them. Meanwhile, you’re taking your first spore
prints and making spore water, or even taking a clone so that you can go for higher
yields.
You can read this guide as a companion as you first interact with the Online
Mushroom Community (OMC), which doesn’t exist on any one website but rather
encompasses all of them. The OMC was the source of all of this information—I have no
claim to any of it. Almost all of the pictures were cheerfully lifted from the OMC and
search engine results. I’m not trying to reinvent the wheel here; I’m just trying to build
a vehicle.
There are some cultivation wizards out there on the forums who have put
together some choice threads on cultivation techniques (“teks”). I will leave it to you to
find the good stuff but I didn’t want you to have to trudge up the mountain of
information any more without an updated, complete, accurate map to lead you to base
camp.
I don’t expect this guide to be the only resource you’ll ever want or need, though
I think you could grow with just the information contained in it. Take advantage of the
experience of knowledgeable growers on sites like Mycotopia.net. They are happy to
help if you are eager to learn.
Magic for the Masses
4
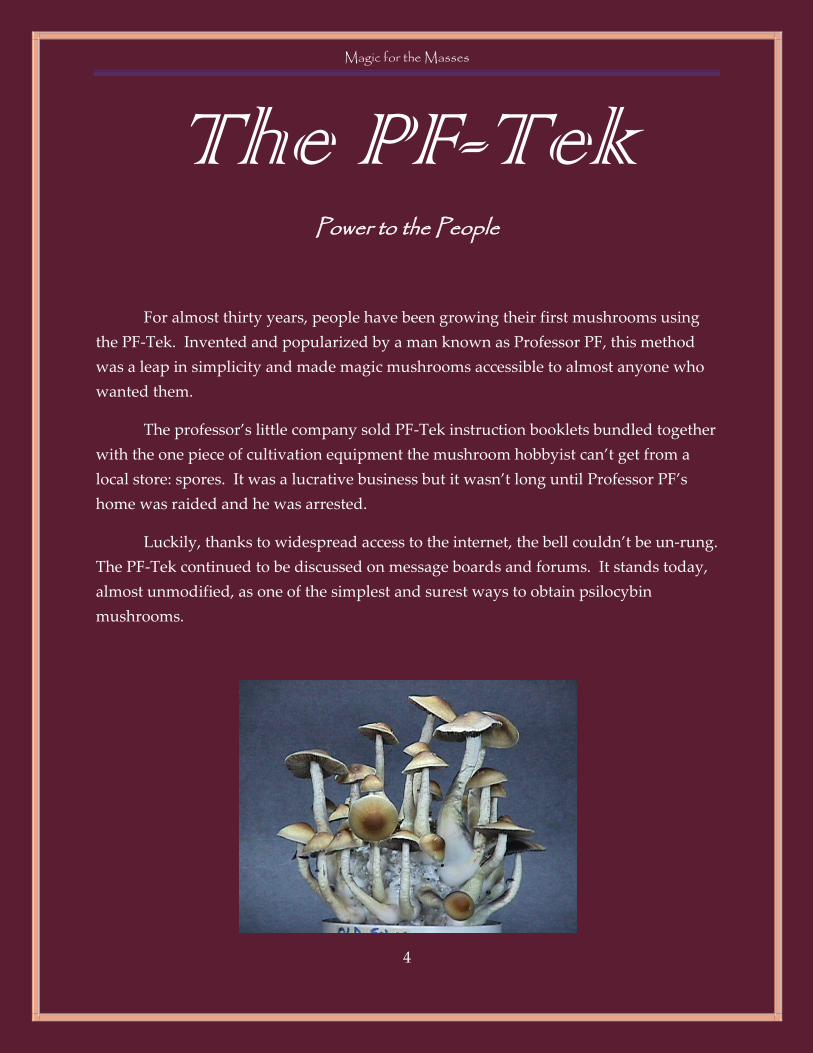
The PF-Tek Power to the People
For almost thirty years, people have been growing their first mushrooms using
the PF-Tek. Invented and popularized by a man known as Professor PF, this method
was a leap in simplicity and made magic mushrooms accessible to almost anyone who
wanted them.
The professor’s little company sold PF-Tek instruction booklets bundled together
with the one piece of cultivation equipment the mushroom hobbyist can’t get from a
local store: spores. It was a lucrative business but it wasn’t long until Professor PF’s
home was raided and he was arrested.
Luckily, thanks to widespread access to the internet, the bell couldn’t be un-rung.
The PF-Tek continued to be discussed on message boards and forums. It stands today,
almost unmodified, as one of the simplest and surest ways to obtain psilocybin
mushrooms.
Magic for the Masses
5
Overview of the Process
Once you gather everything you need, you’ll mix a simple recipe using three
ingredients: brown rice, vermiculite, and water. That mix will go into canning jars.
You’ll add a layer of dry vermiculite and then put the lids on, cover them with tin foil,
and cook them in a pressure cooker.
After allowing the jars to cool for several hours in the pressure cooker, you’ll
prepare a sterile workspace. You’ll use a syringe to inject spore-laden water into the
jars through holes you made in the lids before you started.
Next, the jars will incubate for roughly two weeks. After the first several days,
you will notice little bits of fluffy white mold growing in the jars. The mold, called
mycelium, will eventually fill the jars.
Once it does, you’ll empty the jars. The contents will be solid white and held
together by the mycelium into what we call “cakes”. Those will go into a humid
environment called a fruiting chamber. The cakes will get fuzzy after a few days, and
after roughly a week they will start growing little bumps called “pins” that will grow
into mature mushrooms over the course of another week or so.
Magic for the Masses
6
What You Will Need
Wide-mouth half-pint canning jars
Vermiculite
Perlite
Brown rice flour
Spores
Pressure cooker/canner
Fish tank heater
Plastic storage tub
Bleach
Isopropyl alcohol
Tin foil
Paper towel
1. Wide-Mouth Half-Pint Canning Jars: Time has judged the half-pint jar to be just
the right size for this purpose. You can use jars that are larger or smaller than
that, but there are drawbacks to both. It’s important that you get jars that don’t
have a “shoulder,” because the cake will have to be able to slide out of the jar
once it is colonized by the mycelium. There are two main varieties of half-pints:
wide-mouth and regular. Both will work just fine, but if you get the wide-mouth
(short) ones you can stack them in the fruiting chamber later. Many times these
can be found in supermarkets. They often come in cases of twelve.
Wide-mouth half-pint canning jar
Magic for the Masses
7
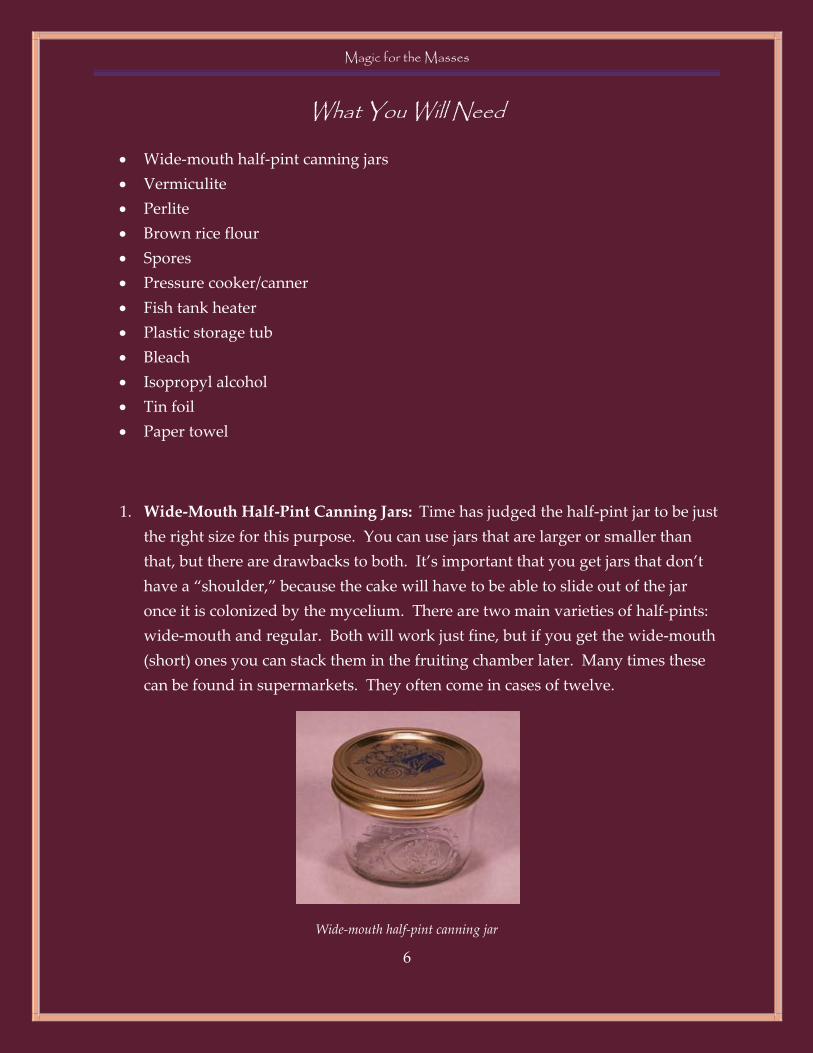
2. Vermiculite: A soil amendment used in gardening (and mushroom growing) to
simultaneously loosen soil, retain moisture, and improve drainage. Vermiculite
is mostly found in bags at gardening stores but can also occasionally be found in
hardware stores and supermarkets. Vermiculite is used as one of the main
ingredients in the PF-Tek mushroom substrate.
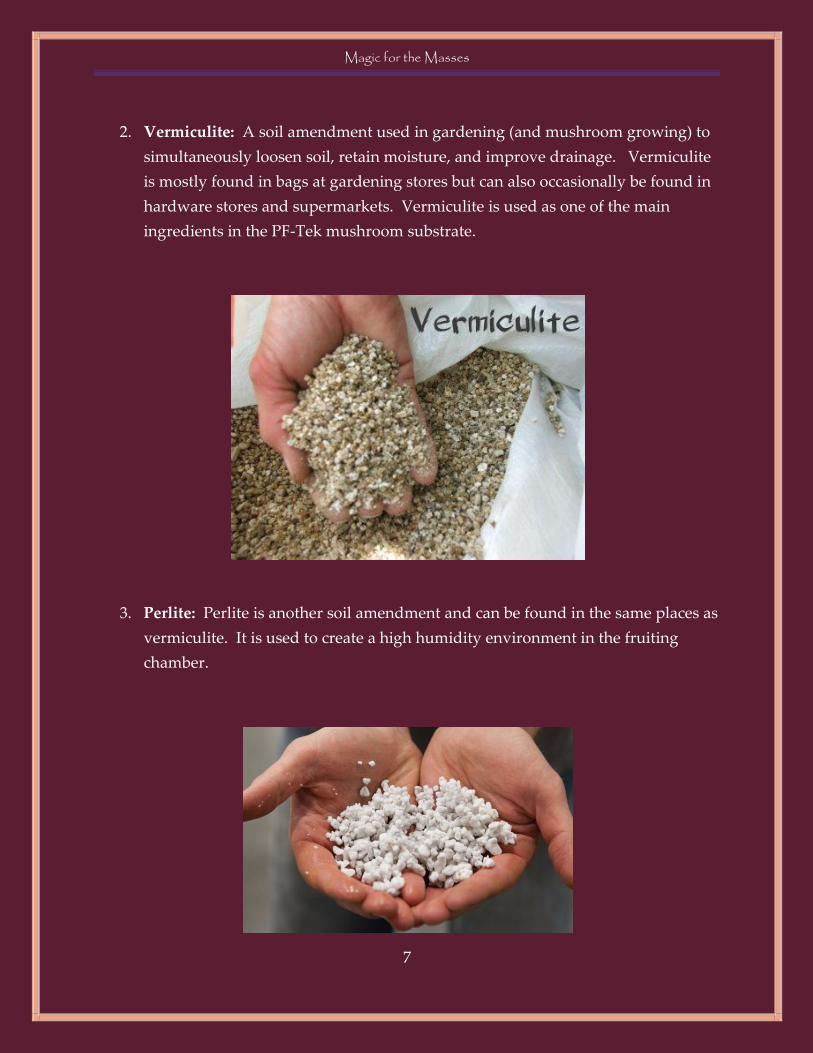
3. Perlite: Perlite is another soil amendment and can be found in the same places as
vermiculite. It is used to create a high humidity environment in the fruiting
chamber.
Magic for the Masses
8
4. Brown Rice Flour: This provides all the nutrition needed for mushrooms of the
species Psilocybe Cubensis (“P. Cubensis”) to thrive. You can purchase brown rice
flour at some supermarkets and health food stores, or you can grind your own
brown rice using a coffee grinder.
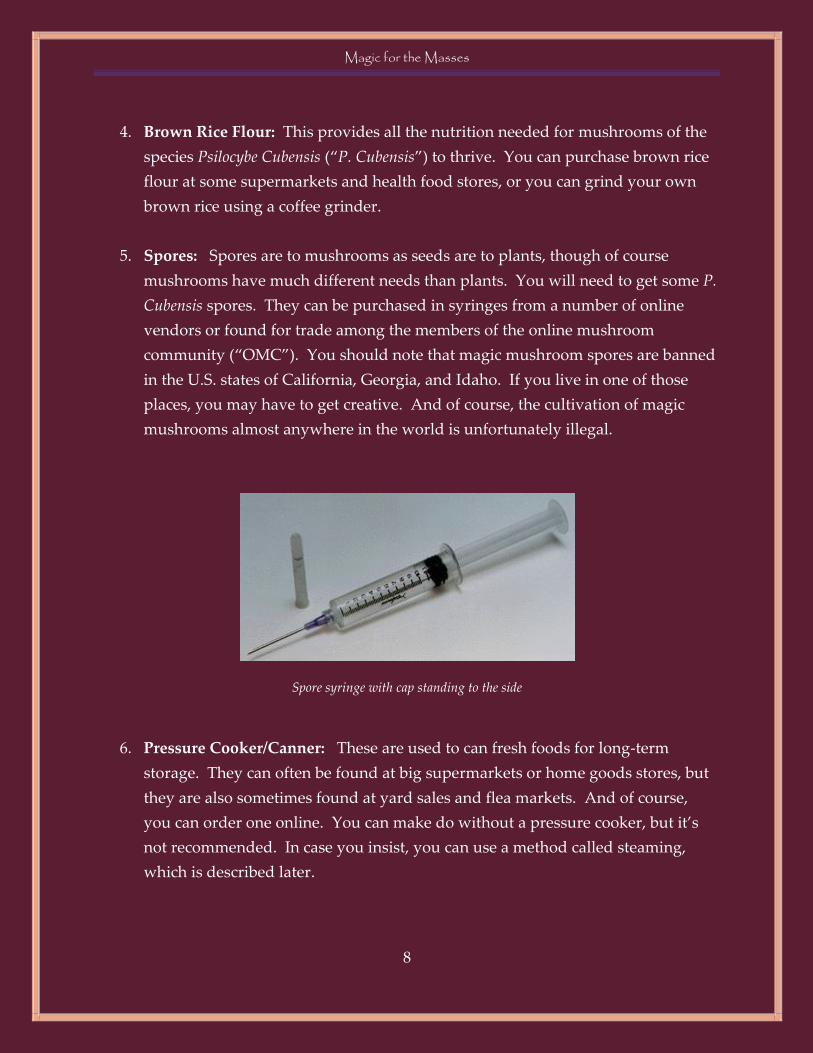
5. Spores: Spores are to mushrooms as seeds are to plants, though of course
mushrooms have much different needs than plants. You will need to get some P.
Cubensis spores. They can be purchased in syringes from a number of online
vendors or found for trade among the members of the online mushroom
community (“OMC”). You should note that magic mushroom spores are banned
in the U.S. states of California, Georgia, and Idaho. If you live in one of those
places, you may have to get creative. And of course, the cultivation of magic
mushrooms almost anywhere in the world is unfortunately illegal.
Spore syringe with cap standing to the side
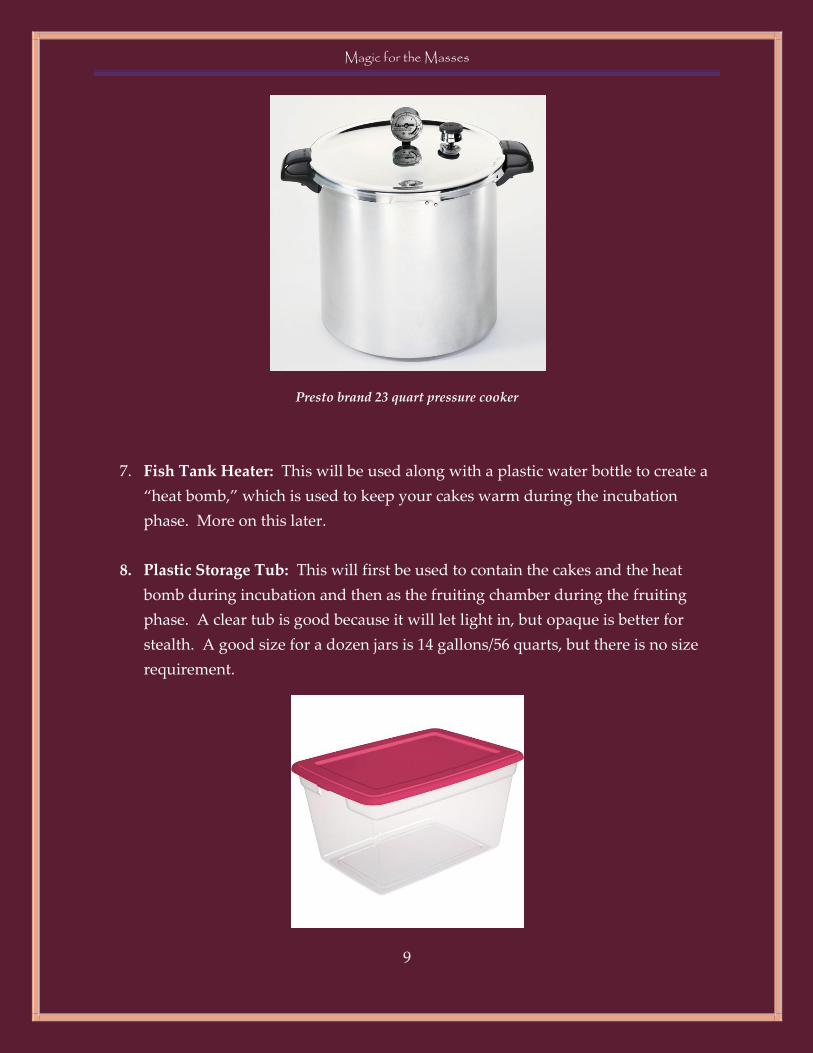
6. Pressure Cooker/Canner: These are used to can fresh foods for long-term
storage. They can often be found at big supermarkets or home goods stores, but
they are also sometimes found at yard sales and flea markets. And of course,
you can order one online. You can make do without a pressure cooker, but it’s
not recommended. In case you insist, you can use a method called steaming,
which is described later.
Magic for the Masses
9
Presto brand 23 quart pressure cooker
7. Fish Tank Heater: This will be used along with a plastic water bottle to create a
“heat bomb,” which is used to keep your cakes warm during the incubation
phase. More on this later.
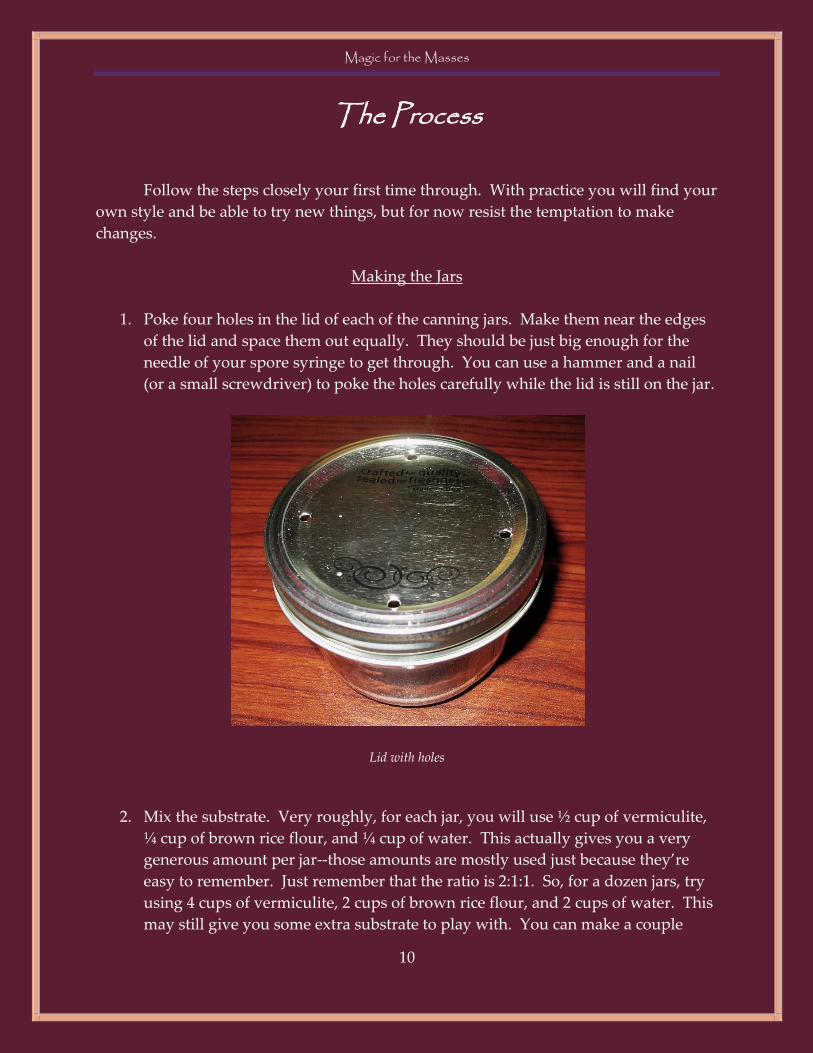
8. Plastic Storage Tub: This will first be used to contain the cakes and the heat
bomb during incubation and then as the fruiting chamber during the fruiting
phase. A clear tub is good because it will let light in, but opaque is better for
stealth. A good size for a dozen jars is 14 gallons/56 quarts, but there is no size
requirement.
Magic for the Masses
10
The Process
Follow the steps closely your first time through. With practice you will find your
own style and be able to try new things, but for now resist the temptation to make
changes.
Making the Jars
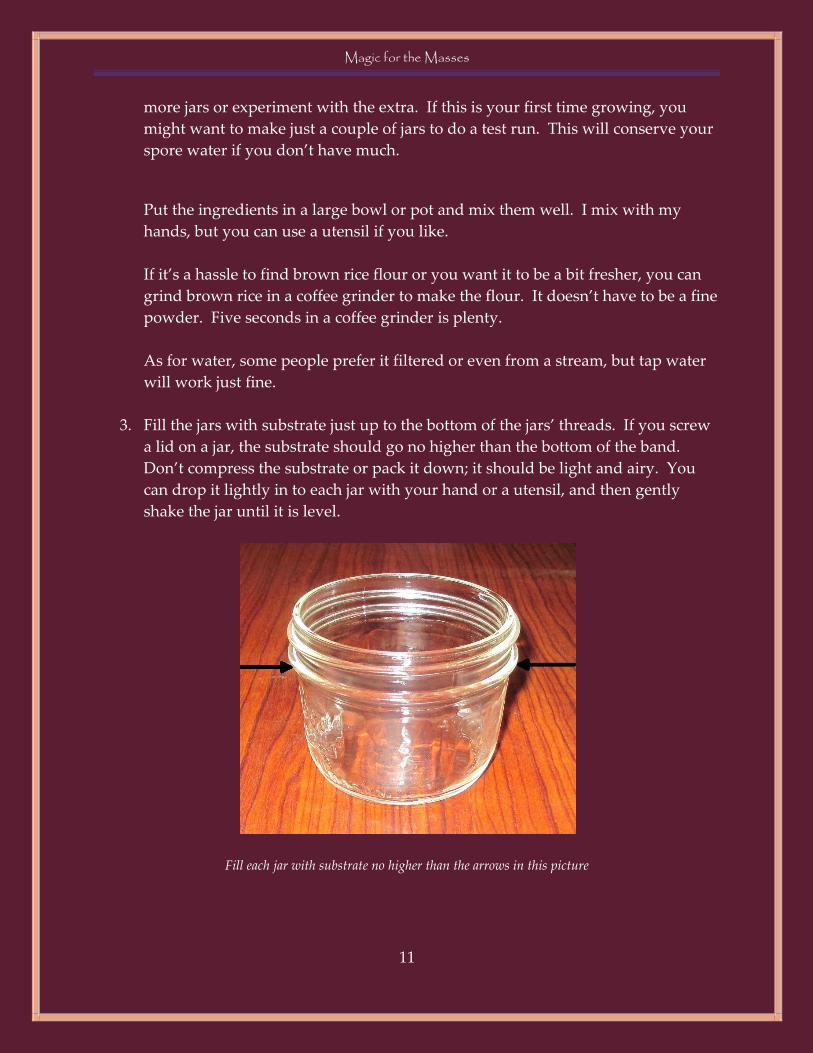
1. Poke four holes in the lid of each of the canning jars. Make them near the edges
of the lid and space them out equally. They should be just big enough for the
needle of your spore syringe to get through. You can use a hammer and a nail
(or a small screwdriver) to poke the holes carefully while the lid is still on the jar.
Lid with holes
2. Mix the substrate. Very roughly, for each jar, you will use ½ cup of vermiculite,
¼ cup of brown rice flour, and ¼ cup of water. This actually gives you a very
generous amount per jar--those amounts are mostly used just because they’re
easy to remember. Just remember that the ratio is 2:1:1. So, for a dozen jars, try
using 4 cups of vermiculite, 2 cups of brown rice flour, and 2 cups of water. This
may still give you some extra substrate to play with. You can make a couple
Magic for the Masses
11
more jars or experiment with the extra. If this is your first time growing, you
might want to make just a couple of jars to do a test run. This will conserve your
spore water if you don’t have much.
Put the ingredients in a large bowl or pot and mix them well. I mix with my
hands, but you can use a utensil if you like.
If it’s a hassle to find brown rice flour or you want it to be a bit fresher, you can
grind brown rice in a coffee grinder to make the flour. It doesn’t have to be a fine
powder. Five seconds in a coffee grinder is plenty.
As for water, some people prefer it filtered or even from a stream, but tap water
will work just fine.
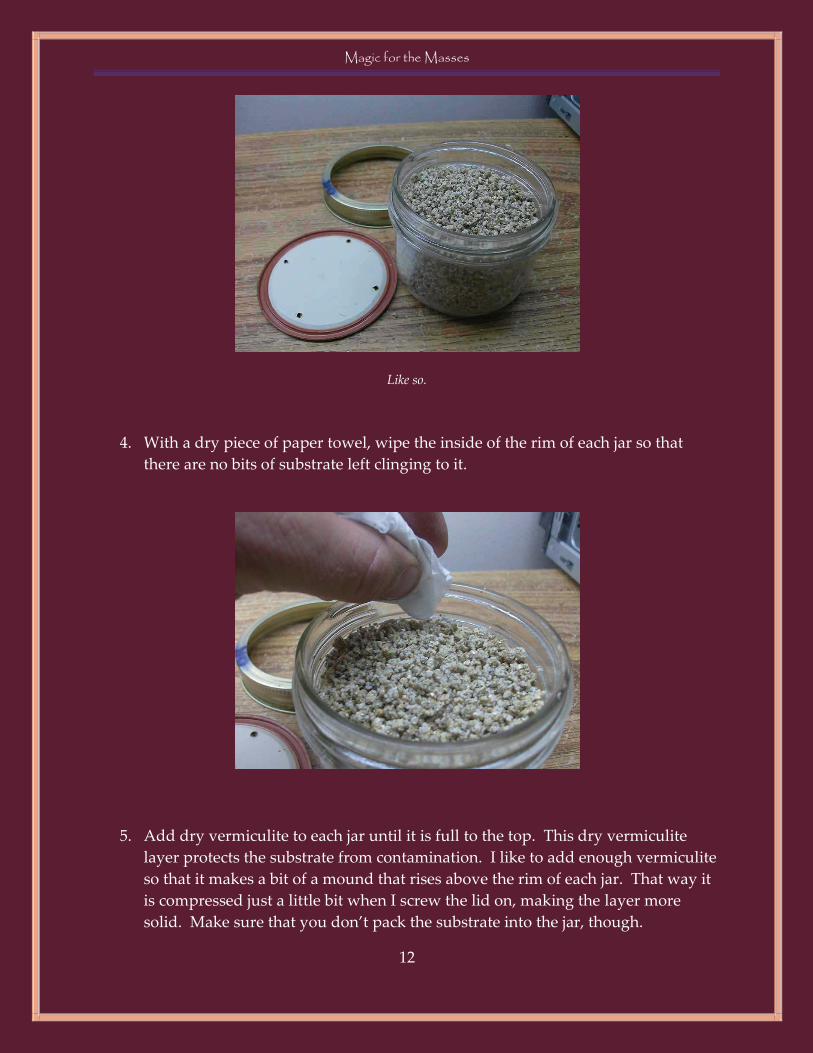
3. Fill the jars with substrate just up to the bottom of the jars’ threads. If you screw
a lid on a jar, the substrate should go no higher than the bottom of the band.
Don’t compress the substrate or pack it down; it should be light and airy. You
can drop it lightly in to each jar with your hand or a utensil, and then gently
shake the jar until it is level.
Fill each jar with substrate no higher than the arrows in this picture
Magic for the Masses
12
Like so.
4. With a dry piece of paper towel, wipe the inside of the rim of each jar so that
there are no bits of substrate left clinging to it.
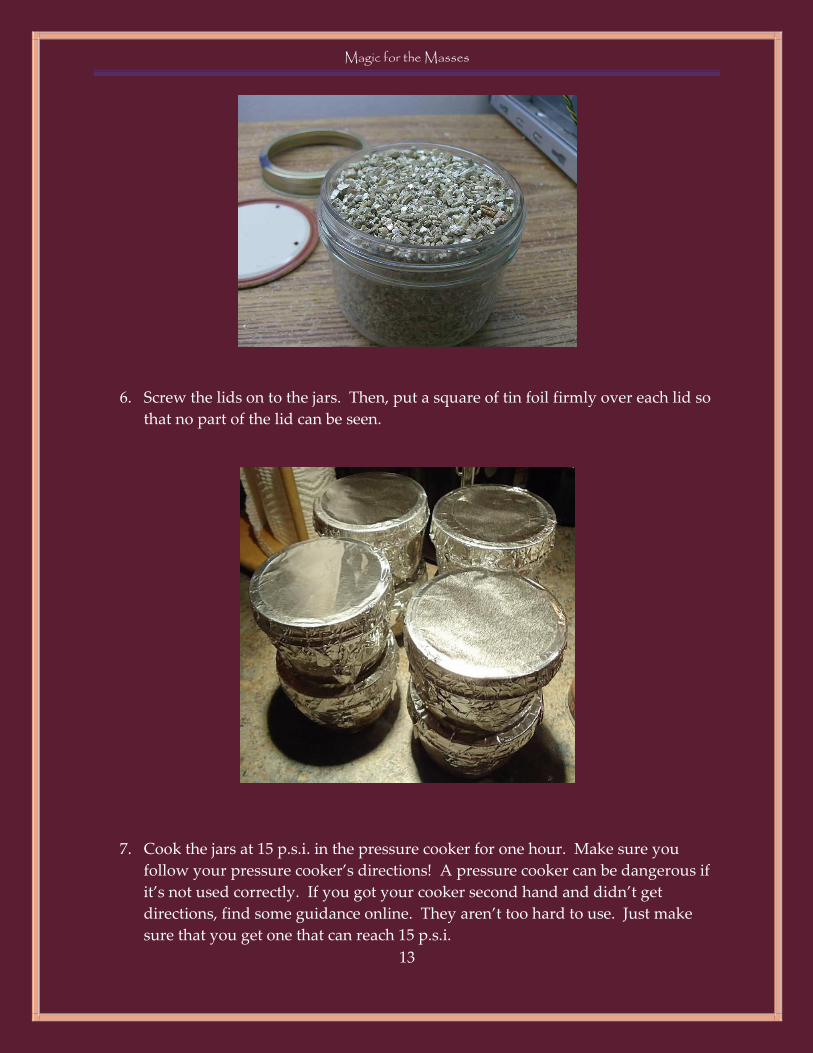
5. Add dry vermiculite to each jar until it is full to the top. This dry vermiculite
layer protects the substrate from contamination. I like to add enough vermiculite
so that it makes a bit of a mound that rises above the rim of each jar. That way it
is compressed just a little bit when I screw the lid on, making the layer more
solid. Make sure that you don’t pack the substrate into the jar, though.
Magic for the Masses
13
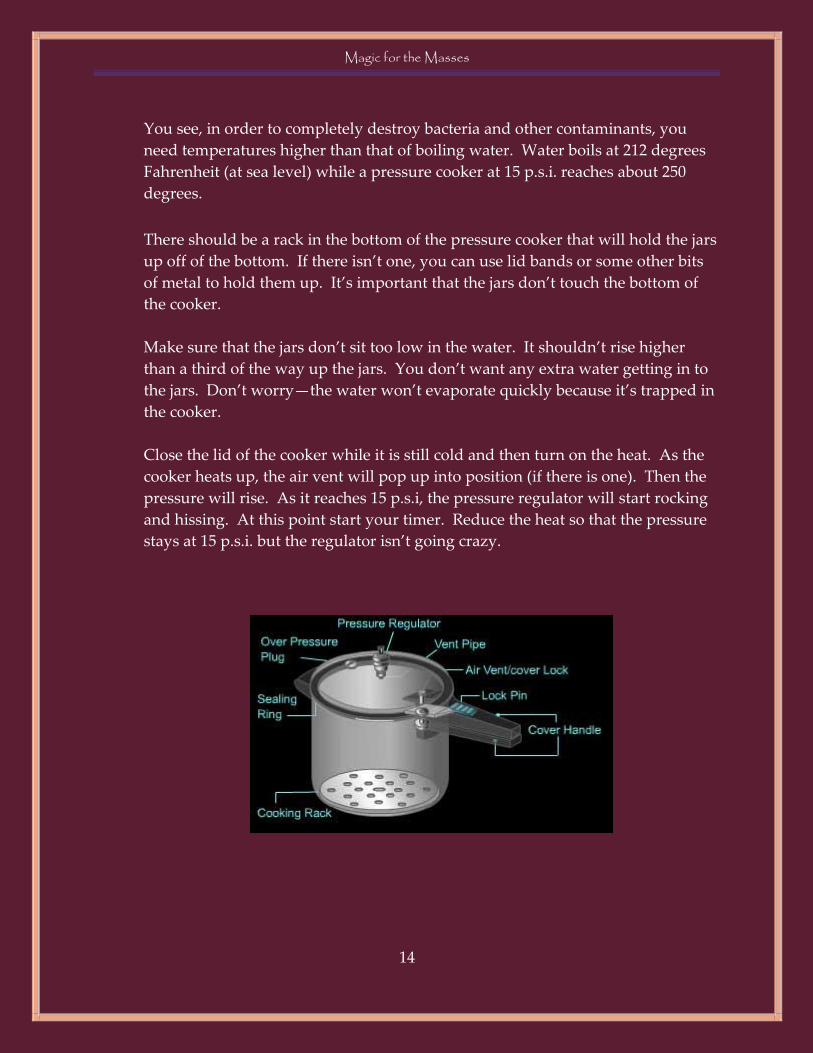
6. Screw the lids on to the jars. Then, put a square of tin foil firmly over each lid so
that no part of the lid can be seen.
7. Cook the jars at 15 p.s.i. in the pressure cooker for one hour. Make sure you
follow your pressure cooker’s directions! A pressure cooker can be dangerous if
it’s not used correctly. If you got your cooker second hand and didn’t get
directions, find some guidance online. They aren’t too hard to use. Just make
sure that you get one that can reach 15 p.s.i.
Magic for the Masses
14
You see, in order to completely destroy bacteria and other contaminants, you
need temperatures higher than that of boiling water. Water boils at 212 degrees
Fahrenheit (at sea level) while a pressure cooker at 15 p.s.i. reaches about 250
degrees.
There should be a rack in the bottom of the pressure cooker that will hold the jars
up off of the bottom. If there isn’t one, you can use lid bands or some other bits
of metal to hold them up. It’s important that the jars don’t touch the bottom of
the cooker.
Make sure that the jars don’t sit too low in the water. It shouldn’t rise higher
than a third of the way up the jars. You don’t want any extra water getting in to
the jars. Don’t worry—the water won’t evaporate quickly because it’s trapped in
the cooker.
Close the lid of the cooker while it is still cold and then turn on the heat. As the
cooker heats up, the air vent will pop up into position (if there is one). Then the
pressure will rise. As it reaches 15 p.s.i, the pressure regulator will start rocking
and hissing. At this point start your timer. Reduce the heat so that the pressure
stays at 15 p.s.i. but the regulator isn’t going crazy.

Magic for the Masses
15
If you simply can’t get your hands on a pressure cooker or you’re stubborn, you
can also sterilize your jars using steam. Niemandgeist gives a succinct
description of steaming:
I don't have a pressure cooker, but I do have a large canning
pot and a gas stove that I use to steam-sterilize my BRF jars.
The original PF Tek guide instructs you to do steam-
sterilization in a pot for 90 minutes. I prefer to let mine go
for an entire 2 hours just to be on the safe side and it's
always worked like a charm.
You'll want to put something around the entire bottom of
the pot upon which you'll place aluminum foil. I prefer to
use spare canning jar metal screw-on lids. These lids are sold
separately in packs so you should be able to find some Ball
brand 1/2 pint lids for sale in a brick and mortar store near
you. You can most certainly find them for cheap on
Amazon.com or other online retailers. I find that these work
the best to line the entire bottom of my canning pot. You
could also use rocks or balls of aluminum foil.
As for how much water to use, I put just enough water into
the pot on the bottom so that it covers the top of the metal jar
lids evenly. I then place a big sheet of aluminum foil on top
of that. On top of the foil I then place my glass 1/2 pint jars
(or my PP5 plastic pint-sized containers). I like to leave a
little bit of space around the edge of the pot to be able to see
when the water is boiling by curling up the edges of the
sheet of foil.
Magic for the Masses
16
After you put the water in the pot and everything you can
place your glass jars on top of the aluminum foil. Keep the
jars from touching the edge of the pot. You want to bring the
water in the pot to a rolling boil. Once you've got it boiling
you want to turn down the flame on the gas stove so that
you keep it simmering for the entire duration of steam-
sterilizing and then put the lid on top of the pot. I've never
had to add more water. I just occasionally open the lid to
keep an eye on things and check on it here and there.
Once your 90 minutes (or 2 hours) has elapsed you need to
turn off the heat and just leave it there to cool. I prefer to let
the pot cool for an entire day. I generally steam-sterilize
during the evening and then inoculate the next evening. It's
fine to safely and carefully remove the pot from the stove
(use oven mitts!) and put it somewhere else to cool.
8. After the jars are done cooking, let them sit in the pressure cooker or steaming
pot for at least eight hours. You want the jars to be at room temperature before
you take the next step. It’s fine to let them sit overnight.
Inoculation
9. Once they’re cool, it’s time to set up your workspace. The workspace can really
be anywhere, but it’s best to use a small room where you have the most control
over the environment, like the bathroom. For this next step, absolute cleanliness
is key.
Start by removing anything from your workspace that might harbor
contaminants, e.g. towels, linens, rugs, laundry, trash cans, etc. Then bring the
items you’ll need into your workspace. That means the pressure cooker with the
Magic for the Masses
17
jars inside, your spore syringe, a spray bottle with bleach water (mixed at about
10% bleach), isopropyl alcohol, paper towels, and a bandana. If you’re working
in the bathroom and there isn’t a lot of counter space, bring a flat surface that
you can place over the sink. The pressure cooker can sit on the toilet seat lid.
Now close the vents in the room and turn off your air conditioning/heat to slow
down air movement. Take a shower and use a fresh towel to dry off. This is to
clean your body, which is covered with potential contaminants. If you choose to
put clothes on, make sure that they’re freshly laundered. If you’re working in
the bathroom you can shower, dry off, throw the towel on the floor to stand on
and get right to work. Tie the bandana over your mouth and nose. This will
prevent your breath from contaminating your project, and will also protect you a
bit from what you’re about to do next.
10. Once you are clean and you’ve closed the door on your workspace, clean every
surface using the paper towels and either the bleach water or the isopropyl
alcohol. Then use the mist setting on your bleach water bottle to spray the air so
that it settles over the entire room. The water captures airborne contaminants
and filters them out of the air while the bleach destroys them. Next, thoroughly
wet several paper towels with isopropyl alcohol. Take one of the soaked paper
towels and wipe your hands and arms up to the elbows.
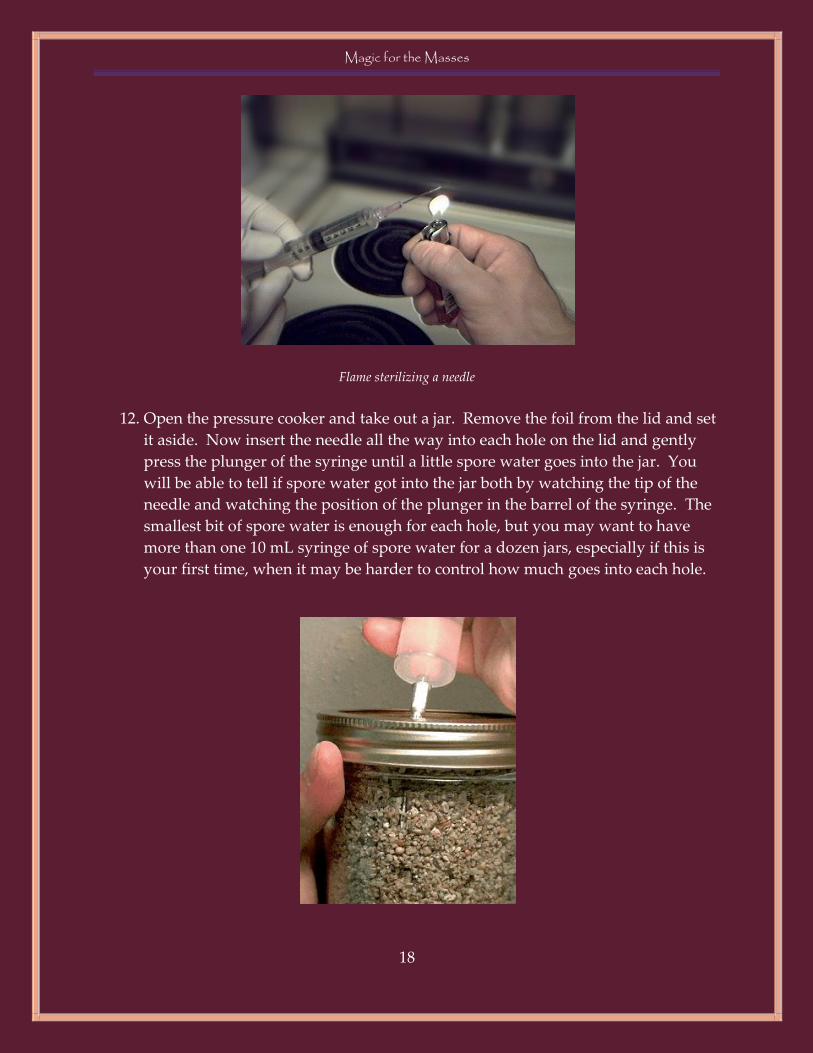
11. Get your spore syringe ready. If you bought a syringe from a spore vendor, the
needle should still be in its sterile wrapping. Connect the needle to the syringe,
being careful not to touch the shaft of the needle itself. If the needle did not
come in a sterile wrapping, heat it with a flame until it turns red. A torch lighter
is good for this, but a regular cigarette lighter will work too (it just leaves a black
residue on the needle--carefully wipe it away with one of the soaked paper
towels). After the needle has been heated glowing red, squirt just a little bit of
the spore solution out to cool it. From this point on, don’t let the needle touch
anything other than the lids of the jars.
Magic for the Masses
18
Flame sterilizing a needle
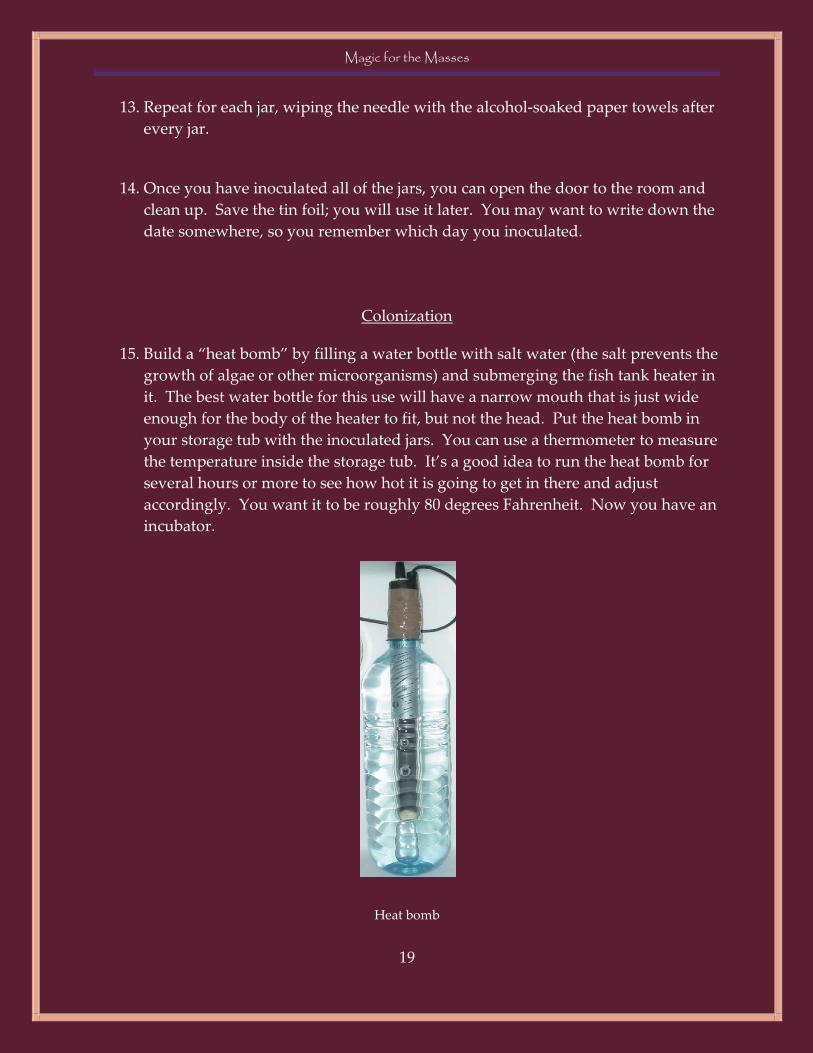
12. Open the pressure cooker and take out a jar. Remove the foil from the lid and set
it aside. Now insert the needle all the way into each hole on the lid and gently
press the plunger of the syringe until a little spore water goes into the jar. You
will be able to tell if spore water got into the jar both by watching the tip of the
needle and watching the position of the plunger in the barrel of the syringe. The
smallest bit of spore water is enough for each hole, but you may want to have
more than one 10 mL syringe of spore water for a dozen jars, especially if this is
your first time, when it may be harder to control how much goes into each hole.
Magic for the Masses
19
13. Repeat for each jar, wiping the needle with the alcohol-soaked paper towels after
every jar.
14. Once you have inoculated all of the jars, you can open the door to the room and
clean up. Save the tin foil; you will use it later. You may want to write down the
date somewhere, so you remember which day you inoculated.
Colonization
15. Build a “heat bomb” by filling a water bottle with salt water (the salt prevents the
growth of algae or other microorganisms) and submerging the fish tank heater in
it. The best water bottle for this use will have a narrow mouth that is just wide
enough for the body of the heater to fit, but not the head. Put the heat bomb in
your storage tub with the inoculated jars. You can use a thermometer to measure
the temperature inside the storage tub. It’s a good idea to run the heat bomb for
several hours or more to see how hot it is going to get in there and adjust
accordingly. You want it to be roughly 80 degrees Fahrenheit. Now you have an
incubator.
Heat bomb
Magic for the Masses
20
You can skip this step altogether and just store your jars at room temperature.
A number of experienced growers do this. The colonization process will be
slower, but the idea is that the environment will be less suitable for
contaminants. Whatever you do, there is no need to leave the tin foil over the
lids of the jars. The vermiculite layer protects the jars from contamination, and
you do want some air to be able to get in.
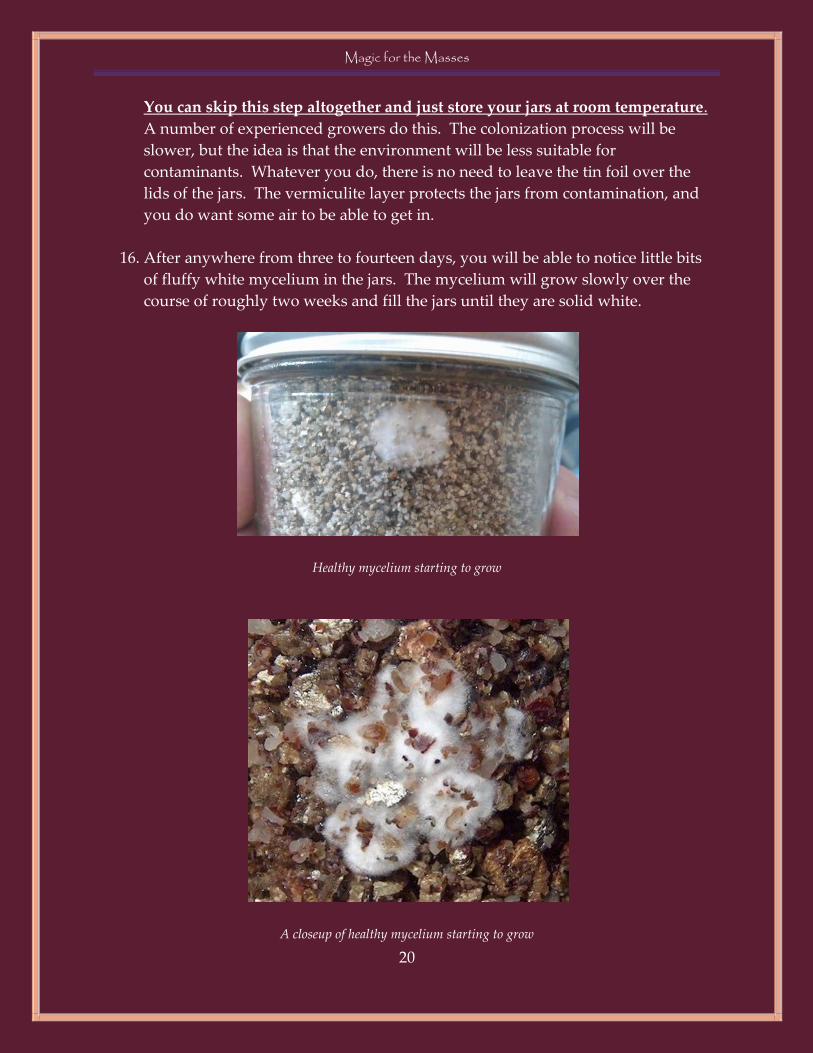
16. After anywhere from three to fourteen days, you will be able to notice little bits
of fluffy white mycelium in the jars. The mycelium will grow slowly over the
course of roughly two weeks and fill the jars until they are solid white.
Healthy mycelium starting to grow
A closeup of healthy mycelium starting to grow
Magic for the Masses
21
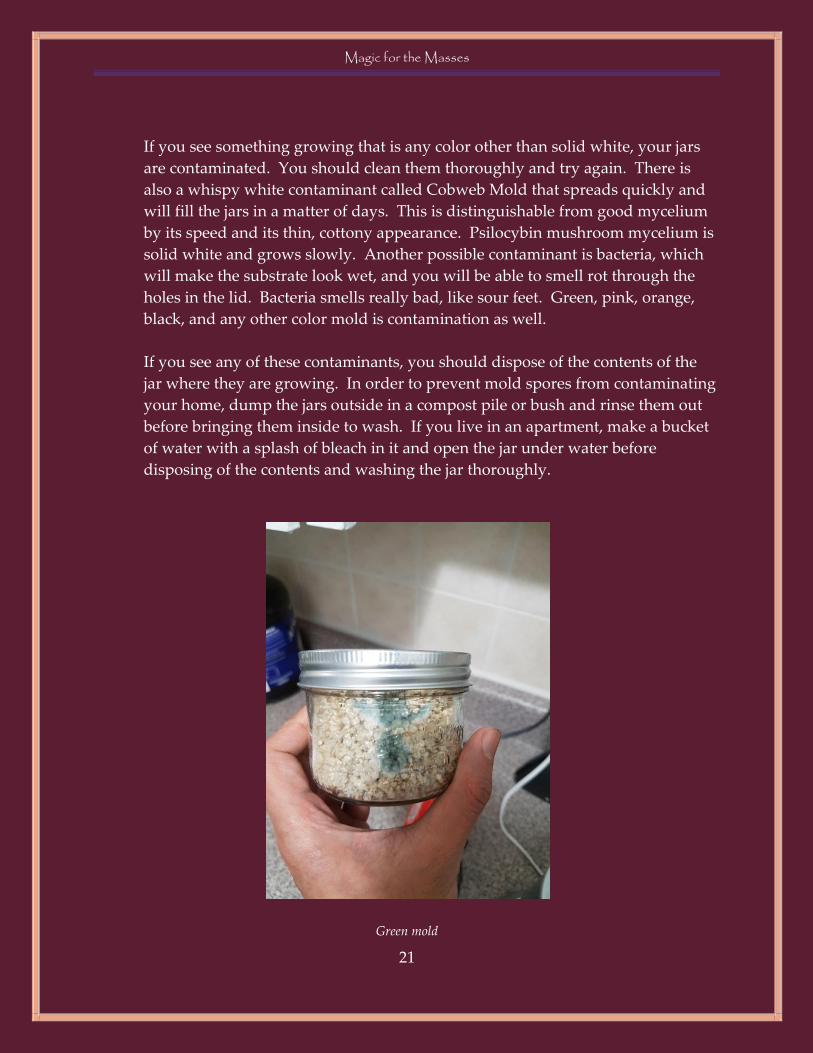
If you see something growing that is any color other than solid white, your jars
are contaminated. You should clean them thoroughly and try again. There is
also a whispy white contaminant called Cobweb Mold that spreads quickly and
will fill the jars in a matter of days. This is distinguishable from good mycelium
by its speed and its thin, cottony appearance. Psilocybin mushroom mycelium is
solid white and grows slowly. Another possible contaminant is bacteria, which
will make the substrate look wet, and you will be able to smell rot through the
holes in the lid. Bacteria smells really bad, like sour feet. Green, pink, orange,
black, and any other color mold is contamination as well.
If you see any of these contaminants, you should dispose of the contents of the
jar where they are growing. In order to prevent mold spores from contaminating
your home, dump the jars outside in a compost pile or bush and rinse them out
before bringing them inside to wash. If you live in an apartment, make a bucket
of water with a splash of bleach in it and open the jar under water before
disposing of the contents and washing the jar thoroughly.
Green mold

Magic for the Masses
22
Cobweb mold (center top) growing near healthy mycelium (on the left and right). Notice how whispy it is. Cobweb
mold will also grow more quickly than mycelium.
A jar of bird seed infected with bacteria (center). Notice how wet and slimy it looks. If your PF jars are infected
with bacteria, you will probably be able to smell it through the holes in the lid. It will smell sour, like rotten feet.
Magic for the Masses
23
17. After the colonization phase, mushroom growth is triggered by light and cooler
temperatures. Once your jars are full of healthy mycelium, remove them from
the incubator or just turn off the heat bomb. Put them somewhere that they will
get at least a little bit of ambient light every day. Don’t let direct sunlight or
other strong light hit them. If you’re using an opaque storage tub you can
simply take the lid off for a minute each day. It doesn’t take much light to
trigger the fruiting stage. If the tub is clear then just make sure direct sunlight
isn’t hitting the jars and they will get plenty of light.
18. At this point, there is no need to do anything else. Mushrooms can grow right in
the jars with no help at all. This method is known as “Mycro-Tek” and was
pioneered by Hippie3, who founded Mycotopia.net. This method will not
produce good-looking mushrooms—they will be smashed up against the glass in
the jar—but it’s a great method for stealth. If you forego the incubator and use
this method, your jars can stay hidden in a drawer or a backpack the entire time,
with no need to bring them out except to be harvested.
Fully colonized jars
Magic for the Masses
24
Pins growing invitro
Mature invitro mushrooms, ready for harvest
Magic for the Masses
25
The Birthday
19. However, watching your mushrooms grow to maturity in a fruiting chamber is
one of the best parts of this hobby. Once the cakes are fully colonized and you
see the first little pins growing in them, then it’s finally time to get out the perlite.
You are going to use a layer of damp perlite in your fruiting chamber to keep the
humidity very high. You may want to put on your bandana when you open the
bag, because the dust you’ll see is made up of tiny particles of rock that are
probably terrible for your lungs. You can add a little water to the perlite while
it’s still in the bag to minimize the dust.
But before you get started with this next part, clean up your kitchen, wipe down
the counters with an antibacterial cleaner or bleach water, and wash your hands.
Wash out your storage tub. It’s not necessary for everything to be sterile, but it
should be nice and clean! The cleaner that you, your equipment, and your home
are, the better your chances of success in this hobby.
20. Open each jar and pour the loose top layer of vermiculite off into the compost
bin or save it for your garden. You can even save it for the next round of jars if
you want. Notice the earthy mushroom smell of the cakes as you open them.
Knock each cake gently out of the jar into your hand. Rinse it under cold
running water. Get a pot or other container big enough to hold all of your cakes.
Gently put the cakes in the container and add enough cold, plain water to
submerge all of them. They will float, so you will have to use something to hold
them down, like a platter or another container filled with water. Let them sit for
about 24 hours. You don’t want them to stay underwater for too much longer
than that, because they do need air to survive.
The reason for this dunk is that mushrooms are mostly water, so you want the
cakes to be as hydrated as possible before they go into the fruiting stage.
21. When the cakes are done being dunked, drain the water from the container and
rinse them again under cold water.
Pour about four inches of perlite into the bottom of your storage tub and add
water along with several tablespoons of salt. The salt will inhibit the growth of
microorganisms. Mix the water into the perlite so that it all gets wet. There
should be enough water so that there’s just a little standing water at the bottom
of the tub. You can pull the perlite to the side to see if there’s any standing
Magic for the Masses
26
water. Once there’s enough water, fluff up the perlite as much as possible and
make the surface smooth and level.
A tub with perlite
22. In a big mixing bowl, mix some vermiculite with enough plain water that you
can just squeeze a single drop of water out of a handful of vermiculite. This is
called hydrating to field capacity. Get out the tin foil lids that you saved from
when you cooked the jars and shape them into platforms with rims.
Another use for the pieces of tin foil that you used to cover your jars in the pressure cooker. You’ll add some damp
vermiculite and then put your cakes on here. You don’t want the cake to sit directly on the perlite because you will
end up with some soggy mushrooms.
Magic for the Masses
27
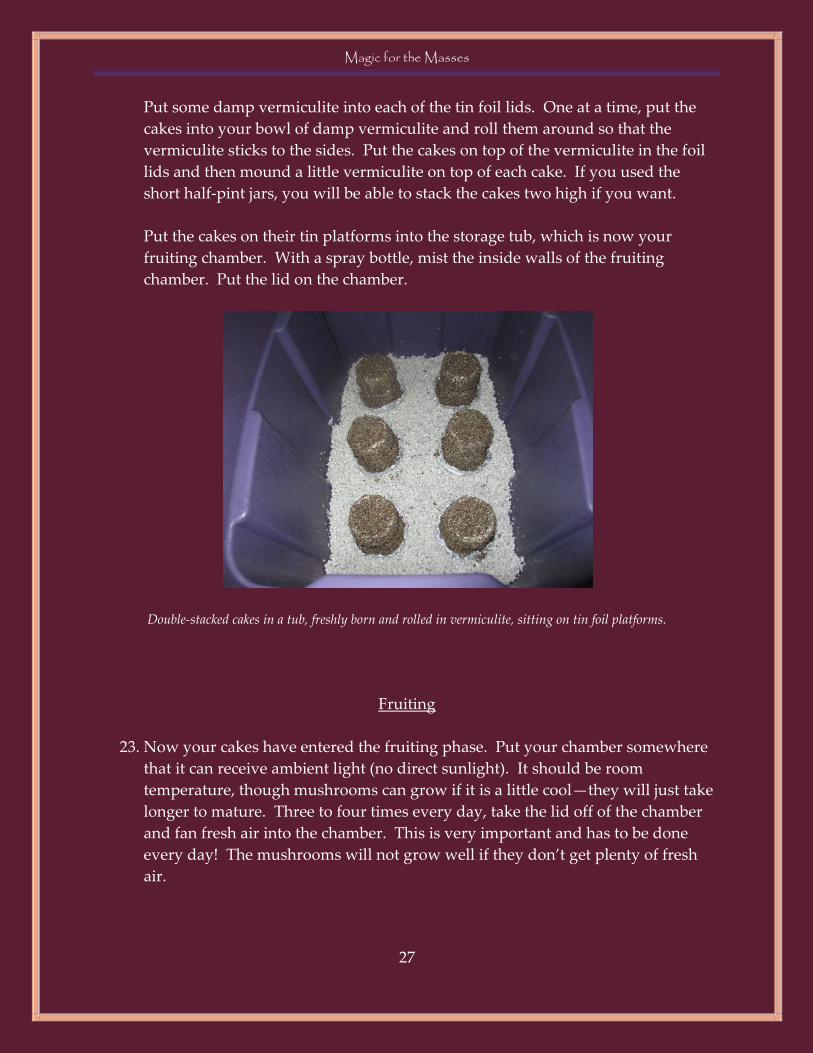
Put some damp vermiculite into each of the tin foil lids. One at a time, put the
cakes into your bowl of damp vermiculite and roll them around so that the
vermiculite sticks to the sides. Put the cakes on top of the vermiculite in the foil
lids and then mound a little vermiculite on top of each cake. If you used the
short half-pint jars, you will be able to stack the cakes two high if you want.
Put the cakes on their tin platforms into the storage tub, which is now your
fruiting chamber. With a spray bottle, mist the inside walls of the fruiting
chamber. Put the lid on the chamber.
Double-stacked cakes in a tub, freshly born and rolled in vermiculite, sitting on tin foil platforms.
Fruiting
23. Now your cakes have entered the fruiting phase. Put your chamber somewhere
that it can receive ambient light (no direct sunlight). It should be room
temperature, though mushrooms can grow if it is a little cool—they will just take
longer to mature. Three to four times every day, take the lid off of the chamber
and fan fresh air into the chamber. This is very important and has to be done
every day! The mushrooms will not grow well if they don’t get plenty of fresh
air.
Magic for the Masses
28
At the same time, it’s important that the inside of your chamber stays very
humid. It should be as humid as possible, and you should see condensation on
the inside walls at all times. If there are any dry spots, mist the walls with plain
water and check to make sure the chamber is well sealed. There is no need to
mist the cakes themselves.
During this time, resist the urge to mess around with your setup or change
things. Just make sure you’re fanning three to four times a day and make sure
the walls of the chamber are covered in condensation and they will be fine.
The maturing mushrooms will grow toward light. If you have a completely
opaque chamber, they will grow in all directions, including down in to the
perlite. Mushrooms growing in all directions may not be pretty, but it’s also not
really a problem. If you have a clear chamber, they will grow in the direction of
the strongest light source. If there is no strong light source, they may still grow
sideways.
There are a number of ways to deal with this. If you have an opaque tub, you
can replace the lid with something clear, like a sheet of plastic. That way, all of
the light is coming from the top and the mushrooms will grow up. You could get
a clear plastic shower curtain for a couple dollars and cut it to the size you want.
You’ll just need some chip clips to fasten it to the edge of the tub. If you have a
clear tub, you can put a small fluorescent light either on the lid or above the tub.
However you do it, if you make sure that the main light source is above your
cakes, then your mushrooms will grow straight up.
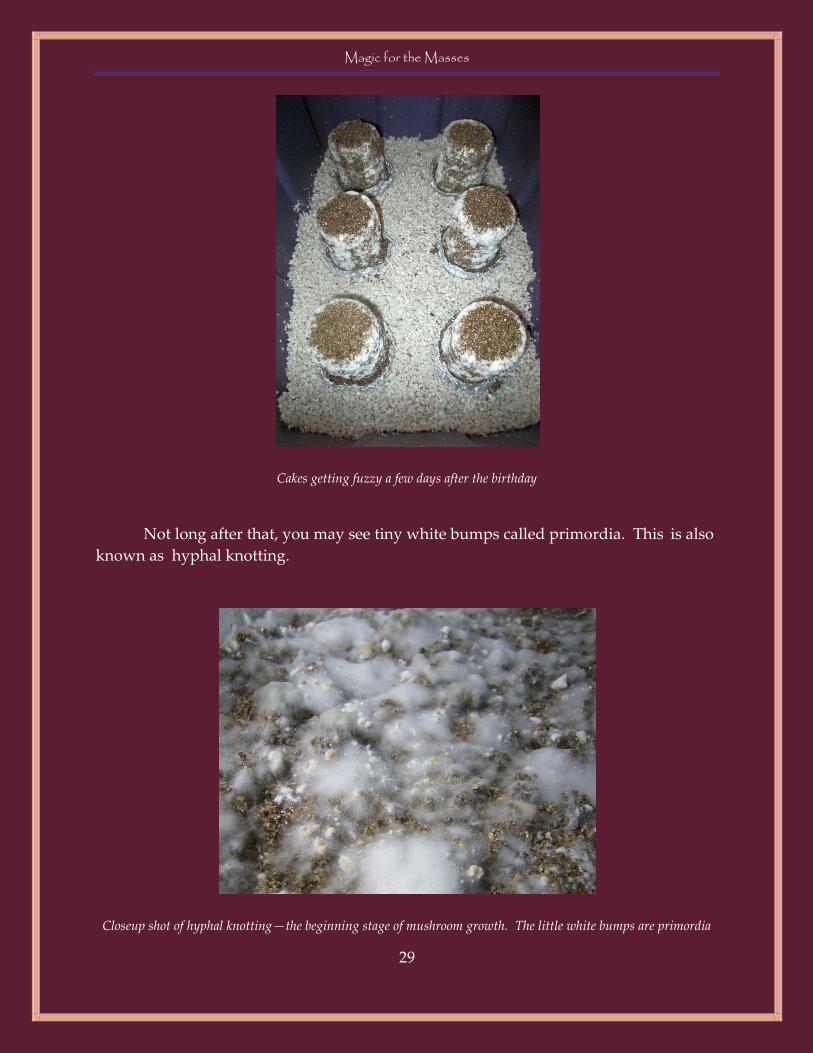
24. After a few days, you will notice that your cakes are getting fuzzy as new
mycelium grows.
Magic for the Masses
29
Cakes getting fuzzy a few days after the birthday
Not long after that, you may see tiny white bumps called primordia. This is also
known as hyphal knotting.
Closeup shot of hyphal knotting—the beginning stage of mushroom growth. The little white bumps are primordia
Magic for the Masses
30
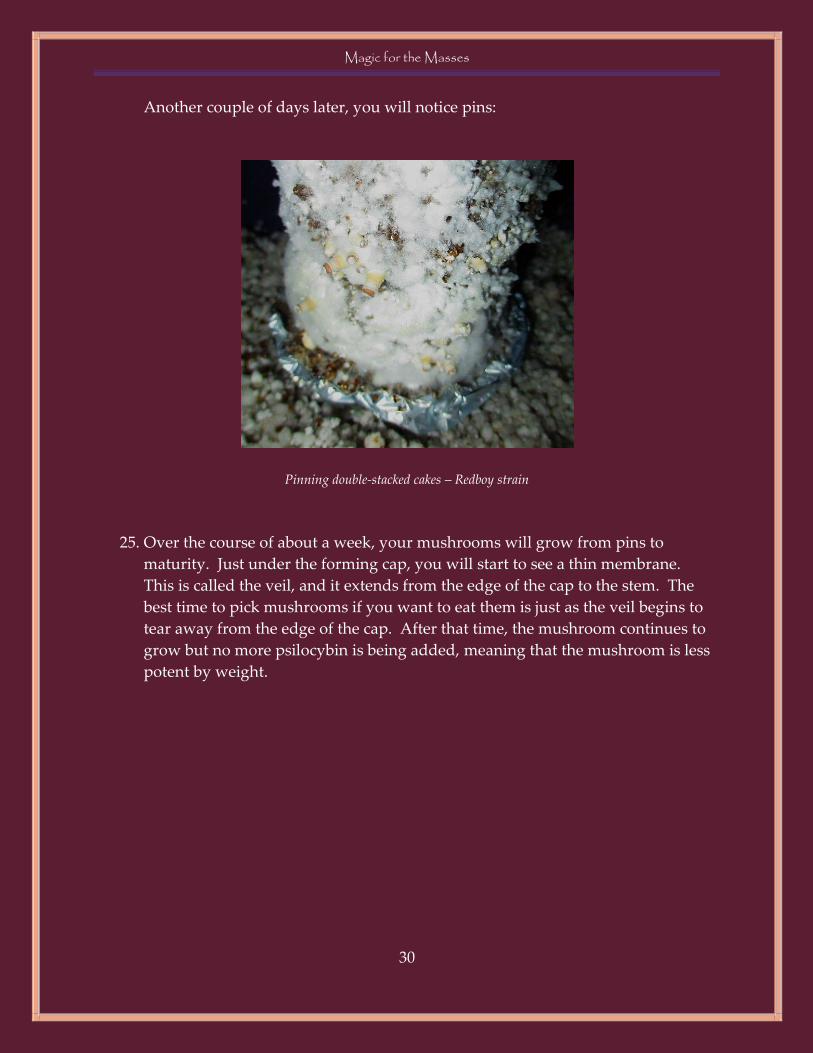
Another couple of days later, you will notice pins:
Pinning double-stacked cakes – Redboy strain
25. Over the course of about a week, your mushrooms will grow from pins to
maturity. Just under the forming cap, you will start to see a thin membrane.
This is called the veil, and it extends from the edge of the cap to the stem. The
best time to pick mushrooms if you want to eat them is just as the veil begins to
tear away from the edge of the cap. After that time, the mushroom continues to
grow but no more psilocybin is being added, meaning that the mushroom is less
potent by weight.
Magic for the Masses
31
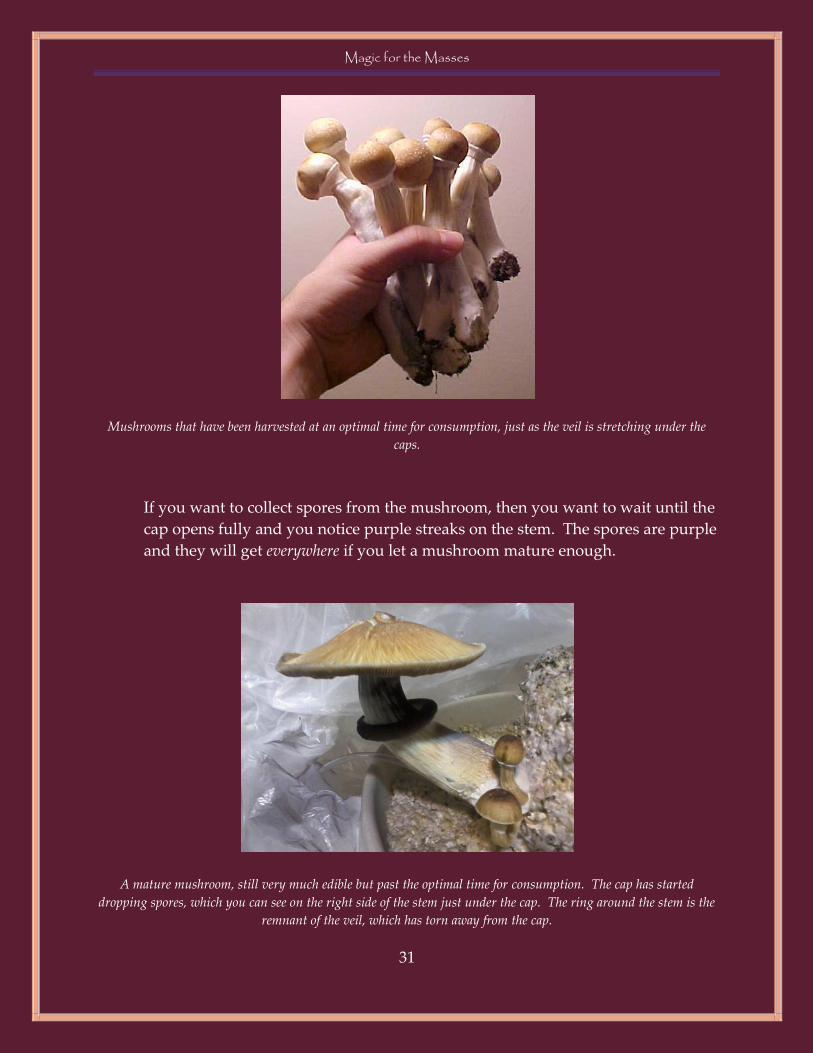
Mushrooms that have been harvested at an optimal time for consumption, just as the veil is stretching under the
caps.
If you want to collect spores from the mushroom, then you want to wait until the
cap opens fully and you notice purple streaks on the stem. The spores are purple
and they will get everywhere if you let a mushroom mature enough.
A mature mushroom, still very much edible but past the optimal time for consumption. The cap has started
dropping spores, which you can see on the right side of the stem just under the cap. The ring around the stem is the
remnant of the veil, which has torn away from the cap.
Magic for the Masses
32
To pick your mushrooms, grasp them near their base with clean fingers and
gently twist until they come free. You don’t have to pick all of the mushrooms at
once if they’re not all ready at the same time. Sometimes vermiculite will be
clinging to the base of the mushrooms. You can wipe that off with your finger.
Some go so far as to use a toothbrush to clean them.
Contamination
26. The risk of contamination continues when the cakes are in the fruiting chamber.
In most cases, if you see contamination, it is time to remove the cakes from your
grow area and your home. Take contaminated cakes outside and bury them
somewhere, if you can do it discreetly. Sometimes if you bury contaminated
cakes in the right place they will fruit outside for you. Compost piles and mulch
are good for this. You can even try to tend to the cakes, watering the area lightly.
If you can’t find a place for the cakes outside, dunk them in some water with a
healthy splash of bleach and then put them in the trash. Get them out of your
home as soon as possible.
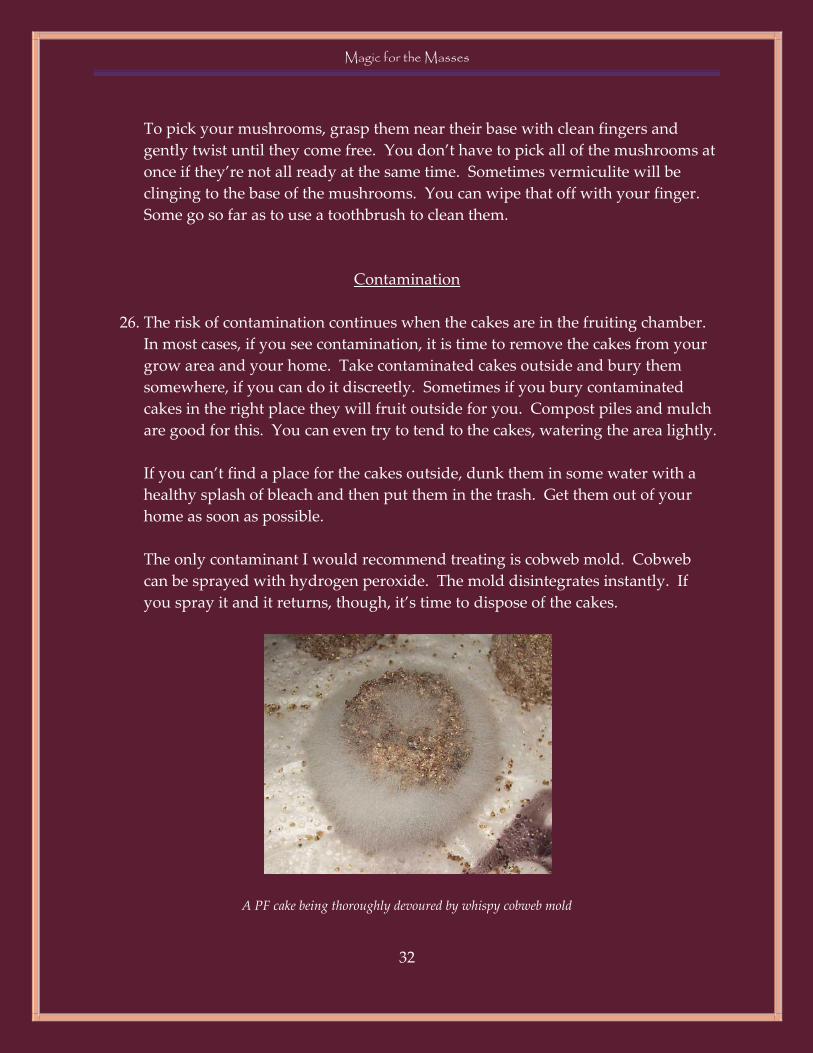
The only contaminant I would recommend treating is cobweb mold. Cobweb
can be sprayed with hydrogen peroxide. The mold disintegrates instantly. If
you spray it and it returns, though, it’s time to dispose of the cakes.
A PF cake being thoroughly devoured by whispy cobweb mold

Magic for the Masses
33
Any green mold is commonly referred to as “trich” in the OMC, which is short
for Trichoderma. It starts out as a white mold and then turns green when it is
sporulating. This stuff is the worst. If you see it on one cake, you can try to
isolate the rest, but if it has turned green, it is likely going to spread. If you have
a project that was infected by trich, do everything you can to clear your home of
its spores before growing anything else. Clean and disinfect all tubs and other
equipment thoroughly.
Trich
Sometimes if you see discoloration on your cakes, it’s not contamination at all.
Bruising can occur on your cakes if they are dehydrated or otherwise distressed.
Bruising is blue, and you can distinguish it from contamination by lightly rolling
a q-tip on the discolored area. If the q-tip comes away clean, you have bruising.
If the spot rubs off, it’s mold. Bruising is not the end of the world. Cakes that
have been dunked for 24 hours often appear bruised for a couple of days
afterward. If you have bruising, think about what caused it. If your cakes are
dry, you may need to dunk them.

Magic for the Masses
34
Dunking and Later Flushes
27. Mushroom colonies are very giving. They will grow mushrooms, or flush,
multiple times before they are spent. If you pick all the mushrooms from the
first flush and then continue to fan them three to four times per day, they will
start growing new mushrooms in about a week.
However, the cakes will be dry after flushing and will need water for later
flushes. For that reason, you’ll want to dunk the cakes again after each flush.
With clean hands, pick them clean of any mushroom material. Make sure to save
any pins and aborts; they are very potent by weight. Rinse the cakes with cold
running water and dunk them for about 24 hours like you did when they first
came out of the jars. After this dunk, it’s not necessary to re-roll them in
vermiculite like you did before, as there will still be a good amount left clinging
to them.
Put the cakes back into the fruiting chamber on the tin foil platforms and fan
three to four times a day. They will start flushing again in about a week. The
more flushes you attempt, the fewer mushrooms will grow, but it’s worth going
for at least three. Later flushes are also supposedly more potent!
Magic for the Masses
35
Drying and Storage
Fresh mushrooms are amazing. In my experience, they give a far more visual
experience than dried. Mushroom for mushroom, they are definitely more potent. This
is because chemicals like psilocin and baeocystin degrade during the drying process.
But, unless you plan to eat your entire crop within a few days of harvesting it, you will
need to preserve your mushrooms, usually by drying them.
Mushrooms should be dried quickly and thoroughly in order to preserve their
potency. However, you shouldn’t try to rush or take shortcuts. Many growers think
that you should avoid heat when drying them. Others think a little heat is OK, but
don’t leave them in the sun or bake them in the oven. Intense light and heat will cause
the psilocybin to break down, leaving your mushrooms less potent than they could be.
When they’re done, your mushrooms should be “cracker dry”. This means that
they should be crispy and snap easily rather than bend. A cracker dry mushroom can
be crumbled almost to dust in your hands. To stay potent over time, they need to stay
cracker dry, which means that they need to be protected from moisture.
Mushrooms can lose their potency fairly easily if they are not stored well. If you
make the effort to do it right, though, they can stay good for a long time.
Storing Fresh Mushrooms
If you do plan on eating your mushrooms fresh, you can store them for a few
days in the refrigerator. Put them in a paper bag or some other breathable container.
Don’t store them in plastic.
As another possibility, Hyphaenation experimented by submerging fresh P.
Cyanescens fruitbodies (mushrooms) in hemp seed oil and storing them in the freezer.
Apparently hemp seed oil does not freeze as easily as other food oils do. After five
months in the freezer, the fruitbodies were not only preserved, they were still alive and
useful for cloning!
Magic for the Masses
36
Dosing will be discussed later in more depth, but for now you should know that
10 grams of fresh mushroom is roughly equivalent to 1 gram of dried mushroom.
Drying and Storing Your Mushrooms
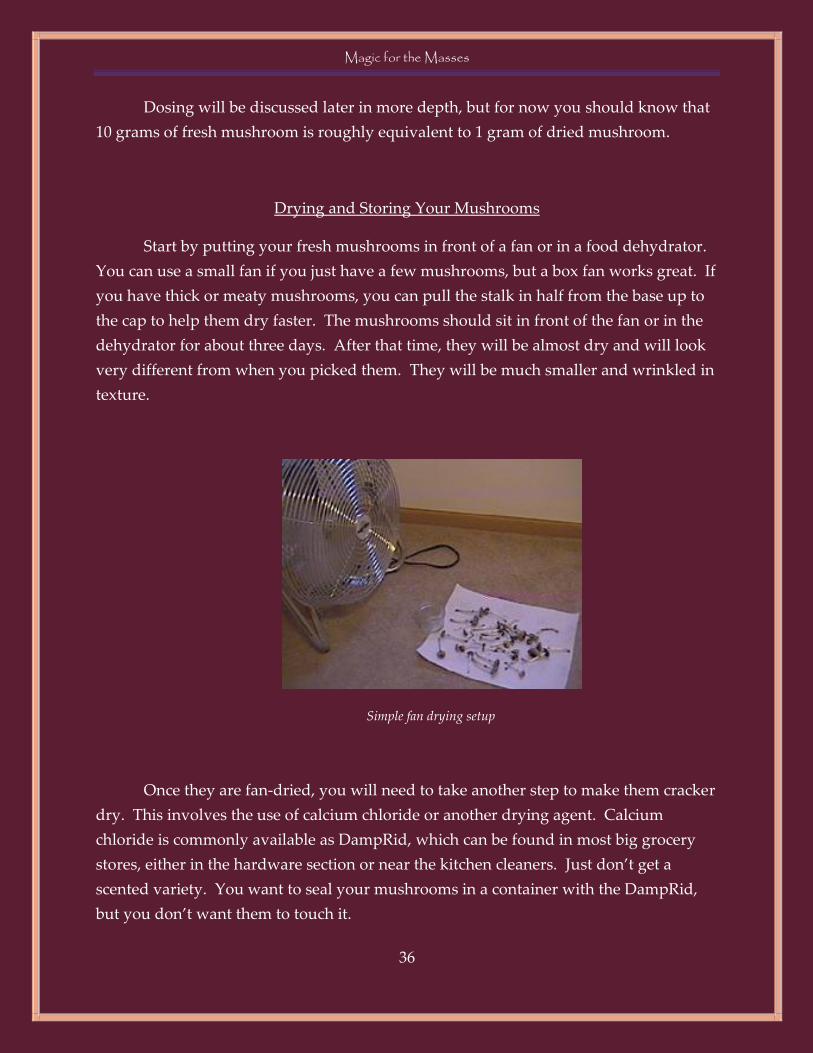
Start by putting your fresh mushrooms in front of a fan or in a food dehydrator.
You can use a small fan if you just have a few mushrooms, but a box fan works great. If
you have thick or meaty mushrooms, you can pull the stalk in half from the base up to
the cap to help them dry faster. The mushrooms should sit in front of the fan or in the
dehydrator for about three days. After that time, they will be almost dry and will look
very different from when you picked them. They will be much smaller and wrinkled in
texture.
Simple fan drying setup
Once they are fan-dried, you will need to take another step to make them cracker
dry. This involves the use of calcium chloride or another drying agent. Calcium
chloride is commonly available as DampRid, which can be found in most big grocery
stores, either in the hardware section or near the kitchen cleaners. Just don’t get a
scented variety. You want to seal your mushrooms in a container with the DampRid,
but you don’t want them to touch it.
Magic for the Masses
37
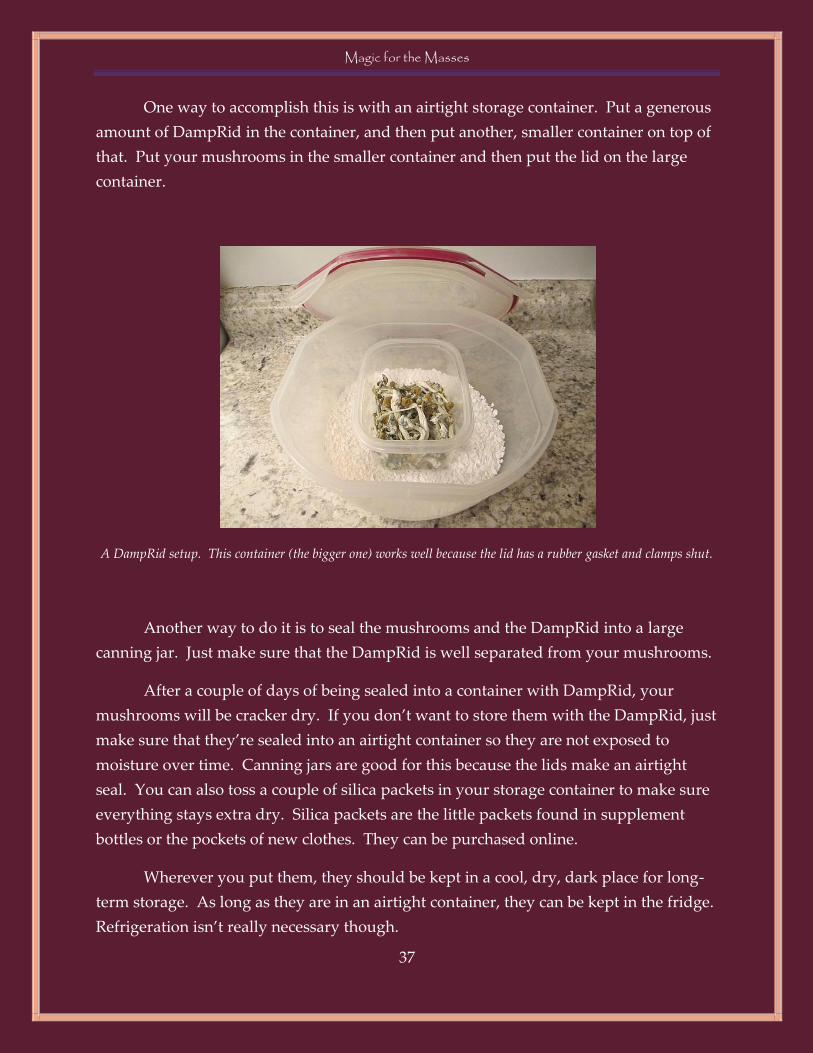
One way to accomplish this is with an airtight storage container. Put a generous
amount of DampRid in the container, and then put another, smaller container on top of
that. Put your mushrooms in the smaller container and then put the lid on the large
container.
A DampRid setup. This container (the bigger one) works well because the lid has a rubber gasket and clamps shut.
Another way to do it is to seal the mushrooms and the DampRid into a large
canning jar. Just make sure that the DampRid is well separated from your mushrooms.
After a couple of days of being sealed into a container with DampRid, your
mushrooms will be cracker dry. If you don’t want to store them with the DampRid, just
make sure that they’re sealed into an airtight container so they are not exposed to
moisture over time. Canning jars are good for this because the lids make an airtight
seal. You can also toss a couple of silica packets in your storage container to make sure
everything stays extra dry. Silica packets are the little packets found in supplement
bottles or the pockets of new clothes. They can be purchased online.
Wherever you put them, they should be kept in a cool, dry, dark place for long-
term storage. As long as they are in an airtight container, they can be kept in the fridge.
Refrigeration isn’t really necessary though.
Magic for the Masses
38
Dosage
There’s nothing like eating mushrooms you grew yourself. Here are some things
to think about if you’re eating mushrooms for the first time.
Psilocybin is a powerful psychedelic drug and has to be treated with respect if
you don’t want to get burned. It’s a good idea to think about “set and setting,”
especially if you plan on taking a big dose. “Set” is your mindset going into a trip. It’s
good to feel balanced, lighthearted, and positive when you trip. Your intention can also
play a big part if you are seeking a spiritual experience. It may be a bad idea to trip
when your life is chaotic or if you’ve just gone through a tragedy. That said,
mushrooms can provide insight and healing.
There is no evidence that psychedelics cause psychological disorders. In fact,
there are ongoing studies utilizing psychedelics in the treatment of a variety of
disorders. Many of those studies involve experienced therapists. If you suffer from any
psychological condition, tread lightly until you know what effect psilocybin will have
on you. Take care of yourself.
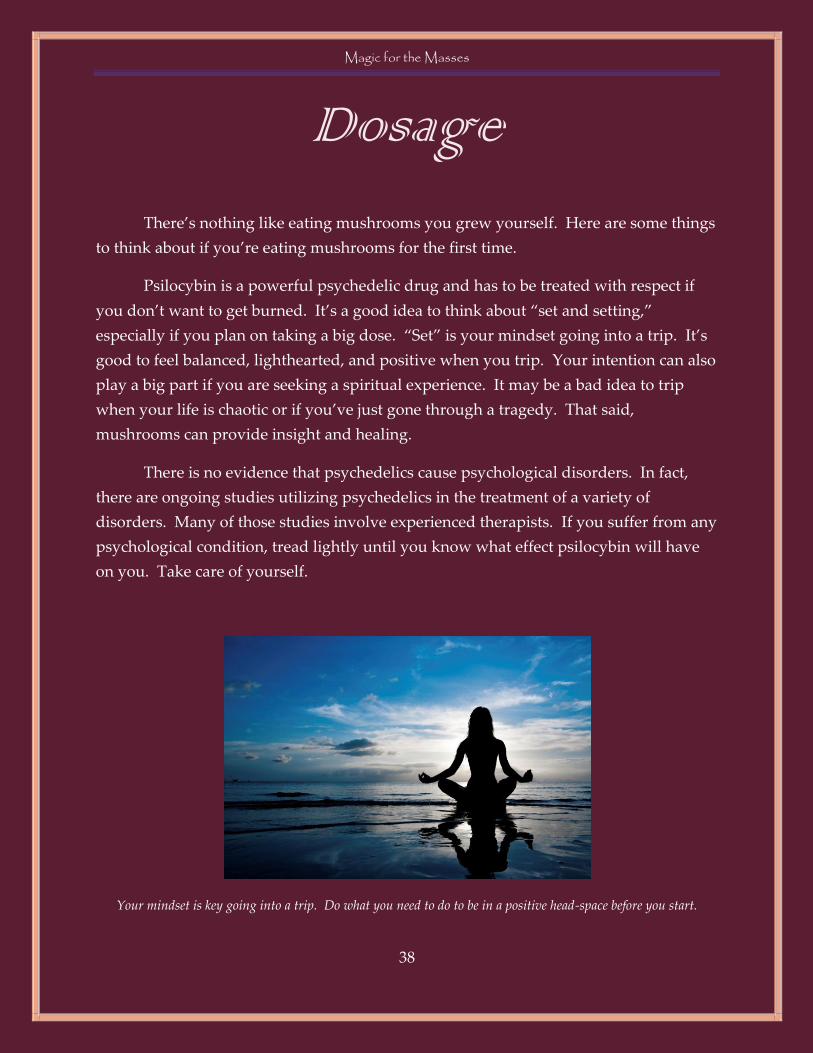
Your mindset is key going into a trip. Do what you need to do to be in a positive head-space before you start.
Magic for the Masses
39
“Setting” is your physical environment. Because you’ll be in an altered state, it’s
good to be somewhere conducive to a positive experience. Nature is a great setting. If
you’re going to dose heavy, your own home might be the best setting. Arrange to be
somewhere that you’ll feel comfortable and safe, especially on your first few trips.
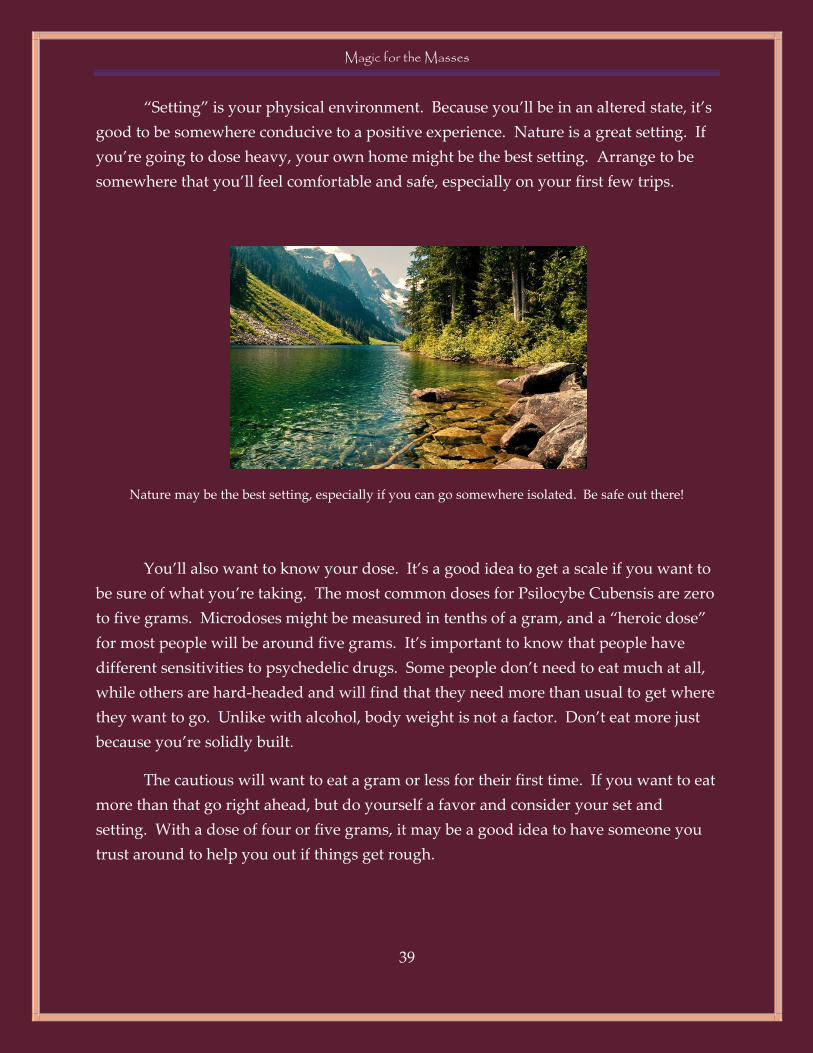
Nature may be the best setting, especially if you can go somewhere isolated. Be safe out there!
You’ll also want to know your dose. It’s a good idea to get a scale if you want to
be sure of what you’re taking. The most common doses for Psilocybe Cubensis are zero
to five grams. Microdoses might be measured in tenths of a gram, and a “heroic dose”
for most people will be around five grams. It’s important to know that people have
different sensitivities to psychedelic drugs. Some people don’t need to eat much at all,
while others are hard-headed and will find that they need more than usual to get where
they want to go. Unlike with alcohol, body weight is not a factor. Don’t eat more just
because you’re solidly built.
The cautious will want to eat a gram or less for their first time. If you want to eat
more than that go right ahead, but do yourself a favor and consider your set and
setting. With a dose of four or five grams, it may be a good idea to have someone you
trust around to help you out if things get rough.
Magic for the Masses
40
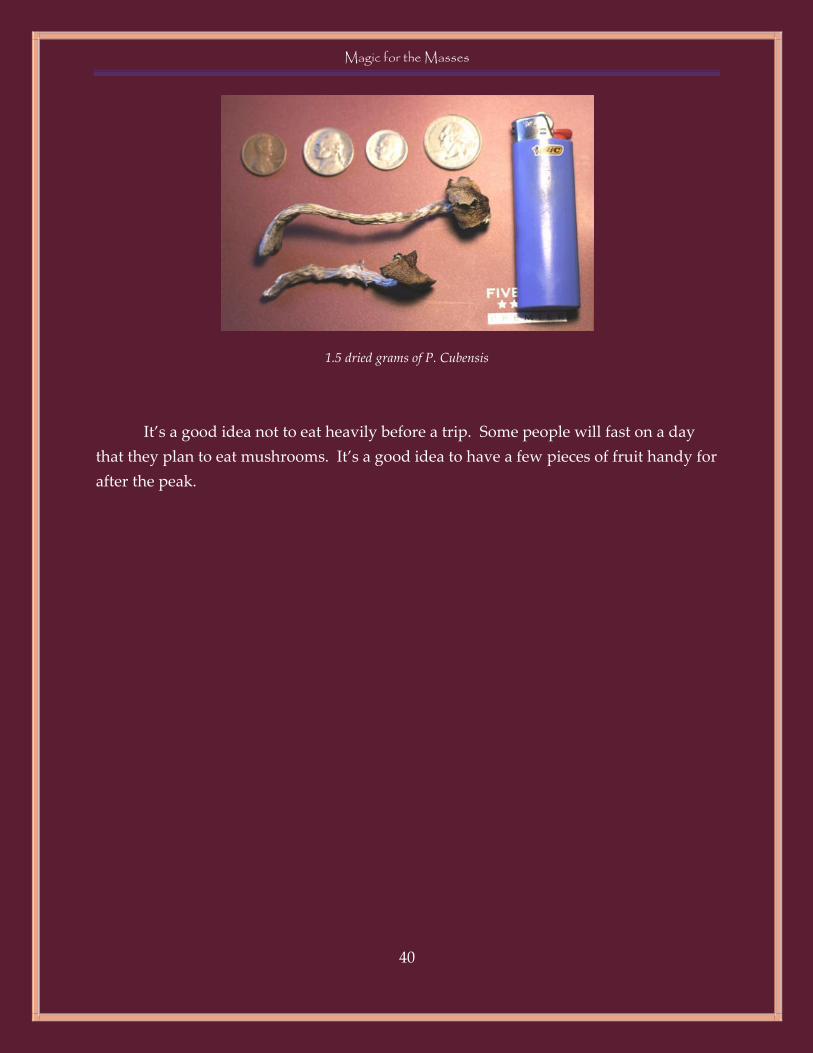
1.5 dried grams of P. Cubensis
It’s a good idea not to eat heavily before a trip. Some people will fast on a day
that they plan to eat mushrooms. It’s a good idea to have a few pieces of fruit handy for
after the peak.
Magic for the Masses
41
Recipes There are a lot of different ways to take mushrooms. The easiest way is just to
put them in your face and chew. Most people don’t like the taste of dried mushrooms,
though, and I don’t blame them. Dried magic mushrooms make me gag. So what other
options are there?
Putting Mushrooms in Food
Food can make magic mushrooms more palatable. Mushroom pizza, anyone?
You can put fresh mushrooms on a salad if you want to be healthier. You can also
blend fresh or dried mushrooms into orange juice, or even make a smoothie. Just put
them on whatever you like, but it’s not a good idea to eat them with a big heavy meal.
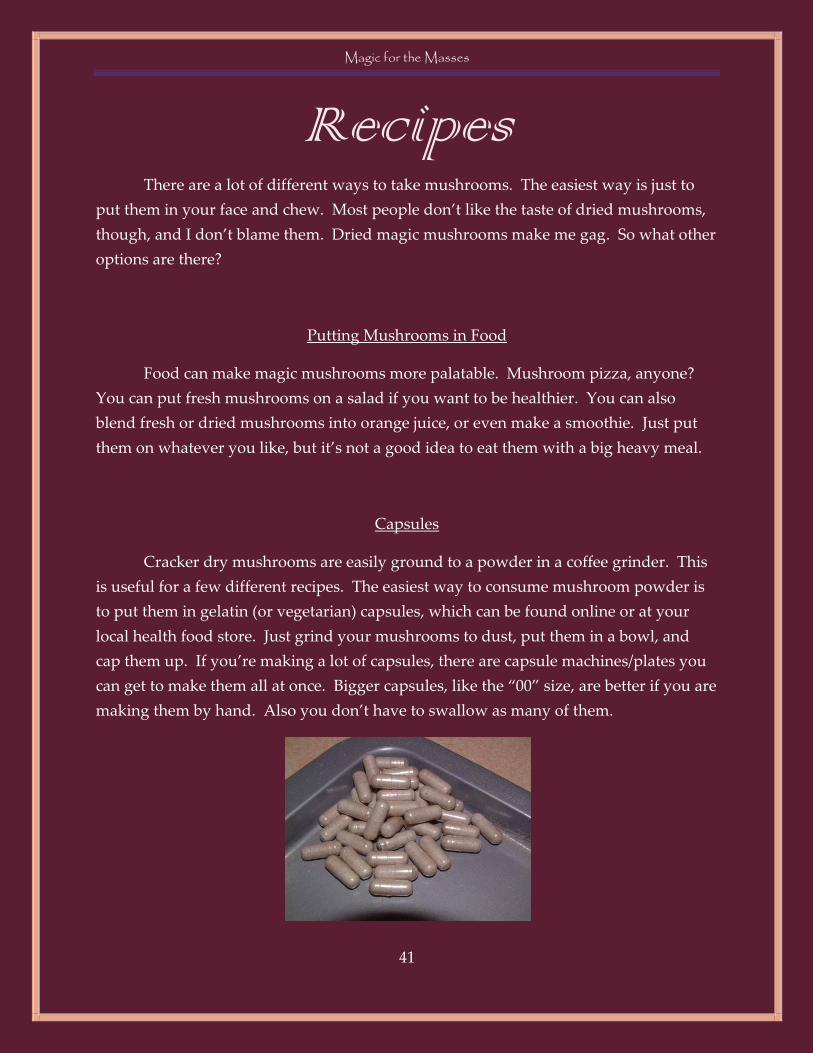
Capsules
Cracker dry mushrooms are easily ground to a powder in a coffee grinder. This
is useful for a few different recipes. The easiest way to consume mushroom powder is
to put them in gelatin (or vegetarian) capsules, which can be found online or at your
local health food store. Just grind your mushrooms to dust, put them in a bowl, and
cap them up. If you’re making a lot of capsules, there are capsule machines/plates you
can get to make them all at once. Bigger capsules, like the “00” size, are better if you are
making them by hand. Also you don’t have to swallow as many of them.
Magic for the Masses
42
Capsules are great because you will not taste mushroom at all, until you burp.
They’re also a bit easier on your stomach. Not only that, but they are easily concealed
and don’t look like magic mushrooms. They do still look like pills, but at least they
don’t look like pharmaceuticals. With a little forethought, they can be hidden in plain
sight.
The downside of capsules comes with the fact that the mushrooms are ground to
dust. This means that there is much more surface area and exposure to air. Even inside
the capsules, psilocybin degrades readily. That means that capsules are not good for
long-term storage. It’s probably best to eat them within a few days of making them. If
you really wanted to store mushroom powder in capsules long-term, you could
probably do so in an airtight container filled with carbon dioxide and a couple of silica
packets. You can make carbon dioxide with vinegar and baking soda. Carbon dioxide
is heavier than air, and can be carefully poured into the container with your capsules
just before sealing it.
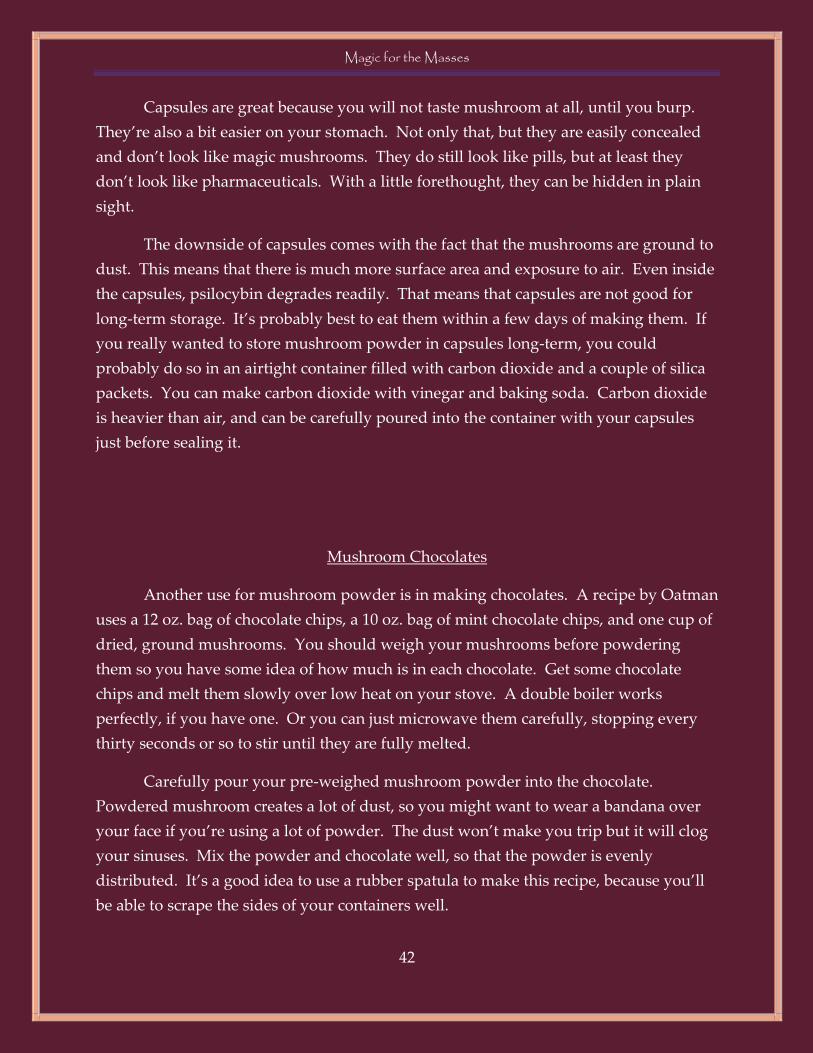
Mushroom Chocolates
Another use for mushroom powder is in making chocolates. A recipe by Oatman
uses a 12 oz. bag of chocolate chips, a 10 oz. bag of mint chocolate chips, and one cup of
dried, ground mushrooms. You should weigh your mushrooms before powdering
them so you have some idea of how much is in each chocolate. Get some chocolate
chips and melt them slowly over low heat on your stove. A double boiler works
perfectly, if you have one. Or you can just microwave them carefully, stopping every
thirty seconds or so to stir until they are fully melted.
Carefully pour your pre-weighed mushroom powder into the chocolate.
Powdered mushroom creates a lot of dust, so you might want to wear a bandana over
your face if you’re using a lot of powder. The dust won’t make you trip but it will clog
your sinuses. Mix the powder and chocolate well, so that the powder is evenly
distributed. It’s a good idea to use a rubber spatula to make this recipe, because you’ll
be able to scrape the sides of your containers well.

Magic for the Masses
43
Use the spatula to fill a chocolate mold that has been lightly greased with
cooking oil. You can use an ice cube tray as a mold. Don’t fill it up to the top, though,
or you’ll end up with massive hunks of chocolate. Fill the cells halfway instead. Then
put the trays in the fridge until the chocolate is solid again.
A good way to store these is to wrap them individually in tin foil and put them
in the fridge. Even though you’re using mushroom powder, the chocolate protects the
powder from light and air. So, chocolates should stay potent for a long time as long as
they stay somewhere cool.
Chocolates are also slightly more stealthy because they don’t look like
mushrooms. Law enforcement has known about mushroom chocolates for a long time,
though, so don’t expect ice cube tray chocolates wrapped in foil to go unnoticed if
they’re discovered. With some ingenuity, you can make chocolates that don’t look so
obvious.
Mushroom Tea
When you make mushroom tea, you’re performing a basic chemical procedure
known as an extraction. Submerging mushrooms into acidic hot water draws
psilocybin into the water, and then the mushrooms themselves can be discarded. This
is a good way to take psilocybin because it can make the trip come on faster and will
help reduce “body load” for some people, meaning that they will experience less nausea
and other discomfort.
Start by weighing your dose. Because the hot water doesn’t extract 100% of the
psilocybin from the mushrooms, you might choose to use a slightly larger dose. Then
chop the mushrooms by hand, as powder will be harder to strain out of the water.
Some people drink the mushroom sludge along with the tea. If you plan on doing that
you can powder the mushrooms.
Put the mushrooms in your tea cup and add just enough lemon juice that it
saturates them. Let that soak while you start heating up your water in a small pot on
the stove. You just want enough water to fill your cup. Once the water is simmering,
put the lemony mushrooms from the cup along with a tea bag into the pot and gently
Magic for the Masses
44
simmer for 10-15 minutes. You don’t need to boil them, just simmer. I like to use mint
tea.
After they are done simmering, strain the water through a fine mesh colander or
coffee filter and discard the mushroom sludge. Add some honey or sugar to taste and
drink it once it’s cool enough. I recommend eating something light beforehand to help
soak up the tea.
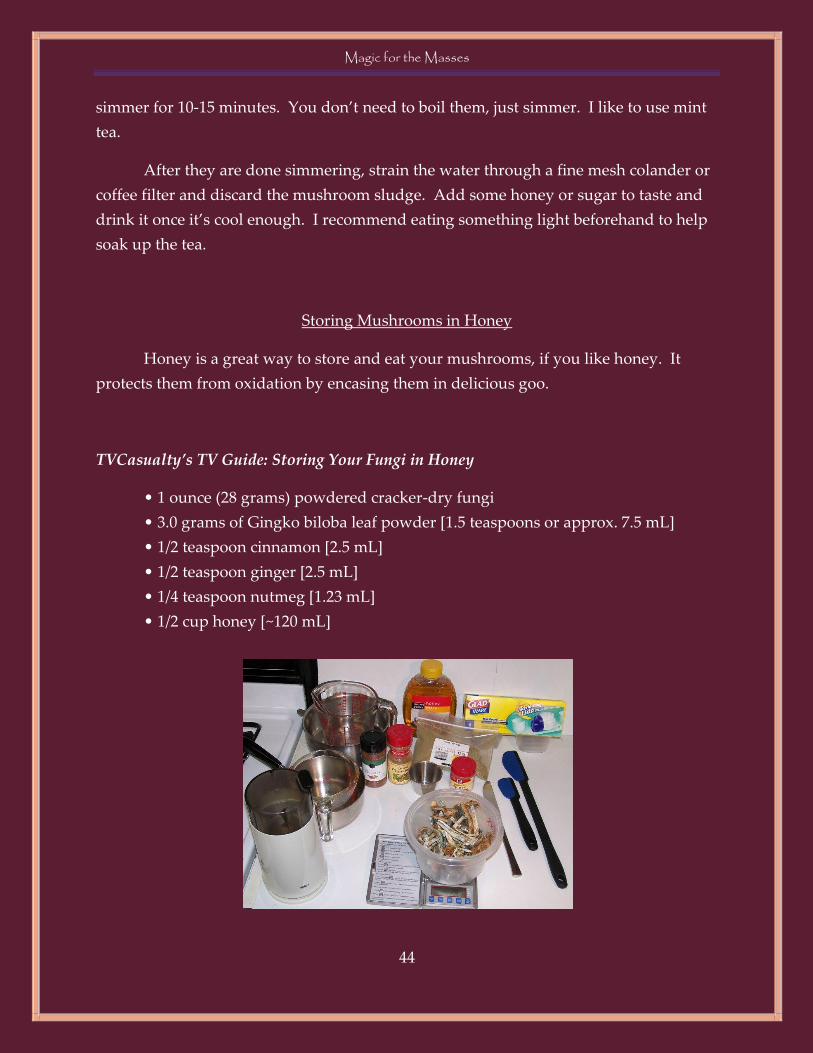
Storing Mushrooms in Honey
Honey is a great way to store and eat your mushrooms, if you like honey. It
protects them from oxidation by encasing them in delicious goo.
TVCasualty’s TV Guide: Storing Your Fungi in Honey
• 1 ounce (28 grams) powdered cracker-dry fungi
• 3.0 grams of Gingko biloba leaf powder [1.5 teaspoons or approx. 7.5 mL]
• 1/2 teaspoon cinnamon [2.5 mL]
• 1/2 teaspoon ginger [2.5 mL]
• 1/4 teaspoon nutmeg [1.23 mL]
• 1/2 cup honey [~120 mL]
Magic for the Masses
45
This recipe uses spices to improve flavor and reduce stomach upset. It also
includes Gingko Biloba, which increases oxygen flow to the brain and potentiates the
trip slightly. It’s also a good recipe to use if you want to take some on the road, because
it doesn’t look like mushrooms.
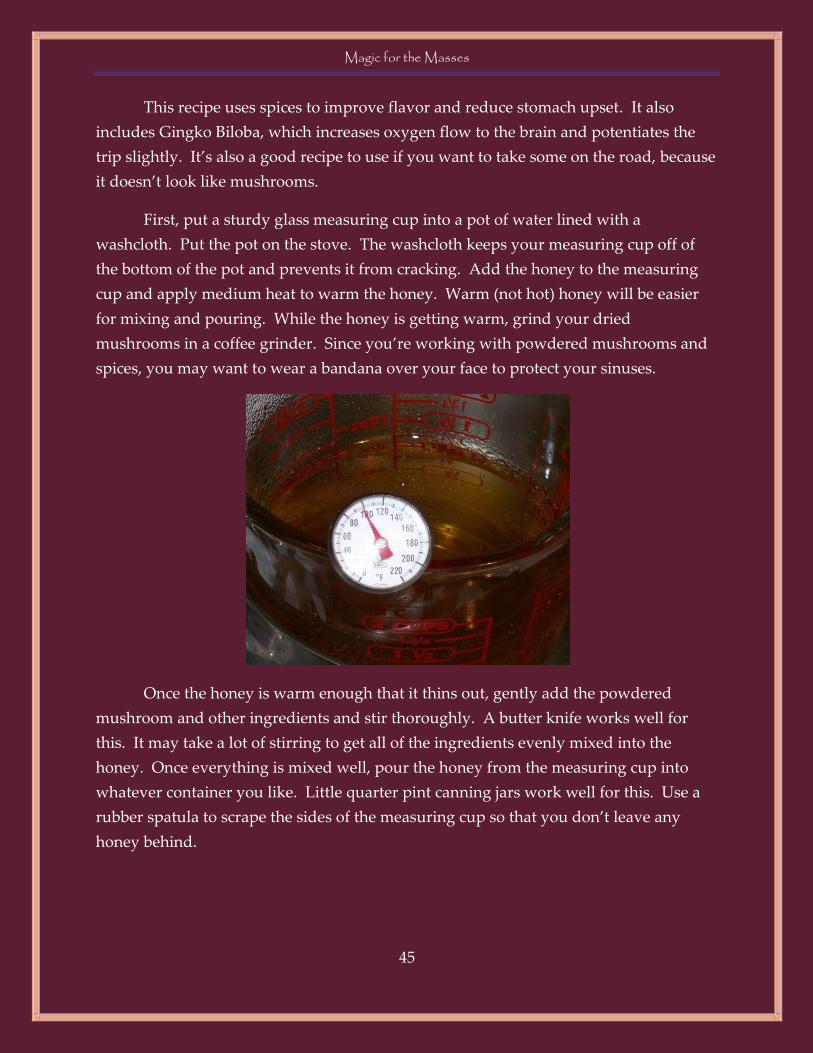
First, put a sturdy glass measuring cup into a pot of water lined with a
washcloth. Put the pot on the stove. The washcloth keeps your measuring cup off of
the bottom of the pot and prevents it from cracking. Add the honey to the measuring
cup and apply medium heat to warm the honey. Warm (not hot) honey will be easier
for mixing and pouring. While the honey is getting warm, grind your dried
mushrooms in a coffee grinder. Since you’re working with powdered mushrooms and
spices, you may want to wear a bandana over your face to protect your sinuses.
Once the honey is warm enough that it thins out, gently add the powdered
mushroom and other ingredients and stir thoroughly. A butter knife works well for
this. It may take a lot of stirring to get all of the ingredients evenly mixed into the
honey. Once everything is mixed well, pour the honey from the measuring cup into
whatever container you like. Little quarter pint canning jars work well for this. Use a
rubber spatula to scrape the sides of the measuring cup so that you don’t leave any
honey behind.
Magic for the Masses
46
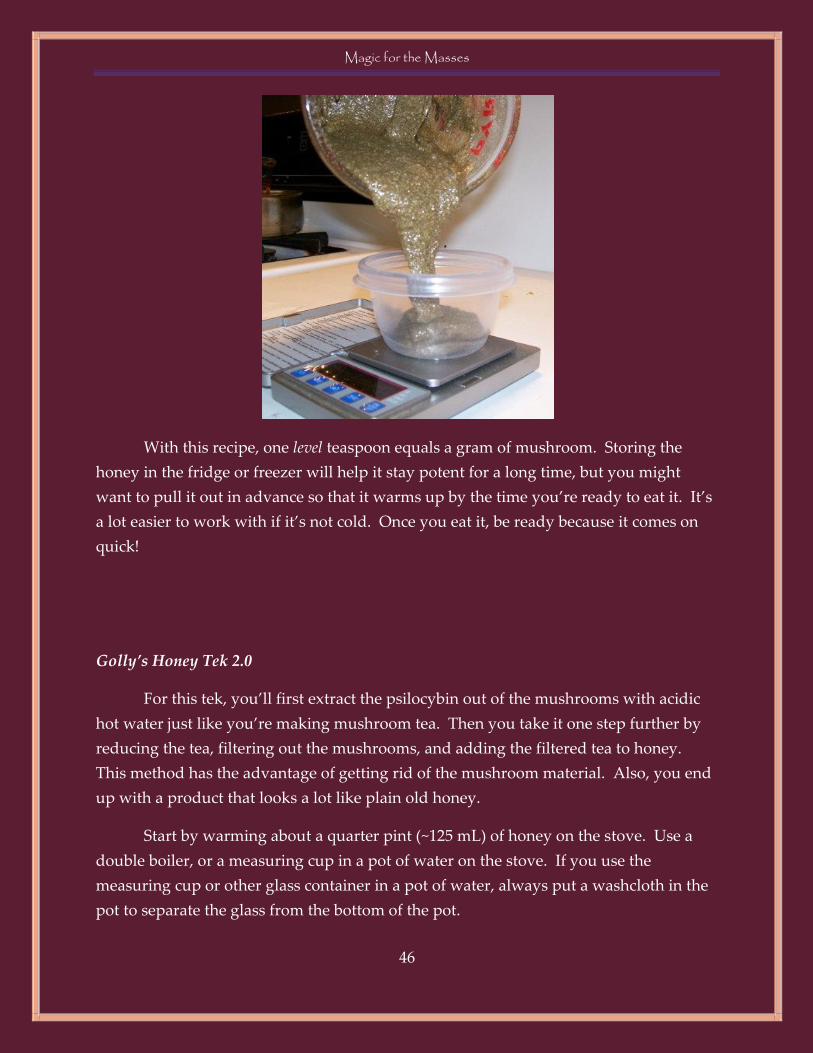
With this recipe, one level teaspoon equals a gram of mushroom. Storing the
honey in the fridge or freezer will help it stay potent for a long time, but you might
want to pull it out in advance so that it warms up by the time you’re ready to eat it. It’s
a lot easier to work with if it’s not cold. Once you eat it, be ready because it comes on
quick!
Golly’s Honey Tek 2.0
For this tek, you’ll first extract the psilocybin out of the mushrooms with acidic
hot water just like you’re making mushroom tea. Then you take it one step further by
reducing the tea, filtering out the mushrooms, and adding the filtered tea to honey.
This method has the advantage of getting rid of the mushroom material. Also, you end
up with a product that looks a lot like plain old honey.
Start by warming about a quarter pint (~125 mL) of honey on the stove. Use a
double boiler, or a measuring cup in a pot of water on the stove. If you use the
measuring cup or other glass container in a pot of water, always put a washcloth in the
pot to separate the glass from the bottom of the pot.
Magic for the Masses
47
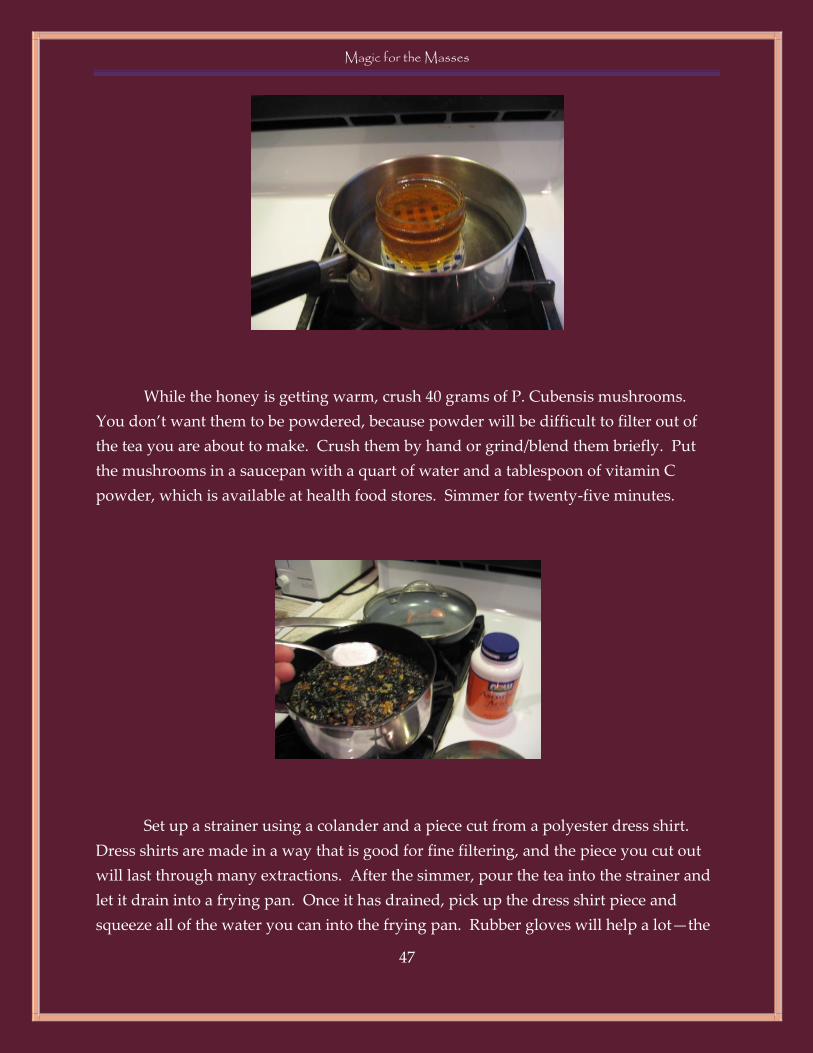
While the honey is getting warm, crush 40 grams of P. Cubensis mushrooms.
You don’t want them to be powdered, because powder will be difficult to filter out of
the tea you are about to make. Crush them by hand or grind/blend them briefly. Put
the mushrooms in a saucepan with a quart of water and a tablespoon of vitamin C
powder, which is available at health food stores. Simmer for twenty-five minutes.
Set up a strainer using a colander and a piece cut from a polyester dress shirt.
Dress shirts are made in a way that is good for fine filtering, and the piece you cut out
will last through many extractions. After the simmer, pour the tea into the strainer and
let it drain into a frying pan. Once it has drained, pick up the dress shirt piece and
squeeze all of the water you can into the frying pan. Rubber gloves will help a lot—the

Magic for the Masses
48
water will be hot! Then pour ½ cup of cold water into the strainer and squeeze it out
again.
Reduce the tea in the frying pan using medium to high heat and stirring
constantly. It will start to thicken. Reduce the heat as it thickens. Once it has thickened
to roughly the consistency of the warm honey, add about half of the honey to the frying
pan. Continue to stir for another minute or two until the honey is well-mixed.
Magic for the Masses
49
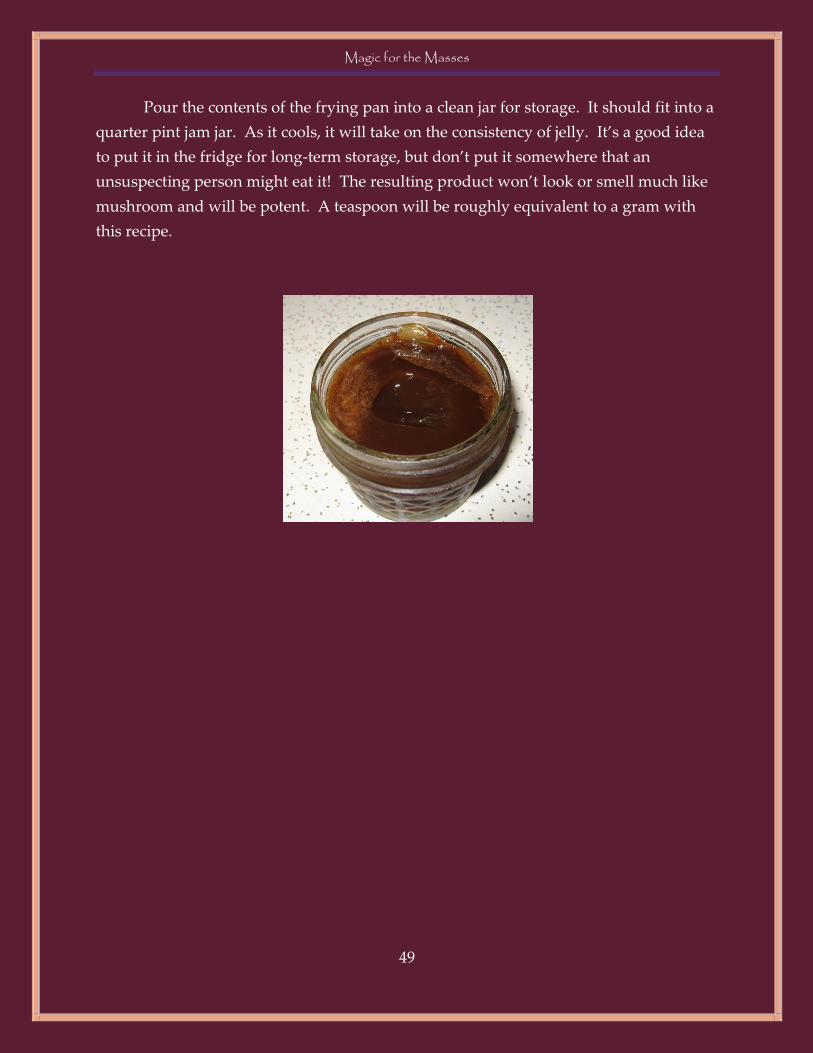
Pour the contents of the frying pan into a clean jar for storage. It should fit into a
quarter pint jam jar. As it cools, it will take on the consistency of jelly. It’s a good idea
to put it in the fridge for long-term storage, but don’t put it somewhere that an
unsuspecting person might eat it! The resulting product won’t look or smell much like
mushroom and will be potent. A teaspoon will be roughly equivalent to a gram with
this recipe.

Magic for the Masses
50
Glove Boxes
The PF-Tek can be done in “open air,” though you will probably want to do it in
a small closed room as described earlier. However, there are other times when you will
want to have more control over your environment for better protection from airborne
contaminants. For example, you probably don’t want to do your spore printing and
cloning in an open air environment (more on those procedures later).
The reason for having a small closed room is because you are trying to keep the
air as still as possible. That way, contaminants aren’t flying around so much and
landing on your work. Preventing air currents is easier in a small room than a large
one, but it’s even easier in a box. That’s where the “glove box” or “still air box” comes
in to play.
The glove box is literally a clear box with two holes just big enough for you to
put your hands into. You put your materials in to the box, close it, sterilize the air
inside it, and then do your work. You still want to sterilize your work space outside of
the glove box too. Use your ~10% bleach solution to sterilize the air inside the box.
Some people prefer to spray lysol instead of bleach, but for Dog’s sake don’t use Lysol
in a glove box if you plan on sterilizing your instruments with a flame. Lysol is
flammable and you’re just concentrating it by spraying it inside a box.
The simplest glove box is made of a clear plastic storage tub, much like the one
you used for your fruiting chamber. It will be upside down, with the lid on the bottom.
That way, you can put your syringes, jars, and cleaning supplies on the lid and close it
by putting the box itself upside down on the lid. Or if you like you can orient it so that
it sits on its side and then put the arm-holes in the bottom. This might work better if the
bottom is harder to see through, because then you will look through the side of the box
instead. It doesn’t really matter how you do it, so long as it works for you.
Magic for the Masses
51
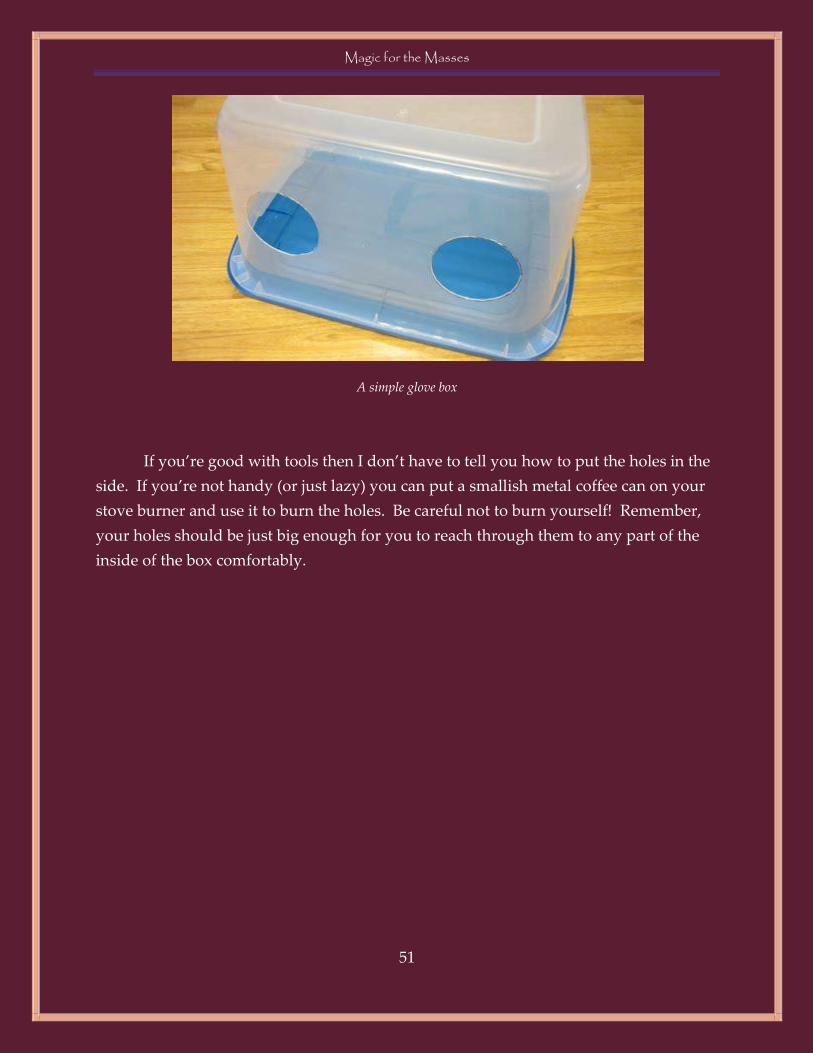
A simple glove box
If you’re good with tools then I don’t have to tell you how to put the holes in the
side. If you’re not handy (or just lazy) you can put a smallish metal coffee can on your
stove burner and use it to burn the holes. Be careful not to burn yourself! Remember,
your holes should be just big enough for you to reach through them to any part of the
inside of the box comfortably.

Magic for the Masses
52
Spore Prints
Spores are roughly analogous to seeds. They are the means by which fungi
reproduce. Thus, if you can harvest spores from your mushrooms, then you can be
completely self-sufficient and grow mushrooms indefinitely with no need to buy, beg,
or trade for spores.
It’s a very good idea to learn how to do this even if you are lazy. There’s no
guarantee that you will be able to buy spores legally in the future. Also, part of the fun
of growing mushrooms is trying different varieties. There are a lot of different varieties
of P. Cubensis, often named for the regions where they were originally collected.
Common varieties include Amazonian, Hawaiian, Golden Teacher, B+, and the highly
sought-after Penis Envy. Varieties are commonly known in the Online Mushroom
Community as “strains,” though that’s not an accurate term. The point is that if you
can create spore prints, you can trade with other mushroom enthusiasts and add
different varieties to your collection.
Spores form on the gills of P. Cubensis, on the underside of the caps. As each
individual mushroom matures, the cap will expand until the veil connecting it to the
stem tears away. The cap will continue to open until finally the edges turn upward. At
Magic for the Masses
53
this point, you will start to notice a purple coloration on the stem. That purple color is
caused by many thousands of microscopic spores that have been ejected from the gills
of the mushroom. If you allow the mushroom to continue maturing, the spores will
start to cover the mushrooms, the cakes, the perlite, and the walls of the fruiting
chamber. A dense flush of sporulating mushrooms can really make a mess.
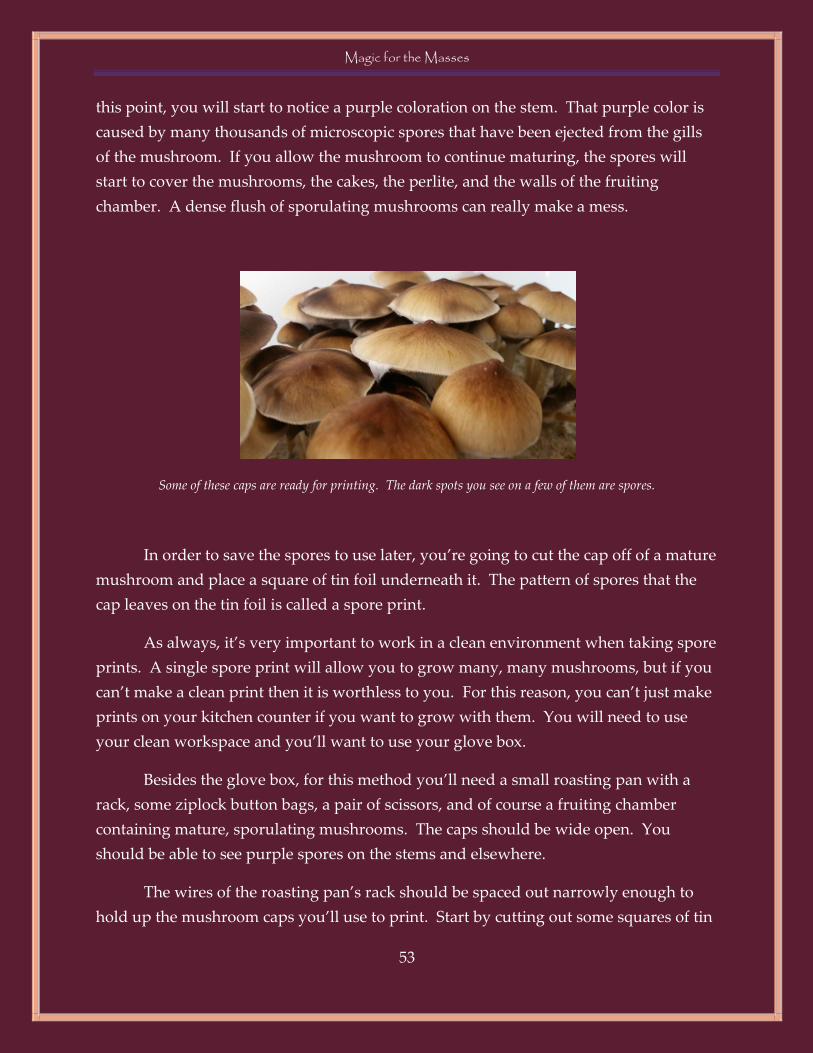
Some of these caps are ready for printing. The dark spots you see on a few of them are spores.
In order to save the spores to use later, you’re going to cut the cap off of a mature
mushroom and place a square of tin foil underneath it. The pattern of spores that the
cap leaves on the tin foil is called a spore print.
As always, it’s very important to work in a clean environment when taking spore
prints. A single spore print will allow you to grow many, many mushrooms, but if you
can’t make a clean print then it is worthless to you. For this reason, you can’t just make
prints on your kitchen counter if you want to grow with them. You will need to use
your clean workspace and you’ll want to use your glove box.
Besides the glove box, for this method you’ll need a small roasting pan with a
rack, some ziplock button bags, a pair of scissors, and of course a fruiting chamber
containing mature, sporulating mushrooms. The caps should be wide open. You
should be able to see purple spores on the stems and elsewhere.
The wires of the roasting pan’s rack should be spaced out narrowly enough to
hold up the mushroom caps you’ll use to print. Start by cutting out some squares of tin

Magic for the Masses
54
foil that are the right size to fit into your button bags. They should be a little bit smaller
than the opening of the bags so it is easy to slide them in. Arrange the squares side by
side on the bottom of the pan and place the rack over the tin foil. Then cover the pan
with a large piece of tin foil and bake the whole thing in the oven at 400 degrees for half
an hour to sterilize. Once it’s done baking, let it cool for several hours with the oven
door closed.
Roasting pan with rack and tin foil squares
When the pan is cool, set up your clean room. Remove anything that might
harbor contaminants like rugs, towels and other linens, hygiene products, etc. Take a
shower and dry off with a fresh towel or at least wash your hands and forearms
thoroughly and put on clean clothes. Put a bandana or dust mask over your face. Bring
in your glove box and use a ~10% bleach solution to wipe down all surfaces including
the surfaces of the glove box. Get the roasting pan out of the oven, still covered in tin
foil, and put it in your glove box. Close the glove box. Get your fruiting chamber
containing mature, sporulating mushrooms and bring it to your clean room. Get your
scissors and wipe them thoroughly with isopropyl alcohol.
Spray your bleach solution into the air and let it settle. Just be careful not to get
bleach in your fruiting chamber or on the foil squares in your roasting pan. The bleach
can cause mutations or worse. Also spray into the glove box and let it settle. Wipe your
Magic for the Masses
55
hands and forearms down with a paper towel soaked in isopropyl alcohol and wipe the
edges of the lid of your fruiting chamber too. Once all of the bleach has settled, reach
into the glove box and gently pull the tin foil off of the roasting pan, setting it aside so
that you can put it back on when you are ready.
Next, gently open your fruiting chamber. Wipe your scissors and your hands
very thoroughly with isopropyl alcohol again. Choose a mushroom cap and very
gently grasp the edges with your fingertips, then cut the stem just below the cap. Put
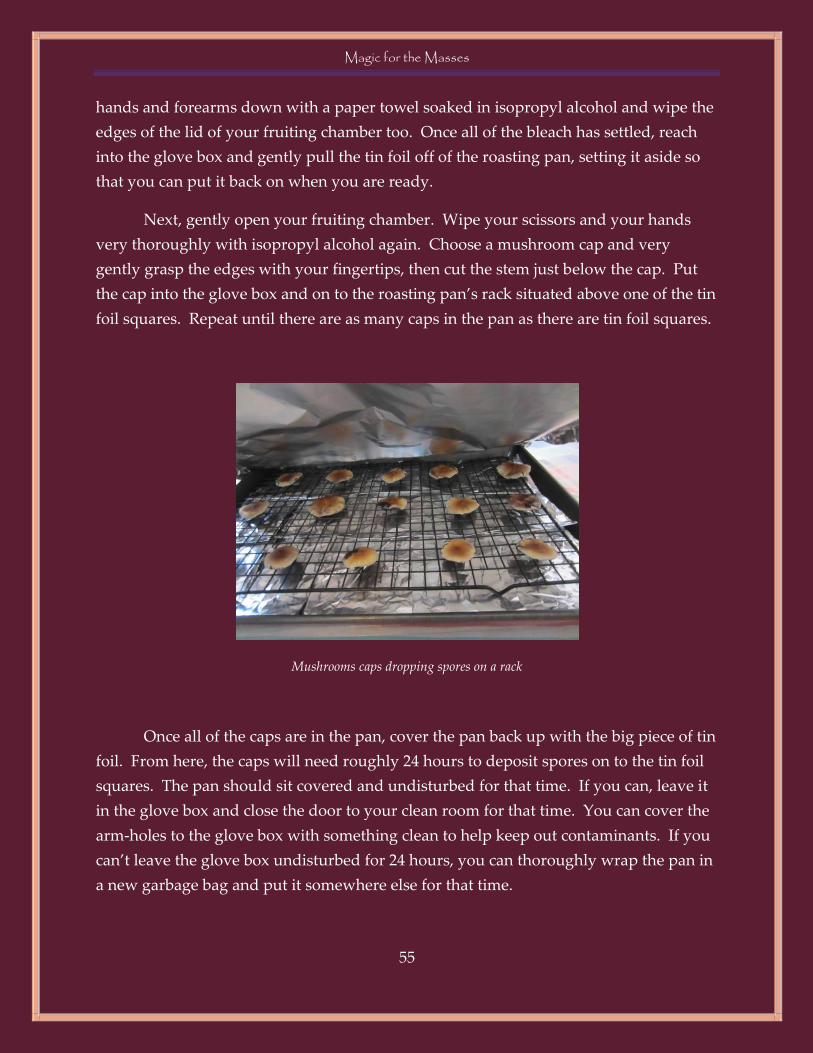
the cap into the glove box and on to the roasting pan’s rack situated above one of the tin
foil squares. Repeat until there are as many caps in the pan as there are tin foil squares.
Mushrooms caps dropping spores on a rack
Once all of the caps are in the pan, cover the pan back up with the big piece of tin
foil. From here, the caps will need roughly 24 hours to deposit spores on to the tin foil
squares. The pan should sit covered and undisturbed for that time. If you can, leave it
in the glove box and close the door to your clean room for that time. You can cover the
arm-holes to the glove box with something clean to help keep out contaminants. If you
can’t leave the glove box undisturbed for 24 hours, you can thoroughly wrap the pan in
a new garbage bag and put it somewhere else for that time.
Magic for the Masses
56
After the 24 hour period, set up your clean room again and do all of the cleaning,
wiping, and spraying you did before. This time, thoroughly wipe down a pair of
tweezers with isopropyl alcohol or even bake them in the oven to sterilize. Also, bring
your button bags into the clean room with you. Don’t forget to cover your mouth and
nose. Wipe your hands and forearms thoroughly with the alcohol.
Once you’re set up, pull the tin foil off of the pan in the glove box. You should
be able to see purple spores on the tin foil squares in the bottom of the pan. If there are
none or the squares are only very lightly covered, you can cover the pan back up and
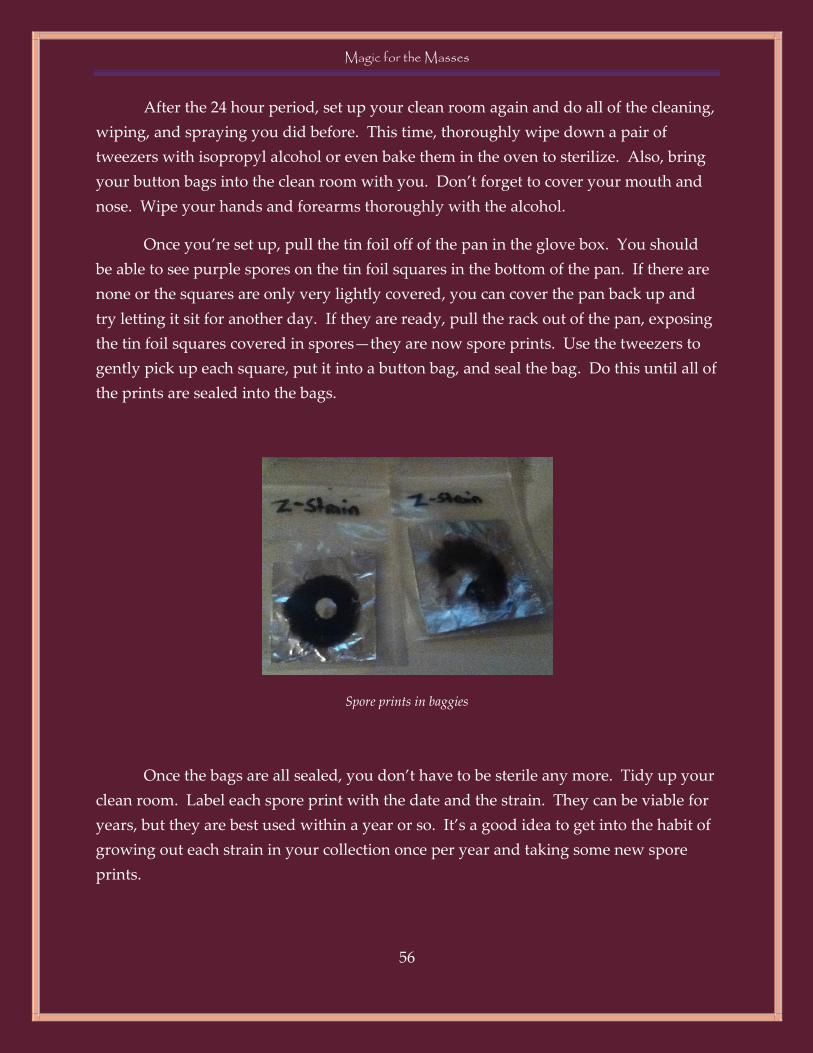
try letting it sit for another day. If they are ready, pull the rack out of the pan, exposing
the tin foil squares covered in spores—they are now spore prints. Use the tweezers to
gently pick up each square, put it into a button bag, and seal the bag. Do this until all of
the prints are sealed into the bags.
Spore prints in baggies
Once the bags are all sealed, you don’t have to be sterile any more. Tidy up your
clean room. Label each spore print with the date and the strain. They can be viable for
years, but they are best used within a year or so. It’s a good idea to get into the habit of
growing out each strain in your collection once per year and taking some new spore
prints.
Magic for the Masses
57
Spore Water
Making A Lid for Spore Water and Liquid Culture
Now that you have some viable spore prints, you need to be able to put them to
use. They aren’t going to do you any good sitting in the button bags. So, when you’re
ready to start a new grow using a spore print, you need to make some spore water.
With spore water you can make spore syringes, and with spore syringes you can
inoculate jars. With this final step, you will have closed the life cycle of the mushroom
and you’ll be a self-sufficient grower.
You will store the spore water in a mason jar with a specialized lid that will
allow you to insert the needle of a syringe but will also prevent airborne contamination
from getting in to the jar. To make the lid, you will need some silicone, two small
washers, and some tyvek. The silicone and washers can be found in the hardware
section of your local megamarket or in a hardware store. Tyvek is a papery material
that is useful as a filter: it allows air to get through while filtering out mold spores and
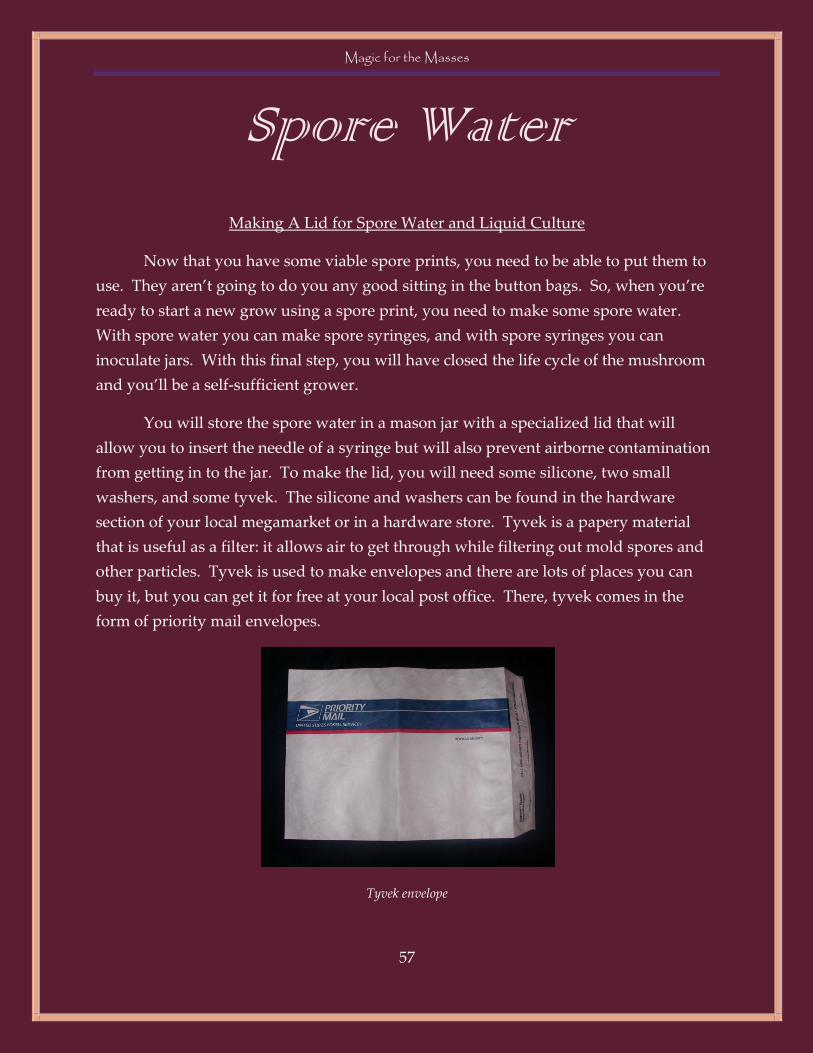
other particles. Tyvek is used to make envelopes and there are lots of places you can
buy it, but you can get it for free at your local post office. There, tyvek comes in the
form of priority mail envelopes.
Tyvek envelope
Magic for the Masses
58
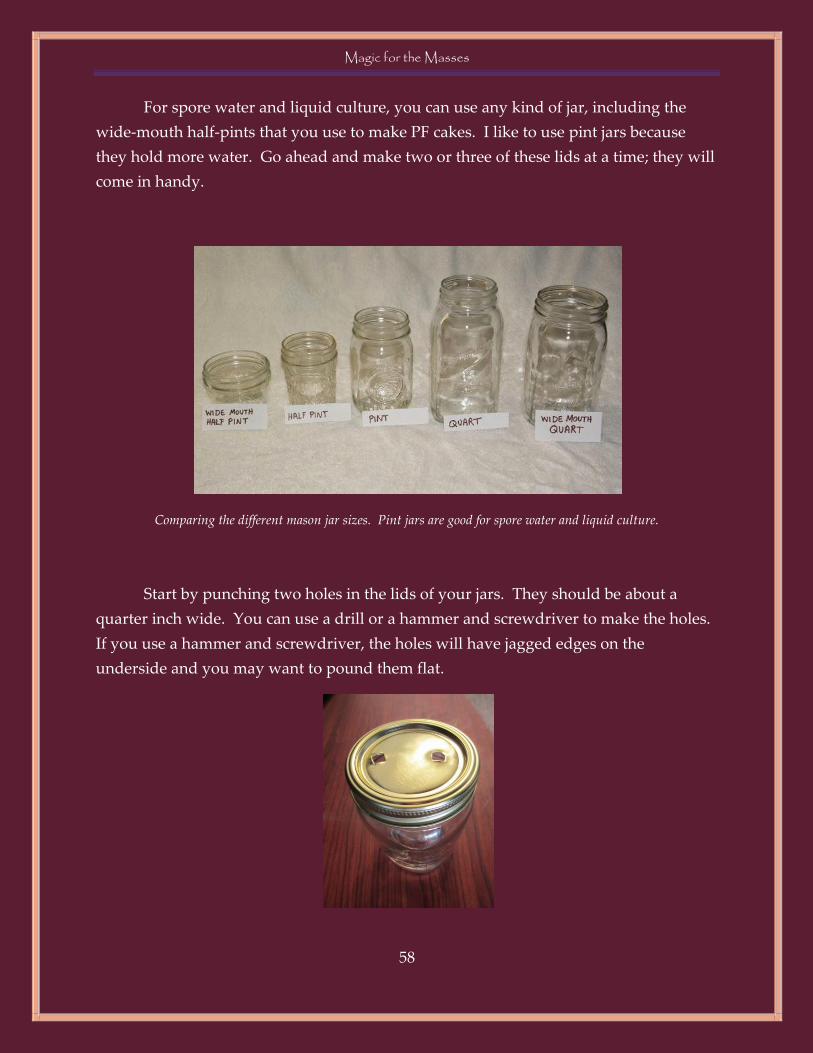
For spore water and liquid culture, you can use any kind of jar, including the
wide-mouth half-pints that you use to make PF cakes. I like to use pint jars because
they hold more water. Go ahead and make two or three of these lids at a time; they will
come in handy.
Comparing the different mason jar sizes. Pint jars are good for spore water and liquid culture.
Start by punching two holes in the lids of your jars. They should be about a
quarter inch wide. You can use a drill or a hammer and screwdriver to make the holes.
If you use a hammer and screwdriver, the holes will have jagged edges on the
underside and you may want to pound them flat.

Magic for the Masses
59
On the tyvek, trace some circles using one of the washers and cut them out.
These tyvek circles will be the filters.
Get some paper towel to help you keep from getting silicone everywhere. Put a
little silicone around the edge of one hole and put a washer over the hole, making sure
that the silicone makes a seal between the washer and the lid. Then do the same thing
for the other side of the same hole. You can let that set for a while to allow the silicone
to dry, or if you are careful you can keep going.
Put a little more silicone on each washer and then put a tyvek circle on each one,
making sure that they are fully sealed to the washer and also that the hole in the lid
remains open.
On the other hole in the lid, put a fat glob of silicone on each side. This will be
where you put the needle when you inject something into the jar or draw something out
of it. The silicone allows the needle through, but then closes up as the needle is pulled
out. A good glob of silicone will allow you to do this many, many times.
Magic for the Masses
60
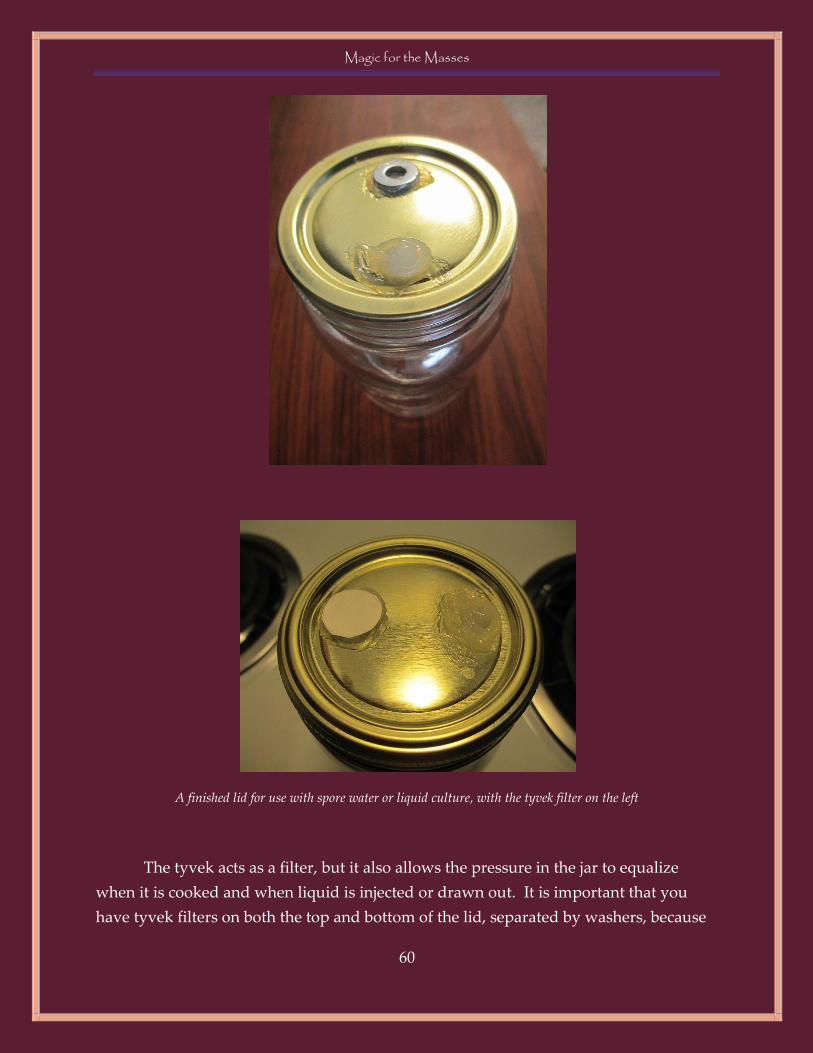
A finished lid for use with spore water or liquid culture, with the tyvek filter on the left
The tyvek acts as a filter, but it also allows the pressure in the jar to equalize
when it is cooked and when liquid is injected or drawn out. It is important that you
have tyvek filters on both the top and bottom of the lid, separated by washers, because

Magic for the Masses
61
it creates a space in between the two filters. That way, when the bottom filter gets wet,
the top one will stay dry. This helps prevent a wet filter from becoming a vector for
contamination.
Making Spore Water from a Spore Print
Now that you have both your lid and your spore print, you can make your own
spore water. You can make a whole lot of spore water from a single print, so from here
on out you will have no need to order spore syringes from a vendor. You will need a
clean spore print in a button bag, a spore water jar with the lid that you just made in the
last section, some filtered water, and a syringe. Hopefully you saved that first syringe
you bought from a vendor, because you can use it over and over again. If you didn’t
save it, you can buy new ones online. 10 cc syringes with 16 gauge needles work well.
Start by putting some water in your spore water jar. Filtered water is best. If
you’re using a pint jar, you can fill it pretty much as full as you want. I fill it about two
thirds full. If your spore print is very light or very small, you may want to use a little
less water. Then put the lid on and cover it tightly with tin foil.
If you have a used syringe, draw some water into the barrel and shoot it back out
once or twice before filling it all the way up with water and wrapping it in tin foil. If
you have a brand new syringe in a sterile wrapping, there is no need to do any of this,
because the syringe is already sterile and protected.
A new syringe in its sterile wrapping
Magic for the Masses
62
Put your wrapped syringe and spore water jar in the pressure cooker. If these
are the only two things in there, you can cook them at 15 p.s.i. for half an hour.
However, you may want to make some PF jars at the same time. If that’s the case, cook
everything for an hour. If this is your first time making prints or you’re not sure how
clean a print is, you may want to make just a couple of PF jars to test the print at first.
You will be able to save the spore water you make for later, once it’s tested.
Once the pressure cooker has completely cooled, set up your clean room in the
same way as you did when you did the PF Tek. It’s a good idea to use a glove box for
this procedure. When everything is ready and you are closed into the clean room, wipe
the outside of your spore print baggie with isopropyl alcohol, including inside the lip of
the ziplock (don’t open it to wipe it down, just wipe the part that’s on the outside of the
zipper).
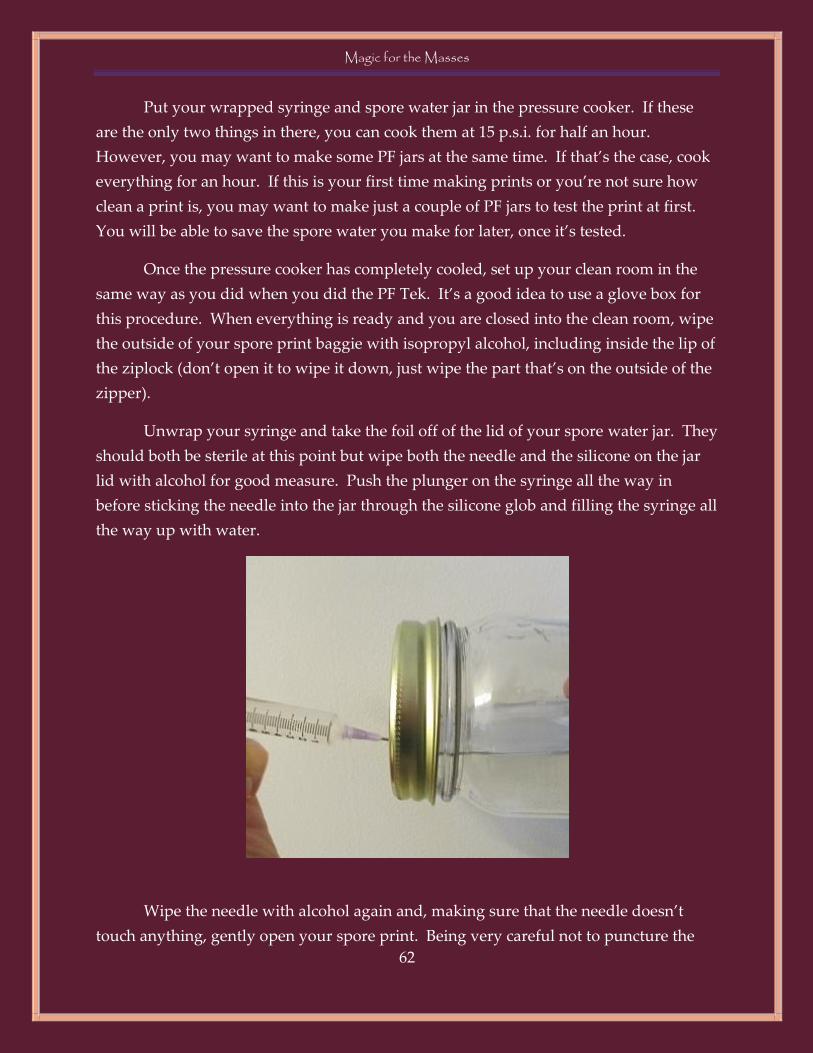
Unwrap your syringe and take the foil off of the lid of your spore water jar. They
should both be sterile at this point but wipe both the needle and the silicone on the jar
lid with alcohol for good measure. Push the plunger on the syringe all the way in
before sticking the needle into the jar through the silicone glob and filling the syringe all
the way up with water.
Wipe the needle with alcohol again and, making sure that the needle doesn’t
touch anything, gently open your spore print. Being very careful not to puncture the

Magic for the Masses
63
bag, put your needle down into the spore print bag and empty all of the water into it.
Gently rub the bag with the water in it to rub as many spores off of the print and into
the water as possible. The water will turn purple.
Once you are satisfied that as many spores as possible are in the water, draw as
much of the water as possible back into the syringe. The water should be nice and
purple. Wipe the needle and the silicone on your jar lid with alcohol, and then shoot
the contents of the syringe into the spore water jar.
The water will not be purple any more, but rest assured that there are more than
enough spores to make all of that water very viable. If you used a pint jar as your spore
water jar, you will easily have enough spore water for dozens of spore syringes from
just one print.
If you made some PF Jars at the same time, you can inoculate them now. Draw
some spore water back into your syringe and shoot the jars as before. Now that you
have so much spore water, you don’t have to worry about putting such a little amount
into each hole and can use a half cc for each one if you like. Just make sure to wipe your
needle with alcohol each time between jars and before you put it back into the silicone
of the spore water jar. Once you are done, you can cover the spore water jar with tin
foil, put it in a plastic bag or other clean container and store it in the fridge. It will stay
good for months. Make sure to wipe it down with alcohol (especially the lid) just before
you use it next time.
Magic for the Masses
64
Liquid Culture
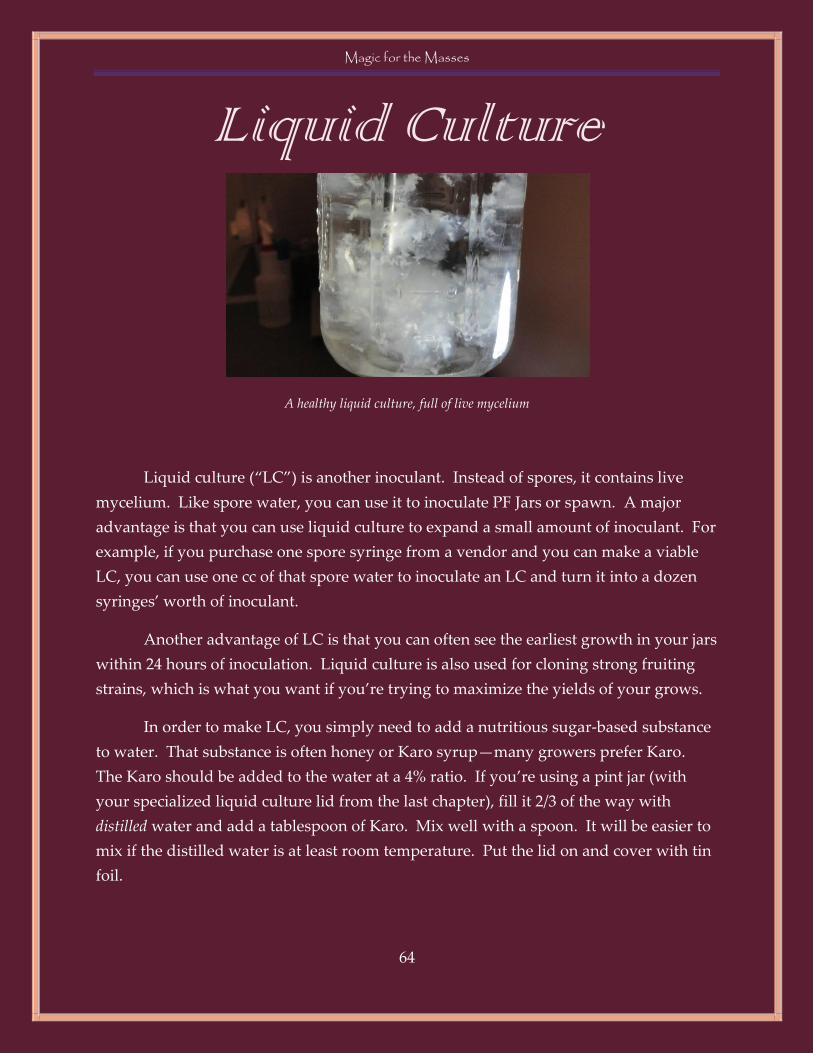
A healthy liquid culture, full of live mycelium
Liquid culture (“LC”) is another inoculant. Instead of spores, it contains live
mycelium. Like spore water, you can use it to inoculate PF Jars or spawn. A major
advantage is that you can use liquid culture to expand a small amount of inoculant. For
example, if you purchase one spore syringe from a vendor and you can make a viable
LC, you can use one cc of that spore water to inoculate an LC and turn it into a dozen
syringes’ worth of inoculant.
Another advantage of LC is that you can often see the earliest growth in your jars
within 24 hours of inoculation. Liquid culture is also used for cloning strong fruiting
strains, which is what you want if you’re trying to maximize the yields of your grows.
In order to make LC, you simply need to add a nutritious sugar-based substance
to water. That substance is often honey or Karo syrup—many growers prefer Karo.
The Karo should be added to the water at a 4% ratio. If you’re using a pint jar (with
your specialized liquid culture lid from the last chapter), fill it 2/3 of the way with
distilled water and add a tablespoon of Karo. Mix well with a spoon. It will be easier to
mix if the distilled water is at least room temperature. Put the lid on and cover with tin
foil.
Magic for the Masses
65
You don’t want to cook LC as hard as you cook PF jars. 20 minutes at 15 p.s.i. is
plenty. Some growers use lower pressure. For example, Hippie3 cooked his liquid
culture at only 5 p.s.i. for 20-25 minutes. The reason for the lower cook time and lower
pressure is that you don’t want the sugars to carmelize, because it inhibits growth.
Carmelized liquid culture will appear brown or yellow after being cooked.
Once your liquid is cooked and cooled, you can inoculate it in your clean room
with spores, mushroom tissue, or another liquid culture. Incubate it at the same
temperature as PF jars, around 80 degrees Fahrenheit. You will start seeing little white
globs of mycelium that will get bigger until they fill the jar. Shake your LC once or
twice during incubation to break up the globs and encourage faster growth. Once there
is enough mycelium in the water that you are sure to suck a good amount into a
syringe, your LC is ready. Prepare whatever project you want and use it up. Shake the
jar well just before drawing the LC into a syringe.
You should only see fluffy white mycelium in your LC. Anything else is likely a
contaminant. Look out for large amounts of sediment or little dark specks. It’s a good
idea to test a new LC on a couple of jars before using it for any large project, especially
if you are new to cultivation. You can also post pictures anonymously on a magic
mushroom forum to ask experienced growers whether your LC looks good.
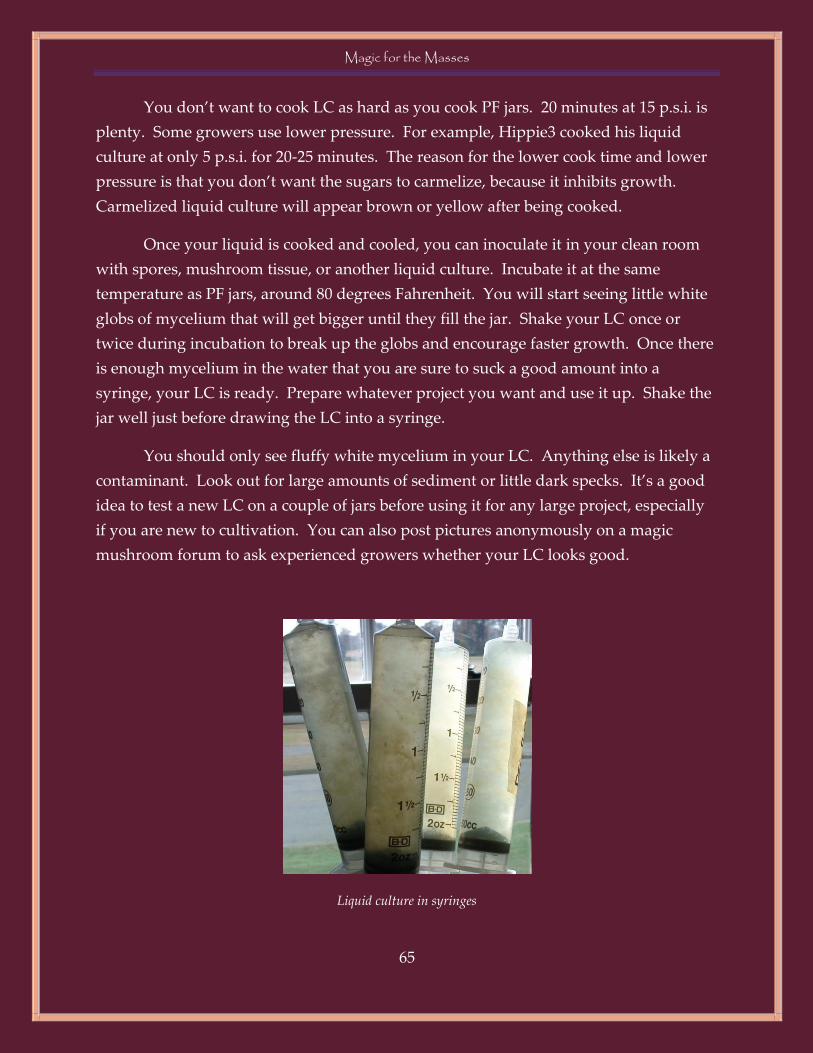
Liquid culture in syringes

Magic for the Masses
66
A full jar of mycelium will stay good for a few weeks in the refrigerator. You can
also stall the growth in the fridge mid-incubation if you have to delay.
Magic for the Masses
67
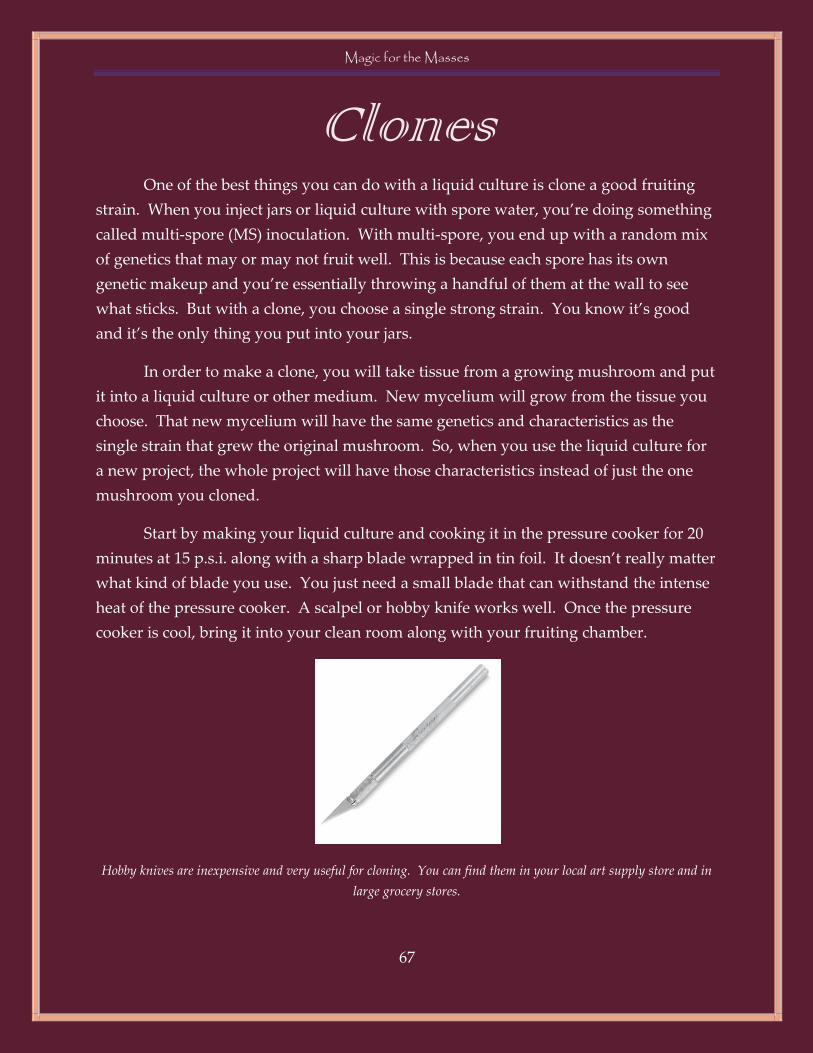
Clones One of the best things you can do with a liquid culture is clone a good fruiting
strain. When you inject jars or liquid culture with spore water, you’re doing something
called multi-spore (MS) inoculation. With multi-spore, you end up with a random mix
of genetics that may or may not fruit well. This is because each spore has its own
genetic makeup and you’re essentially throwing a handful of them at the wall to see
what sticks. But with a clone, you choose a single strong strain. You know it’s good
and it’s the only thing you put into your jars.
In order to make a clone, you will take tissue from a growing mushroom and put
it into a liquid culture or other medium. New mycelium will grow from the tissue you
choose. That new mycelium will have the same genetics and characteristics as the
single strain that grew the original mushroom. So, when you use the liquid culture for
a new project, the whole project will have those characteristics instead of just the one
mushroom you cloned.
Start by making your liquid culture and cooking it in the pressure cooker for 20
minutes at 15 p.s.i. along with a sharp blade wrapped in tin foil. It doesn’t really matter
what kind of blade you use. You just need a small blade that can withstand the intense
heat of the pressure cooker. A scalpel or hobby knife works well. Once the pressure
cooker is cool, bring it into your clean room along with your fruiting chamber.
Hobby knives are inexpensive and very useful for cloning. You can find them in your local art supply store and in
large grocery stores.
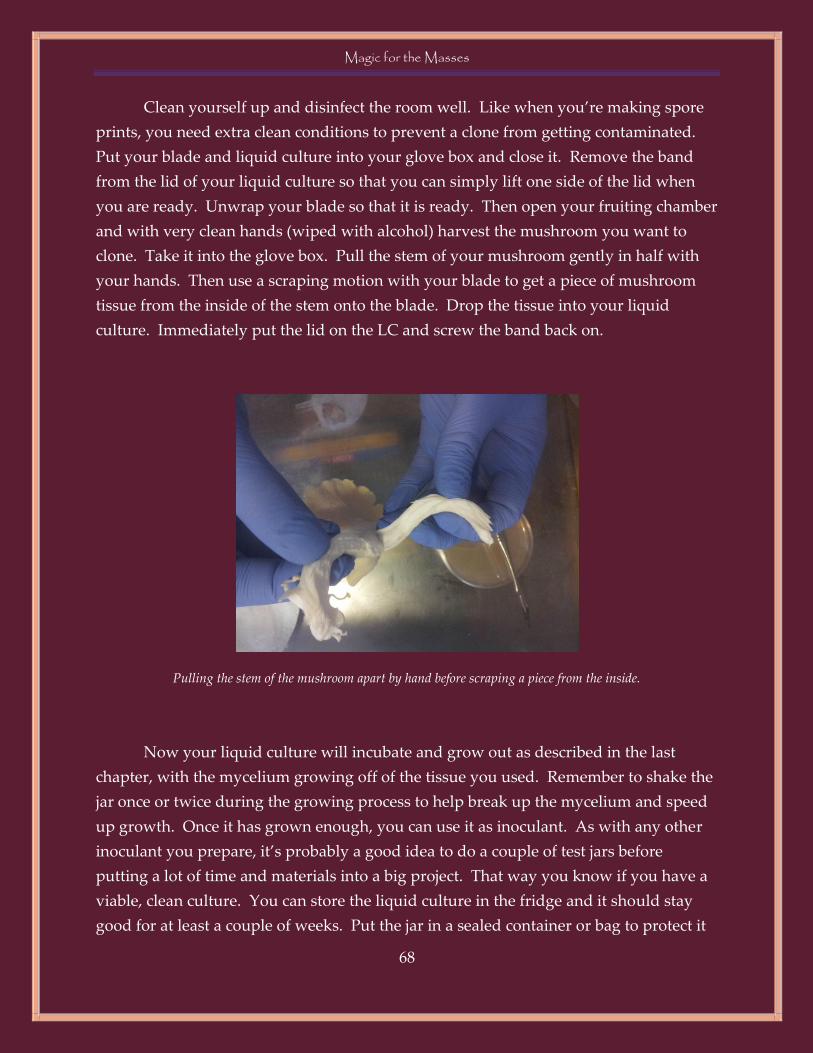
Magic for the Masses
68
Clean yourself up and disinfect the room well. Like when you’re making spore
prints, you need extra clean conditions to prevent a clone from getting contaminated.
Put your blade and liquid culture into your glove box and close it. Remove the band
from the lid of your liquid culture so that you can simply lift one side of the lid when
you are ready. Unwrap your blade so that it is ready. Then open your fruiting chamber
and with very clean hands (wiped with alcohol) harvest the mushroom you want to
clone. Take it into the glove box. Pull the stem of your mushroom gently in half with
your hands. Then use a scraping motion with your blade to get a piece of mushroom
tissue from the inside of the stem onto the blade. Drop the tissue into your liquid
culture. Immediately put the lid on the LC and screw the band back on.
Pulling the stem of the mushroom apart by hand before scraping a piece from the inside.
Now your liquid culture will incubate and grow out as described in the last
chapter, with the mycelium growing off of the tissue you used. Remember to shake the
jar once or twice during the growing process to help break up the mycelium and speed
up growth. Once it has grown enough, you can use it as inoculant. As with any other
inoculant you prepare, it’s probably a good idea to do a couple of test jars before
putting a lot of time and materials into a big project. That way you know if you have a
viable, clean culture. You can store the liquid culture in the fridge and it should stay
good for at least a couple of weeks. Put the jar in a sealed container or bag to protect it

Magic for the Masses
69
from the environment in your fridge. Refrigerators are relatively dirty and you don’t
want to cover the outside of your liquid culture with contaminants!
Here are some considerations from veteran grower Reverend Trips for picking a
mushroom to clone:
1. I like cloning from a young fruit from the first flush. I like the
first flush because the younger the mycelium is, the more
vigorous it is, and it is also less likely to harbor any
contamination. It is hard not to look at a massive beautiful
fruit from a third or fourth flush and want to clone it, but in
my experience you won't see that trait again until that clone is
grown out to the third or fourth flush again. I'm not sure why
fruits from the later flushes get so big, but I always thought it
was because the mycelium is weaker and damaged, and
produces less fruits, so the fruits that do develop, can pig out
on the remaining nutrients and moisture. Not sure on that, but
it makes sense to me.
2. I look at the individual fruit, without any consideration to the
surrounding fruits. I personally have seen no advantage to
select a fruit that is in a cluster, because some of the best
clusters I've held in my hands came from clones of a stand-
alone fruit.
3. I like large, strong, and healthy looking fruits, and is why the
one on the top left was chosen [see the picture below]. It was
given a squeeze test first to see if it was solid. If it felt like it
had a hollow stem, it would have been ruled it out. The one on
the bottom right was chosen, because you can just tell it is
going to be a fatty.

Magic for the Masses
70
Of these, Reverend Trips picked the mushroom at the top left to clone
Magic for the Masses
71
The Beginning Your key ability as a cultivator will often be patience. Sometimes things take
longer than you expect. Other times things don’t work out right away and you end up
with contaminated projects. Just hang in there, keep trying, and keep learning--you will
succeed.
Follow the directions in this guide and you will be a completely self-sufficient
cultivator in no time. Keep your grows to yourself to keep yourself safe. Word spreads
fast, and even your friends might not be good at keeping your secrets. Self-sufficiency
and discretion don’t necessarily mean isolation, though. There can still be some
measure of anonymity on the internet. The online mushroom community is a unique
collection of characters, and many of them are very knowledgeable. There is much
more to learn about topics like agar work and powerful exotic species of mushroom.
Look around and find a site that suits you. Just be careful not to reveal any
identifying information about yourself or anyone else. It’s a good idea to use a virtual
private network (VPN) and learn a few other things about being safe on the internet.
For instance, if you post grow pictures, make sure there are no clues about who you are,
like pictures of your fingertips (prints can be “lifted” from pictures). If you take
pictures with your phone, remember that they can contain metadata like your location.
Make sure you don’t post any of them online unless that metadata has been scrubbed.
Just hang out for a while and participate and you will learn a lot. You might
even make a few friends, though you may never see them in person or even learn their
names.