limesurvey - university of south carolina aikenie.usca.edu/lime/handout.pdf · limesurvey ....
TRANSCRIPT

LimeSurvey Introduction Class
Basic survey elements
A survey has three integral elements, each of which must exist:
• A survey name • At least one group • At least one question
Survey name
The survey name provides the unique title to a survey. Within the same page, settings such as the welcome message on the opening screen, the description of the survey, and contact information for the survey administrator.
• Please note: The participant will see the survey title, welcome message and the description of the survey.
Question Groups A survey requires each question to be a member of a group (and only that group). Depending on the number of questions in the survey, Groups can be used to define logical sections, common subject themes, or possibly pages on the screen.
• A question group has a title and an optional description. You must have at least one group in each survey, even if you do not wish to divide the survey into multiple groups.
Questions
Questions are the core of your survey. There is no real limit to the number of questions you can have in your survey or in a group. Questions include the actual question text as well as settings that determine what form of answer you will accept. You can also specify a short 'help' explanation for each question and determine whether the question is mandatory (that is, must be answered) or optional.

Basics of navigating the survey administrative interface The LimeSurvey tool presents horizontal tool bars to the survey creator in their web browser. These toolbars are the header of a window allowing interaction. There is a tool bar for the survey software known as the Administrative Tool Bar, the Group tool bar, and the Question tool bar. Each tool bar controls its own functions. You will not use the question tool bar to make changes to the groups.
Administrative Tool Bar
The top toolbar is usually the Administrative Tool Bar providing top level, global actions. One of the key items there is the drop down list of surveys along with a Create New (Survey) button; if available and enabled for your login account. Both are on the right side of the toolbar.
Hint: Want to know more about a particular icon button in a tool bar? Hover over the icon to see its name or click on the Help button in the Administrative Tool Bar to see a description of icons in the currently active toolbar.
If the Administrative Tool Bar does not appear to be on top, click the home button to get back to it. By clicking the Create New (Survey) button or selecting an existing survey, you minimize the Administrative window and open a new tool bar below to manage the Survey.

Survey Tool Bar
Similar to before, one can click on the drop down list of question Groups or on the Create New (Group) button on the Survey toolbar. Either selection will bring up the question Group toolbar below the Survey toolbar.
Group Tool Bar
In the Question Group, you can click on the drop down list of Questions or click the Create New (Question) button to add a fourth toolbar to now edit a Question.

Common Buttons
In these nested toolbars are some common, navigational buttons. There is an Edit button to edit the object you selected. By default, you will be put in the editor if you create the object. There is a Delete button to delete the object. For Groups and Questions, there is a Reorder button to change the order the object appears in during the survey execution. Finally, there is an Export button to export a survey, question group or question that you can import back into another survey. Note that the Create button also allows you to import a previously exported object.
Finally, there are two to three small buttons to the far right to minimize, maximize, and close the window of a toolbar. The maximize button will take you back to the summary window of the currently selected object. The window of the current toolbar is automatically minimized when you select a lower level object to edit. Only the current toolbar and its window can be closed. You can open a previous toolbar and window by clicking on its maximize button. And you can jump around by selecting or creating a new object in another toolbar without having to close the currently open window first.

HTML Editor The HTML editor appears automatically for creating surveys, groups and questions. Which means you can type in the editor without seeing HTML code. Therefore, for many tasks completed in LimeSurvey, you will not be aware of or vary from what you see on the screen.
If you wish to use all of the features available that are not seen on the initial screen, you can select the lime icon on the far left of the menu bar (see below.)
However, when entering answer options and/or subquestion options, using the (popup) HTML Editor is necessary IF you wish to make modifications to your text, such as bolded. As seen below, the HTML Editor box will appear after selecting the pencil (edit) icon seen next to each answer option or subquestion. After you have entered your text as you want it to appear, click the save icon (picture of a disk). You will then be prompted with a message asking if you want to navigate away from this page. Select ok. HTML code will now be visible in your answer option text box after saving. Please note the participant will not see the coding.

Creating a New Survey – Overview To create a new survey, click on the Add button on the right side of the administration button bar and a "Create New Survey" screen will appear. You can edit most of these settings later again by click the 'Edit survey settings' icon in the survey toolbar. 1st Step - Creation All survey settings are organized in tabs. The following is a description of each tab and field.
General Tab
1. Base language: We will only work with English at this time. 2. Title: This is the brief descriptive name of the survey. This title will be displayed on
every page of the public survey. 3. Description: This allows you to enter a description of the survey. (i.e.: "A survey to find
out the popularity of chocolate ice cream"). 4. Welcome: This allows you to enter a message that will display when a participant first
logs into your survey. (i.e.: "Thank you for taking the time to participate in this survey 5. End Message: This allows you to enter a message that will display when a participant
completes your survey. (i.e.: "Thank you for completing our survey. We will publish results soon.").
6. Administrator: This is the name of the contact person who administers the survey. It will be included in emails sent out inviting participants to respond.
7. Admin email: This is the email address of the administrator (as above) and is used as the 'reply to:' address on any emails sentBounce email: This is the email address where a delivery error notification email should be sent.
8. Fax to: We do not use this feature at this time.
(You can incorporate HTML elements such as images in this section using the editor—AFTER The survey has been saved.)

Presentation & Navigation Tab
1. Format: Choose from "One at a time", "Group at a time" or "All in one". a. Question by Question: Public survey will display one question per page. b. Group by Group: Public survey will display all questions in a group per page.
Group at a time surveys still have a separate "welcome" page and "submit" page, like "One at a time" surveys.
c. All in one: Public survey will display all questions in one single page. 2. Date format: This format is used when survey participants answer a date question.
Publication & Access control Tab
1. Set token length to: The default setting of 15 digits. (max. value- 99, minimum-5) 2. Start date: Set this to some date if you want your survey to start on a certain date. The
survey will start on midnight of that day and only then will people be able to answer to it. To disable this just clear the date from the input field.
3. Expiry date: Set this to some date if you want your survey to expire on a special date. This is the last date on which the public survey script will let people participate. (Example: If you set it for the 31st of December, then people will no longer be able to use the survey script on the 1st of January). To disable this just clear the date from the input field.
Notification & Data Management Tab
1. Anonymous answers?: This allows you to determine whether responses to your survey are matched up with information from your surveys tokens table, or kept 'anonymous'. The default is yes. If you choose "No" for anonymous, you must also have a tokens table for your survey when you activate it.
2. Date stamp?: This field allows you to determine whether the survey will datestamp all responses. If you choose "Yes", then when a response is submitted, a field will be included in that response indicating the time and date that the response was made.

Creating a New Group
Before you can add questions to your survey you must create a group. Create a new group by clicking on the Add icon in the Survey Button Bar. Alternatively you can import a previously exported group. Groups can also include a "description".
Change Group Order
Reorder groups by clicking on the Change group order icon in the survey toolbar.
Adding a Question Introduction Once you have created your groups, you can start adding questions within each group. Create a new question by clicking on the add icon on the right hand side of the "Group" menu bar. Field descriptions
• Question code: This is a code that will be used when exporting the survey results. Participants will not see this code and this code is not used for any assessment/analysis purposes. You can simply make the first question as code: 1 and the second question as code: 2, etc.
• Question: This is the actual question being asked. There is no real limit to the length of the question here, however if you want to explain the question, leave that for the "Help" field.
• Help: This is an optional field. It is useful if a question needs some explanation, or you want to explain how it should be answered. When you put text in this field, a "Question Mark" icon appears on the survey entry screens with the help text right beside.
• Question type: This determines the type of response the survey allows. View the Question types section for a description of the various options available.
• Label set: For some question types you can choose a set of labels. Only label sets are shown that at least contain labels in the base language of the survey.
• Other?: Depending upon your chosen 'question type' this option may appear. It allows you to specify that an "other" option be presented in some of the list question types.
• Mandatory?: For all question types, except the text ones, this setting allows you to require users to answer the question, before they can move on to the next question. For ranking question this means all items have to be ranked.

QUESTION TYPES • Arrays
o Array o Array (10 point choice) o Array (5 point choice) o Array (Increase/Same/Decrease) o Array (Numbers) o Array (Text) o Array (Yes/No/Uncertain) o Array dual scale o Array by column o Boilerplate question
• Date • Gender • Huge free text • List (dropdown) • List (radio) • List with comment • Long free text • Multiple numerical input • Multiple options • Multiple options with comments • Multiple short text • Numerical input • Ranking • Short free text • Yes/No

Text questions LimeSurvey provides a number of possible variations of the standard text field. All of these variations can be defined by selecting/creating options in the “Advanced Settings” of the question. Questions can permit you to restrict the number of characters as well as the size of the field. Furthermore text input can be validated by using regular expressions. S - Short free text
The entered text can be up to 64KB.
T - Long free text
.
Q - Multiple short text This question type is a variation on the "Short Text" question type which allows more than one text entry per question. The user first defines the question and can then add additional text boxes by adding 'Answers'. Each answer becomes the label of the new text box.

Date This question type can be used to ask for a certain date which can be entered using the javascript calendar or by using the form. Keep in mind that a date has to be in the format YYYY-MM-DD e.g. 2009-12-31.
When setting the question attribute dropdown_dates to "1" you can use three dropdown boxes to enter a date. Since version 1.80 you can also specify a min. and max. value for dropdown dates.
G‐Gender

N‐Numericalinput Limit enter to number and dot.
Single choice questions
Single choice questions are those which provide only one possible entry type. A question like 'What is your name?' is an example and the most typical entry option is a text field. Lists The list type of question allows to present single questions using the same answers, but each question is displayed individually (also in terms of design!). If one wants to customize the type of answers and use custom Label sets the options are infinite. If you need an additional Label set created, please make your request to Ginger Beady .
"!" - List dropdown

"5" - 5 Point choice
L - List radio
O - List with comment

Multiple options: Multiple options questions simply allow the participant to choose more than one option.
Ranking: Allows you to present your participants with a list of possible answers/options, which they may then rank in order of preference. E.g.: Please rank the following movies in order of your preference:
Adding Answers and Sub-questions General Various question types require you to add a list of answer options and/or subquestions. To add answers to one of these question types click on the "Add/Edit Answers for this Question" icon in question button bar. When adding an answer you will be asked for an "Answer Code", an "Answer" and whether that answer is the "Default".
1) Answer code: This is the data/value that will be exported to your spreadsheet when compiling results. When you export your data, you will select either export answers or answers codes – if you select answer codes, this what you will export. Or you can export the actual answer. (i.e., code of 5 or answer of Strongly Agree)
2) Assessment value: This field will only show if the assessments mode is activated in the survey settings. It can be set to a positive or negative integer value. For more information please check out the Assessments page. This is NOT exported.
3) Answer: The answer that will be displayed. (and can be exported or codes) a. You can adjust the layout as well as include pictures or other media elements in your individual
answers. This is possible by clicking on the pencil icon at the end of the answer text-box and using the WYSIWYG editor to create edit or design your answer layout as well as upload images and media.
4) Sort order: This determines the sort-order of the answers. You can use the "Up" and "Dn" buttons next to each answer to change the position of that answer in the list.
5) Default: One answer from all can be chosen as the default answer (i.e.: this one will be chosen and entered into your survey results unless it is changed). Change the Default field to "Y" if you want this answer to be the default answer. If you don't choose any default answer the survey result will record nothing if one of the answers is not specifically chosen.
Change Question Order Reorder questions by clicking on the Change Question Order icon in the group toolbar. If you have a survey with more than one question in a group, the questions are displayed according to this question order. You can change this order by simply click on the 'Up' and 'Down'-buttons. If you set conditions on question the particular condition might prevent re-ordering a question before/after another question. In that case you will have to delete/change that condition first.
To Preview a Question To preview a question click on the Preview Question-icon on the question bar. The preview of the question doesn´t depend on the selected template of your survey, so the preview might differ from the final result.

Setting Conditions for Questions Overview of Conditions in LimeSurvey – Adding Conditions to questions.
LimeSurvey has a very powerful logical branching feature. In this chapter we will describe:
• what conditions are in LimeSurvey • what you can and can't do with conditions • what steps you need to learn to setup simple or more complex conditions
For step-by-step video instructions check out this link: http://video.aol.co.uk/video-detail/conditions-in-limesurvey/838332261 Hide/Show Branching Versus Jump Branching You can design logical branching with LimeSurvey, this means that you can decide that some questions will be displayed only if some conditions are met. Simply put:
• a question without a condition defined on it will always be displayed • a question with a condition defined on it will not be displayed unless the condition is met
This approach is different from the Jump Branching Logic that is sometimes implemented by other software. In the Jump Branching Logic, the resulting action of a met condition would be to jump to another question (that is to say hide all questions in between). Limesurvey doesn't implement this Jump Branching Logic method. Instead if you wish to jump a series of questions, you would simply set the same condition on all the questions you do not wish displayed. For example if the jump condition you want to set on Question2 is "Jump to Question5 if the answer to Question1 is 'Yes'", you can simply:
• set a condition on questions 2, 3 and 4 to only display "if the answer to Question1 was NOT 'Yes'"

CLOSING A SURVEY
General
There are two ways for closing a survey: Expiry or deactivation. It is strongly recommended to use the expiry option to close a survey. - See below why. Expiry → Edit the survey details and set an "Expiry Date".
• No results lost • No respondent information lost • Change of questions, groups and parameters is limited • An expired survey is not accessible to participant (they only see a message that the survey has expired) • it's possible to perform statistics on responses inside LimeSurvey
Deactivation → Click on "Deactivate this survey" in the administration panel.
• All results lost (at least you cannot access them via LimeSurvey) • All respondent information lost • An expired survey is not accessible to a respondent (only a message appears that you are not permitted
to see this survey) • All questions, groups and parameters are editable again
Help! I accidentally deactivated my survey - what now? If you closed your survey accidentally it is important that you don't change anything in the survey. Then, and only then the following steps will work.
1. Activate your survey again 2. Go to the "Browse responses for this survey" menu. 3. Click at the "Import answers from a deactivated survey table" button. 4. Choose your source table. 5. Click at the "Import responses" button.

STATISTICS
The statistics feature is available from the menu of the browse screen, which - of course - is only available once a survey has been activated.
What is the statistics feature?
Let’s say you've got a survey running, or it is finished, and you want to start analyzing the results. LimeSurvey can dump all the results into an Excel spreadsheet (or CSV file, or Microsoft Word file). You can do whatever takes your fancy with the data then. Alternatively you can use the statistics feature to have a look at your data, and start getting some useful information from it. The statistics feature allows you to 'filter' your data and retrieve numbers, and summaries of different fields from it. The statistics script doesn't attempt to do highly complex filtering - but you'd be surprised at the sort of information that can be easily obtained.
Viewing Results and Field Summaries
When you click the "Get statistics" button you will be presented with a list of all available questions. For each question there is a checkbox that can be selected in order to show a summary of this table, and an icon that when clicked (or if the mouse hovers over it) will give you the full text of the question. To view the results for a question or questions, check the checkbox(es) at the top of the question(s) and then click "View stats". Alternatively to view the results for all available questions, check the "View summary of all available fields" box at the very top and then click "View stats". You will then be given a "Results" table which will indicate the number of cases and a "Field Summary" table for each question selected which will summarize all possible answers in the question(s), their totals and their percentage.

Filtering data As of 1.85+, data can be filtered in several ways:
1. By survey completion - use the dropdown at the top to select Completed, Incomplete or All records. For a discussion on incomplete responses see Browsing survey results.
2. By ID - use the inputs to filter by ID number 3. By response - click on one or more responses in the list under each question to filter the data by those
responses (use CTRL/click to select multiple responses in the same question). Note that if you choose to view summary of all available fields (checkbox at top) you will need to select your response filters before checking that box.
Selecting "View stats" will then give you the "Results" table, indicating the number of responses matching your criteria, and a "Field Summary" table for each question selected which will summarize all possible answers in the question(s), their totals and their percentage. It is important to note that these results are a subset of your total responses. So, for example, if your criteria display 146 records out of a total 180, the summary will show the breakdown of just those 146 records for that table. The images below indicate that I have elected to view the stats for "Employment status" of completed records/female/age 18-25. This gives me the results for 6 out of 14 records.

Things to be cautious of
• If you set criteria on the same question that you ask for a summary, then that question will only present answers matching your criteria. So it is good practice not to set any criteria on the same question you are getting a summary of.
• To select multiple entries for a question hold down the CTRL button when clicking. To 'unselect' the last criteria (if you want to clear all criteria from a question) click on the last highlighted answer with the CTRL button.

Browsing / Exporting filtered results If you want to export the responses that match your criteria, click on the "export" button at the bottom of the 'Results' table. This will bring up the usual export screen, however when you export the results you will only receive the responses that match your criteria. Similarly, click on browse to view the matching responses in the browse screen.
Graphs For charting the library pChart is used which is completely included and usually doesn't have to be configured. However for some languages (like Chinese) the usual font used (Vera) does not cover the needed character set. In that case you can use the setting $chartfontfile to set a new TTF font file in config.php (Check out config-defaults.php for the right setting). For Chinese (Simplified and Traditional) we recommend to use the FireFlySung font which can be downloaded from http://cle.linux.org.tw/fonts/FireFly/ . After the graphs have been generated you can export these graphs easily. Use a right-mouse-click over the image and choose "Save image as" and save the graph as a .png-file to your chosen location. Normally all results are displayed as pie charts - only for question type "Multiple Options" bar graphs are used.


Public Statistics
The new feature to show statistics to the user at the end of a survey was introduced in version 1.80RC3. Using this feature the user is presented a link at the end of the survey which takes him to the public statistics. There are two important settings. At first you have to enable public statistics for your current survey at survey settings -> presentation & navigation -> Public statistics. Because often you only want to show statistics for certain questions there is an additional question attribute "public_statistics". This question attribute has to be applied to all questions which should be shown to the user. Note that the use of this question attribute is limited to certain question types.

Assessments General Information: LimeSurvey has the ability to create "assessments" on your survey for the participant. Assessments are rules which evaluate the responses to a survey immediately after it is submitted, and then display text blocks to the participant based on that evaluation. As an example, consider the following: You have two questions in your survey, the first question asks if the user smokes: "Do you smoke?". The question has 3 possible answers, "Yes more than 10 per day" with an answer code of "10", "Yes, but less than 10 per day" with an answer code of "5" and "No, I don't smoke at all" with an answer code of "1". The second question "Do you exercise?" has three possible answers; "Yes, I exercise for at least half an hour three times a week" with a value of "1", "Yes, I exercise every now and then" with a value of "5" and "No, I don't ever do any exercise" with an answer code/value of "10". If we were to add the totals of the values for each possible answer at the end of the survey, we'd have a good indication of the general health of the respondent. Someone who smokes and doesn't ever do any exercise will have scored 10 in each of their answers, giving a sum of 20 when we add the values together. Someone who doesn't smoke and exercises regularly will have scored 1 in each of the answers with a total of 2 when we add the values together.
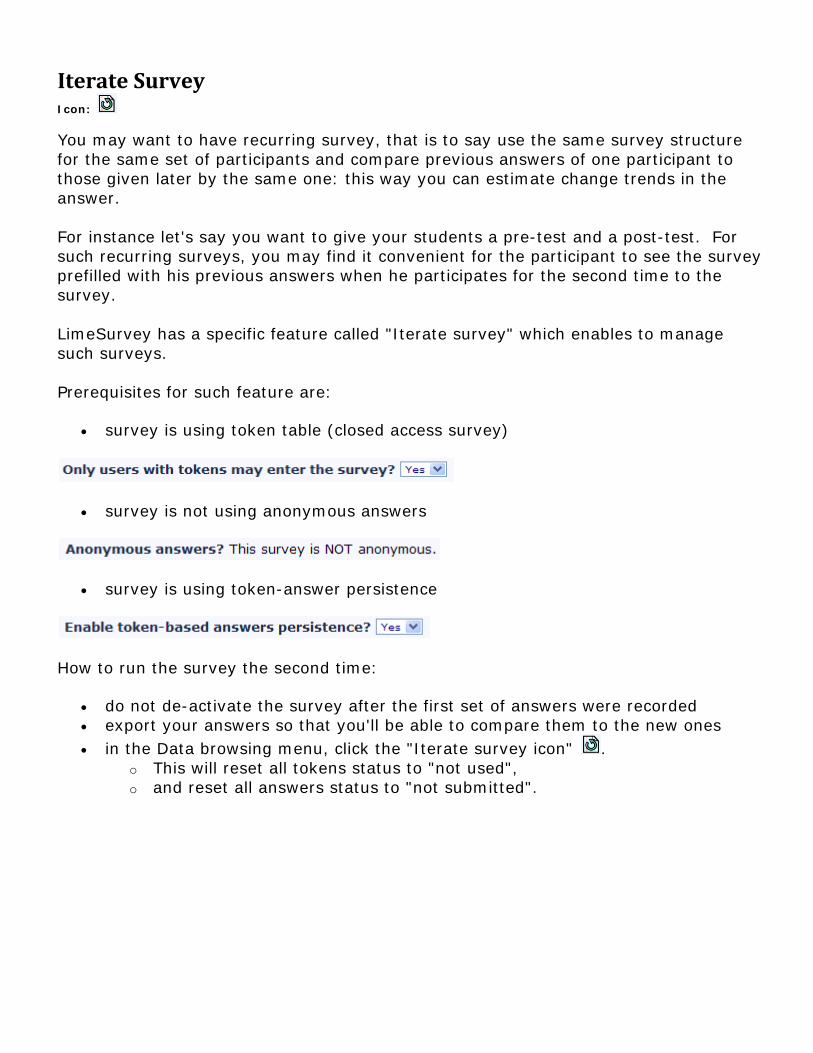
IterateSurveyIcon:
You may want to have recurring survey, that is to say use the same survey structure for the same set of participants and compare previous answers of one participant to those given later by the same one: this way you can estimate change trends in the answer. For instance let's say you want to give your students a pre-test and a post-test. For such recurring surveys, you may find it convenient for the participant to see the survey prefilled with his previous answers when he participates for the second time to the survey. LimeSurvey has a specific feature called "Iterate survey" which enables to manage such surveys. Prerequisites for such feature are:
• survey is using token table (closed access survey)
• survey is not using anonymous answers
• survey is using token-answer persistence
How to run the survey the second time:
• do not de-activate the survey after the first set of answers were recorded • export your answers so that you'll be able to compare them to the new ones • in the Data browsing menu, click the "Iterate survey icon" .
o This will reset all tokens status to "not used", o and reset all answers status to "not submitted".

Tokens Introduction On many occasions you will want to invite a group of people to participate in your survey, keep track of who has completed the survey, and ensure that each person can only participate once. The tokens feature allows you to do the following:
• Manually create invitations (name, email address, ...) • Import a list of names and email addresses for participants (from a CSV file or an LDAP query) • Add/Remove invitations • Generate a unique token number for each participant (invitation code) • Send an email invitation to each person in your list, by group or individually • Send a reminder email to each person in your list who has not yet responded, by group or individually • Track who from your list has responded • Restrict access against people who have not got a token, and those with a token who have already
responded • Edit/change any details in your list
Once the survey is switched to Closed-access mode (you have enabled tokens for this survey), then only the people with a valid token code (not already used) can access the survey.
Can a survey using tokens ensure anonymous answers? The answer to this question is Yes. Tokens can be used both for anonymous and non-anonymous surveys. This is determined when creating a survey. If a survey is not anonymous (or 'tracked') then the token list can be used to find the responses that an individual has made to the survey. If the survey is anonymous, then no link (technically: foreign key relationship) is available between the tokens table and the responses.

How to activate tokens? There are two ways to activate tokens: 1. After survey activation you will be asked if you want to activate tokens:
2. OR you can click on the tokens symbol - even before the survey is activated. The token management tools
After creating the tokens table you can click on the tokens icon to get to the token administration. The following is a brief rundown of the menu options in the tokens screen:
• Admin (house): Returns to the main survey admin screen • Summary: Displays just the brief summary of tokens in the table (number of tokens, how many have
been sent an invitation, and how many have responded). Also provides access to the Database Admin functions (see below). This is the default screen.
• Browse: Displays the complete list of participants in the tokens table. From the browse screen you can edit or delete individual entries in the token table as well as perform a number of other useful functions
• Add new token entry: Allows you to add an entry to the tokens table • Edit additional field attributes: Allows you to add additional fields to the tokens table to store
custom participant data • Import from CSV: Allows you to import information from a csv file • Import from LDAP: Allows you to import information from an LDAP query (tested on openLdap but
should work in any LDAP compliant directory including ActiveDirectory) • Export tokens to CSV file: creates a standard CSV (comma delimited) file with a complete list of
participants of your current tokens table

• Edit email templates: Used to customize the templates used for the invitations, reminders, confirmations, and registration emails
• Send email invitation: Sends bulk email invitations to all participants in the tokens table who have not already been sent an invitation.
• Send email reminder: Sends bulk email reminders to all participants in the tokens table who have not yet responded, but have been sent their first invitation.
• Generate tokens: Creates unique tokens for all individual entries in the tokens table that do not yet have one
• Drop token table: delete the token table and set the survey to Open-access mode.
Editing/adding a token A typical token entry contains the following fields:
• First and last name: .. of the participant (can be used in the emails) • Email: the participant's email address • Email status: a field to keep track of bad emails. Marking this token with an email status other than
'OK', will help skip this entry when sending invitation or reminder emails. Note: that this is completely manual.
• Token: this is the invitation code. It is usually automatically generated by the 'Generate tokens' button • Language: if you want to set the default language for this participant • Invite sent: defaults to 'N', otherwise would contain the date when the invitation email was sent • Completed sent: defaults to 'N', otherwise would contain the date when the survey was submitted • Valid from & Valid until: You can set a date/time range where this token would be allowed to use.
You can leave these empty if you don't want to limit participation time frame for certain users. Note: If the user is answering the survey and the participation time ends then the user is locked out immediately and won't be able to finish the survey.
• Attribute1 to Attribute x: These are user-definable attribute fields - see the next paragraph.
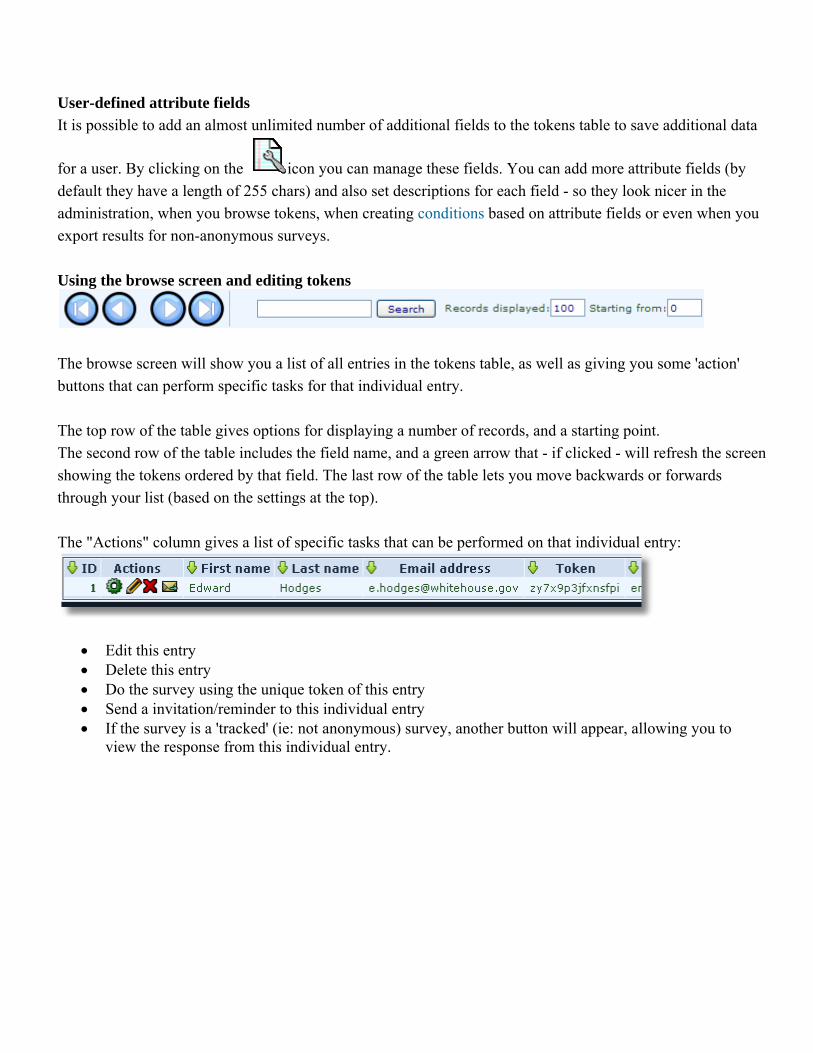
User-defined attribute fields It is possible to add an almost unlimited number of additional fields to the tokens table to save additional data
for a user. By clicking on the icon you can manage these fields. You can add more attribute fields (by default they have a length of 255 chars) and also set descriptions for each field - so they look nicer in the administration, when you browse tokens, when creating conditions based on attribute fields or even when you export results for non-anonymous surveys. Using the browse screen and editing tokens
The browse screen will show you a list of all entries in the tokens table, as well as giving you some 'action' buttons that can perform specific tasks for that individual entry. The top row of the table gives options for displaying a number of records, and a starting point. The second row of the table includes the field name, and a green arrow that - if clicked - will refresh the screen showing the tokens ordered by that field. The last row of the table lets you move backwards or forwards through your list (based on the settings at the top). The "Actions" column gives a list of specific tasks that can be performed on that individual entry:
• Edit this entry • Delete this entry • Do the survey using the unique token of this entry • Send a invitation/reminder to this individual entry • If the survey is a 'tracked' (ie: not anonymous) survey, another button will appear, allowing you to
view the response from this individual entry.

Database Admin
While the summary screen shows a brief summary of tokens in the table, it also provides access to the "Database Admin" features which include:
• Clear invites: Sets all records that an invitation has been sent out to 'N'. Obviously shouldn't normally be used.
• Clear tokens: Clears all tokens. Similarly shouldn't normally be used. • Drop tokens: Allows you to remove the tokens feature from your script. Deletes the entire table and all
records, and allows the survey to be accessed by anybody who knows the URL.

Emailing Email placeholders
The following field names are allowed in invitation/reminder email templates and must be entered in the survey properties. When sending out the emails these field names will be already replaced in the preview of your invitation/reminder email.
{ADMINEMAIL} Email of the Survey admin
{ADMINNAME} Name of Survey Admin
{SURVEYNAME} Title of your survey
{SURVEYDESCRIPTION} Description of your survey The following field names are allowed in invitation/reminder emails (subject and/or body) and will be replaced while sending out the mails: {EMAIL} Email of the recipient
{FIRSTNAME} First Name
{LASTNAME} Last Name
{SURVEYURL} The URL pointing to the survey start - if you are sending HTML emails this will be a fully linked HTML version
@@SURVEYURL@@ The URL pointing to the survey start - this is the bare bone link. Use this if you want to integrate the link in your custom HTML elements somewhere
{TOKEN} Token to access the survey
{ATTRIBUTE_1} Attribute 1
{ATTRIBUTE_2} Attribute 2 (...and so on for more attribute fields) If your survey is NOT anonymous, the following field names are available to insert token data in survey text and javascript: {TOKEN:EMAIL} Email of the recipient
{TOKEN:FIRSTNAME} First Name
{TOKEN:LASTNAME} Last Name
{TOKEN} Token to access the survey
{TOKEN:ATTRIBUTE_1} Attribute 1
{TOKEN:ATTRIBUTE_2} Attribute 2 (and so on for more attribute fields)
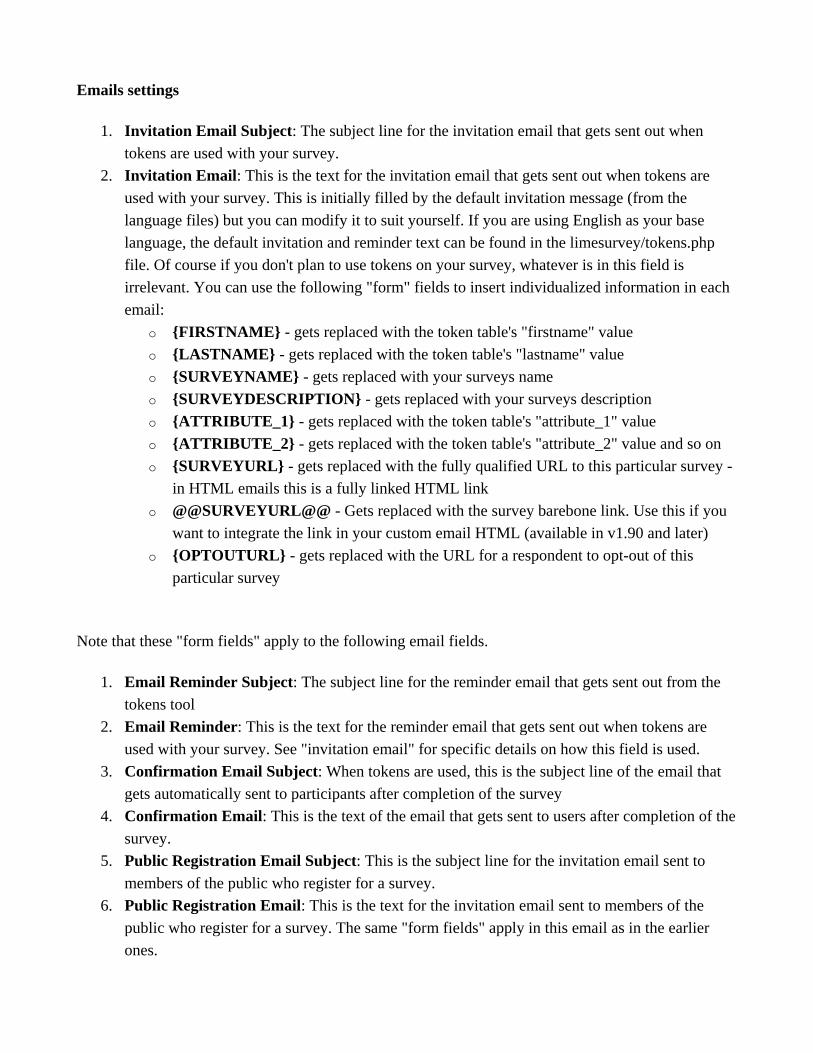
Emails settings
1. Invitation Email Subject: The subject line for the invitation email that gets sent out when tokens are used with your survey.
2. Invitation Email: This is the text for the invitation email that gets sent out when tokens are used with your survey. This is initially filled by the default invitation message (from the language files) but you can modify it to suit yourself. If you are using English as your base language, the default invitation and reminder text can be found in the limesurvey/tokens.php file. Of course if you don't plan to use tokens on your survey, whatever is in this field is irrelevant. You can use the following "form" fields to insert individualized information in each email:
o {FIRSTNAME} - gets replaced with the token table's "firstname" value o {LASTNAME} - gets replaced with the token table's "lastname" value o {SURVEYNAME} - gets replaced with your surveys name o {SURVEYDESCRIPTION} - gets replaced with your surveys description o {ATTRIBUTE_1} - gets replaced with the token table's "attribute_1" value o {ATTRIBUTE_2} - gets replaced with the token table's "attribute_2" value and so on o {SURVEYURL} - gets replaced with the fully qualified URL to this particular survey -
in HTML emails this is a fully linked HTML link o @@SURVEYURL@@ - Gets replaced with the survey barebone link. Use this if you
want to integrate the link in your custom email HTML (available in v1.90 and later) o {OPTOUTURL} - gets replaced with the URL for a respondent to opt-out of this
particular survey
Note that these "form fields" apply to the following email fields.
1. Email Reminder Subject: The subject line for the reminder email that gets sent out from the tokens tool
2. Email Reminder: This is the text for the reminder email that gets sent out when tokens are used with your survey. See "invitation email" for specific details on how this field is used.
3. Confirmation Email Subject: When tokens are used, this is the subject line of the email that gets automatically sent to participants after completion of the survey
4. Confirmation Email: This is the text of the email that gets sent to users after completion of the survey.
5. Public Registration Email Subject: This is the subject line for the invitation email sent to members of the public who register for a survey.
6. Public Registration Email: This is the text for the invitation email sent to members of the public who register for a survey. The same "form fields" apply in this email as in the earlier ones.

Sending emails
Send invitations
You can skip tokens for which the email status field is different from 'OK', by choosing the 'Bypass token with failing email addresses' option.
Resending invitations
Sometimes you might want to send invitations again to certain token entries / persons. When you use the send invitations-function only e-mail addresses that ''has not previously received an invitation will get one. This means that if you add new addresses to the token list after the first time you sent invitations, only these new addresses will receive an invitation the second time you send invitations. This means that you can also edit/change an e-mail in a particular token entry that you got a bounce from and then send to only this edited address. Just substitute the date Invite sent? for a capital N (no) and click send invitations again. Participant opt-out When you use the {OPTOUTURL} tag in your invitation/reminder email, your participants have the possibility to opt out of this particular survey by just clicking on the related URL in the email - so you don't harass them with reminder emails. A participant that opted out of your survey will have the email status 'OptOut' set in the token.

Send reminders
When sending reminders you can:
• bypass tokens with failing email addresses • skip tokens for which an email has been 'recently' sent • skip tokens for which a given number of emails have already been sent
Sending emails by batch When you have to send a lot of emails at the same time, LimeSurvey will only send a first batch of N emails (this threshold is set by the system administrator in the config.php file). You'll then need to click "Next" to send the next batch, and so on untill all emails have been sent.
Confirmation email
If you are using tokens and a participant fills out the survey, a confirmation email is sent to his/her email address. If you don't want this message to be sent please follow these instructions:
HowcanIstopthesystemfromsendingconfirmationemailsIf you are using tokens and a participant fills out the survey, a confirmation email is sent to his/her email address.
If you don't want this message to be sent just delete the whole confirmation email subject and message. You have
to switch to source code mode to be able to delete all the text. Save the empty message and no confirmation
emails should be sent anymore.
Source code mode: