kuali user access request - quick reference user access request document in the usc kuali system,...
TRANSCRIPT

Page 1 of 33 31-March-2014
Quick Reference Guide: Kuali User Access Request Document
In the USC Kuali system, every transaction (such as a requested addition, change, or deletion) is created and submitted in the form of an electronic document, also referred to as an “eDoc.” This brief guide presents instructions for creating and submitting the User Access Request Document eDoc.
The User Access Request Document is one of the Kuali Enterprise Workflow (KEW) modules in the Kuali system. This eDoc is utilized to request that specific access privileges within Kuali and its related systems be added, changed, or deleted for a given user. Although users requesting such access privilege changes can initiate this eDoc themselves, it is anticipated that in most cases, the eDoc will be completed and submitted for those users by someone designated as a User Access Coordinator for his or her department, school, or business unit.
NOTE: This document can only be used to request user access to Kuali and its linked systems, such as Business Intelligence (including the Cognos Reports portal) or USC eMarket. It does not apply to older existing financial systems, such as WebBA, Viador Data Warehouse, and FDL (Financial Download system).
This guide offers basic instructions for working with the User Access Request Document eDoc in Kuali. For brevity, this document does not cover introductory information, such as general descriptions of the Kuali on-screen interface or explanations of workflow routing. For that information, please see the separate document titled Kuali Basics: Reference and Training Guide, which can be accessed here: <www.usc.edu/kuali/basicsguide>
For any user support issues, please send an email to [email protected] to request assistance.
CONTENTS: Initiating a User Access Request Document ................................................................................................. 2 Cashiering ................................................................................................................................................. 4 Procurement Card Reallocation ............................................................................................................... 5 Purchasing - Accounts Payable (USC eMarket)........................................................................................ 7 eStatement ............................................................................................................................................. 10 Journal Vouchers (JVs) ........................................................................................................................... 12 Disbursement Vouchers (DV/DVQE) ...................................................................................................... 13 Purchasing Documents Review (PDR) .................................................................................................... 16 Chart of Accounts (COA) ......................................................................................................................... 17 Course Scheduling .................................................................................................................................. 17 General Purpose Workflow .................................................................................................................... 18 Capital Assets Management (CAMS) ..................................................................................................... 19 Financial Aid Account (FAA) ................................................................................................................... 20 Add Account Access (Inquiries and Reports) ......................................................................................... 22 Remove Account Access (Inquiries and Reports) .................................................................................. 24 Adding Notes or Attachments ..................................................................................................................... 26 Submitting Your User Access Request eDoc ............................................................................................... 27 Saving an eDoc Before You Are Ready to Submit It .................................................................................... 27 Resubmitting an eDoc Returned for Correction ......................................................................................... 28 Checking the Status of a Submitted eDoc ................................................................................................... 28 Importing Multiple Lines of Data ................................................................................................................ 28 Creating a User Access Request Document by Copying an Existing One ................................................... 30 Logging Out of the Kuali System.................................................................................................................. 31 Index ............................................................................................................................................................. 32

Quick Reference Guide: Kuali User Access Request Document Page 2 of 33
31-March-2014
Initiating a User Access Request Document Use this procedure to create a new User Access Request eDoc. For instructions on copying an existing User Access Request eDoc to create a new one, see Creating a User Access Request Document by Copying an Existing One on page 30.
1. Type www.usc.edu/kuali in the address field of your browser. 2. When the home page of the Kuali@USC website is displayed, click the Kuali Login link. The
USCnet Login page will be displayed. 3. Log in, using your USC NetID user name and password. If you do not know your USC NetID or
password, call ITS at 213-740-5555 (UPC) or 323-422-1968 (HSC). The Financial Main Menu page of the Kuali screen will be displayed.
TIP: It is strongly recommended that you create a browser bookmark to the Financial Main Menu page for easy access to the Kuali system. When you later use that bookmark, you will be directed first to the “USCnet Login” page and then to the Financial Main Menu page once you have logged in.
4. Select the Workflow Main Menu tab near the top of the Kuali screen. The Workflow Main Menu page will be displayed.
5. On the Workflow Main Menu page, click the User Access Request Document link, which is located in the upper left-hand portion of the screen. The screen will change to display the form for the User Access Request Document. Fields marked with an asterisk (*) are required, and must be completed in order to submit the eDoc. In the upper right-hand area of the screen, the fields for document number, status, Initiator, and the creation date will be populated by the system.
6. In the Description field in the uppermost folder tab, labeled Document Overview, type a brief description (40 characters max.) to identify the user access request you are submitting. (Below the Description field, the Organization Document Number field is not in use at this time.) When completing the Description field, you should include the name of the applicant for whom this access request is being submitted, the type of access change (addition, deletion, etc.), and the Kuali module to which the access change pertains. Do not enter any information regarding access that exists already for the applicant and does not require any changes. No changes will be made to existing access unless specifically requested. Also, if the eDoc will contain requests for multiple access additions or deletions, or access requests for more than one Kuali module, please include the word “multiple” in the description you enter. NOTE: The eDoc you are creating could appear in the results of a document search performed by any Kuali user. Therefore, do not include any sensitive information in the Description field because the contents of that field will be visible in the search results.
7. The Explanation text box is an optional field. If desired, use it to enter additional notes or a continuation of the information you have entered in the Description field.
8. Complete the folder tab labeled Applicant Information, as follows: a. If you are initiating this eDoc to request user access changes for yourself, simply select
the Same as preparer checkbox. b. If you are initiating this eDoc to request user access changes for someone else, enter
EITHER the 10-digit USC Identification Number OR the 7-digit Employee ID Number for that user in the appropriate field, then press the TAB key or click on another field. The

Quick Reference Guide: Kuali User Access Request Document Page 3 of 33
31-March-2014
system will automatically populate most of the other fields with identification and contact information on file for the applicant, with the following exceptions: ○ The applicant’s Middle Name is not required, but can be entered if desired. ○ Department Organization Code is a required field, but is not populated automatically,
so you must enter the number yourself. Note that this is not the applicant’s Home Department Code; it is the Organization Code (called a “Program Code” in the legacy WebBA system) that identifies the account credited and debited for the transactions of the department with which the applicant is associated. You should be able to obtain the code from the applicant’s SBO or supervisor, or you can click the adjacent lookup icon to search for the desired code using the Organization Lookup form. The Organization Code, which was called a “Program Code” in the legacy WebBA system, is a 10-digit number that identifies an accounting center (e.g., a school or an administrative unit) and all of the departments within that center. Every account used for financial transactions belongs to an Organization Code so that it is possible to identify the center responsible for that account. In the Kuali system, the Organization Code appears in the results displayed for either an Account Lookup or any of the General Ledger balance inquiries, and it appears on the Account Status Report (ASR) in both WebBA and the Cognos reports for Kuali. To find which Organization Code to use for your assigned department, choose one or more of the accounts that you use for transactions on a regular basis, and note the Organization Code associated with those accounts. You may have more than one, so pick the one that identifies your main accounting center.
NOTE: You must enter a complete 10-digit Organization Code in the Department Organization Code field. If you populate this field by using the Organization Lookup form and clicking the “return value” link for an Organization Code “mask” (a 5- or 7-digit string representing all Organization Codes that begin with those same numbers), an error message will be displayed.
9. The folder tab labeled Preparer Information is automatically populated by the Kuali system, using information on file for your user login ID.
10. When you are ready to proceed, click the button. The bottom portion of the on-screen eDoc form will expand to display several more folder tabs in addition to the ones shown previously. One of the added folder tabs, View Applicant’s Current Access, will appear between the Applicant Information tab and the Preparer Information tab.
11. The View Applicant’s Current Access tab contains a link that enables you to view the access rights already assigned to the applicant. When you click that link, the results of a Person Lookup for the applicant will be displayed in a new window or tab (depending on your browser settings). On that results page, click the button on the Membership tab to view the applicant’s current access information.
NOTE: If you need assistance in understanding the information shown on the Membership tab, please consult your department’s User Access Coordinator or SBO.
12. On the Module Selection folder tab, select the appropriate check-box for each Kuali module to which you are requesting new or different user access privileges. Although this eDoc is designed to accommodate access requests for more than one module, the applicant for whom you are submitting the request will probably need access to just one module in most instances. However, it is also common for a user to need access to multiple accounts.

Quick Reference Guide: Kuali User Access Request Document Page 4 of 33
31-March-2014
When you select the check-box for a particular module, the corresponding folder tab in the lower portion of the eDoc form will open. You can see a pop-up description of each module by placing your cursor over its check-box. NOTE: The check-boxes for Pre-Encumbrance and Budget Change are not currently active, and the check-boxes and tabs for both Gift Processing and Tuition Assistance Benefit are not currently in use.
Be sure to also select the Add Account Access check-box if you are requesting access rights to specific accounts for the applicant. Likewise, select the Remove Account Access check-box if you are requesting the removal of access rights for specific accounts.
13. From this point, proceed to the sections of this guide that pertain to the specific types of user access changes that you are requesting. When you have completed the tabs associated with all the changes you are requesting, proceed to the Submitting Your User Access Request eDoc instructions on page 27 of this guide. If you need to attach any related files to your request, refer to the Adding Notes or Attachments instructions on page 26. The following table presents an alphabetical list of the access-related tabs currently in use on the User Access Request eDoc with the page numbers on which you can find the instructions for each tab. You can click on a tab name or its page number to proceed directly to the relevant section of this guide.
Access-Related Tabs on the User Access Request eDoc (listed alphabetically)
• Add Account Access (Inquiries and Reports) [page 22] • Financial Aid Account (FAA) [page 20]
• Capital Assets Management [page 19] • General Purpose Workflow [page 18]
• Cashiering [page 4] • Journal Vouchers (JVs) [page 12]
• Chart of Accounts (COA) [page 17] • Procurement Card Reallocation [page 5]
• Course Scheduling [page 17] • Purchasing - Accounts Payable (USC eMarket) [page 7]
• Disbursement Vouchers (DV/DVQE) [page 13] • Purchasing Documents Review (PDR) [page 16]
• eStatement [page 10] • Remove Account Access (Inquiries and Reports) [page 24]
IMPORTANT: Several of the tabs on the User Access Request eDoc include an Actions column. When completing any of those tabs, remember that you must click the button in the Actions column or the line of information you have entered will not be saved as part of the eDoc.
Cashiering Follow these instructions to complete the Cashiering tab on the User Access Request form. This tab is used to add or remove access privileges that enable a user to submit or approve any of the following types of Cashiering eDocs: Advance Deposit, Cash Receipt, or Credit Card Receipt. When you are ready to submit the User Access Request eDoc, proceed to Submitting Your User Access Request eDoc on page 27.
Instructions for the Add Access section 1. Use the Access Type drop-down list to specify whether this user will be assigned the role of a
Preparer or an Approver for the eDoc types you will specify in the next step. A Preparer can initiate and submit a Cashiering deposits eDoc, whereas an Approver is authorized to approve Cashiering eDocs that have been submitted by other users. The use of the Approver role varies depending on the needs of each department.
2. Select the check-box of each type of Cashiering eDoc for which this user should be granted access privileges.

Quick Reference Guide: Kuali User Access Request Document Page 5 of 33
31-March-2014
3. If applicable for your school or department, use the Workgroup drop-down list to select the workgroup with which this user will be associated. (A workgroup designation is currently needed only for Keck School of Medicine and the USC Bookstore.)
4. Use the Campus drop-down list to select the campus where this user works: UPC or HSC. (If the user works at a site that is not located on either campus, select UPC.)
5. Optionally, use the Request Explanation field to enter brief instructions or comments, such as the reason why the applicant needs the access you are requesting.
6. Click the button in the Actions column. The line entry that you have just added to the eDoc will appear beneath the line on which you entered the information.
Instructions for the Delete Access section 1. Select the check-box of each type of Cashiering eDoc for which you want to remove existing
access privileges for this user.
2. If applicable for your school or department, use the Workgroup drop-down list to select the workgroup with which this user is associated. (A workgroup designation is currently needed only for Keck School of Medicine and the USC Bookstore.)
3. Use the Campus drop-down list to select the campus where this user works: UPC or HSC. (If the user works at a site that is not located on either campus, select UPC.)
4. Optionally, use the Request Explanation field to enter brief instructions or comments, such as the reason why you are requesting that this user’s access be removed.
5. Click the button in the Actions column. The line entry that you have just added to the eDoc will appear beneath the line on which you entered the information.
Procurement Card Reallocation This section presents instructions for completing the Procurement Card Reallocation tab on the User Access Request form. This tab is used to add or remove access privileges that enable a user to reallocate procurement card transactions from a specific card’s default account number and object code to other account numbers and object codes.
A user can be authorized as a reallocator for the 10-digit Organization Code of a single procurement card, or for a group of Organization Codes that all start with the same 5- or 7-digit “mask,” thus enabling that user to reallocate transactions for cards associated with any of those Organization Codes.
When you are ready to submit the User Access Request eDoc, proceed to Submitting Your User Access Request eDoc on page 27.
Instructions for the Add Access section 1. Use the Access Type drop-down list to specify whether this user will be assigned the role of a
Reviewer or an Approver: • A Reallocator Reviewer is authorized to redistribute procurement card transaction amounts
from the card’s default account and object code to other accounts and object codes. • A Reallocator Reviewer Approver typically reviews and approves the procurement card
transaction reallocations that have been submitted by other users.
2. In the Organization Code field, enter a complete or partial Organization Code, according to the type of reallocation access you are requesting for the applicant:

Quick Reference Guide: Kuali User Access Request Document Page 6 of 33
31-March-2014
• To request authorization for the user to reallocate transactions for all procurement cards that have default accounts belonging to a particular Organization Code, enter the entire 10-digit Organization Code.
• To request authorization that will enable the applicant to reallocate transactions on all procurement cards with Organization Codes that begin with the same digits, enter just that 5- or 7-digit “mask.” (Naturally, there can be many more cards associated with a 5-digit mask than with a 7-digit mask.)
If you entered an individual 10-digit Organization Code, the Organization Name field will automatically be populated with information corresponding to your entry when you press the TAB key or click elsewhere on the screen. (Also note that this tab includes an Import file link that you can use to import multiple Organization Codes at once. For instructions, see Importing Multiple Lines of Data on page 28.)
3. Click the button in the Actions column. The line entry that you have just added to the eDoc will appear beneath the line on which you entered the information.
Instructions for the Delete Access section 1. In the Organization Code field, enter a complete or partial Organization Code, according to the
type of reallocation access that should be deleted for the applicant: • To remove the user’s authorization to reallocate transactions for all procurement cards
that have default accounts belonging to a particular Organization Code, enter the entire 10-digit Organization Code.
• To remove the user’s authorization to reallocate transactions on all procurement cards with Organization Codes that begin with the same digits, enter just that 5- or 7-digit “mask.” (Naturally, there can be many more cards associated with a 5-digit mask than with a 7-digit mask.)
If you entered an individual 10-digit Organization Code, the Organization Name field will automatically be populated with information corresponding to your entry when you press the TAB key or click elsewhere on the screen.
2. Click the button in the Actions column. The line entry that you have just added to the eDoc will appear beneath the line on which you entered the information.
Quick Reference Guide: Kuali User Access Request Document Page 7 of 33
31-March-2014
Purchasing - Accounts Payable This section presents instructions for completing the Purchasing - Accounts Payable tab on the User Access Request form. This tab is used to add or remove assigned user roles, which control the activities that a given user can perform in the USC eMarket system. When you are ready to submit the User Access Request eDoc, proceed to Submitting Your User Access Request eDoc on page 27.
NOTE: If you are requesting changes to a user’s already-assigned USC eMarket roles and permissions, be sure to complete both sections of this tab as needed to request (1) the addition of new access information (e.g., a different assigned department; different or additional visible departments; and different or additional role type and threshold), and (2) deletion of any access information that should no longer in place for this user.
Instructions for the Add USC eMarket Role section Complete all applicable fields in this section of the Purchasing - Accounts Payable tab to request new or additional USC eMarket roles and permissions for the applicant.
1. Complete the Assigned Department field by entering the 10-digit Department Organization Code for the department with which this user’s USC eMarket transaction documents will be identified. (Each USC eMarket user can have only one assigned department. For an explanation of this code, see page 3.) Enter the appropriate Organization Code manually, or click the adjacent lookup icon to search for the desired code using the Organization Lookup form.
NOTE: You must enter a complete 10-digit Organization Code in the Assigned Department field. If you populate this field by using the Organization Lookup form and clicking the “return value” link for an Organization Code “mask” (a 5- or 7-digit string representing all Organization Codes that begin with those same numbers), an error message will be displayed.
2. Although a user will automatically be able to view USC eMarket transaction documents that he/she initiates, access to view transaction documents initiated by others must be requested by specifying the departments whose transaction documents will be “visible” for the applicant. In the Visible Departments text box, enter the 10-digit Department Organization Code of the applicant’s assigned department and any additional departments for which he/she should be given access to view USC eMarket transaction documents. Be sure to type a semicolon (;) and a space after each code that you enter (e.g., 1234567891; 1234567892; etc.). No other fields on this tab need to be completed if you are only specifying more visible departments to be added to those previously assigned for this user.
3. Use the Role drop-down list to specify a USC eMarket role that you want to assign to this user, or for which you want to request a change to his/her currently assigned approval settings: • Shopper – Users with this role can place items in a shopping cart, but must assign the cart to
a Requisitioner for submittal. They can also enter Receiving information to confirm receipt of a delivery. (Do not assign this role to a user with the Requisitioner role; giving both roles to one user can cause system conflicts, and is unnecessary because a Requisitioner has all the permissions of a Shopper.)
• Requisitioner – Users with this role can add items to a shopping cart; enter Object Codes, Account Numbers, and delivery information; submit requisitions for approval; and enter Receiving information to confirm receipt of a delivery. (If you are requesting assignment of the Requisitioner role to a user who already has the Shopper role, be sure to also request removal of the Shopper role for this user by completing the Delete USC eMarket Role section (see page 9). Giving both roles to one user can cause system conflicts, and is unnecessary because a Requisitioner has all the permissions of a Shopper.)

Quick Reference Guide: Kuali User Access Request Document Page 8 of 33
31-March-2014
• Approvers – Users with an Approver role can review requisitions, evaluate whether they are appropriate and allowable, provide formal approval, and also facilitate resolution of invoice exceptions. For each set of specified departments, you can assign one of the following Approver roles to the applicant: ○ Financial Approver (Shared) – one of several users who are each authorized to provide
approval of certain dollar amounts when only one approval is required. ○ Financial Approver (Sequential) – one of several users who will be required to provide
up to three consecutive approvals of certain dollar amounts. ○ Special Account Approver – authorized to give optional additional approval beyond the
Financial Approver. ○ Invoice Exception Approver – authorized to approve invoices that cannot be paid due to
pricing, quantity, or receipt exceptions. • Receiver – Users with this role are authorized only to enter Receiving information to confirm
receipt of a delivery. Because the Shopper and Requisitioner roles are authorized to perform receiving duties, it is redundant to assign the Receiver role to a user with one of those roles.
NOTE: Other fields will be displayed or hidden in this section of the Purchasing - Accounts Payable tab depending on your selection in the Role drop-down list. For the remaining steps of this procedure, if a particular field is not shown for the role you selected, skip the instructions for that field.
4. Some roles in the USC eMarket are associated with Approval Thresholds, which either (a) place a limit on the purchase amount for which the user can submit a requisition, or (b) require the user to approve any requisition for an amount within a specified range. If appropriate for the role you are assigning, the Approval Threshold($) drop-down list is displayed so that you can specify one of the following: • For the Requisitioner role, select the maximum dollar amount for which the user will be
permitted to submit requisitions without requiring further approval. Requisitions for amounts that exceed the user’s specified Approval Threshold will be routed to the Financial Approver level for the Account Numbers utilized on the user’s requisition. Note that if you select “None” as the approval threshold, you can skip step 5 and proceed to step 6 because no accounts or Organization Codes have to be specified.
• For a Financial Approver or a Special Account Approver, select the dollar range denoting the purchase amounts for which the user will be required to review and approve requisitions.
5. If appropriate for the role you are assigning, the Access To drop-down list and the Accounts (or Masks)/Organization Codes text box will be displayed so that you can specify the accounts for which the user will have approval access in the USC eMarket.
a. In the Access To drop-down list, select the type of codes that you will enter in the Accounts (or Masks)/Organization Codes text box: ○ Accounts (or Masks) ○ Organization Codes
b. In the Accounts (or Masks)/Organization Codes text box, enter the appropriate type of data, according to the option you selected in the Access To drop-down list. Be sure to type a semicolon (;) and a space after each Account Number or code that you enter: ○ If you chose “Accounts (or Masks),” enter the 10-digit Account Numbers for which the
applicant should have access in the USC eMarket, or the Account “masks” (4- or 6-digit strings ending with asterisks; e.g., 5348*) representing those accounts. Make certain
Quick Reference Guide: Kuali User Access Request Document Page 9 of 33
31-March-2014
that any Account mask you are entering here ends with an asterisk and does not apply to accounts outside of Organization Codes for which the applicant is authorized.
○ If you chose “Organization Codes,” enter the Organization Codes representing all accounts for which the applicant should have access in the USC eMarket.
Note that this section of the Purchasing - Accounts Payable tab includes its own Import file link in the upper right-hand corner. This link gives you the option of populating the Accounts (or Masks)/Organization Codes text box by importing multiple Account Numbers (or 4- or 6-digit masks), or Organization Codes from an Excel file, to be associated with the eMarket role you selected in step 3. Be sure that your selection in the Access To drop-down list matches the type of data that you are importing. For instructions on importing data, see Importing Multiple Lines of Data on page 28.
6. Click the button in the Actions column. The line entry that you have just added to the eDoc will appear beneath the line on which you entered the information.
7. Repeat steps 3 through 6 as needed to request the addition of other USC eMarket roles and permissions for this applicant.
8. Optionally, use the Explanation of User Access Request text box to enter instructions or comments about the USC eMarket access changes you are requesting for the applicant.
Instructions for the Delete USC eMarket Role section For this section of the Purchasing - Accounts Payable tab, you should complete only those fields in which you want to remove existing USC eMarket roles and permissions for the applicant.
1. To request the deletion of the currently assigned department with which this user’s USC eMarket transaction documents are identified, complete the Assigned Department field by entering the 10-digit Department Organization Code for that department. Complete the corresponding field in the Add USC eMarket Role section of this tab if you need to specify a new assigned department for the applicant. (Each USC eMarket user must have a single assigned department. For an explanation of this code, see page 3.) Enter the appropriate Organization Code manually, or click the adjacent lookup icon to search for the desired code using the Organization Lookup form.
NOTE: You must enter a complete 10-digit Organization Code in the Assigned Department field. If you populate this field by using the Organization Lookup form and clicking the “return value” link for an Organization Code “mask” (a 5- or 7-digit string representing all Organization Codes that begin with those same numbers), an error message will be displayed.
2. If you want to remove the applicant’s currently assigned permission to view eMarket transaction documents associated with any specific departments, enter the 10-digit Department Organization Codes for those departments in the Visible Departments text box. Be sure to type a semicolon (;) and a space after each code that you enter (e.g., 1234567891; 1234567892; etc.).
3. If you want to remove an already-assigned USC eMarket role for the applicant, or if you want to delete the currently assigned approval settings for that role, use the Role drop-down list to specify the assigned USC eMarket role in question.
NOTE: Other fields will be displayed or hidden in this section of the Purchasing - Accounts Payable tab depending on which role you selected in the drop-down list. For the remaining steps of this procedure, if a particular field is not shown for the role you selected, skip the instructions for that field.
4. If appropriate for the role you have selected in the Role drop-down list, the Approval Threshold($) drop-down list will be displayed so that you can specify one of the following:

Quick Reference Guide: Kuali User Access Request Document Page 10 of 33
31-March-2014
• For the Requisitioner role, select the maximum approval amount that you want to delete. • For a Financial Approver or a Special Account Approver, select the required-approval range
that you want to delete.
5. If appropriate for the role you have specified, the Access To drop-down list and the Accounts (or Masks)/Organization Codes text box will be displayed so that you can specify accounts for which the user will no longer have approval access in the USC eMarket.
a. In the Access To drop-down list, select the type of codes that you will enter in the Accounts (or Masks)/Organization Codes text box: ○ Accounts (or Masks) ○ Organization Codes
b. In the Accounts (or Masks)/Organization Codes text box, enter the appropriate type of data, according to the option you selected in the Access To drop-down list. Be sure to type a semicolon (;) and a space after each Account Number or code that you enter: ○ If you chose “Accounts (or Masks),” enter the 10-digit Account Numbers for which you
want to remove the applicant’s access in the USC eMarket, or the Account “masks” (4- or 6-digit strings ending with asterisks; e.g., 5348*) representing those accounts. Make certain that any Account mask you are entering here ends with an asterisk and does not apply to accounts outside of Organization Codes for which the applicant is authorized.
○ If you chose “Organization Codes,” enter the Organization Codes representing all accounts for which you want to remove the applicant’s access in the USC eMarket. Note that this user will no longer be able to view eMarket transaction documents for any of the accounts associated with the Organization Codes you are specifying.
Note that this section of the Purchasing - Accounts Payable tab includes its own Import file link in the upper right-hand corner. This link gives you the option of populating the Accounts (or Masks)/Organization Codes text box by importing multiple Account Numbers (or 4- or 6-digit masks), or Organization Codes from an Excel file, to be associated with the eMarket role you selected in step 3. Be sure that your selection in the Access To drop-down list matches the type of data that you are importing. For instructions on importing data, see Importing Multiple Lines of Data on page 28.
6. Click the button in the Actions column. The line entry that you have just added to the eDoc will appear beneath the line on which you entered the information.
7. Repeat steps 3 through 6 as needed to request the removal of other USC eMarket roles and permissions for this applicant.
8. Optionally, use the Explanation of User Access Request text box to enter instructions or comments about the USC eMarket access changes you are requesting for the applicant.
eStatement This section presents instructions for completing the eStatement tab on the User Access Request form, which enables you to take any of the following actions: Update system records to show the applicant has a different supervisor than the one on file. Add, change, or delete another user who is designated to act as a proxy for the applicant in
taking action on eStatements.

Quick Reference Guide: Kuali User Access Request Document Page 11 of 33
31-March-2014
Add or remove Business Office Reviewer (BOR) rights for the applicant in relation to one 10-digit Organization Code or a group of Organization Codes that start with the same 5- or 7-digit “mask.”
When you are ready to submit the User Access Request eDoc, proceed to Submitting Your User Access Request eDoc on page 27.
Instructions for the Change Supervisor section 1. Enter the first and last names of the applicant’s Current Supervisor, as well as his or her 10-digit
USC ID number, in the designated fields.
2. Enter the first and last names of the applicant’s New Supervisor, as well as his or her 10-digit USC ID number, in the designated fields.
Instructions for the Proxy section In the Proxy User Action drop-down list, select the type of action you want to request, and complete other fields as detailed here:
• Add Proxy User – Complete only the New Proxy First Name, New Proxy Last Name, and New Proxy USC ID Number fields.
• Change Proxy User a. Enter the first and last names of the applicant’s Current Proxy User, as well as his or her
10-digit USC ID number, in the designated fields. b. Enter the first and last names of the applicant’s New Proxy User, as well as his or her 10-
digit USC ID number, in the designated fields.
• Delete Proxy User – Complete only the Current Proxy First Name, Current Proxy Last Name, and Current Proxy USC ID Number fields.
Instructions for the Business Office Reviewer (BOR) section Complete the appropriate section to add or delete Organization Code-specific Business Office Reviewer access privileges for the applicant, as described below. (Also note that this section of the eStatement tab includes an Import file link that you can use to import multiple Organization Codes at once when adding or deleting access. For instructions, see Importing Multiple Lines of Data on page 28.)
• Add BOR Access a. In the Organization Code field, enter a complete 10-digit Organization Code for which the
applicant should be granted access, or enter a 5- or 7-digit “mask” to give the applicant access to all Organization Codes that begin with those same digits. If you entered an individual 10-digit Organization Code, the Organization Name field will automatically be populated with information corresponding to your entry when you press the TAB key or click elsewhere on the screen.
b. Click the button in the Actions column. The line entry that you have just added to the eDoc will appear beneath the line on which you entered the information.
c. Repeat the two preceding steps as needed to request that the applicant be granted access privileges for any other Organization Codes.

Quick Reference Guide: Kuali User Access Request Document Page 12 of 33
31-March-2014
• Delete BOR Access a. In the Organization Code field, enter a complete 10-digit Organization Code for which
the applicant’s access should be removed, or enter a 5- or 7-digit “mask” to delete the applicant’s access to all Organization Codes that begin with those same digits. If you entered an individual 10-digit Organization Code, the Organization Name field will automatically be populated with information corresponding to your entry when you press the TAB key or click elsewhere on the screen.
b. Click the button in the Actions column. The line entry that you have just added to the eDoc will appear beneath the line on which you entered the information.
c. Repeat the two preceding steps as needed to request removal of the applicant’s access for any other Organization Codes.
Journal Vouchers (JVs) Follow the instructions in this section to complete the Journal Vouchers (JVs) tab on the User Access Request form. This tab is used to add or remove access privileges that enable a user to prepare and/or approve entries for specific Journal Voucher numbers. (Also note that this tab includes an Import file link that you can use to import multiple JV numbers at once when you are adding or deleting access. For instructions, see Importing Multiple Lines of Data on page 28.)
When you are ready to submit the User Access Request eDoc, proceed to Submitting Your User Access Request eDoc on page 27.
Instructions for the Add Access section 1. Select the check-box (or boxes) that correspond to the type of access that the applicant should
be granted for the Journal Voucher number that you are specifying in the same row. (If you are using the Import file option, your selection will apply to all of the JV numbers that you import.)
2. In the JV Number field, enter the 3-digit Journal Voucher number for which the applicant should be granted access. When you press the TAB key or click elsewhere on the screen, the JV Description field will automatically be populated with information corresponding to your entry in the JV Number field.
3. Click the button in the Actions column. The line entry that you have just added to the eDoc will appear beneath the line on which you entered the information.
Instructions for the Delete Access section 1. In the JV Number field, enter the 3-digit Journal Voucher number for which the applicant’s
access should be deleted. When you press the TAB key or click elsewhere on the screen, the JV Description field will automatically be populated with information corresponding to your entry in the JV Number field.
2. Click the button in the Actions column. The line entry that you have just added to the eDoc will appear beneath the line on which you entered the information.
Quick Reference Guide: Kuali User Access Request Document Page 13 of 33
31-March-2014
Disbursement Vouchers (DV/DVQE) Follow the instructions in this section to complete the Disbursement Vouchers (DV/DVQE) tab on the User Access Request form. This tab is used to add or remove user roles that control the applicant’s ability to initiate, review, and approve Disbursement Vouchers (DVs) and Disbursement Voucher Quick Expense forms (DVQEs), which respectively replace the WebBA Check Request and Quick Expense functionality. When you are ready to submit the User Access Request eDoc, proceed to Submitting Your User Access Request eDoc on page 27.
Instructions for the Add DV & DVQE Access section Complete all applicable fields in this section of the Disbursement Vouchers tab to request new or additional DV/DVQE roles and permissions for the applicant.
1. Use the Role drop-down list to specify a DV/DVQE role that you want to assign to this user, or for which you want to request a change to his/her currently assigned approval settings: • DV Initiator – Users with this role can initiate and submit DV eDocs to request payments to
suppliers. (By default, all USC employees are assigned the permission needed to initiate DVQE eDocs.)
• Account Delegates – The default Financial Approver role is assigned to the Account Fiscal Officer, but the following roles are used to authorize other users as delegate approvers. Delegate approvers can be authorized for individual Account Numbers or Organization Codes, or for Account “masks” (strings of digits ending with an asterisk, representing all Account Numbers that begin with those same digits). ○ Primary Account Delegate DV/DVQE – This role is used to authorize a user as a primary
delegate approver for the use of funds from the account specified in the DV or DVQE eDoc. Note that only one primary account delegate can be specified.
○ Secondary Account Delegate DV/DVQE – This role is used to authorize a user as a secondary delegate approver for the use of funds from the account specified in the DV or DVQE eDoc. Multiple users can be authorized as secondary account delegates.
• Organization Reviewers – These roles are used when it is desired to include an additional review step in the workflow for DV and DVQE eDocs associated with a particular Organization Code. The optional Organization Review will occur after the eDoc in question has received Financial Approval, and just before it is routed to Disbursement Control and Accounts Payable for final approval and payment. ○ Organization Reviewer DV – Users with this role are authorized to perform the optional
step of reviewing DV eDocs associated with a specified Organization Code. ○ Organization Reviewer DVQE – Users with this role are authorized to perform the
optional step of reviewing DVQE eDocs associated with a specified Organization Code. • Special Account Approver DV/DVQE – Users with this role are authorized to give optional
additional approval beyond the Financial Approver for DV or DVQE eDocs associated with individual Account Numbers or Organization Codes, or with Account “masks” (strings of digits ending with an asterisk, representing all Account Numbers that begin with those same digits).
NOTE: Other fields will be shown or hidden in this section of the Disbursement Vouchers tab depending on which role you selected in the drop-down list. For the remaining steps of this procedure, if a particular field is not shown for the role you selected, skip the instructions for that field.
2. Some DV and DVQE roles are associated with Approval Thresholds, which require the user to approve any request for an amount that falls within a specified range. If appropriate for your
Quick Reference Guide: Kuali User Access Request Document Page 14 of 33
31-March-2014
selection in the Role drop-down list, the Approval Threshold($) drop-down list is displayed so that you can select the dollar range denoting the amounts for which the user will be required to review and approve the DV or DVQE request.
3. If appropriate for the role you are assigning, the Access To drop-down list and the Accounts (or Masks)/Organization Codes text box will be displayed so that you can specify the accounts for which the user will have review and approval access.
a. In the Access To drop-down list, select the type of codes that you will enter in the Accounts (or Masks)/Organization Codes text box: ○ Accounts (or Masks) ○ Organization Codes
NOTE: If you selected one of the Organization Reviewer roles in the Role drop-down list, then “Organization Codes” will automatically be selected for you in the Access To drop-down list. If you change this default selection, an error message will be displayed because only Organization Codes can be used to assign access to the Organization Reviewer roles.
b. In the Accounts (or Masks)/Organization Codes text box, enter the appropriate type of data, according to the option you selected in the Access To drop-down list. Be sure to type a semicolon (;) and a space after each Account Number or Organization Code that you enter: ○ If you chose “Accounts (or Masks),” enter the 10-digit Account Numbers for which the
applicant should have access, or the Account “masks” (4- or 6-digit strings ending with asterisks; e.g., 5348*) representing those accounts. Make certain that any Account mask you are entering here ends with an asterisk and does not apply to accounts outside of Organization Codes for which the applicant is authorized.
○ If you chose “Organization Codes,” enter the Organization Codes representing all accounts for which the applicant should have access.
4. Click the button in the Actions column. The line entry that you have just added to the eDoc will appear beneath the line on which you entered the information.
5. Repeat steps 1 through 4 as needed to request the addition of other DV roles and permissions for this applicant.
6. Optionally, use the Explanation of DV/DVQE User Access Request text box to enter instructions or comments about the DV or DVQE access changes you are requesting for the applicant.
Instructions for the Delete DV & DVQE Access section For this section of the Disbursement Vouchers tab, you should complete only those fields in which you want to remove existing DV/DVQE roles and permissions for the applicant.
1. If you want to remove an already-assigned role for the applicant, or if you want to delete the currently assigned approval settings for that role, use the Role drop-down list to specify the assigned DV/DVQE role in question.
NOTE: Other fields will be shown or hidden in this section of the Disbursement Vouchers tab depending on which role you selected in the drop-down list. For the remaining steps of this procedure, if a particular field is not shown for the role you selected, skip the instructions for that field.
2. If appropriate for your selection in the Role drop-down list, the Approval Threshold($) drop-down list will be displayed so that you can select the required approval range that you want to delete.

Quick Reference Guide: Kuali User Access Request Document Page 15 of 33
31-March-2014
3. If appropriate for the role you are assigning, the Access To drop-down list and the Accounts (or Masks)/Organization Codes text box will be displayed so that you can specify accounts for which the user will no longer have review and approval access.
a. In the Access To drop-down list, select the type of codes that you will enter in the Accounts (or Masks)/Organization Codes text box: ○ Accounts (or Masks) ○ Organization Codes
NOTE: If you selected one of the Organization Reviewer roles in the Role drop-down list, then “Organization Codes” will automatically be selected for you in the Access To drop-down list. If you change this default selection, an error message will be displayed because only Organization Codes can be used to assign access to the Organization Reviewer roles.
b. In the Accounts (or Masks)/Organization Codes text box, enter the appropriate type of data, according to the option you selected in the Access To drop-down list. Be sure to type a semicolon (;) and a space after each Account Number or Organization Code that you enter: ○ If you chose “Accounts (or Masks),” enter the 10-digit Account Numbers for which you
want to remove the applicant’s access, or the Account “masks” (4- or 6-digit strings ending with asterisks; e.g., 5348*) representing those accounts. Make certain that any Account mask you are entering here ends with an asterisk and does not apply to accounts outside of Organization Codes for which the applicant is authorized.
○ If you chose “Organization Codes,” enter the Organization Codes representing all accounts for which you want to remove the applicant’s access. Note that this user will no longer be able to view DV or DVQE eDocs for any of the accounts associated with the Organization Codes you are specifying.
4. Click the button in the Actions column. The line entry that you have just added to the eDoc will appear beneath the line on which you entered the information.
5. Repeat steps 1 through 4 as needed to request the addition of other DV roles and permissions for this applicant.
6. Optionally, use the Explanation of DV/DVQE User Access Request text box to enter instructions or comments about the DV or DVQE access changes you are requesting for the applicant.
Instructions for the Change DV/DVQE Supervisor section 1. Enter the first and last names of the applicant’s Current Supervisor, as well as his or her 10-digit
USC ID number, in the designated fields.
2. Enter the first and last names of the applicant’s New Supervisor, as well as his or her 10-digit USC ID number, in the designated fields.
3. Optionally, use the Explanation of DV/DVQE User Access Request text box to enter instructions or comments about the DV or DVQE access changes you are requesting for the applicant.
Quick Reference Guide: Kuali User Access Request Document Page 16 of 33
31-March-2014
Purchasing Documents Review Follow the instructions in this section to complete the Purchasing Documents Review tab on the User Access Request Document form, which enables you to take any of the following actions: Add the applicant to one or more workgroups. Delete the applicant from one or more workgroups. Request the creation of a new workgroup.
When you are ready to submit the User Access Request eDoc, proceed to Submitting Your User Access Request eDoc on page 27.
Instructions for Adding the Applicant to a Workgroup 1. In the Workgroup Name drop-down list, select a workgroup to which this user should be added.
2. Click the button in the Actions column. The line entry that you have just added to the eDoc will appear beneath the line on which you entered the information.
3. Repeat the two preceding steps as needed for any other workgroups to which the applicant should be added.
4. Optionally, use the Explanation of User Access Request text box to enter instructions or comments about the Purchasing Documents Review access changes you are requesting for the applicant.
Instructions for Deleting the Applicant From a Workgroup 1. In the Workgroup Name drop-down list, select the workgroup from which the user should be
removed.
2. Click the button in the Actions column. The line entry that you have just added to the eDoc will appear beneath the line on which you entered the information.
3. Repeat the two preceding steps as needed for any other workgroups from which the applicant should be deleted.
4. Optionally, use the Explanation of User Access Request text box to enter instructions or comments about the Purchasing Documents Review access changes you are requesting for the applicant.
Instructions for Requesting the Creation of a New Workgroup 1. In the Workgroup Name field, type the name of the new workgroup that should be created.
2. Optionally, use the Workgroup Request Comments field to enter brief instructions or comments, such as the reason why you are requesting the creation of this new workgroup.
3. Click the button in the Actions column. The line entry that you have just added to the eDoc will appear beneath the line on which you entered the information.
4. Repeat the three preceding steps as needed to request the creation of additional workgroups.
5. Optionally, use the Explanation of User Access Request text box to enter instructions or comments about the Purchasing Documents Review access changes you are requesting for the applicant.
Quick Reference Guide: Kuali User Access Request Document Page 17 of 33
31-March-2014
Chart of Accounts (COA) Follow the instructions in this section to complete the Chart of Accounts tab, which is used to request access rights for the applicant to create and submit eDocs with the Chart of Accounts options available on the Workflow Main Menu screen. Using those “KEW-COA” options, authorized users can request the creation of new accounts and specify changes to be made to existing accounts. When you are ready to submit the User Access Request eDoc, proceed to Submitting Your User Access Request eDoc on page 27.
Instructions for the Add or Delete User Access section 1. In the Access Type drop-down list, select the appropriate option to indicate whether you are
requesting the addition or removal of access for the applicant to the department code that you will specify in the following step.
2. In the Department Code field, enter the department code for which you are requesting the addition or removal of access for the applicant. When you press the TAB key or click elsewhere on the screen, the Department Description field will automatically be populated with information corresponding to your entry.
3. Click the button in the Actions column. The line entry that you have just added to the eDoc will appear beneath the line on which you entered the information.
4. Repeat the three preceding steps as needed to request the addition or removal of access for the applicant to other department codes.
5. Optionally, use the Explanation of User Access Request text box to enter instructions or comments about the Chart of Accounts access changes you are requesting for the applicant.
Course Scheduling Follow the instructions in this section to complete the Course Scheduling tab on the User Access Request Document form, which enables you to take any of the following actions: Add the applicant to one or more workgroups. Delete the applicant from one or more workgroups. Request the creation of a new workgroup.
When you are ready to submit the User Access Request eDoc, proceed to Submitting Your User Access Request eDoc on page 27.
Instructions for Adding the Applicant to a Workgroup 1. In the Workgroup Name drop-down list, select a workgroup to which this user should be added.
2. Click the button in the Actions column. The line entry that you have just added to the eDoc will appear beneath the line on which you entered the information.
3. Repeat the two preceding steps as needed for any other workgroups to which the applicant should be added.
4. Optionally, use the Explanation of User Access Request text box to enter instructions or comments about the Course Scheduling access changes you are requesting for the applicant.

Quick Reference Guide: Kuali User Access Request Document Page 18 of 33
31-March-2014
Instructions for Deleting the Applicant From a Workgroup 1. In the Workgroup Name drop-down list, select the workgroup from which the user should be
removed.
2. Click the button in the Actions column. The line entry that you have just added to the eDoc will appear beneath the line on which you entered the information.
3. Repeat the two preceding steps as needed for any other workgroups from which the applicant should be deleted.
4. Optionally, use the Explanation of User Access Request text box to enter instructions or comments about the Course Scheduling access changes you are requesting for the applicant.
Instructions for Requesting the Creation of a New Workgroup 1. In the Workgroup Name field, type the name of the new workgroup that should be created.
2. Optionally, use the Workgroup Request Comments field to enter brief instructions or comments, such as the reason why you are requesting the creation of this new workgroup.
3. Click the button in the Actions column. The line entry that you have just added to the eDoc will appear beneath the line on which you entered the information.
4. Repeat the three preceding steps as needed to request the creation of additional workgroups.
5. Optionally, use the Explanation of User Access Request text box to enter instructions or comments about the Course Scheduling access changes you are requesting for the applicant.
General Purpose Workflow Follow the instructions in this section to complete the General Purpose Workflow tab on the User Access Request Document form, which enables you to take any of the following actions: Add the applicant to one or more workgroups. Delete the applicant from one or more workgroups. Request the creation of a new workgroup.
When you are ready to submit the User Access Request eDoc, proceed to Submitting Your User Access Request eDoc on page 27.
Instructions for Adding the Applicant to a Workgroup 1. In the Workgroup Name drop-down list, select a workgroup to which this user should be added.
2. Click the button in the Actions column. The line entry that you have just added to the eDoc will appear beneath the line on which you entered the information.
3. Repeat the two preceding steps as needed for any other workgroups to which the applicant should be added.
4. Optionally, use the Explanation of User Access Request text box to enter instructions or comments about the access changes you are requesting for the applicant.

Quick Reference Guide: Kuali User Access Request Document Page 19 of 33
31-March-2014
Instructions for Deleting the Applicant From a Workgroup 1. In the Workgroup Name drop-down list, select the workgroup from which this user should be
removed.
2. Click the button in the Actions column. The line entry that you have just added to the eDoc will appear beneath the line on which you entered the information.
3. Repeat the two preceding steps as needed for any other workgroups from which the applicant should be deleted.
4. Optionally, use the Explanation of User Access Request text box to enter instructions or comments about the access changes you are requesting for the applicant.
Instructions for Requesting the Creation of a New Workgroup 1. In the Workgroup Name field, type the name of the new workgroup that should be created.
2. Optionally, use the Workgroup Request Comments field to enter brief instructions or comments, such as the reason why you are requesting the creation of this new workgroup.
3. Click the button in the Actions column. The line entry that you have just added to the eDoc will appear beneath the line on which you entered the information.
4. Repeat the three preceding steps as needed to request the creation of additional workgroups. 5. Optionally, use the Explanation of User Access Request text box to enter instructions or comments
about the access changes you are requesting for the applicant.
Capital Assets Management Follow the instructions in this section to complete the Capital Assets Management tab on the User Access Request form. This tab enables you to add or remove access privileges that allow a user to view account-specific information about assets (i.e., equipment) in the Capital Assets Management System (CAMS). When adding or deleting access, you can specify complete, individual 10-digit Account Numbers or 10-digit Organization Codes, or you can specify Account or Organization Code “masks” (strings of digits ending with an asterisk, representing all Account Numbers or Organization Codes that begin with those same digits). The account-level access granted by means of Organization Codes applies only to CAMS data.
NOTE: If a Kuali user has access privileges to use KFS Inquiries and Cognos reports (discussed on page 23), then granting that user account-specific access for CAMS will also enable him or her to view financial information for the same accounts in inquiries and Cognos reports.
When you are ready to submit the User Access Request eDoc, proceed to Submitting Your User Access Request eDoc on page 27. If an error message is shown, indicating that you have exceeded the allowable number of characters, then simply submit a second User Access Request eDoc for any Account Numbers and/or Organization Codes that could not be included.
Instructions for the Add Account Level Access section This section of the Capital Assets Management tab offers you a great deal of flexibility when requesting the addition of account-level access to CAMS data. You can enter any combination of Account Numbers, Account masks, Organization Codes, and Organization Code masks that will best enable you to specify all accounts for which the applicant should be granted access rights.
1. Use the Access to Account Numbers or Account Masks field to enter the complete 10-digit Account Numbers of any individual accounts for which the applicant should be granted access, and also to

Quick Reference Guide: Kuali User Access Request Document Page 20 of 33
31-March-2014
enter Account “masks” (4- or 6-digit strings ending with asterisks; e.g., 5348*) to give him/her access to all Account Numbers that begin with those same digits. Be sure to type a semicolon (;) and a space after each Account Number or mask that you enter.
2. If you want to request that the applicant be granted access to all accounts associated with one or more Organization Codes, use the Access to Organization Codes or Organization Code Masks field to enter either the complete 10-digit Organization Codes or the 5- or 7-digit Organization Code “masks” representing all Organization Codes that begin with those same digits. Be sure to type a semicolon (;) and a space after each Organization Code or mask that you enter.
3. Optionally, use the Explanation of Capital Asset Management User Access Request text box to enter instructions or comments about the access changes you are requesting for the applicant.
Instructions for the Delete Account Level Access section This section of the Capital Assets Management tab offers you a great deal of flexibility when requesting the removal of account-level access to CAMS data. You can enter any combination of Account Numbers, Account masks, Organization Codes, and Organization Code masks that will best enable you to specify all accounts for which the applicant’s current access rights should be deleted.
1. Use the Access to Account Numbers or Account Masks field to enter the complete 10-digit Account Numbers of any individual accounts for which the applicant’s access rights should be deleted, and also to enter Account “masks” (4- or 6-digit strings ending with asterisks; e.g., 5348*) to remove his/her access to all Account Numbers that begin with those same digits. Be sure to type a semicolon (;) and a space after each Account Number or mask that you enter.
2. If you want to request the removal of the applicant’s access to all accounts associated with one or more Organization Codes, use the Access to Organization Codes or Organization Code Masks field to enter either the complete 10-digit Organization Codes or the 5- or 7-digit Organization Code “masks” representing all Organization Codes that begin with those same digits. Be sure to type a semicolon (;) and a space after each Organization Code or mask that you enter.
3. Optionally, use the Explanation of Capital Asset Management User Access Request text box to enter instructions or comments about the access changes you are requesting for the applicant.
Financial Aid Account (FAA) Follow the instructions in this section to complete the Financial Aid Account tab, which is used to request access rights for the applicant to review and approve KEW Financial Aid Account (FAA) eDocs. The FAA eDoc is used to request the creation of new financial aid award codes and to specify changes that should be made to existing award codes.
NOTE: If the applicant for whom you are submitting this request is not employed within the Office of Financial Aid, you can specify only one Financial Aid Account (FAA) role to be added or removed. Submit a separate User Access Request eDoc if you want to add or delete any other FAA roles for this individual.
When you are ready to submit the User Access Request eDoc, proceed to Submitting Your User Access Request eDoc on page 27.
Instructions for adding or deleting Financial Aid Account roles 1. In the FAA Role drop-down list, select the USC Departments role or Financial Aid Department
role that you want to add or delete for the applicant.

Quick Reference Guide: Kuali User Access Request Document Page 21 of 33
31-March-2014
• Roles for USC Departments ○ FAA Reviewer – This role is intended for a fiscal officer who will be responsible for
approving financial aid transactions sourced from accounts that he or she oversees, which are associated with the Organization Codes you are specifying in the next section of the Financial Aid Account tab.
○ Optional FAA Reviewer – Some departments may choose to designate an additional approver to review financial aid transactions before they are approved by a senior fiscal officer. When this User Access Request eDoc is processed, the applicant to whom you are assigning the Optional FAA Reviewer role will be linked to the Organization Codes that you will specify in step 3 below.
• Roles for Financial Aid Department ○ Financial Aid Workgroup – This role is reserved for personnel in the Office of Financial
Aid who are authorized to approve financial aid transactions. ○ FAA View All – Users assigned this role will be given view-only access for any KEW FAA
eDoc, regardless of whether they were included in the document’s route path. ○ Both Financial Aid Workgroup and FAA View All Roles – This role is intended for
someone in the Office of Financial Aid who may need both the authority to approve new KEW FAA eDocs and the capability to view FAA eDocs that were initiated in the past.
2. In the FAA Role Add/Delete drop-down list, select the appropriate option to indicate whether you are requesting the addition or removal of the role you specified in the FAA Role drop-down list.
3. If you selected one of the USC Department roles in the FAA Role drop-down list, complete the Organization Code field, as follows. If you selected one of the Financial Aid Department roles, skip this step and proceed to step 4.
a. Enter the Organization Code associated with the university department that you specified in the FAA Role drop-down list. (Click the adjacent lookup icon if you want to search for the desired code using the Organization Lookup form.) You can enter one or more 10-digit Organization Codes or 5- or 7-digit Organization Code “masks” representing all Organization Codes that begin with those same digits. Be sure to type a semicolon (;) and a space after each Organization Code or mask that you enter. When you press the TAB key or click elsewhere on the screen, the Organization Name field will automatically be populated with the name corresponding to your entry.
b. Click the button in the Actions column. The line entry that you have just added to the eDoc will appear beneath the line on which you entered the information.
4. Optionally, use the Explanation of User Access Request text box to enter instructions or comments about the FAA role changes you are requesting for the applicant.

Quick Reference Guide: Kuali User Access Request Document Page 22 of 33
31-March-2014
Add Account Access (Inquiries and Reports) The Add Account Access (Inquiries and Reports) tab is used to request access rights for the applicant to view KFS inquiry results and (optionally) Cognos financial reports for specific Account Numbers, a range of Account Numbers, or groups of accounts. A user can be authorized to view information for all Account Numbers, for individual 10-digit Account Numbers, or for groups of Account Numbers that all start with the same 4- or 6-digit “mask.” You can also specify Account Numbers to be excluded from those to which the applicant will be granted access. (Also note that this tab includes an Import file link that you can use to import multiple Account Numbers or masks at once when you are adding access rights. For instructions, see Importing Multiple Lines of Data on page 28.)
When you are ready to submit the User Access Request eDoc, proceed to Submitting Your User Access Request eDoc on page 27.
Instructions for Requesting Access to Individual Account Numbers or to Account Masks 1. Complete the Account Number field as follows:
• To request that the applicant be granted access to one specific account, enter the complete 10-digit Account Number.
• To request that the applicant be granted access to multiple Account Numbers that begin with the same digits, enter that 4- or 6-digit “mask” followed by an asterisk. (Naturally, there can be many more Account Numbers associated with a 4-digit mask than with a 6-digit mask.) Be sure to type the digits and the asterisk as an unbroken string with no spaces; for example: 5348*.
• To request that the applicant be granted access to ALL accounts, enter just an asterisk. If you entered an individual 10-digit Account Number, the Account Name field will automatically be populated with information corresponding to your entry when you press the TAB key or click elsewhere on the screen.
2. Click the button in the Actions column. The line entry that you have just added to the eDoc will appear beneath the line on which you entered the information.
3. Optionally, use the Explanation of Request text box to enter instructions or comments about the account access changes you are requesting for the applicant.
Instructions for Requesting Access to a Range of Account Numbers Use the following procedure to request that the applicant be given access to a sequential range of Account Numbers.
NOTE: Do not use this option unless you are sure there are sequential, valid Account Numbers within the range you are specifying, with no numbers skipped. If any Account Numbers in the range should be omitted from those to which the applicant will be given access, be sure to specify them as explained in the next section, Instructions for Excluding Account Numbers When Adding Access to Account Masks and Ranges.
1. Use the From Account Number and To Account Number fields to specify the range of Account Numbers for which the user should be granted access. In both fields, be sure to enter the complete 10-digit Account Number. (You cannot enter an Account mask when defining a range.) When you press the TAB key or click elsewhere on the screen, each Account Name field will automatically be populated with information corresponding to the Account Number you entered.

Quick Reference Guide: Kuali User Access Request Document Page 23 of 33
31-March-2014
2. Click the button in the Actions column. The line entry that you have just added to the eDoc will appear beneath the line on which you entered the information.
3. Optionally, use the Explanation of Request text box to enter instructions or comments about the account access changes you are requesting for the applicant.
Instructions for Excluding Account Numbers When Adding Access to Account Masks and Ranges Use the following procedure to specify Account Numbers that should be excluded from a range of Account Numbers or an Account “mask.” (The applicant will not be able to access the excluded accounts.)
1. Complete the Account Number field as follows: • To request the exclusion of an individual account from a range of Account Numbers or an
Account mask, enter the complete 10-digit Account Number. • To request the exclusion of multiple accounts that begin with the same six numbers, enter
that 6-digit mask followed by an asterisk. Be sure to type the digits and the asterisk as an unbroken string with no spaces; for example: 534854*.
If you entered an individual 10-digit Account Number, the Account Name field will automatically be populated with information corresponding to your entry when you press the TAB key or click elsewhere on the screen.
2. Click the button in the Actions column. The line entry that you have just added to the eDoc will appear beneath the line on which you entered the information.
3. Optionally, use the Explanation of Request text box to enter instructions or comments about the account access changes you are requesting for the applicant.
Instructions for Requesting the Addition of Access to KFS Inquiries and Cognos Reports The Inquiries and Reports: Choose Add Access section of the Add Account Access (Inquiries and Reports) tab is used to request that the applicant be given access to run the General Ledger inquiries available on the KFS Financial Main Menu, and also (optionally) the specially designed USC financial reports available on the Cognos Reporting Portal for Kuali Financial System.
NOTE: In order to run Cognos reports, the applicant must also have access to run the KFS inquiries. Also note that when a user runs either inquiries or Cognos reports, they will only contain data for those accounts to which he/she has been granted access rights. If the applicant has been granted account-specific access for the Capital Assets Management System (discussed on page 19), then he or she will be able to view information for those same accounts in inquiries and Cognos reports.
The None option is selected by default. To request that access be added, select another option: If you want the applicant to have access to run the KFS inquiries, but not the Cognos reports,
select the radio button labeled Inquiries Access Only. If you want to request that the applicant be granted access to run the KFS inquiries and the
Cognos reports, select the radio button labeled Both Inquiries and Cognos Reports Access.
Optionally, use the Explanation of Request text box to enter instructions or comments about the access changes you are requesting for the applicant. If you are requesting only access for KFS Inquiries and Cognos Reports, and not the addition of any account-specific access rights, you can submit the User Access Request eDoc without completing the rest of the Add Account Access (Inquiries and Reports) tab.
Quick Reference Guide: Kuali User Access Request Document Page 24 of 33
31-March-2014
Remove Account Access (Inquiries and Reports) The Remove Account Access (Inquiries and Reports) tab is used to request the deletion of the applicant’s access rights to view KFS inquiry results and (if applicable) Cognos financial reports for specific Account Numbers, a range of Account Numbers, or groups of Account Numbers that all start with the same 4- or 6-digit “mask.” You can also specify Account Numbers to be excluded from those for which the applicant will no longer have access rights. (Also note that this tab includes an Import file link that you can use to import multiple Account Numbers or masks at once when you are deleting access rights. For instructions, see Importing Multiple Lines of Data on page 28.)
When you are ready to submit the User Access Request eDoc, proceed to Submitting Your User Access Request eDoc on page 27.
Instructions for Requesting Removal of Access to Individual Account Numbers or to Account Masks 1. Complete the Account Number field as follows:
• To request removal of the applicant’s access for one specific account, enter the complete 10-digit Account Number.
• To request removal of the applicant’s access for multiple Account Numbers that begin with the same digits, enter that 4- or 6-digit “mask” followed by an asterisk. (Naturally, there can be many more Account Numbers associated with a 4-digit mask than with a 6-digit mask.) Be sure to type the digits and the asterisk as an unbroken string with no spaces; for example: 5348*.
• To request removal of the applicant’s access rights for ALL accounts, enter just an asterisk.
If you entered an individual 10-digit Account Number, the Account Name field will automatically be populated with information corresponding to your entry when you press the TAB key or click elsewhere on the screen.
2. Click the button in the Actions column. The line entry that you have just added to the eDoc will appear beneath the line on which you entered the information.
3. Optionally, use the Explanation of Request text box to enter instructions or comments about the account access removal you are requesting for the applicant.
Instructions for Requesting Removal of Access to a Range of Account Numbers Use the following procedure to request removal of the applicant’s access to a sequential range of Account Numbers.
NOTE: Do not use this option unless you are sure there are sequential, valid Account Numbers within the range you are specifying, with no numbers skipped. If any Account Numbers in the range should be omitted from those to which the user’s access will be removed, be sure to specify them as explained in the next section, Instructions for Excluding Account Numbers When Removing Access to Account Masks and Ranges.
1. Use the From Account Number and To Account Number fields to specify the range of Account Numbers for which the applicant’s access should be removed. In both fields, be sure to enter the complete 10-digit Account Number. (You cannot enter an Account mask when defining a range.) When you press the TAB key or click elsewhere on the screen, each Account Name field will automatically be populated with information corresponding to the Account Number you entered.
2. Click the button in the Actions column. The line entry that you have just added to the eDoc will appear beneath the line on which you entered the information.
Quick Reference Guide: Kuali User Access Request Document Page 25 of 33
31-March-2014
3. Optionally, use the Explanation of Request text box to enter instructions or comments about the account access removal you are requesting for the applicant.
Instructions for Excluding Account Numbers When Removing Access to Account Masks and Ranges Use this procedure if you want to specify Account Numbers that should be excluded from a range of Account Numbers or an Account “mask.” (The applicant will still be able to access the excluded accounts.)
1. Complete the Account Number field as follows: • To request the exclusion of an individual account from a range of Account Numbers or an
Account mask, enter the complete 10-digit Account Number. • To request the exclusion of multiple accounts that begin with the same six numbers, enter
that 6-digit mask followed by an asterisk. Be sure to type the digits and the asterisk as an unbroken string with no spaces; for example: 534854*.
If you entered an individual 10-digit Account Number, the Account Name field will automatically be populated with information corresponding to your entry when you press the TAB key or click elsewhere on the screen.
2. Click the button in the Actions column. The line entry that you have just added to the eDoc will appear beneath the line on which you entered the information.
3. Optionally, use the Explanation of Request text box to enter instructions or comments about the account access removal you are requesting for the applicant.
Instructions for Requesting the Removal of Access to KFS Inquiries and Cognos Reports The Inquiries and Reports: Choose Delete Access section of the Remove Account Access (Inquiries and Reports) tab is used to request the removal of the applicant’s access to run the General Ledger inquiries available on the Financial Main Menu in Kuali, and also the specially designed USC financial reports available on the Cognos Reporting Portal for Kuali Financial System.
NOTE: In order to run Cognos reports, the applicant must also have access to run the KFS inquiries. Also note that when a user runs either inquiries or Cognos reports, they will only contain data for those accounts to which he/she has been granted access rights.
The None option is selected by default. To request that access be removed, select another option: Select the radio button labeled Cognos Reports Access Only to request removal of the applicant’s
access to run the Cognos reports, while leaving him/her the ability to run the KFS inquiries. To request removal of the applicant’s access to run the KFS inquiries and the Cognos reports,
select the radio button labeled Both Inquiries and Cognos Reports Access.
Optionally, use the Explanation of Request text box to enter instructions or comments about the access removal you are requesting for the applicant. If you are requesting removal of access for KFS Inquiries and Cognos Reports, but not changing any account-specific access rights, you can submit the User Access Request eDoc without completing the rest of the Remove Account Access (Inquiries and Reports) tab.

Quick Reference Guide: Kuali User Access Request Document Page 26 of 33
31-March-2014
Adding Notes or Attachments
If you need to add any general comments or attachments to the User Access Request eDoc, follow these instructions to complete the Notes and Attachments tab.
1. On the folder area labeled Notes and Attachments, click the button to reveal the fields and controls used for adding comments and attaching related files.
2. Click the button next to the Attached File field and navigate to the location of the file on your computer that you want to attach to this eDoc. The full path of the file that you have selected will appear in the Attached File field, but it is not yet attached.
If you want to change your selection to a different file, click the small button just below the Attached File field. When that field is empty again, click the button once more to locate the other file that you want to attach.
3. Before attaching the file that you have selected, you must type the name of the file or a brief descriptive comment in the text box labeled Note Text. (This is a required field.)
4. To attach the file that you have selected, click the button located to the right of the Attached File field.
When you have finished entering all the requested information, proceed to the Submitting Your User Access Request eDoc instructions presented next in this guide.

Quick Reference Guide: Kuali User Access Request Document Page 27 of 33
31-March-2014
Submitting Your User Access Request eDoc When submitting the KEW User Access Request Document eDoc, you must complete the Person Requests section of the Ad Hoc Recipients tab as explained below to ensure that the document is routed to the applicant’s SBO for approval. (If the applicant is an SBO, then the eDoc should be routed to his or her supervisor.) The User Access Request Document eDoc cannot be submitted and processed unless at least one ad hoc recipient has been specified. After it has received all ad hoc approvals, the document will automatically be routed to the SysAccess group in the Office of the Comptroller for processing.
1. Select the APPROVE option from the Action Requested drop-down list in the Person Requests section on the Ad Hoc Recipients tab.
2. In the Person field, enter the User ID of the person to whom you want to route the eDoc. If you need to search for the User ID of the intended recipient, click the lookup icon next to the Person field. Use the fields provided on the Person Lookup page to enter search criteria. When the search results are displayed, click the Return Value link for the desired person, and the Person field on the eDoc page will be populated automatically.
3. Click the button in the Actions column.
4. If all other sections of the eDoc have been completed and you are ready to submit your User Access Request Document, click the button at the bottom of the eDoc screen. The Kuali system will validate your eDoc (i.e., check it for errors) and then refresh the page displayed in your browser.
When the refreshed eDoc page appears, scroll to the top of the screen in order to view the status of your eDoc submission. The status message will state “Document successfully submitted” if there were no errors found in your eDoc. If the status message indicates that there were errors in your eDoc, such as missing information, take note of the problem and make the necessary changes or additions to the information you entered. After correcting your eDoc, click the button again, and then check the new status message to see if any further adjustments are needed.
If you later want to check on the status of an eDoc you have submitted, refer to the instructions presented in Checking the Status of a Submitted eDoc on page 28 of this guide.
If you want to perform additional User Access Request transactions, click the button at the bottom of the screen, click Yes if you are asked to confirm your action, and then select the User Access Request Document link again from the Workflow Main Menu screen.
If you want to exit the Kuali system, see the Logging Out of the Kuali System instructions on page 31.
Saving an eDoc Before You Are Ready to Submit It There may be times when you cannot finish entering information for a User Access Request eDoc in one sitting, or you might need to postpone submitting it. On those occasions, you can save the eDoc without losing any of the information that you have entered.
When you click the button at the bottom of the screen, all of the information you have entered will be preserved so that you can return to it later. The eDoc that you saved will wait in your Action List, which you can access by clicking the button located in the upper left-hand portion of the Main Menu screens.
NOTE: You should only save an eDoc if you will not be able to complete filling out the form and need to leave your computer. Do not continuously save the eDoc as you fill it out.

Quick Reference Guide: Kuali User Access Request Document Page 28 of 33
31-March-2014
When you are ready to complete an eDoc that you previously saved, open it from your Action List, finish entering all required information, and then click the button at the bottom of the eDoc screen.
Resubmitting an eDoc Returned for Correction You may occasionally receive an email message from the Kuali system informing you that a User Access Request eDoc needs your attention. The email message will contain a link that you can click to access the eDoc in question.
Once you have opened the eDoc that requires changes, look at the Notes and Attachments tab to find out what information you will need to revise or add. After you have made the required changes or additions to the information you entered when you originally submitted the eDoc, click the button at the bottom of the screen to resubmit the eDoc.
Checking the Status of a Submitted eDoc Use this procedure to learn the current status of a User Access Request eDoc after you have submitted it.
1. Log into the Kuali system, as described in Initiating a User Access Request Document on page 2 of this guide.
2. Near the top of the Kuali screen, click the button. The Document Lookup page will be displayed.
3. Type your user name in the Initiator field.
TIP: If you are unsure of your user name, note that it is displayed after “Logged in User:” in the upper right-hand area of the Kuali window.
4. Use the date selector tools adjacent to the Date Created From/To fields to specify the date range during which you submitted the eDoc in question.
5. Click the Search button. The search results, consisting of all the eDocs that you submitted during the specified time period, will be displayed in a table at the bottom of the screen.
6. In the search results table, identify the eDoc whose status you want to check, and click the document icon at the rightmost end of the same row, in the column labeled Route Log. The screen will change to display status information for the eDoc in question, so that you can see where it is in the approval process.
Importing Multiple Lines of Data Several tabs on the User Access Request eDoc include an Import file link above the Actions column. This link enables you to import multiple lines of data at once for one particular field on the tab in question. In each such instance, the type of data that can be imported varies depending on the field to be populated, as noted in the following table:
Tabs on the User Access Request eDoc Field Data That Can Be Imported
Procurement Card Organization Codes (10 digits, OR a 5- or 7-digit mask)
Purchasing - Accounts Payable Account Numbers (10 digits, OR a 4- or 6-digit mask), or Department Organization Codes (10 digits only)

Quick Reference Guide: Kuali User Access Request Document Page 29 of 33
31-March-2014
Tabs on the User Access Request eDoc Field Data That Can Be Imported
eStatement > Business Office Reviewer: Add BOR Access / Delete BOR Access Organization Codes (10 digits, OR a 5- or 7-digit mask)
Journal Vouchers: Add Access / Delete Access JV Numbers (3 digits only)
Add Account Access Account Numbers (10 digits, OR a 4- or 6-digit mask)
Remove Account Access Account Numbers (10 digits, OR a 4- or 6-digit mask)
To utilize this function, follow these steps:
1. Create an Excel worksheet file consisting only of a single column that contains all the data to be imported, with one entry per cell. If the type of data that you will be importing includes any “masks,” be sure to type them as unbroken strings of digits ending with an asterisk (*).
2. Save the Excel file in the .CSV (comma-separated value) format. Be sure to note the location where you have saved the resulting .CSV file.
3. Click the Import file link on the tab to which you want to import the data from your .CSV file. The link will then be replaced by other controls, as shown in the following screen image: If you want to cancel the import task, click the Cancel lines link. Otherwise, proceed to the next step.
4. Click the Browse button to open a dialog box that will enable you to navigate to the location of the .CSV import file you saved.
5. Select your import file and click the Open button.
6. When the name of the desired import file is displayed in the field next to the Browse button, click the add button. The data from your .CSV file will be imported onto individual lines in the destination tab.
7. After the line entries have been imported from your .CSV file, you can manually add other lines if desired, or make any changes that may be needed in the imported lines.
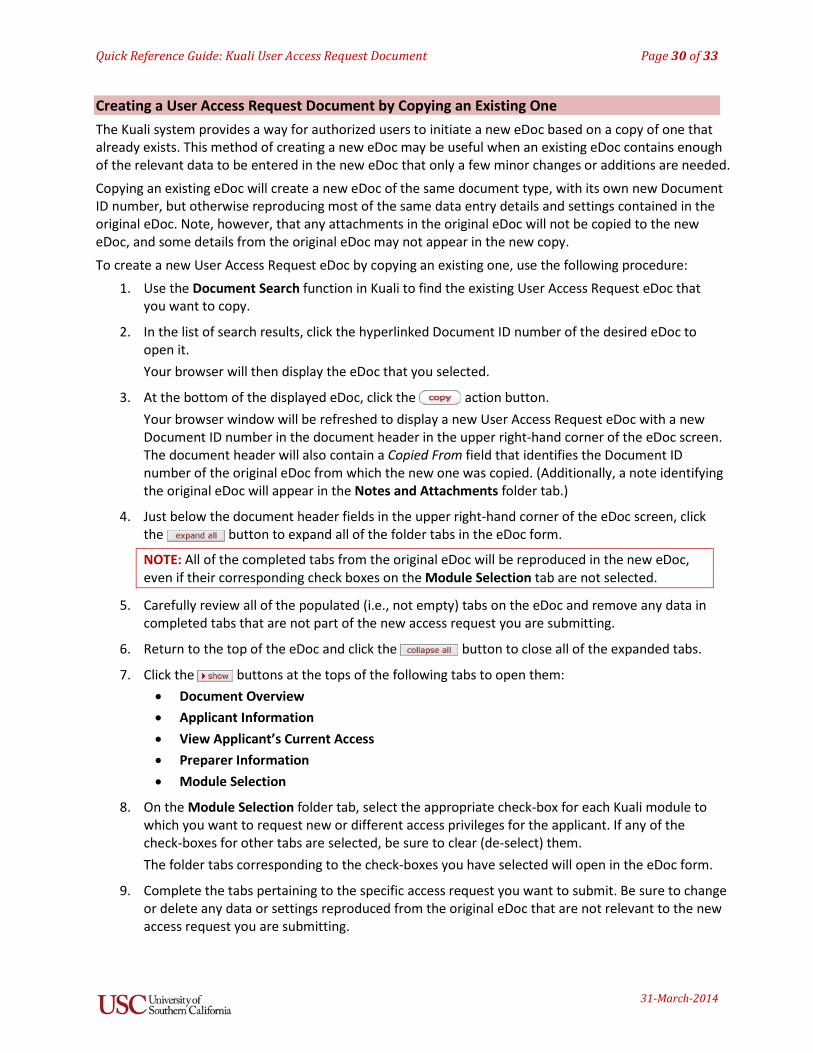
Quick Reference Guide: Kuali User Access Request Document Page 30 of 33
31-March-2014
Creating a User Access Request Document by Copying an Existing One The Kuali system provides a way for authorized users to initiate a new eDoc based on a copy of one that already exists. This method of creating a new eDoc may be useful when an existing eDoc contains enough of the relevant data to be entered in the new eDoc that only a few minor changes or additions are needed.
Copying an existing eDoc will create a new eDoc of the same document type, with its own new Document ID number, but otherwise reproducing most of the same data entry details and settings contained in the original eDoc. Note, however, that any attachments in the original eDoc will not be copied to the new eDoc, and some details from the original eDoc may not appear in the new copy.
To create a new User Access Request eDoc by copying an existing one, use the following procedure: 1. Use the Document Search function in Kuali to find the existing User Access Request eDoc that
you want to copy.
2. In the list of search results, click the hyperlinked Document ID number of the desired eDoc to open it. Your browser will then display the eDoc that you selected.
3. At the bottom of the displayed eDoc, click the action button. Your browser window will be refreshed to display a new User Access Request eDoc with a new Document ID number in the document header in the upper right-hand corner of the eDoc screen. The document header will also contain a Copied From field that identifies the Document ID number of the original eDoc from which the new one was copied. (Additionally, a note identifying the original eDoc will appear in the Notes and Attachments folder tab.)
4. Just below the document header fields in the upper right-hand corner of the eDoc screen, click the button to expand all of the folder tabs in the eDoc form.
NOTE: All of the completed tabs from the original eDoc will be reproduced in the new eDoc, even if their corresponding check boxes on the Module Selection tab are not selected.
5. Carefully review all of the populated (i.e., not empty) tabs on the eDoc and remove any data in completed tabs that are not part of the new access request you are submitting.
6. Return to the top of the eDoc and click the button to close all of the expanded tabs.
7. Click the buttons at the tops of the following tabs to open them: • Document Overview • Applicant Information • View Applicant’s Current Access • Preparer Information • Module Selection
8. On the Module Selection folder tab, select the appropriate check-box for each Kuali module to which you want to request new or different access privileges for the applicant. If any of the check-boxes for other tabs are selected, be sure to clear (de-select) them. The folder tabs corresponding to the check-boxes you have selected will open in the eDoc form.
9. Complete the tabs pertaining to the specific access request you want to submit. Be sure to change or delete any data or settings reproduced from the original eDoc that are not relevant to the new access request you are submitting.

Quick Reference Guide: Kuali User Access Request Document Page 31 of 33
31-March-2014
10. Ensure that the Person Requests section of the Ad Hoc Recipients tab is completed properly, as described in Submitting Your User Access Request eDoc on page 27.
11. When all relevant sections of the eDoc have been completed and you have deleted data from the original eDoc in all unrelated tabs, click the button at the bottom of the eDoc screen.
Logging Out of the Kuali System There is no “Log Out” button in the Kuali system. To exit Kuali, you must close all open windows of your Web browser using the standard window Close button. (On an Apple computer running the OS X operating system, you must also quit the browser.)
Quick Reference Guide: Kuali User Access Request Document Page 32 of 33
31-March-2014
Index account access adding, 22 Capital Assets Management, 19 Cognos Reports, 23 DV and DVQE, 13 individual accounts or masks, 22 Inquiries (KFS General Ledger), 23 ranges of accounts or masks, 22 removing, 24 Capital Assets Management, 20 Cognos Reports, 25 DV and DVQE, 14 individual accounts or masks, 24 Inquiries (KFS General Ledger), 25 ranges of accounts or masks, 24
Ad Hoc Recipients tab (routing upon submittal), 27
Advance Deposits; see Cashiering
Applicant Information tab, 2
applicant’s current access information, 3
attachments (optional), 26
awards, financial aid; see Financial Aid Account
Business Office Reviewer (adding or deleting account access for eStatements), 11
CAMS; see Capital Assets Management
Capital Assets Management, 19 adding access, 19 deleting access, 20
Cash Receipts; see Cashiering
Cashiering, 4 adding access, 4 deleting access, 5
Chart of Accounts (changes and additions), 17
Check requests; see Disbursement Vouchers (DV/DVQE)
Cognos Reports adding access, 23 removing access, 25
copy an existing eDoc to create a new one, 30
Course Scheduling, 17 adding user to a workgroup, 17 deleting user from a workgroup, 18 requesting creation of a workgroup, 18
creating a new eDoc by copying an existing one, 30
Credit Card Receipts; see Cashiering
Department Organization Code (definition), 3
Disbursement Vouchers (DV/DVQE), 13 adding access, 13 change supervisor, 15 deleting access, 14
eMarket; see Purchasing Accounts - Payable
equipment inventory; see Capital Assets Management
eStatement, 10 Business Office Reviewer access, 11 change supervisor, 11 proxy settings, 11
excluding account numbers from ranges or masks when adding access, 23 when removing access, 25
Financial Aid Account (FAA), 20
General Journal Vouchers; see Journal Vouchers
General Ledger inquiries; see Inquiries
General Purpose Workflow eDoc, 18 adding user to a workgroup, 18 deleting user from a workgroup, 19 requesting creation of a workgroup, 19
GJVs; see Journal Vouchers
importing data, 28
Inquiries (KFS General Ledger) adding access, 23 removing access, 25
Journal Vouchers (JVs), 12 adding access, 12 deleting access, 12
JVs; see Journal Vouchers
KFS Inquiries; see Inquiries
Module Selection tab, 3
Notes and Attachments tab (optional), 26
PDR; see Purchasing Documents Review
Preparer Information tab, 3
continued on following page…

Quick Reference Guide: Kuali User Access Request Document Page 33 of 33
31-March-2014
Procurement Card eStatement, 10 Business Office Reviewer access, 11 change supervisor, 11 proxy settings, 11 Reallocation, 5 adding access, 5 deleting access, 6
proxy settings (for eStatements), 11
Purchasing - Accounts Payable (USC eMarket), 7 adding roles and permissions, 7 roles (descriptions), 7 removing roles and permissions, 9
Purchasing Documents Review (PDR), 16 adding user to a workgroup, 16 deleting user from a workgroup, 16 requesting creation of a workgroup, 16
Quick Expense reimbursement requests; see Disbursement Vouchers (DV/DVQE)
ranges of account numbers or masks adding access, 22 excluding accounts, 23 removing access, 24 excluding accounts, 25
Reports, Cognos adding access, 23 removing access, 25
roles Cashiering, adding and deleting roles, 4 DV and DVQE roles adding access, 13 descriptions, 13 removing access, 14 USC eMarket roles adding access, 7 descriptions, 7 removing access, 9
Route Log (checking status after submittal), 28
routing (upon submittal), 27
supervisor, changing, Disbursement Vouchers (DV/DVQE), 15 eStatement, 11
USC eMarket; see Purchasing Accounts - Payable
User Access Request eDoc initiating, 2 saving before submittal, 27 submitting, 27 status after submitting, checking, 28
use an existing eDoc to create a new one, 30
View Applicant’s Current Access tab, 3
workgroups Cashiering, 4 Course Scheduling, 17 General Purpose Workflow, 18 Purchasing Documents Review, 16