jeppesen flitedeck proww1.jeppesen.com/documents/support/mobile/mobile-pro/fdp_8.3.1... · document...
TRANSCRIPT

Version 8.3.1 for Windows
Administrator GuideJeppesen FliteDeck Pro

FliteDeck Pro Administrator Guide
Jeppesen55 Inverness Drive East
Englewood, Colorado 80112-5498
This document supports FliteDeck Pro 8.3.1 for Windows
Jeppesen, All Rights ReservedApril 2016
Document ID: FDP_8.3.1_AdminGuideRevision 1.0

Table of Contents
Table of Contents
IntroductionWho Should Use This Guide ...................................................................................................1
Product Support .......................................................................................................................1
Conventions Used in This Guide .............................................................................................1
Release SummaryRelease Identification Information ...........................................................................................3
Operating System Requirements ............................................................................................3
Hardware Supported ...............................................................................................................3
Connectivity Considerations ....................................................................................................3
What’s New ............................................................................................................................3
Installing and Activating FliteDeck ProUpdate and Deployment Considerations .................................................................................5
Customer Configuration File .............................................................................................5
Installing Jeppesen FliteDeck Pro ...........................................................................................5
Activating Jeppesen FliteDeck Pro ..........................................................................................6Enabling Internet Features ................................................................................................7
Customer Config FileCustom Configuration of App Settings ..............................................................................9
Data Update Policy ................................................................................................................15Defining a Data Update Policy ........................................................................................15
Customer-Inserted Charts OverviewThe Jeppesen Ground Tools ...........................................................................................17 The CIC Workflow ..........................................................................................................17
Engine-Out Charts ..................................................................................................19
Flight Plan Integration .........................................................................................21
Troubleshooting FliteDeck ProEscalation Guidelines ............................................................................................................23
Quick Resolutions ..................................................................................................................23Unable to Perform an Update .........................................................................................24Unable to Use Registration Information on Another Device ............................................25FliteDeck Pro Is Missing Key Data and Cannot Continue ...............................................25
© 2016 Jeppesen, All Rights ReservedProprietary and Confidential
FliteDeck Pro Administrator Guidei

Table of Contents
Unable to Change a Setting in App Settings .................................................................. 25FliteDeck Pro Behaves Unexpectedly After a Windows Update ..................................... 26Internal GPS Does Not Work In FliteDeck Pro ............................................................... 26 FliteDeck Pro Crashes on a Surface Pro 4 or Surface Book ......................................... 26
Troubleshooting Procedures ................................................................................................. 26Assign a Recipient to a Distribution Group in JDM Pro .................................................. 26Download Log Files ........................................................................................................ 27Exit FliteDeck Pro ........................................................................................................... 27Deactivate FliteDeck Pro ................................................................................................ 27Uninstall and Reinstall FliteDeck Pro .............................................................................. 28
Error Codes ........................................................................................................................... 29
© 2016 Jeppesen, All Rights ReservedProprietary and Confidential
FliteDeck Pro Administrator Guideii
Introduction
Introduction
Who Should Use This Guide
This guide is for the following audiences:
• Administrators who manage data updates for FliteDeck Pro for 8.3
• Support specialists
• Anyone who installs, integrates, deploys, or services FliteDeck Pro for Windows 8.1 or higher
Product Support
Jeppesen provides technical support 24 hours a day, 7 days a week.
North America Toll-Free: 800-537-7225
United States Direct: 303-328-6175
International: 49-6102-508430
Email: [email protected]
Web: http://ww1.jeppesen.com/aviation/products/flitedeck-pro/resources.jsp
Conventions Used in This Guide
This guide uses the following conventions:
• Blue text indicates a hyperlink, which you can access when you view the document elec-tronically.
• Boldface type within steps indicates the user interface elements that you use to complete the task.
© 2016 Jeppesen, All Rights Reserved Jeppesen FliteDeck Pro Administrator’s Guide1

Introduction
© 2016 Jeppesen, All Rights ReservedJeppesen FliteDeck Pro Administrator’s Guide2

Release Summary
Release Summary
Jeppesen FliteDeck Pro is continuously modified to be fully compatible with Windows 8.1 or higher operating systems.
Release Identification Information
FliteDeck Pro version 8.3.1.
Operating System Requirements
The minimum operating system requirement for Jeppesen FliteDeck Pro 8.3 is Windows 8.1.
Hardware Supported
FliteDeck Pro is compatible with certain mobile devices that run Windows 8.1 or higher. Among these devices are the Panasonic Toughpad, Samsung Galaxy TabPro S, Surface 2 RT, Surface 3, Surface Pro 3, and Surface Pro 4.
FliteDeck Pro supports any Bluetooth GPS device that provides NMEA data using RFCOMM serial communication, such as Bad Elf.
Connectivity Considerations
To download updates, FliteDeck Pro requires a reliable Internet connection. The connection can be wired, wireless, or cellular. The time necessary to download and perform data updates depends on the speed of the Internet connection and the size of the data coverage area.
What’s New
Several updates were made in FliteDeck Pro version 8.3.1 to improve performance. Refer to the current Release Notes for a list of specific updates and issues addressed.
© 2016 Jeppesen, All Rights Reserved Jeppesen FliteDeck Pro Administrator’s Guide3

Release Summary
© 2016 Jeppesen, All Rights ReservedJeppesen FliteDeck Pro Administrator’s Guide4

Installing and Activating FliteDeck Pro
Installing and Activating FliteDeck Pro
This chapter describes how to install FliteDeck Pro onto a single Windows device. If your orga-nization uses a Mobile Device Management (MDM) service provider (sometimes called a “kitting provider”) to deploy software onto multiple distributed devices, refer to the documenta-tion from your service provider.
Update and Deployment Considerations
Before you install FliteDeck Pro onto a Windows tablet device, ensure the following conditions:
• The operating system on the device is Windows 8.1 or higher.
• The device has at least 8 GB of hard disk space available.
• Determine whether the device operating system uses an Intel or ARM processor. To determine the operating system type, access Control Panel > System.
• You must have a Microsoft developer license or the device must have a Microsoft Sideloading Product Activation key.
• If you use a Microsoft developer license, the device must be connected to the Internet.
- For information about obtaining a Microsoft developer license, refer to the following Microsoft article:http://msdn.microsoft.com/library/windows/apps/hh974578.aspx
- For information about configuring the device to enable apps to be sideloaded and for obtaining a sideload key, refer to the following Microsoft article:http://technet.microsoft.com/en-us/library/dn613835.aspx
Customer Configuration File
With release 8.3, operators can customize a configuration file that controls certain features in FliteDeck Pro, such as the options in App Settings. See "Customer Config File" on page 9.
Installing Jeppesen FliteDeck Pro
FliteDeck Pro is available as a sideload package, and is distributed as either a folder or a zip file.
To install FliteDeck Pro
1. Tap the Desktop tile to access the Windows Desktop.
2. Navigate to the location that contains the sideload package.
If the device does not have a sideload key associated with it, Jeppesen recommends that you acquire a Microsoft developer license. As of January 2015, individual licenses are free of charge and are valid for 30 days. You can renew licenses at no charge.
© 2016 Jeppesen, All Rights Reserved Jeppesen FliteDeck Pro Administrator’s Guide5

Installing and Activating FliteDeck Pro
The sideload package can be on the device or on external media. If the package is on external media, copy the package to the device and install the app from the device location.
3. If the sideload package was delivered as a .zip file, unzip the package.
4. Open the sideload package folder, and then open the subfolder that corresponds to the system:
5. Right-click the Add-AppDevPackage file.
6. Select Run with PowerShell.
7. In Windows PowerShell, follow the prompts to install the app, and note the following:
- If your system is not configured with a Sideloading Product Activation Key, Windows PowerShell prompts you to supply your developer credentials.
- Windows PowerShell might prompt you to supply your device Administrator creden-tials.
- Windows PowerShell notifies you when the installation is complete.
8. To start FliteDeck Pro, do one of the following steps:
- Windows 8.1: Display the Start view (Tile view), swipe upward from the bottom to access All Apps, and then tap the Jeppesen FliteDeck Pro tile.
- Windows 10: Tap the Windows button, tap the All app button, and then tap the Jeppesen FliteDeck Pro tile.
Activating Jeppesen FliteDeck Pro
If you attempt to run FliteDeck Pro and it is not activated, the app displays a message that indicates a missing activation link. Until you activate the app, you can run FliteDeck Pro only in Demo mode.
To activate FliteDeck Pro
1. Locate and open the activation email message for FliteDeck Pro.
If you have trouble locating the message, search for the following sender in your email client:
2. Copy the link into your browser.
FliteDeck Pro displays the Activation screen.
3. Tap Activate.
FliteDeck Pro displays the Updates screen, which enables you to load your subscription data. Subscription data includes the following components:
• Terminal Charts
If the device is... Open the subfolder that ends with...
32-bit or 64-bit x86
ARM ARM
© 2016 Jeppesen, All Rights ReservedJeppesen FliteDeck Pro Administrator’s Guide6

Installing and Activating FliteDeck Pro
• Enroute Data
• Manuals
• Customer Configuration File
4. Tap Update.
The update process can take several minutes. The amount of time necessary to download and perform an update depends on the speed of the Internet connection and the size of the coverage area. You cannot cancel or pause the update process.
5. When the update process is complete, tap the X (Close) button.
Enabling Internet Features
To support the FliteDeck Pro features that require Internet connectivity, the following addresses and ports must be opened on any firewalls:
Action Address and Port
To register and update FliteDeck Prodeliver.jeppesen.com (port 443)cd1.distributionmanageredge.com (port 80)
To download enroute weather jwc-dist.jeppesen.com (port 80)
To download METARs and TAFs aviationservices.jeppesen.com (port 443)
© 2016 Jeppesen, All Rights Reserved Jeppesen FliteDeck Pro Administrator’s Guide7

Installing and Activating FliteDeck Pro
© 2016 Jeppesen, All Rights ReservedJeppesen FliteDeck Pro Administrator’s Guide8

Customer Config File
The customer configuration file defines certain options in FliteDeck Pro App Settings, including the flight servces URL for imported flight plans. The configuration file can also define a company-specific schedule for data updates. If your company chooses to use the customer configuration file, follow the guidelines in this chapter.
The Jeppesen FliteDeck Pro User Guide describes the options under App Settings. The ability of the user to adjust these settings may be controlled by the company through the configura-tion file. If an update policy is not defined in the customer configuration file, the default time period for updates availability is used.
You can author different configurations for use with different user groups within your operation. For example, pilots who fly domestic routes might have a different configuration from pilots who fly international routes.
Each configuration is packaged separately, given its own title, and uploaded to JDM Pro, where it is assigned to the appropriate distribution groups. Only one configuration can be assigned to a device.
In addition, operations that use different versions of FliteDeck Pro (for example, FliteDeck Pro for iOS and FliteDeck Pro for Windows) can combine the configurations into one file as shown in Figure 1 on page 11.
Custom Configuration of App Settings
You complete three steps to upload and distribute custom content to FliteDeck Pro:
Step 1 - Create the Customer Configuration File
Step 2 - Create the Package
Step 3 - Upload the Package to JDM Pro
See the JDM Pro User Guide for more information about uploading packages and assigning them to distribution groups.
Include only the settings you want to control at the company level in the configuration file. Any of the items in App Settings that are not defined in a configuration file remain under user control.
Different versions of FliteDeck Pro might not have all the same configuration options.
© 2016 Jeppesen, All Rights Reserved Jeppesen FliteDeck Pro Administrator’s Guide9
Step 1 - Create the Customer Configuration File
The customer configuration file becomes part of the FliteDeck Pro recipient’s configuration. It is downloaded and used in place of the default options in FliteDeck Pro App Settings. A pilot can change an option in App Settings only when that item does not have a corresponding value in the customer configuration file.
To create a customer configuration file:
1. Using a plain text editor such as Notepad or TextEdit, create a configuration file.
Validate the structure and settings of your configuration file using the XML schema (version 1.2) provided in Figure 1.
Note the following points:
• Aside from the version attribute, you can omit any item. Omitted items remain under user control.
• Use either the words ON or OFF for bilevel elements. (A bilevel element, such as Enable Moving Map, is either switched on or off.)
• To tailor the configuration for different applications, you can associate any top level element with the version of the application. Top-level elements include ApplicationBe-havior, Enroute, TerminalCharts, Weather, and Services. Nonassociated elements are used for all versions.
2. Save the file as CustomerConfiguration.xml.
Specify UTF-8 encoding when you create the XML file.
© 2016 Jeppesen, All Rights ReservedJeppesen FliteDeck Pro Administrator’s Guide10

FIGURE 1: Sample configuration file (continued on the next page)
<?xml version="1.0" encoding="utf-8"?>
<CustomerConfiguration version="1.3">
<ApplicationBehavior>
<SleepMode>ON</SleepMode> <!-- Values are ON or OFF; To ensure that the iPad stays powered on during flight, set Sleep Mode to OFF. Switching Sleep Mode to OFF reduces the iPad battery life. The default value is ON. Supported: iOS 2.5+, Windows 8.3+ -->
<AllowFlightSharing>OFF</AllowFlightSharing> <!-- Values are ON or OFF; To share flight information between two iPads actively running FliteDeck Pro, set Allow Flight Sharing to ON. The default value is OFF. Supported: iOS 2.5+, Windows 8.3+ -->
<DisplayATCClearances>OFF</DisplayATCClearances> <!-- Values are ON or OFF; To be able to display and load ATC cleared routes, Display ATC Clearances must be set to ON.. The default value is OFF. Supported: iOS 2.7+, Windows 8.3+ -->
</ApplicationBehavior>
<Enroute>
<MovingMap>OFF</MovingMap> <!-- Values are ON or OFF; To be able to track aircraft position, recenter the enroute map over the aircraft location, or view the enroute map in Track Up orientation, set Enable Moving Map to ON. The default value is OFF. Supported: iOS 2.5+, Windows 8.3+ -->
<DisplayOwnship>OFF</DisplayOwnship> <!-- Values are ON or OFF; To display the ownship symbol on the enroute map, set Display Ownship on Enroute to ON. The default value is OFF.
Supported: iOS 2.5+, Windows 8.3+ --> <DisplayVFRTheme>OFF</DisplayVFRTheme> <!-- Values are ON or OFF; To be able to display the VFR enroute theme, Display VFR Theme must be set to ON. Supported: iOS 2.7+, Windows 8.3+ -->
<AllowShowAllFilters>OFF</AllowShowAllFilters> <!-- Values are ON
or OFF; To be able to use the Show All filters for airports, navaids, and waypoints, Allow Show All Filters must be set to ON.
Supported: iOS 2.7.1+, Windows 8.3.1+ -->
</Enroute>
<TerminalCharts> <DisplayOwnshipApproach>OFF</DisplayOwnshipApproach> <!-- Values are ON or OFF; To display ownship on approach charts, Display Ownship on Approach Charts must be set to ON. The default value isOFF. Supported: iOS 2.7+ -->
<DisplayOwnship>OFF</DisplayOwnship> <!-- Values are ON or OFF; To display ownship position on the airport diagram, set Display Ownship on Airport Diagram to ON. The default value is OFF. Supported: iOS 2.5+, Windows 8.3+ -->
<DefaultZoomLevel>ZOOM_FIT_FULL</DefaultZoomLevel> <!-- Values are ZOOM_FIT_FULL and ZOOM_FIT_WIDTH. To select a preference for the default zoom level of terminal charts, choose an option. ZOOM_FIT_FULL is the default. Supported: iOS 2.5+, Windows 8.3+ -->
© 2016 Jeppesen, All Rights Reserved Jeppesen FliteDeck Pro Administrator’s Guide11

FIGURE 1: Sample configuration file (continued from the previous page)
<SpeedThreshold>40</SpeedThreshold> <!-- Values may be 30, 40, 50, 60, 70, or 80 knots. This setting is the speed threshold at which the automatic switch to a taxi diagram occurs, if enabled; and the speed threshold at which the ownship appears on the airport diagram occurs. The default value is 40 knots. Supported: iOS 2.5+, Windows 8.3+ -->
</TerminalCharts>
<Weather>
<METARAndTAF>ON</METARAndTAF> <!-- Values are ON or OFF; This setting enables or disables the display of terminal weather. The default value is ON. Supported: iOS 2.5+, Windows 8.2+ -->
<EnrouteWX>OFF</EnrouteWX> <!-- Values are ON or OFF; This setting enables or disables the display of enroute weather over the enroute map. The default value is OFF. Supported: iOS 2.5+, Windows 8.2+ -->
<TemperatureUnit>FAHRENHEIT</TemperatureUnit> <!-- Values are FAHRENHEIT or CELSIUS; To select a preference for the temperature unit, choose an option. The default value is FAHRENHEIT. Supported: iOS 2.5+, Windows 8.2+ -->
<DefaultFormat>RAW</DefaultFormat> <!-- Values are RAW or DECODED; To select a preference for the terminal weather format, select an option. The default value is RAW. Supported: iOS 2.5+, Windows 8.2+ -->
</Weather>
<Services>
<CompanyManuals> <!-- These settings enable users to access company-uploaded documents from the Manuals button on the FliteDeck Pro toolbar. Enter the Jeppesen Document Management Service (e-Link) account information to enable this service. Supported: iOS 2.5+ --> <Username>elink-user</Username> <Password>elink-password</Password> </CompanyManuals>
<FlightPlanning> <!-- This setting enables users to import routes from a flight-planning system that is set up to share routes with FliteDeck Pro. Enter the Flight Plan account information to enable this service. Supported: iOS 2.5+, Windows 8.3+ --> <URL>https://myairlines.com/fp</URL> <Username>corp-user</Username> <Password>corp-password</Password> </FlightPlanning>
</Services>
<Updates>
<OperatorPolicyHours>23</OperatorPolicyHours> <!-- This setting designates the maximum hours of the data availability grace period threshold. If this element is omitted, or the value exceeds the maximum grace period threshold, the default maximum grace period threshold for hours (23 hrs) is used. Supported: iOS 2.5+, Windows 8.3+ -->
© 2016 Jeppesen, All Rights ReservedJeppesen FliteDeck Pro Administrator’s Guide12

FIGURE 1: Sample configuration file (continued from the previous page)
<OperatorPolicyDays>0</OperatorPolicyDays> <!-- This setting designates the maximum days of the data availability grace period threshold. If this element is omitted, or the value exceeds the maximum grace period threshold, the default maximum grace period threshold for days (0 days) is used. Supported: iOS 2.5+, Windows 8.3+ -->
<AirwayManual>TRUE</AirwayManual> <!-- Values are TRUE or FALSE; Set to TRUE if the device receives standard Jeppesen Airway Manuals. Set to FALSE if the device does not receive Jeppesen Standard Airway Manuals. Supported: iOS 2.5+, Windows 8.3+ -->
<Tailored Text>FALSE</TailoredText> <!-- Values are TRUE or FALSE; Set to TRUE if the device receives Jeppesen Tailored Airway Manual text. Set to FALSE if the device does not receive Jeppesen Tailored Airway Manual text. Supported: iOS 2.5+, Windows 8.3+ -->
<TailoredTextCycle>WEEKLY</TailoredTextCycle> <!-- Valuesare BIWEEKLY_EVEN, BIWEEKLY_ODD, WEEKLY; Enter which cycle yourJeppesen Tailored Airway Manual text is published. If you do notsubscribe to Jeppesen Tailored Airway Manual text, omit thiselement. Supported: iOS 2.5+, Windows 8.3+ -->
</Updates>
<Support> <!-- These settings enable users to access your operation's technical support information from the Help button on the FliteDeck Pro toolbar. Supported: iOS 2.5+, Windows 8.3 --> <TollFreeNumber>888-555-1234</TollFreeNumber> <DomesticNumber>206-555-2345</DomesticNumber> <InternationalNumber>+49-5555-345678</InternationalNumber> <Email>[email protected]</Email> <Web>http://support.myairlines.com/efb</Web></Support>
<Control> <PreventDeactivation>FALSE</PreventDeactivation> <!-- Values are TRUE or FALSE; set TRUE to prevent deactivating the application. Supported: Windows 8.3+ -->
<PreventClearingCustomContent>FALSE</PreventClearingCustomContent> <!-- Values are TRUE or FALSE; set TRUE to prevent clearing custom content. Supported: Windows 8.3+ --></Control>
</CustomerConfiguration>
© 2016 Jeppesen, All Rights Reserved Jeppesen FliteDeck Pro Administrator’s Guide13

Step 2 - Create the Package
With the release of JDM Pro 1.7, the next step is to add the configuration file and upload it directly. JDM Pro lets you select all necessary parameters through its user interface. The only specified selection is the content type, which must be FDPro_Customer_Config.
To create a zip file
1. Select the configuration file.
2. Do one of the following actions:
• On a Windows PC, right-click and select Send To, and then select Compressed (zipped) folder.
• On a Mac, select File, and then Compress ‘<filename>'.
A .zip file called CustomerConfiguration.zip is produced.
Step 3 - Upload the Package to JDM Pro
After you create and package the file, upload it to JDM Pro.
To upload content
1. Log on to JDM Pro from https://jdmp.jeppesen.com.
2. From the Content tab, click Import.
3. Using the Upload File dialog box, select the .zip file you want to upload, and then click Open.
4. Select the zipped file. (On most browsers you can drag the file to the dialog box.)
5. Click OK.
The Metadata dialog box appears.
• Specify FDPro_Customer_Config as the type of content.
• Enter the title, or select an existing title from the list.
• Enter the version. If you selected an existing title, JDM Pro displays the previous version. Enter a version later than that version.
• (Optional) Enter the effectivity dates.
• Select or clear the Immediate Delivery check box.
6. Select Continue.
JDM Pro processes and publishes the file.
The configuration becomes part of the recipient configuration, which is downloaded and used in place of the user settings when the recipient launches FliteDeck Pro.
© 2016 Jeppesen, All Rights ReservedJeppesen FliteDeck Pro Administrator’s Guide14

Data Update Policy
Data Update Policy
When you define an update policy for terminal charts and Airway Manuals, you specify the maximum grace period from when the data becomes available and when it is no longer current.
The default grace period is 0 days, 23 hours.To control how data updates are communicated and managed in FliteDeck Pro, first define a policy that specifies when revisions become active. This policy cannot exceed the maximum grace period.
Defining a Data Update Policy
To customize the time period for which terminal charts and Airway Manuals are available to users in FliteDeck Pro, set a policy that falls within the maximum grace period.
To define a data update policy
1. Identify whether your Jeppesen Tailored Airway Manual text or your company terminal charts are distributed on a weekly cycle.
Define your customized grace period according to the follow criteria:
• If either are distributed on a weekly basis, use the weekly maximum grace period.
• If either are not distributed on a weekly basis, use the biweekly maximum grace period.
2. Enter the update policy criteria into the customer configuration file. Figure 2 shows an example of the data update section.
TABLE 1: Default maximum grade period
Updates Maximum Grace Period
Weekly (7 days) 0 days, 0 hours to 6 days, 0 hours
Biweekly (14 days) 0 days, 0 hours to 7 days, 0 hours
© 2016 Jeppesen, All Rights Reserved Jeppesen FliteDeck Pro Administrator’s Guide15
Data Update Policy
FIGURE 2: Sample update criteria in the configuration file
The following diagram represents how the example scenario extends the maximum grace period (represented by the amber bar in the FliteDeck Pro Updates screen) by 2 days, 12 hours.
Without a customized updates policy identified in the customer configuration file, or if the customized policy defined exceeds the default grace period threshold of 0 days, 23 hours, the default grace period is used, as shown in the following diagram.
<Updates>
<OperatorPolicyHours>23</OperatorPolicyHours> <!-- This settingdesignates the maximum hours of the data availability grace periodthreshold. If this element is omitted, or the value exceeds themaximum grace period threshold, the default maximum grace periodthreshold for hours (23 hrs) is used. Supported: iOS 2.5+, Windows8.3+ -->
<OperatorPolicyDays>0</OperatorPolicyDays> <!-- This settingdesignates the maximum days of the data availability grace periodthreshold. If this element is omitted, or the value exceeds themaximum grace period threshold, the default maximum grace periodthreshold for days (0 days) is used. Supported: iOS 2.5+, Windows8.3+ -->
<AirwayManual>TRUE</AirwayManual> <!-- Values are TRUE or FALSE;Set to TRUE if the device receives standard Jeppesen AirwayManuals. Set to FALSE if the device does not receive JeppesenStandard Airway Manuals. Supported: iOS 2.5+, Windows 8.3+ -->
<TailoredText>FALSE</TailoredText> <!-- Values are TRUE or FALSE;Set to TRUE if the device receives Jeppesen Tailored Airway Manualtext. Set to FALSE if the device does not receive JeppesenTailored Airway Manual text. Supported: iOS 2.5+, Windows 8.3+ -->
<TailoredTextCycle>WEEKLY</TailoredTextCycle> <!-- Valuesare BIWEEKLY_EVEN, BIWEEKLY_ODD, WEEKLY; Enter which cycle yourJeppesen Tailored Airway Manual text is published. If you do notsubscribe to Jeppesen Tailored Airway Manual text, omit thiselement. Supported: iOS 2.5+, Windows 8.3+ -->
</Updates>
© 2016 Jeppesen, All Rights ReservedJeppesen FliteDeck Pro Administrator’s Guide16

Data Update Policy
Customer-Inserted Charts Overview
The phrase customer-inserted charts (CIC) refers to charts that your organization imports into JDM Pro and distributes to recipients for use in the mobile versions of FliteDeck Pro. You can insert terminal charts to appear in FliteDeck Pro only for airports that are within your Jeppesen coverage area. In FliteDeck Pro, customer charts appear with the notation Non-Jepp Chart.
The Jeppesen Ground Tools
For pilots to access your company charts on their recipient devices, you use three tools and follow a specific workflow to package, import, and distribute the content. These are the required ground tools:
• Content Delivery Agent for the Desktop for JDM Pro (CDAD for JDM Pro) — A Windows-based application that continually checks JDM Pro for new content. When new content is available, CDAD for JDM Pro downloads the content. You might use this content to create your own customer-inserted charts.
CDAD also provides the reference dataset used by EFB Content Packager. Refer to the Jeppesen Content Delivery Agent for the Desktop User Guide for more information.
• EFB Content Packager — A Windows-based application that you use to assign metadata to your content, and then package that content for distribution with JDM Pro. Refer to the EFB Content Packager User Guide for more information.
• Jeppesen Distribution Manager Pro (JDM Pro) — A web-based application that you use to manage your fleet’s mobile devices. JDM Pro manages data and distributes it to the registered mobile devices in your fleet. Refer to the JDM Pro User Guide for more informa-tion.
The CIC Workflow
After your content has been created and saved in the Customer Content folder, the workflow for getting that content to appear in FliteDeck Pro consists of three phases, as shown in the following figure.
The ability to insert charts that your organization creates for use in FliteDeck Pro is optional. Contact your Jeppesen account manager for more information.
Your company is responsible for any content that you create and display on recipient devices. Be sure to include a quality assurance process before distributing content to recipient devices.
© 2016 Jeppesen, All Rights Reserved Jeppesen FliteDeck Pro Administrator’s Guide17

Data Update Policy
FIGURE 3: The workflow for customer-inserted charts for mobile devices
Phase 1 — Assign Metadata and Package the Content
Using Content Packager, you assign metadata to your content items and create the package. You might also convert PDF content to TCL content during this phase.
Assigning metadata to your charts ensures that FliteDeck Pro correctly displays your charts alongside the Jeppesen-provided charts. For information about assigning metadata, see the EFB Content Packager User Guide.
Phase 2 - Distribute the Content
Using JDM Pro, you upload and distribute your content packages to registered mobile devices in your fleet. See the JDM Pro User Guide for more information about distributing content.
Phase 3 - Perform the Update
On the mobile device, FliteDeck Pro indicates that an update is available for download. When the update is complete, pilots can view the content. See the Jeppesen FliteDeck Pro User Guide for more information about updating the device.
© 2016 Jeppesen, All Rights ReservedJeppesen FliteDeck Pro Administrator’s Guide18

Engine-Out Charts
Engine-Out Charts
Access to engine-out (E/O) charts is available in FliteDeck Pro. Engine-out charts are company-specific, and therefore reside within the company (CO) charts area of the Terminal Charts view.
On the rare occasion when an engine out occurs, FliteDeck Pro enables pilots to quick access the E/O chart. Engine-out charts are directly related to, and used in conjunction with, specific departure procedures and, on rare occasions, approach procedures. FliteDeck Pro identifies the presence of engine-out charts for departure procedures only. Refer to the Jeppesen FliteDeck Pro User Guide for information.
An operator can create and publish an Engine-out chart either as a stand-alone graphical chart (10-7) or as in-line textual information. When these charts are created, the chart type is set to ENGINE OUT. FliteDeck Pro uses that chart type as its only means of determining whether a chart qualifies as an engine-out chart. Departures are not required to have an associated E/O procedure. However, if you associate an E/O procedure with a departure, you can associate only one E/O procedure with that departure. The same E/O procedure can be associated with multiple departures.
© 2016 Jeppesen, All Rights Reserved Jeppesen FliteDeck Pro Administrator’s Guide19

Engine-Out Charts
© 2016 Jeppesen, All Rights ReservedJeppesen FliteDeck Pro Administrator’s Guide20

Flight Plan Integration
Flight Plan Integration
Users can import a route from any flight-planning system that is set up to deliver flight plans to FliteDeck Pro. Flight plan routes can be imported into FliteDeck Pro in any of these four ways:
1. If you use non-Jeppesen flight-planning systems and already file flight plans over the AFTN, you can add the Jeppesen server to the published AFTN Type B message. For this method, include the Jeppesen server in the address list when it is filed.
The flight plan route is then sent to the Jeppesen server via the AFTN and called for when the pilot enters a call sign from within FliteDeck Pro. This option requires that you contact your Jeppesen account manager for the flight plan credentials that are entered in FliteDeck Pro App Settings.
2. If you use Jeppesen flight-planning solutions (for example, FlitePlan Online or JetPlanner), you can send flight plan routes directly to the Jeppesen server. The pilot enters the call sign from FliteDeck Pro to access the flight plans.
3. If you use third-party flight planning apps on your devices, you can send flight plan routes directly to FliteDeck Pro.
4. Finally, you can stand up a flight plan web REST (representational state transfer) service, instead of using the Jeppesen server. This option enables you to integrate with the current flight planning system. This option requires that the operator's flight-planning system produces ARINC 633 flight plans. The REST service must adhere to the Jeppesen specifi-cations, which are provided by the Jeppesen account manager, upon request.
FIGURE 1: Flight plan integration
Pilots can import flight plan routes only when they enter valid credentials in the Account Info section in App Settings. Contact your Jeppesen account manager for credential details.
© 2016 Jeppesen, All Rights Reserved Jeppesen FliteDeck Pro Administrator’s Guide21

Flight Plan Integration
© 2016 Jeppesen, All Rights ReservedJeppesen FliteDeck Pro Administrator’s Guide22

Troubleshooting FliteDeck Pro
Troubleshooting FliteDeck Pro
This chapter describes basic FliteDeck Pro troubleshooting guidelines.
Escalation Guidelines
If you are unable to resolve an issue by using the resources in this guide, you can escalate the issue to your organization’s EFB administrator or to Jeppesen Support.
Before contacting Jeppesen, gather as much of the following information as you can. By providing this information, you help to ensure a rapid resolution.
First, determine whether the issue is reproducible on a test device. If so, provide Technical Support with the following information:
• Recipient name.
• Account information, including the following (which FliteDeck Pro displays in the Account Info section of App Settings):
- FliteDeck Pro version and build numbers
- Flight Services URL
• Complete description of the issue, including a detailed workflow that led up to the issue. If possible, include screen captures or video (or both) of the issue.
• Error codes, if any.
• Whether App Settings are customized through the customer configuration file.
• Detailed description of the device, including device settings. For example, determine the following:
- Sleep Mode setting
- Display Lock setting
- Enroute View settings, including moving map and ownship
- Terminal Charts View settings, including ownship
- Application version number and build number
• Type of network—such as Wi-Fi or cellular:
- If Wi-Fi, describe the location from which the network is accessing data—for example, hotel, FBO, or home.
- If cellular, specify whether 3G or 4G.
• Whether the recipient is using a third-party GPS receiver or an internal GPS. If a third-party GPS receiver is used, determine what brand and type.
Quick Resolutions
This section provides instructions to help you rapidly resolve issues. Links to expanded instructions and processes are indicated where necessary.
© 2016 Jeppesen, All Rights Reserved Jeppesen FliteDeck Pro Administrator’s Guide23
Troubleshooting FliteDeck Pro
Unable to Perform an Update
If you are unable to update FliteDeck Pro, follow these procedures:
1. If an error message appears, see "Error Codes" on page 29 for common error messages and resolutions.
2. Verify that the device is connected to a reliable Wi-Fi or cellular signal.
• Ensure that the device is not in Airplane mode, as follows:
- In Windows 8.1, swipe from the right, tap the Settings charm, and then tap the Wireless Network icon. Make sure that Airplane mode is set to OFF.
- In Windows 10, swipe from the right to display the Action Center. Ensure that the Airplane mode tile is de-selected (gray). If this tile is colored, tap the Airplane mode tile to turn it off.
• After you verify that the device is connected to a Wi-Fi or cellular signal, open a browser session and verify that the device can access a typical Internet page.
For example, some public and hotel Wi-Fi connections indicate a connected status, but do not provide a functional Internet connection to the device.
3. If problems persist, exit, and then restart FliteDeck Pro. See "Exit FliteDeck Pro" on page 27.
4. If problems persist, restart the device, as follows.
• In Windows 8.1, swipe from the right and tap the Settings charm. Tap the Power icon, and then tap Restart.
• In Windows 10, tap the Windows icon on the taskbar, tap the Power icon, and then tap Restart.
5. If problems persist, deactivate, and then reactivate FliteDeck Pro.
Before you deactivate FliteDeck Pro, make sure that the device has an active and stable Internet connection and power source. After you restart FliteDeck Pro, it automatically accesses your registration information and prompts you for an initial data update. For more information about deactivating FliteDeck Pro, see "Deactivate FliteDeck Pro" on page 27.
6. If all previous attempts do not resolve the issue, as a last resort, you can uninstall and reinstall the app. When you uninstall FliteDeck Pro, the system retains your registration information.
• To uninstall the app in Windows 8.1, access the Tile view; then tap and hold the Jeppesen FliteDeck Pro tile. A row of options appears at the bottom of the screen. Choose Uninstall.
• To uninstall the app in Windows 10, access the Tile view. Tap and hold the Jeppesen FliteDeck Pro tile, and then tap the ellipsis icon. An options menu appears. Tap More options, and then tap Uninstall.
• Follow the instructions in "Installing and Activating FliteDeck Pro" on page 5 to reinstall the app. After you reinstall the app, FliteDeck Pro automatically registers according to your existing registration information and prompts you for an initial data update.
Before you uninstall FliteDeck Pro, be sure to deactivate it first.
© 2016 Jeppesen, All Rights ReservedJeppesen FliteDeck Pro Administrator’s Guide24

Troubleshooting FliteDeck Pro
Unable to Use Registration Information on Another Device
Each FliteDeck Pro activation link is applicable to a specific device. Activation links cannot be shared on multiple devices. If a user attempts to activate FliteDeck Pro on a second device, FliteDeck Pro becomes active on that device. However, if the user attempts to use Application Manager on the previously registered device, FliteDeck Pro displays an error message.
To resolve the issue, deactivate the application on both devices and reactivate the software on only one device. See the explanation for error 112 in "Error Codes" on page 29 for more infor-mation. For instructions on deactivating FliteDeck Pro, see "Deactivate FliteDeck Pro" on page 27.
FliteDeck Pro Is Missing Key Data and Cannot Continue
For FliteDeck Pro to operate as expected, the recipient must be set up with necessary data in JDM Pro. An error appears when the application is successfully registered, but the recipient does not have any terminal charts, enroute, data, or other content assigned to the device in JDM Pro.
The EFB administrator must assign the recipient to a distribution group in JDM Pro and ensure that the distribution group has been configured to receive the necessary content. Refer to the following table.
Manuals, customer configuration (FDPro_Customer_Config), and CIC charts (CICCHARTS) are optional, but might be assigned to both 8.1 and 8.3 recipients.
New content types can be added to existing distribution groups. Remove old content types after all the users at the company have been upgraded.
Unable to Change a Setting in App Settings
The company might choose to limit the adjustments pilots can make in FliteDeck Pro. The customer configuration file enables the company to configure the default settings that pilots access and modify in App Settings.
To determine whether the company has a customer configuration file, refer to JDM Pro. That application reports the content that is assigned to distribution groups. Recipients receive a configuration file when the group contains an FDPro_Customer_Config content type.
You can also use JDM Pro reporting tools (including the Recipient Content report) to determine the exact content that is installed with FliteDeck Pro. You can use this method to determine whether the recipient has received the configuration file and, if so, the version of the file.
ContentRequired JDM Pro Content Types (8.1)
Required (8.3)
Terminal Charts Terminal Charts Terminal Charts
Enroute j3nenroute j3n_v04
Cultural j3ncultural j3s_v04
Terrain srtmterrain srtmterrain
© 2016 Jeppesen, All Rights Reserved Jeppesen FliteDeck Pro Administrator’s Guide25
Troubleshooting FliteDeck Pro
FliteDeck Pro Behaves Unexpectedly After a Windows Update
A device might be set to download updates to the Windows operating system automatically. This download might prevent FliteDeck Pro from working as expected. Restarting the device usually corrects any issues caused by a Windows update.
Complete the Windows update and then restart the device.
Internal GPS Does Not Work In FliteDeck Pro
For internal GPS to work on some tablets, the customer may need to install a GPS driver which sends the GPS data to the geolocation services component on the device. Contact the device manufacturer to get an updated driver and install this driver on the device.
FliteDeck Pro Crashes on a Surface Pro 4 or Surface Book
The FliteDeck Pro might crash on startup on a Microsoft Surface Pro 4 or Surface Book. The crash usually occurs immediately after the chart begins to load.
A problem with the Intel graphics driver can cause this issue. Version 20.19.15.4326 of the Intel® HD Graphics 520 driver has known compatibility issues with many graphics applica-tions.
To resolve this issue, download the latest Windows 10 update.
Troubleshooting Procedures
This section provides detailed instructions for resolving the issues that appear in the Quick Resolution Guidelines section.
Contact Jeppesen Support if you are unable to resolve any issues.
Assign a Recipient to a Distribution Group in JDM Pro
Use the following steps to confirm whether a recipient is assigned to a distribution group in JDM Pro and, if necessary, assign the recipient to a distribution group.
To assign a recipient to a distribution group
1. Log on to JDM Pro:
https://jdmp.jeppesen.com
2. On the Recipients tab, select the Not Assigned category.
The recipients that appear on the right are not assigned to a distribution group.
3. Assign the recipient to the appropriate distribution group.
© 2016 Jeppesen, All Rights ReservedJeppesen FliteDeck Pro Administrator’s Guide26

Troubleshooting FliteDeck Pro
Download Log Files
The recipient’s log files can indicate the source of an issue. FliteDeck Pro log files are located in the following location:
c:\Users\<user>\AppData\Local\Packages\Jeppesen.FliteDeck.XXXXXXXX\LocalState
In this path, <user> is a placeholder for the name of the Windows user account. The notation XXXXXXXX refers to a unique value that is based, in part, on the signing certificate for the application. This value remains constant as long that certificate is used.
There are three logs for the different components of the application:
• CDLog
• FliteDeck_LogC2E
• FliteDeck_LogRT
The current date is appended to the name of each log.
Exit FliteDeck Pro
To exit FliteDeck Pro and stop all processes associated with it
• Swipe down from the top edge of the screen, and drag the app to the bottom of the screen, being sure to hold it until it flips over.
Deactivate FliteDeck Pro
Deactivating FliteDeck Pro removes all Jeppesen data and clears the activation information.
To deactivate FliteDeck Pro from App Settings
These steps apply when the user has the capability to deactivate FliteDeck Pro from App Settings. A company may choose to customize the configuration file to prevent this action, as described in "Customer Config File" on page 9.
1. Tap the App Settings button near the top-right corner of the FliteDeck Pro screen.
2. Scroll to locate the Deactivate option.
3. Switch Deactivate to ON.
4. Tap Proceed.
5. Relaunch the application.
Before you deactivate FliteDeck Pro, confirm that the device has an active and stable Internet connection and power source.
© 2016 Jeppesen, All Rights Reserved Jeppesen FliteDeck Pro Administrator’s Guide27

Troubleshooting FliteDeck Pro
When you deactivate and then relaunch FliteDeck Pro, the app prompts you to either activate or use the app in Demo mode. If you reactivate FliteDeck Pro, the app displays the Update screen and prompts you to carry out a data update.
To deactivate FliteDeck Pro with a Customized Configuration File
If the company prevents deactivation on a device from App Settings, use one of the following two methods to deactivate the app.
• Change the distribution group in JDM Pro so that there is a configuration that allows the device to be deactivated. After the new configuration file has been delivered, you are able to deactivate the device. This method is preferred.
• Remove all the CCDL credentials using the credential manager in Windows. After removing the credentials, also remove the delivered data. This method is not intended to be a workflow, but does fix any potential registration problems manually.
To deactivate a device from its registration in JDM Pro
Deactivating FliteDeck Pro might not completely deactivate it from its JDM Pro registra-tion. This issue might result from problems with the deactivation button, multiple registra-tions, or user configuration issues.
1. Type Credential Manager into the Start screen search control.
2. Select the Credential Manager result.
This action opens the Credential Manager control panel. Under Web Credential, a list of items appears under the CCDL_JDM_PRO heading.
3. Select and delete each item.
Each registered application includes 11 items. The "Saved By" field, which contains the text "FliteDeck," indicates the individual application.
After you delete these items, the app is unregistered.
You can optionally delete the CDLDataStore directory from the applications LocalState folder to remove any previously installed data (C:\Users\USER\AppData\Local\Pack-ages\Jeppesen.FliteDeck_g4095tshxnsa8\LocalState\CCdlStore).
To reactivate FliteDeck Pro, see "Activating Jeppesen FliteDeck Pro" on page 6.
Uninstall and Reinstall FliteDeck Pro
For some issues, you might need to uninstall FliteDeck Pro, and then reinstall it.
To uninstall and reinstall FliteDeck Pro in Windows 8.1
1. Exit the application. See "Exit FliteDeck Pro" on page 27.
Do not use demo mode to aid situational awareness during flight.
Always deactivate the app before uninstalling it. See "Deactivate FliteDeck Pro" on page 27.
© 2016 Jeppesen, All Rights ReservedJeppesen FliteDeck Pro Administrator’s Guide28
Troubleshooting FliteDeck Pro
2. On the Start screen, touch and hold the Jeppesen FliteDeck Pro tile momentarily, and then release your finger.
Several options appear at the bottom of the screen.
3. Tap Uninstall.
4. FliteDeck Pro prompts you to confirm your selection.
5. Tap Uninstall.
FliteDeck Pro deletes app data and uninstalls itself. However, the application is still registered.
6. Reinstall and activate FliteDeck Pro according to your company procedures.
If your company provides the installation media to you, follow the instructions in "Installing and Activating FliteDeck Pro" on page 5.
To uninstall and reinstall FliteDeck Pro in Windows 10
1. Tap and hold the Jeppesen FliteDeck Pro tile on the Start screen.
An ellipsis button appears.
2. Tap the ellipsis button.
Windows displays a menu of options.
3. Tap More Options.
4. Tap Uninstall.
5. Reinstall and activate FliteDeck Pro according to your company procedures.
If your company provides the installation media to you, follow the instructions in "Installing and Activating FliteDeck Pro" on page 5.
Error Codes
FliteDeck Pro generates various error codes if it encounters certain conditions. The following table describes the most common error codes.
If you have an issue that is not documented here, ensure that you have a reliable internet connection. If you do, and the problem still exists, deactivate the app and reactivate it.
If an issue persists after you attempt to correct it, contact Jeppesen Support. (See "Product Support" on page 1.)
Error Reason Resolution
-1 Jeppesen FliteDeck Pro generated a general data download error, most likely due to slow Internet connection.
Check for a reliable Internet connection and ensure that the speed is at least 54 mbps. Then, to attempt the download again, tap Refresh on the Update screen.
© 2016 Jeppesen, All Rights Reserved Jeppesen FliteDeck Pro Administrator’s Guide29
Troubleshooting FliteDeck Pro
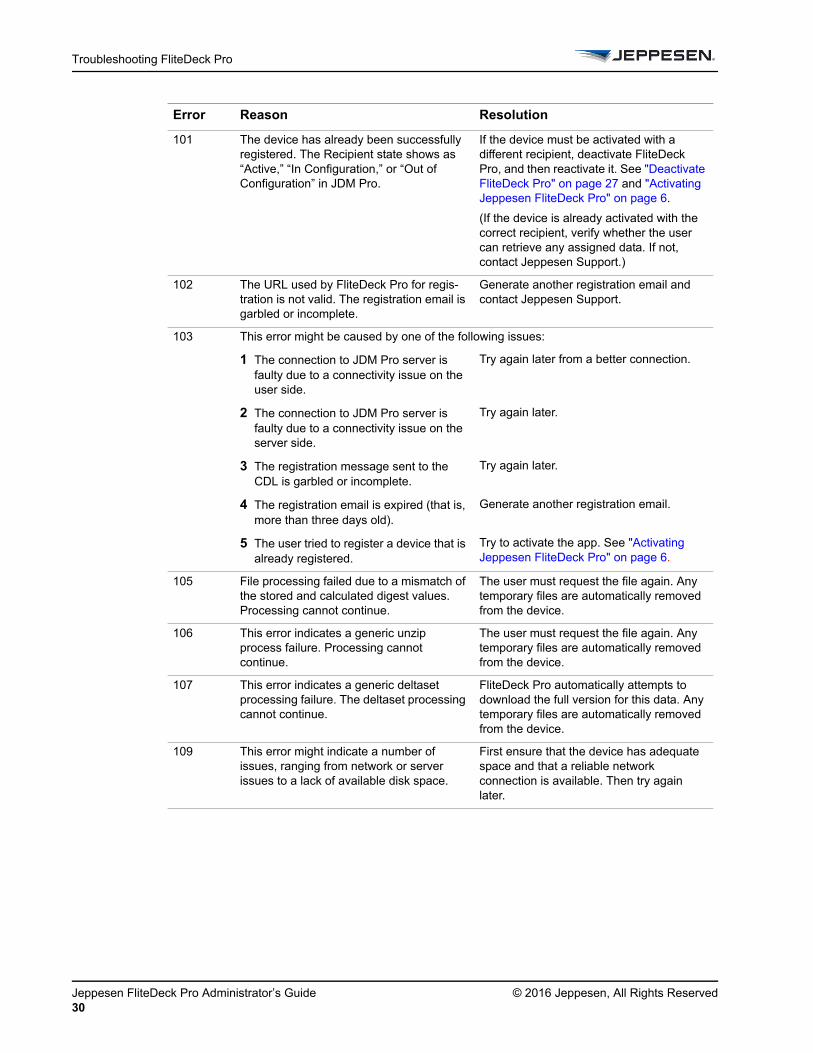
101 The device has already been successfully registered. The Recipient state shows as “Active,” “In Configuration,” or “Out of Configuration” in JDM Pro.
If the device must be activated with a different recipient, deactivate FliteDeck Pro, and then reactivate it. See "Deactivate FliteDeck Pro" on page 27 and "Activating Jeppesen FliteDeck Pro" on page 6.
(If the device is already activated with the correct recipient, verify whether the user can retrieve any assigned data. If not, contact Jeppesen Support.)
102 The URL used by FliteDeck Pro for regis-tration is not valid. The registration email is garbled or incomplete.
Generate another registration email and contact Jeppesen Support.
103 This error might be caused by one of the following issues:
1 The connection to JDM Pro server is faulty due to a connectivity issue on the user side.
Try again later from a better connection.
2 The connection to JDM Pro server is faulty due to a connectivity issue on the server side.
Try again later.
3 The registration message sent to the CDL is garbled or incomplete.
Try again later.
4 The registration email is expired (that is, more than three days old).
Generate another registration email.
5 The user tried to register a device that is already registered.
Try to activate the app. See "Activating Jeppesen FliteDeck Pro" on page 6.
105 File processing failed due to a mismatch of the stored and calculated digest values. Processing cannot continue.
The user must request the file again. Any temporary files are automatically removed from the device.
106 This error indicates a generic unzip process failure. Processing cannot continue.
The user must request the file again. Any temporary files are automatically removed from the device.
107 This error indicates a generic deltaset processing failure. The deltaset processing cannot continue.
FliteDeck Pro automatically attempts to download the full version for this data. Any temporary files are automatically removed from the device.
109 This error might indicate a number of issues, ranging from network or server issues to a lack of available disk space.
First ensure that the device has adequate space and that a reliable network connection is available. Then try again later.
Error Reason Resolution
© 2016 Jeppesen, All Rights ReservedJeppesen FliteDeck Pro Administrator’s Guide30

Troubleshooting FliteDeck Pro
110 The download URL that JDM Pro sends to FliteDeck Pro does not point to a file. The error might be caused by one of the following issues:
1 Content is not available yet. A delay of less than 5 minutes is normal between the time that the content is uploaded and the time that it is available.
Try again later.
2 The connection to the JDM Pro server is faulty due to a connectivity issue on the user side.
Try again later from a better connection.
3 The connection to the JDM Pro server is faulty due to a connectivity issue on the server side.
Try again later.
4 JDM Pro received the data, but the data has not yet reached the remote servers. This process can take from a few minutes to up to an hour.
Try again later.
5 The content assigned in JDM Pro is expired or is no longer in effect. The remote servers do not allow you to download an expired file, even if it is assigned in JDM Pro.
Assign a non-expired version of the content and try again.
112 FliteDeck Pro did not receive the expected configuration from JDM Pro. This error might indicate “server not found” or “timed out connecting to server.” This error might be caused by one of the following issues:
1 The connection to the JDM Pro server is faulty due to a connectivity issue on the user side.
Try again later or from a better connection.
2 The connection to the JDM Pro server is faulty due to a connectivity issue on the server side.
Try again later.
3 FliteDeck Pro received an expected configuration that is invalid or null. Verify the recipient settings in JDM Pro.
If the recipient settings are correct, try the request again.
4 FliteDeck Pro made multiple successive requests over a slow network connection.
Advise the user to wait a few seconds between making requests when using a slower or unreliable network.
5 A recipient was deleted from JDM Pro, and then recreated using the same name, without deactivating or re-registering the device. This causes CDL contact the server using a valid user name but old registration credentials. In this case, JDM Pro returns an empty response, which CDL interprets as a 112 error.
First, deactivate FliteDeck Pro. Then generate a new activation link and use it to reactivate the app. See "Deactivate FliteDeck Pro" on page 27 and "Activating Jeppesen FliteDeck Pro" on page 6. Also, reactivate the recipient in JDM Pro.
120 This error indicates a deltaset processing failure.
FliteDeck Pro automatically attempts to download the full version for this data. Any temporary files are automatically removed from the device.
Error Reason Resolution
© 2016 Jeppesen, All Rights Reserved Jeppesen FliteDeck Pro Administrator’s Guide31

Troubleshooting FliteDeck Pro
121 Disk space is exhausted. Clear disk space on the device and try again.
124 The user attempted to register. The CDL has a network connection but cannot connect to the registration server. This error might be caused by one of the following issues:
1 The network connection failed due to a connectivity issue on the user side.
Try again later, or try from a better connection.
2 The network connection failed due to a connectivity issue on the server side.
Try again later.
3 The JDM Pro server is unavailable. Try again later.
125 The user attempted to register but CDL timed out trying to connect to the registration server. The error might be caused by one of the following issues:
1 The device is not connected to the Internet.
Obtain a local connection and try again
2 The network connection is faulty due to a connectivity issue on the user side.
Try again later or from a better connection.
3 The network connection is faulty due to a connectivity issue on the server side.
Try again later.
4 The JDM Pro server is unavailable. Try again later.
127 The user attempted to contact JDM Pro but CDL timed out trying to connect. This error might be caused by one of the following issues:
1 The device is not connected to the Internet.
Obtain a local connection and try again.
2 The network connection is faulty due to a to connectivity issue on the user side.
Try again later or from a better connection.
3 The network connection is faulty due to a connectivity issue on the server side.
Try again later.
4 The JDM Pro server is unavailable. Try again later.
129 Jeppesen FliteDeck Pro was unable to obtain a network connection.
Ensure that wireless connectivity is turned on in the device settings and that a reliable network connection is available.
133 A data type is missing from the application. Ensure that new data formats are in the appropriate JDM Pro group. Specifically, check that the srtmterrain, j3sCultural, and j3nenroute content is present.
136 The JDM Pro certificate stored locally on the device expired or is about to expire. An attempt was made to renew the certificate, but the attempt failed. The application continues to acquire data until the certificate expires.
NOTE: Regardless of the error, FliteDeck Pro continues to acquire content successfully until two-way SSL is enabled on the Jeppesen servers.
Contact the JDM Pro administrator.
Error Reason Resolution
© 2016 Jeppesen, All Rights ReservedJeppesen FliteDeck Pro Administrator’s Guide32

Troubleshooting FliteDeck Pro
180-186, 188-189
These errors indicate deltaset processing issues.
The software automatically discards the deltaset in favor of the larger, full dataset.
187 This error indicates a disk space issue. Free up disk space on the device, and then try again.
199 Terminal charts content is not assigned to the recipient in JDM Pro, or FlteDeck Pro expects new content to be available on the server, but the content is not available yet.
Contact the JDM Pro administrator.
The correct content items must be present for the distribution group and correctly added to the recipient registered to the device.
400–600 Error codes in this number series indicate issues that originate in JDM Pro.
Contact the JDM Pro administrator and determine whether the JDM service that you are currently using is experiencing technical issues.
1009 FliteDeck Pro attempted to download data, but there no Internet connection is estab-lished.
Obtain a local Internet connection and try again.
3006 FliteDeck Pro is unable to write to a file. The condition might be caused by insuffi-cient disk space, or a permissions issue.
Free up disk space, and then try to download the data again.
3008 Jeppesen FliteDeck Pro was unable to download data, most likely due to a network issue.
Try the download again, or wait for a better connection and try the download later.
3026 A request failed. Retry the operation with a better Internet connection, or at a later time.
Key Data Missing
See "FliteDeck Pro Is Missing Key Data and Cannot Continue" on page 25.
Error Reason Resolution
© 2016 Jeppesen, All Rights Reserved Jeppesen FliteDeck Pro Administrator’s Guide33

Troubleshooting FliteDeck Pro
© 2016 Jeppesen, All Rights ReservedJeppesen FliteDeck Pro Administrator’s Guide34