it’s always the “write” time for mini-lessons in s always the write time for...
TRANSCRIPT
1
It’s Always the “Write” Time for Mini-Lessons in
A Presentation for the National Reading Recovery and
K-6 Classroom Literacy Conference Columbus, Ohio February 9, 2009
By Kathi Hoover and Carol Lutz Kokomo Center Township Consolidated
School Corporation Kokomo, Indiana
2

3
It’s Always the Write Time for Mini-Lessons in
Growing great writing in the primary grades takes time and planning. Planting the learning in your writing workshop to make your students more productive and enjoyable will result in a wonderful
harvest of great writing pieces.
Format of the Primary Writing Workshop Component Time Frame
Gathering ritual 2 minutes Mini-lesson 5-10 minutes Begin work period with “No Walk-No Talk” 5-10 minutes Independent work period with teacher conferencing or meeting with small groups
K: 5-20 minutes 1st: 10- 25 minutes 2nd: 15-40 minutes
Share Time 10 minutes
What is a mini-lesson? A mini-lesson is one small component in the Writing Workshop framework, but it is the seed
that leads to a “blossoming” assortment of writing. Without the seed and careful planning and cultivation of the soil, the flower will not grow. As in nature, so goes the mini-lesson. Without the mini-lesson, the writing produced by young learners will not develop and grow into writing that meets the standards and expectations of the school district.
A mini-lesson is a short focused delivery of explicit instruction. It can be one lesson or a series of lessons that focuses on one skill or strategy. The mini-lesson takes place at the beginning of Writing Workshop after careful planning by the teacher. It includes a statement of purpose, a connection to previous learning, followed by demonstration, modeling, or student involvement.
Mini-lessons must be kept “MINI”. They need to be short and to the point. Mini-lessons that necessitate more time than the 5-10 minute allotment for the component are much more successful when taught in a series of short lessons rather than one longer lesson.

4
How do I know which mini-lessons to teach? The selection of mini-lessons to be taught in the primary grades is dependent upon several
factors. The first thoughts for consideration are the developmental stages of literacy that are characteristic of the students along with the grade level curriculum including both state and local standards. Mini-lessons taught at the beginning of the year are dictated by the procedures that must be taught to make the Writing Workshop successful. Throughout the year, a variety of mini-lessons are taught that coordinate with processes and content/craft techniques that are taught within genre units of study. In addition, to grow a colorful and successful bunch of young writers, plan mini-lessons based upon student assessment, student conferencing, and observation of students and their writing behaviors. The teacher’s enthusiasm during the mini-lesson will be mirrored by the students. When you are excited about writing, your students will be excited. Keep them excited about writing through careful cultivation of the mini-lesson.
Lessons that focus on conventions should also be included in your mini-lessons when appropriate. However, those particular mini-lessons are not a part of this presentation.
Included at the end of this handout are sample planning calendars and a daily mini-lesson planning sheet and a weekly mini-lesson planning sheet (choose the one that best fits your planning style).
Procedures, Process, and Content Mini-Lessons for a Successful Writing Workshop In the mini-lessons that follow, the statement of purpose is noted by the use of quotation marks. Start your school year with mini-lessons that teach procedures about transitions and materials. In the first 4-weeks of Writing Workshop we teach the following procedural routines:
Mini-Lessons that Focus on Procedures What we do in Writing Workshop: “In our Writing Workshop, we are going to be making
“stuff.” (Katie Wood Ray 2004, About the Authors, page 6). Explain that they get to make something of their own every day. Make sure they understand that they are real authors and illustrators who get to make books!
When is Writing Workshop? “Writing Workshop takes place at the same time every day.” Let your students know on the first day of school that Writing Workshop is something you will have every day at the same time each day. This predictable routine provides stability to your balanced literacy framework. We have learned that our students perform at a much higher level when we have this type of expectation. Our students believe that Writing Workshop is very important because we have it at the same time every day! It is a predictable routine in our busy schedule.
Where and how we sit on the carpet (or wherever your whole group area is located): “The procedure for listening to a mini-lesson is to sit on the carpet “criss-cross, applesauce” (or
5
pretzel style) leaving personal space for each of our neighbors.” Model, model, model! This doesn’t seem like a big deal until twenty-three students are all trying to sit in the front by the teacher. Pushing, shoving, and arguing can all be avoided and precious time saved by teaching a procedure for leaving your seat to gather at the whole group area.
How to listen: “There are three important parts of listening. First, sit still; next, look at the speaker; and finally, think about what the speaker is saying. We use our eyes and our ears.” When you are modeling listening, it is important to think aloud the “self-talk” that goes on inside your head. Later prompt students with “sit still, look, and think”.
How to ask/answer questions and make comments: “During our mini-lesson, we will be asking questions, answering questions, and making comments.” We call this “sharing our thinking” and it is encouraged in our classrooms. Taking turns is hard for anyone when they’re excited. Take time to model, practice, and praise this procedure. Whether you prefer that students raise their hands when they want to ask a question or make a comment, or that students take turns speaking without that cue, make sure everyone in your classroom is clear on how this happens. We always explain to our students that blurting out interrupts the speaker and takes away their thinking! Remind students that when they interrupt their friends, they are stepping on someone else’s words.
Where to get new books to write in: “We will have a supply of blank books for you to use during Writing Workshop.” We always keep a supply of pre-stapled books available on hand. Show the students where the blank books are located. The basic rule to this mini-lesson is to offer only two choices of paper in the beginning. Add more choices as time goes on. Where writers get pencils: “One of the tools that we need for Writing Workshop is our pencil.” To avoid interruptions concerning pencils that need sharpened, we encourage the use of “community” pencil containers. Students get pencils as needed and they place a pencil that needs sharpened in the “Needs to be Sharpened” container. Precious time is saved looking for pencils and sharpening them. Do not let time for pencil sharpening replace writing time.
Working with a partner:: “In Writing Workshop, you will have a partner to help you and to share your writing with.” Choose partners for the students. These partners become the students with whom they share their writing work. Explain that sometimes partners will gather writing tools, ask each other questions, give each other ideas, and share their writing. Assign one student to be Partner 1 and the other student to be Partner 2. If there is an odd number or students, create one group with 3 partners.
How to get and use the illustrator tubs: “We have tubs with special tools for illustrating our pictures.” If at all possible it is wise to have one illustrator tub for every two students. Model a procedure for collecting and returning the tubs. Assign table helpers who are responsible each day or alternate between Partner 1 and Partner 2. Whatever you decide, make sure it’s easy for you to remember. Providing a structure that makes it very clear whose turn it is to get these materials eliminates arguing and fussing and again…saves precious time.

6
How writers stamp the date on their book: “So that I can watch how you grow as writers, our classroom authors will stamp the date on their book when it is finished.” The stamp pad and date stamp should be located near the supply of pre-stapled books. Teach this mini-lesson the first day students begin to write in a book. Show them how to get a book, how to open the stamp pad, how to press in on the ink, and how to press it on the date line on their book. Instruct them to “put their thumb on the flat spot.” This prevents students from stamping upside down! Show them how to close the stamp pad and return both to a designated spot. Explain that date stamping helps the teacher keep track of when they wrote a book. Tell them this is important information for their teacher to have so that they can monitor how each student grows as a writer over time.
Where we can write during Writing Workshop: “In our classroom, you may write at a spot that is comfortable for you. That spot may be your desk, certain tables in the room, or the floor.” Some teachers prefer that students write at their own table or desk. Other teachers are comfortable with children writing in different locations around the room with the student making the choice. Acceptable locations might be on the floor, at a table with other students, or on a couch or beanbag using a clipboard. This choice depends upon the teacher’s comfort level and the composition of the class.
How writers write: “During the first few minutes of our Writing Workshop, we will follow the procedure of no walk/no talk. During this time, you will be very quiet while you think about your writing job for the day.” We find it preferable to follow the procedure of “no walk/no talk” so that the children can get “in the writing zone”. During this time, expect students to really focus upon their writing. They should reread a piece of writing work and decide what they are going to do as a writer that day. Choices include finishing a piece, making revisions, or deciding upon a topic for a new book. Starting the Writing Workshop with “No Walk-No Talk” sets the tone for quiet working and helps students focus their thinking on their work.
My Writing Workshop folder: “You will have a writing folder for your writing work.” Prepare a writing folder for each student. Include a pocket that is labeled “Work in Progress” and the second pocket is labeled “Completed Work”.
How do I know I’m finished: “We must be sure that our books are finished before we stop working on them.” Begin this mini-lesson by sharing student work from previous years. Use this work to give students a clear picture of what a writing piece looks like when it is finished. We believe that knowing this author is in a room just down the hall, and was once a Kindergartener or First Grader in this room, makes a big impact. They know the job they are being asked to do is possible!
Creating an anchor chart for How I know when I’m finished: “We will make an anchor chart to help us remember how to know when our books are finished.” After looking at the books of former students, create an anchor chart to put up in your classroom. We label ours “How I Know My Book is Finished”. Guide the conversation and recording to include the following items: 1) I have thoughtful pictures; 2) I have reread my book and checked my words; 3) I
7
have written a title, made a picture, and put my author name on the cover; 4) I have filled all of the pages; and 5) I have checked my spaces.
Where to keep my work when it’s finished: “When we finish a book, we put it in the last pocket of our Writing Workshop folder.” Our students have two places they can keep their work. Begin by modeling that the first place to keep their work is in their Writing Workshop folder. Pieces of writing on which they are working are placed in the front pocket. The back pocket contains writing that is finished but has not been shared with the teacher during a student conference.
Where to keep my work after a conference: “After we have a conference about a piece of writing, we put it in our folder that is in the hanging file.” After conferencing with the teacher on a finished book, the student places this piece of work in a hanging file in a crate or other designated storage area. This creates a writing portfolio the student can revisit when needed. Later in the year when we teach students revision, they learn to take a piece of writing from the crate and work on it again!
How to get help when I need it: “Sometimes we need help during Writing Workshop and our teacher may be busy.” This mini-lesson empowers the students in your classroom. Start this mini-lesson by modeling questions students have been asking the teacher and ask other students if they can help answer that question. Show your materials manager where to get books to restock the book supply and how to put staples in the stapler. Review where mentor texts are kept and point out the anchor chart in your room on how to write words. Ask your students who they think is a good illustrator? “Who is good at writing titles?” “Who is good at figuring out tricky words?” “Who could help with ideas?”
What does talk in Writing Workshop sound like and feel like?: Give this mini-lesson in the first 20 days. Make a T-chart as a reminder for this lesson. At the end of the 5-10 minutes of “No-Walk, No-Talk”, allow children to talk as long as they are talking about writing and talking quietly. Often they will ask a friend for a suggestion or for some help with spelling. Learning is a social process and this kind of productive talking is encouraged.
What happens when it gets too noisy during Writing Workshop?: “Sometimes when it gets too noisy in Writing Workshop, friends in the room have a hard time thinking and writing. It is important to help each other by using quiet voices when we are talking to someone during Writing Workshop.” Explain that any talking in the workshop needs to be about writing. Demonstrate by inviting a student to the front of the group and both of you model what Writing Workshop voices sound like. Now try it as a whole group. Have students quietly talk to someone about their writing. Stop and ask them to think about what the noise level sounded like and felt like. “Was it still too loud or just right?” Send them off to write, and remind them what workshop talk sounds like and feels like. At share-time, ask them how they think they did. Productive conversation is the goal toward which we are working. Remember to praise individuals and the class when “just right” talking can be heard!
How to work with my writing partner: “During Writing Workshop, we will be sharing our writing with our writing partner.” Model this process by having a student tell you an idea for a story and you tell the student an idea that you have for a story. Practice together

8
before moving this process to an independent activity. Repeat the process using student writing and have them read to their partner.
Mini-lessons that Focus on Content
Where writers get ideas: Lesson 1: “Writers get ideas from things they know and care about.” Model where authors get ideas - think aloud and then model writing about something that you know or care about. This modeling facilitates another connection that your students can make to authentic writing. Lesson 2: “We must know something about a subject to write about it.” Our young children must understand that they cannot write about a subject in which they have no background knowledge. Teach the children that you must know something about your subject before you can write about it.
Where our favorite authors get their ideas: “Sometimes, we can use book jackets to learn about how our favorite authors get ideas.” Often the book jackets give insight into an author’s reasons for writing a piece. Share some book jackets of favorite authors in which they share the kinds of things that have inspired their writing.
Writers keep a list of ideas for writing: “Writers keep ideas for writing in a special place.” Many writers keep their ideas in a notebook. An author may get an idea for a new book anytime – it could be in the middle of the night or while on an airplane traveling to a vacation or business destination. Some authors keep their notebook with them at all times.
How to use the idea chart in our writing folder: “In our classroom, we will keep our ideas for writing on a chart in our writing folder.” Students need to be shown how to write down an idea. We prefer that our students keep those ideas in their writing folder but teachers of second graders may prefer using a writing notebook. With our youngest students, their chart may begin with pictures.
The big idea: “Every story has a big idea.” The big idea (or main idea) is important for students to grasp. Teach this mini-lesson to help students understand that they must choose a focus for their writing and stick with it. Go back and revisit several read alouds you have recently read. Talk with your students about the “big idea” in these books. “What was each one mostly about?” Create a “BIG IDEA” anchor chart together. Guide their thinking to include the following points: 1) The big idea is what the story is mostly about; 2) Every page should be about the big idea; 3) The title should match the big idea. Watch for students using this thinking during student conferences so that they can model for the class in share time.
Stick to the topic: “When we write, we must stick to the topic.” We have found that it is easier for younger students to “stick to the big idea”. Using a mentor text, have the students think about the big idea as you read. At the end of the story, ask them if everything in the book was about the big idea. Review this often.
How to write a title: “Every story needs a title.” Lesson 1:Begin by showing students several different familiar read alouds. Discuss how the title gives the reader a clue about the content of the book. Refer to your chart on “Big Ideas” and explain that the title must match the big idea of their book. Give the students several “Big Ideas” to discuss. Then

9
collaborate on appropriate titles. Choosing a title can be tricky. Help your students remember the title must match the topic or big idea of the story. Lesson 2: Create an anchor chart together called “How to Write a Title”. Guide student thinking to include these three points: 1) Your title must match the big idea; 2) The title tells the reader what your book is about; 3) Titles can “hook” the reader and makes them want to read your book!
Writing mentors: “We have writing mentors. A writing mentor is an author of a story we have read. Let other authors support your writing rather than just copying another author’s words.” One way to scaffold student writing is to provide writing mentors for the students. These mentors are authors whose stories have been previously shared with the class. They may also be students, both former and present, who have written books that can be shared as models for writing content or skills. Noticing the techniques used by their peers makes a big impact on student writing. Remember that author studies are a great way to teach a mini-lesson by sharing an author’s style or technique. Make these books available to students during Writing Workshop so that they can refer to them.
Noticing what writers do: “We can notice what authors do intentionally in their writing and in their illustrating.” Noticing is the skill readers and writers develop to recognize when authors and illustrators do things intentionally in their writing and in their illustrating. We carefully notice the techniques that are deliberately included to help us, as the reader, know how to read the book. This may be in the form of interesting text structure or punctuation, very specific and descriptive word choice, interesting illustrations, great beginnings and endings, or repeating patterns. As you share these noticings with children, they also begin to pay attention to the techniques that authors utilize. Gentle reminders that they could include some of these “noticings” in their writing will prompt students to think about the manner in which they write.
What is a good beginning? “Our stories need good beginnings so that the readers want to keep reading.” The best way to help children understand and begin using good beginnings is to demonstrate them with a variety of mentor texts. Make an anchor chart to reinforce the mini-lessons on good beginnings. A good beginning may include an introduction, a question, or a descriptive lead (“One hot summer day……”).
What is a good ending? “Our stories need good endings that make the piece feel finished.” The best way to help children understand and begin using good endings is to demonstrate them with a variety of mentor texts. Create an anchor chart together and include these ideas for endings: an ending can come from your heart ( I love…..); an ending can be like the beginning; or an ending can ask the reader a question. The ending may give the reader something to think about. Share time is an avenue to reinforce good beginnings and endings written by the students.
Using interesting words: “Our stories will be more interesting if we use interesting words. Interesting words are words that we don’t hear everyday. Choose a mentor text to share that has many interesting words. Point out some of the words and note that the author could have used “everyday” words but chose to use a more interesting word. Have the children look and listen for interesting words in mentor texts. With a student’s permission

10
(or use a sample from the previous year with the name removed), share writing that is “everyday” and have the class suggest more interesting words.
Reading Like a Writer: “When we read stories, we think about reading like a writer.” The first mini-lesson in this unit of study helps students begin to notice the craft writers intentionally use. In this mini-lesson, explain to your students that they will learn how to read like a writer does. Use mentor texts to provide strong examples for students to connect their thinking to a term. In subsequent mini-lessons, record what students learn to notice on an anchor chart that contains the following craft choices:
The Power of Three”: “Authors intentionally use three words, phrases, or sentences in a row to create emphasis.” Using several mentor texts demonstrate to students that authors intentionally use three words, phrases, or sentences in a row to create emphasis. Model this through a think aloud and record it on the anchor chart.
“A Repeating Line”: “Authors often use a phrase or a sentence repeats itself throughout a book.” Using several mentor texts show students that often a phrase or a sentence repeats itself throughout a book. Model this through a think aloud and record it on the anchor chart.
“Big and Bold”: “Sometimes authors use text that is written in bold letters or capital letters to express an idea or for emphasis.” Using several mentor texts teach students that text can be written in bold letters or capital letters to express an idea or for emphasis. Model this through a think aloud and record it on the anchor chart.
Creating interesting book covers: “Our cover is the first thing a reader sees. It should make the reader want to pick up the book and read it!” Show the covers of several interesting books. Talk to your students about what makes these covers interesting. Then create an anchor chart together. Be sure to include the contents found on the cover of a book in your anchor chart. Revisit your mini-lesson on “How I Know I’m Finished.” Include in your anchor chart the contents found on the cover of a book. Review the three major parts: 1) The Title, 2) A Picture, and 3) Author (and illustrator) name(s).
Dedications: “Our book may be dedicated to someone special.” Show the students dedication pages in several of the mentor texts that you have used and explain that a dedication is a way to acknowledge someone special. Then show them a dedication written by a former student. Show them that the dedication page comes before the story begins and encourage them to write dedications in their books
Writing a “How To” book: “Some books tell us a series of steps that we can follow to make or do something.” The procedure to write a “how-to” book should be modeled first by actually making something and then writing the book with using Community Writing. This is a series of mini-lessons that should take place over the course of a week. For several days read and discuss mentor texts that tell how to do or make something. Then create an anchor chart together that includes the following: 1) We learn that “how-to” books can tell us how to make something or how to do something. 2) We learn that we must list for the reader the things that we need. 3) We learn to use “time order” words (first, next, then,

11
last). 4) We learn that it is important to following the directions. 5) We need an introduction and an ending in our “how-to” book.
What is non-fiction?: “Some stories are true. A non-fiction text is one which gives us information that is true.” Over several days read nonfiction mentor texts. Point out the different features of nonfiction texts. Record each feature on an anchor chart. 1) Nonfiction often uses photographs for the illustrations. 2) Non-fiction texts have a table of contents and sometimes an index. 3) Captions are written under pictures to explain the content of the picture. 4) A text box contains facts and important information about a topic. 5) A glossary may be included at the end of the book.
What is a narrative non-fiction book? “Narrative non-fiction is a text that is factual but tells a story.” The features of non-fiction that we find in narrative non-fiction may include: table of contents, index, captions, labels, glossary of terms, and list of facts. We must learn how to read and research before writing a narrative non-fiction story.
What is a book with a seesaw pattern?: “Some stories go back and forth like a seesaw goes up and down so we call it a Seesaw Pattern.” Lesson 1: With a seesaw pattern, the text alternates back and forth in order to compare or contrast. A great way to introduce this unit of study is with the book, Tough Boris, by Mem Fox. This unit is a good time to teach a mini-lesson on descriptive words. When using a back and forth pattern, it is important to use words that emphasize the sameness or differences in the subject. Lesson 2: “Some stories compare the way things are now with the way they were in the past.” Now and then is another type of seesaw pattern in which we compare the way things were with the way things are now. The teacher models writing a story about school when she was a little girl as compared to school now. The students love hearing about the differences in school from then to now.
What is a memoir? : Stories that touch our hearts are memoirs.” What is a memoir? How is it like other writing we have done? How is it different? A memoir is written about a memory. It focuses on significant relationships with people, places, or things. It is a combination of the memory and the feelings about the memory. Writers cannot write a memoir about someone that they really didn’t know or something they did not experience. Use descriptive words are used to create sensory images and to express feelings. The use of a repeating pattern can be used in memoir.
What is a personal narrative?: “A personal narrative tells a story that focuses on one significant single event. A personal narrative has a beginning, middle, and end.” Stick to the topic or the “big idea”. Our pictures must match our words. It may include dialogue, which is an important feature to teach to our second grade students.
What is poetry?: “Sometimes our writing will be in verses to create a poem.” Read lots of different kinds of poetry. Discuss what is poetry? How is it like other writing we have done? How is it different? Writers choose a topic that is about things they know and care about. What is rhythm? A pattern can be created in the poem. Line breaks and white space are important in poetry. Use descriptive words to create mental images. Choose a title that matches the content of the poem.
12
Why does my teacher sometimes give me a prompt?: “Sometimes our teacher will give us a prompt. This is called “on demand” writing. In “on demand” writing, there is no choice about what we write. We must stick to the topic.” Model “on demand” writing for the students. Teach them the following: Answer the questions asked in the prompt. A good lead is important. Write a good ending that summarizes the topic. Reread our work to be sure that it sounds right. Use the editor’s checklist to edit our work. Writing should be completed in the space provided.
Structuring Text in Interesting Ways: “Sometimes I can place my words on the page to help make the writing more interesting.” Model placing the text on the page in interesting ways. There are many good examples in our mentor texts.
Mini-lessons that focus on process
Telling a story: “We can tell a story with our words.” Model oral storytelling. Have a student tell a story. Have the students turn and talk with a partner about a story that they can tell.
Use pictures to tell a story: “We can tell a story with our pictures.” Show the students a wordless picture book and read the pictures. Model drawing a picture and telling a story.
Add words (text) to pictures to tell a story: “I can add words to my picture to help tell the story.” Model drawing a picture and labeling it with words, sentences, or phrases to match the picture and tell the story.
Illustrations: Lesson 1: “Illustrations are drawings that match the words in our stories.” An illustration is an important part of the story when creating picture books. Our illustrations should be neat and complete. Model illustrating pages that you write for the students. Stress “neat and complete”. Lesson 2: “My words and my pictures must match.” Begin to teach this concept in their beginning writing by having students first draw a picture and label the picture.
How to get my ideas in my book: Lesson 1: “I can share my idea for writing with my writing partner before I write it in my book.” For some students coming up with ideas is hard and writing them down in some kind of logical order is even harder. Early in the year we teach them to talk about their “Big Idea” to a friend or writing partner. Thinking out loud has been referred to as “putting your thinking in the air!” (Ray DVD, 2005). Lesson 2: “I can touch pages in my book and tell the story before I start writing it.” Teach them to touch each page of the book and say out loud the words they might want to write there. Repeat words several times for each page to remember what we plan to write (negotiating the message and repeating it for confirmation). We call this “touch and tell.” For our Kindergarten and special needs students, we also use four-box paper with touch and tell (fold paper twice to create four boxes). You follow the same procedure, but use only pictures to tell the story.
How to write a word I don’t know how to spell: (you’ll revisit this lesson several times!) Community writing provides an opportunity to teach this strategy. Lesson 1: “I can write a word that I don’t know how to spell by stretching the word out.” Say words slowly......

13
stretching out the sounds and then identify the letter or letters making that sound. This takes lots of practice. . Lesson 2: “I can use the word wall to help me spell a word.” Using the word wall to spell a word - the presence of a word wall in the room is one more way to scaffold student learning. Students learn early in the year that the word wall is a place that to go when they need help with spelling. . Lesson 3: “I can use words in the room to help me spell a word.” Teach children to use all of the print in the room for spelling. Name charts, alphabet linking charts, and thematic word charts are resources that children should be using regularly.
A plan is needed for writing: “I need a plan for my writing.” For young children, their picture can serve as the plan. Graphic organizers such as webs and story maps can be taught to the older primary students.
The purpose of punctuation: Lesson 1: “Punctuation directs the reader as to how the text should be read.” Use mentor texts to demonstrate the ways in which the punctuation helps us, the readers, know how to read the text. Probably the most important thing to stress to students is that the punctuation tells the reader the manner in which the author wants the text to be read. Periods, question marks, exclamation marks are stopping marks. Commas direct us to pause in our reading or commas in a series separate words so that the text makes sense. Lesson 2: “Punctuation can make our writing more interesting.” An ellipsis tells the reader that there is more to come. An exclamation mark is used to indicate strong emotion. Quotation marks are used when the writer wants us to know who is talking and what he or she is saying. Focus upon one mark each day over a period of time. Second grade students love to work in partners with mentor texts and use post-its” to note interesting punctuation.
How to make a “Lift the Flap” book: “Sometimes we can make our writing more interesting by hiding part of our text under a flap. The writing that is under the flap will answer a question or solve a problem for the reader.”
Use details to make our writing interesting: “I should include details in my writing so that it is interesting to read.” For our youngest writers to learn to add details to their writing, they must first be taught to add details to both their oral storytelling and to their drawings. When children tell stories, encourage them to add details by asking them questions during the story. They will not be able to write a good story if they can not tell a good story. During share time, encourage students to add details as their peers question them about the things they did not understand because there was not enough detail. For kindergarten, one sentence with details for the beginning, one for the middle, and one for the ending should be included. For first grade, encourage two sentences with details for each and second graders should include at least three details.
Tired words: “Some words are used over and over again and we call those words tired words.” Teach children to replace overused words in their writing. A “Tired Word” chart is a resource to assist students in making better word choices. Make a poster with pockets and insert word strips. Label the pockets with “tired words”, such as said, good, big, like, or go – words that are overused in the students’ writing. The children and the teacher

14
brainstorm more interesting words to replace the tired words, such as wonderful instead of good, or gigantic instead of big. Write the words on the strips and place them in the pockets. During Writing Workshop, the students can replace their tired words with words from the chart. By putting the tired word labels on Velcro, they can be changed during the year.
Revision: “We can make our writing sound better by revising it. After I am finished with a story, I can reread it or ask my partner to read it and help me make changes.” For young writers, the most developmentally appropriate form of revision takes place as a result of student conferences and share time. During a student conference, direct questions to the student in a manner that will lead her to see the need for revising a piece. This revision may be in the form of changing a word, inserting words or sentences to add more detail, inserting a page to better tell the story, or eliminating pages that may contain text that is not in agreement with the big idea of the story. Revision that occurs with kindergarten and first grade students is highly teacher directed.
The Editor’s Checklist: “After my piece is finished, I can use the editor’s checklist in my classroom. I need to check it and see if I have included everything that my teacher expects to see.” Appropriate skills for the editor’s checklist are taught one at a time. As they are taught, they should be placed on the Editor’s Checklist anchor chart or pocket chart that is visible to the students and becomes another tool that they can use in the environment. It may also be included in the writing folder. The Editor’s Checklist grows as instruction occurs in the classroom.
Important things to remember Have Writing Workshop every day and at the same time every day. Procedures! Procedures! Procedures! Teach them well and revisit them as needed. Model! Model! Model! Modeling, demonstrating, and guiding the students’ practice are
critical. Teach “small bits” at a time. Remember that “less is more”. Go slowly. Your students will gain more if you move slowly than if you try to teach more
than they are capable of processing. Keep those mini-lessons “MINI”. Start each day’s Writing Workshop with a mini-lesson. Routine is of utmost importance.
Resources and References: Calkins, Lucy. Units of Study for Primary Writing: A Yearlong Curriculum. Portsmouth, NH: Heinemann, 2005. Ray, Katie Wood. About the Author. Portsmouth, NH: Heinemann, 2004.

15
Ray, Katie Wood. The Teaching Behind About the Author (DVD). Portsmouth, NH: Heinemann, 2005.
Thank you for attending and sharing
this session with us. Best wishes to you as you grow skills and strategies during the Writing Workshop that will blossom into great student writers. Remember…. It’s always the “Write”
Time for Writing Workshop. ©2008 Really Good Stuff ™
Happy Writing!
Kathi Hoover and Carol Lutz Kokomo Center Schools
Kokomo, Indiana
If you have questions, please feel free to contact us at:
16
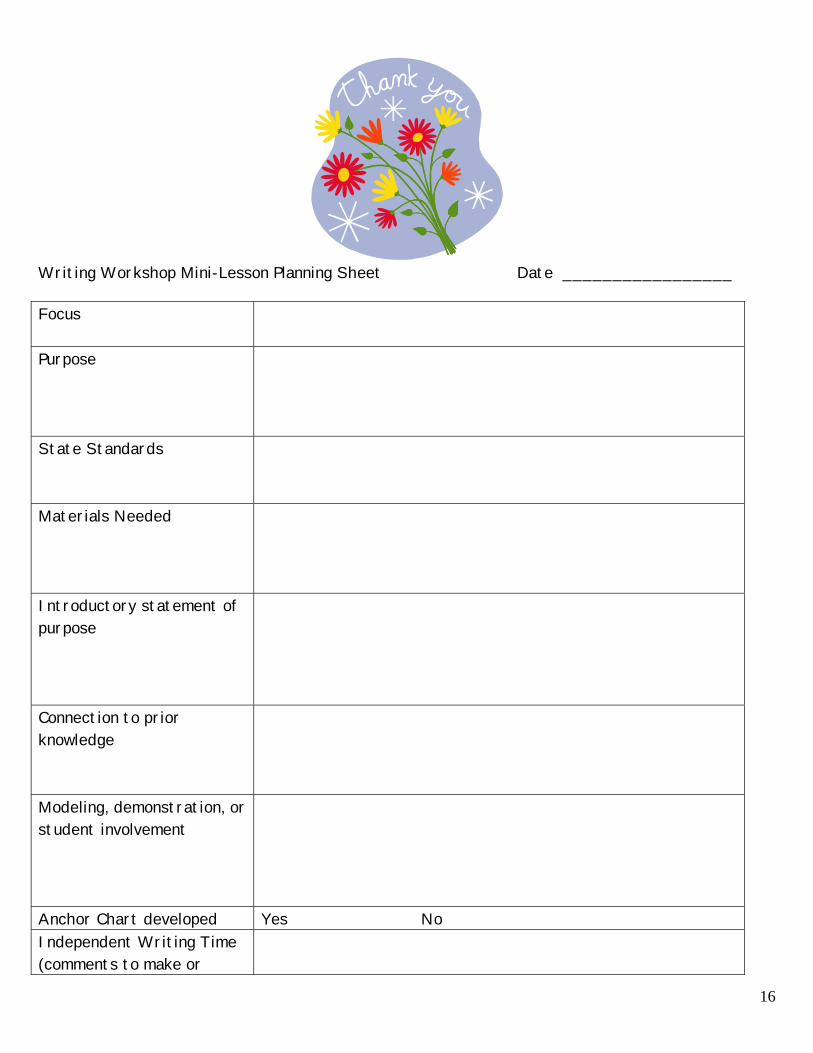
Writing Workshop Mini-Lesson Planning Sheet Date _________________ Focus
Purpose
State Standards
Materials Needed
Introductory statement of purpose
Connection to prior knowledge
Modeling, demonstration, or student involvement
Anchor Chart developed Yes No Independent Writing Time (comments to make or
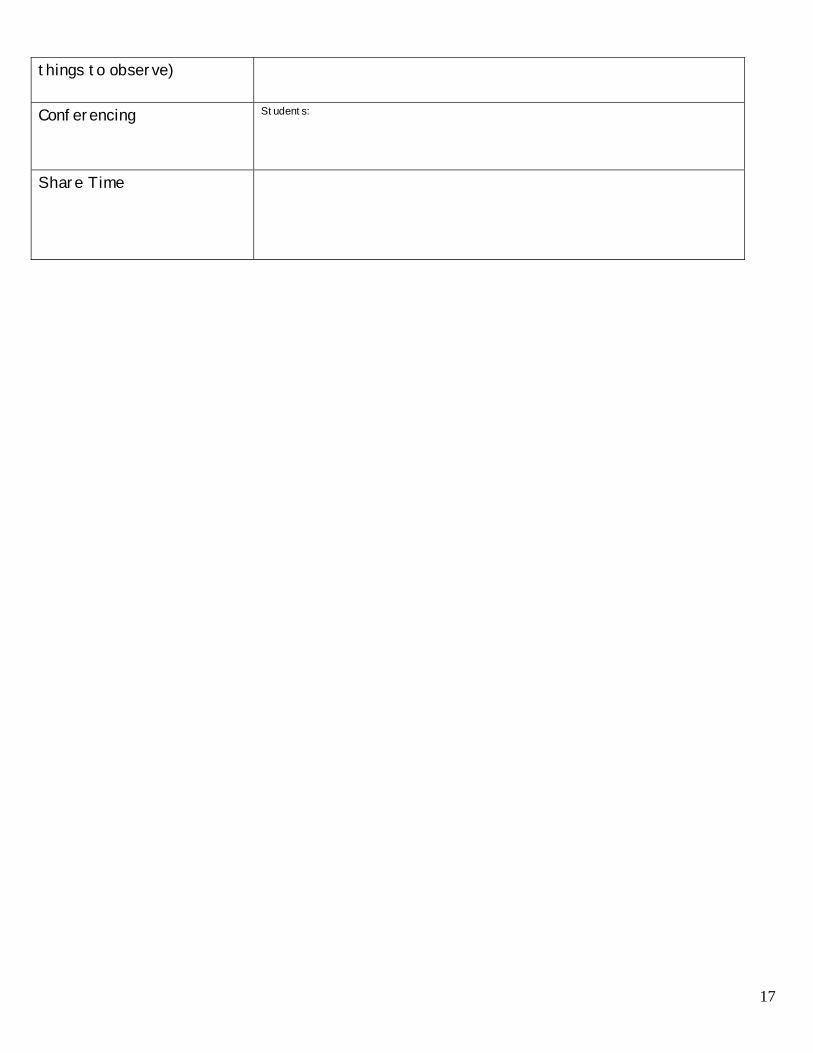
17
things to observe) Conferencing
Students:
Share Time

18
Writing Workshop Mini-lesson Planning Sheet Week of ___________________________ Unit of Study _____________________________ Purpose Materials State
Standards Statement of Intention
Connection to Prior Knowledge
Model, Demonstration, or Student Engagement
Conferences Share Time
M O N.
T U E S.
W E D.
T H U R S.
F R I.
19
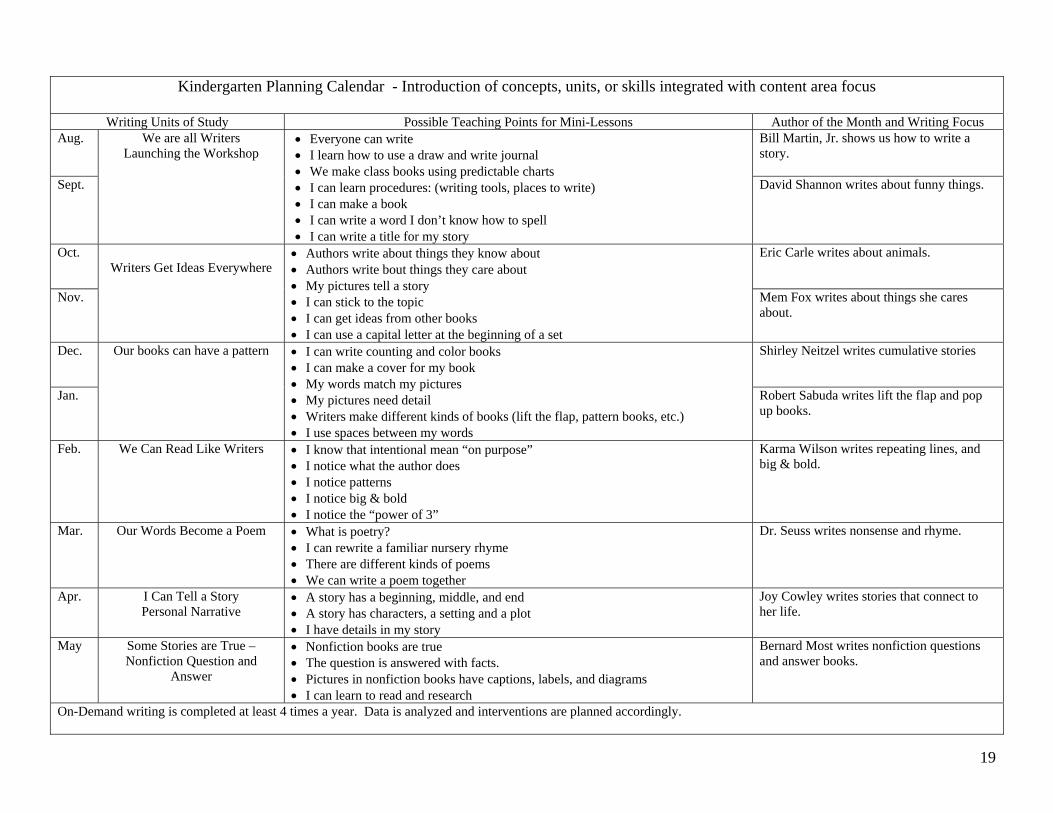
Kindergarten Planning Calendar - Introduction of concepts, units, or skills integrated with content area focus
Writing Units of Study Possible Teaching Points for Mini-Lessons Author of the Month and Writing Focus
Aug. We are all Writers Launching the Workshop
• Everyone can write • I learn how to use a draw and write journal • We make class books using predictable charts • I can learn procedures: (writing tools, places to write) • I can make a book • I can write a word I don’t know how to spell • I can write a title for my story
Bill Martin, Jr. shows us how to write a story.
Sept. David Shannon writes about funny things.
Oct. Writers Get Ideas Everywhere
• Authors write about things they know about • Authors write bout things they care about • My pictures tell a story • I can stick to the topic • I can get ideas from other books • I can use a capital letter at the beginning of a set
Eric Carle writes about animals.
Nov. Mem Fox writes about things she cares about.
Dec. Our books can have a pattern • I can write counting and color books • I can make a cover for my book • My words match my pictures • My pictures need detail • Writers make different kinds of books (lift the flap, pattern books, etc.) • I use spaces between my words
Shirley Neitzel writes cumulative stories
Jan. Robert Sabuda writes lift the flap and pop up books.
Feb. We Can Read Like Writers • I know that intentional mean “on purpose” • I notice what the author does • I notice patterns • I notice big & bold • I notice the “power of 3”
Karma Wilson writes repeating lines, and big & bold.
Mar. Our Words Become a Poem • What is poetry? • I can rewrite a familiar nursery rhyme • There are different kinds of poems • We can write a poem together
Dr. Seuss writes nonsense and rhyme.
Apr. I Can Tell a Story Personal Narrative
• A story has a beginning, middle, and end • A story has characters, a setting and a plot • I have details in my story
Joy Cowley writes stories that connect to her life.
May Some Stories are True – Nonfiction Question and
Answer
• Nonfiction books are true • The question is answered with facts. • Pictures in nonfiction books have captions, labels, and diagrams • I can learn to read and research
Bernard Most writes nonfiction questions and answer books.
On-Demand writing is completed at least 4 times a year. Data is analyzed and interventions are planned accordingly.
20
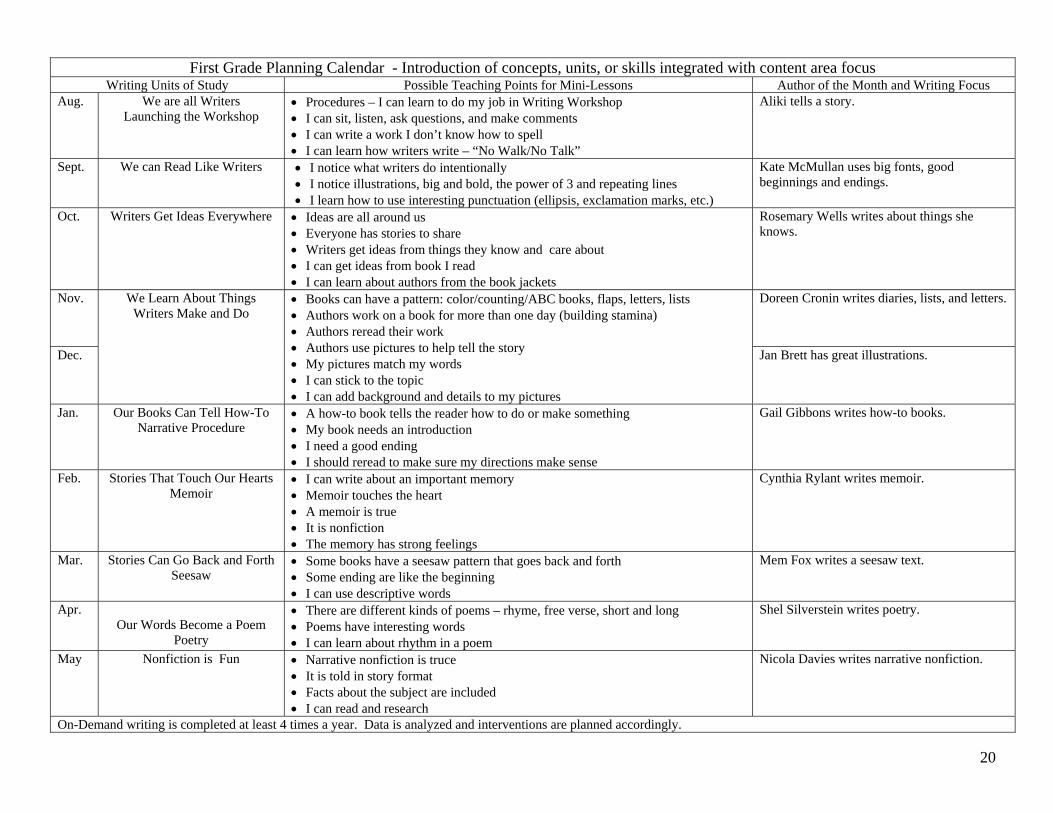
First Grade Planning Calendar - Introduction of concepts, units, or skills integrated with content area focus Writing Units of Study Possible Teaching Points for Mini-Lessons Author of the Month and Writing Focus
Aug. We are all Writers Launching the Workshop
• Procedures – I can learn to do my job in Writing Workshop • I can sit, listen, ask questions, and make comments • I can write a work I don’t know how to spell • I can learn how writers write – “No Walk/No Talk”
Aliki tells a story.
Sept. We can Read Like Writers • I notice what writers do intentionally • I notice illustrations, big and bold, the power of 3 and repeating lines • I learn how to use interesting punctuation (ellipsis, exclamation marks, etc.)
Kate McMullan uses big fonts, good beginnings and endings.
Oct. Writers Get Ideas Everywhere • Ideas are all around us • Everyone has stories to share • Writers get ideas from things they know and care about • I can get ideas from book I read • I can learn about authors from the book jackets
Rosemary Wells writes about things she knows.
Nov. We Learn About Things Writers Make and Do
• Books can have a pattern: color/counting/ABC books, flaps, letters, lists • Authors work on a book for more than one day (building stamina) • Authors reread their work • Authors use pictures to help tell the story • My pictures match my words • I can stick to the topic • I can add background and details to my pictures
Doreen Cronin writes diaries, lists, and letters.
Dec. Jan Brett has great illustrations.
Jan. Our Books Can Tell How-To Narrative Procedure
• A how-to book tells the reader how to do or make something • My book needs an introduction • I need a good ending • I should reread to make sure my directions make sense
Gail Gibbons writes how-to books.
Feb. Stories That Touch Our Hearts Memoir
• I can write about an important memory • Memoir touches the heart • A memoir is true • It is nonfiction • The memory has strong feelings
Cynthia Rylant writes memoir.
Mar. Stories Can Go Back and Forth Seesaw
• Some books have a seesaw pattern that goes back and forth • Some ending are like the beginning • I can use descriptive words
Mem Fox writes a seesaw text.
Apr. Our Words Become a Poem
Poetry
• There are different kinds of poems – rhyme, free verse, short and long • Poems have interesting words • I can learn about rhythm in a poem
Shel Silverstein writes poetry.
May Nonfiction is Fun • Narrative nonfiction is truce • It is told in story format • Facts about the subject are included • I can read and research
Nicola Davies writes narrative nonfiction.
On-Demand writing is completed at least 4 times a year. Data is analyzed and interventions are planned accordingly.

21
Second Grade Planning Calendar - Introduction of concepts, units, or skills integrated with content area focus
Writing Units of Study Possible Teaching Points for Mini-Lessons Author of the Month and Writing Focus Aug. We are all Writers
Launching the Workshop
• Procedures- review tools, place to write, No Walk/ No Talk • Using a writers notebook • Working with writing partners
Jerry Palatta writes ABC books about nonfiction topics.
Sept. All About …. Nonfiction
• Features of non-fiction • What are facts • Using diagrams and photographs
Seymour Simon shows us how to study nonfiction.
Oct. Dear Mr. Henshaw, Letter Writing
• The parts of a friendly letter • Punctuation – colons, commas, and question marks • How-to persuade someone
Mark Teague helps us learn how to write letters.
Nov. I Can Tell a Story Personal Narrative
• Story order – beginning, middle, end • Describing the setting, characters, objects, and events • Using interesting words
Patricia Polacco tells stories she has learned from others.
Dec. Beginnings and Endings are Connected
Circular Stories
• Beginnings and endings that are connected • Logical sequence of events (chronological order, order of importance). • Stick to the topic
Laura Numeroff writes circular stories.
Jan. Who am I? Descriptive First Person
Narrative
• What is first person? • Replacing tired words • Review logical sequence of events
Cynthia Rylant writes chapter books about Henry and Mudge .
Feb. What is an interrobang? All About Punctuation
• The important job of punctuation • Using commas in a series • What is an ellipsis?
Kate & Jim McMullan show us lots of interesting punctuation!
Mar. Look at Me Now! Structuring Text in Interesting
Ways
• Where can I use a repeating line or phrase? • Using questions with a series of answers • Placing text on the page in interesting ways
Eileen Spinelli can teach us about structuring text in interesting ways.
Apr. Our Words Become a Poem Poetry
• There are many kinds of poems • Choosing a title • Using words to create mental images
Jack Prelutsky writes funny poems.
May You Should Read This Book! Book Talks
• How to hook your reader with an interesting lead • Making text to self connections in your writing • Audience – who should read your book?
Leo Lionni writes interesting books.
On-Demand writing is completed at least 4 times a year. Data is analyzed and interventions are planned accordingly.