iot ca2 step-by-step tutorial - amazon web services...lim jun wei, poh wei liang st0324 internet of...
TRANSCRIPT

ST0324 Internet of Things CA2 Step-by-step Tutorial
SCHOOL OF COMPUTING (SOC)
IOT CA2
Step-by-step Tutorial DIPLOMA IN BUSINESS INFORMATION TECHNOLOGY
DIPLOMA IN INFORMATION TECHNOLOGY
DIPLOMA IN INFOCOMM SECURITY MANAGEMENT
ST0324 Internet of Things (IOT)
2017/2018 Semester 1
Date of Submission: 17 Feb 2019 Sun 11:59 pm Prepared for: Dora Chua
Class: DIT/FT/3A/32
Submitted by:
Student ID Name 1626261 1646418
Lim Jun Wei Poh Wei Liang

Lim jun wei, Poh Wei Liang ST0324 Internet of Things CA2 Step-by-step Tutorial
Created by Dora Page 1 of 79
1 Contents Section 1 Overview of the application .............................................................................................. 3
A. Where we have uploaded our tutorial ............................................................................ 3
B. Why we chose to upload on this website ........................................................................ 3
C. What have we uploaded .................................................................................................. 3
D. Video Demo ..................................................................................................................... 3
E. What is the application about? ........................................................................................ 3
F. Summary of the steps that will be described .................................................................. 3
G. How does the final RPI set-up looks like? ........................................................................ 4
H. How does the web application look like? ........................................................................ 4
Section 2 Hardware requirements .................................................................................................... 6
Hardware checklist..................................................................................................................... 6
DHT11 Temperature and Humidity Sensor .................................................................. 6
10k Ω Resistor for DHT11 sensor ................................................................................. 7
LED ............................................................................................................................... 7
Resistor for LED ............................................................................................................ 8
Buzzer ........................................................................................................................... 9
I2C LCD Screen ............................................................................................................. 9
Light-Dependant Resistor (LDR) ................................................................................. 10
Analog-to-Digital Converter ....................................................................................... 10
10K ohms resistor for LDR ......................................................................................... 11
RFID / NFC MFRC522 Card Reader Module ............................................................... 11
Soil Moisture Sensor .................................................................................................. 12
Section 3 Software requirements.................................................................................................... 13
Software checklist .................................................................................................................... 13
Blynk App ................................................................................................................... 13
Telegram Bot .............................................................................................................. 14
Section 4 Setup Hardware on Raspberry Pi .................................................................................... 16
Completed Fritzing Diagram .......................................................................................... 16
Connect the Components .............................................................................................. 16
Section 5 Installing Libraries ............................................................................................................ 22
Section 6 Setup MQTT, S3 and DynamoDB ..................................................................................... 24
Sign in to the AWS IoT Console ...................................................................................... 24
1. Register your Raspberry Pi as a Thing ...................................................................................... 26
Create and register your “Thing” ................................................................................... 26

Lim jun wei, Poh Wei Liang ST0324 Internet of Things CA2 Step-by-step Tutorial
Created by Dora Page 2 of 79
Create Certificates ......................................................................................................... 28
Create a Security Policy for your RPi.............................................................................. 29
Attach Security Policy and Thing to your Cert ............................................................... 30
Copy REST API endpoint of your “Thing” ....................................................................... 32
2. AWS IoT Rules Part 0 ................................................................................................................ 33
Create AWS Role ............................................................................................................ 34
3. AWS IoT Rules Part 1 ................................................................... Error! Bookmark not defined.
Create an AWS SNS Topic ................................................. Error! Bookmark not defined.
Subscribe to an Amazon SNS Topic ................................... Error! Bookmark not defined.
Create IoT Rule to send email ........................................... Error! Bookmark not defined.
4. AWS IoT Rules Part 2 ................................................................................................................ 35
Create an DynamoDB table............................................................................................ 35
Create rule to store MQTT message to DB .................................................................... 36
5. Setting up S3 ............................................................................................................................ 39
Create a bucket on Amazon S3 ...................................................................................... 39
aws configure ................................................................................................................. 41
Section 7 Code the program ............................................................................................................ 42
A. main.py ................................................................................................................................ 42
B. telegramBot.py .................................................................................................................... 46
C. server.py .............................................................................................................................. 47
D. nfc.ino .................................................................................................................................. 52
Section 8 Creating html files............................................................................................................ 58
A. index.html ............................................................................................................................ 58
B. login.html ............................................................................................................................. 70
C. admin.html ........................................................................................................................... 72
Section 9 Test the program ............................................................................................................. 77
A. Run the program .................................................................................................................. 77
B. Expected Results .................................................................................................................. 78

Lim jun wei, Poh Wei Liang ST0324 Internet of Things CA2 Step-by-step Tutorial
Created by Dora Page 3 of 79
Section 1
Overview of the application
A. Where we have uploaded our tutorial https://www.hackster.io/pohwl/ecoplant-plant-monitoring-5e6767
B. Why we chose to upload on this website
We chose Hackster.io because it’s more computer hardware focused and is a better project aggregation site for our project which is related to IoT, computers and programming. Raspberry Pi projects are popular and abundant there, so it’s the sensible choice.
C. What have we uploaded
Fritzing diagram, hardware requirements, software requirements, full tutorial and a summary
D. Video Demo
https://youtu.be/vnTby1GL12Q
E. What is the application about? The application allows users to moniter the real time state of a plant such as the temperature, humidity, light level and also soil moisture level. The user can also receive a photo of the plant through the telegram bot when requested. The telegram bot can also be used to notify the user when the plant needs attention. For example, the temperature is too high, humidity is too high or if the moisture level is too low. The user can also receive a message about the current condition of the plant when a correct nfc card is detected. The user can also use the Blynk app to check the condition of the plant and even use it to play a tune using the buzzer.
F. Summary of the steps that will be described Provide a bullet list of the steps that will be covered in the other parts of this tutorial
Section Description
1) Overview
Sections 2 to 9 provides the step-by-step instructions to set up the application
2) Hardware requirements Provides overview of hardware required

Lim jun wei, Poh Wei Liang ST0324 Internet of Things CA2 Step-by-step Tutorial
Created by Dora Page 4 of 79
3) Software requirements Provides overview of software required
4) Setup Hardware on Raspberry Pi
Setting up all the hardware on the breadboard
5) Installing Libraries Installing library to be able to use certain imports
6) Create mySQL database Creating a database to store data taken in by the different sensors
7) Code the program Code the program using python
8) Creating html files Code the html page for the website to view data
9) Test the program Run the program to test if it works
G. How does the final RPI set-up looks like?
H. How does the web application look like? index.html

Lim jun wei, Poh Wei Liang ST0324 Internet of Things CA2 Step-by-step Tutorial
Created by Dora Page 5 of 79

Lim jun wei, Poh Wei Liang ST0324 Internet of Things CA2 Step-by-step Tutorial
Created by Dora Page 6 of 79
login.html
admin.html
Section 2
Hardware requirements
Hardware checklist
DHT11 Temperature and Humidity Sensor
Lim jun wei, Poh Wei Liang ST0324 Internet of Things CA2 Step-by-step Tutorial
Created by Dora Page 7 of 79
Task
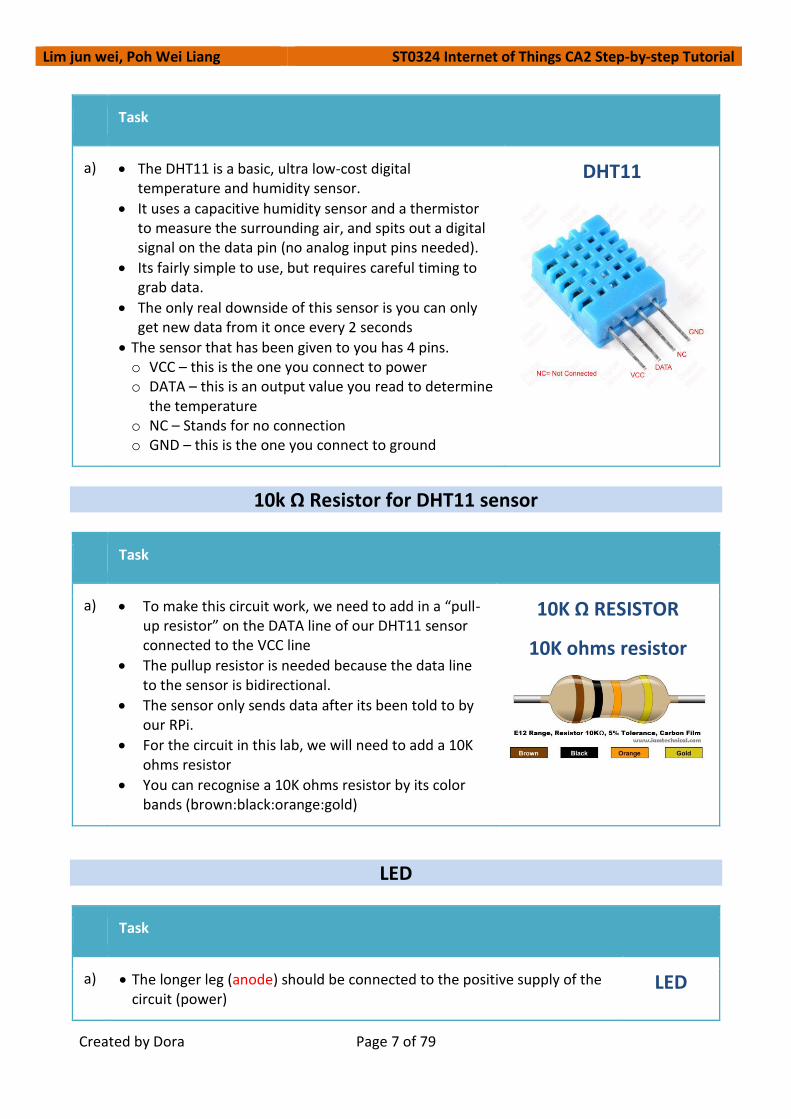
a) • The DHT11 is a basic, ultra low-cost digital temperature and humidity sensor.
• It uses a capacitive humidity sensor and a thermistor to measure the surrounding air, and spits out a digital signal on the data pin (no analog input pins needed).
• Its fairly simple to use, but requires careful timing to grab data.
• The only real downside of this sensor is you can only get new data from it once every 2 seconds
• The sensor that has been given to you has 4 pins. o VCC – this is the one you connect to power o DATA – this is an output value you read to determine
the temperature o NC – Stands for no connection o GND – this is the one you connect to ground
DHT11
10k Ω Resistor for DHT11 sensor
Task
a) • To make this circuit work, we need to add in a “pull-up resistor” on the DATA line of our DHT11 sensor connected to the VCC line
• The pullup resistor is needed because the data line to the sensor is bidirectional.
• The sensor only sends data after its been told to by our RPi.
• For the circuit in this lab, we will need to add a 10K ohms resistor
• You can recognise a 10K ohms resistor by its color bands (brown:black:orange:gold)
10K Ω RESISTOR
10K ohms resistor
LED
Task
a) • The longer leg (anode) should be connected to the positive supply of the circuit (power)
LED

Lim jun wei, Poh Wei Liang ST0324 Internet of Things CA2 Step-by-step Tutorial
Created by Dora Page 8 of 79
Task
• The shorter leg (cathode) should be connected to the negative side of the power supply (ground)
b) • LEDs will only work if power is supplied the correct way round
• You will not break the LEDs if you connect them the wrong way – they just don’t light.
• If the LED doesn’t light when you finish your lab later, maybe you have connected it the wrong way
Resistor for LED
Task
a) • You must ALWAYS use resistors to connect LEDs to the GPIO pins of the Raspberry Pi.
• The Raspberry Pi can only supply a small current (about 60mA)
• The LEDs will want to draw more, and if allowed to, they will burn out the Raspberry Pi
• Putting the resistors in the circuit will ensure that only this small current will flow, and the Pi will not be damaged.
b) • Resistors are a way of limiting the amount of electricity going through a circuit; specifically, they limit the amount of ‘current’ that is allowed to flow.
• The measure of resistance is called the Ohm (Ω), and the larger the resistance, the more it limits the current.
• It does not matter which way round you connect the resistors. Current flows in both ways through them.
c) • Resistors can range from 100Ω to 10000Ω
• The value of a resistor is marked with coloured bands along the length of the resistor body.
https://www.allaboutcircuits.com/tools/resistor-color-code-calculator/
330 ohms RESISTOR

Lim jun wei, Poh Wei Liang ST0324 Internet of Things CA2 Step-by-step Tutorial
Created by Dora Page 9 of 79
Task
• In this lab, you will be using a 330Ω resistor.
• You can identify the 330Ω resistors by the colour bands along the body. The colour coding will depend on how many bands are on the resistors supplied:
• For example, on a four color band resistors, a 330Ω resistor is colored Orange, Orange, Brown, and then Gold. On a five color band 330Ω resistor, the colours are Orange, Orange, Black, Black, Brown.
Figure 1: Orange,Orange,Brown
Buzzer
Task
a) A buzzer is an audio signaling device which is commonly found in circuits to create a buzzing or beeping noise. Buzzers can be categorized as active buzzers and passive ones. For our lab, we will use active buzzers as they are a lot simpler to use than passive ones though they are slightly more expensive. An active buzzer can be connected just like an LED but they are even easier to use because a resistor is not needed. A buzzer typically has 2 pins o VOUT – Connect this to a GPIO pin to control its
value o GND – Connect this to ground
Buzzer
I2C LCD Screen

Lim jun wei, Poh Wei Liang ST0324 Internet of Things CA2 Step-by-step Tutorial
Created by Dora Page 10 of 79
Task
a) • Adding a LCD display in your IoT projects will definitely spice it up by one notch! LCD displays are a fun and easy way to have your microcontroller project talk back to you.
• LCDs are available in tons of colors and sizes. For example, you might have 8x1 LCDs or 20x4 LCDs
• For this lab, we will use the commonly available 16x2 LCD which can display up to 32 characters.
• We will use the i2C version which require you to connect only 2 GPIO pins to your Raspberry Pi.
• If you are buying your own LCDs, do make sure you buy the i2C version though they might cost a bit more. The non-i2C versions require you to connect double the number of GPIO pins!
i2c LCD Screen
Light-Dependant Resistor (LDR)
Task
a) • Light-Dependant Resistor (LDR) are light sensitive resistors which change resistance based on how much light they are exposed to.
• The more light a LDR receives, the less resistant it becomes, i.e. lets more current flow
• When it’s in the dark, the resistance is very high
• The resistance of an LDR may typically have the following resistances: o Daylight = 5000Ω o Dark = 20000000Ω
LDR
Analog-to-Digital Converter
Task
a) • The Raspberry Pi has no built in analogue inputs which makes it difficult to work with analogue sensors such as temperature or light sensors which produce analog values.
• RPi programmers get around this by using ADCs such as the affordable MCP3008 ($3.20) which are able to
MCP3008 ADC

Lim jun wei, Poh Wei Liang ST0324 Internet of Things CA2 Step-by-step Tutorial
Created by Dora Page 11 of 79
Task
read analogue inputs and convert them to digital signals for the RPi.
10K ohms resistor for LDR
Task
a) • To moderate the flow of current within the circuit, we will need to add a 10K ohms resistor in the circuit you will build later
• You can recognise a 10K ohms resistor by its color bands (brown:black:orange:gold)
10K ohms resistor
RFID / NFC MFRC522 Card Reader Module

Lim jun wei, Poh Wei Liang ST0324 Internet of Things CA2 Step-by-step Tutorial
Created by Dora Page 12 of 79
Task
a) • RFID technology is commonly used in many applications to “tag” items for the purpose of identification or tracking.
• For example, an RFID tag attached to an automobile during production can be used to track its progress through the assembly line; RFID-tagged pharmaceuticals can be tracked through warehouses; and implanting RFID microchips in livestock and pets allows animals to be identified.
• In this lab, you will write a simple Python program that is able to read RFID cards/ tags with a MFRC522 card reader module attached to RPi
• This reader is also capable of reading NFC Mifare A cards.
• NFC is based on RFID protocols but goes farther than RFID as it is capable of two-way communication—unlike RFID’s one-directional limitation
RFID/ NFC reader MFRC522
Soil Moisture Sensor
Task
a) • The soil moisture sensor consists of two probes which are used to measure the volumetric content of water. The two probes allow the current to pass through the soil and then it gets the resistance value to measure the moisture value.
• When there is more water, the soil will conduct more electricity which means that there will be less resistance. Therefore, the moisture level will be higher. Dry soil conducts electricity poorly, so when there will be less water, then the soil will conduct less electricity which means that there will be more resistance. Therefore, the moisture level will be lower.
Flying fish soil moisture sensor

Lim jun wei, Poh Wei Liang ST0324 Internet of Things CA2 Step-by-step Tutorial
Created by Dora Page 13 of 79
Section 3
Software requirements
Software checklist
Blynk App
Task
a) Download the appropriate Blynk App for your mobile phone
AppStore: https://itunes.apple.com/us/app/blynk-control-arduino-raspberry/id808760481?ls=1&mt=8 PlayStore: https://play.google.com/store/apps/details?id=cc.blynk
b) After you have installed the Blynk App, you’ll need to create a New Blynk account.
Click the “Create New Account” button and proceed to register a new account with a
valid email address and password.
c) Once you have created your Blynk account, you can proceed to create a new project.
Set the project name as “Assignment”
Choose Hardware Model as “Raspberry Pi 3 B”.
You will observe that the app generates a AUTH TOKEN for you. Click the “E-mail” to
send the Auth TOKEN to your registered email. Check your email and copy the code to
the clipboard, you will need this code later.
Click Create button.

Lim jun wei, Poh Wei Liang ST0324 Internet of Things CA2 Step-by-step Tutorial
Created by Dora Page 14 of 79
Task
d) After creating the Blynk project, you can proceed to add widgets
to it.
First, we will add 4 value display and 1 button. Arrange the
widgets as shown.
The 4 value display will be set to virtual pin V1, V2, V3, V4
respectively and the button will be set to virtual pin V5.
e) When you are done with the Settings - press the PLAY button (top right hand corner)
This will switch you from EDIT mode to PLAY mode where you can interact with the
hardware.
While in PLAY mode, you won’t be able to drag or set up new widgets.
If you want to get back to the EDIT mode, press the STOP button.
Telegram Bot
Task
a) Open Telegram app in your laptop or mobile and start “BotFather”

Lim jun wei, Poh Wei Liang ST0324 Internet of Things CA2 Step-by-step Tutorial
Created by Dora Page 15 of 79
Task
b) Type /newbot to create a new bot
c) Give a name to your bot that describes its purpose.
d) Give a username to your bot. Make sure it ends with _bot
e) Copy down the access token that is issued by BotFather
f) start another bot called “get_id_bot”
g) Type /start to start the bot
h) Copy down the Chat ID gotten by the bot

Lim jun wei, Poh Wei Liang ST0324 Internet of Things CA2 Step-by-step Tutorial
Created by Dora Page 16 of 79
Section 4
Setup Hardware on Raspberry Pi
Completed Fritzing Diagram
Connect the Components
LCD
a) Connect the pins on the LCD to the RPi as follows:
Jumper color
LCD pin RPi pin
White SCL SCL
Yellow SDA SDA
Black GND GND
Red VCC 5V

Lim jun wei, Poh Wei Liang ST0324 Internet of Things CA2 Step-by-step Tutorial
Created by Dora Page 17 of 79
LED and Resistors
a) Plug all LEDs into the breadboard as shown. Place the longer end of the LED nearer to the T-Cobbler Kit.
b) Plug in all the 330 Ω resistor into the breadboard as shown. One end of the resistor should be in the same column as the short leg of the LED.
c) LED i. Using a purple cable, connect the long end of the red LED to BCM13
ii. Using a purple cable, connect the long end of the green LED to BCM19 iii. Using a purple cable, connect the long end of the yellow LED to BCM21 iv. Using a purple cable, connect the long end of the white LED to BCM16
d) Resistor (Red-Red-Brown) i. Using a black cable, connect the free end of all the 220 Ω resistor to GND

Lim jun wei, Poh Wei Liang ST0324 Internet of Things CA2 Step-by-step Tutorial
Created by Dora Page 18 of 79
DHT11 Temperature and Humidity sensor
a) Insert the DHT11 sensor in the middle of the breadboard as shown.
b) As mentioned, the DHT11 chip has a total of 4 pins Connect them to the RPi pins with the corresponding color jumper cables as shown in the diagrams below. Add in a 10k ohms resistor in the DATA and VCC line.
c)
Jumper color
DHT11 pin RPi pin
Purple DATA BCM5
Black GND GND
Red VCC 3V3

Lim jun wei, Poh Wei Liang ST0324 Internet of Things CA2 Step-by-step Tutorial
Created by Dora Page 19 of 79
MCP3008 ADC
a) Insert the MCP3008 chip in the middle of the breadboard, with the small notch facing the T-Cobbler kit as shown in the picture on the right
b) The MCP3008 chip has a total of 16 pins, 8 on each side. In this lab, you will be using 9 of the pins so prepare 9 jumper cables in the colors as shown below. Connect them to the RPi pins with the corresponding color cables as shown in the diagrams below.
Notch here facing your T-cobbler kit
Lim jun wei, Poh Wei Liang ST0324 Internet of Things CA2 Step-by-step Tutorial
Created by Dora Page 20 of 79
LDR
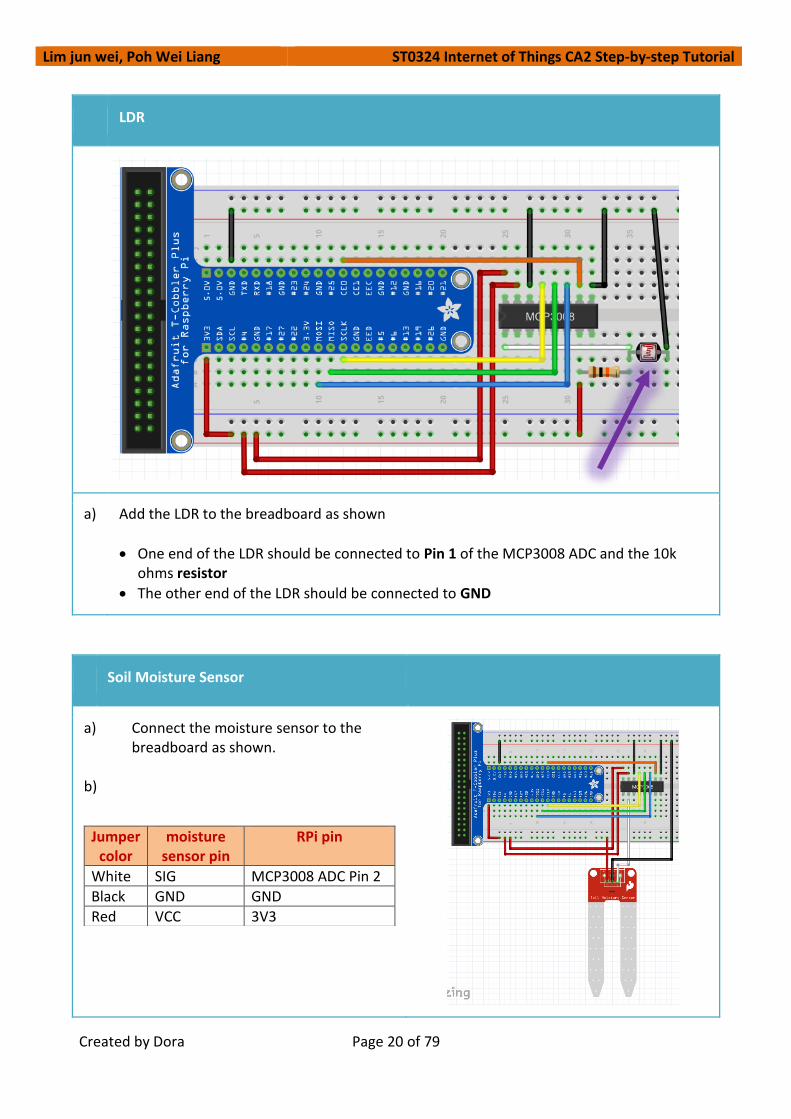
a) Add the LDR to the breadboard as shown
• One end of the LDR should be connected to Pin 1 of the MCP3008 ADC and the 10k ohms resistor
• The other end of the LDR should be connected to GND
Soil Moisture Sensor
a) Connect the moisture sensor to the breadboard as shown.
b)
Jumper color
moisture sensor pin
RPi pin
White SIG MCP3008 ADC Pin 2
Black GND GND
Red VCC 3V3

Lim jun wei, Poh Wei Liang ST0324 Internet of Things CA2 Step-by-step Tutorial
Created by Dora Page 21 of 79
Arduino UNO
a) Connect the Arduino UNO to the raspberry pi using a usb cable as shown.
Buzzer
a) b)
Connect the buzzer to the Arduino UNO as shown.
Jumper color
buzzer pin Arduino pin
Black GND GND
Red VOUT Digital Pin 5

Lim jun wei, Poh Wei Liang ST0324 Internet of Things CA2 Step-by-step Tutorial
Created by Dora Page 22 of 79
MFRC522 Card Reader
a) Connect the MFRC522 Card Reader to the Arduino UNO as shown.
b)
Jumper color MFRC522 Card Reader pin Arduino pin
Red 3.3V 3V3
Blue RST Digital Pin 9
Black GND GND
Green MISO Digital Pin 12
Orange MOSI Digital Pin 11
Yellow SCK Digital Pin 13
White SDA Digital Pin 10
Section 5
Installing Libraries
MFRC522 library
a) b)
Install the MFRC522 library from https://github.com/ljos/MFRC522. Once downloaded, extract the content of the zip files inside your “arduino/libraries” folder.

Lim jun wei, Poh Wei Liang ST0324 Internet of Things CA2 Step-by-step Tutorial
Created by Dora Page 23 of 79
rpi-lcd library
a) Install the rpi-lcd library by typing the following command in the console. sudo pip install rpi-lcd
gpiozero library
a) Install the gpiozero library by typing the following command in the console. sudo pip install gpiozero
Adafruit_DHT library
a) Install the Adafruit_DHT library by typing the following command in the console. sudo pip install Adafruit_DHT
flask library
a) Install the flask library by typing the following command in the console. sudo pip install flask
telegram bot library
a) Install the Telegram API by typing the following command in the console. sudo pip install telepot
Boto 3 Library
a) Install the Boto 3 library with this command.
sudo pip install boto3
AWS Python library
a) Install the AWS Python library with this command.

Lim jun wei, Poh Wei Liang ST0324 Internet of Things CA2 Step-by-step Tutorial
Created by Dora Page 24 of 79
AWS Python library
sudo pip install AWSIoTPythonSDK
AWS CLI
a) Type the following command to install the AWS Command-Line Interface Client on your
Raspberry Pi
sudo pip install awscli
numpy library
b) Install the numpy library by typing the following command in the console. sudo pip install numpy
Section 6
Setup MQTT, S3 and DynamoDB After you have received the email confirmation from AWS, you are now ready to log into the AWS IoT console to start the lab.
Sign in to the AWS IoT Console
No Task
a) Turn on your Raspberry Pi and confirm you have an Internet connection.
b) Sign in with your AWS console at https://aws.amazon.com
c) In the AWS dashboard, type “AWS IoT Core” to access the AWS IoT service.

Lim jun wei, Poh Wei Liang ST0324 Internet of Things CA2 Step-by-step Tutorial
Created by Dora Page 25 of 79
No Task
d) On the Welcome
page, choose Get
started
e) Ensure that the
region selected at
the top right is “US
West (Oregon)”

Lim jun wei, Poh Wei Liang ST0324 Internet of Things CA2 Step-by-step Tutorial
Created by Dora Page 26 of 79
1. Register your Raspberry Pi as a Thing In this section, you will learn how to create and register your Raspberry Pi as a “Thing” with AWS IoT.
Create and register your “Thing”
No Task
a) In the left navigation pane, click “Manage” to expand it,
then choose “Things”.
b) On the page that says “You don't have
any things yet”, choose “Register a
thing”.
If you have created a thing before,
choose Create.
c) A thing represents a device whose status or data is stored in the AWS cloud. The Thing
Shadows is the state of the device, e.g. is it “on” or “off”, is it “red” or “green” etc.
Our “thing” here is our RPi, so let’s type “EcoPlant” for the name.
Click “Create a single thing”

Lim jun wei, Poh Wei Liang ST0324 Internet of Things CA2 Step-by-step Tutorial
Created by Dora Page 27 of 79
No Task

Lim jun wei, Poh Wei Liang ST0324 Internet of Things CA2 Step-by-step Tutorial
Created by Dora Page 28 of 79
Create Certificates
No Task
a) After you have
completed the
previous section,
you might be
presented with this
screen.
b) Choose “One-click certificate creation” to generate an X.509 certificate and key pair.
c) After a while, you
should see the
following screen,
where there are a
total of four
download links.
For the root CA, you
can choose CA 1
d) Create a working directory called deviceSDK
and download all the 4 files above in this
deviceSDK directory, renaming them with
friendly names like what I have done.
e) Next, click the “Activate” button.
Almost immediately, you should see
“Successfully activated certificate” and
the Activate button changes to
“Deactivate”

Lim jun wei, Poh Wei Liang ST0324 Internet of Things CA2 Step-by-step Tutorial
Created by Dora Page 29 of 79
No Task
f) Click to the next page, and click
“Register Thing”
g) You are brought to this page.
Continue with the next section to attach a
security policy to your Thing.
Create a Security Policy for your RPi
Task
a) On the left IOT Core dashboard, select Policies under the
Secure sub-menu
b) On the next page, choose “Create new
policy”
c) On the Create a policy page, key
in the following configuration
Field Type this in
Name EcoPlantPolicy
Action iot:*
Resource ARN *
Allow Checked

Lim jun wei, Poh Wei Liang ST0324 Internet of Things CA2 Step-by-step Tutorial
Created by Dora Page 30 of 79
Task
d) Click “Create”.
You now have a Security Policy
that allows all access to IOT Core
services
Attach Security Policy and Thing to your Cert In this section, you will attach both your security policy and your Thing to your X.509 certificate

Lim jun wei, Poh Wei Liang ST0324 Internet of Things CA2 Step-by-step Tutorial
Created by Dora Page 31 of 79
Task
a) On the left nav bar, click “Security, Certificates”
b) The X.509 certificate you
created earlier is shown.
Click the checkbox beside
it, then click “Actions”
button and choose
“Attach Policy”
c) Check the “EcoPlantPolicy”
you created earlier and click
“Attach” button.

Lim jun wei, Poh Wei Liang ST0324 Internet of Things CA2 Step-by-step Tutorial
Created by Dora Page 32 of 79
Task
d) Let’s attach the “Thing” to this
certificate.
Click “Actions” button and
choose “Attach Thing”
e) In the Attach things to
certificate(s) dialog box, select
the check box next to the thing
you created to represent your
Raspberry Pi, and then choose
Attach
Copy REST API endpoint of your “Thing”

Lim jun wei, Poh Wei Liang ST0324 Internet of Things CA2 Step-by-step Tutorial
Created by Dora Page 33 of 79
No Task
a) Click “Manage->Things” and choose
“EcoPlant”.
On the next screen, choose “Interact”
b) Copy and paste the
REST API endpoint
into a Notepad.
You will need this
value later.
2. AWS IoT Rules Part 1 In this section and the next, you will learn how you can trigger automated actions on the IOT data received on the MQTT broker without any coding! To do this, you set up Rules on your IOT dashboard which tells the AWS IOT service what you want it to do, when IOT data arrives on the MQTT broker. For example, we can set up a rule to send an email or SMS and another rule that stores the data to a NoSQL database like DynamoDB.

Lim jun wei, Poh Wei Liang ST0324 Internet of Things CA2 Step-by-step Tutorial
Created by Dora Page 34 of 79
In most cases, setting up the rules is quite easy on a paid AWS account. However, due to the limitations of the AWSEducate account, you will have to go through an extra step in this section (Part 0) to set up a “role”, before you can proceed to create “rules”. If you are using a paid account, the procedure is much more straightforward and does not require the execution of the steps explained in this section.
Create AWS Role
No Task
a) Search for the IAM service on AWS Console and choose “Roles”
b) Click “Create Role” and on the next page, choose “AWS service”, then “IOT”
Lim jun wei, Poh Wei Liang ST0324 Internet of Things CA2 Step-by-step Tutorial
Created by Dora Page 35 of 79
No Task
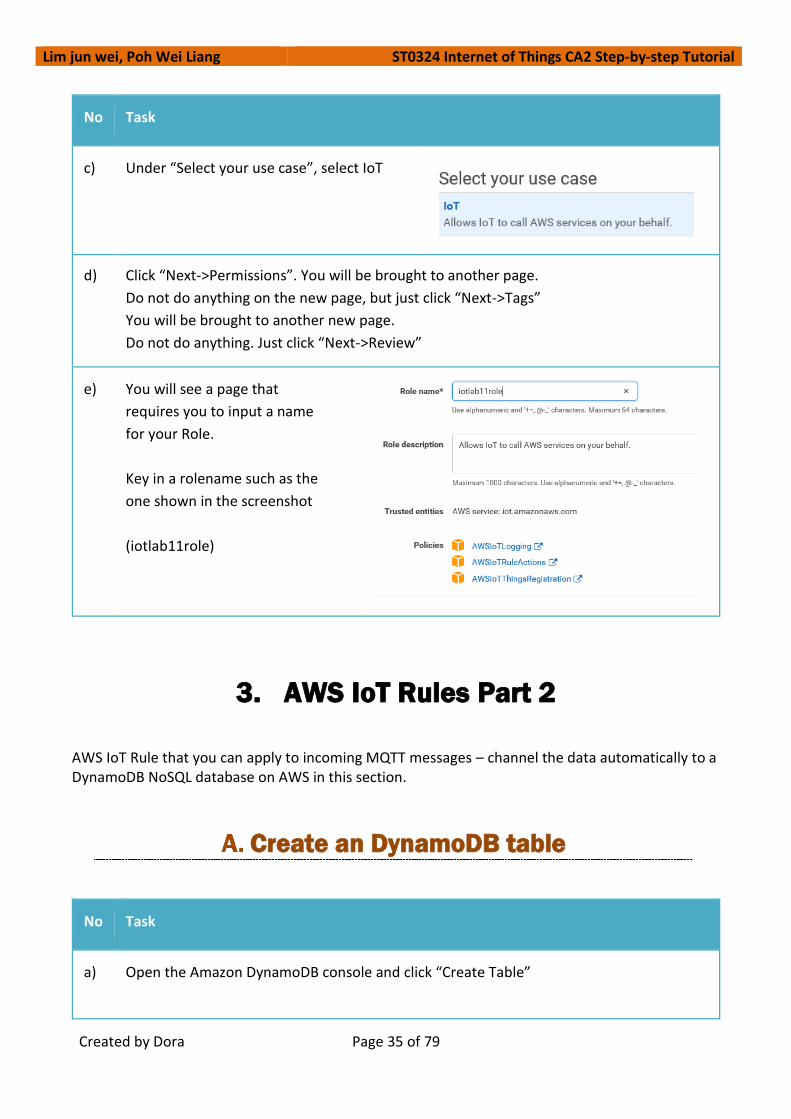
c) Under “Select your use case”, select IoT
d) Click “Next->Permissions”. You will be brought to another page.
Do not do anything on the new page, but just click “Next->Tags”
You will be brought to another new page.
Do not do anything. Just click “Next->Review”
e) You will see a page that
requires you to input a name
for your Role.
Key in a rolename such as the
one shown in the screenshot
(iotlab11role)
3. AWS IoT Rules Part 2 AWS IoT Rule that you can apply to incoming MQTT messages – channel the data automatically to a DynamoDB NoSQL database on AWS in this section.
Create an DynamoDB table
No Task
a) Open the Amazon DynamoDB console and click “Create Table”

Lim jun wei, Poh Wei Liang ST0324 Internet of Things CA2 Step-by-step Tutorial
Created by Dora Page 36 of 79
No Task
b) Create the table using the attributes as shown below
Create rule to store MQTT message to DB In this step, you will create and configure a rule to send the data received from a device to the AWS DynamoDB table you created in Step A of this section

Lim jun wei, Poh Wei Liang ST0324 Internet of Things CA2 Step-by-step Tutorial
Created by Dora Page 37 of 79
No Task
a) In the AWS IoT console, in the left navigation pane, choose “Act”,
then “Create a rule”
b) On the Create a rule page, in the
Name field, type a name for your
rule. In the Description field, type a
description for the rule.
c) Scroll down to Message
source. Choose the latest
version from the Using SQL
version drop-down list. In the
Attribute field, type *. This
specifies that you want to
send the entire MQTT
message that triggered the
rule.

Lim jun wei, Poh Wei Liang ST0324 Internet of Things CA2 Step-by-step Tutorial
Created by Dora Page 38 of 79
No Task
d) The rules engine uses the
topic filter to determine which
rules to trigger when an MQTT
message is received.
In the Topic filter field, type
“ecoplant/sensordata”
Leave the condition blank
e) In Set one or more actions, choose Add action.
f) On the Select an action page, select the action below. Next, choose Configure action.
g) On the Configure action page, from
the SNS target drop-down list,
choose the DynamoDB table you
created earlier.
h) If you are using a AWS Paid account, go ahead and click “Create a new role”. Then
select the newly created role and click “Update role”. For example, I have used my
Paid Account to create a new role named “dynamodb_role” and chosen it.

Lim jun wei, Poh Wei Liang ST0324 Internet of Things CA2 Step-by-step Tutorial
Created by Dora Page 39 of 79
No Task
If you are using a AWS Educate account, you will not be able to create a new role.
Instead, just choose the one you created in Section 8 Step A (iotlab11role) from the
drop-down list and click “Update Role”
i) Click “Create” at the bottom right hand side of the screen.
j) The previous action brings you back to the “Create a Rule” page.
Click “Create Rule” at the bottom right hand side of the screen to finalise the steps in
this section
4. Setting up S3
Create a bucket on Amazon S3
No Task
a) Log in your AWS console and search for
S3

Lim jun wei, Poh Wei Liang ST0324 Internet of Things CA2 Step-by-step Tutorial
Created by Dora Page 40 of 79
No Task
b) Click “Create bucket”
c) Type in a unique
name for your
bucket and choose
Region as “US
West (Oregon)”
which is us-west-2
Click “Create”
button
d) After a while, your newly created bucket should appear in the list.

Lim jun wei, Poh Wei Liang ST0324 Internet of Things CA2 Step-by-step Tutorial
Created by Dora Page 41 of 79
aws configure In this section, you will make use of the Access Key Id and Secret Access Key to run the “aws configure” command so that you can successfully use the AWS boto3 Python SDK library to write Python programs that can interact with AWS services like S3, DynamoDB and Rekognition successfully.
No Task
a) Type the following command in your Raspberry Pi terminal so that you can use the
AWS CLI to configure your credentials file: aws configure
b) Enter the Access Key ID and Secret Access Key id you obtained from the previous
section (either Section E or Section F, depending on whether you are using
AWSEducate or “Credit-card AWS account”)

Lim jun wei, Poh Wei Liang ST0324 Internet of Things CA2 Step-by-step Tutorial
Created by Dora Page 42 of 79
Section 7
Code the program
A. main.py Next, let’s write the main python script that will be handling the reading of data for the plant.
Task
a) Create a folder to store your assignment files mkdir ~/CA2
b) Change directory to CA2 cd CA2
c) Create a python script main.py with the code below sudo nano ~/CA2/main.py
d) Change auth_token, bot_token, bot_chatId and host according to the one taken from section 3 and 6.
e) # -*- coding: utf-8 -*-
from gpiozero import MCP3008,LED
from rpi_lcd import LCD
from blynkapi import Blynk
import Adafruit_DHT
from time import sleep
import telegramBot
import serial
import sys
import telepot
import dynamodb
from AWSIoTPythonSDK.MQTTLib import AWSIoTMQTTClient
arduino = serial.Serial('/dev/ttyUSB0', 9600)
auth_token = "Your auth token for blynk"
bot_token = 'Your bot token for telegram'
bot_chatId = Your telegram bot chat ID
bot = telepot.Bot(bot_token)
ldr = MCP3008(channel=0)
moisture = MCP3008(channel=1)
redLed = LED(13)
greenLed = LED(19)

Lim jun wei, Poh Wei Liang ST0324 Internet of Things CA2 Step-by-step Tutorial
Created by Dora Page 43 of 79
Task
whiteLed = LED(16)
lcd = LCD()
host = "your iot thing rest api endpoint"
rootCAPath = "rootca.pem"
certificatePath = "certificate.pem.crt"
privateKeyPath = "private.pem.key"
my_rpi = AWSIoTMQTTClient("basicPubSub")
my_rpi.configureEndpoint(host, 8883)
my_rpi.configureCredentials(rootCAPath, privateKeyPath, certificatePath)
my_rpi.configureOfflinePublishQueueing(-1)
my_rpi.configureDrainingFrequency(2)
my_rpi.configureConnectDisconnectTimeout(10)
my_rpi.configureMQTTOperationTimeout(5)
def customCallback(client, userdata, message):
print("Received a new message: ")
print(message.payload)
print("from topic: ")
print(message.topic)
print("--------------\n\n")
my_rpi.connect()
my_rpi.subscribe("ecoplant/sensordata", 1, customCallback)
sleep(2)
errorTimes = 0
while True:
try:
limitData = dynamodb.getLimitData()
allOk = True
humidity, temperature = Adafruit_DHT.read_retry(11, 5)
moistureLevel = round(moisture.value*1024,2)
if humidity > 100:
humidity = humidity - 100
lcd.text('Temp: C'.format(temperature), 1)
lcd.text('Humidity: %'.format(humidity), 2)
if temperature > float(limitData['tempLimit']) and humidity >
float(limitData['humidityLimit']):

Lim jun wei, Poh Wei Liang ST0324 Internet of Things CA2 Step-by-step Tutorial
Created by Dora Page 44 of 79
Task
redLed.blink()
greenLed.off()
lcd.text('Temp & Humidity', 1)
lcd.text('too high', 2)
errorTimes += 1
allOk = False
elif temperature > float(limitData['tempLimit']):
redLed.blink()
greenLed.off()
lcd.text('Temperature', 1)
lcd.text('too high', 2)
errorTimes += 1
allOk = False
elif humidity > float(limitData['humidityLimit']):
redLed.blink()
greenLed.off()
lcd.text('Humidity', 1)
lcd.text('too high', 2)
errorTimes += 1
allOk = False
elif moistureLevel < float(limitData['moistureLimit']):
redLed.blink()
greenLed.off()
lcd.text('Plant', 1)
lcd.text('needs water', 2)
errorTimes += 1
allOk = False
if allOk:
greenLed.on()
redLed.off()
errorTimes = 0
else:
if errorTimes == 1:
if temperature > float(limitData['tempLimit']) and
humidity > float(limitData['humidityLimit']):
bot.sendMessage(bot_chatId, '`Plant temperature and
humidity too high: ' + str(temperature) + '°C,' + str(humidity) + '%`',
'Markdown')
elif temperature > float(limitData['tempLimit']):
bot.sendMessage(bot_chatId, '`Plant temperature too
high: ' + str(temperature) + '°C`', 'Markdown')
elif humidity > float(limitData['humidityLimit']):

Lim jun wei, Poh Wei Liang ST0324 Internet of Things CA2 Step-by-step Tutorial
Created by Dora Page 45 of 79
Task
bot.sendMessage(bot_chatId, '`Plant humidity too
high: ' + str(humidity) + '%`', 'Markdown')
elif moistureLevel < float(limitData['moistureLimit']):
bot.sendMessage(bot_chatId, '`Plant too dry.
Requires watering`', 'Markdown')
light_value = round(ldr.value*1024,2)
if light_value > float(limitData['lightLimit']):
whiteLed.on()
else:
whiteLed.off()
blynkTemp = Blynk(auth_token, pin = "V1")
blynkHumidity = Blynk(auth_token, pin = "V2")
blynkLight = Blynk(auth_token, pin = "V3")
blynkMoisture = Blynk(auth_token, pin = "V4")
musicButton = Blynk(auth_token, pin = "V5")
blynkTemp.set_val_old("[\""+ str(temperature) +"°C\"]")
blynkHumidity.set_val_old("[\""+ str(humidity) +"%\"]")
blynkLight.set_val_old("[\""+ str(light_value) +"\"]")
blynkMoisture.set_val_old("[\""+ str(moistureLevel) +"\"]")
musicButtonVal = str(musicButton.get_val()[0])
if musicButtonVal == "1":
arduino.write(b'music')
message =
message["id"] = "sensordata"
import datetime as datetime
message["datetime_value"] = str(datetime.datetime.now())
message["temperature"] = temperature
message["humidity"] = humidity
message["lightValue"] = light_value
message["moistureLevel"] = moistureLevel
import json
my_rpi.publish("ecoplant/sensordata", json.dumps(message), 1)
if arduino.in_waiting > 0:
data = arduino.readline()
if str(data).find("ok") == 0:
msg = 'Temperature: ' + str(temperature) + '°C\n'
msg += 'Humidity: ' + str(humidity) + '%\n'
msg += 'Moisture: ' + str(moistureLevel) + '\n'
if allOk:

Lim jun wei, Poh Wei Liang ST0324 Internet of Things CA2 Step-by-step Tutorial
Created by Dora Page 46 of 79
Task
msg += 'Plant Condition: Good'
else:
msg += 'Plant Condition: `Requires attention`'
bot.sendMessage(bot_chatId, msg, 'Markdown')
arduino.reset_input_buffer()
sleep(2)
except KeyboardInterrupt:
print("Program aborted")
sys.exit()
B. telegramBot.py telegramBot.py is a python program that interacts with the telegram bot to allow users to find out about the current state of the plant. Users are able to send a bot a command to receive a photo of the plant and the bot will also be able to warn the user if the plant needs any attention. The photo taken from the piCam will also be stored in the AWS S3.
Task
a) Create a python script telegramBot.py with the code below
sudo nano ~/CA2/telegramBot.py
b) import telepot
from picamera import PiCamera
import boto3
bot_token = 'Your bot token'
s3 = boto3.client('s3',aws_access_key_id='your aws access
key',aws_secret_access_key=' your aws secret access key ')
bucket_name = 'iot-ay1819s2'
folder = 'home/1819s2_iot_ECOPlant/'
def respondToMsg(msg):

Lim jun wei, Poh Wei Liang ST0324 Internet of Things CA2 Step-by-step Tutorial
Created by Dora Page 47 of 79
Task
chat_id = msg['chat']['id']
command = msg['text']
print('Got command: '.format(command))
if str(command).lower() == 'take photo':
camera = PiCamera()
camera.capture('./capture.jpg')
bot.sendPhoto(chat_id, photo=open('./capture.jpg', 'rb'))
camera.close()
import datetime as datetime
filename = str(datetime.datetime.now()) + '.jpg'
s3.upload_file('./capture.jpg',bucket_name,folder +
filename,ExtraArgs='ACL':'public-read')
bot = telepot.Bot(bot_token)
bot.message_loop(respondToMsg)
C. server.py server.py is a python program that acts as a web server. Users are able to access the web server via a browser such as google chrome and monitor the real time status of the plant, at the same time being able to control the LED on the breadboard and get a history data of the plant.
Task
c) Create a python script server.py with the code below
sudo nano ~/CA2/server.py
d) from flask import Flask, render_template, jsonify, request import datetime
from gpiozero import LED
import dynamodb
import jsonconverter as jsonc
app = Flask(__name__)
@app.route("/api/sensorData/<rows>",methods=['POST','GET'])

Lim jun wei, Poh Wei Liang ST0324 Internet of Things CA2 Step-by-step Tutorial
Created by Dora Page 48 of 79
Task
def apiSensorData(rows):
data =
'data': jsonc.data_to_json(dynamodb.getSensorData(rows))
return jsonify(data)
@app.route("/api/tenMinData",methods=['POST','GET'])
def apiAverage():
data = jsonc.data_to_json(dynamodb.getSensorAvgData())
return jsonify(data)
led = LED(21)
@app.route("/api/setLedState/<on>",methods=['POST','GET'])
def apiSetLed(on):
if str(on) == "1":
led.on()
else:
led.off()
return jsonify(True)
@app.route("/api/getLimitData",methods=['GET'])
def apiGetLimit():
data = jsonc.data_to_json(dynamodb.getLimitData())
return jsonify(data)
@app.route("/api/updateLimit",methods=['POST'])
def apiUpdateLimit():
ok = dynamodb.updateLimitTable(request.get_json())
return jsonify(ok)
@app.route("/api/getImages",methods=['GET'])
def apiGetImage():
urls = dynamodb.getImagesUrl()
return jsonify(urls)
@app.route("/")
def home():
return render_template("index.html")
@app.route("/admin.html")
def admin():
return render_template("admin.html")
@app.route("/login.html")

Lim jun wei, Poh Wei Liang ST0324 Internet of Things CA2 Step-by-step Tutorial
Created by Dora Page 49 of 79
Task
def login():
return render_template("login.html")
app.run(debug=True,host="0.0.0.0")
D. dynamodb.py dynamodb.py is a python program that handles the getting and editing of data in dynamodb.
Task
e) Create a python script dynamodb.py with the code below
sudo nano ~/CA2/ dynamodb.py
f) import boto3
from boto3.dynamodb.conditions import Key, Attr
import datetime
currentYear = datetime.date.today().year
dynamodb = boto3.resource('dynamodb', region_name='us-west-2')
def getLimitData():
try:
table = dynamodb.Table('EcoPlantRangeTable')
response =
response = table.query(
KeyConditionExpression=Key('id').eq('rangedata'),
ScanIndexForward=False
)
items = response['Items']
return items[0]
except:
import sys
print(sys.exc_info()[0])
print(sys.exc_info()[1])
def getSensorData(rows):

Lim jun wei, Poh Wei Liang ST0324 Internet of Things CA2 Step-by-step Tutorial
Created by Dora Page 50 of 79
Task
try:
table = dynamodb.Table('EcoPlantTable')
response =
response = table.query(
KeyConditionExpression=Key('id').eq('sensordata')
&
Key('datetime_value').begins_with(str(currentYear)),
ScanIndexForward=False
)
items = response['Items']
n=int(rows)
data = items[:n]
data_reversed = data[::-1]
return data_reversed
except:
import sys
print(sys.exc_info()[0])
print(sys.exc_info()[1])
def getSensorAvgData():
try:
table = dynamodb.Table('EcoPlantTable')
response =
currentDate = datetime.datetime.now()
date = currentDate - datetime.timedelta(minutes=10)
response = table.query(
KeyConditionExpression=Key('id').eq('sensordata')
&
Key('datetime_value').between(str(date),str(currentDate)),
ScanIndexForward=False
)
items = response['Items']
return items
except:
import sys
print(sys.exc_info()[0])
print(sys.exc_info()[1])
def updateLimitTable(limitData):
try:
table = dynamodb.Table('EcoPlantRangeTable')
response =
Lim jun wei, Poh Wei Liang ST0324 Internet of Things CA2 Step-by-step Tutorial
Created by Dora Page 51 of 79
Task
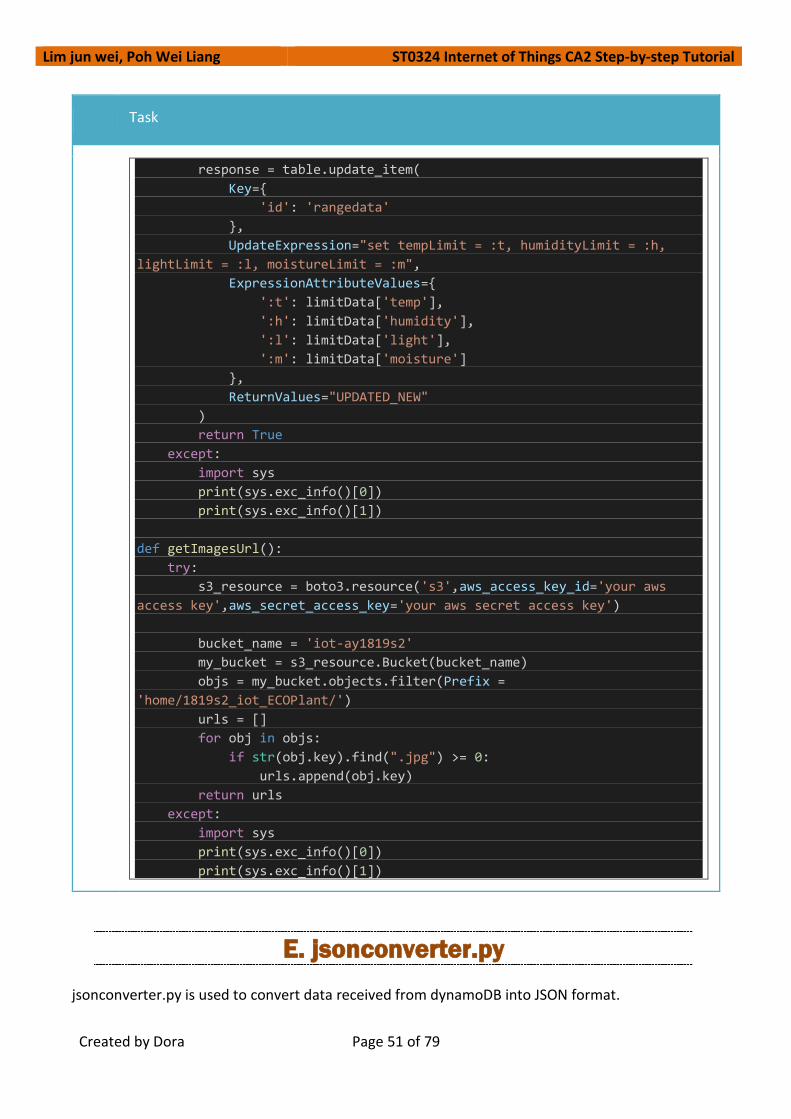
response = table.update_item(
Key=
'id': 'rangedata'
,
UpdateExpression="set tempLimit = :t, humidityLimit = :h,
lightLimit = :l, moistureLimit = :m",
ExpressionAttributeValues=
':t': limitData['temp'],
':h': limitData['humidity'],
':l': limitData['light'],
':m': limitData['moisture']
,
ReturnValues="UPDATED_NEW"
)
return True
except:
import sys
print(sys.exc_info()[0])
print(sys.exc_info()[1])
def getImagesUrl():
try:
s3_resource = boto3.resource('s3',aws_access_key_id='your aws
access key',aws_secret_access_key='your aws secret access key')
bucket_name = 'iot-ay1819s2'
my_bucket = s3_resource.Bucket(bucket_name)
objs = my_bucket.objects.filter(Prefix =
'home/1819s2_iot_ECOPlant/')
urls = []
for obj in objs:
if str(obj.key).find(".jpg") >= 0:
urls.append(obj.key)
return urls
except:
import sys
print(sys.exc_info()[0])
print(sys.exc_info()[1])
E. jsonconverter.py jsonconverter.py is used to convert data received from dynamoDB into JSON format.
Lim jun wei, Poh Wei Liang ST0324 Internet of Things CA2 Step-by-step Tutorial
Created by Dora Page 52 of 79
Task
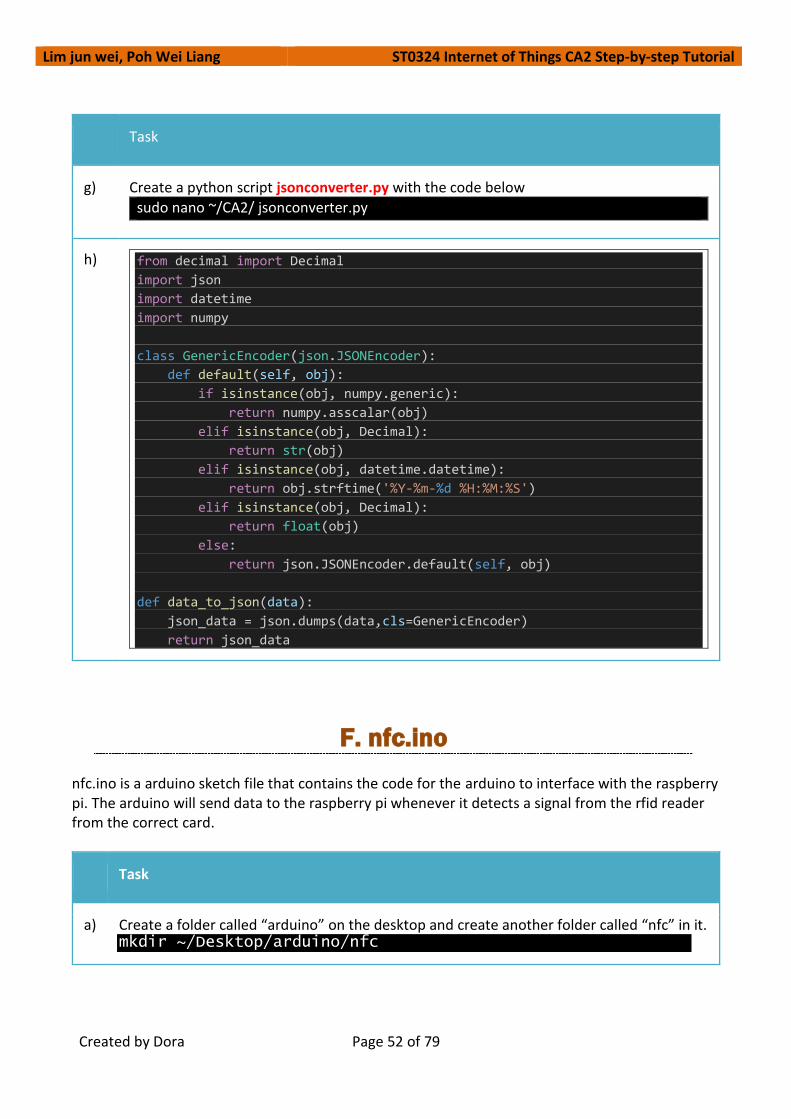
g) Create a python script jsonconverter.py with the code below
sudo nano ~/CA2/ jsonconverter.py
h) from decimal import Decimal
import json
import datetime
import numpy
class GenericEncoder(json.JSONEncoder):
def default(self, obj):
if isinstance(obj, numpy.generic):
return numpy.asscalar(obj)
elif isinstance(obj, Decimal):
return str(obj)
elif isinstance(obj, datetime.datetime):
return obj.strftime('%Y-%m-%d %H:%M:%S')
elif isinstance(obj, Decimal):
return float(obj)
else:
return json.JSONEncoder.default(self, obj)
def data_to_json(data):
json_data = json.dumps(data,cls=GenericEncoder)
return json_data
F. nfc.ino nfc.ino is a arduino sketch file that contains the code for the arduino to interface with the raspberry pi. The arduino will send data to the raspberry pi whenever it detects a signal from the rfid reader from the correct card.
Task
a) Create a folder called “arduino” on the desktop and create another folder called “nfc” in it. mkdir ~/Desktop/arduino/nfc

Lim jun wei, Poh Wei Liang ST0324 Internet of Things CA2 Step-by-step Tutorial
Created by Dora Page 53 of 79
Task
b) Create a new file in the created folder called “nfc.ino” and right click on it and select “Arduino IDE”. Paste the folling code inside.
c) #include <MFRC522.h> #include <SPI.h> #define SDAPIN 10 #define RESETPIN 9 byte FoundTag; byte ReadTag; byte TagData[MAX_LEN]; byte TagSerialNumber[5]; byte GoodTagSerialNumber[5] = 0x88, 0x04, 0x3A, 0xFC; MFRC522 nfc(SDAPIN, RESETPIN); //buzzer #define buzzerPin 5 #define NOTE_B0 31 #define NOTE_C1 33 #define NOTE_CS1 35 #define NOTE_D1 37 #define NOTE_DS1 39 #define NOTE_E1 41 #define NOTE_F1 44 #define NOTE_FS1 46 #define NOTE_G1 49 #define NOTE_GS1 52 #define NOTE_A1 55 #define NOTE_AS1 58 #define NOTE_B1 62 #define NOTE_C2 65 #define NOTE_CS2 69 #define NOTE_D2 73 #define NOTE_DS2 78 #define NOTE_E2 82 #define NOTE_F2 87 #define NOTE_FS2 93 #define NOTE_G2 98 #define NOTE_GS2 104 #define NOTE_A2 110

Lim jun wei, Poh Wei Liang ST0324 Internet of Things CA2 Step-by-step Tutorial
Created by Dora Page 54 of 79
Task
#define NOTE_AS2 117 #define NOTE_B2 123 #define NOTE_C3 131 #define NOTE_CS3 139 #define NOTE_D3 147 #define NOTE_DS3 156 #define NOTE_E3 165 #define NOTE_F3 175 #define NOTE_FS3 185 #define NOTE_G3 196 #define NOTE_GS3 208 #define NOTE_A3 220 #define NOTE_AS3 233 #define NOTE_B3 247 #define NOTE_C4 262 #define NOTE_CS4 277 #define NOTE_D4 294 #define NOTE_DS4 311 #define NOTE_E4 330 #define NOTE_F4 349 #define NOTE_FS4 370 #define NOTE_G4 392 #define NOTE_GS4 415 #define NOTE_A4 440 #define NOTE_AS4 466 #define NOTE_B4 494 #define NOTE_C5 523 #define NOTE_CS5 554 #define NOTE_D5 587 #define NOTE_DS5 622 #define NOTE_E5 659 #define NOTE_F5 698 #define NOTE_FS5 740 #define NOTE_G5 784 #define NOTE_GS5 831 #define NOTE_A5 880 #define NOTE_AS5 932 #define NOTE_B5 988 #define NOTE_C6 1047 #define NOTE_CS6 1109 #define NOTE_D6 1175 #define NOTE_DS6 1245 #define NOTE_E6 1319
Lim jun wei, Poh Wei Liang ST0324 Internet of Things CA2 Step-by-step Tutorial
Created by Dora Page 55 of 79
Task
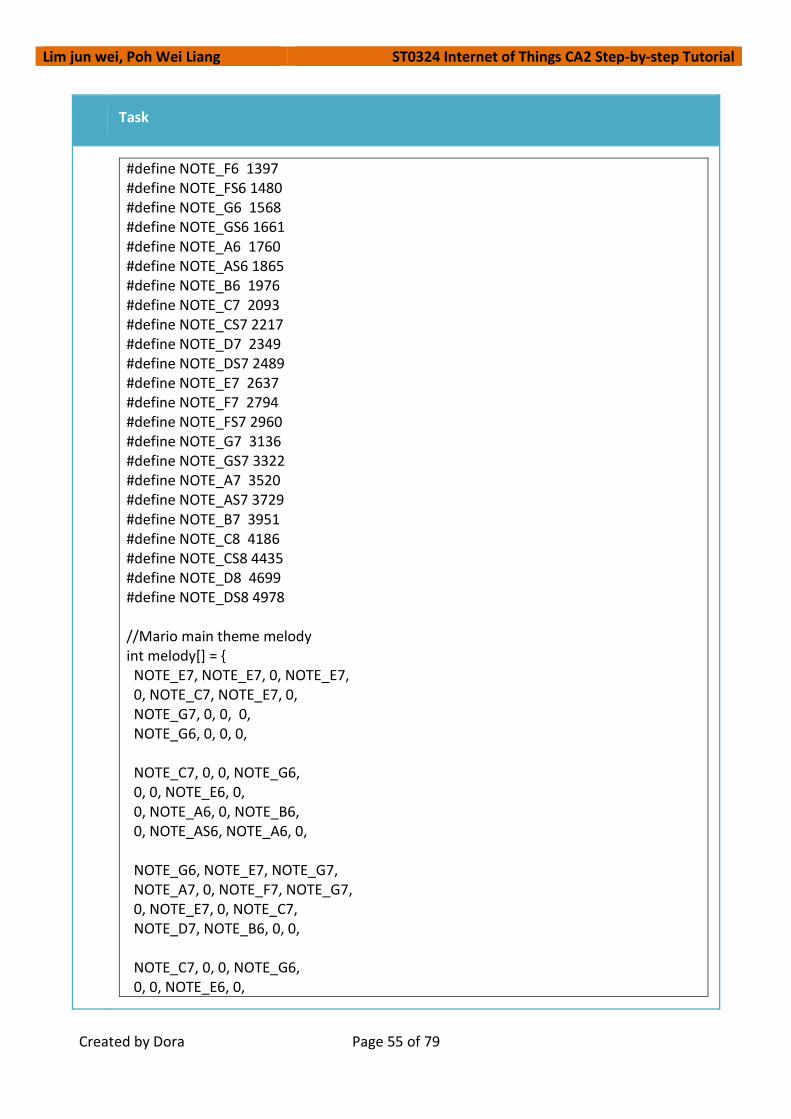
#define NOTE_F6 1397 #define NOTE_FS6 1480 #define NOTE_G6 1568 #define NOTE_GS6 1661 #define NOTE_A6 1760 #define NOTE_AS6 1865 #define NOTE_B6 1976 #define NOTE_C7 2093 #define NOTE_CS7 2217 #define NOTE_D7 2349 #define NOTE_DS7 2489 #define NOTE_E7 2637 #define NOTE_F7 2794 #define NOTE_FS7 2960 #define NOTE_G7 3136 #define NOTE_GS7 3322 #define NOTE_A7 3520 #define NOTE_AS7 3729 #define NOTE_B7 3951 #define NOTE_C8 4186 #define NOTE_CS8 4435 #define NOTE_D8 4699 #define NOTE_DS8 4978 //Mario main theme melody int melody[] = NOTE_E7, NOTE_E7, 0, NOTE_E7, 0, NOTE_C7, NOTE_E7, 0, NOTE_G7, 0, 0, 0, NOTE_G6, 0, 0, 0, NOTE_C7, 0, 0, NOTE_G6, 0, 0, NOTE_E6, 0, 0, NOTE_A6, 0, NOTE_B6, 0, NOTE_AS6, NOTE_A6, 0, NOTE_G6, NOTE_E7, NOTE_G7, NOTE_A7, 0, NOTE_F7, NOTE_G7, 0, NOTE_E7, 0, NOTE_C7, NOTE_D7, NOTE_B6, 0, 0, NOTE_C7, 0, 0, NOTE_G6, 0, 0, NOTE_E6, 0,

Lim jun wei, Poh Wei Liang ST0324 Internet of Things CA2 Step-by-step Tutorial
Created by Dora Page 56 of 79
Task
0, NOTE_A6, 0, NOTE_B6, 0, NOTE_AS6, NOTE_A6, 0, NOTE_G6, NOTE_E7, NOTE_G7, NOTE_A7, 0, NOTE_F7, NOTE_G7, 0, NOTE_E7, 0, NOTE_C7, NOTE_D7, NOTE_B6, 0, 0 ; int tempo[] = 12, 12, 12, 12, 12, 12, 12, 12, 12, 12, 12, 12, 12, 12, 12, 12, 12, 12, 12, 12, 12, 12, 12, 12, 12, 12, 12, 12, 12, 12, 12, 12, 9, 9, 9, 12, 12, 12, 12, 12, 12, 12, 12, 12, 12, 12, 12, 12, 12, 12, 12, 12, 12, 12, 12, 12, 12, 12, 12, 12, 12, 12, 12, 9, 9, 9, 12, 12, 12, 12, 12, 12, 12, 12, 12, 12, 12, 12, ; //end buzzer void setup() SPI.begin(); Serial.begin(9600); nfc.begin();

Lim jun wei, Poh Wei Liang ST0324 Internet of Things CA2 Step-by-step Tutorial
Created by Dora Page 57 of 79
Task
void loop() String GoodTag="False"; FoundTag = nfc.requestTag(MF1_REQIDL, TagData); if (FoundTag == MI_OK) ReadTag = nfc.antiCollision(TagData); memcpy(TagSerialNumber, TagData, 4); for(int i=0; i < 4; i++) if (GoodTagSerialNumber[i] != TagSerialNumber[i]) break; if (i == 3) GoodTag="TRUE"; if (GoodTag == "TRUE") Serial.println("ok"); tone(5, 2000, 100); else tone(5, 500, 100); String music = ""; String Temp = ""; char var; while(Serial.available()) var = Serial.read(); music+= String(var); if (music == "music") sing(); delay(300); void sing() int size = sizeof(melody) / sizeof(int); for (int thisNote = 0; thisNote < size; thisNote++) int noteDuration = 1000 / tempo[thisNote];
Lim jun wei, Poh Wei Liang ST0324 Internet of Things CA2 Step-by-step Tutorial
Created by Dora Page 58 of 79
Task
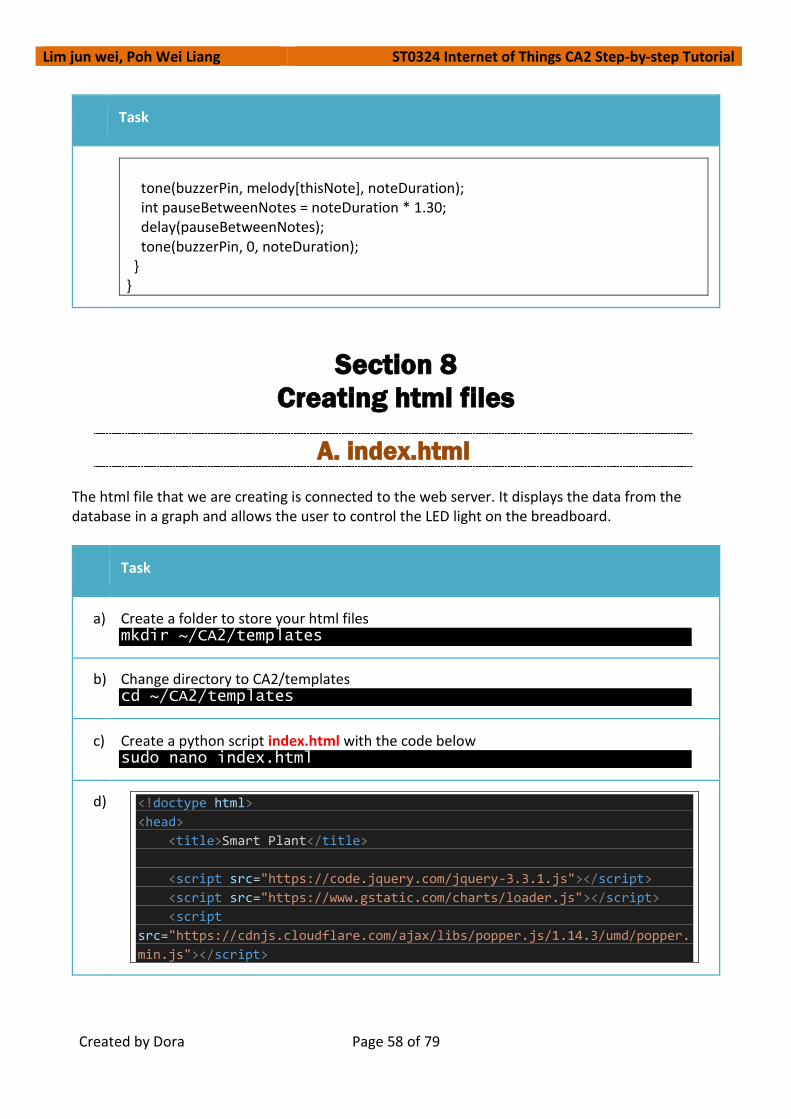
tone(buzzerPin, melody[thisNote], noteDuration); int pauseBetweenNotes = noteDuration * 1.30; delay(pauseBetweenNotes); tone(buzzerPin, 0, noteDuration);
Section 8
Creating html files
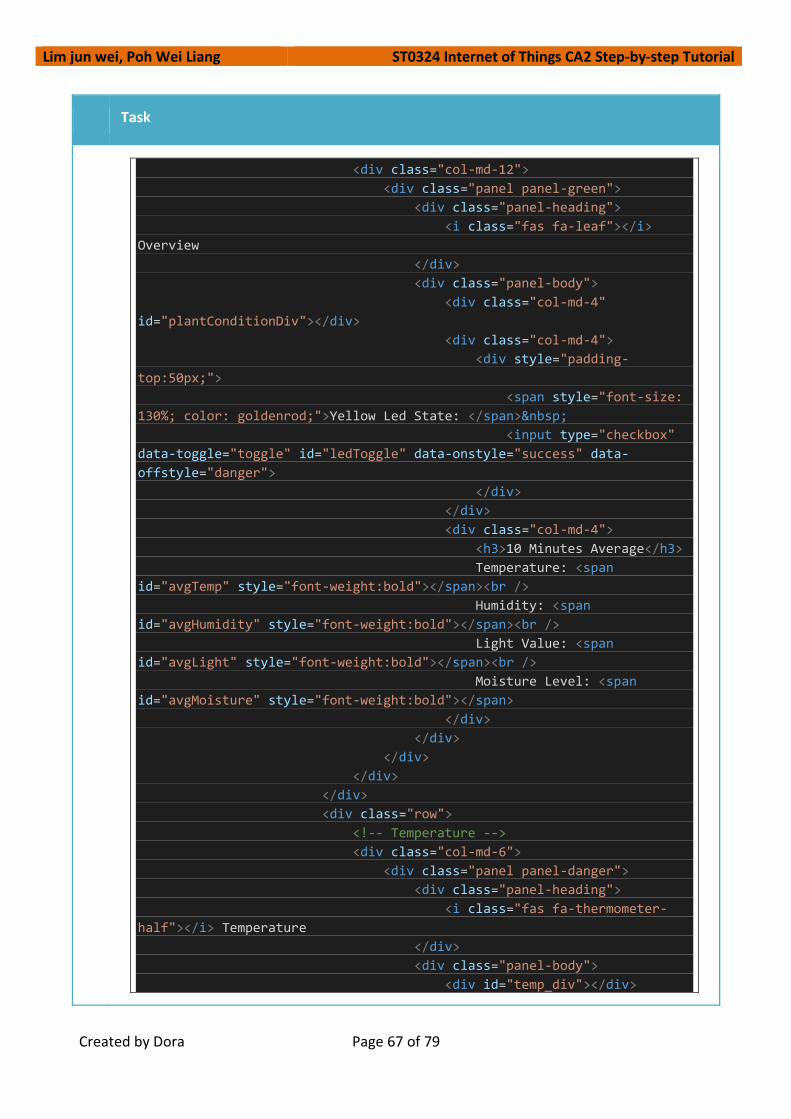
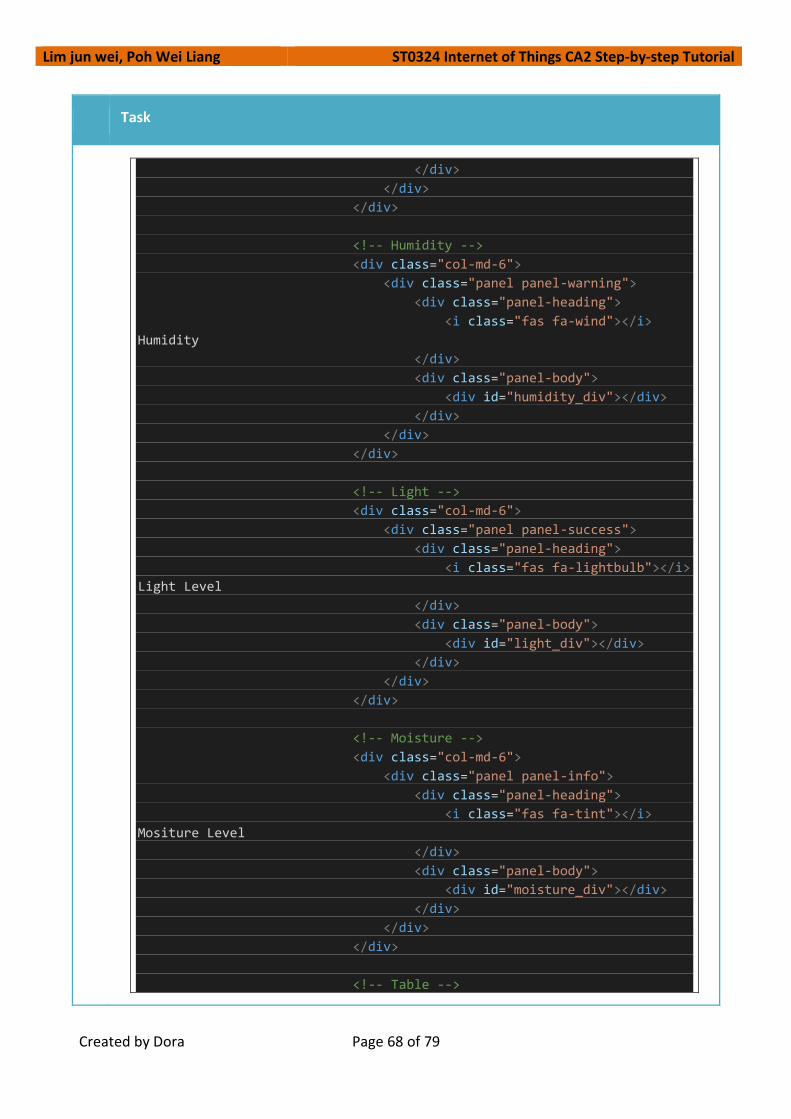
A. index.html The html file that we are creating is connected to the web server. It displays the data from the database in a graph and allows the user to control the LED light on the breadboard.
Task
a) Create a folder to store your html files mkdir ~/CA2/templates
b) Change directory to CA2/templates cd ~/CA2/templates
c) Create a python script index.html with the code below sudo nano index.html
d) <!doctype html>
<head>
<title>Smart Plant</title>
<script src="https://code.jquery.com/jquery-3.3.1.js"></script>
<script src="https://www.gstatic.com/charts/loader.js"></script>
<script
src="https://cdnjs.cloudflare.com/ajax/libs/popper.js/1.14.3/umd/popper.
min.js"></script>

Lim jun wei, Poh Wei Liang ST0324 Internet of Things CA2 Step-by-step Tutorial
Created by Dora Page 59 of 79
Task
<script
src="https://maxcdn.bootstrapcdn.com/bootstrap/3.3.7/js/bootstrap.min.js
"></script>
<script
src="https://cdn.datatables.net/1.10.18/js/jquery.dataTables.min.js"></s
cript>
<script
src="https://cdn.datatables.net/1.10.19/js/dataTables.bootstrap.min.js">
</script>
<script
src="https://cdnjs.cloudflare.com/ajax/libs/noty/3.1.4/noty.min.js"></sc
ript>
<script src="https://gitcdn.github.io/bootstrap-
toggle/2.2.2/js/bootstrap-toggle.min.js"></script>
<link rel="stylesheet"
href="https://maxcdn.bootstrapcdn.com/bootstrap/3.3.7/css/bootstrap.min.
css">
<link rel="stylesheet"
href="https://use.fontawesome.com/releases/v5.5.0/css/all.css">
<link rel="stylesheet"
href="https://cdn.datatables.net/1.10.19/css/dataTables.bootstrap.min.cs
s">
<link rel="stylesheet"
href="https://cdnjs.cloudflare.com/ajax/libs/noty/3.1.4/noty.min.css">
<link rel="stylesheet" href="https://gitcdn.github.io/bootstrap-
toggle/2.2.2/css/bootstrap-toggle.min.css">
<link rel= "stylesheet" href=
" url_for('static',filename='styles/custom.css') ">
<script type="text/javascript">
google.charts.load('current', 'packages':['corechart']);
google.charts.setOnLoadCallback(drawCharts);
function drawCharts()
setInterval(function ()
getSensordata();
, 3000);
function drawLineChart(newdata)
tempData = new google.visualization.DataTable();
tempData.addColumn('string','Time');
tempData.addColumn('number','Temperature');
Lim jun wei, Poh Wei Liang ST0324 Internet of Things CA2 Step-by-step Tutorial
Created by Dora Page 60 of 79
Task
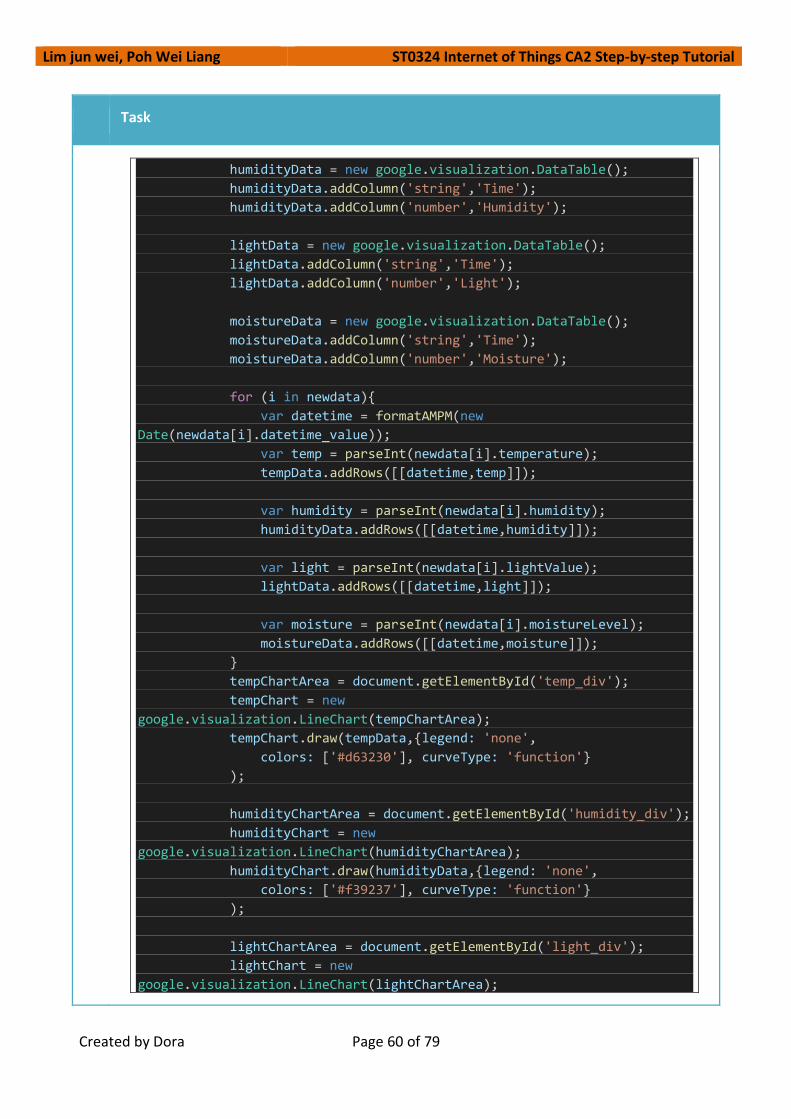
humidityData = new google.visualization.DataTable();
humidityData.addColumn('string','Time');
humidityData.addColumn('number','Humidity');
lightData = new google.visualization.DataTable();
lightData.addColumn('string','Time');
lightData.addColumn('number','Light');
moistureData = new google.visualization.DataTable();
moistureData.addColumn('string','Time');
moistureData.addColumn('number','Moisture');
for (i in newdata)
var datetime = formatAMPM(new
Date(newdata[i].datetime_value));
var temp = parseInt(newdata[i].temperature);
tempData.addRows([[datetime,temp]]);
var humidity = parseInt(newdata[i].humidity);
humidityData.addRows([[datetime,humidity]]);
var light = parseInt(newdata[i].lightValue);
lightData.addRows([[datetime,light]]);
var moisture = parseInt(newdata[i].moistureLevel);
moistureData.addRows([[datetime,moisture]]);
tempChartArea = document.getElementById('temp_div');
tempChart = new
google.visualization.LineChart(tempChartArea);
tempChart.draw(tempData,legend: 'none',
colors: ['#d63230'], curveType: 'function'
);
humidityChartArea = document.getElementById('humidity_div');
humidityChart = new
google.visualization.LineChart(humidityChartArea);
humidityChart.draw(humidityData,legend: 'none',
colors: ['#f39237'], curveType: 'function'
);
lightChartArea = document.getElementById('light_div');
lightChart = new
google.visualization.LineChart(lightChartArea);

Lim jun wei, Poh Wei Liang ST0324 Internet of Things CA2 Step-by-step Tutorial
Created by Dora Page 61 of 79
Task
lightChart.draw(lightData,legend: 'none',
colors: ['#008000'], curveType: 'function'
);
moistureChartArea = document.getElementById('moisture_div');
moistureChart = new
google.visualization.LineChart(moistureChartArea);
moistureChart.draw(moistureData,legend: 'none',
colors: ['#40bcd8'], curveType: 'function'
);
function getSensordata()
jQuery.ajax(
url: "/api/sensorData/10",
success: function(ndata,textStatus,xgr)
ndata = JSON.parse(ndata.data);
lastestData = ndata[9];
getPlantOverview(lastestData);
drawLineChart(ndata);
)
function formatAMPM(date)
var hours = date.getHours();
var minutes = date.getMinutes();
var seconds = date.getSeconds();
var ampm = hours >= 12 ? 'pm' : 'am';
hours = hours % 12;
hours = hours ? hours : 12;
minutes = minutes < 10 ? '0' + minutes : minutes;
var strTime = hours + ':' + minutes + ':' + seconds + ampm;
return strTime;
function formatDate(date)
var monthNames = [
"January", "February", "March",
"April", "May", "June", "July",
"August", "September", "October",
"November", "December"
];

Lim jun wei, Poh Wei Liang ST0324 Internet of Things CA2 Step-by-step Tutorial
Created by Dora Page 62 of 79
Task
var day = date.getDate();
var monthIndex = date.getMonth();
var year = date.getFullYear();
return day + ' ' + monthNames[monthIndex] + ' ' + year;
function getPlantOverview(data)
var allOk = true;
var errorTxt = "";
jQuery.ajax(
url: "/api/getLimitData",
success: function(ndata,textStatus,xgr)
var limitData = JSON.parse(ndata);
if(data.temperature > parseInt(limitData.tempLimit))
allOk = false;
errorTxt += "Temperature too high: <span
style=\"color:red\">" + data.temperature + " °C</span><br />";
if(data.humidity >
parseInt(limitData.humidityLimit))
allOk = false;
errorTxt += "Humidity too high: <span
style=\"color:red\">" + data.humidity + "%</span><br />";
if(data.moistureLevel <
parseInt(limitData.moistureLimit))
allOk = false;
errorTxt += "Moisture Level too low: <span
style=\"color:red\">" + data.moistureLevel + "</span><br />";
if(allOk)
$('#plantConditionDiv').html("<div
style=\"padding-top:20px;font-size: 130%;\">Plant Condition: "
+ "<span style=\"color:green;font-
weight:bold;\">Good <i class=\"fas fa-thumbs-up\"></i></span></div>");
else
$('#plantConditionDiv').html("<div
style=\"padding-top:20px;font-size: 120%;\">Plant Condition: "
+ "<span style=\"color:red;font-
weight:bold;\">Needs attention"

Lim jun wei, Poh Wei Liang ST0324 Internet of Things CA2 Step-by-step Tutorial
Created by Dora Page 63 of 79
Task
+ " <i class=\"fas fa-thumbs-
down\"></i></span><br />" + errorTxt);
)
jQuery.ajax(
url: "/api/tenMinData",
success: function(ndata,textStatus,xgr)
avgData = JSON.parse(ndata);
var avgTemp = 0;
var avgHumidity = 0;
var avgLight = 0;
var avgMoisture = 0;
for (i in avgData)
avgTemp += parseFloat(avgData[i].temperature);
avgHumidity += parseFloat(avgData[i].humidity);
avgLight += parseFloat(avgData[i].lightValue);
avgMoisture +=
parseFloat(avgData[i].moistureLevel);
$('#avgTemp').html((avgTemp/avgData.length).toFixed(2) + "°C");
$('#avgHumidity').html((avgHumidity/avgData.length).toFixed(2) + "%");
$('#avgLight').html((avgLight/avgData.length).toFixed(2));
$('#avgMoisture').html((avgMoisture/avgData.length).toFixed(2));
)
$(document).ready(function()
var sensorTable = $('#sensorDataTable').DataTable(
searching: false,
responsive: true,
ajax:
url: '/api/sensorData/50',
dataSrc: function (json)
json = JSON.parse(json.data);
for(i = 0; i < json.length; i++)

Lim jun wei, Poh Wei Liang ST0324 Internet of Things CA2 Step-by-step Tutorial
Created by Dora Page 64 of 79
Task
var item = json[i];
var date = new Date(item.datetime_value);
item.datetime_value = formatDate(date) + ' '
+ formatAMPM(date);
return json;
,
"order": [[ 0, "desc" ]],
columns: [
data: "datetime_value" ,
data: "temperature" ,
data: "humidity" ,
data: "lightValue" ,
data: "moistureLevel"
]
);
setInterval( function ()
sensorTable.ajax.reload();
, 60000 );
$('#btnNewData').on( "click", function()
sensorTable.ajax.reload();
);
$('#ledToggle').change(function()
if($(this).prop('checked'))
setLed(1);
else
setLed(0);
);
function setLed(on)
jQuery.ajax(
url: "/api/setLedState/" + on,
success: function(ndata,textStatus,xgr)
if(ndata)
var notyMsg = (on == 1) ? 'Successfully
Turned On' : 'Successfully Turned Off';
new Noty(
theme: 'bootstrap-v3',
type: 'success',
layout: 'top',

Lim jun wei, Poh Wei Liang ST0324 Internet of Things CA2 Step-by-step Tutorial
Created by Dora Page 65 of 79
Task
timeout: 3500,
text: notyMsg
).show();
else
new Noty(
theme: 'bootstrap-v3',
type: 'error',
layout: 'top',
timeout: 3500,
text: 'An error occured'
).show();
)
jQuery.ajax(
url: "/api/getImages",
success: function(ndata,textStatus,xgr)
var htmlTxt = '';
for(i = 0; i < ndata.length; i++)
var url = 'https://s3-us-west-
2.amazonaws.com/iot-ay1819s2/' + encodeURI(ndata[i]);
var date =
ndata[i].substr(ndata[i].lastIndexOf('/')+1, ndata[i].length);
date = date.substr(0, date.indexOf('.jpg'));
console.log(date);
date = new Date(date);
htmlTxt += '\
<div class="col-md-3">\
<div class="thumbnail">\
<img src="'+ url +'" alt="Plant"
style="width:100%">\
<div class="caption">\
'+ formatDate(date) + ' ' +
formatAMPM(date) +'\
</div>\
</div>\
</div>';
$('#imagesDiv').html(htmlTxt);
)

Lim jun wei, Poh Wei Liang ST0324 Internet of Things CA2 Step-by-step Tutorial
Created by Dora Page 66 of 79
Task
);
</script>
</head>
<body>
<div id="wrapper">
<nav class="navbar navbar-default navbar-static-top"
role="navigation" style="margin-bottom: 0">
<div class="navbar-header">
<a class="navbar-brand" href="/">Smart Plant IOT</a>
</div>
<ul class="nav navbar-top-links navbar-right"
style="padding-right: 3%;padding-top: 5px;">
<li class="dropdown">
<a class="dropdown-toggle" data-toggle="dropdown"
href="#">
<i class="fa fa-user fa-fw"></i> <i class="fa
fa-caret-down"></i>
</a>
<ul class="dropdown-menu dropdown-user">
<li><a href="admin.html"><i class="fas fa-
toolbox"></i><span style="padding-left: 10%;">Admin Page</span></a></li>
</ul>
</li>
</ul>
</nav>
<div id="page-wrapper">
<div class="row">
<ul class="nav nav-tabs">
<li class="active"><a href="#dashboard" data-
toggle="tab"><i class="fas fa-chart-line"></i> Dashboard</a></li>
<li><a href="#image" data-toggle="tab"><i class="far
fa-images"></i> Images</a></li>
</ul>
<div class="tab-content">
<div class="tab-pane in active" id="dashboard"
style="padding:0 20px">
<div class="row">
<div class="col-lg-12">
<h1 class="page-header">Dashboard</h1>
</div>
</div>
<div class="row">
Lim jun wei, Poh Wei Liang ST0324 Internet of Things CA2 Step-by-step Tutorial
Created by Dora Page 67 of 79
Task
<div class="col-md-12">
<div class="panel panel-green">
<div class="panel-heading">
<i class="fas fa-leaf"></i>
Overview
</div>
<div class="panel-body">
<div class="col-md-4"
id="plantConditionDiv"></div>
<div class="col-md-4">
<div style="padding-
top:50px;">
<span style="font-size:
130%; color: goldenrod;">Yellow Led State: </span>
<input type="checkbox"
data-toggle="toggle" id="ledToggle" data-onstyle="success" data-
offstyle="danger">
</div>
</div>
<div class="col-md-4">
<h3>10 Minutes Average</h3>
Temperature: <span
id="avgTemp" style="font-weight:bold"></span><br />
Humidity: <span
id="avgHumidity" style="font-weight:bold"></span><br />
Light Value: <span
id="avgLight" style="font-weight:bold"></span><br />
Moisture Level: <span
id="avgMoisture" style="font-weight:bold"></span>
</div>
</div>
</div>
</div>
</div>
<div class="row">
<!-- Temperature -->
<div class="col-md-6">
<div class="panel panel-danger">
<div class="panel-heading">
<i class="fas fa-thermometer-
half"></i> Temperature
</div>
<div class="panel-body">
<div id="temp_div"></div>
Lim jun wei, Poh Wei Liang ST0324 Internet of Things CA2 Step-by-step Tutorial
Created by Dora Page 68 of 79
Task
</div>
</div>
</div>
<!-- Humidity -->
<div class="col-md-6">
<div class="panel panel-warning">
<div class="panel-heading">
<i class="fas fa-wind"></i>
Humidity
</div>
<div class="panel-body">
<div id="humidity_div"></div>
</div>
</div>
</div>
<!-- Light -->
<div class="col-md-6">
<div class="panel panel-success">
<div class="panel-heading">
<i class="fas fa-lightbulb"></i>
Light Level
</div>
<div class="panel-body">
<div id="light_div"></div>
</div>
</div>
</div>
<!-- Moisture -->
<div class="col-md-6">
<div class="panel panel-info">
<div class="panel-heading">
<i class="fas fa-tint"></i>
Mositure Level
</div>
<div class="panel-body">
<div id="moisture_div"></div>
</div>
</div>
</div>
<!-- Table -->

Lim jun wei, Poh Wei Liang ST0324 Internet of Things CA2 Step-by-step Tutorial
Created by Dora Page 69 of 79
Task
<div class="col-md-12">
<div class="panel panel-primary">
<div class="panel-heading">
<i class="fas fa-table"></i>
Historical Data
</div>
<div class="panel-body">
<table id="sensorDataTable"
class="table table-striped table-bordered">
<thead>
<tr>
<th>Date</th>
<th>Temperature</th>
<th>Humidity</th>
<th>Light Level</th>
<th>Moisture
Level</th>
</tr>
</thead>
</table>
</div>
<div class="panel-footer"
style="height:58px">
<button type="button" class="btn
btn-default pull-right" id="btnNewData">Pull New Data</button>
</div>
</div>
</div>
</div>
</div>
<div class="tab-pane" id="image" style="padding:0
20px">
<div class="row">
<div class="col-lg-12">
<h1 class="page-header">Images</h1>
</div>
</div>
<div class="row" id="imagesDiv"></div>
</div>
</div>
</div>
</div>
</div>
</body>

Lim jun wei, Poh Wei Liang ST0324 Internet of Things CA2 Step-by-step Tutorial
Created by Dora Page 70 of 79
Task
B. login.html The html file that we are creating is connected to the web server. It allows the user to login as admin.
Task
a) Create a folder to store your html files mkdir ~/CA2/templates
b) Change directory to CA2/templates cd ~/CA2/templates
c) Create a python script login.html with the code below sudo nano login.html
d) <!DOCTYPE html> <head>
<title>Smart Plant</title>
<script src="https://code.jquery.com/jquery-3.3.1.js"></script>
<script
src="https://cdnjs.cloudflare.com/ajax/libs/popper.js/1.14.3/umd/popper.min.
js"></script>
<script
src="https://maxcdn.bootstrapcdn.com/bootstrap/3.3.7/js/bootstrap.min.js"></
script>
<script
src="https://cdnjs.cloudflare.com/ajax/libs/noty/3.1.4/noty.min.js"></script
>
<link rel="stylesheet"
href="https://maxcdn.bootstrapcdn.com/bootstrap/3.3.7/css/bootstrap.min.css"
>
<link rel="stylesheet"
href="https://cdnjs.cloudflare.com/ajax/libs/noty/3.1.4/noty.min.css">

Lim jun wei, Poh Wei Liang ST0324 Internet of Things CA2 Step-by-step Tutorial
Created by Dora Page 71 of 79
Task
<link rel= "stylesheet" href=
" url_for('static',filename='styles/custom.css') ">
<script>
function login()
var username = $('#username').val();
var password = $('#password').val();
if(document.getElementById('loginForm').checkValidity())
if(username == 'admin' && password == 'admin123')
sessionStorage.setItem('adminUsername', username);
window.location.href = '/admin.html';
else
new Noty(
theme: 'bootstrap-v3',
type: 'error',
layout: 'top',
timeout: 3500,
text: 'Username or Password is incorrect.'
).show();
$('#password').val('');
</script>
</head>
<body>
<div class="container" style="padding-top:20%;">
<div class="row">
<div class="col-md-4 col-md-offset-4">
<div class="login-panel panel panel-default">
<div class="panel-heading">
<h3 class="panel-title">Admin Sign In</h3>
</div>
<div class="panel-body">
<form id="loginForm" onsubmit="return false;">
<fieldset>
<div class="form-group">
<input class="form-control"
placeholder="Username" id="username" type="text" required>
</div>
<div class="form-group">

Lim jun wei, Poh Wei Liang ST0324 Internet of Things CA2 Step-by-step Tutorial
Created by Dora Page 72 of 79
Task
<input class="form-control"
placeholder="Password" id="password" type="password" value="" required>
</div>
<a onclick="login()" class="btn btn-lg btn-
success btn-block">Login</a>
</fieldset>
</form>
</div>
</div>
</div>
</div>
</div>
</body>
C. admin.html The html file that we are creating is connected to the web server. It allows the admin to control the sensor settings of the Raspberry Pi remotely.
Task
a) Create a folder to store your html files mkdir ~/CA2/templates
b) Change directory to CA2/templates cd ~/CA2/templates
c) Create a python script admin.html with the code below sudo nano admin.html
d) <!doctype html> <head>
<title>Smart Plant</title>
<script src="https://code.jquery.com/jquery-3.3.1.js"></script>

Lim jun wei, Poh Wei Liang ST0324 Internet of Things CA2 Step-by-step Tutorial
Created by Dora Page 73 of 79
Task
<script
src="https://cdnjs.cloudflare.com/ajax/libs/popper.js/1.14.3/umd/popper.min.
js"></script>
<script
src="https://maxcdn.bootstrapcdn.com/bootstrap/3.3.7/js/bootstrap.min.js"></
script>
<script
src="https://cdnjs.cloudflare.com/ajax/libs/noty/3.1.4/noty.min.js"></script
>
<link rel="stylesheet"
href="https://maxcdn.bootstrapcdn.com/bootstrap/3.3.7/css/bootstrap.min.css"
>
<link rel="stylesheet"
href="https://use.fontawesome.com/releases/v5.5.0/css/all.css">
<link rel="stylesheet"
href="https://cdnjs.cloudflare.com/ajax/libs/noty/3.1.4/noty.min.css">
<link rel= "stylesheet" href=
" url_for('static',filename='styles/custom.css') ">
<script type="text/javascript">
var username = sessionStorage.getItem('adminUsername');
if(username == null || username == '')
window.location.href = '/login.html';
jQuery.ajax(
url: "/api/getLimitData",
success: function(ndata,textStatus,xgr)
var limitData = JSON.parse(ndata);
$('#tempLimit').val(limitData.tempLimit);
$('#humidityLimit').val(limitData.humidityLimit);
$('#lightLimit').val(limitData.lightLimit);
$('#moistureLimit').val(limitData.moistureLimit);
)
function updateRange()
var limitData =
temp: $('#tempLimit').val(),
humidity: $('#humidityLimit').val(),
light: $('#lightLimit').val(),
moisture: $('#moistureLimit').val()
;

Lim jun wei, Poh Wei Liang ST0324 Internet of Things CA2 Step-by-step Tutorial
Created by Dora Page 74 of 79
Task
if(document.getElementById('limitForm').checkValidity())
jQuery.ajax(
type: "POST",
url: "/api/updateLimit",
data: JSON.stringify(limitData),
dataType: 'json',
contentType: 'application/json',
success: function(ndata,textStatus,xgr)
if(ndata)
new Noty(
theme: 'bootstrap-v3',
type: 'success',
layout: 'top',
timeout: 3500,
text: 'Successfully updated.'
).show();
else
new Noty(
theme: 'bootstrap-v3',
type: 'error',
layout: 'top',
timeout: 3500,
text: 'An error occured'
).show();
)
function logout()
sessionStorage.clear();
window.location.href = '/';
</script>
</head>
<body>
<div id="wrapper">
<nav class="navbar navbar-default navbar-static-top"
role="navigation" style="margin-bottom: 0">
<div class="navbar-header">
<a class="navbar-brand" href="/">Smart Plant IOT</a>
</div>

Lim jun wei, Poh Wei Liang ST0324 Internet of Things CA2 Step-by-step Tutorial
Created by Dora Page 75 of 79
Task
<ul class="nav navbar-top-links navbar-right" style="padding-
right: 3%;padding-top: 5px;">
<li class="dropdown">
<a class="dropdown-toggle" data-toggle="dropdown"
href="#">
<i class="fa fa-user fa-fw"></i> <i class="fa fa-
caret-down"></i>
</a>
<ul class="dropdown-menu dropdown-user">
<li><a href="/"><i class="fas fa-tachometer-
alt"></i><span style="padding-left: 10%;">Dashboard</span></a></li>
<li class="divider"></li>
<li><a onclick="logout()"><i class="fas fa-sign-out-
alt"></i><span style="padding-left: 10%;">Logout</span></a></li>
</ul>
</li>
</ul>
</nav>
<div id="page-wrapper">
<div class="row">
<div class="row">
<div class="col-lg-12">
<h1 class="page-header">Sensor Settings</h1>
</div>
</div>
<div class="row">
<div class="col-md-4">
<div class="panel panel-primary">
<div class="panel-heading">
<i class="fas fa-cogs"></i> Sensor Settings
</div>
<div class="panel-body">
<form id="limitForm" onsubmit="return
false;">
<div class="form-group">
<div style="font-weight: bold;font-
size: 1.5em;">Temperature:</div>
<div>warning will show if
temperature is higher than</div><br />
<div class="row">
<div class="col-md-12">
<input class="form-control"
type="number" id="tempLimit" required>
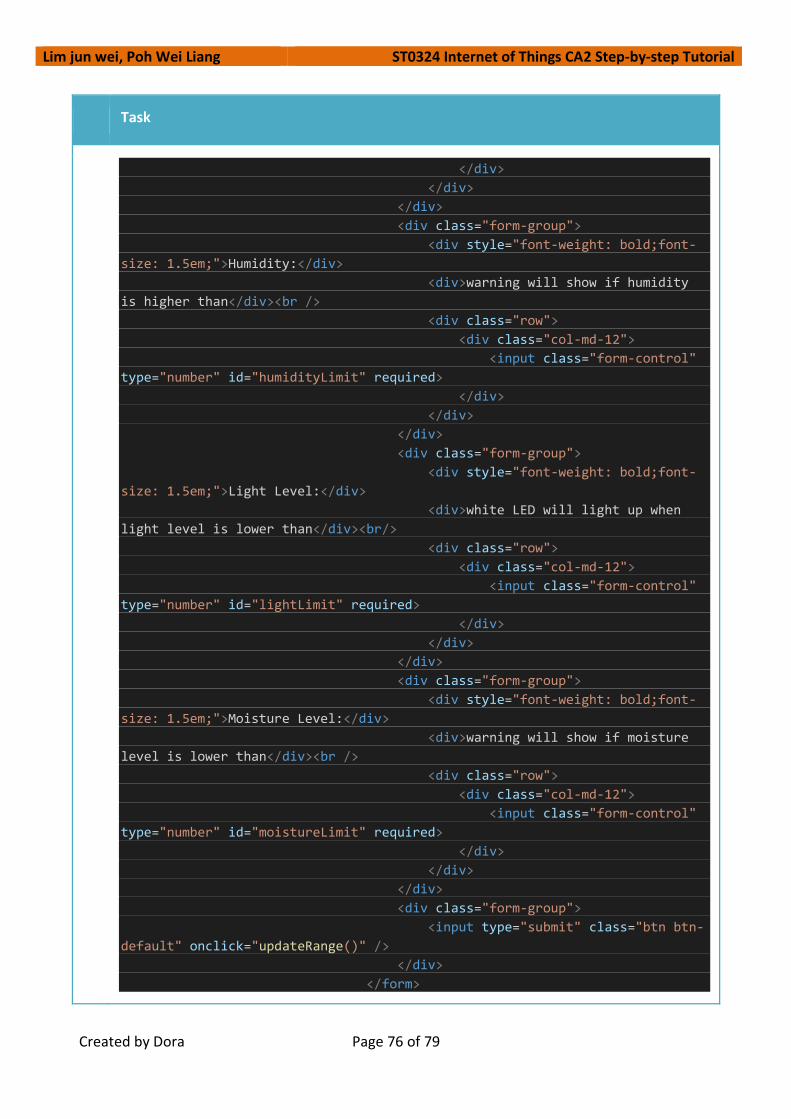
Lim jun wei, Poh Wei Liang ST0324 Internet of Things CA2 Step-by-step Tutorial
Created by Dora Page 76 of 79
Task
</div>
</div>
</div>
<div class="form-group">
<div style="font-weight: bold;font-
size: 1.5em;">Humidity:</div>
<div>warning will show if humidity
is higher than</div><br />
<div class="row">
<div class="col-md-12">
<input class="form-control"
type="number" id="humidityLimit" required>
</div>
</div>
</div>
<div class="form-group">
<div style="font-weight: bold;font-
size: 1.5em;">Light Level:</div>
<div>white LED will light up when
light level is lower than</div><br/>
<div class="row">
<div class="col-md-12">
<input class="form-control"
type="number" id="lightLimit" required>
</div>
</div>
</div>
<div class="form-group">
<div style="font-weight: bold;font-
size: 1.5em;">Moisture Level:</div>
<div>warning will show if moisture
level is lower than</div><br />
<div class="row">
<div class="col-md-12">
<input class="form-control"
type="number" id="moistureLimit" required>
</div>
</div>
</div>
<div class="form-group">
<input type="submit" class="btn btn-
default" onclick="updateRange()" />
</div>
</form>

Lim jun wei, Poh Wei Liang ST0324 Internet of Things CA2 Step-by-step Tutorial
Created by Dora Page 77 of 79
Task
</div>
</div>
</div>
</div>
</div>
</div>
</div>
</body>
Section 9
Test the program
Let’s run the python program to see if we are able to read the plant data.
A. Run the program
Task
a) Start a command prompt and type in the following command to change the directory to CA2 cd CA2
b) Type in the following command to run the Python program

Lim jun wei, Poh Wei Liang ST0324 Internet of Things CA2 Step-by-step Tutorial
Created by Dora Page 78 of 79
Task
sudo python main.py
B. Expected Results
Task
a) If everything goes well, the LCD would display the temperature and humidity level of the plant and the green led will be lit when plant condition is good and red led will be lit if plant needs attention. The white led will also be turned on when light level is too low.
b) The user will also hear a buzz from the buzzer when they tap a card on the rfid reader. If the card is the correct card, a message will be send to the user via the telegram bot that informs the user of the current condition of the plant.
c) When the plant needs attetion (eg. When temperature or humidity is too high or when moisture level is too low), a message will be send to the user via telegram bot to inform them about it. The red led will also start blinking.

Lim jun wei, Poh Wei Liang ST0324 Internet of Things CA2 Step-by-step Tutorial
Created by Dora Page 79 of 79
Task
d) The user can also use the Blynk app to check on the current status on the plant and also use it to play a tune to the plant with the buzzer.
e) Open up a second command prompt tab and run sudo python server.py
Open up your web browser and navigate to the following url: (ip address of RPi):5000 and you will be able to see the daashboard of the website.
-- End of CA2 Step-by-step tutorial --