introduction - introducción - the lower hudson...
TRANSCRIPT

Introduction - Introducción
Ford 32 - 33 Cartoon Style Model
English
This is a complete redesign (or perhaps I should say a new model) based on the original Ford 32 model by Ron Kemp. I liked Ron’s model a lot it’s just that his original model was kinda rough because it was hand drawn and it needed adjustments of many parts as you built it but despite this I found that it looked surprisingly cool and I decided to give it a complete overhaul and vectorize it (draw it using an illustration program that uses lines instead of pixels to draw) fully to make it look much better and also to give it better measurements so the parts fitted together better.
My original idea was to only vectorize it to straighten all the lines and make it look much more clean but as I went along I got very enthusiastic with the design and with my progress and I went much further than that. I corrected all the measurements, meaning that you no longer need to resize any part whatsoever during construction. All the parts now fit together and I even added parts that Ron did not include in his design like the front grille support bars that you had to make from scratch so now the model has all the parts that it needs and new parts that it didn’t need but I decided to add them to it as I went along to make it better.
Now you don’t have to color any white parts (except the edges if you want to like pros do) and I highly recommend that but I mean that the model is covered fully all over and that makes it look much more three-dimensional and when you turn it over all the undercarriage is fully covered and also more complete because now I gave it a full three-dimensional transmission with the corresponding floor pan modifications instead of a simulated one and I also created a new muffler that is much more three-dimensional too and I added detail to the engine pulley system that makes it look so much better in my humble opinion but cause I liked so much the results I was having I decided to go even further and included parts with different colors and even some alternate parts so you can create your own custom hot rod! Now you have SEVEN different colors for the body of your car and different color and designs for many other parts of the car too! You can even give it either a Ford 33 style front grille that looks a lot like Ron’s original or a Ford 32 style grill that is my own design in different colors, cool ehh? Now, you might find that in some parts it’s actually harder to build my model than it is to built Ron’s original car but that is not because the parts do not fit well, they do, it’s just that I added a lot of details that make the model much neater and the results were in my opinion worth the extra building effort so be patient and build it carefully and you will be rewarded with a very cool Ford Hot Rod.
Now remember that this model doesn’t pretend to be a realistic scale model but that’s because it is a cartoonish model so it’s lines are simplified in the same way that Ron did with his original cartoonish models, it’s just that this is a different style of model design but despite that you will find a lot of cool details that I added to it if you compare it with Mr. Ron’s original model, overall I think that people are going to like the new design a lot and it’s an opportunity to give back the paper model community something for all the good free models that I’ve downloaded so enjoy!
My thanks to Ron Kemp for giving away his cool model designs so people could enjoy them and for giving me ideas for designing this new model. I really hope you enjoy building it as much as I enjoyed designing it. Have fun!
Original design by: Ron KempNew complete redesign and improvementof model by: Angel D. Guzman (PixelOz)
Español
Este es un modelo rediseñado por completo (o tal vez debería decir un modelo nuevo) basado en el Ford 32 de Ron Kemp. A mi me gustó mucho el modelo de Ron es solo que su modelo original es algo suelto porque fue dibujado a mano y necesitaba ajustes de muchas de sus piezas mientras uno lo construía pero a pesar de eso descubrí que se veía sorpresivamente bonito y decidí darle un arreglo completo y vectorizarlo (dibujarlo con un programa de ilustración que utiliza líneas en vez de puntos para dibujar) completamente para hacerlo ver mucho mejor y también darle mejores medidas para que las piezas encajaran unas con las otras mejor.
Mi idea original era vectorizarlo solamente para enderezar sus líneas y hacer que se viera mucho más limpio pero según fuí avanzando me entusiasmé mucho con el diseño y con el progreso que llevaba e hice mucho más que eso. Yo corregí todas las medidas lo que significa que usted ya no tiene que ajustar el tamaño de ninguna parte en lo absoluto durante la construcción. Todas las partes ahora encajan unas con otras y hasta añadí partes que Ron no incluyó en su diseño como las barras de soporte de la parrilla delantera que uno tenía que fabricar desde cero pues no las tenía así que ahora el modelo tiene todas las piezas que necesita y piezas nuevas que no necesitaba pero que decidí añadir según fuí haciendo progreso para hacerlo mejor.
Ahora no tiene que colorear ninguna de las partes blancas (excepto los bordes si decide pintarlos como hacen los modelistas con experiencia) y esto es algo que yo recomiendo pero lo que quiero decir es que el modelo ahora está cubierto completamente por doquier y eso hace que se vea mucho más tridimensional y cuando voltea el modelo y lo ve por debajo está todo cubierto y más completo porque ahora le hice una transmisión completamente tridimensional con las modificaciones pertinentes al piso del carro en vez de una simulada y también creé un escape que es mucho mas tridimensional y le añadí detalles al sistema de poleas que lo hace ver mucho mejor en mi opinión pero como me gustaron tanto los resultados que estaba obteniendo decidí ir mucho más lejos e incluí partes con colores diferentes ¡y hasta algunas partes alternas de manera que usted pueda crear su propio “hot rod customizado” (personalizado)! ¡Ahora tiene SIETE colores diferentes para la carrocería de su vehículo y diferentes colores para muchas otras piezas del vehículo también! ¡Hasta puede colocarle una parrilla estilo Ford 33 que se parece mucho a la original de Ron o una parrilla estilo Ford 32 diseñada por mi en colores diferentes también, nítido ehh? Ahora, puede que encuentre que en algunas partes es más difícil construir mi modelo que lo es construir el carro original de Ron pero no es porque las piezas no encajen bien, lo hacen, es solo que yo añadí muchos detalles que hacen que el modelo se vea mejor y los resultados en mi opinión valen el esfuerzo extra de construcción así que por favor sea paciente y constrúyalo cuidadosamente y será recompensado con un modelo “Hot Rod” de Ford muy nítido.
Ahora, recuerde que este modelo no pretende ser un modelo a escala realístico porque es un modelo estilo caricatura así que está simplificado en la misma forma en que Ron lo hizo con sus modelos originales caricaturescos, es solo que es un estilo diferente de diseño de modelos pero a pesar de esto encontrará que tiene muchos detalles nítidos que le añadí si lo compara con el modelo original de Ron, en general creo que a la gente le va a gustar mucho el nuevo diseño y es una oportunidad de otorgarle algo a cambio a la comunidad del modelismo de papel por todos los buenos modelos gratis que descargué ¡así que disfrútelo!
Mi agradecimiento al señor Ron Kemp por regalar sus bonitos diseños de modelos para que la gente los pudiera disfrutar y por darme ideas para diseñar este nuevo modelo. En verdad espero que disfrute ensamblándolo tanto como yo lo hice diseñándolo. ¡Diviértase!
You can download the original Ford model at the following address: most of Ron’s models can
usually be downloaded from the website but at the moment of this writing the site is down for transference to another server so you might try to find Paperian paper models in an web search in the near future.
http://jleslie48.com/gallery_models_other.htmlhttp://www.Paperian.com
Puede descargar el modelo original de Ron en la siguiente dirección: La mayoría de los modelos de Ron pueden ser usualmente descargados en la página de la red pero al momento de escribir esto la página no está funcionando porque se está transfiriendo a otro servidor así que podría encontrar el sitio de Paperian haciendo una búsqueda de red de: “Paperian paper models” en un futuro cercano.
http://jleslie48.com/gallery_models_other.html http://www.Paperian.com
Diseño de modelo nuevo por:New model design by:

Assembly - Ensamblaje
Now here is an interesting thing, I didn’t know when I started to redesign this model that Ron’s original idea was to make something similar to the hot rod that appears in the American Graffiti movie so I wasn’t trying to create that, I was merely trying to make his model better but when I was about 80% done with the redesign I found out about this and I decided to include in the customized parts things and colors to also allow you to build it in the American Graffiti version if you wish but remember that this is a somewhat loose approximation of that car just like Ron’s original was because it’s a cartoon style model but if you do want to build it American Graffiti style below are the parts and color combinations that you have to use to approximate it.
To build it in American Graffiti style:
• Yellow main body• Silver firewall• Tire tread with patterns (not the all black slick type)• Black tire walls (without white letters)• American Graffiti wheel centers (they are labeled as such)• Black engine block• Black transmission (as far as I know)• Silver muffler• Yellow Ford 32 style front grille• Silver round mirrors (the circular ones)• Black chassis• You use the yellow fenders• Use both door handles as shown in the instruction• Use trunk latch (the third one from top to bottom in the parts sheets) and position it vertically with the wider part at the bottom• Use the THX 138 license plate (that’s a new courtesy from me) the movie car used the license plate in the front but many hot roders that clone the car from this movie use it in the back so you can do the same• Use either the air scoop or the oval air filter (the American Graffiti version is not like either anyway)• Use the yellow round headlights (If you find them too difficult to assemble use the square ones)
If you want to build it like Ron’s original model it’s like this:
• Yellow main body• Silver firewall• Tire tread without patterns (tire tread black slick type)• Tire walls with randomly rotated logos• Wheel centers only slightly similar to the American Graffiti ones so you can use any that you want• Red engine block• Red transmission• White muffler• Yellow Ford 33 style front grille• No mirrors so use any• Silver chassis• You use the yellow fenders• Use both door handles as shown in the instruction• Use trunk latch (the third one from top to bottom in the parts sheets) and position it as you wish• No license plate so use either• Use the air scoop instead of the oval air filter• Use the yellow square headlights.
The version in the instructions is with all the parts of the Main Parts document and no more, for any other version:
You can do many combinations, for example, you can build it with or without fenders, with air scoop or oval air filter, with either of the two license plates, the tire parts will give you six different tire combinations such as centered logos with or without tire tread patterns, black tire walls with or without tire tread patterns and randomly rotated logos with or without tire tread patterns, you have a choice of three different wheels (for the slightly bluish wheel centers you can use the specially included wheel cylinders), you can use one of three chassis colors, seven different colors for body parts, either vertical Ford 32 style grille (this one has it’s own support bars) or slightly backward inclined Ford 33 style grille (remember to rotate the headlights slightly in this grille so they are vertical), square or round headlights (the round ones are harder to assemble) and they are in silver and other colors, silver or colored firewall, silver or colored engine, silver or colored transmission, silver or colored mirrors in three different styles, silver or white muffler and the use or no use of door handles and/or the trunk latch (a lot of hot roders do not use the door handles for the shaved look and even less use the trunk latch [they use remote opening]). So as you can see there is a lot that you can do to customize your car and give it your own particular look like the real hot roders do.
You don’t have to use for example all the yellow parts if you assemble the yellow model, see, Ron’s original used a red engine and transmission and you could use a yellow engine and a yellow transmission in the yellow car but if you think that you are using too much yellow then use the yellow engine with the silver transmission you see? Do a web search for Ford 32 and 33 hot rods and you will see many of the combinations that people use for these cars to give you an idea, OK?
Ahora he aquí una cosa interesante, yo no sabia cuando comenzé a rediseñar este modelo que la idea original de Ron era hacer algo similar al “hot rod” que aparece en la película American Graffiti así que yo no estaba tratando de crear esto, yo solo estaba meramente tratando de hacer que su modelo quedara mejor pero cuando iba como a 80% de terminar el diseño descubrí esto y decidí incluir en las partes “customizadas” cosas y colores para en adición permitirle construirlo en la versión American Graffiti si usted lo desea pero recuerde que esto es solo una representación algo suelta de ese carro tal como la idea original de Ron era porque es un carro caricaturesco pero si desea construirlo al estilo American Graffiti aquí abajo están las combinaciones de partes y colores que necesita para aproximarlo.
Para construirlo al estilo American Graffiti:
• Carrocería principal amarilla• Panel cortafuegos plateado• Rodaje de los neumáticos con patrones (no todo negro como los neumáticos lisos)• Paredes de los neumáticos totalmente negras (sin letras blancas)• Centros de aros American Graffiti (están etiquetados de esta forma)• Motor negro• Transmisión negra (hasta donde yo sé)• Escape plateado• Parrilla delantera amarilla estilo Ford 32• Retrovisores plateados redondos (los circulares)• Chasis negro• Utilice los guardalodos amarillos• Utilice ambas manijas de las puertas como se muestra en las instrucciones• Utilice la manija del baúl (cajuela) (la tercera de arriba hacia abajo en las hojas de las partes) y posiciónela verticalmente con la parte ancha hacia abajo• Utilice la matrícula THX 138 (esa es una nueva cortesía mia) el carro en la película tiene la matrícula al frente pero muchos “hot roders” que construyen clones del carro de esta película la utilizan en la parte trasera así que usted puede hacer lo mismo• Utilice la entrada de aire o el filtro de aire ovalado (en la película American Graffiti el carro no tiene ninguna de las dos de esta forma de todas maneras)• Utilice las luces redondas (si las encuentra muy difíciles utilice las cuadradas)
Si quiere construirlo como el original de Ron es de esta forma:
• Carrocería principal amarilla• Panel cortafuegos plateado• Rodaje de los neumáticos sin patrones (el rodaje negro liso)• Paredes de los neumáticos con logos rotados al azar• Los centros de los aros eran nada más un poco parecidos a los de American Graffiti así que utilice los que quiera• Motor rojo• Transmisión roja• Escape blanco• Parrilla delantera amarilla estilo Ford 33• No tenia espejos así que use cualquiera• Chasis plateado• Utilice los guardalodos amarillos• Utilice ambas manijas de las puertas como se muestra en las instrucciones• Utilice manija del baúl (cajuela) (la tercera de arriba hacia abajo en la hoja de partes) y posiciónela como le guste• No tenía matrícula así que use cualquiera• Utilice la entrada de aire en vez del filtro de aire ovalado• Utilice los faros delanteros cuadrados
La versión en las instrucciones es con todas las partes del documento “Main Parts” (Partes principales) y ninguna otra, para cualquier otra versión:
Puede crear muchas combinaciones como por ejemplo, puede construirlo con o sin guardalodos, con la entrada de aire o con el filtro de aire ovalado, con cualquiera de las dos matrículas, las partes de los neumáticos le pueden dar seis combinaciones diferentes como logos centralizados con o sin patrones de rodaje, paredes de los neumáticos negras con o sin patrones de rodaje y logos rotados al azar con o sin patrones de rodaje, puede elegir entre tres tipos de aros (para los centros de aros ligeramente azulados utilice los cilindros de aros especiales para ellos), puede utilizar tres colores diferentes de chasis, siete colores diferentes de carrocería, parrilla Ford 32 vertical (esta tiene barras de soporte especiales para ella) o la parrilla ligeramente inclinada hacia atrás estilo Ford 33 (acuérdese de rotar los faros delanteros ligeramente con esta parrilla de manera que queden verticales), faros delanteros cuadrados o redondos (los redondos son más difíciles de ensamblar) y vienen en plateado o en colores, panel cortafuegos plateado o en colores, motor plateado o en colores, transmisión plateada o en colores, retrovisores en plateado o en colores en tres estilos diferentes, escape blanco o plateado y el uso o la omisión de las manijas de las puertas y/o la manija del baúl (cajuela) (muchos “hot roders” no utilizan las manijas de las puertas para un estilo mas suave y aún menos utilizan la manija del baúl [cajuela] [estos utilizan apertura remota]). Así que como puede ver hay mucho que usted puede hacer para “customizar” su carro y darle su estilo particular como lo hacen los “hot roders” verdaderos.
No tiene que usar por ejemplo todas las partes amarillas si ensambla el modelo amarillo, vea que el original de Ron utilizaba motor y transmisión en rojo y usted puede usar el motor amarillo y la transmisión amarilla en el carro amarillo pero si cree que tiene demasiado amarillo entonces podría usar el motor amarillo con la transmisión plateada ¿ve? Haga una búsqueda de la red y mire las combinaciones que la gente usa para estos carros para que tenga una idea, ¿está bien?
American Graffiti Version Versión American Graffiti

Assembly - Ensamblaje
Glue the white backs of these two parts to each other (Look atnext picture to the right).
White to white (back to back)Blanco a blanco (La parte posterior de una contra la parte posterior de la otra)
Wait for the glue to dry throughly before cutting.
Cardstock
Rear fender
Main body.
Rear fender liner
PaperPapelCartulina Fina
Guardalodo trasero
Carrocería principal.
Cubrefaltas delguardalodo trasero
White (Reverse side)Blanco (Lado de atrás)
Pegue este borde pocoa poco comenzando desde arriba
hasta abajo usando pequeñas tirasde papel (como las que se muestranen el documento de materiales) para
colocar el pegamento poquito a poco.
Glue this edge little by little starting fromthe top all the way down using paperstrips (like those on the Materialsdocument) to place the glueone bit at a time.
Pegue la parte blanca trasera de estas dos partes una con laotra (Mire la foto que le sigue a esta a la derecha).
Espere a que el pegamento se seque por completo antes de cortarla.Now make the right rear fender.Ahora haga el guardalodo trasero del lado derecho.

Assembly - Ensamblaje
Glue rear fenders to main body.
Decide now if your vehicle will have fenders or not! It can beassembled with or without them.
Pegue los guardalodos traserosa la carrocería principal.
¡Decida ahora si su vehículo va a tener guardalodos o no! Puedeser ensamblado con o sin ellos.
Glue rear fenders interiors to main body.
Floorpan.
Rear of floorpan (it iscolored).
Start to glue the panel above firewall on one side first and thenwhen the glue is dry enough glue it to the windshield panel littleby little applying glue one bit at a time as shown in the AssemblyTips document and then keep going until you glue it completely.
Follow theguideline.
Pegue los interiores de los guardalodos traserosa la carrocería principal.
Piso del carro.
Parte trasera delpiso del carro (esta esen colores).
Comience a pegar el panel que va sobre el panel cortafuegos en unlado primero y cuando el pegamento esté suficientemente seco co-mience a pegarlo contra el panel del parabrisas poco a poco aplican-do el pegamento en cantidades pequeñas como se muestra en el do-cumento de Ayuda de Ensamblaje y continúe hasta pegarlo completo.
Siga la líneade guia.
This technique of gluing long parts little by little instead of wholesome is one youcan use for many other parts of the car and it will help prevent glue messes.Esta técnica de pegar partes largas poco a poco en vez de un solo golpe es unaque puede usar para otras partes del carro y ayudará a evitar sucio de pegamento.

Assembly - Ensamblaje
Glue rear offloorpan.
Glue the firewallhere and coverthis huge hole!!!
Glue this panel tothe main body last.
Use theguideline.
Use la líneade guía.
Pegue el piso del carro a lacarrocería principal.Recuerde, pocoa poco.
Glue the floorpan to the main body.Remember, one bit at a time.
Wait until is the glue is dry enoughand then glue to floorpan.
Glue the two floorpan middle bulge parts together.
Put the gluing tab of this panelon the other other side of thefloorpan (the side that goes up).
Pegue la partetrasera del pisodel carro.
¡Pegue el panelcortafuegos aquíy cubra este enormeagujero!!!
Pegue este panel ala carrocería principala lo último.
Espere a que el pegamento este suficientementeseco y pegue esta pieza al piso del carro.
Pegue las dos partes de la joroba en el piso del carrouna con la otra.
Pegue la solapa para pegamen-to de este panel en el otro lado(en el lado que va hacia arribadel piso del carro).
You can start on one side from the front all the way to the back then do the otherside.Puede comenzar en un lado desde el frente hasta atrás y luego hacer el otro lado.
Again remember, one bit at a time, putting the glue little by little and going aroundlittle by little until you close it.De nuevo recuerde poquito a poco, colocando el pegamento en pequeñas cantida-des dando la vuelta poco a poco hasta cerrarlo completo.
Main body completed.Carrocería principal terminada.

Assembly - Ensamblaje
Assemble the engine.
Assemble the carburetors.
This is the harmonic balancer.
First form the ring.
Now glue the front and rear lids.
In this picture they are upside down.
Glue carburetors to supercharger with holes facing down.
Assemble supercharger.
Ensamble el motor.
Ensamble los carburadores.
Este es el balanceador harmónico.
Primero forme el anillo.
Ahora pegue la cubierta delanteray la cubierta trasera.
En esta foto están boca arriba.
Pegue los carburadores al supercargador con los agujeros hacia abajo.
Ensamble el supercargador.

Assembly - Ensamblaje
This is the idler pulley.
Form a ring with this.
Form a ring with this first and then glue the covers.
Assemble idler pulley spacer.
Assembled harmonic balancer.
Assembled superchargerpulley spacer.
Assemble supercharger pulley spacer.
Assemble the supercharger pulley and the crankshaft pulleythe same way that you assembled the spacers.
Glue idler pulley spacerto rear of idler pulley
Spacer join shouldpoint downward.
Assemble idler pulley bracket.
Idler pulley join shouldpoint to the left.
Glue covers (they are larger than the ring).
Front cover.Rear cover.
Esta es la polea de tensión.
Forme un anillo con esto.
Forme un anillo con esto primero y luego pegue las cubiertas.
Ensamble el separador dela polea de tensión.
Balanceador armónico ensamblado.
Separador de la polea delsupercargador ensamblado.
Ensamble el separador dela polea del supercargador.
Ensamble la polea del supercargador y la polea del cigüeñalde la misma manera en que ensambló los separadores.
Pegue el separador dela polea de tensión a laparte posterior de lapolea de tensión.
Unión del separadordebe de ir hacia abajo.
Ensamble el soporte de lapolea de tensión.
Unión de polea de tensióndebe de apuntar hacia laizquierda.
Pegue cubiertas (son mas grandes que el anillo).
Cubierta delantera.Cubierta trasera.

Assembly - Ensamblaje
Glue the supercharger pulley spacer to therear of the supercharger pulley.
Glue the supercharger to the top of theengine with the front of the supercharger
and the pulley to the front of the engine(were you see the idler pulley bracket
mark and the harmonic balancercircular mark).
Glue supercharger pulley and spacer to the front of thesupercharger (to the black circle in front .of the supercharger)
Glue crankshaft pulley to harmonicbalancer front.
Pegue el separador de la polea del supercargadora la parte de atrás de la polea del supercargador.
Pegue el supercargador ala parte de arriba del motor teniendo cui-
dado de pegarlo conel frente del super-
cargador y su poleamirando hacia el frente
del motor (en donde estánlas marcas para colocar el
soporte de la polea de tensión y la marca circulardel balanceador armónico).
Pegue la polea y el separador del supercargadora la parte de al frente del supercargador (en el círculo negro que elsupercargador tiene al frente).
Pegue la polea del cigüeñal a la partede al frente del balanceador armónico.
Spacer join shouldpoint downward.
Both joins shouldpoint downward.
Fold the belt in half and glue those halves togetherbut leave a small portion unglued at the oppositeside of the gluing tab just like you see here so youcan put the gluing tab in between the two belt halves.
Glue idler pulley brackethere but do not glue theidler pulley now!
Assemble air scoop base.Glue and close the belt completely.
Make sure that the stripes or lines are towards the inside.
Glue harmonic balancer and crankshaftpulley here with the joins pointing downward.
Pulley join shouldpoint upward.
Again, pulley join shouldpoint upward (that way it will bemostly covered by the belt).
Unión de separadordebe de ir hacia abajo.
Ambas uniones debende ir hacia abajo.
Doble la correa por la mitad y pegue estas dos mitadesuna con otra pero deje un poco sin pegar en el extremoopuesto a donde está la solapa de pegamento comose ve aquí de manera que pueda meter la solapa depegamento entre medio de las dos mitades de la correa.
Pegue el soporte de la poleade tensión aquí ¡pero no pegueahora la polea de tensión!
Ensamble la base de la entrada de aire.Pegue y cierre completamente la correa.
Asegúrese de que las rayas queden hacia adentro.
Pegue el balanceador armónico y la polea delcigüeñal aquí con las uniones apuntando hacia abajo.
Unión de poleadebe de ir hacia arriba.
De nuevo, unión de polea debede ir hacia arriba (asi será cubiertamayormente por la correa).

Assembly - Ensamblaje
Glue and close this carefully so you don’t crease it.
Assemble air scoop.
Glue air scoop and base to thetop of the carburetors.
Idler pulley level(align it to this line).
Now glue all the three separate middle tubes to thelarge muffler tube and then glue the muffler flangeto the middle tubes. Now make the other muffler.
Make this part carefully and be patient,this corner is a bit challenging butif you do it right the result is very nice.
The join of the spacer shouldbe pointing downwards.
The join of the idler pulley should be pointing to left (if you look at the engine fromthe front). Curiously you tension the belt a bit like in a real car.
Put the belt momentarily (withoutgluing it) over the supercharger andcrankshaft pulleys then glue the idler
pulley with it’s spacer to the idlerpulley bracket while youtension the belt. Hold it
there while the glue driesenough. Remove the belt
and when the idler pulley gluedries completely glue thebelt to the three pulleys.
Glue the air scoop base with thehole facing upward to the bottomof the air scoop.
Pegue y cierre esto con suavidad para que no lo arrugue.
Ensamble entrada de aire.
Pegue la entrada de airey su base a la parte superiorde los carburadores.
Nivel de la polea de tensión(alíniela a esta línea).
Ahora pegue los tres tubos blancos separados al tubodel escape grande y luego pegue la brida del escapea los tubos. Ahora haga el otro escape.
Haga esta parte cuidadosamente y seapaciente, esta esquina es algo difícilpero si lo hace bien el resultado esmuy satisfactorio.
La unión del separadordebe de ir hacia abajo.
La unión de la polea de tensión debe de ir hacia la izquierda (mirando el motor des-de al frente). La correa se tensa algo parecido a como se hace en carros de verdad.
Ponga la correa momentá-neamente (sin pegarla)
sobre las poleas del super-cargador y el cigüeñal y
entonces pegue la polea detensión y su separador al
soporte de la polea de tensiónmientras tensa la correa. Sostenga
la pieza en su lugar hasta que elpegamento se seque lo suficiente. Remueva la
correa y cuando el pegamento de la polea de tensiónesté suficientemente seco pegue la correa a las tres poleas.
Pegue la base de la entrada deaire con el agujero hacia arribaa el fondo de la entrada de aire.
Muffler Flange
Glue the two mufflers to the engine.
Brida del Escape
Pegue los dos escapes al motor.

Assembly - Ensamblaje
Assemble the transmission.
Glue the engine mounts to the engine in the areas marked for such purpose.
Assemble the four engine mounts, again be patientthey are small and a bit challenging unless you havemore experience in paper modeling.
Assembled Transmission.
Glue the transmission to the engine using the markon the rear of engine for that purpose.
Ensamble la transmisión.
Pegue las monturas del motor al motor en las áreas marcadas para talpropósito.
Ensamble las cuatro monturas del motor, de nuevosea paciente son algo difíciles a menos que tengamas experiencia en el modelismo de papel.
Transmisión Ensamblada.
Pegue la transmisión al motor utilizando la marca enla parte posterior del motor para este propósito.
Watch how you glue these parts, theyhave an orientation, meaning that youhave to watch which side goes up ordown and which side goes facingthe engine and which side goesfacing the chassis. Refer to theparts sheets for indications.
Observe como pega estas partes,tienen una orientación, lo cual quiere
decir que tienen un lado que va haciaarriba y hacia abajo y tienen un lado
que va hacia el motor y un ladoque va hacia el chasis.
Refiérase a las hojas de laspartes para indicaciones.
The markings on this engine mounts will be used later on together with the mar-kings on the chassis to determine correct engine position and height.Las marcas en estas monturas del motor se utilizarán luego en conjunto con lasmarcas en el chasis para determinar la posición correcta del motor y su altura.
Curve the surface of the cone in the waydescribed in the Ford Materials and Assembly
Tips document. Glue the joiner tab to oneof the ends of this circular part and when the
glue dries enough glue the cone together.
Assemble one of the tire walls(the one shown here is for theoutside of rear tire).
Curve la superficie del cono en la maneramostrada en el documento titulado Ford
Materials and Assembly Help(Materiales y Ayuda de Ensamblaje de Ford).
Pegue la solapa deunión a uno de losextremos de esta
pieza circular y cuandoel pegamento se seque lo
suficiente cierre el conopegando la solapa al otro lado.
Ensamble la pared de unode los neumáticos. (La que semuestra aquí es de la parte deafuera del neumático trasero).

Assembly - Ensamblaje
Assembled outside wall of rear tire.
Align wheel center topto join.
Close the cylinder by gluing the joiner tab.
Glue the wheel cylinder and center to the tire wall. The alignmentof the joins of these two parts is completely opposite.
Place the wheel center in the interior of the cylinder as shownand align the top to the cylinder join.
Place glue in the tabs and hold them down while the glue dries. You can putyour finger on the interior of the cylinder to hold the wheel center while youdo this.
Fold this tabs up.
Fold this tabs down.
Cylinder join.
Glue joiner tab.
Tire Tread.
Tire wall join.
It may be easier like in this case to fold the tabs before cutting them like inthis example. Remember to curve the printed side to the inside.
Assemble wheel cylinder.
Curve the surface (in a linear not conical way of course) and glue the joiner tabto the rear of the part just like you did with the tire wall.
Pared externa de neumático trasero ensamblada.
Alínie la parte de arribadel centro del aro a launión del cilindro.
Cierre el cilindro pegando la solapa de unión.
Pegue el cilindro y el centro del aro a la pared del neumático.El alineamiento de las uniones de estas dos partes es completamenteopuesto.
Coloque el centro del aro dentro del cilindro como se muestray alínie la parte superior de este con la unión del cilindro.
Coloque pegamento en las solapas y sujételas hacia abajo mientras secael pegamento. Puede colocar su dedo dentro del cilindro para sujetar elcentro del aro mientras hace esto.
Pliegue estas solapas hacia arriba.
Pliegue estas solapas hacia abajo.
Unión del cilindro.
Pege solapa de unión.
Rodaje del Neumático.
Unión de la pareddel neumático.
Puede ser más fácil doblar estas solapas antes de recortarlas comose muestra aquí. Recuerde curvar el lado impreso hacia adentro.
Ensamble el cilindro del aro.
Curve la superficie (de forma lineal no cónica por supuesto) y pegue la solapa deunión en la parte posterior de esta parte tal y como hizo en la pared del neumático.

Assembly - Ensamblaje
Curve the part, form a ring and glue it closed.
Outside tire wall completed.
Observe proper joinalignment.
Cut the hole for the axle(leave the glue tabs of course)then glue the disc to the tire.
Repeat the same process of assembling and gluing the outside tire wallfor the inside one.
Continue little by little applying glue carefully with paper stripsas explained before until you close the tire wall completely.
Align the tire wall joinwith the tire tread join.
Glue the tire walls toone or two tabs first
only and then continuefrom there.
Observe orientation oftire tread. Refer to partsheets.
Curve la pieza, forme un anillo y péguela cerrándola.
Pared exterior del neumático completada.
Observe alineamientocorrecto de la unión.
Corte el agujero para el eje(deje las solapas de pegamentopor supuesto) y pegue el discoal neumático.
Repita el mismo proceso de ensamblar y pegar la pared exterior delneumático para la pared interior.
Continúe poco a poco aplicando el pegamento cuidadosamentecon pequeñas tiras de papel como se explicó antes hasta cerrarla pared del neumático completamente.
Alínie la unión de lapared del neumático
con la unión de elrodaje del mismo.
Pegue la pared delneumático a una o dos
solapas primero sola-mente entonces
continúe de ahí enadelante.
Observe la orientación del rodajedel neumático. Refiérase a lashojas de las partes.

Assembly - Ensamblaje
Assemble front fender.
Observe that there are no holes in the front tires because there is no front axle.
Cardstock.
Assemble the left and right chassis frames.
Glue both cross-members to one chassis frame and then glue the chassisframe for the other side to the cross-members.
Assemble both rear cross-members.
Glue the body to the chassis. Observe floorpan marks for chassis.
Wheels Assembled.
Glue front fenders to front wheels. Observe that the square marks in thesecoincide with the square marks in the front discs.
Repeat the steps for the other front fender.
Paper.
Gluing tabs on the outside.Gluing tabs on the inside.
This step is not necessary if you decided not to use the fenders.
After assembling these two parts cover the entire inside part of the fender withglue and place the liner on the inside of the fender.
Assemble front fender liner.Ensamble el guardalododelantero.
Observe que no hay agujero en las ruedas delanteras porque no hay ejedelantero.
Cartulina.
Ensamble los marcos de bastidor derecho e izquierdo.
Pegue los dos travesaños a uno de los marcos de bastidor y luego pegue elotro marco de bastidor a los travesaños.
Ensamble ambos travesaños traseros.
Pegue la carrocería al chasis. Observe las marcas en el piso del carropara este propósito.
Ruedas ensambladas.
Pegue los guardalodos delanteros a las ruedas delanteras. Observe que lasmarcas cuadradas en estos coinciden con las marcas cuadradas de los discosdelanteros.
Repita los pasos para el otro guardalodos delantero.
Papel.
Solapas pegadas en laparte exterior.
Solapas pegadas en laparte interior.
Este paso es innecesario si decidió no utilizar los guardalodos.
Después de ensamblar estas dos partes cubra el interior del guardalodos com-pletamente con pegamento y pegue el cubrefaltas al interior del guardalodo.
Ensamble el cubrefaltas delguardalodo delantero.

Assembly - Ensamblaje
Glue Engine to chassis.
Glue and close the top lids.
Shock absorberjoins point to theinside of the car.
Again observe shock absorber joinspointing to the inside of the car.
Glue the front shock absorbers cross-member to the front suspensioncross-member and glue bottom of shock absorbers to the bottom shockmounts .
Glue the other two shock absorber mounts to the front suspensioncross-member with the holes facing down and with the location andorientation as shown in this picture.
Assemble the two front shocks and glue them to the front shock absorberscross-member. (Specifically glue them to the shock absorber mounts in thispart).
1. Glue the front suspensionarm interiors.
4. Glue and close this lid.
3. Glue these upper lids to the partsyou assembled on step 2.
2. Assemble and glue thesetwo parts to the bottom of the suspension arm interiors.
Observe the correct position and orientation of the twomounts glued to the inside of the cross-member lids.
Glue mounts with holesfacing the cross-member lids.
The thin part of the mounts points outwards(see next picture for reference).
Assemble the four shock absorber mounts. Two of them will go inside the frontshock absorber cross-member.
Assemble front shock absorber cross-memberexcept the top lids.
Markings in chassis and engine mounts determine engineposition and it’s height.
Pegue el motor al chasis.
Pegue y cierre las tapas superiores.
Las uniones delos amortigua-dores apuntan
hacia el interiordel carro.
De nuevo observe las uniones de los amor-tiguadores apuntando hacia elinterior del carro.
Pegue el travesaño de los amortiguadores delanteros al travesaño dela suspensión delantera y pegue el fondo de los amortiguadores a lasmonturas de amortiguadores inferiores.
Pegue las otras dos monturas de los amortiguadores al travesaño dela suspensión delantera con los agujeros apuntando hacia abajo y conla ubicación y orientación como se muestra en esta foto.
Ensamble los dos amortiguadores delanteros y péguelos al travesañode los amortiguadores delanteros. (Específicamente a la montura de losamortiguadores en esta parte).
1. Pegue el interior de losplatos de la suspensióndelantera.
4. Pegue y cierre esta cubierta.
3. Pegue estas cubiertas de arribaa las partes que ensambló en elpaso 2.
2. Ensamble y pegue estas piezasal fondo del interior de los platosde la suspensión delantera.
Observe la posición y orientación correcta de las dosmonturas pegadas al interior de las tapas del travesaño.
Pegue las monturas con los agujerosapuntando hacia las tapas del travesaño.
La parte delgada de las monturas van apuntandohacia afuera (observe la siguiente foto para referencia).
Ensamble las cuatro monturas de los amortiguadores. Dos de ellas irán dentrodel travesaño de los amortiguadores delanteros.
Ensamble el travesaño de los amortiguadores delan-teros pero no cierre las tapas superiores aún.
Las marcas en el chasis y en las monturas del motor deter-minan posición y altura del mismo.

Assembly - Ensamblaje
Glue assembled front suspension to chassis (insert fully).
Assemble front and rear differential covers.
Assemble the rear axle.
Axle join should point up (to thetop of the differential).
For axle insertion open the tabs on oneside wider (very wide) to make it easyto slide it through the two holes.
For axle insertion open the tabs on oneside wider (very wide) to make it easyto slide it through the two holes.
Insert rear axle into the two differential holes as shown and glue the axle tothe differential with these tabs. Make sure that it’s in the center of the axle.
Pegue la suspensión delantera ensamblada al chasis (inserte completamente).
Ensamble las cubiertas delanteras y traseras del diferencial.
Ensamble el eje trasero.
La unión del eje debe de apuntarhacia arriba (hacia la parte supe-rior del diferencial.
Para insertar el eje abra las solapas enuno de los lados mas ampliamente (muyampliamente) para que sea fácil des-lizarlo a través de los dos agujeros.
Para insertar el eje abra las solapas enuno de los lados mas ampliamente (muyampliamente) para que sea fácil des-lizarlo a través de los dos agujeros.
Inserte el eje trasero en los dos agujeros del diferencial como se muestra ypegue el eje al diferencial usando estas solapas. Asegúrese de que está enel centro del eje.
Haga todos los pliegos del diferencialpero no pegue nada de el aún.
Las uniones de las cubiertas del diferencial deben deapuntar hacia arriba tal y como las del eje.
Pegue las cubiertas delanteras y traseras deldiferencial en sus marcas correspondientes. La más corta de estas
cubiertas va hacia arriba(refiérase a las hojas delas partes).
Observe que el dife-rencial y las unionesapuntan hacia arriba.
Haga todos los pliegos a las barras izquierda y derecha de la suspensióntrasera y deslícelas en el eje trasero hasta sus posiciones correctas (ob-serve marcas en el eje) pero no las pegue al eje aún.
Do all the folds of the differentialbut do not glue anything in it yet.
Differential cover joins should point up just like the axle.
Glue the front and rear covers of the differential totheir corresponding marks.
Shorter one of theselids goes up (refer topart sheets).
Observe that thedifferential and thejoins are pointing up.
Make all the folds for the left and right suspension arms and slide them intotheir correct positions in the axle (observe the markings in the axle) but donot glue them to the axle at all now.
Assemble the remaining parts of the differential, close it completely.Ensamble lo que queda del diferencial, ciérrelo completamente.

Assembly - Ensamblaje
Pegue y cierre las cubiertas superiores solamente y no pegue las barrasde la suspensión al eje aún.
No pegue las cubiertas inferiores de las barras de la suspensión aún.
Ensamble los dos amortiguadores traseros y péguelos asus marcas correspondientes en el chasis.Inclínelos ligeramente hacia elfrente como se ve en la foto.
Glue the upper lids close only and do not glue these parts to the axle yet.
Do not glue the lower lids of suspension arms yet.
Assemble the two rear shock absorbers and glue them totheir correct chassis marks. Slant them slightly to the frontas seen in the picture.
Shock absorberjoins point to theinside of the car.
Assemble and glue driveshaftto the transmission.
Observe that differential angle is parallel to the chassis horizon. It’sperpendicular to the chassis and body of the car but not to the driveshaftor the ground. The angle that the driveshaft acquires is completelydifferent to that of the differential.
Insert to the insertion linemarked in driveshaft.
Glue top of supension armsto shock absorbers.
Straightendifferential asexplained in theprevious illustrationand glue the axle tothe suspension armswith the inner gluing tabsfrom the holes.
Glue front of suspension armsto chassis.
Apply glue to the tabs in the hole of the frontdifferential cover before inserting driveshaft.
Las uniones delos amortigua-dores apuntanhacia el interiordel carro.
Ensamble y pegue el cardana la transmisión.
Observe que el ángulo del diferencial es paralelo al horizonte del chasis.Es perpendicular al chasis y la carrocería del carro pero no al cardan oal suelo. El ángulo que el cardan adquiere es completamente diferente aldel diferencial.
Inserte hasta la línea de inserciónmarcada en el cardan.
Peque el tope de las barrasde la suspensión a losamortiguadores.
Enderece el diferencial como seexplicó en la ilustración anterior y pegueel eje a los brazos de la suspensión conlas solapas que están adentro que pro-vienen de los agujeros.
Pegue el frente de las barrasde la suspensión al chasis.
Aplique pegamento a las solapas en elagujero de la cubierta delantera del
diferencial antes de insertar el cardan.
After you are sure that differential is straight, allow the glue to dry while you checkthat differential remains straight.Una vez seguro que el diferencial está derecho, permita al pegamento secar mien-tras revisa que se mantenga derecho.
Pegue y cierre las tapas inferiores de las barrasde la suspensión.
Glue and close the lower suspension arm lids.
Make sure differential is inthe center of
suspension arms.Asegúrese de que
el dife-rencial
esté enel centro
de lasbarras de lasuspención.

Assembly - Ensamblaje
Observe proper angle (rotation) of wheels. The join should point perfectlydown even when the chassis is very inclined due to large wheel size.
Apply glue to end of axle, around endof axle (close to the ends) in both sidesand in tabs in the holes of wheelsand glue both rear wheels tothe axle.
5/8”
Observe ángulo correcto (rotación) de las ruedas. La unión debe apuntar perfec-tamente hacia abajo a pesar del chasis inclinarse tanto por las grandes ruedas.
When fully assembled with four wheels installed the distance from the very tip (atthe bottom side) of the chassis to the ground is very close to 5/8 of an inch. Ensamblado completamente con las cuatro ruedas instaladas la distancia de la mis-ma punta (en el lado de abajo) del chasis al suelo es muy cerca de 5/8 de pulgada.
Checkperiodically asthe glue dries thatthe wheels are alignedcorrectly. You can flip themodel and check againsta flat surface and also see it fromother angles to see if they are straight.Revise periódicamente mientras el pegamentoseca que las ruedas estén alineadas correctamente. Puede enderezar elmodelo y revisar contra una superficie plana y también ver de otros ángulospara saber si están quedando derechas.
Glue the front wheels to the ends of the front suspensionarms (one at a time of course).
Front Grille completed.
Glue the bars to the firewall and wait for theglue to dry and glue the front grille to thebars and the chassis.
Assemble front grille support bars.Be patient, they are a bit challengingbut they look very nice whendone right.
Assemble the front grille, when the glue is dry enough glue the radiatorpanel to it’s back and close it completely.
Make sure that the chassis gluing tabs are left outside when closing thegrill with the radiator panel.
If the front wheel feels too loose you can reinforce them by placing tinyglue fillets around the area where the discs join the suspension arms.
Pegue las ruedas delateras a los extremos de los platosde la suspensión delantera (una a la vez por supuesto).
Parrilla delantera completada.
Pegue las barras a el panel cortafuegos yespere a que el pegamento se seque y entoncespegue la parrilla delantera a las barras y al chasis.
Ensamble las barras de soporte de laparrilla delantera. Sea paciente, son
algo difíciles pero se ven muy biensi se hacen correctamente.
Ensamble la parrilla delantera, cuando el pegamento se seque lo suficientepegue el panel del radiador a su parte posterior y ciérrela completamente.
Asegúrese de que las solapas de pegar al chasis están afuera al cerrarla parrilla con el panel del radiador.
Si las ruedas delanteras se sienten muy sueltas puede reforzarlas colocandopequeñísimos rellenos de pegamento alrededor del área donde el disco seencuentra con los platos de la suspensión.
Aplique pegamento al final del eje,alrededor (cerca del final) del eje enambos lados y a las solapas en los
agujeros de las ruedas y pegueambas ruedas traseras al eje.

Assembly - Ensamblaje
Assemble headlights.
Glue headlights to front grilleas shown, one at a timeof course. Rememberthat in the Ford 33 stylegrille you have torotate the headlightsslightly so they arevertical.
Glue door handles if you wish, many modernhot roders do not use them at all because theylike a cleaner look (shaved) so they are optional..
Glue rear lights, license plate of yourchoice and if desired the trunk latch. Aneven greater number of hot roders donot use external trunklatches so they arealso optional.
Ensamble las luces delanteras.
Pegue las lucesdelanteras a laparrilla delantera,una a la vez porsupuesto. Recuer-de que en la parrillaestilo Ford 33 tieneque rotar las lucesligeramente para quequeden derechas.
Pegue las manijas de las puertas si las desea,muchos “hot roders” prefieren no usarlas del todo porqueprefieren un estilo mas limpio así que son opcionales.
Pegue las luces traseras, matrículade su preferencia y si lo desea la
manija de abrir el baúl (la cajuela).Un número aún mayor de “hot roders”
no utiliza manija de baúlexterna así que estatambién es opcional.

Assembly - Ensamblaje
Assemble rear view mirrors of your choice. Glue rear view mirrors to the body.
Your model is ready!
Ensamble los espejos retrovisores de supreferencia.
Pegue los espejos retrovisores ala carrocería.
¡Su modelo está listo!
Note: There are small changes to some parts in the final model that you wont see here in the instructions. You will notice for example that the front grille has a better artwork in the parts sheets and that some parts may be a little different in size than in some of the pictures (very little), that’s because these pictures were taken with an almost final prototype and some slight improvements were made afterwards (and those parts were tested afterwards too) but the assembly is exactly the same. This is the same reason of why the pictures are black and white (actually they are not), it’s because the prototype model was printed in a black and white laser printer for economic reasons and as I was assembling it I was taking the pictures for the instructions and was making changes and corrections as I went along and then taking new pictures and I did it this way because it was the fastest way to finish the instructions for you. Don’t worry, the model turned out pretty well and the final changes are some things that you might not notice at all because they were small and they were precisely to make the model parts fit together better and easier to assemble yet and to make it look neater.
These are the parts that were changed after the instruction photos:
• Rear wheels are a bit deeper• Carburetors are now a bit higher (higher than in the assembled engine, the ones shown alone are the last)• Grille support bars are slightly thicker to make them slightly easier to assemble• Front fenders are slightly wider• Rear axle is a bit thicker to make it a bit stronger and to make it look better (other corresponding parts were changed accordingly)• As mentioned already in the 33 style front grill the texture (the artwork) was improved
Nota: Hay pequeños cambios en algunas de las partes en el modelo final que no verá aquí en las instrucciones. Notará por ejemplo que la parrilla delantera tiene el trabajo artístico mejorado en las hojas de las partes y que algunas piezas pueden ser un poco diferentes en tamaño que en algunas de las fotos (muy poco), esto es porque estas fotos se tomaron con un prototipo casi final y algunas pequeñas mejoras fueron realizadas después (y estas partes fueron probadas también luego) pero el ensamblaje es exactamente el mismo. Esta es la misma razón de porqué las fotos son en blanco y negro (es que realmente no lo son), esto es porque el modelo prototipo fue impreso en una impresora láser en blanco y negro por razones económicas y así como lo iba ensamblando iba tomando las fotos para las instrucciones e iba haciendo cambios y correcciones según avanzaba y entonces tomando nuevas fotos e hice esto porque era la manera más rápida de terminar las instrucciones para usted. No se preocupe, el modelo salió muy bien y los cambios finales son cosas que puede que ni note del todo porque fueron pequeños y fueron hechos precisamente para hacer que las partes del modelo encajaran mejor unas con otras y hacerlo más fácil de ensamblar aún y hacer que se viera mejor.
Estas fueron las partes que se cambiaron después de tomar las fotos de las instrucciones:
• Los aros traseros son un poco más profundos ahora• Los carburadores son un poco más altos (de los que están en el motor completado, los que están solos en una foto son los últimos)• Las barras de soporte de la parrilla delantera son un poco mas gruesas para hacerlas un poco más fáciles de ensamblar• Los guardalodos delanteros son un poco más anchos• El eje trasero es un poco más grueso ahora para hacerlo un poco más fuerte y que se vea mejor (otras partes correspondientes a esta fueron cambiadas también)• Como ya se mencionó, la textura (el trabajo artístico) se mejoró en la parrilla de al frente que tiene estilo Ford 33
Assembly - Ensamblaje
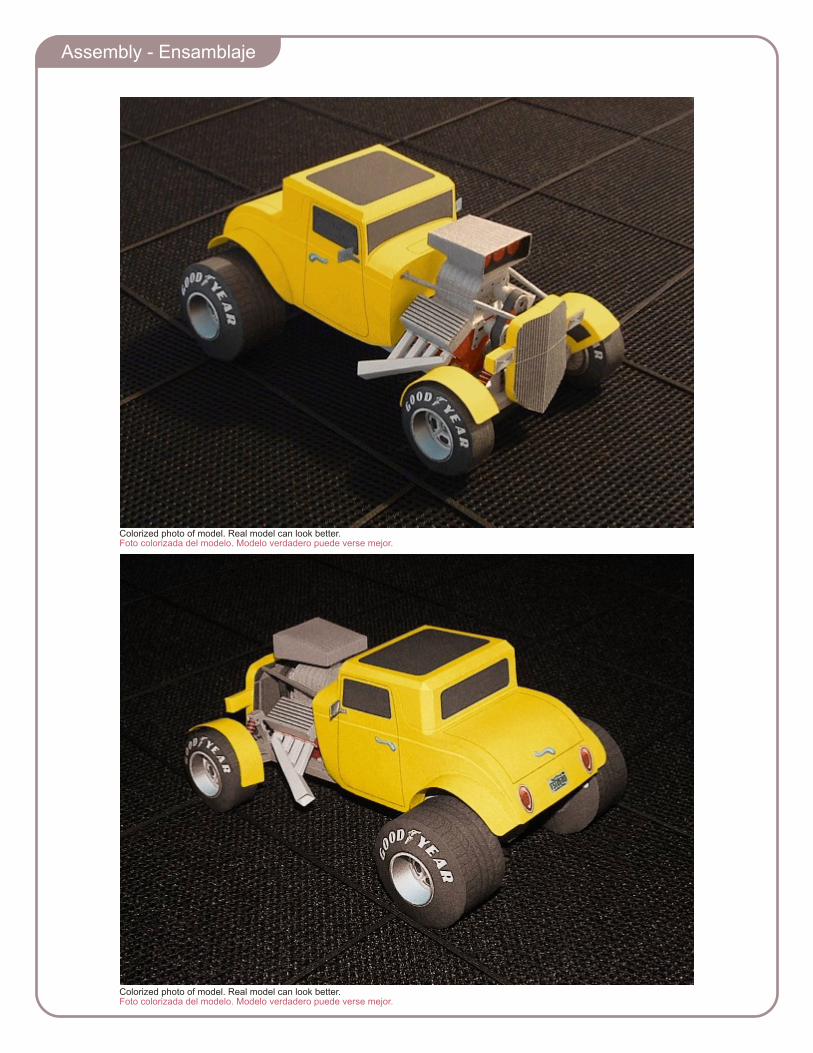
Colorized photo of model. Real model can look better. Foto colorizada del modelo. Modelo verdadero puede verse mejor.
Colorized photo of model. Real model can look better. Foto colorizada del modelo. Modelo verdadero puede verse mejor.

Assembly - Ensamblaje
Colorized photo of model. Real model can look better. Foto colorizada del modelo. Modelo verdadero puede verse mejor.