ihfom chapter 13 mold cleanup, remediation, and … cleanup, remediation, and clearance sampling ....
TRANSCRIPT
CHAPTER 13, SECTION 3 MOLD CLEANUP, REMEDIATION, AND CLEARANCE SAMPLING
1. INTRODUCTION.
a. The previous section stressed that prevention is the best policy: if water does not get into the building, mold will not grow. However, if you do find mold, it is crucial that you know how to remove the contamination safely and effectively and to assess the project success. Be prepared to review contract requirements, oversee the remediation, or liaise with occupants about associated concerns.
b. This section is a compilation of the most widely practiced mold remediation guidance, using the New York City Department of Health Guidelines on Assessment and Remediation of Fungi in Indoor Environments (Reference 13.3-1) and Environmental Protection Agency’s (EPA’s) Mold Remediation and Schools and Commercial Buildings (Reference 13.3-2) and several other documents are also incorporated.
c. Also, consult Interim Technical Guidance (ITG) FY03-4, NAVFAC Mold Response Manual, (Reference 13.3-3), and United Facilities Guide Specifications (UFGS) 02 85 00.00 20, Mold Remediation (Reference 13.3-4) for additional specific information.
d. Other references may cite different or additional recommendations for cleaning and remediation procedures.
e. Facilities where sensitive populations are found (e.g. - hospitals treatment areas, day care centers, or nursing homes) might require a more conservative approach.
f. These guidelines are not intended for use in critical care facilities, such as intensive care units, transplant units, or surgical suites.
2. “RULES” FOR RESPONSE AND REMEDIATION. a. Act Quickly. Rapid response and proper actions following water damage are essential to
significantly reduce or even prevent microbial damage. Ideally, response actions following water intrusion should begin within 8 hours. Response within 24 hours will usually prevent mold growth. If actions are not underway within 48 hours, chances are good that mold will grow in or on water damaged materials and some level of remediation will be needed.
b. Locate and Fix Water Intrusion Source(s). This is essential to stop additional water infiltration and damage. Make repairs before or concurrent with removing water and drying the area.
(1) Likely sources to check as water intrusion points include: the roof (missing or damaged shingles/finish or flashing); loose or damaged soffits and gutters; chimneys; through-roof pipes or vents; improperly sloped drains; improperly vented appliances; uncontrolled humidity (i.e., moisture condenses on inside surfaces); improperly installed vapor/moisture barriers or surface finishes (e.g., exterior insulation and finish system (EIFS) or unsealed stucco); poorly fitted or sealed windows; crawlspace, slab or other foundation material (standing water or episodic incursion from rising water table); heating and cooling system; visible signs of flooding or recurrent water damage.
Page 1 of 21
c. Remove the Water and Protect Materials. Some actions that might prove useful include:
(1) Water can be removed from hard surfaces by soaking it up or mopping. If large volumes of water are in the building, it may be necessary to actively pump out standing water and/or use wet vacuums.
(2) Remove all wet carpet, rugs and padding.
(3) Remove wall moldings (baseboard, decorative trim) to allow drainage if water has entered the wall cavity.
(4) Drill holes in the wallboard to facilitate drying inside the wall cavities. Remove wet wallboard. This allows you to assess wall cavity damage, determine when structural components are dry, and removes a likely growth substrate for mold.
(5) If built-in cabinets are wet, remove kick plates or drill holes for drying.
(6) Check for water in the ventilation ducts, pipe chases, crawl spaces, basements, and attics.
(7) Consider moving wet furnishings and items outside (weather permitting) or to a separate dry location. This can decrease dry time since you are not trying to dry out the furniture and the room simultaneously.
(8) Furnishings and other building contents that are not wet or damaged by the water intrusion should be moved temporarily to a dry location. If such items cannot be moved, protect them as much as possible (e.g., by covering in plastic if water is still leaking into the area or by elevating off the floor to remove from direct water contact).
d. Dry the Area. Control Humidity and Temperature. Once excess water is removed, use fans/air moving devices to promote evaporation and help drive off remaining moisture from furnishings and building materials. This step, in turn, increases the amount of moisture in the air, which must be removed by using dehumidifiers or by actively exhausting air outside. Take care to ensure that partially dried areas and/or those not initially damaged by water are stabilized as other wet areas are being processed. Generally, relative humidity levels <60% will inhibit mold growth.
(1) If weather permits, move wet furnishings outside to help with drying. If this is not possible, consider moving wet furnishings and items to a separate dry location. This can decrease dry time since you are not trying to dry out the furniture and the room simultaneously.
(2) Do not use any building ventilation systems unless you have confirmed that they are not damaged, contaminated, or electrically compromised (wiring damage or electrical hazards).
(3) There are two basic types of drying systems: open and closed.
(a) An open or natural dehumidification system exchanges the moist air inside the structure with dryer air from outside. For example, if outside conditions are favorable (i.e., relative humidity less than about 40% with moderate temperatures), opening windows and doors and continuously ventilating the area with air movers, building exhaust fans and/or ceiling fans will speed the drying process.
Page 2 of 21
(b) A closed or mechanical system uses equipment to remove the evaporated water from the remediation area. Be careful to ensure that the dehumidification rate does not go below the evaporation rate or you will slow drying time and may actually cause additional damage. Controlling the temperature in the building will enhance both evaporation and dehumidification efforts.
(4) You should routinely check the temperature, relative humidity, and material moisture to monitor drying progress. A moisture meter is essential for determining the status of structural components and furnishings.
e. Clean the Area. Remove Mold if Required (1) Once water is removed, assess remaining structural materials and building contents to
determine what can be saved. The general rule is to remove all porous materials that were/are wet or damaged. Use a mild detergent and water solution to clean non-porous materials.
(2) If mold is visible or materials have been wet longer than 48 hours, more extensive actions are needed to ensure that mold is completely removed and unlikely to reappear.
(a) Mold removal plans must be approved by the cognizant industrial hygiene, safety, and facilities personnel.
(b) As a minimum, the mold removal plan should specify exactly what will be done during remediation, how it will be accomplished, acceptable criteria for reoccupancy, and required sampling procedures (if any) and how to interpret results. For example, include detailed removal procedures; protective equipment for remediators; type of containments; contaminated material disposal; special cleaning requirements (books, carpet); sampling method(s) and interpretation criteria if any sampling is required; employee relocation requirements if needed; and risk communication plan (e.g., meetings with employees, method and frequency of status reports to employees and management, points of contact).
(c) Killing mold is not sufficient. Because residual biomass can still elicit allergenic responses from sensitive individuals, mold must be removed.
(3) The cleanup and remediation guidance in this section applies only when the contamination results from clean water intrusion, such as broken water supply lines, roof or window leaks, or condensate from high relative humidity. Cleanup of gray water (contains some contamination, e.g., dishwasher or washing machine overflows; toilet overflow (no feces)) or black water (unsanitary, pathogenic water source, e.g., sewage; storm flooding) requires more extensive procedures and protection because of the unsanitary conditions.
(4) All procedures discussed in this section are minimum recommendations for cleaning and/or decontaminating materials that have been subjected to clean water damage, including building contents, ventilation systems, and structural components. The investigative team may recommend more stringent procedures based on actual conditions at the site.
e. Ensure Personnel Protection and Communication (1) Protect personnel, including occupants and cleanup/remediation personnel - A
successful remediation means that visible mold and mold damaged materials are Page 3 of 21
removed without exposing personnel or releasing any of the contamination to other parts of the building or to the environment. Protection is discussed in detail later in this section.
(2) Communication - A critical component of the assessment phase is open and honest communication and information exchange between the investigators, managers, and occupants. This is even more important during remediation. People need assurance that their work environment is safe and that they are not exposed to the mold during cleaning or removal procedures. Inform occupants of exactly what will occur during remediation and what precautions are in place to protect them.
f. Follow Up. After cleanup/remediation is complete, revisit the area periodically to ensure that leak repairs were effective, materials are still dry, and there are no signs of water damage or visible mold growth. People should be able to occupy the space without experiencing mold related health complaints and associated physical symptoms.
3. CLEANING AND REMEDIATION PROCEDURES. a. General Considerations
(1) In most cases, at least some kind of cleaning will be required following water infiltration. Even with quick response actions, the area will have to be dried out and surfaces wiped down to prevent mold growth. If mold is visible, it must be completely removed. This can be as simple as washing and high efficiency particulate air (HEPA) vacuuming, or as complex as demolition and reconstruction.
(2) Successful cleaning requires an understanding of the location of contamination and the reason why fungal growth initially occurred. The more extensive the moisture damage, the more likely it is that you need to look for hidden mold colonization. Thus, it may be necessary to open and inspect representative structural components (i.e., destructive investigation) to estimate the extent of mold growth and determine the best remediation approach.
(3) When writing or reviewing a cleaning and remediation plan, think about the following issues. While the plan should be written by the facility, public works, or the contractor, it should be coordinated with and reviewed by industrial hygiene, safety, occupational medicine, and other appropriate members of the investigative team.
(a) Type of occupant – Use more conservative guidelines for cleaning mold in high risk populations, such as health care facilities or child care centers.
(b) Building structure - Residential buildings generally have more wood (framing) than commercial buildings. Commercial building may have steel support structures that are less likely to support mold growth and are usually easier to clean if they become contaminated.
(c) Building use - Special protocols are needed to clean mold in libraries or museums where discarding contaminated contents may not be an option.
(d) Extent of contamination – Small areas of visible mold growth can be cleaned quickly and easily. At the other extreme, buildings with extensive contamination may need to be demolished down to the structural framing for successful remediation.
Page 4 of 21

(e) Potential health effects - Are occupants reporting mold related symptoms? Are there confirmed diagnoses from a physician (vs. self-reported diagnosis)?
(f) Potential for personnel exposure – Define the exposure pathway to ensure remediation addressees the complete process.
(g) Remediation risks - Consider the potential for spreading contamination and possible health impacts to occupants and remediators.
(h) Remediation costs - Can the area be cleaned successfully? What are the costs for remediation vs. relocating employees to another site?
(i) Building plans – Is the contaminated building already scheduled for demolition or extensive renovation?
b. Cleaning Guide Based on Type of Material. In general, the success and ease of cleaning building materials is based on their porosity.
(1) Non-porous - Materials that do not absorb moisture and will dry quickly, such as metal, glass, hard plastic, tile. These materials can usually be salvaged by thoroughly cleaning with a mild detergent solution. If visibly contaminated, materials should also be HEPA vacuumed before returning to service. Ensure that ALL surfaces of the object(s) are clean.
(2) Semi-porous – Materials like wood, concrete, linoleum and vinyl floor covering, vinyl wall covering, hardboard furniture, painted drywall or plaster. These will absorb moisture if exposed to water for a long time. Generally, if semi-porous materials are wet, it is best to discard them. However, if they are structurally sound, and only minimally wet or have only a small area of mold growth, they can be dried thoroughly and cleaned the same as non-porous materials. Drywall/Plaster should be removed or cleaned at least six inches beyond any water damage, or visible mold growth, including hidden mold reservoirs.
(3) Porous – Because porous materials readily absorb and retain water, they should almost always be discarded. Examples include carpet, padding, mattresses, stuffed furniture, wicker, fabrics, wallboard, insulation, and ceiling tiles. You can usually save linens, drapes, and clothes after thorough washing or professional dry-cleaning.
(a) Damp wiping and vacuuming will not work because you cannot clean the air spaces and channels that are an inherent part of the structure of porous materials. For example, damp wiping gypsum wall board will remove vegetative colonies and mold components on the surface but will not remove colonies or spores that have infiltrated the “nooks and crannies” within and throughout the wallboard. This is why if you wash mold off a wall but take no further action, the mold will usually reappear in a week or so.
(b) The exception to discarding porous materials is when dealing with items that have historic or high monetary value, are irreplaceable, or have sentimental or other inherent value (i.e., certain furniture, books, art, rugs). Such articles may be cleaned, but it requires special procedures, and hiring a specialist is usually the best option. This is very expensive and may not be successful.
(4) Following is general guidance for cleaning groups of materials that are damaged by clean water and/or have visible mold growth. Check material dryness with a moisture
Page 5 of 21
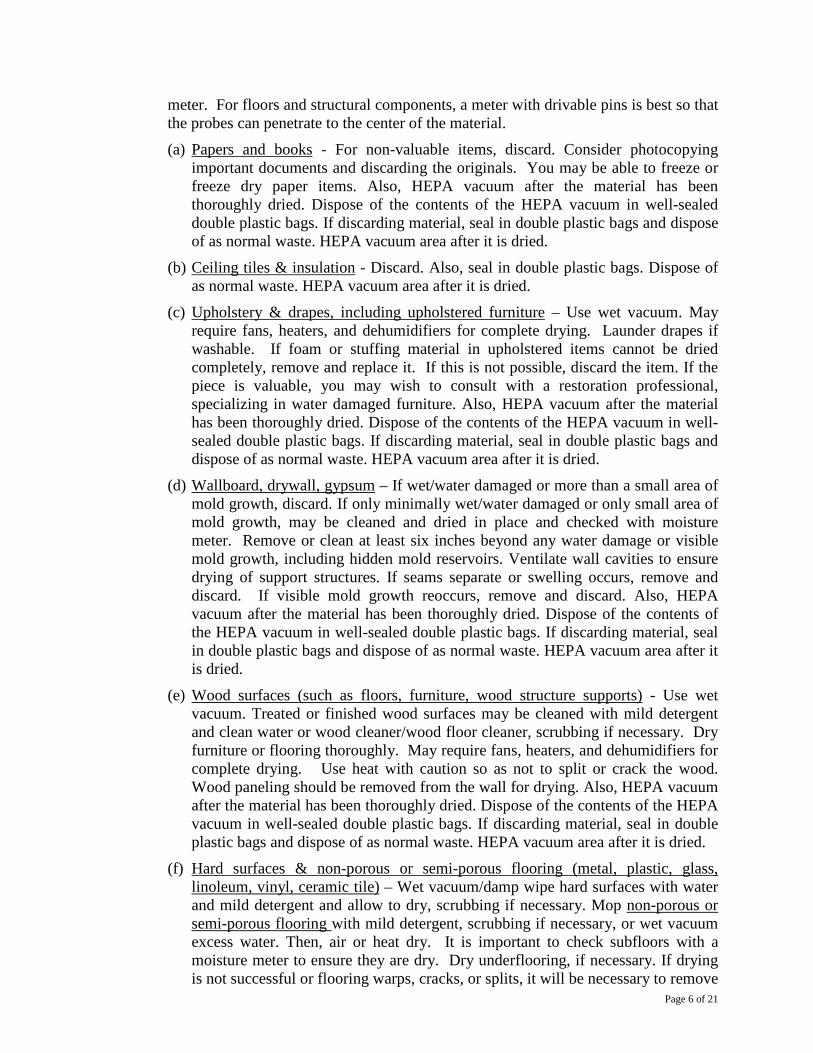
meter. For floors and structural components, a meter with drivable pins is best so that the probes can penetrate to the center of the material.
(a) Papers and books - For non-valuable items, discard. Consider photocopying important documents and discarding the originals. You may be able to freeze or freeze dry paper items. Also, HEPA vacuum after the material has been thoroughly dried. Dispose of the contents of the HEPA vacuum in well-sealed double plastic bags. If discarding material, seal in double plastic bags and dispose of as normal waste. HEPA vacuum area after it is dried.
(b) Ceiling tiles & insulation - Discard. Also, seal in double plastic bags. Dispose of as normal waste. HEPA vacuum area after it is dried.
(c) Upholstery & drapes, including upholstered furniture – Use wet vacuum. May require fans, heaters, and dehumidifiers for complete drying. Launder drapes if washable. If foam or stuffing material in upholstered items cannot be dried completely, remove and replace it. If this is not possible, discard the item. If the piece is valuable, you may wish to consult with a restoration professional, specializing in water damaged furniture. Also, HEPA vacuum after the material has been thoroughly dried. Dispose of the contents of the HEPA vacuum in well-sealed double plastic bags. If discarding material, seal in double plastic bags and dispose of as normal waste. HEPA vacuum area after it is dried.
(d) Wallboard, drywall, gypsum – If wet/water damaged or more than a small area of mold growth, discard. If only minimally wet/water damaged or only small area of mold growth, may be cleaned and dried in place and checked with moisture meter. Remove or clean at least six inches beyond any water damage or visible mold growth, including hidden mold reservoirs. Ventilate wall cavities to ensure drying of support structures. If seams separate or swelling occurs, remove and discard. If visible mold growth reoccurs, remove and discard. Also, HEPA vacuum after the material has been thoroughly dried. Dispose of the contents of the HEPA vacuum in well-sealed double plastic bags. If discarding material, seal in double plastic bags and dispose of as normal waste. HEPA vacuum area after it is dried.
(e) Wood surfaces (such as floors, furniture, wood structure supports) - Use wet vacuum. Treated or finished wood surfaces may be cleaned with mild detergent and clean water or wood cleaner/wood floor cleaner, scrubbing if necessary. Dry furniture or flooring thoroughly. May require fans, heaters, and dehumidifiers for complete drying. Use heat with caution so as not to split or crack the wood. Wood paneling should be removed from the wall for drying. Also, HEPA vacuum after the material has been thoroughly dried. Dispose of the contents of the HEPA vacuum in well-sealed double plastic bags. If discarding material, seal in double plastic bags and dispose of as normal waste. HEPA vacuum area after it is dried.
(f) Hard surfaces & non-porous or semi-porous flooring (metal, plastic, glass, linoleum, vinyl, ceramic tile) – Wet vacuum/damp wipe hard surfaces with water and mild detergent and allow to dry, scrubbing if necessary. Mop non-porous or semi-porous flooring with mild detergent, scrubbing if necessary, or wet vacuum excess water. Then, air or heat dry. It is important to check subfloors with a moisture meter to ensure they are dry. Dry underflooring, if necessary. If drying is not successful or flooring warps, cracks, or splits, it will be necessary to remove
Page 6 of 21
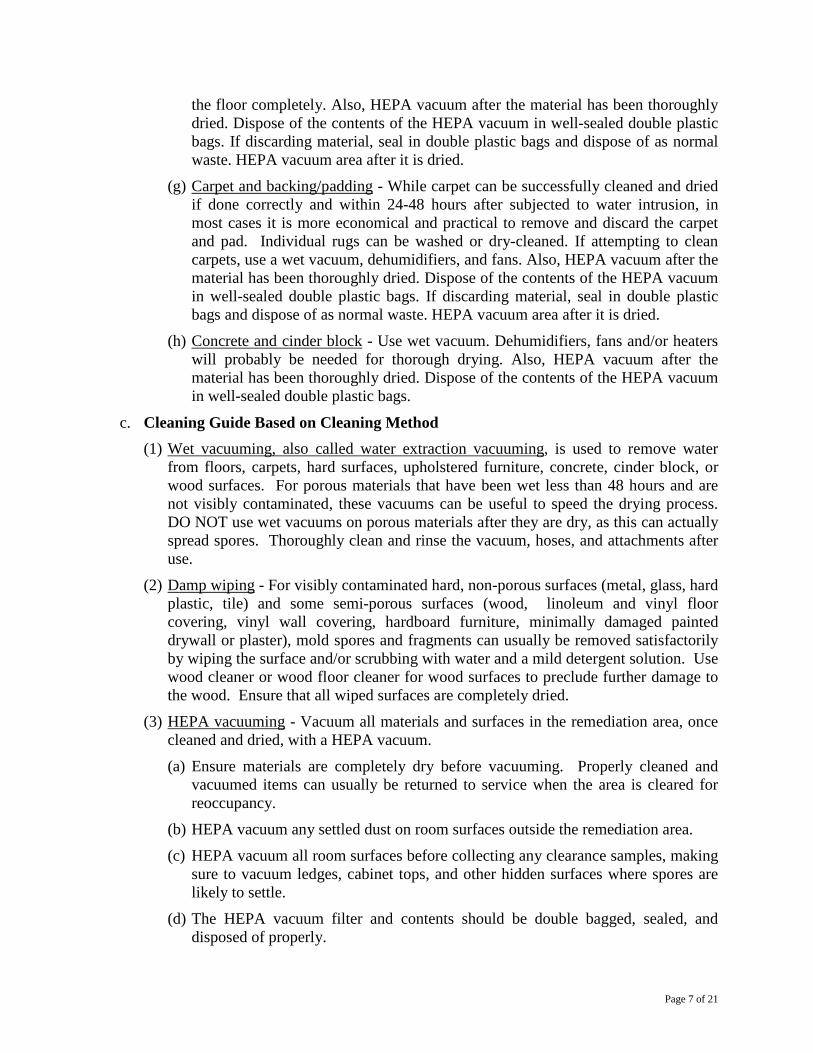
the floor completely. Also, HEPA vacuum after the material has been thoroughly dried. Dispose of the contents of the HEPA vacuum in well-sealed double plastic bags. If discarding material, seal in double plastic bags and dispose of as normal waste. HEPA vacuum area after it is dried.
(g) Carpet and backing/padding - While carpet can be successfully cleaned and dried if done correctly and within 24-48 hours after subjected to water intrusion, in most cases it is more economical and practical to remove and discard the carpet and pad. Individual rugs can be washed or dry-cleaned. If attempting to clean carpets, use a wet vacuum, dehumidifiers, and fans. Also, HEPA vacuum after the material has been thoroughly dried. Dispose of the contents of the HEPA vacuum in well-sealed double plastic bags. If discarding material, seal in double plastic bags and dispose of as normal waste. HEPA vacuum area after it is dried.
(h) Concrete and cinder block - Use wet vacuum. Dehumidifiers, fans and/or heaters will probably be needed for thorough drying. Also, HEPA vacuum after the material has been thoroughly dried. Dispose of the contents of the HEPA vacuum in well-sealed double plastic bags.
c. Cleaning Guide Based on Cleaning Method (1) Wet vacuuming, also called water extraction vacuuming, is used to remove water
from floors, carpets, hard surfaces, upholstered furniture, concrete, cinder block, or wood surfaces. For porous materials that have been wet less than 48 hours and are not visibly contaminated, these vacuums can be useful to speed the drying process. DO NOT use wet vacuums on porous materials after they are dry, as this can actually spread spores. Thoroughly clean and rinse the vacuum, hoses, and attachments after use.
(2) Damp wiping - For visibly contaminated hard, non-porous surfaces (metal, glass, hard plastic, tile) and some semi-porous surfaces (wood, linoleum and vinyl floor covering, vinyl wall covering, hardboard furniture, minimally damaged painted drywall or plaster), mold spores and fragments can usually be removed satisfactorily by wiping the surface and/or scrubbing with water and a mild detergent solution. Use wood cleaner or wood floor cleaner for wood surfaces to preclude further damage to the wood. Ensure that all wiped surfaces are completely dried.
(3) HEPA vacuuming - Vacuum all materials and surfaces in the remediation area, once cleaned and dried, with a HEPA vacuum.
(a) Ensure materials are completely dry before vacuuming. Properly cleaned and vacuumed items can usually be returned to service when the area is cleared for reoccupancy.
(b) HEPA vacuum any settled dust on room surfaces outside the remediation area.
(c) HEPA vacuum all room surfaces before collecting any clearance samples, making sure to vacuum ledges, cabinet tops, and other hidden surfaces where spores are likely to settle.
(d) The HEPA vacuum filter and contents should be double bagged, sealed, and disposed of properly.
Page 7 of 21
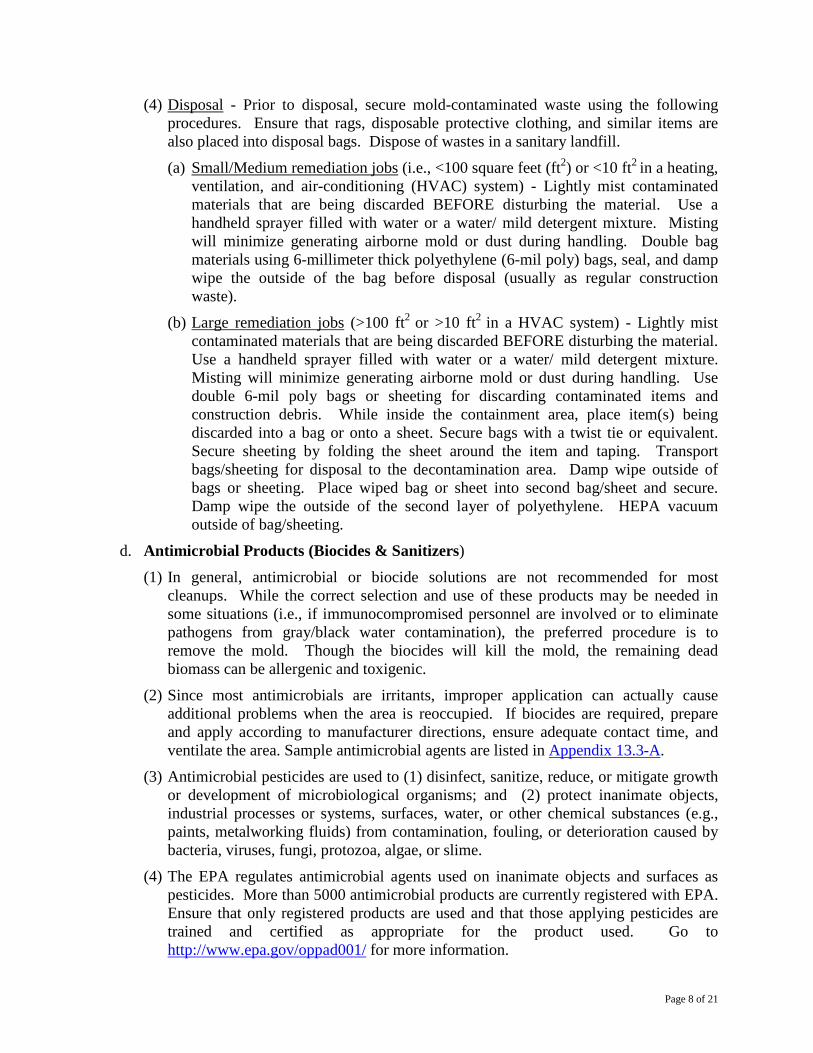
(4) Disposal - Prior to disposal, secure mold-contaminated waste using the following procedures. Ensure that rags, disposable protective clothing, and similar items are also placed into disposal bags. Dispose of wastes in a sanitary landfill.
(a) Small/Medium remediation jobs (i.e., <100 square feet (ft2) or <10 ft2 in a heating, ventilation, and air-conditioning (HVAC) system) - Lightly mist contaminated materials that are being discarded BEFORE disturbing the material. Use a handheld sprayer filled with water or a water/ mild detergent mixture. Misting will minimize generating airborne mold or dust during handling. Double bag materials using 6-millimeter thick polyethylene (6-mil poly) bags, seal, and damp wipe the outside of the bag before disposal (usually as regular construction waste).
(b) Large remediation jobs (>100 ft2 or >10 ft2 in a HVAC system) - Lightly mist contaminated materials that are being discarded BEFORE disturbing the material. Use a handheld sprayer filled with water or a water/ mild detergent mixture. Misting will minimize generating airborne mold or dust during handling. Use double 6-mil poly bags or sheeting for discarding contaminated items and construction debris. While inside the containment area, place item(s) being discarded into a bag or onto a sheet. Secure bags with a twist tie or equivalent. Secure sheeting by folding the sheet around the item and taping. Transport bags/sheeting for disposal to the decontamination area. Damp wipe outside of bags or sheeting. Place wiped bag or sheet into second bag/sheet and secure. Damp wipe the outside of the second layer of polyethylene. HEPA vacuum outside of bag/sheeting.
d. Antimicrobial Products (Biocides & Sanitizers)
(1) In general, antimicrobial or biocide solutions are not recommended for most cleanups. While the correct selection and use of these products may be needed in some situations (i.e., if immunocompromised personnel are involved or to eliminate pathogens from gray/black water contamination), the preferred procedure is to remove the mold. Though the biocides will kill the mold, the remaining dead biomass can be allergenic and toxigenic.
(2) Since most antimicrobials are irritants, improper application can actually cause additional problems when the area is reoccupied. If biocides are required, prepare and apply according to manufacturer directions, ensure adequate contact time, and ventilate the area. Sample antimicrobial agents are listed in Appendix 13.3-A.
(3) Antimicrobial pesticides are used to (1) disinfect, sanitize, reduce, or mitigate growth or development of microbiological organisms; and (2) protect inanimate objects, industrial processes or systems, surfaces, water, or other chemical substances (e.g., paints, metalworking fluids) from contamination, fouling, or deterioration caused by bacteria, viruses, fungi, protozoa, algae, or slime.
(4) The EPA regulates antimicrobial agents used on inanimate objects and surfaces as pesticides. More than 5000 antimicrobial products are currently registered with EPA. Ensure that only registered products are used and that those applying pesticides are trained and certified as appropriate for the product used. Go to http://www.epa.gov/oppad001/ for more information.
Page 8 of 21
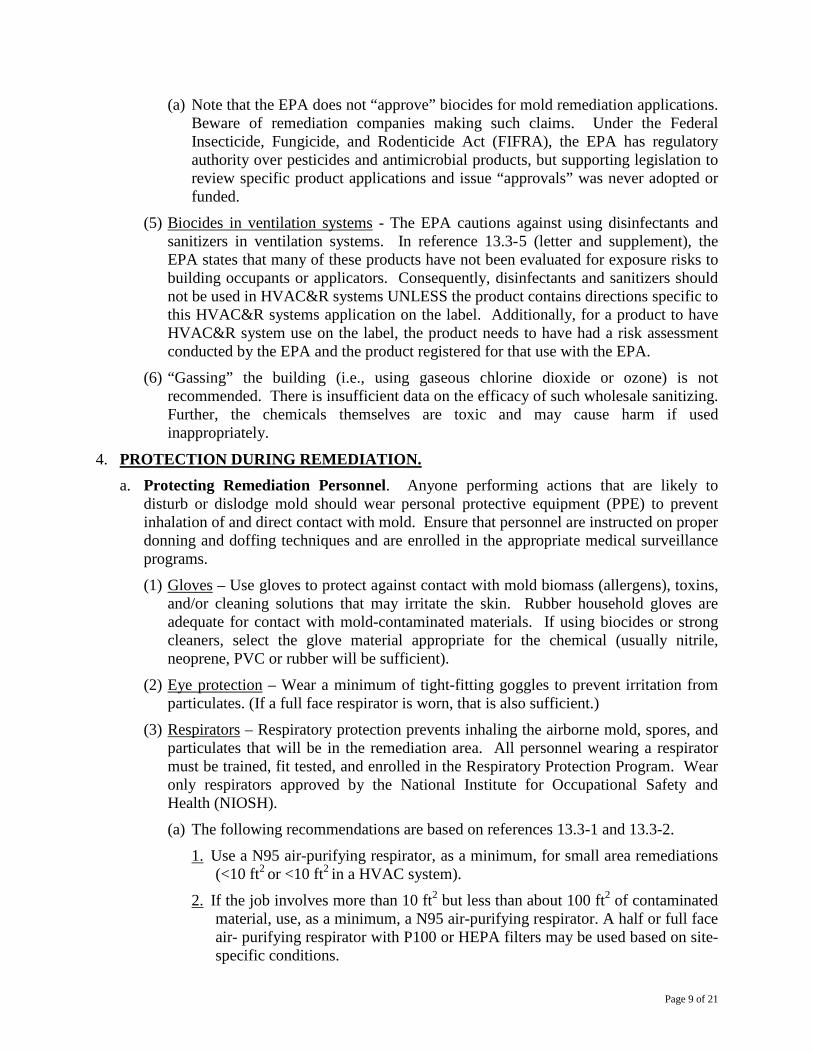
(a) Note that the EPA does not “approve” biocides for mold remediation applications. Beware of remediation companies making such claims. Under the Federal Insecticide, Fungicide, and Rodenticide Act (FIFRA), the EPA has regulatory authority over pesticides and antimicrobial products, but supporting legislation to review specific product applications and issue “approvals” was never adopted or funded.
(5) Biocides in ventilation systems - The EPA cautions against using disinfectants and sanitizers in ventilation systems. In reference 13.3-5 (letter and supplement), the EPA states that many of these products have not been evaluated for exposure risks to building occupants or applicators. Consequently, disinfectants and sanitizers should not be used in HVAC&R systems UNLESS the product contains directions specific to this HVAC&R systems application on the label. Additionally, for a product to have HVAC&R system use on the label, the product needs to have had a risk assessment conducted by the EPA and the product registered for that use with the EPA.
(6) “Gassing” the building (i.e., using gaseous chlorine dioxide or ozone) is not recommended. There is insufficient data on the efficacy of such wholesale sanitizing. Further, the chemicals themselves are toxic and may cause harm if used inappropriately.
4. PROTECTION DURING REMEDIATION. a. Protecting Remediation Personnel. Anyone performing actions that are likely to
disturb or dislodge mold should wear personal protective equipment (PPE) to prevent inhalation of and direct contact with mold. Ensure that personnel are instructed on proper donning and doffing techniques and are enrolled in the appropriate medical surveillance programs.
(1) Gloves – Use gloves to protect against contact with mold biomass (allergens), toxins, and/or cleaning solutions that may irritate the skin. Rubber household gloves are adequate for contact with mold-contaminated materials. If using biocides or strong cleaners, select the glove material appropriate for the chemical (usually nitrile, neoprene, PVC or rubber will be sufficient).
(2) Eye protection – Wear a minimum of tight-fitting goggles to prevent irritation from particulates. (If a full face respirator is worn, that is also sufficient.)
(3) Respirators – Respiratory protection prevents inhaling the airborne mold, spores, and particulates that will be in the remediation area. All personnel wearing a respirator must be trained, fit tested, and enrolled in the Respiratory Protection Program. Wear only respirators approved by the National Institute for Occupational Safety and Health (NIOSH).
(a) The following recommendations are based on references 13.3-1 and 13.3-2.
1. Use a N95 air-purifying respirator, as a minimum, for small area remediations (<10 ft2 or <10 ft2 in a HVAC system).
2. If the job involves more than 10 ft2 but less than about 100 ft2 of contaminated material, use, as a minimum, a N95 air-purifying respirator. A half or full face air- purifying respirator with P100 or HEPA filters may be used based on site-specific conditions.
Page 9 of 21
3. If the job involves more than 10 ft2 in a HVAC system, use, as a minimum, a half face air- purifying respirator with P100 or HEPA filters.
4. If remediating an extensive contaminated area (>100 ft2) or an area with high concentrations of mold, use, as a minimum, a full-face air purifying respirator with P100 or HEPA filters. A full-face powered air purifying respirator (PAPR) with P100 or HEPA filters may be used based on site-specific conditions.
(b) Other references may cite different recommendations for protective procedures and equipment. The following recommendations are based on reference 13.3-3.
1. Use a half face air-purifying respirator with P100 or HEPA filters for small or medium area remediations (<100 ft2, or <10 ft2 in a HVAC system).
2. If remediating a large contaminated area (>100 ft2) or involves more than 10 ft2 in a HVAC system, use, as a minimum, a full-face air purifying respirator with P100 or HEPA filters.
(c) Coveralls, Head, and Foot Coverings – Disposable coveralls keep molds and spores from contaminating personal clothing. Coverings also prevent direct skin contact with the mold biomass. As a minimum, wear protective clothing for remediations of more than 10 ft2. For large remediations (>100 ft2 or >10 ft2 in a HVAC system), ensure all openings (i.e., zipper, wrists, leg) are taped and head and foot coverings are also worn.
b. Protecting Occupants (1) Scheduling Remediation - Consider scheduling remediation work during minimum
occupancy hours to incur the least disruption.
(2) Relocation - In most cases, it is not necessary to vacate the building during remediation as long as the work area is properly controlled. However, occupants in the actual work site should be relocated until remediation is complete. During large remediations, offices adjacent to the enclosure should be vacated to remove occupants from the noise, construction traffic, and disruption associated with the work.
(a) If contamination results from gray or black water, especially in sewage situations, occupants should be removed from the building until cleanup and disinfection are complete.
(b) Work with the local occupational medicine department to determine if occupants with health problems should be relocated until cleaning/ remediation is complete and the building is cleared for reoccupancy. Health care providers may recommend temporary relocation based on individual medical evaluations. For example, people with hypersensitivity pneumonitis, severe allergies, asthma, immune suppression, or chronic inflammatory lung diseases are at higher risk and may require relocation or other accommodations during remediation. Chapter 13 Section 4 discusses medical evaluations specific to mold contamination events.
c. Protecting the Environment (1) Containments (enclosures) are used to prevent the release of mold, mold spores, and
remediation debris into the surrounding building areas and into the environment. Although the remediation procedures are loosely associated with the size of the
Page 10 of 21
contamination area, you have to consider actual mold concentrations. Small contaminated areas do not usually need to be enclosed before removal. If an area is heavily contaminated (i.e., “covered” with mold), there is a high potential for mold/spore release and subsequent spread of contamination to other areas. In this situation, an enclosure would be appropriate.
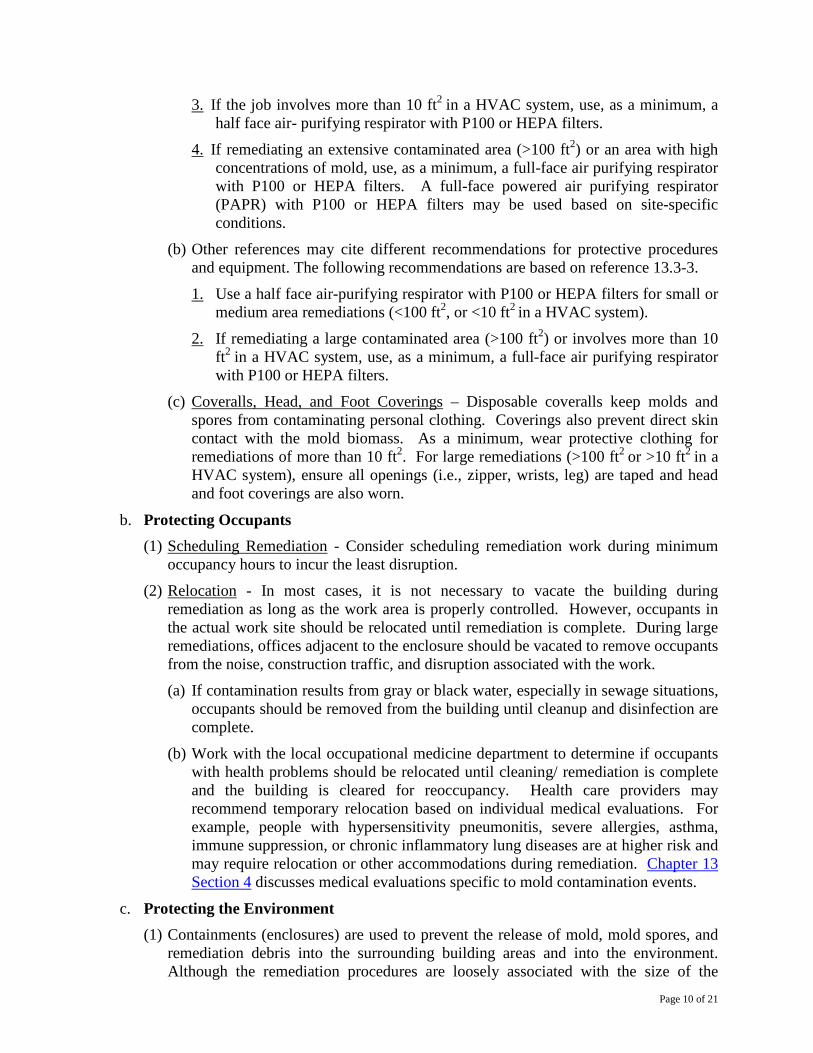
(2) Table 13.3-1 provides minimum containment procedures. Any remediations with high concentrations of mold and/or extensive contamination areas should institute the strictest containment procedures. Also, consider more extensive containments if demolition actions (i.e., cutting, hammering) are required to remove contaminated material. If removal work is contracted, acceptable containment requirements should be specified in the contract.
(3) When containments are properly constructed, the polyethylene sheeting will billow inwards when placed under negative pressure. If the sheeting billows outward or flutters, the containment is not properly sealed. Stop work until the containment is restored to full negative pressure.
Table 13.3-1. Mold remediation containment guide.
PROCEDURE or ACTION CONTAMINATED AREA, ft2
HVAC1 < 10 10-100 >100
Remove occupants from work area2.
Remove occupants from adjacent areas2.
No containment needed.
Seal off work area with flame-retardant 6-mil polyethylene sheeting (i.e., critical barrier) 3. Seal seams.
double poly
Seal off all supply and return air ducts and doors into/out of the contained area.
Secure ventilation system.
if needed to
properly seal
vents
Place work area under negative pressure using exhaust fan(s) equipped with HEPA filters. Exhaust air outside.
4
Use airlocks into/out of the work area. 4
Establish decontamination room outside of the enclosure. 4
Use dust suppression methods (misting) on any material or object to be removed, cut, or discarded.
Page 11 of 21
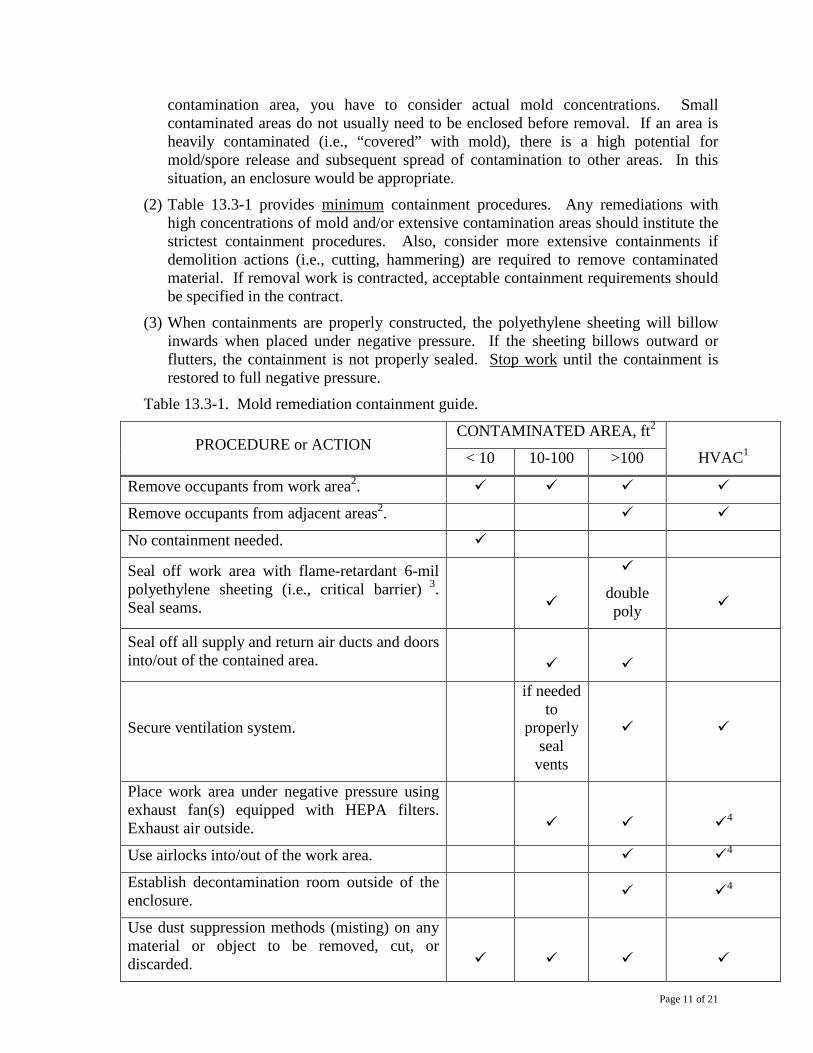
PROCEDURE or ACTION CONTAMINATED AREA, ft2
HVAC1 < 10 10-100 >100
Dispose of contaminated material and cleaning rags per disposal guidelines.
Mop or wipe down area after cleaning/removal is complete.
After damp wiping, clean the same area with a HEPA-filtered vacuum
Visually inspect work area for cleanliness (no dust).
Conduct clearance sampling before removing containment.
1 HVAC = heating, ventilation, and air-conditioning system. 2 Consult occupational medicine physician. Some occupants may be removed based on medical conditions such as recent surgery, chronic lung disease, immunosuppression, etc. 3 Cover area with poly sheeting from ceiling to floor. Tape (or otherwise attach) poly to the framing or room perimeter. Tape all seams shut. Provide slit entry with covering flap. Maintain high negative pressure using HEPA filtered fan. Block supply and return vents in the contaminated area. 4 If contaminated area is >10 ft2.
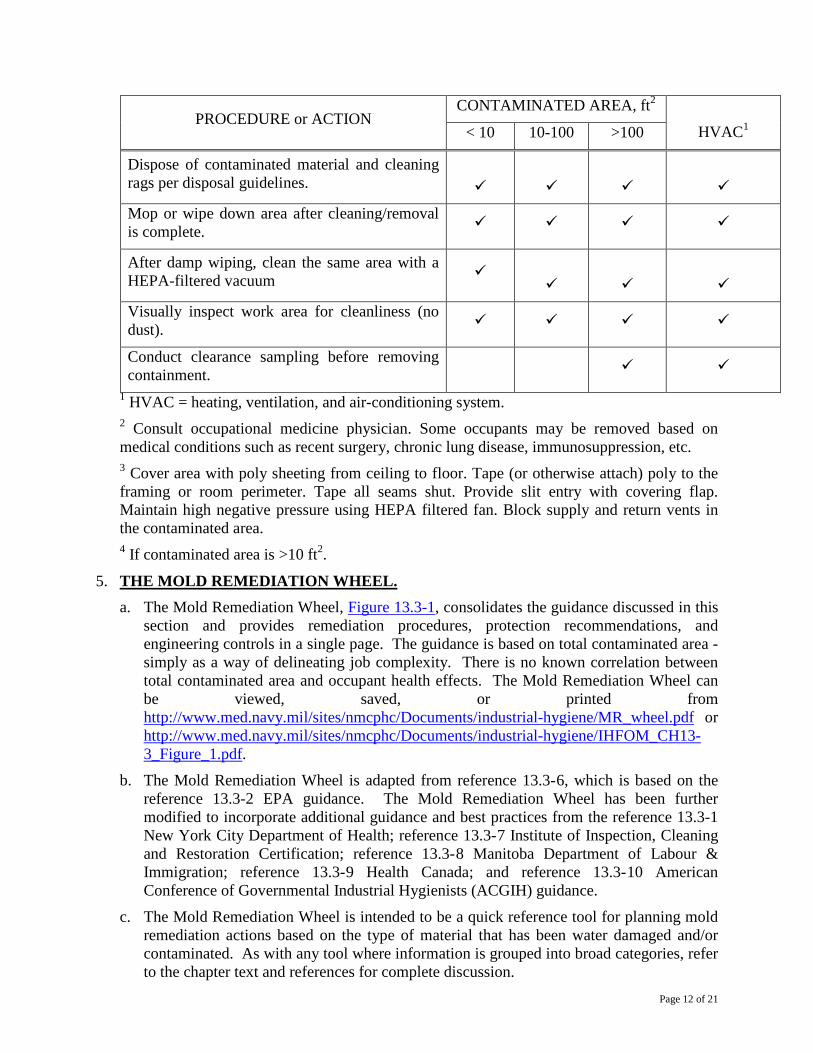
5. THE MOLD REMEDIATION WHEEL. a. The Mold Remediation Wheel, Figure 13.3-1, consolidates the guidance discussed in this
section and provides remediation procedures, protection recommendations, and engineering controls in a single page. The guidance is based on total contaminated area - simply as a way of delineating job complexity. There is no known correlation between total contaminated area and occupant health effects. The Mold Remediation Wheel can be viewed, saved, or printed from http://www.med.navy.mil/sites/nmcphc/Documents/industrial-hygiene/MR_wheel.pdf or http://www.med.navy.mil/sites/nmcphc/Documents/industrial-hygiene/IHFOM_CH13-3_Figure_1.pdf.
b. The Mold Remediation Wheel is adapted from reference 13.3-6, which is based on the reference 13.3-2 EPA guidance. The Mold Remediation Wheel has been further modified to incorporate additional guidance and best practices from the reference 13.3-1 New York City Department of Health; reference 13.3-7 Institute of Inspection, Cleaning and Restoration Certification; reference 13.3-8 Manitoba Department of Labour & Immigration; reference 13.3-9 Health Canada; and reference 13.3-10 American Conference of Governmental Industrial Hygienists (ACGIH) guidance.
c. The Mold Remediation Wheel is intended to be a quick reference tool for planning mold remediation actions based on the type of material that has been water damaged and/or contaminated. As with any tool where information is grouped into broad categories, refer to the chapter text and references for complete discussion. Page 12 of 21
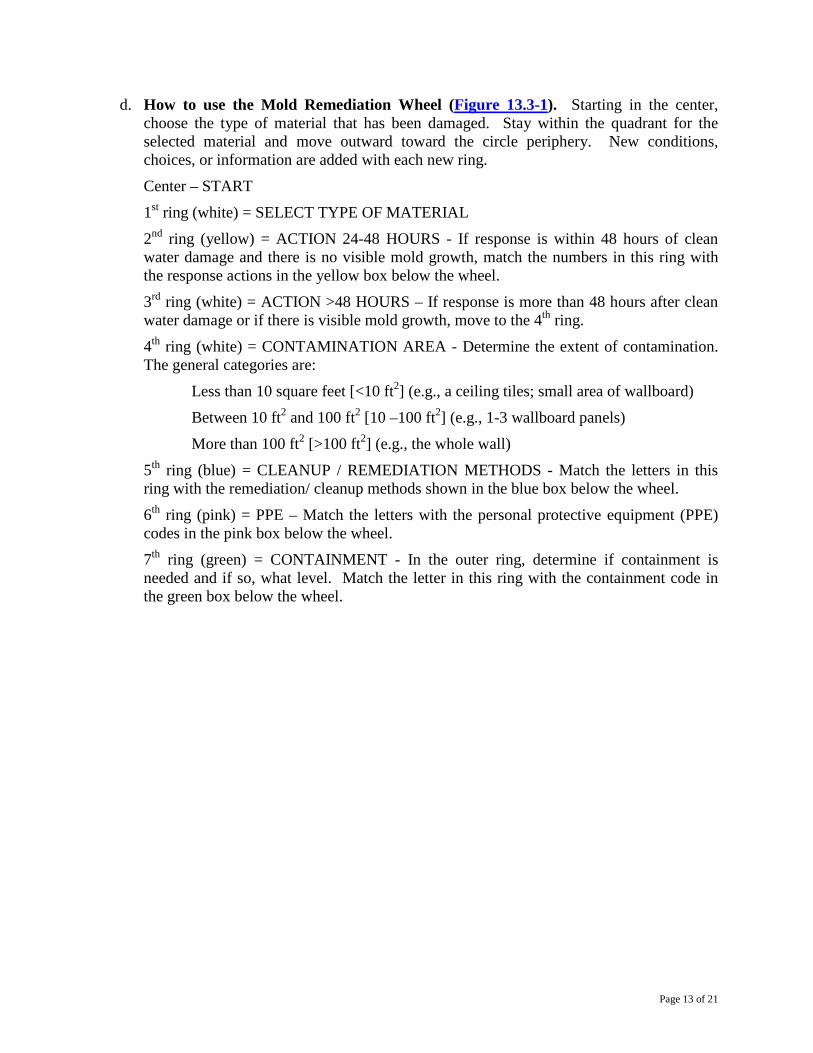
d. How to use the Mold Remediation Wheel (Figure 13.3-1). Starting in the center, choose the type of material that has been damaged. Stay within the quadrant for the selected material and move outward toward the circle periphery. New conditions, choices, or information are added with each new ring.
Center – START
1st ring (white) = SELECT TYPE OF MATERIAL
2nd ring (yellow) = ACTION 24-48 HOURS - If response is within 48 hours of clean water damage and there is no visible mold growth, match the numbers in this ring with the response actions in the yellow box below the wheel.
3rd ring (white) = ACTION >48 HOURS – If response is more than 48 hours after clean water damage or if there is visible mold growth, move to the 4th ring.
4th ring (white) = CONTAMINATION AREA - Determine the extent of contamination. The general categories are:
Less than 10 square feet [<10 ft2] (e.g., a ceiling tiles; small area of wallboard)
Between 10 ft2 and 100 ft2 [10 –100 ft2] (e.g., 1-3 wallboard panels)
More than 100 ft2 [>100 ft2] (e.g., the whole wall)
5th ring (blue) = CLEANUP / REMEDIATION METHODS - Match the letters in this ring with the remediation/ cleanup methods shown in the blue box below the wheel.
6th ring (pink) = PPE – Match the letters with the personal protective equipment (PPE) codes in the pink box below the wheel.
7th ring (green) = CONTAINMENT - In the outer ring, determine if containment is needed and if so, what level. Match the letter in this ring with the containment code in the green box below the wheel.
Page 13 of 21
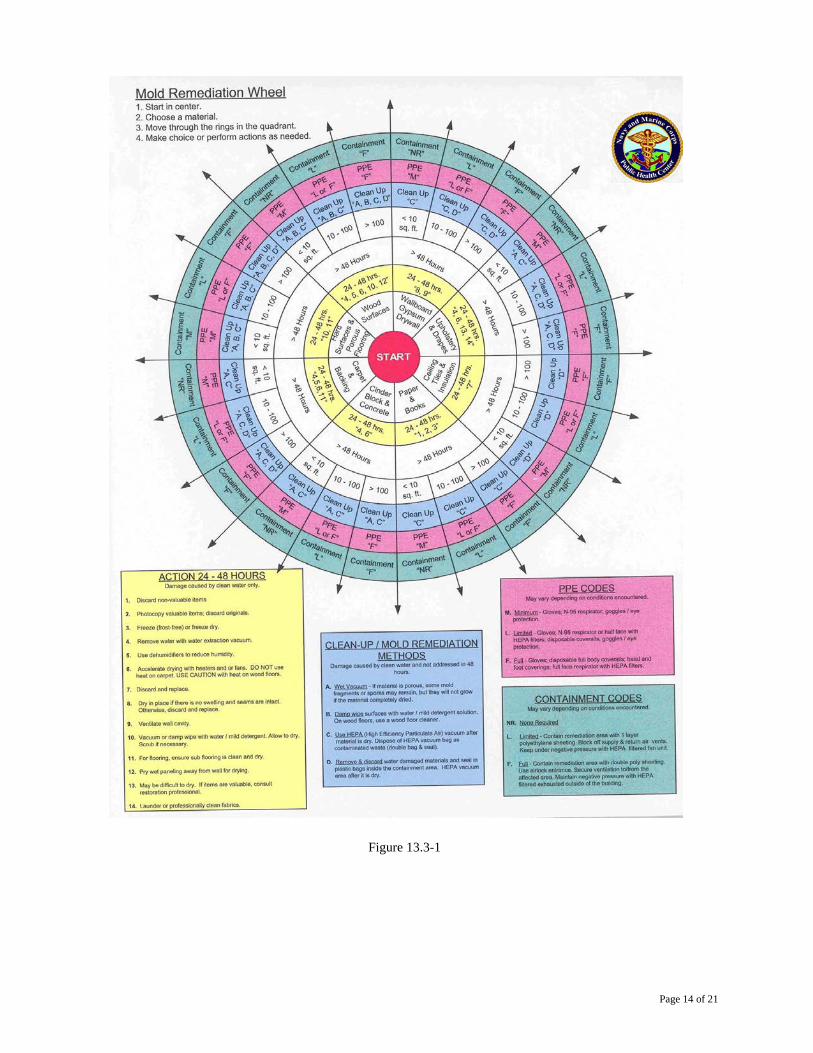
Figure 13.3-1
Page 14 of 21
6. QUALIFIED PERSONNEL. a. There are no specific regulations that govern mold remediation or define qualifications
for personnel who clean and remediate contaminated areas. Various references may cite different recommendations for trained/qualified personnel
(1) According to the reference 13.3-1:
(a) Small and medium isolated areas (<100 ft2; e.g., 3 sheets of wallboard) – Remediation can be done by maintenance personnel who have been specifically trained on mold contamination cleaning procedures, potential hazards, and proper protective equipment.
(b) Small areas in HVACs systems (<10 ft2) – Remediation can be done by maintenance personnel who have been specifically trained on mold contamination cleaning procedures, potential hazards, and proper protective equipment and who are familiar with the design and function of the impacted HVAC system.
(c) Large areas (>100 ft2; e.g., an entire wall in an office) and large areas in HVAC systems (<10 ft2) – Only personnel specially trained in mold contamination cleanup and disposal procedures should do large scale remediation. Further, an occupational safety and health professional should oversee the remediation, including reviewing protocols and contract requirements.
(2) Reference 13.3-3 specifies that only remediation on small areas of contamination can be done by maintenance personnel who have been specifically trained on mold contamination cleaning procedures, potential hazards, and proper protective equipment. It also specifies that only specially trained/certified personnel perform remediation on medium areas of contamination or small areas of contamination in HVAC systems as well as large areas of contamination and large areas of contamination in HVAC systems.
(3) Reference 13.3-4 lists specific training/certification guidelines for microbial assessors, mold remediation supervisors, ventilation system mold remediators, industrial hygienist (IH), and other workers.
7. MOLD/ INDOOR AIR QUALITY CERTIFICATIONS. a. There are certifications that cover the range from indoor air quality generalist to very
specific titles. Below are the sponsoring organizations and certifications they offer. We have listed only organizations whose certification requirements include as a minimum: education and/or experience to qualify; written examination; and ongoing training and recertification programs. This list is provided as an information resource to assist Navy IHs in making an informed decision about mold remediators’ qualifications. Listing does not imply endorsement by the Department of Defense, the Navy, or the Navy and Marine Corps Public Health Center, nor does it mean that these certifications have merit.
(1) American Council for Accredited Certification (http://www.acac.org)
(a) Council Certified Indoor Environmental Consultant (CIEC)
(b) Council Certified Indoor Environmentalist (CIE)
(c) Council Certified Indoor Environmental Supervisor (CIES)
(d) Council Certified Indoor Environmental Remediator (CIER) Page 15 of 21
(e) Council Certified Microbial Consultant (CMC)
(f) Council Certified Microbial Investigator (CMI)
(g) Council Certified Microbial Remediation Supervisor (CMRS)
(h) Council Certified Microbial Remediator (CMR)
(i) Council Certified Moisture Control Consultant (CMCC)
(j) Council Certified Moisture Control Investigator (CMCI)
(k) Council Certified Structural Drying Supervisor (CSDS)
(l) Council Certified Structural Drying Remediator (CSDR)
(m) Council Certified Indoor Air Quality Manager (CIAQM)
(n) Council Certified Microbial Claims Adjuster (CMCA) (o) Others (http://www.acac.org).
(2) Institute of Professional Environmental Practice (http://www.ipep.org/)
(a) Qualified Environmental Professional (QEP)
(b) Environmental Professional Intern (EPI)
(3) National Air Duct Cleaners Association (http://www.nadca.com)
(a) Certified Air Systems Cleaning Specialist (ASCS)/Ventilation System Mold Remediator (VSMR)
(b) Certified Ventilation Inspectors (CVI)
8. POST-REMEDIATION. a. After remediation, the site’s underlying moisture problems should be fixed; the site
should be dry, clean, and free of visible mold growth or moldy odors, and free from visible dust and debris. Also, when revisiting the site shortly after remediation, no signs of water damage, mold growth or moldy odors should have reoccurred. People should be able to occupy or re-occupy the space without mold related health complaints or physical symptoms.
b. If any sampling is performed, only background types and concentrations of mold, similar to those found outside, should remain.
9. POST-REMEDIATION/CLEARANCE SAMPLING. a. General Considerations
(1) References 13.3-1, 13.3-2, and 13.3-10 provide guidance on assessing and remediating fungal contamination in buildings. Though there are differences in the documents, they all agree that visible fungal growth should not be present in indoor occupied space, regardless of the number or type of fungi. Consequently, the goals of remediation are to (1) completely remove microbial reservoirs, and (2) thoroughly clean the air and all surfaces in the affected area.
(2) The Centers for Disease Control (CDC), EPA, New York City Department of Health, and the UFGS guidance for mold remediation do not recommend routine sampling for molds.
Page 16 of 21
(3) According to the EPA Mold Course, air sampling for mold or other biological contaminants usually is not necessary to determine remediation effectiveness. They go on to mention that such clearance sampling may be less effective at determining the success of remediation than visual inspection of the area.
(4) Reference 13.3-4 lists specific information on clearance procedures, sampling, and criteria in circumstances where clearance sampling is performed. Reference 13.3-4 only requires clearance sampling for remediation projects in buildings that will be occupied by sensitive and/or high risk populations, such as hospitals, child care centers, certain treatment centers, or when specified by the local medical support staff.
(5) Before performing any type of mold sampling, in any building, be sure there is a clear plan for data evaluation. Understand the sampling limitations and what the results may – or may not – mean.
(6) Always have any samples analyzed by a laboratory accredited by the American Industrial Hygiene Association (AIHA) under the Environmental Microbiology Laboratory Accreditation Program (EMLAP), and proficient in the Environmental Microbiology Proficiency Analytical Testing (EMPAT) program for the specific field of testing methods used.
b. Clearance Sampling Considerations (if clearance sampling is performed)
(1) Clearance sampling is not always needed, especially for small remediation jobs.
(2) General area, HVAC system, and/or surface sampling, performed both before and after cleaning, may be useful to show remediation success. Sampling should only be performed after developing a sampling plan that explains where and how to sample, pass-fail criteria, and what action is required if samples fail.
(3) Clearance sampling should be considered when:
(a) Litigation is involved
(b) Specific health concerns are a problem
(c) Sensitive populations are involved
(d) Must assure personnel that mold was successfully removed
(e) Must document that the containment was not compromised
(f) Must show that a remediated area is ready for occupancy (particularly by sensitive populations)
(g) If more than 10 ft2 of the HVAC system has been remediated.
1. After the ventilation system is cleaned and visually inspected, sample in the ducts, at the supply registers, and/or in the ambient spaces served by the remediated system to make sure the ducts are clean and adjacent spaces are not contaminated.
(4) Remember that the area will not be sterile even after a successful remediation! In general, you are looking for a decrease in the number and types of fungi.
(5) After remediation, the kinds and concentrations of mold and mold spores in the building should be similar to those found outside.
Page 17 of 21

c. Clearance Sampling Procedure (See Figure 13.3-2 for process diagram.)
(1) Perform a visual inspection of the cleaned, remediated area to ensure absence of visible fungal growth. It may be helpful to do a “white glove inspection” – that is, use a clean white glove, sterile cotton gauze square or equivalent. (A clean cloth of another color, suitable to reveal expected type of dust, may be used, particularly if a white or light colored dust is expected.) Wipe across surfaces to check for dust or debris. This is particularly helpful for quickly checking ledges, recessed surfaces, and out-of-the-way areas. Carefully inspect hard to reach spots since they may have been missed or insufficiently cleaned during remediation.
(2) Any areas or surfaces that do not pass the visual inspection must be re-cleaned (i.e., damp wiped with water/detergent, then HEPA vacuumed).
(3) If the remediated area includes a containment, conduct any clearance sampling with the containment in place. Leave negative air systems running so any remaining contamination will not be distributed.
(4) Collect air samples inside the work area using aggressive techniques (i.e., use a leaf blower to move the air in the room before sampling). Total spore counts are sufficient for clearance sampling except in very unusual cases.
(5) Collect air samples outside, preferably at the fresh air intake that supplies the remediated area, to use as ambient controls for comparing with inside results.
(6) You may want to collect control samples in non-contaminated areas of the building that can be used for comparing the inside contaminated/remediated site with a comparable inside non-contaminated/non-complaint area.
(7) Swab or tape samples are usually sufficient to check for adequate surface cleaning.
d. Interpreting Clearance Sample Results (1) Inside sample results should be less than or equal to outside sample results for total
spores, rank order, and biodiversity of taxa.
(2) In pre- and post-remediation sampling comparisons, as a minimum, post-cleaning results should be significantly less than pre, with no indicator species present above background levels.
(3) Indicator species (Aspergillus, Penicillium, Chaetomium, Stachybotrys, Memnoniella) in inside samples should be absent or lower than outside control samples.
(a) For practical purposes, finding 1 or 2 spores of an indicator species inside during clearance sampling should not automatically trigger re-cleaning. However, because the mere presence of some indicator species, like Stachybotrys, may cause employee concern, it may be prudent to repeat the cleaning protocol until no spores are found during clearance sampling if feasible. The investigating team should determine whether zero indicator species spores would be required to pass the clearance test. Document the decision in the sampling plan along with the criteria for clearance.
(4) If indoor total spore concentrations are greater than outdoor results, or if there are reversals/differences in rank order and biodiversity, this indicates that fungal reservoirs may still be present in the work area. Inspect the area for visible contamination. If mold is found, repeat the remediation protocol for the affected area
Page 18 of 21
and contents. If unable to locate visible contamination, search for hidden mold reservoirs and, if found, repeat the complete protocol.
(5) In general, if inside sample results are less than or equal to outside results (total spores, rank order, biodiversity of taxa, and indicator species), the area can be reoccupied. Actual reoccupancy criteria will be specified in the remediation plan.
(6) Medical Support Sampling - In cases with medical diagnoses that indicate suspected or specific fungi, clearance sampling should include viable sample collection so that recovered fungi can be speciated.
(a) If diagnosis is linked to allergic symptoms, total spore counts are essential for clearance sampling because analysis counts all particulates. Remember that dead mold spores can still elicit allergenic responses.
(b) If a genetic signature (target specific primer) is available for a suspected causative fungus, polymerase chain reaction (PCR) testing may also be useful.
e. Other Possible Post-Remediation Tests (1) Carpet - If carpet was cleaned rather than removed, clearance sampling should
include collecting representative samples with a microvacuum on a 1 ft. x 1 ft. template. Sample results should show spore counts, rank order, and biodiversity less than pre-cleaned carpet samples.
(a) Remember that it is almost always best to remove and discard water-damaged carpet. Carpet damaged from clean water may be successfully cleaned if it is properly dried within 24-48 hours and has no visible growth. For gray water damage, salvaging carpet will depend on the extent of damage and the responder’s professional judgment. Without exception, discard carpet damaged by black water.
(2) Surface Cleaning Effectiveness - If you need to confirm surface cleaning effectiveness for decontamination of non-porous or semi-porous materials, collect surface samples using tape, swabs, or wipes. Surface sampling results should be at background levels.
(3) Moisture Testing - Moisture meters can be useful to monitor the drying process for wood (e.g., flooring; structural supports; siding), concrete, brick, carpet, wallboard, and EIFS.
10. AFTER THE REMEDIATION: ENSURING SUCCESS. a. Follow-up inspections are required to ensure that contamination conditions do not recur.
(1) Reinspect the remediated area every 2-3 weeks until satisfied that water intrusion has stopped and mold growth is unlikely to recur. Look for any new water sources or water damage. Also check to ensure that porous/semi-porous building materials that were cleaned remain free of visible contamination.
b. Provide update reports to employees/occupants until the investigation team determines that the contamination has been successfully remediated. Provide a final report to occupants when remediation is complete.
c. Ensure there is an appropriate preventive maintenance plan for the HVAC system and that the building owner understands the importance of strict maintenance.
Page 19 of 21
11. REFERENCES CITED.
13.3-1 New York City Department of Health. Guidelines on Assessment and Remediation of Fungi in Indoor Environments. New York City: Department of Health. 2008. http://www.nyc.gov/html/doh/downloads/pdf/epi/epi-mold-guidelines.pdf; http://www.nyc.gov/html/doh/html/environmental/moldrpt1.shtml
13.3-2 United States Environmental Protection Agency (EPA). Mold Remediation and Schools and Commercial Buildings. Office of Air and Radiation, Indoor Environments Division (6609-J) EPA 402-K-01-001. Washington, DC: United States Government Printing Office. September 2008. www.epa.gov/mold/mold_remediation.html; http://www.epa.gov/mold/pdfs/moldremediation.pdf
13.3-3 Naval Facilities Engineering Command (NAVFACENGCOM). Interim Technical Guidance (ITG) FY03-4, NAVFAC Mold Response Manual. NAVFACENGCOM. June 2003. http://www.wbdg.org/ccb/NAVFAC/INTCRIT/fy03_04.pdf
13.3-4 United Facilities Guide Specifications (UFGS). 02 85 00.00 20, Mold Remediation. UFGS. May 2011. http://www.wbdg.org/ccb/DOD/UFGS/UFGS%2002%2085%2000.00%2020.pdf 13.3-5 EPA. Use of Disinfectants and Sanitizers in Heating, Ventilation, Air Conditioning, and Refrigeration Systems. Office of Pesticide Programs. March 14, 2002. http://www.epa.gov/oppad001/hvac.htm and Supplemental Guidance - Use of Disinfectants and Sanitizers in Heating, Ventilation, Air Conditioning, and Refrigeration Systems. Office of Pesticide Programs. September 23, 2010. http://www.epa.gov/oppad001/hvac-supplemental.html 13.3-6 Education Safety Association of Ontario (ESAO). Mould Growth Prevention and Remediation. http://www.osach.ca/new/MouldV2/MouldChartLetter.pdf
13.3-7 American National Standards Institute (ANSI)/Institute of Inspection, Cleaning and Restoration Certification (IICRC). Standard and Reference Guide for Professional Water Damage Restoration. ANSI/IICRC Standard S500. 2006. http://www.iicrc.org/standards/iicrc-s500/
13.3-8 Manitoba Department of Labour & Immigration. Guidelines for the Investigation, Assessment, & Remediation of Mould in Workplaces. Workplace Safety and Health Division, Manitoba Department of Labour & Immigration. 2001. http://www.bio-chemconsulting.com/pdf/mouldguide.pdf
13.3-9 Health Canada Guidelines. www.hc-sc.gc.ca/ewh-semt/air/in/index_e.html; http://www.hc-sc.gc.ca/ewh-semt/alt_formats/hecs-sesc/pdf/pubs/air/mould-moisissures-eng.pdf
13.3-10 American Conference of Governmental Industrial Hygienists (ACGIH). Bioaerosols: Assessment and Control. 1999. https://www.acgih.org/
OTHER RESOURCES Occupational Safety and Health Administration (OSHA) A Brief Guide to Mold in the Workplace. OSHA Safety and Health Information Bulletin SHIB 03-10-10. Washington, DC: United States Department of Labor. October 10, 2003. http://www.osha.gov/dts/shib/shib101003.html
Page 20 of 21
American Industrial Hygiene Association (AIHA). Assessment, Remediation, and Post-Remediation Verification of Mold in Buildings. 2004. https://www.aiha.org/Pages/default.aspx
IICRC. Standard and Reference Guide for Professional Mold Remediation. IICRC Standard S520. 2008. http://www.iicrc.org/standards/iicrc-s520/
Manitoba Department of Labour & Immigration. A Safe Workplace A Workplace Safety and Health Manual for Your Community. April 1, 2011 http://www.gov.mb.ca/ana/publications/safe_workplace/section-iii/section-iii-f/pubs/swp-9-mould.pdf
Additional useful references can be found by looking at resources listed in Chapter 13 Section 6.
Page 21 of 21