hpe myroom content quick reference guide quick reference guide - content.pdf · july 2018 hpe...
TRANSCRIPT

July 2018 HPE MyRoom Quick Reference Guide - Content Page 1 of 14
HPE MyRoom Content
Quick Reference Guide
Earlier topics in the series
Other helpful topics
These Quick Reference Guides will also help you prepare to host meetings in HPE MyRoom
Getting Started
Meet With Others
Events
Import / add content
Open Content panel
Open a room or chat room
Click Show content panel icon on toolbar to display the Content panel
Content Panel Hidden
Content Panel Shown
Import content
Either:
Drag file from desktop or folder
Drop it into Content panel
Or:
Right-click in the Content panel
Select Import from the menu
Browse to the file on your computer
Click Open
File name will appear in the Content panel
Note: Any file type can be imported but only these can be displayed in center viewing area:
Image files
Converted Microsoft PowerPoint slides
Converted PDF pages
July 2018 HPE MyRoom Quick Reference Guide - Content Page 2 of 14
Import / add content (continued)
Convert Microsoft PPT and PDF files
When you import certain file types you can choose to have:
MyRoom convert each page into a png image that can be displayed in center viewing area
The original file itself imported as a single Content item that other users can export
Conversion options are available for these file types
Windows users
Microsoft PowerPoint
Mac and Linux users
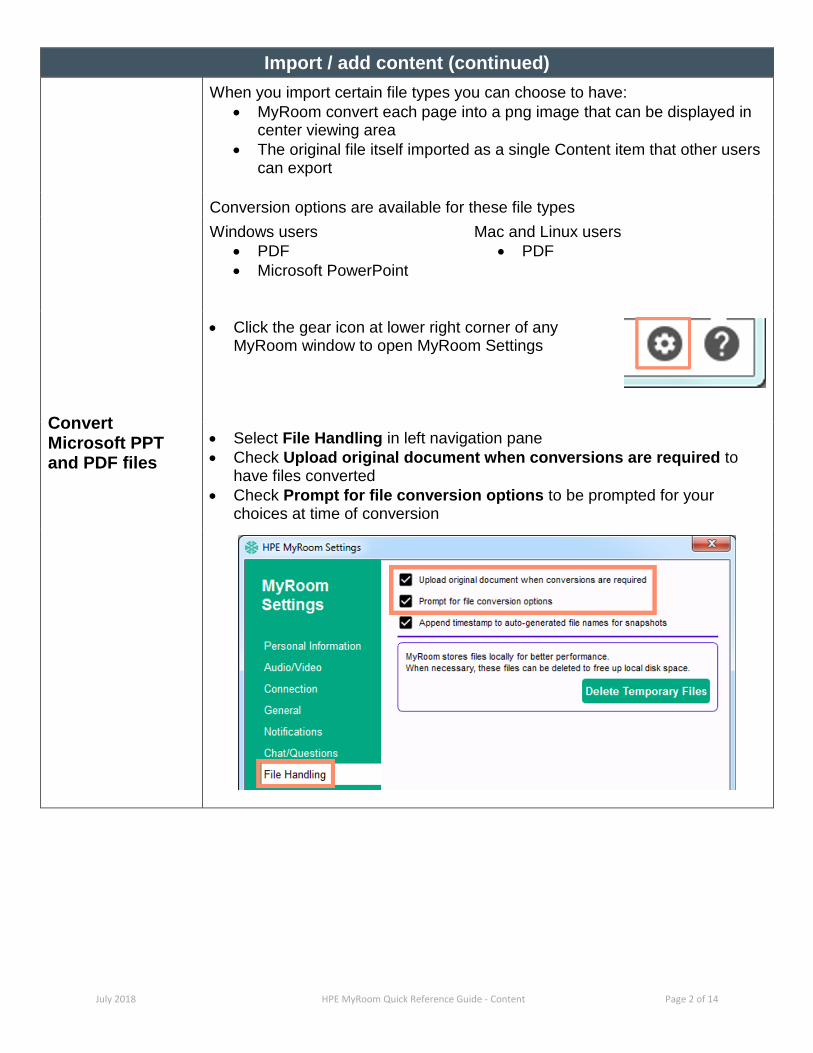
Click the gear icon at lower right corner of any MyRoom window to open MyRoom Settings
Select File Handling in left navigation pane
Check Upload original document when conversions are required to have files converted
Check Prompt for file conversion options to be prompted for your choices at time of conversion
July 2018 HPE MyRoom Quick Reference Guide - Content Page 3 of 14
Import / add content (continued)
Add content
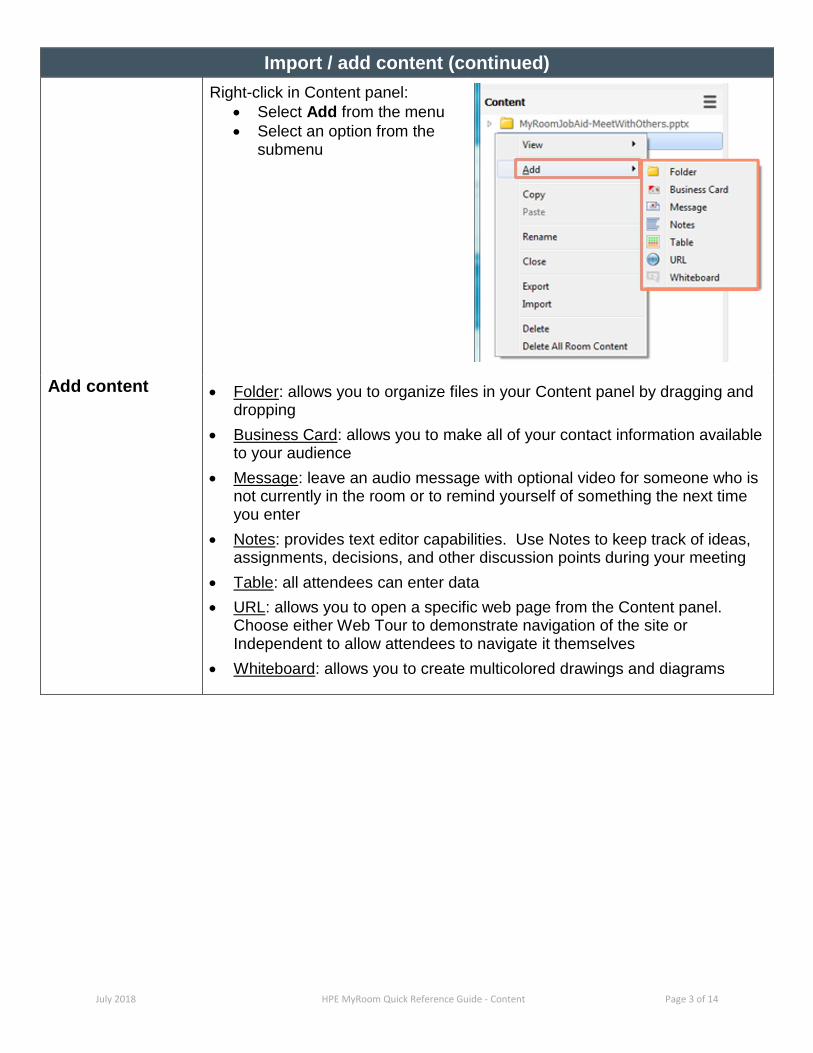
Right-click in Content panel:
Select Add from the menu
Select an option from the submenu
Folder: allows you to organize files in your Content panel by dragging and dropping
Business Card: allows you to make all of your contact information available to your audience
Message: leave an audio message with optional video for someone who is not currently in the room or to remind yourself of something the next time you enter
Notes: provides text editor capabilities. Use Notes to keep track of ideas, assignments, decisions, and other discussion points during your meeting
Table: all attendees can enter data
URL: allows you to open a specific web page from the Content panel. Choose either Web Tour to demonstrate navigation of the site or Independent to allow attendees to navigate it themselves
Whiteboard: allows you to create multicolored drawings and diagrams

July 2018 HPE MyRoom Quick Reference Guide - Content Page 4 of 14
Sharing
Share entire desktop
To share your entire desktop:
Click Share desktop, application or region icon on toolbar
Select Share Entire Desktop from menu
Share window will open for others right away
Share selected monitor
If you have multiple monitors you can choose which one to share:
Click Share desktop, application or region icon on toolbar
Select Share Desktop from menu
Select the monitor you want to share
Share window will open for others right away

July 2018 HPE MyRoom Quick Reference Guide - Content Page 5 of 14
Sharing (continued)
Share a region
To share a portion of your desktop:
Click Share desktop, application or region icon on toolbar
Select A Region of desktop from menu
Drag and stretch the sharing frame to cover the portion of your monitor you want others to see o If you receive popup notifications (from Outlook, instant messaging
programs, etc.), maintain privacy by framing the upper left region of your monitor. (Most popups appear in the lower right corner.)
Click Start Sharing button
Anything you display within the frame will be visible to others
July 2018 HPE MyRoom Quick Reference Guide - Content Page 6 of 14
Sharing (continued)
Share an application
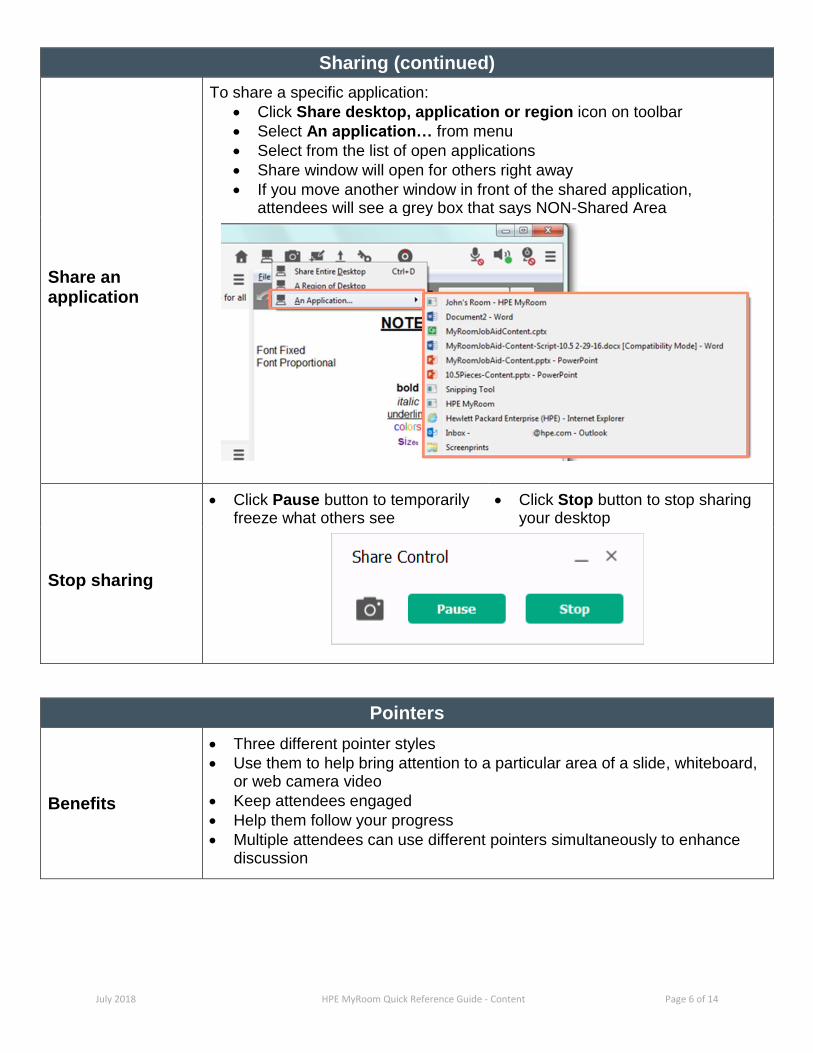
To share a specific application:
Click Share desktop, application or region icon on toolbar
Select An application… from menu
Select from the list of open applications
Share window will open for others right away
If you move another window in front of the shared application, attendees will see a grey box that says NON-Shared Area
Stop sharing
Click Pause button to temporarily freeze what others see
Click Stop button to stop sharing your desktop
Pointers
Benefits
Three different pointer styles
Use them to help bring attention to a particular area of a slide, whiteboard, or web camera video
Keep attendees engaged
Help them follow your progress
Multiple attendees can use different pointers simultaneously to enhance discussion

July 2018 HPE MyRoom Quick Reference Guide - Content Page 7 of 14
Pointers (continued)
Styles
Click Select Pointer icon at top left side of center viewing area
No Pointer (default selection)
Dot Pointer
Arrow Pointer
Picture Pointer
Movement All pointer styles follow your mouse movement
They are not static

July 2018 HPE MyRoom Quick Reference Guide - Content Page 8 of 14
Chat
Show Chat
Click Show chat icon on toolbar to show it
Hide Chat
Hide Chat in your personal view using one of two methods
Either click Hide chat icon on toolbar
Or click X in the right corner of the Chat
Submit chat message
Type in the chat field at the bottom
Hit Enter on your keyboard to submit your message

July 2018 HPE MyRoom Quick Reference Guide - Content Page 9 of 14
Chat (continued)
Headers
Chat headers contain:
Name of person who submitted the message
Date and time it was submitted
Change header style to suit your needs.
Click the gear icon at lower right corner of any MyRoom window to open MyRoom Settings
Select Chat/Questions in left navigation pane
Choose your preferences

July 2018 HPE MyRoom Quick Reference Guide - Content Page 10 of 14
Chat (continued)
History
Chat page will show 500 chat entries A new chat page will be displayed when the next entry is submitted Navigate using Previous chat page and Next chat page arrows Maximum 10,000 entries across 20 pages will be saved Oldest entry will disappear when a new entry is submitted
Save
Click the Save icon to save chat history
Delete
Right-click in chat history
Select Delete Chat History from menu

July 2018 HPE MyRoom Quick Reference Guide - Content Page 11 of 14
Question manager
Question manager is available in rooms but not in chat rooms. You cannot show both Chat and Question Manager at the same time.
Show question manager
Click Show question manager icon on toolbar to show it
Hide question manager
Hide question manager in your personal view using one of two methods
Either click Hide question manager icon on toolbar to hide it
Or click X in the right corner of the question manager
Submit questions and answers
Question:
Type in the question field at the bottom
Hit Enter on your keyboard to submit your question
Answer:
Click a+ next to the question
Type in the answer field that opens under the question
Hit Enter on your keyboard to submit your answer

July 2018 HPE MyRoom Quick Reference Guide - Content Page 12 of 14
Question manager (continued)
Indicator for new questions and answers
When Question manager is hidden:
A number will appear next to Show question manager icon on toolbar
It indicates that new questions have been submitted
The number will be cleared when you show Question manager Note: During events, Participants will only see the number indicator if the room is configured to enable View All Questions for participants. * * Refer to the Events Quick Reference Guide or MyRoom Help documentation for information about participant room configuration.
Save
Click the Save icon to save questions and answers
Delete
Presenters, room owners, and room administrators can delete:
Individual questions and answers o Click the X at far right of the question or answer
All questions and answers o Right-click in Question manager o Select Delete All Questions from menu

July 2018 HPE MyRoom Quick Reference Guide - Content Page 13 of 14
Recording
Record meetings using the in-room push-button recording feature
Duration
You can create an unlimited number of recordings.
Maximum recording duration depends on your MyRoom account: *
5 minutes per recording (with premium add-on)
2 hours per recording (with paid Premium or University subscription) * Recording feature is not available to users who have a basic (3-person) account
Record
Click Show Recording Toolbar icon on toolbar
Click Start button in Record Control box
Use the Record Control box to:
Turn your audio/video devices on and off as needed
Preview what is being recorded
Pause the recording
Stop the recording
What is captured
Recording will capture:
Audio from the room if you have your speaker on while recording
Share window if anyone is sharing their desktop
Anything displayed in your center viewing area while recording o Displayed content o Chat o Question manager o Streaming webcam video if you choose Center video position *
* Refer to the Customize View Quick Reference Guide or MyRoom Help documentation for information about video positions.
July 2018 HPE MyRoom Quick Reference Guide - Content Page 14 of 14
Recording (continued)
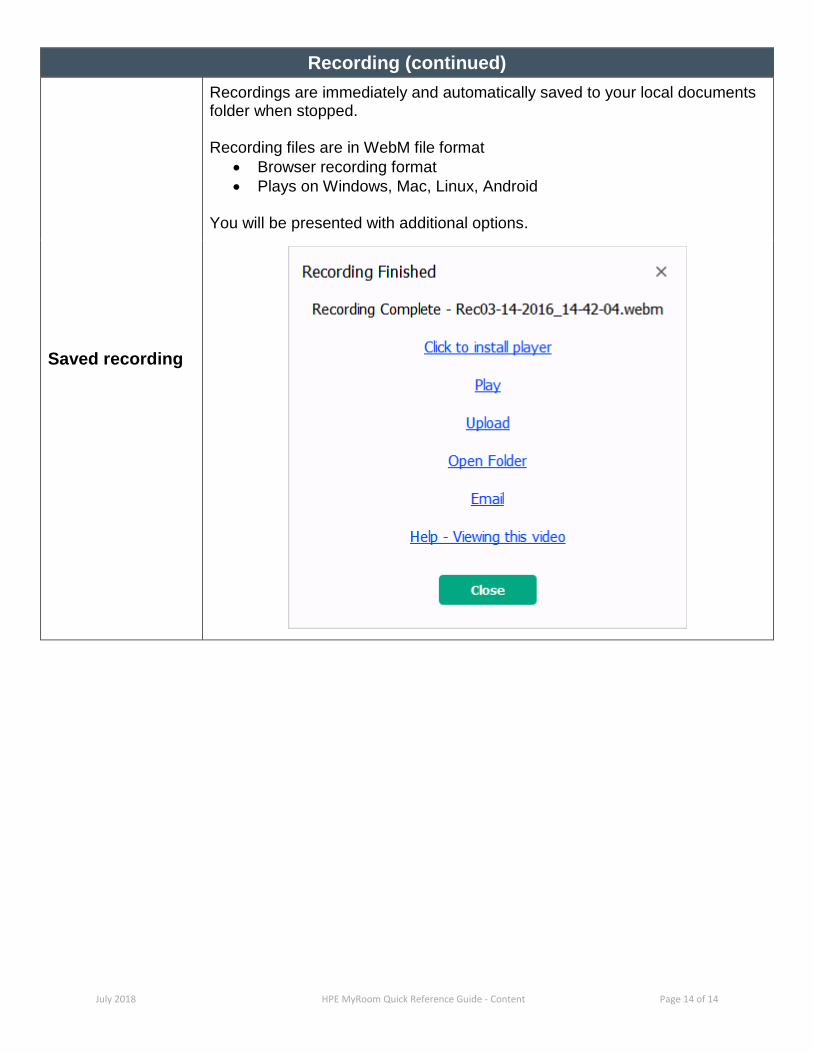
Saved recording
Recordings are immediately and automatically saved to your local documents folder when stopped. Recording files are in WebM file format
Browser recording format
Plays on Windows, Mac, Linux, Android You will be presented with additional options.