how to plant your bulbs...the bulb a chance to make enough food to survive through the dormant...
TRANSCRIPT
sarahraven.com
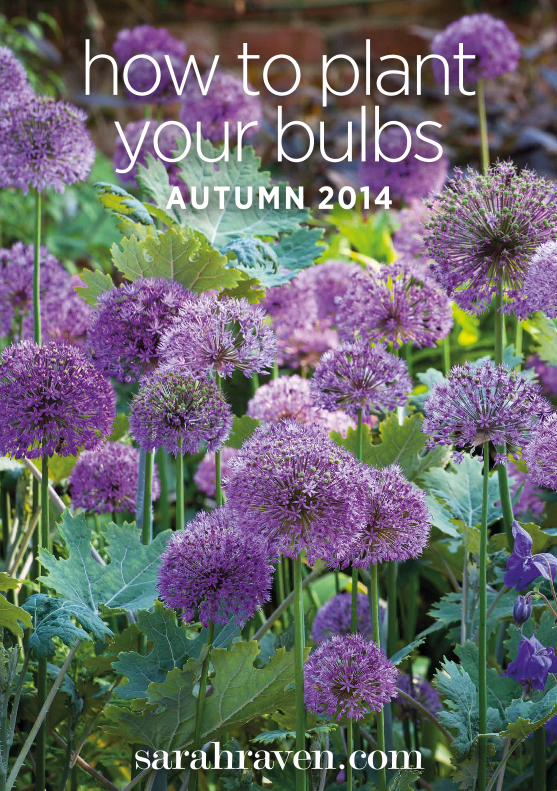
how to plant your bulbs
autumn 2014

2
general bulb planting instructions
general bulb planting instructions – bulbs, corms and tubersMost spring and early summer bulbs are best planted in the autumn. Apart from tulips, you should try and get them into the ground in September or October – daffodils, narcissi, hyacinths and alliums need an extensive root system to flower well, so benefit from getting into the ground as soon as possible. Tulips should be planted later, once the frosts have killed any tulip blight spores that may be in the soil. Planting site Most bulbs like a light, very well-drained soil in full sun, but if I add horticultural grit (or 5-6mm pea shingle) or spent compost to aid drainage to their planting position, they grow happily with me on heavy clay.
Numbers I tend to plant in good drifts, rather than in twos and threes, to avoid a dotty look.
How to plant Most bulbs have a pointed and a blunt end – plant them pointy end up. Anemones and ranunculus are a bit different – see individual instructions.
General bulb planting instructions To make them more perennial, bulbs should be planted deeply, to at least twice the depth of the bulb. Dig a hole or trench, and on heavy soil spread a 5cm (2in) layer of grit (or spent compost) all over the bottom. Push your bulbs into the grit, leaving a gap of at least 3 times the bulb-width between each bulb, then cover them up, mixing more grit into the soil you replace. If you are on heavy ground, mix in about one-third grit to two-thirds soil. After planting, firm the ground with your hand (using your feet can trample the crowns) to get rid of air pockets – watering will help this too.
For the larger bulbs like narcissi and camassia, use a bulb planter with a long handle like a spade. It acts like a corer, removing a cylinder of soil. On heavy soil, add a little grit or spent compost to the newly dug hole, drop in the bulb and move on to the next. As you cut the second hole, this dislodges the first core of soil still sitting in the bulb planter and this can then be placed over your first bulb.
For smaller bulbs like fritillaries, crocus and snowdrops, you can make the holes with a metal post, swivelling it around (or do the same with a garden fork) or use a bulb planter as you would for the larger bulbs (see individual bulb instructions for more information).
3
general bulb planting instructions
Planting and naturalising bulbs in grassThis is more easily done if the grass is short before planting, so cut in the late autumn. This has the added advantage that you’ll see the flowers in the spring much more clearly with the grass cut short. When planting in grass, remember to go for a very natural look, avoiding straight lines and regimental spacing. Scatter the bulbs from the bag with a sweep of your hand like sowing seed and then plant each bulb where it falls. I use a long-handled bulb planter which cuts easily through the turf (as above).
At Kew, they use a different system, peeling back a section of turf, loosening the soil beneath if it is compacted, adding some grit, then scattering the bulbs before covering them back over with the section of turf.
There are a couple of final things to remember with planting in grass: first, not to cut the grass and bulb foliage until all the bulb leaves have turned yellow and second, not to add any fertiliser. This feeds the competing grass more than your bulbs. If the soil is very poor you can use a sprinkling of potash, but never add nitrogen.
Planting in potsBulbs should be planted in pots at the same depth as bulbs grown in the ground. This may not always be possible with the largest bulbs, as it’s important that a large bulb has at least 4cm (2in) of compost beneath it. Use good quality multi-purpose compost and top-dress the pot with a generous layer of grit.
In large pots containing multiple bulbs (eg the Venetian Tulip Collection), plant them one bulb-width apart in lasagne layers – one layer of one variety, the next layer the next variety and so on, with the smallest bulbs forming the layer nearest the top. Cover with compost and firm well, then top dress with grit. See sarahraven.com/bulblasagne for a video and further help.
After careAll bulbs do best if you minimize the number of leaves you cut when you pick the flowers. When the leaves are at the base of the plants it’s easy, but when you cut plants such as lilies and imperial fritillaries, tulips and gladioli, make sure you leave a short section of the leafy part of the stem to give the bulb a chance to make enough food to survive through the dormant period.
It’s also important to leave the browning foliage on your bulbs until every leaf has died right down. Don’t be tempted to clear them up until every leaf is completely brown. After flowering is the time when bulbs photosynthesise and create food, stored in the bulb to help next year’s flower. If you remove the leaves halfway through this process, you’re less likely to have a flower the following year.
I don’t lift any of the bulbs in my garden. Planted deeply and mulched with a generous blanket of mushroom compost, I leave them in the ground to over-winter.
FeedOn poor soil, it’s worth giving almost all spring-flowering bulbs a potash feed in the early spring. This helps with root and bulb formation and will encourage them to stick around and flower on and on for years. We use comfrey pellets, rich in natural potash (available from our website).
0845 092 0283 sarahraven.com

4
autumn bulbs a-Z
autumn bulbs A-Z individual bulb planting instructionsAlliumPlanting site Full sun in well-drained soil (add grit on heavy soils).
Instructions Plant bulbs twice their own depth.
The small and middle-sized alliums can be planted en masse 10-15cm (4-6in) apart (cowanii, caeruleum, nigrum, ‘Purple Sensation’, sphaerocephalon, ‘Graceful’, cernuum, hollandicum aflatunenese, oreophilum and atropurpureum).
The larger varieties (‘Globemaster’, ‘Early Emperor’, ‘Spider’, rosenbachianum, Mount Everest, ‘Silverspring’, cristophii and schubertii) can be planted in groups or individually at a depth of 15cm (6in), but need more space for their much larger heads: cristophii and ‘Silverspring’ need to be at least 30cm (12in) apart, and ‘Globemaster’ and schubertii need spacing at 30-45cm (12-16in).
AmaryllisAmaryllis are a tender bulb from Brazil and so need to be grown inside – frost free – when it’s cold, but once the frosts are over and the nights are no longer cold, they can be moved outside until the end of summer. Think of them as a tender garden plant – not a house plant – and treat them much as you would a precious pot of freesia or non-hardy agapanthus.
For spring Amaryllis flower naturally from March to May and are ideally planted at the end of a dormant season in November or December.
For winter Amaryllis can be forced to flower in the winter if you buy special, prepared bulbs. Forcing them cuts down their photosynthetic, food-making and storing phase after the demands of flowering and may compromise the longevity of the bulb, so you can’t do this to the same bulb every year. Like forcing rhubarb or hyacinths, you need to give the plant a couple of years rest before you force it again, so store this bulb for next year, but allow it to flower at its natural time in the 2nd year, ie spring. To force in time for Christmas, you’ll need to have your bulbs planted by early October.
PlantingDepth In the wild, they root quite superficially, with their huge bulb two thirds in, one third out of the soil. This allows heavy rain to flow away from the crown of the bulb more easily, and lessen the likelihood of rot. You should plant them like this in a pot too.
Planting medium Amaryllis like their soil rich, but exceptionally well-drained, so ideally create a mix from one part well-rotted manure, one part horticultural grit or sand, and two parts leaf mould. Two-thirds good compost mixed with one-third grit also does fine.
Pot size They like to feel confined; put them in a pot just 5-6cm (2-2½in) wider than the diameter of the bulb, with a crock in the bottom for extra drainage. Plant them firmly, really cramming the soil around the bulb to hold them in their elevated position.
Feeding After the plant begins to grow, feeding is a good idea. You can add a complete slow-release fertiliser to the potting medium, or use a liquid fertiliser twice a month when in flower.
Watering Keep the potting medium moist, but not wet. Water from the top using tepid tap water, not from the bottom, and once the water has drained through into the saucer, tip it away. Don’t over-water.

5
autumn bulbs a-Z
In forcersFill the forcer with water, enough to fill the bottom section of the vase, but not to touch the bulb. The roots will grow down into the water. Place the container in a cool, dark room (approx 10-15°C), checking the water level daily, until you see root and top growth (about 2-3 weeks). Move the container to a bright room, but keep it out of direct sunlight. The amaryllis will bloom in 6-8 weeks after being moved into the light, and should last for 4-6 weeks.
Site Keep them in a bright, warm, sunny place, ideally at about 20°C, free from draughts of an open window. A shelf above a radiator is ideal.
Once the plant is flowering, continue the watering and keep it out of direct sunlight, and slightly cooler (10-15°C), but as light as possible to promote a longer flower life. Each individual flower should last two or even three weeks before they brown. As each one fades, cut it off at the top of the stalk and then when the whole stalk is over and begins to sag, carefully cut it off just above the bulb nose.
After flowering Don’t chuck out your amaryllis and start again like most of us do; keep them from one year to the next. Feeding needs to continue and you want to water too, until the leaves begin to yellow in late summer/early autumn. At this stage, cut the leaves back to about 6cm (2½in) from the top of the bulb and remove it from the pot. Keep the bulb cool (5-10°C) and dark, to give it a dormant period for 8 weeks before you can encourage it to come into leaf and flower again. Replant and start watering 8-10 weeks before you would like them to bloom. The older and bigger the bulb, the more flowering stems you’ll get, so it’s worth the trouble of nurturing these mini football bulbs.
Propagating Bulbs older than two years will produce offset bulblets. These may be left attached to the mother and re-potted with her, creating an amazing show, but its best to remove them carefully just before you replant and put them in their own individual pots. These little bulbs will take two years before producing their first flower, but it will be a proud moment when they do.
AnemoneFor all anemones, it is best to soak tubers in a bucket of water overnight before planting. They will double in size and start growing more quickly than if planted dry.
Anemone blandaPlanting site Full sun or partial shade in well-drained soil (add grit on heavy soils).
Instructions These are mini versions of the bit of dried dirt of Anemone coronarias (see below), so soak and plant them in the same way. These look their best planted en masse in grass or on the edge of a shrubbery or wood (see Planting and naturalising bulbs in grass, page 3) and they look lovely edging a border. Left to its own devices, A. blanda ‘Blue Shades’ in particular will gradually self sow and naturalise happily anywhere but deep shade.
Anemone coronariaPlanting site Full sun in well-drained soil (add grit on heavy soils).
Instructions These have strange looking tubers and resemble a bit of dried dirt. Soak (as above) and plant them on their (longest) side, rather than upright, about 7-8cm (3½in) deep and 10-15cm (4-6in) apart. They are said to not be properly hardy, but I’ve seen them emerging from snow in the Omolos plain in Crete. The key thing is good drainage. Also excellent forced in pots for inside and good in pots or beds in a cool greenhouse or conservatory, where they should flower by mid February.
0845 092 0283 sarahraven.com
6
autumn bulbs a-Z
Anemone x lipsiensis ‘Pallida’Planting site Prefers partial shade in a dampish soil, rich in leaf mould.
Instructions Soak (as above) and then lay the twiggy rhizomes out 7cm (3in) below soil surface, 7cm (3in) apart. To propagate, separate rhizomes in spring and replant.
Anemone nemerosa Planting site Partial shade in moist but well-drained soil.
Instructions Soak (as above) and plant 7-8cm (3½in) deep 10-15cm (4-6in) apart. They will slowly naturalize in grass or in a wooded area.
Camassia Planting site Full sun or partial shade in almost any soil bar dry chalk.
Instructions Coming from marshy meadows in the United States, Camassia love moisture and grow and do well even in damp soil on a pond edge. Plant 10cm (4in) deep and 15cm (6in) apart. You can grow them in a border and they naturalize well in grass (see ‘Planting and naturalising bulbs in grass’, page 3).
Chionodoxa (Glory of the snow) Planting site Full sun or partial shade in almost any soil.
Instructions These are very easy bulbs, which naturalise and self sow easily. They look best en masse. Plant 8cm (3in) deep and about 10cm (4in) apart and just leave them to get on with it.
Convallaria majalis (Lily of the valley)Planting site Prefers shady corners and moist growing conditions to hot, sunny ones.
Instructions Soak them in a bucket of water overnight and then lay the long thin rhizomes horizontally, just under the surface of the soil, 5-7cm (2-3in) deep and 20cm (8in) apart. Water them in and give them a mulch of leaf mould or good compost. Divide in September-November. Once well established, you can dig up a clump in autumn, pot them up and force into flower early inside, sometimes working brilliantly for Christmas. CrocusPlanting site Full sun or partial shade in almost any soil.
Instructions Space the corms about 10cm (4in) and cover with 8-10cm (3-4in) of soil.
Crocus can be naturalized in grass very easily if the grass is not too coarse and is not cut until the foliage dies down in June. At Great Dixter (Christopher Lloyd’s garden near us in East Sussex), even though crocus bulbs are small, they are still planted singly by the thousand into grass using a bulb planter.
The job of planting is much quicker with two people. You’ll need a bucket of spent compost (or grit on heavy soil) and a bucket of crocuses. After punching 20 or 30 holes (and saving the soil plugs to cover them over later), stand back and squint your eyes to check that the distribution is natural.
Once you’re happy with the pattern, start planting the bulbs. Half an inch of spent potting compost needs to go in the bottom of each hole. You can also use a fresh bag of multipurpose compost mixed with 50% grit on heavy soils. Then place an individual crocus on top of that and then another half inch of compost. Break a little soil off the bottom of the soil plug so it will sink to the right level, and place it over the bulb.
7
autumn bulbs a-Z
It’s worth knowing that snowdrops thrive on the periphery of your grass, where the turf is often semi-shaded and less dense, whereas crocuses are happy in thick turf with the sun fully on them. Purposely look for places where the winter sun hits them, so your crocus will open wide and give maximum drama and impact.
Crocuses are also lovely in pots inside or out. They look fantastic and it’s a good way of working out which ones you like before you put 100s into your garden or grass. In pots, you really want to cram them in, almost touching. Inside in the warm, they open up fully, performing like a party trick. Once in flower, it’s essential to keep them cool or they go over in 4 or 5 days. Kept cool, you should triple this flower life. Put them on the doorstep outside when you don’t need them as a table centre. Cyclamen
Planting site Partial shade in well-drained soil. Cyclamen hederifolium is more vigorous than Cyclamen coum so plant this species where it can happily romp away.
Instructions Cyclamen like to be shallow-planted, so only cover with 3cm (1in) of soil, and they love a wooded area, deep in leaf mould. They dislike root disturbance so are best left alone to get established. They like good drainage, but ensure they don’t dry out completely in the summer.
EremurusPlanting site A well-drained, sunny, open position without too much shading their leaves, and protection from strong winds.
Instructions Spread out the roots on a bed of sand or add grit when you plant them, 6-8cm (2½ -3in) deep and 30-45cm (12-16in) apart. On my heavy soil I tend to start them off in large pots, sinking them in the ground and then lifting after flowering. Water well if the weather is dry and cover with a layer of mulch in the winter if leaving in place.
Erythronium (Dogs tooth violet)Planting site Shade or sun, with moist soil.
Instructions Plant the bulbs 8cm (3in) deep and 15-20cm (6-8in) apart. Leave undisturbed in the same position for years so they can get established.
FritillariaPlanting site Full sun, with moist soil. These bulbs need an annual potash feed.
Instructions Plant larger varieties 15cm (6in) deep, smaller varieties at 8cm (3in). It is best to plant the bulbs on their sides to prevent water getting into the crowns. Fritillaria meleagris look brilliant naturalised in grass (see ‘Planting and naturalising bulbs in grass’, page 3).
Galanthus (Snowdrop)Planting site Shade or partial sun, in almost any soil.
Instructions Plant bulbs 10cm (4in) deep (15cm (6in) on very light soils) and 8-10cm (3-4in) apart. Leave undisturbed for a few years until they look overcrowded, then as the foliage begins to die down they should be split and replanted. You can gradually carpet huge areas of grass or woodland in this way and they look fantastic (see ‘Planting and naturalising bulbs in grass’, page 3). Snowdrops also grow well in grass and thrive on the periphery, where the turf is often semi shaded and less dense.
0845 092 0283 sarahraven.com
8
autumn bulbs a-Z
GladiolusPlanting site Full sun, in well-drained soil.
Instructions Most gladioli you plant in the spring, but with the species varieties (Gladiolus communis subsp. byzantinus and ‘The Bride’), plant corms in the autumn, 15cm (6in) deep and about 15cm (6in) apart. They also look wonderful in pots, spaced more closely. The species varieties are also hardier than the grandiflora hybrids so can be left in the ground in a sunny, sheltered spot and will get better year on year.
Hyacinth Hyacinths are one of the most perennial of garden bulbs. Unlike tulips, you can expect them to come up again, year after year. Beware that hyacinth bulbs are toxic, so wear gloves or wash your hands well after handling.
Planting site Full sun, in very well-drained soil. They thrive on a good baking in the summer.
Instructions In the garden, plant them 8-10cm (3-4in) deep, 15cm (6in) apart onto a bed of grit, at least 4cm (1½in) deep if you have heavy, poorly drained soil. Propagate them by dividing clumps after flowering then immediately replanting.
In pots As well as growing in the garden, hyacinths look marvellous in pots. They can be forced to flower early inside, or left for their natural time, bang outside your front door so you emerge out into the world through their cloud of perfume.
Put in a crock at the bottom for drainage. For pots growing outside, use a soil-based compost, lightened with about one third grit, finishing off with a half inch layer of grit on the top to prevent the carpeting of mosses and liverworts. For pots staying inside, use a peat-free compost, or in a pot with no holes use bulb fibre, which includes charcoal and grit in the right proportions.
Forced Hyacinths for indoors For growing hyacinths indoors, you can buy prepared bulbs which have been pre-chilled. They will need to be potted up in free draining compost. Alternatively they can be placed in glass hyacinth forcing vases with the water just below the bottom of the bulb. These should then be placed in the cold for at least nine weeks to flower well, with a temperature below 10°C and a period in the dark, so that the root has time to develop before the light pulls the flower and leaves from the bulb. If you’ve got a cellar, garage, or dark corner of a potting shed, this is easy enough to do.
Once the sprouts are up to a good 3cm (1in), bring the pots in and they’ll be in flower in about 3 weeks. To stop the stems and leaves flopping about, it’s a good idea to create a nest of twigs to support them.
Hyacinthoides (Bluebells)Planting site Partial shade, ideally below deciduous trees or shrubs, in almost any soil.
Instructions Bluebells seem to be as happy in Sussex clay woods as they are in beech woods on chalk (eg Hampshire and the Chilterns) with soil as dry as it gets.
Plant 15cm (6in) deep and 15cm (6in) apart. Leave undisturbed for a few years until they look overcrowded, then as the foliage begins to die down, they should be split and immediately replanted. You can gradually carpet huge areas of grass or woodland in this way and they look fantastic (see ‘Planting and naturalising bulbs’ in grass, page 3).

9
autumn bulbs a-Z
IpheionPlanting site Partial shade in well-drained soil.
Instructions In the garden, plant 7cm (3in) deep and 7cm (3in) apart. Protect the bulbs in winter with a thick mulch. I also grow these for early pots inside in a cold greenhouse and then bring them in as ‘houseplants’ in February.
Iris reticulata and I. histroidesPlanting site Full sun in well-drained soil.
Instructions Plant 7cm (3in) deep and 10cm (4in) apart. These iris are also lovely in pots for the house (out of reach of marauding sparrows which tend to pick at their flowers) and will be in flower in February forced on a sunny windowsill. Once in flower, it’s essential to keep them cool or they go over in 4 or 5 days. Kept cool, you should triple this flower life.
LilyLilies can be planted at any time during the autumn, winter or early spring. As long as they are in by the end of March, they’ll be fine.
Planting site Sun or light shade, where they won’t be disturbed. Lilies are reliably perennial – reappearing for year after year – so bear this in mind when you choose where to plant them. Most colours stay better with some shade, particularly the pinks.
Instructions I always plant lily bulbs in clumps of a minimum of three or five. Without these numbers, you get a very dotty effect. Dig a hole for each group at least 20cm (8in) deep. I dig out a trench or shallow hole, taking up as much space as I have room for between other plants. It’s just one big hole, dug at the same time, not lots of mini cores. Spread a 5cm (2in) layer of grit all over the bottom. Drainage is the most important thing. All lilies flower better and live longer if the soil is not cold and clammy, with feet in the shade, flowers in the sun.
Plant them pointy end up. Don’t worry if the bulbs have a sprout – plant them with the sprout just above ground and, even if it is bent, it will right itself in three to four weeks.
Mark clearly wherever you plant a lily bulb so you don’t later slice through it, and protect against slugs. Alternatively, start into growth inside in a pot for planting out into gaps in late spring. That’s what I often do at Perch Hill.
In pots Plant the bulbs using a loam-based compost mixed with grit – two-thirds compost, one-third grit. They like to be fed while they’re growing; ideally give a liquid potash feed every two weeks, as well top dressing with as a slow-release fertiliser.
Aftercare The main current issue with lilies is lily beetle. These are scarlet, easy to see, small beetles which munch away on the lilies’ foliage and flowers through the spring. We’ve got on top of lily beetle at Perch Hill by checking all our lilies regularly and squashing any beetle we see (particularly April-May when they are at their most active). See our website for pest control.
0845 092 0283 sarahraven.com

10
autumn bulbs a-Z
Muscari (Grape Hyacinths)Planting site Full sun in almost any soil.
Instructions Plant 8cm (3in) deep and 8cm (3in) apart.
Muscari armeniacum is invasive and can take over a bit if given the room! They are good in pots, and this is an effective way to contain them. ‘Valerie Finnis’ is an excellent variety for naturalising in sunny grass (see Planting and naturalising bulbs in grass, page 3). It flowers long and hard and never becomes invasive.
Forced Muscari for indoorsGrape Hyacinths are very easy to force and flower for ages. Plant in a shallow pot (approximately 7cm (3in) deep) with drainage holes in the bottom. Fill loosely with potting mix. Place the bulbs close together, but not touching, pointed end up and their tips level with the rim of the pot. Cover with additional potting mix, leaving tips exposed. Water thoroughly.
Move to a dark, cool location (4°C) such as an unheated garage or fridge. Avoid storing bulbs near ripening fruit or vegetables, which give off ethylene gas which can damage the bulbs. Keep them in cold storage for about 10 weeks, with the compost barely moist. When shoots reach about 5cm (2in) tall, bring the pot out of the cold and place in a slightly warmer place (10°C) with low light intensity. Increase watering, keeping the soil moist. Over the next few days, gradually move it towards a sunny window, turning the pot every day for even growth. When in full bloom, keep in a bright location out of direct sun to prolong the bloom. After flowering, store until the following spring or plant out in the garden.
NarcissusPlanting site Narcissi are very tolerant bulbs. They’ll grow well on a light, sandy soil in full sun and grow happily with me on heavy clay if I add lots of grit to their planting position and they’ll grow well in partial shade.
Instructions Plant them pointy end up, anytime from August to November, 10- 15cm (4-6in) deep with 7-10cm (3-4in) between each bulb.
Dead-head them once they have flowered, to help next year’s flowering. Do not remove the foliage; leave it for at least six weeks after flowering – or longer – and this will also help next year’s flowers. Mowing daffodil foliage off too early when they’re planted in grass is the most common cause of blind, non flowering bulbs. There is an exception to the dead-heading rule with varieties such as N. pseudonarcissus and other species which will self-sow. With these, leave the seed heads on until they have opened and dispersed their seed (late May-June). You can also divide overcrowded groups in late summer and plant offsets in other parts of the garden.
In pots Fill your containers with peat-free compost and plant bulbs 10-15cm (4-6in) deep with 5cm (2in) between bulbs to give you a spectacular show for inside or out.
Forced narcissi for indoorsPaperwhites are the easiest and quickest bulbs to flower inside. They look and smell wonderful. ‘Avalanche‘ and ‘Cragford‘ are also superb, but take longer to bloom.
Use a loam-based compost, lightened with some grit for planting. Narcissi are large bulbs with an extensive root structure, so large, deep pots are ideal. Plant the bulbs just below the soil surface. They will need a spell in the cold to ensure they flower well, with a temperature below 10°C, but they do not require a period in the dark. Narcissi Paperwhites and ‘Avalanche’ need only 4-6 weeks from planting to flowering, and ‘Cragford’ 8-10. Keep the compost moist but not dripping wet through this whole time. Use a decorative nest of twigs to support as they grow to keep them from flopping.
11
autumn bulbs a-Z
Triteleia Planting site Full sun or partial shade, in well-drained, fertile soil.
Instructions Spacing 10cm (4in) apart and 8cm (3in) deep, in groups to create a fantastic display. Water freely once growing begins, and dead-head as necessary.
Scilla siberica Planting site Well-drained soil in full sun or partial shade. Instructions Plant 5cm (2in) apart, 8-10cm (3-4in) below the surface. These will spread without being invasive, so leave room for this or plant in pots.
Tulip Planting site Full sun in well-drained soil.
Instructions I plant my tulips in a different way to the rest of my bulbs. They go in later and deeper, in trenches or holes up to 20cm (8in) deep. Deeper planting means you won’t need to stake and also means your bulbs are more likely to flower year after year. Tulips don’t need to be planted until October-November. They don’t start putting roots down until then and the cold temperatures help to wipe out viral and fungal diseases that lurk in the soil and which may infect the bulbs. Planting late is a traditional means of disease protection.
If you garden on heavy soil, dig a trench/hole and cover the base with 5cm (2in) of washed sharp sand, horticultural grit, or spent compost. Add a handful of bone meal to encourage formation of next year’s flowers and mix it into the soil and grit at the base of the hole.
Place the tulip bulbs pointy end up, about 8cm (3in) apart and cover with soil. Again, if you garden on heavy soil, you can mix with grit, at approximately one-third grit, two-thirds infill soil. If you’re short of space, cover the bulbs with soil and then add a second layer of bulbs before filling in the hole. There is still enough soil above the bulbs to allow you to over-plant without damaging them.
In pots To get dense and flowery spring pot displays, you have to try layering bulbs in what the Dutch call a bulb lasagna, layering them up one on top of another. The largest and latest flowering bulbs go in deepest, moving to the smallest and earliest in the top layer. The emergent shoots of the lower layer bulbs just bend round anything they hit sitting over their heads and keep on growing. Done like this, you need to plant the bulbs slightly further apart than you would in a pot with a single layer, so 2-3cm (1-1½in) apart is about right. The first layer can go as deep as 28-30cm (11-12in), then cover them over with 5cm (2in) of potting compost, before you place the next layer of bulbs.
Aftercare I have found no benefits from digging up tulip bulbs after flowering each year so as a result I leave them in place (remembering to let all the foliage die right down before tidying up). In mid June I rake up all the dead foliage, mulch with 5-8cm (2-3in) of compost or well-rotted manure, and over-plant with half-hardy flowers or vegetables like courgettes or pumpkins.
Forcing Tulip ‘Calgary’A beautiful pure white tulip, which when forced comes into flower in February/March.
Plant using a loam-based compost lightened with some grit. Plant 3 bulbs to a 11cm pot, 5 bulbs to a 13cm, or 7-8 bulbs to a 2 litre. Plant the bulbs just below the soil surface anytime from early October. They will need a 16 week spell in the cold to ensure they flower well, with a temperature below 10°C, but they do not require a period in the dark. Then bring them inside and so increase the temperature to induce flowering. Keep the compost moist but not dripping wet. Planting to flowering is about 20 weeks.
0845 092 0283 sarahraven.com

1 Woodstock Court, Blenheim Road, marlborough, Wiltshire Sn8 4an
For more growing advice, Sarah’s videos and gardening articles visit our website:
sarahraven.com