how to begin building your global fellow electronic ...how to begin building your global fellow...
TRANSCRIPT

How to begin building your Global
Fellow electronic portfolio in ManeSync
An electronic portfolio is a personalized and interactive product that contains a collection of
artifacts, allowing students, faculty, and staff to showcase their educational and professional
accomplishments. With the ePortfolio tool, users are able to input information and artifacts to
share with others in a polished format (e.g. resume).The ePortfolio tool is important for students
because it serves as a means to present, assess, and reflect on work they’ve accomplished over
the course of their collegiate careers. As Global Fellow members, the ePortfolio tool will be
critical to your assessment of student progress, as well as your own. Let us begin…
1. First, go to the myLeo homepage at https://leo.tamuc.edu/ and log on to your account using
your Campus Wide Identification (CWID) number OR directory username and password.
Do NOT use the Internet Explorer web browser.
2. In your myLeo account, look to the top right and click the ManeSync tab. If you have already
populated your ManeSync account, you may proceed to step 4.

3. The “Welcome to OrgSync!” page will appear if you have not accessed this page before. You
are only required to fill in the highlighted boxes that are marked REQUIRED. You may also
upload a profile picture. When you are ready, click NEXT.
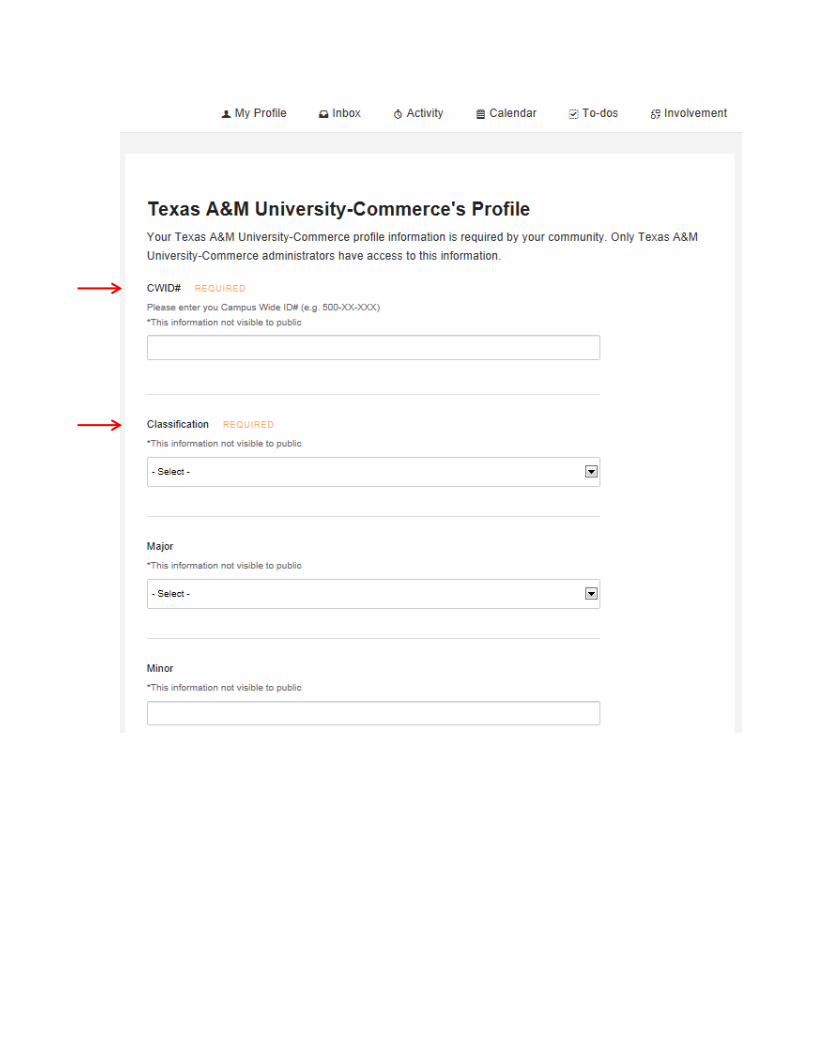
4. On the “Texas A&M University-Commerce Profile” page you are only required to fill in the
boxes that are labeled REQUIRED. When you are ready, click FINISH at the bottom of the
page and you will be redirected to your “My Profile” page.

5. Click your photo icon in the top right corner of the screen. A dropdown menu will appear-
click the “ePortfolio” tab.
6. You will be prompted to create a portfolio URL. Spell out your first and last name, with no
spaces and all lowercase letters (e.g., johndoe). Click “Reserve Name” after entering your
URL name. If it is unavailable, continue creating names until you find one that is available.
7. Adjust privacy settings according to your preferences.
johndoe johndoe

You can also add other contact methods. After entering additional information, click “SAVE” at
the bottom of the screen.

8. Edit the electronic portfolio sections by clicking on each topic to add information. Be sure to
click “SAVE” at the bottom of the page after editing each section. Provided below is a table
listing entries and where they should go in the ePortfolio:
Entry Section Label
Global Travel Involvement Global Travel-insert name of
travel program
Global Events Involvement Global Event-insert name of
event
Global Courses Academics Global Courses Developed
and/or taught-insert name of
course
Global Courses Syllabus Documents Global Course-insert name of
course or insert name of
artifact
Global Publications
Global Presentations
Employment Global Research. Then put the
publication/presentation
citation in the description
section.
Service to Profession Employment Service to Profession – List
the service citation in the
description
Funded Grants Employment Funded grants – Global
Research/Project Name
Global Research (paper,
project, theses, conferences,
presentations)
Documents Global Research-insert type
and name of the document and
upload the artifacts
Personal and Professional
Development activities
(Outside School)
Involvement Personal or Professional
Development-insert name of
event or activity

Note: You can also click on the sign and drag and arrange the order of entries. Make sure
you click SAVE after you arrange the order.
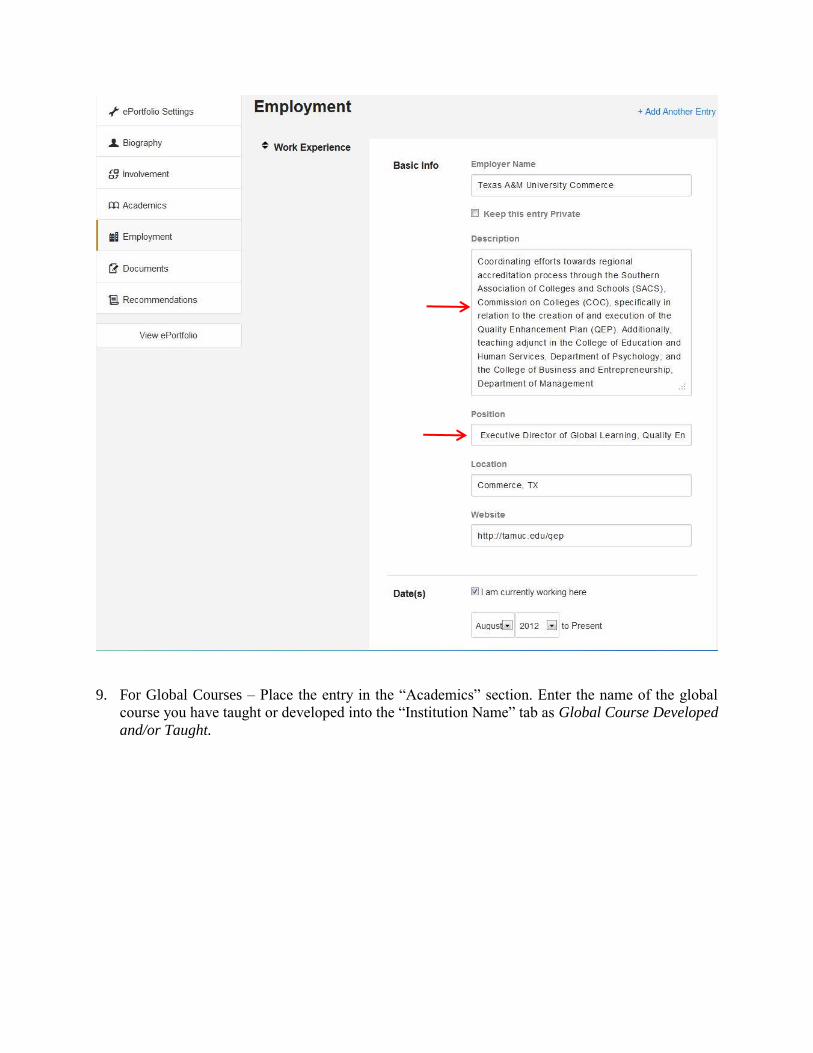
9. For Global Courses – Place the entry in the “Academics” section. Enter the name of the global
course you have taught or developed into the “Institution Name” tab as Global Course Developed
and/or Taught.

10. Provide the dates taught of the course, name of the course, and course description in the
following boxes. The description should include the student learning outcomes addressing
“Preparing Students for an Interconnected World.”

11. For Global Courses Syllabus – enter the course syllabus into the “Documents” section by
selecting “Add another Entry” Label the file name as “Global Course – insert name of course
– insert name of artifact”. Save your entries.
12. For Global Events- enter the event into the “Involvement” section by selecting “Add another
Entry” Label the entry as “Global Event- insert name of event.” Be sure to complete the
reflection for each entry. Save your entries.
Note: You can also click on the sign and drag and arrange the order of entries. Make sure
you click SAVE after you rearrange the order.

13. For Global Travel- enter the program into the “Involvement” section by selecting “Add
another Entry.” Label the entry as “Global Travel- insert name of travel program.” Save your
entries.

14. For Global Research- upload the paper, project, theses, conference and/or presentation that
you and the student(s) were involved in to the “Documents” section by selecting “Add
another Entry.” Label the entry as “Global Research- insert type and name of document.”
Save your entries.

15. For Personal and Professional Development- enter any activities and events (that occurred
outside of campus) into the “Involvement” section by selecting “Add another Entry.” Label
the entry as “Personal or Professional Development- insert name of event or activity.” Be
sure to complete the reflection for each entry. Save your entries.

16. Once you are satisfied with the section entries, select “view ePortfolio” to see the web
format. Each section of the ePortfolio is interactive. Click a section and it will expand to
present all entered information. Select “Download” to preview your ePortfolio in a polished
pdf resume format. You may save this pdf and share.


The shareable URL (located at the top of your resume) can be sent to anyone and they will be
able to see your interactive ePortfolio.
Congratulations!
Should you encounter any errors, please contact OrgSync via phone or email:
(972) 907-0900 or [email protected]