home-dzine online november 2011
DESCRIPTION
Free publication that offers advice, ideas and inspiration for homeovers - whether you own your home or rent it.TRANSCRIPT
Home-DzineIDEAS AND INSPIRATION FOR YOUR HOME
November 2011
online
In this issue ...• Make dining chairs • DIY indoor/outdoor cart• Colourful cushions • Slipcovered bench• Creative centrepieces • Upholstery fabrics and more...
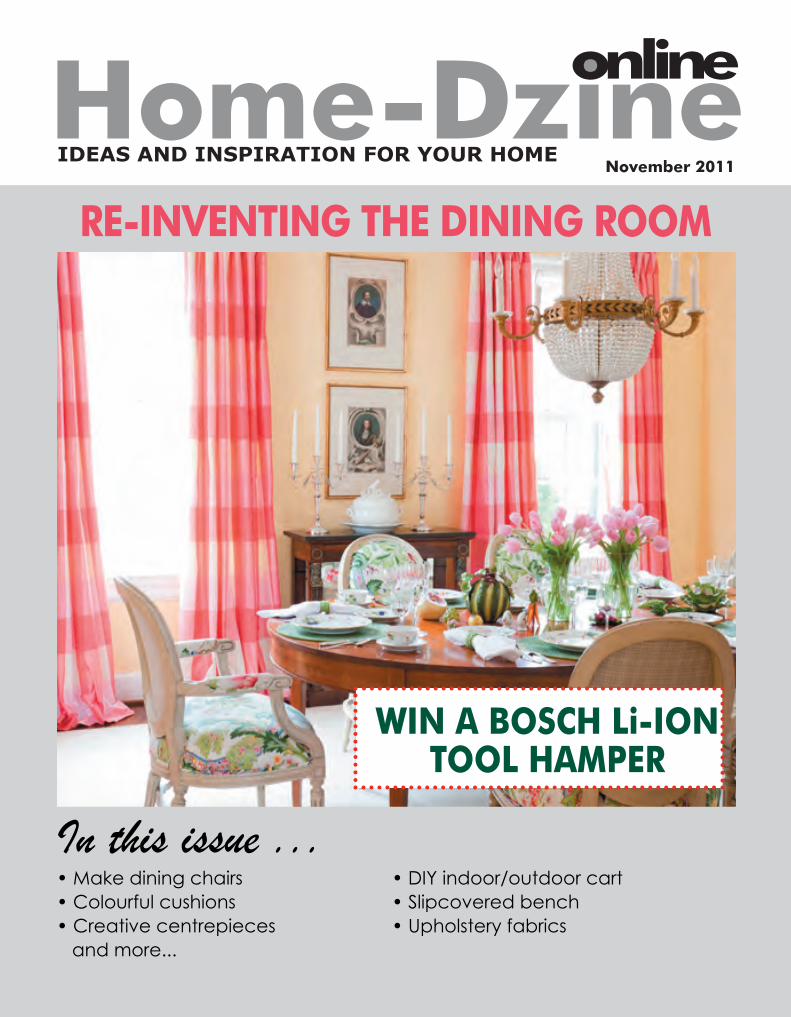
RE-INVENTING THE DINING ROOM
WIN A BOSCH Li-ION TOOL HAMPER

Home-Dzine Online is written and compiled by Janice Anderssen. All projects in this issue, or any other issue, remain the property of Home-Dzine and Janice Anderssen, or the respective copyright holders, and may not be copied or reproduced in any manner whatsoever without written permission.
Getting bigger all the time!
This month’s issue is even bigger and, hopefully, better. As from next year Home-Dzine Online will bring you even more. If you’re not yet a subscriber - sign up fast - as next year the new issues will be for subscribers only.
Don’t forget to drop us a line at any time ([email protected]) if there is a particular project you would like to tackle.
Enjoy!
Janice
a word or two
DIY Divas at the recent DIY Workshop at Black Eagle Guest House.
3RE-INVENT
YOUR DINING ROOM
16PRACTICALSEATING
18MAKE YOUR OWNUPHOLSTERED
DINING CHAIRS
12CREATIVECENTREPIECES

CLICK HERE FORNOVEMBER 2011 WORKSHOPS
DIY DIVAS WORKSHOPSLAUNCHING AT
VANDERBIJLPARK
42GARDENING
26EASY
COLOURFULCUSHIONS
28 CHOOSING FABRIC
35DIY
INDOOR-OUTDOOR CART
47GIRL TALK

2
Buy online at www.lapa.co.za, Exclusive Books and Kalahari.net
With 128-pages of tips, tricks, techniques and
projects for the beginner DIY enthusiast,
there’s something for everyone in the new
English and Afrikaans books.
Full colour and detailed step-by-step instructions guide you through each
and every project,with tips and techniques
on using the various tools, accessories and
attachments.

3
RE-INVENTING THE DINING ROOM
Don’t hide your dining room away in a corner. Let it be a feature all on its own!
imag
es: a
hia

4
As you page through this month’s issue, you will come across our project that shows you how easy it is to make your own upholstered dining chairs. Not only is this an affordable way to add stylish chairs to your dining room, it also allows you to be creative with both design and fabric.
I truly believe that with a little imagina-tion, a few basic power tools, and the desire to create - you can re-invent any dining room - or dining space.
FURNITURE
Let’s start with the most important pieces for any dining room: dining chairs and a table.
Circular, oval, square or rectangular - choose the most practical shape to fitinto the available space. A circular table easily fits into a small corner, with spaceto pull out chairs. Whilst a rectangular table with banquette seating on one side fits nicely into a long, narrow space.
For many homes, the dining room needs to be dual-purpose and serve as both a formal and casual dining room. Designing and decorating a dining room to be versatile allows for an easy transition when the
occasion arises.
No matter how small the space, there are so many ways to create a beautiful setting for casual for formal dining - without spending a fortune!
5
imag
es: s
tanley
furn
iture

6
In an open plan setting, choose a table that mirrors the style of the rest of the space. For example: A rectangular or square table works well when placed in a dining space next to a kitchen with square-line cabinets.
If the kitchen features circular shapes - perhaps a kitchen island - then a circular or oval table would work well.
Look at all the elements in the open space to determine the best shape for your table. This can include anything from arched door openings, a ceiling motif, or larger pieces.

7
Design your dining room in line with that of the rest of your home. It’s easy to
incorporate design elements to set the scene.
imag
es: n
ew en
gland
jour
nal

8

9
TEXTILES AND FABRICS
Upholstered Dining Chairs
If you have decided to make your own dining chairs, you can choose your own fabric, but if you’re buying dining rooms chairs, you need to select fabrics that are going to work well in the finishedspace.
Being more expensive that window treatments, it makes sense to choose the fabric for the chairs first and then selectfabrics for drapes.
This is a personal choice unless you are using the services of an interior designer, in which case they will advise you. But bear in mind that you should choose fabrics to complement the style of furniture. If you’re not sure - browse Home-Dzine, or search on the Internet for ideas and inspiration.
It is also essential to select the right type of fabric. Thicker, non woven fabrics will wear better than silks, so preferably select upholstery-classed fabrics for dining chairs - if you are upholstering your own.
Curtains and Window Treatments
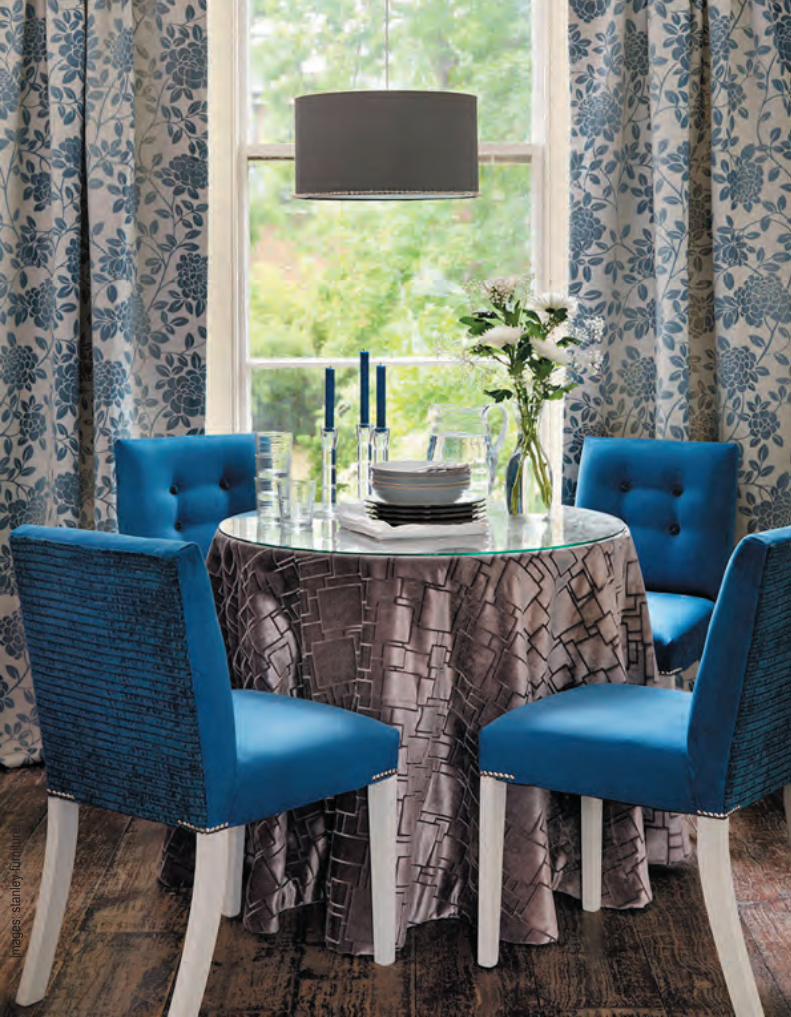
Having selected the fabric for your dining chairs, you’re ready to decide on fabric for curtains or window treatments. This decision should be easier now that the chairs are out of the way, but you still need to be careful to tie the look together. With a busy pattern on the chairs - keep curtains plain or softly patterned. If the chairs are plain, you can go to town on selecting fabric for windows.
Plain and bold-patterned fabrics complement this eclectic dining room, while solid velvet adds a luxurious touch to an informal dining space.

10

11
LIGHTING
As with every other room in the home, lighting is important for a dining room or dining space.
This is one area that definitely benefitsfrom layered lighting - or various levels of lighting - that can be adjusted according to the mood or setting that you want to create.
A pendant light or chandelier is a ‘must-have’ buy for over a dining table. Not only does this define the space, it adds elegance and sophistication to any dining room.
Next on the shopping list would be wall sconces, or table lamps that can be placed on a dresser or server within the dining room.
And finally, set the mood with candles.
TABLEWARE AND ACCESSORIES
Every home should have one set of quality crockery and cutlery - even if it only comes out of storage one a year!
Dressing the table for formal dining or entertaining friends, you want to set a table that set the tone for the evening or celebration.
The always-ready white crockery set is perfect for dressing up or down, and you can easily add elegance with coloured or metallic charger plates, serviettes and place mats.
And no table would be complete without a centrepiece, which can be anything from a vase or two of fresh flowers, to a gorgeous arrangement, or something unique and special for the occasion.

12
creative centrepiece

13
It only takes a few basic elements to create a unique dining table for celebrations, parties and special occasions.
Lynda Quinteiro-Davids shows how easy it is to transform a dining room simply by swapping out and adding a few select accessories here and there.
What stays:• Rectangular Dining Table• Slipcovered Chairs• Slipcovered Bench• Pendant Lights• Crockery and Cutlery
OPPOSITE PAGE:
Set the table for spring with bright greens and gold.
What is added:• Hurricane Vases each
with a single palm frond
• Brass Candleholders• Glassware with copper
trim
RIGHT:
Want more impact? No problem! Add bold oranges flowers in glassbottles to the mix.
What is added:• Glass bottles with
deep-orange roses• Small vases with a
single orange gerbera• Fresh, green apples
When it comes to dressing up a dining room table, the old adage “less is
best” is the most practical approach.
A single glass vase filledwith fresh flowers in a vibrantcolour can do wonders for a dining room that has lost its
identity.

14
LEFT:
A trendy mix of colours for a fun celebration.
What is added:• Tall candle holders• Small and tall ceramic
pots filled withmagenta blossoms
• Magenta drapes• Black table runner• Silver candlestick
Silver candle stickR69.99 @ Mr Price Home
Tall white textured vaseR129.99
White textured belly vaseR99.99Feel like a change?
With a basic black table and dining chairs with white slipcovers - anything is possible.
That’s what I love about Mr Price Home - everything is so affordable, and so trendy, you can change the look of your dining room without spending a fortune.

15
imag
es: L
ynda
Quin
tero-
David
s

16
quick change seatingA plain, pine bench - that you can easily knock up in an hour or two - is covered with a simple linen slipcover that allows you to create so many looks.
What makes it so easy to transform, are table runners in different fabrics to match the look you want to create. And another plus, you can also swap and change your table runner when you change your bench runner!
A decorative lace runner adds a touch of elegance to this fresh setting.
Fabric off cuts make perfect runners to add colour and texture to your dining bench. A visit to your local fabric shop - and a peek in their remnant bin - may provide you with plenty of scraps to make your own runners or bands.

17
To make a slipcover:
Wash the fabric to pre-shrink.
Sew together a top, two sides and two ends.
Make sure that you allow 2cm on each piece of seam allowance, and be sure to zig-zag the edges to prevent them from fraying.
Press the seams flat.
For added comfort, add a foam cushion or add batting to the inside of the cover.
You can also add your own personal touch by stencilling a border or adding ribbon to the bottom. You can bedazzle or you can also stencil a pattern on it.
RE-PURPOSED STYLE
Using table runners gives great multiple options for adding
colour, pattern, and to change the look of the bench. You can also use the runners
on your chairs or cushions.

18
DIY DINING chairsInspired by a set of dining chairs seen on the Internet, I have been itching to make a dining chair for quite some time. The recent shoot with Top Billing was just the opportunity to try this project for the first time.
The shoot was to cover our J-hooks, recycled wood cellphone holder and a storage ottoman. After making the ottoman, I so fell in love with the fabric that I decided to make the chair using it as well.
my inspirationmy inspiration

19

20
You will need:Sheet of 16mm PG Bison SupaWoodSpray contact adhesive30mm thick foam for the back50mm thick foam for the seatFabricUpholstery pins
TOOLSTape measure and pencilDrill/Driver + asstd drill and screw bitsCountersink bitHammerClampsWorkbenchStaple gun and staples
CUTTING LIST2 of 50 x 1000mm - back sides5 of 40 x 368mm - back slats1 of 400 x 450mm - seat top2 of 100 x 450mm - seat sides1 of 100 x 368mm - seat front2 of 80 x 500mm - legs
CHAIR BACK
CHAIR SIDE
450mm500mm
1000mm450mm
100mm
400mm
368mm
1000mm

21
Here’s how:
For this project I had to spend a fair amount of time working on the design. I haven’t come across any plans for din-ing chairs that I like, and I really wanted to create a chair that would look nice in any room.
The total height of the chair (floor to top) is1 metre, with a width of 400mm and height to top of cushion of 550mm. After I made the chair I had to cut some height off the legs, as my feet wouldn’t even touch the floor, so I have now modified this for you.
1. Draw the sides of the chair back onto a 1 metre long piece of PG Bison 16mm SupaWood. If you look at the diagram of the chair side, the centre of the side curves in towards the front. It’s easier to cut this piece as one section, rather than fiddle around with angles and doweljoints, etc.
2. On one side of both chair sides drill 3mm pilot holes and countersink the holes. There are no measurements but do try to space the holes equally as per the chair back diagram on the previous page. It’s important that the holes on both sides are exactly the same. These holes will make it easier when it comes to joining the back slats and chair sides together.
3. Drill 2mm pilot holes into the edge of each back slat. Hold in place as you screw through the chair side to attach each slat. Make sure that the slats are centred nicely on the sides for an even finish.
4. Spray the outer edges of the slats with spray contract adhesive, and also spray the back of the 30mm thick foam. Let this dry for approximately 10 minutes.

22
5. Arrange the foam so that it fits snuglybetween the two sides and covers the front of the chair back from where the curve starts, and at the back - almost to the bottom of the chair back.
GOOD TO KNOWDon’t worry about the length at this stage - you can always cut off any excess once the chair is assembled.
6. Assemble the seat by gluing the seat sides, front and back to the base of the seat. Once the glue has dried you can add screws to provide additional stability. You don’t need to countersink these screws as they will be covered by batting.
7. Measure and mark the legs. They need to be 80mm at the top and 50mm at the bottom. Cut these out with your jigsaw and a clean cut blade.
8. Screw the chair legs to the underside of the side at the front and back. You will need to countersink these holes for a nice finish.

23
9. Cut the 50mm foam to fit the shapeof the chair seat. I used a sharp craft knife to do this but you can also use an electric carving knife.
10. Wrap the seat top and sides in batting and then cover with fabric. Start on one side and staple to the underside edge and then move to the opposite side - pulling the fabric gently - and staple. Repeat this for the other two sides.
GOOD TO KNOW Don’t staple down at the corners, so
that once you have finished staplingto the underside edges you can play around and adjust the corners for a professional finish.
11. Arrange the corners so that the excess fabric on the side is tucked under that at the front - almost like making a bed with military or hospital corners. You can cut off any excess, but be careful not to cut off too much. Fold the front under and arrange everything neatly - adjusting as you go along - so that the front sits squarely. Tuck under and staple.
12. Finish off by hand sewing the edges together.
hand sew

24
13. I made a slipcover for the back of the seat, which comprised of two sides and a long strip to cover from the front to the back. This part was a bit tricky, as you need to get the shape right so that it sits properly when fitted.
I found the easiest way to cut out the sides was to put the chair onto the fabric and draw around with a piece of chalk - allowing a 2cm seam allowance all the way around.
When you have the sides and main section cut out - with a 2cm seam allowance - pin everything together and fit over the chair before you sewtogether. You need a snug fit, but nottoo tight that the fabric pulls.
Turn inside out and sew together.
GOOD TO KNOW When I make another chair I will use
the seat sides to draw my pattern BEFORE assembling the chair back.
14. Staple the bottom of the fabric at the front to the under edge of the last slat to hold the fabric firmly in place.
15. To attach the seat to the chair back use a pockethole jig to drill holes in both seat sides and then screw to the chair back sides. I found that this wasn’t quite strong enough and added additional support with a small block of supawood fastened across the seat side onto the chair back side.
chair seat
chair back
addedsupport
chair backsides
ABOVE: Attaching the chair seat to the chair back. Note how the fabric from the back section is tucked and stapled to the bottom slat of the back section.

25
ABOVE: Drape a long piece of fabric along the side - from the front all the way around the back and to the front at the other side. Tuck and pin in place as you work.
NOTE: Paint the legs before adding the fabric panel to the chair.
16. You now need one long piece of fabric that will reach from one side to the other side. No measurements here - it’s not exact for every single chair.
As you position the fabric along the top, tuck under and add pins to keep the fabric in place. This also allows you to make any adjustments before you sew the panel to the chair seat and back.
With the top edge pinned, cut away the excess fabric at the bottom to create the slightly angled panel. Tuck this under and pin so that you can make adjustments.
The panel is hand sewn onto the sides and back.
Although it may seem like a lot of work, once you get started you’ll see it’s not that difficult. Enjoy!

26
You will need:
Coloured felt*ScissorsFabric glue
*It doesn’t have to be felt - you can use almost any fairly thick fabric for this project. It needs to be thick in order to glue on nicely.
SEWEASYDress up plain cushions with scraps of felt in different colours to complement your home decor.
If you’re handy with a sewing machine you can even add the coloured piping around the cushion.
Cut out the individual sections and then use fabric glue to attach to the front of your cushion.
For this project we used different colours and shades to create a dappled colouring for the flower blossoms.

27

28
When buying fabrics for upholstery, window treatments, or other home-related projects, it helps to know what fabric is for what, and where it can be used for best durability.
Fabrics can be separated into two groups: natural and synthetic, and while both have their own positive qualities, you need to know how to use these fabrics correctly to avoid any negative complications.
It’s important to note that you are not strictly limited to natural or synthetic fabrics. In many instances, a natural-synthetic fabric blend would offer comfort and durability in one, as added synthetics impart their own properties to the mix, whether durability, texture, pattern or comfort.
Let’s take a look at the various types and styles of fabric used for upholstery and decorating a home and how they’re best put to use.
As a natural fabric, cotton and linen are ideal for upholstered furniture in a living room, where comfort is a major factor.
Cotton has the ability to ‘breathe’ through the woven fibres,allow for comfortable seating when used to cover cushions, upholstered or padded furniture.
CHOOSE THE RIGHT FABRIC

29
The NaturalsCotton: Cotton is extremely versatile and the strongest of the natural fibres, with theexception of wool. Cotton is easily dyed, which means almost unlimited colour options.
accepts dyes well, so colour options are great, and it allows for the flow of airthrough the goods; in industry jargon, we’d say it’s a fabric that “breathes” well.
Use cotton for:
• Upholstered living and dining furniture
• Casual window treatments and blinds
• Bedding
Linen: Made from a vegetable fibre, linen hasa fine lustre. It possesses a healthy stainresistance but wrinkles if you even look at it funny and that’s what makes if perfect for Shabby Chic and French Country decorating.
Use linen for:
• Shabby Chic or French Country decorating and upholstery
• Table coverings and napkins
• Casual window treatments

30
Silk: A luxurious fabric, silk imparts elegance and sophistication no matter where it is used. Popular for window treatments - where it must be lined - and cushions, silk comes in a wide variety of fabric weights, from light-handed to heavy raw silk. The weave will often determine the wearability of silk, with some of the raw silks being much stronger and able to take more wear.
Silk has been used to manufacture the finest Oriental rugs for hundreds of years.
Use silk for:
• Formal window treatments (lined silk), valances and decorative blinds.
• Upholstered pieces such as ottomans, stools and headboards.
• Cushions and throw pillows
Wool: The battleship of the naturals, wool is a fabric that provides long wear. However, wool is not often used for upholstery projects.

31
The Synthetics
Rayon: Rayon is a very versatile fibre that offersthe same comfort as natural fibres. It canimitate the feel and texture of silk, wool, cotton and linen. Rayon fabrics are soft, but also highly absorbent, making them a bad choice for upholstery projects.
Acrylic: Acrylic is colourfast and resists stains well, so it’s good to look at a natural-acrylic blend for durability and wear. Acrylic also has sun-resistant qualities not found in the natural fabrics, which makes it ideal for outdoor upholstery projects.
Nylon: A true stalwart of the 70’s, nylon is tough and highly resistant to stains. A natural fabric containing a nylon blend will be strong, fairly stain resistant and water-resistant to a degree.
Polyester: More often found as a blend, polyester added to natural fibres it reduceswrinkling, durability and colour retention.
Choose natural-synthetic fabric blend for outdoor upholstery.

32
Styles & PatternsChintz: The style originally hails from India and was brought to the West by the British raj. Chintz is a highly polished, rather thin, brightly coloured calico cotton fabric. Popular for upholstery and slipcovers.
Cretonne: A plain-weave fabric with both printed floral motif and angular shapes for people who can’t make up their minds about what they like. Often used for chair coverings and curtains.
Damask: A glossy Jacquard weave (a Jacquard weave is made with a Jacquard loom, which was invented Joseph Marie Jacquard in 1801) that has a flat look on the pattern itself but a glossy look for the background. In silk, rayon or linen, it’s often used for draperies and upholstery.
Gingham: A relatively inexpensive fabric that usually has a checkered pattern. Looks great as a dining tablecloth in Italian restaurants or on kitchen or nursery windows.
Herringbone: A regular geometric pattern consisting of two slanted rows that form a “V” shape on the fabric. This menswear look has become popular in upholstery.
Moiré: For some reason, the French liked fabric with water spilled on it just like your kids do. Moiré is a “water-marked” fabric (an effect now produced by cylindrical presses) with vertical “cathedrals” (lines that look like the peak of a cathedral).
chintz
damask
gingham
moire

33
Mohair: Angora goats’ hair. Sometimes used for throws and pillows.
Satin: This one dates from the 14th century. It’s believed to be named after the Chinese town of Zaitun, though no one knows where Zaitun was. Satin was originally a glossy silk fabric with a dull back, but the look can be reproduced in rayon for the cost-conscious.
Ticking: Ticking is a striped cotton fabric traditionally made in black and white but also seen in blue/white and red/white. It’s used for mattress covers and informal curtains and coverings.
Toile de Jouy: Literally meaning “fabric of joy,” toile is a French fabric with a pattern that’s somewhat naïve, featuring country scenes of a solid black, red, gray or blue against a cream coloured background. Toile is often associated with cottons.
Ultrasuede: An advance in technology, ultrasuede replicates natural suede (the underside of leather) but resists stains much better than the highly absorbent suede. Second-generation ultrasuedes are the more affordable microfibres that are less dense in terms of fibre count and therefore more affordable.
Velvet: A pile that’s cut at uniform lengths to create an even overall surface. Very durable and great for heavy flowing draperies.
Mark McCauley is a professional member of the American Society of Interior Designers and author of Color Therapy at Home (Rockport Publishers) and Interior Design for Idiots
satin
ticking
toile de jouy
velvet
chintz

34
WIN A BOSCH Li-ION TOOL HAMPER
With the new range of Bosch Li-Iontools you never have to worry about power cords or power cuts!
The lithium-ion battery is quick tocharge and ready to go whenyou are.
I have tested all three toolsand asked Santa to please deliver in time for Christmas.
How would you like to own a set of Bosch Li-Ion power tools?
All you have to do is send us an email and tell us what you will make with these fantastic products and we’ll enter your details into the draw.
Competition closes 30 November 2011, so get your entries in fast.
CLICK HERE TO SEND YOUR DETAILS or mail us at [email protected].
Dear SantaI’ve been a very good girl this year.
All I want for Christmas is a Bosch PST 18 LI Cordless Jigsaw, a PSR 18 Li-2 Cordless Drill/Driver and a PSM 18 LI Cordless Sander.
I promise to make lots of projects with my new cordless Li-Ion power tools!
xxxx
35
Easy to prepare, the main ingredients in tapas are fresh vegetables and local ingredients. You can keep it simple or you can make it as
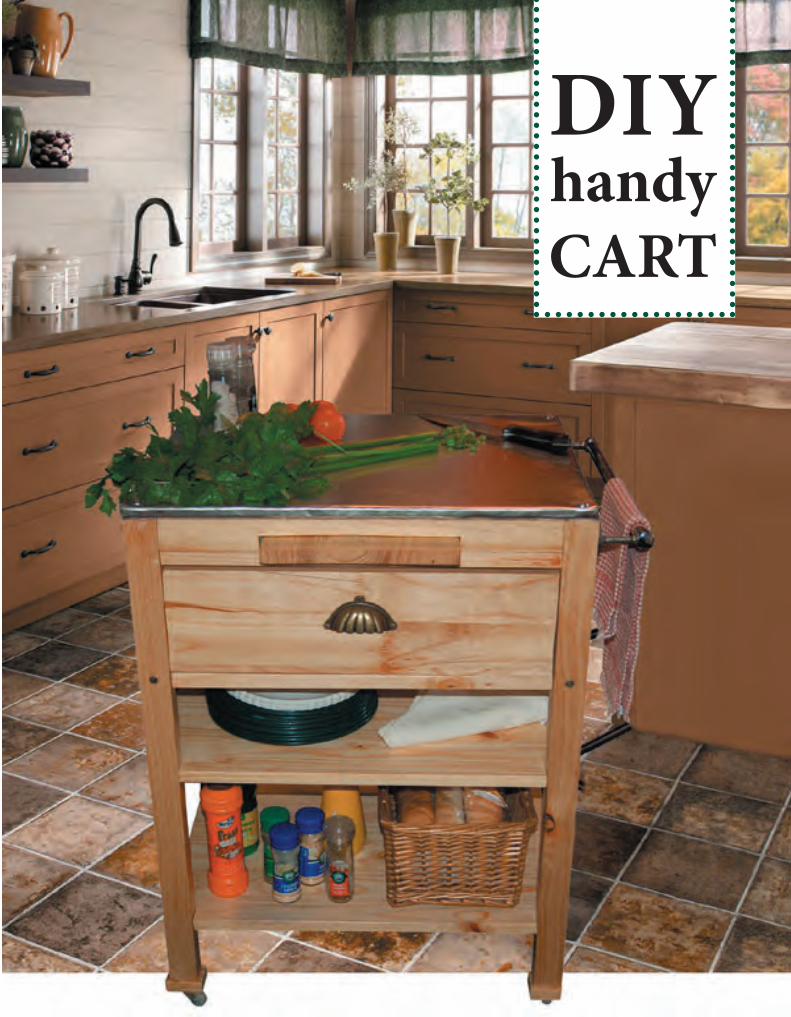
DIYhandyCART

36
You will need:A 4 legs 32 x 44 x 760mm pineB 2 front/back crossbeams 32 x 44 x 512mm pineC 2 sides 230 x 436mm pineD 2 pullout supports 12 x 50 x 436mm pineE 1 top shelf 500 x 556mm chipboard or pineF 3 drawer/middle/bottom shelf 500 x 600mmG 1 pullout shelf 250 x 560mmH 1 drawer assembly consisting of: 2 sides 150 x 460mm 2 front and back 150 x 505mm 1 Base for drawer 460 x 465mm
35mm wood screws12mm wood screws60mm deck screws4 cup washers4 of stainless steel screwsWood glueWood fillerWoodoc 30Woodoc steel woolPaintbrushTape measurePencilTimber off cutsHandle4 x small castor wheels2 chrome pipe bracketsChrome pipe 600mm long.Clean cloths
TOOLS:Drill/Driver and assorted drill and screw bitsJigsaw and clean cut bladeOrbital sander and 180-grit sanding padsPockethole jigHammerWorkbenchClampsSharp utility knife
COST TO MAKER400
COST TO MAKER400

37
Summer is in full swing and that means spending plenty of time outdoors. Make this nifty serving trolley with aluminium top and storage galore to make entertaining a breeze.
We made ours from pine, but you can also use Meranti, Saligna or other hardwood. Buy cut aluminium sheets from your local steel merchant.
1. Before assembly, cut the front and back cross sections [B] as shown in the diagram. This cut out allows for insertion of a pullout shelf.
Here’s how:
2. Attach front and back cross sections [B] to legs [A] using a pockethole jig and screws. If you don’t own a pockethole jig, you can use wood glue and corner braces. Clamp the sections until the glue has dried.
3. Attach side panels [C] to legs [A], again using a pockethole jig and screws. Alternatively, use wood glue, corner brackets and screws, or drill through the outside edge of the leg to hole the sides in position.

38
4. Cut top shelf [E] as shown in the diagram. Screw on the two pullout inserts [D] to allow for easy use of the pullout shelf [G] and then insert the pullout shelf.
5. Attach top shelf [E] by driving screws through the shelf into the front and back cross sections [B].

39
6. Insert drawer shelf [F1], allowing 155mm below the top shelf [E] to place the drawer [H]. On all remaining shelves cut a rebate of 32 x 44mm with your jigsaw - to allow for the legs - and then continue to add shelves [F2] and [F3] at spaced intervals. You can position these shelves as required to suit your own requirements.
7. Assemble drawer [H] by attaching the side panels to the rear of the front and back. To do this you can use a pockethole jig or wood glue and corner brackets (clamp until glue has dried). Glue the base inside the drawer frame and let the glue dry.
8. Measure and mark with a pencil for the top section and then use a jigsaw and steel blade to cut in at the sides of the front and back.
9. Place the top onto the aluminium and use a sharp utility knife to score a line around the edge of the top section. This makes it easier to bend the aluminium.
ABOVE: The individual shelves are attached by drilling through one side of each leg into the shelf. It is best to use deck screws for this, as they do not rust as quickly as standard screws.
ABOVE: Lightly score the aluminium sheet around the edge of the top to make it easier to bend into shape.

40
10. Use a hammer to lightly tap the aluminium up the front and back edges. Complete all the edges before you tap the aluminium over onto the back.
GOOD TO KNOWTap the front edge where you cut so that it angles around the corner to create a neat edge and the tap the side edge over the top of this.
11. Use a piece of off cut timber and your hammer to tap along the top and edges to create a neat finish.
12. Position the top onto the trolley and use stainless steel screws and cup washers to attach to the top of each leg.
13. When it came to attaching the castor wheels, they were slightly smaller than the actual width of the leg.
GOOD TO KNOWTry to source smaller wheels than the ones I used in this project, so that they will fit onto the legs.
To compensate for this, and as can be seen on the finished trolley, small blockswere added to the base of each leg with wood glue and a central screw, and the castors were then attached to the block. If you are unable to source castors that do not fit on the leg as is, you may needto do this as well.

41
14. Use an orbital sander and 180-grit sanding pads to sand the entire project.
FINISHING
Wipe clean to remove all traces of dust and then apply Woodoc 10 (interior) or Woodoc 30 (exterior) sealer as recommended by the manufacturer. Let each coat dry completely before applying the next coat, and lightly rub with steel wool between the first and second coats.
15. Use small screws to attach one pipe bracket to one end of the trolley. Cut the chrome pipe to size with your jigsaw and a steel cutting blade, and insert in the mounted bracket. Pop the second bracket onto the other end of the chrome pipe and then screw the bracket to the side. Attach a handle to each drawer front – and you’re done!
GOOD TO KNOWDon’t remove the plastic coating
on the aluminium top until you are 100% finished, as this protects it from
scratching

42
Low-maintenance beauty abounds in ornamental grasses as they bring movement and sound to a garden; dancing on breezes and rustling in winds. Their foliage unfurls in colourful tones, from dusky greens to glowing gold, blushing pink, and steely blue. Variegated forms blend green with white or gold, sporting stripes that run the length of grass blades or that crisscross leaves to form zigzag patterns.
How To Use Ornamental Grasses
Grasses can stand alone as accent plants or be grouped en masse to create striking designs, guard a slope against erosion, or become living screens for privacy in a garden.
Beautifu lLANDSCAPES
When and Where to Plant
Ornamental grasses offer more than good looks, and their easy-growing habits demand little care. Plant grasses year-round. When choosing a planting site, consider that grasses stand out when planted against darker backgrounds.

43
General Care and Maintenance
Feed grasses in spring and late summer by scratching a slow release fertilizer into soil around plants. Foliage will fade to hues of brown sugar or amber in winter.
Consider snipping seed heads before winter on potentially invasive types.
Pruning
In spring, remove old foliage before new growth emerges. This task proves simple with small clumps. For larger, established plants, electric hedge shears make quick work of annual pruning. Trim tall grasses to a height of around 30 cm for large clumps, 20 cm for medium clumps and 100 cm for small clumps. For pruning large clumps of grass, gather the stems together and tie twine around them before trimming.
ABOVE: Melinis nerviglumis. This pretty, tufted grass with its bluish leaves and shining
pink inflorescences is an attractive additionto any border or wild garden. It is particularly
effective when planted in wide swathes.
For more information on the various types of indigenous grasses and their growth habits, water and feeding requirements, visit your local garden centre or plant nursery.

44
The basic ingredients for a salsa are easily grown in pots on a balcony, patio, or sunny courtyard, or when placed in a small area of the garden. For salsa you will need.
Tomatoes - Peppers - Onions - Garlic- Cilantro
All these are fairly easy to grow from seed or seedlings and will provide an endless supply of fresh ingredients for your salsa or salad.
A salsa garden is not hard to grow - and you will love the
fiesta of flavours from your own fresh home made salsa.
Transfer seedlings from their containers into a fairly large pot, so that this will allow for plenty of growth. It’s a good idea to add a wire climbing frame to keep them propped up.
If you are growing your vegetables from seed, the packet contains all the instructions for when and how to plant.
You will need a large, deep pot for onions if you’re growing these on a balcony.
imag
es: g
ap ph
otos

45
Simple Fresh Salsa1 medium-sized onion3 large cloves garlic4 large tomatoes2 green peppers (seeded if desired)½ cup cilantro1 pinch saltLemon or lime juice to taste
Blend half an onion, two tomatoes, garlic, one green pepper, and cilantro to a puree. Add the remaining ingredients finely chopped;add salt, lemon or lime juice to taste and cilantro to garnish.
Green peppers are easy to grow in pots, either from seed or seedlings. Again, make sure you have a fairly large pot to allow for good growth. Green peppers need support once the fruit appears - add a few bamboo stakes.
Grow garlic from seed, or by planting a single clove in potting soil.
Cilantro is actually the leaves of coriander, an
easy-to-grow herb that can be grown in
pots.

46
PROUDLY ANNOUNCING THE
LAUNCH OF OUR
DIY DIVAS WORKSHOPS
VANDERBIJLPARK
BEDWORTH PARKVANDERBIJLPARK
in association with
VANDERBIJLPARK

47
Girl TalkNow you CAN
saw a perfectly straight line!
Perfectly straight, accurate cutting with a circular saw? It’s no problem with the Skil guide-rail! This new accessory is easy to set up, easy to use and easy to store.
A circular saw is ideal for making fast cuts in large workpieces, but sawing perfectly straight lines can be a challenge. The Skil guide-rail solves that problem by accurately guiding your circular saw exactly where you want it to saw, so the desired cutting line can be followed perfectly. It’s a convenient solution for making perfect cuts on all kinds of planks and panels from 8 cm right up to 136 cm wide.
The guide-rail is easy to set up and adjust, with two clamps to secure it firmly
to the workpiece. The package contains four 36 cm sections which fit
together instantly with Skil’s Clic system up to a total length of 144 cm. From one to four
sections can be used, depending on the size of the workpiece. It’s also
handy to transport and store; all parts can be stored and are protected by its compact, re-closable carton box.
The guide-rail fits all Skil circular saws, either directly or with the footplate adaptor supplied. It’s available as a separate accessory, or in combination with Skil’s circular saw models 5064, 5155 and 5166 for a very attractive price.
Sawing a straight line has never been easier

48
4 Good Reasons to choose 4 Everdeck® Composite Decking
Industry leading guarantee
4 Everdeck® is guaranteed for 10 years and the expected lifespan is in excess of 20 – 25 years.
Lower cost of ownership than timber deckingHigh Quality Composite products may initially appear to be more expensive than timber, however once one takes the maintenance
of timber into account, as well as the ease of installation of 4 Everdeck® products, you will find that 4 Everdeck® is more cost
effective than timber decking.
Installers Countrywide4 Everdeck® can be installed anywhere in South Africa through
our network of trusted installers
Maintenance FreeNever sand or seal your deck again. Guaranteed against warping,
rotting, cracking, splitting, fungus and termites.
National Sales Tel. 0861 22 22 21 - (+27) 82 894 7889 - Fax: 086 671 9562E-mail:[email protected]

49
We are often requested to run a full day workshop, where ladies can get together and cover a wide range of topics at one workshop. Our new full day workshops do exactly that. Starting at 09:00 and finishing at 16:00 - each workshop will offer as much information as possible on thevarious subjects.
Have a day out with the girls at the tranquil Black Eagle Guest House, just off Hendrik Potgieter Road in Strubens Valley. Enjoy a light breakfast and buffet lunch while honing up your DIY skills. The emphasis is on a casual and relaxed atmosphere, where previous power tool knowledge is not necessary. And our experience is second to none... with such projects as Decorex, Homemakers Expo, Gardenex, and more under our belt.
Woodwork & Furniture Making
Full day workshop covers:
* Joining and fastening
* Hardware
* Timber and board
* How to design and plan to make your own furniture
* Make a small cabinet to take home.
Cost R1250 pp includes light breakfast, tea/coffee & snacks and buffet lunch. All materials and use of tools included.
CLICK ON THIS PAGE TO BOOK