home-based business
DESCRIPTION
The perfect Home-Based Busines combining the latest technology and the New EconomyTRANSCRIPT
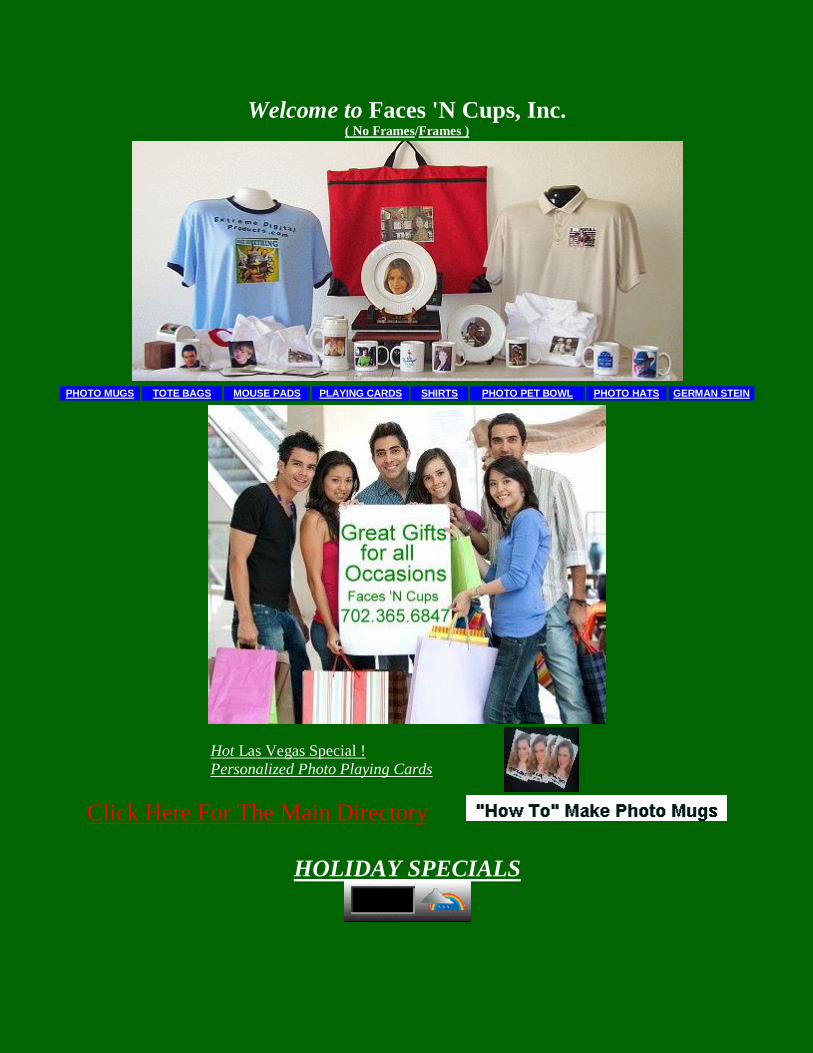
Welcome to Faces 'N Cups, Inc. ( No Frames/Frames )
PHOTO MUGS TOTE BAGS MOUSE PADS PLAYING CARDS SHIRTS PHOTO PET BOWL PHOTO HATS GERMAN STEIN
Hot Las Vegas Special !
Personalized Photo Playing Cards
Click Here For The Main Directory
HOLIDAY SPECIALS

Faces 'N Cups, Inc.
6130 W. Flamingo Road, # 455 Las Vegas, NV 89103
702.365.6847
"The Perfect Business for the New Economy"!!
HOME-BASED MALL CART BUSINESS ADD-ON
Key Hanger LaserSub Plaques Laundry Bag License Plates Light Switch Covers Magnets - FRP Message Boards Mousepads Mugs Name Badges Neck Tie
Night Lights Ornaments Paperweights Patches Pet Bowls Pet Leashes & Collars Pet Mats Pet Tags Pillow Cases Placemats Plates
Puzzles Seat Back Covers Serving Trays Shot Glass Shoulder Bags Stadium Cushions Steins Stockings Throw Blankets Tiles Tile Accessories
Tile Frames Tote Bags Towels Trailer Hitch Cover Travel Mugs UNISUB Tiles Wallets & Checkbook Water Bottles Wine Boxes Wood Boxes Wood Frames
Follow us on Facebook
While in Las Vegas be sure to take home a
photo mug "Las Vegas' Best Souvenir".
Photo mugs make great gifts for all occasions.
Just bring your photo by, or we can take your
picture. The entire photo mug process on site
takes only five minutes. The original photo is
returned unharmed. What a great gift to take home
to mom & dad, or grandma & grandpa.
How about the folks back at the office you left
behind? Or, that birthday that's coming up soon,
Mother's Day, Father's Day, Christmas? Photo
mugs are a great gift for the person that has
everything.
You think Grandma or Grandpa would
like a picture of that new baby on a photo
coffee cup?? Surprise someone today with
that permanent memory etched in a special
porcelain photo mug. Need some ideas?
Visit our sample photo mug gallery.
When you stop by, mention this page for a
20% discount on your photo mugs!
If you are not coming to Las Vegas
soon, just drop your favorite photo in the
mail. We will return your photo with the
photo mug.
For additional information, e-mail. or
call 702.365.MUGS (6847)
For each book sold through our link to Amazon.com $1.00 will be donated
to the Juvenile Diabetes Foundation in Las Vegas.
YOUR PERSONALIZED PHOTO GIFT BUSINESS!
Own the World's Best Photo Gift Business. Visit the Personalized Photo Gift System
Opportunity Page. Then give us a call and become part of the
fun!! Major mall locations available. For info please E-
mail:[email protected]

Extreme Digital 2011 Personalized Photo Products Training Program
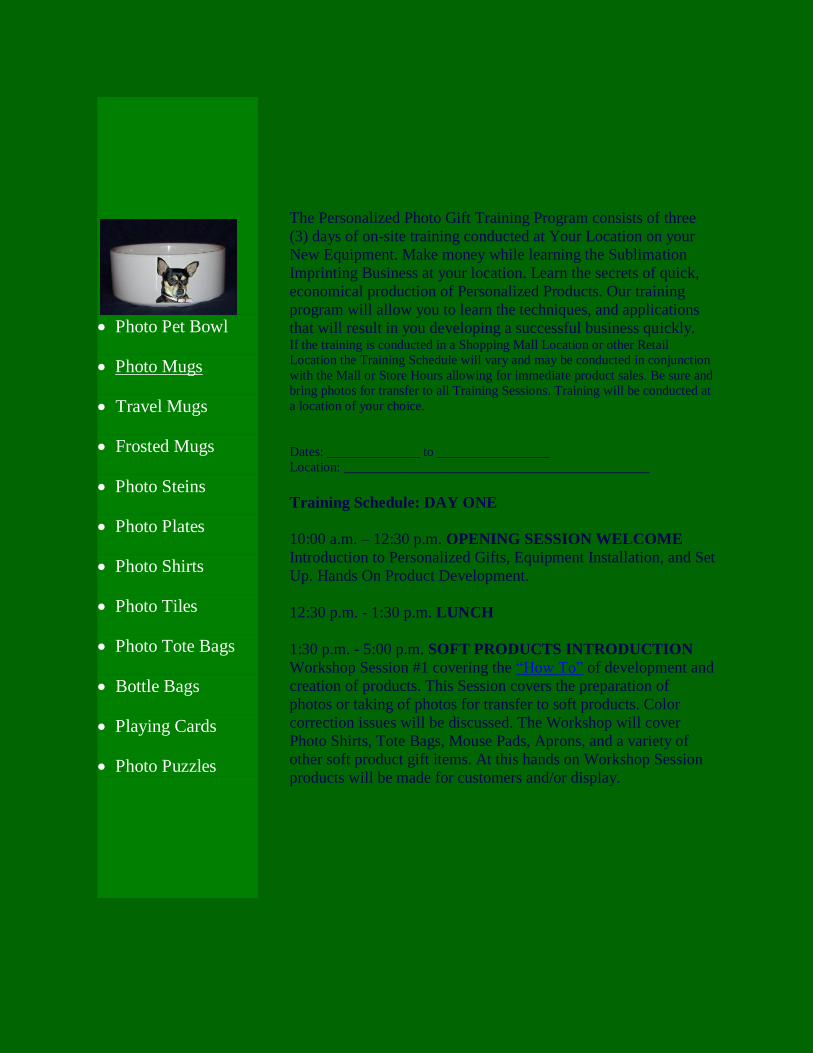
Photo Pet Bowl
Photo Mugs
Travel Mugs
Frosted Mugs
Photo Steins
Photo Plates
Photo Shirts
Photo Tiles
Photo Tote Bags
Bottle Bags
Playing Cards
Photo Puzzles
The Personalized Photo Gift Training Program consists of three
(3) days of on-site training conducted at Your Location on your
New Equipment. Make money while learning the Sublimation
Imprinting Business at your location. Learn the secrets of quick,
economical production of Personalized Products. Our training
program will allow you to learn the techniques, and applications
that will result in you developing a successful business quickly. If the training is conducted in a Shopping Mall Location or other Retail
Location the Training Schedule will vary and may be conducted in conjunction
with the Mall or Store Hours allowing for immediate product sales. Be sure and
bring photos for transfer to all Training Sessions. Training will be conducted at
a location of your choice.
Dates: ______________ to _________________
Location: ______________________________________________
Training Schedule: DAY ONE
10:00 a.m. – 12:30 p.m. OPENING SESSION WELCOME
Introduction to Personalized Gifts, Equipment Installation, and Set
Up. Hands On Product Development.
12:30 p.m. - 1:30 p.m. LUNCH
1:30 p.m. - 5:00 p.m. SOFT PRODUCTS INTRODUCTION
Workshop Session #1 covering the “How To” of development and
creation of products. This Session covers the preparation of
photos or taking of photos for transfer to soft products. Color
correction issues will be discussed. The Workshop will cover
Photo Shirts, Tote Bags, Mouse Pads, Aprons, and a variety of
other soft product gift items. At this hands on Workshop Session
products will be made for customers and/or display.
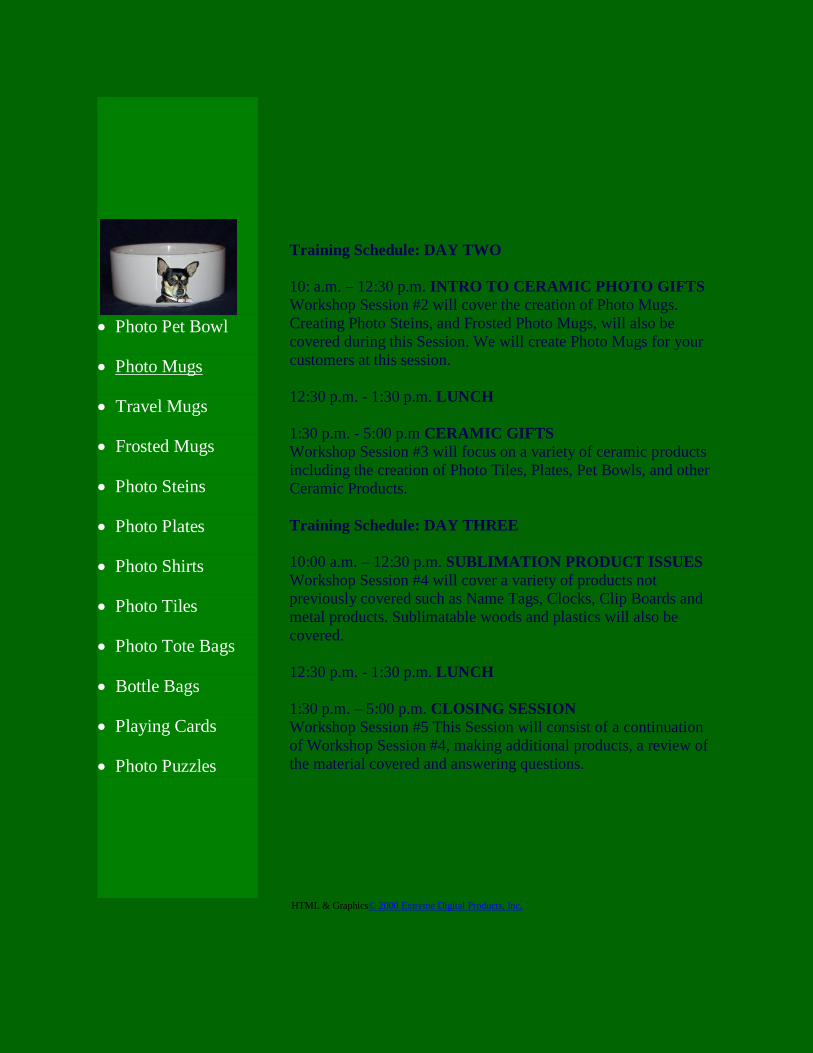
Photo Pet Bowl
Photo Mugs
Travel Mugs
Frosted Mugs
Photo Steins
Photo Plates
Photo Shirts
Photo Tiles
Photo Tote Bags
Bottle Bags
Playing Cards
Photo Puzzles
Training Schedule: DAY TWO
10: a.m. – 12:30 p.m. INTRO TO CERAMIC PHOTO GIFTS
Workshop Session #2 will cover the creation of Photo Mugs.
Creating Photo Steins, and Frosted Photo Mugs, will also be
covered during this Session. We will create Photo Mugs for your
customers at this session.
12:30 p.m. - 1:30 p.m. LUNCH
1:30 p.m. - 5:00 p.m CERAMIC GIFTS
Workshop Session #3 will focus on a variety of ceramic products
including the creation of Photo Tiles, Plates, Pet Bowls, and other
Ceramic Products.
Training Schedule: DAY THREE
10:00 a.m. – 12:30 p.m. SUBLIMATION PRODUCT ISSUES
Workshop Session #4 will cover a variety of products not
previously covered such as Name Tags, Clocks, Clip Boards and
metal products. Sublimatable woods and plastics will also be
covered.
12:30 p.m. - 1:30 p.m. LUNCH
1:30 p.m. – 5:00 p.m. CLOSING SESSION
Workshop Session #5 This Session will consist of a continuation
of Workshop Session #4, making additional products, a review of
the material covered and answering questions.
HTML & Graphics© 2000 Extreme Digital Products, Inc.
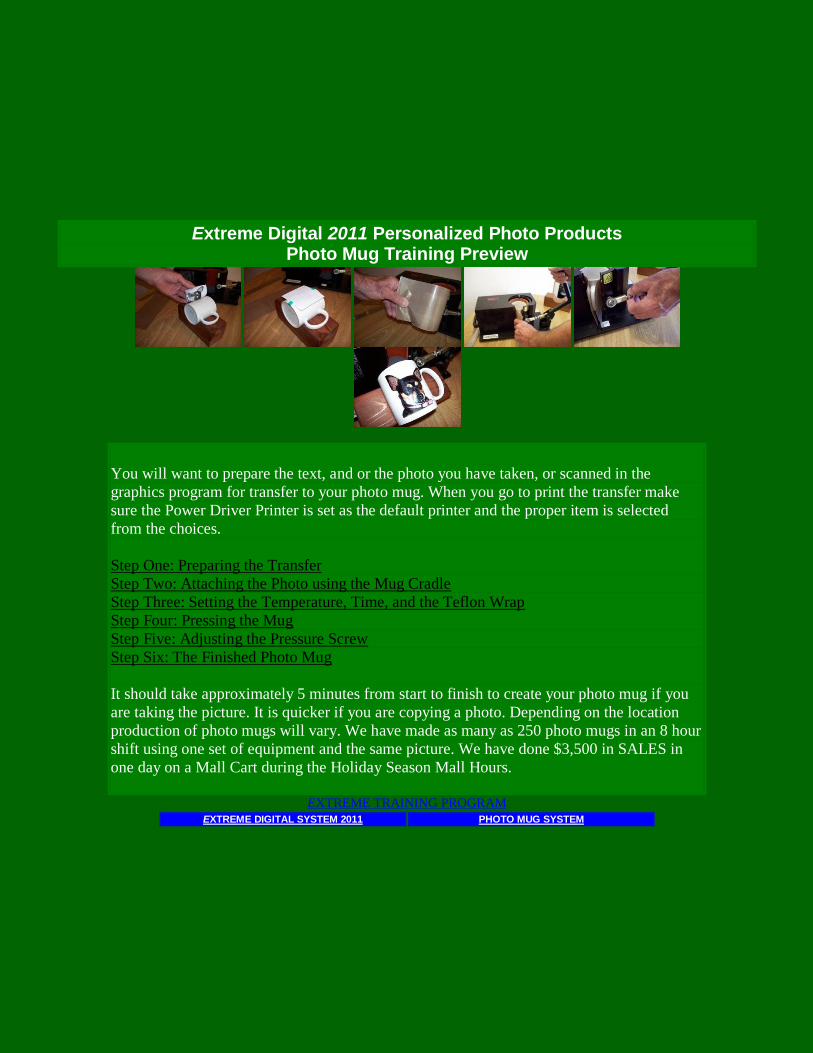
Extreme Digital 2011 Personalized Photo Products Photo Mug Training Preview
You will want to prepare the text, and or the photo you have taken, or scanned in the
graphics program for transfer to your photo mug. When you go to print the transfer make
sure the Power Driver Printer is set as the default printer and the proper item is selected
from the choices.
Step One: Preparing the Transfer
Step Two: Attaching the Photo using the Mug Cradle
Step Three: Setting the Temperature, Time, and the Teflon Wrap
Step Four: Pressing the Mug
Step Five: Adjusting the Pressure Screw
Step Six: The Finished Photo Mug
It should take approximately 5 minutes from start to finish to create your photo mug if you
are taking the picture. It is quicker if you are copying a photo. Depending on the location
production of photo mugs will vary. We have made as many as 250 photo mugs in an 8 hour
shift using one set of equipment and the same picture. We have done $3,500 in SALES in
one day on a Mall Cart during the Holiday Season Mall Hours.
EXTREME TRAINING PROGRAM
EXTREME DIGITAL SYSTEM 2011 PHOTO MUG SYSTEM
Extreme Digital 2011 Personalized Photo Products Photo Mug Training Preview
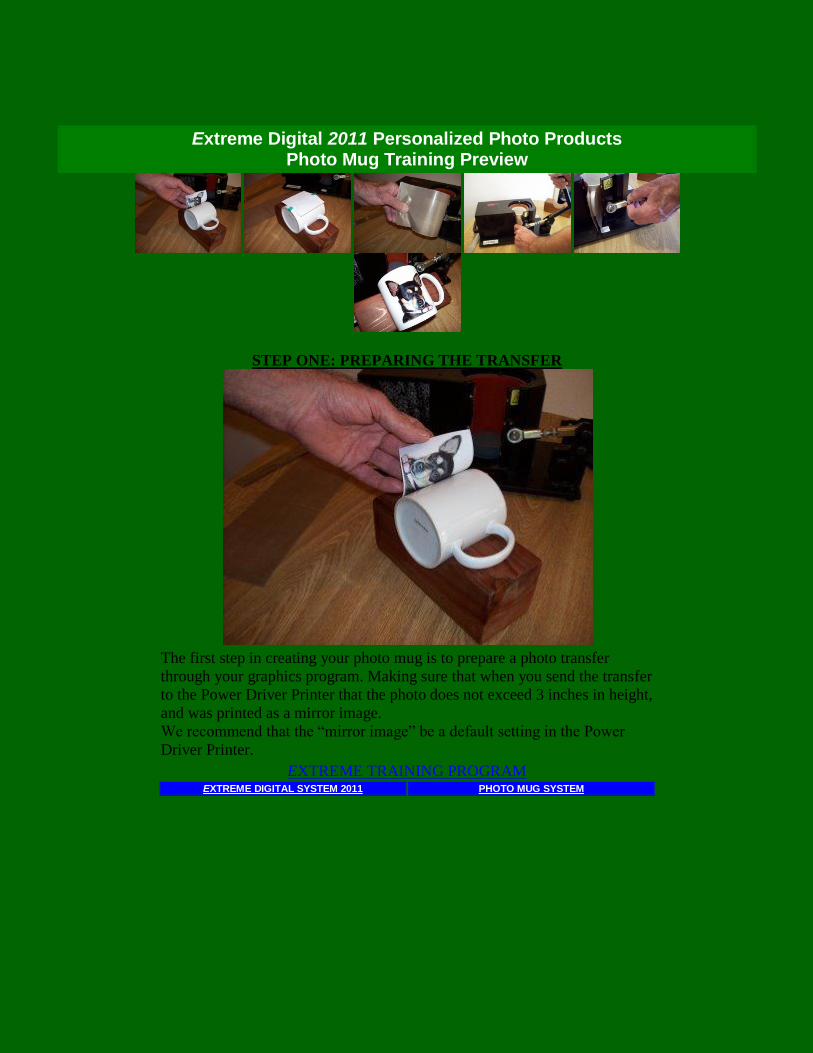
STEP ONE: PREPARING THE TRANSFER
The first step in creating your photo mug is to prepare a photo transfer
through your graphics program. Making sure that when you send the transfer
to the Power Driver Printer that the photo does not exceed 3 inches in height,
and was printed as a mirror image.
We recommend that the “mirror image” be a default setting in the Power
Driver Printer.
EXTREME TRAINING PROGRAM EXTREME DIGITAL SYSTEM 2011 PHOTO MUG SYSTEM
Extreme Digital 2011 Personalized Photo Products Photo Mug Training Preview
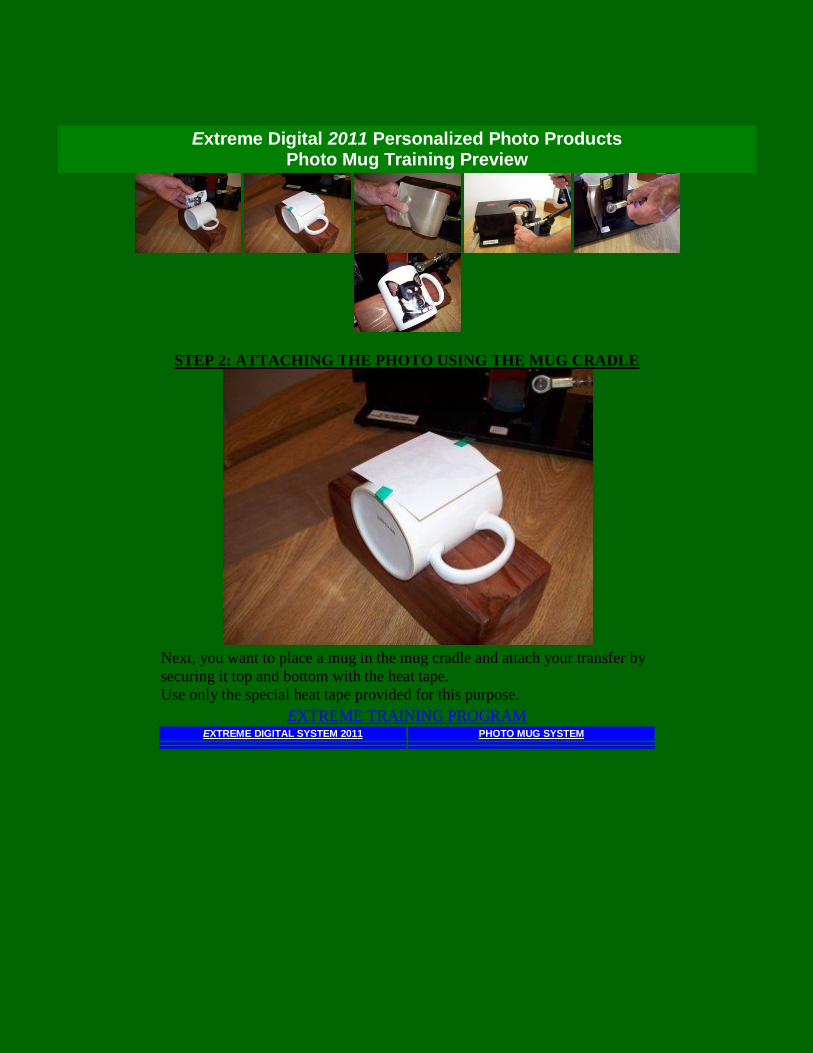
STEP 2: ATTACHING THE PHOTO USING THE MUG CRADLE
Next, you want to place a mug in the mug cradle and attach your transfer by
securing it top and bottom with the heat tape.
Use only the special heat tape provided for this purpose.
EXTREME TRAINING PROGRAM EXTREME DIGITAL SYSTEM 2011 PHOTO MUG SYSTEM
Extreme Digital 2011 Personalized Photo Products Photo Mug Training Preview
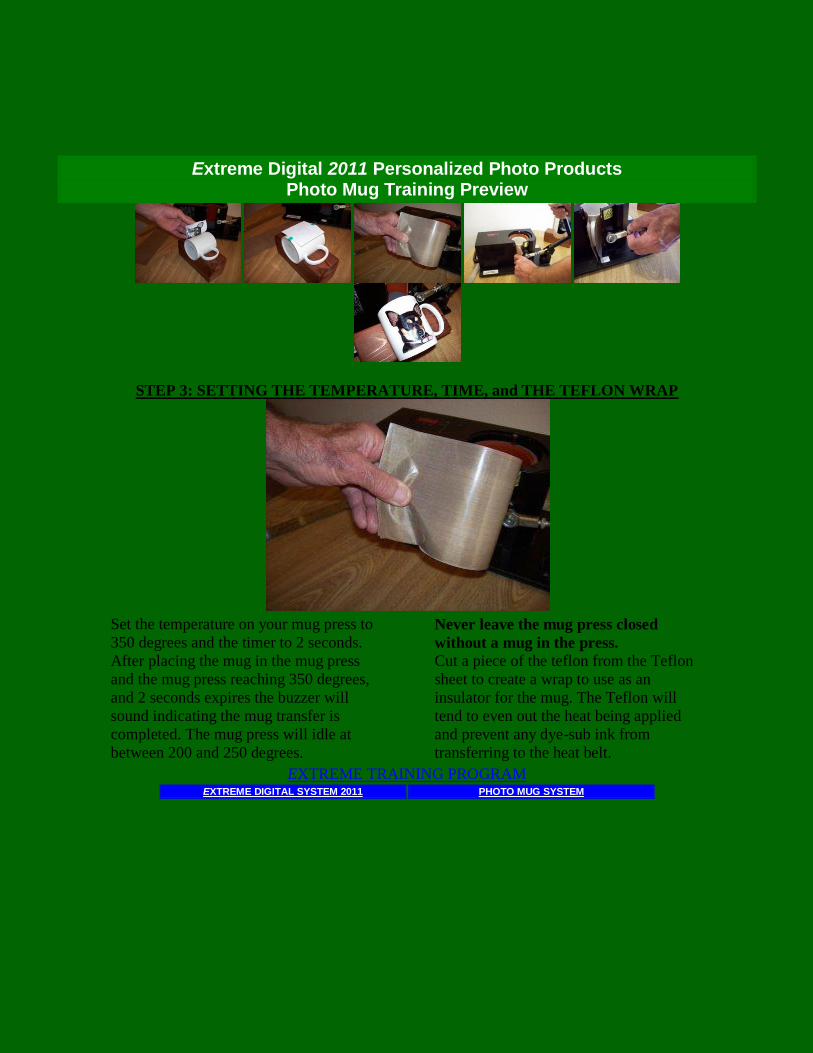
STEP 3: SETTING THE TEMPERATURE, TIME, and THE TEFLON WRAP
Set the temperature on your mug press to
350 degrees and the timer to 2 seconds.
After placing the mug in the mug press
and the mug press reaching 350 degrees,
and 2 seconds expires the buzzer will
sound indicating the mug transfer is
completed. The mug press will idle at
between 200 and 250 degrees.
Never leave the mug press closed
without a mug in the press. Cut a piece of the teflon from the Teflon
sheet to create a wrap to use as an
insulator for the mug. The Teflon will
tend to even out the heat being applied
and prevent any dye-sub ink from
transferring to the heat belt.
EXTREME TRAINING PROGRAM EXTREME DIGITAL SYSTEM 2011 PHOTO MUG SYSTEM
Extreme Digital 2011 Personalized Photo Products Photo Mug Training Preview
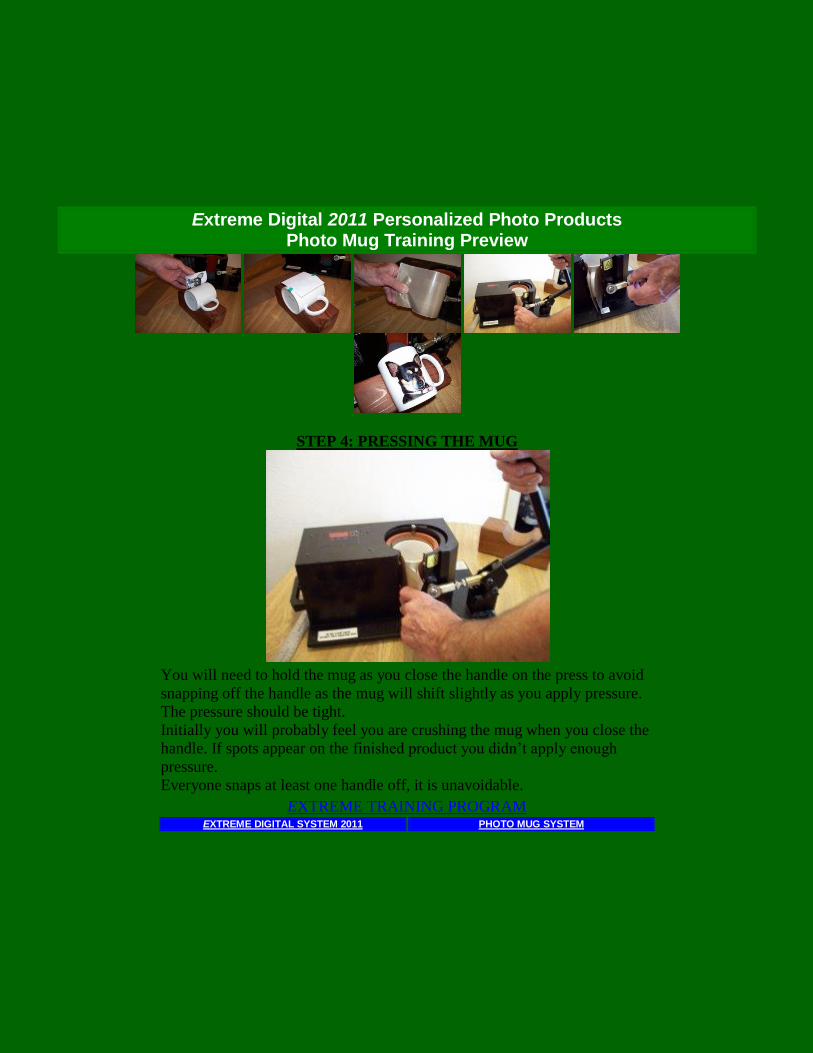
STEP 4: PRESSING THE MUG
You will need to hold the mug as you close the handle on the press to avoid
snapping off the handle as the mug will shift slightly as you apply pressure.
The pressure should be tight.
Initially you will probably feel you are crushing the mug when you close the
handle. If spots appear on the finished product you didn’t apply enough
pressure.
Everyone snaps at least one handle off, it is unavoidable.
EXTREME TRAINING PROGRAM EXTREME DIGITAL SYSTEM 2011 PHOTO MUG SYSTEM
Extreme Digital 2011 Personalized Photo Products Photo Mug Training Preview
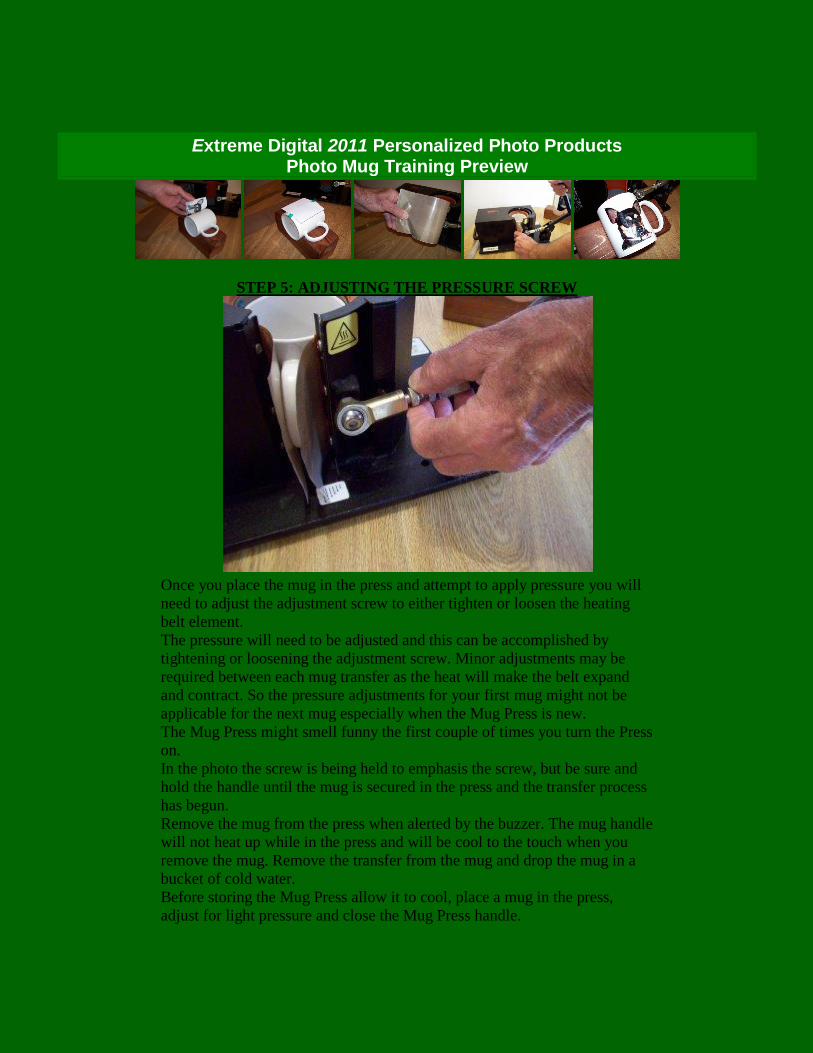
STEP 5: ADJUSTING THE PRESSURE SCREW
Once you place the mug in the press and attempt to apply pressure you will
need to adjust the adjustment screw to either tighten or loosen the heating
belt element.
The pressure will need to be adjusted and this can be accomplished by
tightening or loosening the adjustment screw. Minor adjustments may be
required between each mug transfer as the heat will make the belt expand
and contract. So the pressure adjustments for your first mug might not be
applicable for the next mug especially when the Mug Press is new.
The Mug Press might smell funny the first couple of times you turn the Press
on.
In the photo the screw is being held to emphasis the screw, but be sure and
hold the handle until the mug is secured in the press and the transfer process
has begun.
Remove the mug from the press when alerted by the buzzer. The mug handle
will not heat up while in the press and will be cool to the touch when you
remove the mug. Remove the transfer from the mug and drop the mug in a
bucket of cold water.
Before storing the Mug Press allow it to cool, place a mug in the press,
adjust for light pressure and close the Mug Press handle.

EXTREME TRAINING PROGRAM EXTREME DIGITAL SYSTEM 2011 PHOTO MUG SYSTEM
Extreme Digital 2011 Personalized Photo Products Photo Mug Training Preview
STEP 6: THE FINISHED PHOTO MUG
Once the buzzer sounds on the Mug Press, remove the mug from the Press
and remove the transfer. The mug with the transfer attached can be dropped
into a bucket of cold water. We suggest removing the transfer prior to
dropping the mug into cold water as a matter of good housekeeping.
The Photo Mug is now ready for use and is micro wave and dishwasher safe.
EXTREME TRAINING PROGRAM EXTREME DIGITAL SYSTEM 2011 PHOTO MUG SYSTEM
Call 702.365.6847 or visit www.facesncups.com