hitachi - hodgson tool hire burscough · hitachi power tools. ... to meet the requirements of...
TRANSCRIPT

TECHNICAL DATAAND
SERVICE MANUAL
GAS STRIP NAILERNR 90GC
SPECIFICATIONS AND PARTS ARE SUBJECT TO CHANGE FOR IMPROVEMENT
LIST No. E025 Sept. 2005
N
MODEL
NR 90GC
Hitachi �Power Tools

REMARK:
Throughout this TECHNICAL DATA AND SERVICE MANUAL, a symbol
is used in the place of company name and model name of our
competitor. The symbol utilized here is as follows:
Symbols UtilizedCompetitors
Company Name Model Name
P Paslode IMCT

CONTENTS
Page
1. PRODUCT NAME ........................................................................................................................... 1
2. MARKETING OBJECTIVE ............................................................................................................. 1
3. APPLICATIONS .............................................................................................................................. 1
4. SELLING POINTS .......................................................................................................................... 1
5. SPECIFICATIONS .......................................................................................................................... 2
5-1. Specifications .................................................................................................................................. 2
5-2. Explanation of the Nailing Action .................................................................................................... 2
5-3. Nail Selection .................................................................................................................................. 3
5-4. Nail Driving Force ........................................................................................................................... 4
6. COMPARISONS WITH SIMILAR PRODUCTS .............................................................................. 5
7. PRECAUTIONS IN SALES PROMOTION ..................................................................................... 6
7-1. Handling Instructions ...................................................................................................................... 6
7-2. Warning Label ................................................................................................................................. 6
7-3. Related Laws and Regulations ....................................................................................................... 8
8. MECHANISM AND OPERATION PRINCIPLE ............................................................................. 10
8-1. Mechanism ................................................................................................................................... 10
8-2. Principle of Operation ................................................................................................................... 12
9. TROUBLESHOOTING GUIDE ..................................................................................................... 16
9-1. Problems Caused by Improper Handling ...................................................................................... 16
9-2. Troubleshooting and Correction .................................................................................................... 19
9-3. Checking for Sparking and Corrective Action ............................................................................... 26
9-4. Regrinding the Driver Blade .......................................................................................................... 27
10. DISASSEMBLY AND REASSEMBLY ........................................................................................ 28
10-1. General Precautions in Disassembly and Reassembly .............................................................. 28
10-2. Disconnection and Reconnection of Wiring between Cylinder Head Section and
Handle Section ............................................................................................................................ 31
10-3. Disassembly and Reassembly of Cylinder Head Section ........................................................... 34
10-4. Disassembly and Reassembly of Housing Section .................................................................... 39
10-5. Disassembly and Reassembly of Handle Section ...................................................................... 55
11. INSPECTION AND CONFIRMATION AFTER REASSEMBLY .................................................. 69
12. STANDARD REPAIR TIME (UNIT) SCHEDULES ..................................................................... 70
Assembly diagram for NR 90GC

--- 1 ---
1. PRODUCT NAME
Hitachi 90 mm (3-1/2") Gas Strip Nailer, Model NR 90GC
2. MARKETING OBJECTIVE
Today, one company has been monopolizing the gas nailer markets. We will enter the largest-scale clipped head
(D-head) nailer market with the new Model NR 90GC gas strip nailer to expand our market share. The main
features of the Model NR 90GC are as follows:
(1) The battery is located at the end of the handle for well balance.
(2) New aggressive appearance
(3) 2-actioned nail feeding
(4) Comfortable grip
(5) Fully charged in one hour
3. APPLICATIONS
Floor and framing
Truss build-up, window build-up
Subflooring and roof decking
Wall sheathing
Mobile home and modular housing construction
4. SELLING POINTS
New aggressive appearance Comfortable grip
2-actioned nail feeding
Fully charged in one hour
Well balance

--- 2 ---
Optional accessories
Nail capacity
3.5 kg (7.7 lbs.)
Plastic case
347 mm x 353 mm x 108 mm(13-21/32" x 13-29/32" x 4-1/4")
37 nails (1 strip)
Dimensions(Length x Height x Width)
Nail feed system
Standard accessories
Weight
Spiral spring
Package dimensions(Length x Height x Width)
Packaging
500 mm x 460 mm x 150 mm(19-11/16" x 18-5/32" x 5-29/32")
- For North America -
Safety glasses (Code No. 875769)
Battery (Code No. 324147)
Charger UC 7SD
Case (Code No. 885360)
Allen wrench for M5 screw
(Code No. 944458)
5. SPECIFICATIONS
5-1. Specifications
(1) Gas nailer
Reciprocating piston type
Model
Driving system
NR 90GC
- For Europe -
Safety glasses (Code No. 885549)
Battery (Code No. 324148)
Charger UC 7SD
Case (Code No. 885360)
Allen wrench for M5 screw
(Code No. 944458)
- For North America -
Lubricant oiler (A) (Code No. 885546)
Fuel cell (Code No. 728980)
Grease (Code No. 317918)
- For Europe -
Lubricant oiler (A) (Code No. 885246)
Fuel cell (Code No. 753600)
Grease (Code No. 317918)
5-2. Explanation of the Nailing Action
To meet the requirements of "ANSI SNT-101-2002" (USA), the Model NR 90GC is equipped with FULL
SEQUENTIAL ACTUATION MECHANISM.
FULL SEQUENTIAL ACTUATION MECHANISM
First, press the pushing lever against the wood; next, pull the trigger to drive the nail. After nailing once,
nailing will not be possible again until the trigger is released and pressed again.

--- 3 ---
5-3. Nail Selection
The Model NR 90GC utilizes D-head (clipped head) nails collated with paper tape.
Applicable nail dimensions are shown below. Please note that screw-type nails cannot be used with the Model
NR 90GC.
CAUTION: Ensure that nails are as specified in Fig. 1. The Model NR 90GC utilizes D-head (clipped
head) nails collated at an angle of 35 degrees which are the same as the nails utilized by P.
However, some D-head nails made by other makers are collated at a different angle of 26
degrees. Use of such nails will cause clogging of nails and subsequent damage to the
nailer. Also avoid use of misaligned nails or nails collated with a weak paper tape. Do not
use P's 2" Roundrive nail (eccentric full round head nail) with the Model NR 90GC because it
may cause bending of nails. It is recommended to use genuine HITACHI nails to ensure
satisfactory driving quality.
6.8 mm(0.266")
3.0 mm(0.120")
50 m
m (
2")
Minimum
Paper tape collated strip nails D-head (clipped head) nails
Fig. 1 Dimensions of nail
Maximum
7.7 mm(0.303")
90 m
m (
3-1/
2")
3.3 mm(0.131")
35û
Paper tape
3.3 mm x 90 mm nails(0.131" x 3-1/2")
Max
.4.
6 m
m(0
.181
")
Max
.31
.7 m
m(1
.248
")

--- 4 ---
5-4. Nail Driving Force
In contrast to a pneumatic nailer, the output energy of a gas nailer cannot be adjusted optionally. However, the
output energy is changed because environmental conditions such as ambient temperature, humidity and altitude
have an effect on its combustion. Figure 2 shows a comparison between the pneumatic nailers Models NR 90AD
and others and the gas nailer Model NR 90GC on the output energy range. The output energy of the Model
NR 90GC changes within the operating range from 5.7 kg/cm2 (81.5 psi) to 6.1 kg/cm2 (87.2 psi) as a result of
conversion to the air pressure of the pneumatic nailer Model NR 90AD. Choose suitable nails and workpieces
according to the output energy of the nailer.
Fig. 2 Required nailing energy and nailer output energy
NR 90GC, P
Required nailing energy Nailer output energy
3.3
x 70
(.1
3 x
3)

--- 5 ---
6. COMPARISONS WITH SIMILAR PRODUCTS
Driving method
Feeder 2-actioned nail feeding
Battery voltage 7.2 V
Charge
Fuel cell life 1200 nails
HITACHIP
Fuel cell dimension
Applicable nails(Clip head)
3.0 mm --- 3.3 mm (0.120" --- 0.131")
31.5 mm dia. x 167
Model NR 90GC
Weight (tool, battery, fuel cell) 3.5 kg (7.7 lbs.)
Dimensions(L x H x W)
347 mm x 353 mm x 108 mm(12-21/32" x 13-29/32" x 4-1/4")
Nail capacity 37 nails (1 strip)
Maker
Magazine type Rear loading
Driving depth adjusting mechanism With wrench
Handle grip Rubber
Hook
Dia.
Length 50 mm --- 90 mm (2" --- 3-1/2")
2.9 mm --- 3.3 mm (0.113" --- 0.131")
50 mm --- 90 mm (2" --- 3-1/2")
310 mm x 343 mm x 110 mm(12-3/16" x 13-1/2" x 4-11/32")
37 nails (1 strip)
Rear loading
Tool not required
Rubber
Single action Single action
Provided Provided
2-actioned nail feeding
6 V
1 h 2 h
31.5 mm dia. x 167
1200 nails (USA, Canada)1000 nails (Europe)
3.4 kg (7.5 lbs.)
HITACHI

--- 6 ---
7. PRECAUTIONS IN SALES PROMOTION
In the interest of promoting the safest and most efficient use of the Model NR 90GC Nailer by all of our customers,
it is very important that at the time of sale the salesperson carefully ensures that the buyer seriously recognizes
the importance of the contents of the Handling Instructions, and fully understands the meaning of the precautions
listed on the Warning Label attached to each tool.
7-1. Handling Instructions
Although every effort is made in each step of design, manufacture, and inspection to provide protection against
safety hazards, the dangers inherent in the use of any pneumatic tool cannot be completely eliminated.
Accordingly, general precautions and suggestions for use of pneumatic tools, and specific precautions and
suggestions for the use of the pneumatic nailer are listed in the Handling Instructions to enhance the safe, efficient
use of the tool by the customer.
Salespersons must be thoroughly familiar with the contents of the Handling Instructions to be able to offer
appropriate guidance to the customers during sales promotion.
7-2. Warning Label
Each Model NR 90GC unit is provided with a Warning Label (illustrated below) which lists basic safety precautions
in its use. Carefully ensure that customers fully understand and follow these precautions before using the tool.
For the U.S.A. and Canada

--- 7 ---
For Europe
Fuel cell
For the U.S.A. and Canada
OK Befestigung D-47802 Krefeld, Germany www.okbefestigung.de
Contents: Propane/Butane liquefied 100 3 e Made in Germany 40 g 80 ml
DANGER - EXTREMELY FLAMMABLE
CONTENTS UNDER PRESSURE.
� Keep away from temperatures over 50ûC < 120û F >(for ex., sun radiation).
� Do not damage, puncture or burn even after use.
KEEP OUT OF THE REACH OF CHILDREN.
IN USE, MAY FORM FLAMMABLE/EXPLOSIVE VAPOR-AIR MIXTURE.
� Do not use near flames or spray on heated surface.
� Keep away from ignition sources.
� Use only outside or well ventilated rooms.
� keep container in well ventilated place.
� No smoking.
KEEP AWAY FROM SKIN AND EYES and DO NOT BREATHE GAS,
for SKIN AND EYE IRRITANT and VAPOR HARMFUL.
DO NOT REFILL.
For EU
OK Befestigung D-47802 Krefeld, Germany www.okbefestigung.de
Contents: Propane/Butane liquefied 100 3 e Made in Germany 40 g 80 ml
DANGER - EXTREMELY FLAMMABLE � Contents under pressure, keep away from temperatures
over 50ûC < 120û F > (for ex., sun radiation). � Do not use near flames or spray on heated surfaces.
� Use only outside or in well ventilated rooms. � Throw away only at designated areas.
� Keep out of the reach of children. � Do not damage, puncture or burn even after use.
� In use, may form flammable/explosive vapor - air mixture. � Keep container in a well ventilated place.
� Do not breathe gas. � Keep away from ignition sources. � No smoking. � Do not refill.
PATENT PENDING
PATENT PENDING

--- 8 ---
7-3. Related Laws and Regulations
As nailers and staplers are designed to instantaneously drive nails and staples, there is an ever-present danger of
misfiring and subsequent possible serious injury. Accordingly, close attention in handling is absolutely necessary
at all times. Carefully ensure that the customer is fully aware of the precautions listed in the Handling Instructions
provided with each unit.
While there are no specific safety regulations, there are related items in various general safety regulations with
which the salespersons should be familiar in order to properly advise the customer. Please check your national
and/or local regulations for applicable items. Some applicable items are outlined below.
The U.S.A:
OSHA 1926.102 Eye and face protection
1926.302 Power-operated hand tools
ANSI SNT-101-2002 Portable, Compressed-Air-Actuated,
Fastener Driving Tools-Safety Requirements for
The Europe
EN 712-13 2000 Hand-held-non-electric power tools
EN 50260-1 2002 Safety of hand-held battery-powered motor operated tools and battery packs
< Certificate No. FI 21611 by SGS Fimko Ltd./Finland >
75/324/EEC 1975 Aerosol Dispensers
At 50ûC, the pressure in the aerosol dispenser must not exceed 12 bars
8 bars/35ûC

--- 9 ---
First Aid:If contents inhaled, move to area with fresh air.Contact a doctor if symptoms persist.If contents come in contact with skin, washthe affected area with soap and warm waterthen apply skin cream.If contents come in contact with eyes, flush open eyeswith water. Contact a doctor if irritation continues.
Cautions in handling the fuel cell:
How to discharge gases from the canister:(1) Separate the metering valve from the canister;(2) Push the extended stem vertically to discharge
remaining fuel gas;(3) After the remaining fuel gas has been discharged,
to discharge remaining propellant gas, stronglypush the stem down, vertically, in order topuncture the cap of the canister. When punctured,remaining propellant gas will be discharged.
Carton box, small
Storage
To Retailers,
Flammable contents. Container under pressure.
Store in well-ventilated area.
Do not store above 50ûC (120ûF), e.g. sun radiation.
Do not be displayed in shop windows.
Do not store in passages, entry halls, near doors/exit or attic.
Do not store together with pyrotechnical goods.
The quantity stored in sales rooms should not exceed daily sales.
Store rooms must not take more than 20 m2 of room surface.
A fire extinguisher of 6 kg, class A, B, C must be available.
Packages should be stacked up not to fall to the ground.
Do not expose to an open flame and sparks.
Do not puncture or open the fuel cell.
Keep out of reach of children.
Carton box, large
Transportation
Shipment per mail is not allowed.
--- Transportation of small quantities for own use in
private car is allowed without shipping papers and
emergency card.
--- Observe temperature limit of 50ûC (120ûF).
--- Goods must be accompanied by transport
emergency card for road; class 2.1, UN No. 1950.
UN No.: United Nation IMDG
(International Maritime Dangerous Goods)

--- 10 ---
8. MECHANISM AND OPERATION PRINCIPLE
8-1. Mechanism
The Model NR 90GC is a nailer that drives nails into workpieces with the aid of fuel combustion energy. This is
the Hitachi's first gas strip nailer and there is no similarity between the Model NR 90GC and other Hitachi nailers
in construction. Its principle of operation is completely different from that of a pneumatic nailer except the
magazine section. The Model NR 90GC is equipped with a fuel cell and a battery in order to output combustion
energy in addition to the electric components such as electric circuits, motor and electric switches.
As illustrated in Fig. 8, the Model NR 90GC can be generally divided into three sections: Output section, head
section and handle section. Features of the main parts are described below.
Output section (Housing section):
This section outputs fuel combustion energy. The piston reciprocates to drive nails in the same manner as a
pneumatic nailer. The piston reciprocates in the cylinder. Under the piston, there is a driving unit. The
combustion chamber is encased in a chamber and burns fuel to output combustion energy. Outputted
combustion energy is applied to the top of the piston then the piston is suddenly lowered to drive nails at the
driving unit. The nails are fed from the magazine unit in the handle section.
Head section (Cylinder head section):
This section is at the top of the combustion chamber in the output section. There is a fan to stir fuel and fuel is
fed from the fuel cell to the combustion chamber in this section. The fan is mounted to the motor.
The motor is held in the motor mount and secured to the center of the cylinder head through the spring.
This spring absorbs shock to the motor. There is a spark plug beside the fan. The top cover at the top of the
main body covers the filter. The cell lever feeds fuel from the fuel cell to the combustion chamber. Its rotation
is supported.
Handle section:
This section is comprised of a magazine unit to feed nails to the driving unit, battery holder, handle unit, fuel
cell holder and electrical wiring. The construction of the magazine unit is similar to that of a pneumatic nailer.
There is a controller behind the magazine unit in order to control electric signals. The handle unit contains a
trigger with a built-in spark switch. Switch lever (B) is located at the top of the trigger in order to turn on the
spark switch. The electrical wiring connects the battery, trigger switch and fan switch. Upon receipt of each
switch signal by the controller, the motor in the head section rotates and the spark plug discharges.

--- 11 ---
Fig. 3
Cylinder Head [14]
Chamber [24]
Cylinder Ass'y [42]
Motor Mount [8]
Cell Lever [105]
Out
put s
ectio
n
Spark Plug (A) [11]Motor Spring [12]
Combustionchamber
Housing Ass'y [74]
Piston [39]
Piston Bumper [40]
Pushing Lever [64] Feeder Knob [125]
Handle section
Trigger [98]
Motor [6]
Head section (Cylinder head section)
Top Cover [3] Cell Cover [109]
Filter [4]
Switch Lever (B) [114]
Battery[111]
Fan [20]

--- 12 ---
8-2. Principle of Operation
(1) Before nailing
Fuel is not charged into the nailer in the initial
state. The combustion chamber is released
to the atmosphere (Fig. 4).
(2) When nailing
1) Push up the Pushing Lever [64].
Then the nailer starts operation in the
following order (Fig. 5).
The Switch Plate [34] on the Chamber
[24] pushes the Switch Arm [82] to turn on
the fan switch. The Fan [20] in the
combustion chamber rotates.
The Chamber Head [22] is sealed by the
O-ring [15] and the Chamber [24] surface
is sealed by the O-ring [36]
simultaneously. Thus the combustion
chamber is cut off from the atmosphere.
The convex portion of the Chamber [24]
pushes up the Tension Plate [113] on
Switch Lever (B) [114] to rotate Switch
Lever (B) [114].
The protrusion of the Chamber Head
[22] pushes up the tip of the Cell Lever
[105] to rotate it. Thus the Cell Lever
[105] pushes the back of the fuel cell to
spray fuel into the combustion chamber.
Fig. 5
Fig. 4
Fuel cell
Chamber [24]Cylinder Ass'y [42]
PushingLever [64]
Fan [20]
Combustionchamber
Trigger [98]
Chamber [24]
Cell Lever [105]O-ring [15]
Protrusion ofChamber Head [22]
Fan switch
Switch Lever (B)[114]
Trigger [98]
Switch Arm [82]
Pushing Lever [64]
Convex of Chamber [24]
Switch Plate [34]
Combustionchamber
O-ring [36]
Chamber [24]Tension Plate [113]
Fan [20]Chamber Head [22]

--- 13 ---
2) When the Trigger [98] is depressed, the
switch in the Trigger [98] contacts the end of
Switch Lever (B) [114] and turns on. Then the
spark plug in the combustion chamber
discharges (Fig. 6).
Fuel burns and a sudden expansion occurs.
The Piston [39] is lowered to drive nails
(Fig. 7).
When the Piston [39] passes the hole of the
Cylinder Ass'y [42], combustion gas is
partially released into the atmosphere
through the Lead Valve [45]. Because the
Lead Valve [45] is a nonreturn valve, no air
comes in the Cylinder Ass'y [42]. When the
Piston [39] contacts the Piston Bumper [40],
combustion of fuel is almost completed.
Fig. 7
Fig. 6
Switch
Trigger[98]
Hole of CylinderAss'y [42]
Switch Lever(B) [114]
Piston [39]
Nail
Piston Bumper [40]
Lead Valve [45]
Spark plug
O-ring [15]
Lead Valve[45]
Piston [39]
Chamber [24]
O-ring [36]
Chamber Lock Bar [100]
Combustionchamber
(3) During return
When the Trigger [98] is depressed, the Chamber
Lock Bar [100] at the bottom of the Trigger [98] is
positioned under the Chamber [24] to prevent the
Chamber [24] from lowering while the Trigger [98]
is depressed. The Chamber [24] is sealed by the
O-rings [15] and [36] to cut off the atmosphere
(Fig. 7). Because combustion gas is partially
released into the atmosphere through the Lead
Valve [45], the pressure of the upper portion of the
Piston [39] becomes lower than the atmospheric
pressure. The Piston [39] is returned to the initial
position by the pressure difference between the
upper portion and the lower portion of the Piston
[39].

--- 14 ---
O-ring [15]
Chamber Lock Bar [100]
Chamber [24]
Fan [20]
Pushing Lever [64]
Fig. 8
(4) Discharging and cooling
When the Trigger [98] is released, the
Chamber Lock Bar [100] is returned from the
position under the Chamber [24] to the original
position. Thus the Chamber [24] and the
Pushing Lever [64] are placed in the initial
state and sealing by the O-rings [15] and [36]
is released. When the Fan [20] rotates, air
passes through the Filter [4], enters the
combustion chamber and goes to the outside
in order to discharge gas and cool the
combustion chamber (Fig. 8).
Filter [4]
Combustionchamber
O-ring [36]
Trigger [98]

--- 15 ---
A
SwitchLever (B)[114]
Pushing Lever [64]
Fig. 9
(5) Full sequential action mechanism
Press the Pushing Lever [64] against the
workpiece and move the Chamber [24] to the
uppermost position. Then the nailer operates only
when the Trigger [98] is depressed. The nailer
does not operate if the pressing amount of the
Pushing Lever [64] is insufficient or if the Pushing
Lever [64] is pressed after depressing the Trigger
[98].
When depressing the Trigger [98] after pressing
the Pushing Lever [64]
The convex portion of the Chamber [24] pushes up
the Tension Plate [113] and rotates when the
Chamber [24] reaches the uppermost position.
Therefore, the end of Switch Lever (B) [114] is
moved toward the Trigger [98] (Fig. 9).
The Lever Stopper [116] at the side of the Trigger
[98] does not prevent Switch Lever (B) [114] from
rotating (Fig. 10). The switch is turned on and nails
are driven by depressing the Trigger [98].
When pressing the Pushing Lever [64] after
depressing the Trigger [98]
When depressing the Trigger [98], the Lever
Stopper [116] is deformed by the Trigger [98] and
the end of the Lever Stopper [116] is positioned
toward Switch Lever (B) [114]
(Fig. 11).
Then the convex portion of the Chamber [24]
pushes up the Tension Plate [113] when the
Pushing Lever [64] is pressed. However, the Lever
Stopper [116] prevents Switch Lever (B) [114] from
rotating. Thus the switch of the Trigger [98] is not
turned on.
TensionPlate [113]
Convexportion ofthe Chamber[24]
A
Trigger [98]
Switch Lever (B)[114]
Trigger [98]Lever Stopper [116]
Fig. 10 (A --- A)
Switch Lever (B)[114]
Trigger [98]Lever Stopper [116]
Fig. 11 (A --- A)
A

--- 16 ---
The Trigger [98] isdepressed insufficiently.
The Pushing Lever [64] ispressed while depressing
the Trigger [98] slightly.
The Battery [111] is not
set or set improperly.The nailer is used while
the battery indicator light
is red (Fig. 12).
The nailer is used with the
Filter [4] clogged.
The fuel cell is not set or
set improperly.
The metering valve of the
fuel cell is set improperly.
The Pushing Lever [64] ispressed insufficiently.
The fuel cell is short of
fuel.
No combustion occurs.
No nail is driven.
No combustion occurs.
The nailer does not
start.The output is
decreased.
The output is
decreased.
The nailer producesheat.
No combustion occurs.
No combustion occurs.
No combustion occurs.
No combustion occurs.
Problem CauseImproper handling Remedy
9. TROUBLESHOOTING GUIDE
9-1. Problems Caused by Improper Handling
Following table shows the problems that are apt to occur. These problems are not caused by abnormality of the
nailer but improper handling. Please instruct the customers to use the nailer properly according to the table.
The Piston [39] islowered.
The spark switch is
not turned on.
No electricity is sent.
The number of
revolutions of the
Fan [20] is low.
Discharging and
cooling are insufficient.
No fuel is fed.
No fuel is fed.
No fuel is fed.The switch of the Fan
[20] is not turned on.
No fuel is fed.
Return the Piston [39] to the
uppermost position with a
flat-blade screwdriver.
Keep depressing the Trigger
[98] securely about 0.5
second after combustion.Press the Pushing Lever [64]without depressing the Trigger
[98], then depress the Trigger
[98].Set the Battery [111] properly
to the nailer.Charge the Battery [111].
Clean the Filter [4] (Fig. 13).
Set the fuel cell properly
(Fig. 14).
Set the metering valve of the
fuel cell properly (Fig. 15).
Press the Pushing Lever [64]securely.
Use a new fuel cell.
Top Cover [3]
Fig. 13
Fig. 12
Batteryindicator light
Filter Cover [5]
Filter [4](Clean the Filter [4]with an air gun.)

--- 17 ---
Fig. 15
Fig. 14
Checking the fuel cell
Fuel is leaked.
There is no fuel.
The bag in the fuel cell is
damaged.
Insufficient sealing of the cup
and the stem in the metering
valve.
The nailer is left under a high
temperature condition.
The nailer is left in directsunlight or nails are driven
continuously. <Excessively
high concentration of gas>
The nailer is left under a low
temperature condition.
0ûC or lower temperature<Low concentration of gas>
Problem Possible cause Inspection method Remedy
The metering valve is not
set properly.
Press the stem five times or
more with the fuel cell held
upright to check whetherfuel is sprayed or not.
Fuel is not sprayed when
holding the fuel cell upright
but sprayed when holding
the fuel cell horizontally.Check whether fuel is
leaked or not by keeping the
stem pressed.
The main body is hot due to
the combustion heat.
The sprayed fuel is in a
liquid state.
Set the metering valve properly
(the metering valve may be
secured by rotating it).
Replace the metering valve
with new one.Replace the fuel cell with new
one.
Replace the fuel cell with new
one.
Replace the metering valve
with new one.
Cool the main body and the
fuel cell.
Replace the fuel cell with newone.
Warm up the fuel cell.
Instruct the customers
necessary measures such asputting the fuel cell in a pocket
or wrapping the fuel cell in a
thermal insulating material.
Fuel is notsprayed.
Fuel issprayed butnocombustionoccurs.
Adapter
Fuel cell
(1) Separate the metering valve and the cap from the gas cartridge.
Fuel cell
Stem
StemAdapter
To attach the metering valve to a fuel cell:
(2) Press forward (stem side) and downward on the front side of the metering valve.
(3) Press downward on the rear of the metering valve until it seals.
Insert the stem of fuel cell into the hole of adapter.

--- 18 ---
The oxygen content of the airis low in a place such as
highlands at an altitude of
1500 meters or more.
<Excessively high
concentration of gas>
Problem Possible cause Inspection method Remedy
A large amount of fuel issprayed.
Use the nailer in a place wherethe altitude is under 1500
meters.
Fuel issprayed butnocombustionoccurs.

--- 19 ---
Check the position of thePiston [39].
Check the outside airtemperature and the altitude.
Check that the fuel cell is setproperly.Short of fuel in the fuel cell.The metering valve is not setproperly to the fuel cell.The Cell Lever [105] isdeformed.The Adapter [30] is damaged.
The Pushing Lever [64] isdeformed.Pushing Lever Arms (A) [60]and (B) [62] are deformed.The O-ring [15] is pinched.
It automatically turns off if it isleft with the Battery [111] set(for Europe).Low voltage.The Battery [111] is not setproperly.The Battery [111] is faulty.The battery indicator lightlights red.Connection failure betweenInternal Wire (A) [86] and theController [101].Connection failure betweenInternal Wire (A) [86] and theMotor [6].Break in Internal Wire (A)[86].The fan switch is faulty.The Switch Arm [82] isdeformed.The Switch Arm [82] isdeformed.The Motor [6] is damaged.
The Piston [39] is lowered.
The outside air temperatureand the altitude are out of thespecifications.
No fuel is fed.
The Pushing Lever [64]cannot be pushed up.
<Electric section>The battery indicator lightdoes not light.
The Motor [6] does notrotate.
Problem Possible cause Inspection method Remedy
Return the Piston [39] to theuppermost position with aflat-blade screwdriver.Keep depressing the Trigger[98] securely until thenailing operation iscompleted.Outside air temperaturerange: 0ûC to 40ûCAltitude: Under 1500 m(5000 feet)Set the fuel cell properly(Fig. 14).Replace the fuel cell.Set the metering valve tothe fuel cell properly (Fig.15).Replace the Cell Lever[105].The Adapter [30] isdamaged.Replace the Pushing Lever[64].Replace Pushing LeverArms (A) [60] and (B) [62].Mount the O-ring [15]properly.
Remove the Battery [111]and set it again.Perform charging.
Set the Battery [111]properly.Replace the Battery [111].Charge the Battery [111].Connect properly (Fig. 16).Connect properly (Fig. 17).Replace Internal Wire (A)[86].Replace Internal Wire (A)[86].Replace the Switch Arm[82].Replace the Switch Arm[82].Replace the Motor [6].
(Combustion section)
9-2. Troubleshooting and Correction
(1) Troubleshooting and correction in the case of gas nailers
The mechanism of a gas nailer to produce output is completely different from that of a pneumatic nailer.
Following table shows the troubleshooting and correction procedures inherent in gas nailers.
No combustion
occurs.

--- 20 ---
The wire must notbe pinched whendepressing theTrigger [98].
Controller [101].
Controller connector
Fig. 16
Fig. 17
Spark plug cable
Motor wire connector

--- 21 ---
No combustionoccurs.
No nail is driventhough nails areset properly andcombustion isnormal.
Low output.
The nailer isoverheated.
The Battery [111] is not setproperly.The Battery [111] is faulty.The battery indicator lightlights red.Connection failure betweenInternal Wire (A) [86] and theController [101].The spark plug cable isdisconnected from spark plug(A).Faulty insulation of the sparkplug cable wire.Break in Internal Wire (A)[86].The spark switch is faulty.Spark Plug (A) [11] is stained.The wire near the Trigger [98]is pinched.Switch Lever (B) [114] isdeformed.
Check the position of thePiston [39].
The O-rings [15] [36] areworn.The Lead Valve [45] isdeformed.Inside of the cylinder isstained.The Piston Ring [38] isdamaged.The Filter [4] is clogged.Check the outside airtemperature and the altitude.
The Filter [4] is clogged.
Check that the Motor [6],Motor Mount [8], MotorSleeve [9], Fan [20] and NutM4 [18] are mountedproperly.
<Electric section> ContinuedNo spark occurs. (Check forsparking according to "9-3.Checking for Sparking andCorrective Action".)
<Combustion section>The Piston [39] does notreturn completely.
Discharging and cooling areinsufficient.The outside air temperatureand the altitude are out of thespecifications.Discharging and cooling areinsufficient.Operating speed is fast.
Discharging and cooling areinsufficient.
Problem Possible cause Inspection method Remedy
Set the Battery [111]properly.Replace the Battery [111].Charge the Battery [111].Connect properly (Fig. 16).Connect properly (Fig. 17).Replace the Controller[101].Replace Internal Wire (A)[86].Replace Internal Wire (A)[86].Clean spark plug (A)(Fig. 18).Position the wire correctly(Fig. 16).Replace Switch Lever (B)[114].
Return the Piston [39] to theuppermost position with aflat-blade screwdriver.Keep depressing the Trigger[98] securely until thenailing operation iscompleted.Replace the O-rings [15]and [36].Replace the Lead Valve[45].Clean the inside of thecylinder.Replace the Piston Ring[38].Clean the Filter [4] (Fig. 13).Outside air temperaturerange: 0ûC to 40ûCAltitude: Under 1500 m(5000 feet)Clean the Filter [4] (Fig. 13).Do not use the nailer at highspeed. Speed: 1 nail/sec. Continuous operation:
1000 nails/h
Mount each part properly.
Continued
Abnormal noise isheard when thefan is rotating.* A rubbing noise may be heard in some rare cases but there is no problem in operation.

--- 22 ---
Fan
Clean this area especially.
Spark plug cable
Spark plug
Fig. 18

--- 23 ---
Check if the magazine isnormally loaded withspecified nails.
Check if the nail feederoperates smoothly in themagazine.
Check if nails (one strip)move smoothly in themagazine.
Check if nails (one strip) arefed smoothly into the nailinjection port of the nose.
<Nails>Magazine is not loaded withspecified genuine nails.
Magazine is loaded withabnormal nails (bent nails,large or small round-headnails, abnormal collation,etc.).
Nail or collating band clogs.
Collating band is deformedor torn.
<Magazine>Magazine is abnormal(deformed or damaged).
Nail Feeder (A) [112] isabnormal (deformed ordamaged).
Ribbon Spring [121] isabnormal (deformed ordamaged).
Nail Rail [93] is abnormal(deformed, burrs, damagedor fatigued).
Adhesive fragments are onthe nail rail or they need oil.
Foreign matter is found onthe guide face of Nail Feeder(A) [112].
<Nose>Nail inlet groove of the noseis abnormal (deformed, burrsor damaged).
Adhesive fragments are inthe nail inlet groove.
Problem Possible cause Inspection method Remedy
Use specified nails.Remove the abnormal nailsand load the magazine withnormal nails.
Repair or replace thedefective part.
Remove the adhesivefragments and apply oil tothe nail feeder, RibbonSpring [121] and the nailrail.
Repair or replace thedefective part.
Remove the adhesivefragments.
1) Nails cannot be driven.
(2) Troubleshooting and correction in the case of general-purpose nailers

--- 24 ---
Pull the nail feeder backwardand perform idle driving.Check if the driver blade hasreturned.
While operating the nailerwithout nails, check if thedriving operation isperformed.
After operating the nailerwithout nails, check if thedriver blade is kept in thedown position.
Check if the adjuster is raisedtoo high.
See item 1).
Check if the driver blade tipis abnormally worn.
Drive a nail into soft woodworkpiece and check if thenail is bent.
Check Nail Feeder (A) [112]for abnormal condition.
<Output section>Piston bumper is abnormal(dislocated, deformed ordamaged).
O-ring [36] of the cylinder isabnormal (dislocated,deformed or damaged).
Driver blade is abnormal(deformed, burrs, damagedor fatigued).
For short nails, the adjusteris raised too high.
Nails are not fully fed into theinjection port.Unspecified nails are used.Driver blade is worn.
Workpiece is very hard.
Nail Feeder (A) [112] isabnormal (worn ordamaged).
Problem Possible cause Inspection method Remedy
Replace the piston bumper.
Reassemble or replace.
Repair or replace.
Replace the head valvespring.
Turn the adjuster to thelower position to decreasethe pressure.See item 1).
Replace the driver blade.
Do not use unspecifiedworkpieces.
Replace Nail Feeder (A)[112].
2) Nails are bent when being driven.

--- 25 ---
Adjust the adjuster to theproper position.
Do not use unspecifiedworkpieces.
Replace the driver blade.
Use specified nails.
See <Magazine> in iem 1).
Replace the part.
Replace Nail Feeder (A)[112].
Turn the adjuster to thelowest position and drive anail.
Drive a nail into soft woodworkpiece and check if thehead protrudes from thewood surface.
Operate the nailer withoutnails and check if the driverblade is projected from thenose tip.
Check if the nails arespecified ones.
Check if they move smoothlyafter putting nails, and checkif the nail feeder operatessmoothly.
Check if the driver blade tip isworn.
Check Nail Feeder (A) [112]for abnormal condition.
Adjuster is improperlyadjusted.
Workpiece is very hard.
Driver blade is worn.
Unspecified nails used.
<Improper nail feed>See <Magazine> in item 1).
Driver blade worn.
Nail Feeder (A) [112] isabnormal (worn ordamaged).
Problem Possible cause Inspection method Remedy
3) Head of a nail driven into a workpiece protrudes from the wood surface.
4) Nails clog the mechanism.

--- 26 ---
9-3. Checking for Sparking and Corrective Action
The main causes of no combustion are the following five items.
1. The fuel cell is abnormal. (Replace the fuel cell with new one.)
2. The battery is abnormal. (Check the battery.)
3. The Chamber [24] is improperly sealed. (Check the O-rings [15] and [36], and the moving amount of the
Pushing Lever [64].)
4. The Piston [39] is not in the uppermost position. (Check the position of the Piston [39].)
5. No sparking occurs.
It is most difficult to check the cause of the above "5. No sparking occurs". How to determine the cause of no
sparking is explained below. (Disassemble the nailer according to "10. DISASSEMBLY AND REASSEMBLY".)
Remove the fuel cell then set nails and the battery.
(1) Remove the Hex. Socket Hd. Bolt M5 x 14 [1] and open the Top Cover [3].
(2) Remove the Hex. Socket Hd. Bolt M5 x 20 [13] and remove the Cylinder Head [14] from the Housing [71].
(3) Put the Fan [20] on the Cylinder Head [14] and check that the Fan [20] does not contact the surrounding
components.
(4) Push up the Pushing Lever [64] to rotate the Motor [6].
(5) Depress the Trigger [98].
If sparking does not occur from the spark plug (Fig. 19) as a result of the above operation, perform checking
and take corrective actions as follows.
(Disassemble and reassemble the nailer according to "10. DISASSEMBLY AND REASSEMBLY".)
Checking and corrective action
1. Check for stain of Spark Plug (A) [11]. Clean Spark Plug (A) [11].
2. Faulty insulation of the spark plug cable (sparking occurs from the spark plug cable).
Disconnect the spark plug cable from Spark Plug (A) [11] and check the spark plug cable. If the spark plug
cable is abnormal (discharged from the cable due to scratches), replace the Controller [101].
3. Faulty insulation of Spark Plug (A) [11]. Replace Spark Plug (A) [11].
4. Check whether the trigger switch wire in the Trigger [98] is pinched or not (Fig. 16).
5. Switch Lever (B) [114] is faulty. Replace Switch Lever (B) [114].
6. The Trigger [98] is faulty. Replace the Trigger [98].
7. No sparking occurs even if the switch in the Trigger [98] is directly turned on. Replace Internal Wire (A) [86].
Spark Plug (A) [11]
Cylinder Head [14]
Check whether sparkingoccurs at this area or not.
Fig. 19
Spark plug cable

--- 27 ---
9-4. Regrinding the Driver Blade
The tip of the driver blade should be ground as shown in Fig. 20. To grind with a grinder, gradually grind the tip
while cooling the ground area with water to prevent it from being excessively heated. Excessive grinding will
rapidly reduce the service life of the driver blade. In such a case, replace the driver blade.
Fig. 20
Slant
Grinding surface
Driver blade
5û

--- 28 ---
10. DISASSEMBLY AND REASSEMBLY
The items particularly necessary for disassembly and reassembly are described below. The [Bold] numbers in
the descriptions below correspond to the item numbers in the Parts List and exploded assembly diagram.
[CAUTION]
Before disassembly or reassembly, be sure to remove all nails, fuel cell and battery.
Be sure to tighten the screw of the head securely before driving nails.
10-1. General Precautions in Disassembly and Reassembly
Apply grease (ATTOLUB No. 2) (Code No. 317918) to the areas shown in Fig. 22.
Apply oil (Gas Nailer Lubricant) (Code No. 885246) (Code No. 885546) to the areas shown in Fig. 21.
When installing the O-rings, be careful not to damage the O-rings and prevent dirt entry.
Oil required: Hitachi Gas Nailer Lubricant
8 oz. (250 cc) oil feeder (Code No. 885-246) (Code No. 885-546)
Use the cleaner (Code No. 885245) for cleaning the inner parts such as O-rings.
Tightening torque for each part
Bolt and others Tightening torque N�m (kgf�cm, ft-lb)
3.4 0.7 (35 7, 2.5 0.5)
4.6 0.5 (45 5, 3.4 0.4)
6.4 0.5 (65 5, 4.7 0.4)
1.0 to 1.5 (10 to 15, 0.7 to 1.1)
6.4 0.5 (65 5, 4.7 0.4)
Hex. Socket Set Screw M4 x 5 .............................................. [31]
Hex. Socket Hd. Bolt M4 x 10 ................................................ [61]
Hex. Socket Hd. Bolt M4 x 10 ................................................ [43]
Hex. Socket Hd. Bolt M4 x 16 ................................................ [21]
Hex. Socket Hd. Bolt M4 x 18 .............................................. [127]
Hex. Socket Hd. Bolt M5 x 10 ................................................ [66]
Hex. Socket Hd. Bolt M5 x 14 .................................................. [1]
Hex. Socket Hd. Bolt M5 x 15 ................................................ [76]
Hex. Socket Hd. Bolt M5 x 20 ................................................ [13]
Hex. Socket Hd. Bolt M5 x 50 ................................................ [51]
Seal Lock Hex. Socket Hd. Bolt M5 x 10 ............................... [58]
Tapping Screw (W/Flange) D4 x 14 (Black) ........................... [95]
Tapping Screw (W/Flange) D4 x 16 (Black) ........................... [78]
Tapping Screw (W/Flange) D4 x 20 (Black) ........................... [83]
Tapping Screw (W/Flange) D5 x 20 (Black) ......................... [126]
Tapping Screw (W/Flange) D4 x 45 ....................................... [80]
Flat Hd. Tapping Screw D4 .................................................. [104]
Machine Screw M4 x 6 ........................................... [28], [33], [46]
Nut M4 ................................................................................... [18]
Spark Plug (A) ......................................................................... [11]
5.9 0.5 (60 5, 4.4 0.4)
6.9 0.5 (70 5, 5.1 0.4)
8.3 0.5 (85 5, 6.1 0.4)
1.5 0.5 (15 5, 0.7 0.4)
3.0 0.5 (30 5, 2.2 0.4)
1.0 0.3 (10 3, 0.7 0.2)
1.8 0.4 (18 4, 1.3 0.3)
1.0 0.2 (10 2, 0.7 0.1)

--- 29 ---
O-ring (I.D. 66.27) [36]Apply oil entirely.
Oil application areas
Mount Sleeve [9]Apply oil entirely.
O-ring (I.D. 59.92) [15]Apply oil entirely.
Cylinder Head [14]Apply oil to the diagonally shadedareas.
Outside: O-ring groove
Piston Ring [38]Apply oil entirely. Chamber ass'y
Apply oil to the diagonallyshaded areas.
Inside: O-ring sliding portions (2 places)
Fig. 21
Cylinder Ass'y [42]Apply oil to the diagonallyshaded areas.
InsideOutside: O-ring groove
Piston [39]Apply oil to the diagonallyshaded areas.
Outside: Piston ring groove

--- 30 ---
Handle (B) [84]
Grease application areas
Plunger of the fan switch Plunger of the trigger switch
Fig. 22

--- 31 ---
Housing section
Cylinder head section
Hanging mechanismFour bolts
10-2. Disconnection and Reconnection of Wiring between Cylinder Head Section and Handle Section
The Model NR 90GC is comprised of three sections, cylinder head section, housing section and handle section.
The wiring between the cylinder head section and the handle section must be disconnected before disassembly
and reassembly of each section. Refer to 10-3, 10-4 and 10-5 for disassembly and reassembly of each section.
[Tools required]
Hex. bar wrench (4 mm)
Phillips screwdriver
(a) Disassembly (Fig. 24)
Remove the Hex. Socket Hd. Bolt M5 x 14 [1] and the Washer M5 [2] then open the Top Cover [3]. (Do not
open the Top Cover [3] excessively. Otherwise, it may be broken.)
Disconnect the red cable from Spark Plug (A) [11]. Be sure to hold the black rubber cap at disconnection to
prevent the cable from being damaged. Do not yank the cable. If it is difficult to disconnect the rubber cap
from Spark Plug (A) [11], pry the rubber cap off with a Phillips screwdriver or the like by fitting the tip of the
Phillips screwdriver in the root of the cable outlet of the rubber cap.
Remove the connector from the two wires coming from the Motor [6].
Remove the Hex. Socket Hd. Bolts M5 x 20 [13] and remove the cylinder head section from the main body.
Two bolts Handle section
Spark plug cable(One thick red cable)
Wiring connected tothe motor. Connectoris provided.(One thin red wire andone thin black wire)
Fig. 23

--- 32 ---
Fig. 24
Handle section
Connector of the motor
Wiring connected to the motor
Spark plug cable
Top Cover [3] (Do not open excessively.)
Hex. Socket Hd. Bolt M5 x 14 [1]
Housing section
Washer M5 [2]
Spark Plug (A) [11]
Cylinder head section

--- 33 ---
Fig. 25
(b) Reassembly
Reassembly procedures should be followed in the reverse order. Note the following points.
When mounting the cylinder head section to the main body, align the core of the Cylinder Ass'y [42] with the
core of the cylinder head section and tighten the Hex. Socket Hd. Bolts M5 x 20 [13] while pushing up the
Pushing Lever [64] to prevent the O-ring [15] from being pinched.
Perform wiring as shown in Fig. 25.
Perform wiring so that nowire is placed on this area.

--- 34 ---
10-3. Disassembly and Reassembly of Cylinder Head Section
(1) Disassembly and reassembly of the Cylinder Head [14], Motor [6] and the related parts
[Tools required]
Hex. bar wrench (3 mm)
Phillips screwdriver
Spanner (7 mm (0.276")) x 2 pcs.
Roll pin puller (2.5 mm (0.098") dia.)
Socket wrench (8 mm (0.314"))
(a) Disassembly (See Fig. 26.)
Remove the O-ring [15].
Remove the Nut M4 [18] and the Washer M4 [19] to remove the Fan [20].
Remove the Hex. Socket Set Screw M4 x 5 [31] with a hex. bar wrench. Then remove the Machine Screw
M4 x 6 [28] to remove the Motor Mount [8], Motor Sleeve [9], Shaft Washer [10] and Motor Spring [12].
Remove the Roll Pin D2.5 x 25 [7] with a roll pin puller. Then remove the Motor [6] and the Rubber Washer
[29].
Remove Spark Plug (A) [11] with a socket wrench.
CAUTION: Do not deform the Fan [20].

--- 35 ---
Motor Mount [8]
Washer M4 [19]
Machine Screw M4 x 6 [28]
Motor Spring [12]
Motor [6]
Rubber Washer [29]
Mount Sleeve [9]
Hex. Socket Set Screw M4 x 5 [31]
Spark Plug (A) [11]
Roll Pin D2.5 x 25 [7]
Nut M4 [18]
Shaft Washer [10]
Washer M4 [19]
Cylinder Head [14]
O-ring (I.D 59.92) [15]
Fan [20]
Nut M4 [18]
Fig. 26

--- 36 ---
Do not widen the clearance betweenthe ribs when aligning.
Motor Mount [8]
(b) Reassembly
Disassembly procedures should be followed in the reverse order. Note the following points.
Apply designated oil (Code No. 885-546, Code No. 885-246) to the O-ring [15] and the Mount Sleeve [9].
Mount the Mount Sleeve [9] with the uneven surface faced outward.
Align the end of the Motor Spring [12] with the center of the Motor Mount [8] and rotate it as shown in Fig. 27.
Set the Cylinder Head [14] and the Motor Mount [8] as shown in Fig. 28 and secure with the Hex. Socket Set
Screw M4 x 5 [31]. At this time, lightly press the Motor Mount [8] in "A" direction to prevent the Motor Mount
[8] from floating.
Fig. 28
Motor Spring [12]
Cylinder Head [14]
Fig. 27
Motor Mount [8]
Motor Spring [12]
Motor Mount [8]
Setting position Position after rotation
End End

--- 37 ---
(2) Disassembly and reassembly of the Top Cover [3] and the related parts
[Tools required]
Roll pin puller (2.0 mm (0.078") dia.)
(a) Disassembly (See Fig. 29.)
Remove the Filter Cover [5] and the Filter [4].
Remove the Shaft Ring [26]. Then remove the Shaft [27], Washer M5 [2], Cell Lever [105], Cell Rubber [110]
and Cell Cover [109].
Remove the Roll Pin D2 x 8 [107]. Then remove the Latch [106] and the Spring D3.6 [108].
Remove the Adapter [30].

--- 38 ---
Fig. 29
Cell Lever [105]
Washer M5 [2]
Cell Rubber [110]
Top Cover [3]
Hex. Socket Hd.Bolt M5 x 14 [1]
Filter [4]
Shaft Ring [26]
Cell Cover [109]
Washer M5 [2]
Washer M5 [2]
Cylinder Head [14]
Shaft [27]
Latch [106]
Filter Cover [5]
Adapter [30]
Roll Pin D2 x 8 [107]
Spring D3.6 [108]
(b) Reassembly
Disassembly procedures should be followed in the reverse order. Note the following points.
Push the Adapter [30] in until it contacts the Cylinder Head [14].

--- 39 ---
10-4. Disassembly and Reassembly of Housing Section
(1) Disassembly and reassembly of housing section, handle section and pushing lever (Fig. 30)
[Tools required]
Hex. bar wrench (4 mm)
(a) Disassembly
Remove the cylinder head section from the main body according to 10-2 and 10-3.
Remove the Hex. Socket Hd. Bolt M5 x 50 [51] and pull out the Nose Sleeve [52]. Then the output section
and the Plate Sleeve [54] can be removed from the main body. Remove the Hex. Socket Hd. Bolt M5 x 10
[66]. Then the Pushing Lever [64], Pushing Stopper [65], Adjuster Bush (S) [67], Blade Guide [53] and U-Nut
M5 [56] can be removed.
Hex. Socket Hd.Bolt M5 x 50 [51]
Pushing Stopper [65]
Nose Sleeve [52]
Pushing Lever [64]
Handle section
Housing section
Blade Guide [53]
U-Nut M5 [56]
Adjuster Bush (S) [67]
Hex. Socket Hd.Bolt M5 x 10 [66]
Plate Sleeve [54]
Fig. 30

--- 40 ---
(b) Reassembly
Reassembly procedures should be followed in the reverse order. Note the following points.
Mount the Plate Sleeve [54] facing the stepped portion to the handle so that the stepped portion fits in the
concave portion of the Side Plate [55] (Fig. 31).
Check that each lever protruded from the handle section fits in each hole on the side of the handle of the
housing section (Fig. 32).
Align the Pushing Lever [64] with Adjuster Bush (S) [67] fitting the convex portions in the concave portions
before tightening the Hex. Socket Hd. Bolt M5 x 10 [66].
If the U-Nut M5 [56] turns together when tightening the Hex. Socket Hd. Bolt M5 x 20 [13], insert a small flat-
blade screwdriver between the handle and the U-Nut M5 [56] to stop turning of the U-Nut M5 [56].
Stepped portion
Plate Sleeve [54]Slide Plate [55]
Convex portion of Handle (A) [124]
Switch Lever (B) [114]
Chamber Lock Bar [100]
Fig. 31
Convex portion of Handle (B) [84]
Concave portion
Fig. 32
Housing sectionHandle section
Switch Arm [82]

--- 41 ---
(2) Disassembly and reassembly of the housing section (Fig. 33)
[Tools required]
Hex. bar wrench (3 mm (0.118"), 4 mm (0.157"))
Spaner (7 mm (0.276") or slender hd. pliers
Roll pin puller (3 mm (0.118"))
Phillips screwdriver
Retaining ring puller for C-type hole
Small flat-blade screwdriver
(a) Disassembly
Remove the Seal Lock Hex. Socket Hd. Bolt M5 x 10 [58] to remove the Cylinder plate [57].
Remove the Machine Screw M4 x 6 [33] to remove the Switch Plate [34]. Note that the Cylinder Ass'y [42]
cannot be removed from the Housing Ass'y [74] without removing the Switch Plate [34].
Push the tip of the Cylinder Ass'y [42] in the Housing Ass'y [74]. Then the Cylinder Ass'y [42], chamber
section, Pushing Lever Arms (A) [60] and (B) [62] can be removed from the Housing Ass'y [74] in a single unit.
It is easy to remove them while pressing the side of the Housing Ass'y [74] with a hand (Fig. 34).
Remove the two Pushing Lever Springs [63] with a hand.
Remove the two Roll Pins D3 x 32 [25] with a roll pin puller to remove the chamber section from the Cylinder
Ass'y [42].
Secure the U-Nut M4 [59] with a spanner (7 mm (0.276")) or slender hd. pliers and loosen the Hex. Socket Hd.
Bolt M4 x 10 [61]. Then Pushing Lever Arms (A) [60] and (B) [62] are separated from the Pushing Lever
Connector [68] and they can be removed from the Cylinder Ass'y [42].
Remove the O-ring (I.D. 66.27) [36] and two Chamber Stop Rubbers [41] with a hand.
Remove the two Hex. Socket Hd. Bolts M4 x 10 [43]. Then the muffler section can be disassembled into
Buffer Cover [44], Lead Valve [45] and Muffler [50].
Note that a special sealant is used for the Cylinder Ass'y [42]. Select a liquid silicon sealant capable of
resisting temperatures up to 300ûC.

--- 42 ---
Pushing Lever Arm (A) [60]
Hex. Socket Hd. BoltM4 x 10 [61]
Machine ScrewM4 x 6 [46]
Spring Washer M4 [131]
Cylinder Ass'y [42]
Roll Pin D3 x 32 [25]
Spring Washer M4 [131]
Machine Screw M4 x 6 [33]
Pushing Lever Connector [68]
Chamber section
Piston Bumper [40]
Pushing Lever Arm (B) [62]
Seal Lock Hex. Socket Hd.Bolt M5 x 10 [58]
U-Nut M4 [59]
Housing Ass'y [74]
Piston [39]
Retaining Ring [37]
Pushing Lever Spring [63]
Piston Ring [38]
Fig. 33
O-ring (I.D. 66.27) [36]
Hex. Socket Hd. Bolt M4 x 10 [61]
Switch Plate [34]
Chamber Stop Rubber [41]
Cylinder Plate [57]Lead Valve [45]
Buffer Cover [44]
Hex. Socket Hd.Bolt M4 x 10 [43]
Muffler [50]

--- 43 ---
(1) Keep pressing the side of the housing.
Piston [39]
Fig. 34
Piston [39]
Small flat-blade screwdriver
(2) Push the tip of the cylinder.
Output section
Piston Ring [38]
Fig. 35
Push in.
Cylinder Ass'y [42]
Push in.

--- 44 ---
Remove the Retaining Ring [37] with the retaining ring puller for C-type hole. Insert a finger into the outlet of
the Cylinder Ass'y [42] and push the tip of the Piston [39] straight up. Then the Piston [39] can be removed
from the Cylinder Ass'y [42]. If the Piston Ring [38] fits in the retaining ring groove inside the cylinder, insert a
small flat-blade screwdriver into the concave portion of the cylinder and fit the Piston Ring [38] in the piston
ring groove of the Piston [39]. Then the Piston Ring [38] can be removed by pushing the Piston [39] up
(Fig. 35).
Remove the two Piston Rings [38] from the Piston [39] being careful not to deform them.
Screw a bolt having 20 mm or more threaded portion (for example, Hex. Socket Hd. Bolt M5 x 20 [13]) in the
hole beside the outlet of the cylinder or insert a roll pin puller in the hole and tap it lightly with a hammer to
remove the Piston Bumper [40] (Fig. 36).
Fig. 36
Roll pin puller
Cylinder Ass'y [42]
Piston Bumper [40]
Bolt having 20 mm ormore threaded portion

--- 45 ---
(2) Reassembly
Reassembly procedures should be followed in the reverse order. Note the following points.
Drop the Piston Bumper [40] in the Cylinder Ass'y [42] facing its stepped side inward and push it in until it
passes through the stopper portion by means of the handle of a hammer. You feel a click when the Piston
Bumper [40] passes through the stopper portion (Fig. 37).
Apply designated oil to the inside of the Cylinder Ass'y [42] and the O-ring groove on the outside of the
Cylinder Ass'y [42] according to 10-1.
Mount the two Piston Rings [38] to the Piston [39] being careful not to deform them.
Be careful of the following when mounting the Piston [39] to the Cylinder Ass'y [42].
(1) Position each split of the two Piston Rings [38] at an angle of 90 degrees with respect to the exhaust
port aligning these two splits in 180-degree opposite positions (Fig. 38).
(2) If the Piston Ring [38] fits in the retaining ring groove inside the cylinder, insert a small flat-blade
screwdriver into the concave portion (7 places) at the end of the cylinder and lightly push the Piston [39] in
fitting the Piston Ring [38] in the groove of the Piston [39]. Do not push the Piston [39] in forcedly.
Otherwise, the Piston Ring [38] may be damaged (Fig. 39).
(3) Check that the tip of the driver blade is shown in the outlet. The Piston [39] cannot be mounted if the tip of
the driver blade contacts the Piston Bumper [40] or the bottom of the cylinder.
(4) Face the chamfered side of the tip of the driver blade in the direction opposite to the exhaust port of the
Cylinder Ass'y [42] (Fig. 39).
Cylinder Ass'y [42]
Handle of a hammer
Piston Bumper [40]
Stopper portion
Fig. 37

--- 46 ---
Fig. 39
Split of the Piston Ring [38]
Cylinder Ass'y [42]
Exhaustingdirection
Push lightly.
Piston Ring [38]
Piston [39]
Small flat-blade screwdriver
Chamfered side ofthe driver blade
Fig. 38
Split of the Piston Ring [38]
Exhaustingdirection
Push lightly.
Piston [39]

--- 47 ---
When mounting the Retaining Ring [37] to the Cylinder Ass'y [42], fit the Retaining Ring [37] in the groove
securely facing the split to the no-concave portion of the cylinder. Face the sagged side of the Retaining Ring
[37] to the Piston [39] (Figs. 40 and 41).
Fig. 40
Concave portion (7 places)
Retaining Ring [37]
Cylinder Ass'y [42]
Face the split of the Retaining Ring [37] to theno-concave portion of the Cylinder Ass'y [42].
Fig. 41
Piston [39]
Face the sagged side of the RetainingRing [37] to the Piston [39].
Retaining Ring [37]
Cylinder Ass'y [42]
Exhaustingdirection

--- 48 ---
Apply designated oil to the O-ring sliding surface in the Chamber [24] according to 10-1.
Be careful of the mounting direction of Pushing Lever Arms (A) [60] and (B) [62] (Fig. 42). Align the notch of
Pushing Lever Arm (A) [60] or (B) [62] with the convex portion of the Pushing Lever Connector [68]. Secure
the U-Nut M4 [59] with a spanner (7 mm (0.276")) or slender hd. pliers and tighten the Hex. Socket Hd. Bolt
M4 x 10 [61].
Mount the Chamber Stop Rubber [41] and the chamber ass'y to the Cylinder Ass'y [42]. Align the roll pin hole
of the Chamber [24] with the bent portion of Pushing Lever Arm (A) [60] or (B) [62] and drive the two Roll Pins
D3 x 32 [25] with a roll pin puller (Fig. 43). Use a pedestal when driving the Roll Pins D3 x 32 [25] (Fig. 44).
Do not support driving the Roll Pins D3 x 32 [25] on the buffer cover.
Fig. 42
Pushing Lever Arm (A) [60] Pushing Lever Arm (B) [62]

--- 49 ---
Cylinder Ass'y [42]
Pushing Lever Arm (A)[60] or (B) [62]
Roll Pin D3 x 32 [25]
Split of the Roll Pin D3 x 32 [25]
Pushing Lever Arm (A) [60] or (B) [62]
Chamber [24]
Support the Chamber[24] with a pedestal.
Chamber [24]
Fig. 43
Fig. 44

--- 50 ---
Secure the Cylinder Plate [57] to the Cylinder Ass'y [42] with the Seal Lock Hex. Socket Hd. Bolt M5 x 10 [58]
and join the Cylinder Ass'y [42] with the Housing [71].
Make the Cylinder Plate [57] contact with the convex portion of the cylinder. Do not tighten the Seal Lock Hex.
Socket Hd. Bolt M5 x 10 [58] with the Cylinder Plate [57] overlapped on the convex portion (Fig. 46). At this
time, insert the Blade Guide [53] between the Cylinder Ass'y [42] and the Cylinder Plate [57].
* Because it is difficult to mount the Blade Guide [53] later because the Cylinder Plate [57] pushes the Blade
Guide [53].
* Do not use any bolt other than the Seal Lock Hex. Socket Hd. Bolt M5 x 10 [58] because a special adhesive
is used for the Seal Lock Hex. Socket Hd. Bolt M5 x 10 [58].
Cylinder Ass'y [42]
Pushing Lever Spring [63]
Pushing Lever Connector [68]Convex portion
Fig. 45
Mount the Pushing Lever Spring [63] and insert the Cylinder Ass'y [42] into the Housing [71]. At this time, fit
the convex portion of the Pushing Lever Connector [68] in the end of the Pushing Lever Spring [63] being
careful not to remove the Pushing Lever Spring [63] (Fig. 45).
Finally, secure the Switch Plate [34] to the Chamber [24] with the Machine Screw M4 x 6 [33].
* After mounting the Cylinder Ass'y [42] to the Housing [71], mount the Switch Plate [34] to the Chamber [24].
Note that the Cylinder Ass'y [42] cannot be mounted to the Housing [71] if the Switch Plate [34] is mounted
to the Chamber [24] first.

--- 51 ---
Seal Lock Hex.Socket Hd. BoltM5 x 10 [58]
Convex portion of theCylinder Ass'y [42]
Housing Ass'y [74]
Cylinder Ass'y [42]
Cylinder Plate [57]Make the Cylinder Plate[57] contact with theconvex portion of theCylinder Ass'y [42]. Donot overlap the cylinderPlate [57] on the convexportion of the CylinderAss'y [42].
Driver blade
Blade Guide [53]
Cylinder Plate [57]
Convex portion of theCylinder Ass'y [42]
Fig. 46
Section A --- A

--- 52 ---
(3) Disassembly and reassembly of Chamber [24] and the related parts (Fig. 47)
[Tools required]
Hex. bar wrench (3 mm (0.118"))
Phillips screwdriver
(a) Disassembly
Remove the Hex. Socket Hd. Bolt M4 x 16 [21]. Then the Chamber Head [22], Gasket (A) [23] and Chamber
[24] can be removed.
Remove the Machine Screw M4 x 6 [33]. Then the Chamber Lock Plate [32] can be removed.
Hex. Socket Hd.Bolt M4 x 16 [21]
Chamber [24]
Gasket (A) [23]
Chamber Head [22]
Chamber LockPlate [32]
Machine screwM4 x 6 [33]
Fig. 47

--- 53 ---
(b) Reassembly
Fit Gasket (A) [23] in the groove of the Chamber Head [22] and mount it to the Chamber [24]. Do not
protrude Gasket (A) [23] from the groove. Be careful of the mounting direction of Gasket (A) [23] (Fig. 48).
* After mounting the Cylinder Ass'y [42] to the Housing [71], mount the Switch Plate [34] to the Chamber [24].
Note that the Cylinder Ass'y [42] cannot be mounted to the Housing [71] if the Switch Plate [34] is mounted
to the Chamber [24] first.
Fig. 48
Convex portion ofGasket (A) [23]
Gasket (A) [23]
Chamber Head [22]

--- 54 ---
(4) Disassembly and reassembly of Housing Ass'y [74] (Fig. 49)
Although the Housing Ass'y [74] is supplied in assembly, perform disassembly and reassembly of the Housing
Ass'y [74] when replacing the components of the Housing Ass'y [74] singly.
[Tools required]
Hand press
(a) Disassembly
Push out the Screw M5 [70] in "A" direction as shown in Fig. 49 with a hand press.
The insulator Sheet [72] cannot be replaced because it is adhered with double-side adhesive tape.
(b) Reassembly
Push in the Screw M5 [70] in "B" direction as shown in Fig. 49 with a hand press.
Degrease the adhering surface on the Housing [71] then adhere the Insulator Sheet [72] to the designated
position (Fig. 49).
Housing [71]
Insulator Sheet [72]Insulator Sheet [72]
Screw M5 [70]
Housing [71]
Align the end.
Fig. 49
B
--- 55 ---
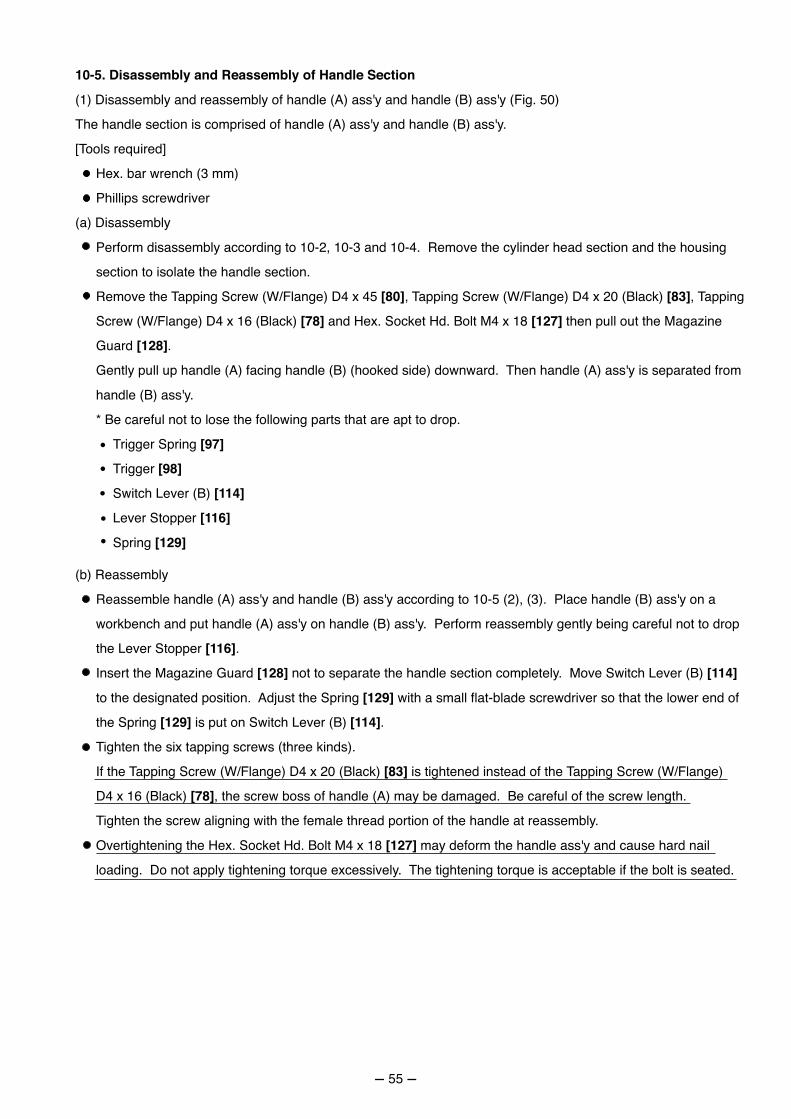
10-5. Disassembly and Reassembly of Handle Section
(1) Disassembly and reassembly of handle (A) ass'y and handle (B) ass'y (Fig. 50)
The handle section is comprised of handle (A) ass'y and handle (B) ass'y.
[Tools required]
Hex. bar wrench (3 mm)
Phillips screwdriver
(a) Disassembly
Perform disassembly according to 10-2, 10-3 and 10-4. Remove the cylinder head section and the housing
section to isolate the handle section.
Remove the Tapping Screw (W/Flange) D4 x 45 [80], Tapping Screw (W/Flange) D4 x 20 (Black) [83], Tapping
Screw (W/Flange) D4 x 16 (Black) [78] and Hex. Socket Hd. Bolt M4 x 18 [127] then pull out the Magazine
Guard [128].
Gently pull up handle (A) facing handle (B) (hooked side) downward. Then handle (A) ass'y is separated from
handle (B) ass'y.
* Be careful not to lose the following parts that are apt to drop.
Trigger Spring [97]
Trigger [98]
Switch Lever (B) [114]
Lever Stopper [116]
Spring [129]
(b) Reassembly
Reassemble handle (A) ass'y and handle (B) ass'y according to 10-5 (2), (3). Place handle (B) ass'y on a
workbench and put handle (A) ass'y on handle (B) ass'y. Perform reassembly gently being careful not to drop
the Lever Stopper [116].
Insert the Magazine Guard [128] not to separate the handle section completely. Move Switch Lever (B) [114]
to the designated position. Adjust the Spring [129] with a small flat-blade screwdriver so that the lower end of
the Spring [129] is put on Switch Lever (B) [114].
Tighten the six tapping screws (three kinds).
If the Tapping Screw (W/Flange) D4 x 20 (Black) [83] is tightened instead of the Tapping Screw (W/Flange)
D4 x 16 (Black) [78], the screw boss of handle (A) may be damaged. Be careful of the screw length.
Tighten the screw aligning with the female thread portion of the handle at reassembly.
Overtightening the Hex. Socket Hd. Bolt M4 x 18 [127] may deform the handle ass'y and cause hard nail
loading. Do not apply tightening torque excessively. The tightening torque is acceptable if the bolt is seated.

--- 56 ---
Magazine Guard [128]
Hex. Socket Hd.Bolt M4 x 18 [127]
Tapping Screw(W/Flange) D4 x 45 [80]
Nylon Nut M4 [75]
Tapping Screw(W/Flange) D4 x 16(Black) [78]
Hex. SocketHd. BoltM4 x 18
Item No.
Tapping Screw(W/Flange)D4 x 16 (Black)
Tapping Screw(W/Flange) D4 x 20(Black) [83]
Tapping Screw(W/Flange)D4 x 20 (Black)
[83] [127][78][80]
Description
Dimensions
Number ofscrews/bolts
Tightening torqueN�m (kgf�cm)
(ft-lb)
Tapping Screw(W/Flange)D4 x 45
45
20 16
1 4 1 1
30 0.5(30 3)
(2.2 0.4)
1.0 to 1.5(10 to 15)(0.7 to 1.1)
Fig. 50

--- 57 ---
(2) Disassembly and reassembly of Handle (A) [124], nail feeder and the related parts (Fig. 51)
[Tools required]
Phillips screwdriver
Roll pin puller (4 mm (0.157"))
(a) Disassembly
Remove the Lever Stopper [116] from the trigger of Handle (A) [124] with a hand.
Remove the Nail Rail [93] with a hand.
Loosen the Tapping Screw (W/Flange) D5 x 20 (Black) [126] and remove the Feeder Knob [125]. Then the
nail feeder ass'y can be removed.
Remove the Side Plate [55]. Then the Ribbon Spring [121], Spring D8 [122] and Pushing Lever Stopper [123]
can be removed.
Remove the Roll Pin D4 x 28 [118] in "A" direction as shown in Fig. 52. Then Nail Feeder (A) [112], Spring
[119] and Nail Feeder (B) [120] can be removed.

--- 58 ---
Lever Stopper [116]
Tapping Screw(W/Flange) D5 x 20(Black) [126]
Handle (A) [124]
Nail Rail [93]
Nail feeder ass'y
Ribbon Spring [121]
Feeder Knob [125]
Spring D8 [122]
Pushing Lever Stopper [123]
Side Plate [55]
Fig. 51
Spring [119]
Nail Feeder (A) [112]
Roll Pin D4 x 28 [118]
Nail Feeder (B) [120]
Fig. 52

--- 59 ---
Do not tilt or pinchthe Spring D8 [122]
Side Plate [55]
Handle (A) [124]
Pushing LeverStopper [123]
Ribbon Spring [121]
Springhookingportion
Spring D8 [122]
Nail feeder ass'y
(1)
(2)
(3)
Fig. 53

--- 60 ---
(b) Reassembly
Perform reassembly according to the following procedure.
Mount Nail Feeder (A) [112] and the Spring [119] to Nail Feeder (B) [120] and drive the Roll Pin D4 x 28 [118]
in "B" direction as shown in Fig. 52 to secure it. Do not protrude the end of the Roll Pin D4 x 28 [118] from
Nail Feeder (B) [120].
See Fig. 53.
(1) Fit the Spring D8 [122] in Handle (A) [124].
(2) Set the Pushing Lever Stopper [123] on the Spring D8 [122]. Do not tilt the Spring D8 [122] or insert the
Pushing Lever Stopper [123] into the Spring D8 [122]. Check that the Pushing Lever Stopper [123] moves
smoothly. Keep holding the Pushing Lever Stopper [123] with fingers until the Side Plate [55] is mounted
because the Pushing Lever Stopper [123] is apt to be removed. Set the Ribbon Spring [121] to Handle (A)
[124]. Mount the Side Plate [55] to Handle (A) [124] with the spring hooking portion of the Side Plate [55]
engaged with the hook of the Ribbon Spring [121].
(3) Insert a finger into the coil portion of the Ribbon Spring [121] from the front of Handle (A) [124]. Stretch
the coil portion in the nail feeder pulling direction. Then set the nail feeder to the coil portion and return the
nail feeder to the forward position slowly. Mount the Feeder Knob [125] to the nail feeder and tighten the
Tapping Screw (W/Flange) D5 x 20 (Black) [126].
Apply grease to the Lever Stopper [116] and mount it to the specified position on the handle. Push in the
Lever Stopper [116] as far as it will go with a roll pin puller to engage with the convex portion of Handle (A)
[124] (Fig. 54-1).
Apply grease to thesurface where Handle(A) [124] contacts(prevention of dropping).
Push in this portion to engagewith the convex portion ofHandle (A) [124].
Convex portion
Handle (A) [124]
Lever Stopper [116]
Fig. 54-1

--- 61 ---
(3) Disassembly and reassembly of Handle (B) [84], Controller [101] and the related parts
[Tools required]
Spanner
Hex. bar wrench (4 mm)
Phillips screwdriver
Roll pin puller (2.5 mm (0.098"))
(a) Disassembly (See Fig. 54-2.)
Remove the Trigger Spring [97] and the Chamber Lock Bar [100].
Remove the Pin D2.5 [115] and Switch Lever (B) [114].
Remove the Tension Plate [113] from Switch Lever (B) [114].
Remove the Tapping Screw (W/Flange) D4 x 14 (Black) [95] to remove the Magazine Plate [94].
Remove the Prism [96].
Remove the Flat Hd. Tapping Screw D4 [104] to remove the Wiring Cover [103].
Remove the Switch Arm [82] and the Lock Bar Spring [102].
Remove the Tapping Screw (W/Flange) D4 x 14 (Black) [95] to remove the Controller [101] and Internal Wire
(A) [86]. Disconnect the connector of the Controller [101] and Internal Wire (A) [86]. Remove the Roll Pin
D2.5 x 10 [99] with a roll pin puller to remove the Trigger [98].
Remove the Switch Mount [81] from Internal Wire (A) [86].
Remove the Nylon Nut M5 [92] and the Hex. Socket Hd. Bolt M5 x 15 [76].
Remove the Sleeve [77] and the hook ass'y.

--- 62 ---
Spring [129]
Spring D2.95 [117]
Hex. Socket Hd.Bolt M5 x 15 [76]
Switch Lever (B) [114]
Switch Arm [82]
Switch Mount [81]
Tension Plate [113]
Prism [96]
Wiring Cover [103]
Lock Bar Spring[102]Pin D2.5
[115]
TappingScrew(W/Flange)D4 x 14(Black)[95]
Controller [101]
Tapping Screw(W/Flange)D4 x 14 (Black)[95]
Magazine Plate [94]
Flat Hd. Tapping ScrewD4 [104]
Trigger Spring [97]
Trigger [98]
Roll PinD2.5 x 10 [99]
Chamber Lock Bar [100]
Sleeve [77]
Nylon Nut M5 [92]
Hook ass'y
Internal Wire (A) [86]
Handle (B) [84]
Nail Rail [93]
Fig. 54-2
--- 63 ---
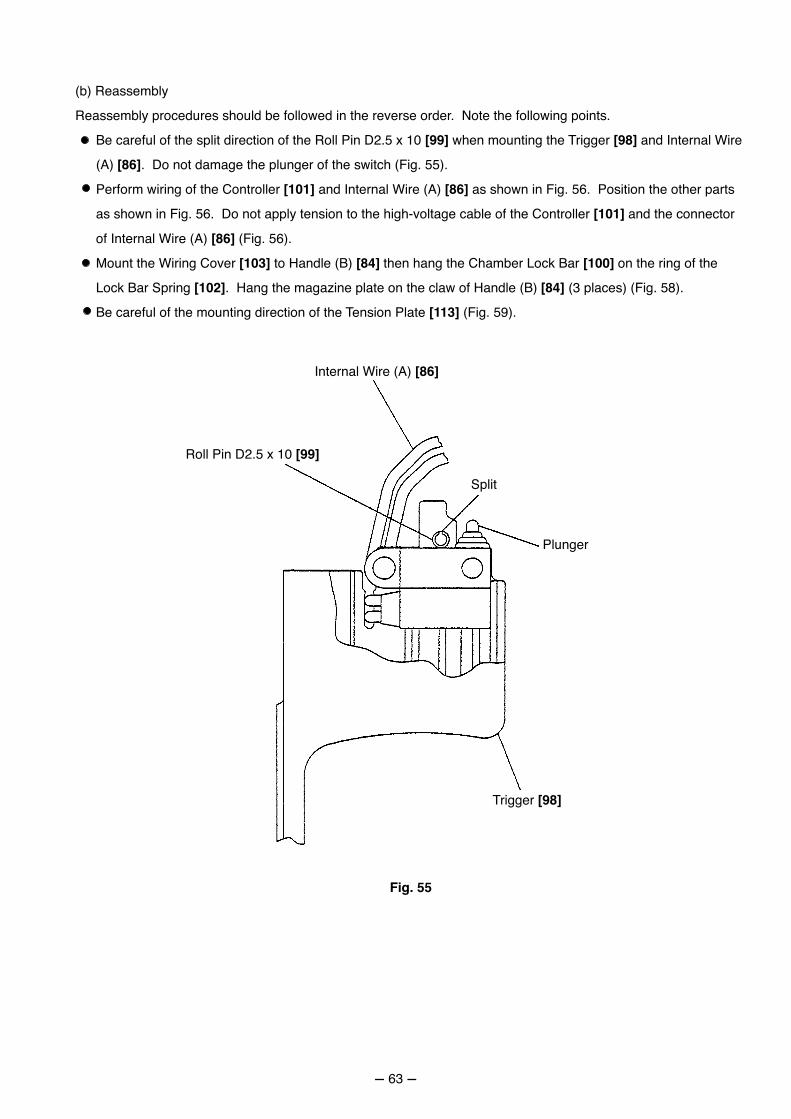
(b) Reassembly
Reassembly procedures should be followed in the reverse order. Note the following points.
Be careful of the split direction of the Roll Pin D2.5 x 10 [99] when mounting the Trigger [98] and Internal Wire
(A) [86]. Do not damage the plunger of the switch (Fig. 55).
Perform wiring of the Controller [101] and Internal Wire (A) [86] as shown in Fig. 56. Position the other parts
as shown in Fig. 56. Do not apply tension to the high-voltage cable of the Controller [101] and the connector
of Internal Wire (A) [86] (Fig. 56).
Mount the Wiring Cover [103] to Handle (B) [84] then hang the Chamber Lock Bar [100] on the ring of the
Lock Bar Spring [102]. Hang the magazine plate on the claw of Handle (B) [84] (3 places) (Fig. 58).
Be careful of the mounting direction of the Tension Plate [113] (Fig. 59).
Fig. 55
Roll Pin D2.5 x 10 [99]
Plunger
Internal Wire (A) [86]
Trigger [98]
Split

--- 64 ---
Roll Pin D2.5 x 10 [99]
Do not apply tension.
Trigger Spring [97]
Switch Mount [81]
Hook ass'y
Nylon Nut M5 [92]
Hex. Socket Hd. BoltM5 x 15 [76]
Switch Arm [82]
Hook ass'y
Tapping Screw (W/Flange)D4 x 14 (Black) [95]
Sleeve [77]
Handle (B) [84]Perform wiring so that no lead wire isplaced on this rib and no pinchingoccurs by the Trigger [98] operation.
Internal Wire(A) [86]
Position the leadwire at the top.
Lock BarSpring [102]
Trigger [98]
Prism [96]
Fig. 56

--- 65 ---
Pin D2.5 [115]
Tension Plate [113]
Chamber Lock Bar [100]
Magazine Plate [94]
Flat Hd. TappingScrew D4 [104]
Spring D2.95 [117]
Hook ass'y
Nylon Nut M5 [92]
Switch Lever (B) [114]
Sleeve [77]
Wiring Cover [103]
Tapping Screw(W/Flante) D4 x 14 [95]
Hang the MagazinePlate [94] on the claw.
Fig. 57

--- 66 ---
Fig. 58
Lock Bar Spring [102]
Fig. 59
Ring
Tension Plate [113]
Switch Lever (B) [114]

--- 67 ---
(3) Disassembly and reassembly of hook and the related parts (Fig. 60)
[Tools required]
Roll pin puller (4 mm (0.157"))
Flat-blade screwdriver
(a) Disassembly
Remove the Roll Pin D3 x 14 [87]. Then the Hook [88], Washer (B) [89] and Spring D12 [90] can be removed
from the Bracket [91].
(b) Reassembly
Mount the Hook [88], Washer (B) [89] and Spring D12 [90] to the Bracket [91].
Drive the Roll Pin D3 x 14 [87] into the Hook [88] in the direction as shown in Fig. 60.
It becomes easy to reassemble if the clearance between the Bracket [91] and Washer (B) [89] is widened with
a flat-blade screwdriver beforehand. Note that the cross groove of the Bracket [91] must be aligned with the
Hook [88] properly. Perform reassembly in the proper direction as shown in Fig. 61.
After reassembly, rotate the Hook [88] and check that the Roll Pin D3 x 14 [87] does not protrude from the
Bracket [91] (Fig. 62).
Roll Pin D3 x 14 [87]
Washer (B) [89]Hook [88]
Spring D12 [90]
Bracket [91]
Fig. 60

--- 68 ---
Fig. 61
Rotate.
Bracket [91]
Do not protrude the Roll PinD3 x 14 [87] from the Bracket [91].
Split of the RollPin D3 x 14 [87]
Fig. 62
100û

--- 69 ---
(1) Check only the main body for the following.
Check that the Pushing Lever [64] does not operate when the Feeder Knob [125] is at the forward end.
Check that the Pushing Lever [64] operates smoothly when the Feeder Knob [125] is pulled backward.
Check that the Trigger [98] operates smoothly.
Check that the Cell Lever [105] operates smoothly when pressing the Pushing Lever [64] against a workpiece.
Press the Pushing Lever [64] against a workpiece and depress the Trigger [98]. Check that the chamber
ass'y is held at the top dead center and it does not return to the bottom dead center even if the Pushing Lever
[64] is released. Release the Trigger [98] and check that the chamber ass'y returns to the bottom dead
center.
(2) Check the main body with the battery loaded for the following.
Check that the Prism [96] lights.
Check that the Fan [20] rotates when pressing the Pushing Lever [64] against a workpiece.
Check that the Fan [20] stops about 6 to 7 seconds after the Pushing Lever [64] is released.
(3) Check the main body with the battery, fuel cell and nails loaded for the following.
Check that no nail is driven just by depressing the Trigger [98]. Check that no nail is driven just by pressing
the Pushing Lever [64] against a workpiece (check that the Fan [20] is rotating).
Check that the Pushing Lever [64] operates smoothly.
Check that the piston returns to the top dead center by driving a nail actually (do not drive nails continuously to
prevent idle driving).
Press the Pushing Lever [64] against a workpiece and depress the Trigger [98] partway to hold the Chamber
[24] at the top dead center. Then release the Pushing Lever [64] and depress the Trigger [98] fully to check
that no nail is driven.
Check that no nail is driven when pressing the Pushing Lever [64] against a workpiece with the Trigger [98]
depressed.
(4) Perform the following after the above checking.
Check that the main body is not loaded with the battery, fuel cell and nails.
Recheck the tightening torque of each screw.
Set the Pushing Lever [64] to the uppermost position (nails are driven to the deepest position).
11. INSPECTION AND CONFIRMATION AFTER REASSEMBLY

--- 70 ---
Controller
Lead Wire (A)
Prism
12. STANDARD REPAIR TIME (UNIT) SCHEDULES
MODEL 10 20 30 40Fixed
Variable
NR 90GCWork Flow
Top Cover
Filter
Filter Cover
70 min.50
Cylinder Head
Motor
Motor Mount
Motor Spring
Fan
Trigger
Trigger Spring
Switch Lever (B)
Piston
O-ring
Piston Ring x 2
Piston Bumper
Blade Guide
Side Plate
Cylinder Plate
Pushing LeverArm (A)
Pushing LeverArm (B)
Pushing LeverSpring
Adjustment(Cylinder)
Chamber Head
Gasket (A)
Chamber
Housing Ass'y
Magazine Plate
Nail Rail
Nail Feeder (A)
Nail Feeder (B)
Ribbon Spring
Feeder Knob
Pushing Lever
PushingStopper
Spark Plug (A)
O-ring
Handle (B)
Handle (A)
Cylinder
GeneralAssembly
60

GAS TOOL PARTS LIST
LIST NO. E025
GAS STRIP NAILERModel NR 90GC
2005 � 9 � 30
(E3)
Hitachi Power Tools
C
C
A
A
B
B
95
1
2
3
4
5
6
8
9
10
11
13
14
15
18
19
20
19
18
21
22
23
24
25
26
227
28
30
32
33
36
37
38
39
40
41
4544
43
50
5251
61
62
63
64
65
66
69
70
71
4153
5455
56
57
58
5960
6168
67
73
7576
78
85
82
84
90
89
88
87
86
91
92
10195
9394
96
97
98
100
102
104
105
106
108
109110
111107
103
501
502 503
504
2
7
12
31
42
46
34
33
72
74
77
79
80
81
99
83
129
116115
114
118117
113
112131
131
119
123121
120
122124
126125
127
128
130
29

* ALTERNATIVE PARTS--- 2 ---
ITEMNO. CODE NO. DESCRIPTION REMARKS
NO.USED
PARTS
9 -- 05
NR 90GC
1 949-665 HEX. SOCKET HD. BOLT M5X14 (10 PCS.) 1
2 949-424 WASHER M5 (10 PCS.) 3
3 885-353 TOP COVER 1
4 885-274 FILTER 1
5 885-275 FILTER COVER 1
6 885-309 MOTOR 1
7 885-318 ROLL PIN D2.5X25 1
8 885-310 MOTOR MOUNT 1
9 885-314 MOUNT SLEEVE 1
10 885-320 SHAFT WASHER 1
11 885-333 SPARK PLUG (A) 1
12 885-319 MOTOR SPRING 1
13 949-757 HEX. SOCKET HD. BOLT M5X20 (10 PCS.) 4
14 885-308 CYLINDER HEAD 1
15 885-316 O-RING (I.D 59.92) 1
18 949-554 NUT M4 (10 PCS.) 2
19 949-423 WASHER M4 (10 PCS.) 2
20 885-311 FAN 1
21 949-754 HEX. SOCKET HD. BOLT M4X16 (10 PCS.) 4
22 885-294 CHAMBER HEAD 1
23 885-295 GASKET (A) 1
24 885-296 CHAMBER 1
25 884-975 ROLL PIN D3X32 2
26 880-319 SHAFT RING 1
27 885-277 SHAFT 1
28 949-214 MACHINE SCREW M4X6 (10 PCS.) 1
29 885-313 RUBBER WASHER 1
30 885-317 ADAPTER 1
31 961-681 HEX. SOCKET SET SCREW M4X5 2
32 885-297 CHAMBER LOCK PLATE 1
33 949-214 MACHINE SCREW M4X6 (10 PCS.) 3
34 885-306 SWITCH PLATE 1
36 885-283 O-RING (I.D. 66.27) 1
37 885-285 RETAINING RING 1
38 885-286 PISTON RING 2
39 885-291 PISTON 1
40 885-289 PISTON BUMPER 1
41 885-284 CHAMBER STOP RUBBER 2
42 885-361 CYLINDER ASS�Y 1 INCLUD. 43-46, 50
43 949-812 HEX. SOCKET HD. BOLT M4X10 (10 PCS.) 2
44 885-287 BUFFER COVER 1
45 885-290 LEAD VALVE 1
46 949-214 MACHINE SCREW M4X6 (10 PCS.) 2
50 885-288 MUFFLER 1
51 949-897 HEX. SOCKET HD. BOLT M5X50 (10 PCS.) 2
52 885-269 NOSE SLEEVE 2
53 885-355 BLADE GUIDE 1
54 885-270 PLATE SLEEVE 2
55 885-326 SIDE PLATE 1
56 945-255 U-NUT M5 2
57 885-299 CYLINDER PLATE 1

* ALTERNATIVE PARTS --- 3 ---
ITEMNO. CODE NO. DESCRIPTION REMARKS
NO.USED
PARTS
9 -- 05
NR 90GC
58 980-046 SEAL LOCK HEX. SOCKET HD. BOLT M5X10 2
59 956-329 U-NUT M4 2
60 885-302 PUSHING LEVER ARM (A) 1
61 949-812 HEX. SOCKET HD. BOLT M4X10 (10 PCS.) 2
62 885-303 PUSHING LEVER ARM (B) 1
63 885-305 PUSHING LEVER SPRING 2
64 885-271 PUSHING LEVER 1
65 885-273 PUSHING STOPPER 1
66 949-819 HEX. SOCKET HD. BOLT M5X10 (10 PCS.) 1
67 885-272 ADJUSTER BUSH (S) 1
68 885-301 PUSHING LEVER CONNECTOR 1
69 NAME PLATE 1
70 885-304 SCREW M5 4
71 885-298 HOUSING 1
72 885-307 INSULATOR SHEET 1
73 HITACHI LABEL 1
74 885-362 HOUSING ASS�Y 1 INCLUD. 70-72
75 876-465 NYLON NUT M4 1
76 949-820 HEX. SOCKET HD. BOLT M5X15 (10 PCS.) 1
77 878-164 SLEEVE 1
78 305-812 TAPPING SCREW (W/FLANGE) D4X16 (BLACK) 1
79 WARNING LABEL 1
80 301-815 TAPPING SCREW (W/FLANGE) D4X45 1
81 885-334 SWITCH MOUNT 1
82 885-347 SWITCH ARM 1
83 302-086 TAPPING SCREW (W/FLANGE) D4X20 (BLACK) 4
84 885-330 HANDLE (B) 1
85 CAUTION PLATE 1
86 885-332 INTERNAL WIRE (A) 1
87 949-900 ROLL PIN D3X14 (10 PCS.) 1
88 885-343 HOOK 1
89 956-161 WASHER (B) 1
90 885-345 SPRING D12 1
91 885-344 BRACKET 1
92 877-371 NYLON NUT M5 1
93 885-341 NAIL RAIL 1
94 885-342 MAGAZINE PLATE 1
95 309-933 TAPPING SCREW (W/FLANGE) D4X14 (BLACK) 3
96 885-338 PRISM 1
97 885-336 TRIGGER SPRING 1
98 885-335 TRIGGER 1
99 949-551 ROLL PIN D2.5X10 (10 PCS.) 1
100 885-340 CHAMBER LOCK BAR 1
* 101 885-331 CONTROLLER 1
* 101 885-595 CONTROLLER 1 FOR USA, CAN
102 885-337 LOCK BAR SPRING 1
103 885-339 WIRING COVER 1
104 885-346 FLAT HD. TAPPING SCREW D4 1
105 885-276 CELL LEVER 1
106 885-280 LATCH 1
107 949-859 ROLL PIN D2X8 (10 PCS.) 2

PARTSITEMNO. CODE NO. DESCRIPTION REMARKS
NO.USED
NR 90GC
STANDARD ACCESSORIESITEMNO. CODE NO. DESCRIPTION REMARKS
NO.USED
OPTIONAL ACCESSORIESITEMNO. CODE NO. DESCRIPTION REMARKS
NO.USED
* ALTERNATIVE PARTS--- 4 --- 9 -- 05Printed in Japan
(050930N)
108 885-281 SPRING D3.6 1
109 885-352 CELL COVER 1
110 885-279 CELL RUBBER 1
* 111 324-148 BATTERY EB 714S (W/ENGLISH N.P.) 1
* 111 324-147 BATTERY EB 714S (W/ENGLISH N.P.) 1 FOR USA, CAN
112 885-323 NAIL FEEDER (A) 1
113 885-351 TENSION PLATE 1
114 885-348 SWITCH LEVER (B) 1
115 885-349 PIN D2.5 1
116 885-329 LEVER STOPPER 1
117 885-350 SPRING D2.95 1
118 949-506 ROLL PIN D4X28 (10 PCS.) 1
119 883-687 SPRING 1
120 885-324 NAIL FEEDER (B) 1
121 885-325 RIBBON SPRING 1
122 885-328 SPRING D8 1
123 885-327 PUSHING LEVER STOPPER 1
124 885-321 HANDLE (A) 1
125 885-322 FEEDER KNOB 1
126 302-089 TAPPING SCREW (W/FLANGE) D5X20 (BLACK) 1
127 880-003 HEX. SOCKET HD. BOLT M4X18 1
128 885-354 MAGAZINE GUARD 1
129 885-518 SPRING 1
130 LABEL (A) 1
131 949-453 SPRING WASHER M4 (10 PCS.) 2
501 CHARGER (MODEL UC 7SD) 1
502 875-769 SAFETY GLASSES 1
503 885-360 CASE 1
504 944-458 HEX. BAR WRENCH 4MM 1
* 601 885-246 LUBRICANT OILER (A) 1
* 601 885-546 LUBRICANT OILER (A) 1 FOR USA, CAN
602 317-918 GREASE (ATTOLUB NO. 2) 500G 1
