have fun!!! demo the power of robotics to: –improve problem solving skills –utilize math skills...
TRANSCRIPT


• Have FUN!!!• Demo the power of robotics to:
– improve problem solving skills– utilize math skills– develop an “engineering mindset”– improve communication/teamwork skills
• Identify info sources (websites, etc.)

• Ask questions!!!!!
• Work as teams.
• Try as many different challenges as
you can.
• Stop working and listen during
instructional times.

• Problem solving through mission planning.
• Use of mathematical models to predict: – Linear moves– Turns
• Use of ultrasonic, sound, touch, and light sensors.
• Programming with LEGO Mindstorms
• FIRST LEGO League competitions

1. Understand problem.
2. Choose strategy and plan.
3. Implement plan.
4. Reflect and check answer.
• Pick a path of travel.• Map path by measuring angles
and distances.• Convert measurements to
computer control parameters.
• Generate program and download to robot
• Test program.
• Adjust parameters and program as needed.

First Robot Across Finish Line WINS!!

First Robot Across Finish Line WINS!!
Step Meas. 1 F 16” 2 R 45°
3 F 8.5” 4 R 90°
5 F 30”
11
2
4
3
5

Mars Obstacle Challenge(from ASU’s Mars Education Program)

Mission Planning

• Show videos

• Precise measurements of-– linear moves– turns– reference points
• Conversion of physical measurements to needed computer control parameters

• Initial programming lesson

The NXT uses 4 different ways to control movement:
- Tire rotations*
- Degrees turned by tire
(360° = one rotation)
- Time
- Unlimited (used with sensors)
*rotations is the easiest to use

Wheel/Tire Calibration(distance vs rotation)
• Measure diameter – calculate circumference• Measure tape wrapped around wheel• Use “wheelies”
– make table– graph

Move Calibrations
Students use a concrete model of the robot wheel called a “wheelie” to determine the distance travelled for different numbers of rotations. By plotting the data, they can see the relationship between distance and rotations.

Tattletale to help count rotations.

Wheel/Tire Calibration(distance vs rotation)
• Measure diameter – calculate circumference• Measure tape wrapped around wheel• Use “wheelies”
– make table– graph
• Verify distance traveled by direct measurement of bot vs wheel rotations
• Key issue: Does bot move straight?

First Activity – Bot Calibration
• Linear (forward/backward)– Use wheelie to measure dist vs rotations– Run “five rotation test”
key issues:
measurement reference points
run straightness
• Fill in score sheet

Key Move Formula
Distance traveled, Dt is:
Dt = n × C where
n = number of tire rotationsC = tire circumference
Note:
An alternate approach using speed over time (Dt = S × t) is NOT recommended because speed is not constant.

• Tires of different size will cause the robot to veer towards the smaller wheel.
• Friction will reduce the power to the wheel causing it to turn slightly.
• Loose connections in chassis can cause unwanted variation.
• Motors that are not synched can cause the wheels to spin at different rates.

• Isolate the problem through experimentation. – How could you determine that the wheels were the
cause of the problem? Chassis? Motors?
• Brainstorm solutions.– How could you solve the problem now that you have
an idea of what it is? (There are wrong answers, but there is never only one correct one.)
• Test the solutions.– Did it solve the problem? Does it work consistently
over repeated trials?

• Youtube Video?
• Two wheel test video
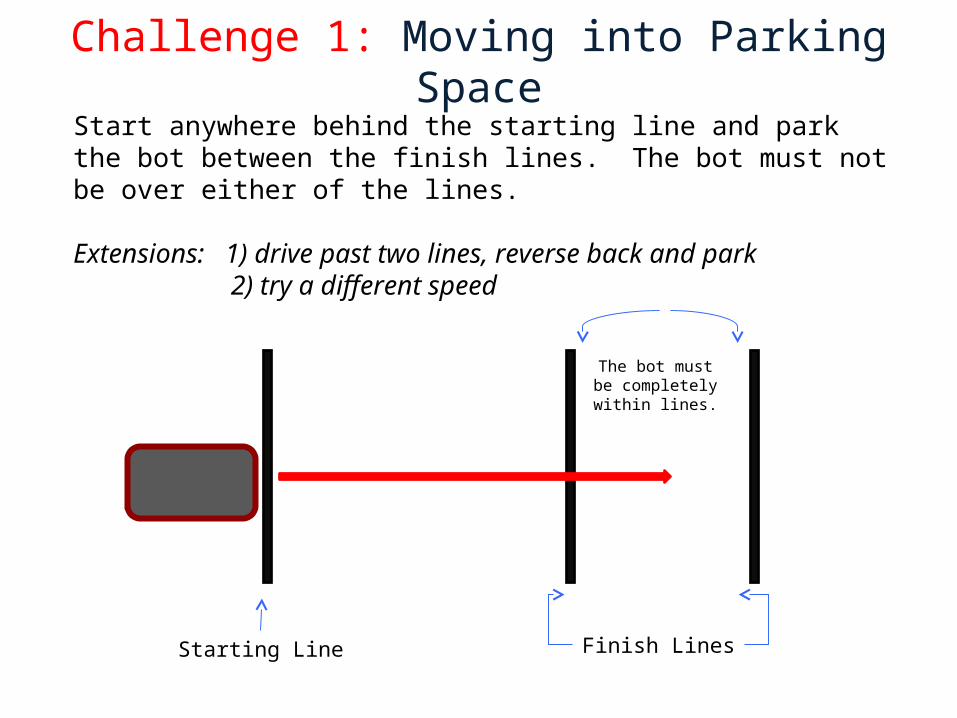
Challenge 1: Moving into Parking Space
Starting Line Finish Lines
Start anywhere behind the starting line and park the bot between the finish lines. The bot must not be over either of the lines.
Extensions: 1) drive past two lines, reverse back and park 2) try a different speed
The bot must be completely within
lines.

Challenge 2: Closest to the Wall
Starting Line Wall
Start the bot any where behind the starting line. The bot should move forward and come within 0.5 jn without any piece of the bot touching the wall.
The bot should stop within 0.5 in of the wall.

Video
Run challenges – 30 Min
Fill in score sheet

Dt = n × C
In the above equation, we can control the distance traveled and number of rotations. With a little algebra, we can find the circumference of the wheel.
C = Dt / n
This can be done a number of ways. Initially, concrete methods are the best because students will understand them more readily.Notes:
- did the robot run straight?? - measurement skills/reference points
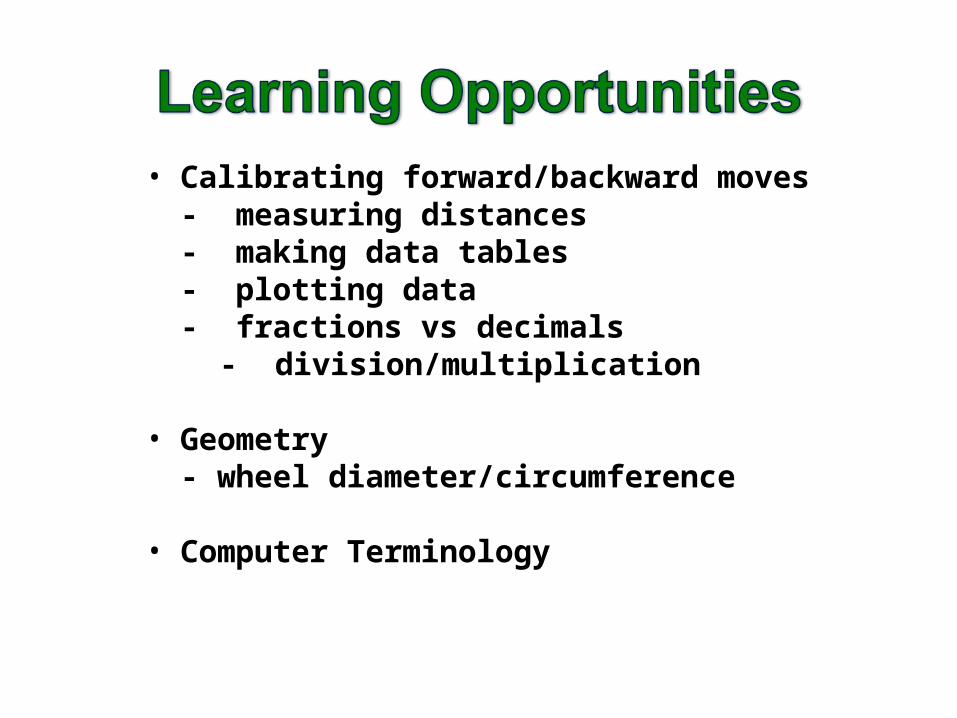
• Calibrating forward/backward moves- measuring distances- making data tables- plotting data - fractions vs decimals
- division/multiplication
• Geometry- wheel diameter/circumference
• Computer Terminology

• Does distance moved depend upon robot speed? Why?
• Does wheel size matter? Why?
• Do robots with big wheels go faster or slower than standard wheels? Why?
• Why don’t some robots go straight?
Experiments should be encouraged!!

• There are many different types of turns, but we will use pivot turns. They are the easiest to understand and calibrate, and they can be pretty accurate.
• Pivot turns occur when one wheel remains stationary while the other turns.
Question: How many rotations does it take to complete a turns of various angles?

• 360° Turns Calibration – This will serve as a basis for other turn parameters.
• Four Turn Test – This will help refine the 90° by highlighting errors over multiple movements. Errors compound, so minor parameters errors will create large inaccuracies in final placement.

Tire Rotations
Using a concrete model will help students visualize the number of rotations it takes to complete various turns.
One wheel turns while the other is locked into position.

Tire rotations = path length/tire circumference
# rotations = (desired angle/360°)(2πr)/C r => turning radius (distance between the tires)
C => tire circumference
r

360° Turn TestThe bot must move forward one rotation, complete a 360° pivot turn, and move forward again one rotation. The bot should finish the movement exactly in line with its original trajectory.
Perfect Turn Parameter
Oversteer (decrease turn)
Understeer (increase turn)
Why do this test?This will help develop experiential knowledge, so students can
reasonable estimate 90° turn parameters. The movement after the turn highlights turning parameter errors.

Four Turn TestProgram the bot to move forward and turn 90ᵒ. Repeat this a total of four times, and end the with one final movement forward. Test the turn duration and adjust as necessary.
All forward should be the same duration ( movements about 2-3 rotations).
When the bot completes its movements, check to see if it under or over turned and adjust the turn parameter appropriately.
Under steer
Over steer
Why this test? This test helps determine the 90° turn parameter, and it illustrates compounded error.

• Does wheel size affect turn parameters? Why?
• Do castor wheels and sliders change the turn parameter? Why?
• Do different surfaces change the turn accuracy? How? Why?
• Does weight placement affect the turn? Where should the weight be placed on a robot?

Challenge 3: Turn to Park
Starting Line
Parking Space
Start the bot any where behind the starting line. The bot should move forward and turn to park within the parking space. No part of the bot can be touching or over the boundaries.
No part of the bot can be out of the parking space.

Challenge 4: Turn to Closest to Wall
Starting Line
Wall
Start the bot any where behind the starting line. The bot should move forward, turn towards the wall, park between the lines, and stop within 0.5” of the wall. No part of the bot can be touching the wall.
Distance should be less than 0.5”.

Challenge 5: Figure 8
Blue tape lines
Place one of the robot’s wheels on the tape line. Program the robot to complete the figure 8 without having that tire stray from the tape line.

• Run challenges ~ 30 min

• How does the initial placement affect the ending position?
• How can you accurately place the robot in the beginning?
Notes:
- reference points (x-y)
- initial alignment “angle”L ~ d (π/180) a
where L is the lateral placement error,
d is the distance traversed, a is the misalignment angle
Example: for d = 30”, a at 2° , L ~ 1.05”

• “Find” things
• Establish “intermediate reference points”
(position errors cumulate as bot moves away from starting point)
• Types (sonar, sound, touch, light, other)

• WAIT Block Operation: keep doing whatever action that is being done BEFORE the WAIT block UNTIL the desired sensor is triggered – then continue actions along the sequence beam
examples:– stopped - sensor trigger - move– moving forward “unlimited”- sensor trigger - stop– etc.

• “clap-on” (sound, other)
• ultrasonic wall sensing
• touch sensing
• line sensing (need light calibration)
• sensor combinations

• Show FLL videos

• Robotics is a great vehicle to teach:– problem solving skills– application of classroom math skills– an “engineering mindset”– communication/teamwork skills– Etc.
• Can utilize a teacher’s creativity skills

Some Information Sources
• http://engineering.asu.edu/k12outreach/fll (look for “coaches resources” link)
• http://usfirst.org• http://nxtprograms.com• www.education.rec.ri.cmu.edu• http://robotics.scottsdalecc.edu• http://youtube.com
(in search field - type Lego robots+FLL)• And many more