hadoop administration using cloudera student lab guidebook
TRANSCRIPT

! 1!
!
!
!
!
!
!
!
!
!
!
!
!
!
!
!
!
!
!
!
!
!
!
!
!
!
!
!
!
!
!
!
!
!
!
!
!
!
HADOOP!ADMINISTRATION!
USING!CLOUDERA!!
!
STUDENT!LAB!GUIDEBOOK!!

! 2!
!
!
TABLE!OF!CONTENTS!
Lab!1:!Installing!CDH5!using!Cloudera!Manager…………………………………………3!
Lab!2:!Working!with!Hadoop!User!and!Administrative!Commands………….13!
Lab!3:!Configuring!and!Working!with!Hue………………………………………………..16!
Lab!4:!Configuring!High!Availability!using!CM5………………………………………..21!
Lab!5:!Adding!New!Node!to!Cluster…………………………………………………………..27!
Lab!6:!Installing!Kerberos………………………………………………………………………..33!
Lab!7:!Securing!Hadoop!using!Kerberos…………………………………………………..38!
Lab!8:!Installing!CDH!5!with!YARN!on!a!Single!Linux!Node!in!PseudoY
distributed!mode……………………………………………………………………………………..42!
Lab!9:!Manual!CDH5!Installation:!Hadoop!Installation……………………………..46!
Lab!10:!Configuring!YARN!in!Cloudera………………………………………………….….51!
Lab!11:!Installing!and!Configuring!Sqoop…………………………………………………55!
Lab!12:!Installing!and!working!with!Pig……………………………………………………60!
Lab!13:!Installing!and!Configuring!Zookeeper!on!CDH5……………………………62!
Lab!14:!Installing!and!Configuring!Hive!in!CDH5………………………………………66!
Lab!15:!Working!with!Flume…………………………………………………………………….73!
Lab!16:!Installation!and!Configuration!of!HBase………………………………………77!
!
Appendix:!A:!!
Ports!Used!by!Components!of!CDH!5All!ports!listed!are!TCP…………………….81!
!
APPENDIX:!B:!
Permission!Requirements!with!Cloudera!Manager………………………………….85!
!
!
!
!
!
!
!
!
!
!
!
!
!!
!
!
!
!
!
!
!
!
!
!

! 3!
!
!
!
!
!
!
!
!
!
!
!
!
!
!
!
!
!
!
!
!
!
!
!
!
!
LAB:!Installing!CDH5!using!Cloudera!Manager:!
! !

! 4!
!!Step:!1!Meet!the!prerequisites:!Ensure!following!are!met!before!installing!CDH5.!!!The!hosts!in!a!Cloudera!Manager!deployment!must!satisfy!the!following!networking!and!security!requirements:!!Cluster!hosts!must!have!a!working!network!name!resolution!system!and!correctly!formatted!/etc/hosts!file.!!!All!cluster!hosts!must!have!properly!configured!forward!and!reverse!host!resolution!through!DNS.!!!
• The!/etc/hosts!files!must!Contain!consistent!information!about!hostnames!and!IP!addresses!across!all!hosts!!
• Not!contain!uppercase!hostnames!• Not!contain!duplicate!IP!addresses.!
!Step:!2!In!our!case!we!have!following!Ubuntu!instances!configured!in!amazon!aws!as!specified!in!the!picture!below:(Ask!administrator!for!instance!details).!!
!!Step:3!Following!are!the!private!IP!and!the!edited!!/etc/hosts!as!specified!below,!configure!the!same!in!your!instances!using!putty!or!ssh!client!connecting!to!the!instances!as!specified!below.!!Instance!1!configuration:!
!!!Instance!2!Configuration:!
!!Instance!3!Configuration:!
!!

! 5!
Step:4!Select!instance!to!install!CM5!package!as!specified!below!and!download!the!utility!as!specified!below:!!
!!Step:5!Once!your!wget!runs!properly!do!ls!to!get!the!installation!binary.!!
!Step:6!!Run!the!installer(ensure!as!root!user)!
!!Step:7!!From!here!specify!follow!the!wizard.Follow!the!wizard!as!specified!in!below!diagrams:!!
!!

! 6!
Step:8!!Select!Next!and!Accept!!the!license.!
!
!!Step:!9!Accept!nonYcloudera!licenses.!!
!
!Step:!10!It!starts!installation!with!following!tasks!.!

! 7!
!
!!
!!!
!!Step:11!!Once!installation!is!done!browse!using!7180!tcp!port!as!indicated!in!last!steps.!!
!!Step:12!Finalize!the!CM!installation.!
!

! 8!
Step:13!Login!in!the!CM!using!admin!as!userid!and!admin!as!password.!
!Step:14!Select!the!right!distribution!for!installation!.We!would!be!selecting!express!!since!no!licenses!are!required!!
!!Compare!the!feature!and!select!the!right!one!as!per!your!production!need.!!!!!

! 9!
Step:15!Click!on!continue!to!reach!to!the!products!overview!page!as!specified!below.!
!!Step:16!Select!the!host!as!specified!below!ensure!the!ip!addresses!selected!are!correct!as!given/specified!by!administrator.!!
!!Step:17!Mark!the!progress!of!cluster!installation!!
!!!!!!

! 10!
!Step:18!Once!everything!goes!fine!you!will!see!the!below!screen!marking!successful!installation!of!cluster!packages!.!
!!Step:!19!Click!on!continue!to!mark!the!CDH5!parcel!as!specified!below.!!
!!Step:20!select!the!pack!you!want!to!install!as!specified!below.!
!!

! 11!
Step:21!Configure!the!required!databases!(don’t!worry!its!automatically!done)!!!
!!Step:22!!In!the!following!steps!CM!configures!and!starts!the!services!as!specified!below.Its!a!22!step!task!keep!patience!!till!it!succeeds.!!
!!!Step:23!once!all!22!services!are!installed!and!done!you!get!the!below!message!as!specified!.!!
!!Step:24!once!everything!is!done!click!on!finish!and!you!get!a!Dashboard!for!provisioning!and!configuring!the!hadoop!services!as!specified!below.!

! 12!
!!Step:25!you!may!find!some!warnings!ignore!for!now.Your!cloudera!CDH5(Hadoop!is!up!and!running).!! !

! 13!
LAB:!Working!with!Hadoop!user!and!administrative!Commands!!
! !

! 14!
!
!Task:1!Finding!the!version!of!Hadoop!Installed!!
!!!!Task:2!Creating!a!Directory:!!!
!!Task:3!Creating!a!local!file!and!copying!it!to!HDFS!!
!! !
!!!!

! 15!
!Copy!from!Local!to!HDFS:!!
!!List!the!directory!to!confirm!file!transfer.!!
!!!Task:4!expunge!a!file!!!
!!!!!Use!Instructors!Guidance!to!try!out!rest!of!the!commands.!!! !

! 16!
LAB!:!Configuring!and!Working!with!Hue! !

! 17!
!
!Hue!is!a!Web!interface!for!analyzing!data!with!Apache!Hadoop.!It!supports!a!file!and!job!browser,!Hive,!Pig,!Impala,!Spark,!Oozie!editors,!Solr!Search!dashboards,!HBase,!Sqoop2,!and!more.Cloudera!CM!!can!be!configured!to!use!Hue.!!Step:1!Go!to!Home!and!select!Hue!to!configure!it!as!specified!below.!!
!!Step:2!!Launch!the!wizard!to!prepare!Hue!use!http://<ip>:8888!port!to!launch!hue!configuration!wizard.!!
!!!!Step:3!!Select!the!utilities!you!need!!to!make!Hue!productive.!You!have!two!options!.(All!and!individual!applications).!!

! 18!
!!Step:4!Install!following!utilities!!
!!Step:5!Configure!user!as!specified!in!below!pictures.!!
!

! 19!
Step:6!Complete!the!last!steps!as!specified!below.!!!
!!!Step:7!!Follow!the!step!of!downloading!!and!setting!!the!hue!to!work.!
!!!!!!!!
! 20!
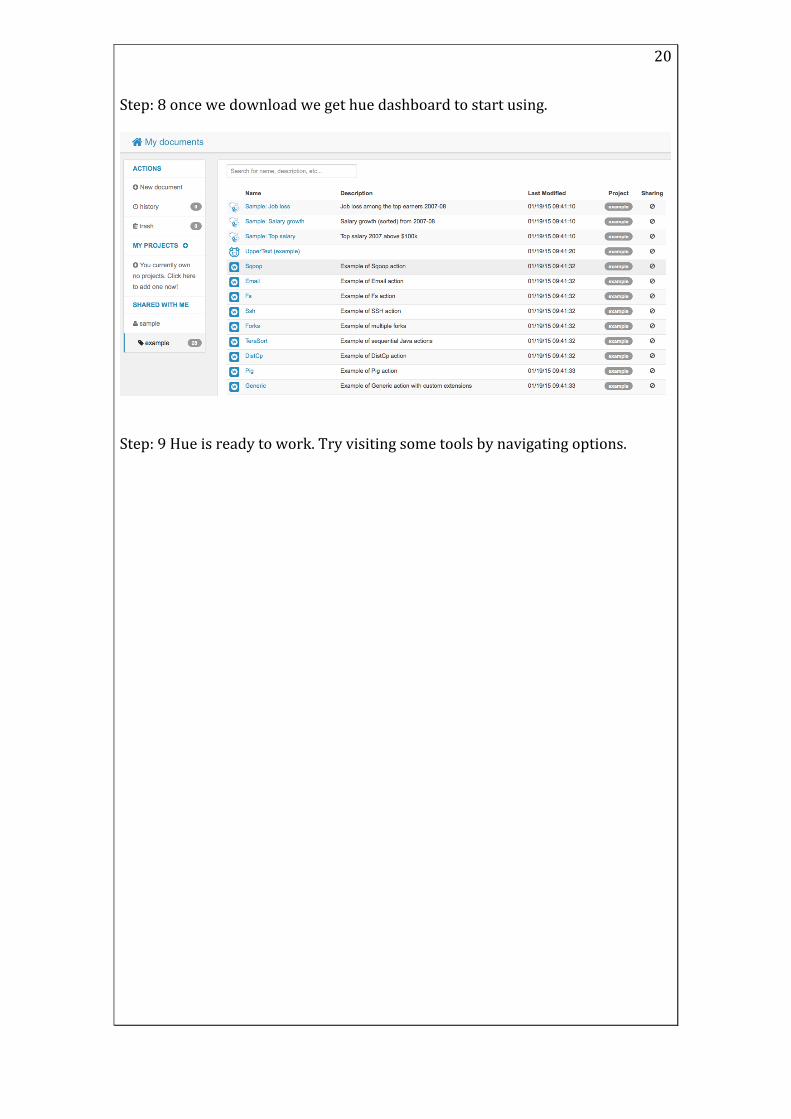
Step:!8!once!we!download!we!get!hue!dashboard!to!start!using.!!
!!!Step:!9!Hue!is!ready!to!work.!Try!visiting!some!tools!by!navigating!options.!!!!!! !

! 21!
LAB:!Configuring!High!Availability!using!CM5.!!!!!!!!! !

! 22!
Before!we!configure!High!Availability!we!need!to!ensure!we!have!proper!hardware!checklist!ready.!Some!guidelines!to!be!followed!are!as!follows.!!
• Hardware!Configuration!for!QuorumYbased!Storage!• In!order!to!deploy!an!HA!cluster!using!QuorumYbased!Storage,!you!should!
prepare!the!following:!!
o NameNode!machines!Y!the!machines!on!which!you!run!the!Active!and!Standby!NameNodes!should!have!equivalent!hardware!to!each!other,!and!equivalent!hardware!to!what!would!be!used!in!a!nonYHA!cluster.!
o JournalNode!machines!Y!the!machines!on!which!you!run!the!JournalNodes.!
o The!JournalNode!daemon!is!relatively!lightweight,!so!these!daemons!can!reasonably!be!collocated!on!machines!with!other!Hadoop!daemons,!for!example!NameNodes,!the!JobTracker,!or!the!YARN!ResourceManager.!
o Cloudera)recommends)that)you)deploy)the)JournalNode)daemons)on)the)"master")host)or)hosts)(NameNode,)Standby)NameNode,)JobTracker,)etc.))so)the)JournalNodes')local)directories)can)use)the)reliable)local)storage)on)those)machines.)You)should)not)use)SAN)or)NAS)storage)for)these)directories.)
!• There!must!be!at!least!three!JournalNode!daemons,!since!edit!log!
modifications!must!be!written!to!a!majority!of!JournalNodes.!This!will!allow!the!system!to!tolerate!the!failure!of!a!single!machine.!!!
• You!can!also!run!more!than!three!JournalNodes,!but!in!order!to!actually!increase!the!number!of!failures!the!system!can!tolerate,!you!should!run!an!odd!number!of!JournalNodes,!(three,!five,!seven,!etc.)!!
!• Note!that!when!running!with!N!JournalNodes,!the!system!can!tolerate!at!
most!(N!Y!1)!/!2!failures!and!continue!to!function!normally.!If!the!requisite!quorum!is!not!available,!the!NameNode!will!not!format!or!start,!and!you!will!see!an!error!similar!to!this:!
!
!!!!!!!!!!

! 23!
Step:1!On!the!previous!cluster!installation!we!have!three!nodes!.We!will!be!using!same!nodes!to!configure!high!availiability.go!to!home!select!HDFS!to!see!the!following!.!!
!!!Step:2!Click!on!action!button!as!specified!and!select!Enable!High!Availiability.!!
!!Step:3!!Specify!the!name!of!the!cluster!which!will!have!two!namenodes.!!
!

! 24!
Step:4!Click!on!continue!and!you!move!to!next!step!where!you!have!to!specify!name!of!second!name!node!and!three!journal!nodes!as!specified!below.!!!
!!Step:5!!Below!picture!shows!the!node!selection!pane.!!
!!Step:6!!in!Next!steps!we!will!specify!the!directory!structure!as!specified!below!!
!!!

! 25!
Step:7!Click!on!continue!to!complete!the!process!.monitor!the!!progress!of!activities.!!
!!Step:8!Monitor!the!progress!and!ensure!all!tasks!are!completed!successfully.!Some!of!the!task!are!as!specified!below.!
!Step:9!Once!!the!task!completes!you!would!find!the!status!as!specified!below.!!
!!!

! 26!
Step:10!Upon!successful!startup!of!all!services!we!find!below!message!that!indicates!configuration!of!Hue!!and!Hive.!
!!Step:11!See!the!dashboard!and!you!will!find!the!two!namenodes!configured!in!form!of!active!and!standby.!!
!!!Step:12!!Click!on!the!Quick!links!of!Both!and!you!will!find!the!appropriate!!webUI!with!details!indicating!status!as!specified!below.!!
!!

! 27!
LAB:!Adding!New!node!to!cluster!! !

! 28!
!!!!Step:1!!For!Adding!extra!host!to!existing!cluster!we!need!extra!node!which!is!configured!and!provided!to!you!by!administrator.!In!current!case!we!have!created!an!extra!instance!in!amazon!EWS!as!specified!below.!!
!!Note:This!exercise!is!optional!and!demonstration!need!to!be!done!by!Mentor.!!!Step:2!!Go!to!hosts!and!click!on!it!to!proceed!with!adding!a!new!host!wizard.!!
!!!!Step:3!Launch!wizard!to!add!new!node!as!specified!below.!!
!!!Step:4!!Launch!add!host!wizard!as!specified!below.!!!!

! 29!
!
!!!Step:5!!Specify!the!ip!and!search!for!host!.!
!!Step:6!!Ensure!host!specified!by!you!is!part!of!successfully!discovered!host!as!specified!below.!!
!!

! 30!
Step:7!Select!repository!to!be!installed!on!the!host.!!
!!!!Step:8!Install!jdk!(prompted!by!wizard)!!
!!Step:9!Select!user!and!the!key!as!specified!below!for!ssh!credentials.!

! 31!
!Step:10!click!on!ok!
!!Step:11!Ensure!that!auto!install!is!successful.!!
!!Step:12!!Once!you!see!the!below!diagram!it!ensures!your!installation!is!successful.!!

! 32!
!!!!Step:13!Next!step!installs!parcel!giving!you!opportunity!of!selecting!component!you!want!on!the!host!added.!!
!Step:!14!once!prompted!select!the!packages!you!want!and!finalize!the!process.!Go!to!hosts!and!see!that!host!is!added!as!specified!below.!!
!!!!! !

! 33!
LAB:!Installing!Kerberos! !

! 34!
!!!Step:1!on!Ubuntu!use!the!following!command!to!install!Kerberos!!$sudo!aptYget!install!krb5*!!This!installs!all!the!untilities!and!prompts!you!to!follow!a!wizard!as!specified!below.!!Step:2!Enter!the!realm!as!HADOOP.COM!!
!!Step:3!Enter!the!hostname!/IP!!of!KDC!as!per!your!image!(IP!of!your!host).!!!
!!Step:4!Enter!the!administrative!host!in!our!case!it’s!the!same!value.!!

! 35!
!!Step:5!Finalize!the!process!to!initiate!setup!of!realm!!
!!Step:6!Enter!following!command!to!configure!realm!!$sudo!krb5_newrealm!!This!creates!a!realm!with!the!inputs!provided!in!the!wizard.you!get!something!similar!diagram!specified!below.!!
!

! 36!
Step:7!!use!kadmin.local!to!create!and!add!new!principals!as!specified!below!!
!!Step:8!use!addprinc!to!create!new!principals!as!specified!below!!
!!Step:9!!Test!whether!you!have!principals!listed!and!added!properly!to!database!use!listprincs!command!as!specified!below.!!
!!Step:10!Create!a!principal!as!client!principal!called!Ubuntu!as!specified!below.!!
!!Step:11!quit!and!test!!!
!Step:12!Test!using!Ubuntu!principal!!
!!

! 37!
Step:13!Verify!the!ticket.!
!!!This!lab!installs!and!configures!Kerberos!and!this!would!be!used!in!cloudera.! !

! 38!
!LAB:!Securing!Hadoop!using!Kerberos!! !

! 39!
!!!!!Assuming!that!Kerberos!server!is!installed!we!need!to!follow!following!steps!to!secure!hadoop!instances!with!authentication!mechanism.!!Step:1!Use!Cloudera!manager!to!launch!the!Kerberos!wizard!as!specified!below.!!
!!Step:2!!Enable!Kerberos!!!
!!Step:3!Verify!your!Kerberos!setup!using!cloudera!guidelines!specified!below!and!ensure!all!requirements!are!met.!
!!Ensure!you!check!all!the!prerequisites!check!boxes.!!

! 40!
!Step:4!Specify!the!required!Kerberos!server!details!in!the!below!page.Since!we!are!using!MIT!we!have!selected!MIT(default).!!
!!!Step:5!Consult!your!Kerberos!administrator!and!add!the!required!details!of!KDC!server!host!and!realm.in!our!case!it!is!the!hostname!of!the!master!node.!!Step:6!!Enter!the!credentials!having!create!user!privileges.!!
!!Step:7!!This!step!imports!account!manager!credentials!as!specified!below.!!

! 41!
!!!Step:!8!Follow!through!the!steps!!and!Kerberos!gets!enabled!.To!confirm!walkthrough!settings!as!specified!.!!
!Step:!9!!Test!Kerberos!client!using!below!commands.!!
!!Since!we!are!able!to!get!kadmin!it!confirms!that!client!interacts!with!Kerberos!server.!!!!!!! !

! 42!
LAB:!Installing!CDH!5!with!YARN!on!a!Single!Linux!Node!in!PseudoYdistributed!mode!! !

! 43!
Oracle!JDK!Installation!!!!!!!!!!Download!!Java!SE!Development!Kit!7u45!(http://www.oracle.com/technetwork/java/javase/downloads/javaYarchiveYdownloadsYjavase7Y521261.html)!!!!!!!!!!$!tar!Yxvf!~/Downloads/jdkY7u45YlinuxYx64.gz!!!!!!$!sudo!mkdir!Yp!/usr/java/jdk.1.7.0_45!!!!!!$!sudo!mv!~/Downloads/jdk1.7.0_45/*!/usr/java/jdk.1.7.0_45!!!!!!$!sudo!vim!!/etc/profile!!!!!!!!!JAVA_HOME=/usr/java/jdk.1.7.0_45!!!!!!!!!PATH=$PATH:$HOME/bin:$JAVA_HOME/bin!!!!!!!!!JRE_HOME=/usr/java/jdk.1.7.0_45/jre!!!!!!!!!PATH=$PATH:$HOME/bin:$JRE_HOME/bin!!!!!!!!!export!JAVA_HOME!!!!!!!!!export!JRE_HOME!!!!!!!!!export!PATH!!!!!!$!source!/etc/profile!!!!!!$!vi!/etc/sudoers!!!!!!!!!Defaults!env_keep+=JAVA_HOME!!!!!!$!sudo!init!6!!!Installing!CDH!5!with!YARN!on!a!Single!Linux!Node!in!PseudoYdistributed!mode!http://www.cloudera.com/content/clouderaYcontent/clouderaYdocs/CDH5/latest/CDH5YQuickYStart/cdh5qs_yarn_pseudo.html!!!Download!the!CDH!5!"1Yclick!Install"!package:!!!"this!link!for!a!Precise!system"!!$!sudo!dpkg!Yi!cdh5Yrepository_1.0_all.deb!!$!curl!Ys!http://archive.cloudera.com/cdh5/ubuntu/precise/amd64/cdh/archive.key!|!sudo!aptYkey!add!Y!!!Install!Hadoop!in!pseudoYdistributed!mode:!To!install!Hadoop!with!YARN:!!$!sudo!aptYget!update!!$!sudo!aptYget!install!hadoopYconfYpseudo!!!

! 44!
Starting!Hadoop!and!Verifying!it!is!Working!Properly!For!YARN,!a!pseudoYdistributed!Hadoop!installation!consists!of!one!node!running!all!five!Hadoop!daemons:!namenode,!secondarynamenode,!resourcemanager,!datanode,!and!nodemanager.!!!To!view!the!files!on!Ubuntu!systems:!!$!dpkg!YL!hadoopYconfYpseudo!!The!new!configuration!is!selfYcontained!in!the!!/etc/hadoop/conf.pseudo!directory.!!!!Step!1:!Format!the!NameNode.!!!$!sudo!Yu!hdfs!hdfs!namenode!Yformat!!!Step!2:!Start!HDFS!!!if!occured!"Error:!JAVA_HOME!is!not!set"!set!java!home!in!hadoopYenv!configuration!file!in!etc/hadoop/conf!directory!$!sudo!vim!!/etc/hadoop/conf/hadoopYenv.sh!!!!!!!!!!export!JAVA_HOME=/usr/java/jdk.1.7.0_45!!!!!!!!!!$!for!x!in!`cd!/etc/init.d!;!ls!hadoopYhdfsY*`!;!do!sudo!service!$x!start!;!done!!The!NameNode!provides!a!web!console!http://localhost:50070/!for!viewing!your!Distributed!File!System!(DFS)!capacity,!number!of!DataNodes,!and!logs!!YYYYYYYYYYYYYYYYYYYYYYYYYYYYYYYYYYYYYYYYYYYYYYYYYYYYYYYYYYYYYYYYYYYYYYYYYYYYYYYYYYYYYYYYYYYYYYYYYYYYYYYYYYYYYYYYYYYYYYYYYYYYYYYYYYYYYYYYYYYYYYYYYYYYYYYYYYYYYYYYYYYYYYYYYYYYYYYYYYYYYYYYYYYYYYYYYYYYYY!!Step!3:!Create!the!/tmp,!Staging!and!Log!Directories!Remove!the!old!/tmp!if!it!exists:!!$!sudo!Yu!hdfs!hadoop!fs!Yrm!Yr!/tmp!!Create!the!new!directories!and!set!permissions:!$!sudo!Yu!hdfs!hadoop!fs!Ymkdir!Yp!/tmp/hadoopYyarn/staging/history/done_intermediate!$!sudo!Yu!hdfs!hadoop!fs!Ychown!YR!mapred:mapred!/tmp/hadoopYyarn/staging!!$!sudo!Yu!hdfs!hadoop!fs!Ychmod!YR!1777!/tmp!!$!sudo!Yu!hdfs!hadoop!fs!Ymkdir!Yp!/var/log/hadoopYyarn!$!sudo!Yu!hdfs!hadoop!fs!Ychown!yarn:mapred!/var/log/hadoopYyarn!!Note:!You!need!to!create!/var/log/hadoop/yarn!because!it!is!the!parent!of!/var/log/hadoopYyarn/apps!which!is!explicitly!configured!in!yarnYsite.xml.!!

! 45!
!Step!4:!Verify!the!HDFS!File!Structure:!Run!the!following!command:!!$!sudo!Yu!hdfs!hadoop!fs!Yls!YR!/!!!Step!5:!Start!YARN!$!sudo!service!hadoopYyarnYresourcemanager!start!!$!sudo!service!hadoopYyarnYnodemanager!start!!$!sudo!service!hadoopYmapreduceYhistoryserver!start!!!!Step!6:!Create!User!Directories!Create!a!home!directory!for!each!MapReduce!user.!It!is!best!to!do!this!on!the!NameNode;!for!example:!!#!$!sudo!Yu!hdfs!hadoop!fs!Ymkdir!/user/$USER!#!$!sudo!Yu!hdfs!hadoop!fs!Ychown!$USER!/user/$USER!!$!sudo!Yu!hdfs!hadoop!fs!Yls!/!$!sudo!Yu!hdfs!hadoop!fs!Ymkdir!/user!$!sudo!Yu!hdfs!hadoop!fs!Ymkdir!/user/ercan!$!sudo!Yu!hdfs!hadoop!fs!Ychown!ercan!/user/ercan!!!Running!an!example!application!with!YARN!$!hadoop!fs!Ymkdir!input!!#!create!new!directory!in!/user/ercan/!directory!!Run!MR!job!samples!$!hadoop!jar!/usr/lib/hadoopYmapreduce/hadoopYmapreduceYexamples.jar!grep!input!output23!'dfs[aYz.]+'!!$!hadoop!fs!Yls!!Found!2!items!drwxrYxrYx!Y!joe!supergroup!0!2009Y08Y18!18:36!/user/ercan/input!drwxrYxrYx!Y!joe!supergroup!0!2009Y08Y18!18:38!/user/ercan/output23!!$!hadoop!fs!Ycat!output23/partYrY00000!|!head!1!!!!dfs.safemode.min.datanodes!1!!!!dfs.safemode.extension!1!!!!dfs.replication!1!!!!dfs.namenode.name.dir!1!!!!dfs.namenode.checkpoint.dir!1!!!!dfs.datanode.data.dir!!!! !

! 46!
Lab!Manual!CDH5!Installation:!Hadoop!Installation!!!! !

! 47!
!!Step:1!Add!the!CDH!5!repository!!!$sudo wget 'http://archive.cloudera.com/cdh5/ubuntu/wheezy/amd64/cdh/cloudera.list' \ -O /etc/apt/sources.list.d/cloudera.list !Step:!2!Update!repositories!!sudo apt-get update Step:!3!Add!a!repository!key!!$ wget http://archive.cloudera.com/cdh5/ubuntu/precise/amd64/cdh/archive.key -O archive.key $ sudo apt-key add archive.key Step:!4!Our!current!installation!is!not!HA!for!HA!it!is!recommended!to!install!zookeeper!.!!$sudo apt-get install zookeeper-server Step:5!create!/var/lib/zookeeper!and!set!permissions.! $mkdir -p /var/lib/zookeeper $chown -R zookeeper /var/lib/zookeeper/ ZooKeeper!may!start!automatically!on!installation!on!Ubuntu!and!other!Debian!systems.!This!automatic!start!will!happen!only!if!the!data!directory!exists;!otherwise!you!will!be!prompted!to!initialize!as!shown!below.!!Step:6!Install!each!type!of!daemon!package!on!the!appropriate!systems(s).!!6.1!On!Resource!manage!node!install!!sudo apt-get update; sudo apt-get install hadoop-yarn-resourcemanager !6.2!NameNode!Host!will!have!following!!!sudo apt-get install hadoop-hdfs-secondarynamenode

! 48!
6.3!On!all!other!nodes!except!those!where!Resource!Manage!is!running$sudo apt-get install hadoop-yarn-nodemanager hadoop-hdfs-datanode hadoop-mapreduce 6.4!On!all!client!hosts!!$sudo apt-get install hadoop-client. Step:7!!Setting!up!hadoop!configuration!files:!!7.1!Copy!the!default!configuration!to!your!custom!directory: $ sudo cp -r /etc/hadoop/conf.empty /etc/hadoop/conf.my_cluster 7.2!CDH!uses!the!alternatives!setting!to!determine!which!Hadoop!configuration!to!use.!Set!alternatives!to!point!to!your!custom!directory,!as!follows.! $sudo update-alternatives --install /etc/hadoop/conf hadoop-conf /etc/hadoop/conf.my_cluster 50 $ sudo update-alternatives --set hadoop-conf /etc/hadoop/conf.my_cluster 7.3!Display!current!settings!as!follows!!$sudo update-alternatives --display hadoop-conf Output!of!the!above!program!would!be!something!similar!to!below!given!diagram!!hadoop-conf - status is auto. link currently points to /etc/hadoop/conf.my_cluster /etc/hadoop/conf.my_cluster - priority 50 /etc/hadoop/conf.empty - priority 10 Current `best' version is /etc/hadoop/conf.my_cluster. !!!!Step:!8.Customize!Configuration!files:!!

! 49!
! Step:9!Configure!directories.Below!is!the!sample!for!namenode!and!datanode!local!directories!change!it!with!your!directories.!!
!!!Step:!10!Configuring!local!directories!used!for!HDFS.!!10.1!On!a!NameNode!host:!create!the!dfs.name.dir!or!dfs.namenode.name.dir!local!directories:!
!!10.2!On!all!DataNode!hosts:!create!the!dfs.data.dir!or!dfs.datanode.data.dir!local!directories:!
10.3!Configure!the!owner!of!the!dfs.name.dir!or!dfs.namenode.name.dir!directory,!and!of!the!dfs.data.dir!or!dfs.datanode.data.dir!directory,!to!be!the!hdfs!user:!
10.4!Change!permission!to!correct!permission!as!specified!below!!

! 50!
!!Step:!11!Format!the!NameNode!as!specified!below.!!
!!Step:12!Configuring!a!secondary!NameNode.!Add!the!following!entry!in!hdfsYsite.xml!!
!!!Step:!12!Enable!WebHDFS.!!If!you!want!to!use!WebHDFS,!you!must!first!enable!it.DO!the!following!changes!in!hdfsYsite.xml!!as!specified!below.!
!!!Step:13!Deploy!the!configuration!push!your!custom!directory!to!each!host!as!specified!below.!Use!the!correct!ips.!!
!!Step:14!!Manually!set!the!configuration!as!specified!below.!!
!!Step:15!Start!the!HDFS!!
!!Step:16!Create!tmp!directory!(if!not!created!you!may!run!into!problem).Also!specify!the!right!permission!to!the!file!as!shown!below.!
!

! 51!
LAB:!Configuring!YARN!in!Cloudera!!
!!! !

! 52!
The!default!installation!in!CDH!5!is!MapReduce!2.x!(MRv2)!built!on!the!YARN!framework.!In!this!document!we!usually!refer!to!this!new!version!as!YARN.!The!fundamental!idea!of!MRv2's!YARN!architecture!is!to!split!up!the!two!primary!responsibilities!of!the!JobTracker!—!resource!management!and!job!scheduling/monitoring!—!into!separate!daemons:!a!global!ResourceManager!(RM)!and!perYapplication!ApplicationMasters!(AM).!With!MRv2,!the!ResourceManager!(RM)!and!perYnode!NodeManagers!(NM),!form!the!dataYcomputation!framework.!The!ResourceManager!service!effectively!replaces!the!functions!of!the!JobTracker,!and!NodeManagers!run!on!slave!nodes!instead!of!TaskTracker!daemons.!!!Step:!1!Configure!YARN!for!CDH5!for!cluster!as!specified!below!!
!!Step:!2!Configure!the!YARN!Daemons!Create!yarnYsite.xml!file!as!specified!below.!!<property> <name>yarn.resourcemanager.hostname</name> <value>resourcemanager.company.com</value> </property> <property> <description>Classpath for typical applications.</description> <name>yarn.application.classpath</name> <value> $HADOOP_CONF_DIR, $HADOOP_COMMON_HOME/*,$HADOOP_COMMON_HOME/lib/*, $HADOOP_HDFS_HOME/*,$HADOOP_HDFS_HOME/lib/*, $HADOOP_MAPRED_HOME/*,$HADOOP_MAPRED_HOME/lib/*, $HADOOP_YARN_HOME/*,$HADOOP_YARN_HOME/lib/* </value> </property> <property> <name>yarn.nodemanager.aux-services</name> <value>mapreduce_shuffle</value> </property> <property> <name>yarn.nodemanager.local-dirs</name> <value>file:///data/1/yarn/local,file:///data/2/yarn/local,file:///data/3/yarn/local</value> </property> <property> <name>yarn.nodemanager.log-dirs</name> <value>file:///data/1/yarn/logs,file:///data/2/yarn/logs,file:///data/3/yarn/logs</value> </property> <property> <name>yarn.log.aggregation-enable</name> <value>true</value> </property> <property>

! 53!
<description>Where to aggregate logs</description> <name>yarn.nodemanager.remote-app-log-dir</name> <value>hdfs://<namenode-host.company.com>:8020/var/log/hadoop-yarn/apps</value> </property>!!!Step:!3!create!the!directories!and!assign!the!correct!file!permissions!to!them!on!each!node!in!your!cluster.(ensure!you!use!directories!created!by!you!on!your!system)!!
!!Step:!4!Configure!mapredYsite.xml!If!you!have!decided!to!run!YARN!on!your!cluster!instead!of!MRv1,!you!should!also!run!the!MapReduce!JobHistory!Server.!The!following!table!shows!the!most!important!properties!that!you!must!configure!in!mapredYsite.xml.!!
!
!!Step:5!YARN!By!default!it!creates!/tmp/hadoopYyarn/staging!with!restrictive!permissions!that!may!prevent!your!users!from!running!jobs.!To!forestall!this,!you!should!configure!and!create!the!staging!directory!yourself;!in!the!example!that!follows!we!use!/user(make!following!entries!in!mapredYsite.xml.!!
!Once!HDFS!is!up!and!running,!you!will!create!this!directory!and!a!history!subdirectory!under!it.!!!Step:!6!Create!the!history!Directory!and!Set!Permissions!and!Owner.!See!the!below!statement!and!do!the!needful!.!

! 54!
!
!!Step:!7!create!log!directories!as!specified!below!!
!!Step:8!!Verify!using!HDFS!command!specified!below!!
!You!will!see!the!following!structure!as!follows!!
!!Step:9!!Start!YARN!and!MapReduce!jobHistory!server!!!!
!!Step!:10!Start!MapReduce!and!JobHistory!Server.!!
!!Step:!11!Create!home!directory!for!each!MapReduce!user.!!
!!!!! !

! 55!
LAB:!Installing!and!configuring!Sqoop.!!! !

! 56!
Sqoop!2!is!a!serverYbased!tool!designed!to!transfer!data!between!Hadoop!and!relational!databases.!You!can!use!Sqoop!2!to!import!data!from!a!relational!database!management!system!(RDBMS)!such!as!MySQL!or!Oracle!into!the!Hadoop!Distributed!File!System!(HDFS),!transform!the!data!with!Hadoop!MapReduce,!and!then!export!it!back!into!an!RDBMS.!!In!this!Lab!we!will!wouk!exclusively!with!Sqoop!components!1.SqoopYserver!2.SqoopYclient.!!Note:!!!We!need!to!install!the!server!package!on!one!node!in!the!cluster;!because!the!Sqoop!2!server!acts!as!a!MapReduce!client!this!node!must!have!Hadoop!installed!and!configured.!!Install!the!client!package!on!each!node!that!will!act!as!a!client.!A!Sqoop!2!client!will!always!connect!to!the!Sqoop!2!server!to!perform!any!actions,!so!Hadoop!does!not!need!to!be!installed!on!the!client!nodes.!!!Step:!1!Install!the!Sqoop!2!server!package!on!an!Ubuntu.!!
!!Step:!2!install!the!Sqoop!2!client!package!on!an!Ubuntu!!
!!Step:!3!Configure!Sqoop2!to!work!with!MapReduce!Mrv1!and!YARN.!The!Sqoop!2!server!can!work!with!either!MRv1!or!YARN.!It!cannot!work!with!both!simultaneously.!We!need!to!configure!CATALINA_BASE!variable!in!the!/etc/defaults/sqoop2Yserver!file. By!default,!CATALINA_BASE!is!set!to!/usr/lib/sqoop2/sqoopYserver.!This!setting!configures!the!Sqoop!2!server!to!work!with!YARN.!You!need!to!change!it!to!/usr/lib/sqoop2/sqoopYserverY0.20!to!switch!to!MRv1.!!Use!following!statements!to!configure!Sqoop2!to!work!with!your!selected!mode.!!
!! ! ! ! or!
! !!Step:!4!Next!is!to!install!the!required!database!driver.!In!our!case!its!mysql!java!driver.(download!and!extract!to!get!the!driver).!!
!

! 57!
!!
!!Step:!5!Starting!Sqoop2!Server!!
!!Step:!6!Confirming!server!startup!!
!
!!Step:!7!Stopping!Sqoop2!Server.!!
!!Step:!8!Accessing!the!Sqoop!2!Server!with!the!Sqoop!2!Client!!Step:!8.1!Lets!Start!the!Sqoop!2!client.!!
!Step:!8.2!Lets!identify!the!host!where!your!server!is!running!(localhost/ip!of!the!server!).!!
!!Step:!8.3!Test!the!connection!as!shown!below.!!!!
!!!

! 58!
Note:!Sqoop!is!using!numerical!identifiers!to!identify!various!meta!data!structures!(connectors,!connections,!jobs).!Each!meta!data!structures!have!it’s!own!pool!of!identifiers!and!thus!it’s!perfectly!valid!when!Sqoop!have!connector!with!id!1,!connection!with!id!1!and!job!with!id!1!at!the!same!time.!!Step:!9!Lets!check!what!connectors!are!available!on!your!Sqoop!server.!!
!!Step:!10!Create!a!connector!as!specified!below.!It!creates!a!new!connection!object!will!be!created!with!assigned!id!1.!!
!!!Step:!11!Create!Job!Obect!as!specified!below.!List!of!supported!job!types!for!each!connector!might!be!seen!in!the!output!of!show!connector!command!as!shown!below.!!
!!Step:!12!Create!import!job!for!connection!object!created!in!previous!step.!!

! 59!
!!Step:!13!Moving!data!around.!Submit!Hadoop!job!using!submission!start!as!specified!below.!!
!!Step:!14!Check!the!running!job!as!specified!below.!!
!!Step:!15!Stop!running!job!as!specified!below.!!
!

! 60!
LAB:!Installing!and!working!with!Pig.!!!! !

! 61!
Pig!is!a!high!level!scripting!language!that!is!used!with!Apache!Hadoop.!Pig!enables!data!workers!to!write!complex!data!transformations!without!knowing!Java.!Pig’s!simple!SQLYlike!scripting!language!is!called!Pig!Latin,!and!appeals!to!developers!already!familiar!with!scripting!languages!and!SQL.!!!Step:!1!Install!Pig.!!
!!Step:!2!Starting!Pig!in!interactive!mode!with!YARN!.!!!For!each!user!who!will!be!submitting!MapReduce!jobs!using!MapReduce!v2!(YARN),!or!running!Pig,!Hive,!or!Sqoop!in!a!YARN!installation,!make!sure!that!the!HADOOP_MAPRED_HOME!environment!variable!is!set!correctly,!as!follows:!!
!!For!each!user!who!will!be!submitting!MapReduce!jobs!using!MapReduce!v1!(MRv1),!or!running!Pig,!Hive,!or!Sqoop!in!an!MRv1!installation,!set!the!HADOOP_MAPRED_HOME!environment!variable!as!follows:!!
!!Step:!3!Start!Pig!
!!Step:!4!Verify!Pig!Installation!as!specified!below.!!
!
!!Step:!5!Write!a!Pig!Script!and!test!the!Pig!Response!!
!!!Step:!6!Test!the!output!on!the!console!(Installation!of!Pig!is!verified).!!!!

! 62!
LAB:!Installing!!and!Configuring!Zookeeper!on!CDH5! !

! 63!
ZooKeeper!is!a!centralized!service!for!maintaining!configuration!information,!naming,!providing!distributed!synchronization,!and!providing!group!services.!All!of!these!kinds!of!services!are!used!in!some!form!or!another!by!distributed!applications.!Each!time!they!are!implemented!there!is!a!lot!of!work!that!goes!into!fixing!the!bugs!and!race!conditions!that!are!inevitable.!Because!of!the!difficulty!of!implementing!these!kinds!of!services,!applications!initially!usually!skimp!on!them,!which!make!them!brittle!in!the!presence!of!change!and!difficult!to!manage.!Even!when!done!correctly,!different!implementations!of!these!services!lead!to!management!complexity!when!the!applications!are!deployed.!!There!are!two!ZooKeeper!server!packages:!!
• The!zookeeper!base!package!provides!the!basic!libraries!and!scripts!that!are!necessary!to!run!ZooKeeper!servers!and!clients.!The!documentation!is!also!included!in!this!package.!!
• The!zookeeperYserver!package!contains!the!init.d!scripts!necessary!to!run!ZooKeeper!as!a!daemon!process.!Because!zookeeperYserver!depends!on!zookeeper,!installing!the!server!package!automatically!installs!the!base!package.!
!Installing!Zookeeper!on!Single!Host:!
!Step:!1!Install!zookeeper!Base!Packages!using!!!
!!Step:!2!Installing!the!ZooKeeper!Server!Package!and!Starting!ZooKeeper!on!a!Single!Server!(not!recommended!for!production).!!
!!Step:!3!Create!the!/var/lib/zookeeper!!and!set!permissions!on!it!as!specified!below.!!
!!Step:!4!Starting!Zookeeper!after!first!time!install.!!
!!!!!!

! 64!
Installing!Zookeeper!on!multimode!hosts!(Production):!
!
Note: In!a!production!environment,!you!should!deploy!ZooKeeper!as!an!ensemble!with!an!odd!number!of!servers.!As!long!as!a!majority!of!the!servers!in!the!ensemble!are!available,!the!ZooKeeper!service!will!be!available.!The!minimum!recommended!ensemble!size!is!three!ZooKeeper!servers,!and!Cloudera!recommends!that!each!server!run!on!a!separate!machine.!In!addition,!the!ZooKeeper!server!process!should!have!its!own!dedicated!disk!storage!if!possible.!!Step:!1!Use!the!following!steps!on!each!hosts!you!want!to!install!zookeeper.!!Step:!1.1!Install!zookeeper!Base!Packages!using!!!
!!Step:!1.2!Installing!the!ZooKeeper!Server!Package!and!Starting!ZooKeeper!on!a!Single!Server!(not!recommended!for!production).!!
!!Step:!1.3!Create!the!/var/lib/zookeeper!!and!set!permissions!on!it!as!specified!below.!!
!!!!Step:2!On!each!host!!Test!the!expected!loads!to!set!the!Java!heap!size!so!as!to!avoid!swapping.!Make!sure!you!are!well!below!the!threshold!at!which!the!system!would!start!swapping;!for!example!12GB!for!a!machine!with!16GB!of!RAM.!!Step:3!On!each!host!Create!a!configuration!file!with!following!entries.!!
!!Step:4!On!each!Host!create!a!file!named!myid!in!the!server's!DataDir;!in!this!example,!/var/lib/zookeeper/myid!.!The!file!must!contain!only!a!single!line,!and!
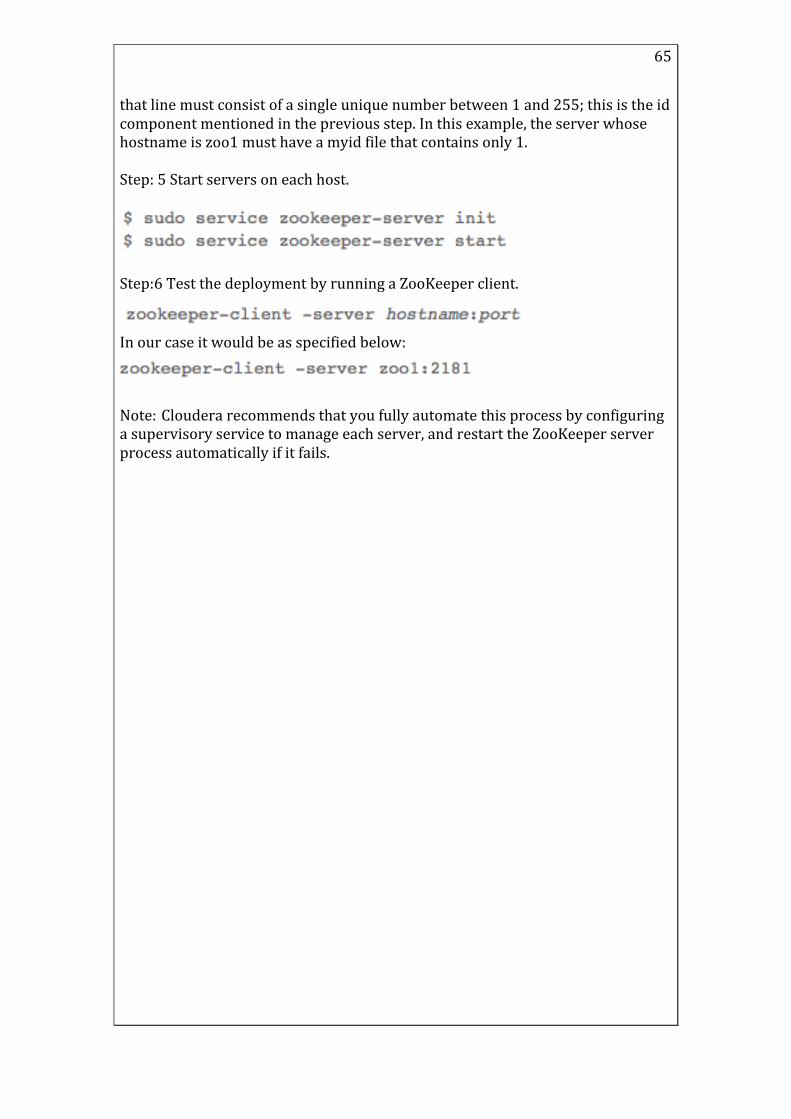
! 65!
that!line!must!consist!of!a!single!unique!number!between!1!and!255;!this!is!the!id!component!mentioned!in!the!previous!step.!In!this!example,!the!server!whose!hostname!is!zoo1!must!have!a!myid!file!that!contains!only!1.!!Step:!5!Start!servers!on!each!host.!!
!!Step:6!Test!the!deployment!by!running!a!ZooKeeper!client.!
!In!our!case!it!would!be!as!specified!below:!
!!Note: Cloudera!recommends!that!you!fully!automate!this!process!by!configuring!a!supervisory!service!to!manage!each!server,!and!restart!the!ZooKeeper!server!process!automatically!if!it!fails.!!! !

! 66!
!LAB:!Installing!and!configuring!Hive!in!CDH5!! !

! 67!
The!Apache!Hive!project!provides!a!data!warehouse!view!of!the!data!in!HDFS.!Using!a!SQLYlike!language!Hive!lets!you!create!summarizations!of!your!data,!perform!adYhoc!queries,!and!analysis!of!large!datasets!in!the!Hadoop!cluster.!The!overall!approach!with!Hive!is!to!project!a!table!structure!on!the!dataset!and!then!manipulate!it!with!HiveQL.!Since!you!are!using!data!in!HDFS!your!operations!can!be!scaled!across!all!the!datanodes!and!you!can!manipulate!huge!datasets.!!Step:!1!For!in!CDH5!we!need!to!install!following!packages.!!
• hive!–!base!package!that!provides!the!complete!language!and!runtime!• hiveYmetastore!–!provides!scripts!for!running!the!metastore!as!a!
standalone!service!(optional)!• hiveYserver2!–!provides!scripts!for!running!HiveServer2!!
!Step:!2!Configure!Heap!size!depending!on!your!cluster!size!some!Cloudera!benchmarks!are!specified!below.!
!!!To!configure!the!heap!size!for!HiveServer2!and!Hive!metastore,!use!the!hiveYenv.sh!advanced!configuration!snippet!if!you!use!Cloudera!Manager,!or!edit!/etc/hive/hiveYenv.sh!otherwise,!and!set!the!YXmx!parameter!in!the!HADOOP_OPTS!variable!to!the!desired!maximum!heap!size.Below!script!sets!the!heap!size!of!the!components!as!required!by!our!cluster.!!
!!Use!the!hiveYenv.sh!advanced!configuration!snippet!if!you!use!Cloudera!Manager,!or!edit!/etc/hive/hiveYenv.sh!otherwise,!and!set!the!HADOOP_HEAPSIZE!environment!variable!before!starting!the!Beehive!CLI.!!Step:!3!Configure!WebHat(Optional).!!
!!

! 68!
Step:4!!Configure!Hive!to!use!a!remote!database(embedded!an!d!local!are!other!modes).!!!!Step:!4.1!Install!mysql!on!a!box!using!following!command.!!
!!Step:4.2!Install!mysqlYconnector!(Driver)!!
!!Step:4.3!!Configure!To!make!sure!the!MySQL!server!starts!at!boot.!
!Step:4.4!Create!the!database!and!user!using!following!statements.!!Note:!use!the!hiveYschemaY0.12.0.mysql.sql!file!instead;!that!file!is!located!in!the!/usr/lib/hive/scripts/metastore/upgrade/mysql!directory.!Proceed!as!follows!if!you!decide!to!use!hiveYschemaY0.12.0.mysql.sql.!!
!!Step:4.5!You!also!need!a!MySQL!user!account!for!Hive!to!use!to!access!the!metastore.!It!is!very!important!to!prevent!this!user!account!from!creating!or!altering!tables!in!the!metastore!database!schema.!!
!!Step:5!Configure!the!metastore!service!to!communicate!with!the!MySQL!database.!!Note:!This!step!shows!the!configuration!properties!you!need!to!set!in!hiveYsite.xml!(/usr/lib/hive/conf/hiveYsite.xml)!to!configure!the!metastore!service!to!communicate!with!the!MySQL!database,!and!provides!sample!settings.!Though!you!can!use!the!same!hiveYsite.xml!on!all!hosts!(client,!metastore,!HiveServer),!hive.metastore.uris!is!the!only!property!that!must!be!configured!on!all!of!them;!the!others!are!used!only!on!the!metastore!host.!! !

! 69!
Edit!the!file!to!make!sure!following!entries!in!hiveYsite.xml.!!<property>!!!<name>javax.jdo.option.ConnectionURL</name>!!!<value>jdbc:mysql://myhost/metastore</value>!!!<description>the!URL!of!the!MySQL!database</description>!</property>!!<property>!!!<name>javax.jdo.option.ConnectionDriverName</name>!!!<value>com.mysql.jdbc.Driver</value>!</property>!!<property>!!!<name>javax.jdo.option.ConnectionUserName</name>!!!<value>hive</value>!</property>!!<property>!!!<name>javax.jdo.option.ConnectionPassword</name>!!!<value>mypassword</value>!</property>!!<property>!!!<name>datanucleus.autoCreateSchema</name>!!!<value>false</value>!</property>!!<property>!!!<name>datanucleus.fixedDatastore</name>!!!<value>true</value>!</property>!!<property>!!!<name>datanucleus.autoStartMechanism</name>!!!!<value>SchemaTable</value>!</property>!!!<property>!!!<name>hive.metastore.uris</name>!!!<value>thrift://<n.n.n.n>:9083</value>!!!<description>IP!address!(or!fullyYqualified!domain!name)!and!port!of!the!metastore!host</description>!</property>!!<property>!<name>hive.metastore.schema.verification</name>!<value>true</value>!</property>!

! 70!
Step:6!Configure!HiverServer2!as!specified!below.!!You!must!properly!configure!and!enable!Hive's!Table!Lock!Manager.!This!requires!installing!ZooKeeper!and!setting!up!a!ZooKeeper!ensemble.!setting!properties!in!/etc/hive/conf/hiveYsite.xml!as!follows!(substitute!your!actual!ZooKeeper!node!names!for!those!in!the!example):!!
!!Step:7!If!ZooKeeper!is!not!using!the!default!value!for!ClientPort,!you!need!to!set!hive.zookeeper.client.port!in!/etc/hive/conf/hiveYsite.xml!to!the!same!value!that!ZooKeeper!is!using.!Check!/etc/zookeeper/conf/zoo.cfg!to!find!the!value!for!ClientPort.!If!ClientPort!is!set!to!any!value!other!than!2181!(the!default),!set!hive.zookeeper.client.port!to!the!same!value.!!
!!Step:8!Running!HiveServer2!and!HiveServer. HiveServer2!and!HiveServer1!can!be!run!concurrently!on!the!same!system,!sharing!the!same!data!sets.!This!allows!you!to!run!HiveServer1!to!support,!for!example,!Perl!or!Python!scripts!that!use!the!native!HiveServer1!Thrift!bindings.!Both!HiveServer2!and!HiveServer1!bind!to!port!10000!by!default,!so!at!least!one!of!them!must!be!configured!to!use!a!different!port.!You!can!set!the!port!for!HiveServer2!in!hiveYsite.xml!by!means!of!the!hive.server2.thrift.port!property.!!!
!!!!

! 71!
Step:9!Start!the!meta!service!as!specified!below.!!
!!Step:10!Setting!the!permissions!as!specified!.!!Your!Hive!data!is!stored!in!HDFS,!normally!under!/user/hive/warehouse.!The!/user/hive!and!/user/hive/warehouse!directories!need!to!be!created!if!they!don't!already!exist.!Make!sure!this!location!(or!any!path!you!specify!as!hive.metastore.warehouse.dir!in!your!hiveYsite.xml)!exists!and!is!writable!by!the!users!whom!you!expect!to!be!creating!tables.!!Note!:!If!you!do!not!enable!impersonation,!HiveServer2!by!default!executes!all!Hive!tasks!as!the!user!ID!that!starts!the!Hive!server;!for!clusters!that!use!Kerberos!authentication,!this!is!the!ID!that!maps!to!the!Kerberos!principal!used!with!HiveServer2.!Setting!permissions!to!1777,!as!recommended!above,!allows!this!user!access!to!the!Hive!warehouse!directory.!!Change!the!behavior!making!!hive.metastore.execute.setugi!to!true!on!both!the!server!and!client.!This!setting!causes!the!metastore!server!to!use!the!client's!user!and!group!permissions.!!Step:11!Start/Stop/verify!HiveServer2!!!
!!
!!
!Once!you!are!able!to!see!this!output!it!ensures!setup!is!successful.!!Step:!12!In!beeline!feature!we!still!don’t!have!some!features!sometimes!we!would!like!to!use!hiveservr1!and!hive!console.!Following!pictures!helps!you!to!start!HiveServer1!and!use!Hive!console!as!specified!below.!!
!
!Once!you!see!prompt!type!the!following!!

! 72!
!your!HiverServer1!and!hive!prompts!are!configured!properly.!!!! !

! 73!
LAB:!Working!with!Flume!!!!!!!!!!!!!!!!!!!!!!!!!!!!!!!!!!!!!!!!!!!!!!!

! 74!
Apache!Flume!is!a!distributed,!reliable,!and!available!system!for!efficiently!collecting;!aggregating!and!moving!large!amounts!of!log!data!from!many!different!sources!to!a!centralized!data!store.!!The!use!of!Apache!Flume!is!not!only!restricted!to!log!data!aggregation.!Since!data!sources!are!customizable,!Flume!can!be!used!to!transport!massive!quantities!of!event!data!including!but!not!limited!to!network!traffic!data,!socialYmediaYgenerated!data,!email!messages!and!pretty!much!any!data!source!possible.!!!Step:!1!Installing!Flume!on!CDH5:!
! Step:!2!Lets!install!the!Flume!agent!so!Flume!starts!automatically!on!boot!on!Ubuntu.!
!!Step:!3!Install!Documentation!as!specified!below.!
!!Step:!4!Configure!Flume.!!Flume!1.x!provides!a!template!configuration!file!for!flume.conf!called!conf/flumeYconf.properties.template!and!a!template!for!flumeYenv.sh!called!conf/flumeYenv.sh.template.Follow!the!following!steps!as!specified!below.!!Step:!5!Copy!the!Flume!template!property!file!conf/flumeYconf.properties.template!to!conf/flume.conf.!!
!!Step:6!Edit!the!configuration!file!as!specified!below!to!describe!a!singleYnode!Flume!deployment.!This!configuration!lets!a!user!generate!events!and!subsequently!logs!them!to!the!console.!Edit!the!file!as!specified!below.! A!singleYnode!Flume!configuration!!#!Name!the!components!on!this!agent!a1.sources!=!r1!a1.sinks!=!k1!a1.channels!=!c1!!#!Describe/configure!the!source!a1.sources.r1.type!=!netcat!a1.sources.r1.bind!=!localhost!a1.sources.r1.port!=!44444!

! 75!
!#!Describe!the!sink!a1.sinks.k1.type!=!logger!!#!Use!a!channel!which!buffers!events!in!memory!a1.channels.c1.type!=!memory!a1.channels.c1.capacity!=!1000!a1.channels.c1.transactionCapacity!=!100!!#!Bind!the!source!and!sink!to!the!channel!a1.sources.r1.channels!=!c1!a1.sinks.k1.channel!=!c1!!Step:!6!The!flumeYng!executable!looks!for!a!file!named!flumeYenv.sh!in!the!conf!directory,!and!sources!it!if!it!finds!it.!Some!use!cases!for!using!flumeYenv.sh!are!to!specify!a!bigger!heap!size!for!the!flume!agent.!!
!!Step:!7!verify!the!installation.!!
!You!get!following!output!as!specified!below.!!
!!Step:!8!Look!at!your!configuration!file!to!test!Flume.!This!configuration!defines!a!single!agent!named!a1.!a1!has!a!source!that!listens!for!data!on!port!44444,!a!channel!that!buffers!event!data!in!memory,!and!a!sink!that!logs!event!data!to!the!

! 76!
console.!The!configuration!file!names!the!various!components,!then!describes!their!types!and!configuration!parameters.!Use!the!following!commands!as!specified!below!to!start!Flume.!!$ bin/flume-ng agent --conf conf --conf-file example.conf --name a1 -Dflume.root.logger=INFO,console Step:!9!Test!the!Flume!launch!a!separate!terminal!and!do!telnet!as!specified!below.!!$ telnet localhost 44444 Trying 127.0.0.1... Connected to localhost.localdomain (127.0.0.1). Escape character is '^]'. Hello world! <ENTER> OK Step:!10!Check!the!original!Flume!terminal!and!you!will!find!the!below!log!.! 12/06/19 15:32:19 INFO source.NetcatSource: Source starting 12/06/19 15:32:19 INFO source.NetcatSource: Created serverSocket:sun.nio.ch.ServerSocketChannelImpl[/127.0.0.1:44444] 12/06/19 15:32:34 INFO sink.LoggerSink: Event: { headers:{} body: 48 65 6C 6C 6F 20 77 6F 72 6C 64 21 0D Hello world!. } !!!!!!! !

! 77!
LAB:!Installation!and!configuration!of!HBase.! !

! 78!
!Apache™!HBase!is!a!nonYrelational!(NoSQL)!database!that!runs!on!top!of!the!Hadoop®!Distributed!File!System!(HDFS).!!It!is!columnar!and!provides!faultYtolerant!storage!and!quick!access!to!large!quantities!of!sparse!data.!It!also!adds!transactional!capabilities!to!Hadoop,!allowing!users!to!conduct!updates,!inserts!and!deletes.!!Following!Lab!helps!to!install!HBase!from!CDH5!distribution!!!Step:!1!To!install!HBase!on!Ubuntu:!!!$!sudo!aptYget!install!hbase!!
Step:!2!To!list!the!installed!files!on!Ubuntu:!!!$!dpkg!YL!hbase!!TODO!Y!You!are!now!ready!to!enable!the!server!daemons!you!want!to!use!with!Hadoop.!You!can!also!enable!JavaYbased!client!access!by!adding!the!JAR!files!in!/usr/lib/hbase/!and!/usr/lib/hbase/lib/!to!your!Java!class!path.!!!Step:3!Settings!for!HBase!!Using!DNS!with!HBase!!TODO!(if!necessary)!Y!HBase!uses!the!local!hostname!to!report!its!IP!address.!Both!forward!and!reverse!DNS!resolving!should!work.!If!your!machine!has!multiple!interfaces,!HBase!uses!the!interface!that!the!primary!hostname!resolves!to.!If!this!is!insufficient,!you!can!set!hbase.regionserver.dns.interface!in!the!hbaseYsite.xml!file!to!indicate!the!primary!interface.Setting!User!Limits!for!HBase!If!you!get!these!errors!then!set!following!–!!!hdfs!!Y!!!!!!!nofile!!32768!hbase!Y!!!!!!!nofile!!32768!!Note!:Only!the!root!user!can!edit!this!file.!!If!this!change!does!not!take!effect,!check!other!configuration!files!in!the!/etc/security/limits.d!directory!for!lines!containing!the!hdfs!or!hbase!user!and!the!nofile!value.!!!Such!entries!may!be!overriding!the!entries!in!/etc/security/limits.conf.!!Step:!4!To!apply!the!changes!in!/etc/security/limits.conf!on!Ubuntu!and!Debian!systems,!add!the!following!line!in!the!/etc/pam.d/commonYsession!file:!!Session!required!!pam_limits.so!!Step:!5!Using!dfs.datanode.max.xcievers!with!HBase!

! 79!
!If!you!get!below!error!set!theproperties!as!–!!!10/12/08!20:10:31!INFO!hdfs.DFSClient:!Could!not!obtain!block!blk_XXXXXXXXXXXXXXXXXXXXXX_YYYYYYYY!from!any!node:!!java.io.IOException:!No!live!nodes!contain!current!block.!Will!get!new!block!locations!from!namenode!and!retry...!!!!!/etc/hadoop/conf/hdfsYsite.xml!!!<property>!!!<name>dfs.datanode.max.xcievers</name>!!!<value>4096</value>!</property>!!Step:!6!Starting!HBase!in!standalone!mode!!Step:!6.1!Install!the!HBase!Master!using!the!below!statement.!!$!sudo!aptYget!install!hbaseYmaster!!Step:!6.2!Starting!the!HBase!Master!!$!sudo!service!hbaseYmaster!start!!Step:6.3!Verify!the!installation!!!http://localhost:60010.!The!list!of!Region!Servers!at!the!bottom!of!the!page!should!include!one!entry!for!your!local!machine.!!Step:7!Accessing!HBase!by!using!the!HBase!Shell!!After!you!have!started!HBase,!you!can!access!the!database!by!using!the!HBase!Shell:!!!$!hbase!shell!!Step:!8!Installing!and!Configuring!REST!!
$!sudo!aptYget!install!hbaseYrest!!Step:!9!Run!the!service!!$sudo!service!hbaseYrest!start!!!

! 80!
If!the!service!does!not!start!at!port!8080,!change!the!configuration!as!per!below!–!configure!it!in!hbaseYsite.xml,!<property>!!!<name>hbase.rest.port</name>!!!<value>60050</value>!</property>!! Step:!10!Test!it!again!and!your!HBase!is!set!to!run.!!!!! !

! 81!
!!!!!!!!!!!!!!!!!!Appendix:!A!!Ports!Used!by!Components!of!CDH!5All!ports!listed!are!TCP.!! !

! 82!
Component! Service! Qualifier! Port!Access!Requirement!
Hadoop!HDFS!
DataNode! !! 50010! External!
!! DataNode! Secure! 1004! External!!! DataNode! !! 50075! External!!! DataNode! !! 50475! External!!! DataNode! Secure! 1006! External!!! DataNode! !! 50020! External!!! NameNode! !! 8020! External!!! NameNode! !! 8022! External!!! NameNode! !! 50070! External!!! NameNode! Secure! 50470! External!!! Secondary!
NameNode!!! 50090! Internal!
!! Secondary!NameNode!
Secure! 50495! Internal!
!! JournalNode! !! 8485! Internal!!! JournalNode! !! 8480! Internal!!! JournalNode! !! 8481! Internal!!! Failover!Controller! !! 8019! Internal!!! NFS!gateway! !! 2049! !!! NFS!gateway! !! 4242! !!! NFS!gateway! !! 111! !Hadoop!MapReduce!(MRv1)!
JobTracker! !! 8021! External!
!! JobTracker! !! 8023! External!!! JobTracker! !! 50030! External!!! JobTracker! Thrift!Plugin! 9290! Internal!!! TaskTracker! !! 50060! External!!! TaskTracker! !! 0! Localhost!!! Failover!Controller! !! 8018! Internal!Hadoop!YARN!(MRv2)!
ResourceManager! !! 8032! External!
!! ResourceManager! !! 8030! Internal!!! ResourceManager! !! 8031! Internal!!! ResourceManager! !! 8033! External!!! ResourceManager! !! 8088! External!!! ResourceManager! !! 8090! !!!! NodeManager! !! 8040! Internal!!! NodeManager! !! 8041! Internal!!! NodeManager! !! 8042! External!!! NodeManager! !! 8044! External!!! JobHistory!Server! !! 10020! Internal!

! 83!
!! JobHistory!Server! !! 10033! Internal!!! Shuffle!HTTP! !! 13562! Internal!!! JobHistory!Server! !! 19888! External!!! JobHistory!Server! !! 19890! External!Flume! Flume!Agent! !! 41414! External!Hadoop!KMS!
Key!Management!Server!
!! 16000! External!
! Key!Management!Server!
!! 16001! Localhost!
HBase! Master! !! 60000! External!!! Master! !! 60010! External!!! RegionServer! !! 60020! External!!! RegionServer! !! 60030! External!!! HQuorumPeer! !! 2181! !!!! HQuorumPeer! !! 2888! !!!! HQuorumPeer! !! 3888! !!!! REST! NonYCMY
managed!8080! External!
!! REST! CMYManaged! 20550! External!!! REST!UI! ! 8085! External!!! ThriftServer! Thrift!Server! 9090! External!!! ThriftServer! ! 9095! External!!! !! Avro!server! 9090! External!!! hbaseYsolrYindexer! Lily!Indexer! 11060! External!Hive! Metastore! !! 9083! External!!! HiveServer2! !! 10000! External!!! WebHCat!Server! !! 50111! External!Sentry! Sentry!Server! !! 8038! External!! Sentry!Server! !! 51000! External!Sqoop! Metastore! !! 16000! External!Sqoop!2! Sqoop!2!server! ! 8005! Localhost!!! Sqoop!2!server! !! 12000! External!!! Sqoop!2! !! 12001! External!ZooKeeper! Server!(with!CDH!
5!and/or!Cloudera!Manager!5)!
!! 2181! External!
!! Server!(with!CDH!5!only)!
!! 2888! Internal!
!! Server!(with!CDH!5!only)!
!! 3888! Internal!
!! Server!(with!CDH!5!and!Cloudera!Manager!5)!
!! 3181! Internal!
!! Server!(with!CDH!5!and!Cloudera!Manager!5)!
!! 4181! Internal!

! 84!
!! ZooKeeper!JMX!port!
!! 9010! Internal!
Hue! Server! !! 8888! External!Oozie! Oozie!Server! !! 11000! External!! Oozie!Server! SSL! 11443! External!!! Oozie!Server! !! 11001! localhost!Spark! Default!Master!
RPC!port!!! 7077! External!
!! Default!Worker!RPC!port!
!! 7078! !!
!! Default!Master!web!UI!port!
!! 18080! External!
!! Default!Worker!web!UI!port!
!! 18081! !!
! History!Server! !! 18088! External!HttpFS!! HttpFS! !! 14000! !!!! HttpFS! !! 14001! !!!!!!!!!!!!!!!!!!!!!!!!!!!!!!!!!

! 85!
!!!!!!!!!!!APPENDIX:!B!!Permission!Requirements!with!Cloudera!Manager!!!!!!!!!!!!!!!!!!!!!!!!!!!!!!!!!!!!

! 86!
Table!1:!!Permission!Requirements!with!Cloudera!Manager:!!
TASK! PERMISSION!REQUIRED!
Install!Cloudera!Manager!(via!clouderaYmanagerYinstaller.bin)!
root!and/or!sudo!access!on!a!single!host!
Manually!start/stop/restart!the!Cloudera!Manager!Server!(that!is,!log!onto!the!host!running!Cloudera!Manager!and!execute:!service!clouderaYscmYserver!action)!
root!and/or!sudo!
Run!Cloudera!Manager!Server.!
clouderaYscm!
Install!CDH!components!through!Cloudera!Manager.!
One!of!the!following,!configured!during!!initial!installation!of!Cloudera!Manager:!Direct!access!to!root!user!via!the!root!password.!Direct!access!to!root!user!using!a!SSH!key!file.!Passwordless!sudo!access!for!a!specific!user.!!This!is!the!same!requirement!as!the!installation!of!CDH!components!on!individual!hosts,!which!is!a!requirement!of!the!UNIX!system!in!general.!You!cannot!use!another!system!!(such!as!PowerBroker)!!that!provides!root/sudo!privileges.!
Install!the!Cloudera!Manager!Agent!through!Cloudera!Manager.!
One!of!the!following,!configured!during!initial!installation!of!Cloudera!Manager:!Direct!access!to!root!user!via!the!root!password.!Direct!access!to!root!user!using!a!SSH!key!file.!Passwordless!sudo!access!for!a!specific!user.!!This!is!the!same!requirement!as!the!installation!of!!CDH!components!on!individual!hosts,!which!is!a!!requirement!of!the!UNIX!system!in!general.!You!cannot!use!another!system!!(such!as!PowerBroker)!that!provides!root/sudo!privileges.!

! 87!
Run!the!Cloudera!Manager!Agent.!
If!single!user!node!is!not!enabled,!access!to!the!root!account!during!runtime,!through!one!of!the!following!scenarios:!During!Cloudera!Manager!and!CDH!installation,!!the!Agent!is!automatically!started!if!installation!!is!successful.!!It!is!then!started!via!one!of!the!following,!as!!configured!during!the!initial!installation!of!!Cloudera!Manager:!Direct!access!to!root!user!via!the!root!password!Direct!access!to!root!user!using!a!SSH!key!file!Passwordless!sudo!access!for!a!specific!user!Using!another!system!(such!as!PowerBroker)!!that!provides!root/sudo!privileges!is!not!acceptable.!Through!automatic!startup!during!system!boot,!!via!init.!
Manually!start/stop/restart!the!Cloudera!Manager!Agent!process.!
If!single!user!node!is!not!enabled,!root!and/or!!sudo!access.!This!permission!requirement!ensures!that!services!!managed!by!the!Cloudera!Manager!Agent!!assume!the!appropriate!user!(that!is,!the!HDFS!service!assumes!the!hdfs!user)!for!correct!privileges.!Any!action!request!for!a!CDH!service!managed!within!Cloudera!Manager!does!not!require!root!and/or!sudo!access,!because!the!action!is!handled!by!the!Cloudera!Manager!Agent,!which!is!already!running!under!the!root!user.!
!!!!!!!!!!!!!!!!!!!

! 88!
Table!2:!Permission!Requirements!without!Cloudera!Manager!!
TASK! PERMISSION!REQUIRED!
Install!CDH!products.! root!and/or!sudo!access!for!the!installation!of!any!RPMYbased!package!during!the!time!of!installation!and!service!startup/shut!down.!Passwordless!SSH!under!the!root!user!is!not!required!for!the!installation!(SSH!root!keys).!
Upgrade!a!previously!installed!CDH!package.!
Passwordless!SSH!as!root!(SSH!root!keys),!so!that!scripts!can!be!used!to!help!manage!the!CDH!package!and!configuration!across!the!cluster.!
Manually!install!or!upgrade!hosts!in!a!CDH!ready!cluster.!
Passwordless!SSH!as!root!(SSH!root!keys),!so!that!scripts!can!be!used!to!help!manage!the!CDH!package!and!configuration!across!the!cluster.!
Change!the!CDH!package!(for!example:!RPM!upgrades,!configuration!changes!the!require!CDH!service!restarts,!addition!of!CDH!services).!
root!and/or!sudo!access!to!restart!any!host!impacted!by!this!change,!which!could!cause!a!restart!of!a!given!service!on!each!host!in!the!cluster.!
Start/stop/restart!a!CDH!service.!
root!and/or!sudo!according!to!UNIX!standards.!
!!!!!