get started with sales cloud implementation...
TRANSCRIPT
Get Started with Sales CloudImplementation Guide
Salesforce, Spring ’18
@salesforcedocsLast updated: March 7, 2018

© Copyright 2000–2018 salesforce.com, inc. All rights reserved. Salesforce is a registered trademark of salesforce.com, inc.,as are other names and marks. Other marks appearing herein may be trademarks of their respective owners.
CONTENTS
INTRODUCTION . . . . . . . . . . . . . . . . . . . . . . . . . . . . . . . . . . . . . . . . . . . . . . . . . . . 1Welcome to Salesforce . . . . . . . . . . . . . . . . . . . . . . . . . . . . . . . . . . . . . . . . . . . . . . . . . . 1Key Concepts and Terms . . . . . . . . . . . . . . . . . . . . . . . . . . . . . . . . . . . . . . . . . . . . . . . . 2Salesforce Editions . . . . . . . . . . . . . . . . . . . . . . . . . . . . . . . . . . . . . . . . . . . . . . . . . . . . . 4
ADD USERS . . . . . . . . . . . . . . . . . . . . . . . . . . . . . . . . . . . . . . . . . . . . . . . . . . . . . . . 6User Account Overview . . . . . . . . . . . . . . . . . . . . . . . . . . . . . . . . . . . . . . . . . . . . . . . . . . 6Key Concept and Terms for User Accounts . . . . . . . . . . . . . . . . . . . . . . . . . . . . . . . . . . . . . 6Add a Single User . . . . . . . . . . . . . . . . . . . . . . . . . . . . . . . . . . . . . . . . . . . . . . . . . . . . . 7Add Multiple Users . . . . . . . . . . . . . . . . . . . . . . . . . . . . . . . . . . . . . . . . . . . . . . . . . . . . 8
FINE-TUNE PRE-EXISTING FEATURES . . . . . . . . . . . . . . . . . . . . . . . . . . . . . . . . . 9Overview . . . . . . . . . . . . . . . . . . . . . . . . . . . . . . . . . . . . . . . . . . . . . . . . . . . . . . . . . . . 9Change Tab and Field Names . . . . . . . . . . . . . . . . . . . . . . . . . . . . . . . . . . . . . . . . . . . . . 9Replace Picklist Choices . . . . . . . . . . . . . . . . . . . . . . . . . . . . . . . . . . . . . . . . . . . . . . . . . 10Log Changes to Your Data . . . . . . . . . . . . . . . . . . . . . . . . . . . . . . . . . . . . . . . . . . . . . . . 11Change What Your Users See . . . . . . . . . . . . . . . . . . . . . . . . . . . . . . . . . . . . . . . . . . . . . 11
IMPORT YOUR DATA . . . . . . . . . . . . . . . . . . . . . . . . . . . . . . . . . . . . . . . . . . . . . . 13Data Import Overview . . . . . . . . . . . . . . . . . . . . . . . . . . . . . . . . . . . . . . . . . . . . . . . . . . 13Prepare to Import Data . . . . . . . . . . . . . . . . . . . . . . . . . . . . . . . . . . . . . . . . . . . . . . . . . 13
Create an Export File . . . . . . . . . . . . . . . . . . . . . . . . . . . . . . . . . . . . . . . . . . . . . . . 13Prepare Your Data for Import . . . . . . . . . . . . . . . . . . . . . . . . . . . . . . . . . . . . . . . . . . 14
Import Data . . . . . . . . . . . . . . . . . . . . . . . . . . . . . . . . . . . . . . . . . . . . . . . . . . . . . . . . . 14Choose an Import Method . . . . . . . . . . . . . . . . . . . . . . . . . . . . . . . . . . . . . . . . . . . 15Test First . . . . . . . . . . . . . . . . . . . . . . . . . . . . . . . . . . . . . . . . . . . . . . . . . . . . . . . . 15Import Data with the Data Import Wizard . . . . . . . . . . . . . . . . . . . . . . . . . . . . . . . . . . 15
Validate Your Imported Data . . . . . . . . . . . . . . . . . . . . . . . . . . . . . . . . . . . . . . . . . . . . . 16
SET UP BASIC REPORTING . . . . . . . . . . . . . . . . . . . . . . . . . . . . . . . . . . . . . . . . . 18Overview . . . . . . . . . . . . . . . . . . . . . . . . . . . . . . . . . . . . . . . . . . . . . . . . . . . . . . . . . . . 18Get Started with Reports . . . . . . . . . . . . . . . . . . . . . . . . . . . . . . . . . . . . . . . . . . . . . . . . . 18
Create and Customize a Report . . . . . . . . . . . . . . . . . . . . . . . . . . . . . . . . . . . . . . . . 19Run a Report . . . . . . . . . . . . . . . . . . . . . . . . . . . . . . . . . . . . . . . . . . . . . . . . . . . . . 19
Get Started with Dashboards . . . . . . . . . . . . . . . . . . . . . . . . . . . . . . . . . . . . . . . . . . . . . 19Install the CRM Sample Dashboards from AppExchange . . . . . . . . . . . . . . . . . . . . . . . 20Create a Dashboard . . . . . . . . . . . . . . . . . . . . . . . . . . . . . . . . . . . . . . . . . . . . . . . 20
Share Reports and Dashboards . . . . . . . . . . . . . . . . . . . . . . . . . . . . . . . . . . . . . . . . . . . 20
ROLL SALESFORCE OUT . . . . . . . . . . . . . . . . . . . . . . . . . . . . . . . . . . . . . . . . . . . 22Best Practices for a Successful Rollout . . . . . . . . . . . . . . . . . . . . . . . . . . . . . . . . . . . . . . . 22
AFTER YOU IMPLEMENT SALESFORCE . . . . . . . . . . . . . . . . . . . . . . . . . . . . . . 23Set Up More Salesforce Features . . . . . . . . . . . . . . . . . . . . . . . . . . . . . . . . . . . . . . . . . . 23Stay Current with Salesforce . . . . . . . . . . . . . . . . . . . . . . . . . . . . . . . . . . . . . . . . . . . . . . 23
INDEX . . . . . . . . . . . . . . . . . . . . . . . . . . . . . . . . . . . . . . . . . . . . . . . . . . . . . . . . . . . 25
Contents
INTRODUCTION
Welcome to Salesforce
With Salesforce, you can work smarter, connect better with customers, sell more, and grow your business faster. But before you startclosing more deals, you must get your business set up in Salesforce.
Salesforce offers a customizable platform that can grow with your business. Salesforce stores critical information about your customersand helps you connect and close deals with new customers. You can modify the Salesforce platform to reflect how your company doesbusiness. You can add new features as you grow, so that your information system is always the right size for your business.
This guide is designed to help Salesforce administrators set up and customize a new sales organization using the Salesforce Classic userinterface. After setup is complete, you can use most features in either the Salesforce Classic or Lightning Experience user interface.
We assume you’re familiar with common office programs such as Microsoft® Excel® and know at least a little about computer systems.You don’t have to be a Salesforce expert to get started. You’ll learn much of what you need to know as you work in Salesforce.
How to Use This GuideWe’ve arranged the information in this guide in the order you’ll need it.
1. Add UsersStart by learning how Salesforce helps you manage users, and add user accounts to your organization. It’s essential to add usersbefore importing your data, so that your existing records can be matched up to their owners.
2. Fine-Tune Pre-Existing FeaturesNext, work with Salesforce’s existing, or standard, fields, objects, and tabs. Modifying the standard setup by renaming fields, tabs,and objects or by changing what data fields can contain lets you better reflect your organization’s business practices.
3. Import Your DataWith your records and users set up, you’re ready to import your existing data into Salesforce. We’ll help you prepare your data to beimported, introduce you to data import tools, then lead you through using our data import wizard.
4. Set Up Basic ReportingsEnhance your organization’s efficiency by setting up automation to perform actions based on changes to Salesforce data, such assending records to managers for approval or notifying users of changes to records they own. Then, enable powerful analytics suchas standard and custom reports and dashboards to enable users and other stakeholders to review activities and track metrics.
5. Roll It OutFinally, we provide some tips on how to roll out Salesforce to your users. Your roll-out strategy will drive how quickly and happilyyour users adopt Salesforce. We’ll also show you where you can learn more about other existing features and keep up-to-date withthe latest Salesforce products and features.
6. After You Implement SalesforceLearn how to network with other administrators, learn new skills, and keep your company on the leading edge by staying up-to-datewith updates and new features.
1

Before You Get StartedBefore you start setting up Salesforce, take some time to review your organization’s vision, pain points, goals, and priorities. Knowingwhat your organization hopes to gain from Salesforce helps you make decisions during the setup process, such as what customizationsto make and requirements for reports.
• What is your overall vision, and how will Salesforce fit into it?
• What pain points do your sales organization hope to fix with Salesforce?
• What organizational goals can be reached using Salesforce? At a minimum, consider what your executives, managers, and end userscan gain.
• How will you measure progress toward your goals?
• How should these goals be prioritized?
Also, you should be familiar with your organization’s sales process, so that you can decide how best to configure Salesforce to help yourusers make and close deals in the way that works for them.
How to Get HelpAs you set up Salesforce, you may find that your organization has special requirements that aren’t discussed here or that you havequestions that aren’t answered in this guide. Here’s where you can go for help.
Salesforce Online HelpSalesforce online help offers explanations and instructions on hundreds of topics. Search for topics of interest athttp://help.salesforce.com/
Getting Started Trailblazer CommunitySalesforce Success Communities are the place to go to ask questions and get help from other admins and Salesforce experts. Visitthe Getting Started Trailblazer Community for help while implementing Salesforce.
Key Concepts and Terms
As you getting up to speed with Salesforce, it’s helpful to learn some key concepts and terms. They come up frequently as you interactwith the product, our documentation, and our service professionals. The concepts here will help you understand how Salesforce works.And the terms will help you understand some of its main components.
Concepts
DefinitionConcept
A Salesforce name for a loose federation of features that help you accomplish certain types activities,such as selling products or supporting your customers. Two common examples are Service Cloud andSales Cloud.
Cloud
Technology that enables Internet-based services that let you sign up and log in through a browser.Salesforce delivers its service in the cloud. Other familiar cloud computing services include Google Appsand Amazon.com.
Cloud Computing
Software delivered not by traditional means (such as on disk) but in the cloud, as a service. There’s nothingto download or install, and updates are automatic.
Software as a Service (SaaS)
2
Key Concepts and TermsIntroduction
DefinitionConcept
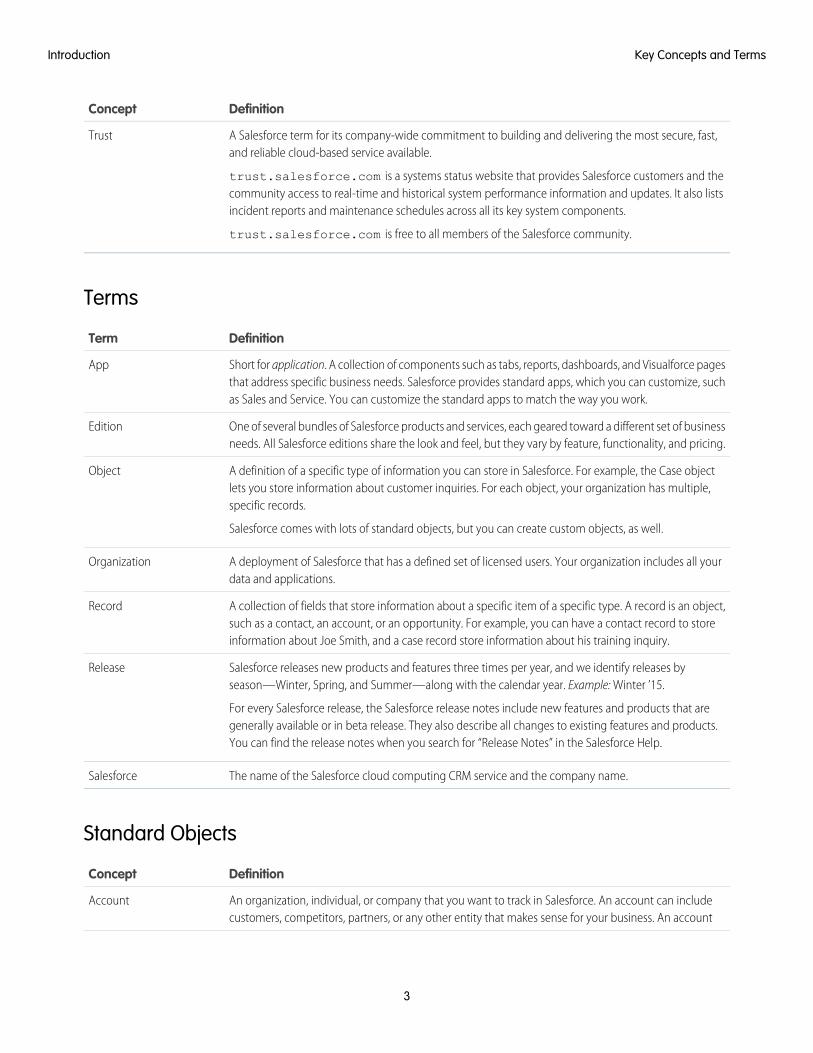
A Salesforce term for its company-wide commitment to building and delivering the most secure, fast,and reliable cloud-based service available.
trust.salesforce.com is a systems status website that provides Salesforce customers and thecommunity access to real-time and historical system performance information and updates. It also listsincident reports and maintenance schedules across all its key system components.
Trust
trust.salesforce.com is free to all members of the Salesforce community.
Terms
DefinitionTerm
Short for application. A collection of components such as tabs, reports, dashboards, and Visualforce pagesthat address specific business needs. Salesforce provides standard apps, which you can customize, suchas Sales and Service. You can customize the standard apps to match the way you work.
App
One of several bundles of Salesforce products and services, each geared toward a different set of businessneeds. All Salesforce editions share the look and feel, but they vary by feature, functionality, and pricing.
Edition
A definition of a specific type of information you can store in Salesforce. For example, the Case objectlets you store information about customer inquiries. For each object, your organization has multiple,specific records.
Salesforce comes with lots of standard objects, but you can create custom objects, as well.
Object
A deployment of Salesforce that has a defined set of licensed users. Your organization includes all yourdata and applications.
Organization
A collection of fields that store information about a specific item of a specific type. A record is an object,such as a contact, an account, or an opportunity. For example, you can have a contact record to storeinformation about Joe Smith, and a case record store information about his training inquiry.
Record
Salesforce releases new products and features three times per year, and we identify releases byseason—Winter, Spring, and Summer—along with the calendar year. Example: Winter ’15.
For every Salesforce release, the Salesforce release notes include new features and products that aregenerally available or in beta release. They also describe all changes to existing features and products.You can find the release notes when you search for “Release Notes” in the Salesforce Help.
Release
The name of the Salesforce cloud computing CRM service and the company name.Salesforce
Standard Objects
DefinitionConcept
An organization, individual, or company that you want to track in Salesforce. An account can includecustomers, competitors, partners, or any other entity that makes sense for your business. An account
Account
3
Key Concepts and TermsIntroduction
DefinitionConcept
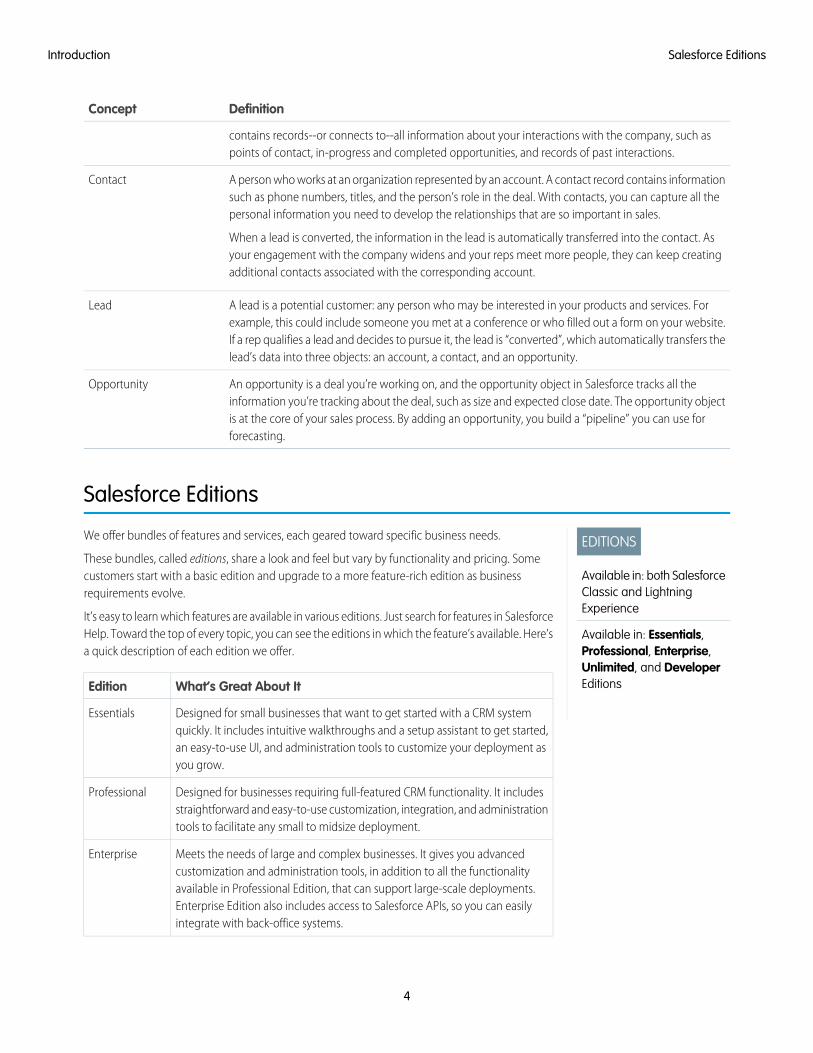
contains records--or connects to--all information about your interactions with the company, such aspoints of contact, in-progress and completed opportunities, and records of past interactions.
A person who works at an organization represented by an account. A contact record contains informationsuch as phone numbers, titles, and the person’s role in the deal. With contacts, you can capture all thepersonal information you need to develop the relationships that are so important in sales.
When a lead is converted, the information in the lead is automatically transferred into the contact. Asyour engagement with the company widens and your reps meet more people, they can keep creatingadditional contacts associated with the corresponding account.
Contact
A lead is a potential customer: any person who may be interested in your products and services. Forexample, this could include someone you met at a conference or who filled out a form on your website.
Lead
If a rep qualifies a lead and decides to pursue it, the lead is “converted”, which automatically transfers thelead’s data into three objects: an account, a contact, and an opportunity.
An opportunity is a deal you’re working on, and the opportunity object in Salesforce tracks all theinformation you’re tracking about the deal, such as size and expected close date. The opportunity object
Opportunity
is at the core of your sales process. By adding an opportunity, you build a “pipeline” you can use forforecasting.
Salesforce Editions
EDITIONS
Available in: both SalesforceClassic and LightningExperience
Available in: Essentials,Professional, Enterprise,Unlimited, and DeveloperEditions
We offer bundles of features and services, each geared toward specific business needs.
These bundles, called editions, share a look and feel but vary by functionality and pricing. Somecustomers start with a basic edition and upgrade to a more feature-rich edition as businessrequirements evolve.
It’s easy to learn which features are available in various editions. Just search for features in SalesforceHelp. Toward the top of every topic, you can see the editions in which the feature’s available. Here’sa quick description of each edition we offer.
What’s Great About ItEdition
Designed for small businesses that want to get started with a CRM systemquickly. It includes intuitive walkthroughs and a setup assistant to get started,
Essentials
an easy-to-use UI, and administration tools to customize your deployment asyou grow.
Designed for businesses requiring full-featured CRM functionality. It includesstraightforward and easy-to-use customization, integration, and administrationtools to facilitate any small to midsize deployment.
Professional
Meets the needs of large and complex businesses. It gives you advancedcustomization and administration tools, in addition to all the functionality
Enterprise
available in Professional Edition, that can support large-scale deployments.Enterprise Edition also includes access to Salesforce APIs, so you can easilyintegrate with back-office systems.
4
Salesforce EditionsIntroduction

What’s Great About ItEdition
Maximizes your success and extends it across the entire enterprise through the Lightning platform. It givesyou new levels of platform flexibility for managing and sharing all your information on demand. Includes all
Unlimited
Enterprise Edition functionality, Premier Support, full mobile access, unlimited custom apps, increased storagelimits, and other features.
Provides access to the Lightning platform and APIs. It lets developers extend Salesforce, integrate with otherapplications, and develop new tools and applications. Developer Edition also provides access to many of thefeatures available in Enterprise Edition.
Developer
Note: Salesforce doesn’t provide technical support for Developer Edition. But you can ask for helpfrom developer community message boards after you register for the Lightning Platform developerwebsite: developer.salesforce.com.
We also provide documentation for Developer Edition.
Compare editions and their features in Salesforce Pricing and Editions.
5
Salesforce EditionsIntroduction
ADD USERS
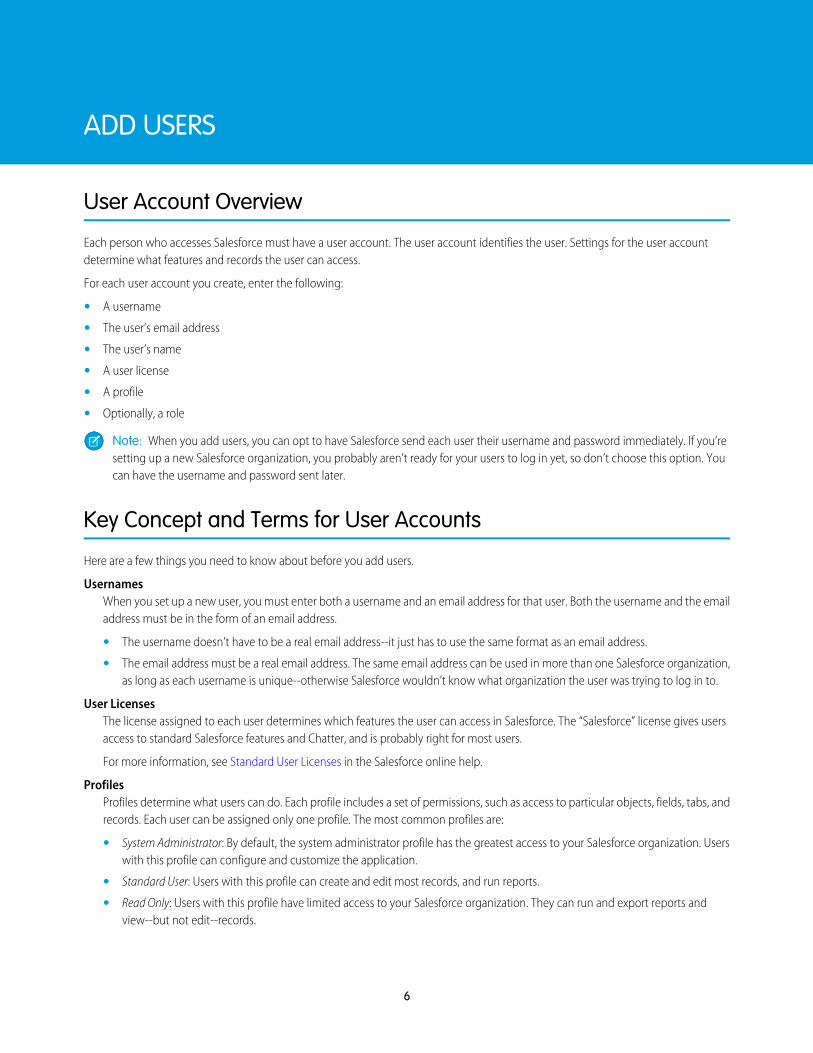
User Account Overview
Each person who accesses Salesforce must have a user account. The user account identifies the user. Settings for the user accountdetermine what features and records the user can access.
For each user account you create, enter the following:
• A username
• The user’s email address
• The user’s name
• A user license
• A profile
• Optionally, a role
Note: When you add users, you can opt to have Salesforce send each user their username and password immediately. If you’resetting up a new Salesforce organization, you probably aren’t ready for your users to log in yet, so don’t choose this option. Youcan have the username and password sent later.
Key Concept and Terms for User Accounts
Here are a few things you need to know about before you add users.
UsernamesWhen you set up a new user, you must enter both a username and an email address for that user. Both the username and the emailaddress must be in the form of an email address.
• The username doesn’t have to be a real email address--it just has to use the same format as an email address.
• The email address must be a real email address. The same email address can be used in more than one Salesforce organization,as long as each username is unique--otherwise Salesforce wouldn’t know what organization the user was trying to log in to.
User LicensesThe license assigned to each user determines which features the user can access in Salesforce. The “Salesforce” license gives usersaccess to standard Salesforce features and Chatter, and is probably right for most users.
For more information, see Standard User Licenses in the Salesforce online help.
ProfilesProfiles determine what users can do. Each profile includes a set of permissions, such as access to particular objects, fields, tabs, andrecords. Each user can be assigned only one profile. The most common profiles are:
• System Administrator: By default, the system administrator profile has the greatest access to your Salesforce organization. Userswith this profile can configure and customize the application.
• Standard User: Users with this profile can create and edit most records, and run reports.
• Read Only: Users with this profile have limited access to your Salesforce organization. They can run and export reports andview--but not edit--records.
6
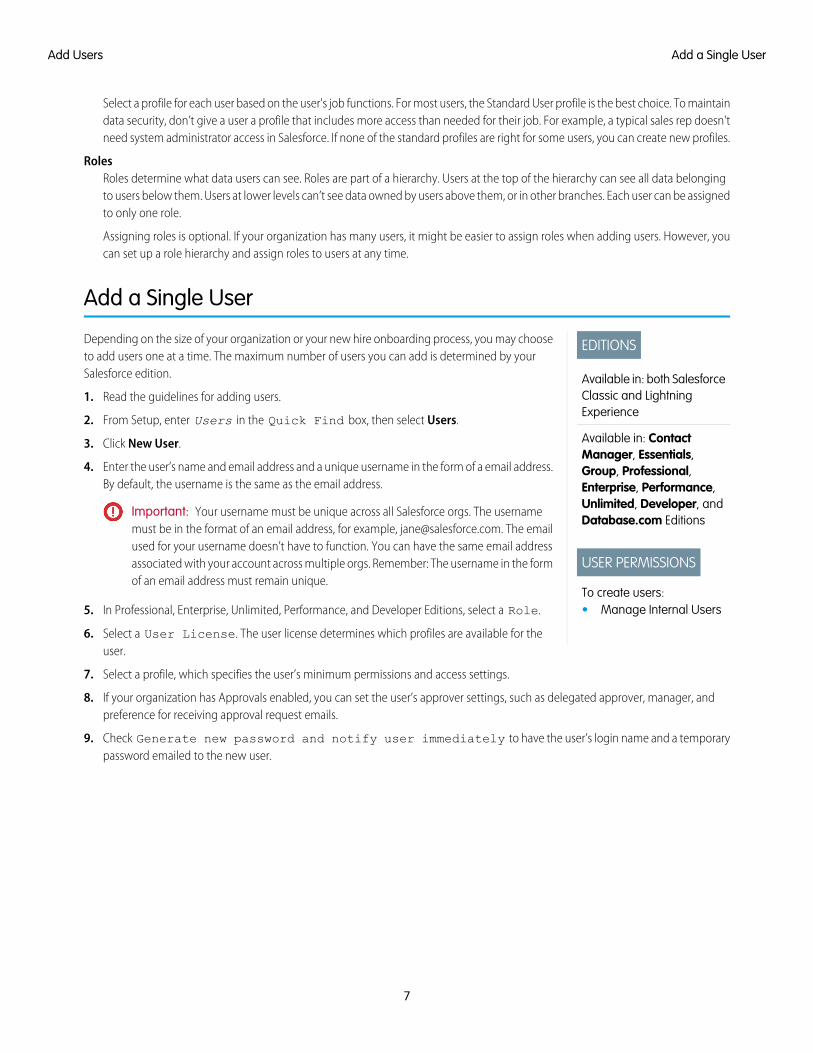
Select a profile for each user based on the user's job functions. For most users, the Standard User profile is the best choice. To maintaindata security, don’t give a user a profile that includes more access than needed for their job. For example, a typical sales rep doesn'tneed system administrator access in Salesforce. If none of the standard profiles are right for some users, you can create new profiles.
RolesRoles determine what data users can see. Roles are part of a hierarchy. Users at the top of the hierarchy can see all data belongingto users below them. Users at lower levels can’t see data owned by users above them, or in other branches. Each user can be assignedto only one role.
Assigning roles is optional. If your organization has many users, it might be easier to assign roles when adding users. However, youcan set up a role hierarchy and assign roles to users at any time.
Add a Single User
EDITIONS
Available in: both SalesforceClassic and LightningExperience
Available in: ContactManager, Essentials,Group, Professional,Enterprise, Performance,Unlimited, Developer, andDatabase.com Editions
USER PERMISSIONS
To create users:• Manage Internal Users
Depending on the size of your organization or your new hire onboarding process, you may chooseto add users one at a time. The maximum number of users you can add is determined by yourSalesforce edition.
1. Read the guidelines for adding users.
2. From Setup, enter Users in the Quick Find box, then select Users.
3. Click New User.
4. Enter the user’s name and email address and a unique username in the form of a email address.By default, the username is the same as the email address.
Important: Your username must be unique across all Salesforce orgs. The usernamemust be in the format of an email address, for example, [email protected]. The emailused for your username doesn’t have to function. You can have the same email addressassociated with your account across multiple orgs. Remember: The username in the formof an email address must remain unique.
5. In Professional, Enterprise, Unlimited, Performance, and Developer Editions, select a Role.
6. Select a User License. The user license determines which profiles are available for theuser.
7. Select a profile, which specifies the user’s minimum permissions and access settings.
8. If your organization has Approvals enabled, you can set the user’s approver settings, such as delegated approver, manager, andpreference for receiving approval request emails.
9. Check Generate new password and notify user immediately to have the user’s login name and a temporarypassword emailed to the new user.
7
Add a Single UserAdd Users
Add Multiple Users
EDITIONS
Available in: both SalesforceClassic and LightningExperience
Available in: Professional,Enterprise, Performance,Unlimited, Developer, andDatabase.com Editions
USER PERMISSIONS
To create users:• Manage Internal Users
You can quickly add up to 10 users at a time to your organization. Your Salesforce edition determinesthe maximum number of users that you can add.
1. From Setup, enter Users in the Quick Find box, then select Users.
2. Click Add Multiple Users.
3. If multiple user license types are available in your organization, select the user license to associatewith the users you plan to create. The user license determines the available profiles.
4. Specify the information for each user.
5. To email a login name and temporary password to each new user, select Generate passwordsand notify user via email.
6. Click Save.
7. To specify more details for the users that you’ve created with this method, edit individual usersas needed.
8
Add Multiple UsersAdd Users

FINE-TUNE PRE-EXISTING FEATURES
Overview
Your Salesforce organization is highly customizable. In this chapter, learn how to tweak pre-existing features to make Salesforce workbetter for your business.
Pre-existing features in Salesforce are called standard objects. Each standard object contains standard fields used to store data. Your userscan easily access most standard objects by clicking one of the tabs on any page of your Salesforce organization.
Note: For example, the standard object Accounts has a standard field called Account Name. Your users can access yourcompany’s accounts by clicking the Accounts tab in Salesforce.
You can’t delete standard objects or fields, but you can change them to better suit your business’s needs.
Change Tab and Field NamesYou can change the name of almost any object, field, or tab in Salesforce. This simple adjustment lets you continue using theterminology your users already know and helps them transition to using Salesforce. However, be aware that Setup and SalesforceHelp always display the original names for standard objects, fields, and tabs.
Replace Picklist ChoicesIf our standard picklist choices aren’t right for your business, you can change them.
Log Changes to Your DataYou can set up Salesforce to track changes your users make to most fields on many standard objects, including Accounts, Contacts,Leads, and Opportunities.
Change What Your Users SeeYou can’t delete standard fields, but you can hide them from your users by removing them from the page layout. You can also addpage elements, change the order they’re displayed, require data in certain fields, and make other tweaks to what users see.
Change Tab and Field Names
You can change the name of almost any object, field, or tab in Salesforce. This simple adjustment lets you continue using the terminologyyour users already know and helps them transition to using Salesforce. However, Salesforce Help and most pages in Setup always displaythe original names for standard objects, fields, and tabs.
For example, you can change the name label for the "Accounts" object and related "Accounts" tab to "Companies", and change the field"Account Name" to "Company Name." When you rename an object, tab, or field, the new name appears on all pages the user sees, inSalesforce for Outlook, and in Connect Offline.
1. From Setup, enter Rename Tabs and Labels in the Quick Find box, then select Rename Tabs and Labels.
2. Select your default language from the Select Language drop-down list at the top of the page.
Note: In Hebrew, we recommend keeping tab renaming to a minimum because variable gender in verbs is not supportedand verbs can lose gender agreement.
3. Click Edit next to the tab you want to rename. Click Reset to revert to a tab’s original name.
Note: You can’t reset custom object tab names.
9

4. Enter the singular and plural forms of the new tab name. Also, if applicable for the language, select Starts with a vowel sound forlabels that start with a vowel to ensure that Salesforce uses the proper article (such as “a” or “an”). Then click Next.
When you rename a tab or an object, you can’t use the name of another standard tab, custom object, external object, or customtab.
5. Enter your labels for the standard field labels and other user interface elements. Be sure to enter both a singular and plural form foreach label that requires it. Select Starts with a vowel sound for labels that start with a vowel.
Note: Some standard fields, such as Created By and Last Modified By, are purposely omitted from renamingbecause they track system information.
6. Click Save.
If you’ve created any reports, dashboards, user profiles, permission sets, custom fields, or list views using the tabs or fields you renamed,be sure to update them.
Replace Picklist Choices
If our standard picklist choices aren’t right for your business, you can change them.
To update a picklist:
1. Navigate to the fields area for your object.
2. In the Custom Fields & Relationships related list, click the name of the picklist field to update.
3. In the Values section, click Edit next to a value.
4. Change the value’s name, and optionally make the value the default for the master picklist.
5. Assign a color to use in charts by clicking the button and selecting how to assign colors to values.
• Assign fixed colors to all values assigns a fixed color to each value from the standard set of chart colors. The Chart Colorscolumn shows the assigned colors. For example, if you want Closed Lost values always to be red in charts grouped by OpportunityStage, assign red to that picklist value.
• Assign colors to values dynamically assigns colors when a chart is generated. For example, if you need only certain picklistvalues to have fixed colors in charts, manually assign colors to those values and leave the rest to be assigned dynamically.
Note: Chart colors aren’t available for multi-select picklists, currency picklists, or Task Subject, Event Subject, KnowledgeValidation Status, and Opportunity Competitor picklists.
Tip:
• If you use record types, changing the default value of the master picklist doesn’t affect the default value of the picklist fora record type.
• For Ideas, setting the default value of the Categories or Status picklists doesn’t affect the default value on the Ideas pages.
• If you change the label for a picklist value that’s used as a filter criterion, the picklist value is automatically removed fromthe filter criteria. For example, if your report contains a filter where Lead Source equals Email or Web andyou change the picklist value Web to Referral, your report filter changes to Lead Source equals Email. If thechanged picklist value was the only value specified for a particular filter, it continues to show up in your filters, but an errorappears.
6. Click Save.
7. To make the picklist required (if it’s not already), click Edit at the top of the detail page, and check Always require a value in thisfield in order to save a record.
10
Replace Picklist ChoicesFine-Tune Pre-Existing Features

8. To change the picklist from unrestricted to restricted or vice-versa, adjust the Restrict picklist to the values defined in the valueset setting.
9. To open an easy-to-print list of your picklist values, click Printable View.
Log Changes to Your Data
Set up Salesforce to track changes your users make to most fields on many standard objects, including Accounts, Contacts, Leads, andOpportunities.
When you select fields to track in the Accounts, Contacts, Leads objects, or in certain other standard objects, entries are added to theHistory related list for each tracked field every time that field is modified. All entries include the data, time, nature of the change, andwho made the change.
1. From Setup, click Customize and select an object.
2. Click Fields.
3. Click Set History Tracking. Then, select the option to enable field history tracking. For example, for Accounts, select Enable AccountHistory.
4. Choose up to 20 fields you want tracked.
Salesforce can’t track the Created By or Last Modified By fields; formula, roll-up summary, or auto-numbered fields; or ExpectedRevenue field on Opportunities.
5. Click Save to start tracking changes. Changes made before you save aren’t included in field history tracking.
6. Change the page layout for the object to add the object’s field history related list. For instructions, see Change What Your Users See.
Change What Your Users See
You can’t delete standard fields, but you can hide them from your users by removing them from the page layout. You can also add pageelements, change the order they’re displayed, require data in certain fields, and make other tweaks to what users see.
1. Go to the management settings for an object.
2. Complete one of the following.
a. For Enterprise, Unlimited, Performance, and Developer Edition organizations, go to Page Layouts, then click Edit next to thepage layout that you want to change.
a. For all other editions, go to Page Layouts.
3. In the page layout editor, select a category to which the element you’re editing belongs from the left column. For example, if you’readding the Account History related list to the Account object, select Related Lists.
4. Complete one of the following.
a. To add an element to the page, drag it form the palette to the page layout. For example, if you’re adding the Account Historyrelated list to the Account object, click Account History and drag it to the Related List section of the page layout.
b. To remove an element, drag it from the page to the palette.
c. To require data in a field, or to make a field read-only, double click the field and select Required or Read Only.
d. To change sort order, column order, the columns displayed, or remove standard buttons from a related list, click .
5. Click Preview As... and select a user profile to see what the new page layout looks like to a user assigned to that profile.
11
Log Changes to Your DataFine-Tune Pre-Existing Features

6. Click Save.
12
Change What Your Users SeeFine-Tune Pre-Existing Features
IMPORT YOUR DATA
Data Import Overview
EDITIONS
Available in: SalesforceClassic
Available in: All exceptDatabase.com andPersonal Editions
Before you go live with Salesforce, import your org’s data. You can complete this task by using theData Import Wizard.
The Data Import Wizard transfers your data from an existing data file into your Salesforce org.Although other wizards are also available for importing into individual standard objects, werecommend using the Data Import Wizard because it allows you to import all your data at once,and it imports data into both standard objects and custom objects.
Before importing your data, it’s important to take time to review your data storage needs, map yourdata to Salesforce objects and fields, and clean your data. A poorly executed import can create baddata, leading to loss of time or confusion in your organization.
Prepare to Import Data
Prepare to import your data by creating an export file, mapping your existing data to Salesforce fields, and cleaning your existing data.
IN THIS SECTION:
Create an Export File
Create a data export file that can be imported into Salesforce.
Prepare Your Data for Import
Before importing data, review your import file to make sure your data is up-to-date, accurate, and reportable. You might also needto change headers in your import file to make sure that your data is stored in the right place in Salesforce.
Create an Export FileCreate a data export file that can be imported into Salesforce.
An export file contains all the information you want to import.
Your export file can contain a mixture of new records and updates to existing records. You choose how records are matched to avoidduplication. For example, you can choose to match accounts and contacts by name or by email address. If you choose to match by emailaddress, then records already in Salesforce are updated if records in your imported data have the same email address. However, if recordshave the same name but different email addresses, the records remain separate.
You can import data from any source that can output data to a comma-delimited (.csv) file. Search the Salesforce Help for instructionson exporting data from any of these common source programs:
• Exporting from ACT!
• Exporting from LinkedIn®
• Exporting from Outlook
• Exporting from Other Data Sources
• Exporting from Salesforce
13
Prepare Your Data for ImportBefore importing data, review your import file to make sure your data is up-to-date, accurate, and reportable. You might also need tochange headers in your import file to make sure that your data is stored in the right place in Salesforce.
Tip: Watch a Demo: Cleaning Up Your Import File (English only)
Clean Your DataYour Salesforce data will be replaced with data from your import file, even if it’s out of date. Importing duplicate, inaccurate, or old datawill cause reports to be inaccurate, and can cause your coworkers extra effort to ensure that new records are entered correctly.
The cleaner the data you import, the better the quality of your reports.
Even if you are importing into a new Salesforce organization, you should still review your existing data and remove outdated or duplicateinformation. For example, you might need to remove information for old accounts or ensure that each contact is listed only once.
Tip: Now is the right time to set standards for how data should be recorded. For example, you might establish a rule that thenames of states in the United States must be abbreviated using the regular 2-letter postal abbreviation. Then, review the data inyour import file and change any entries that don’t meet the standards.
Map Your DataChanging the field names in your export file to match existing Salesforce field names will help ensure that your data is automaticallymapped to the correct fields when it's imported. You can do this by opening your export file in Microsoft® Excel® and changing thecolumn headers for each column of data to name of the Salesforce field you want the data imported into.
• When importing into a custom object, use the field labels shown on the custom object detail page in Salesforce as the column labelsin your import file. If you created any universally required custom fields, you must include these fields in your import files or theimport will fail.
• If you’re importing account and contact data generated by Outlook or ACT! you don’t need to change the field names.
• Refer to the Salesforce Field Reference Guide in the Salesforce Help for field names for common Salesforce objects, including Account,Contact, and Lead.
Import Data
Ensure your data is ready for import, then select the appropriate import wizard and import your data into Salesforce.
IN THIS SECTION:
Choose an Import Method
Usually, you can use the Data Import Wizard to import data into your org. However, in some cases, you might need to select adifferent import wizard or import product.
Test First
Before you import your all of your organization’s data, it’s a good idea to first import a small set of your data as a test. This will allowyou to ensure that your data is fully prepared, and to verify in Salesforce that your data has been imported as expected. After you’veimported your sample data and verified its accuracy, be sure to delete the sample data before proceeding with your real import.
Import Data with the Data Import Wizard
Use the Data Import Wizard to import data into Salesforce.
14
Prepare Your Data for ImportImport Your Data
Choose an Import MethodUsually, you can use the Data Import Wizard to import data into your org. However, in some cases, you might need to select a differentimport wizard or import product.
• Use the Data Import Wizard if you’re importing 50,000 or fewer records for business accounts, contacts, leads, custom objects, andsolutions.
• If your org uses person accounts, use the individual Import My Person Accounts wizard to import 50,000 or fewer person accountrecords. See the Salesforce Help for instructions.
• If you need to import data into other objects, or if you need to import more than 50,000 records, you may need to use the DataLoader or a third-party app. See Deciding on A Method for Importing Data in the Salesforce Help for more information.
Test FirstBefore you import your all of your organization’s data, it’s a good idea to first import a small set of your data as a test. This will allow youto ensure that your data is fully prepared, and to verify in Salesforce that your data has been imported as expected. After you’ve importedyour sample data and verified its accuracy, be sure to delete the sample data before proceeding with your real import.
Note: If some groups in your business are already using Salesforce, it may be best to perform the data import after business hoursto avoid confusion.
Import Data with the Data Import Wizard
EDITIONS
Available in: SalesforceClassic and LightningExperience
Available in: All editionsexcept Database.com
USER PERMISSIONS
To import data with the DataImport Wizard:• Depends on what you’re
importing. See Whatpermissions do I need toimport records? in theSalesforce Help.
Use the Data Import Wizard to import data into Salesforce.
These browsers support the Data Import Wizard:
• Google Chrome™ version 29 and later
• Mozilla® Firefox® version 23 and later
• Microsoft® Internet Explorer® version 9 and later
• Apple® Safari® version 5 and later
1. Start the wizard.
a. From Setup, enter Data Import Wizard in the Quick Find box, then select DataImport Wizard.
b. Review the information provided on the welcome page, then click Launch Wizard.
You can also launch the Data Import Wizard from the Tools list on the object-specific homepage.
Note: Users who aren’t administrators can also access the Data Import wizard from theirpersonal settings.
2. Choose the data that you want to import.
a. To import accounts, contacts, leads, solutions, person accounts, or articles, click Standard Objects. To import custom objects,click Custom Objects.
b. Specify whether you want to add new records to Salesforce, update existing records, or add and update records simultaneously.
Note: If you have workflows that add new objects when importing, selecting add new and update existing recordsfires them, but selecting update existing records doesn't.
15
Choose an Import MethodImport Your Data

c. Specify matching and other criteria as necessary. Hover your mouse over the question marks for more information about eachoption.
d. Specify whether to trigger workflow rules and processes when the imported records meet the criteria.
e. Specify the file that contains your data.
Specify your data file by dragging the CSV file to the upload area of the page. You can also click the CSV category you’re usingand then navigate to the file.
f. Choose a character encoding method for your file. Typically, you don’t change your character encoding.
g. Select comma or tab as a value separator.
h. Click Next.
3. Map your data fields to Salesforce data fields.
The Data Import wizard maps as many of your data fields as possible to standard Salesforce data fields. But if the wizard can’t mapfields, you must do it manually. Unmapped fields are not imported into Salesforce.
To see a list of standard Salesforce data fields, from the management settings for the object, go to the fields area.
a. Scan the list of mapped data fields and locate the unmapped fields.
b. Click Map to the left of each unmapped field.
c. In the Map Your Field dialog box, search and choose up to 10 Salesforce fields to map to and click Map.
Note: You also have the option of saving data from unmapped fields in a general notes field for accounts and contacts.Choose Account Note or Contact Note from the Map To dropdown list and click Map.
d. To change mappings that Salesforce performed automatically, click Change to the left of the appropriate field. Delete theSalesforce fields you don’t want to map, choose the fields you want to map, then click Map.
e. Click Next.
4. Review and start your import.
a. Review your import information on the Review page. If you still have unmapped fields that you want to import, click Previousto return to the previous page and specify your mappings.
b. Click Start Import.
5. Check import status.
The Recent Import Jobs chart on the Data Import Wizard home page lists the status and metrics of the data import. Alternatelyfrom Setup, enter Bulk Data Load Jobs in the Quick Find box, then select Bulk Data Load Jobs.
Note: The Bulk Data Load Jobs page is not available in Professional Edition. Only administrators have access to the Bulk DataLoad Jobs page in Salesforce Setup. If you’re not an administrator, you can check the status of your upload by monitoring therelevant tabs in Salesforce.
Validate Your Imported Data
Before proceeding, spot-check your imported data to make sure that data was imported into the desired fields.
Review several records from each object. Make sure you can answer yes to each of the following questions.
• Was the data imported into the correct fields?
• Was all the data imported for each record?
16
Validate Your Imported DataImport Your Data
• Is the record linked to its related records? For example, check that all contacts on an account show up on the account's Contactsrelated list.
17
Validate Your Imported DataImport Your Data
SET UP BASIC REPORTING
Overview
Reports give you access to data you’ve collected over time so that you can make more informed decisions. You can examine yourcompany’s data in almost infinite combinations, display it in easy-to-understand formats such as graphical dashboards, and share it withothers.
ReportsA report organizes data you’ve selected into rows and columns. You can summarize, filter, and group report data.
You can view a report on any data that you have access to. When other users view reports you’ve shared, they see only data theyhave access to. Users who can access more records can see more data in their reports. Generally, you can report on data owned byyou and on data owned by users below you in the role hierarchy.
DashboardsA dashboard displays your report data visually as a graphic or chart. Dashboards help you summarize your data in a glance. They’rebased on reports.
Salesforce has already set up a few reports and related dashboards for you. You can change existing reports and dashboards or set upnew ones that better suit your business needs, and you can share them with others. Coworkers can set up more reports and dashboardsat any time.
Tip: Before you jump into reports and dashboards, we recommend completing our online tutorial to learn how reports anddashboards work, and how to work with them. It takes about half an hour.
Access the Training: Get Started With Reports and Dashboards
Get Started with Reports
To view the reports Salesforce has already set up for you, click the Reports tab.
If you need more reports, you can set them up by either creating a report, or copying and altering an existing one. When you create areport from scratch, you start by selecting a report type. You can’t change the report type after the report is created. When you createa report based on an existing report, the new report uses the same type as the one it’s created from.
Report TypeEach report is based on a report type. The report type determines the records included in the report. For example, if you select theAccounts and Contacts report type, your report includes record data only for account and contacts. Salesforce provides many standardreport types. Administrators can create more as needed.
IN THIS SECTION:
Create and Customize a Report
You can create a report from scratch, or by copying and customizing an existing report.
Run a Report
Click the Reports tab, then click the name of the report. Most reports run automatically when you click the name.
18
Create and Customize a ReportYou can create a report from scratch, or by copying and customizing an existing report.
1. Create a report.
a. To create a report from scratch, on the Reports tab, click New Report. Select a report type, then click Create.
b. To create a report from an existing report, on the Reports tab, open the existing report you’ll base your new report on. ClickCustomize, then click Save As to save it as a new report.
2. Use the Report Builder to customize your report.
Watch a Demo: Getting Started with Report Builder (Salesforce Classic)
3. Optionally, click Run Report to preview your report.
4. Click Save. If you plan to share the report, save it in a folder you’d like to share.
Run a ReportClick the Reports tab, then click the name of the report. Most reports run automatically when you click the name.
If you’re already viewing a report, click Run Report to run it immediately, or schedule a future run.
If you don’t see any data, try changing the report to avoid one of these common problems.
• If the report runs but doesn’t return any data, it’s possible that your filter criteria may not include any records, or includes only recordsthat you don’t have access to.
• If your report returns more than 2,000 records, only the first 2,000 records are displayed. Click Export Details to see the completereport.
• If your report takes more than 10 minute to run, Salesforce cancels the report. Reduce the amount of data the report includes bychanging the filters, scope, level of detail, or number of columns so the report runs more quickly.
Get Started with Dashboards
Click the Dashboard tab to view the dashboards that Salesforce has already set up for you.
You can quickly download and install a variety of popular dashboards from the Salesforce AppExchange. If you need more dashboards,you can create new ones based on existing reports.
IN THIS SECTION:
Install the CRM Sample Dashboards from AppExchange
Use these dashboards from the AppExchange as a starting point for building dashboards that meet your business needs.
Create a Dashboard
If you need more dashboards, you can create them based on your reports, or on reports shared with you, using the drag-and-dropDashboard Builder.
19
Create and Customize a ReportSet Up Basic Reporting
Install the CRM Sample Dashboards from AppExchange
EDITIONS
Available in: both SalesforceClassic and LightningExperience
Available in: Group (ViewOnly), Professional,Enterprise, Performance,Unlimited, and DeveloperEditions
Available in: both LegacyFolder Sharing andEnhanced Folder Sharing
USER PERMISSIONS
To install packages:• Download AppExchange
Packages
Use these dashboards from the AppExchange as a starting point for building dashboards that meetyour business needs.
The CRM sample dashboards package from AppExchange offers best-practice dashboards withunderlying reports that are based on your organization’s standard objects and fields. You can usethese sales, marketing, service, and support dashboards to track business processes and keyperformance metrics for yourself, your team, and your company. Dashboards in this package include:
• Sales & Marketing Dashboards
– Marketing Executive Dashboard
– Sales Executive Dashboard
– Sales Manager Dashboard
– Salesperson Dashboard
• Customer Service Dashboards
– Agent Supervisor Overview Dashboard
– Service Executive Overview Dashboard
– Service KPIs Dashboard
1. In AppExchange, search for “Salesforce CRM Dashboards” and click Get It Now.
2. To install the sample dashboards, install the package.
Create a DashboardIf you need more dashboards, you can create them based on your reports, or on reports shared with you, using the drag-and-dropDashboard Builder.
1. On the Dashboards tab, click Go to Dashboard List.
2. Click New Dashboard.
3. Customize your dashboard using the Dashboard Builder.
Watch a Demo: An Overview of Dashboards (Salesforce Classic)
4. Click Save. If you plan to share the dashboard, save it in a folder you’d like to share.
Share Reports and Dashboards
To let coworkers access a report or a dashboard you own, share the folder where you saved it. You can share folders with individualcoworkers, public groups, or roles in the user hierarchy.
You can manage any folder you’ve created, along with the reports and dashboards stored in them. Unless you share a folder, only youand other users with administrative permissions can see it.
Share a report or dashboard folder with individual coworkers:
1. On the Reports tab, click Sharing Settings on a folder.
2. Select Internal Users.
3. Find a coworker typing part of a name.
20
Install the CRM Sample Dashboards from AppExchangeSet Up Basic Reporting
4. Click Share, then choose an access level.
5. After you’ve finished selecting coworkers to share a folder with, click Done.
You can find instructions for sharing folders with public groups or roles in the user hierarchy in the Salesforce Help.
21
Share Reports and DashboardsSet Up Basic Reporting
ROLL SALESFORCE OUT
Best Practices for a Successful Rollout
For a successful Salesforce implementation, it’s important to plan your rollout to users. Here are some general guidelines.
Communicate Your ScheduleDecide on the date your users will start using Salesforce early in the process. Communicate your roll-out plans and go-live date toyour users, so they know what to expect.
Activate Your Users’ AccountsIf you didn’t send login information to your users when you added them, prepare to send it as part of the roll-out process.
To have login information sent automatically, from Setup, enter Users in the Quick Find box, then select Users, select allthe users who need login information, and click Change Password .
Train Your UsersSet up a time to train your users. You may need to prepare different training for each type of user. Each user will need to know howto log in. Your users will feel more comfortable with Salesforce once you’ve shown them how to complete each of their critical jobfunctions. But remember, changes your users make during training are real changes to your data, so plan ahead to ensure thattraining activities don’t impact your business.
Provide Users With ResourcesHandy resources for users may include Salesforce Help articles, videos, workbooks, online training, and success communities. Pointyour users to these resources so they can learn on their own. See the Resources list for some ideas.
We also offer a PDF guide that helps users learn about common terminology, features, and functions in Salesforce. Learn SalesforceBasics is for everyone, users and administrators included.
Gather FeedbackLet your users know how you'd like them to communicate issues, suggestions, or requests to you.
22
AFTER YOU IMPLEMENT SALESFORCE
Set Up More Salesforce Features
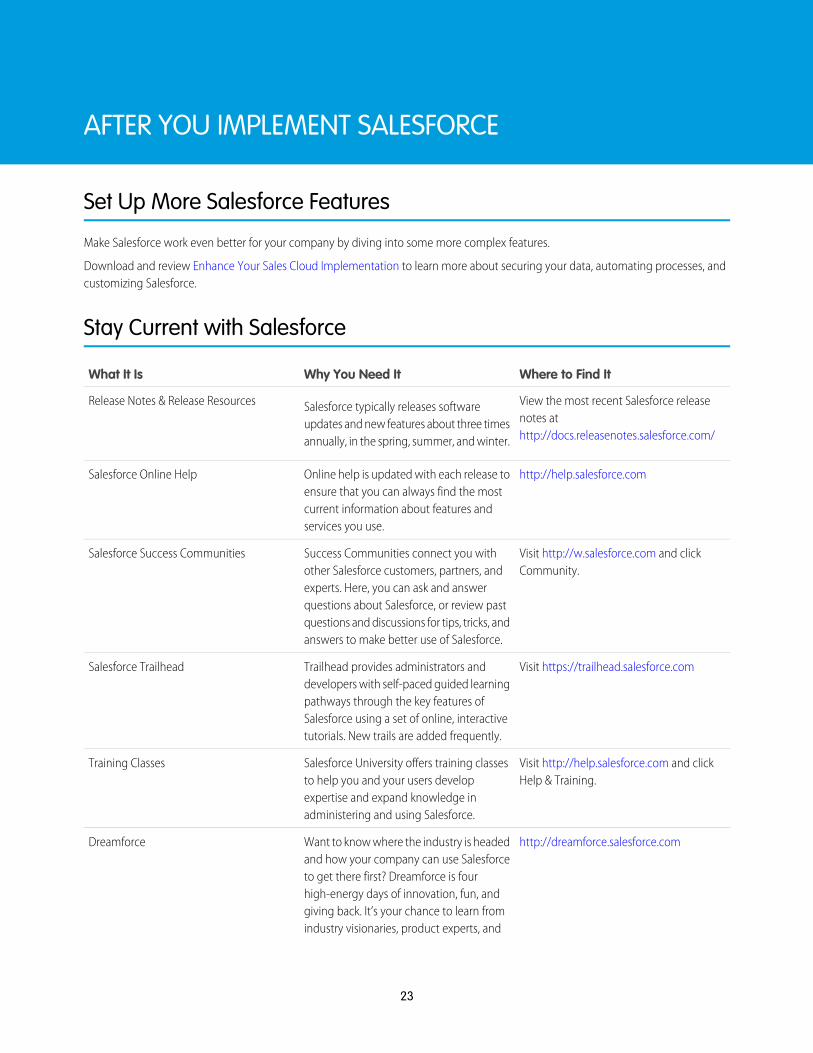
Make Salesforce work even better for your company by diving into some more complex features.
Download and review Enhance Your Sales Cloud Implementation to learn more about securing your data, automating processes, andcustomizing Salesforce.
Stay Current with Salesforce
Where to Find ItWhy You Need ItWhat It Is
View the most recent Salesforce releasenotes athttp://docs.releasenotes.salesforce.com/
Salesforce typically releases softwareupdates and new features about three timesannually, in the spring, summer, and winter.
Release Notes & Release Resources
http://help.salesforce.comOnline help is updated with each release toensure that you can always find the most
Salesforce Online Help
current information about features andservices you use.
Visit http://w.salesforce.com and clickCommunity.
Success Communities connect you withother Salesforce customers, partners, andexperts. Here, you can ask and answer
Salesforce Success Communities
questions about Salesforce, or review pastquestions and discussions for tips, tricks, andanswers to make better use of Salesforce.
Visit https://trailhead.salesforce.comTrailhead provides administrators anddevelopers with self-paced guided learning
Salesforce Trailhead
pathways through the key features ofSalesforce using a set of online, interactivetutorials. New trails are added frequently.
Visit http://help.salesforce.com and clickHelp & Training.
Salesforce University offers training classesto help you and your users developexpertise and expand knowledge inadministering and using Salesforce.
Training Classes
http://dreamforce.salesforce.comWant to know where the industry is headedand how your company can use Salesforce
Dreamforce
to get there first? Dreamforce is fourhigh-energy days of innovation, fun, andgiving back. It’s your chance to learn fromindustry visionaries, product experts, and
23

Where to Find ItWhy You Need ItWhat It Is
world leaders who can help you transformyour business and your life.
24
Stay Current with SalesforceAfter You Implement Salesforce
INDEX
AAdd users
key concepts and terms 6overview 6
AppExchangeSample CRM Dashboards 20
CChange tracking 11
DDashboards
create new 20get started with 19overview 18Sample CRM Dashboards on AppExchange 20share 20
EEditions
definition 4
FFields
rename 9
HHelp with Salesforce, Finding 23
IImport Data
data import wizard 15overview 13prepare 13Prepare 14validate imported data 16
Introduction 1
MMarketing User
assigning 7
NNext Steps 23
PPage layout 11Picklists
change picklist choices 10Profiles 6
RRelease Notes 23Reports
create 19get started 18overview 18run a report 19share 20
Roles 6rolling out Salesforce 22
SSolution Managers
assigning 7
TTabs
rename 9Terminology 2
UUser licenses 6Users
adding a single user 7adding multiple 8duplicate user 7
25