final cut pro video editing suite review. final cut pro review getting started: start by clicking...
TRANSCRIPT

FINAL CUT PROVIDEO EDITING SUITE
REVIEW

FINAL CUT PRO REVIEW
GETTING STARTED:•Start by clicking the Final Cut Pro (FCP) icon in your dock.
•Wait for FCP to load.
FINAL CUT PRO REVIEW
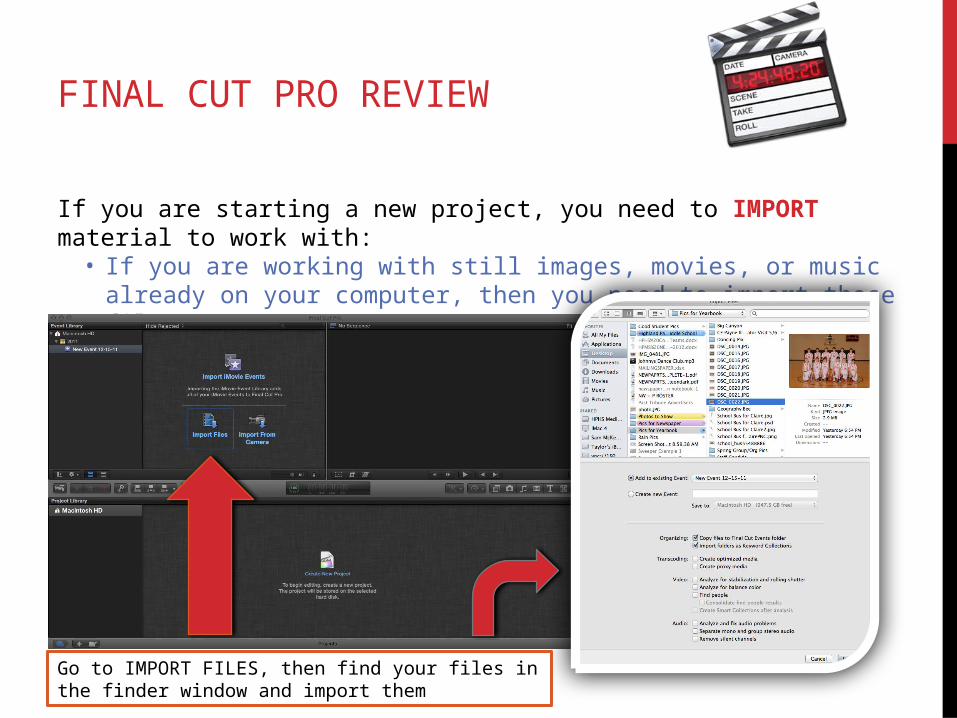
If you are starting a new project, you need to IMPORTmaterial to work with:• If you are working with still images, movies, or music already on your
computer, then you need to import those files …
Go to IMPORT FILES, then find your files in the finder window and import them

FINAL CUT PRO REVIEW
If you are starting a new project, you need to IMPORTmaterial to work with:• If you want to work on movies that are on the camera, you will need to
import those movie files from camera …
Go to IMPORT FROM CAMERA, then find your movies in the camera import window when it opens. Select the movies you want by clicking on them. Hold down shift to select multiple movies.

FINAL CUT PRO REVIEW
Once you have selected your movie(s), they will highlight in yellow, then click import selected.
FINAL CUT PRO REVIEW
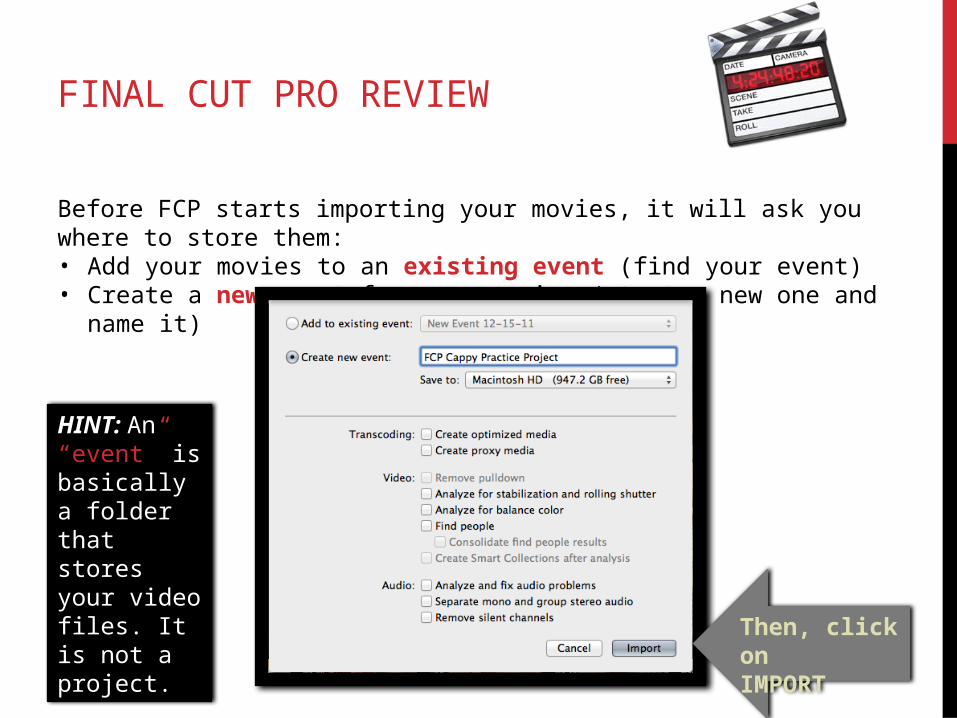
Before FCP starts importing your movies, it will ask you where to store them:• Add your movies to an existing event (find your event)• Create a new event for your movies (start a new one and name it)
Then, click onIMPORT
HINT: An “event” is basically a folder that stores your video files. It is not a project.

FINAL CUT PRO REVIEW
Next, wait for your movies to import to the computer.• As your movies import, you’ll see an orange line at the bottom of the movie
clip and a clock icon showing progress of import
• When the movies are imported on stored on the computer, you’ll see the orange line at the bottom of the movie clip, but no clock icon
HINT: Don’t exit out of the camera import window until all clips have been imported to the computer!
Line and clock

FINAL CUT PRO REVIEW
• Once your footage is captured, close the camera import window.• Look for your imported movie clips in the EVENT WINDOW
HINT: If you don’t see your clips in the event window, check the events library

FINAL CUT PRO REVIEW
• Now, we need to create a new project
HINT: A project is where you edit all your movie clips, photos, and music into one complete movie
Label your project
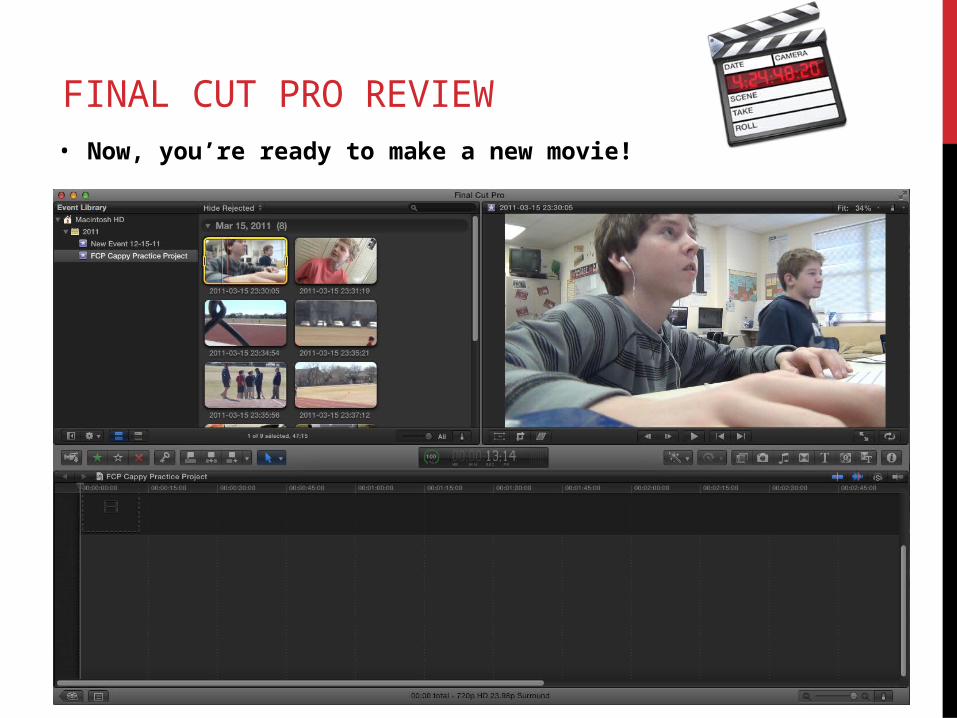
FINAL CUT PRO REVIEW• Now, you’re ready to make a new movie!
FINAL CUT PRO REVIEW
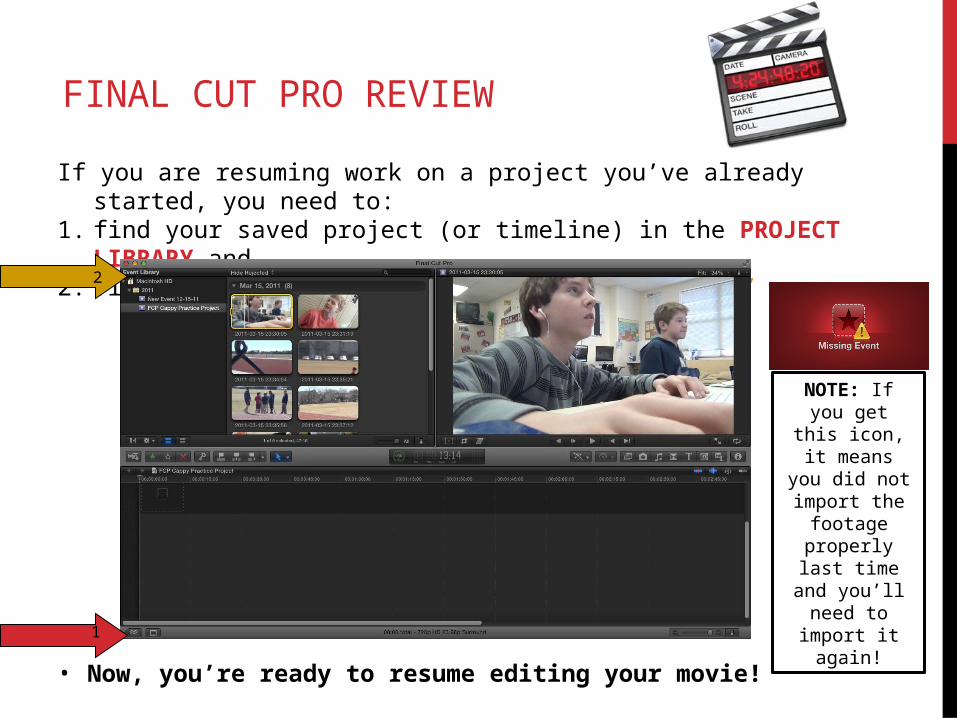
If you are resuming work on a project you’ve already started, you need to: 1. find your saved project (or timeline) in the PROJECT LIBRARY and …2. find your old raw footage in the EVENT LIBRARY
1
2
• Now, you’re ready to resume editing your movie!
NOTE: If you get this icon, it means you did not import the
footage properly last
time and you’ll need to import
it again!

FINAL CUT PRO REVIEW
Let’s look at the different FCP windows you’ll use …
This is your TIMELINE This is your project. Put the parts of the
movie clips, photos, and songs you want to use here. Edit them into a project here
This is your PREVIEW WINDOW
You can view what you are editing here
This is your EVENT WINDOW
You can view your raw footage clips from
events here
FINAL CUT PRO REVIEW
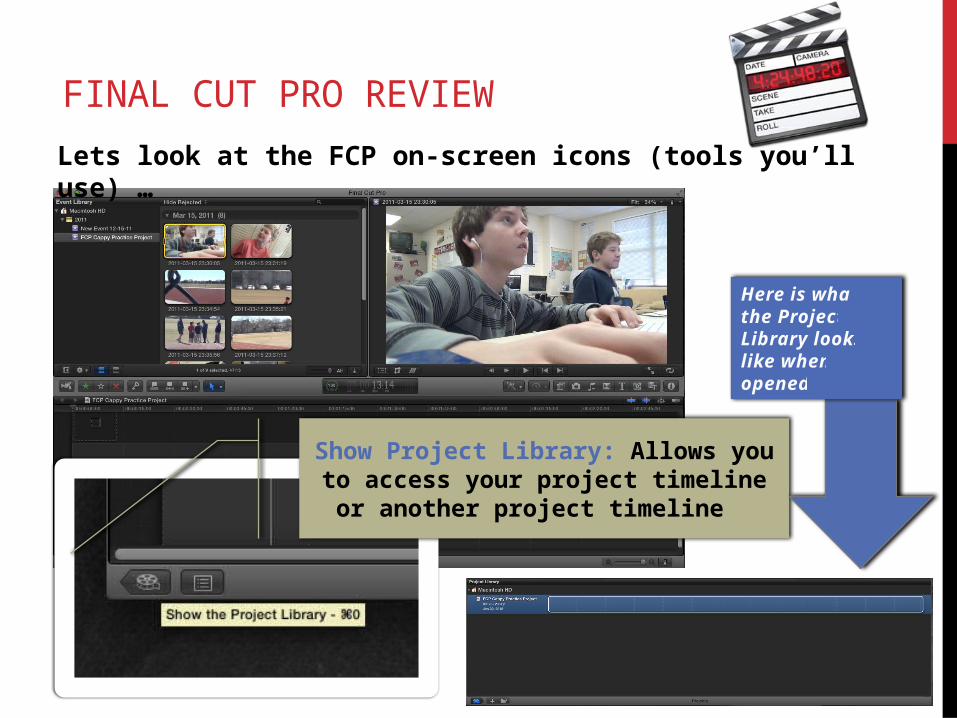
Show Project Library: Allows you to access your project timeline or another
project timeline
Here is what the Project Library looks like when opened
Lets look at the FCP on-screen icons (tools you’ll use) …

FINAL CUT PRO REVIEW
When you’re in the project library …
Project Library Controls: You can create new folders and new projects. Click on the blue reel to go back to the timeline
editor

FINAL CUT PRO REVIEW
The Timeline: This is where you place the video clips and audio you want to use and mix them together. You will see the graphical display of the scenes in your edited sequence/movie) …
Clip Appearance: Allows you to adjust how you see
your sequence in the timeline. For example, do
you want to see large thumbnails of the video and a graphical representation of the audio levels? Then
use the 4th icon in.
Time: Shows you how long your video sequence
is.
Tracks: You can add
multiple video and audio tracks and
stagger them. Zoom: Zoom in on tracks.

FINAL CUT PRO REVIEW
Multitrack Editing in The Timeline: Here’s what it looks like when you stagger using multiple tracks. The track with the yellow border is the track that is selected and the one I can edit. The video track on the top (or highest) track is what will be shown in your final video …

FINAL CUT PRO REVIEW
Editing “B Roll” into The Timeline: To keep your main audio track from your “A Roll” (or main track) and use other video (or “B Roll”) in place of the “A Roll” video, while keeping the “A Roll” audio …
A Roll
B Roll
1. Detach the B Roll audio from the video
2. B Roll audio will break off and appear below the A Roll track
3. Highlight and delete the B Roll Audio

FINAL CUT PRO REVIEW
Editing Tools
TOOLS YOU’LL USE OFTEN …Select: Tool used to select a clip and move it (Shortcut is: A)Trim: Tool used trim the beginning or end of a clip by dragging the clip in and out at the ends (Shortcut is: putting your cursor at the beginning or end of
clip)Range Selection: Tool used to select a a portion of a clip (Shortcut is: I and O)Blade: Tool used to cut a clip (Shortcut is: B)Zoom: Tool used to zoom IN and OUT on timeline (Shortcut is: command +/-)

FINAL CUT PRO REVIEW
The Insert Timeline Tools (For Creative Effects, etc)
FINAL CUT PRO REVIEW
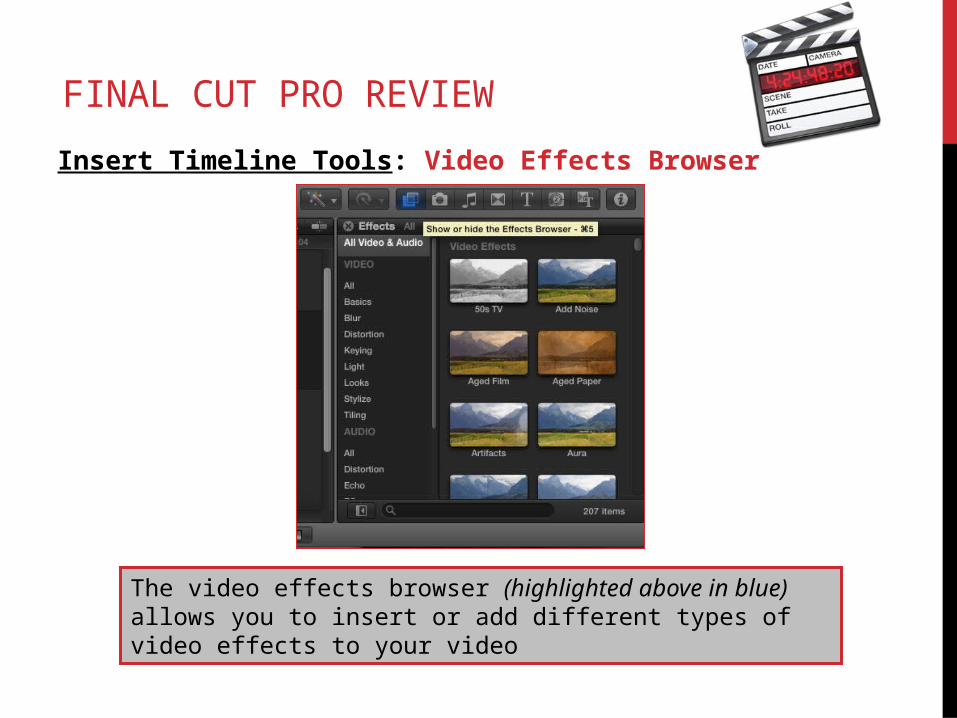
Insert Timeline Tools: Video Effects Browser
The video effects browser (highlighted above in blue) allows you to insert or add different types of video effects to your video

FINAL CUT PRO REVIEW
Insert Timeline Tools: Photos Browser
The photos browser (highlighted above in blue) allows you to insert or add photos to your video on the fly

FINAL CUT PRO REVIEW
Insert Timeline Tools: Music and Sound Browser
The music and sound browser (highlighted above in blue) allows you to insert or add music and sound effects to your video

FINAL CUT PRO REVIEW
Insert Timeline Tools: Transitions Browser
The transitions browser (highlighted above in blue) allows you to insert or add transitions (like dissolves or wipes) between the clips of your video

FINAL CUT PRO REVIEW
Insert Timeline Tools: Titles Browser
The titles browser (highlighted above in blue) allows you to insert or add text (or titles) to lay over your video

FINAL CUT PRO REVIEW
Insert Timeline Tools: Generations Browser
The generations browser (highlighted above in blue) allows you to video placeholders of different colors, textures, or themes to your video
FINAL CUT PRO REVIEW
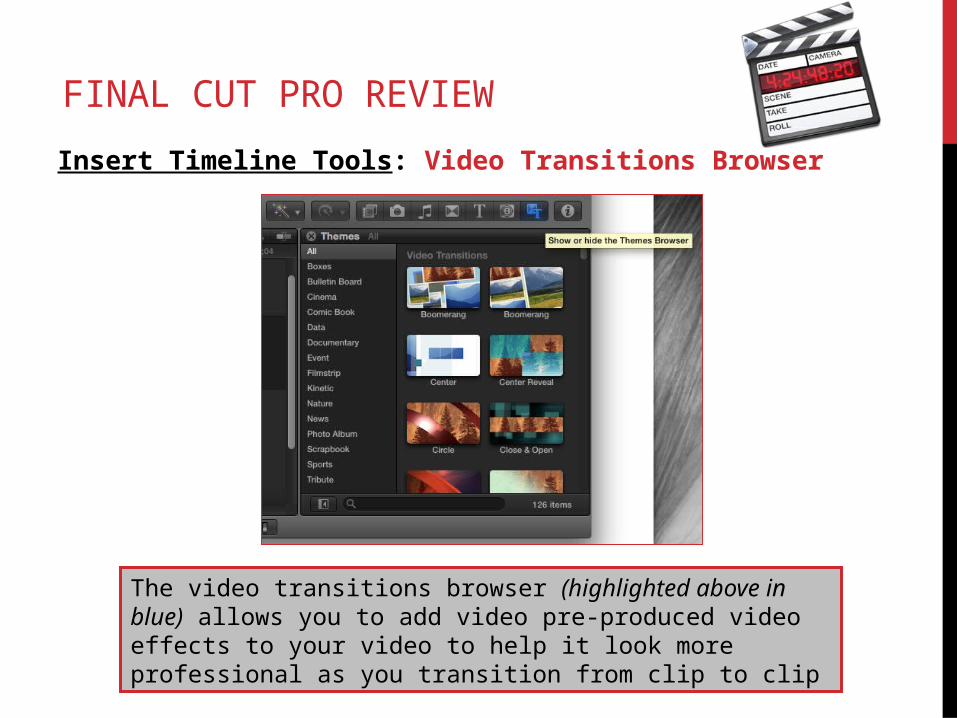
Insert Timeline Tools: Video Transitions Browser
The video transitions browser (highlighted above in blue) allows you to add video pre-produced video effects to your video to help it look more professional as you transition from clip to clip

FINAL CUT PRO REVIEW
Insert Timeline Tools: Clip Inspector
The clip inspector allows you to open up a window next to the preview window. Within the clip inspector window, you can make adjustments (like color) to the video clips or audio (like fading or panning) you have in the timeline. Whatever you have selected (bordered in yellow) will show in the clip inspector.

FINAL CUT PRO REVIEW
Insert Timeline Tools: Clip Inspector Video Controls
Clip Inspector allows you to adjust the video effects you have put on your video. It allows you to further control the transform, crop and distort options. It also allows you to adjust the color of your image manually or using pre-sets if you click on “Correction 1” under the color tab

FINAL CUT PRO REVIEW
Insert Timeline Tools: Clip Inspector Audio Controls
You can use the clip inspector when audio is highlighted in the timeline to make audio adjustments. You can adjust the master volume of the audio track. You can add effects or enhance the audio. You can also fade in/out and pan L/R your audio by click on the yellow triangle and adding keyframes to the audio track. The keyframes will show up as small gray triangles and act like envelopes.
FINAL CUT PRO REVIEW
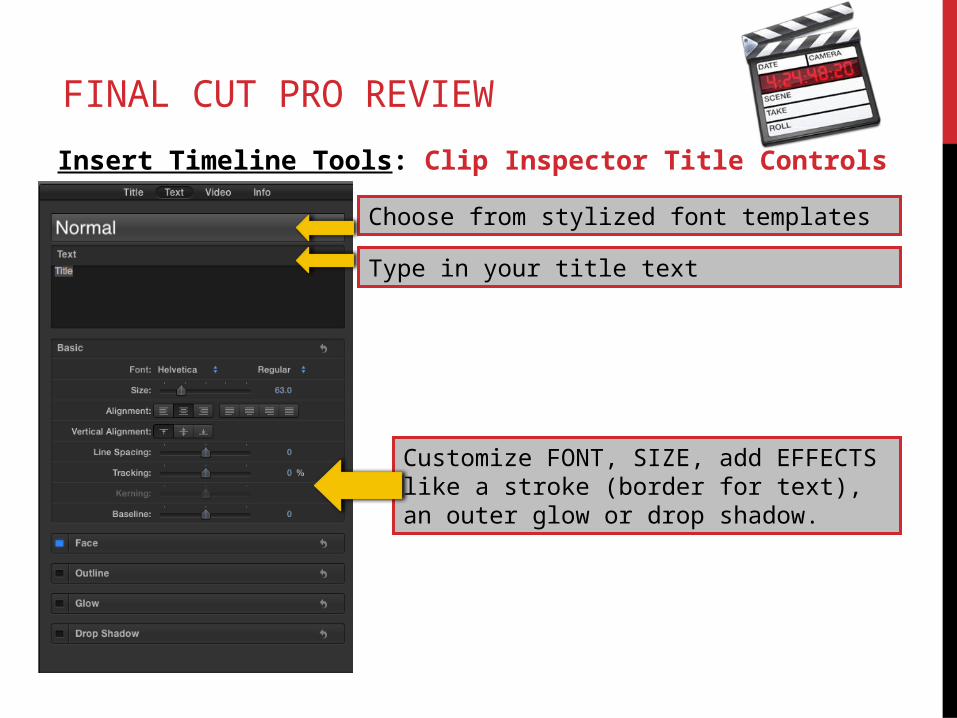
Insert Timeline Tools: Clip Inspector Title Controls
Customize FONT, SIZE, add EFFECTS like a stroke (border for text), an outer glow or drop shadow.
Type in your title text
Choose from stylized font templates

FINAL CUT PRO REVIEW
The Preview Window:Playback Controls: Allows you to Play, Fast Forward, Go to Beginning, or Go to
End of Video. HINT: use the spacebar to play!
Transform: Allows you to resize entire
image or place it in a
different part of the screen
Crop: Allows you to crop or delete a part of the image so
you can get rid of unnecessary background
footage
Distort: Allows you to distort
the way an image looks on
the screen

FINAL CUT PRO REVIEW
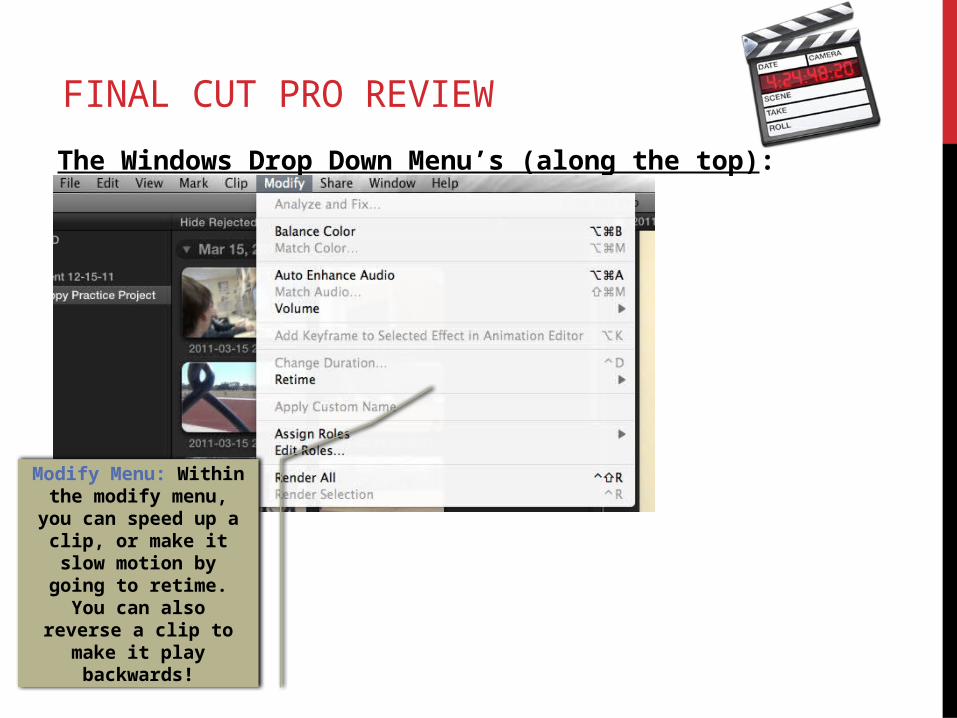
The Windows Drop Down Menu’s (along the top):
Edit Menu: Can use for copying and pasting,
undoing and redoing, etc. Don’t forget that
shortcutscommand Z, C, V, and X all work in Final Cut
Pro
File Menu: Can use for new projects, new folders,
duplicating a clip, importing files or footage, etc.

FINAL CUT PRO REVIEW
The Windows Drop Down Menu’s (along the top):
Mark Menu: Can use for marking an in point and an out point on a clip for ease
of selecting a specific portion of video. TIP: the
keyboard shortcut “I” marks and in point and the
“O” marks an out point!
View Menu: Can use for zooming, turning on/off audio skimming (hearing the audio step by step as you edit), and turning on/off snapping, etc.
TIP: make sure snapping is off!
FINAL CUT PRO REVIEW
The Windows Drop Down Menu’s (along the top):
Modify Menu: Within the modify menu, you can
speed up a clip, or make it slow motion by going to retime. You can also reverse a clip to make it
play backwards!

FINAL CUT PRO REVIEW
The Windows Drop Down Menu’s (along the top):
Window Menu: If you lose some of your
controls; for example, you no longer see your
timeline, go to the window drop down and make adjustments here.

FINAL CUT PRO REVIEW
Sharing Your Video:In the Share Window Dialogue Box, click SHARE
Go to FILE and SHARE: Export
as Apple Devices 720p
Track exporting process from 0%-100%

FINAL CUT PRO REVIEW
Sharing Movie to Alias:
Locate .MP4 (MPEG-4) movie in FINDER under “Movies” and drag and drop movie to your folder on the alias drive.
FINAL CUT PRO REVIEW
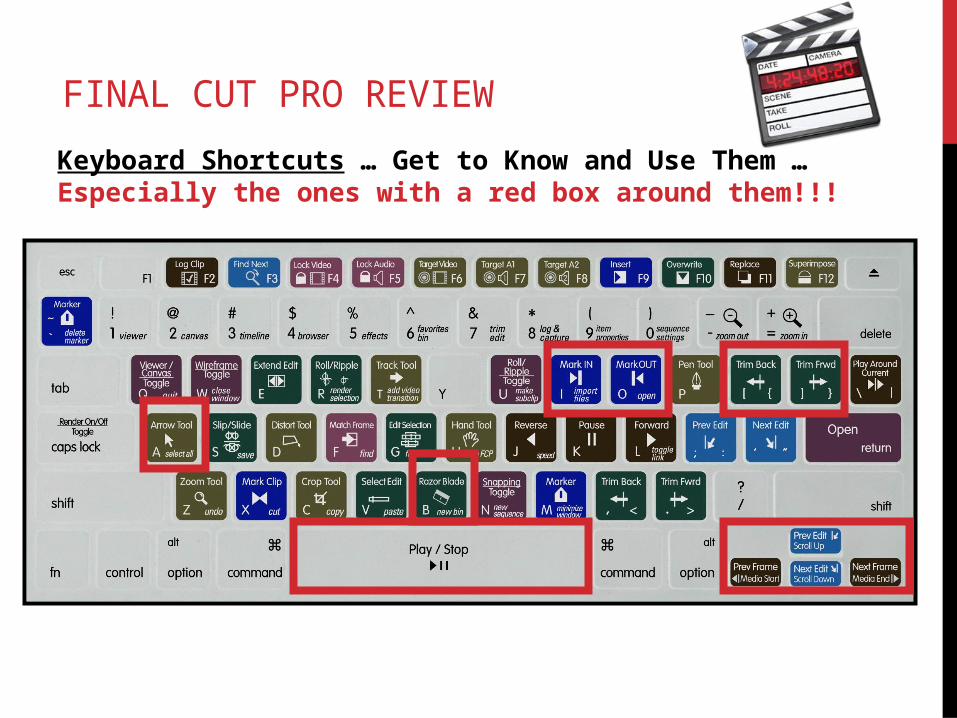
Keyboard Shortcuts … Get to Know and Use Them … Especially the ones with a red box around them!!!