trainer's gide - development experience
TRANSCRIPT
Education Crisis Response - Facilitator’s Guide
1 | Introduction
Principles of ‘Do No Harm’
At all times in the learning centers, facilitators must observe the following
“Do no harm principles” and ensure that:
1. all content of lessons and learning activities must be culturally sensitive
(in values and norms)
2. all content of lessons and learning activities must consider age
appropriateness
3. to give equal opportunity to all learners
4. to have unconditional respect for learner’s opinion
5. appropriate time management in the delivery of lesson contents
6. effective communication of lesson contents to learners
7. and be a positive role model to learners
8. he/she is tolerant, patient, accommodative, resilient and should endeavor
to apply all the five Social and Emotional Learning (SEL) competences in
the delivery of all lesson contents and activities to the learners.
Education Crisis Response - Facilitator’s Guide
2 | Introduction
CONTENTS
Acronyms .................................................................................................................................. 6
Definition of list of icons .......................................................................................................... 7
Preface ....................................................................................................................................... 9
Acknowledgements ................................................................................................................ 10
Introduction ............................................................................................................................ 11
BACKGROUND OF EDUCATION CRISIS RESPONSE PROJECT ............................................... 11
Facilitator’s guide development team .................................................................................. 12
Purpose of this guide .............................................................................................................. 14
Structure of the guide ............................................................................................................ 15
Introduction to NFE Benchmark ......................................................................................... 16
Contact hours ......................................................................................................................... 16
The facilitator ......................................................................................................................... 17
Responsibilities of an effective learning facilitator ............................................................. 17
Part 1 - Reading Lessons - Beginners ................................................................................... 18
Quick start reading lesson #1 - Concepts of Print ................................................................ 19
Quick start reading lesson #2 - Recognizing and Manipulating Sounds.............................. 24
Quick start reading lesson #3 - Recognizing and Manipulating Sounds.............................. 29
Quick start reading lesson #4 - Recognizing and Manipulating Sounds.............................. 33
Quick start reading lesson #5 - Consonants, letter N n ........................................................ 38
Quick start reading lesson #6 - Vowel, letter A a (long and short) ...................................... 42
Quick start reading lesson #7 - Consonants, letter K k ........................................................ 47
Quick start reading lesson #8 - Consonants, letter M m ...................................................... 51
Quick start reading lesson #9 - Consonants, letter S s ......................................................... 55
Quick start reading lesson #10 - Consonants, letter T t ....................................................... 59
Quick start reading lesson #11 - Vowels, letter I i ............................................................... 63
Quick start reading lesson #12 - Consonants, letter R r. ...................................................... 68
Quick start reading lesson #13 - Consonants, letter D d. ..................................................... 72
Quick start reading lesson #14 - Consonants, letter F f. ...................................................... 76
Quick start reading lesson #15 - Consonants, sound Ts, letters Ts. ..................................... 80

Education Crisis Response - Facilitator’s Guide
3 | Introduction
Quick start reading lesson #16 - Consonants, letter B b. ..................................................... 84
Quick start reading lesson #17 - Consonants, letter W w. ................................................... 88
Quick start reading lesson #18 - Consonants, letter G g ...................................................... 92
Quick start reading lesson #19 - Consonants, letter Y y. ..................................................... 96
Quick start reading lesson #20 - Consonants, letter L l. .................................................... 100
Quick start reading lesson # 21 - Vowel, letter U u. .......................................................... 104
Quick start reading lesson #22 - Consonants, letter C c. .................................................... 108
Quick start reading lesson #23 - Consonants, letter H h. ................................................... 112
Quick start reading lesson #24 - Consonants, sound and letters Sh sh together. ............... 116
Quick start reading lesson #25 - Consonants, letter V v. ................................................... 120
Quick start reading lesson #26 - Consonants, sound and letters Au, au together. ............. 124
Quick start reading lesson #27 - Consonants, letter X x. ................................................... 128
Quick start reading lesson #28 - Consonants, sound and letters J j . ................................. 132
Quick start reading lesson # 29 - Vowel, letter E e. ........................................................... 136
Quick start reading lesson # 30 - Consonants, letter Z z. ................................................... 140
Quick start reading lesson # 31 - Vowels, letter O o.......................................................... 144
Quick start reading lesson #32 - Consonants, letter Q q. ................................................... 148
Quick start reading lesson #33 - Consonants, letters Kw kw together. .............................. 152
Quick start reading lesson #34 - Consonants, letters Ky ky together. ............................... 156
Quick start reading lesson #35 - Consonants, letters Qw qw together. .............................. 160
Quick start reading lesson #36 - Consonants, letters Qy qy ............................................ 164
Quick start reading lesson #37 - Consonants, letters Gw gw. ............................................ 168
Quick start reading lesson #38 - Consonants, letters Gy gy............................................... 172
Quick start reading lesson #39 - Consonants, sound and letters Ai ai . ............................. 176
Appendix 1: Hausa alphabets ............................................................................................. 180
Part 2 – Numeracy Lessons ................................................................................................. 181
Lesson 1: I Can Count!....................................................................................................... 182
Lesson 2: Addition ............................................................................................................. 186
Lesson 3: Subtraction ......................................................................................................... 189
Scripted Lesson 4: Twos, threes and fours (Multiplication) .............................................. 193

Education Crisis Response - Facilitator’s Guide
4 | Introduction
Scripted Lesson 5: The concept of zero (0)........................................................................ 197
Scripted Lesson 6: Division of numbers ............................................................................ 200
Scripted Lesson 7: If Today is Tuesday ............................................................................. 204
Scripted Lesson 8: Time ..................................................................................................... 207
Scripted Lesson 9: How long is it?..................................................................................... 212
Scripted Lesson 10: Halves and Quarters .......................................................................... 216
Scripted Lesson 11: Dealing with money .......................................................................... 220
Scripted Lesson 12: 3-dimensional shapes......................................................................... 223
Scripted Lesson 13: 2- dimensional shapes........................................................................ 226
Scripted Lesson 14: Factors ............................................................................................... 229
Scripted Lesson 15: Multiples ............................................................................................ 234
Scripted Lesson 16: Counting with Pictures ...................................................................... 238
Appendix 2: Sample of Nigerian currencies ...................................................................... 241
Appendix 3: My 3-D shapes............................................................................................... 242
Part 3 - Social Emotional Learning .................................................................................... 243
MODULE 1: INTRODUCTION TO CLASSMATES, CLASSROOM AND SEL
ECR Approach to Social Emotional Learning ................................................................... 244
Module 1: Week 1: Lesson 1 - Getting to know one another ............................................ 245
Module 1: Week 1: Lesson 2 - Building Positive Rapport ................................................ 248
Module 1: Week 1: Lesson 3 - Respecting Differences ..................................................... 251
Module 1 Week 2: Lesson 1 - Introduction to classroom norms and creating a safe place
............................................................................................................................................ 254
Module 1: Week 2: Lesson 2 - Developing Classroom Rules ........................................... 258
Module 1: Week 2: Lesson 3 - Following Class Rules ...................................................... 260
Module 1: Week 3: Lesson 1 - Paying Attention in Class ................................................. 262
Module 1: Week 3: Lesson 2 - Following Directions in Class .......................................... 265
Module 1: Week 3: Lesson 3 - How to Learn .................................................................... 267
Module 1: Week 4: Lesson 1 - Building Our Memory ...................................................... 271
Module 1: Week 4: Lesson 2 - Using Our Memory ........................................................... 274
Module 1: Week 4: Lesson 3 - Importance of Memory ..................................................... 277
Module 1: Week 5: Lesson 1 - Setting Goals..................................................................... 280
Education Crisis Response - Facilitator’s Guide
5 | Introduction
Module 1: Week 5: Lesson 2 - Setting a Story Timeline ................................................... 283
Appendix 4 – Story tiles ..................................................................................................... 287
Appendix 5 – Handout 1 .................................................................................................... 291
Module 1 Assessment: Week 6 .......................................................................................... 292
Appendix 6: Sample Student Assessment Tracker – Module 1 ......................................... 298
MODULE 2: FEELINGS AND EMOTIONS
Module 2: Week 7: Lesson 1 - Topic: Expressing How I Feel .......................................... 299
Module 2: Week 7: Lesson 2 - How I feel my feelings ..................................................... 302
Module 2: Week 7: Lesson 3 - Comfortable and Uncomfortable Feelings ....................... 307
Module 2: Week 8: Lesson 1 - Why we manage our emotions ......................................... 311
Module 2: Week 8: Lesson 2 - Using Belly-Breathing ...................................................... 314
Module 2: Week 8: Lesson 3 - Controlling your feelings .................................................. 317
Module 2: Week 9: Lesson 1 - How are they feeling? ....................................................... 321
Module 2: Week 9: Lesson 2 - Different feelings .............................................................. 324
Module 2: Week 9: Lesson 3 - Responding to Others’ Feelings ....................................... 327
Module 2: Week 10: Lesson 1 - What is Empathy? ........................................................... 330
Module 2: Week 10: Lesson 2 – The Empathy Heart ........................................................ 333
Module 2: Week 10: Lesson 3 - Communication Skills .................................................... 337
Module 2 Assessment: Week 11 ........................................................................................ 342
SAMPLE LESSONS - MODULE 3, 4, 5, 6
Module 3: Week 12: Lesson 1 - How my actions affect others ......................................... 348
Module 4 Week 18: Lesson 1 - How to make friends ........................................................ 351
Module 5: Week 23: Lesson 1 - Making decisions ............................................................ 354
Module 6: Week 30: Lesson 1 - Ways of Addressing Conflict, Part 1 .............................. 357

Education Crisis Response - Facilitator’s Guide
6 | Introduction
ACRONYMS
AE Alternative Education
ANFEA Adult and Non Formal Education Agency
CSACEFA Civil Society Action Coalition on Education for All
GDSS Government Day Secondary School
FBO Faith Based Organization
FOMWAN Federation of Muslim Women Associations in Nigeria
FS Formal school
LC Learning Center
LF Learning Facilitator
MOE Ministry of Education
MTTR Multi-media Training Resource
NFE Non-Formal Education
NFLC Non-Formal Learning Center
OVC Orphans and Vulnerable Children
SEL Social and Emotional Learning
SBMC School Based Management Committee
SEMA State Emergency Management Agency
SAME State Agency for Mass Education
SMoE State Ministry of Education
SUBEB State Universal Basic Education Board
Education Crisis Response - Facilitator’s Guide
7 | Introduction
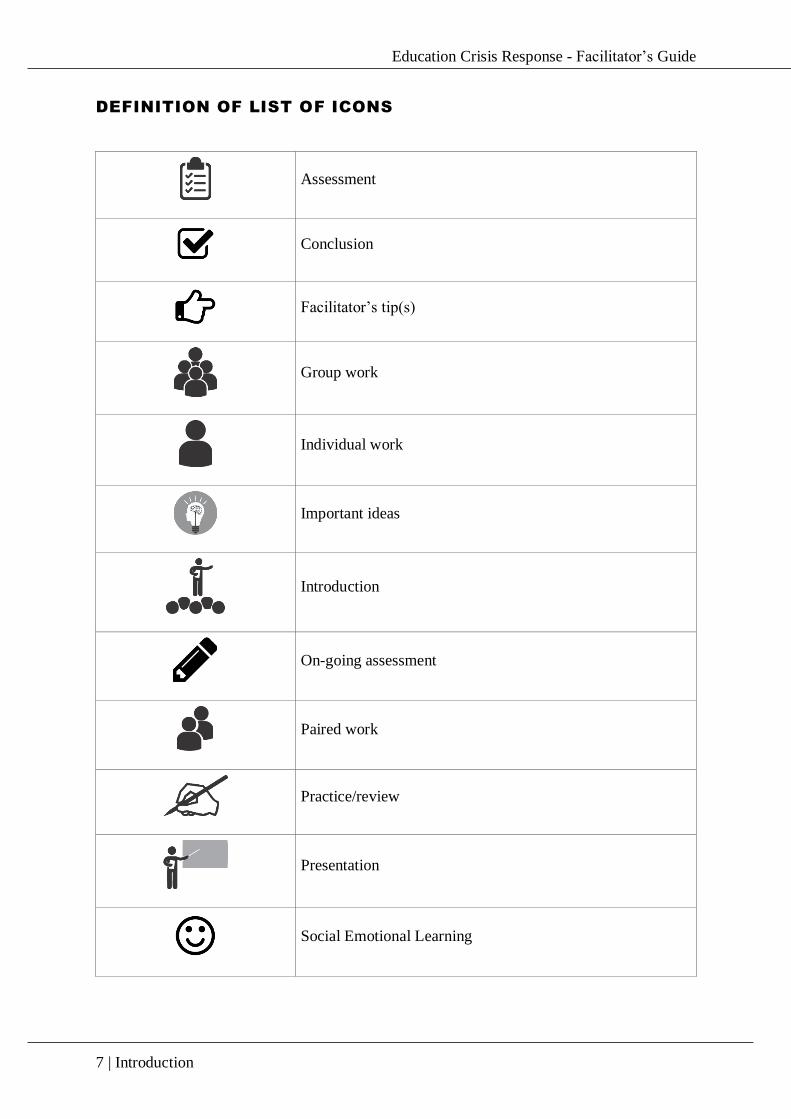
DEFINITION OF LIST OF ICONS
Assessment
Conclusion
Facilitator’s tip(s)
Group work
Individual work
Important ideas
Introduction
On-going assessment
Paired work
Practice/review
Presentation
Social Emotional Learning

Education Crisis Response - Facilitator’s Guide
8 | Introduction
Total allotted time for a lesson
Time allotted for each step of an activity procedure
Whole class review/work
Education Crisis Response - Facilitator’s Guide
9 | Introduction
PREFACE
Education in Nigeria is in a state of transition. Numerous efforts are being made to improve
the quality of education in the non-formal sector. Yet persistently, low literacy rates threaten
the possibility of meeting the MDG goals and, more importantly, threaten the future prosperity
of all Nigerians and our nation as a whole. This situation has been further exacerbated by
conflicts.
The Federal Ministry of Education (FMoE) and the National Mass Education Commission
(NMEC) through the State Ministry of Education (SMoE), State Universal Basic Education
Board (SUBEB), State Agency for Mass Education (SAME)/Adult and Non Formal Education
Agency (ANFEA) and Local Government Education Authorities (LGEAs) in Adamawa,
Bauchi, Gombe and Yobe States, are working with the United States Agency for International
Development (USAID) funded Education Crisis Response (ECR) project and other partners to
improve Reading, Numeracy and Social Emotional Learning (SEL) of internally displaced
children and youth in Adamawa, Bauchi, Gombe and Yobe states of the North East Nigeria.
This Facilitator’s Guide is intended to be a practical and flexible training document to facilitate
the teaching of core subjects in Basic Literacy program of Non Formal Education (NFE)
approach/model. It is designed to be activity-based and aid facilitation by practitioners at basic
education level. It can be adapted to specific situations depending on the needs of the
facilitators. The training duration is recommended to cover a period of nine (9) months to
ensure proper understanding of the rudiments of facilitation both in pedagogic and
andragogical teaching skills. This Guide is designed to lead to effectiveness in the delivery of
the enhanced NFE Curriculum by facilitators of Non Formal Learning Centres (NFLCs).
The Facilitator’s Guide adopts the participatory, Learner-Centered, Problem-solving, Self-
discovery and Action-oriented (LePSA) approach for non-formal facilitation. The essence of
these approaches is to ensure active teaching/learning during classroom practice.
We, the Managers of Education, would like to thank United States Agency for International
Development (USAID) – Education Crisis response funded project for its efforts in providing
access to quality education services for the internally displaced children, as well as all who
have assisted in the development of this manual. We applaud the work of Education Crisis
Response project in the development and production of this Guide and its other activities to
support quality teaching and learning in our Non Formal Leaning Centers (NFLCs). We urge
teachers and facilitators to use it diligently and build on the ideas suggested in their own ways
in order to raise successful learners and a better Nigeria for all of us!
Sincerely,
Mrs. Dubi Charity
Chairman NFE Technical Working
Group,
Adamawa State
Hajiya Yelwa Abubakar Tafawa
Balewa Chairman NFE Technical
Working Group, Bauchi State
Alhaji Zakari Kudi
Chairman NFE Technical
Working Group, Gombe
State
Education Crisis Response - Facilitator’s Guide
10 | Introduction
ACKNOWLEDGEMENTS
This manual was developed by a team of local consultants, international consultants, and
College of Education lecturers from Adamawa, Bauchi and Gombe States, under the
coordination of Education Crisis Response (ECR). We acknowledge the important
contributions of our partners from State Ministries of Education (MoE), State Universal Basic
Education Boards (SUBEB), Adult and Non Formal Education Agencies (ANFEA), State
Agencies for Mass Education (SAME), SEMA, SMOWA, Budget and Economic Planning,
State and Federal Colleges of Education, Universities, Polytechnics, National Mass Education
Commission (NMEC), Federation of Muslim Women Associations in Nigeria (FOMWAN),
and the Civil Society Action Coalition on Education For All (CSACEFA). We are indebted to
the technical contributions of our colleagues, whose names appear on the Contributors’ Page.
Education Crisis Response - Facilitator’s Guide
11 | Introduction
INTRODUCTION
BACKGROUND OF EDUCATION CRISIS RESPONSE PROJECT
Funded by the United States Agency for International Development (USAID) in partnership with
the Government of Nigeria (GON), the Education Crisis Response project aims to expand access
to quality, relevant, safe Non-Formal and Alternative Education (AE) opportunities for Internally
Displaced Persons (IDPs) children and youths, aged 6-17 including children of host communities
in the four north eastern states of Adamawa, Bauchi, Gombe and Yobe. Education Crisis
Response is a three-year project, implemented under Cooperative Agreement awarded to Creative
Associates International, in consortium with two international organizations - International
Rescue Committee (IRC) and Florida State University (FSU) as well as two national Non-
Governmental Organizations (NGOs) - Federation of Muslim Women Association in Nigeria
(FOMWAN) and Civil Society Action Coalition on Education For All (CSACEFA) - in
partnership with state and local governments institutions in Adamawa, Bauchi, Gombe and
Yobe states.
The project is designed to address the main learning needs of IDPs and host learners affected by
the crisis in north east Nigeria, through Non-Formal Learning Centers (NFLCs), Youth Learning
Centers (YLCs), and Adolescent Girls’ Learning Centers (AGLCs), serving both Muslim and
Christian communities. These alternative opportunities include NFE centers, formal schools and
vocational skill acquisition centers that address the immediate educational and psychosocial
needs of IDP children and youth. The project also seeks to collaborate with other implementing
partners in the focal states with effective coordination in child protection related activities as well
as ensuring safe learning environments. The project will provide learning in protective centers in
urban and rural areas, support formal schools and work within host communities who have taken
IDPs into their homes/ where IDPs live together in settlement-type housing.
The Education Crisis Response project will improve quality and relevant instructional practices
to update and/or newly develop teaching-learning materials for Literacy, Numeracy, Life
Skills, Social Emotional Learning (SEL) competencies and psychosocial support services in
NFE and Alternative Education options. The project will recruit, train, and coach NFLC
learning facilitators (LFs) to provide quality instruction and ensure Technical Working Groups
(TWGs) make relevant teaching-learning materials available. The project will also increase
community engagement and support to schooling in targeted NFE and alternative education
learning center communities so that there is heightened awareness of these new and enhanced
educational opportunities to improve the value placed on education and provide IDPs and host
community girls, boys and youths with a way to sustain their education.
Education Crisis Response will also work to increase state and Local Government and Civil
Society support for NFE and Alternative Education options so that they collaborate, coordinate
and provide government funding and policy support to sustain and expand Non-Formal
Education.
Education Crisis Response - Facilitator’s Guide
12 | Introduction
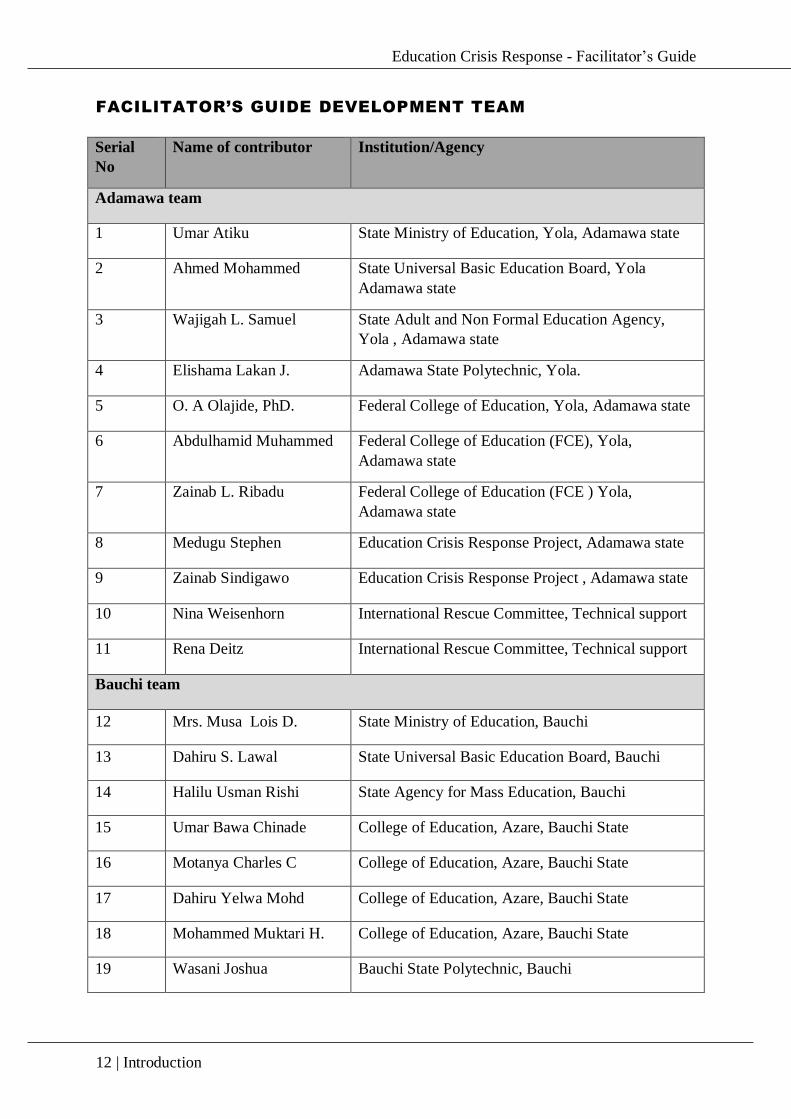
FACILITATOR’S GUIDE DEVELOPMENT TEAM
Serial
No
Name of contributor Institution/Agency
Adamawa team
1 Umar Atiku State Ministry of Education, Yola, Adamawa state
2 Ahmed Mohammed State Universal Basic Education Board, Yola
Adamawa state
3 Wajigah L. Samuel State Adult and Non Formal Education Agency,
Yola , Adamawa state
4 Elishama Lakan J. Adamawa State Polytechnic, Yola.
5 O. A Olajide, PhD. Federal College of Education, Yola, Adamawa state
6 Abdulhamid Muhammed Federal College of Education (FCE), Yola,
Adamawa state
7 Zainab L. Ribadu Federal College of Education (FCE ) Yola,
Adamawa state
8 Medugu Stephen Education Crisis Response Project, Adamawa state
9 Zainab Sindigawo Education Crisis Response Project , Adamawa state
10 Nina Weisenhorn International Rescue Committee, Technical support
11 Rena Deitz International Rescue Committee, Technical support
Bauchi team
12 Mrs. Musa Lois D. State Ministry of Education, Bauchi
13 Dahiru S. Lawal State Universal Basic Education Board, Bauchi
14 Halilu Usman Rishi State Agency for Mass Education, Bauchi
15 Umar Bawa Chinade College of Education, Azare, Bauchi State
16 Motanya Charles C College of Education, Azare, Bauchi State
17 Dahiru Yelwa Mohd College of Education, Azare, Bauchi State
18 Mohammed Muktari H. College of Education, Azare, Bauchi State
19 Wasani Joshua Bauchi State Polytechnic, Bauchi
Education Crisis Response - Facilitator’s Guide
13 | Introduction
20 Wulne F. Buba Government Day Secondary School (GDSS)
Alkaleri, Bauchi state
21 Helen Boyle Florida State University, USA.- Technical Support
22 Ayo Oladini Education Crisis Response Project , Bauchi state
23 Nurudeen Lawal Education Crisis Response Project Consultant,
Lagos
24 Dr. Rasheed Sanni Education Crisis Response Project, Bauchi state
25 Mohammed Awal Education Crisis Response Project, Bauchi
26 Phoebe Mshelia Education Crisis Response Project, Bauchi state
27 Ernest Akoma Education Crisis Response Project, Bauchi state
28 Christain K. Ikpe Education Crisis Response Project, Bauchi state
Gombe team
29 Mohammed Sadiq State Ministry of Education, Gombe
30 Larai Ibrahim State Agency for Mass Education, Gombe
31 Adamu Mamman Puma State Ministry of Women Affairs and Social
Development, Gombe
32 Mohammed Lawal Gombe State Universal Basic Education Board, ,
33 Adepoju O.A Gombe State University, Gombe
34 Fatima B. Sani Gombe State University,
35 Talatu D. Waziri Federal College of Education (Technical), Gombe
36 Ibrahim Ahmed Federal College of Education, Gombe
37 Dalhatu Sulaiman Darazo Education Crisis Response Project, Gombe
38 Hassana Lazarus Education Crisis Response Project, Gombe

Education Crisis Response - Facilitator’s Guide
14 | Introduction
PURPOSE OF THIS GUIDE
Welcome to the Facilitator’s Guide: NFE Literacy, Numeracy and Social and Emotional
Learning. It was developed for you, an Education Crisis Response NFLC Facilitator in
Adamawa, Bauchi, Gombe and Yobe States, to use when teaching learners Reading skills in
Hausa language, Numeracy and Social and Emotional Learning. However, the manual can also
be adapted by other states in Nigeria. Though it was developed using the NFE curriculum as a
benchmark, the strategies in this guide can be used by all. The guide is based on the national
basic literacy (reading) curriculum, with a focus on listening and speaking, phonics, reading,
and writing. It is one of the four guides to be developed by the project that will focus on
Literacy, Numeracy, Life-Skills, and Social and Emotional Learning.
The first part of this guide consists of Activity Plans. We use the term Activity Plans instead
of Lesson Plans because Lesson Plans are too often associated with “chalk and talk” methods
where Facilitators do most of the talking while children sit passively and listen. Our aim is to
provide you with activities to engage your Learners in singing, playing games and discussing
ideas – activities that will be more fun both for you and them, and if done properly, that will
lead to better learning.
Education Crisis Response - Facilitator’s Guide
15 | Introduction
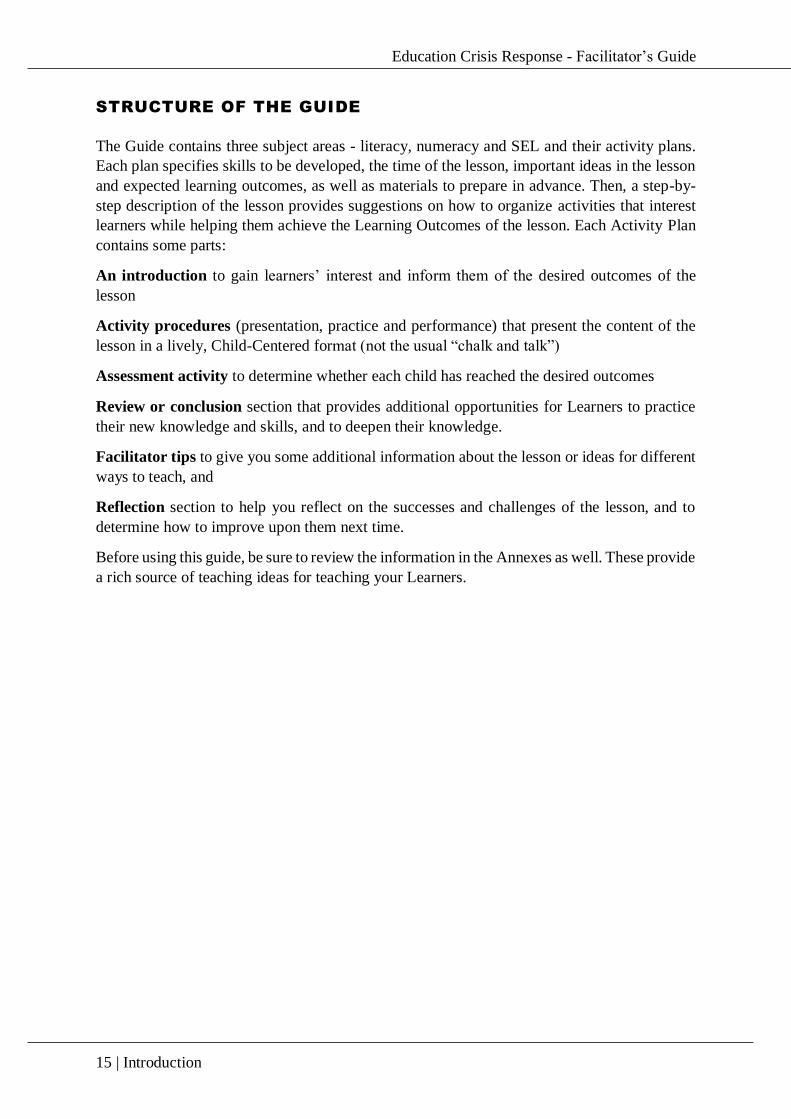
STRUCTURE OF THE GUIDE
The Guide contains three subject areas - literacy, numeracy and SEL and their activity plans.
Each plan specifies skills to be developed, the time of the lesson, important ideas in the lesson
and expected learning outcomes, as well as materials to prepare in advance. Then, a step-by-
step description of the lesson provides suggestions on how to organize activities that interest
learners while helping them achieve the Learning Outcomes of the lesson. Each Activity Plan
contains some parts:
An introduction to gain learners’ interest and inform them of the desired outcomes of the
lesson
Activity procedures (presentation, practice and performance) that present the content of the
lesson in a lively, Child-Centered format (not the usual “chalk and talk”)
Assessment activity to determine whether each child has reached the desired outcomes
Review or conclusion section that provides additional opportunities for Learners to practice
their new knowledge and skills, and to deepen their knowledge.
Facilitator tips to give you some additional information about the lesson or ideas for different
ways to teach, and
Reflection section to help you reflect on the successes and challenges of the lesson, and to
determine how to improve upon them next time.
Before using this guide, be sure to review the information in the Annexes as well. These provide
a rich source of teaching ideas for teaching your Learners.
Education Crisis Response - Facilitator’s Guide
16 | Introduction
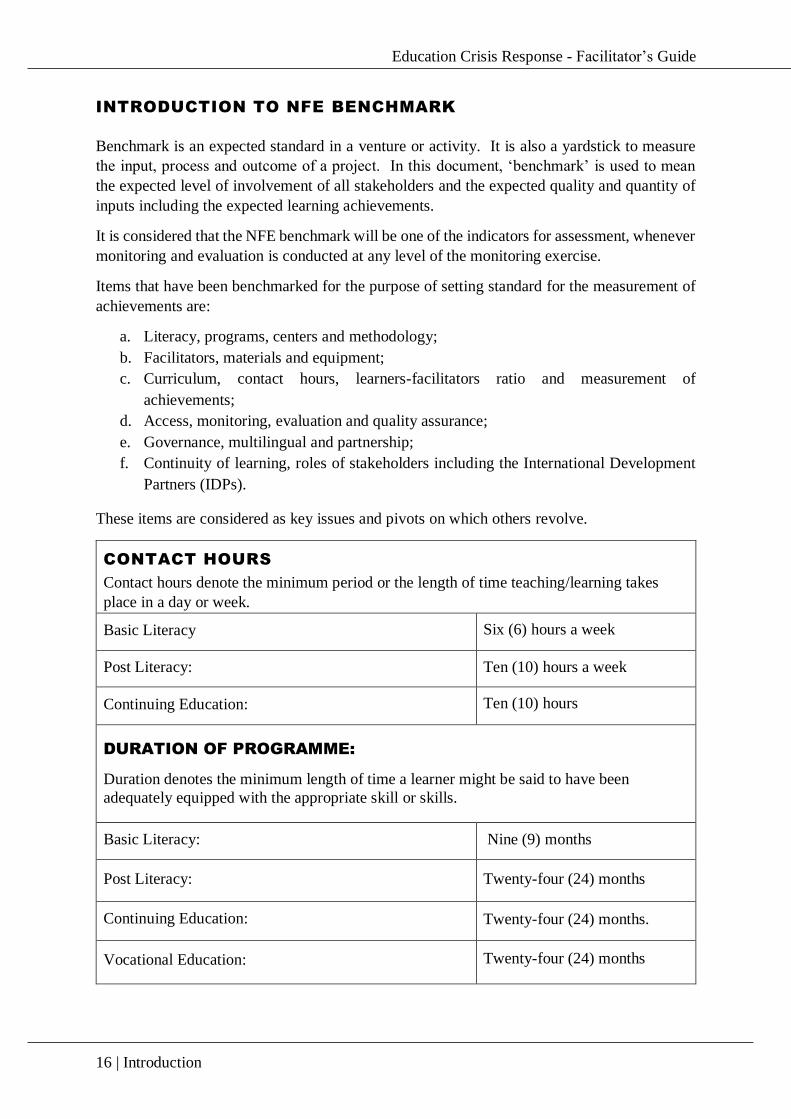
INTRODUCTION TO NFE BENCHMARK
Benchmark is an expected standard in a venture or activity. It is also a yardstick to measure
the input, process and outcome of a project. In this document, ‘benchmark’ is used to mean
the expected level of involvement of all stakeholders and the expected quality and quantity of
inputs including the expected learning achievements.
It is considered that the NFE benchmark will be one of the indicators for assessment, whenever
monitoring and evaluation is conducted at any level of the monitoring exercise.
Items that have been benchmarked for the purpose of setting standard for the measurement of
achievements are:
a. Literacy, programs, centers and methodology;
b. Facilitators, materials and equipment;
c. Curriculum, contact hours, learners-facilitators ratio and measurement of
achievements;
d. Access, monitoring, evaluation and quality assurance;
e. Governance, multilingual and partnership;
f. Continuity of learning, roles of stakeholders including the International Development
Partners (IDPs).
These items are considered as key issues and pivots on which others revolve.
CONTACT HOURS
Contact hours denote the minimum period or the length of time teaching/learning takes
place in a day or week.
Basic Literacy Six (6) hours a week
Post Literacy: Ten (10) hours a week
Continuing Education: Ten (10) hours
DURATION OF PROGRAMME:
Duration denotes the minimum length of time a learner might be said to have been
adequately equipped with the appropriate skill or skills.
Basic Literacy: Nine (9) months
Post Literacy: Twenty-four (24) months
Continuing Education: Twenty-four (24) months.
Vocational Education: Twenty-four (24) months
Education Crisis Response - Facilitator’s Guide
17 | Introduction
THE FACILITATOR
The facilitator is a person who organizes and directs learning activities.
The facilitator is directly responsible for all learning activities at the schools/centers.
The facilitator could be a full or part time employee in the school/center.
The facilitator possesses the relevant qualifications to facilitate learning.
He should:
Have good listening and communication skills
Demonstrate empathy for the learners
Demonstrate knowledge of the subject matter
Possess effective teaching skills
Be approachable
Show professional attitude
Be a mentor and role model
RESPONSIBILITIES OF AN EFFECTIVE LEARNING
FACILITATOR
The role of the facilitator is to skillfully assist and guide a group of learners to understand and
achieve their common learning objectives. In addition, a facilitator is charged with the
following responsibilities:
1. organization of learning space to facilitate active learning,
2. lesson planning and preparation of notes,
3. delivering the lessons,
4. keep adequate record and maintain established class room management system,
5. identifying the differential needs of the learners and taking action to solve them,
6. assessing learning achievements,
7. taking part in professional development activities,
8. keeping a good relationship with parents and the community, and
9. taking part in feedback discussions with School Mentors after lesson observations.
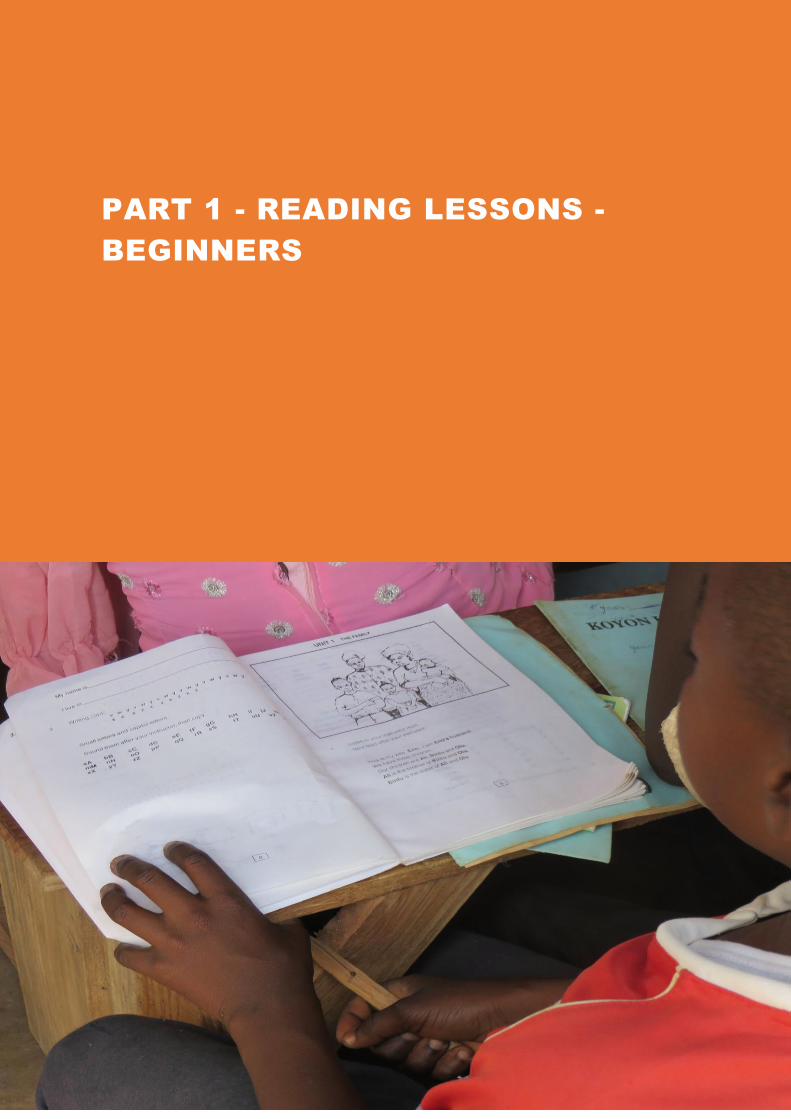
PART 1 - READING LESSONS -
BEGINNERS
Education Crisis Response - Facilitator’s Guide
19 | Part 1 – Reading lessons
First, recognizing that facilitators may be inexperienced with teaching the fundamentals that
are critical in learning to read, we have included a set of scripted lessons that the facilitator
should use to teach in each class in the Quick Start program. The scripts contain the basic
lesson content, but they will be richly enhanced by the creativity and input of the facilitator
during the implementation. A further purpose of the scripted lessons is to assist the facilitators
in apportioning class time between presentation, practice and performance.
Quick start reading lesson #1 - Concepts of Print
Skills: Holding a pencil or pen, forming and copying shapes. Recognizing, directionality of
print, distinguishing print (the part you read) from pictures, knowing the beginning vs. the end
of book, page-to-page reading (i.e. turning pages).
Time: 65 minutes
Learning Objectives: At the end of the lesson, learners should be able to identify how print
“works” in Hausa—i.e. knowing to read left to right, distinguishing text and pictures, being
able to turn pages, identifying the book’s cover and beginning pages. Use a writing implement
to make controlled markings on a page.
Materials: chalk, chalkboard, phrase, song or text written on the board or a piece of paper; if
possible, a few story books or primers to be used for demonstration and practice.
Facilitator’s Tips:
Write any text you are going to use in class on the board in large, clear
handwriting BEFORE class begins. Do not take instructional time to be copying
text you need for the lesson onto the board or a piece of paper.
Important Ideas:
Pupils need to know how books and text work so that they can read them
properly. It is important to give pupils time to familiarize themselves with the
concepts of print that they will encounter in school and other learning or working
situations. The best way to do this is to let pupils look at actual books to see how they
work. Reading aloud to pupils is another good way to help them understand concepts
of print.
SEL Ideas: Getting to know one another.
Step &
Icons
Time Activity procedure
10 minutes
Introduction
1. Say good morning to the children and welcome them. Give all
the children the name tag you have prepared.
2. Tell them that every day, they should pick up their name tag
and keep it with them during the lesson. If they have desks,
they can display it on their desks.

Education Crisis Response - Facilitator’s Guide
20 | Part 1 – Reading lessons
Step &
Icons
Time Activity procedure
3. Tell the pupils that today they are going to learn some of the
fundamentals, in order to be ready to read and write. Some
children may know some of these things; in that case, they can
help their friends.
4. Ask them how many of them know how to hold a pen or
pencil? How many of them know their letters? How many of
them know how to use a book (how to hold it, etc.) Ask them
how many have books in their homes. How many know how
to turn pages?
15 minutes
(Because
this is the
first lesson,
the
presentation
segment is
15 minutes
long and
the
performanc
e is only 5
minutes; in
the other
lessons, the
presentation
is 10
minutes and
the
performanc
e is 10
minutes
Presentation: Facilitator presents and demonstrates the lesson
content for the pupils.
1. Ask pupils to pick up their pencils. Demonstrate the correct
way to hold a pencil. Go around the room and look at the pupils
as they hold their pencils.
2. Have the pupils make some marks in their notebooks. You can
have them draw a shape, copying one you put on the board.
The purpose is to let them get used to holding a pencil and
making marks with it. The marks do not need to be perfect.
3. Next, Show pupils the poem/song you have written on the
board. Put a few pictures you have made that connect to the
story on the board or on a piece of paper as well.
Text for the Lesson (on the board or on a piece of large paper):
Masu hikima sun ce:
Bemu bay a hana ilimi
Bay aba ta da kaxan
Gaba ta fi baya yawa
Matambayi bay a vata
Komai nisan jifa kasa zai faxo
Gava ba ta motsawa banza
Kyawun alkawari cikawa
Wuyar aiki ba a soma ba
Mai kishin abu biyu bay a koshi; ilimi
da dukiya.
4. Say to them:
“When we read a book/poem/song, we have to read the words.
Some text have pictures which can also show us something
about a story, but it is the words that tell us the story.’’
5. Also say to the pupils:
Education Crisis Response - Facilitator’s Guide
21 | Part 1 – Reading lessons
Step &
Icons
Time Activity procedure
“I am going to point to the words on the page. They won’t
show us what is happening as a picture would, but they will tell
us what is happening. Here are the words on this page.”
6. Now, read the words on the paper or board using your finger to
point to the words as you read them.
7. After you do this, say,
“Here are words that tell me a story or message, and here is
what the message says. (Finger-point to words.)
8. Tell the pupils:
“When we read a book/poem/song, we read the words. We read
the words from left to right.”
9. Point to the first word in a line and put your hand under the
first line of words. Show them how your finger moves from
left to right as you read the sentence.
10. Now point to the first word in the first line and move your
finger under the words in the line as you read it Tell the pupils:
“In Hausa, we read words from left to right.”
11. Demonstrate this again as you read the first few lines of the
text.
12. When you come to the end of a line of text, move your finger to
the next line, going back to the beginning of that line. Say to
the pupils:
“When we come to the end of a line, we go to the line below.”
13. Demonstrate this again with the next couple of lines of text,
pointing with your finger as you read aloud.
14. Ask the pupils to try it with you. Have them say the first two
lines of text as you move your finger along under the text.
When you come to the end of the line, move your finger under
the first word in the next line and read that line.
15. If you have a book present in the class, hold that up for pupils
to see. Show them the cover (front and back). Show them the
pages and how they turn.
16. Read a line of text from the book you have, indicating each
word with your finger. Show the pupils that when you finish
with the text on one page, you turn the page to see what is on
the next page.
17. Tell the pupils that books are special and interesting and they
must take care of books and be gentle with them so they will
not get torn or damaged.
18. If you have story books, let the pupils hold and look at the
story books so they can feel what they are like.
Education Crisis Response - Facilitator’s Guide
22 | Part 1 – Reading lessons
Step &
Icons
Time Activity procedure
5 minutes
5 minutes
5 minutes
10 minutes
Practice: The children have a chance to practice what they
have learned; they can practice individually, in pairs, in groups
or as a whole class.
Segment 1:
1. Ask pupils to pick up their pencils and to draw a circle in
their notebook. Draw one on the board for them to copy.
2. Ask them to copy their name from the nametag into their
notebooks. The results can be messy and imperfect—the
pupils are just practicing. Tell them we will learn to write
all the letters soon. Right now, we just want them to be
able to use a pencil.
Segment 2:
3. Ask each one in turn to use his/her finger to point to the text
as you read it aloud. Read the first line aloud and have the
pupil point to the words as you say read them, moving his
or her finger from right to left. You can guide the pupil’s
hand if need be.
4. Ask the second pupil to point to a word (any word) in the
text. Ask the pupil to point to the space on either side of
the word.
5. Read a line from the text aloud and ask the third pupil to
point to where you go after you finish reading the line.
(The pupil should point to the first word on the left in the
line below.)
6. Ask the fourth student to pick up the book you have been
using for demonstration and point to the cover.
7. Ask the fifth pupil to show you how to turn the pages of the
book.
8. Ask the class what the words on a page do. The correct
response is that they tell you what is going on.
9. Ask the pupils if pictures are enough to tell a story? The
correct answer is no, they are usually not enough; the words
tell you what is happening. The pictures help you to
understand.
Segment 3:
10. Ask the pupils to read the text aloud after you; read the
whole text, moving your finger along under the text as you
read it, going from line to line.
SEL Message: It is important to know each other and call each
other by name. Ask each pupil to hold up his or her name tag and
tell the whole class his or her name. It is nice when everyone can
call each other by name in class.
Education Crisis Response - Facilitator’s Guide
23 | Part 1 – Reading lessons
Step &
Icons
Time Activity procedure
10 minutes Performance (Assessment)
1. Ask all the pupils to look at their name tags. Have them put
their fingers at the beginning of their name. They should
deduce the beginning as being at the left side of the card.
Ask them to say their name and move their finger along the
bottom of the name as they say it. They should move their
fingers from left to right.
2. Read a line of text from the text on the board and move
your finger from left to right under the text. Ask the pupils
if this is the right direction. (The answer is yes.)
3. Read a line of text on the board but move your finger under
it from right to left. Ask pupils if this is the right direction.
(The answer is no.)
5 minutes Conclusions/Review
1. Tell the children that they have done very well and are all
going to be very good readers.
2. Remind them that we learned the parts of a book and in
what direction to read text. We also learned how to hold a
pen or pencil and make marks on a paper.
Reflection: Facilitator, write down notes for yourself on this lesson. Did you enjoy the
lesson? How do you think we can improve on it? If you make some notes, then when you
teach this lesson again, you will remember what worked well and where you found some
challenges. This will help you to improve the lesson next time you teach it.
Education Crisis Response - Facilitator’s Guide
24 | Part 1 – Reading lessons
Quick start reading lesson #2 - Recognizing and Manipulating Sounds.
Skills: Phonological Awareness: 1) Alliteration and rhyme, 2) Sentence segmentation.
Time: 65 minutes
Learning Objectives: At the end of the lesson, learners should be able to recognize
rhyming words and make rhymes. Learners will also identify word boundaries in spoken
sentences.
Materials: chalk, chalkboard, phrase, song or text written on the board or a piece of paper; if
possible, a few story books or primers to be used for demonstration and practice.
Facilitator’s Tips:
Make sure the pupils can see your mouth as you pronounce and break down
the words into sounds in this lesson.
Important Ideas:
In order to read, pupils need to hear the sounds in the words they use; they
need to be able to hear and distinguish the individual sounds. These next few
lessons on phonological awareness are not about the alphabet or even about
writing; they are about how sounds are heard.
SEL Ideas:
Getting to know one another.
Step &
Icons
Time Activity procedure
10 minutes
Introduction
1. Say good morning to the children and welcome them. Give
all the children the name tag you have prepared.
2. Ask the pupils if they remember what they learned in the
last lesson. Listen to their replies.
3. Point to the text that you read them yesterday. Read it
again. (It should be on the board or a piece of paper before
class begins. It should be large enough so that all pupils
can see it.)
Masu hikima sun ce:
Bemu bay a hana ilimi
Bay aba ta da kaxan
Gaba ta fi baya yawa
Matambayi bay a vata
Komai nisan jifa kasa zai faxo
Gava ba ta motsawa banza
Kyawun alkawari cikawa
Wuyar aiki ba a soma ba
Mai kishin abu biyu bay a koshi; ilimi
da dukiya.
Education Crisis Response - Facilitator’s Guide
25 | Part 1 – Reading lessons
Step &
Icons
Time Activity procedure
4. Ask the pupils if they remember it. Ask them to help you
point to the words as you read them. Read the text, moving
your finger under the words from left to right. At the end
of each line, move your finger to the first word on the left
of the line below. Call pupils’ attention to how the text
flows.
5. Ask pupils to pick up their pencils. Have them practice
making lines and shapes in their notebook for a minute, to
warm them up.
6. Tell them they did a good job. Tell them today we are
going to look more closely at words and where they begin
and end. We are also going to see how words can rhyme.
15 minutes
Presentation: Facilitator presents and demonstrates the lesson
content for the pupils.
1. Read the first sentence of the text on the board and ask the
pupils how many words are in that sentence. Take several
answers. (The answer is 4.)
2. Have a student come forward and count the words.
3. Ask the pupils how they know where one word stops and
another begins. (Answer: spaces between the words; some
might say they recognize full-stops or periods. Praise them
if they say this.)
4. Point out that there are spaces between words; even if they
cannot read the words yet, help them to see that some
spaces are bigger than others; words have spaces between
them. This is how you can tell where one word stops and
another one starts.
5. Words are made up of sounds. In this part of the lesson, we
are going to identify the sounds we hear in some words.
We will say the words really slowly so we can hear each
sound in the word. This is called segmenting the word.
Ask them what is the first sound they hear in the following
words:
Noma
Kano
Saka
Tafi
Rawa
Daka
Fere
Tsalle
Go back to the beginning of the list. Take the first word—
Noma—and ask the pupils how many sounds they hear in this
Education Crisis Response - Facilitator’s Guide
26 | Part 1 – Reading lessons
Step &
Icons
Time Activity procedure
word? /n/ /o/ /m/ /a/ (4 sounds). Do this with the other words.
Keep in mind that in the word boom, there are 3 sounds not 4
even though there are 4 letters.
Boom
Wanka
Gudu
Yanka
Leka
Ci
Hamma
Shiru
Vare
Auna
Xandano
Ji
Zane
kirga
Kwalo
Kyau
kwai
kyama
Gwanda
Gyara
Aisha
6. Next, demonstrate that with some words they can substitute
one sound for another. Give them the example of:
Ba
Ya
Ta
Ka
Ma
Da
Wa
Na Point out that if you change the first sound in these words, you get
different words. Ask them for more examples: ga, za, sa, fa, ra,
ha, la, ja, xa, va, ka, etc
This is called rhyme.
5 minutes
Practice: The children have a chance to practice what they
have learned; they can practice individually, in pairs, in
groups or as a whole class.
Segment 1:
1. Write a set of words on the board, with spaces between
them. Have pupils come to the board to point to words.
They do not need to know what the word says, but should
Education Crisis Response - Facilitator’s Guide
27 | Part 1 – Reading lessons
Step &
Icons
Time Activity procedure
5 minutes
5 minutes
10 minutes
recognize word boundaries—i.e. where a word starts and
ends.
2. Pair the pupils with a partner seated near them. Have each
pair do the following:
1 partner says a word and the second partner segments it,
counting out the sounds;
After a minute, have them switch roles.
3. Next, ask the children to each think of a word, say it aloud
and count the number of sounds they hear.
4. Go around the room and make sure they are correctly
identifying the word sounds they hear.
Segment 2:
5. Say a word to each child and ask that child to put a new
sound at the beginning of the word. Examples you can use
include:
Bi , fi
Yo, ko
Bu, tu
Ke, te
Nu ,wu
Li, ji Etc.
The purpose is to replace the initial sound with a new sound; the
pupils do not have to create correct new words; they just have to
replace one sound with another.
Segment 3:
6. Lastly, still in their pairs, have children alternate in saying
a word that starts with a /b/ sound; then have them do this
with an /m/ sound
Examples could include: ba, bi, bo, bu, be, baba, babi,
babu, bubu, bebe etc.
Examples could include: ma, mi, mo, mu, me, mama,
mata, mako, mita, miki, mubi, etc.
7. Tell them they did a great job.
SEL Message: Ask the pupils to take turns pointing to a colleague
in the class and slowly saying that person’s name; for example: aaa
mmm iii nnn aaa (Amina) or Mmm ooo hhh aaa mmm eee ddd
(Mohamed). Make sure everyone has a turn. This is a good way
to help the pupils learn each others’ names and practice in hearing
the individual sounds in words.
10 minutes Performance (Assessment)
1. Ask pupils to replace the first sound in the word mama;
have some tell you what they came up with. Possible
replies could include; dama, sama, yama, bama, lama,
etc.

Education Crisis Response - Facilitator’s Guide
28 | Part 1 – Reading lessons
Step &
Icons
Time Activity procedure
2. Do the same with the word ware. Possible replies could
include zare, dare, vare, etc. The pupils do not need to
make words but rather just to replace the initial sound.
3. Say a word and have pupils identify the number of sounds
in the word: maxe (4), cida (4), soja (4), ka (2), uba (3),
ye (2), etc.
5 minutes Conclusions/Review 1. Tell the children that they have done very well and that
they should tell their parents that they know how to
identify the sounds in words, which is an important skill in
learning to read. Ask them for examples of how they will
show this skill to their parents.
2. Read aloud the text on the board with the pupils repeating
it after you.
Reflection: Facilitator, write down notes for yourself on this lesson. Did you enjoy the
lesson? How do you think we can improve on it? If you make some notes, then when you
teach this lesson again, you will remember what worked well and where you found some
challenges. This will help you to improve the lesson next time you teach it.
Education Crisis Response - Facilitator’s Guide
29 | Part 1 – Reading lessons
Quick start reading lesson #3 - Recognizing and Manipulating Sounds.
Skills: Phonological Awareness continued: 3) Syllable segmentation, 4) Onsets and rimes.
Time: 65 minutes
Learning Objectives: At the end of the lesson, learners should be able to clap out syllables
in words. Learners will also be able to segment onsets from rimes in single syllable words.
Materials: chalk, chalkboard, phrase, song or text written on the board or a piece of paper; if
possible, a few story books or primers to be used for demonstration and practice.
Facilitator’s Tips:
Saying a word so that you can hear all the letter sounds is called segmenting;
saying a word more quickly so that it sounds like a word and the sounds flow is
called blending.
Important Ideas:
In order to read, pupils need to hear the sounds in the words they use; they
need to be able to hear and distinguish the individual sounds. These next few
lessons on phonological awareness are not about the alphabet or even about writing;
they are about hearing sounds.
SEL Ideas: Getting to know one another.
Step &
Icons
Time Activity procedure
10 minutes
Introduction
1. Say good morning to the children and welcome them. Give
all the children the name tag you have prepared.
2. Ask the pupils if they remember what they learned in the
last lesson. Listen to their replies.
3. Point to the text that you read them yesterday. Read it
again. (It should be on the board or a piece of paper before
class begins. It should be large enough so that all pupils
can see it.)
Masu hikima sun ce:
Bemu bay a hana ilimi
Bay aba ta da kaxan
Gaba ta fi baya yawa
Matambayi bay a vata
Komai nisan jifa kasa zai faxo
Gava ba ta motsawa banza
Kyawun alkawari cikawa
Wuyar aiki ba a soma ba
Mai kishin abu biyu bay a koshi; ilimi
da dukiya.
4. Ask the pupils if they remember it. Ask them to help you
point to the words as you read them. Read the text, moving
Education Crisis Response - Facilitator’s Guide
30 | Part 1 – Reading lessons
Step &
Icons
Time Activity procedure
your finger under the words from left to right. At the end
of each line, move your finger to the first word on the left
of the line below. Call pupils’ attention to how the text
flows.
5. Ask pupils to pick up their pencils. Have them practice
making lines and shapes in their notebook for a minute, to
warm them up.
6. Tell them they did a good job. Tell them today we are
going to listen to words and clap out syllables.
15 minutes
Presentation: Facilitator presents and demonstrates the lesson
content for the pupils.
7. Look at the first line of the text on the board:
Masu hikima sun ce
8. Ask the pupils if they can hear a beat in the words:
Ma-su hi-ki-ma sun ce
9. This line has 7 beats in it. Beats are called syllables. Clap
out the following syllables by word:
Ma-ma
Ba-ba
Fe-da
Ge-fe
Zo-mo
Ta-fi-ya
A-su-su
Have the pupils clap out more words; call out a word and have the
class clap out the syllables. Do this with them to model it.
Say a list of words that start with the same letter:
Sa, saye, sabo, sama, sisi, sito.
Ask them if they can do the same with the sound /g/.
Ask them to do the same with the sound /f/.
This is called alliteration, when the words all start with the same
first sound.
Point out that if you change the first sound in these words, you get
different words. Ask them for more examples: ga, za, sa, fa, ra,
ha, ma, ja, xa, va, ka, etc.
Ask them for other words where they can change a letter in the
beginning to get a new word.
Practice: The children have a chance to practice what they
have learned; they can practice individually, in pairs, in
groups or as a whole class.
Education Crisis Response - Facilitator’s Guide
31 | Part 1 – Reading lessons
Step &
Icons
Time Activity procedure
5 minutes
5 minutes
5 minutes
10 minutes
Segment 1:
1. Write a set of words on the board, with spaces between
them. Have pupils come to the board to point to words.
They do not need to know what the word says, but should
recognize word boundaries—i.e. where a word starts and
ends.
2. Pair the pupils with a partner seated near them. Have each
pair do the following:
1 partner says a word and the second partner segments it,
counting out the sounds;
After a minute, have them switch roles
3. Next, ask the children to each think of a word, say it aloud
and count the number of sounds they hear.
4. Go around the room and make sure they are correctly
identifying the word sounds they hear.
Segment 2:
5. Say a word to each child and ask that child to put a new
sound at the beginning of the word. Examples you can use
include:
Bi, fi
Yo, ko
Bu ,tu
Ke ,te
Nu, ru
Li , ji
Etc.
The purpose is to replace the initial sound with a new sound; the
pupils do not have to create correct new words; they just have to
replace one sound with another.
Segment 3:
6. Lastly, still in their pairs, have children alternate in saying
a word that starts with a /b/ sound; then have them do this
with an /m/ sound
Exasmples could include: ba, bi, bo, bu, be, baba, babi,
babu, bubu, bebe, etc.
Examples could include: ma, mi, mo, mu, me, mama, mata,
mako, mita, miki, mubi, etc.
7. Tell them they did a great job.
SEL Message: Ask the pupils to take turns pointing to a colleague
in the class and slowly saying that person’s name; for example: aaa
mmm iii nnn aaa (Amina) or Mmm ooo hhh aaa mmm eee ddd
(Mohamed). Make sure everyone has a turn. This is a good way
to help the pupils learn each others’ names and practice in hearing
the individual sounds in words.

Education Crisis Response - Facilitator’s Guide
32 | Part 1 – Reading lessons
Step &
Icons
Time Activity procedure
10 minutes Performance (Assessment)
1. Ask pupils to replace the first sound in the word mama;
have some tell you what they came up with. Possible
replies could include; dama, sama, yama, bama, lama,
etc.
2. Do the same with the word ware. Possible replies could
include zare, dare, vare, etc. The pupils do not need to
make words but rather just to replace the initial sound.
3. Say a word and have pupils identify the number of sounds
in the word: mace (4), cida (4), soja (4), ka (2), uba (3),
ye (2), etc.
5 minutes Conclusions/Review 1. Tell the children that they have done very well and they
should tell their parents that they know how to identify the
sounds in words, which is an important skill in learning to
read. Ask them for examples of how they will show this
skill to their parents.
2. Read aloud the text on the board with the pupils repeating
it after you.
Reflection:
Facilitator, write down notes for yourself on this lesson. Did you enjoy the lesson?
How do you think we can improve on it? If you make some notes, then when you
teach this lesson again, you will remember what worked well and where you found
some challenges. This will help you to improve the lesson next time you teach it.
Education Crisis Response - Facilitator’s Guide
33 | Part 1 – Reading lessons
Quick start reading lesson #4 - Recognizing and Manipulating Sounds
Skills: Phonemic awareness: Blending and separating sounds in words.
Time: 65 minutes
Learning Objectives: At the end of the lesson, learners should be able to segment and
blend individual sounds in words. Learners will be able to identify the beginning, middle, and
ending sounds in words. Learners will also be able to manipulate sounds in words to make
new words.
Materials: chalk, chalkboard, phrase, song or text written on the board or a piece of paper; if
possible, a few story books or primers to be used for demonstration and practice.
Facilitator’s Tip:
Saying a word so that you can hear all the letter sounds is called segmenting;
saying a word more quickly so that it sounds like a word and the sounds flow is
called blending.
Important Ideas:
In order to read, pupils need to hear the sounds in the words they use; they
need to be able to hear and distinguish the individual sounds. These lessons on
phonological awareness are not about the alphabet or even about writing; they are about
hearing sounds.
Getting to know one another.
Step &
Icons
Time Activity procedure
10 minutes
Introduction
1. Say good morning to the children and welcome them. Give
all the children the name tag you have prepared.
2. Ask the pupils if they remember what they learned in the
last lesson. Listen to their replies.
3. Point to the text that you read them yesterday. Read it
again. (It should be on the board or a piece of paper before
class begins. It should be large enough so that all pupils
can see it.)
Masu hikima sun ce
Bemu bay a hana ilimi
Bay aba ta da kaxan
Gaba ta fi baya yawa
Matambayi bay a vata
Komai nisan jifa kasa zai faxo
Gava ba ta motsawa banza
Kyawun alkawari cikawa
Wuyar aiki ba a soma ba
Mai kishin abu biyu bay a koshi; ilimi
da dukiya.
Education Crisis Response - Facilitator’s Guide
34 | Part 1 – Reading lessons
Step &
Icons
Time Activity procedure
4. Ask the pupils if they remember it. Ask them to help you
point to the words as you read them. Read the text,
moving your finger under the words from left to right. At
the end of each line, move your finger to the first word on
the left of the line below. Call pupils’ attention to how the
text flows.
5. Ask pupils to pick up their pencils. Have them practice
making lines and shapes in their notebook for a minute, to
warm them up.
6. Tell them they did a good job. Tell them today we are
going to look more closely at words and where they begin
and end. We are also going to see how words can rhyme.
15 minutes
Presentation: Facilitator presents and demonstrates the
lesson content for the pupils.
1. Tell pupils that words are combination of sounds like:
Masu : mmm aaa sss uuu
Hikima: hhh iii kkk iii mmm aaa
Sun: sss uuu nnn
Ce: ccc eee
Ask them to repeat after you. Say these words again, drawing
them out so pupils hear all the sounds in the word.
M – a –s – u
H-i-k—i-m-a
S-u-n
c-e
2. Tell them that to hear all the sounds in a word, you have
to say it slowly, emphasizing each sound. Ask them to do
this for other words: mama, dare, hudu, kura. Ask them
for other words and have them say them slowly,
segmenting the sounds.
3. For each word, repeat it slowly and ask the children what
sounds they hear
/m/ /a/ /s/ /u/
/h/ /i/ /k/ /i/ /m/ /a/
/s/ /u/ /n/
/c/ /e/
The pupils only need to make the sounds they hear.
You do not need to write anything.
4. Next, for the word masu, ask the pupils the first sound
they hear. Have them repeat it.
5. Ask the pupils if they hear the /m/ sound in more than one
word of the four above. Ask them if they hear the /i/
sound more than once.
Education Crisis Response - Facilitator’s Guide
35 | Part 1 – Reading lessons
Step &
Icons
Time Activity procedure
6. Pupils will not know the letter but this is ok. Your goal is
to have them begin to hear all of the individual sounds in
the words. This is called segmenting. Have them
segment the other words they have given you so that they
can hear all the sounds in the word.
7. Now, have them say the words faster, as if they would
when speaking. When they say the word normally again
they put the sounds all back together. This is called
blending.
5 minutes
.
Practice: The children have a chance to practice what they
have learned; they can practice individually, in pairs, in
groups or as a whole class.
Segment 1:
1. Put the pupils in pairs.
2. Next, ask each pair what sound they hear first in the
following words. Have one person tell the word to his or
her partner and make the first sound of the word.
3. Now, have the other pupil in the pair segment out the
whole word, saying it slowly.
4. Have the first partner blend the word back again, saying it
normally.
5. Have them switich roles and go through all the words
below.
Noma
Kano
Saka
Tafi
Rawa
Daka
Fere
Tsalle
Boom
Wanka
Gudu
Yanka
Leka
Ci
Hamma
Shiru
Vare
Auna
Xandano
Ji
Zane
Kirga
Education Crisis Response - Facilitator’s Guide
36 | Part 1 – Reading lessons
Step &
Icons
Time Activity procedure
5 minutes
5 minutes
10 minutes
Kwalo
Kyau
Kwai
Kyama
Gwanda
Gyara
Aisha
Segment 2:
8. Next, ask the children to each think of a word, say it aloud
and count the number of sounds they hear.
9. Go around the room and make sure they are correctly
identifying the word sounds they hear.
10. Say a word to each child and ask that child to put a new
sound at the beginning of the word. Examples you can use
include:
Bi, fi
Yo, fo
Bu, fu
Ke ,ke
Nu ,wu
Li, ji
Etc.
The purpose is to replace the initial sound with a new sound; the
pupils do not have to create correct new words; they just have to
replace one sound with another.
Segment 3:
11. Lastly, still in their pairs, have children alternate in saying
a word that starts with a /n/ sound; then have them do this
with an /t/ sound
Examples could include: ba, bi, bo, bu, be, baba, babi,
babu, bubu, bebe etc.
Examples could include: ma, mi, mo, mu, me, mama,
mata, mako, mita, miki, mubi, etc.
12. Tell them they did a great job.
SEL Message: Ask the pupils to take turns pointing to a
colleague in the class and slowly saying that person’s name; for
example: aaa mmm iii nnn aaa (Amina) or Mmm ooo hhh aaa
mmm eee ddd (Mohamed). Make sure everyone has a turn. This
is a good way to help the pupils learn each others’ names and
practice in hearing the individual sounds in words.
Education Crisis Response - Facilitator’s Guide
37 | Part 1 – Reading lessons
Step &
Icons
Time Activity procedure
10 minutes Performance (Assessment)
1. Ask pupils to replace the first sound in the word mama;
have some tell you what they came up with. Possible
replies could include; dama, sama, yama, bama, lama,
etc.
2. Do the same with the word ware. Possible replies could
include zare, dare, vare, etc. The pupils do not need to
make words but rather just to replace the initial sound.
3. Say a word and have pupils identify the number of sounds
in the word: mace (4), cida (4), soja (4), ka (2), uba (3),
ye (2), etc. This will mean they have to segment out the
sounds to count them.
4. Ask pupils to segment their names and have each one tell
you how many sounds are in his or her name.
5 minutes Conclusions/Review 1. Tell the children that they have done very well and that
they should tell their parents that they know how to
identify the sounds in words, which is an important skill in
learning to read. Ask them for examples of how they will
show this skill to their parents.
2. Read aloud the text on the board with the pupils repeating
it after you.
Reflection: Facilitator, write down notes for yourself on this lesson. Did you enjoy the
lesson? How do you think we can improve on it? If you make some notes, then when you
teach this lesson again, you will remember what worked well and where you found some
challenges. This will help you to improve the lesson next time you teach it.
Education Crisis Response - Facilitator’s Guide
38 | Part 1 – Reading lessons
Quick start reading lesson #5 - Consonants, letter N n
Skills: Phonemic awareness, letter N; phonics, letter N n.
Time: 65 minutes
Learning Objectives: At the end of the lesson, learners should have
mastered the sound of the letter, pronounce it, be able to identify it and
write it, (upper and lower case).
Materials: chalk, chalkboard, song or text written on the board or a piece of paper, alphabet
chart.
Previous Knowledge: concepts of print; sounds and syllables.
Facilitator’s Tips: Oral language is an important part of learning to read. Make
sure that the pupils have a chance to speak in the classroom, especially during the
SEL segment.
Important Ideas: Explain to the pupils that big letters (capital letters) are used to
start a sentence and for names (of people and places—e.g. Nurudeen and Nigeria.
Small letters are used for everything else. Do not belabor the point—simply show
pupils that in Hausa, letters have two forms—big and small, but that we are not
going to worry about that too much right now; we just need to know how to write and
recognize both.)
SEL Ideas: Ban girma—respect in English, is a very important idea in our
lives We must give respect to others and others must respect us. This phrase has
the letter N in it.
Step &
Icons
Time Activity procedure
10 minutes
Introduction
1. Give all the children the name tags you have prepared. Tell
them that every day, they should pick out their name tag
and keep it during the class. If the pupils have desks, have
them display the name tag on the desk.
2. Explain the Concept of Reading to Children:
“Pupils, it is very important to know how to read and write.
Reading and writing are skills you need in your life.
We are going to begin to learn all the letters of the alphabet.
We are going to learn the names of the letters, the sound a
letter makes, see what different letters look like and practice
writing them.”
3. Write the following morning message on the board (before
class begins):
Bin na gaba bin Allah.
Mai nema yana tare da samu.
Ba a nema da zafi saboda zafin nema baya kawo samu.
N n
Education Crisis Response - Facilitator’s Guide
39 | Part 1 – Reading lessons
Step &
Icons
Time Activity procedure
4. Ask the pupils if they know what the text means. Explain it
to them briefly and try to engage them and relate it to their
own experiences.
Next, underline the letter n wherever it appears.
5. Read the phrase on the board slowly, pointing at each word
as you say it. Do this three times. Ask the pupils to say the
phrase with you. Point to the words as you say the phrase.
6. Point to the letter n in some of the words. Now, ask the
pupils to make the sound /n/. Have them repeat it several
times. Point to the letter and tell them that we are going to
learn the letter N n today.
15 minutes
5 minutes
5 minutes
Presentation: Facilitator presents the new letter and
involves children by repeating the sound of the letter and
having them write it.
1. Write the letter on the board: N and n. Tell the
students this is the letter N n. Tell pupils the letter
name. Ask them to repeat it.
2. Point to the consonant n and ask them if they know
what sound it makes. Give them an example of the
sound. Walk around the class letting the pupils see
your mouth making the /n/ sound.
3. Ask the children to write a large N and a small n in their
notebook. Go around and look at what the children
write, helping those who need assistance.
4. Say the sound yourself several times. Explain that the
big N and the little n still make the same sound.
Practice: The children have a chance to practice the letter
sound and writing with the teacher, in small groups, pairs
or individually.
First segment (learning the sound)
1. Put children in pairs; one partner says the letter sound
/n/and the other says the letter name N. After a minute,
have them switch roles.
2. Facilitator, go around the classroom to listen and know
if the pairs are doing well with the sound and the letter
name.
3. Pick some pairs to demonstrate after they have worked
for a minute or two.
4. Have the pupils stand up and make the letter sound N n
10 times while shrugging their shoulders.
5. Tell them they did a great job.
Second segment (hearing the sound in words)
Education Crisis Response - Facilitator’s Guide
40 | Part 1 – Reading lessons
Step &
Icons
Time Activity procedure
5 minutes
10 minutes
6. Ask pupils what other words they know that start with
the same sound. (They may give you a word from the
phrase above that starts with /n/ or another word they
know.) Write all these on the board.
7. Congratulate them as hopefully they have given you
some examples of words that start with /n/. If they have
not, give them some examples yourself and write these
on the board. Point out the N words in the morning
message as well. Some words you can use are: nana,
namu, naka, nesa, nufi
8. Tell them that the sound /n/ can occur in different
places in the word. Ask them for words where the /n/ is
in the middle of the word. Write those on the board.
(Examples: tunani, and wani, etc.)
9. Point to the words on the board and say them in unison
with the children, emphasizing the/n/ sound.
10. Ask everyone in the class whose given name starts with
N to stand up; have them say their name, emphasizing
the /n/ sound. Write the names on the board.
11. Ask everyone who has an /n/ sound in their family
name to stand up. Have them say their name so
everyone can hear the /n/ sound. Point out where the /n/
sound occurs.
Segment 3 (recognizing the N n in print)
12. Point to the text above that you used in the introduction.
13. Recite it at least two more times, pointing to the words
as you say them;
14. Have the pupils recite the phrase with you a few times.
15. Ask the pupils to look at the text and tell you how many
words in the phrase contain the letter N n. Point out
again that the sound /n/ can occur at the middle or end
of words. Point to the words you wrote on the board
earlier that have an N n in them.
16. Ask several pupils to come forward and point to the
letter N n in one of the words on the board.
17. Have all the pupils stand up and use their finger to write
a big N in the air. Have them write a small n in the air.
18. Tell them they all did a great job.
SEL Message: Tell the pupils that the word ban girma has a
letter N in it. Ask them if they can point to the n. Ask them
what the word means. Let several children respond.
Encourage them to speak. Ask them who they respect most?
How do they show respect to that person or persons?
Education Crisis Response - Facilitator’s Guide
41 | Part 1 – Reading lessons
Step &
Icons
Time Activity procedure
10 minutes Performance (Assessment)
1. Have everyone whose surname starts with N stand up
and make a letter n in the air using their finger.
2. Call on various children (boys and girls) to give you the
sound /n/or the letter name or point to N n on the
alphabet chart.
3. Have everyone write a line of N n in their notebook.
Go around and help children as needed.
5 minutes Conclusions/Review 1. Tell children that they now know the name and the
sound of the letter N n. They also know how to write it.
Tell them many words start with the N n sound and they
have listed some of them.
2. Chant the phrase on the board one last time, pointing to
the words as the pupils sing/chant.
Reflection: Teacher, write down notes for yourself on this lesson. Did you enjoy the lesson?
How do you think we can improve on it? If you make some notes, then when you teach this
lesson again, you will remember what worked well and where you found some challenges.
This will help you to improve the lesson next time you teach it.

Education Crisis Response - Facilitator’s Guide
42 | Part 1 – Reading lessons
Quick start reading lesson #6 - Vowel, letter A a (long and short)
Skills: Phonemic awareness, letter A; phonics, letter A a.
Time: 65 minutes
Learning Objectives: At the end of the lesson, learners should have
mastered the sound of the letter, both long and short, pronounce it, be
able to identify it and write it, (upper and lower case).
Materials: chalk, chalkboard, song or text written on the board or a piece of paper, alphabet
chart.
Previous Knowledge: concepts of print, sounds and syllables, letter n.
Facilitator’s Tips:
Be sure to have your alphabet chart displayed in your classroom. It should
have each letter written in capital and small forms. It is important for pupils to
see print in their environment; this helps them to learn to read. Be sure to refer to your
alphabet chart and to write the text of the day clearly on the board so pupils can see it.
Important Ideas:
Vowels are important letters because they are found in almost all words.
Vowels can be pronounced in two ways in Hausa—with a short sound and with a
long sound.
SEL Ideas: Making choices; being able to choose—Zabi--has the A sound in it.
So does the word makaranta. It is a good choice to come to school and learn to
read.
Step &
Icons
Time Activity procedure
10 minutes
Introduction
1. Say good morning to the children and welcome them.
Give all the children the name tag you have prepared.
2. Ask them if they remember their letter from yesterday.
3. Write the following morning message on the board:
Auta ya sa sabon agogo mai bada lokaci.
Auta bai yi letti zuwa makaranta yau ba
Read the phrase on the board slowly, pointing at each word as
you say it. Do this three times. On the third time, stop at the first
letter A and ask students what sound they hear. Have them make
the sound and tell them it is the short letter A a; have them repeat
the sound after you. Do this for the short vowel sounds.
Continue to a word that has a long A a in it; ask the students to
make that sound and repeat it after you several times.
Tell them that we are going to learn the letter A a today. Tell
them that Aa is a vowel and vowels are very useful letters as
almost all words have vowels.
A a
A
Education Crisis Response - Facilitator’s Guide
43 | Part 1 – Reading lessons
Step &
Icons
Time Activity procedure
15 minutes
5 minutes
Presentation: Facilitator presents the new letter and involves
children by repeating the sound, the letter and having them
write it.
1. Write the letter on the board: A and a.
2. Tell the students this is the letter A; ask them what sound
it makes? Congratulate them as hopefully some have
remembered from the morning message.
3. Tell them that Aa can make two sounds. One is called
short Aa and one is called long A a.
4. Say the two sounds yourself several times. Ask pupils if
they can hear the difference. Have them repeat the
sounds several times.
5. Ask them what other words they know that start with the
short /a/ sound. Amina, Anan, Azura all start with a short
/a/ sound.
6. Ask them what words they can think of that start with a
long /a/ sound. Examples include: Aure, Audu, Ango
7. Ask them what words they know that have a short /a/
sound in the middle of them: jaka (bag) and baki (mouth)
are examples you can use.
8. Now say the words jaki (ass or donkey) and baka (black)
to them with the long /a/ sound on the first A. These are
two different words than the first two because the /a/
sound is different. .
9. Make two columns on the board, one that has the heading
short a and the other that has the heading long a. Ask the
pupils for examples of words that could fit under either of
these headings. (Some words might have both a short and
a long /a/ sound in them. You can put those in the middle
between the columns. Examples you can use are:
amana,azare,ashana etc.
10. Explain that in writing, the big A and the small a still
make the same sounds, both long and short.
Practice: The children have a chance to practice the letter
sound and writing with the teacher, in small groups, pairs or
individually.
First segment (learning the sound)
1. Put children in pairs; one partner says the letter sounds /a/
(long and short) and the other says the letter name A.
After a minute, have them switch roles.
2. Facilitator, goes around in the classroom to listen and see
if the pairs are doing well with the sound and the letter
name.
3. Pick some pairs to demonstrate after they have worked
for a minute or two.
Education Crisis Response - Facilitator’s Guide
44 | Part 1 – Reading lessons
Step &
Icons
Time Activity procedure
5 minutes
5 minutes
4. Have the pupils stand up and make the letter sound A a 10
times while hopping on their right foot. (5 times short a
and five times long a)
5. Tell them they did a great job.
Second segment (hearing the sound in words)
6. Ask pupils what other words they know that start with A,
either short or long. (They may give you a word from
the phrase above that starts with A a or another word they
know.) Write all these on the board.
7. Congratulate them as hopefully they have given you some
more examples of words that start with A a. If they have
not, give them some examples yourself and write these on
the board. Some words you can use are: azumi, acaba,
alheri etc.. Ask them which ones start with a long A and
which start with a short A. Have pupils tell you which
column (from the presentation) you should list the
different words under. Move the words with help from
the pupils.
8. Remind them that we said the sound /a/ can occur in
different places in the word. Ask them for words where
the /a/ is in the middle of the word. Write those on the
board. Examples include: lafiya, bana, salla, marko, etc.
Ask them for examples of where the sound /a/ comes at
the end of a word. Examples include: sa, ya, bada, auta,
etc.
9. Ask them to identify the long and short /a/ sounds in the
words they just named. Move them under the appropriate
columns.
10. Remind them that whether the /a/ is long or short it can
change the meaning of a word. Point to the words you
wrote earlier: jaka and jaki and baki and bakaa. When the
A a is long the word jaki (donkey) means something
different than when it is short (bag)
11. Point to the words on the board again and say them in
unison with the children, emphasizing the two /a/ sounds.
12. Ask everyone in the class whose given name starts with A
to stand up; have them say their name, emphasizing the
/a/ sound. Write the names on the board.
13. Ask everyone who has an /a/ sound in their family name
to stand up. Have them say their name so that everyone
can hear the /a/ sound. Point out where the /a/ sound
occurs.
Segment 3 (recognizing the A a in print)
14. Point to the phrase written out on a piece of paper or the
chalkboard that you used in the introduction.
Education Crisis Response - Facilitator’s Guide
45 | Part 1 – Reading lessons
Step &
Icons
Time Activity procedure
10 minutes
Auta ya sa sabon agogo mai bada lokaci.
Auta bai yi leti zuwa makaranta yau.
15. Recite it at least two times, pointing to the words as you
say them;
16. Have the pupils recite the phrase with you a few times.
17. Ask the pupils to look at the text and tell you how many
words in the phrase contain the letter A a. Point out again
the sound A a can occur at the middle or end of words.
Point to the words you wrote on the board earlier that
have an A a in them.
18. Ask several pupils to come forward and point to the letter
A a in one of the words on the board.
19. Have all the pupils stand up and use their finger to write a
big A in the air. Have them write a small a in the air.
20. Tell them they all did a great job.
SEL Message: We are all lucky to have the chance to get
education. This is a wise choice. Zabi is the word for choice and
it has an /a/ in it. Sometimes we do not have choices in life. Ask
the pupils what choices they have made. (They could say they
chose to eat something particular, they chose to run to center; the
objective is to get them to talk because oral language
development is important in learning to read.)
10 minutes Performance (Assessment)
1. Have everyone whose surname starts with A stand up and
make a letter A in the air using their finger.
2. Call on various children (boys and girls) to give you the
sound /a/ or the letter name or point to A a on the
alphabet chart.
3. Have everyone write a line of A a in their notebook.
Circulate and help children as needed.
5 minutes Conclusions/Review
1. Tell children that they now know the name and the sound
of the letter A a. They also know how to write it. Tell
them that many words start with the A a sound and they
have named some of them.
2. Chant the phrase on the board one last time, pointing to
the words as the pupils sing/chant.

Education Crisis Response - Facilitator’s Guide
46 | Part 1 – Reading lessons
Reflection: Teacher, write down notes for yourself on this lesson. Did you enjoy the lesson?
How do you think we can improve on it? If you make some notes, then when you teach this
lesson again, you will remember what worked well and where you found some challenges.
This will help you to improve the lesson next time you teach it.
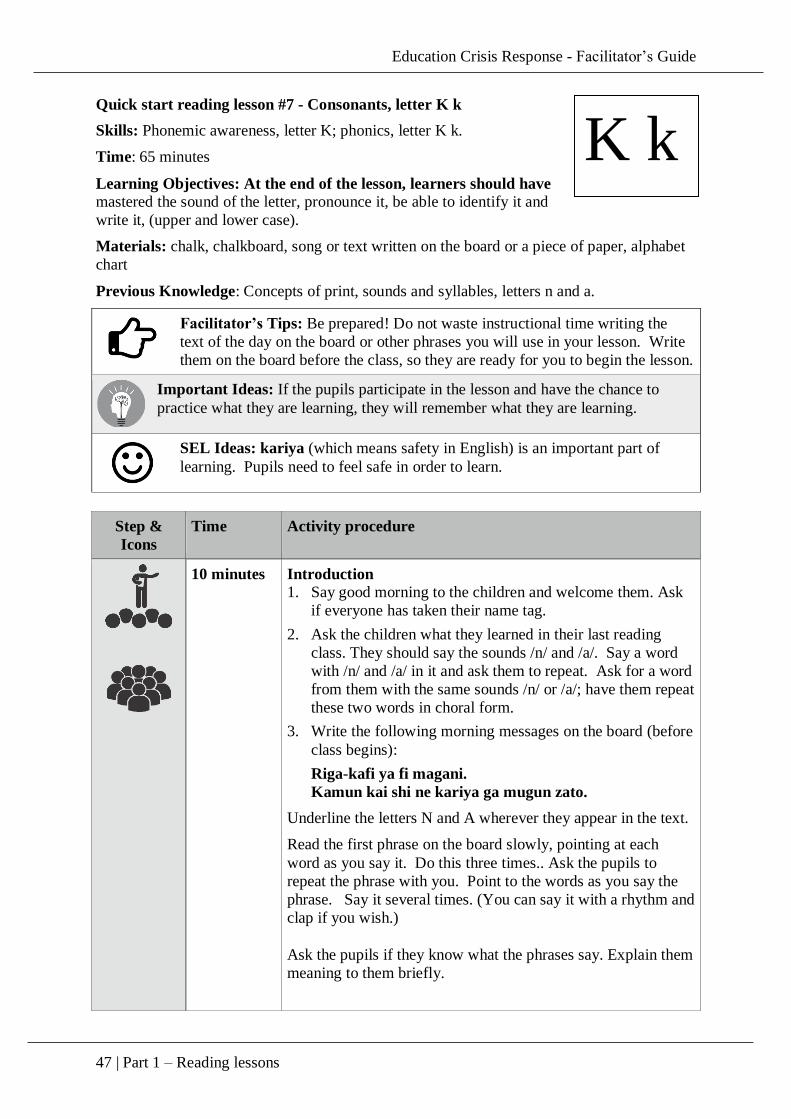
Education Crisis Response - Facilitator’s Guide
47 | Part 1 – Reading lessons
Quick start reading lesson #7 - Consonants, letter K k
Skills: Phonemic awareness, letter K; phonics, letter K k.
Time: 65 minutes
Learning Objectives: At the end of the lesson, learners should have
mastered the sound of the letter, pronounce it, be able to identify it and
write it, (upper and lower case).
Materials: chalk, chalkboard, song or text written on the board or a piece of paper, alphabet
chart
Previous Knowledge: Concepts of print, sounds and syllables, letters n and a.
Facilitator’s Tips: Be prepared! Do not waste instructional time writing the
text of the day on the board or other phrases you will use in your lesson. Write
them on the board before the class, so they are ready for you to begin the lesson.
Important Ideas: If the pupils participate in the lesson and have the chance to
practice what they are learning, they will remember what they are learning.
SEL Ideas: kariya (which means safety in English) is an important part of
learning. Pupils need to feel safe in order to learn.
Step &
Icons
Time Activity procedure
10 minutes
Introduction
1. Say good morning to the children and welcome them. Ask
if everyone has taken their name tag.
2. Ask the children what they learned in their last reading
class. They should say the sounds /n/ and /a/. Say a word
with /n/ and /a/ in it and ask them to repeat. Ask for a word
from them with the same sounds /n/ or /a/; have them repeat
these two words in choral form.
3. Write the following morning messages on the board (before
class begins):
Riga-kafi ya fi magani.
Kamun kai shi ne kariya ga mugun zato.
Underline the letters N and A wherever they appear in the text.
Read the first phrase on the board slowly, pointing at each
word as you say it. Do this three times.. Ask the pupils to
repeat the phrase with you. Point to the words as you say the
phrase. Say it several times. (You can say it with a rhythm and
clap if you wish.)
Ask the pupils if they know what the phrases say. Explain them
meaning to them briefly.
K k
Education Crisis Response - Facilitator’s Guide
48 | Part 1 – Reading lessons
Step &
Icons
Time Activity procedure
Now, ask the pupils to make the sound /k/. Have them repeat it
several times. Point to the letter and tell them that we are going
to learn the letter K k today.
15 minutes
5 minutes
5 minutes
Presentation: Facilitator presents the new letter and
involves children by repeating the sound, the letter and
having them write it.
1. Write the letter on the board: K and k. Tell the students
this is the letter K k. Tell pupils the letter name. Ask them
to repeat it.
2. Point to the consonant k and ask them if they know what
sound it makes. Give them an example of the sound.
Walk around the class letting the pupils see your mouth
making the /k/ sound.
3. Ask the children to write a large K and a small k in their
notebook. Go around and look at what the children write,
helping those who need it.
4. Say the sound yourself several times. Explain that the big
K and the small k still make the same sound.
5. Read the following phrase to the pupils (it should be
written on the board in advance of the lesson.)
Ka kare kanka daga cuta ya fi ka nemi magani
Point at each word as you read it aloud. Ask the pupils to point
to the different K k letters they see in this phrase. (You can
have some come to the board to do this.)
Practice: The children have a chance to practice the letter
sound and writing with the teacher, in small groups or
pairs or individually.
First segment (learning the sound)
1. Put children in pairs; one partner says the letter sound
/k/ and the other says the letter name K. After a minute,
have them switch roles.
2. Facilitator, circulate in the classroom to listen that the
pairs are doing well with the sound and the letter name.
3. Pick some pairs to demonstrate after they have worked
for a minute or two.
4. Have the pupils stand up and make the letter sound /k/
10 times shaking their body.
5. Tell them they did a great job.
Second segment (hearing the sound in words)
6. Ask pupils what other words they know that start with
the same sound. (They may give you a word from the
Education Crisis Response - Facilitator’s Guide
49 | Part 1 – Reading lessons
Step &
Icons
Time Activity procedure
5 minutes
10 minutes
phrase above that starts with K k or another word they
know.) Write all these on the board.
7. Congratulate them as hopefully they have given you
some examples of words that start with K k. If they
have not, give them some examples yourself and write
these on the board. Point out the K words in the
morning message as well. Some words you can use are:
kujera, keke, karatu, katako,
8. Tell them that the sound /k/ can occur in different
places in the word. Ask them for words where the /k/ is
in the middle of the word. Write those on the board.
(Examples: bokiti, ukre, etc.)
9. Point to the words on the board and say them in unison
with the children, emphasizing the/k/ sound.
10. Ask everyone in the class whose given name starts with
K to stand up; have them say their name, emphasizing
the /k/ sound. Write the names on the board.
11. Ask everyone who has a /k/sound in their family name
to stand up. Have them say their name so everyone can
hear the /k/ sound. Point out where the /k/ sound
occurs.
Segment 3 (recognizing the K k in print)
12. Point to the phrase written out on a piece of paper or the
chalkboard that you used in the introduction.
13. Recite it at least two times, pointing to the words as
you say them;
14. Have the pupils recite the phrase with you a few times.
15. Ask the pupils to look at the text and tell you how many
words in the phrase contain the letter K k. Point out
again the sound K k can occur at the middle or end of
words. Point to the words you wrote on the board
earlier that have a K k in them.
16. Ask several pupils to come forward and point to the
letter the K k in one of the words on the board.
17. Have all the pupils stand up and use their finger to write
a big Kin the air. Have them write a small kin the air.
They can help each other as they do this.
18. Tell them they all did a great job.
SEL Message: tell the pupils that the word kariya starts with
a k and it means safety. Ask the children if they feel safe in
their school. Do they feel safe at home? Ask them why or why
not.
Education Crisis Response - Facilitator’s Guide
50 | Part 1 – Reading lessons
Step &
Icons
Time Activity procedure
10 minutes Performance (Assessment)
4. Have everyone whose surname starts with K stand up
and make a letter k in the air using their finger.
5. Call on various children (boys and girls) to give you the
sound /k/or the letter name or point to K k on the
alphabet chart.
6. Have everyone write a line of K k in their notebook.
Circulate and help children as needed.
7. Ask pupils to teach someone at home how to write letter
k
5 minutes Conclusions/Review
1. Tell children that they now know the name and the
sound of the letter K k. They also know how to write it.
Tell them many words start with the K k sound and they
have named some of them.
2. Chant the phrase on the board one last time, pointing to
the words as the pupils sing/chant.
Reflection: Teacher, write down notes for yourself on this lesson. Did you enjoy the lesson?
How do you think we can improve on it? If you make some notes, then when you teach this
lesson again, you will remember what worked well and where you found some challenges.
This will help you to improve the lesson next time you teach it.
Education Crisis Response - Facilitator’s Guide
51 | Part 1 – Reading lessons
Quick start reading lesson #8 - Consonants, letter M m
Skills: Phonemic awareness, letter M; phonics, letter M m.
Time: 65 minutes
Learning Objectives: At the end of the lesson, learners should
have mastered the sound of the letter, pronounce it, be able to
identify it and write it, (upper and lower case).
Materials: chalk, chalkboard, song or text written on the board or a piece of paper, alphabet
chart.
Previous Knowledge: Concepts of print, sounds and syllables, letters n, a, k.
Facilitator’s Tips: Review your classroom rules that are posted on the wall.
Point out to the pupils some of the letters they have learned since you first
posted the rules.
Important Ideas: In order to be successful readers, pupils must know the sound a
letter makes, its name and how to write it.
SEL Ideas: martani — response. It is important to control how we respond to
situations.
Step &
Icons
Time Activity procedure
10 minutes
Introduction
1. Say good morning to the children and welcome them.
Ask if everyone has taken their name tag.
2. Ask the children what they learned in their last reading
class. They should say the sound /k/. Say a word with
/k/ in it and ask them to repeat. Ask for a word from
them with the same sound /k/; have them repeat these
two words in choral form.
3. Write the following morning message on the board
(before class begins):
Mai da martani ga mugunta ba shi da kyau.
Zaman lafiya da lumana cikin adalci shine gatan
rayuwa da arjiki
Underline the letter k in the sentence as well as the letter m.
Read the phrase on the board slowly, pointing at each word as
you say it. Do this three times. Ask the pupils to say the phrase
with you. Point to the words as you read the phrase.
Now, ask the pupils to make the sound /m/. Have them repeat
it several times. Point to the letter and tell them that we are
going to learn the letter M m today.
M m

Education Crisis Response - Facilitator’s Guide
52 | Part 1 – Reading lessons
Step &
Icons
Time Activity procedure
15 minutes
5 minutes
5 minutes
Presentation: Facilitator presents the new letter and
involves children by repeating the sound, the letter and
having them write it.
1. Write the letter on the board: M and m. Tell the
students this is the letter M m. Tell pupils the letter
name. Ask them to repeat it.
2. Point to the consonant M and ask them if they know
what sound it makes. Give them an example of the
sound. Walk around the class letting the pupils see
your mouth making the /m/ sound.
3. Ask the children to write a large M and a small m in
their notebook. Go around and look at what the
children write, helping those who need assistance.
4. Say the sound yourself several times. Explain that
the big M and the little m still make the same sound.
Practice: The children have a chance to practice the letter
sound and writing with the teacher, in small groups, pairs
or individually.
First segment (learning the sound)
1. Put children in pairs; one partner says the letter sound
/m/and the other says the letter name M. After a minute,
have them switch roles.
2. Facilitator, walk around the classroom to listen and see
if the pairs are doing well with the sound and the letter
name.
3. Pick some pairs to demonstrate after they have worked
for a minute or two.
4. Have the pupils stand up and make the letter sound M
m 10 times shaking their body.
5. Tell them they did a great job.
Second segment (hearing the sound in words)
6. Ask pupils what other words they know that start with
the same sound. (They may give you a word from the
phrase above that starts with M m or another word they
know.) Write all these on the board.
7. Congratulate them as hopefully they have given you
some examples of words that start with M m. If they
have not, give them some examples yourself and write
these on the board. Point out the M words in the
morning message as well.Some words you can use are:
makaranta, miya, mulki, mama, magi, mamake and
mutuwa.

Education Crisis Response - Facilitator’s Guide
53 | Part 1 – Reading lessons
Step &
Icons
Time Activity procedure
5 minutes
10 minutes
8. Tell them that the sound /m/ can occur in different
places in the word. Ask them for words where the /m/
is in the middle of the word. Write those on the board.
(Examples: kamu, mamaye, tumu, komo, etc.)
9. Point to the words on the board and say them in unison
with the children, emphasizing the/m/ sound.
10. Ask everyone in the class whose given name starts with
M to stand up; have them say their name, emphasizing
the /m/ sound. Write the names on the board.
11. Ask everyone who has /m/ sound in their family name
to stand up. Have them say their name so everyone can
hear the /m/ sound. Point out where the /m/ sound
occurs.
Segment 3 (recognizing the M m in print)
12. Point to the phrase written out on a piece of paper or the
chalkboard that you used in the introduction.
13. Recite it at least two times, pointing to the words as you
say them;
14. Have the pupils recite the phrase with you a few times.
15. Ask the pupils to look at the text and tell you how many
words in the phrase contain the letter M m. Point out
again that the sound M m can occur at the middle or end
of words. Point to the words you wrote on the board
earlier that have an M m in them.
16. Ask several pupils to come forward and point to the
letter the M m in one of the words on the board.
17. Have all the pupils stand up and use their finger to write
a big M in the air. Have them write a small m in the air.
They can help each other as they do this.
18. Tell them they all did a great job.
SEL Message: Tell the pupils that the word martani starts
with an m and it means response. We respond to many people
and situations in daily life, including our parents, teachers,
extended family and friends. We sometimes have to respond to
situations that are not pleasant. It is important to think before
responding and to always respond politely. How would you
respond if you were mad at one of your classmates? (The
pupils should say things like “talk to the classmate” “tell the
classmate why I am mad” and things like that. They should not
say “hit the classmate” or “yell at the classmate”.
10 minutes Performance (Assessment)
1. Have everyone whose surname starts with M stand
up and make a letter m in the air using their finger.
Education Crisis Response - Facilitator’s Guide
54 | Part 1 – Reading lessons
Step &
Icons
Time Activity procedure
2. Call on various children (boys and girls) to give you
the sound /m/or the letter name or point to M m on
the alphabet chart.
3. Have everyone write a line of M m in their
notebook. Go round and help children as needed.
5 minutes Conclusions/Review
1. Tell children that they now know the name and the
sound of the letter M m. They also know how to
write it. Tell them many words start with the M m
sound and they have named some of them.
2. Chant the phrase on the board one last time,
pointing to the words as the pupils sing/chant.
Reflection: Teacher, write down notes for yourself on this lesson. Did you enjoy the lesson?
How do you think we can improve on it? If you make some notes, then when you teach this
lesson again, you will remember what worked well and where you found some challenges.
This will help you to improve the lesson next time you teach it.
Education Crisis Response - Facilitator’s Guide
55 | Part 1 – Reading lessons
Quick start reading lesson #9 - Consonants, letter S s
Skills: Phonemic awareness, letter S; phonics, letter S s.
Time: 65 minutes
Learning Objectives: At the end of the lesson, learners should have
mastered the sound of the letter, pronounce its name, be able to identify
it and write it, (upper and lower case).
Materials: chalk, chalkboard, song or text written on the board or a piece of paper, alphabet
chart.
Previous Knowledge: Concepts of print, sounds and syllables, letters n, a, k, m.
Facilitator’s Tips: It is important to learn the names of your pupils and call
them by name. Since they all have name tags, this will help you to call them by
name.
Important Ideas: Point to words as you read them, either on the board, in a story
book or on the word wall.
SEL Ideas: The importance of your name.
Step &
Icons
Time Activity procedure
10 minutes
Introduction
1. Say good morning to the children and welcome them.
Ask if everyone has taken their name tag.
2. Ask the children what they learned in their last reading
class. They should say the sound /m/. Say a word with
/s/ in it and ask them to repeat. Ask for a word from
them with the same sound /s/; have them repeat these
two words in choral form.
3. Write the following morning message on the board
(before class begins):
Sani Sale ya sami sabuwar sallaya.
Sanin ya kamata shine adon rayuwa.
Nemi sanin yakamata domin kar a salwanta a
rayuwa.
Underline the letter m in the daily text. Also underline the
letter s wherever it appears.
Read the phrase on the board slowly, pointing at each word as
you say it. Do this three times. On the third time, stop at the
S s
Education Crisis Response - Facilitator’s Guide
56 | Part 1 – Reading lessons
Step &
Icons
Time Activity procedure
letter m and remind pupils that they learned it in the last
lesson. Ask them what sound it makes.
Now, ask the pupils to say the phrase with you. Point to the
words as you say the phrase.
Finally, ask the pupils to make the sound /s/. Have them
repeat it several times. Point to the letter S in the text and tell
them that we are going to learn the letter S s today.
15 minutes
5 minutes
5 minutes
Presentation: Facilitator presents the new letter and
involves children by repeating the sound, the letter and
having them write it.
1. Write the letter on the board: S and s. Tell the
students this is the letter S s. Tell pupils the letter
name. Ask them to repeat it.
2. Point to the consonant s and ask them if they know
what sound it makes. Give them an example of the
sound. Walk around the class letting the pupils see
your mouth making the /s/ sound.
3. Ask the children to write a large S and a small s in
their notebook. Go around and look at what the
children write, helping those who need assistance.
4. Say the sound yourself several times. Explain that
the big S and the little s still make the same sound.
Practice: The children have a chance to practice the letter
sound and writing with the teacher, in small groups, pairs
or individually.
First segment (learning the sound)
1. Put children in pairs; one partner says the letter
sound and the other says the letter name. After a
minute, have them switch roles.
2. Facilitator, walk around in the classroom to listen
and see if the pairs are doing well with the sound
and the letter name.
3. Pick some pairs to demonstrate after they have
worked for a minute or two.
4. Have the students stand up and make the letter
sound S s 10 times while hopping on their right
foot.
5. Tell them they did a great job.
Second segment (hearing the sound in words)
6. Ask pupils what other words they know that start
with the same sound. (They may give you a word
from the phrase above that starts with S s or
Education Crisis Response - Facilitator’s Guide
57 | Part 1 – Reading lessons
Step &
Icons
Time Activity procedure
5 minutes
another word they know.) Write all these on the
board.
7. Congratulate them as hopefully they have given
you some examples of words that start with S s. If
they have not, give them some examples yourself
and write these on the board. Point out the S words
in the morning message as well. Some words you
can use are: Suna, Sakamako, Soso, Suya, Sabo.
8. Tell them that the sound /s/ can occur in different
places in the word. Ask them for words where the
/s/ is in the middle of the word. Write those on the
board. (Examples: Tasa, Asusu etc.)
9. Point to the words on the board and say them in
unison with the children, emphasizing the/s/ sound.
10. Ask everyone in the class whose name starts with
S to stand up; have them say their name,
emphasizing the /s/ sound. Write the names on the
board.
11. Ask everyone who has a /s/sound in their family
name to stand . Have them say their name so
everyone can hear the /s/ sound. Point out where
the /s/ sound occurs.
Segment 3 (recognizing the S s in print)
12. Point to the phrase written out on the chalkboard
that you used in the introduction.
13. Recite it at least two times, pointing to the words as
you say them; ask the pupils to recite the phrase
with you.
14. Ask the pupils to look at the text and tell you how
many words in the phrase contain the letter S s.
Point to the words you wrote on the board earlier
that have an S s in them.
15. Go back to the chalkboard. Ask a child to come
forward and underline the Ss in the words that are
up there (that you wrote earlier when the children
suggested them.)
16. Call 6 children forward and have 3 write upper case
S, 3 lower case on the board. Ask the other
children if they can copy those letters into their
notebook as well.
17. Have all the pupils stand up and use their finger to
write a big S in the air. Have them write a small s
in the air.
18. Tell them they all did a great job.
Education Crisis Response - Facilitator’s Guide
58 | Part 1 – Reading lessons
Step &
Icons
Time Activity procedure
5 minutes SEL Message: Tell the pupils that the word suna (name in
English) starts with the letter s. Write the following on the
board and say it a couple of times, pointing to the words with
your finger and have the pupils repeat it with you.
Suna linzami idan ya yi kyau alheri, idan ya baci ko sharri
ne
Tell the pupils that everyone has a name and it is important to
know the names of everyone in the classroom, so as to address
them respectfully. Ask two pupils to come forward and point
to the word suna in the phrase. They should know it because it
starts with S and because you pointed to it as you read it aloud.
10 minutes Performance (Assessment)
1. Have everyone whose surname starts with S stand
up and make a letter s in the air using their finger.
2. Call on some pupils (boys and girls) to make the
sound /s/, say the letter name or point to the S on
the alphabet chart.
3. Have everyone write a line of S s in their notebook.
Go around and help children as needed.
5 minutes Conclusions/Review
1. Tell children that they now know the name and the
sound of the letter S s. They also know how to
write it. Tell them many words start with the S s
sound and they have named some of them.
2. Chant the phrase on the board one last time,
pointing to the words as the pupils sing/chant.
Reflection: Teacher, write down notes for yourself on this lesson. Did you enjoy the
lesson? How do you think we can improve on it? If you make some notes, then when you
teach this lesson again, you will remember what worked well and where you found some
challenges. This will help you to improve the lesson next time you teach it.
Education Crisis Response - Facilitator’s Guide
59 | Part 1 – Reading lessons
Quick start reading lesson #10 - Consonants, letter T t
Skills: Phonemic awareness, letter T; phonics, letter T t.
Time: 65 minutes
Learning Objectives: At the end of the lesson, learners should have
mastered the sound of the letter, pronounce its name, be able to identify it and write it, (upper
and lower case).
Materials: chalk, chalkboard, phrase, song or text written on the board or on a piece of
paper, alphabet chart.
Previous Knowledge: Concepts of print, sounds and syllables, letters n, a, k, m, s.
Facilitator’s Tips: Arrange the class in such a way that you will be able to walk
around freely and look at all children’s work, especially during the performance
part of the lesson.
Important Ideas: If the pupils participate in the lesson and have the chance to
practice what they are learning, they will remember what they are learning.
SEL Ideas: Remembering—tunawa
Step &
Icons
Time Activity procedure
10 minutes
Introduction
1. Say good morning to the children and welcome them. Ask if
everyone has taken their name tag.
2. Ask the children what they learned in their last reading
class. They should say the sound /s/. Say a word with /s/ in
it and ask them to repeat. Ask for a word from them with
the same sound /s/; have them repeat these two words in
choral form.
3. Write the following morning message on the board (before
class begins):
Talatu ta tafi talla a Talatan Mafara.
Talatu ta tuna ta dawo gida a cikin lokaci domin kar ta
fada ma tasku.
Tell the pupils what the text means. Help them out if they do
not understand. Read the phrase on the board again slowly,
pointing at each word as you say it. Do this three times. Point
to the words as you say the phrase.
Now, point to a letter T in the text and ask the pupils to make
the sound /t/. Have them repeat it several times. Point to the
letter T and tell them that we are going to learn the letter T t
today.
T t
Education Crisis Response - Facilitator’s Guide
60 | Part 1 – Reading lessons
Step &
Icons
Time Activity procedure
15 minutes
5 minutes
5 minutes
Presentation: Facilitator presents the new letter and
involves children by repeating the sound, the letter and
having them write it.
1. Write the letter on the board: T and f. Tell the students
this is the letter T t. Tell pupils the letter name. Ask
them to repeat it.
2. Point to the consonant f and ask them if they know what
sound it makes. Give them an example of the sound.
Walk around the class letting the pupils see your mouth
making the /t/ sound.
3. Ask the children to write a large T and a small t in their
notebook. Go around and look at what the children
write, helping those who need it.
4. Say the sound yourself several times. Explain that the
big T and the small t still make the same sound.
Practice: The children have a chance to practice the letter
sound and writing with the teacher, in small groups, pairs
or individually.
First segment (learning the sound)
1. Put children in pairs; one partner says the letter
sound and the other says the letter name. After a
minute, have them switch roles.
2. Facilitator, move around in the classroom to listen
and see if the pairs are doing well with the sound
and the letter name.
3. Pick some pairs to demonstrate after they have
worked for a minute or two.
4. Have the students stand up and make the letter
sound T t 10 times while hopping on their left foot.
5. Tell them they did a great job.
Second segment (hearing the sound in words)
6. Ask pupils what other words they know that start
with the same sound. (They may give you a word
from the phrase above that starts with T t or another
word they know.) Write all these on the board.
7. Congratulate them as hopefully they have given you
some examples of words that start with T t. If they
have not, give them some examples yourself and
write these on the board. Point out the t words in the
morning message as well. Some words you can use
are: tebur, tibi, tanka, taki, tafi, tarihi, etc.
8. Tell them that the sound /t/ can occur in different
places in the word. Ask them for words where the
Education Crisis Response - Facilitator’s Guide
61 | Part 1 – Reading lessons
Step &
Icons
Time Activity procedure
5 minutes
10 minutes
/t/ is in the middle of the word. Write those on the
board. (Examples: boto, tuta, ate)
9. Point to the words on the board and say them in
unison with the children, emphasizing the /t/ sound.
10. Ask everyone in the class whose name starts with /t/
to stand up; have them say their name, emphasizing
the /t/ sound. Write the names on the board.
11. Ask everyone who has a /t/ sound in their family
name to stand up. Have them say their name so
everyone can hear the /t/ sound. Point out where the
/t/ sound occurs.
Segment 3 (recognizing the T t in print)
12. Point to the phrase written out on a piece of paper or
the chalkboard that you used in the introduction.
13. Recite it at least two times, pointing to the words as
you say them;
14. Have the pupils recite the phrase with you a few
times.
15. Ask the pupils to look at the text and tell you how
many words in the phrase contain the letter T t.
Point out again that the sound T t can occur at the
middle or end of words. Point to the words you
wrote on the board earlier that have a T t in them.
16. Ask several pupils to come forward and point to the
letter T t in one of the words on the board.
17. Have all the pupils stand up and use their finger to
write a big T in the air. Have them write a small t in
the air. They can help each other as they do this.
18. Tell them they all did a great job.
SEL Message: Tell the pupils that the word tunawa
(remember in English) starts with the letter t. Sometimes it is
hard to remember things. Remembering is very important to
learning. Ask them if they remember all the letters they have
learned. Have them tell you some of the letter names they
remember from previous lessons.
10 minutes Performance (Assessment)
1. Have everyone whose surname starts with T stand up
and make a letter t in the air using their finger.
2. Call on various children (boys and girls) to give you the
sound /t/ or the letter name or point to T t on the
alphabet chart.
3. Have everyone write a line of T t in their notebook. Go
around and help children as needed.
Education Crisis Response - Facilitator’s Guide
62 | Part 1 – Reading lessons
Step &
Icons
Time Activity procedure
5 minutes Conclusions/Review
1. Tell children that they now know the name and the
sound of the letter T t. They also know how to write it.
Tell them many words start with the T t sound and they
have named some of them.
2. Chant the phrase on the board one last time, pointing to
the words as the pupils sing/chant.
Reflection: Teacher, write down notes for yourself on this lesson. Did you enjoy the lesson?
How do you think we can improve on it? If you make some notes, then when you teach this
lesson again, you will remember what worked well and where you found some challenges.
This will help you to improve the lesson next time you teach it.
.
Education Crisis Response - Facilitator’s Guide
63 | Part 1 – Reading lessons
Quick start reading lesson #11 - Vowels, letter I i
Skills: Phonemic awareness, letter I; phonics, letter I i.
Time: 65 minutes
Learning Objectives: at the end of the lesson, learners should have
mastered the sound of the letter, both long and short, pronounce its name,
be able to identify it and write it, (upper and lower case).
Materials: chalk, chalkboard, song or text written on the board or a piece of paper, alphabet
chart.
Previous Knowledge: Concepts of print, sounds and syllables, letters n, a, k, m, s, t.
Facilitator’s Tips: Speak very clearly and loudly when making the letter sound
so that pupils can all hear you and see your mouth move as you make the sound.
Important Ideas: When you read the daily text to the pupils, make sure you point
to the words as you read them. Read with some animation and energy.
SEL Ideas: It is important to show respect to all people; it is important that all
people show you respect as well.
Step &
Icons
Time Activity procedure
10 minutes
Introduction
1. Say good morning to the children and welcome them.
Ask the children if they have each taken their name tag to their
seat with them. If some have not, be sure to give them their
name tag.
2. Write the following morning message on the board:
Dan kirki shi ke bin ne gaba, wanda, Hausawa suka ce bin
Allah ne. Don nagartaccen iri shi ne ke hana amfani illa.
(Facilitator, the long /i/ sounds in this text are underlined; the
letters I i not underlined make the short /i/ sound.)
Read the phrase on the board slowly, pointing at each word as
you say it. Do this three times. On the third time, stop at the first
letter I in the phrase and ask students what it is. Tell them it is
the letter I and make the short /i/ sound for them. Next, move to
one of the long /i/ sounds and and ask students what it is; tell
them it too is the letter I i and have them repeat the sound after
you.
Ask the students if they know what the phrase means. Explain it
and help them figure out the basic meaning.
I i
Education Crisis Response - Facilitator’s Guide
64 | Part 1 – Reading lessons
Step &
Icons
Time Activity procedure
Tell them that we are going to learn the letter I i today. Tell them
that I i is a vowel and vowels are very useful letters as almost all
words have vowels.
15 minutes
5 minutes
Presentation: Facilitator presents the new letter and involves
children by repeating the sound, the letter and having them
write it.
1. Write the letter on the board: I and i.
2. Tell the students this is the letter I; ask them what sound it
makes? Congratulate them as hopefully some have
remembered from the introduction.
3. Tell them that I i can make two sounds. One is called short I
i and one is called long I i.
4. Explain that there are short I i sounds and long I i sounds in
words. Continue (using the phrase above) to a word that has
another short I i in it and make the sound for the pupils. Ask
the students to make the sound /i/, after you.
5. Tell them this is a short /i/ sound.
6. Repeat this process with a long /i/ sound from the phrase
above.
7. Say the two sounds (short I and long I) yourself several
times. Ask pupils if they can hear the difference. Have them
repeat the sounds.
8. Make two columns on the board, one with the heading short I
and the other with the heading long I.
9. Have them repeat the two sounds again—short /i/ and long
/i/. Read them two words with the short /i/ sound: fito, ciko.
Ask them for some more examples. (Other examples you can
use include biri, Ali, birki etc.) Write the words the pupils
gave you, plus the ones above on the board in the short I
column.
10. Ask them what words they know that have a long /i/ sound in
them. Give them the example of fito (whistling) and ciko
(barbing). (Other examples of words with long /i/ sound
include: birgima, yi, fi, Idriss, Ilimi, etc. Ask the pupils for
words where they hear the long /i/ sound. Add some of your
own examples, facilitator. Write all these words on the board
in the long I column.
Practice: The children have a chance to practice the letter
sound and writing with the teacher, in small groups or pairs
or individually.
First segment (learning the sound)

Education Crisis Response - Facilitator’s Guide
65 | Part 1 – Reading lessons
Step &
Icons
Time Activity procedure
5 minutes
5 minutes
1. Put children in pairs; one partner says the letter sound short
/i/ and the other says the letter name I. After a minute, have
them switch roles with one saying the long /i/ sound and the
other the letter name.
2. Facilitator, circulate in the classroom to listen that the pairs
are doing well with the sound and the letter name.
3. Pick some pairs to demonstrate after they have worked for a
minute or two.
4. Have the pupils stand up and make the letter sound I i 10
times while wiggling their fingers in the air. (Make the short
/i/ sound 5 times and the long /i/ sound 5 times.)
5. Tell them they did a great job.
Second segment (hearing the sound in words)
6. Ask pupils what other words they know that start with the
same sound. (They may give you a word from the phrase or
words above that start with I i or another word they know.)
Write all these on the board.
7. Congratulate them as hopefully they have given you some
more examples of words that start with I i. If they have not,
give them some examples yourself and write these on the
board. Point out the I words in the morning message as well.
Some words you can use are: Ibrahim, Ilham, inshallah, ilmu,
icce
8. Tell them that the sound /i/ --both long and short /i/--can
occur in different places in the word. Ask them for words
where the /i/ is in the middle of the word. Write those on the
board. (Examples: biri, shinge, iri, aiki, aibi, fushi, bi, auki,
etc.)
9. Point to the words on the board and say them in unison with
the children, emphasizing the /i/ sound.
10. Ask everyone in the class whose given name starts with I to
stand up; have them say their name, emphasizing the /i/
sound. Write the names on the board.
11. Ask everyone who has an /i/ sound in their family name to
stand up. Have them say their name so everyone can hear the
/i/ sound. Point out where the /i/ sound occurs.
Segment 3 (recognizing the I i in print)
12. Point to the phrase written out on a piece of paper or the
chalkboard that you used in the introduction.
13. Recite it at least two times, pointing to the words as you say
them;
14. Have the pupils recite the phrase with you a few times.
Education Crisis Response - Facilitator’s Guide
66 | Part 1 – Reading lessons
Step &
Icons
Time Activity procedure
10 minutes
15. Ask the pupils to look at the text and tell you how many
words in the phrase contain the letter I i. Point out again the
sound I i can occur at the middle or end of words. Point to
the words you wrote on the board earlier that have an I i in
them.
16. Ask several pupils to come forward and point to the letter the
I i in one of the words on the board.
17. Have all the pupils stand up and use their finger to write a big
I in the air. Have them write a small i in the air. They can
help each other as they do this.
18. Tell them they all did a great job.
SEL Message: Ban girma: bin na gaba bin Allah
ll the pupils that respect is an important concept in life. Ask
them how they show respect to people? Ask them how they
know when people respect them? Facilitator, make sure you call
on at least 10 pupils for each of the two questions above; you can
call on more than 10 for each question, if many pupils raise their
hands. If the pupils need some examples, give them ones such
as: you show respect by listening to the teacher, by raising your
hand; you show respect to your parents by listening to them, etc.
People show you respect when: they listen to you, by greeting
you, etc
10 minutes Performance (Assessment)
1. Have everyone whose given name has a letter I in it stand
up and make a letter i in the air using their finger. (The
name should have either a long or a short /i/ sound.)
2. Call on various children (boys and girls) to give you the
sound /i/ or the letter name or point to I i on the alphabet
chart.
3. Have everyone write a line of I i in their notebook.
Circulate and help children as needed.
5 minutes Conclusions/Review 3. Tell children that they now know the name and the sound
of the letter I i. They also know how to write it. Tell
them many words start with / I i /sound and they have
named some of them.
4. Chant the phrase on the board one last time, pointing to
the words as the pupils sing/chant.
Education Crisis Response - Facilitator’s Guide
67 | Part 1 – Reading lessons
Reflection: Teacher, write down notes for yourself on this lesson. Did you enjoy the lesson?
How do you think we can improve on it? If you make some notes, then when you teach this
lesson again, you will remember what worked well and where you found some challenges.
This will help you to improve the lesson next time you teach it.
Education Crisis Response - Facilitator’s Guide
68 | Part 1 – Reading lessons
Quick start reading lesson #12 - Consonants, letter R r.
Skills: Phonemic awareness, letter R; phonics, letter R r.
Time: 65 minutes
Learning Objectives: At the end of the lesson, learners should have
mastered the sound of the letter, pronounce its name, be able to identify it and
write it, (upper and lower case).
Materials: chalk, chalkboard, song or text written on the board or a piece of paper, alphabet
chart.
Previous Knowledge: Concepts of print, sounds and syllables, letters n, a, k, m, s, t, i
Facilitator’s Tips:
When you write something on the chalkboard for the pupils, do not stand in
front of it and block their view.
Important Ideas:
All pupils need a chance to practice making the /r/ sound and writing the letter
R r while in the classroom. All pupils also need the chance to recognize the letter R
r and point it out, whether on the blackboard or the alphabet chart or in the classroom
rules hanging in the classroom.
SEL Ideas: Rashin jin dadi - uncomfortable in English.
Step &
Icons
Time Activity procedure
10 minutes
Introduction
1. Say good morning to the children and welcome them.
Ask if everyone has taken their name tag.
2. Ask the children what they learned in their last reading
class. They should say the sound /i/. Say a word with /i/
in it and ask them to repeat. Ask for a word from them
with the same sound /i/; have them repeat these two
words in choral form.
3. Write the following morning message on the board
(before class begins):
Karatu shi ke inganta rayuwa.
Da karatu ake fahimtan rayuwa.
Duniya rawar ‘yanmatane nagaba ya koma baya
sai a bita da sannu kar a tabe.
Underline the letter I and also underline the letter r wherever it
appears.
R r
Education Crisis Response - Facilitator’s Guide
69 | Part 1 – Reading lessons
Step &
Icons
Time Activity procedure
Read the phrase on the board slowly, pointing at each word as
you say it. Do this three times. Ask the pupils to say the phrase
with you. Point to the words as you say the phrase.
Tell the pupils what the phrase means briefly.
Now, ask the pupils to make the sound /r/. Have them repeat it
several times. Point to the letter and tell them that we are going
to learn the letter R r today.
15 minutes
5 minutes
5 minutes
Presentation: Facilitator presents the new letter and
involves children by repeating the sound, the letter and
having them write it.
Write the letter on the board: R and r. Tell the students
this is the letter R r. Tell pupils the letter name. Ask
them to repeat it.
1. Point to the consonant f and ask them if they know
what sound it makes. Give them an example of the
sound. Walk around the class letting the pupils see
your mouth making the /r/ sound.
2. Ask the children to write a large R and a small r in
their notebook. Go around and look at what the
children write, helping those who need it.
3. Say the sound yourself several times. Explain that
the big R and the little r still make the same sound.
Practice: The children have a chance to practice the letter
sound and writing with the teacher, in small groups, pairs
or individually.
First segment (learning the sound)
1. Put children in pairs; one partner says the letter
sound /r/ and the other says the letter name R. After
a minute, have them switch roles.
2. Facilitator, go around in the classroom to listen and
see if the pairs are doing well with the sound and
the letter name.
3. Pick some pairs to demonstrate after they have
worked for a minute or two.
4. Have the pupils stand up and make the letter sound
/R r/ 10 times while wiggling their toes.
5. Tell them they did a great job.
Second segment (hearing the sound in words)
6. Ask pupils what other words they know that start
with the same sound. (They may give you a word
from the phrase above that starts with R r or another
word they know.) Write all these on the board.
Education Crisis Response - Facilitator’s Guide
70 | Part 1 – Reading lessons
Step &
Icons
Time Activity procedure
5 minutes
10 minutes
7. Congratulate them as hopefully they have given you
some examples of words that start with R r. If they
have not, give them some examples yourself and
write these on the board. Point out the R words in
the morning message as well. Some words you can
use are: rabo, rai, rawani, reshe, rogo and rumbu.
8. Tell them that the sound /r/ can occur in different
places in the word. Ask them for words where the
/r/ is in the middle of the word. Write those on the
board. (Examples: kare, zare, ware, sari, bara, etc.)
9. Point to the words on the board and say them in
unison with the children, emphasizing the /r/ sound.
10. Ask everyone in the class whose given name starts
with r to stand up; have them say their name,
emphasizing the /r/ sound. Write the names on the
board.
11. Ask everyone who has /r/ sound in their family
name to stand up. Have them say their name so
everyone can hear the /r/ sound. Point out where
the /r/ sound occurs.
Segment 3 (recognizing the R r in print)
12. Point to the phrase written out on a piece of paper or
the chalkboard that you used in the introduction.
13. Recite it at least two times, pointing to the words as
you say them.
14. Have the pupils recite the phrase with you a few
times.
15. Ask the pupils to look at the text and tell you how
many words in the phrase contain the letter R r.
Point out again that the sound R r can occur at the
middle or end of words. Point to the words you
wrote on the board earlier that have an R r in them.
16. Ask several pupils to come forward and point to the
letter R r in one of the words on the board.
17. Have all the pupils stand up and use their finger to
write a big R in the air. Have them write a small r
in the air. They can help each other as they do this.
18. Tell them they all did a great job.
SEL Message: Tell the pupils that rashin jin dadi has two
letter Rs in it. Ask the pupils if they are ever uncomfortable.
What things make them uncomfortable? Ask them what they
do to feel comfortable again.
Education Crisis Response - Facilitator’s Guide
71 | Part 1 – Reading lessons
Step &
Icons
Time Activity procedure
10 minutes Performance (Assessment)
1. Have everyone whose surname starts with R stand
up and make a letter r in the air using their finger.
2. Call on various children (boys and girls) to give you
the sound /r/ or the letter name or point to R r on the
alphabet chart.
3. Have everyone write a line of R r in their notebook.
Go round and help children as needed.
5 minutes Conclusions/Review
1. Tell children that they now know the name and the
sound of the letter R r. They also know how to
write it. Tell them many words start with the /R r/
sound and they have named some of them.
2. Chant the phrase on the board one last time,
pointing to the words as the pupils sing/chant.
Education Crisis Response - Facilitator’s Guide
72 | Part 1 – Reading lessons
Quick start reading lesson #13 - Consonants, letter D d.
Skills: Phonemic awareness, letter D; phonics, letter D d.
Time: 65 minutes
Learning Objectives: At the end of the lesson, learners should have
mastered the sound of the letter, pronounce its name, be able to identify
it and write it, (upper and lower case).
Materials: chalk, chalkboard, song or text written on the board or a piece of paper, alphabet
chart.
Previous Knowledge: Concepts of print, sounds, syllables, letters n, a, k, m, s, t, i, r.
Facilitator’s Tips: Be sure to point to your alphabet chart during the lesson to
get children in the habit of referring to it.
Important Ideas: Make sure the pupils can say the letter name and the letter sound.
These are not the same thing. Make sure pupils can recognize the letter D d and
write the letter D d.
SEL Ideas: The word rules in Hausa starts with the /d/ sound: dokoki. Use
this as a vocabulary word for the letter D d according to the directions below.
Step &
Icons
Time Activity procedure
10 minutes
Introduction
1. Say good morning to the children and welcome them.
Ask if everyone has taken their name tag.
2. Ask the children what they learned in their last reading
class. They should say the sound /r/. Say a word with
/r/ in it and ask them to repeat. Ask for a word from
them with the same sound /r/; have them repeat these
two words in choral form.
3. Write the following morning message on the board
(before class begins)
Dabo yana da dawa a gona.
Dada tana dafa doya.
Dudu ta dasa itace da daddare.
Delu tana daka daddawa.
Dauda yana duba littafin sa.
Underline I and R in the daily text. Read the phrase on the
board slowly, pointing at each word as you say it. Do this three
times.
On the third time, stop at the letter I you have underlined and
ask students what it is; have them make the sound again. Do
the same for the R.
D d
Education Crisis Response - Facilitator’s Guide
73 | Part 1 – Reading lessons
Step &
Icons
Time Activity procedure
Ask the pupils to say the passage with you. Ask them to make
the sound /d/. Have them repeat it several times.
Now, point to the letter D and tell them that we are going to
learn the letter D d today.
15 minutes
5 minutes
5 minutes
Presentation: Facilitator presents the new letter and
involves children by repeating the sound, the letter and
having them write it.
1. Write the letter on the board: D and d. Tell the
students this is the letter D d. Tell pupils the letter
name. Ask them to repeat it.
2. Point to the consonant D d and ask them if they
know what sound it makes. Give them an example
of the sound. Walk around the class letting the
pupils see your mouth making the /d/ sound.
3. Ask the children to write a large D and a small d in
their notebook. Go around and look at what the
children write, helping those who need assistance.
4. Say the sound yourself several times. Explain that
the big D and the little d still make the same sound.
Practice: The children have a chance to practice the letter
sound and writing with the teacher, in small groups, pairs
or individually.
First segment (learning the sound)
1. Put children in pairs; one partner says the letter
sound and the other says the letter name. After a
minute, have them switch roles.
2. Facilitator, go around in the classroom to listen and
see if the pairs are doing well with the sound and
the letter name.
3. Pick some pairs to demonstrate after they have
worked for a minute or two.
4. Have the students stand up and make the letter
sound D d 10 times while nodding their head up and
down.
5. Tell them they did a great job.
Second segment (hearing the sound in words)
6. Ask pupils what other words they know that start
with the same sound. (They may give you a word
from the phrase above that starts with D d or
another word they know.) Write all these on the
board.
Education Crisis Response - Facilitator’s Guide
74 | Part 1 – Reading lessons
Step &
Icons
Time Activity procedure
5 minutes
10 minutes
7. Congratulate them as hopefully they have given you
some examples of words that start with D d. If they
have not, give them some examples yourself and
write these on the board. Point out the D words in
the morning message as well. Some words you can
use are: doki, dubu, daba, dukiya. Tell them that the
sound /d/ can occur in different places in the word.
Ask them for words where /d/ is in the middle of the
word. Write those on the board. (Examples:
Adada, Ado, Kakidi, Kadada)
8. Point to the words on the board and say them in
unison with the children, emphasizing the /d/ sound.
9. Ask everyone in the class whose given name starts
with D to stand up; have them say their name,
emphasizing the /d/ sound. Write the names on the
board.
10. Ask everyone who has a /d/ sound in their family
name to stand up. Have them say their name so
everyone can hear the /d/ sound. Point out where
the /d/ sound occurs.
Segment 3 (recognizing the D d in print)
11. Point to the passage written out on a piece of paper
or the chalkboard that you used in the introduction.
12. Sing or recite it at least two times, pointing to the
words as you say them;
13. Have the pupils read the passage with you a few
times.
14. Ask the pupils to look at the passage and tell you
how many words in the passage contain the letter D
d. Point out the sound D d can occur at the middle
or end of words. There are 17 letter Ds in this song.
15. Ask several pupils to come forward and point to the
letter D d in the song.
16. Have all the pupils stand up and use their finger to
write a big D in the air. Have them write a small d
in the air. They can help each other as they do this.
17. Tell them they all did a great job.
SEL Message: Tell the pupils that the word dokoki (rules in
English) starts with D. Write it on the board. Ask pupils about
the important rules that they know of. (Offer them some
suggestions yourself from the SEL curriculum if they do not
have any ideas—listen in class, be polite, do not hit other
pupils, respect parents, etc.)
Education Crisis Response - Facilitator’s Guide
75 | Part 1 – Reading lessons
Step &
Icons
Time Activity procedure
10 minutes Performance (Assessment)
1. Have everyone whose surname starts with D stand up
and make a letter d in the air using their finger.
2. Call on various children (boys and girls) to give you the
sound /d/or the letter name or point to D d on the
alphabet chart.
3. Have everyone write a line of D d in their notebook.
Go round and help children as needed.
5 minutes Conclusions/Review 1. Tell children that they now know the name and the
sound of the letter D d. They also know how to write it.
Tell them many words start with the /D d/ sound and
they have named some of them.
2. Chant the D d song on the board one last time, pointing
to the words as the pupils sing/chant.
Reflection: Teacher, write down notes for yourself on this lesson. Did you enjoy the lesson?
How do you think we can improve on it? If you make some notes, then when you teach this
lesson again, you will remember what worked well and where you found some challenges.
This will help you to improve the lesson next time you teach it.
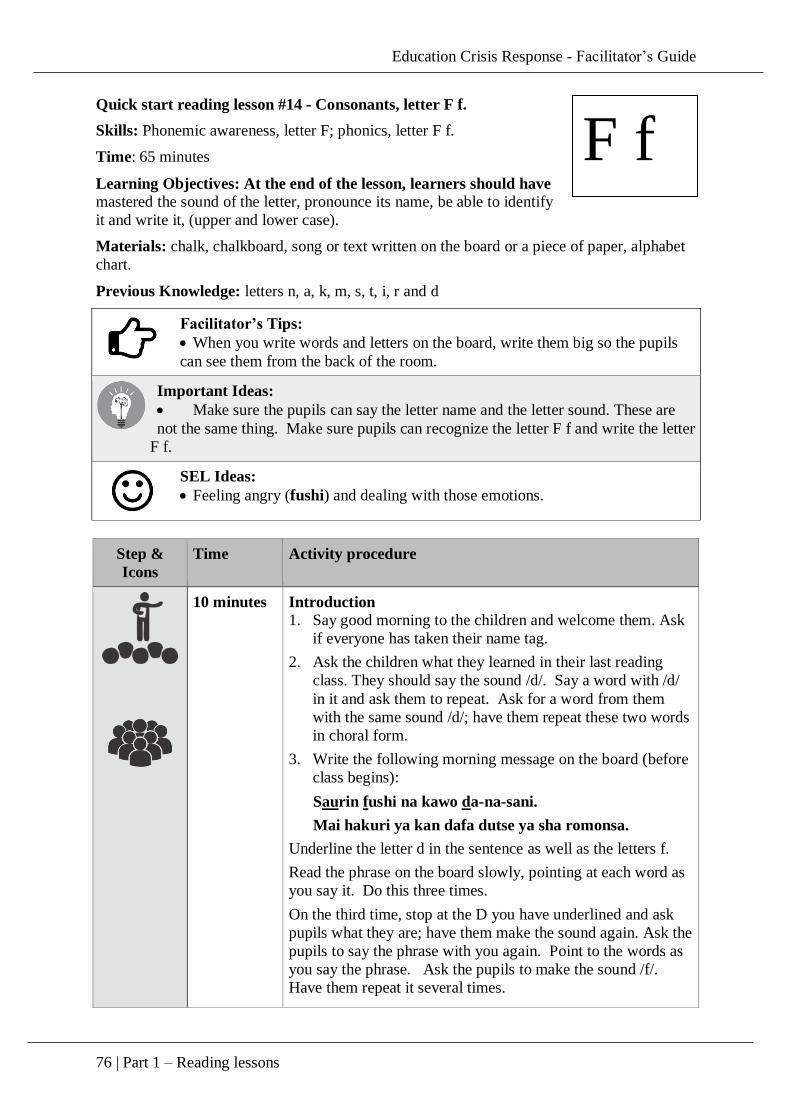
Education Crisis Response - Facilitator’s Guide
76 | Part 1 – Reading lessons
Quick start reading lesson #14 - Consonants, letter F f.
Skills: Phonemic awareness, letter F; phonics, letter F f.
Time: 65 minutes
Learning Objectives: At the end of the lesson, learners should have
mastered the sound of the letter, pronounce its name, be able to identify
it and write it, (upper and lower case).
Materials: chalk, chalkboard, song or text written on the board or a piece of paper, alphabet
chart.
Previous Knowledge: letters n, a, k, m, s, t, i, r and d
Facilitator’s Tips:
When you write words and letters on the board, write them big so the pupils
can see them from the back of the room.
Important Ideas:
Make sure the pupils can say the letter name and the letter sound. These are
not the same thing. Make sure pupils can recognize the letter F f and write the letter
F f.
SEL Ideas:
Feeling angry (fushi) and dealing with those emotions.
Step &
Icons
Time Activity procedure
10 minutes
Introduction
1. Say good morning to the children and welcome them. Ask
if everyone has taken their name tag.
2. Ask the children what they learned in their last reading
class. They should say the sound /d/. Say a word with /d/
in it and ask them to repeat. Ask for a word from them
with the same sound /d/; have them repeat these two words
in choral form.
3. Write the following morning message on the board (before
class begins):
Saurin fushi na kawo da-na-sani.
Mai hakuri ya kan dafa dutse ya sha romonsa.
Underline the letter d in the sentence as well as the letters f.
Read the phrase on the board slowly, pointing at each word as
you say it. Do this three times.
On the third time, stop at the D you have underlined and ask
pupils what they are; have them make the sound again. Ask the
pupils to say the phrase with you again. Point to the words as
you say the phrase. Ask the pupils to make the sound /f/.
Have them repeat it several times.
F f
Education Crisis Response - Facilitator’s Guide
77 | Part 1 – Reading lessons
Step &
Icons
Time Activity procedure
Point to the letter F and tell them that we are going to learn the
letter F f today.
15 minutes
5 minutes
5 minutes
Presentation: Facilitator presents the new letter and
involves children by repeating the sound, the letter and
having them write it.
1. Write the letter on the board: F and f. Tell the pupils
this is the letter F f. Tell pupils the letter name. Ask
them to repeat it.
2. Point to the consonant f and ask them if they know
what sound it makes. Give them an example of the
sound. Walk around the class letting the pupils see
your mouth making the /f/ sound.
3. Ask the children to write a large F and a small f in their
notebook. Go around and look at what the children are
writing, helping those who need assistance.
4. Say the sound yourself several times. Explain that the
big F and the small f still make the same sound.
Practice: The children have a chance to practice the letter
sound and writing with the teacher, in small groups, pairs
or individually.
First segment (learning the sound)
1. Put children in pairs; one partner says the letter sound
and the other says the letter name. After a minute, have
them switch roles.
2. Facilitator, go around in the classroom to listen and see
if the pairs are doing well with the sound and the letter
name.
3. Pick some pairs to demonstrate after they have worked
for a minute or two.
4. Have the students stand up and make the letter sound F
f 10 times while waving their right hand in the air.
5. Tell them they did a great job.
Second segment (hearing the sound in words)
6. Ask pupils what other words they know that start with
the same sound. (They may give you a word from the
phrase above that starts with F f or another word they
know.) Write all these on the board.
7. Congratulate them as hopefully they have given you
some examples of words that start with F f. If they
have not, give them some examples yourself and write
these on the board. Point out the F words in the

Education Crisis Response - Facilitator’s Guide
78 | Part 1 – Reading lessons
Step &
Icons
Time Activity procedure
5 minutes
10 minutes
morning message as well. Some words you can use are:
fama, fada, fure, fari, farce and others.
8. Tell them that the sound /f/ can occur in different
places in the word. Ask them for words where /f/ is in
the middle of the word. Write those on the board.
(Examples: kifi, zafi, tafiya)
9. Point to the words on the board and say them in unison
with the children, emphasizing the/f/ sound.
10. Ask everyone in the class whose given name starts with
F to stand up; have them say their name, emphasizing
the /f/ sound. Write the names on the board.
11. Ask everyone who has a /f/ sound in their family name
to stand up. Have them say their name so everyone can
hear the /f/ sound. Point out where the /f/ sound
occurs.
Segment 3 (recognizing the F f in print)
12. Point to the phrase written out on a piece of paper or
the chalkboard that you used in the introduction.
13. Sing or recite it at least two times, pointing to the
words as you say them;
14. Have the pupils sing the song or recite the poem with
you a few times.
15. Ask the pupils to look at the text and tell you how
many words in the phrase contain the letter F f. Point
out again that the sound /f/ can occur at the middle or
end of words. Point to the words you wrote on the
board earlier that have an F f in them.
16. Ask several pupils to come forward and point to the
letter F f in one of the words on the board.
17. Have all the pupils stand up and use their finger to
write a big F in the air. Have them write a small f in
the air. They can help each other as they do this.
18. Tell them they all did a great job.
SEL Message: Tell the pupils that the word fushi (angry in
English) starts with F. Write it on the board. Tell the children
that it is normal to get angry at times, but we all have to learn
to control our emotions. Ask the children what they do to
control their emotions if they feel angry. (Examples: take a
deep breath, have a sip of water, sit down, close your eyes,
etc.)
Education Crisis Response - Facilitator’s Guide
79 | Part 1 – Reading lessons
Step &
Icons
Time Activity procedure
10 minutes Performance (Assessment)
1. Have everyone whose surname starts with F stand up
and make a letter f in the air using their finger.
2. Call on various children (boys and girls) to give you
the sound /f/or the letter name or point to F f on the
alphabet chart.
3. Have everyone write a line of F f in their notebook. Go
round and help children as needed.
5 minutes Conclusions/Review 1. Tell children that they now know the name and the
sound of the letter F f. They also know how to write it.
Tell them many words start with the /F f/ sound and
they have named some of them.
2. Chant the phrase on the board one last time, pointing to
the words as the pupils sing/chant.
Reflection: Teacher, write down notes for yourself on this lesson. Did you enjoy the
lesson? How do you think we can improve on it? If you make some notes, then when you
teach this lesson again, you will remember what worked well and where you found some
challenges. This will help you to improve the lesson next time you teach it.
Education Crisis Response - Facilitator’s Guide
80 | Part 1 – Reading lessons
Quick start reading lesson #15 - Consonants, sound Ts, letters Ts.
Skills: Phonemic awareness, sound Ts; phonics, letters Ts together.
Time: 65 minutes
Learning Objectives: At the end of the lesson, learners should
have mastered the sound of the letter, pronounce its name, be able
to identify it and write it, (upper and lower case).
Materials: chalk, chalkboard, song or text written on the board or a piece of paper, alphabet
chart.
Previous Knowledge: letters n, a, k, m, s, t, i, r, d, f.
Facilitator’s Tips:
Read the daily text in the introduction with energy and enthusiasm. This will
keep the pupils interested.
Important Ideas:
If the pupils participate in the lesson and have the chance to practice what
they are learning, they will remember what they are learning.
SEL Ideas:
The word tsaro (safety in English) is an important word for children to know.
It begins with the sound /ts/. We learned another word for safety in a past
lesson but we will teach the children this word as well to enrich their vocabulary.
Step &
Icons
Time Activity procedure
10 minutes
Introduction
1. Say good morning to the children and welcome them. Ask
if everyone has taken their name tag.
2. Ask the children what they learned in their last reading
class. They should say the sound /f/. Say a word with /f/ in
it and ask them to repeat. Ask for a word from them with
the same sound /f/; have them repeat these two words in
choral form.
3. Write the following morning message on the board (before
class begins):
Tsafta tsaftaTsafta tsafta tsafta
Tsafta
Wanka wanki,wannan shi ne tsafta
Tsafta
Wanke baki wannan shi ne tsafta
Tsafta.
Underline the letter f in the daily text. Also underline the letter
combination ts in the text above.
Read the phrase on the board slowly, pointing at each word as
you say it. Do this three times. On the third time, stop at the f
Ts ts
Education Crisis Response - Facilitator’s Guide
81 | Part 1 – Reading lessons
Step &
Icons
Time Activity procedure
you have underlined and ask students what it is; have them
make the sound again. Ask the pupils to say the phrase with
you again. Point to the words as you say the phrase.
Now, ask the pupils to make the sound /ts/. Have them repeat
it several times. Point to the letter and tell them that we are
going to learn the letter Ts ts today.
15 minutes
5 minutes
5 minutes
Presentation: Facilitator presents the new letter and
involves children by repeating the sound, the letter and
having them write it.
1. Write the letter on the board: Ts and ts. Tell the
students this is the letter Ts ts. Tell pupils the letter
name. Ask them to repeat it.
2. Point to the consonant ts and ask them if they know
what sound it makes. Give them an example of the
sound. Walk around the class letting the pupils see
your mouth making the /ts/ sound.
3. Ask the children to write a large Ts and a small ts in
their notebook. Go around and look at what the
children are writing, helping those who need it.
4. Say the sound yourself several times. Explain that the
big Ts and the little ts still make the same sound.
Practice: The children have a chance to practice the letter
sound and writing with the teacher, in small groups, pairs
or individually.
First segment (learning the sound)
1. Put children in pairs; one partner says the letter sound
/ts/ and the other says the letter names Ts. After a
minute, have them switch roles.
2. Facilitator, go around in the classroom to listen and see
if the pairs are doing well with the sound and the letter
name.
3. Pick some pairs to demonstrate after they have worked
for a minute or two.
4. Have the pupils stand up and make the letter sound Ts
ts 10 times shaking their body.
5. Tell them they did a great job.
Second segment (hearing the sound in words)
6. Ask pupils what other words they know that start with
the same sound. (They may give you a word from the
phrase above that starts with Ts ts or another word they
know.) Write all these on the board.
Education Crisis Response - Facilitator’s Guide
82 | Part 1 – Reading lessons
Step &
Icons
Time Activity procedure
5 minutes
10 minutes
7. Congratulate them as hopefully they have given you
some examples of words that start with Ts ts. If they
have not, give them some examples yourself and write
these on the board. Point out the Ts words in the
morning message as well. Some words you can use are
tsawa, tsoro, tsaga, tsere, tsauni and others).
8. Tell them that the sound /ts/ can occur in different
places in a word. Ask them for words where the /ts/ is
in the middle of the word. Write those on the board.
(Examples: yatsu, titse, etc.)
9. Point to the words on the board and say them in unison
with the children, emphasizing the /ts/ sound.
10. Ask everyone in the class whose given name starts with
Ts to stand up; have them say their name, emphasizing
the /ts/ sound. Write the names on the board.
11. Ask everyone who has a /ts/ sound in their family name
to stand up. Have them say their name so everyone can
hear the /ts/ sound. Point out where the /ts/ sound
occurs.
Segment 3 (recognizing the Ts ts in print)
12. Point to the phrase written out on a piece of paper or the
chalkboard that you used in the introduction.
13. Recite it at least two times, pointing to the words as
you say them.
14. Have the pupils recite the phrase with you a few times.
15. Ask the pupils to look at the text and tell you how many
words in the phrase contain the letter Ts ts. Point out
again that the sound Ts ts can occur at the middle or end
of words. Point to the words you wrote on the board
earlier that have a Ts ts in them.
16. Ask several pupils to come forward and point to the
letter Ts in one of the words on the board.
17. Have all the pupils stand up and use their finger to write
a big Ts in the air. Have them write a small ts in the
air. They can help each other as they do this.
18. Tell them they all did a great job.
SEL Message: All pupils need to feel safe in their school or
learning center. The word tsaro means safety. Have the pupils
repeat the word and tell you where the /ts/ sound occurs. Ask
the children where they feel the safest. They might name
places or people with whom they feel safe.
10 minutes Performance (Assessment)
1. Have everyone whose surname starts with Ts stand up
and make the letters ts in the air using their finger.
Education Crisis Response - Facilitator’s Guide
83 | Part 1 – Reading lessons
Step &
Icons
Time Activity procedure
2. Call on various children (boys and girls) to give you the
sound /ts/ or the letter name or point to Ts ts on the
alphabet chart.
3. Have everyone write a line of Ts ts in their notebook.
Go round and help children as needed.
5 minutes Conclusions/Review
1. Tell children that they now know the name and the
sound of the letter Ts ts. They also know how to write
it. Tell them many words start with the Ts ts sound and
they have named some of them.
2. Chant the phrase on the board one last time, pointing to
the words as the pupils sing/chant.
Reflection: Teacher, write down notes for yourself on this lesson. Did you enjoy the lesson?
How do you think we can improve on it? If you make some notes, then when you teach this
lesson again, you will remember what worked well and where you found some challenges.
This will help you to improve the lesson next time you teach it.
.
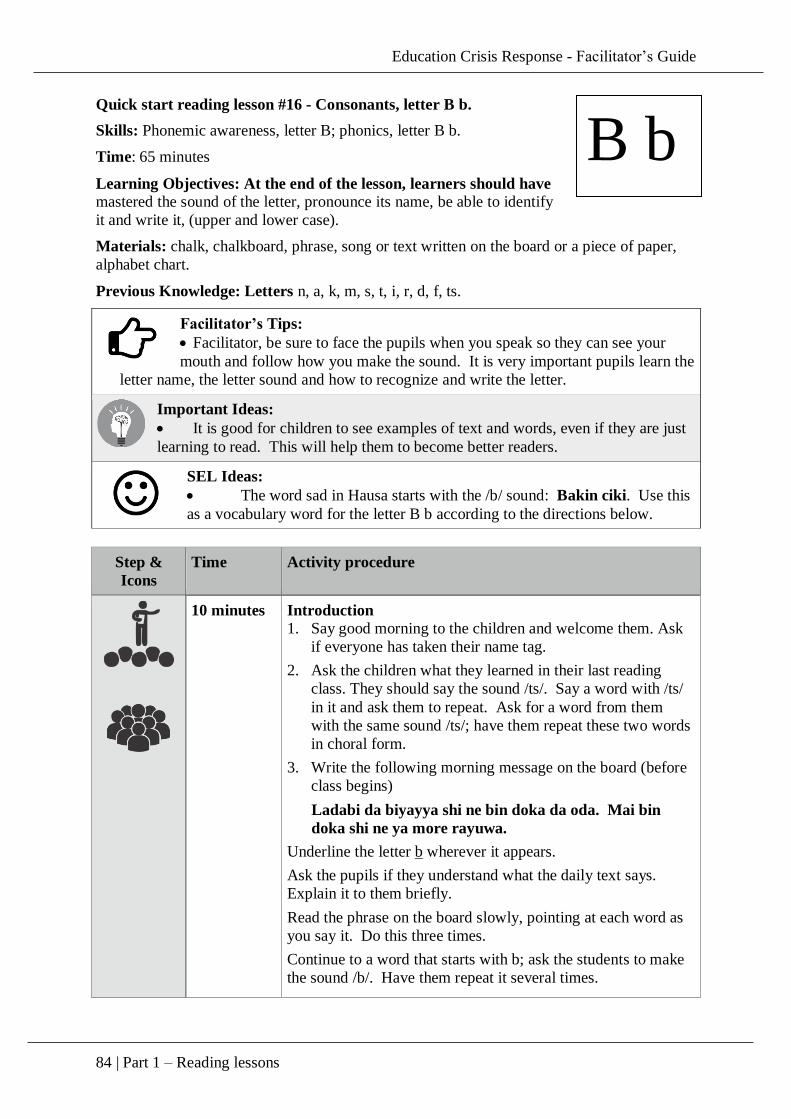
Education Crisis Response - Facilitator’s Guide
84 | Part 1 – Reading lessons
Quick start reading lesson #16 - Consonants, letter B b.
Skills: Phonemic awareness, letter B; phonics, letter B b.
Time: 65 minutes
Learning Objectives: At the end of the lesson, learners should have
mastered the sound of the letter, pronounce its name, be able to identify
it and write it, (upper and lower case).
Materials: chalk, chalkboard, phrase, song or text written on the board or a piece of paper,
alphabet chart.
Previous Knowledge: Letters n, a, k, m, s, t, i, r, d, f, ts.
Facilitator’s Tips:
Facilitator, be sure to face the pupils when you speak so they can see your
mouth and follow how you make the sound. It is very important pupils learn the
letter name, the letter sound and how to recognize and write the letter.
Important Ideas:
It is good for children to see examples of text and words, even if they are just
learning to read. This will help them to become better readers.
SEL Ideas:
The word sad in Hausa starts with the /b/ sound: Bakin ciki. Use this
as a vocabulary word for the letter B b according to the directions below.
Step &
Icons
Time Activity procedure
10 minutes
Introduction
1. Say good morning to the children and welcome them. Ask
if everyone has taken their name tag.
2. Ask the children what they learned in their last reading
class. They should say the sound /ts/. Say a word with /ts/
in it and ask them to repeat. Ask for a word from them
with the same sound /ts/; have them repeat these two words
in choral form.
3. Write the following morning message on the board (before
class begins)
Ladabi da biyayya shi ne bin doka da oda. Mai bin
doka shi ne ya more rayuwa.
Underline the letter b wherever it appears.
Ask the pupils if they understand what the daily text says.
Explain it to them briefly.
Read the phrase on the board slowly, pointing at each word as
you say it. Do this three times.
Continue to a word that starts with b; ask the students to make
the sound /b/. Have them repeat it several times.
B b
Education Crisis Response - Facilitator’s Guide
85 | Part 1 – Reading lessons
Step &
Icons
Time Activity procedure
Point to the letter B and tell them that we are going to learn the
letter B b today.
15 minutes
5 minutes
5 minutes
Presentation: Facilitator presents the new letter and
involves children by repeating the sound, the letter and
having them write it.
1. Write the letter on the board: B and b. Tell the students
this is the letter B b. Tell pupils the letter name. Ask
them to repeat it.
2. Point to the consonant b and ask them if they know
what sound it makes. Give them an example of the
sound. Walk around the class letting the pupils see
your mouth making the /b/ sound.
3. Ask the children to write a large B and a small b in their
notebook. Go around and look at what the children are
writing, helping those who need it.
4. Say the sound yourself several times. Explain that the
big B and the small b still make the same sound.
Practice: The children have a chance to practice the letter
sound and writing with the teacher, in small groups, pairs
or individually.
First segment (learning the sound)
1. Put children in pairs; one partner says the letter name
and the other says the letter sound. After a minute,
have them switch roles.
2. Facilitator, go around in the classroom to listen and see
if the pairs are doing well with the sound and the letter
name.
3. Pick some pairs to demonstrate after they have worked
for a minute or two.
4. Have the students stand up and make the letter sound B
b 10 times while jumping in a place on both feet.
5. Tell them they did a great job.
Second segment (hearing the sound in words)
6. Ask pupils what other words they know that start with
the same sound. (They may give you a word from the
phrase above that starts with B b or another word they
know.) Write all these on the board.
7. Congratulate them as hopefully they have given you
some examples of words that start with B b. If they
have not, give them some examples yourself and write
these on the board. Some words you can use are: Bintu,
bauta, birki, bebe.
Education Crisis Response - Facilitator’s Guide
86 | Part 1 – Reading lessons
Step &
Icons
Time Activity procedure
5 minutes
10 minutes
8. Tell them that the sound /b/ can occur in different
places in the word. Ask them for words where the /b/ is
in the middle of the word. Write those on the board.
9. Point to the words on the board and say them in unison
with the children, emphasizing the /b/ sound.
10. Ask everyone in the class whose given name starts with
B to stand up; have them say their name, emphasizing
the /b/ sound. Write the names on the board.
11. Ask everyone who has a /b/ sound in their family name
to stand up. Have them say their name so everyone can
hear the /b/ sound. Point out where the /b/ sound
occurs.
Segment 3 (recognizing the B b in print)
12. Point to the phrase from the introduction written out on
a piece of paper or the chalkboard.
13. Recite it at least two times, pointing to the words as you
say them.
14. Have the pupils recite the phrase with you a few times.
15. Ask the pupils to look at the text and tell you how many
words in the phrase contain the letter B b. Point out
that the sound /B b/ can occur at the middle or end of
words.
16. Ask several pupils to come forward and point to the
letter Bb in the phrase.
17. Have all the pupils stand up and use their finger to write
a big B in the air. Have them write a small b in the air.
They can help each other as they do this.
18. Tell them they all did a great job.
19. Still standing, recite the b message about rules again,
pointing to the words as you say them.
SEL Message: Tell the pupils that the words bakin ciki (sad
in English) starts with B. Write it on the board. Ask pupils
what they do in order to feel better when they are sad? (Offer
them some suggestions yourself from the SEL curriculum if
they do not have any ideas—talk to mama, tell a joke, play with
friends, etc).
10 minutes Performance (Assessment)
1. Have everyone whose surname starts with B stand up
and make a letter b in the air using their finger.
2. Call on various children (boys and girls) to give you the
sound /b/ or the letter name or point to B b on the
alphabet chart.
Education Crisis Response - Facilitator’s Guide
87 | Part 1 – Reading lessons
Step &
Icons
Time Activity procedure
3. Have everyone write a line of B b in their notebook.
Go round and help children as needed.
5 minutes Conclusions/Review 1. Tell children that they now know the name and the
sound of the letter B b. They also know how to write it.
Tell them many words start with the /B b/ sound and
they have named some of them.
2. Chant the B b phrase on rules one last time, pointing to
the words as the pupils sing/chant.
Reflection: Teacher, write down notes for yourself on this lesson. Did you enjoy the lesson?
How do you think we can improve on it? If you make some notes, then when you teach this
lesson again, you will remember what worked well and where you found some challenges.
This will help you to improve the lesson next time you teach it.
Education Crisis Response - Facilitator’s Guide
88 | Part 1 – Reading lessons
Quick start reading lesson #17 - Consonants, letter W w.
Skills: Phonemic awareness, letter W; phonics, letter W w.
Time: 65 minutes
Learning Objectives: At the end of the lesson, learners should
have mastered the sound of the letter, pronounce its name, be able
to identify it and write it, (upper and lower case).
Materials: chalk, chalkboard, song or text written on the board or a piece of paper, alphabet
chart.
Previous Knowledge: Letters n, a, k, m, s, t, i, r, d, f, ts, b.
Facilitator’s Tips:
Remember to come to your class early so you can write the text of the day on
the board and write out any other text you may use. Do not take instructional
time to write the text of the day on the board—do it before class!
Important Ideas:
Oral language development supports reading and writing; during the SEL
segment, be sure to let pupils talk in class!
SEL Ideas:
Waraka means healing in Hausa and word starts with the letter w.
Step &
Icons
Time Activity procedure
10 minutes
Introduction
1. Say good morning to the children and welcome them. Ask if
everyone has taken their name tag.
2. Ask the children what they learned in their last reading class.
They should say the sound /b/. Say a word with /b/ in it and
ask them to repeat. Ask for a word from them with the same
sound /b/; have them repeat these two words in choral form.
3. Write the following morning message on the board (before
class begins):
Wata yarinya ta yi
Wanka da wanki ta tafi makaranta.
Underline the letter k in the phrase above. Also underline the
letter w when and wherever it appears.
Read the phrase on the board slowly, pointing at each word as
you say it. Do this three times. On the third time, stop at the
letter K you have underlined and ask students what it is; have
them make the sound again. Ask the pupils to say the phrase
with you again. Point to the words as you say the phrase.
Ask the pupils if they can tell you what the phrase means.
W w
Education Crisis Response - Facilitator’s Guide
89 | Part 1 – Reading lessons
Step &
Icons
Time Activity procedure
Now, ask the pupils to make the sound /w/. Have them repeat
it several times. Point to the letter and tell them that we are
going to learn the letter W w today.
15 minutes
5 minutes
5 minutes
Presentation: Facilitator presents the new letter and
involves children by repeating the sound, the letter and
having them write it.
1. Write the letter on the board: W w. Tell the students
this is the letter W w. Tell pupils the letter name. Ask
them to repeat it.
2. Point to the consonant w and ask them if they know
what sound it makes. Give them an example of the
sound. Walk around the class letting the pupils see
your mouth making the /w/ sound.
3. Ask the children to write a large W and a small w in
their notebook. Go around and look at what the
children are writing, helping those who need it.
4. Say the sound yourself several times. Explain that the
big W and the little w still make the same sound.
Practice: The children have a chance to practice the letter
sound and writing with the teacher, in small groups, pairs
or individually.
First segment (learning the sound)
1. Put children in pairs; one partner says the letter sound
/w/ and the other says the letter name W. After a
minute, have them switch roles.
2. Facilitator, go around in the classroom to listen and see
if the pairs are doing well with the sound and the letter
name.
3. Pick some pairs to demonstrate after they have worked
for a minute or two.
4. Have the pupils stand up and make the letter sound W
w 10 times shaking their heads.
5. Tell them they did a great job.
Second segment (hearing the sound in words)
1. Ask pupils what other words they know that start with
the same sound. (They may give you a word from the
phrase above that starts with W w or another word they
know.) Write all these on the board.
2. Congratulate them as hopefully they have given you
some examples of words that start with W w. If they
have not, give them some examples yourself and write
these on the board. Point out the W words in the
Education Crisis Response - Facilitator’s Guide
90 | Part 1 – Reading lessons
Step &
Icons
Time Activity procedure
5 minutes
10 minutes
morning message as well. Some words you can use are:
wanka, wanki, waya, waraka, wauta
3. Tell them that the sound /w/ can occur in different
places in a word. Ask them for words where the /w/ is
in the middle of the word. Write those on the board.
(Examples: dawa and baiwa, etc.)
4. Point to the words on the board and say them in unison
with the children, emphasizing the /w/ sound.
5. Ask everyone in the class whose given name starts with
W to stand up; have them say their name, emphasizing
the /w/ sound. Write the names on the board.
6. Ask everyone who has a /w/ sound in their family name
to stand up. Have them say their name so everyone can
hear the /w/ sound. Point out where the /w/ sound
occurs.
Segment 3 (recognizing the W w in print)
7. Point to the phrase written out on a piece of paper or the
chalkboard that you used in the introduction.
8. Recite it at least two times, pointing to the words as
you say them;
9. Have the pupils recite the phrase with you a few times.
10. Ask the pupils to look at the text and tell you how many
words in the phrase contain the letter W w. Point out
again that the sound W w can occur at the middle or end
of words. Point to the words you wrote on the board
earlier that have a W w in them.
11. Ask several pupils to come forward and point to the
letter W w in one of the words on the board.
12. Have all the pupils stand up and use their finger to write
a big W in the air. Have them write a small w in the air.
They can help each other as they do this.
13. Tell them they all did a great job.
SEL Message: Tell the pupils that the word waraka begins
with a W w. It means healing in English. Healing is an
important process for people who have been hurt. If a person is
sick or injured, they need to heal. Likewise, feelings can be
hurt too and when feelings are hurt, a person also needs time to
heal.
10 minutes Performance (Assessment)
1. Have everyone whose surname starts with W stand up
and make a letter w in the air using their finger.

Education Crisis Response - Facilitator’s Guide
91 | Part 1 – Reading lessons
Step &
Icons
Time Activity procedure
2. Call on various children (boys and girls) to give you the
sound /w/ or the letter name or point to W w on the
alphabet chart.
3. Have everyone write a line of W w in their
notebook.Go round and help children as needed.
5 minutes Conclusions/Review
1. Tell children that they now know the name and the
sound of the letter W w. They also know how to write
it. Tell them many words start with the W w sound and
they have named some of them.
2. Chant the phrase on the board one last time, pointing to
the words as the pupils sing/chant.
Reflection: Teacher, write down notes for yourself on this lesson. Did you enjoy the lesson?
How do you think we can improve on it? If you make some notes, then when you teach this
lesson again, you will remember what worked well and where you found some challenges.
This will help you to improve the lesson next time you teach it.
.
Education Crisis Response - Facilitator’s Guide
92 | Part 1 – Reading lessons
Quick start reading lesson #18 - Consonants, letter G g
Skills: Phonemic awareness, letter G; phonics, letter G g.
Time: 65 minutes
Learning Objectives: At the end of the lesson, learners should have
mastered the sound of the letter, pronounce its name, be able to identify
it and write it, (upper and lower case).
Materials: chalk, chalkboard, song or text written on the board or a piece of paper, alphabet
chart.
Previous Knowledge: Letters n, a, k, m, s, t, i, r, f, ts, b, w.
Facilitator’s Tips:
Face the pupils when you talk to them so they can see your mouth making the
letter sound. When you write on the board or on a piece of paper, make sure
you write big enough so everyone can see what you write.
Important Ideas:
Make sure the pupils can say the letter name and the letter sound. These are
not the same thing. Make sure pupils can recognize the letter G g and write the
letter G g.
SEL Ideas:
The word gajiya (tiredness in English) starts with the /g/ sound. Use this as a
vocabulary word for the letter G g according to the directions below.
Step &
Icons
Time Activity procedure
10 minutes
Introduction
1. Say good morning to the children and welcome them. Ask
if everyone has taken their name tag.
2. Ask the children what they learned in their last reading
class. They should say the sound /w/. Say a word with /w/
in it and ask them to repeat. Ask for a word from them
with the same sound /w/; have them repeat these two words
in choral form.
3. Write the following morning message on the board (before
class begins)
A guje wa gaggawa cikin rayuwa abita da sannu sabo
da a guje wa illarta.
Underline a vowel in the sentence and the letter W w. Also
underline the letter g when and wherever it appears. Read the
phrase on the board slowly, pointing at each word as you say it.
Do this three times. Read it with some energy.
On the third time, stop at the vowel you have underlined and
ask students what it is; have them make the sound again. Do
the same for the w you have underlined.
G g
Education Crisis Response - Facilitator’s Guide
93 | Part 1 – Reading lessons
Step &
Icons
Time Activity procedure
Now, ask the pupils to say the phrase with you. Have them
repeat it several times.
Ask them to make the sound /g/. Have them repeat it several
times.
Point to the letter G and tell them that we are going to learn the
letter G g today.
15 minutes
5 minutes
5 minutes
Presentation: Facilitator presents the new letter and
involves children by repeating the sound, the letter and
having them write it.
1. Write the letter on the board: G and g. Tell the
students this is the letter G g. Tell pupils the letter
name. Ask them to repeat it.
2. Point to the consonant g and ask them if they know
what sound it makes. Give them an example of the
sound. Walk around the class letting the pupils see
your mouth making the /g/ sound.
3. Ask the children to write a large G and a small g in
their notebook. Go around and look at what the
children are writing, helping those who need it.
4. Say the sound yourself several times. Explain that the
big G and the little g still make the same sound.
Practice: The children have a chance to practice the letter
sound and writing with the teacher, in small groups, pairs
or individually.
First segment (learning the sound)
1. Put children in pairs; one partner says the letter sound
and the other says the letter name. After a minute, have
them switch roles.
2. Facilitator, go around in the classroom to listen and see
if the pairs are doing well with the sound and the letter
name.
3. Pick some pairs to demonstrate after they have worked
for a minute or two.
4. Have the students stand up and make the letter sound G
g 10 times while nodding their head up and down.
5. Tell them they did a great job.
Second segment (hearing the sound in words)
6. Ask pupils what other words they know that start with
the same sound. (They may give you a word from the
phrase above that starts with G g or another word they
know.) Write all these on the board.
Education Crisis Response - Facilitator’s Guide
94 | Part 1 – Reading lessons
Step &
Icons
Time Activity procedure
5 minutes
10 minutes
7. Congratulate them as hopefully they have given you
some examples of words that start with G g. If they
have not, give them some examples yourself and write
these on the board. Point out the G words in the
morning message as well. Some words you can use are:
gado, giwa, gudu, garu and rago
8. Tell them that the sound /g/ can occur in different
places in the word. Ask them for words where /g/ is in
the middle of the word. Write those on the board.
(Examples: bege, agogo, mage and kogo, etc.)
9. Point to the words on the board and say them in unison
with the children, emphasizing the/g/ sound.
10. Ask everyone in the class whose given name starts with
G to stand up; have them say their name, emphasizing
the /g/ sound. Write the names on the board.
11. Ask everyone who has a /g /sound in their family name
to stand up. Have them say their name so everyone can
hear the /g/ sound. Point out where the /g/ sound
occurs.
Segment 3 (recognizing the G g in print)
12. Point to the phrase, song or poem written out on a piece
of paper or the chalkboard that you used in the
introduction.
13. Chant or recite it at least two times, pointing to the
words as you say them;
14. Have the pupils sing the song or recite the poem with
you a few times.
15. Ask the pupils to look at the text and tell you how many
words in the poem contain the letter G g. Point out that
the sound /g/ can occur at the middle or end of words.
16. Ask several pupils to come forward and point to the
letter the G g in the song.
17. Have all the pupils stand up and use their finger to write
a big G in the air. Have them write a small g in the air.
They can help each other as they do this.
18. Tell them they all did a great job.
SEL Message: Tell the pupils that the word gajiya (which
means tiredness in English) starts with G. Write it on the
board. Ask pupils if they feel tired today. If some say yes, ask
what makes them feel tired. Ask them what things make them
feel tired.
Education Crisis Response - Facilitator’s Guide
95 | Part 1 – Reading lessons
Step &
Icons
Time Activity procedure
10 minutes Performance (Assessment)
1. Have everyone whose surname starts with G stand up
and make a letter g in the air using their finger.
2. Call on various children (boys and girls) to give you the
sound /g/or the letter name or point to G g on the
alphabet chart.
3. Have everyone write a line of G g in their notebook.
Go round and help children as needed.
5 minutes Conclusions/Review
1. Tell children that they now know the name and the
sound of the letter G g. They also know how to write
it. Tell them many words start with the /G g/ sound
and they have named some of them.
2. Chant the G g song one last time, pointing to the words
as the pupils sing/chant.
Reflection: Teacher, write down notes for yourself on this lesson. Did you enjoy the
lesson? How do you think we can improve on it? If you make some notes, then when you
teach this lesson again, you will remember what worked well and where you found some
challenges. This will help you to improve the lesson next time you teach it.
.
Education Crisis Response - Facilitator’s Guide
96 | Part 1 – Reading lessons
Quick start reading lesson #19 - Consonants, letter Y y.
Skills: Phonemic awareness, letter Y; phonics, letter Y y.
Time: 65 minutes
Learning Objectives: At the end of the lesson, learners should have
mastered the sound of the letter, pronounce its name, be able to identify
it and write it, (upper and lower case).
Materials: chalk, chalkboard, song or text written on the board or a piece of paper, alphabet
chart.
Previous Knowledge: letters n, a, k, m, s, t, i, r, d, f, ts, b, w, g.
Facilitator’s Tips:
Do not speak to the chalkboard—face the children and make eye contact with
them as you speak.
Important Ideas:
If the pupils participate in the lesson and have the chance to practice what
they are learning, they will remember what they are learning.
SEL Ideas:
Step &
Icons
Time Activity procedure
10 minutes
Introduction
1. Say good morning to the children and welcome them. Ask
if everyone has taken their name tag.
2. Ask the children what they learned in their last reading
class. They should say the sound /g/. Say a word with /g/ in
it and ask them to repeat. Ask for a word from them with
the same sound /g/; have them repeat these two words in
choral form.
3. Write the following morning message on the board (before
class begins).
Underline a long vowel and the letter Y y in the phrase above.
Read the phrase on the board slowly, pointing at each word as
you say it. Do this three times. On the third time, stop at the
long vowel you have underlined and ask students what it is;
have them make the sound again. Do the same for the letter y.
Ask the pupils to say the phrase with you. Point to the words
as you say the phrase. Tell the pupils what the phrase means;
try to connect it to their daily lives and ask them questions.
Now, ask the pupils to make the sound /y/. Have them repeat it
several times. Point to the letter and tell them that we are going
to learn the letter Y y today.
Y y
Education Crisis Response - Facilitator’s Guide
97 | Part 1 – Reading lessons
Step &
Icons
Time Activity procedure
15 minutes
5 minutes
5 minutes
Presentation: Facilitator presents the new letter and
involves children by repeating the sound, the letter and
having them write it.
1. Write the letter on the board: Y and y. Tell the
students this is the letter Y y. Tell pupils the letter
name. Ask them to repeat it.
2. Point to the consonant y and ask them if they know
what sound it makes. Give them an example of the
sound. Walk around the class letting the pupils see
your mouth making the /y/ sound.
3. Ask the children to write a large Y and a small y in their
notebook. Go around and look at what the children are
writing, helping those who need it.
4. Say the sound yourself several times. Explain that the
big Y and the little y still make the same sound.
Practice: The children have a chance to practice the letter
sound and writing with the teacher, in small groups, pairs
or individually.
First segment (learning the sound)
5. Put children in pairs; one partner says the letter sound
/y/ and the other says the letter name Y. After a minute,
have them switch roles.
6. Facilitator, go around in the classroom to listen and see
if the pairs are doing well with the sound and the letter
name.
7. Pick some pairs to demonstrate after they have worked
for a minute or two.
8. Have the pupils stand up and make the letter sound Y y
10 times shaking their body.
9. Tell them they did a great job.
Second segment (hearing the sound in words)
10. Ask pupils what other words they know that start with
the same sound. (They may give you a word from the
phrase above that starts with Y y or another word they
know.) Write all these on the board.
11. Congratulate them as hopefully they have given you
some examples of words that start with Y y. If they
have not, give them some examples yourself and write
these on the board. Point out the Y words in the
morning message as well. Some words you can use are:
12. Tell them that the sound /y/ can occur in different
places in the word. Ask them for words where /y/ is in
Education Crisis Response - Facilitator’s Guide
98 | Part 1 – Reading lessons
Step &
Icons
Time Activity procedure
5 minutes
5 minutes
the middle of the word. Write those on the board.
(Examples: etc.)
13. Point to the words on the board and say them in unison
with the children, emphasizing the /y/ sound.
14. Ask everyone in the class whose given name starts with
Y to stand up; have them say their name, emphasizing
the /y/ sound. Write the names on the board.
15. Ask everyone who has a /y/ sound in their family name
to stand up. Have them say their name so everyone can
hear the /y/ sound. Point out where the /y/ sound
occurs.
Segment 3 (recognizing the Y y in print)
16. Point to the phrase written out on a piece of paper or the
chalkboard that you used in the introduction.
17. Recite it at least two times, pointing to the words as
you say them;
18. Have the pupils recite the phrase with you a few times.
19. Ask the pupils to look at the text and tell you how many
words in the phrase contain the letter Y y. Point out
again that the sound Y y can occur at the middle or end
of words. Point to the words you wrote on the board
earlier that have a Y y in them.
20. Ask several pupils to come forward and point to the
letter Y y in one of the words on the board.
21. Have all the pupils stand up and use their finger to write
a big Y in the air. Have them write a small y in the air.
They can help each other as they do this.
22. Tell them they all did a great job.
SEL Message:
10 minutes Performance (Assessment)
1. Have everyone whose surname starts with Y stand up
and make a letter y in the air using their finger.
2. Call on various children (boys and girls) to give you the
sound /y/ or the letter name or point to Y y on the
alphabet chart.
3. Have everyone write a line of Y y in their notebook.
Go round and help children as needed.
5 minutes Conclusions/Review
1. Tell children that they now know the name and the
sound of the letter Y y. They also know how to write it.

Education Crisis Response - Facilitator’s Guide
99 | Part 1 – Reading lessons
Step &
Icons
Time Activity procedure
Tell them many words start with the Y y sound and they
have named some of them.
2. Chant the phrase on the board one last time, pointing to
the words as the pupils sing/chant.
Reflection: Teacher, write down notes for yourself on this lesson. Did you enjoy the lesson?
How do you think we can improve on it? If you make some notes, then when you teach this
lesson again, you will remember what worked well and where you found some challenges.
This will help you to improve the lesson next time you teach it.

Education Crisis Response - Facilitator’s Guide
100 | Part 1 – Reading lessons
Quick start reading lesson #20 - Consonants, letter L l.
Skills: Phonemic awareness, letter L; phonics, letter L l
Time: 65 minutes
Learning Objectives: At the end of the lesson, learners should have
mastered the sound of the letter, pronounce its name, be able to identify
it and write it, (upper and lower case).
Materials: chalk, chalkboard, song or text written on the board or a piece of paper, alphabet
chart.
Previous Knowledge: letters n, a, k, m, s, t, l , r, d, f, ts, b, w, g, y.
Facilitator’s Tips: Point to words as you read them, either on the board, in a
story book or on the word wall. This helps children as they develop concepts of
print and helps them to recognize words.
Important Ideas: Make sure the pupils pronounce the sound /l/ correctly;
demonstrate how they should move their mouth and tongue to make the sound.
SEL Ideas: The school is an important place where pupils can prepare
themselves to reach their goals in life.
Step &
Icons
Time Activity procedure
10 minutes
Introduction
1. Say good morning to the children and welcome them. Ask
if everyone has taken their name tag.
2. Ask the children what they learned in their last reading
class. They should say the sound /y/. Say a word with /y/
in it and ask them to repeat. Ask for a word from them
with the same sound /y/; have them repeat these two words
in choral form.
3. Write the following morning message on the board (before
class begins):
Ilimi tushen zaman lafiya
Soyayya da fahimtar juna tsakanin mutane shine
lasisin zaman lafiya
Underline a long vowel in the sentence as well as the letter y.
Also underline the letter l where it appears.
Read the phrase on the board slowly, pointing at each word as
you say it. Do this three times. On the third time, stop at the
long vowel you have underlined and ask students what it is;
have them make the sound again. Do the same for the letter y.
Ask the pupils to say the phrase with you. Point to the words
as you say the phrase. You can clap and chant the phrase if
you wish; this often makes it more fun for the pupils. Ask
L l
Education Crisis Response - Facilitator’s Guide
101 | Part 1 – Reading lessons
Step &
Icons
Time Activity procedure
them what the phrase means. Tell them if they do not know
and try to connect it to their lives.
Now, ask the pupils to make the sound /l/. Have them repeat it
several times. Point to the letter and tell them that we are going
to learn the letter L l today.
15 minutes
5 minutes
5 minutes
Presentation: Facilitator presents the new letter and
involves children by repeating the sound, the letter and
having them write it.
1. Write the letter on the board: L and l. Tell the students
this is the letter L l. Tell pupils the letter name. Ask
them to repeat it.
2. Point to the consonant l and ask them if they know
what sound it makes. Give them an example of the
sound. Walk around the class letting the pupils see
your mouth making the /l/ sound.
3. Ask the children to write a large L and a small l in their
notebook. Go around and look at what the children are
writing, helping those who need it.
4. Say the sound yourself several times. Explain that the
big L and the small l still make the same sound.
Practice: The children have a chance to practice the letter
sound and writing with the teacher, in small groups, pairs
or individually.
First segment (learning the sound)
1. Put children in pairs; one partner says the letter sound
/l/and the other says the letter name L. After a minute,
have them switch roles.
2. Facilitator, go around in the classroom to listen and see
if the pairs are doing well with the sound and the letter
name.
3. Pick some pairs to demonstrate after they have worked
for a minute or two.
4. Have the pupils stand up and make the letter sound L l
10 times while standing on one foot.
5. Tell them they did a great job.
Second segment (hearing the sound in words)
6. Ask pupils what other words they know that start with
the same sound. (They may give you a word from the
phrase above that starts with L l or another word they
know.) Write all these on the board.
7. Congratulate them as hopefully they have given you
some examples of words that start with L l. If they

Education Crisis Response - Facilitator’s Guide
102 | Part 1 – Reading lessons
Step &
Icons
Time Activity procedure
5 minutes
10 minutes
have not, give them some examples yourself and write
these on the board. Point out the L words in the
morning message as well. Some words you can use are:
lafiya, lada, leda, lura, liyafa, lokaci, etc.
8. Tell them that the sound /l/ can occur in different places
in the word. Ask them for words where the /l/ is in the
middle of the word. Write those on the board.
(Examples: lilo, dole, tulu, hali, bulala, etc.)
9. Point to the words on the board and say them in unison
with the children, emphasizing the /l/ sound.
10. Ask everyone in the class whose given name starts with
L to stand up; have them say their name, emphasizing
the /l/ sound. Write the names on the board.
11. Ask everyone who has a /l/ sound in their family name
to stand up. Have them say their name so everyone can
hear the /l/ sound. Point out where the /l/ sound occurs.
Segment 3 (recognizing the L l in print)
12. Point to the phrase written out on a piece of paper or
the chalkboard that you used in the introduction.
13. Recite it at least two times, pointing to the words as
you say them.
14. Have the pupils recite the phrase with you a few times.
15. Ask the pupils to look at the text and tell you how many
words in the phrase contain the letter L l. Point out
again that the sound L l can occur at the middle or end
of words. Point to the words you wrote on the board
earlier that have an L l in them.
16. Ask several pupils to come forward and point to the
letter L l in one of the words on the board.
17. Have all the pupils stand up and use their finger to
write a big L in the air. Have them write a small l in
the air.
18. Tell them they all did a great job.
SEL Message: Tell the pupils that the word ilimi has an l in
it. It means knowledge. Pupils need knowledge of how to read
and write to pursue their goals in life. They can learn these
skills in the NFLC. Ask the children what they want to be
when they grow up.
10 minutes Performance (Assessment)
1. Have everyone whose surname starts with L stand up
and make a letter l in the air using their finger.
Education Crisis Response - Facilitator’s Guide
103 | Part 1 – Reading lessons
Step &
Icons
Time Activity procedure
2. Call on various children (boys and girls) to give you the
sound /l/or the letter name or point to L l on the
alphabet chart.
3. Have everyone write a line of L l in their notebook. Go
round and help children as needed.
5 minutes Conclusions/Review
1. Tell children that they now know the name and the
sound of the letter L l. They also know how to write it.
Tell them many words start with the L l sound and they
have named some of them.
2. Chant the phrase on the board one last time, pointing to
the words as the pupils sing/chant.
Reflection: Teacher, write down notes for yourself on this lesson. Did you enjoy the
lesson? How do you think we can improve on it? If you make some notes, then when you
teach this lesson again, you will remember what worked well and where you found some
challenges. This will help you to improve the lesson next time you teach it.
Education Crisis Response - Facilitator’s Guide
104 | Part 1 – Reading lessons
Quick start reading lesson # 21 - Vowel, letter U u.
Skills: Phonemic awareness, letter U (short and long); phonics, letter U u.
Time: 65 minutes
Learning Objectives: At the end of the lesson, learners should have
mastered the sound of the letter, both long and short, pronounce its name,
be able to identify it and write it, (upper and lower case).
Materials: chalk, chalkboard, song or text written on the board or a piece
of paper, alphabet chart.
Previous Knowledge: Letters n, a, k, m, s, t, i, r, d, f, ts, b, w, g, y, l.
Facilitator’s Tips: Speak very clearly and loudly when making the letter sound
so that pupils can all hear you and see your mouth move as you make the sound.
Important Ideas: Pupils need to practice making the letter sounds; be sure to
model how to make the sounds for them and give them time to practice.
SEL Ideas: We must be tolerant of others and we ask them to be tolerant of us.
Step &
Icons
Time Activity procedure
10 minutes
Introduction
1. Say good morning to the children and welcome them.
Ask the children if they have each taken their name tag
to their seat with them. If some have not, be sure to
give them their name tag.
Ask the pupils why reading is important. Tell them they are all
going to learn to be excellent readers and writers soon.
2. Write the following morning message on the board:
Edita shi ne mai gyare--gyare wanda zai inganta rubuce –
rubucenmu.
Be sure to underline a long and a short vowel in the sentence
that the pupils have already learned.
Read the phrase on the board slowly, pointing at each word as
you say it. Do this three times. On the third time, stop at the
long vowel you have underlined and ask students what it is.
Have them make the vowel sound both long and short. Tell
them we are going to learn another vowel today. Point to the
first word in the sentence that starts with E ask the students to
make the sound /u/. Point to another word with e in it. Make
the sound again.
Tell them that we are going to learn the letter U u today and
this letter can make two sounds. Tell them that U u is a vowel
U u
A

Education Crisis Response - Facilitator’s Guide
105 | Part 1 – Reading lessons
Step &
Icons
Time Activity procedure
and vowels are very useful letters as almost all words have
vowels.
15 minutes
5 minutes
5 minutes
Presentation: Facilitator presents the new letter and
involves children by repeating the sound, the letter and
having them write it.
1. Write the letter on the board: U and u.
2. Tell the students this is the letter U. Make the sound
long /u/ and ask them to repeat it.
3. Have pupils repeat the sounds; ask them what other
words they know that start with the same sound.
(Examples: ungo, maiunguwa add some of your own
examples, facilitator.) Write all these words on the
board
4. Write on the board some words that have the short /u/
sound in them: Dutse. Have the pupils repeat these
words.
5. Write on the board some words that have the long /u/
sound in them: unguwa, Ummi …..
6. Say the sounds again yourself several times. Explain
that the big U and the small u still make the same
sounds.
Practice: The children have a chance to practice the letter
sound and writing with the teacher, in small groups, pairs
or individually.
First segment (learning the sound)
1. Put children in pairs; one partner says the letter sound
/u/ and the other says the letter name u. After a minute,
have them switch roles.
2. Facilitator, walk around in the classroom to listen and
see if the pairs are doing well with the sound and the
letter name.
3. Pick some pairs to demonstrate after they have worked
for a minute or two.
4. Have the pupils stand up and make the letter sound U u
10 times while hopping on their left foot. (Have them
hop 5 times while making short /u/ sound and 5 times
while making the long /u/ sound.
5. Tell them they did a great job.
Second segment (hearing the sound in words)
6. Ask pupils what other words they know that start with
the same sound. (They may give you a word from the

Education Crisis Response - Facilitator’s Guide
106 | Part 1 – Reading lessons
Step &
Icons
Time Activity procedure
5 minutes
10 minutes
phrase above that starts with U u or another word they
know.) Write all these on the board.
7. Congratulate them as hopefully they have given you
some more examples of words that start with U u. If
they have not, give them some examples yourself and
write these on the board. Point out the U words in the
morning message as well.
8. Tell them that the sound /u/ can occur in different
places in a word. Ask them for words where the /u/ is
in the middle of the word. Write those on the board.
(Examples hukuma, azumi: etc.)
9. Point to the words on the board and say them in unison
with the children, emphasizing the /u/ sound.
10. Ask everyone in the class whose given name starts with
U (long or short) to stand up; have them say their name,
emphasizing the /u/ sound. Write the names on the
board.
11. Ask everyone who has /u/ sound in their family name
(long or short) to stand up. Have them say their name
so everyone can hear the /u/ sound. Point out where the
/u/ sound occurs and whether it is long or short.
Segment 3 (recognizing the U u in print)
12. Point to the phrase written out on a piece of paper or the
chalkboard that you used in the introduction.
13. Recite it at least two times, pointing to the words as
you say them.
14. Have the pupils recite the phrase with you a few times.
15. Ask the pupils to look at the text and tell you how many
words in the phrase contain the letter U u. Point out
again that the sound U can occur at the middle or end of
words. Point to the words you wrote on the board
earlier that have a U u in them.
16. Ask several pupils to come forward and point to the
letter U u in one of the words on the board.
17. Have all the pupils stand up and use their finger to write
a big U in the air. Have them write a small u in the air.
They can help each other as they do this.
18. Tell them they all did a great job.
SEL Message: Nigeria is blessed with many different peoples,
with many languages, traditions and social groups. In order to
live together peacefully all citizens must be tolerant of other
groups and their differences. Can the pupils give you an
Education Crisis Response - Facilitator’s Guide
107 | Part 1 – Reading lessons
Step &
Icons
Time Activity procedure
example of what it means to be tolerant? Have at last 10 pupils
offer ideas.
10 minutes Performance (Assessment)
1. Have everyone whose given name starts with U stand
up and make a letter U in the air using their finger.
2. Call on various children (boys and girls) to give you the
sound /u/ or the letter name or point to U u on the
alphabet chart.
3. Have everyone write a line of U u in their notebook.
Walk around and help children as needed.
5 minutes Conclusions/Review
1. Tell children that they now know the name and the
sound of the letter U u. They also know how to write it.
Tell them many words start with the U u sound and
they have named some of them.
2. Chant the phrase on the board one last time, pointing to
the words as the pupils sing/chant.
Reflection: Teacher, write down notes for yourself on this lesson. Did you enjoy the lesson?
How do you think we can improve on it? If you make some notes, then when you teach this
lesson again, you will remember what worked well and where you found some challenges.
This will help you to improve the lesson next time you teach it.
.
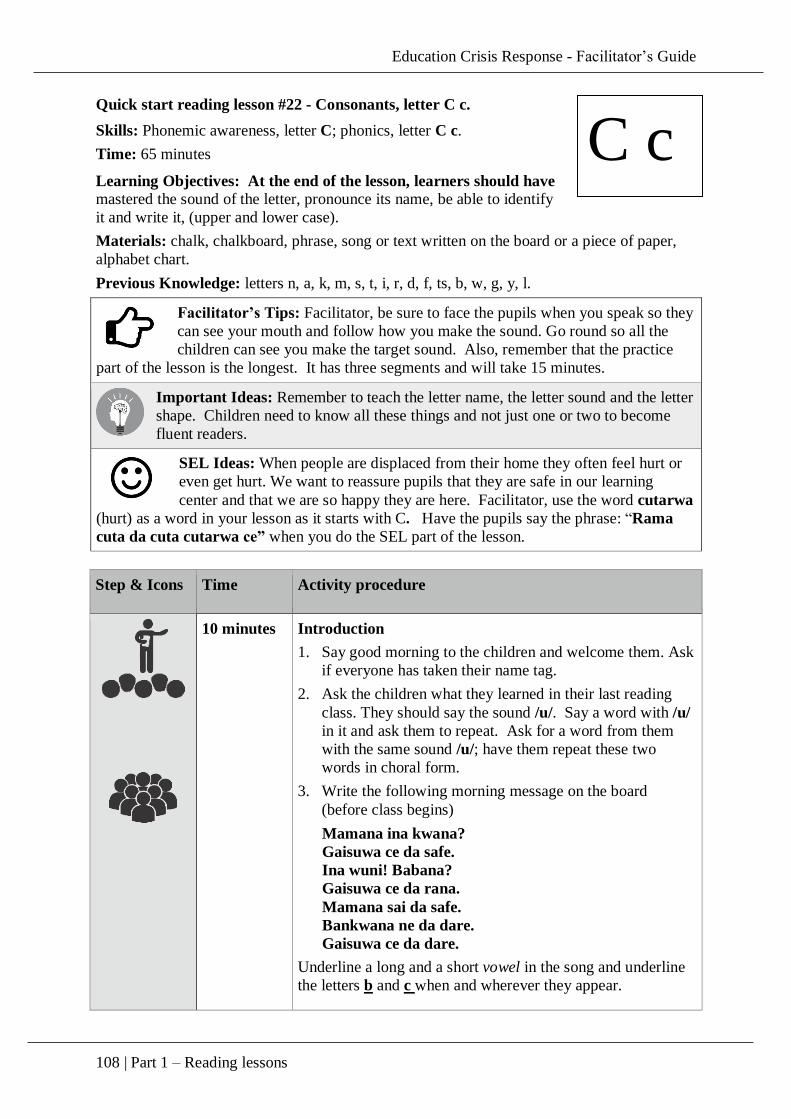
Education Crisis Response - Facilitator’s Guide
108 | Part 1 – Reading lessons
Quick start reading lesson #22 - Consonants, letter C c.
Skills: Phonemic awareness, letter C; phonics, letter C c.
Time: 65 minutes
Learning Objectives: At the end of the lesson, learners should have
mastered the sound of the letter, pronounce its name, be able to identify
it and write it, (upper and lower case).
Materials: chalk, chalkboard, phrase, song or text written on the board or a piece of paper,
alphabet chart.
Previous Knowledge: letters n, a, k, m, s, t, i, r, d, f, ts, b, w, g, y, l.
Facilitator’s Tips: Facilitator, be sure to face the pupils when you speak so they
can see your mouth and follow how you make the sound. Go round so all the
children can see you make the target sound. Also, remember that the practice
part of the lesson is the longest. It has three segments and will take 15 minutes.
Important Ideas: Remember to teach the letter name, the letter sound and the letter
shape. Children need to know all these things and not just one or two to become
fluent readers.
SEL Ideas: When people are displaced from their home they often feel hurt or
even get hurt. We want to reassure pupils that they are safe in our learning
center and that we are so happy they are here. Facilitator, use the word cutarwa
(hurt) as a word in your lesson as it starts with C. Have the pupils say the phrase: “Rama
cuta da cuta cutarwa ce” when you do the SEL part of the lesson.
Step & Icons Time Activity procedure
10 minutes
Introduction
1. Say good morning to the children and welcome them. Ask
if everyone has taken their name tag.
2. Ask the children what they learned in their last reading
class. They should say the sound /u/. Say a word with /u/
in it and ask them to repeat. Ask for a word from them
with the same sound /u/; have them repeat these two
words in choral form.
3. Write the following morning message on the board
(before class begins)
Mamana ina kwana?
Gaisuwa ce da safe.
Ina wuni! Babana?
Gaisuwa ce da rana.
Mamana sai da safe.
Bankwana ne da dare.
Gaisuwa ce da dare.
Underline a long and a short vowel in the song and underline
the letters b and c when and wherever they appear.
C c
Education Crisis Response - Facilitator’s Guide
109 | Part 1 – Reading lessons
Step & Icons Time Activity procedure
Read the song on the board slowly, pointing at each word as
you say it. Do this three times.
On the third time, stop at the vowel you have underlined and
ask students what it is; have them make the sound again.
Continue to a word that starts with b; ask the students to make
the sound /b/. Have them repeat it several times.
Point to the letter C c and tell them that we are going to learn
the letter C c today.
15 minutes
5 minutes
5 minutes
Presentation: Facilitator presents the new letter and
involves children by repeating the sound, the letter and
having them write it.
1. Write the letter on the board: C and c. Tell the
students this is the letter C c. Tell pupils the letter
name. Ask them to repeat it.
2. Point to the consonant c and ask them if they know
what sound it makes. Give them an example of the
sound. Walk around the class letting the pupils see
your mouth making the /c/ sound.
3. Ask the children to write a large C and a small c in
their notebook.
4. Say the sound yourself several times. Explain that the
big C and the small c still make the same sound.
Practice: The children have a chance to practice the letter
sound and writing with the teacher, in small groups, pairs
or individually.
First segment (learning the sound)
1. Put children in pairs; one partner says the letter name
and the other says the letter sound. After a minute,
have them switch roles.
2. Facilitator, walk round the classroom to listen and see
if the pairs are doing well with the sound and the letter
name.
3. Pick some pairs to demonstrate after they have worked
for a minute or two. Pick different pairs from the ones
you picked in the last lesson.
4. Have the students stand up and make the letter sound
/C c/ 10 times while hopping on one foot.
5. Tell them they did a great job.
Second segment (hearing the sound in words)
6. Ask pupils what other words they know that start with
the same sound. (They may give you a word from the
Education Crisis Response - Facilitator’s Guide
110 | Part 1 – Reading lessons
Step & Icons Time Activity procedure
5 minutes
morning message that starts with C or another word
they know.) Write all these on the board.
7. Congratulate them as hopefully they have given you
some examples of words that start with C c. If they
have not, give them some examples yourself and write
these on the board. Point out the C words in the
morning message as well. Some words you can use
are: canji, ci, ceto, cokali, cuna
8. Write this phrase on the board (before the class).
Point to it and have pupils come forward and
underline the letter C c that they see: Rama cuta da
cuta cutarwa ce.
9. Tell them that the sound /c/ can occur in different
places in the word. Ask them for words where the /c/
is in the middle of the word. Write those on the board.
(Examples include: sace, dace and coci.)
10. Point to the words on the board and say them in
unison with the children, emphasizing the /c/ sound.
11. Ask everyone in the class whose given name starts
with C to stand up; have them say their name,
emphasizing the C c sound. If there are not enough
pupils whose name starts with a C, ask them for
friends of siblings whose name starts with C. Write
the names on the board.
12. Ask everyone who has a /c/ sound in their family
name to stand up. Have them say their name
emphasizing the /c/ sound.
Segment 3 (recognizing the C c in print)
13. Point to the song or poem written out on a piece of
paper or the chalkboard that you used for the
introduction.
14. Sing or recite it at least two times, pointing to the
words as you say them;
15. Have the pupils sing the song or recite the poem with
you a few times.
16. Ask the pupils to look at the text and tell you how
many words in the poem contain the letter C c. Tell
the pupils that the sound C c can occur at the middle
or end of words
17. Ask several pupils to come forward and point to the
letter C c in the poem.
Education Crisis Response - Facilitator’s Guide
111 | Part 1 – Reading lessons
Step & Icons Time Activity procedure
5 minutes
18. Have all the pupils stand up and use their arms and
body to form the letter C. They can help each other as
they do this.
19. Tell them they all did a great job.
20. Still standing, sing or recite the C c song/poem again
SEL Message: Have the pupils say the phrase: Rama cuta
da cuta cutarwa ce. Tell the pupils that the word cutarwa
(hurt in English) starts with C. Write it on the board. Ask
pupils what they do to feel better when they are hurt? (Offer
them some suggestions yourself from the SEL curriculum if
they do not have any ideas—talk with friends, play with
siblings, hug mama or baba, etc.)
10 minutes Performance (Assessment)
1. Have everyone whose surname starts with C stand up
and make a letter c using their arms.
2. Call on various children (boys and girls) to give you
the sound /c/ or the letter name or point to C c on the
alphabet chart.
3. Have everyone write a line of C c in their notebook.
Go round and help children as needed.
5 minutes Conclusions/Review 1. Tell children that they now know the name and the
sound of the letter C c. They also know how to write
it. Tell them that many words start with the /C c/
sound and they have named some of them.
2. Sing the /C c/ sound or chant the song one last time,
pointing to the words as the pupils sing/chant.
Reflection: Teacher, write down notes for yourself on this lesson. Did you enjoy the lesson?
How do you think we can improve on it? If you make some notes, then when you teach this
lesson again, you will remember what worked well and where you found some challenges.
This will help you to improve the lesson next time you teach it.

Education Crisis Response - Facilitator’s Guide
112 | Part 1 – Reading lessons
Quick start reading lesson #23 - Consonants, letter H h.
Skills: Phonemic awareness, letter H; phonics, letter H h.
Time: 65 minutes
Learning Objectives: At the end of the lesson, learners should have
mastered the sound of the letter, pronounce its name, be able to identify
it and write it, (upper and lower case).
Materials: chalk, chalkboard, song or text written on the board or a piece of paper, alphabet
chart.
Previous Knowledge: letters n, a, k, m, s, t, i, r, d, f, ts, b, w, g, y, l, u, c.
Facilitator’s Tips: It is important for pupils, especially young pupils to enjoy
learning; activities like drawing in the air, hopping, waving and things like this
make the lesson more fun and help the pupils to pay attention more.
Important Ideas: Make sure the pupils can say the letter name and the letter
sound. These are not the same thing. Make sure pupils can recognize the letter H h
and write the letter H h both upper and lower case.
SEL Ideas: Hakuri (patience) starts with an H. Use this as a vocabulary word
during the lesson.
Step &
Icons
Time Activity procedure
10 minutes
Introduction
1. Say good morning to the children and welcome them. Ask
if everyone has taken their name tag.
2. Ask the children what they learned in their last reading
class. They should say the sound /c/. Say a word with /c/ in
it and ask them to repeat. Ask for a word from them with
the same sound /c/; have them repeat these two words in
choral form.
3. Write the following morning message on the board (before
class begins):
Mahakurci mawadaci,
Mai hakuri yakan dafa dutse ya sha romonsa ,
Mai hakuri ba zai tabeba a rayuwa.
Underline a long vowel and a short vowel in the sentence as
well as the letter c. Also underline the letter h when and
wherever it appears.
Read the phrase on the board slowly, pointing at each word as
you say it. Do this three times.
On the third time, stop at the long vowel you have underlined
and ask students what it is; have them make the sound again.
Do the same for the short vowel you have underlined and the
letter c. Ask the pupils to say the phrase with you. Point to the
H h
Education Crisis Response - Facilitator’s Guide
113 | Part 1 – Reading lessons
Step &
Icons
Time Activity procedure
words as you say the phrase. Ask the pupils to make the sound
/h/. Have them repeat it several times.
Ask them what the song means.
Point to the letter H and tell them that we are going to learn the
letter H h today.
15 minutes
5 minutes
5 minutes
Presentation: Facilitator presents the new letter and
involves children by repeating the sound, the letter and
having them write it.
1. Write the letter on the board: H and h. Tell the
students this is the letter H h. Tell pupils the letter
name. Ask them to repeat it.
2. Point to the consonant h and ask them if they know
what sound it makes. Give them an example of the
sound. Walk around the class letting the pupils see
your mouth making the /h/ sound.
3. Ask the children to write a large H and a small h in their
notebook. Go around and look at what the children are
writing, helping those who need it.
4. Say the sound yourself several times. Explain that the
big H and the little h still make the same sound.
Practice: The children have a chance to practice the letter
sound and writing with the teacher, in small groups, pairs
or individually.
First segment (learning the sound)
1. Put children in pairs; one partner says the letter sound
and the other says the letter name. After a minute, have
them switch roles.
2. Facilitator, walk round in the classroom to listen and
see if the pairs are doing well with the sound and the
letter name.
3. Pick some pairs to demonstrate after they have worked
for a minute or two.
4. Have the students stand up and make the letter sound H
h 10 times while waving their left hand in the air.
5. Tell them they did a great job.
Second segment (hearing the sound in words)
6. Ask pupils what other words they know that start with
the same sound. (They may give you a word from the
phrase above that starts with H h or another word they
know.) Write all these on the board.
Education Crisis Response - Facilitator’s Guide
114 | Part 1 – Reading lessons
Step &
Icons
Time Activity procedure
5 minutes
10 minutes
7. Congratulate them as hopefully they have given you
some examples of words that start with H h. If they
have not, give them some examples yourself and write
these on the board. Point out the H h words in the
morning message as well. Some words you can use are:
haruffa, hoda, hukuma, hisabi, horo, hali and hikima
and others
8. Tell them that the sound /h/ can occur in different
places in the word. Ask them for words where the /h/ is
in the middle of the word or at the end of the word.
Write those on the board.
9. Point to the words on the board and say them in unison
with the children, emphasizing the /h/ sound.
10. Ask everyone in the class whose given name starts with
H to stand up; have them say their name, emphasizing
the /h/ sound. Write the names on the board.
11. Ask everyone who has a /h/ sound in their family name
to stand up. Have them say their name so everyone can
hear the /h/ sound. Point out where the /h/ sound
occurs.
Segment 3 (recognizing the H h in print)
12. Point to the phrase written out on a piece of paper or the
chalkboard that you used in the introduction.
13. Sing or recite it at least two times, pointing to the words
as you say them;
14. Have the pupils sing the song or recite the poem with
you a few times.
15. Ask the pupils to look at the text and tell you how many
words in the phrase contain the letter H h. Point out
again that the sound /H h/ can occur at the middle or
end of words. Point to the words you wrote on the
board earlier that have an H h in them.
16. Ask several pupils to come forward and point to the
letter H h in one of the words on the board.
17. Have all the pupils stand up and use their finger to write
a big H in the air. Have them write a small h in the air.
They can help each other as they do this.
18. Tell them they all did a great job.
SEL Message: Tell the pupils that the word hakuri (patience
in English) starts with the letter h. Ask them what hakuri
means. If they do not know, explain it to them. Ask them if
they are patient. When is it hard to be patient? What things
make them impatient?
Education Crisis Response - Facilitator’s Guide
115 | Part 1 – Reading lessons
Step &
Icons
Time Activity procedure
10 minutes Performance (Assessment)
1. Have everyone whose surname starts with H stand up
and make a letter h in the air using their finger.
2. Call on various children (boys and girls) to give you the
sound /h/ or the letter name or point to H h on the
alphabet chart.
3. Have everyone write a line of H h in their notebook.
Go round and help children as needed.
5 minutes Conclusions/Review 1. Tell children that they now know the name and the
sound of the letter H h. They also know how to write
it. Tell them many words start with the /H h/ sound and
they have named some of them.
2. Chant the phrase on the board one last time, pointing to
the words as the pupils sing/chant.
Reflection: Teacher, write down notes for yourself on this lesson. Did you enjoy the lesson?
How do you think we can improve on it? If you make some notes, then when you teach this
lesson again, you will remember what worked well and where you found some challenges.
This will help you to improve the lesson next time you teach it.
.
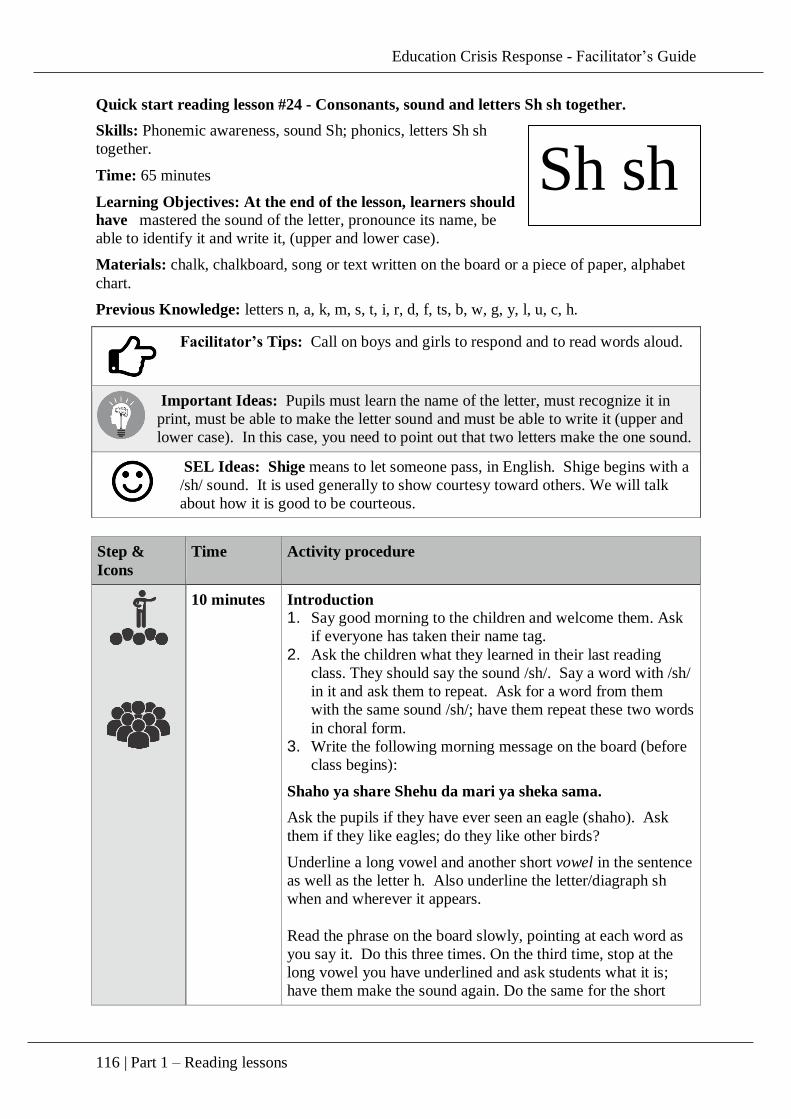
Education Crisis Response - Facilitator’s Guide
116 | Part 1 – Reading lessons
Quick start reading lesson #24 - Consonants, sound and letters Sh sh together.
Skills: Phonemic awareness, sound Sh; phonics, letters Sh sh
together.
Time: 65 minutes
Learning Objectives: At the end of the lesson, learners should
have mastered the sound of the letter, pronounce its name, be
able to identify it and write it, (upper and lower case).
Materials: chalk, chalkboard, song or text written on the board or a piece of paper, alphabet
chart.
Previous Knowledge: letters n, a, k, m, s, t, i, r, d, f, ts, b, w, g, y, l, u, c, h.
Facilitator’s Tips: Call on boys and girls to respond and to read words aloud.
Important Ideas: Pupils must learn the name of the letter, must recognize it in
print, must be able to make the letter sound and must be able to write it (upper and
lower case). In this case, you need to point out that two letters make the one sound.
SEL Ideas: Shige means to let someone pass, in English. Shige begins with a
/sh/ sound. It is used generally to show courtesy toward others. We will talk
about how it is good to be courteous.
Step &
Icons
Time Activity procedure
10 minutes
Introduction
1. Say good morning to the children and welcome them. Ask
if everyone has taken their name tag.
2. Ask the children what they learned in their last reading
class. They should say the sound /sh/. Say a word with /sh/
in it and ask them to repeat. Ask for a word from them
with the same sound /sh/; have them repeat these two words
in choral form.
3. Write the following morning message on the board (before
class begins):
Shaho ya share Shehu da mari ya sheka sama.
Ask the pupils if they have ever seen an eagle (shaho). Ask
them if they like eagles; do they like other birds?
Underline a long vowel and another short vowel in the sentence
as well as the letter h. Also underline the letter/diagraph sh
when and wherever it appears.
Read the phrase on the board slowly, pointing at each word as
you say it. Do this three times. On the third time, stop at the
long vowel you have underlined and ask students what it is;
have them make the sound again. Do the same for the short
Sh sh
Education Crisis Response - Facilitator’s Guide
117 | Part 1 – Reading lessons
Step &
Icons
Time Activity procedure
vowel you have underlined and the letter H. Ask the pupils to
say the phrase with you. Point to the words as you say the
phrase.
Now, ask the pupils to make the sound /sh/. Have them repeat
it several times. Point to the letter and tell them that we are
going to learn the letter/diagraph Sh sh today.
15 minutes
5 minutes
5 minutes
Presentation: Facilitator presents the new letter and
involves children by repeating the sound, the letter and
having them write it.
1. Write the letter on the board: Sh and sh. Tell the
students this is the letters Sh sh. Tell pupils the letter
name. Ask them to repeat it.
2. Point to the letters sh and ask them if they know what
sound they make. Give them an example of the sound.
Walk around the class letting the pupils see your mouth
making the /sh/ sound.
3. Ask the children to write a large Sh and a small sh in
their notebook. Go around and look at what the
children write, helping those who need it.
4. Say the sound yourself several times. Explain that the
big Sh and the small sh still make the same sound.
Practice: The children have a chance to practice the letter
sound and writing with the teacher, in small groups, pairs
or individually.
First segment (learning the sound)
5. Put children in pairs; one partner says the letter sound
/sh/ and the other says the letter name Sh. After a
minute, have them switch roles.
6. Facilitator, go around in the classroom to listen and see
if the pairs are doing well with the sound and the letter
name.
7. Pick some pairs to demonstrate after they have worked
for a minute or two.
8. Have the pupils stand up and make the letter sound Sh
sh 10 times jumping on both feet.
9. Tell them they did a great job.
Second segment (hearing the sound in words)
10. Ask pupils what other words they know that start with
the same sound. (They may give you a word from the
phrase above that starts with Sh sh or another word they
know.) Write all these on the board.
Education Crisis Response - Facilitator’s Guide
118 | Part 1 – Reading lessons
Step &
Icons
Time Activity procedure
5 minutes
10 minutes
11. Congratulate them as hopefully they have given you
some examples of words that start with Sh sh. If they
have not, give them some examples yourself and write
these on the board. Point out the Sh words in the
morning message as well. Some words you can use are:
sho, shu, shiga, shiri, and others.
12. Tell them that the sound /sh/ can occur in different
places in a word. Ask them for words where the /sh/ is
in the middle of the word. Write those on the board.
(Examples: nishi, kamasho, asho, bishiya, etc.)
13. Point to the words on the board and say them in unison
with the children, emphasizing the /sh/ sound.
14. Ask everyone in the class whose given name starts with
Sh to stand up; have them say their name, emphasizing
the /sh/ sound. Write the names on the board.
15. Ask everyone who has a /sh/ sound in their family name
to stand up. Have them say their name so everyone can
hear the /sh/ sound. Point out where the /sh/ sound
occurs.
Segment 3 (recognizing the Sh sh in print)
16. Point to the phrase written out on a piece of paper or the
chalkboard that you used in the introduction.
17. Recite it at least two times, pointing to the words as
you say them.
18. Have the pupils recite the phrase with you a few times.
19. Ask the pupils to look at the text and tell you how many
words in the phrase contain the letter Sh sh. Point out
again the sound Sh sh can occur at the middle or end of
words. Point to the words you wrote on the board
earlier that have a Sh sh in them.
20. Ask several pupils to come forward and point to the
letters Sh sh in one of the words on the board.
21. Have all the pupils stand up and use their finger to write
a big Sh in the air. Have them write a small sh in the
air. They can help each other as they do this.
22. Tell them they all did a great job.
SEL Message: The word shige means to let someone pass in a
polite way. Ask the children if they encounter situations where
they have to be very courteous. Is it hard to be courteous?
10 minutes Performance (Assessment)
1. Have everyone whose surname starts with Sh stand up
and make the letters sh in the air using their finger.
Education Crisis Response - Facilitator’s Guide
119 | Part 1 – Reading lessons
Step &
Icons
Time Activity procedure
2. Call on various children (boys and girls) to give you the
sound /sh/ or the letter name or point to Sh sh on the
alphabet chart.
3. Have everyone write a line of Sh sh in their notebook.
Go round and help children as needed.
5 minutes Conclusions/Review
1. Tell children that they now know the name and the
sound of the letter Sh sh. They also know how to write
it. Tell them many words start with the Sh sh sound
and they have named some of them.
2. Chant the phrase on the board one last time, pointing to
the words as the pupils sing/chant.
Reflection: Teacher, write down notes for yourself on this lesson. Did you enjoy the lesson?
How do you think we can improve on it? If you make some notes, then when you teach this
lesson again, you will remember what worked well and where you found some challenges.
This will help you to improve the lesson next time you teach it.
.

Education Crisis Response - Facilitator’s Guide
120 | Part 1 – Reading lessons
Quick start reading lesson #25 - Consonants, letter V v.
Skills: Phonemic awareness, letter V v; phonics, letter V v.
Time: 65 minutes
Learning Objectives: At the end of the lesson, learners should
have mastered the sound of the letter, pronounce its name, be able
to identify it and write it, (upper and lower case).
Materials: chalk, chalkboard, song or text written on the board or a piece of paper, alphabet
chart.
Previous Knowledge: Previous Knowledge: letters n, a, k, m, s, t, i, r, d, f, ts, b, w, g, y, l, u,
c, h, and sh.
Facilitator’s Tips: Do not speak to the chalkboard—face the children and make
eye contact with them as you speak.
Important Ideas: With emphatic consonants like the V v, be sure to model the
pronunciation for the pupils. Let them see your mouth move as you make the letter
sound.
SEL Ideas: Vinke araka (unity in English). Unity is an important idea in
Nigeria and elsewhere. Even though there are many different peoples in
Nigeria, there is unity as a country.
Step &
Icons
Time Activity procedure
10 minutes
Introduction
1. Say good morning to the children and welcome them. Ask
if everyone has taken their name tag.
2. Ask the children what they learned in their last reading
class. They should say the sound /sh/. Say a word with /sh/
in it and ask them to repeat. Ask for a word from them
with the same sound /sh/; have them repeat these two words
in choral form.
3. Write the following morning message on the board (before
class begins):
Varawon vera ya ji masu gida sun dawo ya vuya a lungu.
Read the phrase on the board slowly, pointing at each word as
you say it. Also underline the letter v when and wherever it
appears.
Do this three times. On the third time, stop and ask the pupils if
they know what the phrase says. Let them answer.
Then, point out some of the letters that they have already
learned.
Ask the pupils to say the phrase with you. Point to the words
as you say the phrase.
V v
Education Crisis Response - Facilitator’s Guide
121 | Part 1 – Reading lessons
Step &
Icons
Time Activity procedure
Now, ask the pupils to make the sound /v/. Have them repeat it
several times. Point to the letter and tell them that we are going
to learn the letter V v today.
15 minutes
5 minutes
5 minutes
Presentation: Facilitator presents the new letter and
involves children by repeating the sound, the letter and
having them write it.
1. Write the letter on the board: V v. Tell the students
this is the letter V v. Tell pupils the letter name. Ask
them to repeat it.
2. Point to the consonant V v and ask them if they
know what sound it makes. Give them an example
of the sound. Walk around the class letting the
pupils see your mouth making the /v/ sound.
3. Ask the children to write a large v and a small v in
their notebook. Go around and look at what the
children are writing, helping those who need it.
4. Say the sound yourself several times. Explain that
the big V and the small v still make the same sound.
Practice: The children have a chance to practice the letter
sound and writing with the teacher, in small groups, pairs
or individually.
First segment (learning the sound)
5. Put children in pairs; one partner says the letter
sound /v/ and the other says the letter name V v.
After a minute, have them switch roles.
6. Facilitator, go around in the classroom to listen and
see if the pairs are doing well with the sound and
the letter name.
7. Pick some pairs to demonstrate after they have
worked for a minute or two.
8. Have the pupils stand up and make the letter sound
/v/ 10 times shaking their body.
9. Tell them they did a great job.
Second segment (hearing the sound in words)
10. Ask pupils what other words they know that start
with the same sound. (They may give you a word
from the phrase above that starts with V v or
another word they know.) Write all these on the
board.
Education Crisis Response - Facilitator’s Guide
122 | Part 1 – Reading lessons
Step &
Icons
Time Activity procedure
5 minutes
10 minutes
11. Congratulate them as hopefully they have given you
some examples of words that start with V v. If they
have not, give them some examples yourself and
write these on the board. Point out the v words in
the morning message as well. Some words you can
use are: vinke araka, varawo, vare, varaka,
vawa.
12. Tell them that the sound /v/ can occur in different
places in a word. Ask them for words where the /v/
is in the middle of the word. Write those on the
board. (Examples: vavura etc.)
13. Point to the words on the board and say them in
unison with the children, emphasizing the /v/ sound.
14. Ask everyone in the class whose given name starts
with V v to stand up; have them say their name,
emphasizing the /v/ sound. Write the names on the
board.
15. Ask everyone who has a /v/ sound in their family
name to stand up. Have them say their name so
everyone can hear the /v/ sound. Point out where
the /v/ sound occurs.
Segment 3 (recognizing the V v in print)
16. Point to the phrase written out on a piece of paper or
the chalkboard that you used in the introduction.
17. Recite it at least two times, pointing to the words as
you say them.
18. Have the pupils recite the phrase with you a few
times.
19. Ask the pupils to look at the text and tell you how
many words in the phrase contain the letter V v.
Point out again that the sound /V v/ can occur at the
middle or end of words. Point to the words you
wrote on the board earlier that have a V v in them.
20. Ask several pupils to come forward and point to the
letter V v in one of the words on the board.
21. Have all the pupils stand up and use their finger to
write a big V in the air. Have them write a small v
in the air.
22. Tell them they all did a great job.
SEL Message: Vinke varaka starts with V v. What does it
mean to be unified? Ask the pupils this question and let them
respond.
Education Crisis Response - Facilitator’s Guide
123 | Part 1 – Reading lessons
Step &
Icons
Time Activity procedure
10 minutes Performance (Assessment)
1. Have everyone whose surname starts with V stand up
and make a letter V v in the air using their finger. If no
one’s name starts with V ask children to call out words
that start with V v.
2. Call on various children (boys and girls) to give you the
sound /v/ or the letter name or point to V v on the
alphabet chart.
3. Have everyone write a line of V v in their notebook.Go
round and help children as needed.
Wrap up
icon
5 minutes Conclusions/Review
1. Tell children that they now know the name and the
sound of the letter V v. They also know how to write it.
Tell them many words start with the /V v/ sound and
they have named some of them.
2. Chant the phrase on the board one last time, pointing to
the words as the pupils sing/chant.
Reflection: Teacher, write down notes for yourself on this lesson. Did you enjoy the lesson?
How do you think we can improve on it? If you make some notes, then when you teach this
lesson again, you will remember what worked well and where you found some challenges.
This will help you to improve the lesson next time you teach it.
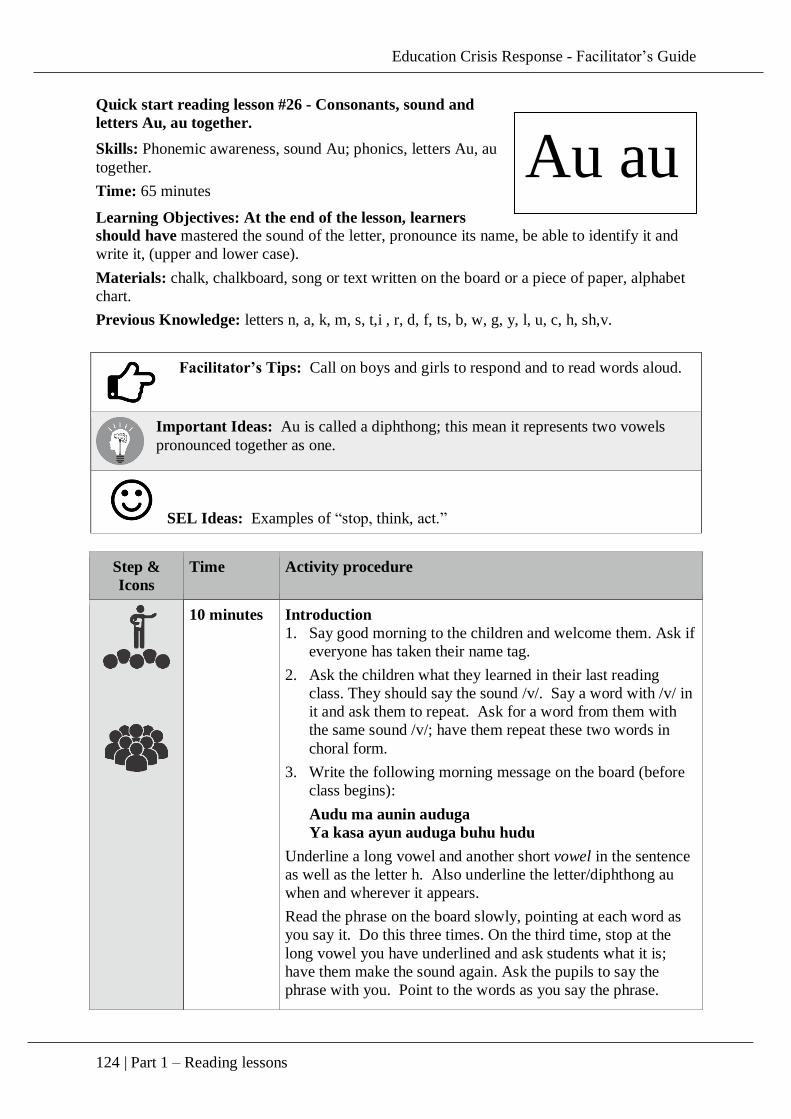
Education Crisis Response - Facilitator’s Guide
124 | Part 1 – Reading lessons
Quick start reading lesson #26 - Consonants, sound and
letters Au, au together.
Skills: Phonemic awareness, sound Au; phonics, letters Au, au
together.
Time: 65 minutes
Learning Objectives: At the end of the lesson, learners
should have mastered the sound of the letter, pronounce its name, be able to identify it and
write it, (upper and lower case).
Materials: chalk, chalkboard, song or text written on the board or a piece of paper, alphabet
chart.
Previous Knowledge: letters n, a, k, m, s, t,i , r, d, f, ts, b, w, g, y, l, u, c, h, sh,v.
Facilitator’s Tips: Call on boys and girls to respond and to read words aloud.
Important Ideas: Au is called a diphthong; this mean it represents two vowels
pronounced together as one.
SEL Ideas: Examples of “stop, think, act.”
Step &
Icons
Time Activity procedure
10 minutes
Introduction
1. Say good morning to the children and welcome them. Ask if
everyone has taken their name tag.
2. Ask the children what they learned in their last reading
class. They should say the sound /v/. Say a word with /v/ in
it and ask them to repeat. Ask for a word from them with
the same sound /v/; have them repeat these two words in
choral form.
3. Write the following morning message on the board (before
class begins):
Audu ma aunin auduga
Ya kasa ayun auduga buhu hudu
Underline a long vowel and another short vowel in the sentence
as well as the letter h. Also underline the letter/diphthong au
when and wherever it appears.
Read the phrase on the board slowly, pointing at each word as
you say it. Do this three times. On the third time, stop at the
long vowel you have underlined and ask students what it is;
have them make the sound again. Ask the pupils to say the
phrase with you. Point to the words as you say the phrase.
Au au
Education Crisis Response - Facilitator’s Guide
125 | Part 1 – Reading lessons
Step &
Icons
Time Activity procedure
Now, ask the pupils to make the sound /au/. Have them repeat
it several times. Point to the letter and tell them that we are
going to learn the letter/diphthong au today.
15 minutes
5 minutes
5 minutes
Presentation: Facilitator presents the new letter and
involves children by repeating the sound, the letter and
having them write it.
1. Write the letter on the board: Au and au. Tell the
students this is the letter Au, au. Tell pupils the letter
name. Ask them to repeat it.
2. Point to the letter Au and ask them if they know what
sound it makes. Give them an example of the sound.
Walk around the class letting the pupils see your mouth
making the /au/ sound.
3. Ask the children to write a large Au and a small au in
their notebook. Go around and look at what the children
are writing, helping those who need it.
4. Say the sound yourself several times. Explain that the
big Au and the small au still make the same sound.
Practice: The children have a chance to practice the letter
sound and writing with the teacher, in small groups, pairs or
individually.
First segment (learning the sound)
1. Put children in pairs; one partner says the letter sound
/au/ and the other says the letter/diphthong name Au.
After a minute, have them switch roles.
2. Facilitator, go around in the classroom to listen and see
if the pairs are doing well with the sound and the letter
name.
3. Pick some pairs to demonstrate after they have worked
for a minute or two.
4. Have the pupils stand up and make the letter sound /Au/,
10 times jumping on both feet.
5. Tell them they did a great job.
Second segment (hearing the sound in words)
6. Ask pupils what other words they know that start with
the same sound. (They may give you a word from the
phrase above that starts with Au or another word they
know.) Write all these on the board.
7. Congratulate them as hopefully they have given you
some examples of words that start with Au, au. If they
have not, give them some examples yourself and write
these on the board. Point out the Au words in the
Education Crisis Response - Facilitator’s Guide
126 | Part 1 – Reading lessons
Step &
Icons
Time Activity procedure
5 minutes
10 minutes
morning message as well. Some words you can use are:
au, auta, aure, aunawa, auki.
8. Tell them that the sound /au/ can occur in different
places in a word. Ask them for words where the /au/ is
in the middle of the word. Write those on the board.
(Examples: bauta, yau, lau, azure, gauye, etc.)
9. Point to the words on the board and say them in unison
with the children, emphasizing the /au/ sound.
10. Ask everyone in the class whose given name starts with
Au to stand up; have them say their name, emphasizing
the /au/ sound. Write the names on the board.
11. Ask everyone who has an /au/ sound in their family
name to stand up. Have them say their name so
everyone can hear the /au/ sound. Point out where the
/au/ sound occurs.
Segment 3 (recognizing the Au, au in print)
12. Point to the phrase written out on a piece of paper or the
chalkboard that you used in the introduction.
13. Recite it at least two times, pointing to the words as you
say them.
14. Have the pupils recite the phrase with you a few times.
15. Ask the pupils to look at the text and tell you how many
words in the phrase contain the letter Au, au. Point out
again that the sound /Au/ can occur at the middle or end
of words. Point to the words you wrote on the board
earlier that have an Au in them.
16. Ask several pupils to come forward and point to the
letter au in one of the words on the board.
17. Have all the pupils stand up and use their finger to write
a big Au in the air. Have them write a small au in the
air. They can help each other as they do this.
18. Tell them they all did a great job.
SEL Message: Facilitator, give the pupils an example of when
you have stopped and thought before acting. Ask them for
examples from their lives.
10 minutes Performance (Assessment)
1. Have everyone whose surname has an /au/sound in it
stand up and make the letters Au in the air using their
finger.
2. Call on various children (boys and girls) to give you the
sound /au/ or the letter name or point to au on the
alphabet chart.
Education Crisis Response - Facilitator’s Guide
127 | Part 1 – Reading lessons
Step &
Icons
Time Activity procedure
3. Have everyone write a line of Au in their notebook. Go
round and help children as needed.
5 minutes Conclusions/Review
1. Tell children that they now know the name and the
sound of the letter Au. They also know how to write it.
Tell them that many words start with the Au sound and
they have named some of them.
2. Chant the phrase on the board one last time, pointing to
the words as the pupils sing/chant.
Reflection: Teacher, write down notes for yourself on this lesson. Did you enjoy the lesson?
How do you think we can improve on it? If you make some notes, then when you teach this
lesson again, you will remember what worked well and where you found some challenges.
This will help you to improve the lesson next time you teach it.
.
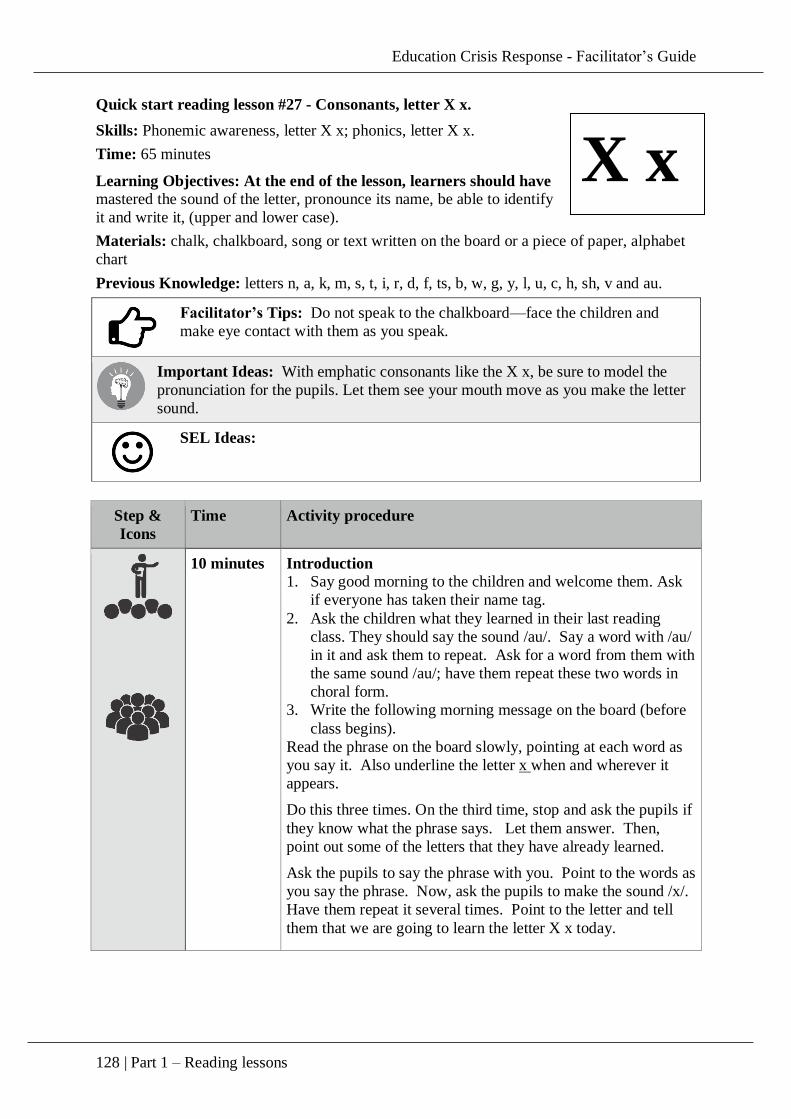
Education Crisis Response - Facilitator’s Guide
128 | Part 1 – Reading lessons
Quick start reading lesson #27 - Consonants, letter X x.
Skills: Phonemic awareness, letter X x; phonics, letter X x.
Time: 65 minutes
Learning Objectives: At the end of the lesson, learners should have
mastered the sound of the letter, pronounce its name, be able to identify
it and write it, (upper and lower case).
Materials: chalk, chalkboard, song or text written on the board or a piece of paper, alphabet
chart
Previous Knowledge: letters n, a, k, m, s, t, i, r, d, f, ts, b, w, g, y, l, u, c, h, sh, v and au.
Facilitator’s Tips: Do not speak to the chalkboard—face the children and
make eye contact with them as you speak.
Important Ideas: With emphatic consonants like the X x, be sure to model the
pronunciation for the pupils. Let them see your mouth move as you make the letter
sound.
SEL Ideas:
Step &
Icons
Time Activity procedure
10 minutes
Introduction
1. Say good morning to the children and welcome them. Ask
if everyone has taken their name tag.
2. Ask the children what they learned in their last reading
class. They should say the sound /au/. Say a word with /au/
in it and ask them to repeat. Ask for a word from them with
the same sound /au/; have them repeat these two words in
choral form.
3. Write the following morning message on the board (before
class begins).
Read the phrase on the board slowly, pointing at each word as
you say it. Also underline the letter x when and wherever it
appears.
Do this three times. On the third time, stop and ask the pupils if
they know what the phrase says. Let them answer. Then,
point out some of the letters that they have already learned.
Ask the pupils to say the phrase with you. Point to the words as
you say the phrase. Now, ask the pupils to make the sound /x/.
Have them repeat it several times. Point to the letter and tell
them that we are going to learn the letter X x today.
X x

Education Crisis Response - Facilitator’s Guide
129 | Part 1 – Reading lessons
Step &
Icons
Time Activity procedure
15 minutes
5 minutes
5 minutes
Presentation: Facilitator presents the new letter and
involves children by repeating the sound, the letter and
having them write it.
1. Write the letter on the board: X x. Tell the students this
is the letter X x. Tell pupils the letter name. Ask them to
repeat it.
2. Point to the consonant X x and ask them if they know
what sound it makes. Give them an example of the
sound. Walk around the class letting the pupils see your
mouth making the /x/ sound.
3. Ask the children to write a large x and a small x in their
notebook. Go around and look at what the children are
writing, helping those who need it.
4. Say the sound yourself several times. Explain that the
big X and the small x still make the same sound.
Practice: The children have a chance to practice the letter
sound and writing with the teacher, in small groups, pairs
or individually.
First segment (learning the sound)
1. Put children in pairs; one partner says the letter sound
/x/ and the other says the letter name X x. After a
minute, have them switch roles.
2. Facilitator, walk around in the classroom to listen and
see if the pairs are doing well with the sound and the
letter name.
3. Pick some pairs to demonstrate after they have worked
for a minute or two.
4. Have the pupils stand up and make the letter sound /x/
10 times shaking their body.
5. Tell them they did a great job.
Second segment (hearing the sound in words)
6. Ask pupils what other words they know that start with
the same sound. (They may give you a word from the
phrase above that starts with X x or another word they
know.) Write all these on the board.
7. Congratulate them as hopefully they have given you
some examples of words that start with X x. If they
have not, give them some examples yourself and write
these on the board. Point out the x words in the morning
message as well. Some words you can use are:
8. Tell them that the sound /x/ can occur in different places
in the word. Ask them for words where the /x/ is in the
Education Crisis Response - Facilitator’s Guide
130 | Part 1 – Reading lessons
Step &
Icons
Time Activity procedure
5 minutes
10 minutes
middle of the word. Write those on the board.
(Examples: etc.)
9. Point to the words on the board and say them in unison
with the children, emphasizing the /x/ sound.
10. Ask everyone in the class whose given name starts with
X x to stand up; have them say their name, emphasizing
the /x/ sound. Write the names on the board.
11. Ask everyone who has /x/ sound in their family name to
stand up. Have them say their name so that everyone
can hear the /x/ sound. Point out where the /x/ sound
occurs.
Segment 3 (recognizing the X x in print)
12. Point to the phrase written out on a piece of paper or the
chalkboard that you used in the introduction.
13. Recite it at least two times, pointing to the words as
you say them.
14. Have the pupils recite the phrase with you a few times.
15. Ask the pupils to look at the text and tell you how many
words in the phrase contain the letter X x. Point out
again that the sound /X x/ can occur at the middle or
end of words. Point to the words you wrote on the
board earlier that have X x in them.
16. Ask several pupils to come forward and point to the
letter X x in one of the words on the board.
17. Have all the pupils stand up and use their finger to write
a big X in the air. Have them write a small x in the air.
18. Tell them they all did a great job.
SEL Message:
10 minutes Performance (Assessment)
1. Have everyone whose surname starts with X stand up
and make a letter X x in the air using their finger. If no
one’s name starts with X ask children to call out words
that start with X x.
2. Call on various children (boys and girls) to give you the
sound /x/ or the letter name or point to X x on the
alphabet chart.
3. Have everyone write a line of X x in their notebook.
Go round and help children as needed.
5 minutes Conclusions/Review
1. Tell children that they now know the name and the
sound of the letter X x. They also know how to write it.
Education Crisis Response - Facilitator’s Guide
131 | Part 1 – Reading lessons
Step &
Icons
Time Activity procedure
Tell them that many words start with the X x sound and
they have named some of them.
2. Chant the phrase on the board one last time, pointing to
the words as the pupils sing/chant.
Reflection: Teacher, write down notes for yourself on this lesson. Did you enjoy the lesson?
How do you think we can improve on it? If you make some notes, then when you teach this
lesson again, you will remember what worked well and where you found some challenges.
This will help you to improve the lesson next time you teach it.
Education Crisis Response - Facilitator’s Guide
132 | Part 1 – Reading lessons
Quick start reading lesson #28 - Consonants, sound and letters J j .
Skills: Phonemic awareness, sound J; phonics, letter J j.
Time: 65 minutes
Learning Objectives: At the end of the lesson, learners should have
mastered the sound of the letter, pronounce its name, be able to identify it
and write it, (upper and lower case).
Materials: chalk, chalkboard, song or text written on the board or a piece of paper, alphabet
chart.
Previous Knowledge: letters n, a, k, m, s, t, i, r, d, f, ts, b, w, g, y, l, u, c, h, sh, au, x.
Facilitator’s Tips: Call on boys and girls to respond and to read words aloud.
Important Ideas: Make sure that pupils can see the text you have written on the
board or on a piece of paper. Interacting with text is a critical part of learning to
read. In a resource learning environment, we have to innovate and figure out how
to make sure pupils see and interact with text.
SEL Ideas: Jaje in Hausa means condolences. When we see people who are
sad or who have lost someone dear, we offer them condolences. This is part of
helping them heal.
Step &
Icons
Time Activity procedure
10 minutes
Introduction
1. Say good morning to the children and welcome them. Ask
if everyone has taken their name tag.
2. Ask the children what they learned in their last reading
class. They should say the sound /x/. Say a word with /x/ in
it and ask them to repeat. Ask for a word from them with
the same sound /x/; have them repeat these two words in
choral form.
3. Write the following morning message on the board (before
class begins):
Jiki magayi, wanda bai
Ji bari ba zai ji hoho.
Underline a long vowel and another short vowel in the
sentence. Under line the letter J j as well.
Read the phrase on the board slowly, pointing at each word as
you say it. Do this three times. On the third time, stop at the
long vowel you have underlined and ask students what it is;
have them make the sound again. Do the same for the short
vowel you have underlined. Ask the pupils to say the phrase
with you. Point to the words as you say the phrase.
J j
Education Crisis Response - Facilitator’s Guide
133 | Part 1 – Reading lessons
Step &
Icons
Time Activity procedure
Ask the pupils what the phrase means. Be sure to let them talk
and tell you what they think it means.
Now, ask the pupils to make the sound /j/. Have them repeat it
several times. Point to the letter and tell them that we are going
to learn the letter J j today.
15 minutes
5 minutes
5 minutes
Presentation: Facilitator presents the new letter and
involves children by repeating the sound, the letter and
having them write it.
1. Write the letter on the board: J and j. Tell the students
these are the letters J j. Tell pupils the letter name. Ask
them to repeat it.
2. Point to the letters J and ask them if they know what
sound they make. Give them an example of the sound.
Walk around the class letting the pupils see your mouth
making the /j/ sound.
3. Ask the children to write a large J and a small j in their
notebook. Go around and look at what the children are
writing, helping those who need it.
4. Say the sound yourself several times. Explain that the
big J and the small j still make the same sound.
Practice: The children have a chance to practice the letter
sound and writing with the teacher, in small groups, pairs
or individually.
First segment (learning the sound)
1. Put children in pairs; one partner says the letter sound
/j/ and the other says the letter name J. After a minute,
have them switch roles.
2. Facilitator, walk around in the classroom to listen and
see if the pairs are doing well with the sound and the
letter name.
3. Pick some pairs to demonstrate after they have worked
for a minute or two.
4. Have the pupils stand up and make the letter sound J j
10 times jumping on both feet.
5. Tell them they did a great job.
Second segment (hearing the sound in words)
6. Ask pupils what other words they know that start with
the same sound. (They may give you a word from the
phrase above that starts with J j or another word they
know.) Write all these on the board.
Education Crisis Response - Facilitator’s Guide
134 | Part 1 – Reading lessons
Step &
Icons
Time Activity procedure
5 minutes
10 minutes
7. Congratulate them as hopefully they have given you
some examples of words that start with J j. If they have
not, give them some examples yourself and write these
on the board. Point out the J words in the morning
message as well. Some words you can use are jiki,
Jamila, ji and others.
8. Tell them that the sound /j/ can occur in different places
in a word. Ask them for words where the /j/ is in the
middle of the word. Write those on the board.
(Examples: daji, hajiya, etc.)
9. Point to the words on the board and say them in unison
with the children, emphasizing the /j/ sound.
10. Ask everyone in the class whose given name starts with
J to stand up; have them say their name, emphasizing
the /j/ sound. Write the names on the board.
11. Ask everyone who has a /j/ sound in their family name
to stand up. Have them say their name so everyone can
hear the /j/ sound. Point out where the /j/ sound occurs.
Segment 3 (recognizing the J j in print)
12. Point to the phrase written out on a piece of paper or the
chalkboard that you used in the introduction.
13. Recite it at least two times, pointing to the words as
you say them.
14. Have the pupils recite the phrase with you a few times.
15. Ask the pupils to look at the text and tell you how many
words in the phrase contain the letter J j. Point out
again that the sound J j can occur at the middle or end
of words. Point to the words you wrote on the board
earlier that have a J j in them.
16. Ask several pupils to come forward and point to the
letters J j in one of the words on the board.
17. Have all the pupils stand up and use their finger to write
a big J in the air. Have them write a small j in the air.
They can help each other as they do this.
18. Tell them they all did a great job.
SEL Message: Jaje in Hausa means condolence. It has two
letter Js in it! When we see people who are sad or who have
lost someone dear, we offer them a condolence. This is part of
helping them heal. Ask the pupils if they have ever offered
condolence to anyone? Has anyone offered them a
condolence?
Education Crisis Response - Facilitator’s Guide
135 | Part 1 – Reading lessons
Step &
Icons
Time Activity procedure
10 minutes Performance (Assessment)
1. Have everyone whose surname has a /j/sound in it stand
up and make the letters J in the air using their finger.
2. Call on various children (boys and girls) to give you the
sound /j/ or the letter name or point to J j on the
alphabet chart.
3. Have everyone write a line of J j in their notebook.
Walk around the classroom and help children as
needed.
5 minutes Conclusions/Review 1. Tell children that they now know the name and the
sound of the letter J j. They also know how to write it.
Tell them many words start with the J j sound and they
have named some of them.
2. Chant the phrase on the board one last time, pointing to
the words as the pupils sing/chant.
Reflection: Teacher, write down notes for yourself on this lesson. Did you enjoy the lesson?
How do you think we can improve on it? If you make some notes, then when you teach this
lesson again, you will remember what worked well and where you found some challenges.
This will help you to improve the lesson next time you teach it.
Education Crisis Response - Facilitator’s Guide
136 | Part 1 – Reading lessons
Quick start reading lesson # 29 - Vowel, letter E e.
Skills: Phonemic awareness, letter E (short and long); phonics, letter E e.
Time: 65 minutes
Learning Objectives: At the end of the lesson, learners should have
mastered the sound of the letter, both long and short, pronounce its name,
be able to identify it and write it, (upper and lower case).
Materials: chalk, chalkboard, song or text written on the board or a piece of paper, alphabet
chart.
Previous Knowledge: Letters n, a, k, m, s, t, i, r, d, f, ts, b, w, g, y, l, u, c, h, sh, v, au, x, j.
Facilitator’s Tips: Speak very clearly and loudly when making the letter sound
so that pupils can all hear you and see your mouth move as you make the sound.
Important Ideas: Pupils need to practice making the letter sounds; be sure to
model how to make the sounds for them and give them time to practice.
SEL Ideas: We must be tolerant of others and we ask them to be tolerant of us.
Step &
Icons
Time Activity procedure
10 minutes
Introduction
1. Say good morning to the children and welcome them. Ask
the children if they have each taken their name tag to their
seat with them. If some have not, be sure to give them their
name tag.
Ask the pupils why reading is important. Tell them they are all
going to learn to be excellent readers and writers soon.
2. Write the following morning message on the board:
Edita shi ne mai gyare--gyare wanda zai inganta rubuce
– rubucenmu
Be sure to underline a long and a short vowel in the sentence
that the pupils have already learned.
Read the phrase on the board slowly, pointing at each word as
you say it. Do this three times. On the third time, stop at the
long vowel you have underlined and ask students what it is.
Have them make the vowel sound both long and short. Tell
them we are going to learn another vowel today. Point to the
first word in the sentence that starts with E ask the students to
make the sound /e/. Point to another word with e in it. Make
the sound again.
E e
A
Education Crisis Response - Facilitator’s Guide
137 | Part 1 – Reading lessons
Step &
Icons
Time Activity procedure
Tell them that we are going to learn the letter E e today and this
letter can make two sounds. Tell them that E e is a vowel and
vowels are very useful letters as almost all words have vowels.
15 minutes
5 minutes
5 minutes
Presentation: Facilitator presents the new letter and
involves children by repeating the sound, the letter and
having them write it.
1. Write the letter on the board: E and e.
2. Tell the students this is the letter E. Make the sound
long /e/ and ask them to repeat it.
3. Have pupils repeat the sounds; ask them what other
words they know that start with the same sound.
(Examples: edita, add some of your own examples,
facilitator.) Write all these words on the board.
4. Write on the board some words that have the short /e/
sound in them: dutse and talle, ze, fate, gefe, deba.
Have the pupils repeat these words.
5. Write on the board some words that have the long /e/
sound in them: safe as well as buzaye, yartsame,
tsuntsaye etc.
6. Say the sounds again yourself several times. Explain
that the big E and the small e still make the same
sounds.
Practice: The children have a chance to practice the letter
sound and writing with the teacher, in small groups, pairs
or individually.
First segment (learning the sound)
1. Put children in pairs; one partner says the letter sound
/e/ and the other says the letter name E. After a minute,
have them switch roles.
2. Facilitator, go around in the classroom to listen and see
if the pairs are doing well with the sound and the letter
name.
3. Pick some pairs to demonstrate after they have worked
for a minute or two.
4. Have the pupils stand up and make the letter sound /E e/
10 times while hopping on their left foot. (Have them
hop 5 times while making short /e/ sound and 5 times
while making the long /e/ sound.
5. Tell them they did a great job.
Second segment (hearing the sound in words)
6. Ask pupils what other words they know that start with
the same sound. (They may give you a word from the
Education Crisis Response - Facilitator’s Guide
138 | Part 1 – Reading lessons
Step &
Icons
Time Activity procedure
5 minutes
10 minutes
phrase above that starts with E e or another word they
know.) Write all these on the board.
7. Congratulate them as hopefully they have given you
some more examples of words that start with E e. If
they have not, give them some examples yourself and
write these on the board. Point out the E words in the
morning message as well.
8. Tell them that the sound /e/ can occur in different places
in the word. Ask them for words where the /e/ is in the
middle of the word. Write those on the board.
(Examples: tsegumi, makewa, nokewa, nema, etc.)
9. Point to the words on the board and say them in unison
with the children, emphasizing the /e/ sound.
10. Ask everyone in the class whose given name starts with
E (long or short) to stand up; have them say their name,
emphasizing the /e/ sound. Write the names on the
board.
11. Ask everyone who has an/e/ sound in their family name
(long or short) to stand up. Have them say their name
so everyone can hear the /e/ sound. Point out where the
/e/ sound occurs and whether it is long or short.
Segment 3 (recognizing the E e in print)
12. Point to the phrase written out on a piece of paper or the
chalkboard that you used in the introduction.
13. Recite it at least two times, pointing to the words as
you say them.
14. Have the pupils recite the phrase with you a few times.
15. Ask the pupils to look at the text and tell you how many
words in the phrase contain the letter E e. Point out
again the sound E a can occur at the middle or end of
words. Point to the words you wrote on the board
earlier that have an E e in them.
16. Ask several pupils to come forward and point to the
letter E e in one of the words on the board.
17. Have all the pupils stand up and use their finger to write
a big E in the air. Have them write a small e in the air.
They can help each other as they do this.
18. Tell them they all did a great job.
SEL Message: Nigeria is blessed with many different peoples,
with many languages, traditions and social groups. In order to
live together peacefully all citizens must be tolerant of other
groups and their differences. Can the pupils give you an
example of what it means to be tolerant? Have at last 10 pupils
offer ideas.
Education Crisis Response - Facilitator’s Guide
139 | Part 1 – Reading lessons
Step &
Icons
Time Activity procedure
10 minutes Performance (Assessment)
1. Have everyone whose surname starts with E stand up
and make a letter E in the air using their finger.
2. Call on various children (boys and girls) to give you the
sound /e/ or the letter name or point to E e on the
alphabet chart.
3. Have everyone write a line of E e in their notebook. Go
round and help children as needed.
5 minutes Conclusions/Review
1. Tell children that they now know the name and the
sound of the letter E e. They also know how to write it.
Tell them many words start with the /E e/ sound and
they have named some of them.
2. Chant the phrase on the board one last time, pointing to
the words as the pupils sing/chant.
Reflection: Teacher, write down notes for yourself on this lesson. Did you enjoy the lesson?
How do you think we can improve on it? If you make some notes, then when you teach this
lesson again, you will remember what worked well and where you found some challenges.
This will help you to improve the lesson next time you teach it.
.
Education Crisis Response - Facilitator’s Guide
140 | Part 1 – Reading lessons
Quick start reading lesson # 30 - Consonants, letter Z z.
Skills: Phonemic awareness, letter Z; phonics, letter Z z.
Time: 65 minutes
Learning Objectives: At the end of the lesson, learners should have
mastered the sound of the letter, pronounce its name, be able to identify it
and write it, (upper and lower case).
Materials: chalk, chalkboard, song or text written on the board or a piece of paper, alphabet
chart.
Previous Knowledge: Letters n, a, k, m, s, t, i, r, d, f, ts, b, w, g, y, l, u, c, h, sh, v, au, x, j, e.
Facilitator’s Tips: Remember to come to your class early so you can write the
text of the day on the board and write out any other text you may use. Do not
take instructional time to write the text of the day on the board—do it before
class!
Important Ideas: Oral language development supports reading and writing;
during the SEL segment, be sure to let pupils talk in class!
SEL Ideas: Making choices; being able to choose things that are good for us.
Zavi (choices in English) begins with the letter Z.
Step &
Icons
Time Activity procedure
10 minutes
Introduction
1. Say good morning to the children and welcome them. Ask
if everyone has taken their name tag.
2. Ask the children what they learned in their last reading
class. They should say the sound /e/. Say a word with /e/ in
it and ask them to repeat. Ask for a word from them with
the same sound /e/; have them repeat these two words in
choral form.
3. Write the following morning message on the board (before
class begins):
Zainab ta zubar da zaren da Zara’u ta sayo.
Zamantakewa tsakanin mutane shine tushen zaman
lafiya a rayuwa.
Read the phrase on the board slowly, pointing at each word as
you say it. Do this three times. On the third time, stop at a
short a, i or e. Ask students what it is and have them make the
sound that goes with the letter. Do the same for the long vowel
you have underlined. Ask the pupils to say the phrase with
you. Point to the words as you say the phrase. Have them
Z z
Education Crisis Response - Facilitator’s Guide
141 | Part 1 – Reading lessons
Step &
Icons
Time Activity procedure
repeat the phrase after you 3 times. If you can clap while you
recite it, that is good!
Now, ask the pupils to make the sound /z/. Have them repeat it
several times. Point to the letter Z in the phrases and tell them
that we are going to learn the letter Z z today.
15 minutes
5 minutes
5 minutes
Presentation: Facilitator presents the new letter and
involves children by repeating the sound, the letter and
having them write it.
1. Write the letter on the board: Z and z. Tell the students
this is the letter Z z. Tell pupils the letter name. Ask
them to repeat it.
2. Point to the consonant z and ask them if they know
what sound it makes. Give them an example of the
sound. Walk around the class letting the pupils see
your mouth making the /z/ sound.
3. Ask the children to write a large Z and a small z in their
notebook. Go around and look at what the children are
writing, helping those who need it.
4. Say the sound yourself several times. Explain that the
big Z and the small z still make the same sound.
Practice: The children have a chance to practice the letter
sound and writing with the teacher, in small groups, pairs
or individually.
First segment (learning the sound)
1. Put children in pairs; one partner says the letter sound
/z/ and the other says the letter name Z. After a minute,
have them switch roles.
2. Facilitator, go around in the classroom to listen and see
if the pairs are doing well with the sound and the letter
name.
3. Pick some pairs to demonstrate after they have worked
for a minute or two.
4. Have the pupils stand up and make the letter sound Z z
10 times shaking their heads.
5. Tell them they did a great job.
Second segment (hearing the sound in words)
6. Ask pupils what other words they know that start with
the same sound. (They may give you a word from the
phrase above that starts with Z z or another word they
know.) Write all these on the board.
7. Congratulate them as hopefully they have given you
some examples of words that start with Z z. If they
have not, give them some examples yourself and write
Education Crisis Response - Facilitator’s Guide
142 | Part 1 – Reading lessons
Step &
Icons
Time Activity procedure
5 minutes
10 minutes
these on the board. Point out the Z words in the
morning message as well. Some words you can use are:
zuma, zance, zobe, zane, etc.
8. Tell them that the sound /z/ can occur in different places
in a word. Ask them for words where the /z/ is in the
middle of the word. Write those on the board.
(Examples: buzu, gazawa, ziza, Azura etc.)
9. Point to the words on the board and say them in unison
with the children, emphasizing the /z/ sound.
10. Ask everyone in the class whose given name starts with
Z to stand up; have them say their name, emphasizing
the /z/ sound. Write the names on the board.
11. Ask everyone who has a /z/ sound in their family name
to stand up. Have them say their name so everyone can
hear the /z/ sound. Point out where the /z/ sound
occurs.
Segment 3 (recognizing the Z z in print)
12. Point to the phrase written out on a piece of paper or the
chalkboard that you used in the introduction.
13. Recite it at least two times, pointing to the words as
you say them.
14. Have the pupils recite the phrase with you a few times.
15. Ask the pupils to look at the text and tell you how many
words in the phrase contain the letter Z z. Point out
again that the sound Z z can occur at the middle or end
of words. Point to the words you wrote on the board
earlier that have a Z z in them.
16. Ask several pupils to come forward and point to the
letter Z z in one of the words on the board.
17. Have all the pupils stand up and use their finger to write
a big Z in the air. Have them write a small z in the air.
They can help each other as they do this.
18. Tell them they all did a great job.
SEL Message: Tell the pupils that the word zavi begins with a
/z/ sound. Ask them what the phrase: Zavi Allah shi ne zavi
means. Do they feel they have choices in their lives? What
would they choose to do if they could choose anything at all?
10 minutes Performance (Assessment)
1. Have everyone whose surname starts with Z stand up
and make a letter z in the air using their finger.
2. Call on various children (boys and girls) to give you the
sound /z/ or the letter name or point to Z z on the
alphabet chart.
Education Crisis Response - Facilitator’s Guide
143 | Part 1 – Reading lessons
Step &
Icons
Time Activity procedure
3. Have everyone write a line of Z z in their notebook. Go
round and help children as needed.
5 minutes Conclusions/Review
1. Tell children that they now know the name and the
sound of the letter Z z. They also know how to write it.
Tell them many words start with the Z z sound and they
have named some of them.
2. Chant the phrase on the board one last time, pointing to
the words as the pupils sing/chant.
Reflection: Teacher, write down notes for yourself on this lesson. Did you enjoy the lesson?
How do you think we can improve on it? If you make some notes, then when you teach this
lesson again, you will remember what worked well and where you found some challenges.
This will help you to improve the lesson next time you teach it.
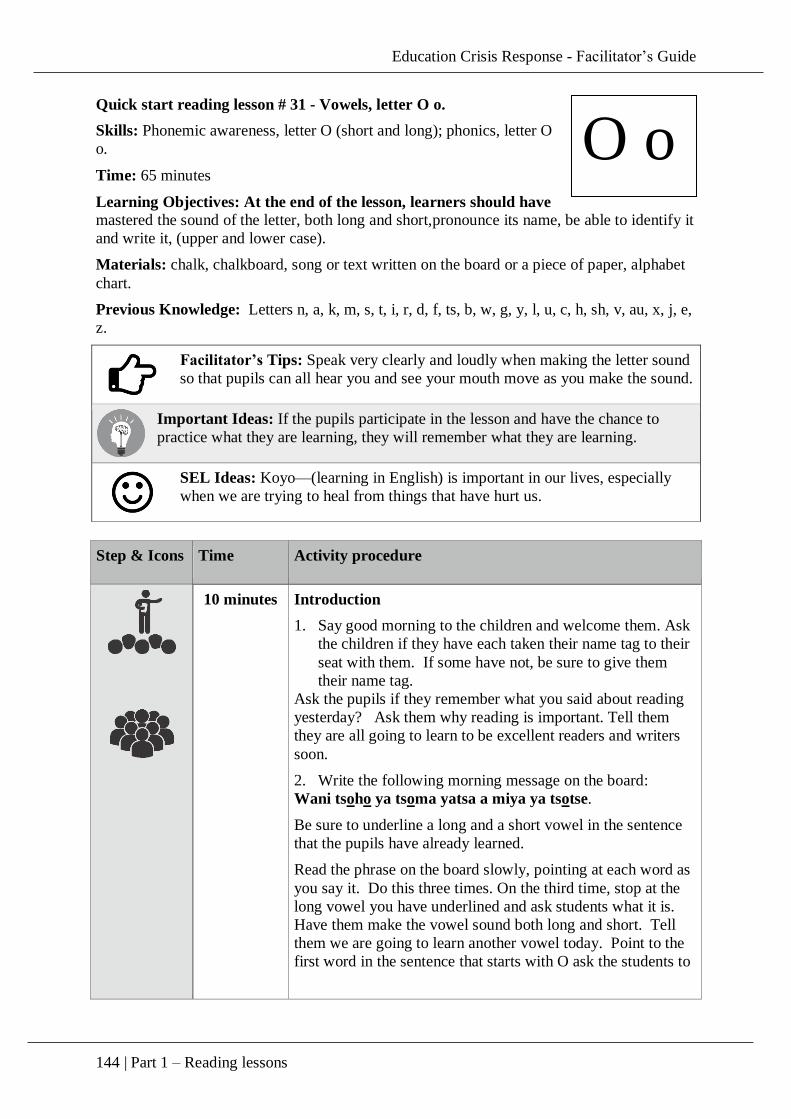
Education Crisis Response - Facilitator’s Guide
144 | Part 1 – Reading lessons
Quick start reading lesson # 31 - Vowels, letter O o.
Skills: Phonemic awareness, letter O (short and long); phonics, letter O
o.
Time: 65 minutes
Learning Objectives: At the end of the lesson, learners should have
mastered the sound of the letter, both long and short,pronounce its name, be able to identify it
and write it, (upper and lower case).
Materials: chalk, chalkboard, song or text written on the board or a piece of paper, alphabet
chart.
Previous Knowledge: Letters n, a, k, m, s, t, i, r, d, f, ts, b, w, g, y, l, u, c, h, sh, v, au, x, j, e,
z.
Facilitator’s Tips: Speak very clearly and loudly when making the letter sound
so that pupils can all hear you and see your mouth move as you make the sound.
Important Ideas: If the pupils participate in the lesson and have the chance to
practice what they are learning, they will remember what they are learning.
SEL Ideas: Koyo—(learning in English) is important in our lives, especially
when we are trying to heal from things that have hurt us.
Step & Icons Time Activity procedure
10 minutes
Introduction
1. Say good morning to the children and welcome them. Ask
the children if they have each taken their name tag to their
seat with them. If some have not, be sure to give them
their name tag.
Ask the pupils if they remember what you said about reading
yesterday? Ask them why reading is important. Tell them
they are all going to learn to be excellent readers and writers
soon.
2. Write the following morning message on the board:
Wani tsoho ya tsoma yatsa a miya ya tsotse.
Be sure to underline a long and a short vowel in the sentence
that the pupils have already learned.
Read the phrase on the board slowly, pointing at each word as
you say it. Do this three times. On the third time, stop at the
long vowel you have underlined and ask students what it is.
Have them make the vowel sound both long and short. Tell
them we are going to learn another vowel today. Point to the
first word in the sentence that starts with O ask the students to
O o
A
Education Crisis Response - Facilitator’s Guide
145 | Part 1 – Reading lessons
Step & Icons Time Activity procedure
make the sound /o/. Point to another word with o in it. Make
the sound again.
Tell them that we are going to learn the letter O o today and
this letter can make two sounds. Tell them that O o is a vowel
and vowels are very useful letters as almost all words have
vowels.
15 minutes
5 minutes
5 minutes
Presentation: Facilitator presents the new letter and
involves children by repeating the sound, the letter and
having them write it.
1. Write the letter on the board: O and o.
2. Tell the students this is the letter O; ask them what
sound it makes? Congratulate them as hopefully some
have remembered from the morning message.
3. Have them repeat it; ask them what other words they
know that have the sound /o/ in them. (Examples
awo, nono, komo, omo, di’o, ado, doki, komi, yawo,
zomo. Add some of your own examples, facilitator.)
Write all these words on the board.
4. Pronounce a word with a long O; pronounce a word
with a short O. Ask pupils if they can hear the
difference. Have them give you examples of words
that have a short /o/ sound and those that have a long
/o/ sound.
5. Make a column on the board entitled long O and one
called short O.
6. Say the sound yourself several times. Explain that the
big O and the little o still make the same sound.
Practice: The children have a chance to practice the letter
sound and writing with the teacher, in small groups, pairs
or individually.
First segment (learning the sound)
1. Put children in pairs; one partner says the letter sound
/o/and the other says the letter name. After a minute,
have them switch roles.
2. Facilitator, walk around in the classroom to listen and
see if the pairs are doing well with the sound and the
letter name.
3. Pick some pairs to demonstrate after they have worked
for a minute or two.
4. Have the pupils stand up and make the letter sound Oo
10 times while waving their hands in the air.
5. Tell them they did a great job.
Second segment (hearing the sound in words)
Education Crisis Response - Facilitator’s Guide
146 | Part 1 – Reading lessons
Step & Icons Time Activity procedure
5 minutes
10 minutes
6. Ask pupils what other words they know that start with
the same sound. (They may give you a word from the
phrase above that starts with O o or another word they
know.) Write all these on the board.
7. Congratulate them as hopefully they have given you
some more examples of words that start with O o. If
they have not, give them some examples yourself and
write these on the board. Point out the O words in the
morning message as well. Some words you can use
are: omo, etc.
8. Tell them that the sound /o/ can occur in different
places in a word. Ask them for words where the /o/ is
in the middle or at the end of the word. Write those on
the board. (Examples: koyo, toho, horo, hoto, lodi,
baho, etc) Put the words in the proper column.
9. Point to the words on the board and say them in unison
with the children, emphasizing the/o/ sound.
10. Ask everyone in the class whose given name starts
with O to stand up; have them say their name,
emphasizing the /o/ sound. Write the names on the
board.
11. Ask everyone who has an/o/sound in their family name
to stand up. Have them say their name so everyone
can hear the /o/ sound. Point out where the /o/ sound
occurs.
Segment 3 (recognizing the O o in print)
12. Point to the phrase written out on a piece of paper or
the chalkboard that you used in the introduction.
13. Recite it at least two times, pointing to the words as
you say them;
14. Have the pupils recite the phrase with you a few times.
15. Ask the pupils to look at the text and tell you how
many words in the phrase contain the letter O o. Point
out again that the sound O can occur at the middle or
end of words. Point to the words you wrote on the
board earlier that have an O o in them.
16. Ask several pupils to come forward and point to the
letter O in one of the words on the board.
17. Have all the pupils stand up and use their finger to
write a big O in the air. Have them write a small o in
the air.
18. Tell them they all did a great job.
SEL Message: Tell the children that koyo - (learning in
English) is important in our lives, especially when we are
trying to heal from things that have hurt us. Ask them to tell
you some things that they have learned recently. Ask them to
Education Crisis Response - Facilitator’s Guide
147 | Part 1 – Reading lessons
Step & Icons Time Activity procedure
raise their hand if they like learning? Have them tell you why
they like it.
10 minutes Performance (Assessment)
1. Have everyone whose surname starts with O stand up
and make a letter O in the air using their finger.
2. Call on various children (boys and girls) to give you
the sound /o/or the letter name or point to O o on the
alphabet chart.
3. Have everyone write a line of O o in their notebook.
Go round and help children as needed.
5 minutes Conclusions/Review
1. Tell children that they now know the name and the
sound of the letter O o. They also know how to write
it. Tell them many words start with the O o sound and
they have named some of them.
2. Chant the phrase on the board one last time, pointing
to the words as the pupils sing/chant.
Reflection: Teacher, write down notes for yourself on this lesson. Did you enjoy the lesson?
How do you think we can improve on it? If you make some notes, then when you teach this
lesson again, you will remember what worked well and where you found some challenges.
This will help you to improve the lesson next time you teach it.
.

Education Crisis Response - Facilitator’s Guide
148 | Part 1 – Reading lessons
Quick start reading lesson #32 - Consonants, letter Q q.
Skills: Phonemic awareness, letter Q; phonics, letter Q q.
Time: 65 minutes
Learning Objectives: At the end of the lesson, learners should have
mastered the sound of the letter, pronounce its name, be able to identify it
and write it, (upper and lower case).
Materials: chalk, chalkboard, song or text written on the board or a piece of paper, alphabet
chart.
Previous Knowledge: Letters n, a, k, m, s, t, i, r, d, f, ts, b, w, g, y, l, u, c, h, sh, v, au, x, j. e,
z, o.
Facilitator’s Tips: Do not speak to the chalkboard—face the children and
make eye contact with them as you speak.
Important Ideas: If the pupils participate in the lesson and have the chance to
practice what they are learning, they will remember what they are learning.
SEL Ideas: Making decisions: stop, think, act.
Step &
Icons
Time Activity procedure
10 minutes
Introduction
1. Say good morning to the children and welcome them. Ask
if everyone has taken their name tag.
2. Ask the children what they learned in their last reading
class. They should say the sound /o/. Say a word with /o/ in
it and ask them to repeat. Ask for a word from them with
the same sound /o/; have them repeat these two words in
choral form.
3. Write the following morning message on the board (before
class begin)
Malam yana da Karamin kamus.
Underline a long vowel and another short vowel in the
sentence. Also underline the letter q when wherever it appears.
Read the phrase on the board slowly, pointing at each word as
you say it. Do this three times. On the third time, stop at the
long vowel you have underlined and ask students what it is;
have them make the sound again. Ask the pupils to say the
phrase with you. Point to the words as you say the phrase.
Ask them what the phrase means.
Q q

Education Crisis Response - Facilitator’s Guide
149 | Part 1 – Reading lessons
Step &
Icons
Time Activity procedure
Now, ask the pupils to make the sound /q/. Have them repeat it
several times. Point to the letter and tell them that we are going
to learn the letter Q q today.
15 minutes
5 minutes
5 minutes
Presentation: Facilitator presents the new letter and
involves children by repeating the sound, the letter and
having them write it.
1. Write the letter on the board: Q and q. Tell the
students this is the letter Q q. Tell pupils the letter
name. Ask them to repeat it.
2. Point to the consonant f and ask them if they know what
sound it makes. Give them an example of the sound.
Walk around the class letting the pupils see your mouth
making the /q/ sound.
3. Ask the children to write a large Q and a small q in their
notebook. Go around and look at what the children
write, helping those who need it.
4. Say the sound yourself several times. Explain that the
big Q and the little q still make the same sound.
Practice: The children have a chance to practice the letter
sound and writing with the teacher, in small groups or
pairs or individually.
First segment (learning the sound)
1. Put children in pairs; one partner says the letter sound
/q/ and the other says the letter name Q. After a minute,
have them switch roles.
2. Facilitator, circulate in the classroom to listen that the
pairs are doing well with the sound and the letter name.
3. Pick some pairs to demonstrate after they have worked
for a minute or two.
4. Have the pupils stand up and make the letter sound Q q
10 times shaking their body.
5. Tell them they did a great job.
Second segment (hearing the sound in words)
6. Ask pupils what other words they know that start with
the same sound. (They may give you a word from the
phrase above that starts with Q q or another word they
know.) Write all these on the board.
7. Congratulate them as hopefully they have given you
some examples of words that start with Q q. If they
have not, give them some examples yourself and write
these on the board. Point out the Q words in the
morning message as well. Some words you can use are:
Ka, Kaba, Kira, Kusa, , Kidaya, Kaguwa
Education Crisis Response - Facilitator’s Guide
150 | Part 1 – Reading lessons
Step &
Icons
Time Activity procedure
5 minutes
10 minutes
8. Tell them that the sound /q/ can occur in different
places in the word. Ask them for words where the /q/ is
in the middle of the word. Write those on the board.
(Examples: Kokari kekuwa, leke, baki, sako, etc.)
9. Point to the words on the board and say them in unison
with the children, emphasizing the /q/ sound.
10. Ask everyone in the class whose given name starts with
Q to stand up; have them say their name, emphasizing
the /q/ sound. Write the names on the board.
11. Ask everyone who has a /q/ sound in their family name
to stand up. Have them say their name so everyone can
hear the /q/ sound. Point out where the /q/ sound
occurs.
Segment 3 (recognizing the Q q in print)
12. Point to the phrase written out on a piece of paper or the
chalkboard that you used in the introduction.
13. Recite it at least two times, pointing to the words as
you say them;
14. Have the pupils recite the phrase with you a few times.
15. Ask the pupils to look at the text and tell you how many
words in the phrase contain the letter Q q. Point out
again the sound Q q can occur at the middle or end of
words. Point to the words you wrote on the board
earlier that have a Q q in them.
16. Ask several pupils to come forward and point to the
letter the Q q in one of the words on the board.
17. Have all the pupils stand up and use their finger to write
a big Q in the air. Have them write a small q in the air.
They can help each other as they do this.
18. Tell them they all did a great job.
SEL Message: Ask the pupils what it means to stop, think and
then act when making decisions. Let 10 pupils at least offer
some ideas in response to the question.
10 minutes Performance (Assessment)
1. Have everyone whose surname starts with Q stand up
and make a letter gin the air using their finger.
2. Call on various children (boys and girls) to give you the
sound /q/ or the letter name or point to Q q on the
alphabet chart.
3. Have everyone write a line of Q q in their notebook.
Circulate and help children as needed.
5 minutes Conclusions/Review
1. Tell children that they now know the name and the
sound of the letter Q q. They also know how to write it.

Education Crisis Response - Facilitator’s Guide
151 | Part 1 – Reading lessons
Step &
Icons
Time Activity procedure
Tell them many words start with the Q q sound and they
have named some of them.
2. Chant the phrase on the board one last time, pointing to
the words as the pupils sing/chant.
Reflection: Teacher, write down notes for yourself on this lesson. Did you enjoy the
lesson? How do you think we can improve on it? If you make some notes, then when you
teach this lesson again, you will remember what worked well and where you found some
challenges. This will help you to improve the lesson next time you teach it.

Education Crisis Response - Facilitator’s Guide
152 | Part 1 – Reading lessons
Quick start reading lesson #33 - Consonants, letters Kw
kw together.
Skills: Phonemic awareness, sound / Kw/; phonics, letter
Kw kw.
Time: 65 minutes
Learning Objectives: At the end of the lesson, learners
should have mastered the sound of the letter, pronounce its name, be able to identify it and
write it, (upper and lower case).
Materials: chalk, chalkboard, song or text written on the board or a piece of paper, alphabet
chart.
Previous Knowledge: Letters n, a, k, m, s, t, i, r, d, f, ts, b, w, g, y, l, u, c, h, sh, v, au, x, j. e,
z, o, q.
Facilitator’s Tips: Do not speak to the chalkboard—face the children and make
eye contact with them as you speak.
Important Ideas: If the pupils participate in the lesson and have the chance to
practice what they are learning, they will remember what they are learning.
SEL Ideas: Avoiding greediness—ku guji kwaxayi da haxama; sharing with
each other is a way to make sure everyone is happy.
Step &
Icons
Time Activity procedure
10 minutes
Introduction
1. Say good morning to the children and welcome them. Ask
if everyone has taken their name tag.
2. Ask the children what they learned in their last reading
class. They should say the sound /o/. Say a word with /o/ in
it and ask them to repeat. Ask for a word from them with
the same sound /o/; have them repeat these two words in
choral form.
3. Write the following morning message on the board (before
class begins):
Rabon kwaxo ba ya hawa sama.
Ku guje ma kwaxayi domin kare kai daga wulaqanci.
Underline a short vowel and a long vowel in the sentence.
Read the phrase on the board slowly, pointing at each word as
you say it. Do this three times. On the third time, stop at the
long vowel you have underlined and ask students what it is;
have them make the sound again. Do the same for the short
vowel you have underlined. Ask the pupils to say the phrase
with you. Point to the words as you say the phrase and have
them repeat after you.
Kw kw

Education Crisis Response - Facilitator’s Guide
153 | Part 1 – Reading lessons
Step &
Icons
Time Activity procedure
Now, ask the pupils to make the sound /kw/. Have them repeat
it several times. Point to the letters kw together and tell them
that we are going to learn the letters Kw kw today as a double
consonant or diagraph. In Hausa this is called tagon sauti. Use
the Hausa phrase as you explain this.
15 minutes
5 minutes
5 minutes
Presentation: Facilitator presents the new letter and
involves children by repeating the sound, the letter and
having them write it.
1. Write the tagon sauti Kw and kw on the board. Tell the
students these are the letters Kw kw written together.
Ask them to repeat it.
2. Point to the consonants kw together and ask them if
they know what sound they make. Give them an
example of the sound. Walk around the class letting the
pupils see your mouth making the /kw/ sound. Have
the pupils repeat the sound after you.
3. Ask the children to write a large Kw and a small kw in
their notebook. Go around and look at what the
children are writing, helping those who need it.
4. Say the sound yourself again several times with the
pupils repeating after you.
5. Explain that the big Kw and the small kw still make the
same sound.
Practice: The children have a chance to practice the letter
sound and writing with the teacher, in small groups, pairs
or individually.
First segment (learning the sound)
6. Put children in pairs; one partner says the letter sound
/kw/ and the other says the letter names Kw. After a
minute, have them switch roles.
7. Facilitator, go around in the classroom to listen and see
if the pairs are doing well with the sound and the letter
name.
8. Pick some pairs to demonstrate after they have worked
for a minute or two.
9. Have the pupils stand up and make the letter sound Kw
kw 10 times while shrugging their shoulders up and
down.
10. Tell them they did a great job.
Second segment (hearing the sound in words)
11. Ask pupils what other words they know that start with
the same sound. (They may give you a word from the
Education Crisis Response - Facilitator’s Guide
154 | Part 1 – Reading lessons
Step &
Icons
Time Activity procedure
5 minutes
10 minutes
phrase above that starts with Kw kw or another word
they know.) Write all these on the board.
12. Congratulate them as hopefully they have given you
some examples of words that start with Kw kw. If they
have not, give them some examples yourself and write
these on the board. Point out the Kw words in the
morning message as well. Some words you can use are:
kwa, kwi, kwai, kwau, kwando, kwangiri, kwanya and
kwalli
13. Tell them that the sound /kw/ usually occurs in the
beginning of a word.
14. Point to the words on the board and say them in unison
with the children, emphasizing the /kw/ sound.
15. Ask everyone in the class whose given name starts with
Kw to stand up; have them say their name, emphasizing
the /kw/ sound. Write the names on the board. If there
are not pupils whose name starts with Kw, ask the
pupils for any additional words where they hear the
sound /kw/.
Segment 3 (recognizing the Kw kw in print)
16. Point to the phrase written out on a piece of paper or the
chalkboard that you used in the introduction.
17. Recite it at least two times, pointing to the words as
you say them.
18. Have the pupils recite the phrase with you a few times.
19. Ask the pupils to look at the text and tell you how many
words in the phrase contain the letter Kw kw. Point to
the words you wrote on the board earlier that have Kw
kw in them.
20. Ask several pupils to come forward and point to the
letter Kw kw in one of the words on the board.
21. Have all the pupils stand up and use their finger to write
a big Kw in the air. Have them write a small kw in the
air.
22. Tell them they all did a great job.
SEL Message: If we are greedy, we may take more than we
need and others will have too little. Kiguji kwadayi da
hadama. Point out the /kw/ in this phrase. Ask the pupils if the
have ever seen anyone being greedy? Ask them to tell you
about a time when they shared what they had with others or
when someone shared with them.
5 minutes Conclusions/Review
3. Tell children that they now know the name and the
sound of the letters Kw kw. They also know how to
Education Crisis Response - Facilitator’s Guide
155 | Part 1 – Reading lessons
Step &
Icons
Time Activity procedure
write them together. Tell them many words start with
the Kw kw sound and they have named some of them.
4. Chant the phrase on the board one last time, pointing to
the words as the pupils sing/chant.
Reflection: Teacher, write down notes for yourself on this lesson. Did you enjoy the lesson?
How do you think we can improve on it? If you make some notes, then when you teach this
lesson again, you will remember what worked well and where you found some challenges.
This will help you to improve the lesson next time you teach it.
.
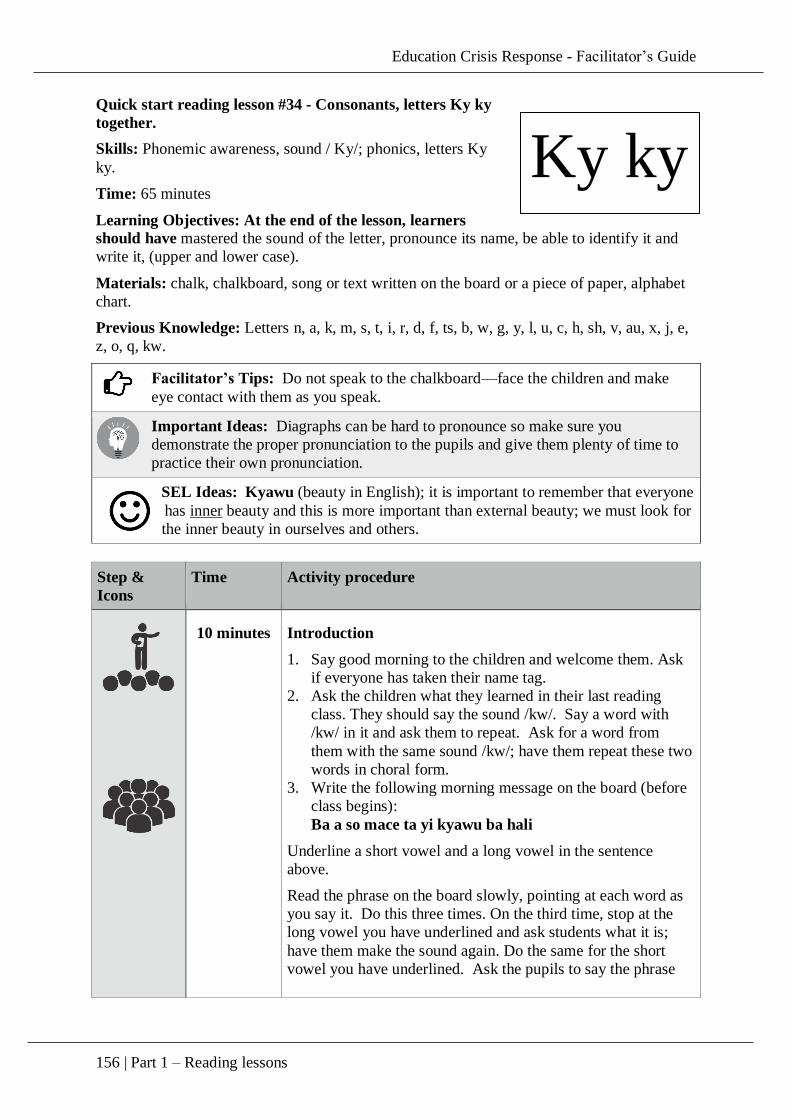
Education Crisis Response - Facilitator’s Guide
156 | Part 1 – Reading lessons
Quick start reading lesson #34 - Consonants, letters Ky ky
together.
Skills: Phonemic awareness, sound / Ky/; phonics, letters Ky
ky.
Time: 65 minutes
Learning Objectives: At the end of the lesson, learners
should have mastered the sound of the letter, pronounce its name, be able to identify it and
write it, (upper and lower case).
Materials: chalk, chalkboard, song or text written on the board or a piece of paper, alphabet
chart.
Previous Knowledge: Letters n, a, k, m, s, t, i, r, d, f, ts, b, w, g, y, l, u, c, h, sh, v, au, x, j, e,
z, o, q, kw.
Facilitator’s Tips: Do not speak to the chalkboard—face the children and make
eye contact with them as you speak.
Important Ideas: Diagraphs can be hard to pronounce so make sure you
demonstrate the proper pronunciation to the pupils and give them plenty of time to
practice their own pronunciation.
SEL Ideas: Kyawu (beauty in English); it is important to remember that everyone
has inner beauty and this is more important than external beauty; we must look for
the inner beauty in ourselves and others.
Step &
Icons
Time Activity procedure
10 minutes
Introduction
1. Say good morning to the children and welcome them. Ask
if everyone has taken their name tag.
2. Ask the children what they learned in their last reading
class. They should say the sound /kw/. Say a word with
/kw/ in it and ask them to repeat. Ask for a word from
them with the same sound /kw/; have them repeat these two
words in choral form.
3. Write the following morning message on the board (before
class begins):
Ba a so mace ta yi kyawu ba hali
Underline a short vowel and a long vowel in the sentence
above.
Read the phrase on the board slowly, pointing at each word as
you say it. Do this three times. On the third time, stop at the
long vowel you have underlined and ask students what it is;
have them make the sound again. Do the same for the short
vowel you have underlined. Ask the pupils to say the phrase
Ky ky

Education Crisis Response - Facilitator’s Guide
157 | Part 1 – Reading lessons
Step &
Icons
Time Activity procedure
with you. Point to the words as you say the phrase and have
them repeat after you at least three times.
Now, ask the pupils to make the sound /ky/. Have them repeat
it several times. Point to the letters ky together and tell them
that we are going to learn the letters Ky ky today as a double
consonant or diagraph. In Hausa this is called tagon sauti. Use
the Hausa phrase as you explain this.
15 minutes
5 minutes
Presentation: Facilitator presents the new letter and
involves children by repeating the sound, the letter and
having them write it.
1. Write the tagon sauti Ky and ky on the board. Tell the
students these are the letters Ky ky written together.
Ask them to repeat it.
2. Point to the consonants ky together and ask them if they
know what sound they make. Give them an example of
the sound. Walk around the class letting the pupils see
your mouth making the /ky/ sound. Have the pupils
repeat the sound after you.
3. Ask the children to write a large Ky and a small ky in
their notebook. Go around and look at what the
children are writing, helping those who need it.
4. Say the sound yourself again several times with the
pupils repeating after you.
5. Explain that the big Ky and the small ky still make the
same sound.
Practice: The children have a chance to practice the letter
sound and writing with the teacher, in small groups, pairs
or individually.
First segment (learning the sound)
1. Put children in pairs; one partner says the letter sound
/ky/ and the other says the letter names Ky. After a
minute, have them switch roles.
2. Facilitator, go round the classroom to listen and see if
the pairs are doing well with the sound and the letter
name.
3. Pick some pairs to demonstrate after they have worked
for a minute or two.
4. Have the pupils stand up and make the letter sound Ky
ky 10 times shaking right arm in the air.
5. Tell them they did a great job.
Second segment (hearing the sound in words)
6. Ask pupils what other words they know that start with
the same sound. (They may give you a word from the
Education Crisis Response - Facilitator’s Guide
158 | Part 1 – Reading lessons
Step &
Icons
Time Activity procedure
5 minutes
5 minutes
10 minutes
phrase above that starts with Ky ky or another word
they know.) Write all these on the board.
7. Congratulate them as hopefully they have given you
some examples of words that start with Ky ky. If they
have not, give them some examples yourself and write
these on the board. Point out the Ky words in the
morning message as well. Some words you can use are:
kyawu, kya, kyara, kyau, kyauta, kyanwa.
8. Tell them that the sound /ky/ usually occurs in the
beginning of a word.
9. Point to the words on the board and say them in unison
with the children, emphasizing the /ky/ sound.
10. Ask everyone in the class whose given name starts with
Ky to stand up; have them say their name, emphasizing
the /ky/ sound. Write the names on the board. If there
are not pupils whose name starts with Ky, ask the pupils
for any additional words where they hear the sound
/ky/.
Segment 3 (recognizing the Ky ky in print)
11. Point to the phrase written out on a piece of paper or the
chalkboard that you used in the introduction.
12. Recite it at least two times, pointing to the words as
you say them.
13. Have the pupils recite the phrase with you a few times.
14. Ask the pupils to look at the text and tell you how many
words in the phrase contain the letter Ky ky. Point to
the words you wrote on the board earlier that have a Ky
ky in them.
15. Ask several pupils to come forward and point to the
letter Ky ky in one of the words on the board.
16. Have all the pupils stand up and use their finger to write
a big Ky in the air. Have them write a small ky in the
air.
17. Tell them they all did a great job.
SEL Message: Kyawu (beauty in English) is an important
concept in developing empathy and appreciation for people
around you. Kyawu starts with the letters Ky. As you get to
know people, look for their inner beauty—for the good
qualities they possess inside. Facilitator, ask the pupils if they
can name some qualities you look for in a friend or loved one
that exemplify inner beauty.
Education Crisis Response - Facilitator’s Guide
159 | Part 1 – Reading lessons
Step &
Icons
Time Activity procedure
5 minutes Conclusions/Review
1. Tell children that they now know the name and the
sound of the letters Ky ky. They also know how to
write them together. Tell them many words start with
the Ky ky sound and they have named some of them.
2. Chant the phrase on the board one last time, pointing to
the words as the pupils sing/chant.
Reflection: Teacher, write down notes for yourself on this lesson. Did you enjoy the lesson?
How do you think we can improve on it? If you make some notes, then when you teach this
lesson again, you will remember what worked well and where you found some challenges.
This will help you to improve the lesson next time you teach it.
.
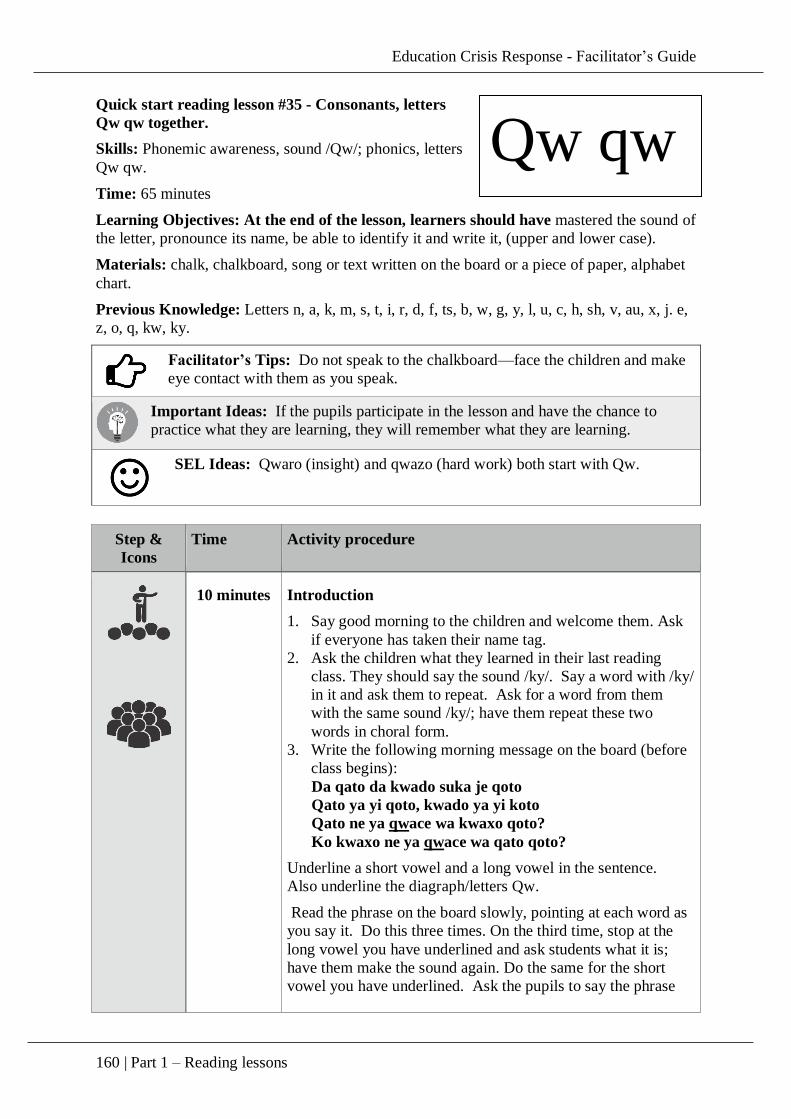
Education Crisis Response - Facilitator’s Guide
160 | Part 1 – Reading lessons
Quick start reading lesson #35 - Consonants, letters
Qw qw together.
Skills: Phonemic awareness, sound /Qw/; phonics, letters
Qw qw.
Time: 65 minutes
Learning Objectives: At the end of the lesson, learners should have mastered the sound of
the letter, pronounce its name, be able to identify it and write it, (upper and lower case).
Materials: chalk, chalkboard, song or text written on the board or a piece of paper, alphabet
chart.
Previous Knowledge: Letters n, a, k, m, s, t, i, r, d, f, ts, b, w, g, y, l, u, c, h, sh, v, au, x, j. e,
z, o, q, kw, ky.
Facilitator’s Tips: Do not speak to the chalkboard—face the children and make
eye contact with them as you speak.
Important Ideas: If the pupils participate in the lesson and have the chance to
practice what they are learning, they will remember what they are learning.
SEL Ideas: Qwaro (insight) and qwazo (hard work) both start with Qw.
Step &
Icons
Time Activity procedure
10 minutes
Introduction
1. Say good morning to the children and welcome them. Ask
if everyone has taken their name tag.
2. Ask the children what they learned in their last reading
class. They should say the sound /ky/. Say a word with /ky/
in it and ask them to repeat. Ask for a word from them
with the same sound /ky/; have them repeat these two
words in choral form.
3. Write the following morning message on the board (before
class begins):
Da qato da kwado suka je qoto
Qato ya yi qoto, kwado ya yi koto
Qato ne ya qwace wa kwaxo qoto?
Ko kwaxo ne ya qwace wa qato qoto?
Underline a short vowel and a long vowel in the sentence.
Also underline the diagraph/letters Qw.
Read the phrase on the board slowly, pointing at each word as
you say it. Do this three times. On the third time, stop at the
long vowel you have underlined and ask students what it is;
have them make the sound again. Do the same for the short
vowel you have underlined. Ask the pupils to say the phrase
Qw qw
Education Crisis Response - Facilitator’s Guide
161 | Part 1 – Reading lessons
Step &
Icons
Time Activity procedure
with you. Point to the words as you say the phrase and have
them repeat after you; do this three times.
Now, ask the pupils to make the sound /qw/. Have them repeat
it several times. Point to the letters Qw together and tell them
that we are going to learn the letters Qw qw today as a double
consonant or diagraph. In Hausa this is called tagon sauti. Use
the Hausa phrase as you explain this.
15 minutes
5 minutes
5 minutes
Presentation: Facilitator presents the new letter and
involves children by repeating the sound, the letter and
having them write it.
1. Write the tagon sauti Qw and Qw on the board. Tell the
students these are the letters Qw qw written together.
Ask them to repeat it.
2. Point to the consonants Qw together and ask them if
they know what sound they make. Give them an
example of the sound. Walk around the class letting the
pupils see your mouth making the /qw/ sound. Have
the pupils repeat the sound after you.
3. Ask the children to write a large Qw and a small qw in
their notebook. Go around and look at what the
children are writing, helping those who need it.
4. Say the sound yourself again several times with the
pupils repeating after you.
5. Explain that the big Qw and the small qw still make the
same sound.
Practice: The children have a chance to practice the letter
sound and writing with the teacher, in small groups, pairs
or individually.
First segment (learning the sound)
1. Put children in pairs; one partner says the tagon sauti
sound /qw/ and the other says the letter name Qw. After
a minute, have them switch roles.
2. Facilitator, go round the classroom to listen and see if
the pairs are doing well with the sound and the letter
name.
3. Pick some pairs to demonstrate after they have worked
for a minute or two.
4. Have the pupils stand up and make the letter sound Qw
qw 10 times hopping on one foot.
5. Tell them they did a great job.
Second segment (hearing the sound in words)
Education Crisis Response - Facilitator’s Guide
162 | Part 1 – Reading lessons
Step &
Icons
Time Activity procedure
5 minutes
10 minutes
6. Ask pupils what other words they know that start with
the same sound. (They may give you a word from the
phrase above that starts with Qw qw or another word
they know.) Write all these on the board.
7. Congratulate them as hopefully they have given you
some examples of words that start with Qw qw. If they
have not, give them some examples yourself and write
these on the board. Point out the Qw words in the
morning message as well. Some words you can use are:
qwai, qwakwa, qwarya, qwace, qwaro, qwala, qwado,
qwaya, qwalama.
8. Tell them that the sound /qw/ usually occurs in the
beginning of a word.
9. Point to the words on the board and say them in unison
with the children, emphasizing the /qw/ sound.
10. Ask everyone in the class whose given name starts with
Qw to stand up; have them say their name, emphasizing
the /qw/ sound. Write the names on the board. If there
are not pupils whose name starts with qw, ask the pupils
for any additional words where they hear the sound
/qw/.
Segment 3 (recognizing the Qw qw in print)
11. Point to the phrase written out on a piece of paper or the
chalkboard that you used in the introduction.
12. Recite it at least two times, pointing to the words as
you say them.
13. Have the pupils recite the phrase with you a few times.
14. Ask the pupils to look at the text and tell you how many
words in the phrase contain the letter Qw qw. Point to
the words you wrote on the board earlier that have Qw
qw in them.
15. Ask several pupils to come forward and point to the
letter Qw qw in one of the words on the board.
16. Have all the pupils stand up and use their finger to write
a big Qw in the air. Have them write a small qw in the
air.
17. Tell them they all did a great job.
SEL Message: Qwaro is an important term in social and
emotional learning; insight helps us to understand why we react
in a certain way to things. Insight helps us understand our
reactions and better control them. Controling our reactions can
take hard work (qwazo), which also starts with qw.
Education Crisis Response - Facilitator’s Guide
163 | Part 1 – Reading lessons
Step &
Icons
Time Activity procedure
Ask the pupils if they understand the idea of qwaro. Ask them
to tell you what it means. Ask them if they can give you
examples of times they have worked hard (qwazo).
5 minutes Conclusions/Review
1. Tell children that they now know the name and the
sound of the letters Qw qw. They also know how to
write them together. Tell them many words start with
the Qw qw sound and they have named some of them.
2. Chant the phrase on the board one last time, pointing to
the words as the pupils sing/chant.
Reflection: Teacher, write down notes for yourself on this lesson. Did you enjoy the lesson?
How do you think we can improve on it? If you make some notes, then when you teach this
lesson again, you will remember what worked well and where you found some challenges.
This will help you to improve the lesson next time you teach it.
.
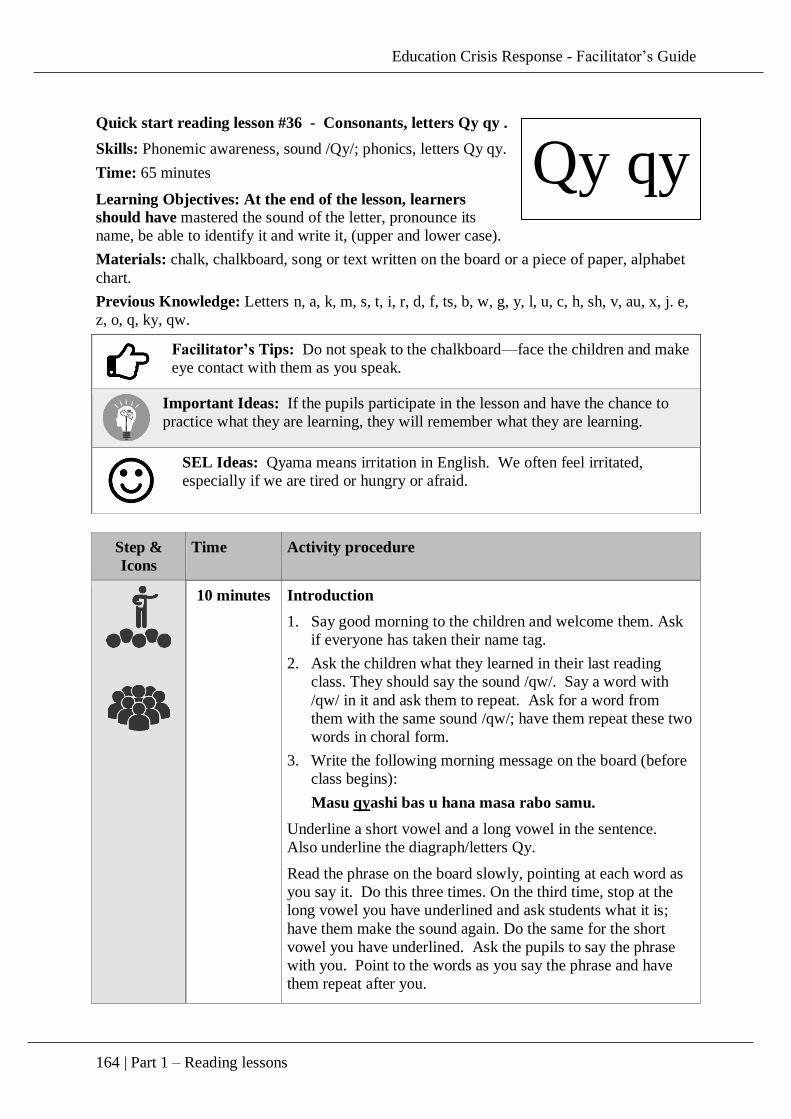
Education Crisis Response - Facilitator’s Guide
164 | Part 1 – Reading lessons
Quick start reading lesson #36 - Consonants, letters Qy qy .
Skills: Phonemic awareness, sound /Qy/; phonics, letters Qy qy.
Time: 65 minutes
Learning Objectives: At the end of the lesson, learners
should have mastered the sound of the letter, pronounce its
name, be able to identify it and write it, (upper and lower case).
Materials: chalk, chalkboard, song or text written on the board or a piece of paper, alphabet
chart.
Previous Knowledge: Letters n, a, k, m, s, t, i, r, d, f, ts, b, w, g, y, l, u, c, h, sh, v, au, x, j. e,
z, o, q, ky, qw.
Facilitator’s Tips: Do not speak to the chalkboard—face the children and make
eye contact with them as you speak.
Important Ideas: If the pupils participate in the lesson and have the chance to
practice what they are learning, they will remember what they are learning.
SEL Ideas: Qyama means irritation in English. We often feel irritated,
especially if we are tired or hungry or afraid.
Step &
Icons
Time Activity procedure
10 minutes
Introduction
1. Say good morning to the children and welcome them. Ask
if everyone has taken their name tag.
2. Ask the children what they learned in their last reading
class. They should say the sound /qw/. Say a word with
/qw/ in it and ask them to repeat. Ask for a word from
them with the same sound /qw/; have them repeat these two
words in choral form.
3. Write the following morning message on the board (before
class begins):
Masu qyashi bas u hana masa rabo samu.
Underline a short vowel and a long vowel in the sentence.
Also underline the diagraph/letters Qy.
Read the phrase on the board slowly, pointing at each word as
you say it. Do this three times. On the third time, stop at the
long vowel you have underlined and ask students what it is;
have them make the sound again. Do the same for the short
vowel you have underlined. Ask the pupils to say the phrase
with you. Point to the words as you say the phrase and have
them repeat after you.
Qy qy

Education Crisis Response - Facilitator’s Guide
165 | Part 1 – Reading lessons
Step &
Icons
Time Activity procedure
Now, ask the pupils to make the sound /qy/. Have them repeat
it several times. Point to the letters Qy together and tell them
that we are going to learn the letters Qy qy today as a double
consonant or diagraph. In Hausa this is called tagon sauti. Use
the Hausa phrase as you explain this.
15 minutes
5 minutes
5 minutes
Presentation: Facilitator presents the new letter and
involves children by repeating the sound, the letter and
having them write it.
1. Write the tagon sauti Qy and qy on the board. Tell the
students these are the letters Qy qy written together.
Ask them to repeat it.
2. Point to the consonants Qy together and ask them if
they know what sound they make. Give them an
example of the sound. Walk around the class letting the
pupils see your mouth making the /qy/ sound. Have the
pupils repeat the sound after you.
3. Ask the children to write a large Qy and a small qy in
their notebook. Go around and look at what the
children are writing, helping those who need it.
4. Say the sound yourself again several times with the
pupils repeating after you.
5. Explain that the big Qy and the small qy still make the
same sound.
Practice: The children have a chance to practice the letter
sound and writing with the teacher, in small groups, pairs
or individually.
First segment (learning the sound)
6. Put children in pairs; one partner says the tagon sauti
sound /qy/ and the other says the letter name Qy. After
a minute, have them switch roles.
7. Facilitator, walk around in the classroom to listen and
see if the pairs are doing well with the sound and the
letter name.
8. Pick some pairs to demonstrate after they have worked
for a minute or two.
9. Have the pupils stand up and make the letter sound Qy
qy 10 times hopping on one foot.
10. Tell them they did a great job.
Second segment (hearing the sound in words)
11. Ask pupils what other words they know that start with
the same sound. (They may give you a word from the
phrase above that starts with Qy qy or another word
they know.) Write all these on the board.

Education Crisis Response - Facilitator’s Guide
166 | Part 1 – Reading lessons
Step &
Icons
Time Activity procedure
\
5 minutes
10 minutes
12. Congratulate them as hopefully they have given you
some examples of words that start with Qy qy. If they
have not, give them some examples yourself and write
these on the board. Point out the Qy words in the
morning message as well. Some words you can use are:
qyama, qyashi, qyaure, qyau, qyauta.
13. Tell them that the sound /qy/ usually occurs in the
beginning of a word.
14. Point to the words on the board and say them in unison
with the children, emphasizing the /qy/ sound.
15. Ask everyone in the class whose given name starts with
Qy to stand up; have them say their name, emphasizing
the /qy/ sound. Write the names on the board. If there
are not pupils whose name starts with Qy, ask the pupils
for any additional words where they hear the sound
/qy/.
Segment 3 (recognizing the Qy qy in print)
16. Point to the phrase written out on a piece of paper or the
chalkboard that you used in the introduction.
17. Recite it at least two times, pointing to the words as
you say them.
18. Have the pupils recite the phrase with you a few times.
19. Ask the pupils to look at the text and tell you how many
words in the phrase contain the letter Qy qy. Point to
the words you wrote on the board earlier that have a Qy
qy in them.
20. Ask several pupils to come forward and point to the
letter Qy qy in one of the words on the board.
21. Have all the pupils stand up and use their finger to write
a big Qy in the air. Have them write a small qy in the
air.
22. Tell them they all did a great job.
SEL Message: Qyama means irritation in English. It starts
with the diagraph Qy. We often feel irritated, especially if we
are tired or hungry or afraid. Ask the pupils to tell you of some
examples where they felt irritated. Ask them what they did to
feel better? Did someone help them to feel better?
5 minutes Conclusions/Review
1. Tell children that they now know the name and the
sound of the letters Qy qy. They also know how to
write them together. Tell them many words start with
the Qy qy sound and they have named some of them.
Education Crisis Response - Facilitator’s Guide
167 | Part 1 – Reading lessons
Step &
Icons
Time Activity procedure
2. Chant the phrase on the board one last time, pointing to
the words as the pupils sing/chant.
Reflection: Teacher, write down notes for yourself on this lesson. Did you enjoy the lesson?
How do you think we can improve on it? If you make some notes, then when you teach this
lesson again, you will remember what worked well and where you found some challenges.
This will help you to improve the lesson next time you teach it.
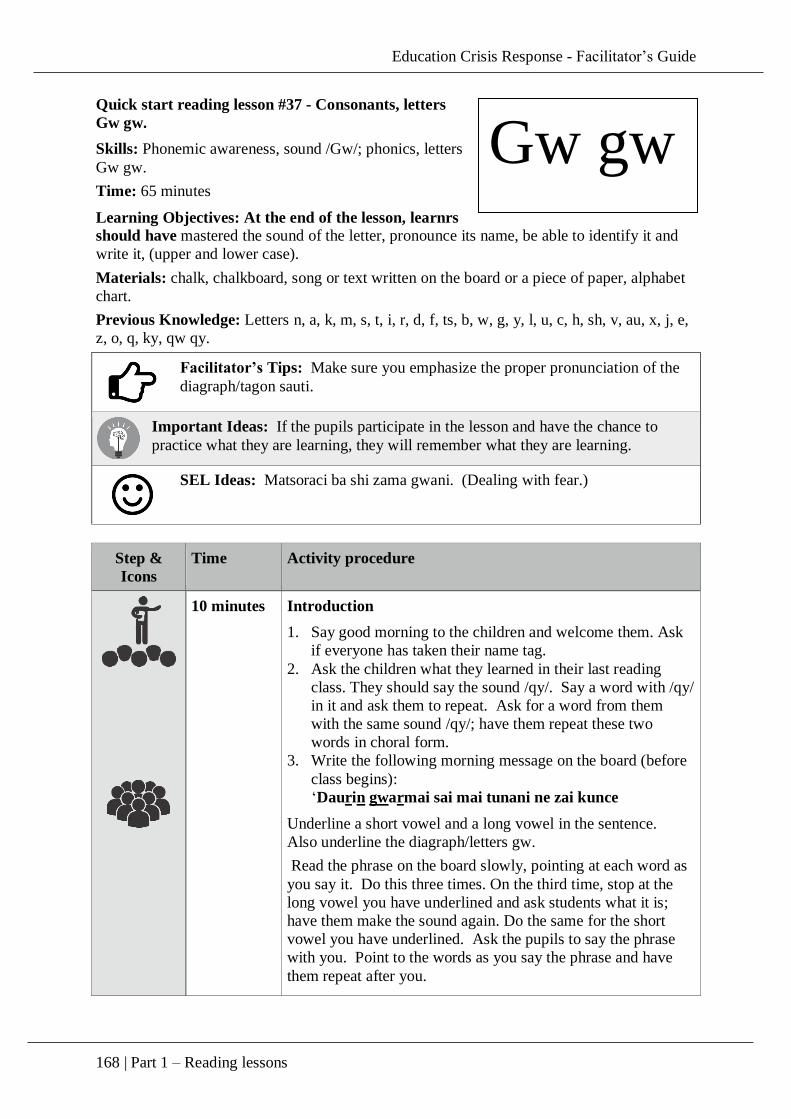
Education Crisis Response - Facilitator’s Guide
168 | Part 1 – Reading lessons
Quick start reading lesson #37 - Consonants, letters
Gw gw.
Skills: Phonemic awareness, sound /Gw/; phonics, letters
Gw gw.
Time: 65 minutes
Learning Objectives: At the end of the lesson, learnrs
should have mastered the sound of the letter, pronounce its name, be able to identify it and
write it, (upper and lower case).
Materials: chalk, chalkboard, song or text written on the board or a piece of paper, alphabet
chart.
Previous Knowledge: Letters n, a, k, m, s, t, i, r, d, f, ts, b, w, g, y, l, u, c, h, sh, v, au, x, j, e,
z, o, q, ky, qw qy.
Facilitator’s Tips: Make sure you emphasize the proper pronunciation of the
diagraph/tagon sauti.
Important Ideas: If the pupils participate in the lesson and have the chance to
practice what they are learning, they will remember what they are learning.
SEL Ideas: Matsoraci ba shi zama gwani. (Dealing with fear.)
Step &
Icons
Time Activity procedure
10 minutes
Introduction
1. Say good morning to the children and welcome them. Ask
if everyone has taken their name tag.
2. Ask the children what they learned in their last reading
class. They should say the sound /qy/. Say a word with /qy/
in it and ask them to repeat. Ask for a word from them
with the same sound /qy/; have them repeat these two
words in choral form.
3. Write the following morning message on the board (before
class begins):
‘Daurin gwarmai sai mai tunani ne zai kunce
Underline a short vowel and a long vowel in the sentence.
Also underline the diagraph/letters gw.
Read the phrase on the board slowly, pointing at each word as
you say it. Do this three times. On the third time, stop at the
long vowel you have underlined and ask students what it is;
have them make the sound again. Do the same for the short
vowel you have underlined. Ask the pupils to say the phrase
with you. Point to the words as you say the phrase and have
them repeat after you.
Gw gw
Education Crisis Response - Facilitator’s Guide
169 | Part 1 – Reading lessons
Step &
Icons
Time Activity procedure
Now, ask the pupils to make the sound /gw/. Have them repeat
it several times. Point to the letters Gw together and tell them
that we are going to learn the letters Gw gw today as a double
consonant or diagraph. In Hausa this is called tagon sauti. Use
the Hausa phrase as you explain this.
15 minutes
5 minutes
5 minutes
Presentation: Facilitator presents the new letter and
involves children by repeating the sound, the letter and
having them write it.
1. Write the tagon sauti Gw and gw on the board. Tell the
students these are the letters Gw gw written together.
Ask them to repeat it.
2. Point to the consonants Gw together and ask them if
they know what sound they make. Give them an
example of the sound. Walk around the class letting the
pupils see your mouth making the /Gw/ sound. Have
the pupils repeat the sound after you.
3. Ask the children to write a large Gw and a small gw in
their notebook. Go around and look at what the
children are writing, helping those who need it.
4. Say the sound yourself again several times with the
pupils repeating after you.
5. Explain that the big Gw and the small gw still make the
same sound.
Practice: The children have a chance to practice the letter
sound and writing with the teacher, in small groups, pairs
or individually.
First segment (learning the sound)
1. Put children in pairs; one partner says the tagon sauti
sound /gw/ and the other says the letter names Gw.
After a minute, have them switch roles.
2. Facilitator, go round in the classroom to listen and see if
the pairs are doing well with the sound and the letter
name.
3. Pick some pairs to demonstrate after they have worked
for a minute or two.
4. Have the pupils stand up and make the letter sound Gw
gw 10 times standing on their toes.
5. Tell them they did a great job.
Second segment (hearing the sound in words)
1. Ask pupils what other words they know that start with
the same sound. (They may give you a word from the
phrase above that starts with Gw gw or another word
they know.) Write all these on the board.
Education Crisis Response - Facilitator’s Guide
170 | Part 1 – Reading lessons
Step &
Icons
Time Activity procedure
5 minutes
10 minutes
2. Congratulate them as hopefully they have given you
some examples of words that start with Gw gw. If they
have not, give them some examples yourself and write
these on the board. Point out the Gw words in the
morning message as well. Some words you can use are:
gwanda, gwaiba, gwado, gwangwani
3. Tell them that the sound /gw/ usually occurs in the
beginning of a word although it can come in the middle
too, like it does in the word gwangwani.
4. Point to the words on the board and say them in unison
with the children, emphasizing the /gw/ sound.
5. Ask everyone in the class whose given name starts with
Gw to stand up; have them say their name, emphasizing
the /gw/ sound. Write the names on the board. If there
are not pupils whose name starts with Gw, ask the
pupils for any additional words where they hear the
sound /gw/.
Segment 3 (recognizing the Gw gw in print)
6. Point to the phrase written out on a piece of paper or the
chalkboard that you used in the introduction.
7. Recite it at least two times, pointing to the words as
you say them.
8. Have the pupils recite the phrase with you a few times.
9. Ask the pupils to look at the text and tell you how many
words in the phrase contain the letter Gw gw. Point to
the words you wrote on the board earlier that have a Gw
gw in them.
10. Ask several pupils to come forward and point to the
letter Gw gw in one of the words on the board.
11. Have all the pupils stand up and use their finger to write
a big Gw in the air. Have them write a small gw in the
air.
12. Tell them they all did a great job.
SEL Message: Dealing with our fears is important if we are to
overcome them or put them to rest. Acknowledging fear is one
way to begin to deal with it. Ask the pupils what they are
afraid of and how they deal with their fear. Share the phrase
with them: Matsoraci ba shi zama gwani. Ask them to point
to the word that begins with gw.
5 minutes Conclusions/Review
1. Tell children that they now know the name and the
sound of the letters Gw gw. They also know how to
write them together. Tell them many words start with
the Gw gw sound and they have named some of them.

Education Crisis Response - Facilitator’s Guide
171 | Part 1 – Reading lessons
Step &
Icons
Time Activity procedure
2. Chant the phrase on the board one last time, pointing to
the words as the pupils sing/chant.
Reflection: Teacher, write down notes for yourself on this lesson. Did you enjoy the lesson?
How do you think we can improve on it? If you make some notes, then when you teach this
lesson again, you will remember what worked well and where you found some challenges.
This will help you to improve the lesson next time you teach it
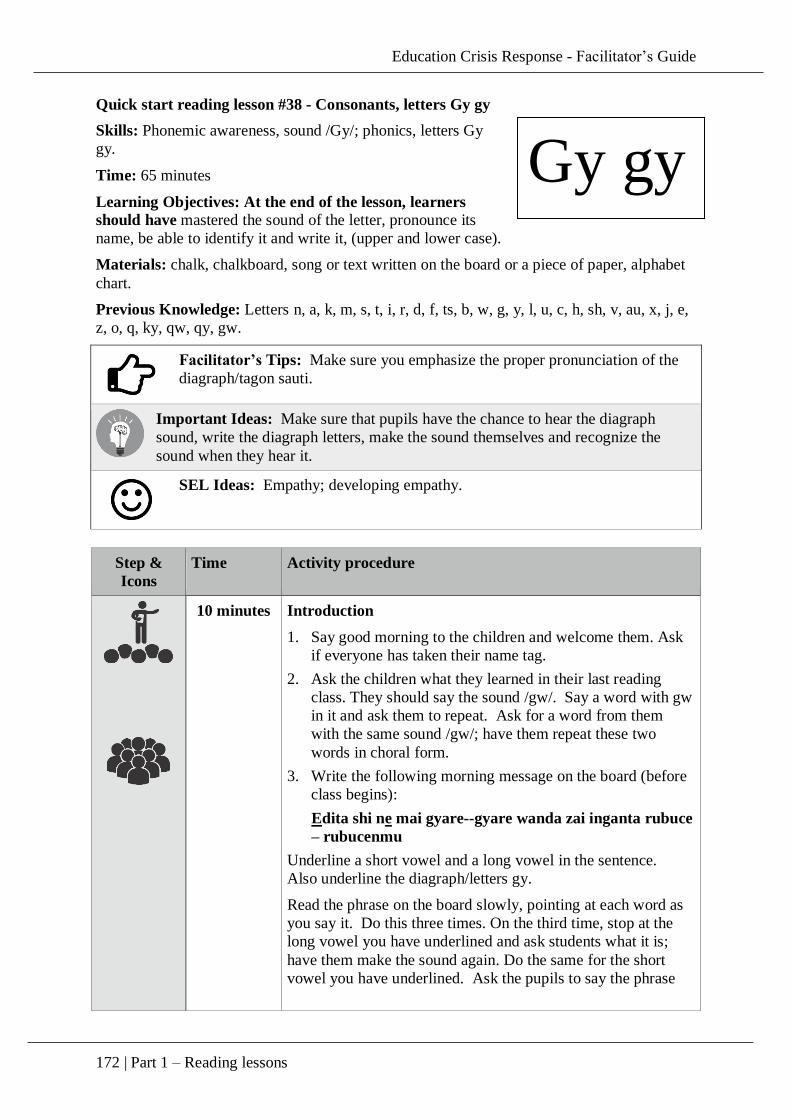
Education Crisis Response - Facilitator’s Guide
172 | Part 1 – Reading lessons
Quick start reading lesson #38 - Consonants, letters Gy gy
Skills: Phonemic awareness, sound /Gy/; phonics, letters Gy
gy.
Time: 65 minutes
Learning Objectives: At the end of the lesson, learners
should have mastered the sound of the letter, pronounce its
name, be able to identify it and write it, (upper and lower case).
Materials: chalk, chalkboard, song or text written on the board or a piece of paper, alphabet
chart.
Previous Knowledge: Letters n, a, k, m, s, t, i, r, d, f, ts, b, w, g, y, l, u, c, h, sh, v, au, x, j, e,
z, o, q, ky, qw, qy, gw.
Facilitator’s Tips: Make sure you emphasize the proper pronunciation of the
diagraph/tagon sauti.
Important Ideas: Make sure that pupils have the chance to hear the diagraph
sound, write the diagraph letters, make the sound themselves and recognize the
sound when they hear it.
SEL Ideas: Empathy; developing empathy.
Step &
Icons
Time Activity procedure
10 minutes
Introduction
1. Say good morning to the children and welcome them. Ask
if everyone has taken their name tag.
2. Ask the children what they learned in their last reading
class. They should say the sound /gw/. Say a word with gw
in it and ask them to repeat. Ask for a word from them
with the same sound /gw/; have them repeat these two
words in choral form.
3. Write the following morning message on the board (before
class begins):
Edita shi ne mai gyare--gyare wanda zai inganta rubuce
– rubucenmu
Underline a short vowel and a long vowel in the sentence.
Also underline the diagraph/letters gy.
Read the phrase on the board slowly, pointing at each word as
you say it. Do this three times. On the third time, stop at the
long vowel you have underlined and ask students what it is;
have them make the sound again. Do the same for the short
vowel you have underlined. Ask the pupils to say the phrase
Gy gy
Education Crisis Response - Facilitator’s Guide
173 | Part 1 – Reading lessons
Step &
Icons
Time Activity procedure
with you. Point to the words as you say the phrase and have
them repeat after you.
Now, ask the pupils to make the sound /gy/. Have them repeat
it several times. Point to the letters gy together and tell them
that we are going to learn the letters Gy gy today as a double
consonant or diagraph. In Hausa this is called tagon sauti. Use
the Hausa phrase as you explain this.
15 minutes
5 minutes
5 minutes
Presentation: Facilitator presents the new letter and
involves children by repeating the sound, the letter and
having them write it.
1. Write the tagon sauti Gy and gy on the board. Tell the
students these are the letters Gy gy written together.
Ask them to repeat it.
2. Point to the consonants Gy together and ask them if
they know what sound they make. Give them an
example of the sound. Walk around the class letting the
pupils see your mouth making the /gy/ sound. Have the
pupils repeat the sound after you.
3. Ask the children to write a large Gy and a small gy in
their notebook. Go around and look at what the
children are writing, helping those who need it.
4. Say the sound yourself again several times with the
pupils repeating after you.
5. Explain that the big Gy and the small gy still make the
same sound.
Practice: The children have a chance to practice the letter
sound and writing with the teacher, in small groups, pairs
or individually.
First segment (learning the sound)
6. Put children in pairs; one partner says the tagon sauti
sound /gy/ and the other says the letter names Gy. After
a minute, have them switch roles.
7. Facilitator, walk around in the classroom to listen and
see if the pairs are doing well with the sound and the
letter name.
8. Pick some pairs to demonstrate after they have worked
for a minute or two.
9. Have the pupils stand up and make the letter sound Gy
gy 10 times standing on their toes.
10. Tell them they did a great job.
Second segment (hearing the sound in words)

Education Crisis Response - Facilitator’s Guide
174 | Part 1 – Reading lessons
Step &
Icons
Time Activity procedure
5 minutes
10 minutes
11. Ask pupils what other words they know that start with
the same sound. (They may give you a word from the
phrase above that starts with Gy gy or another word
they know.) Write all these on the board.
12. Congratulate them as hopefully they have given you
some examples of words that start with Gy gy. If they
have not, give them some examples yourself and write
these on the board. Point out the Gy words in the
morning message as well. Some words you can use are:
gyara, gyare, gyale
13. Tell them that the sound /gy/ usually occurs in the
beginning of a word.
14. Point to the words on the board and say them in unison
with the children, emphasizing the /gy/ sound.
15. Ask everyone in the class whose given name starts with
Gy to stand up; have them say their name, emphasizing
the /gy/ sound. Write the names on the board. If there
are not pupils whose name starts with Gy, ask the pupils
for any additional words where they hear the sound
/gy/.
Segment 3 (recognizing the Gy gy in print)
16. Point to the phrase written out on a piece of paper or the
chalkboard that you used in the introduction.
17. Recite it at least two times, pointing to the words as
you say them.
18. Have the pupils recite the phrase with you a few times.
19. Ask the pupils to look at the text and tell you how many
words in the phrase contain the letter Gy gy. Point to
the words you wrote on the board earlier that have a Gy
gy in them.
20. Ask several pupils to come forward and point to the
letter Gy gy in one of the words on the board.
21. Have all the pupils stand up and use their finger to write
a big Gy in the air. Have them write a small gy in the
air.
22. Tell them they all did a great job.
SEL Message: Empathy means feeling the same feelings as
someone else. We need as humans and as citizens to empathize
with one another so that we do not act to cause each other pain.
Can the pupils tell you someone whose feelings they empathize
with?
5 minutes Conclusions/Review
Education Crisis Response - Facilitator’s Guide
175 | Part 1 – Reading lessons
Step &
Icons
Time Activity procedure
1. Tell children that they now know the name and the
sound of the letters Gy gy. They also know how to
write them together. Tell them many words start with
the Gy gy sound and they have named some of them.
2. Chant the phrase on the board one last time, pointing to
the words as the pupils sing/chant.
Reflection: Teacher, write down notes for yourself on this lesson. Did you enjoy the lesson?
How do you think we can improve on it? If you make some notes, then when you teach this
lesson again, you will remember what worked well and where you found some challenges.
This will help you to improve the lesson next time you teach it.
.
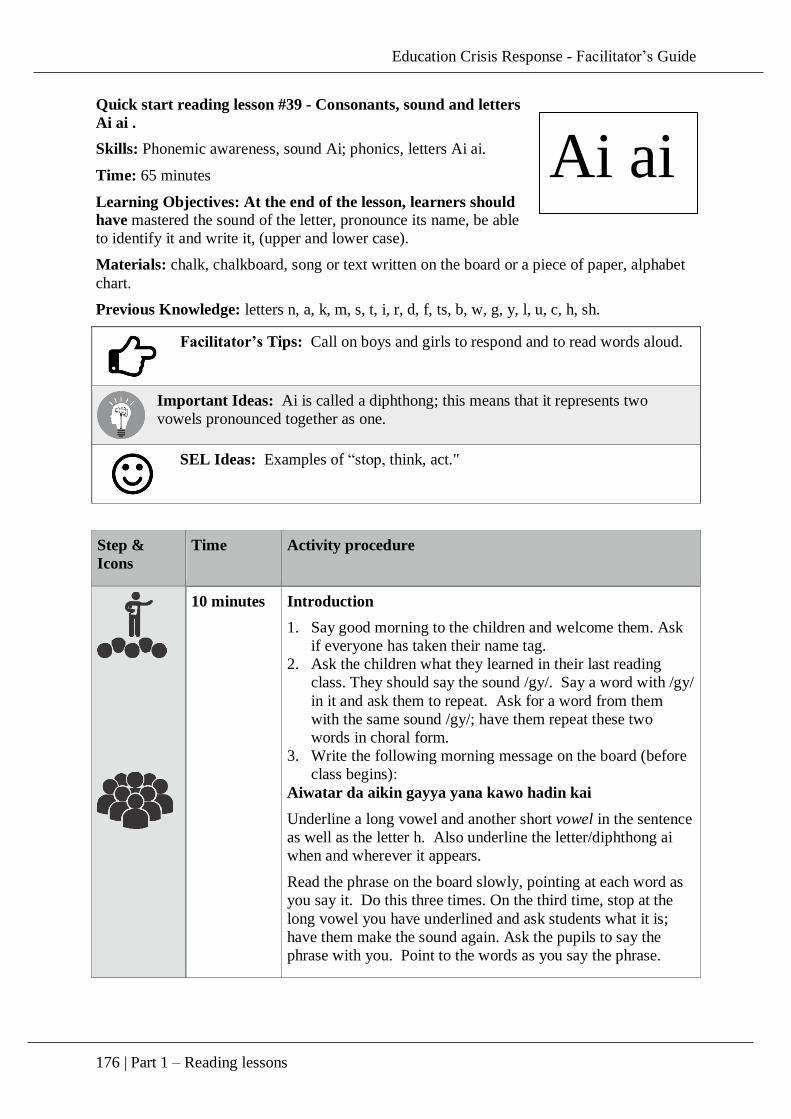
Education Crisis Response - Facilitator’s Guide
176 | Part 1 – Reading lessons
Quick start reading lesson #39 - Consonants, sound and letters
Ai ai .
Skills: Phonemic awareness, sound Ai; phonics, letters Ai ai.
Time: 65 minutes
Learning Objectives: At the end of the lesson, learners should
have mastered the sound of the letter, pronounce its name, be able
to identify it and write it, (upper and lower case).
Materials: chalk, chalkboard, song or text written on the board or a piece of paper, alphabet
chart.
Previous Knowledge: letters n, a, k, m, s, t, i, r, d, f, ts, b, w, g, y, l, u, c, h, sh.
Facilitator’s Tips: Call on boys and girls to respond and to read words aloud.
Important Ideas: Ai is called a diphthong; this means that it represents two
vowels pronounced together as one.
SEL Ideas: Examples of “stop, think, act."
Step &
Icons
Time Activity procedure
10 minutes
Introduction
1. Say good morning to the children and welcome them. Ask
if everyone has taken their name tag.
2. Ask the children what they learned in their last reading
class. They should say the sound /gy/. Say a word with /gy/
in it and ask them to repeat. Ask for a word from them
with the same sound /gy/; have them repeat these two
words in choral form.
3. Write the following morning message on the board (before
class begins):
Aiwatar da aikin gayya yana kawo hadin kai
Underline a long vowel and another short vowel in the sentence
as well as the letter h. Also underline the letter/diphthong ai
when and wherever it appears.
Read the phrase on the board slowly, pointing at each word as
you say it. Do this three times. On the third time, stop at the
long vowel you have underlined and ask students what it is;
have them make the sound again. Ask the pupils to say the
phrase with you. Point to the words as you say the phrase.
Ai ai
Education Crisis Response - Facilitator’s Guide
177 | Part 1 – Reading lessons
Step &
Icons
Time Activity procedure
Now, ask the pupils to make the sound /ai/. Have them repeat
it several times. Point to the letter and tell them that we are
going to learn the letter/diphthong ai today.
15 minutes
5 minutes
5 minutes
Presentation: Facilitator presents the new letter and
involves children by repeating the sound, the letter and
having them write it.
1. Write the letter on the board: Ai and ai. Tell the
students this is the letter Ai ai. Tell pupils the letter
name. Ask them to repeat it.
2. Point to the letters Ai and ask them if they know what
sound they make. Give them an example of the sound.
Walk around the class letting the pupils see your mouth
making the /ai/ sound.
3. Ask the children to write a large Ai and a small ai in
their notebook. Go around and look at what the
children are writing, helping those who need it.
4. Say the sound yourself several times. Explain that the
big Ai and the small ai still make the same sound.
Practice: The children have a chance to practice the letter
sound and writing with the teacher, in small groups, pairs
or individually.
First segment (learning the sound)
1. Put children in pairs; one partner says the letter sound
/ai/ and the other says the letter/diphthong name Ai.
After a minute, have them switch roles.
2. Facilitator, go around in the classroom to listen and see
if the pairs are doing well with the sound and the letter
name.
3. Pick some pairs to demonstrate after they have worked
for a minute or two.
4. Have the pupils stand up and make the letter sound Ai
ai 10 times jumping on both feet.
5. Tell them they did a great job.
Second segment (hearing the sound in words)
6. Ask pupils what other words they know that start with
the same sound. (They may give you a word from the
phrase above that starts with Ai ai or another word they
know.) Write all these on the board.
7. Congratulate them as hopefully they have given you
some examples of words that start with Ai ai. If they
have not, give them some examples yourself and write
these on the board. Point out the Ai words in the
Education Crisis Response - Facilitator’s Guide
178 | Part 1 – Reading lessons
Step &
Icons
Time Activity procedure
5 minutes
10 minutes
morning message as well. Some words you can use are:
A’isha, aika, aiwatarwa and aikatawa.
8. Tell them that the sound /ai/ can occur in different
places in the word. Ask them for words where the /ai/
is in the middle of the word. Write those on the board.
(Examples: kai, saiwa, nai, naira, faifai, rai, aika.)
9. Point to the words on the board and say them in unison
with the children, emphasizing the /ai/ sound.
10. Ask everyone in the class whose given name starts with
Ai to stand up; have them say their name, emphasizing
the /ai/ sound. Write the names on the board.
11. Ask everyone who has an /ai/ sound in their family
name to stand up. Have them say their name so
everyone can hear the /ai/ sound. Point out where the
/ai/ sound occurs.
Segment 3 (recognizing the Ai ai in print)
12. Point to the phrase written out on a piece of paper or the
chalkboard that you used in the introduction.
13. Recite it at least two times, pointing to the words as
you say them.
14. Have the pupils recite the phrase with you a few times.
15. Ask the pupils to look at the text and tell you how many
words in the phrase contain the letter Ai ai. Point out
again that the sound Ai ai can occur at the middle or
end of words. Point to the words you wrote on the
board earlier that have an Ai ai in them.
16. Ask several pupils to come forward and point to the
letters Ai ai in one of the words on the board.
17. Have all the pupils stand up and use their finger to write
a big Ai in the air. Have them write a small ai in the
air. They can help each other as they do this.
18. Tell them they all did a great job.
SEL Message: Give the pupils an example of when you have
stopped and thought before acting. Ask them for examples
from their lives.
10 minutes Performance (Assessment)
1. Have everyone whose surname has an /ai/sound in it
stand up and make the letters Ai in the air using their
finger.
2. Call on various children (boys and girls) to give you the
sound /ai/ or the letter name or point to Ai ai on the
alphabet chart.
3. Have everyone write a line of Ai ai in their notebook.
Go round and help children as needed.
Education Crisis Response - Facilitator’s Guide
179 | Part 1 – Reading lessons
Step &
Icons
Time Activity procedure
5 minutes Conclusions/Review
1. Tell children that they now know the name and the
sound of the letter Ai ai. They also know how to write
it. Tell them many words start with the Ai ai sound and
they have named some of them.
2. Chant the phrase on the board one last time, pointing to
the words as the pupils sing/chant.
Reflection: Teacher, write down notes for yourself on this lesson. Did you enjoy the lesson?
How do you think we can improve on it? If you make some notes, then when you teach this
lesson again, you will remember what worked well and where you found some challenges.
This will help you to improve the lesson next time you teach it.
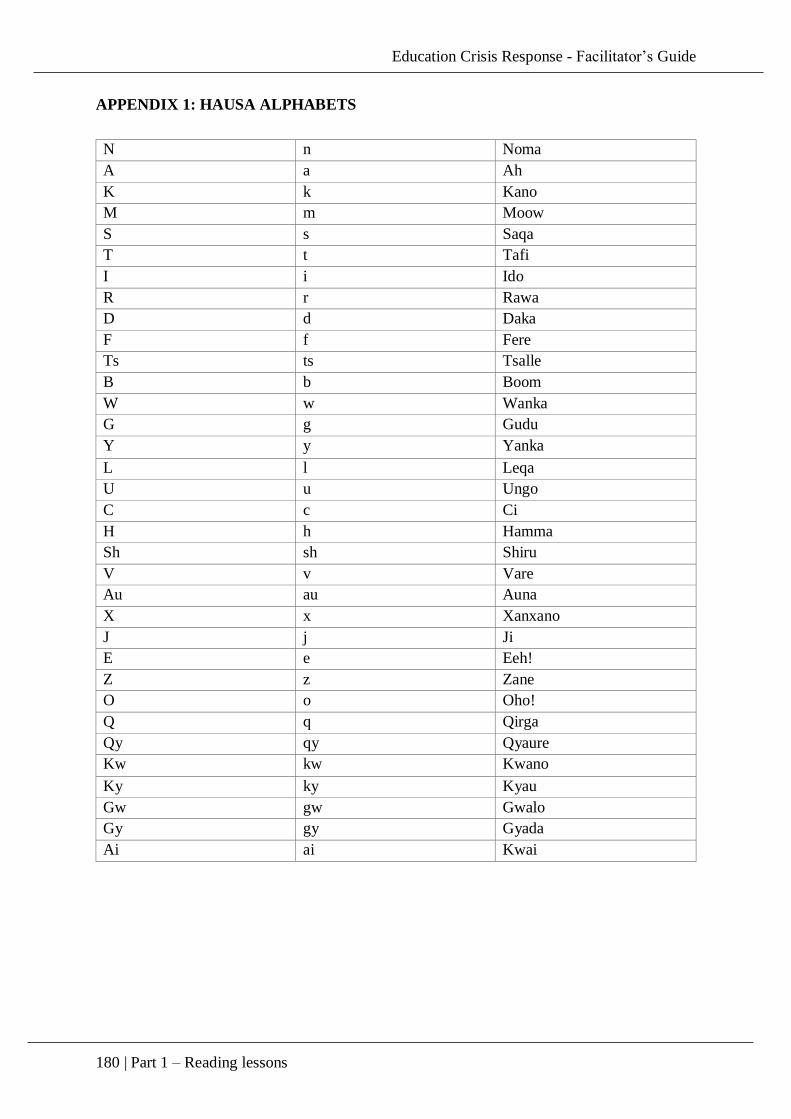
Education Crisis Response - Facilitator’s Guide
180 | Part 1 – Reading lessons
APPENDIX 1: HAUSA ALPHABETS
N n Noma
A a Ah
K k Kano
M m Moow
S s Saqa
T t Tafi
I i Ido
R r Rawa
D d Daka
F f Fere
Ts ts Tsalle
B b Boom
W w Wanka
G g Gudu
Y y Yanka
L l Leqa
U u Ungo
C c Ci
H h Hamma
Sh sh Shiru
V v Vare
Au au Auna
X x Xanxano
J j Ji
E e Eeh!
Z z Zane
O o Oho!
Q q Qirga
Qy qy Qyaure
Kw kw Kwano
Ky ky Kyau
Gw gw Gwalo
Gy gy Gyada
Ai ai Kwai

PART 2 – NUMERACY LESSONS
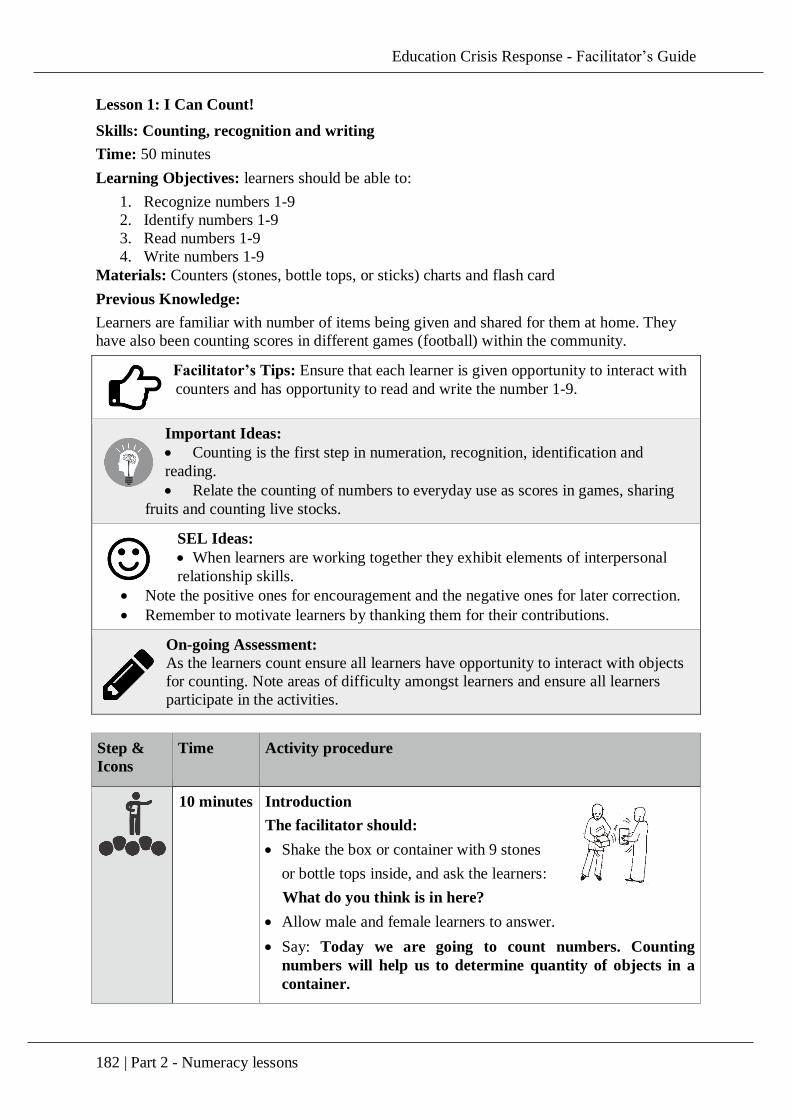
Education Crisis Response - Facilitator’s Guide
182 | Part 2 - Numeracy lessons
Lesson 1: I Can Count!
Skills: Counting, recognition and writing
Time: 50 minutes
Learning Objectives: learners should be able to:
1. Recognize numbers 1-9
2. Identify numbers 1-9
3. Read numbers 1-9
4. Write numbers 1-9
Materials: Counters (stones, bottle tops, or sticks) charts and flash card
Previous Knowledge:
Learners are familiar with number of items being given and shared for them at home. They
have also been counting scores in different games (football) within the community.
Facilitator’s Tips: Ensure that each learner is given opportunity to interact with
counters and has opportunity to read and write the number 1-9.
Important Ideas:
Counting is the first step in numeration, recognition, identification and
reading.
Relate the counting of numbers to everyday use as scores in games, sharing
fruits and counting live stocks.
SEL Ideas:
When learners are working together they exhibit elements of interpersonal
relationship skills.
Note the positive ones for encouragement and the negative ones for later correction.
Remember to motivate learners by thanking them for their contributions.
On-going Assessment:
As the learners count ensure all learners have opportunity to interact with objects
for counting. Note areas of difficulty amongst learners and ensure all learners
participate in the activities.
Step &
Icons
Time Activity procedure
10 minutes Introduction
The facilitator should:
Shake the box or container with 9 stones
or bottle tops inside, and ask the learners:
What do you think is in here?
Allow male and female learners to answer.
Say: Today we are going to count numbers. Counting
numbers will help us to determine quantity of objects in a
container.

Education Crisis Response - Facilitator’s Guide
183 | Part 2 - Numeracy lessons
Step &
Icons
Time Activity procedure
Allow the learners to count after you chorally picking the
counters from one pile to making another pile.
Ask a boy and a girl to come to the front of the class and repeat
the counting one after the other while the others listen.
Say: Thank you and well done everyone!
10 minutes The facilitator should:
Divide the learners into groups of 3 or 4.
Ask the learners to bring out their bottle tops or stones and select
9 bottle tops or stones of similar size.
Tell the groups to count their 9 bottle tops: Each learner within
each group should count from one pile to making another pile
while the others listen.
Ask the children to clap for themselves 4 times.
10 minutes
The facilitator should:
Write the numbers 1-9 on the chalkboard. Under each number put
a number of strokes to represent the number quantity i.e. one
stroke under 1; two strokes under 2; three strokes under 3, ...
Read the number and count the stroke(s) twice while the learners
listen.
Ask the learners to join chorally in reading 4 times.
Put the learners into groups ask each group to put their counters
to represent the numbers instead of the strokes on the board.
Say to learners: Read the number and count the number of
objects. As many learners as possible should do this in their
groups. Walk round the classroom to support the groups.
Go back to board and read the numbers 1-9 at random and ask the
learners to count equivalent number of counters.
Allow as many learners in the class to answer
Say: Well done to each learner that counted correctly.
10 minutes The facilitator should:
Ask each learner to write down the numbers and the strokes as
written on the board in their notebooks.
Walk round to support the learners in making sure that each of
them has written the numbers correctly.
Tell the learners “Well done!”
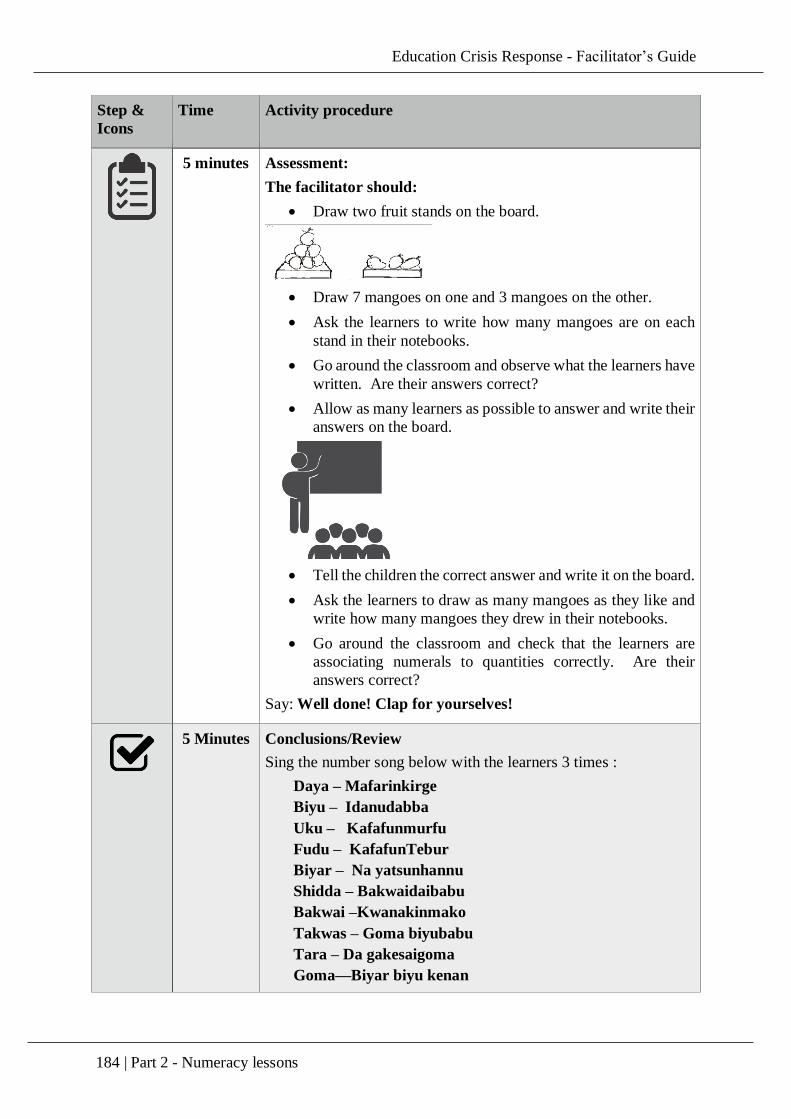
Education Crisis Response - Facilitator’s Guide
184 | Part 2 - Numeracy lessons
Step &
Icons
Time Activity procedure
5 minutes Assessment:
The facilitator should:
Draw two fruit stands on the board.
Draw 7 mangoes on one and 3 mangoes on the other.
Ask the learners to write how many mangoes are on each
stand in their notebooks.
Go around the classroom and observe what the learners have
written. Are their answers correct?
Allow as many learners as possible to answer and write their
answers on the board.
Tell the children the correct answer and write it on the board.
Ask the learners to draw as many mangoes as they like and
write how many mangoes they drew in their notebooks.
Go around the classroom and check that the learners are
associating numerals to quantities correctly. Are their
answers correct?
Say: Well done! Clap for yourselves!
5 Minutes Conclusions/Review
Sing the number song below with the learners 3 times :
Daya – Mafarinkirge
Biyu – Idanudabba
Uku – Kafafunmurfu
Fudu – KafafunTebur
Biyar – Na yatsunhannu
Shidda – Bakwaidaibabu
Bakwai –Kwanakinmako
Takwas – Goma biyubabu
Tara – Da gakesaigoma
Goma—Biyar biyu kenan

Education Crisis Response - Facilitator’s Guide
185 | Part 2 - Numeracy lessons
Reflection:
Did the learners enjoy the activity?
Did you enjoy it?
How can it be improved?
Education Crisis Response - Facilitator’s Guide
186 | Part 2 - Numeracy lessons
Lesson 2: Addition
Title: Addition of one digit numbers
Skills: Addition of numbers with sum less than 10
Time: 35 minutes
Learning Objective: At the end of the lesson, learners should be able to:
1. Recognize and use the addition sign (+)
2. Add two single-digit numbers sum less than 10
3. Add three single-digit numbers sum less than 10
4. Describe addition.
Materials:
1. Counters; (Bottle tops, bean seeds, stones)
2. Addition chart
Previous Knowledge: Learners can count numbers from 1 to 99
Facilitator’s Tips: When learners encounter addition with objects, especially
object in their environments, the learning lasts longer; so addition with real
objects should be emphasized
Important Ideas: Addition of numbers using real objects
SEL Ideas:
When learners are allowed to work together in groups/pairs, their positive
social skills are developed
When learners engage in high cognitive tasks, their level of perseverance in
increased
On-going Assessment: As the lesson progresses, facilitators should observe how
the learners are responding and ensure that every learner is given an opportunity to
construction knowledge around addition of numbers.
Step &
Icons
Time Activity procedure
10 minutes Introduction
The facilitator should:
Ask each learner to pick some counters between one and 5
and write down how many counters they picked in their
exercise books
In pairs, tell each learner to tell his/her partner how many
counters he or she has and write the number of counters the
partners have under their own
Have each pair put together their counters, count them and
write the number under the two numbers earlier written.

Education Crisis Response - Facilitator’s Guide
187 | Part 2 - Numeracy lessons
Step &
Icons
Time Activity procedure
Ask 6 people (3 boys and 3 girls) from different parts of
the classroom to come and write their three numbers on the
board.
As they write, say very good and have the class clap for
them
Say: We have made a total out of two smaller groups;
when we put things together and count, we are adding.
Today we are going to learn about how to do this and
how to write it down in math as we do addition of
numbers.
10 minutes The facilitator should:
Tell learners to pick any amount of counters between 1 and
3 and write the number of counters they have in their
exercise books
Arrange the learners in groups of three and ask members of
the groups to tell themselves and write down the number of
counters other group members have under their own
By using small circles or other symbols to represent the
counters, they should draw each amount next to the
number the wrote
Ask each group to use small circles to represent all the
counters in their group and count how many counters are in
the group all together
Have groups present by drawing and writing on the board
group by group and say well done after each group has
presented
15 minutes The facilitator should:
Say. When two or more quantities
or numbers are put together, we
are doing addition. The symbol
or sign for addition is + called plus.
Tell the learners that to add 2 and 3, we say two plus three
and write 2+3. Using real objects, we draw:
Put the illustration of the board
Say: To write the amount altogether, we use another
sign, =, called equals. So we can write 2+3=5. Using real
objects, we draw:
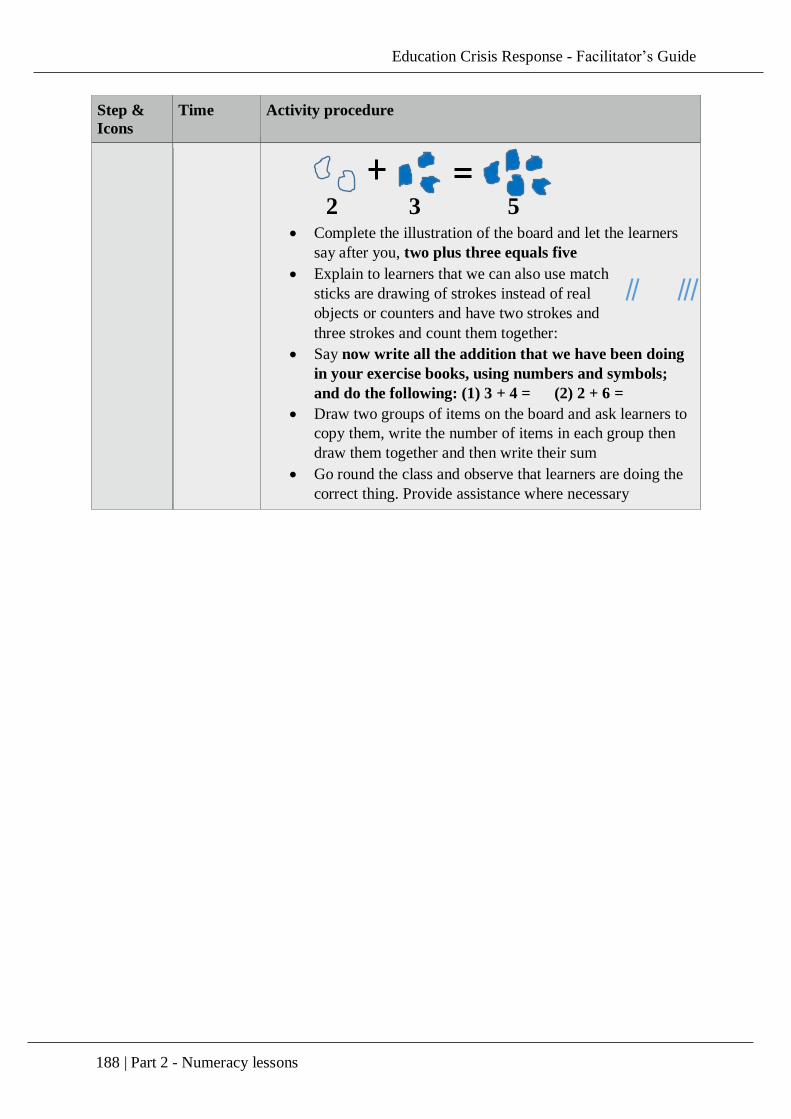
Education Crisis Response - Facilitator’s Guide
188 | Part 2 - Numeracy lessons
Step &
Icons
Time Activity procedure
Complete the illustration of the board and let the learners
say after you, two plus three equals five
Explain to learners that we can also use match
sticks are drawing of strokes instead of real
objects or counters and have two strokes and
three strokes and count them together:
Say now write all the addition that we have been doing
in your exercise books, using numbers and symbols;
and do the following: (1) 3 + 4 = (2) 2 + 6 =
Draw two groups of items on the board and ask learners to
copy them, write the number of items in each group then
draw them together and then write their sum
Go round the class and observe that learners are doing the
correct thing. Provide assistance where necessary
2 3 5

Education Crisis Response - Facilitator’s Guide
189 | Part 2 - Numeracy lessons
Lesson 3: Subtraction
Title: Subtraction (Take away) from the number 10 or less
Skills: Number sense, successive counting in 2s, 3s, …, identifying and recognizing
multiples
Time: 45 minutes
Learning Objective: At the end of the lesson, learners should be able to:
1. Recognize the subtraction sign (-).
2. Subtract single digit numbers.
3. Copy (write) solved problems.
Materials:
1. Counters
2. Container (empty sugar box or tin)
Previous Knowledge: Learners can count numbers from 1 to 99
Facilitator’s Tips: When learners are taught subtraction by counting using either
real objects or stroke, the learning lasts longer in their memories. Counting is an
important aspect of effective teaching and learning of subtraction
Important Ideas: Subtraction of numbers using real objects
SEL Ideas:
Positive Social Skills is developed in the learners by allowing them (learners)
to work together either in groups or in pairs
And encouraging them to push on even when they are tired, their level of
perseverance is increased
On-going Assessment: The facilitator should continuously observe how learners
are participating and work to ensure that learner take ownership of their learning
as he/she builds up to knowledge construction around subtraction of numbers.
Step &
Icons
Time Activity procedure
10 minutes Introduction
The facilitator should:
Put 5 counters in a box and shake the box before the
learners, asking the learners: how many counters they
think is in there?
Invite 2 boys and 2 girls to the front of the class and ask
them to feel and shake the box one after the other before
saying the answer.
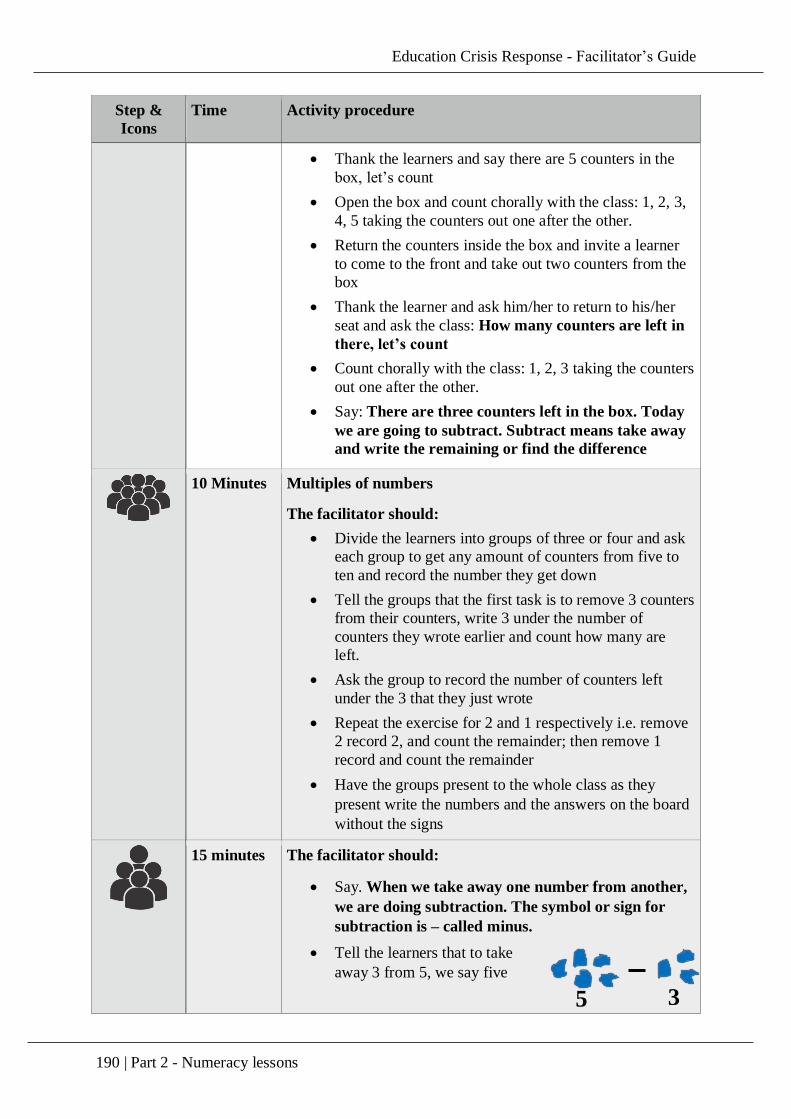
Education Crisis Response - Facilitator’s Guide
190 | Part 2 - Numeracy lessons
Step &
Icons
Time Activity procedure
Thank the learners and say there are 5 counters in the
box, let’s count
Open the box and count chorally with the class: 1, 2, 3,
4, 5 taking the counters out one after the other.
Return the counters inside the box and invite a learner
to come to the front and take out two counters from the
box
Thank the learner and ask him/her to return to his/her
seat and ask the class: How many counters are left in
there, let’s count
Count chorally with the class: 1, 2, 3 taking the counters
out one after the other.
Say: There are three counters left in the box. Today
we are going to subtract. Subtract means take away
and write the remaining or find the difference
10 Minutes Multiples of numbers
The facilitator should:
Divide the learners into groups of three or four and ask
each group to get any amount of counters from five to
ten and record the number they get down
Tell the groups that the first task is to remove 3 counters
from their counters, write 3 under the number of
counters they wrote earlier and count how many are
left.
Ask the group to record the number of counters left
under the 3 that they just wrote
Repeat the exercise for 2 and 1 respectively i.e. remove
2 record 2, and count the remainder; then remove 1
record and count the remainder
Have the groups present to the whole class as they
present write the numbers and the answers on the board
without the signs
15 minutes The facilitator should:
Say. When we take away one number from another,
we are doing subtraction. The symbol or sign for
subtraction is – called minus.
Tell the learners that to take
away 3 from 5, we say five
3
5

Education Crisis Response - Facilitator’s Guide
191 | Part 2 - Numeracy lessons
Step &
Icons
Time Activity procedure
minus three and write 5–3. Using real objects, we draw:
Put the illustration on the board and note that learners
often mis-represent or reverse the subtraction when
“from” is used, and caution the learners against it
Say: To write the amount that is left, we use the
equals sign (=). So we can write 5–3=2. Using our
counters, we draw:
Complete the illustration with the answer part and lead
the class chorally: five minus three equals two.
Explain to learners that we also can use match sticks or
drawing of strokes instead of real objects or
counters and have five strokes and cross out
three of them and count the remainder:
Show this illustration on the board
Say now write all the subtraction examples that we
have been doing in your exercise books, using
numbers and symbols
Go round the class and observe that learners are doing
the correct thing.
Provide assistance and support where necessary
5 minutes The facilitator should:
Ask the learners to do the following subtraction sums
by using counters or by using strokes: (1) 3–1 (2) 8–5
(3) 3–2 (4) 5–4 (5) 4–3 (6) 9–5 (7) 7–3 (8) 3–3
Draw two groups of items on the board and ask learners
to copy them, write the number of items in each group
then draw them together and then write their sum
Say there will be a prize for the person whoever gets
everything correct
5 minutes The facilitator should:
Say: Subtraction is an important activity in our lives.
We need to do subtraction many times. Learning it
this way is quite useful. If we have to subtract other
numbers, the process is the same – draw enough
strokes to represent the first number and cross out
the number of strokes that represent the number
2 3
5
Education Crisis Response - Facilitator’s Guide
192 | Part 2 - Numeracy lessons
Step &
Icons
Time Activity procedure
you want to subtract and then count the remaining
strokes. Well done!
Reflection:
The facilitator should reflect on the following:
How did the lesson go generally?
Did the learners enjoy the activities in the lesson?
Did you enjoy it as the teacher?
Are there any challenges in its delivery?
How can it be improved?
How could the presentation be improved?
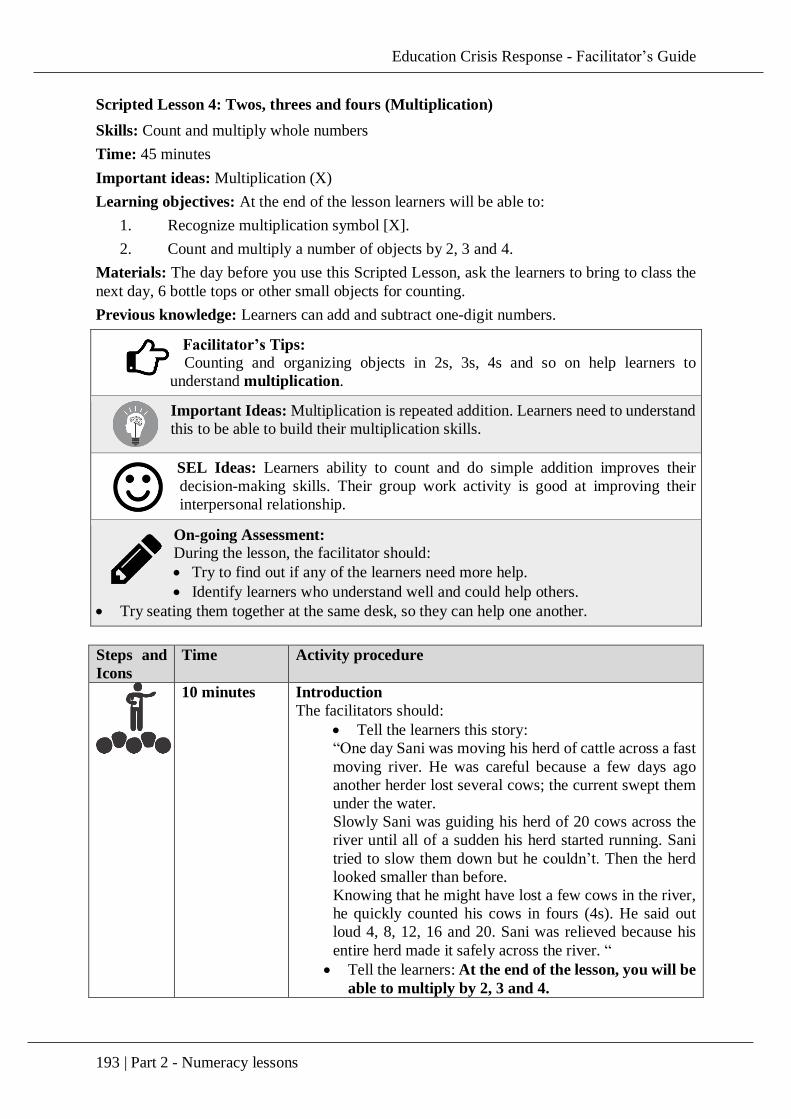
Education Crisis Response - Facilitator’s Guide
193 | Part 2 - Numeracy lessons
Scripted Lesson 4: Twos, threes and fours (Multiplication)
Skills: Count and multiply whole numbers
Time: 45 minutes
Important ideas: Multiplication (X)
Learning objectives: At the end of the lesson learners will be able to:
1. Recognize multiplication symbol [X].
2. Count and multiply a number of objects by 2, 3 and 4.
Materials: The day before you use this Scripted Lesson, ask the learners to bring to class the
next day, 6 bottle tops or other small objects for counting.
Previous knowledge: Learners can add and subtract one-digit numbers.
Facilitator’s Tips: Counting and organizing objects in 2s, 3s, 4s and so on help learners to
understand multiplication.
Important Ideas: Multiplication is repeated addition. Learners need to understand
this to be able to build their multiplication skills.
SEL Ideas: Learners ability to count and do simple addition improves their
decision-making skills. Their group work activity is good at improving their
interpersonal relationship.
On-going Assessment:
During the lesson, the facilitator should:
Try to find out if any of the learners need more help.
Identify learners who understand well and could help others.
Try seating them together at the same desk, so they can help one another.
Steps and
Icons
Time Activity procedure
10 minutes Introduction
The facilitators should:
Tell the learners this story:
“One day Sani was moving his herd of cattle across a fast
moving river. He was careful because a few days ago
another herder lost several cows; the current swept them
under the water.
Slowly Sani was guiding his herd of 20 cows across the
river until all of a sudden his herd started running. Sani
tried to slow them down but he couldn’t. Then the herd
looked smaller than before.
Knowing that he might have lost a few cows in the river,
he quickly counted his cows in fours (4s). He said out
loud 4, 8, 12, 16 and 20. Sani was relieved because his
entire herd made it safely across the river. “
Tell the learners: At the end of the lesson, you will be
able to multiply by 2, 3 and 4.
Education Crisis Response - Facilitator’s Guide
194 | Part 2 - Numeracy lessons
Ask the learners to pair up and ask a learner to count
how many pairs there are in class.
Repeat the above step by putting the learners into group
of 3s and 4s, asking different learners to count and
complete the table below:
Number of
learners or bottle
tops
Number of pairs Number of 3s
Have pupils clap for correct responses.
5 minutes The facilitators should:
Arrange the learners in pairs as they are seated in class.
Ask each pair to bring out their bottle tops (this should
be 6 per learner).
Ask how many bottle tops each pair has altogether.
Ask each pair to put the tops in sets of 2, or 3, or 4 and
count and record the number of sets
Ask four different pairs of learners to say how many
bottle tops they have and how many sets they have.
Record their correct results in the table above
Say: Well done to all of you!
5 minutes
.
The facilitator should:
Ask 4 pairs of children to stand in front of the class. Each pair
to hold up a large 2 numeral card. Explain that we have 2
learners per pair. Write a large 2 on the blackboard.
Write a large 4 on the blackboard (close to the numeral 2) and
ask, how many groups of twos are there, point at the numeral 4
on the board..
Explain that we have four sets twos and record the result in the
table
Say: when we have equal number of objects or people in a
set, counting the total number of things or people in all sets
together is called multiplication.
Say and show that: Multiplication is repeated addition
Say: We use a special symbol “X” to represent
multiplication, we write this between the 2 and 4 to
complete the statement as two multiplied by four equals
eight or simply two times four equals eight.
x 4 = 8
2
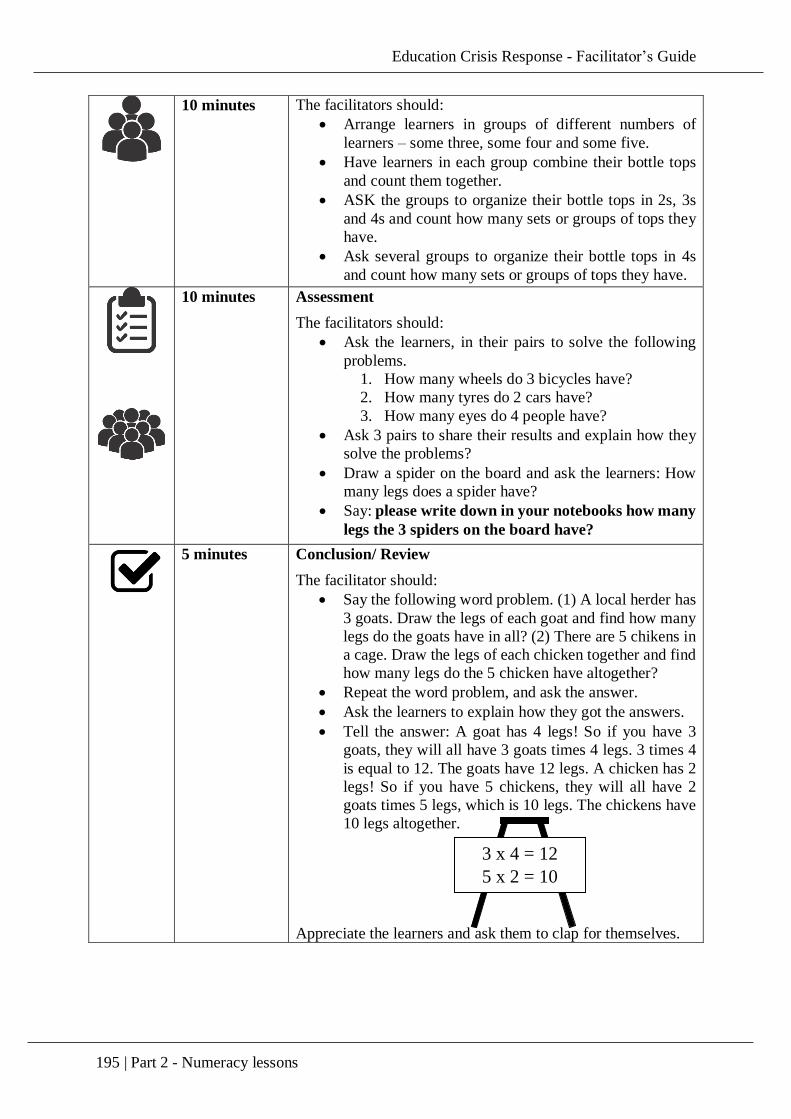
Education Crisis Response - Facilitator’s Guide
195 | Part 2 - Numeracy lessons
10 minutes The facilitators should:
Arrange learners in groups of different numbers of
learners – some three, some four and some five.
Have learners in each group combine their bottle tops
and count them together.
ASK the groups to organize their bottle tops in 2s, 3s
and 4s and count how many sets or groups of tops they
have.
Ask several groups to organize their bottle tops in 4s
and count how many sets or groups of tops they have.
10 minutes Assessment
The facilitators should:
Ask the learners, in their pairs to solve the following
problems.
1. How many wheels do 3 bicycles have?
2. How many tyres do 2 cars have?
3. How many eyes do 4 people have?
Ask 3 pairs to share their results and explain how they
solve the problems?
Draw a spider on the board and ask the learners: How
many legs does a spider have?
Say: please write down in your notebooks how many
legs the 3 spiders on the board have?
5 minutes Conclusion/ Review
The facilitator should:
Say the following word problem. (1) A local herder has
3 goats. Draw the legs of each goat and find how many
legs do the goats have in all? (2) There are 5 chikens in
a cage. Draw the legs of each chicken together and find
how many legs do the 5 chicken have altogether?
Repeat the word problem, and ask the answer.
Ask the learners to explain how they got the answers.
Tell the answer: A goat has 4 legs! So if you have 3
goats, they will all have 3 goats times 4 legs. 3 times 4
is equal to 12. The goats have 12 legs. A chicken has 2
legs! So if you have 5 chickens, they will all have 2
goats times 5 legs, which is 10 legs. The chickens have
10 legs altogether.
Appreciate the learners and ask them to clap for themselves.
3 x 4 = 12
5 x 2 = 10
Education Crisis Response - Facilitator’s Guide
196 | Part 2 - Numeracy lessons
Reflections:
Did the learners enjoy the activity?
Did you enjoy it?
How can it be improved?
Can learners clap in 2s, 3s and 4s?
Education Crisis Response - Facilitator’s Guide
197 | Part 2 - Numeracy lessons
Scripted Lesson 5: The concept of zero (0)
Skill area: Recognition of number 0
Time: 45 minutes
Learning objectives: Learners should be able to:
1. Recognize number 0.
2. Read number 0.
3. Write number 0.
Previous knowledge: Learners can count and identify numbers from 1-9
Materials to Prepare in Advance:
1. Nine bottle tops
2. Nine small stones (same size)
3. Two small boxes or plastic bottles (non transparent)
Facilitator’s Tips:
Every pupil needs to know that counting numbers does not start with zero because
it is not a counting number but that zero is a place holder.
Ask learners to bring to class several bottle tops, stones, seeds and sticks of similar sizes and
containers and empty boxes.
Important Ideas:
Number 0 is a placeholder; for example, in the number 3,052, there is three units in
the thousands position, no unit in the hundreds position, five units in the tens
position, and two units in the units position.
SEL Ideas:
When you engage both boys and girls together in an activity, you avoid
negative interaction and negative peer influence in conflict resolution. Learners
will also be developing their listening skills and ability to follow directions in this activity.
On-going Assessment: As the lesson progresses, observe how the learners are
responding and ensure that every learner participates as you build up the lesson.
Step and
Icons
Time Activity procedure
10 minutes Introduction
The facilitator should:
1. Put the 9 stones inside one of the containers and shake the
box/container with the stones or bottles tops inside. Ask the
learners: What do you think is in here?
2. Shake the container or box again and ask: How many of the
items are there in this container? How do you know?
3. Ask a learner to come out and count out the number of
objects in the box for the rest of the learners to see.
4. Count the items together with the learner and then after
counting, ask, turning the box over: Are there any item
remaining in the box?
Education Crisis Response - Facilitator’s Guide
198 | Part 2 - Numeracy lessons
Step and
Icons
Time Activity procedure
5. Say: Today we are going to learn about the number ‘0’
then read number 0 and write number 0.
10 minutes The facilitator should:
1. Draw a circle on the floor.
2. Ask 4 learners to stand inside the circle.
3. Ask the class: How many learners are there inside this
circle? The learners will chorally say four
4. Say: Well done! Clap for your selves.
5. Call 2 learners out of the circle.
6. Ask the class: How many learners are there in the circle?
The learners will chorally say two
7. Say: Well done!
8. Call the remaining 2 learners out of the circle and ask the
class: How many learners are there in the circle?
9. Listen to whatever the learners would say and say thank
you the number of people left in the circle is zero
10 minutes The facilitator should:
1. Ask 2 learners (1 boy and 1 girl) to come to the front of the
class.
2. Let the first learner put 1 stone in the container; the second
to put 2 stones in the other container.
3. Ask the girl to say to the class the number of stones in her
box, and begin to drop the objects on the floor by dropping
the stones one after the other until the box is empty.
4. After dropping all the stones, ask learners: How many items
are there left in the box?
5. After they say zero, say: You have done well!
6. Ask the boy to say to the class the number of stones in his
box, and begin to empty it by dropping the stones one after
the other.
7. After dropping all the stones, ask learners: How many items
are there left in the box?
8. After they say zero, say: You have done well!
9. Say: Zero represent nothing, nothing is left and it is
written as 0, as you write 0 on the board
10. Ask the learners to write 0 in their exercise books.
5 minutes The facilitator should:
1. Ask the learners to think of situations where they have
nothing or ‘Zero’. Say: For example, If pupils plug all
ripe mangoes on a tree on their way to school, how many
ripe mangoes are left on the tree? ‘Babu!” Zero. (0)

Education Crisis Response - Facilitator’s Guide
199 | Part 2 - Numeracy lessons
Step and
Icons
Time Activity procedure
2. Ask learners one after the other to give their own
experience of zero. Tell them to say a sentence with zero in
it
3. Say: Well done, clap for yourselves.
5 minutes Assessment
The facilitator should: Ask learners to write zero on the floor
individually, while he inspects the writing.
5 minutes Review/Reinforcement
The facilitator should:
Ask the learners to pick a stone each with their hands
Pick learners (one at a time) from different parts of the room
and ask how many stones he/she is holding
After saying 1, ask him/her to drop it, and ask, how many
stones he/she is having
Say: I had 10 bottle tops yesterday, but I lost all of them.
How many do I have today?
Say good when the learners have said zero
Say: Well done learners, we now know, and can write
zero!
Reflection:
Did the learners enjoy the activity?
Did you enjoy it?
How could it be improved?
Education Crisis Response - Facilitator’s Guide
200 | Part 2 - Numeracy lessons
Scripted Lesson 6: Division of numbers
Skills: Count and divide whole numbers
Time: 45 minutes.
Learning objectives: At the end of the lesson learners will be able to
1. Recognize the symbols of division (÷).
2. Count and divide whole numbers of objects by 2, 3 and 4.
3. Recognize remainder in division
4. Solve simple problems of division.
Materials:
The day before you use this Scripted Lesson, ask the learners to each bring to class the next
day, 6 bottle tops or other small objects for counting.
Previous knowledge: Learners can add and subtract one-digit numbers.
Facilitator’s Tips:
Counting and organizing objects in 2s, 3s, 4s and so on help learners to understand
division.
Important Ideas: Division of numbers. Division is repeated subtraction. Learners
need to understand this to be able to build their division skills.
SEL Ideas: Positive social skills: When learners work together in pairs and in
groups, their interpersonal skills/relationship is developed
On-going Assessment:
During the lesson, the facilitator should:
Try to find out if any of the learners need more help.
Identify learners who understand well and could help others and seat them
together at the same desk, so they can help one another.
Step and
Icons
Time Activity procedure
10 minutes Introduction
The facilitator should:
Read the story of Bala to the learners:
Bala has 3 wives and 6 children, 3 children from the first
wife, 2 from the second and 1 from Amaria. Amaria’s
child eats a lot more than the other children. One
Saturday morning, he bought 12 pieces of Masa for the
chilkren’s breakfast. The first wife wanted 6 for her
children, just as the second wanted 4 four hers. Amaria
said since there are three of them (wives), four of the
Masa must come to her – “Trouble!!!” the first wife
screams.
Tell the learners: Today you will learn how to divide, you
will divide by 2, 3 and 4.
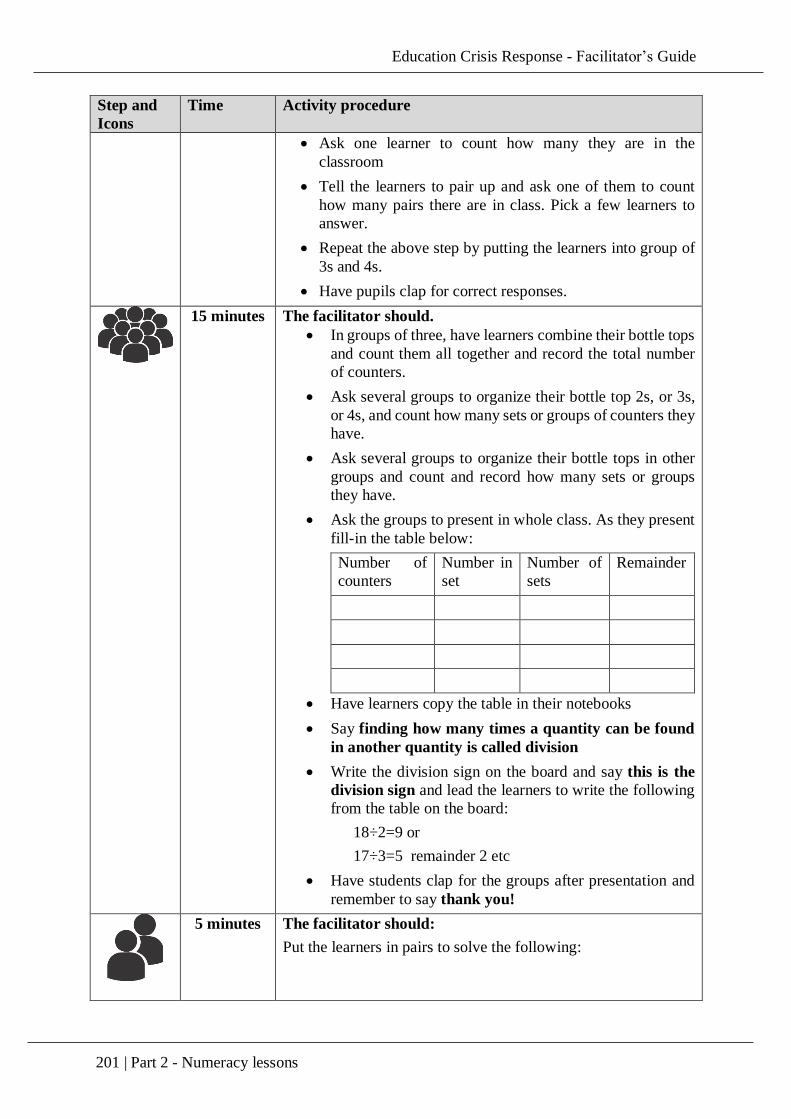
Education Crisis Response - Facilitator’s Guide
201 | Part 2 - Numeracy lessons
Step and
Icons
Time Activity procedure
Ask one learner to count how many they are in the
classroom
Tell the learners to pair up and ask one of them to count
how many pairs there are in class. Pick a few learners to
answer.
Repeat the above step by putting the learners into group of
3s and 4s.
Have pupils clap for correct responses.
15 minutes
The facilitator should.
In groups of three, have learners combine their bottle tops
and count them all together and record the total number
of counters.
Ask several groups to organize their bottle top 2s, or 3s,
or 4s, and count how many sets or groups of counters they
have.
Ask several groups to organize their bottle tops in other
groups and count and record how many sets or groups
they have.
Ask the groups to present in whole class. As they present
fill-in the table below:
Number of
counters
Number in
set
Number of
sets
Remainder
Have learners copy the table in their notebooks
Say finding how many times a quantity can be found
in another quantity is called division
Write the division sign on the board and say this is the
division sign and lead the learners to write the following
from the table on the board:
18÷2=9 or
17÷3=5 remainder 2 etc
Have students clap for the groups after presentation and
remember to say thank you!
5 minutes The facilitator should:
Put the learners in pairs to solve the following:
Education Crisis Response - Facilitator’s Guide
202 | Part 2 - Numeracy lessons
Step and
Icons
Time Activity procedure
How many sweets would each learner have if 2 of them
are to share 12 sweets? Ask them to use their bottle tops
and write using the division symbol
Repeat the step above
3 learners were to share 12 sweets
4 learners were to share 12 sweets
4 learners were to share 18 sweets
Ask different groups to share their results and explain
how they solved the problems.
Appreciate each response by saying well done and let
them discuss other methods that are most useful, like
drawing pictures or making groups or repeated
subtraction.
10 minutes Assessment
The facilitator should
Draw a table with 4 legs on the board.
Ask the learners: How many legs has the table. (4)
Ask the learners how many tables will make up 12 legs.
Ask the learner to use the mathematical form 12÷4
Say, please write down in your notebook the division
and answer.
Review the learners’ work/answer.
Place a check () on the papers of learners who write the correct
answer (3) and say well done to each successful learner.
5 minutes Conclusion/Review
The facilitator should:
Say the following word problems. A farmer has 3
children, how would he share 18 pieces of Kosai with
them?
Repeat the word problem and ask the learners to say the
answer
Ask the learners to explain how they got the answer.
Tell the answer; the farmer has 3 children, so if you have
18 pieces of Kosai. If you give one to each child at a time,
you will give out three at a time. If you repeat this four
times, the kosai will all be gone and each child will have
4 pieces of kosai.
Thank the learners and ask them to clap for themselves.
Education Crisis Response - Facilitator’s Guide
203 | Part 2 - Numeracy lessons
Reflection
Do any of your learners need more help?
Are there learners who understand well?
Which learners can help other learners and how can you encourage that?
Education Crisis Response - Facilitator’s Guide
204 | Part 2 - Numeracy lessons
Scripted Lesson 7: If Today is Tuesday
Skills: Measuring time
Time: 45 minutes
Learning Objectives:
By the end of the activity, learners should be able to:
1. Read the days of week in sequential order
2. Determine the days of the week in the near past, present and future
Previous knowledge:
Learners are familiar with important days in their communities for example market days,
worship, school days.
Materials:
1. Chalk
2. Chart showing the days of the week
Facilitator’s Tips: When teaching learners about time, it is important for them to
understand the difference between yesterday, today and tomorrow.
Telling the difference between yesterday, today and tomorrow (for example,
being able to say what one has done, what one is doing and what one will do) is important
for literacy learning as well.
Important Ideas: Days of the week and time measurement
SEL Ideas: When learners are working in a group they improve on their
interpersonal social skills. When they follow instruction from the facilitator they
are improving their executive function.
On-going Assessment:
During the lesson, the facilitator should:
Try to find out if any of the learners need more help
Identify learners who understand well and could help others
Try seating them together at the same desk, so they can help one another.
Step &
Icons
Time Activity procedure
5 minutes Introduction
The facilitator should:
Write this riddle on the blackboard:
One day, two children went to school. When they arrived
at the school it was closed. To determine the day of the
week, one of the children said, “If the day before
yesterday was Friday what day is it today?”
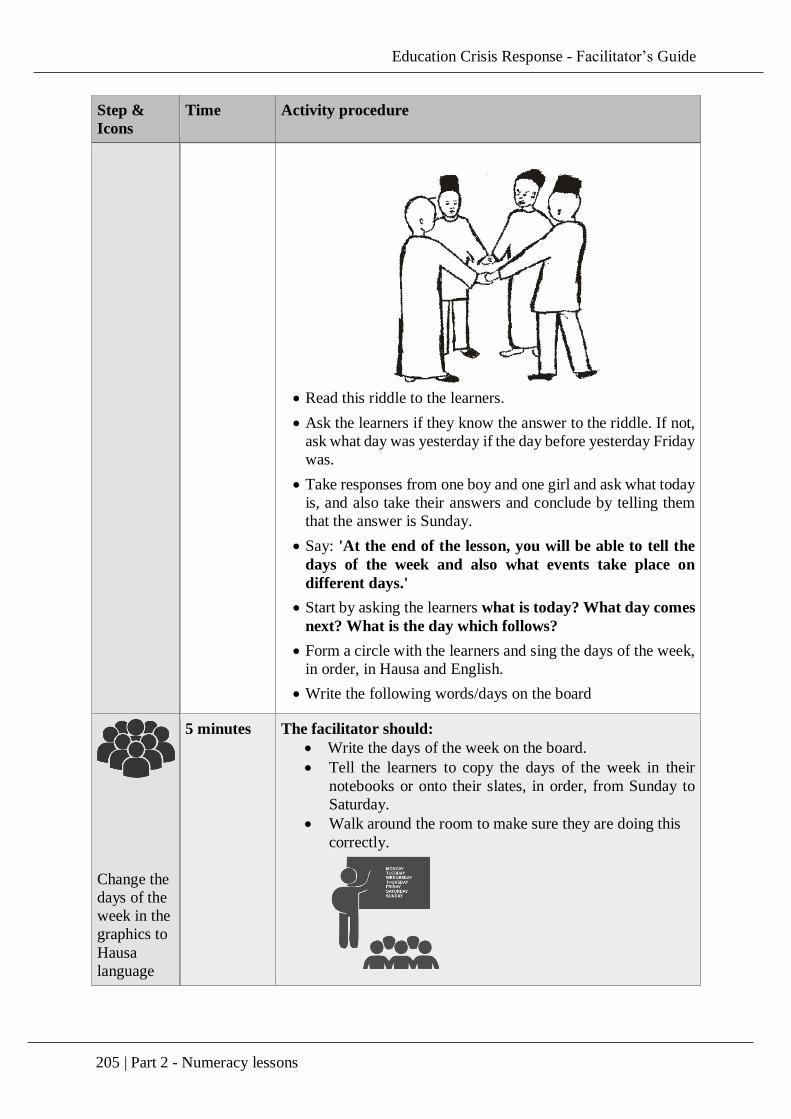
Education Crisis Response - Facilitator’s Guide
205 | Part 2 - Numeracy lessons
Step &
Icons
Time Activity procedure
Read this riddle to the learners.
Ask the learners if they know the answer to the riddle. If not,
ask what day was yesterday if the day before yesterday Friday
was.
Take responses from one boy and one girl and ask what today
is, and also take their answers and conclude by telling them
that the answer is Sunday.
Say: 'At the end of the lesson, you will be able to tell the
days of the week and also what events take place on
different days.'
Start by asking the learners what is today? What day comes
next? What is the day which follows?
Form a circle with the learners and sing the days of the week,
in order, in Hausa and English.
Write the following words/days on the board
Change the
days of the
week in the
graphics to
Hausa
language
5 minutes The facilitator should:
Write the days of the week on the board.
Tell the learners to copy the days of the week in their
notebooks or onto their slates, in order, from Sunday to
Saturday.
Walk around the room to make sure they are doing this
correctly.
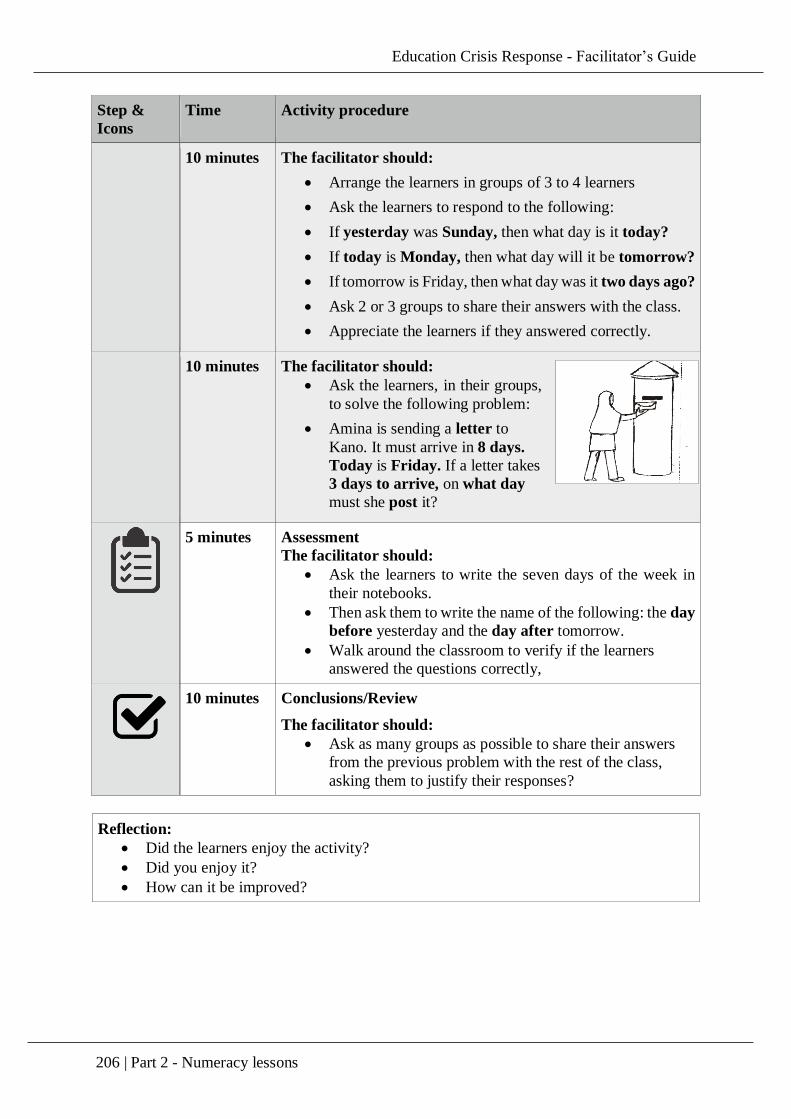
Education Crisis Response - Facilitator’s Guide
206 | Part 2 - Numeracy lessons
Step &
Icons
Time Activity procedure
10 minutes The facilitator should:
Arrange the learners in groups of 3 to 4 learners
Ask the learners to respond to the following:
If yesterday was Sunday, then what day is it today?
If today is Monday, then what day will it be tomorrow?
If tomorrow is Friday, then what day was it two days ago?
Ask 2 or 3 groups to share their answers with the class.
Appreciate the learners if they answered correctly.
10 minutes The facilitator should:
Ask the learners, in their groups,
to solve the following problem:
Amina is sending a letter to
Kano. It must arrive in 8 days.
Today is Friday. If a letter takes
3 days to arrive, on what day
must she post it?
5 minutes Assessment
The facilitator should:
Ask the learners to write the seven days of the week in
their notebooks.
Then ask them to write the name of the following: the day
before yesterday and the day after tomorrow.
Walk around the classroom to verify if the learners
answered the questions correctly,
10 minutes Conclusions/Review
The facilitator should:
Ask as many groups as possible to share their answers
from the previous problem with the rest of the class,
asking them to justify their responses?
Reflection:
Did the learners enjoy the activity?
Did you enjoy it?
How can it be improved?

Education Crisis Response - Facilitator’s Guide
207 | Part 2 - Numeracy lessons
Scripted Lesson 8: Time
Title: Time
Skills: Reading and saying time, recognizing and using the relationship among units of
time
Time: 45 minutes
Learning Objective: At the end of the lesson, learners should be able to:
1. Read time of the day
2. Identify the standard unit of measuring time
3. State the relationship among units of time: seconds, minutes, hours, days, weeks,
months, year
Materials: Big wall clock, model wall clock, model clocks, table clocks, annual calendar
Previous Knowledge:
1. Learners can count numbers from 1 to 60 and beyond
2. Learners are familiar with time i.e. time to wake up, say their morning prayers, go to
farm or school, break time, etc
Facilitator’s Tips:
Tip 1: To learn time learners need to fully interact with the clock, so, there is
the need to provide clocks both real and model clocks
Active participation is an important aspect of learner-centred teaching. As much as
possible, get the learners involved in their learning of time of the day and relationship
among various time units
Important Ideas: Recognition of the unit of time e.g. seconds, minutes, hours,
days, weeks months and years
SEL Ideas: Positive social skills: When learners work together, their interpersonal
relationship is developed
Executive function: When learners are challenged cognitively with high level
tasks, their executive function element of SEL is developed
On-going Assessment: As the lesson progresses, ensure to carry all learners
along as you build up to knowledge construction around reading time and
seconds-minutes-hours-days-weeks-months-years relationships
Education Crisis Response - Facilitator’s Guide
208 | Part 2 - Numeracy lessons
Step &
Icons
Time Activity procedure
10 minutes Introduction
The facilitator should:
Ask learners to tell their partners what time they went to
sleep yesterday and what time they woke up today
Invite learners from different parts of the classroom to
say what time their partners told them they went to
sleep yesterday and what time they woke up today and
say very good
Say how do we know the time of the day or what tells
us the time of the day at any time?
Allow two boys and two girls from different parts of the
classroom to respond and say thank you.
Say: Today we are going to learn how to read time
from clock and measure time
10 minutes Hands of a clock
The facilitator should:
Show a big model clock to the learners and say: what is
this? What is it used for?
Take responses from two learners and say this is a
clock, it tells us the time of the day
Ask the learners to write the figures they see on the
clock in their exercise books. They should have written
1, 2, 3, … 12.
Tell them that to tell the time of the day, we use these
figures
Ask the learners how many hand does a clock have?
Take responses from another two learners, and say a
clock has three hands – the tiny seconds hand, long
minutes hand and the short hour hand. Some clocks
do not come with the seconds hand, pointing at the
hand in each case
Using a big clock, have learners observe how many
small divisions are there on a clock i.e. 60; and note that
they are grouped in 5s
Still using the big clock, have learners observe (by
counting) how long the tiny seconds hand moves i.e.
how many groups of 5 or how many smaller units
before the minutes hand moves from one small division
to the next
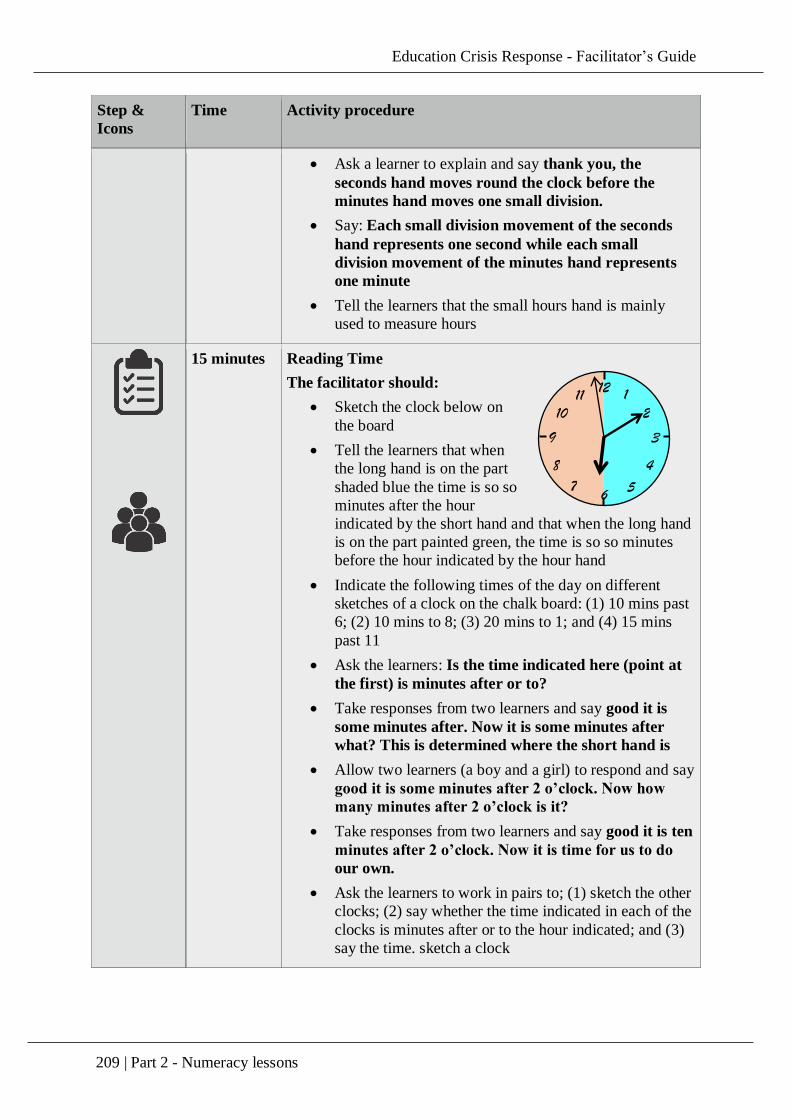
Education Crisis Response - Facilitator’s Guide
209 | Part 2 - Numeracy lessons
Step &
Icons
Time Activity procedure
Ask a learner to explain and say thank you, the
seconds hand moves round the clock before the
minutes hand moves one small division.
Say: Each small division movement of the seconds
hand represents one second while each small
division movement of the minutes hand represents
one minute
Tell the learners that the small hours hand is mainly
used to measure hours
15 minutes Reading Time
The facilitator should:
Sketch the clock below on
the board
Tell the learners that when
the long hand is on the part
shaded blue the time is so so
minutes after the hour
indicated by the short hand and that when the long hand
is on the part painted green, the time is so so minutes
before the hour indicated by the hour hand
Indicate the following times of the day on different
sketches of a clock on the chalk board: (1) 10 mins past
6; (2) 10 mins to 8; (3) 20 mins to 1; and (4) 15 mins
past 11
Ask the learners: Is the time indicated here (point at
the first) is minutes after or to?
Take responses from two learners and say good it is
some minutes after. Now it is some minutes after
what? This is determined where the short hand is
Allow two learners (a boy and a girl) to respond and say
good it is some minutes after 2 o’clock. Now how
many minutes after 2 o’clock is it?
Take responses from two learners and say good it is ten
minutes after 2 o’clock. Now it is time for us to do
our own.
Ask the learners to work in pairs to; (1) sketch the other
clocks; (2) say whether the time indicated in each of the
clocks is minutes after or to the hour indicated; and (3)
say the time. sketch a clock
12
6
9 3
1
2
8
7
11
10
4
5
Education Crisis Response - Facilitator’s Guide
210 | Part 2 - Numeracy lessons
Step &
Icons
Time Activity procedure
Ask the different pairs for their answers and say thank
the learners give correct answers. Ask other pairs when
a wrong answer is given
10 minutes Units of time
The facilitator should:
Write the following questions on the board: When the
second hand moves round the clock from 12 through
1, 2, 3, … to 12, how many seconds has it moved?
How many small divisions has the hours hand
moved? Starting from 12 mid night, how many times
will the hour hand move round the clock before 12
midnight the next day? How many hours does it
move in one complete turn?
In groups of five, ask the learners to work on the
questions in their groups
Take responses from each group and use their correct
answers to complete the table
60 seconds 1 minute
60 minutes 1 hour
24 hours 1 day
Complete the table with 7 days = One week; 30/31 days
= One month; 12 months = One year; 52 weeks = One
year
Say thank you and well done and ask the learners to
copy the table in their exercise book
5 minutes The facilitator should:
Sketch the clocks showing the following times on the
board and ask the learners to write down the time in
each case: (a)15 minutes past 5 o’clock (b) 20 minutes
to 9 o’clock (c) 10 minutes past 6 o’clock (d) 11:35 (e)
1:25
Ask the learners to sketch clocks showing: (a) 10
minutes to 9 o’clock (b) 25 minutes after 4 o’clock (c) 5
minutes to 3 o’clock (d) 10:40 (e) 8: 15
Go round the class to check that the learners are doing
the work correctly; provide assistance where required
Reflection:
The facilitators should reflect on the following:
Education Crisis Response - Facilitator’s Guide
211 | Part 2 - Numeracy lessons
Did you enjoy this lesson?
Did the learners enjoy the activities in it?
How can it be improved?
What would you have preferred done differently?
Education Crisis Response - Facilitator’s Guide
212 | Part 2 - Numeracy lessons
Scripted Lesson 9: How long is it?
Skill: Measuring lengths.
Time: 50 Minutes
Important ideas: Measurement, length and standard unit.
Learning objectives: At the end of the lesson, learners will be able to:
i. Use standard units of measuring lengths.
ii. Recognize the units of length in metric system.
iii. Measure familiar lengths using standard measures.
Previous knowledge: Learners are familiar with different length and sizes around the homes
such as their slippers and shoes, they were also introduced to measurements using non-standard
units.
Materials: Meter rules/sticks – non calibrated (as many as can go round the class in groups of
3-4), calibrated meter rule (as many as can go round the class in groups of 3-4)
Facilitator’s Tips: The facilitators should not use a meter first learners are already
familiar with non-standard units like hand span, feet, etc. The need for
standardization should lead to the use of meter rule etc and other rule required to
measure length smaller than a meter. When measuring the height of learners’ boys and girls
should be in different groups.
Important Ideas: The measuring of length is the first measure to be introduced to
learners. It is important for learners to understand that though there are non-standard
measures, standard measures are important for uniform measurement or else we all
measure an object differently as seen in non-standard measures.
SEL Ideas: Learners in this activity will recognize and appreciate individual and
group similarities and differences, learn to follow direction, learn to listen and learn
to focus attention and keep minds on tasks.
On-going Assessment: Facilitator should ask learners questions and encourage
learners to ask questions. Note their difficulties towards understanding the
concept. And how many of them have understood the concept.
Step and
Icon
Time Activity procedure
10 minutes
Introduction
The facilitator should:
Arrange learners in groups of three or four and ask
them to talk about the lengths they measure and how
they measure each of them. Say: for example to
measure distance between goal posts, boys often
use their feet
Allow five minutes for this and take response from
four groups. Make sure to include groups of boys and
girls and mixed groups.
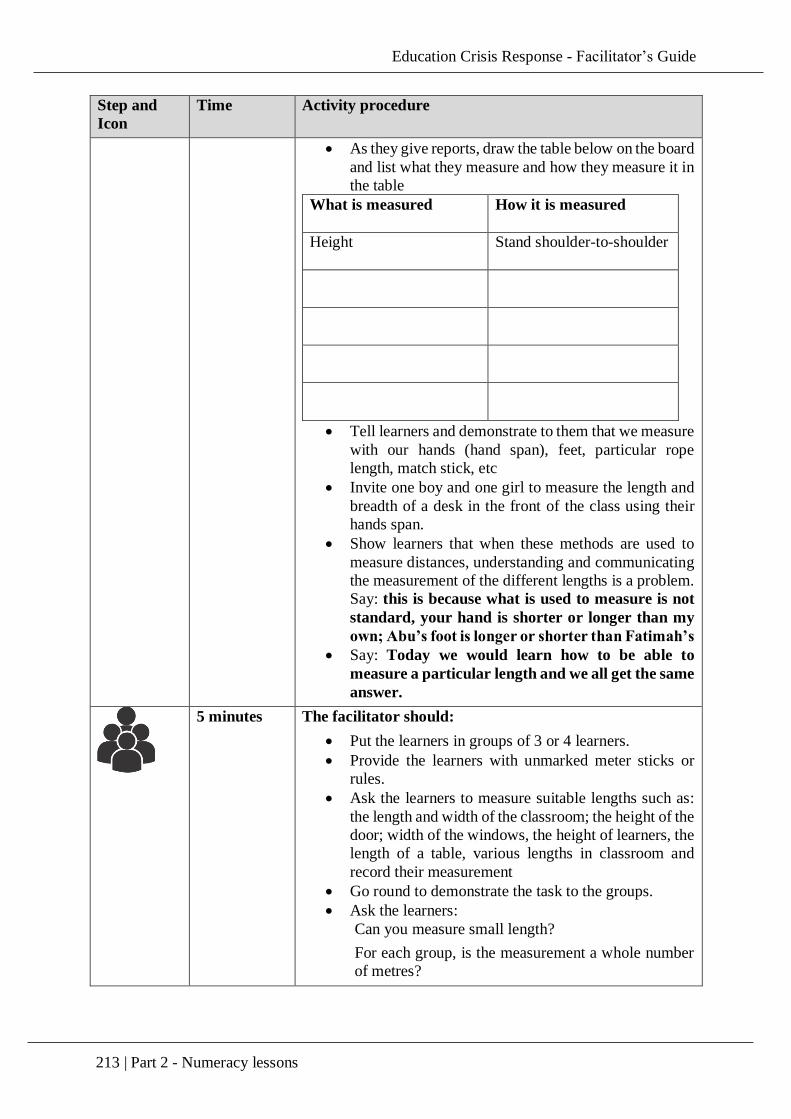
Education Crisis Response - Facilitator’s Guide
213 | Part 2 - Numeracy lessons
Step and
Icon
Time Activity procedure
As they give reports, draw the table below on the board
and list what they measure and how they measure it in
the table
What is measured How it is measured
Height Stand shoulder-to-shoulder
Tell learners and demonstrate to them that we measure
with our hands (hand span), feet, particular rope
length, match stick, etc
Invite one boy and one girl to measure the length and
breadth of a desk in the front of the class using their
hands span.
Show learners that when these methods are used to
measure distances, understanding and communicating
the measurement of the different lengths is a problem.
Say: this is because what is used to measure is not
standard, your hand is shorter or longer than my
own; Abu’s foot is longer or shorter than Fatimah’s
Say: Today we would learn how to be able to
measure a particular length and we all get the same
answer.
5 minutes The facilitator should:
Put the learners in groups of 3 or 4 learners.
Provide the learners with unmarked meter sticks or
rules.
Ask the learners to measure suitable lengths such as:
the length and width of the classroom; the height of the
door; width of the windows, the height of learners, the
length of a table, various lengths in classroom and
record their measurement
Go round to demonstrate the task to the groups.
Ask the learners:
Can you measure small length?
For each group, is the measurement a whole number
of metres?
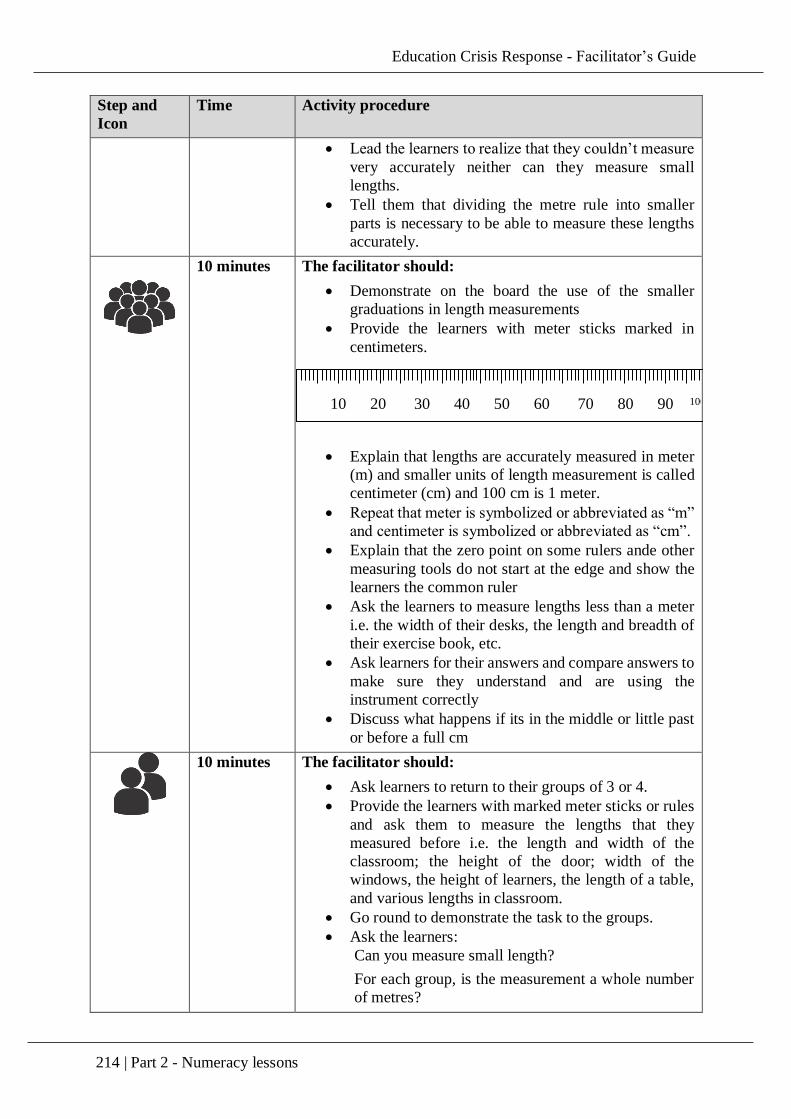
Education Crisis Response - Facilitator’s Guide
214 | Part 2 - Numeracy lessons
Step and
Icon
Time Activity procedure
Lead the learners to realize that they couldn’t measure
very accurately neither can they measure small
lengths.
Tell them that dividing the metre rule into smaller
parts is necessary to be able to measure these lengths
accurately.
10 minutes The facilitator should:
Demonstrate on the board the use of the smaller
graduations in length measurements
Provide the learners with meter sticks marked in
centimeters.
Explain that lengths are accurately measured in meter
(m) and smaller units of length measurement is called
centimeter (cm) and 100 cm is 1 meter.
Repeat that meter is symbolized or abbreviated as “m”
and centimeter is symbolized or abbreviated as “cm”.
Explain that the zero point on some rulers ande other
measuring tools do not start at the edge and show the
learners the common ruler
Ask the learners to measure lengths less than a meter
i.e. the width of their desks, the length and breadth of
their exercise book, etc.
Ask learners for their answers and compare answers to
make sure they understand and are using the
instrument correctly
Discuss what happens if its in the middle or little past
or before a full cm
10 minutes The facilitator should:
Ask learners to return to their groups of 3 or 4.
Provide the learners with marked meter sticks or rules
and ask them to measure the lengths that they
measured before i.e. the length and width of the
classroom; the height of the door; width of the
windows, the height of learners, the length of a table,
and various lengths in classroom.
Go round to demonstrate the task to the groups.
Ask the learners:
Can you measure small length?
For each group, is the measurement a whole number
of metres?
10 20 30 40 50 60 70 80 90 100
Education Crisis Response - Facilitator’s Guide
215 | Part 2 - Numeracy lessons
Step and
Icon
Time Activity procedure
The learners realized that they could now measure
very accurately and can measure small lengths.
10 minutes Assessment
The facilitators should:
Divide learners into pairs and ask pairs to measure
(ensure you go round to support the learners):
1. The length of their arm.
2. The length of their foot.
3. Their heights
Ask 3-4 pairs of learners to share their answers with
class
Say: You have all done great!
5 minutes Conclusion/Review
The facilitators should:
Explain to the learners that standard measurement allows our
measurements to be uniform and we can measure small
distances more accurately.
On-going assessment of learning:
Do any of your learners need more help?
Are there learners who understand well?
Which learners can help other learners and how can you encourage that?
Education Crisis Response - Facilitator’s Guide
216 | Part 2 - Numeracy lessons
Scripted Lesson 10: Halves and Quarters
Skills: Using and writing fractions
Time: 45 minutes
Learning Objectives:
At the end of the lesson, learners will be able to:
1. Divide a given amount of items into halves and quarters.
2. Show a fraction or proportion of items using pictures and numbers.
Previous Knowledge:
Learners have been sharing things among siblings at home and with friends in school.
Materials:
1. Four closed containers of the same size.
2. A pile of sand to be used to demonstrate halves and quarters.
3. The day before you use this Scripted Lesson, ask the learners to bring to class 12 bottle
tops, 12 small stones, or similar size items for this activity the following day.
Facilitator’s Tips:
Writing and working with fractions is challenging for many learners.
When learners divide something in half, then in half again, they are dividing
fractions.
Have learners show fractions using stones, bottle tops or other items that they can
divide into parts.
Dividing a group of objects helps learners to understand that a fraction is part of a
whole.
Important Ideas:
SEL Ideas: When learners follow instruction of the facilitator they are improving
their executive functions, while working in groups improve their interpersonal
and positive social skills.
On-going Assessment:
During the lesson, the facilitator should:
Try to find out if any of his/her learners need more help
Find out whether there are learners who understand well and could help others
Step &
Icons
Time Activity procedure
5 minutes Introduction
The facilitator should:
Place the four containers on the table
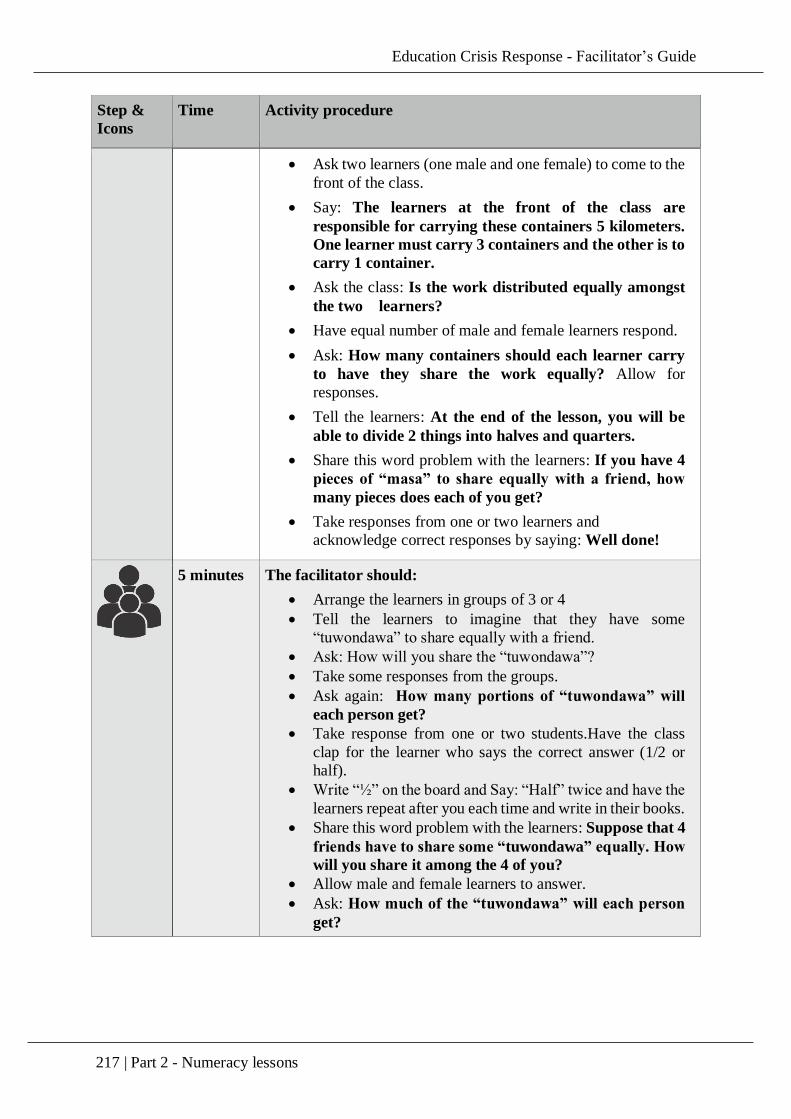
Education Crisis Response - Facilitator’s Guide
217 | Part 2 - Numeracy lessons
Step &
Icons
Time Activity procedure
Ask two learners (one male and one female) to come to the
front of the class.
Say: The learners at the front of the class are
responsible for carrying these containers 5 kilometers.
One learner must carry 3 containers and the other is to
carry 1 container.
Ask the class: Is the work distributed equally amongst
the two learners?
Have equal number of male and female learners respond.
Ask: How many containers should each learner carry
to have they share the work equally? Allow for
responses.
Tell the learners: At the end of the lesson, you will be
able to divide 2 things into halves and quarters.
Share this word problem with the learners: If you have 4
pieces of “masa” to share equally with a friend, how
many pieces does each of you get?
Take responses from one or two learners and
acknowledge correct responses by saying: Well done!
5 minutes The facilitator should:
Arrange the learners in groups of 3 or 4
Tell the learners to imagine that they have some
“tuwondawa” to share equally with a friend.
Ask: How will you share the “tuwondawa”?
Take some responses from the groups.
Ask again: How many portions of “tuwondawa” will
each person get?
Take response from one or two students.Have the class
clap for the learner who says the correct answer (1/2 or
half).
Write “½” on the board and Say: “Half” twice and have the
learners repeat after you each time and write in their books.
Share this word problem with the learners: Suppose that 4
friends have to share some “tuwondawa” equally. How
will you share it among the 4 of you?
Allow male and female learners to answer.
Ask: How much of the “tuwondawa” will each person
get?
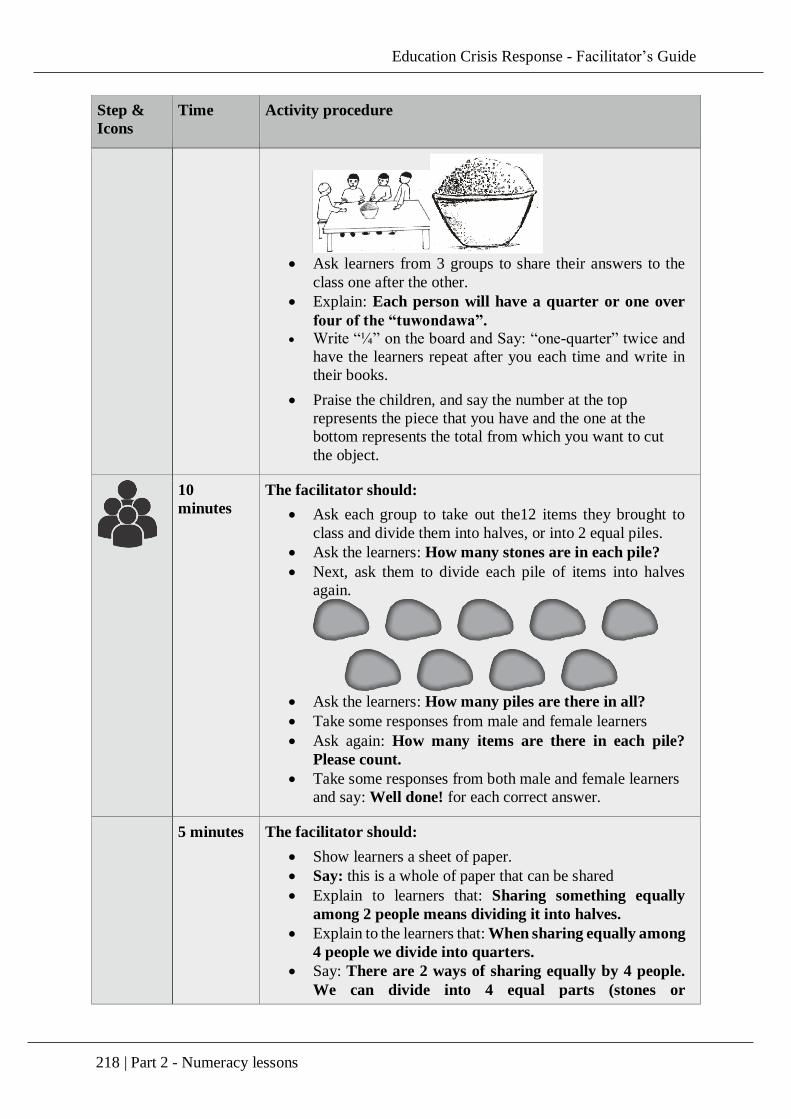
Education Crisis Response - Facilitator’s Guide
218 | Part 2 - Numeracy lessons
Step &
Icons
Time Activity procedure
Ask learners from 3 groups to share their answers to the
class one after the other.
Explain: Each person will have a quarter or one over
four of the “tuwondawa”. Write “¼” on the board and Say: “one-quarter” twice and
have the learners repeat after you each time and write in
their books.
Praise the children, and say the number at the top
represents the piece that you have and the one at the
bottom represents the total from which you want to cut
the object.
10
minutes
The facilitator should:
Ask each group to take out the12 items they brought to
class and divide them into halves, or into 2 equal piles.
Ask the learners: How many stones are in each pile?
Next, ask them to divide each pile of items into halves
again.
Ask the learners: How many piles are there in all?
Take some responses from male and female learners
Ask again: How many items are there in each pile?
Please count.
Take some responses from both male and female learners
and say: Well done! for each correct answer.
5 minutes The facilitator should:
Show learners a sheet of paper.
Say: this is a whole of paper that can be shared
Explain to learners that: Sharing something equally
among 2 people means dividing it into halves.
Explain to the learners that: When sharing equally among
4 people we divide into quarters.
Say: There are 2 ways of sharing equally by 4 people.
We can divide into 4 equal parts (stones or
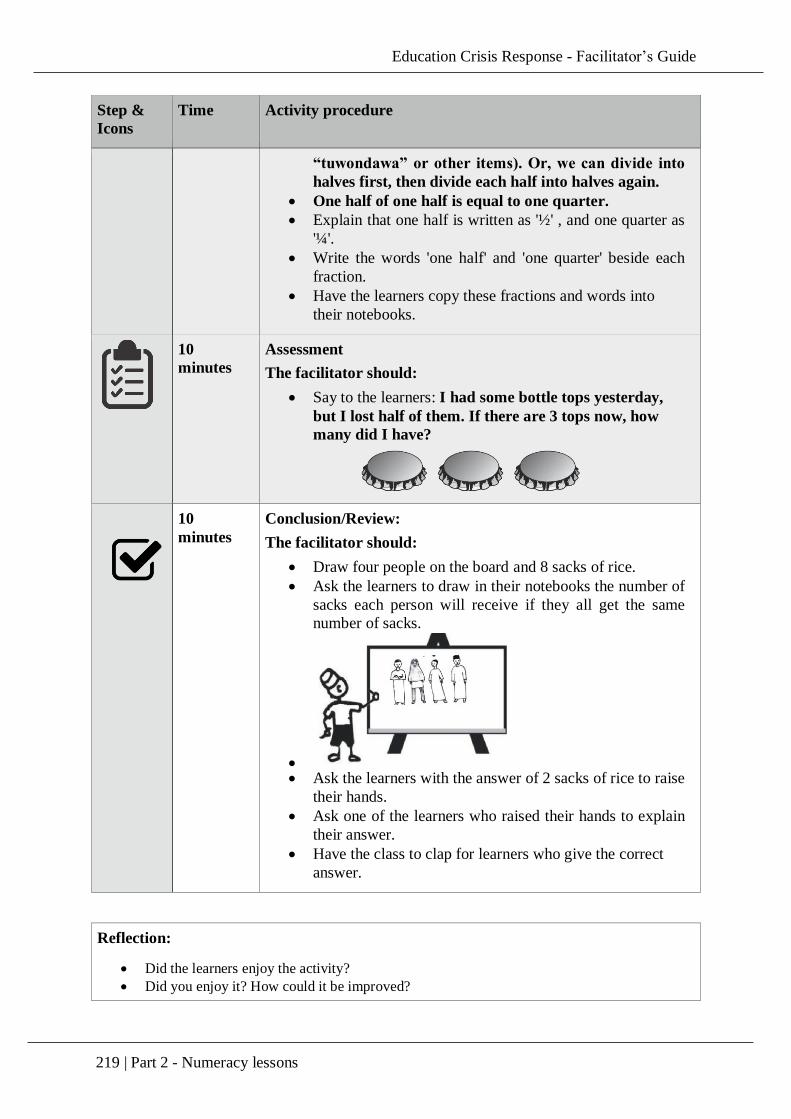
Education Crisis Response - Facilitator’s Guide
219 | Part 2 - Numeracy lessons
Step &
Icons
Time Activity procedure
“tuwondawa” or other items). Or, we can divide into
halves first, then divide each half into halves again.
One half of one half is equal to one quarter.
Explain that one half is written as '½' , and one quarter as
'¼'.
Write the words 'one half' and 'one quarter' beside each
fraction.
Have the learners copy these fractions and words into
their notebooks.
10
minutes
Assessment
The facilitator should:
Say to the learners: I had some bottle tops yesterday,
but I lost half of them. If there are 3 tops now, how
many did I have?
10
minutes
Conclusion/Review:
The facilitator should:
Draw four people on the board and 8 sacks of rice.
Ask the learners to draw in their notebooks the number of
sacks each person will receive if they all get the same
number of sacks.
Ask the learners with the answer of 2 sacks of rice to raise
their hands.
Ask one of the learners who raised their hands to explain
their answer.
Have the class to clap for learners who give the correct
answer.
Reflection:
Did the learners enjoy the activity?
Did you enjoy it? How could it be improved?
Education Crisis Response - Facilitator’s Guide
220 | Part 2 - Numeracy lessons
Scripted Lesson 11: Dealing with money
Title: Nigerian currency
Skills: Recognition of Nigerian currency
Time: 50 minutes.
Learning objectives: At the end of the lesson, learners should able to:
1. Identify the Naira (N) and Kobo (K) symbols
2. State Naira and Kobo denominations.
Previous knowledge:
Learners have been using money in buying and selling at home.
Materials: A chart of sample Nigeria currency notes and coins (see appendix 2)
Facilitator’s Tips: Currency notes are bank notes, known as paper notes or simply a note. The
currency of Nigeria is the Naira (N) and kobo (K)
Important Ideas: Recognizing and identifying Nigerian currency help learners to become familiar with
the symbols and denominations of Nigerian currency note Naira and kobo. Warn
learners not to attempt to make money of their own.
SEL Ideas: Concept of leadership in the executive function of Socio Emotional
Learning as the learners are involved in working in groups playing different
leadership roles i.e. sharing of learning materials etc. In the competition/game
leaners will be developing their impulse control.
On-going Assessment: The facilitators should observe how the groups do the
activity: Are pupils in group working together to show and play with the different
currency notes.
Steps and
Icons
Time Activity procedure
5 minutes Introduction
The facilitator should:
Ask the learners if they have spent money before, how
much and to buy what.
Allow 2 boys and 2 girls to answer from different parts of
the classroom and write the amount mentioned on the
board ensure you have some learners mention some Naira
and kobo.
Ask all the learners to think about what they can buy or do
with money.
Let 3-4 learners share their answers.
Thank the learners and say: By the end of the lesson you
should be able to identify the Naira and kobo symbols
and state Naira and Kobo denominations.
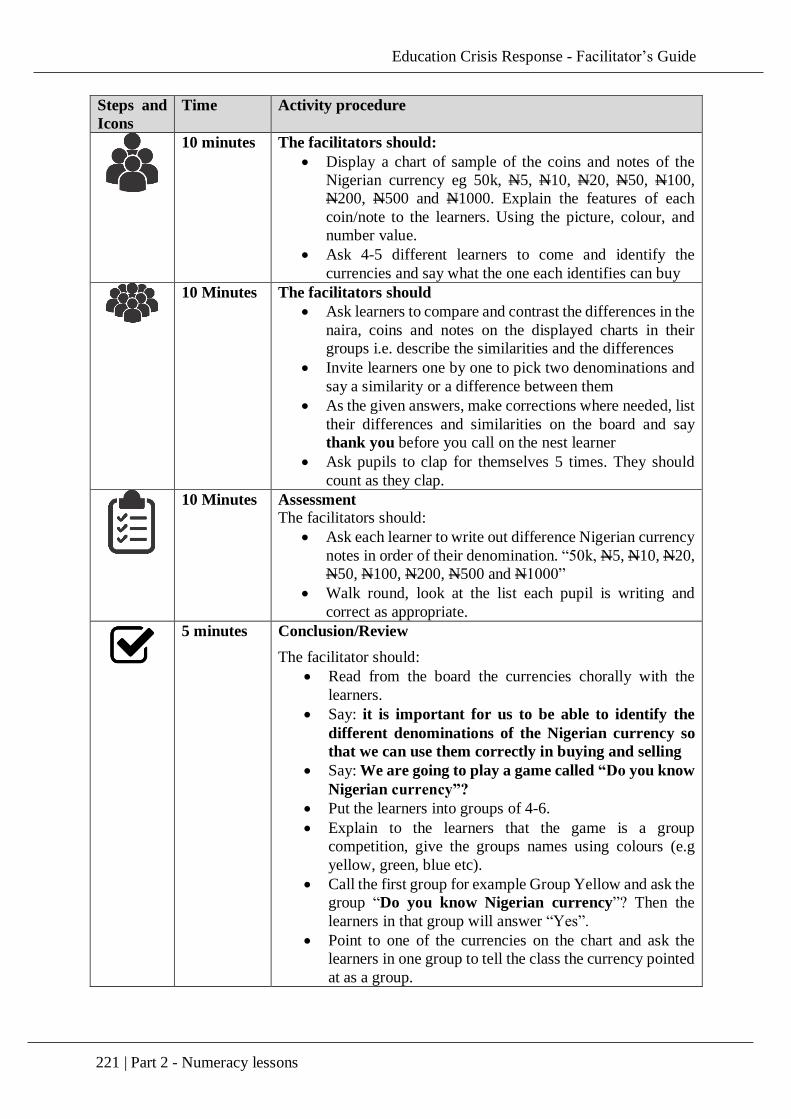
Education Crisis Response - Facilitator’s Guide
221 | Part 2 - Numeracy lessons
Steps and
Icons
Time Activity procedure
10 minutes The facilitators should:
Display a chart of sample of the coins and notes of the
Nigerian currency eg 50k, N5, N10, N20, N50, N100,
N200, N500 and N1000. Explain the features of each
coin/note to the learners. Using the picture, colour, and
number value.
Ask 4-5 different learners to come and identify the
currencies and say what the one each identifies can buy
10 Minutes The facilitators should
Ask learners to compare and contrast the differences in the
naira, coins and notes on the displayed charts in their
groups i.e. describe the similarities and the differences
Invite learners one by one to pick two denominations and
say a similarity or a difference between them
As the given answers, make corrections where needed, list
their differences and similarities on the board and say
thank you before you call on the nest learner
Ask pupils to clap for themselves 5 times. They should
count as they clap.
10 Minutes Assessment
The facilitators should:
Ask each learner to write out difference Nigerian currency
notes in order of their denomination. “50k, N5, N10, N20,
N50, N100, N200, N500 and N1000”
Walk round, look at the list each pupil is writing and
correct as appropriate.
5 minutes Conclusion/Review
The facilitator should:
Read from the board the currencies chorally with the
learners.
Say: it is important for us to be able to identify the
different denominations of the Nigerian currency so
that we can use them correctly in buying and selling
Say: We are going to play a game called “Do you know
Nigerian currency”?
Put the learners into groups of 4-6.
Explain to the learners that the game is a group
competition, give the groups names using colours (e.g
yellow, green, blue etc).
Call the first group for example Group Yellow and ask the
group “Do you know Nigerian currency”? Then the
learners in that group will answer “Yes”.
Point to one of the currencies on the chart and ask the
learners in one group to tell the class the currency pointed
at as a group.

Education Crisis Response - Facilitator’s Guide
222 | Part 2 - Numeracy lessons
Steps and
Icons
Time Activity procedure
Repeat the process for all the groups, pointing at different
currencies for different groups
Say well done! All the groups have won, please clap for
yourselves.
Reflection: How can you improve this activity and what other games can you use to teach currencies.

Education Crisis Response - Facilitator’s Guide
223 | Part 2 - Numeracy lessons
Scripted Lesson 12: 3-dimensional shapes
Skills: Recognition of 3-dimensional shapes
Time: 45 minutes
Learning objectives: Learners should be able to:
1. Mention solid shapes in their homes and environment;
2. Sort-out cubes, cuboids (rectangular prisms), cylinder and spheres.
3. Identify and name cubes, cuboids, cylinder and sphere.
Materials:
1. Ask the learners to come to class with the following objects for this lesson; matchbox,
tins, building blocks, empty milk can, empty insecticide can, empty carton of sugar, tea
etc.
2. A Chart of 3-dimensional shapes (see appendix 3).
Previous knowledge:
Learners have been seeing, playing with and using objects of different shapes at home, school
and in the environment.
Facilitator’s Tips: Learners interaction with the real objects is critical to their
understanding of the concept of 3-dimesional shapes. Teaching 3-dimensional
shapes should make learning of 2 dimensional shapes easier. Learners are first
exposed to 3–dimensional shapes in real life, they are familiar with matchboxes, cubes of sugar,
suitcases, lockers etc at home and in school.
Important Ideas: Sorting and naming solid shapes help learners become familiar
with the shapes and build knowledge of their properties.
SEL Ideas: This activity will improve learners’ positive social skills as they work
in their pairs and groups, share learning materials and cooperate with each other in
the group. Thanking the learners or appreciating them develops their positive self-
concept, identity and confidence.
On-going Assessment: Observe the learners that are not active enough in the
groups, ask them questions to test their understanding.
Step and
Icons
Time Activity procedure
10 minutes Introduction:
The facilitators should:
Ask learner to put the items they brought on their tables
Collect some of the 3D shapes (match box, empty carton
of sugar, ball, empty carton of tea or other products) and
put in a bag.
Touch and feel a shape in the bag of 3D shapes, and
describe the shape to class according to its properties (For
example it has 6 faces and opposite faces are the same size
and shape or it is round and can roll on the ground).
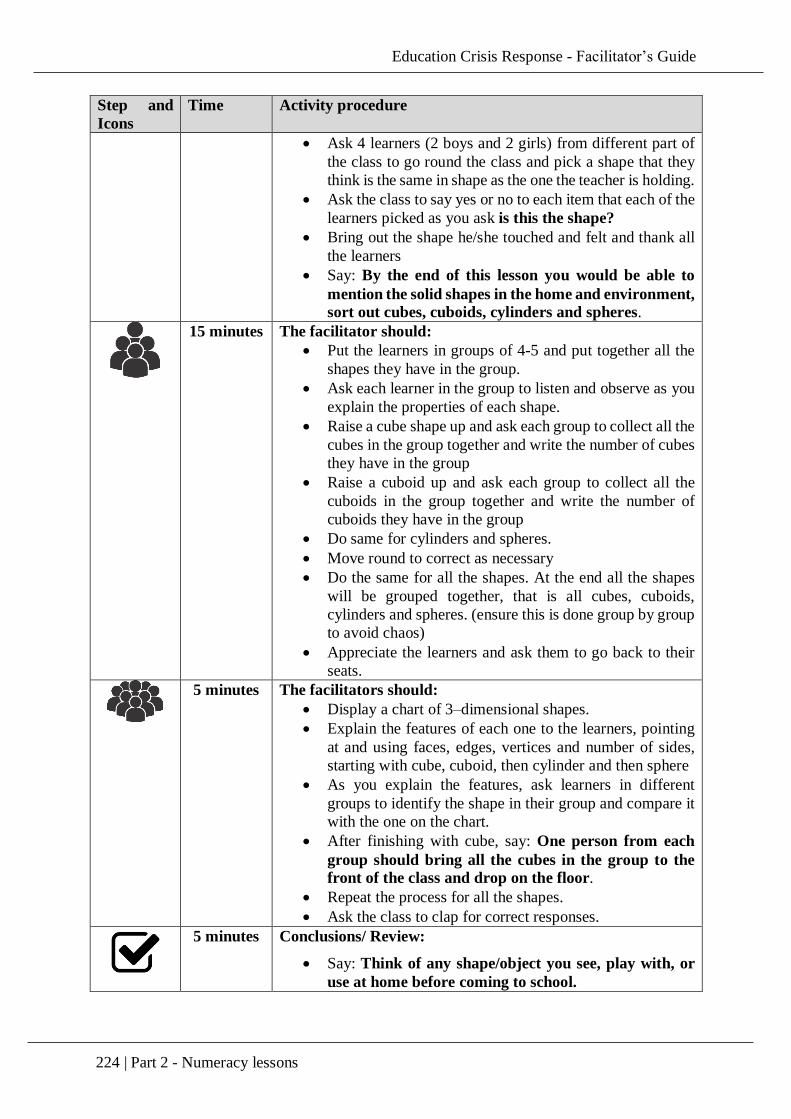
Education Crisis Response - Facilitator’s Guide
224 | Part 2 - Numeracy lessons
Step and
Icons
Time Activity procedure
Ask 4 learners (2 boys and 2 girls) from different part of
the class to go round the class and pick a shape that they
think is the same in shape as the one the teacher is holding.
Ask the class to say yes or no to each item that each of the
learners picked as you ask is this the shape?
Bring out the shape he/she touched and felt and thank all
the learners
Say: By the end of this lesson you would be able to
mention the solid shapes in the home and environment,
sort out cubes, cuboids, cylinders and spheres.
15 minutes The facilitator should:
Put the learners in groups of 4-5 and put together all the
shapes they have in the group.
Ask each learner in the group to listen and observe as you
explain the properties of each shape.
Raise a cube shape up and ask each group to collect all the
cubes in the group together and write the number of cubes
they have in the group
Raise a cuboid up and ask each group to collect all the
cuboids in the group together and write the number of
cuboids they have in the group
Do same for cylinders and spheres.
Move round to correct as necessary
Do the same for all the shapes. At the end all the shapes
will be grouped together, that is all cubes, cuboids,
cylinders and spheres. (ensure this is done group by group
to avoid chaos)
Appreciate the learners and ask them to go back to their
seats.
5 minutes The facilitators should:
Display a chart of 3–dimensional shapes.
Explain the features of each one to the learners, pointing
at and using faces, edges, vertices and number of sides,
starting with cube, cuboid, then cylinder and then sphere
As you explain the features, ask learners in different
groups to identify the shape in their group and compare it
with the one on the chart.
After finishing with cube, say: One person from each
group should bring all the cubes in the group to the
front of the class and drop on the floor.
Repeat the process for all the shapes.
Ask the class to clap for correct responses.
5 minutes Conclusions/ Review:
Say: Think of any shape/object you see, play with, or
use at home before coming to school.
Education Crisis Response - Facilitator’s Guide
225 | Part 2 - Numeracy lessons
Step and
Icons
Time Activity procedure
Call a girl and a boy to describe and name the shape and
object she/he used before coming to school.
Reflection:
How will you improve this lesson, if you have to teach it again?
Which activity do you think the learners enjoyed most?
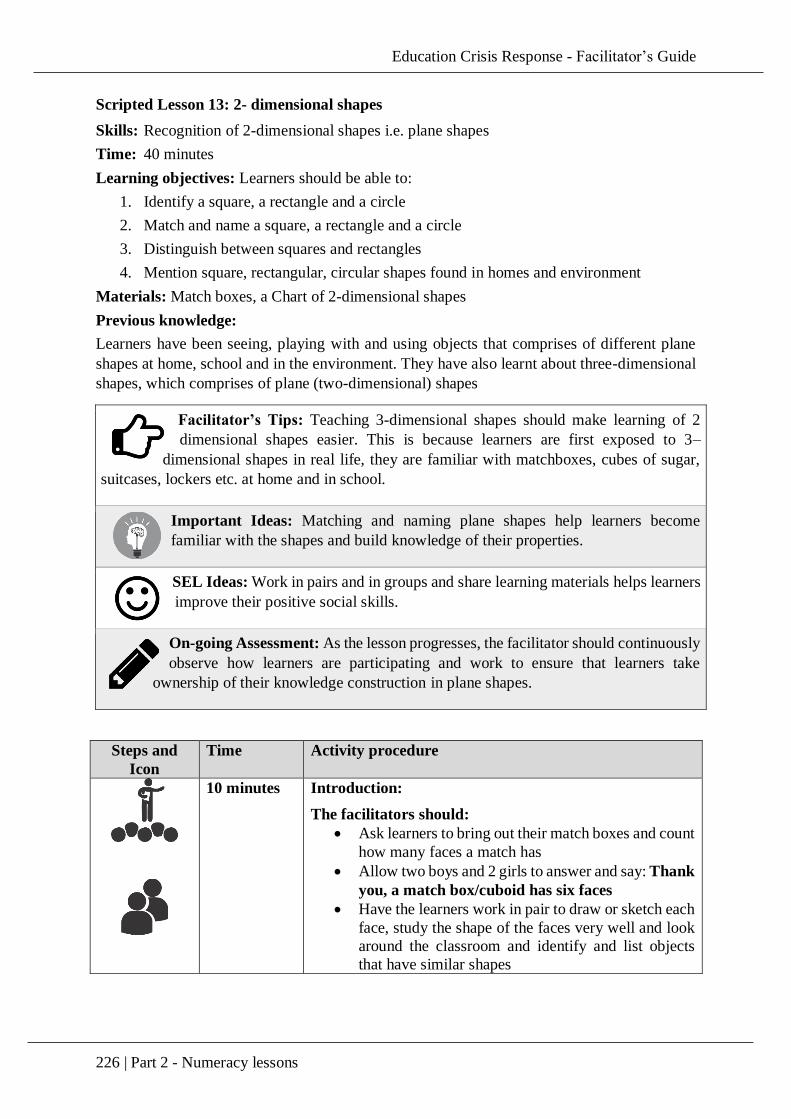
Education Crisis Response - Facilitator’s Guide
226 | Part 2 - Numeracy lessons
Scripted Lesson 13: 2- dimensional shapes
Skills: Recognition of 2-dimensional shapes i.e. plane shapes
Time: 40 minutes
Learning objectives: Learners should be able to:
1. Identify a square, a rectangle and a circle
2. Match and name a square, a rectangle and a circle
3. Distinguish between squares and rectangles
4. Mention square, rectangular, circular shapes found in homes and environment
Materials: Match boxes, a Chart of 2-dimensional shapes
Previous knowledge:
Learners have been seeing, playing with and using objects that comprises of different plane
shapes at home, school and in the environment. They have also learnt about three-dimensional
shapes, which comprises of plane (two-dimensional) shapes
Facilitator’s Tips: Teaching 3-dimensional shapes should make learning of 2
dimensional shapes easier. This is because learners are first exposed to 3–
dimensional shapes in real life, they are familiar with matchboxes, cubes of sugar,
suitcases, lockers etc. at home and in school.
Important Ideas: Matching and naming plane shapes help learners become
familiar with the shapes and build knowledge of their properties.
SEL Ideas: Work in pairs and in groups and share learning materials helps learners
improve their positive social skills.
On-going Assessment: As the lesson progresses, the facilitator should continuously
observe how learners are participating and work to ensure that learners take
ownership of their knowledge construction in plane shapes.
Steps and
Icon
Time Activity procedure
10 minutes Introduction:
The facilitators should:
Ask learners to bring out their match boxes and count
how many faces a match has
Allow two boys and 2 girls to answer and say: Thank
you, a match box/cuboid has six faces
Have the learners work in pair to draw or sketch each
face, study the shape of the faces very well and look
around the classroom and identify and list objects
that have similar shapes
Education Crisis Response - Facilitator’s Guide
227 | Part 2 - Numeracy lessons
Ask 4 pairs from different parts of the room to
present their work and the list of objects that have
similar shape.
List the objects as they are presenting and ask the
class if there are other objects that have not been
mentioned
Say: That shape is a rectangle. A rectangle is a 2-
dimensional shape because it only has two
dimensions the length and the breadth.
Tell the learners that they are going to learn about
the properties of some two-dimensional shapes
10 minutes The facilitator should:
Divide the learners into groups of three or four and
ask the groups to look at their drawing and the shapes
of the objects the listed earlier to identify their
similarities
Have four groups explain what they notice about the
shapes. Their submission should include that (1)
sides that are facing each other are the same in shape
and size (2) all the sides are straight i.e. at angle 90
degrees
Thank the learners and say Very Good! to the
presenters.
Say: These are the two most important properties
of a rectangle.
10 minutes The facilitators should:
Draw a rectangle on the board and ask the learners
what shape it is
Allow two learners to say their answers and say thank
you to them
Draw a square and ask what shape it is
Allow two learners to say their answers and thank
them
Say: This is a special kind of rectangle, but
because all its four sides are equal, it is called a
square
Tell learners to look around and identify objects that
are in the shape of a square.
Take as many answers as possible and list the correct
ones as examples of square
5 minutes The facilitators should:
Draw a circle on the board and ask the learners to say
what shape it is
Allow two learners to say their answers and say thank
you to them
Say: Any shape that is round like this is called a
circle
Display a chart of 3–dimensional shapes.
Education Crisis Response - Facilitator’s Guide
228 | Part 2 - Numeracy lessons
Explain the features of a rectangle, square and circle
to the learners
5 minutes Conclusions/ Review:
Say: Think of any shape/object you see, play with,
or use at home before coming to school.
Call a girl and a boy to describe and name the shape
and object she/he used before coming to school.
Say: List the items in your homes that are (1)
rectangular (2) circular and (3) square in shape
Reflection:
How will you improve this lesson, if you have to teach it again?
Which activity do you think the learners enjoyed most?
Which activities would you like to remove?

Education Crisis Response - Facilitator’s Guide
229 | Part 2 - Numeracy lessons
Scripted Lesson 14: Factors
Title: Factors
Skills: Number sense, successive counting in 2s, 3s, …, recognizing factors
Time: 55 minutes
Learning Objective: At the end of the lesson, learners should be able to:
1. Identify and write the factors of 1, 2, 3, …, 20
2. Recognize 1 as a factor of all numbers
Materials: Counters, Multiplication chart
Previous Knowledge:
1. Learners can count numbers from 1 to 100
2. Learners can read multiplication tables
Facilitator’s Tips:
The concept of factors is not new. Learners have been seeing it in their multiplication
tables. What is new however, is the term ‘Factors’. So, moving from what
learners know to what they do not know will help in their comprehension of the
concept. Thus efforts should be directed at making them recognize the term and
linking it to its meaning which is already in their experiences
Active participation is an important aspect of learner-centered teaching. As much as
possible, get the learners involved in their learning
Important Ideas: Factors of numbers are other numbers that can divide the
number without any remainder.
SEL Ideas: Positive social skills: When learners work together, their
interpersonal relationship is developed
On-going Assessment: As the lesson progresses, note how learners are
responding and ensure to carry all learners along as you build up to knowledge
construction around finding the factors of 1, 2, 3, …, 20.
Step &
Icons
Time Activity procedure
10 minutes Introduction
The facilitator should:
Ask 12 learners from different parts of the classroom to
stand up and stand in twos.
Ask the class how many groups of two are there?
Allow answers from at least one male and one female
learner and ask all learners to draw two people in six
places and to write 2 and 6
Education Crisis Response - Facilitator’s Guide
230 | Part 2 - Numeracy lessons
Step &
Icons
Time Activity procedure
Ask the 12 learners return to their seats and also write 2
and 6
Say: When twelve people stands in 2s, there will be 6
groups
In convenient pairs, ask the class to get 12 counters per
pair and explore other ways of having 12 people
standing in groups
Ask the learners to write the numbers involved in each
case as they have 2 and 6 earlier
Go round the class to see what the learners have written
Invite learners from different parts of the room to say
their numbers and say thank you as they do that
Write their numbers on the board. These should include
the following: 2,6; 3,4; 6,2; 4,3; 1,12; and 12,1.
Make sure to allow all of these even though it can be
said that 2,6 is the same as 6,2. It will be found useful
later
Say: Today we are going to learn about factors of
numbers.
10 minutes Factors of numbers
The facilitator should:
Draw a two-column table with number in group and
number of groups as column headings
Ask a female learner to list all the numbers that they had
in the different pairs i.e. 2, 3, 4, 6, 1 and 12; and say
thank you to the learner
Ask a male learner to write the number of groups in the
different cases of groupings i.e. 6, 4, 3, 2, 12 and 1; and
say thank you to the learner
Tell the class that all of these numbers are called
factors of 12 because they can divide 12 without
remainder i.e. each of the numbers is a factor of 12
Ask a learner who has not spoken at all in class during
the lesson to come to the board and write all the factors
of 12. Say excellent even if there are repetitions and/or if
the numbers not arranged in any order
Say: when we list factors of a number, there is no
need to repeat anyone and that it is good to list them
from the smallest to the biggest. Let somebody come
and list the factors of 12 on the chalk board.
Say: Very good
Ask all learners to write the factors of 12 in their
exercise books and go round the class to check
Education Crisis Response - Facilitator’s Guide
231 | Part 2 - Numeracy lessons
Step &
Icons
Time Activity procedure
15 minutes The Facilitator should:
Divide learners into pairs or groups of 3 depending on
the population in class.
Give each group or pair the numbers 4, 6, 8, 9, 10, 14,
15, or 18. There can be repetitions i.e. two or three
groups/pairs having the same numbers.
Tell the pairs or groups to (1) think about, and write
down all the possible ways of arranging the 4, 6, …
(number given to the groups) without remainder; (2)
write the number in each group and the number of
groups in each case; and (3) list all the factors of the
number given to them
Have each group present the group work and say very
good at the end of each presentation
As they present, ask for contributions to the
presentations, make necessary inputs and complete the
table below.
Numbe
r
Factors
4
6
8
9
10
12 1, 2, 3, 4, 6, 12
14
15
18
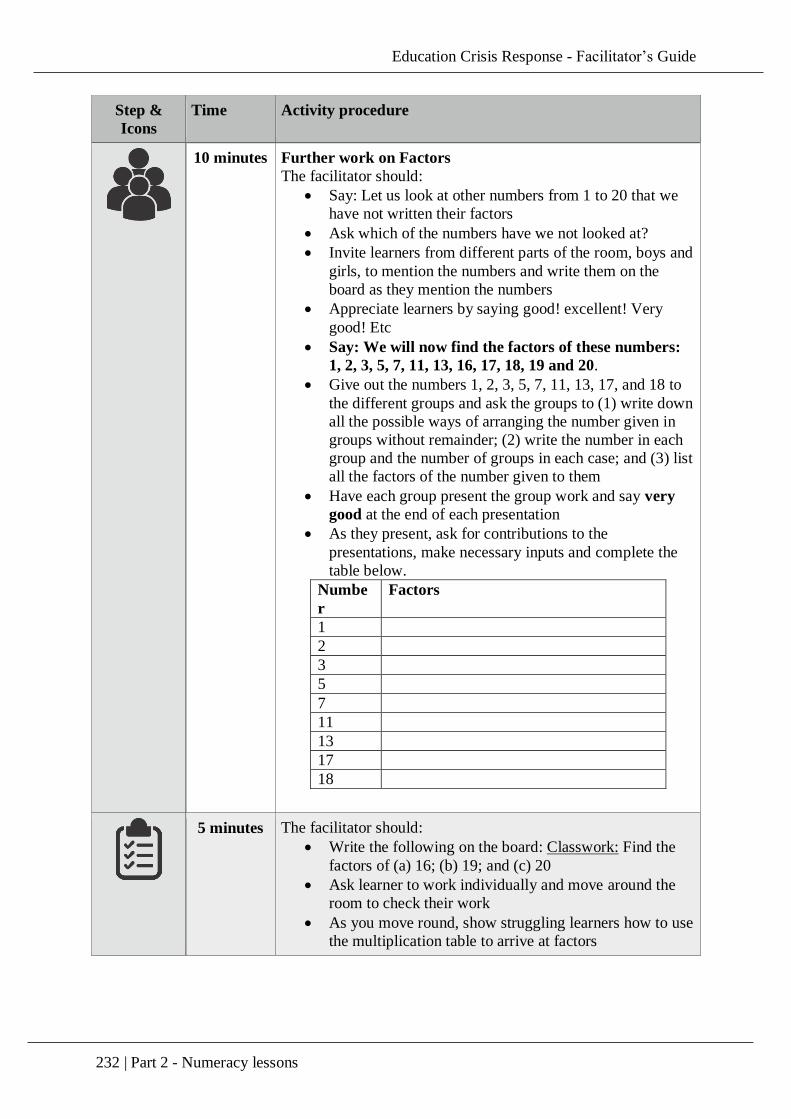
Education Crisis Response - Facilitator’s Guide
232 | Part 2 - Numeracy lessons
Step &
Icons
Time Activity procedure
10 minutes Further work on Factors
The facilitator should:
Say: Let us look at other numbers from 1 to 20 that we
have not written their factors
Ask which of the numbers have we not looked at?
Invite learners from different parts of the room, boys and
girls, to mention the numbers and write them on the
board as they mention the numbers
Appreciate learners by saying good! excellent! Very
good! Etc
Say: We will now find the factors of these numbers:
1, 2, 3, 5, 7, 11, 13, 16, 17, 18, 19 and 20.
Give out the numbers 1, 2, 3, 5, 7, 11, 13, 17, and 18 to
the different groups and ask the groups to (1) write down
all the possible ways of arranging the number given in
groups without remainder; (2) write the number in each
group and the number of groups in each case; and (3) list
all the factors of the number given to them
Have each group present the group work and say very
good at the end of each presentation
As they present, ask for contributions to the
presentations, make necessary inputs and complete the
table below.
Numbe
r
Factors
1
2
3
5
7
11
13
17
18
5 minutes The facilitator should:
Write the following on the board: Classwork: Find the
factors of (a) 16; (b) 19; and (c) 20
Ask learner to work individually and move around the
room to check their work
As you move round, show struggling learners how to use
the multiplication table to arrive at factors
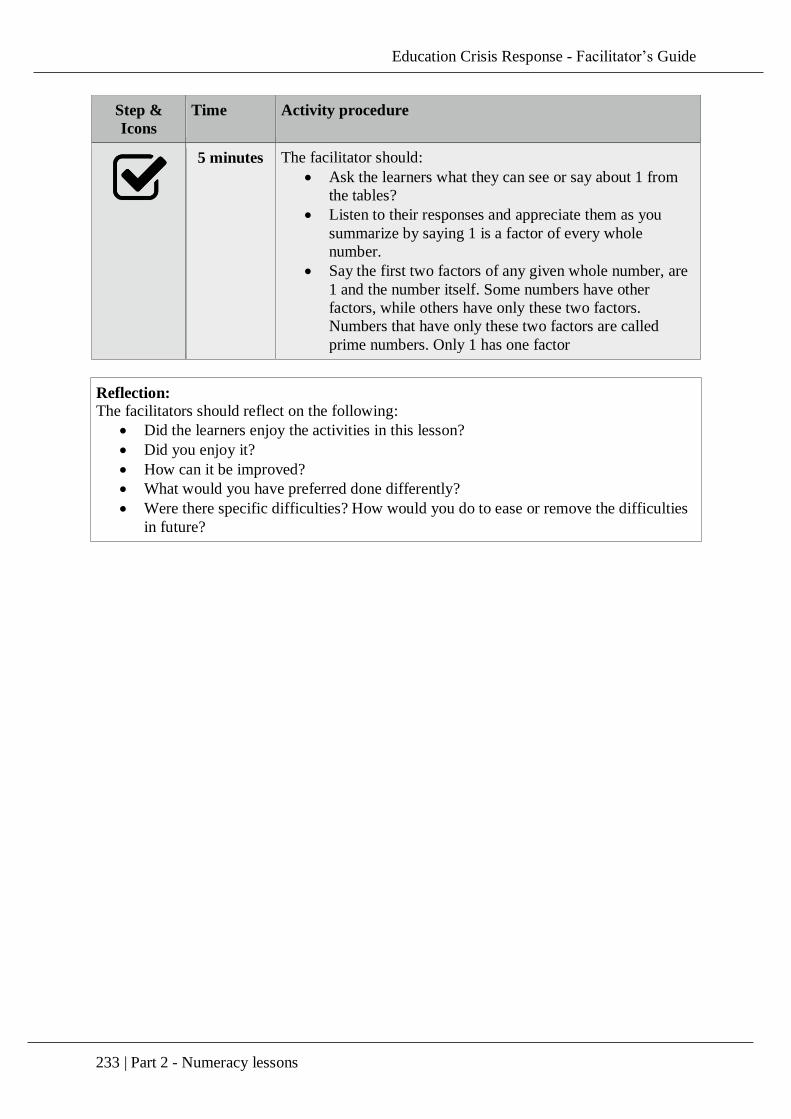
Education Crisis Response - Facilitator’s Guide
233 | Part 2 - Numeracy lessons
Step &
Icons
Time Activity procedure
5 minutes The facilitator should:
Ask the learners what they can see or say about 1 from
the tables?
Listen to their responses and appreciate them as you
summarize by saying 1 is a factor of every whole
number.
Say the first two factors of any given whole number, are
1 and the number itself. Some numbers have other
factors, while others have only these two factors.
Numbers that have only these two factors are called
prime numbers. Only 1 has one factor
Reflection: The facilitators should reflect on the following:
Did the learners enjoy the activities in this lesson?
Did you enjoy it?
How can it be improved?
What would you have preferred done differently?
Were there specific difficulties? How would you do to ease or remove the difficulties
in future?
Education Crisis Response - Facilitator’s Guide
234 | Part 2 - Numeracy lessons
Scripted Lesson 15: Multiples
Title: Multiples
Skills: Number sense, successive counting in 2s, 3s, …, identifying and recognizing
multiples
Time: 45 minutes
Learning Objective: At the end of the lesson, learners should be able to:
1. List the multiples of 1, 2, 3, 4, 5 & 10
Materials: Counters, Multiplication chart
Previous Knowledge:
1. Learners can count numbers from 1 to 100
2. Learners can read multiplication tables
Facilitator’s Tips: The multiples of any given number is an infinite set. If a
number is a multiple of a smaller number, then that smaller number is a factor of
the bigger one
Important Ideas: Multiples of numbers. A number is said to be a multiple of a
(usually) smaller number if it can be divided by the smaller number without a
remainder
SEL Ideas:
Positive Social Skills: By allowing learners to work together in groups/pairs,
their positive social skills are developed
Perseverance: By giving high cognitive tasks to learners and by charging learners to
write as many as possible of multiples and offering prices for those with the highest
numbers
On-going Assessment: As the lesson progresses, observe how the learners are
responding and ensure that every learner participates as you build up to knowledge
construction around finding the multiples of 1, 2, 3, 4, 5, 10.
Step &
Icons
Time Activity procedure
10 minutes Introduction
The facilitator should:
Ask 14 learners (boys and girls) from different parts of
the classroom to come to the front of the class and stand
in pairs
Ask the class how many pairs are there? Allow one
boy and one girl to answer and say: there are seven
pairs of learners standing
Education Crisis Response - Facilitator’s Guide
235 | Part 2 - Numeracy lessons
Step &
Icons
Time Activity procedure
Direct one pair to go back to their seats and ask the class
how many learners have returned to their seat?
Ask a learner who has not spoken during the lesson to
answer and say very good after the mention of two, and
write 2, on the board.
Ask another pair of learners to return to their seats and
ask how many learners have returned to their seats
altogether?
Invite another learner (opposite sex) who has not spoken
before to answer and say well done to him or her and say
four is correct, as you write 4, next to 2, that was
written earlier
Ask another pair of learners to return to their seats and
ask the learners to write in their exercise book how
many learners have returned to their seats
altogether?
Go round the class to see what the learners have written
and invite learners from different locations in the room
to say their answers.
Say thank you as you write 6, next to 4, that was written
previously
Continue this until all fourteen learners have taken their
seats and the sequence 2, 4, 6, … to 14 is on the board
and in learners notebooks
Say: These numbers can be divided into/by two
without remainders. Today we are going to learn
about multiples of numbers.
10 minutes Multiples of numbers
The facilitator should:
Tell the class that you are going to play a game between
the male and the female learners using numbers. Tell
them that if there are still other learners standing, and
they are going to their seats in pairs, the game is to say
how many learners altogether have gone to take their
seats?
Ask a female learner to go first, then a male learner and
then a female learner etc
Continue to write as the learners produce answers and
say good, very good, excellent, correct, …
Ensure that at least 6 boys and six girls contribute to the
list and say both boys and girls have won.
Tell the class that all of these numbers are called the
multiples of two because we started with groups of
two i.e. pairs of learners. If we have groups of three
learners, then the numbers will be multiples of three

Education Crisis Response - Facilitator’s Guide
236 | Part 2 - Numeracy lessons
Step &
Icons
Time Activity procedure
Ask the learners, if we don’t stop, will the game ever
end?
Allow a boy and a girl to respond and say: this game
will never end if we do not stop it. That is why any
whole number has infinite (i.e.
unending/uncountable) multiples.
15 minutes The facilitator should:
Divide learners into groups of 4 or 5 depending on the
number of learners in class.
Give the numbers 4, 5, and 6 to the groups. There can be
repetitions i.e. two or three groups having the same
numbers.
Tell the groups to (1) get enough counters; (2) arrange
the counters in 4s, or 5s, or 6s depending on the numbers
that they were given; and (3) count together as they put
1, 2, 3, … groups of counters together and record the
totals successively (4) generate a list of multiples of the
numbers given to them
Have each group present the group work, asking other
learners to contribute to the presentations as they are
made.
Say very good or well done at the end of each
presentation; and make necessary inputs as you complete
the table below:
Number Multiples
2 2, 4, 6, 8, 10, 12, 14, 16, 18, 20,
22, 24, 26, 28, 30, 32, 34, 36,
…
4 4, 8, 12, 16, 20, 24, 28, 32, 36,
40, 44, 48, 52, 56, 60, 64, 68,
…
5 5, 10, 15, 20, 25, 30, 35, 40, 45,
50, 55, 60, 65, 70, 75, 80, 85,
…
6 6, 12, 18, 24, 30, 36, 42, 48, 54,
60, 66, 72, 78, 84, 90, 96, 102,
…
Ask if any group generated their list using a different
method or strategy; and discuss the strategy
Tell the different groups that perseverance is when you
continue on a given task even when you get tired and ask
them to go on to get more and more multiples of their
number

Education Crisis Response - Facilitator’s Guide
237 | Part 2 - Numeracy lessons
Step &
Icons
Time Activity procedure
5 minutes The facilitator should:
Ask the learners to use any convenient strategy to
generate a list of multiples of 3, 1, 10 and 7.
Say there will be a prize for the person who generated
the most number of multiples for each number
5 minutes The facilitator should:
Say it is important to note three facts about multiples of
numbers – (1) the smallest or least multiple of any whole
number is that number itself; (2) A number is a factor of
all its multiples; and (3) The set of multiples of any
whole number is an endless set i.e. multiples are infinite
Reflection: The facilitator should reflect on the following:
Did the learners enjoy the activities in this lesson?
Did you enjoy it?
How can it be improved?
What would you have preferred done differently?
Were there specific difficulties? What would you do to ease or remove the difficulties
in future?

Education Crisis Response - Facilitator’s Guide
238 | Part 2 - Numeracy lessons
Scripted Lesson 16: Counting with Pictures
Skills: Making and reading pictographs
Time: 45 minutes
Learning Objectives:
At the end of the lesson, the learners should be able to:
1. Read and interpret information presented on tables
2. Read and interpret information presented on a pictogram
Previous Knowledge:
Learners can count and associate symbols with objects
Materials:
The day before you use this Scripted Lesson, ask each learner to bring their own notebook and
pencil or chalk and slate as well as 5 stones or bottle tops to class for this activity the following
day.
Facilitator’s Tips:
Using pictures helps to improve learning in both literacy and numeracy.
When learners are presented contents using familiar things like ‘paten acha’,
‘shinfaka’ and other foods, they understand better
Important Ideas: Using pictures for counting and showing information
SEL Ideas: When learners listen and follow instruction of the facilitator they are
improving their executive functions, while working in groups improve their
interpersonal and positive social skills.
On-going Assessment:
During the lesson, the facilitator should observe which learners seem to have grasped
the concepts? Which ones do not?
Identity the learners who understand better to help others
Step & Icons Time Activity procedure
10 minutes Introduction
The facilitator should:
Stand in front of the class and do a count silently of the
number of boys and girls in the class
Tell learners to watch what you do and that whoever gets
what you did right will get a prize
Draw a table with three rows and two columns on the board
Write ‘Gender’ in the top row of the left column
Write ‘Boys’ and ‘Girls’ on the second and third rows of the
first column respectively
Education Crisis Response - Facilitator’s Guide
239 | Part 2 - Numeracy lessons
Step & Icons Time Activity procedure
Write the number of boys and girls in the class in the second
and third rows of the second column respectively
Ask four learners (2 boys and 2 girls) from different parts of
the class to say what the information on the table represent
Thank the learners and write ‘Number of pupils' in the top
row of the right column
Say: The information in the table represent the number
of boys and girls in the class. Today we are going to learn
how to read information from a table and from a
pictogram.
10 minutes The facilitator should:
Ask all learners to stand in different groups according to the
day they were born (Sunday to Saturday).
Ask the groups to count how many learners are there in each
group
Ask each group how many they are and draw 'stick people'
on the board to show the number for each day (1 stick person
for Sunday, 2 for Monday and so on).
Note for the learners that the figures must all be the same size
and spaces in between as well
Say: We can also put this information on a table like this;
and make an eight-row, two-column table and put the
information on it
Ask learners to return to their seat and copy the table
15 minutes The facilitator should:
In groups of five or six, ask each learner to name the food
that he or she likes best
Ask the groups to record the number of people that like each
food best
In presentation, first ask the learner the food that they have
mentioned in all of the groups and make a list of all of them
Ask each group how many people like each of the food best
and record. Record for all of the foods in one group and sum
up for confirmation
After the food in the last group has been written and
confirmed, say thank you to all the learners and sum of the
number of people that like each type of food best to complete
the table
Say: We can also represent the information about best
food in a picture
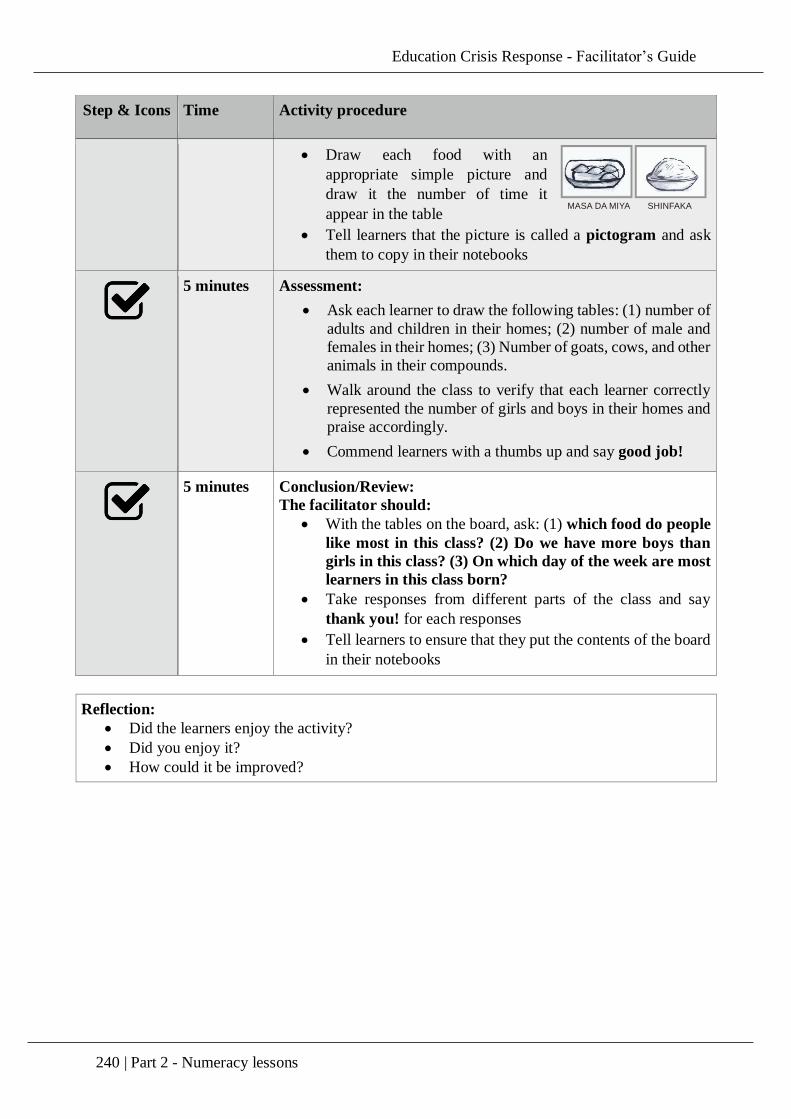
Education Crisis Response - Facilitator’s Guide
240 | Part 2 - Numeracy lessons
Step & Icons Time Activity procedure
Draw each food with an
appropriate simple picture and
draw it the number of time it
appear in the table
Tell learners that the picture is called a pictogram and ask
them to copy in their notebooks
5 minutes Assessment:
Ask each learner to draw the following tables: (1) number of
adults and children in their homes; (2) number of male and
females in their homes; (3) Number of goats, cows, and other
animals in their compounds.
Walk around the class to verify that each learner correctly
represented the number of girls and boys in their homes and
praise accordingly.
Commend learners with a thumbs up and say good job!
5 minutes Conclusion/Review:
The facilitator should:
With the tables on the board, ask: (1) which food do people
like most in this class? (2) Do we have more boys than
girls in this class? (3) On which day of the week are most
learners in this class born?
Take responses from different parts of the class and say
thank you! for each responses
Tell learners to ensure that they put the contents of the board
in their notebooks
Reflection:
Did the learners enjoy the activity?
Did you enjoy it?
How could it be improved?
MASA DA MIYA SHINFAKA

Education Crisis Response - Facilitator’s Guide
241 | Part 2 - Numeracy lessons
APPENDIX 2: SAMPLE OF NIGERIAN CURRENCIES

Education Crisis Response - Facilitator’s Guide
242 | Part 2 - Numeracy lessons
APPENDIX 3: MY 3-D SHAPES
Appendix Education Crisis Response - Facilitator’s Guide
243
PART 3 - SOCIAL EMOTIONAL LEARNING
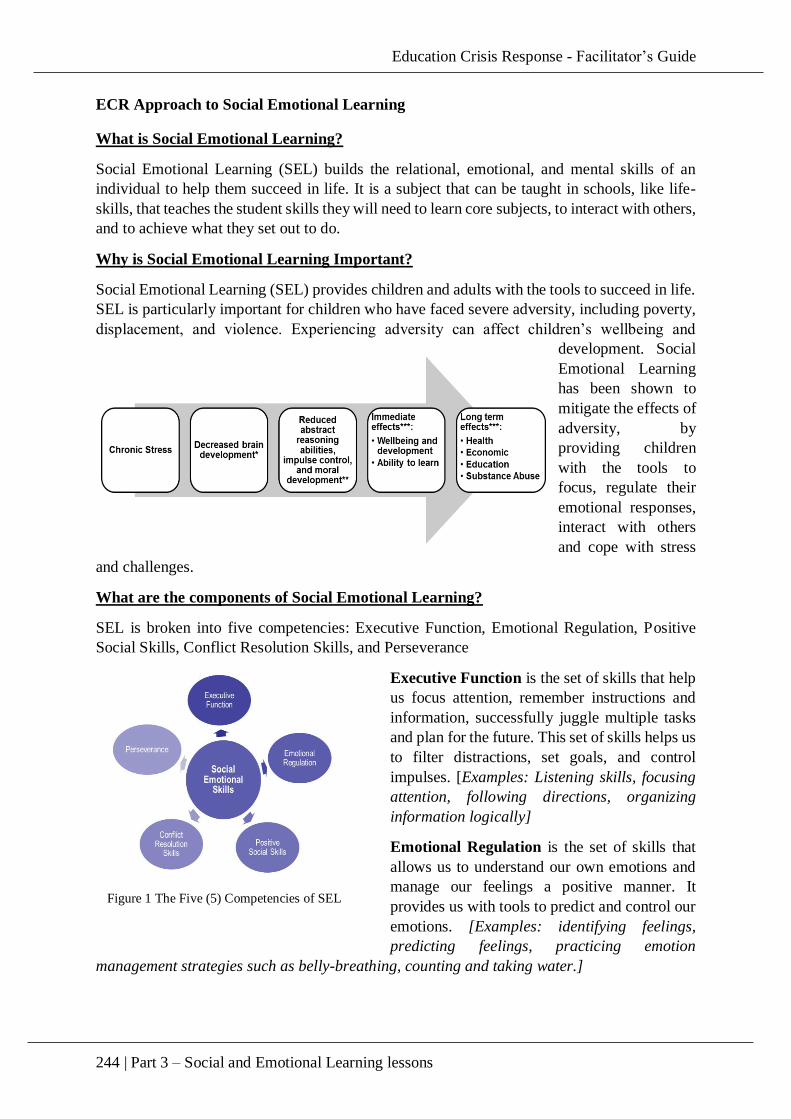
Education Crisis Response - Facilitator’s Guide
244 | Part 3 – Social and Emotional Learning lessons
ECR Approach to Social Emotional Learning
What is Social Emotional Learning?
Social Emotional Learning (SEL) builds the relational, emotional, and mental skills of an
individual to help them succeed in life. It is a subject that can be taught in schools, like life-
skills, that teaches the student skills they will need to learn core subjects, to interact with others,
and to achieve what they set out to do.
Why is Social Emotional Learning Important?
Social Emotional Learning (SEL) provides children and adults with the tools to succeed in life.
SEL is particularly important for children who have faced severe adversity, including poverty,
displacement, and violence. Experiencing adversity can affect children’s wellbeing and
development. Social
Emotional Learning
has been shown to
mitigate the effects of
adversity, by
providing children
with the tools to
focus, regulate their
emotional responses,
interact with others
and cope with stress
and challenges.
What are the components of Social Emotional Learning?
SEL is broken into five competencies: Executive Function, Emotional Regulation, Positive
Social Skills, Conflict Resolution Skills, and Perseverance
Executive Function is the set of skills that help
us focus attention, remember instructions and
information, successfully juggle multiple tasks
and plan for the future. This set of skills helps us
to filter distractions, set goals, and control
impulses. [Examples: Listening skills, focusing
attention, following directions, organizing
information logically]
Emotional Regulation is the set of skills that
allows us to understand our own emotions and
manage our feelings a positive manner. It
provides us with tools to predict and control our
emotions. [Examples: identifying feelings,
predicting feelings, practicing emotion
management strategies such as belly-breathing, counting and taking water.]
Figure 1 The Five (5) Competencies of SEL
Education Crisis Response - Facilitator’s Guide
245 | Part 3 – Social and Emotional Learning lessons
Positive Social Skills are the skills which allow us to relate to one another in a positive way,
through understanding others’ feelings and behavior and responding in a way that promotes
positive social interactions. [Examples: recognizing and accepting feelings of others,
developing empathy, understanding group dynamics.]
Conflict Resolution Skills are the skills which help us address problems and conflicts as they
arise in a positive manner. These skills minimize the negative impact of conflict, leading to a
positive outcome. [Example: identifying problems, generating solutions, implementing conflict
resolution strategies.]
Perseverance is the set of skills that allows us to push through challenges and continue to work
towards a realistic goal. These skills develop persistence in developing alternative ways to
reach a goal and a willingness to ask for support to overcome challenges. [Examples: applying
decision-making skills, developing goal-setting behavior, developing a positive self-identity.]
Module 1: Week 1: Lesson 1 - Getting to know one another
Skills: Recognize and appreciate individual and group similarities and differences; begin to
develop self-concept/identity
Time: 30 minutes
Learning Objective: By the end of the lesson, learners should be able to:
1. Identify and introduce themselves to their classmates by stating their names and
where they come from
2. Describe oneself using several basic characteristics
3. Describe how people are similar and different
4. Name their classmates
Materials: chalk, chalkboard, picture chart showing people of different characteristics (size,
height, gender, etc) and livelihood (including gender non-normative jobs) pencils, paper
Previous Knowledge: Learners are aware that they are attending a learning space that
includes social emotional learning.
Facilitator’s Tips:
Make sure the class is as engaged as possible by keeping your energy and tone
positive in order to build the learners’ self-esteem, self-confidence and respect for
oneself and others.
Start the class by introducing yourself to learners, telling your name and where you
come from.
Tell learners to draw themselves and how they want to be addressed.
Appreciate all drawings and contributions from students.
Explain to learners that it is very good to come to a learning center, where they can
learn a lot of skills that will support them throughout their lives.
Be sure to praise the learners for their efforts in coming to the center and reinforce
that you would like to see them every day and that you care about them.
Important Ideas: It is important for every learner to feel s/he is special and that other learners are
special as well. This can make the learners respect themselves and others. It is also
important for the teacher to positively express why we are in this center.
Education Crisis Response - Facilitator’s Guide
246 | Part 3 – Social and Emotional Learning lessons
On -going Assessment: Observe your learners. Are some of them shy about sharing with others? Are some
learners more willing to share? Ask more engaged learners to help others to participate
by pairing them with less engaged learners.
Step &
Icons
Time
Activity procedure
5 minutes Introduction
Introduce yourself to the class by saying: Good
morning/afternoon. My name is… I am from… Today
we will get to know one another and discuss why we are
all here together.
Ask the learners to introduce themselves one after the
other to their classmates, sharing their names and where
they come from.
After all learners have finished, tell them: Very good,
please clap for yourselves. I am so excited to see all of
you every day because I care a lot about you.
5 minutes Explain to learners: Each person has something
different about them, as well as some things in common.
Display a pictorial chart that shows people of different
characters (in size, height, gender, etc) as well as what
they do for a living.
Ask learners if they see any similarities in the
characters. Any differences?
Explain that we all have similarities and differences.
Say: It is good to have both similarities and differences
with our classmates. We can understand each other
based on our similarities, and learn new things based on
our differences.
10 minutes Tell learners to draw themselves, including things that
they want their classmates to know about them, such as
how many sisters and brothers you have or your favorite
food.
Pass out one sheet of paper and pencils or markers to
each student.
After 7 – 8 minutes say: Thank you all for drawing your
pictures. Can we now come back together to share
them?
Ask 3 – 4 learners to describe their drawings to the
class.
Say: Good work, very excellent effort and hardwork.
4 minutes Ask learners to turn to the person next to them and share
their drawings and compare the similarities and
differences with their partner.
Education Crisis Response - Facilitator’s Guide
247 | Part 3 – Social and Emotional Learning lessons
Step &
Icons
Time
Activity procedure
Direct learners to pair off so that all are included. Walk
around and encourage them to compare and find the
differences and similarities on the bases of their
characteristics, abilities and accomplishments.
Tell learners: Let us come back together now. Well
done working together and cooperating, you should clap
for yourselves.
5 minutes Assessment
Ask all learners to say their names and identify the
names of the students next to them.
Ask 3 -4 learners to identify their differences and
similarities on the basis of their characteristics, abilities
and accomplishments.
Ask 3 – 4 learners to share why they interested in
coming to class.
Tell learners: Well done, keep it up.
1 minute Conclusions/Review
Conclude the lesson by saying: It is important to know
all of your classmates by their names as well as identify
the things that make people different or similar. We
should be proud and excited to learn new things from our
classmates. Now clap for yourselves and look around our
class at all of the diverse students.
Reflection:
Were all students engaged?
Were there any students that were particularly shy or had trouble speaking out?
Did all of the students understand the language you were using in class?
If any students were particularly shy or did not understand the language, be sure to
speak with them individually to make sure they are comfortable in the class.
Education Crisis Response - Facilitator’s Guide
248 | Part 3 – Social and Emotional Learning lessons
Module 1: Week 1: Lesson 2 - Building Positive Rapport
Skills: Recognize and appreciate individual and group similarities and differences
Time: 30 minutes
Learning Objective: By the end of the lesson, learners should be able to:
1. Describe the ways that people are similar and different
2. Recognize and accept the difference of other cultures / ethnicities
3. Demonstrate how to work effectively with those who are different from oneself
Materials: paper, pens/markers, chalk, chalkboard, chart with various Nigerian tribes
Previous Knowledge: learners are familiar with their peers and teacher
Facilitator’s Tips:
Encourage the learners to identify similarities and differences among people,
especially in the introduction part of the lesson.
With the aid of a good diagram or chart, the learners should be shown how to
recognize and accept differences among various cultures and ethnicities
Important Ideas: It is important for the learners to recognize and accept that people are different, as
well as have things in common, respect other cultures and be able to work
together in the school and community.
On -going Assessment: Continue to check if the students are understanding why it is important to have
both similarities and differences. Are they accepting their differences within the
class? Are they understanding the idea of acceptance and working together?
Step &
Icons
Time Activity procedure
5 minutes Introduction
Facilitator should write the date and topic on the board.
Say to the learners: By the end of the lesson, you will be
able to understand how people differ, as well as have things
in common. We will also learn the importance of
respecting one another, developing good relationships and
living in peace.
Select 4 to 5 learners with differing characteristics to stand
in front of the class, ie: tall, short, dark, fair, male, female
etc.
Tell the learners to identify the physical differences as well
as the things they have in common
Say to the learners: people can be the same as well as
different in their behavior, such as waking up early or late,
preferring different foods, liking to be by themselves or
with others, etc.
Education Crisis Response - Facilitator’s Guide
249 | Part 3 – Social and Emotional Learning lessons
Step &
Icons
Time Activity procedure
Thank the learners who were standing and ask them to sit
back down.
5 minutes Ask 4 to 5 learners to name a tribe / ethnicity that exists in
Nigeria.
Write their answers on the chalkboard.
Display the chart or picture that shows a variety of tribes /
ethnic groups to learners.
Explain the different cultures. Emphasize that there are
differences and similarities. Also emphasize that all are
great and have their benefits.
Ask the class to identify some of the differences and
similarities between the groups (dressing, mode of
greeting, food, etc.)
7 minutes
Say: We will each think of five (5) things that are part of
our culture and things we do and like. These could be
foods you like, sports, activities, types of clothes, or
anything that is part of who you are. After two minutes of
quiet thinking, we will find a partner that we did not know
before the first class. Share with that partner the five (5)
things that are part of who you are. After a few minutes of
sharing with partners, we will come back together and
share with the class what we found the same and what we
found to be different with our partners.
Say: Now you have two minutes to think to yourself: what
are five (5) things that are part of who I am?
After 2 minutes, pair off the students. While they are
talking, walk around and make sure they are learning
about each other.
5 minutes Say: Let’s come back together as full class. Can each pair
share something that they found to be similar and
something different?
Make sure that the entire class responds. Highlight
similarities and differences.
Conclude by saying: It is so interesting and exciting to
hear all of the similarities and differences among our
class! This is a great example of how we can work with
someone who is different than us. Each group has found
some things they have in common and some things that
are different. I hope you enjoyed learning about your
classmate.
6 minutes Assessment
Ask learners to write down or draw five (5) ways how
people are different and similar.
Bring the group back together and ask:
Education Crisis Response - Facilitator’s Guide
250 | Part 3 – Social and Emotional Learning lessons
Step &
Icons
Time Activity procedure
o What is the importance of recognizing and
accepting other peoples’ cultures and ethnicities?
o Example answers: By accepting others cultures, we
are working towards creating a safe space; we all
have cultures so if we respect someone else’s, they
are more likely to respect our culture; better for
working and playing together, etc.
o How can we work with others in harmony?
o Example answers: Sharing, listening to what they
need, trying to relate to what they are thinking and
feeling, being patient and understanding, etc.
2 minutes Conclusions/Review
Conclude the lesson by reviewing all that has been
discussed. Emphasize the following main points:
o We described how people are different and similar
o We recognize and accept differences among various
cultures and ethnicities
o It is important for us to work effectively with other
people.
Answer any questions that the students bring up.
Say: Thank you for such a great class.
Reflection:
Did the learners enjoy sharing with one another?
Did the activity achieve the stated objective?
Did all learners fully participate?
Was the instructional material fully utilized?
Education Crisis Response - Facilitator’s Guide
251 | Part 3 – Social and Emotional Learning lessons
Module 1: Week 1: Lesson 3 - Respecting Differences
Skills: Recognize and appreciate individual and group similarities and differences
Time: 30 minutes
Learning Objective: By the end of the lesson, learners should be able to:
1. Understand that despite differences, they can all work together.
2. Recognize and appreciate individual and group similarities.
Materials: paper, pens/markers, tape
Previous Knowledge: Learners are familiar with their peers and teacher and the concept of
respecting differences.
Facilitator’s Tips:
Encourage learners to work together and begin to form friendships.
Important Ideas: By seeing the visible differences and how they can come together, the students will
learn to appreciate similarities and differences and working together.
On -going Assessment:
Continue to check if the students are being respectful of one another. Are they
excited by their similarities and differences?
Step &
Icons
Time Activity procedure
3 minutes Introduction
Facilitator should write the date and topic on the board.
Say: Earlier this week, we learned that people have
similarities and differences. People with differences, of
different cultures, ethnic groups can work together
harmoniously.
Ask: Can you share with me 5 examples of how people are
similar?
Examples: all eat food, all love other people, all sleep, etc.
Ask: How about 5 examples of how people are different?
Examples: eat different food, have different family units,
wear different clothes, etc.
10 minutes Say: Working together can be achieved by learners
playing games together and coming together in different
activities. Today we are going to show how all of us are
different, but together we can make something beautiful.
We will each draw our hands on a piece of paper. Each
person should take one piece of paper and a marker. Then,
a partner will trace the outline of your hand on the paper.
You will switch and trace the other partner’s hand. Once
you both the outline of your hands traced, you can
Education Crisis Response - Facilitator’s Guide
252 | Part 3 – Social and Emotional Learning lessons
Step &
Icons
Time Activity procedure
decorate inside the outline any way you want with the
markers.
Ask: Do you have any questions?
Say: When you have finished decorating your hand, you
can bring it up to me.
Pass around pieces of paper. Walk around as the students
are tracing each other’s’ hands and make sure they are
doing it correctly. Each student should end up with an
outline of their hand. Once students finish, if you have
scissors you can cut out the traced outline. Either way,
you can tape the hand prints on a larger piece of paper
that you hang on the wall, or directly on the wall.
7 minutes Once students are all finished, say:
Let’s all sit down. Do you see how all of our hands have
come together?
Ask: What is the same about all of the hands?
Example answers: they are small, they have 5 fingers, they
are about the same shape, etc.
What is different about each of our hands?
Example answers: they are slightly different sizes, shapes,
colors.
When all of our hands are put together – is it the same as
just one hand? How is it different?
Example answer: No, it is bigger, more colorful, more
interesting, and prettier. Generally – it is better.
7 minutes Assessment
Say: Based on our lessons this week, I want each of you to
individually think of one thing you learned about yourself,
and one thing you learned about our class and the other
people in the class. After one minute of thinking, we will
each share the two things we learned this week.
Give an example of the two things you learned. For
example: I learned that I get excited to meet new people
and I learned that we have a very diverse class who can all
get along and work together.
After one minute of thinking, go around and invite every
student to share the two things they learned.
Say: Thank you all for sharing what you learned this week.
3 minutes Conclusions/Review
Conclude the lesson by summarizing the lesson.
Education Crisis Response - Facilitator’s Guide
253 | Part 3 – Social and Emotional Learning lessons
Step &
Icons
Time Activity procedure
Say: Today we each traced our hands. Each of our hands
had similarities and differences. When we put all of the
hands together, we made something better and more
beautiful. This week, we have learned a lot about one
another. It has been very exciting to get to know our new
friends. I am very excited to see each and every one of you
for the rest of the year. Just like if we took one of the hands
off of the wall, it would not be as pretty and there would be
a hole, the same is true in our class. It is important that we
are all here so we can learn the most from each other.
Together we make an exciting, diverse, unique community.
I look forward to spending this time with all of you.
Answer any questions that the students bring up.
Reflection:
Did the learners enjoy drawing their hands? Did they understand that the hand-tracings were
a metaphor for their class? Were any students not fully involved?

Education Crisis Response - Facilitator’s Guide
254 | Part 3 – Social and Emotional Learning lessons
Module 1 Week 2: Lesson 1 - Introduction to classroom norms and creating a safe place
Skills: Learning to listen
Time: 30 minutes.
Learning Objective: By the end of the lesson, learners should be able to:
1. Name and demonstrate the basic rules for listening in a group
2. Identify the differences and similarities between the classroom and the home
environments
3. Listen respectfully to the thinking of others and share their own thinking
Materials: drawn- up story book for the story on “Ibrahim”
Previous Knowledge: Learners already know the names of one another and recognize
individual and group similarities and differences. They are also familiar with their home
environment.
Facilitator’s Tips:
It is important to emphasize that the classroom has many similarities and
differences to the home
Important Ideas: The concept of the classroom might be relatively new to most of
the learners. They need to be well familiar with learning to work together as a team
in the classroom and to pay attention in class.
On -going Assessment: Is everyone paying attention? Is everyone raising their
hands and waiting to be called on before talking? If not, try to emphasize this point.
Step &
Icons
Time Activity procedure
5 minutes Introduction
Teacher should review previous lesson by saying: Last
week we learned one another’s names and about one
another. To remind ourselves, let’s try to remember the
names of the people next to us.
Say: Turn to your partner next to you. Both should share
his or her name and favorite food. Then we will come back
together and introduce our neighbors.
Make sure that students are paired off. Walk around the
room and make sure that the students are talking about
their names and favorite foods. Give them 1 – 2 minutes as
necessary.
Say: Now we will come back together to share what we
learned about our partners.
Give the example, “My partner is… His/her favorite food
is…”
Call on one student to introduce their partner by name and
favorite food, then have the other partner introduce the first
Education Crisis Response - Facilitator’s Guide
255 | Part 3 – Social and Emotional Learning lessons
Step &
Icons
Time Activity procedure
student. Go around the class and make sure everyone has
been introduced.
Say: It is good we know and call each other by names. It
will make us be better friends.
Say: Now that we know the names of one another, let us
begin today’s lesson. Today we will discuss the similarities
and differences between our homes and our class. Then we
will talk about the importance of listening to one another.
5 minutes Say: It is good to know that when we are in a group, it is
important to listen when others talk.
Say: There are basic rules that guide talking and listening
in a group
Ask the group: What would you want others to do when
you are talking?
o Call on 3 – 4 students to answer
Ask the group: What would you do when others talk so that
you can hear what they are saying?
o Call on 3 – 4 different students to answer
Thank all of the students for their answers.
Summarize their responses and say:
o To learn from one another, we need to take turns
when speaking
o We do not want to say things that hurt others
o We need to pay attention when others speak
o We do not want to disturb others when someone
speaks
5 minutes Mention that our classrooms are similar to homes.
Ask the learners to identify some similarities between the
classroom and their homes
You may direct the class attention to
o There are rules and regulations at home and in the
classroom
o Adults protect and provide for the young in both the
classroom and at home
o Children have the responsibility to listen to adults at
home and in the classroom
o Sometimes children do basic chores to help the
home/class run smoothly
o We listen to each other in these places and respect
one another.
Commend the learners for their participation
5 minutes Say that although the classroom is similar to our homes,
there are also differences
Education Crisis Response - Facilitator’s Guide
256 | Part 3 – Social and Emotional Learning lessons
Step &
Icons
Time Activity procedure
Ask learners to identify differences between their homes
and the classrooms
Give the learners some examples if they are unable to come
up with ideas:
o The class has a chalkboard
o The class sitting arrangement
o There is different furniture
o Most of the people in the class are children
o In class, our time is very structured
5 minutes Tell the class to pay close attention as you tell them this
story:
Ibrahim* is coming to the classroom for the first time
today. He is very excited to learn. The teacher has invited
all of the students to draw pictures of their families and
then share back with the class. Ibrahim raises his hand to
share his pictures. The teacher calls on Ibrahim and he
stands to answer. As he begins to answer the students next
to him begin whispering. Ibrahim sits down and begins to
cry.
*As you tell the story, be sure that all are paying attention.
Be sure the name you use is not the name of any learner in
the class.
Ask the learners the following questions to determine if
they are listening and for them to share their own thoughts
and listen respectfully to the thinking of others.
o How do you think Ibrahim is feeling?
Example answer: sad, hurt, lonely
o Why do you think he is feeling sad?
Example answer: because his peers were
disrespectful, they did not listen to him,
o What could have the other students done instead of
whispering to make Ibrahim feel welcome in the
school?
Example answer: they should have actively
listened and responded to Ibrahim’s
presentation of his drawing.
Follow learners’ responses with further probing
questions, such as “Why?” to encourage them to share
their thoughts. Make sure that they are understanding that
the students should have instead listened respectfully. By
whispering, it made Ibrahim feel bad.
Thank them for their thoughtful responses
Education Crisis Response - Facilitator’s Guide
257 | Part 3 – Social and Emotional Learning lessons
Step &
Icons
Time Activity procedure
4 minutes Assessment
1) Tell the learners that they will first think about the following
questions, then pair off with a partner to discuss, and then
share their discussion with the class.
2) Post the following questions on a chalkboard or flip chart. Ask
the students to first think independently and then turn to the
student next to them to discuss in pairs.
3) What similarities do you see between your home and our
classroom?
4) What differences do you see between your home and our
classroom?
5) What would you want others to do when you talk?
6) What would you do when others talk?
7) Tell the learners: Thank you for pairing off. Let’s now come
back together. Who would like to share what they discussed in
their pairs?
a) Ask each of the questions to the group and facilitate
sharing of the outcomes from their pairs discussions.
8) Thank you for sharing what you discussed. You have all
thought very critically about similarities and differences
between the home and school. You have also shared very
important reasons that we listen when others talk.
1 minute Conclusions/Review
Conclude the lesson by saying that the class is an extension of our
home. Today we have learned that in the classroom we need to pay
attention. We need to talk one after another and listen to one
another in order to learn what each other has to offer. Tell the class
to clap for themselves for learning about their differences today.
Reflection:
After this lesson, students should be consistently listening in the classroom.
Make sure that students are respectful of one another when they speak. Otherwise,
remind them of this lesson.
Education Crisis Response - Facilitator’s Guide
258 | Part 3 – Social and Emotional Learning lessons
Module 1: Week 2: Lesson 2 - Developing Classroom Rules
Skills: Following direction; learning to listen; recognize and appreciate individual and group
similarities and differences
Time: 30 minutes
Learning Objective: By the end of the lesson, learners should be able to:
i) Discuss and create classroom/school rules
ii) Follow classroom/school rules
Materials: chalk, chalkboard, pieces of paper cut into stars for each student, markers, large
paper with the title “Class Rules,” tape
Previous Knowledge: Learners are used to following simple instruction, taking-turns at
home.
Facilitator’s Tips:
Ask learners how they think that classroom/school rules can help them to
become effective listeners in the classroom
Make sure that as the facilitator, you are modeling all of the rules the class
decides on.
Important Ideas:
Setting classroom/school rules is an important tool for enhancing orderliness,
effective listening and appreciating individual similarities and differences.
On -going Assessment:
Observe your learners whether they are observing rules in the classroom/school. If
not, why? Emphasize obeying the rule by doing the right things.
Step &
Icons
Time Activity procedure
5 minutes Introduction
Say: Do you remember the story of Ibrahim from our last
class? He was hurt because his friends did not listen to him
in class. In order to avoid any of us being hurt in our class,
today we will develop rules for our class.
Ask: Who is the leader in your home?
Most likely answer: father, mother
Ask: Who makes some rules in the house?
Most likely answer: father, mother
Say: Today we will all have the opportunity to be leaders
and make rules for our classroom. We will develop rules as
a whole class.
Say: In many classrooms, rules include: having a class
monitor/prefects, taking-turns before speaking, asking for
permission before going out and coming in, being
respectful of people and their opinions.

Education Crisis Response - Facilitator’s Guide
259 | Part 3 – Social and Emotional Learning lessons
Step &
Icons
Time Activity procedure
In our class, we will decide which of these rules to include
and which we do not want to include. Then we will also
decide on consequences for breaking rules.
5 minutes Say: Each person will get a small star. On that star, I want
you to draw a picture of a rule that you would like to
include in the class rules.
Pass out stars and markers. Give the students just a couple
of minutes to draw their rule.
15 minutes Say: Let’s all come back together with our rules. Each
person will share their star rule. I will write down each
rule on this paper for our classroom rules. Then we will
tape the star next to the appropriate rule.
As each child shares their rule, write it down. Then paste
that star next to the rule. After all of those rules have been
pasted, say:
What other rules do we want to include for our classroom?
You can also suggest some rules. The following are rules
that should be included, but also be sure to include others
that you think are necessary:
o Raise your hand before you speak
o Respect others’ opinions and property
o Follow directions
o Be nice to others
Once you have finished the rules, say:
Great job developing class rules! Remember that we
developed these together, so we all have to act by these
rules when we are in class. Does anyone have any
questions?
4 minutes Assessment
Ask each child to go around and say their favorite class
rule. Each child should be able to list one of the class
rules.
1 minute Conclusions/Review
Say: Thank you all for working together so well to create
class rules. I want you to all think about what it looks like
to follow these classroom rules and what consequences
might be appropriate for breaking them until our next class.
Reflection: Did the learners realize the benefits of setting the classroom/school rules?
Education Crisis Response - Facilitator’s Guide
260 | Part 3 – Social and Emotional Learning lessons
Module 1: Week 2: Lesson 3 - Following Class Rules
Skills: Following directions; Learning to Listen
Time: 30 minutes
Learning Objective: By the end of the lesson, learners should be able to:
1. Demonstrate taking turns speaking
2. Understand and demonstrate following classroom rules
3. Develop appropriate consequences for breaking classroom rules
Materials: Classroom Rules, another large piece of paper with the title “Consequences for
Breaking Classroom Rules”
Previous Knowledge: Learners have already established classroom rules, they should be
familiar with consequences for breaking rules at home.
Facilitator’s Tips:
Remember that consequences should be appropriate for the rule they broke.
They should NEVER involve any physical punishment. They should ALWAYS
teach the student why they should not break that rule. Use knowledge from your
training session on positive discipline.
Important Ideas: Demonstrating classroom/school rules is an important tool for enhancing
orderliness, effective listening and appreciating individual similarities and
differences.
On -going Assessment:
Observe your learners whether they are correctly practicing the set rules in the
classroom/school. If not, why? Promptly remedy where they are not correctly
practicing the set rules
Step &
Icons
Time Activity procedure
3 minutes Introduction
Review the class rules.
Say: Throughout lesson we will practice the rules for the
classroom and demonstrate appropriate consequences for
breaking them.
Ask learners to mention 2 or 3 of the classroom/school
rules.
Say: Today we will see what the rules look like in practice.
We will act out what we think
7 minutes Say: In small groups, we will act out a role play of what happens
when we break a class rule. Each group will be assigned one rule.
In each group, one person will play the teacher, one will play the
student breaking the rule, and the other group members will play
classmates. Decide in your small groups what the appropriate
consequence for breaking your rule will be. When you act out the
short role play to the class, we will decide if that is an appropriate
Education Crisis Response - Facilitator’s Guide
261 | Part 3 – Social and Emotional Learning lessons
Step &
Icons
Time Activity procedure
consequence for breaking that rule. The presentations on your role
plays should only be 1-2 minutes.
Ask: What questions do you have?
Break the class up into the number of groups that there
are rules. Give them a few minutes to select roles and plan
out their role play.
15 minutes Say: We will come back together as a class and present
our role plays.
Invite each group to present their role play. After each
presentation clap for the actors. Then ask the class:
Is the consequence that this group demonstrated an
appropriate consequence for their rule?
If so, write it on the “Consequences for Breaking
Classroom Rules” sheet. Otherwise, ask the students for a
better example of an appropriate consequence and write
that on the sheet.
Congratulations to all of your for your role plays and for
creating such a great list of consequences for breaking
class rules.
4 minutes Assessment
Ask each child to go around and say one class rule and the
corresponding consequence for breaking that rule. Each
child should be able to list one of the class rules.
1 minute Conclusions/Review
Say: This week we have created a set of classroom rules
and consequences together. These will be the guiding
principles for our time together over the next few months. I
am so excited to share this exciting journey with you where
we will learn even more about ourselves and one another
and continue to develop a respectful community.
Reflection:
Did the learners realize the benefits of setting and following the classroom/school
rules?
Did the role play convey the anticipated message?
Education Crisis Response - Facilitator’s Guide
262 | Part 3 – Social and Emotional Learning lessons
Module 1: Week 3: Lesson 1 - Paying Attention in Class
Skills: Focusing attention
Time: 30 minutes
Learning Objective: By the end of the lesson, learners should be able to:
1. Identify strategies for focusing attention
2. Identify classroom distractions
3. Use positive self-talk to stay focused and on task
Materials: blackboard, chalk, timer
Previous Knowledge: Students know that there are certain behaviors expected of them in a
classroom.
Facilitator’s Tips:
Throughout the class, commend students who are doing a particularly good
job of paying attention.
Important Ideas:
Students should understand what distracts them, and what strategies work for them
in paying attention.
On -going Assessment:
Are students able to stay on-task? Do some students get very distracted by others?
Step &
Icons
Time Activity procedure
5 minutes Introduction
Warm up the class with a short activity. The class will
break up into small groups and decide on a song to sing in
their small group.
Say: You will begin today by counting off into groups of
five (5). In our small groups, each group will choose a song
to sing. Think of a song you sing in your home or
community. As soon as your group decides on a song, you
will sing the song over and over again until I raise my
hand. When I raise my hand, stop singing and sit back
down in your groups. Do you have any questions?
Have the students count off into 5 groups. Once they are in
their groups, walk around and assist them in selecting a
song if they are having trouble. Once all groups have
begun singing, let them all sing at the same time for 2
minutes and then raise your hand. Wait for all children to
be quiet and in their seats.
7 minutes Say: I hope you enjoyed singing your songs. Did you find
it difficult to pay attention to your song while the other
groups were singing?
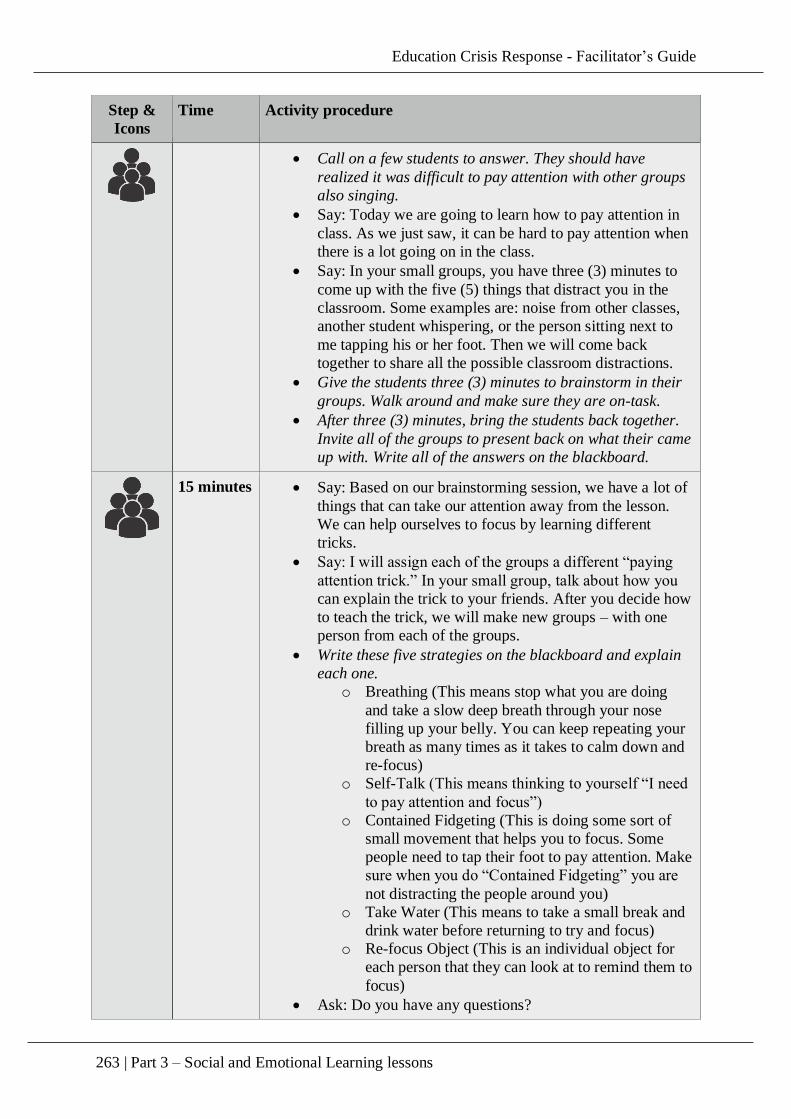
Education Crisis Response - Facilitator’s Guide
263 | Part 3 – Social and Emotional Learning lessons
Step &
Icons
Time Activity procedure
Call on a few students to answer. They should have
realized it was difficult to pay attention with other groups
also singing.
Say: Today we are going to learn how to pay attention in
class. As we just saw, it can be hard to pay attention when
there is a lot going on in the class.
Say: In your small groups, you have three (3) minutes to
come up with the five (5) things that distract you in the
classroom. Some examples are: noise from other classes,
another student whispering, or the person sitting next to
me tapping his or her foot. Then we will come back
together to share all the possible classroom distractions.
Give the students three (3) minutes to brainstorm in their
groups. Walk around and make sure they are on-task.
After three (3) minutes, bring the students back together.
Invite all of the groups to present back on what their came
up with. Write all of the answers on the blackboard.
15 minutes Say: Based on our brainstorming session, we have a lot of
things that can take our attention away from the lesson.
We can help ourselves to focus by learning different
tricks.
Say: I will assign each of the groups a different “paying
attention trick.” In your small group, talk about how you
can explain the trick to your friends. After you decide how
to teach the trick, we will make new groups – with one
person from each of the groups.
Write these five strategies on the blackboard and explain
each one.
o Breathing (This means stop what you are doing
and take a slow deep breath through your nose
filling up your belly. You can keep repeating your
breath as many times as it takes to calm down and
re-focus)
o Self-Talk (This means thinking to yourself “I need
to pay attention and focus”)
o Contained Fidgeting (This is doing some sort of
small movement that helps you to focus. Some
people need to tap their foot to pay attention. Make
sure when you do “Contained Fidgeting” you are
not distracting the people around you)
o Take Water (This means to take a small break and
drink water before returning to try and focus)
o Re-focus Object (This is an individual object for
each person that they can look at to remind them to
focus)
Ask: Do you have any questions?
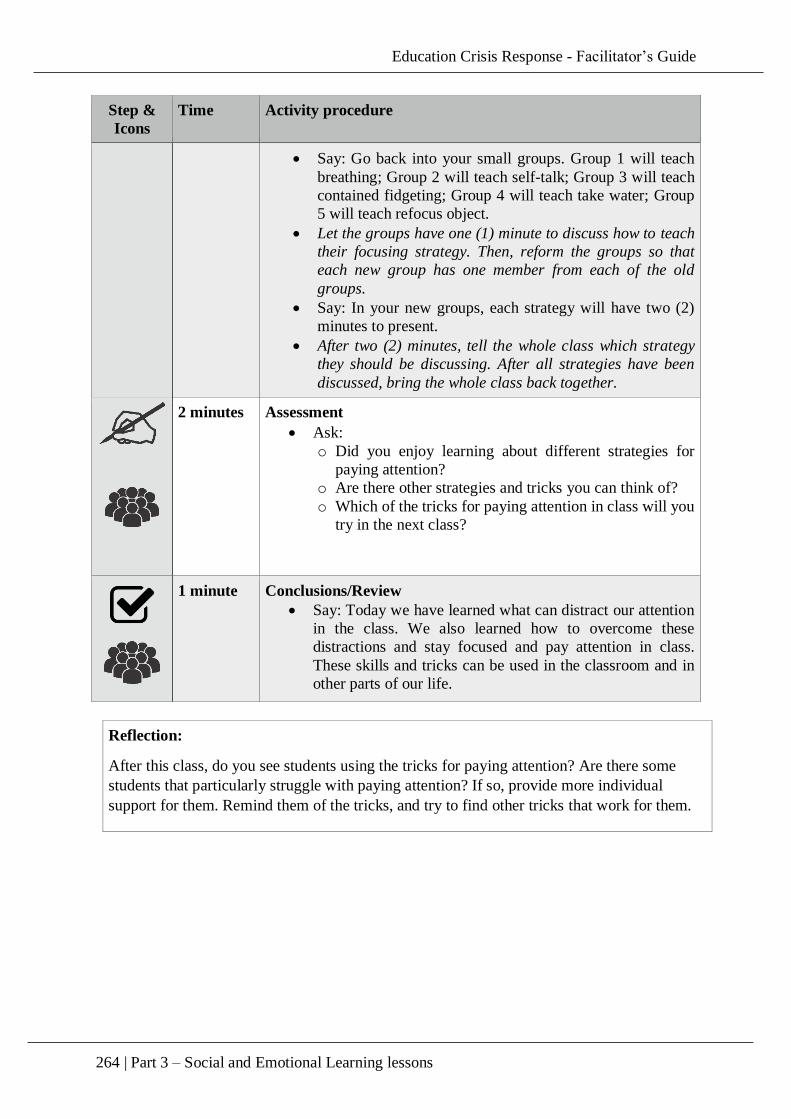
Education Crisis Response - Facilitator’s Guide
264 | Part 3 – Social and Emotional Learning lessons
Step &
Icons
Time Activity procedure
Say: Go back into your small groups. Group 1 will teach
breathing; Group 2 will teach self-talk; Group 3 will teach
contained fidgeting; Group 4 will teach take water; Group
5 will teach refocus object.
Let the groups have one (1) minute to discuss how to teach
their focusing strategy. Then, reform the groups so that
each new group has one member from each of the old
groups.
Say: In your new groups, each strategy will have two (2)
minutes to present.
After two (2) minutes, tell the whole class which strategy
they should be discussing. After all strategies have been
discussed, bring the whole class back together.
2 minutes Assessment
Ask:
o Did you enjoy learning about different strategies for
paying attention?
o Are there other strategies and tricks you can think of?
o Which of the tricks for paying attention in class will you
try in the next class?
1 minute Conclusions/Review
Say: Today we have learned what can distract our attention
in the class. We also learned how to overcome these
distractions and stay focused and pay attention in class.
These skills and tricks can be used in the classroom and in
other parts of our life.
Reflection:
After this class, do you see students using the tricks for paying attention? Are there some
students that particularly struggle with paying attention? If so, provide more individual
support for them. Remind them of the tricks, and try to find other tricks that work for them.
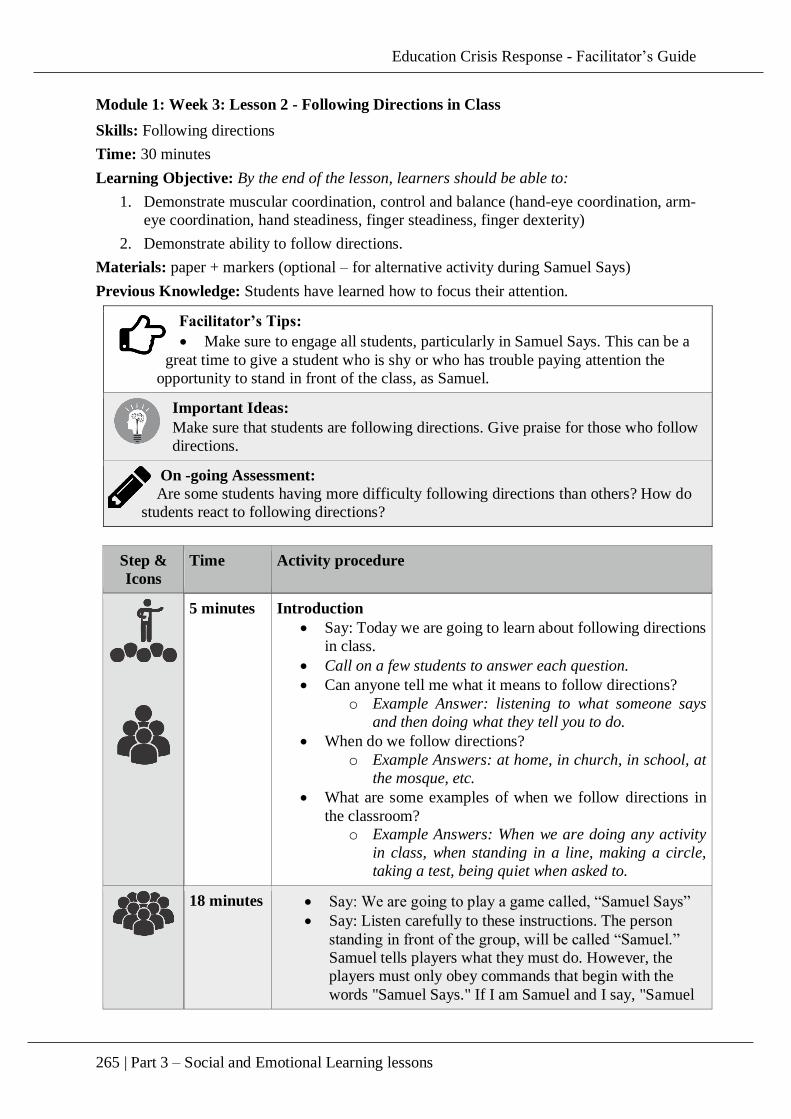
Education Crisis Response - Facilitator’s Guide
265 | Part 3 – Social and Emotional Learning lessons
Module 1: Week 3: Lesson 2 - Following Directions in Class
Skills: Following directions
Time: 30 minutes
Learning Objective: By the end of the lesson, learners should be able to:
1. Demonstrate muscular coordination, control and balance (hand-eye coordination, arm-
eye coordination, hand steadiness, finger steadiness, finger dexterity)
2. Demonstrate ability to follow directions.
Materials: paper + markers (optional – for alternative activity during Samuel Says)
Previous Knowledge: Students have learned how to focus their attention.
Facilitator’s Tips:
Make sure to engage all students, particularly in Samuel Says. This can be a
great time to give a student who is shy or who has trouble paying attention the
opportunity to stand in front of the class, as Samuel.
Important Ideas:
Make sure that students are following directions. Give praise for those who follow
directions.
On -going Assessment:
Are some students having more difficulty following directions than others? How do
students react to following directions?
Step &
Icons
Time Activity procedure
5 minutes Introduction
Say: Today we are going to learn about following directions
in class.
Call on a few students to answer each question.
Can anyone tell me what it means to follow directions?
o Example Answer: listening to what someone says
and then doing what they tell you to do.
When do we follow directions?
o Example Answers: at home, in church, in school, at
the mosque, etc.
What are some examples of when we follow directions in
the classroom?
o Example Answers: When we are doing any activity
in class, when standing in a line, making a circle,
taking a test, being quiet when asked to.
18 minutes Say: We are going to play a game called, “Samuel Says”
Say: Listen carefully to these instructions. The person
standing in front of the group, will be called “Samuel.”
Samuel tells players what they must do. However, the
players must only obey commands that begin with the
words "Samuel Says." If I am Samuel and I say, "Samuel
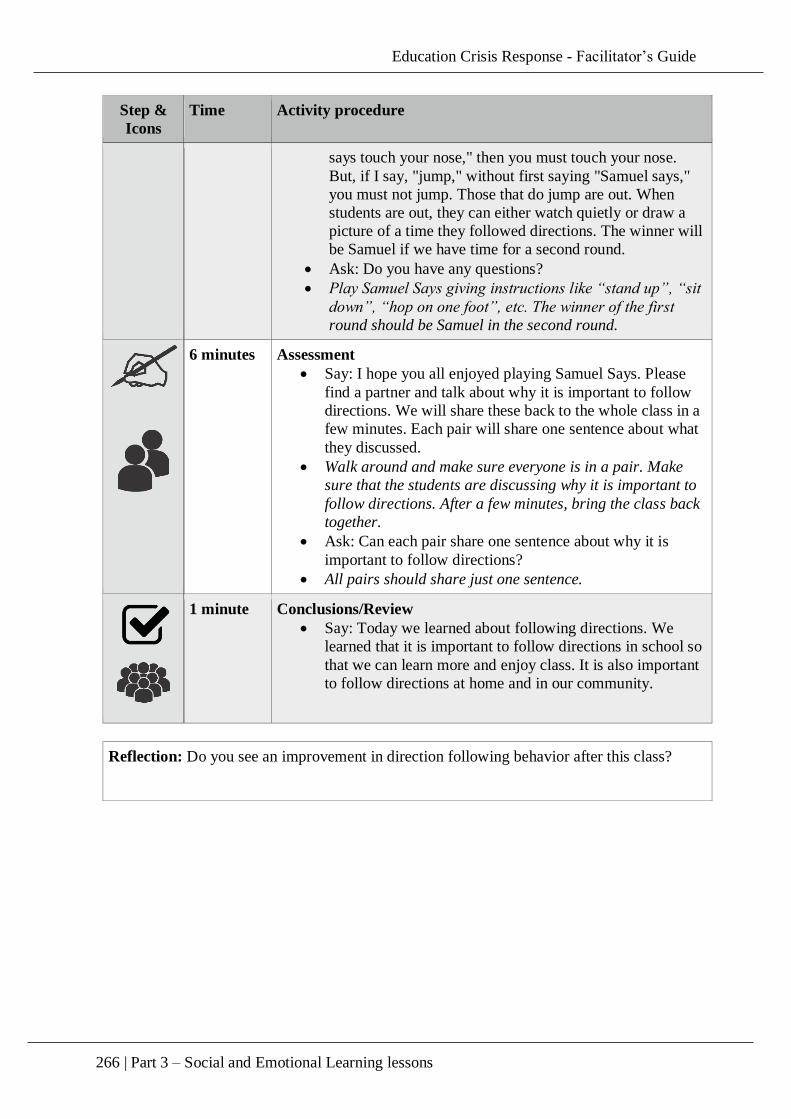
Education Crisis Response - Facilitator’s Guide
266 | Part 3 – Social and Emotional Learning lessons
Step &
Icons
Time Activity procedure
says touch your nose," then you must touch your nose.
But, if I say, "jump," without first saying "Samuel says,"
you must not jump. Those that do jump are out. When
students are out, they can either watch quietly or draw a
picture of a time they followed directions. The winner will
be Samuel if we have time for a second round.
Ask: Do you have any questions?
Play Samuel Says giving instructions like “stand up”, “sit
down”, “hop on one foot”, etc. The winner of the first
round should be Samuel in the second round.
6 minutes Assessment
Say: I hope you all enjoyed playing Samuel Says. Please
find a partner and talk about why it is important to follow
directions. We will share these back to the whole class in a
few minutes. Each pair will share one sentence about what
they discussed.
Walk around and make sure everyone is in a pair. Make
sure that the students are discussing why it is important to
follow directions. After a few minutes, bring the class back
together.
Ask: Can each pair share one sentence about why it is
important to follow directions?
All pairs should share just one sentence.
1 minute Conclusions/Review
Say: Today we learned about following directions. We
learned that it is important to follow directions in school so
that we can learn more and enjoy class. It is also important
to follow directions at home and in our community.
Reflection: Do you see an improvement in direction following behavior after this class?

Education Crisis Response - Facilitator’s Guide
267 | Part 3 – Social and Emotional Learning lessons
Module 1: Week 3: Lesson 3 - How to Learn
Skills: Develop inhibitory / impulse control
Time: 30 minutes
Learning Objective: By the end of the lesson, learners should be able to:
1. Demonstrate ability to form a line and a circle without making noise as a part of a
group
2. Understand and demonstrate when to form a line and a circle in a classroom setting.
Materials: none
Previous Knowledge: Learners can identify strategies for focusing attention and classroom
distractions
Facilitator’s Tips: Keep an eye on which students are able to follow directions; encourage students
to work together and self-monitor/self-manage.
Important Ideas: The lesson should be focused on the students’ ability to focus and control their
impulses, and understand classroom norms.
On -going Assessment:
The teacher observes the learners’ ability to pay attention to the lesson
The teacher should monitor the learners while forming lines and circles and
provide feedback and corrections when necessary.
Step &
Icons
Time Activity procedure
5 minutes Introduction
Say: During our last lessons we discussed following
directions and identifying classroom distractions.
Today we will learn how we can control our actions to
have more fun and learn better in class.
Ask: Do you know what we do to go from one place to
the next as a class?
o Answer: line up
Ask: When do we line up in our class?
o Answer: to go from one place to another, to wait
for food/latrine, etc.
Ask: Do you know what shape we make in the middle of
the room when we all want to come together?
o Answer: a circle
Ask: When do we make a circle in our class?
o Answer: When we are doing group activities,
when we are sharing, to read as a class, etc.
In order to make these shapes, we need to be able to
control our bodies and move quietly and efficiently.
Education Crisis Response - Facilitator’s Guide
268 | Part 3 – Social and Emotional Learning lessons
Step &
Icons
Time Activity procedure
We will learn about making a line and a circle as a group
today.
5 minutes Say: We will split into three (3) groups for a small
competition. Each group will have the task of lining up
in order by height. During this exercise, you can talk to
one another. Once you are in a line, you must be very
quiet and still in order to win.
o Demonstrate for the learners what it looks like to
stand quiet and still.
o Count off “1, 2, 3, 1, 2, 3…” so that the entire
class is split into three groups.
Say: All of the 1’s should go over here, 2’s over here,
and 3’s over here.
o Decide on a fair “prize”, and tell the learners that
after this practice round, the first group to line up
by height will get that “prize.”
Say: When I say go, you will begin to line up by height
in your groups. Ready, set, go!
o Allow the groups a few minutes until the first
group is finished.
Check and make sure the group is actually in height
order.
Clap and say: Congratulations, this group has lined up by
height. Congratulations to all teams for lining up by
height.
5 minutes Say: In your same groups, we will now line up by
birthday. However, this time you cannot speak in order
to get yourselves into the line. So, you will have to find
an alternative way to communicate while being calm and
silent. Does anyone have any ideas for how to
communicate without using words?
o Ask a few students for responses. They could
include hand gestures, facial expressions, etc.
Say: When I say go, you will begin to line up by birthday
in your groups. Ready, set, go!
o Allow the groups a few minutes until the first
group is finished.
Ask the group to go down the line and say their
birthdays, to make sure they are truly in birthday order.
Clap and say: Congratulations, this group has lined up by
birthday. Congratulations to the other groups, too, for
lining up by birthday.
Education Crisis Response - Facilitator’s Guide
269 | Part 3 – Social and Emotional Learning lessons
Step &
Icons
Time Activity procedure
5 minutes Say: Now we will work together so we all line up in one
line by hair length.
Say: When I say go, you will begin to line up by hair
length. Ready, set, go!
o Allow the class a few minutes until they are
finished.
Make sure they are truly in order.
Clap and say: Congratulations, you have all lined up by
hair length.
5 minutes Say: Can we turn this line into a circle, while keeping
silent? There are many times when we need to be in a
circle as a class. We are now going to see how quickly
we can move from standing in a line to sitting in a circle
on the ground. Remember, do not say anything!!
Say: When I say go, you can get into a circle as quickly
and quietly as you can. Are you ready? Ready, set, go!
Give them a few minutes, as needed, to get into a circle.
While they are moving, watch closely to make sure no
one is speaking or being aggressive with one another.
Once they are in a circle, say: Great job. Give yourselves
a clap!
3 minutes Assessment
Now that the class is seated and quiet, you can have a
short discussion on why it is important to make a line and
a circle in class.
Ask:
o Why do you think it is important to make a line in
class?
o When do you think we make a line?
When we go from one place to another,
waiting for food, etc.
o Why do you think it is important to make a circle
in class?
o So we can all see one another, work together
o When do you think we make a circle?
When we are reading together, doing a
whole group activity, sharing.
o Why did we make sure to be still and quiet when
making a line and a circle? Did it help us?
o In order to be more efficient,
2 minutes Conclusions/Review
Thank the class for their participation in the competitions
and doing such a great job making lines and circles. All
Education Crisis Response - Facilitator’s Guide
270 | Part 3 – Social and Emotional Learning lessons
Step &
Icons
Time Activity procedure
of the winning teams will receive their prizes tomorrow
(or during that class, depending on what you decide for
the prize)
Say: It is important that when we need to make a line in
class, you are able to do it as quickly and quietly as we
did today. The same is true for making a circle. We will
be able to do many more fun activities if we can make a
line or a circle quickly and quietly.
Reflection:
Were there some children who struggled to make a line or a circle?
Were all students included in the activity?
After this lesson, are the students better at making lines and circles together?
Education Crisis Response - Facilitator’s Guide
271 | Part 3 – Social and Emotional Learning lessons
Module 1: Week 4: Lesson 1 - Building Our Memory
Skills: Working memory
Time: 30 minutes
Learning Objective: By the end of the lesson, learners should be able to:
1. Understand the importance of their memory
2. Apply attention, memory, and impulse control skills in a brain-building game
Materials: N/A
Previous Knowledge: Students know how to follow directions.
Facilitator’s Tips:
Try to clear as much space in your classroom as possible. You may
need to do this lesson outside where there is space.
This lesson requires a lot of energy, so make sure you are ready to give the class a lot
of energy.
You will need enough decks of cards for the next lesson (Module 1: Week 4: Lesson
2) for a deck for every 4 – 5 students. If you would like to invite students to bring
them in, remember to ask at the end of this lesson.
Important Ideas:
Students will be asked to remember multiple different things throughout the class.
On -going Assessment:
Are students performing the correct activity? Are they focused and paying
attention?
Step &
Icons
Time Activity procedure
10 minutes Introduction
Say: Last week we learned about focusing our attention
to learn. The next step is to be able to use what we learn
in the future. We call this memory.
Ask: What is one thing you remember from our lessons
last week?
Go around so that everyone in the class quickly says
one thing they remember from last week’s classes.
Say: Do you see all of the exciting things we
remember? Why do you think our memory is important
for learning?
Go around and ask a few students to answer. Example
answer: without memory, we cannot use what we
learned in the future.
5 minutes Say: Today we are going to create handshake buddies.
During the class, whenever I say “handshake buddy”
you have to go to the person you are paired with today
and do your secret handshake. Each pair will come up
Education Crisis Response - Facilitator’s Guide
272 | Part 3 – Social and Emotional Learning lessons
Step &
Icons
Time Activity procedure
with their own secret handshake that is 10 movements.
It can be whatever you want it to be – the only rules are
that no one can get hurt and you cannot make any
noise. Take the next few minutes to create and practice
your handshake. You have to remember it later in the
day and in the week!
Break the class into pairs. Try to pair students that are
not friends with one another. Give them 3 – 5 minutes
to make and practice their handshake.
11 minutes Say: In just a moment, we will count off by five (5).
You should not end up in the same group as your
handshake buddy. In those groups, you will do a
charade – which means to act out an activity. I will call
out an activity and then all four (4) of you will do the
movement in a circle. Remember the activities I call
out. There will be four rounds. In the first round, I will
call out each of the five (5) activities and then you will
act out the activity I called. In the second round, I will
call out all five (5) activities, and then you will do all
five (5) in a row. In the third round, you will have to
remember all five (5) activities to act out. In the fourth
round, and you will have to call out all of the five (5)
activities as I said them. Except for in the fourth round,
you cannot make any sounds. Do you have any
questions?
Count the students off so they are in five (5) groups.
Say: Round one. When I call out an activity, you will
act out the activity in your small groups. Ready?
o Kick a football (wait 20 seconds for learners to
do the activity)
o Cook a stew (wait 20 seconds for learners to do
the activity)
o Dance (wait 20 seconds for learners to do the
activity)
o Greet a friend (wait 20 seconds for learners to
do the activity)
o Hold your baby sister (wait 20 seconds for
learners to do the activity)
Say: Round two: I will call out all five (5) activities
and then you will do all of them in a row. Ready?
o Kick a football; Cook a stew; Dance; Greet a
friend; Hold your baby sister – Go!
Say: Round three: Act out the five (5) activities!
After they have finished round three, say: Handshake
buddy!

Education Crisis Response - Facilitator’s Guide
273 | Part 3 – Social and Emotional Learning lessons
Step &
Icons
Time Activity procedure
Students should all go find their handshake buddy and
perform their handshake.
Say: Great job finding your handshake buddies! Now
all together as a class, in round four we will call out all
of the five (5) activities as I said them.
Let the class lead, but chime in if they needs help: o
Kick a football; Cook a stew; Dance; Greet a
friend; Hold your baby sister
Say: Great job, class. Now let’s all go back to our
seats.
3 minutes Assessment
As students are heading to their seats, say: Handshake
buddy!
Students should all go find their handshake buddy and
perform their handshake.
Say: Give yourselves a round of applause for having
such good memories! Let’s all head back to our seats
now
1 minute Conclusions/Review
Say: Great job today. We have discussed why working
memory is important for learning and learned different
games that test our memories. Do not forget your
handshake buddy or your second partner handshake for
next class. You will need both of them later in the
week!
Reflection:
Are the students enjoying playing the memory games? Are they performing the right
activities, by memory?
Education Crisis Response - Facilitator’s Guide
274 | Part 3 – Social and Emotional Learning lessons
Module 1: Week 4: Lesson 2 - Using Our Memory
Skills: Working memory
Time: 30 minutes
Learning Objective: By the end of the lesson, learners should be able to:
1. Apply attention, memory, and impulse control skills in a brain-building game
2. Demonstrate ability to hold information in ones’ short-term memory and utilize it in
an activity
Materials: standard decks of cards, enough for one deck for 4-5 children in your class (if you
know students might have a deck of cards, ask students to bring in decks of cards in lesson
1); paper/notebook; pens/pencils
Previous Knowledge: Learners are familiar with the concept of memory and are aware of its
importance
Facilitator’s Tips:
Throughout the class, make sure all of the learners are on the same page and
are understanding and able to use their memories.
It is very important that you positively address any behavior issues and student
challenges immediately in this lesson – provide alternatives or simplify the games,
assist those who are struggling.
Important Ideas:
Learners should be focused on applying their working memory skills
On -going Assessment: Are students performing the correct activity? Are they focused and paying attention?
Are they able to remember which cards were where?
Step &
Icons
Time Activity procedure
6 minutes Introduction
Say: Handshake Buddy!
All of the students should go find their handshake buddy
and perform their handshake. Some students may not
remember what they are supposed to do, so you can
remind them that they should find their handshake
buddy and perform their handshake.
Say: Great job! You remembered your handshakes. You
can sit down now. Yesterday we talked about the
importance of our memory. We also played some
games that required our memory. We will play more
memory games today. First, I want you to find someone
other than your handshake buddy and teach them your
handshake. Make sure you practice both handshakes,
because you will need to remember this later. This
person is called your “second partner.”
Education Crisis Response - Facilitator’s Guide
275 | Part 3 – Social and Emotional Learning lessons
Step &
Icons
Time Activity procedure
Students should find someone new and spend 3 – 5
minutes teaching their handshake and learning their
second partner’s handshake.
15 minutes Say: We are going to play a game in groups of four or
five students.
Each group will have a deck of cards. To set up for the
game, we will shuffle the cards and place them face
down in rows, like this.
Demonstrate laying out playing cards in a row for the
students.
Say: To play the game, the first player will choose two
cards to turn over. If the two cards are a matching pair
(for example two Jacks) then they take the two cards
and start a stack. The player is awarded another turn
for making a match and goes again. If the cards are not
a match they are turned back over in the same spots. It
is the end of the player’s turn when she or he is no
longer able to make a matching pair.
Say: The next player then chooses two cards to turn
over. If the first is a match for one of the cards the
previous player turned over, they try to remember it
was to make a pair. If they are successful at making a
match they place the cards in their stack and choose
another card.
Say: This continues until all the cards are collected by
players. The winner is the one with the most matching
pairs at the end of the game.
Say: Do you have any questions?
Once you have answered any questions, say: You will
have 10 minutes to play in your groups.
Break the students into groups of 4 – 5 and give each
group a deck of cards. Assist them in laying out the
cards if they need.
Give the groups ten (10) minutes to play. Let them
know around nine (9) minutes to begin wrapping up.
4 minutes After ten (10) minutes of the memory card game, call
out: Handshake buddy!
Students should all go find their handshake buddy and
perform their handshake.
Say: Good job finding your handshake buddy. Now,
find your second partner and practice both of your
handshakes. You will need to remember these for
tomorrow.
Education Crisis Response - Facilitator’s Guide
276 | Part 3 – Social and Emotional Learning lessons
Step &
Icons
Time Activity procedure
4 minutes Assessment
Say: Think of one thing you learned in this activity and
one thing you found challenging. Write or draw what
you learned and what you found challenging on a piece
of paper. Make sure to put your name on your paper
Pass around paper and pencils and make sure that all
students have them.
1 minute Conclusions/Review
Say: Today we continued to work on improving our
memories through fun games. You were able to use
your short and long term memory – short term in the
card game and long term to remember your handshakes.
Do not forget your handshakes. Please pass in your
drawings/writings of what you learned and what was
challenging to me on your way out.
Reflection:
Look through the drawings/writings of the learners before the next lesson.
What was challenging for them? Do they understand how to use their memories?
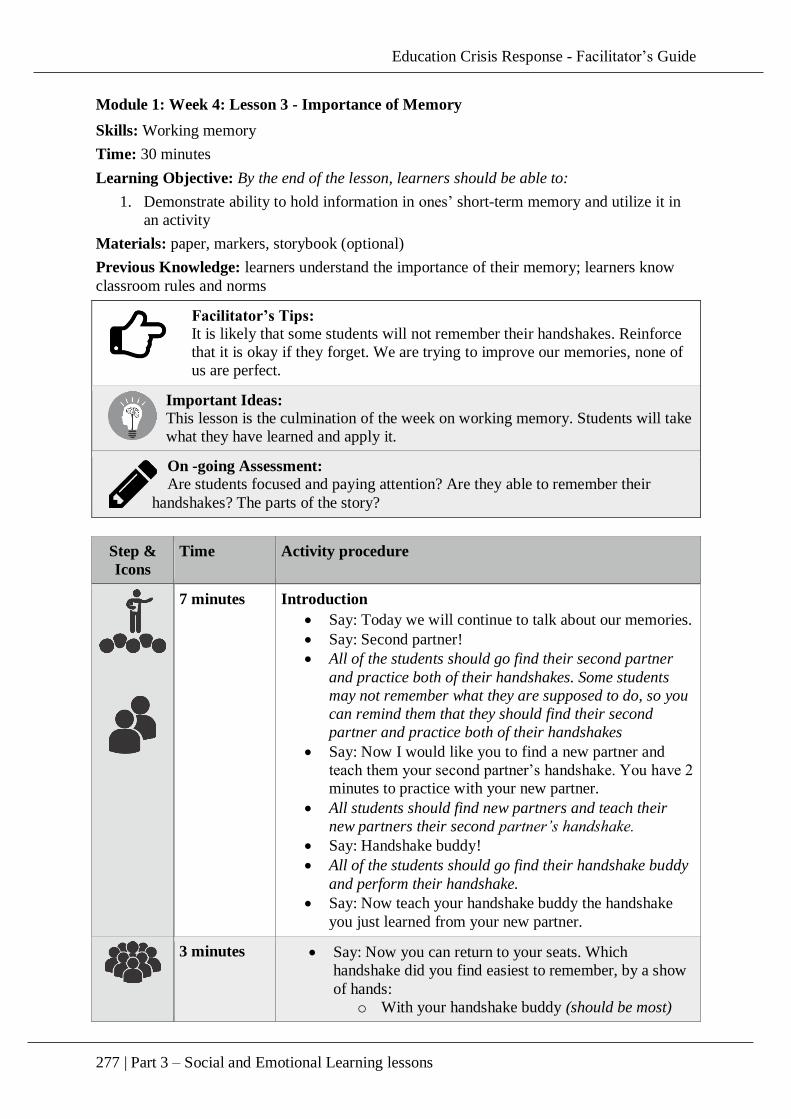
Education Crisis Response - Facilitator’s Guide
277 | Part 3 – Social and Emotional Learning lessons
Module 1: Week 4: Lesson 3 - Importance of Memory
Skills: Working memory
Time: 30 minutes
Learning Objective: By the end of the lesson, learners should be able to:
1. Demonstrate ability to hold information in ones’ short-term memory and utilize it in
an activity
Materials: paper, markers, storybook (optional)
Previous Knowledge: learners understand the importance of their memory; learners know
classroom rules and norms
Facilitator’s Tips: It is likely that some students will not remember their handshakes. Reinforce
that it is okay if they forget. We are trying to improve our memories, none of
us are perfect.
Important Ideas: This lesson is the culmination of the week on working memory. Students will take
what they have learned and apply it.
On -going Assessment: Are students focused and paying attention? Are they able to remember their
handshakes? The parts of the story?
Step &
Icons
Time Activity procedure
7 minutes Introduction
Say: Today we will continue to talk about our memories.
Say: Second partner!
All of the students should go find their second partner
and practice both of their handshakes. Some students
may not remember what they are supposed to do, so you
can remind them that they should find their second
partner and practice both of their handshakes
Say: Now I would like you to find a new partner and
teach them your second partner’s handshake. You have 2
minutes to practice with your new partner.
All students should find new partners and teach their
new partners their second partner’s handshake.
Say: Handshake buddy!
All of the students should go find their handshake buddy
and perform their handshake.
Say: Now teach your handshake buddy the handshake
you just learned from your new partner.
3 minutes Say: Now you can return to your seats. Which
handshake did you find easiest to remember, by a show
of hands:
o With your handshake buddy (should be most)

Education Crisis Response - Facilitator’s Guide
278 | Part 3 – Social and Emotional Learning lessons
Step &
Icons
Time Activity procedure
o Your second partner’s
o Your new partner’s, the one you learned today
Ask: Which handshake was hardest to remember?
o With your handshake buddy
o Your second partner’s
o Your new partner’s, the one you learned today
Say: Over the course of this week, we have practiced
with our handshake buddies the most. We can train our
memories to work better if we practice a lot.
5 minutes Say: I am going to read you a short story. After I finish
the story, each of you will have the opportunity to draw
a picture showing what happened in the story. Pay very
close attention to the story so you know what to draw in
your picture.
You can choose to read the story below, or select a
short children’s storybook, or tell a folktale that is
appropriate for your students.
Story:
There once was a gentle lion king who lived in a far away
land. He wore a crown to show he was king. He ruled
kindly over all of the other animals. All of the other
animals – the tortoises, the monkeys, even the fish loved
him. He had a brother who looked just like him, but he
was not as kind and gentle. His brother was very angry
that he was not king. One day, he slipped into the king’s
home and stole his crown. The brother of the king walked
outside and put on the crown, which showed the other
animals he was king. Immediately, he told the cheetah
ruler to go and bring him all of the best animals for him
to eat. He wanted a feast that was so big, he could not
possibly finish it. The cheetah thought this was odd,
because the king usually only ate what he needed to eat
in order to protect the other animals. But, she knew to
listen to the king. So, she brought together her cheetahs
and started to begin the hunt. On her way out, she saw
the king – who was out on his morning walk. He said
“Hello Mrs. Cheetah!” She knew it was the king and that
it must have been his evil brother who told her to kill so
many animals. She told him everything. He thanked her
and ran quickly back to find his brother in his lair. He
said to his brother, “Brother, it is not good to pretend to
be someone you are not! And worse yet, you used that
power for evil – to kill many animals! You should
apologize and make it right to the animals.” The king’s
brother knew he had done something very bad. He gave
the king back his crown and called all the animals

Education Crisis Response - Facilitator’s Guide
279 | Part 3 – Social and Emotional Learning lessons
Step &
Icons
Time Activity procedure
together to apologize for his actions. He promised to
never do it again. After that day, the king’s brother
became a good friend to all of the animals. He had
learned how to be kind and gentle like his brother.
10 minutes Pass out paper and markers. Give the students ten (10)
minutes to draw the story.
3 minutes Assessment
Say: You have all drawn such lovely pictures. Now, I
would like you to find a partner to share your picture
with. Show your partner what parts of the story you were
able to draw.
Give the pairs three (3) minutes to share their drawings.
Walk around to listen and to hear if they were able to
correctly remember parts of the story
2 minutes Conclusions/Review
Say: Let’s come back together as a class. This week, we
have learned a lot about how we can use our memory.
Can I have three volunteers share with us why it is
important to use our memory?
Call on three students to share why memory is
important.
Say: Great, thank you all. We also learned, with the
handshakes, that the more we practice, the more likely
we are to remember. So, when you really need to
remember something, what should you do?
Whole class should say: Practice!
Say: Yes, we should practice to improve our memory.
Memory is very important for learning. As you leave
class, please hand me your drawings. I will put them up
as a decoration.
Reflection:
Put the students’ drawings on the walls of your class.
Check to see if their drawings represented the story you read.
If they do not, you should revisit the listening to writing/drawing memory during the
assessment week.

Education Crisis Response - Facilitator’s Guide
280 | Part 3 – Social and Emotional Learning lessons
Module 1: Week 5: Lesson 1 - Setting Goals
Skills: Organizing steps and information in a logical manner, Demonstrate skills related to
achieving personal and academic goals.
Time: 30 minutes
Learning Objective: By the end of the lesson, learners should be able to:
Describe why learning is important in helping students achieve personal goals
Set personal and academic goals
Understand timeline and progression of events in a story.
Materials: N/A
Previous Knowledge: Students have learned the skills needed for focusing direction and
paying attention
Facilitator’s Tips:
Ensure that learners know the importance of goal setting and it should
be taken seriously
Let the learners know that goals must be within their capacity to make
it happen
Remember to follow up with Lesson 2 and 3 to check on the students’ progress on their
goals
Important Ideas:
It is important for every learner to know what learning entails in achieving
personal and academic goals. This can help them to be able to set and achieve their
goals.
On -going Assessment:
Are children giving appropriate answers about their goals and their plan to achieve
them? Do students understand the story and how it relates to their lives?
Step &
Icons
Time Activity procedure
7 minutes Introduction
Say to the learners: During this lesson we will learn why it
is important for us to set and achieve personal and
academic goals.
Ask learners to mention two reasons why learning can help
them achieve their personal goals.
Call on 3 students to respond.
Example answers:
o Learning can help to improve your ability to set
goals
o It allows the learner to have clear understanding of
the goals s/he is setting
o Builds your brain so you can understand what you
need to do to achieve goals
Education Crisis Response - Facilitator’s Guide
281 | Part 3 – Social and Emotional Learning lessons
Step &
Icons
Time Activity procedure
2 minutes Invite learners to sit in a circle in the middle of the room.
Say: Now I will tell you a story about setting goals
Story:
Lydia was in Primary 4. She loved going to school, but she
had trouble learning maths. Even though she paid
attention in class and did her homework, she never did
well on her maths test. She set the goal of getting a better
score on her next maths test so she could go on to the next
level of maths.
Lydia continued to pay attention in class and do her
homework, but she knew she needed to add more steps in
order to achieve her goal of getting a perfect score on her
next maths test.
5 minutes Ask the children, “What other steps can Lydia take to help
her achieve her goal and get a perfect score on her next
maths test?”
Students should answer. Answers may include:
o Study with another student,
o Ask for help from siblings, teacher, parents
o Take notes during class
o Ask the teacher for additional help
o Practice maths problems
5 minutes Tell the students the rest of Lydia’s story:
Lydia knew that she had to do more than pay attention and
do her homework. She had to make a plan. So, Lydia sat
down with her teacher and created a plan to help her
succeed in achieving a perfect score on her next maths
test. Every day Lydia and her teacher would meet for 5
minutes after class to make sure she was following her
plan. First, she started to take notes during class. She
asked questions in class when she did not understand. Her
older sister had an old primer that she used to do 20
minutes of additional maths problems every evening.
Lydia even asked her mother to time her so she could
practice under the pressure of taking a test. She took a
practice test once per week. By the time the next maths test
came around 4 weeks later, Lydia felt very ready and very
confident in her knowledge of the topics. She took the test
and finished very quickly. Then she took the remaining
time to go through the test and check her answers. When
Education Crisis Response - Facilitator’s Guide
282 | Part 3 – Social and Emotional Learning lessons
Step &
Icons
Time Activity procedure
Lydia turned in her test, she knew it was perfect. The next
day, Lydia received her grade – 100%. She had achieved
her goal.
6 minutes Assessment
Say to the students: Now I want you to think quietly to
yourself of one goal that you would like to set that you can
realistically achieve this year.
Allow the students a minute to think of a goal.
Say: Now we will each find a partner who set a goal
similar to our own goal. For example, if I set a goal to be
able to focus and do all of my homework without getting
distracted, I could find a partner who also had a focusing
goal. If you had set a goal of actively listening and
understanding instructions in class, we could be partners.
*Make sure that all participants have partners. If not, pair
the remaining learners with one another*
Say: Tell your partner your goal. Then, together come up
with a plan to achieve your goal. After 3 minutes we will
come back together to share our goals with the whole class.
5 minutes Conclusions/Review
Say: Let’s come back together and sit in a circle. Sit next to
your partner so we can share what we discussed back to the
group.
Say: Each set of partners will share back the goals they set
and how they plan to achieve them.
Ask if there are any volunteers to begin, then go around
and invite all students to share.
After all pairs have shared their answers conclude the
session.
Tell the students that next session they will have the
opportunity to create a goal achievement plan.
Reflection:
Were students able to set goals? Were they engaged and interested in goal-setting?

Education Crisis Response - Facilitator’s Guide
283 | Part 3 – Social and Emotional Learning lessons
Module 1: Week 5: Lesson 2 - Setting a Story Timeline
Skills: Organizing steps and information in a logical manner
Time: 30 minutes
Learning Objective: By the end of the lesson, learners should be able to:
1. State the basic steps in organizing information in a logical manner
2. Set steps to achieve personal and academic goals in a logical manner
Materials: Copies of “Story Tiles” for all groups (see Appendix 4 below) Chart: Steps to
Achieve Goals (matching the Handout); Handouts for all children: Steps to Achieve Goals
(see Appendix 5 below); pens/markers/crayons
Previous Knowledge: Learners understand the importance of setting goals
Facilitator’s Tips:
Prepare handouts for the children and large chart before class
Make sure to have completed Lesson 1 before starting this lesson.
Important Ideas:
Learners should be able to organize steps logically and apply that skill to
developing an action plan for achieving goals.
On -going Assessment:
Are students able to understand organization? Are they able to set their own
goals?
Step &
Icons
Time Activity procedure
1 minute Introduction
Say: Last lesson we learned how to set goals and that it
takes lots of steps to achieve them.
Today we will learn to create steps to achieve our own
goals and create a plan to achieve them.
5 minutes Say: We will begin the day by listening to a story.
Once upon a time there were three little pigs who were
all very good friends. They wanted to build their houses
next to each other so they could see each other every
day. The first pig was very lazy, so he built his house of
straw. The second pig was also lazy, and he built his
house out of sticks. The third little pig worked very
hard. He spent all day building his brick house while
the other two pigs played in the mud. There was a big
bad wolf watching the two pigs while they played. He
thought to himself “what a delicious meal these pigs
would make!”
Education Crisis Response - Facilitator’s Guide
284 | Part 3 – Social and Emotional Learning lessons
Step &
Icons
Time Activity procedure
The next day, a big bad wolf came around while all of the pigs
where in their homes. He came to the straw house and said, “I’ll
huff, and I’ll puff, and I’ll blow your house down!” With one
puff, he blew the house down and the first pig ran squealing into
the second pig’s house made of sticks.
Now the big bad wolf got to the stick house and he said,
“I’ll huff, and I’ll puff, and I’ll blow your house down!”
With one puff, he blew the house down and the two pigs
ran squealing into the third pig’s house made of bricks.
Now the pig came to the third house made of bricks and
said, “I’ll huff, and I’ll puff, and I’ll blow your house
down!” He huffed and he puffed and he could not blow
the house down. He climbed on top of the house to look
in at the three little pigs through the chimney. He
slipped and fell directly into the boiling kettle that the
third pig and put on to boil. The three pigs were safe
and joyous in the third house and had a meal of boiled
wolf.
8 minutes I will divide you into groups of five (5) learners.
o Each group will receive seven (7) story tiles. As
a group, you will organize the tiles into the order
of the story.
o After we are all finished, one representative
from each group will tell us your group’s order.
Do: Divide the class into small groups and distribute the
story tiles (see Appendix below). While the groups are
brainstorming their story, walk around and listen to
what they are saying to make sure they understand.
8 minutes Say: Now that we know how to put a story in order, we
can also put steps to achieving a goal in order.
Just like the story has a beginning, middle, and end, so
does achieving a goal.
What do you think comes first in achieving a goal?
o [correct answer: setting a goal]
DO: write on the board the first step in achieving a goal
SAY: Once you know your goal, what do you have to
develop to achieve that goal?
o [correct answer: a plan]
DO: write on the board the second step, “developing a
5-step plan”
SAY: When we are trying to achieve a goal, it is
important to have the support of the people who you
Education Crisis Response - Facilitator’s Guide
285 | Part 3 – Social and Emotional Learning lessons
Step &
Icons
Time Activity procedure
trust around you. You can have someone give you
advice, and you can also tell a friend who will support
you. When you get advice, you might need to change
your plan.
DO: Write Steps 3 - 5 on the board
SAY: Now you are ready to begin going through your 5
step plan.
DO: Write step 6 on the board.
SAY: When you begin to carry out your plan, you might
have to change it again.
DO: Write step 7 on the board.
SAY: It is important to check off the steps that you have
achieved to see your progress. This can help you feel
closer to achieving your goal and make sure that you are
working towards it.
DO: Write step 8 on the board.
SAY: Finally, it is very important to continue to believe
in yourself throughout the process.
DO: Write step 9 on the board.
SAY: With all of this completed, you will be able to
achieve your goal!
DO: Write step 10 on the board.
7 minutes Assessment
SAY: To close class today, I would like all of you to do
Step one (1) of the 10-step plan to achieve goals. Set a
goal that you would like to achieve in class this year.
ASK: Who can tell me what step one includes?
o [correct answer: set a detailed goal]
SAY: The reason we want a detailed goal is so that it is
clearer to achieve. If we set a simple goal, like “I want to
control my anger” then we will never know when we
have achieved it. Instead “I want to control my anger so
that I do not yell when my little sister annoys me” is a
more detailed goal that we can see when we have
achieved it.
SAY: I will pass out a handout with our steps to achieve
goals. Everyone can write or draw under Step 1.
DO: Pass out the “Steps to Achieve Goals” Handout (see
Appendix) and pens / markers
1 minute Conclusions/Review
Today we have learned how to organize steps in order
and how to set achievable goals. Next session we will set
the rest of the steps to achieve our goals.
Education Crisis Response - Facilitator’s Guide
286 | Part 3 – Social and Emotional Learning lessons
Reflection:
Were the children able to set goals appropriately? Did they understand how to place the story
tiles in order?
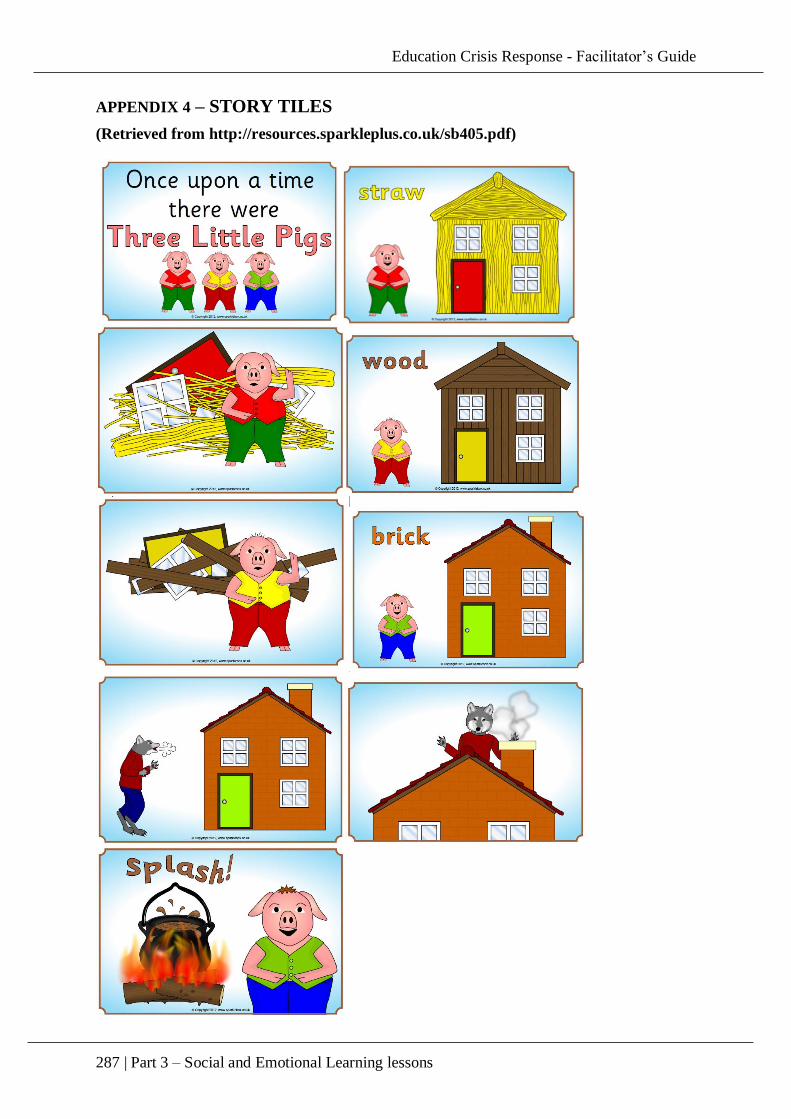
Education Crisis Response - Facilitator’s Guide
287 | Part 3 – Social and Emotional Learning lessons
APPENDIX 4 – STORY TILES
(Retrieved from http://resources.sparkleplus.co.uk/sb405.pdf)
Education Crisis Response - Facilitator’s Guide
288 | Part 3 – Social and Emotional Learning lessons
Module 1: Week 5: Lesson 3 - Setting your Goal Achievement Plan
Skills: Organizing steps and information in a logical manner; Demonstrate skills related to achieving
personal and academic goals
Time: 30 minutes
Learning Objective: By the end of the lesson, learners should be able to:
1. Set personal and academic goals
2. Understand timeline and progression of events in a story
Materials: Chart: Steps to Achieve Goals (matching the Handout); Handouts for all children: Steps to
Achieve Goals (see Appendix 2 from Lesson 3 above); pens/markers/crayons
Previous Knowledge: Learners understand logical organization of a timeline and the importance of
setting goals
Facilitator’s Tips:
Make sure that all students have their handout with the goal they set
during lesson 2.
Make sure to have completed lesson 1 and 2 before starting this lesson.
Constantly check that the students are able to understand all of the steps
Important Ideas:
Learners should be able to apply the skills they’ve learned to develop an action plan
for achieving goals.
On -going Assessment:
Are students able to develop a goal achievement action plan? Do they understand the
various steps?
Step &
Icons
Time Description
10 minutes Introduction
SAY: Last session we set goals and discussed action plans to
achieve those goals.
ASK: Who remembers the 10 points to achieve our goals?
DO: Write on the board the steps of the goal achievement
plan as students remember them.
o Encourage students who are trying. Make sure to
ONLY write down the correct answers. (See Week 5:
Lesson 2)
1. Set a Detailed Goal
2. Define 5-steps to Achieve that Goal
3. Get advice from someone you trust
4. Revise your 5- step plan
5. Tell a friend your goal and how you will
achieve it, ask them for support
6. Act on the 5 step
7. Revise your 5- step plan
8. Check off your 5 steps as you achieve them
9. Believe in yourself
Education Crisis Response - Facilitator’s Guide
289 | Part 3 – Social and Emotional Learning lessons
Step &
Icons
Time Description
10. Achieve your goal!
3 minutes SAY: Today we are going to have the opportunity to fill out
your Goal Achievement Plans.
ASK: Who would like to share the goal they set during our
last session?
6 minutes SAY: We will start by creating a 5-step plan together, and
then you can create your own 5-step plan for your goal.
Let’s start with the example of this goal:
I will understand addition so I can add two numbers (between
1 and 10) in less than 15 seconds.
DO: Write that goal on the board
ASK: What are some steps that I could take to achieve my
goal?
DO: As students give answers, write them on the board.
o After they have brainstormed all the answers, ask
them to vote on the top 5 steps.
o Write the 5 steps that they selected on another space
on the board.
SAY: Now we have to put these 5 steps into a logical order
to achieve our goal.
ASK: Which step do we need to do first?
DO: Ask the class to place the 5 steps in a logical order
3 minutes SAY: Think of someone you trust who can help you to
make decisions.
o On your Goal Achievement Plan, write or draw a
picture of that person next to step 3.
DO: Pass out markers or crayons or pens
5 minutes Assessment
SAY: Now we will find a friend in the class to share our 5-
step plan. I will pair you off and you will share your goal
and your 5 steps and who you will ask advice from.
DO: Put the students in pairs and walk around while they are
paired off to make sure they are talking about their goals and
plans.
3 minutes Conclusions/Review
SAY: Let’s come back together as a whole class now.
ASK: How was it helpful or not helpful to talk about your
Goal Achievement Plan with your friend?
SAY: Next class we will find our partner and check-in to see
if they: achieved any of the 5 steps, shared their Goal
Education Crisis Response - Facilitator’s Guide
290 | Part 3 – Social and Emotional Learning lessons
Step &
Icons
Time Description
Achievement Plan, and if they had to change their plans at
all. Your homework is to share your Goal Achievement Plan
with the person you wrote or drew by Step 3 and begin to act
on your 5-step plan.
NOTE: *Next class – have the students find their partner and ask if
they have achieved any of the 5 steps, and if they shared their Goal
Achievement Plan with anyone and if any revisions were necessary*
Reflection:
Were students able to understand steps needed to achieve goals?
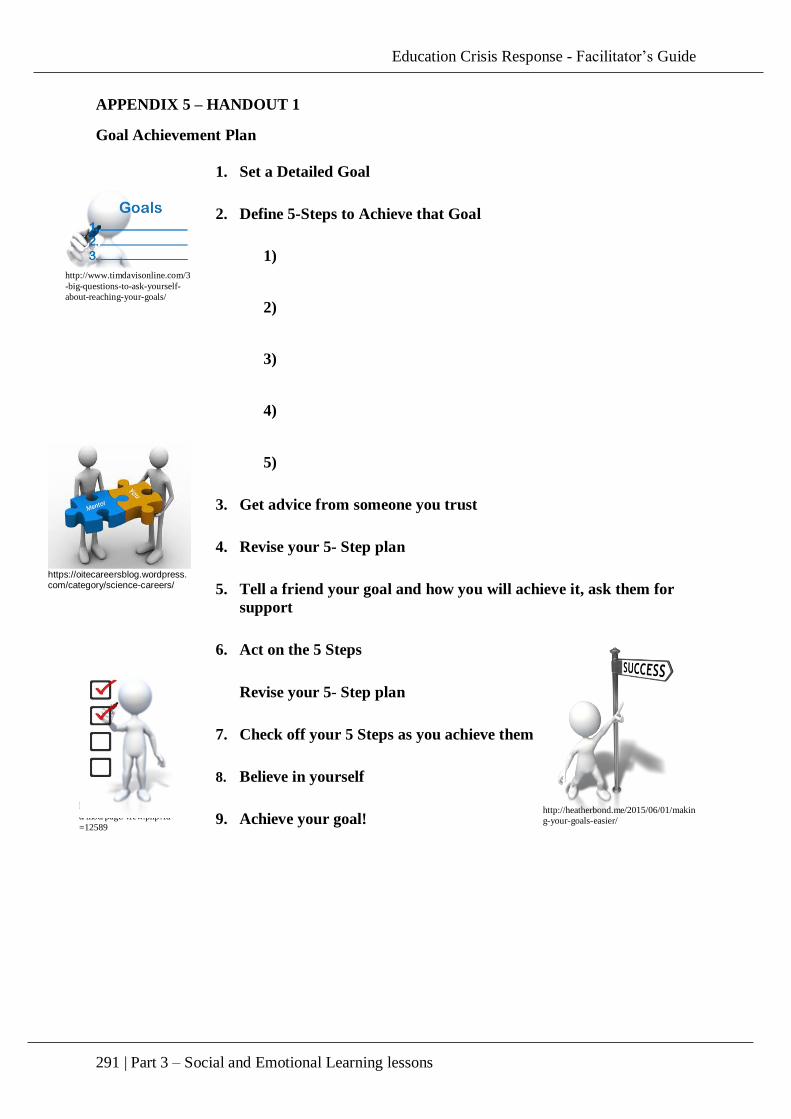
Education Crisis Response - Facilitator’s Guide
291 | Part 3 – Social and Emotional Learning lessons
APPENDIX 5 – HANDOUT 1
Goal Achievement Plan
1. Set a Detailed Goal
2. Define 5-Steps to Achieve that Goal
1)
2)
3)
4)
5)
3. Get advice from someone you trust
4. Revise your 5- Step plan
5. Tell a friend your goal and how you will achieve it, ask them for
support
6. Act on the 5 Steps
Revise your 5- Step plan
7. Check off your 5 Steps as you achieve them
8. Believe in yourself
9. Achieve your goal! http://heatherbond.me/2015/06/01/makin
g-your-goals-easier/
http://claremont.sd63.bc.c
a/mod/page/view.php?id
=12589
http://www.timdavisonline.com/3
-big-questions-to-ask-yourself-
about-reaching-your-goals/
https://oitecareersblog.wordpress.com/category/science-careers/
Education Crisis Response - Facilitator’s Guide
292 | Part 3 – Social and Emotional Learning lessons
Module 1 ASSESSMENT: Week 6
Assessment weeks are different than instruction weeks. Facilitators should select from the
various review and assessment activities below. Each review / assessment activity has a time
and an intended learning outcome.
Create and keep a tracking sheet (sample attached) for each student. For each assessment
activity, score the student’s performance on a scale of 1 to 5.
1 = Unsatisfactory
2 = Needs Improvement
3 = Meets Expectations
4 = Exceeds Expectations
5 = Exceptional
Learning Objective: By the end of the modules, learners should be able to:
1. Name their classmates
2. Describe the ways that people are similar and different
3. Describe oneself using several basic characteristics, abilities and accomplishments
4. Listen respectfully (culturally and age appropriate eye contact, nodding, asking
clarifying questions) to the thinking of others and share your own thoughts
5. Demonstrate ability to remember classroom norms
6. Understand safety requirements in classroom
7. Discuss and create classroom and school rules
8. Follow classroom and school rules
9. Describe the consequences of breaking school or classroom rules
10. Demonstrate raising hand and waiting to be called on before speaking
11. Identify strategies for focusing attention
12. Identify classroom distractions
13. Use positive self-talk to stay focused and on task
14. Demonstrate ability to form a line and a circle without making noise as part of a group
15. Apply attention, memory, and impulse control skills in a brain-building game
16. Demonstrate ability to hold information in ones’ short-term memory and utilize it in
an activity
17. Describe why learning is important in helping students achieve personal goals
18. Set personal and academic goals
19. Understand timeline and progression of events in a story
Step &
Icons
Time Activity procedure
Reviewing Class Rules: 10 minutes
Assesses the students’ ability to create and follow classroom rules.
Materials: NONE
Education Crisis Response - Facilitator’s Guide
293 | Part 3 – Social and Emotional Learning lessons
Step &
Icons
Time Activity procedure
5 minutes ASK: Why do we have class rules?
SAY: We created class rules in our second week together.
ASK: Who can remember the class rules?
5 minutes DO: Ask each child to go around and say their favorite class
rule. Each child should be able to list one of the class rules
Step &
Icons
Time Activity procedure
What happens when we break rules: 20 minutes
Assesses the students’ ability to create and follow classroom rules and understand appropriate
consequences for breaking rules.
Materials: deck of cards
5 minutes Say: In small groups, we will act out a role play of what
happens when we break a class rule. Each group will be
assigned one rule. In each group, one person will play the
teacher, one will play the student breaking the rule, and the
other group members will play classmates. Decide in your
small groups what the appropriate consequence for breaking
your rule will be. When you act out the short role play to the
class, we will decide if that is an appropriate consequence
for breaking that rule. The presentations on your role plays
should only be 1-2 minutes.
15 minutes Say: We will come back together as a class and present our
role plays.
DO: Invite each group to present their role play. After each
presentation clap for the actors. Then ask the class:
SAY: Is the consequence that this group demonstrated an
appropriate consequence for their rule?
DO: If so, write it on the “Consequences for Breaking
Classroom Rules” sheet. Otherwise, ask the students for a
better example of an appropriate consequence and write
that on the sheet.
SAY: Congratulations to all of your for your role plays and
for creating such a great list of consequences for breaking
class rules.
Education Crisis Response - Facilitator’s Guide
294 | Part 3 – Social and Emotional Learning lessons
Step &
Icons
Time Activity procedure
Singing and Focusing: 15 minutes.
Assesses the students’ ability to identify strategies for focusing attention and use positive self-
talk to stay focused and on task
Materials: deck of cards
5 minutes ASK: Who can remember one of the five strategies that we
learned to help ourselves stay focused?
Answers: breathing, self-talk, contained fidgeting, take
water, refocus object
SAY: Who can remind me what each of these mean?
o Breathing (This means stop what you are doing and
take a slow deep breath through your nose filling up
your belly. You can keep repeating your breath as
many times as it takes to calm down and re-focus)
o Self-Talk (This means thinking to yourself “I need to
pay attention and focus”)
o Contained Fidgeting (This is doing some sort of
small movement that helps you to focus. Some people
need to tap their foot to pay attention. Make sure
when you do “Contained Fidgeting” you are not
distracting the people around you)
o Take Water (This means to take a small break and
drink water before returning to try and focus)
o Re-focus Object (This is an individual object for each
person that they can look at to remind them to focus)
5 minutes Say: Count off into groups of five (5). In our small groups,
each group will choose a song to sing. Think of a song you
sing in your home or community. As soon as your group
decides on a song, you will sing the song over and over
again until I raise my hand. When I raise my hand, stop
singing and sit back down in your groups. You can use any
of the focusing strategies that we learned in our third week
together. Do you have any questions?
Have the students count off into 5 groups. Once they are in
their groups, walk around and assist them in selecting a
song if they are having trouble. Once all groups have begun
singing, let them all sing at the same time for 2- 3 minutes
and then raise your hand. Wait for all children to be quiet
and in their seats.
5 minutes SAY: Now we can all sit back down.
ASK: What strategies did you use to help you focus?
DO: Call on multiple students
ASK: Why is it important to be able to focus our attention?
DO: Call on multiple students
Education Crisis Response - Facilitator’s Guide
295 | Part 3 – Social and Emotional Learning lessons
Step &
Icons
Time Activity procedure
Samuel Says: 15 minutes.
Assesses the students’ ability to listen respectfully and follow directions.
Materials: NONE
5 minutes Can anyone tell me what it means to follow directions?
o Example Answer: listening to what someone says
and then doing what they tell you to do.
When do we follow directions?
o Example Answers: at home, in church, in school, at
the mosque, etc.
What are some examples of when we follow directions in
the classroom?
o Example Answers: When we are doing any activity
in class, when standing in a line, making a circle,
taking a test, being quiet when asked to.
10 minutes Say: We are going to play a game called, “Samuel Says”
Say: Listen carefully to these instructions. The person
standing in front of the group, will be called “Samuel.”
Samuel tells players what they must do. However, the
players must only obey commands that begin with the
words "Samuel Says." If I am Samuel and I say, "Samuel
says touch your nose," then you must touch your nose. But,
if I say, "jump," without first saying "Samuel says," you
must not jump. Those that do jump are out. When students
are out, they can either watch quietly or draw a picture of a
time they followed directions. The winner will be Samuel
if we have time for a second round.
Ask: Do you have any questions?
Play Samuel Says giving instructions like “stand up”, “sit
down”, “hop on one foot”, etc. The winner of the first
round should be Samuel in the second round.
Step &
Icons
Time Activity procedure
Memory Game: 15 minutes.
Assesses the students’ ability to apply attention, memory, and impulse control skills in a
brain-building game and hold information in ones’ short-term memory and utilize it in an
activity
Materials: deck of cards
5 minutes Say: We are going to play a game in groups of four or five
students.
Education Crisis Response - Facilitator’s Guide
296 | Part 3 – Social and Emotional Learning lessons
Step &
Icons
Time Activity procedure
Each group will have a deck of cards. To set up for the
game, we will shuffle the cards and place them face down
in rows, like this.
o Demonstrate laying out playing cards in a row for
the students.
Say: To play the game, the first player will choose two
cards to turn over. If the two cards are a matching pair (for
example two Jacks) then they take the two cards and start a
stack. The player is awarded another turn for making a
match and goes again. If the cards are not a match they are
turned back over in the same spots. It is the end of the
player’s turn when she or he is no longer able to make a
matching pair.
Say: The next player then chooses two cards to turn over. If
the first is a match for one of the cards the previous player
turned over, they try to remember it was to make a pair. If
they are successful at making a match they place the cards
in their stack and choose another card.
Say: This continues until all the cards are collected by
players. The winner is the one with the most matching pairs
at the end of the game.
Say: Do you have any questions?
Once you have answered any questions, say: You will have
10 minutes to play in your groups.
10 minutes Break the students into groups of 4 – 5 and give each
group a deck of cards. Assist them in laying out the cards if
they need.
Give the groups ten (10) minutes to play. Let them know
around nine (9) minutes to begin wrapping up.
Step &
Icons
Time Description
Samuel Says: 15 minutes.
Assesses the students’ ability to….
Materials: Handouts for all children: Steps to Achieve Goals (see Appendix 2 below);
pens/markers/crayons
5 minutes ASK: Who remembers the steps of the Goal Achievement
Plan?
DO: Write on the board the steps of the goal achievement
plan as students remember them.
o Encourage students who are trying. Make sure to
ONLY write down the correct answers. (See Week
5: Lesson 2)
1. Set a Detailed Goal
Education Crisis Response - Facilitator’s Guide
297 | Part 3 – Social and Emotional Learning lessons
Step &
Icons
Time Description
2. Define 5-steps to Achieve that Goal
3. Get advice from someone you trust
4. Revise your 5- step plan
5. Tell a friend your goal and how you will achieve it, ask
them for support
6. Act on the 5 step
7. Revise your 5- step plan
8. Check off your 5 steps as you achieve them
9. Believe in yourself
o Achieve your goal!
10 minutes SAY: You will now each have time to fill out your own
Goal Achievement Plan.
DO: Pass out the Goal Achievement Plan handouts and
markers/pens for all of the students
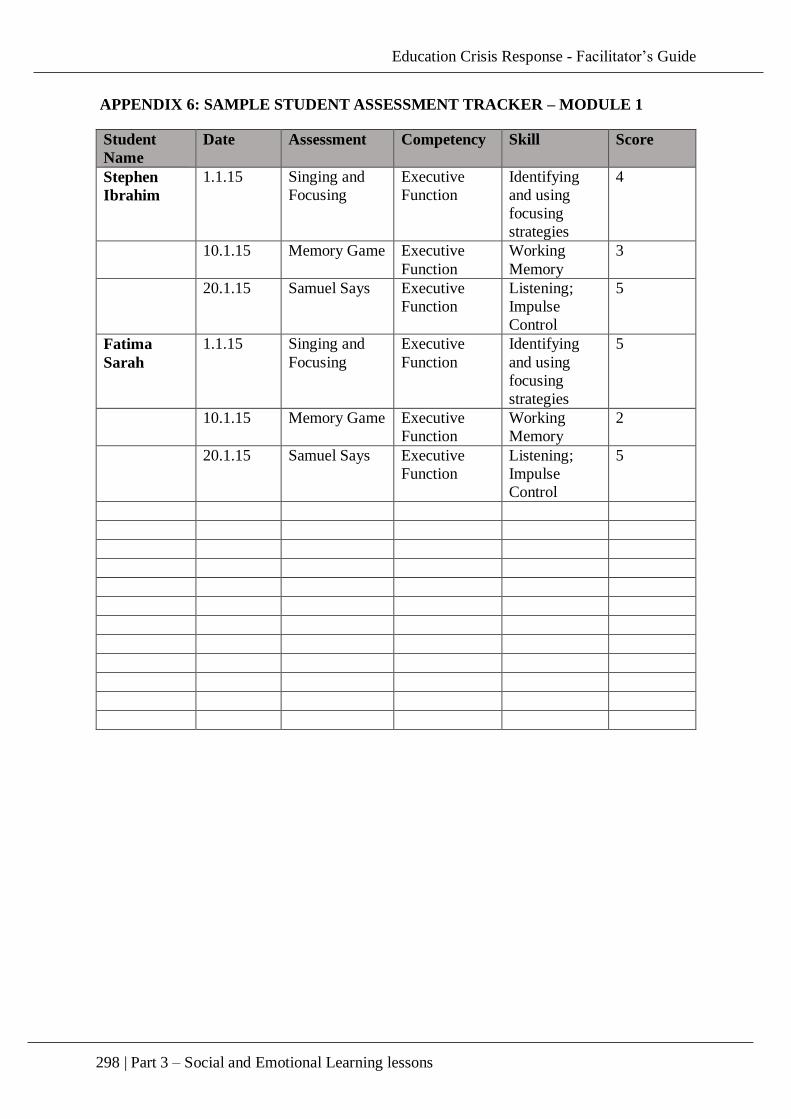
Education Crisis Response - Facilitator’s Guide
298 | Part 3 – Social and Emotional Learning lessons
APPENDIX 6: SAMPLE STUDENT ASSESSMENT TRACKER – MODULE 1
Student
Name
Date Assessment Competency Skill Score
Stephen
Ibrahim
1.1.15 Singing and
Focusing
Executive
Function
Identifying
and using
focusing
strategies
4
10.1.15 Memory Game Executive
Function
Working
Memory
3
20.1.15 Samuel Says Executive
Function
Listening;
Impulse
Control
5
Fatima
Sarah
1.1.15 Singing and
Focusing
Executive
Function
Identifying
and using
focusing
strategies
5
10.1.15 Memory Game Executive
Function
Working
Memory
2
20.1.15 Samuel Says Executive
Function
Listening;
Impulse
Control
5
Education Crisis Response - Facilitator’s Guide
299 | Part 3 – Social and Emotional Learning lessons
Module 2: Week 7: Lesson 1 - Topic: Expressing How I Feel
Skill Area: Assertiveness, feelings and emotions
Total Time: 30 minutes
Learning Objective: By the end of the activity, learns will be able to:
1. Explain meanings of feelings and emotions
2. Identify different types of emotions
3. Express how they think and feel when they are hurt
4. Express how they think and feel when they are happy
5. Express how they feel without hurting other
Materials to prepare in advance: chalk or stick, blackboard (optional), flash cards with one
feeling word: happy, lonely, scared, bored, angry, sad, upset, surprised, strong, proud, afraid,
glad, shy, worried, tired, love
Previous knowledge: Learners have had experience of negative and positive emotions /
feelings
Facilitator’s Tips:
Keep in mind throughout the lesson that some students may have had
experiences with very bad emotions. Do your best to address these emotions. If
students are getting very sad, or begin to act out in class, ask them what is
happening. If they are acting out, give them an important task to do.
Important Ideas: It is important for learners to express themselves, their feelings and their opinions
in order for them to have a healthy self-esteem, respect for oneself and for others.
They ability of the learners to say how they think and feel is important to living together in
any community.
On -going Assessment: Observe your learners. How willing are they to express
their thoughts and feelings politely and honestly? Note learners that find it difficult
to express their thoughts and feelings politely and encourage them to do so.
Step &
Icons
Time Activity procedure
10 minutes Introduction
Tell the learners: Today we will discuss feelings and
emotions. Emotions are showing how you feel.
Demonstrate to the learners both the positive and
negative feelings and emotions (e.g. smiling, frowning,
etc.) Explain to learners if I am happy I smile, while when
I frown I am sad
Paste flash cards containing words expressing feelings
(examples: happy, lonely, scared, bored, angry, sad,
upset, surprised, strong, proud, afraid, glad, shy,
worried, tired, love, etc) on the chalkboard. If you did not
Education Crisis Response - Facilitator’s Guide
300 | Part 3 – Social and Emotional Learning lessons
Step &
Icons
Time Activity procedure
make the flash cards before the lesson, simply write the
words on the blackboard.
Call on a few learners to demonstrate the different
feelings (examples: happy, lonely, scared, bored, angry,
sad, upset, surprised, strong, proud, afraid, glad, shy,
worried, tired, love, etc) one after the other.
Say: Show what it looks like to have this emotion or
feeling.
Say: For the second round, one person will demonstrate
the feeling again, without telling us what he or she is
showing. The rest of the class will guess which feeling is
being demonstrated.
Say to the learners: Now we have shown how different
feelings and emotions look.
10 minutes The teacher should:
Ask the learners to stand up (or form a circle) for a game.
Tell the learners: “I will pass a piece of chalk, stick (or
any other object available) around while everyone is
clapping. The pupil that is holding the object when I
shout ‘Stop’ will repeat what I say and complete the
sentence.
Give an example (I feel hurt when people make fun of me)
I feel angry when…
I feel sad when…
I feel happy when…
I feel excited when..
Start the game and let the class continue clapping until
about five learners have formed different sentences.
Explain to the learners: When we do not tell others how
we think and feel, then our thoughts and feelings can
continue to hurt us.
5 minutes The teacher should:
Say: We will now discuss, in pairs, how we can tell others
about their feelings without hurting someone else. For
examples, we can be honest, avoid shouting and speaking
politely, using ‘Please’, “Can you”, ”Will you”, etc.). e.g.
‘Aliyu, please stop shouting at me. I don’t like it.’
‘Kande, will you stop stepping on my toes? It is hurting
me.’
Observe the class as they discuss in pairs.
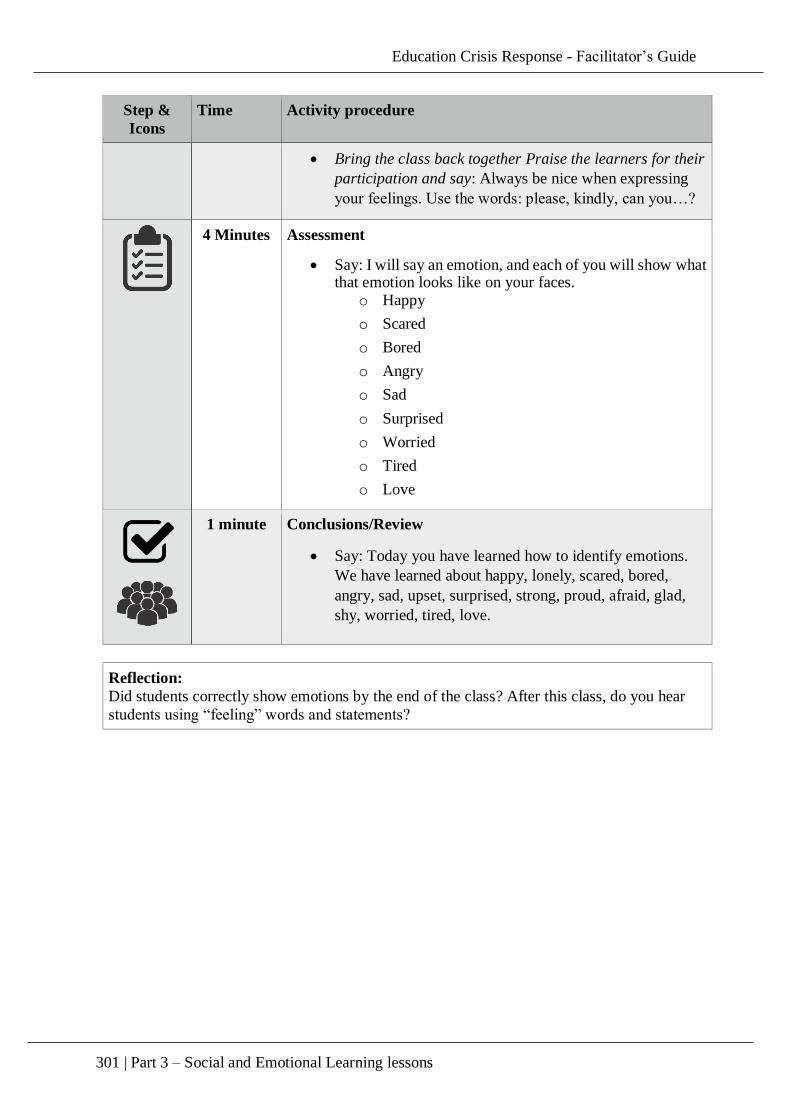
Education Crisis Response - Facilitator’s Guide
301 | Part 3 – Social and Emotional Learning lessons
Step &
Icons
Time Activity procedure
Bring the class back together Praise the learners for their
participation and say: Always be nice when expressing
your feelings. Use the words: please, kindly, can you…?
4 Minutes Assessment
Say: I will say an emotion, and each of you will show what that emotion looks like on your faces.
o Happy
o Scared
o Bored
o Angry
o Sad
o Surprised
o Worried
o Tired
o Love
1 minute Conclusions/Review
Say: Today you have learned how to identify emotions.
We have learned about happy, lonely, scared, bored,
angry, sad, upset, surprised, strong, proud, afraid, glad,
shy, worried, tired, love.
Reflection:
Did students correctly show emotions by the end of the class? After this class, do you hear
students using “feeling” words and statements?
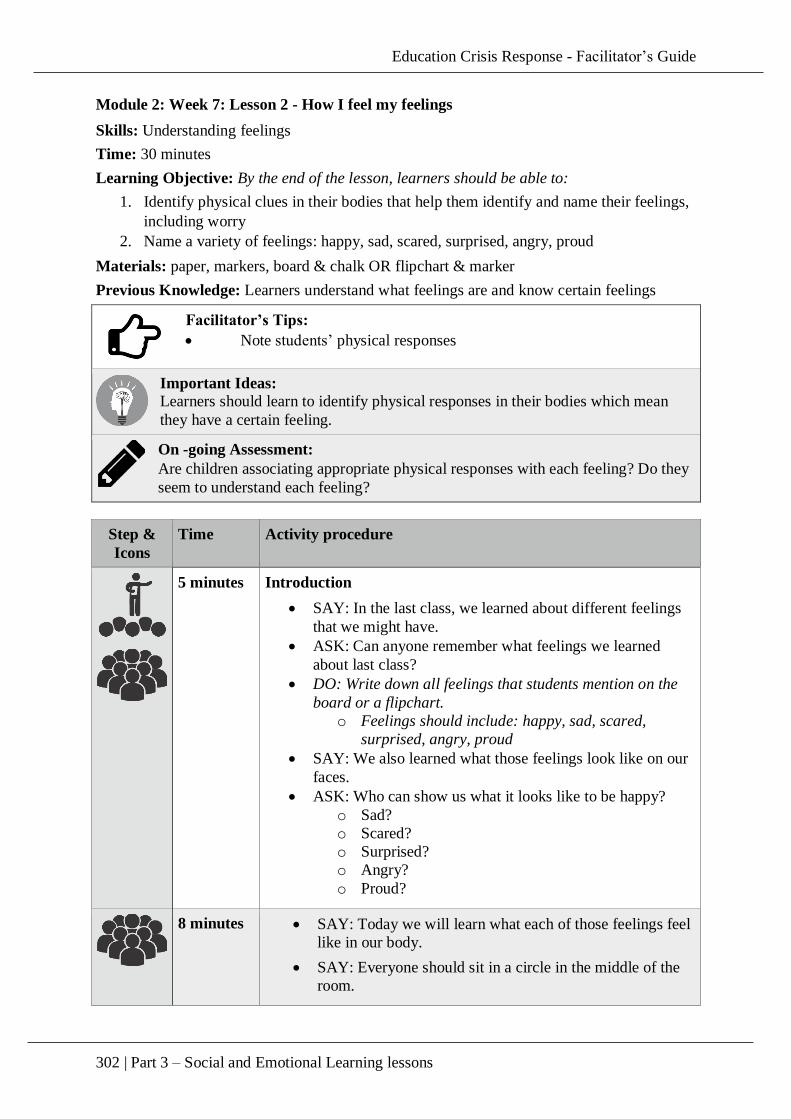
Education Crisis Response - Facilitator’s Guide
302 | Part 3 – Social and Emotional Learning lessons
Module 2: Week 7: Lesson 2 - How I feel my feelings
Skills: Understanding feelings
Time: 30 minutes
Learning Objective: By the end of the lesson, learners should be able to:
1. Identify physical clues in their bodies that help them identify and name their feelings,
including worry
2. Name a variety of feelings: happy, sad, scared, surprised, angry, proud
Materials: paper, markers, board & chalk OR flipchart & marker
Previous Knowledge: Learners understand what feelings are and know certain feelings
Facilitator’s Tips:
Note students’ physical responses
Important Ideas: Learners should learn to identify physical responses in their bodies which mean
they have a certain feeling.
On -going Assessment:
Are children associating appropriate physical responses with each feeling? Do they
seem to understand each feeling?
Step &
Icons
Time Activity procedure
5 minutes Introduction
SAY: In the last class, we learned about different feelings
that we might have.
ASK: Can anyone remember what feelings we learned
about last class?
DO: Write down all feelings that students mention on the
board or a flipchart.
o Feelings should include: happy, sad, scared,
surprised, angry, proud
SAY: We also learned what those feelings look like on our
faces.
ASK: Who can show us what it looks like to be happy?
o Sad?
o Scared?
o Surprised?
o Angry?
o Proud?
8 minutes SAY: Today we will learn what each of those feelings feel
like in our body.
SAY: Everyone should sit in a circle in the middle of the
room.
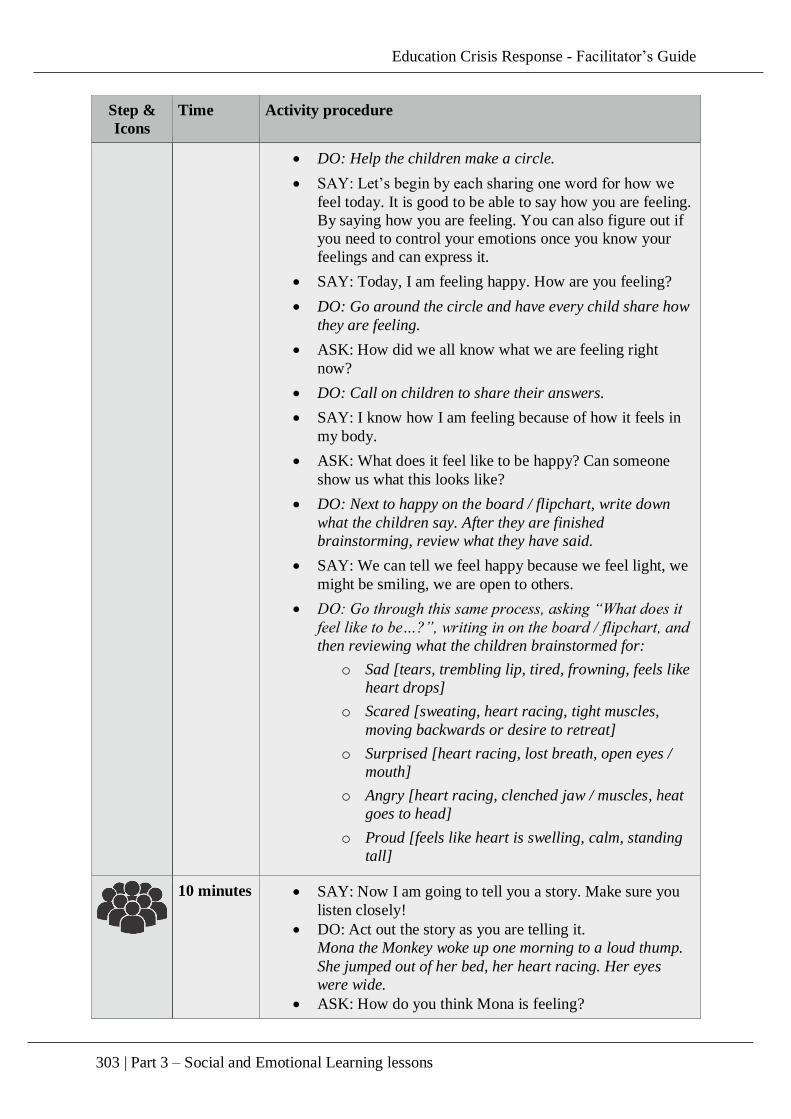
Education Crisis Response - Facilitator’s Guide
303 | Part 3 – Social and Emotional Learning lessons
Step &
Icons
Time Activity procedure
DO: Help the children make a circle.
SAY: Let’s begin by each sharing one word for how we
feel today. It is good to be able to say how you are feeling.
By saying how you are feeling. You can also figure out if
you need to control your emotions once you know your
feelings and can express it.
SAY: Today, I am feeling happy. How are you feeling?
DO: Go around the circle and have every child share how
they are feeling.
ASK: How did we all know what we are feeling right
now?
DO: Call on children to share their answers.
SAY: I know how I am feeling because of how it feels in
my body.
ASK: What does it feel like to be happy? Can someone
show us what this looks like?
DO: Next to happy on the board / flipchart, write down
what the children say. After they are finished
brainstorming, review what they have said.
SAY: We can tell we feel happy because we feel light, we
might be smiling, we are open to others.
DO: Go through this same process, asking “What does it
feel like to be…?”, writing in on the board / flipchart, and
then reviewing what the children brainstormed for:
o Sad [tears, trembling lip, tired, frowning, feels like
heart drops]
o Scared [sweating, heart racing, tight muscles,
moving backwards or desire to retreat]
o Surprised [heart racing, lost breath, open eyes /
mouth]
o Angry [heart racing, clenched jaw / muscles, heat
goes to head]
o Proud [feels like heart is swelling, calm, standing
tall]
10 minutes SAY: Now I am going to tell you a story. Make sure you
listen closely!
DO: Act out the story as you are telling it.
Mona the Monkey woke up one morning to a loud thump.
She jumped out of her bed, her heart racing. Her eyes
were wide.
ASK: How do you think Mona is feeling?
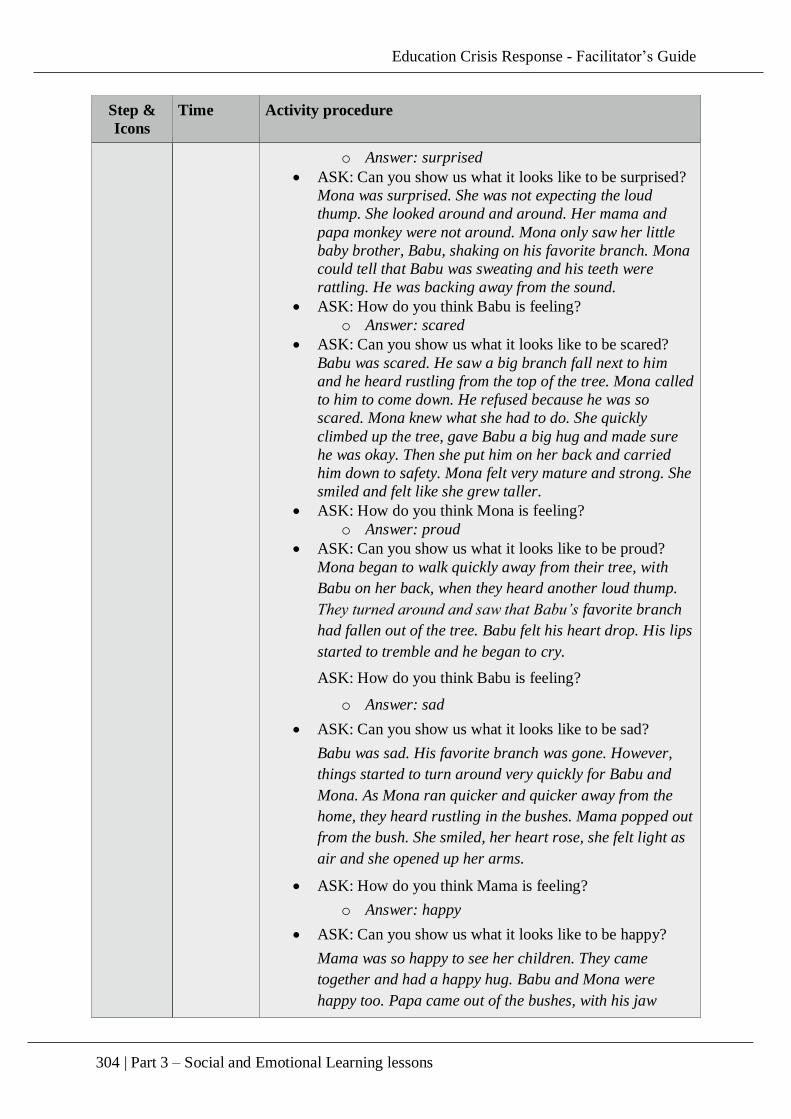
Education Crisis Response - Facilitator’s Guide
304 | Part 3 – Social and Emotional Learning lessons
Step &
Icons
Time Activity procedure
o Answer: surprised
ASK: Can you show us what it looks like to be surprised?
Mona was surprised. She was not expecting the loud
thump. She looked around and around. Her mama and
papa monkey were not around. Mona only saw her little
baby brother, Babu, shaking on his favorite branch. Mona
could tell that Babu was sweating and his teeth were
rattling. He was backing away from the sound.
ASK: How do you think Babu is feeling?
o Answer: scared
ASK: Can you show us what it looks like to be scared?
Babu was scared. He saw a big branch fall next to him
and he heard rustling from the top of the tree. Mona called
to him to come down. He refused because he was so
scared. Mona knew what she had to do. She quickly
climbed up the tree, gave Babu a big hug and made sure
he was okay. Then she put him on her back and carried
him down to safety. Mona felt very mature and strong. She
smiled and felt like she grew taller.
ASK: How do you think Mona is feeling?
o Answer: proud
ASK: Can you show us what it looks like to be proud?
Mona began to walk quickly away from their tree, with
Babu on her back, when they heard another loud thump.
They turned around and saw that Babu’s favorite branch
had fallen out of the tree. Babu felt his heart drop. His lips
started to tremble and he began to cry.
ASK: How do you think Babu is feeling?
o Answer: sad
ASK: Can you show us what it looks like to be sad?
Babu was sad. His favorite branch was gone. However,
things started to turn around very quickly for Babu and
Mona. As Mona ran quicker and quicker away from the
home, they heard rustling in the bushes. Mama popped out
from the bush. She smiled, her heart rose, she felt light as
air and she opened up her arms.
ASK: How do you think Mama is feeling?
o Answer: happy
ASK: Can you show us what it looks like to be happy?
Mama was so happy to see her children. They came
together and had a happy hug. Babu and Mona were
happy too. Papa came out of the bushes, with his jaw
Education Crisis Response - Facilitator’s Guide
305 | Part 3 – Social and Emotional Learning lessons
Step &
Icons
Time Activity procedure
clenched and his face was getting very hot. He felt like his
blood was boiling. He told the family that someone had
decided to cut down their favorite family tree.
ASK: How do you think Papa is feeling?
o Answer: angry
ASK: Can you show us what it looks like to be angry?
Papa was angry. Someone had decided to chop down his
favorite tree. It left the family without a home and to flee.
However, Mama reminded Papa that they had another
tree they liked nearby. This tree had lots of leaves and
other monkeys nearby for Mona and Babu to play with.
Papa agreed that they should go there. They were all
happy.
10 minutes Assessment
ASK: Who can show us and name the first feeling that
Mona had in the story when she woke up to the loud
thump?
o Answer: surprise
ASK: Who remembers a time when you felt surprised?
How did it feel in your body?
DO: Call on children to share their own personal
experience
ASK: Who show us and name what feeling Babu had in
the story when he was shaking in the tree?
o Answer: scared
ASK: Who remembers a time when you felt scared? How
did it feel in your body?
DO: Call on children to share their own personal
experience
ASK: Who show us and name what feeling Mona had in
the story when she rescued Babu?
o Answer: pride
ASK: Who remembers a time when you felt proud? How
did it feel in your body?
DO: Call on children to share their own personal
experience
ASK: Who show us and name what feeling Babu had in
the story when he saw that his favorite branch had fallen
down?
o Answer: sad
ASK: Who remembers a time when you felt sad? How did
it feel in your body?
Education Crisis Response - Facilitator’s Guide
306 | Part 3 – Social and Emotional Learning lessons
Step &
Icons
Time Activity procedure
DO: Call on children to share their own personal
experience
ASK: Who show us and name what feeling Mama had in
the story when she saw Babu and Mona?
o Answer: happy
ASK: Who remembers a time when you felt happy? How
did it feel in your body?
DO: Call on children to share their own personal
experience
ASK: Who show us and name what feeling Papa had in
the story when he was found out that someone was
chopping down their favorite family tree?
o Answer: angry
ASK: Who remembers a time when you felt angry? How
did it feel in your body?
DO: Call on children to share their own personal
experience
2 minutes Conclusions/Review
SAY: Today we have talked about how different feelings
feel in our bodies. We can use what we know to identify
our feelings. Next class, we will use what we learned today
to be able to identify if our feelings are comfortable or
uncomfortable.
Reflection: Are children understanding correctly which feeling has which physical response?
Are they able to relate it to their own experiences?
Education Crisis Response - Facilitator’s Guide
307 | Part 3 – Social and Emotional Learning lessons
Module 2: Week 7: Lesson 3 - Comfortable and Uncomfortable Feelings
Skills: Understanding feelings
Time: 30 minutes
Learning Objective: By the end of the lesson, learners should be able to:
1. Identify physical clues in their bodies that help them identify and name their feelings,
including worry
2. Name a variety of feelings: happy, sad, scared, surprised, angry, proud
3. Identify comfortable and uncomfortable feelings
Materials: N/A
Previous Knowledge: Learners understand what feelings are and how they manifest in their
bodies
Facilitator’s Tips:
Be sure to complete Week 7: Lesson 1 and 2 before this lesson.
Important Ideas: Learners should categorize feelings as comfortable and uncomfortable
On -going Assessment: Are children able to identify which feelings are comfortable and which are
uncomfortable?
Step &
Icons
Time Description
4 minutes Introduction
ASK: Who can remember what we talked about during our
last class?
DO: Encourage responses from children. Try to guide them
to talk about understanding how their feelings feel in their
bodies.
SAY: We talked about how we can feel different feelings
in our bodies.
ASK: What feelings did we talk about?
SAY: Yes, we talked about happy, sad, scared, surprised,
angry, proud
7 minutes SAY: Some of the feelings make us feel good and
comfortable. Other feelings can make us feel bad and
uncomfortable. Today we will talk about how to tell
comfortable and uncomfortable feelings apart.
SAY: Comfortable feelings
ASK: Does anyone remember the story we heard during
our last session, about Mona the Monkey and her family?
ASK: Who can tell me what happened to Mona and her
family?
Education Crisis Response - Facilitator’s Guide
308 | Part 3 – Social and Emotional Learning lessons
Step &
Icons
Time Description
DO: Guide the children to follow the key points outlined
below in the story:
o Mona felt surprised when she woke up to a loud
thump.
o Babu, Mona’s brother, felt scared in the tree.
o Mona went up to rescue Babu and she felt proud.
o While Mona and Babu were going away, Babu’s
favorite branch fell down and Babu felt sad.
o Mama came out from the bush and she felt very
happy to see Mona and Babu.
o When Papa came out, he felt angry because
someone was cutting down their favorite family
tree.
o In the end, the whole family felt happy because
they knew another tree nearby that had a lot of
leaves and lots of other monkeys lived nearby to
play with.
ASK: What feelings did Mona and her family feel in the
story?
DO: Write a list as children brainstorm. Only include:
surprise, scared, sad, happy, angry, proud.
DO: As they say feelings, ask “Do you like when you feel
that feeling?” Encourage the learners to explain why it is
good or bad and comfortable or uncomfortable
o Happy: good and comfortable
o Sad: not comfortable, but it is okay to sometimes
feel sad.
o Angry: not good or comfortable.
o Scared: not comfortable, but sometimes normal.
o Surprise: not usually comfortable, but can be either
good or bad, depending on the cause.
o Proud: comfortable and good
14 minutes SAY: Now we have categorized our feelings so we know
when we are feeling something comfortable or
uncomfortable.
SAY: Now we will break into four groups. I will secretly
tell two groups to choose a comfortable feeling and two
groups to choose an uncomfortable feeling. Each group
will think of a time when that feeling can happen. You
will act out a situation that shows when that feeling
happens. Make sure that you show the feeling as we feel it
in our bodies.
DO: Divide the class into four even groups. Assign two
groups the task of a scenario with a comfortable feeling
and two groups the task of a scenario with an
Education Crisis Response - Facilitator’s Guide
309 | Part 3 – Social and Emotional Learning lessons
Step &
Icons
Time Description
uncomfortable feeling. Allow them 5 – 7 minutes to create
their scenario, and then call the whole class together.
SAY: Now each group will have just two minutes to
present their situation. As a class, we will guess if that
group was showing us a comfortable or uncomfortable
feeling. Then we will guess which feeling it was.
DO: Facilitate so that all four groups are able to present.
After each presentation, take a vote of the class
“uncomfortable” or “comfortable.” Then let volunteers
guess which feeling they had selected.
4 minutes Assessment
SAY: We are going to play a little game. Everyone will put
down your head and close their eyes. I will say a feeling. If
that feeling is a comfortable feeling, raise your hand. If it is
an uncomfortable feeling, lower your hand.
ASK: Who can remind the class what we are going to do
now?
DO: Call on a student to repeat the instructions.
SAY: Everyone put your heads down.
SAY: The first feeling is anger. If you think it is a
comfortable feeling, raise your hand. If it is an
uncomfortable feeling, lower your hand.
DO: Count the number of hands that go up.
SAY: Everyone put your hands down. The second feeling
is pride.
DO: Count the number of hands that go up.
SAY: Everyone put your hands down. The next feeling is
sadness.
DO: Count the number of hands that go up.
SAY: Everyone put your hands down. The next feeling is
surprise.
DO: Count the number of hands that go up.
SAY: Everyone put your hands down. The next feeling is
scared.
DO: Count the number of hands that go up.
SAY: Everyone put your hands down. The next feeling is
happiness.
DO: Count the number of hands that go up.
SAY: Great job. You can all bring your heads back up.
1 minute Conclusions/Review
SAY: In the last three sessions, we learned what our feeling
are, how we feel them in our body, and finally we learned
how to tell a comfortable feeling from an uncomfortable
feeling.

Education Crisis Response - Facilitator’s Guide
310 | Part 3 – Social and Emotional Learning lessons
Step &
Icons
Time Description
SAY: For homework, I want you to think of one situation
where you know your feeling and can identify it as
comfortable or uncomfortable. Come back next class ready
to share with the class how you will use this awareness of
your feelings
Reflection:
Were students able to correctly classify feelings as comfortable or uncomfortable? Could
they demonstrate their knowledge in scenarios?
Education Crisis Response - Facilitator’s Guide
311 | Part 3 – Social and Emotional Learning lessons
Module 2: Week 8: Lesson 1 - Why we manage our emotions
Skills: Managing your emotions
Time: 30 minutes
Learning Objective: By the end of the lesson, learners should be able to:
1. State the advantages of controlling emotions (calming down strong feelings)
2. State the advantages of controlling impulsive behavior (stopping and thinking about
your behavior before acting)
3. Identify ways of controlling emotions
Materials: N/A
Previous Knowledge: Learners understand feelings and can identify comfortable and
uncomfortable feelings.
Facilitator’s Tips:
Notice if children are giving incorrect answers. Make sure to guide all incorrect
answers to get to correct answers
Important Ideas: Learners should understand and share why it is important to control emotions.
On -going Assessment:
Do students understand why they need to control their emotions?
Step &
Icons
Time Description
8 minutes Introduction
SAY: Today we are going to talk about why we need to
control our emotions.
SAY: Let’s begin with a song we all know. Everyone come
to the center and make a big circle.
DO: Assist the children in forming the circle. Once they are
ready, begin.
SAY: Does anyone know the song “If you’re happy and you
know it clap your hands?” Let’s all sing the first verse
together.
SING:
If you’re happy and you know it clap your hands (clap, clap)
If you’re happy and you know it clap your hands (clap, clap)
If you’re happy and you know it and you really want to show
it
If you’re happy and you know it clap your hands (clap, clap)
For the second verse we will try a new feeling:
If you’re angry and you know it stamp your fight (stamp,
stamp)
ASK: Can anyone think of another feeling we can sing?

Education Crisis Response - Facilitator’s Guide
312 | Part 3 – Social and Emotional Learning lessons
Step &
Icons
Time Description
DO: Encourage students to create their own verses with the
feelings they learned the previous week. Some examples:
If you’re sad and you know it cry it out (boo-hoo, boo-hoo)
If you’re proud and you know it stand up tall (put your hands
on your hips and puff up your chest turn side – side)
If you’re surprised and you know it jump back (jump, jump)
SAY: Great job! Clap for yourselves and return to your seats.
5 minutes SAY: Sometimes when we feel strong emotions, we have to
control the feeling.
ASK: In the song we just sang, can you all show me what do
we do when we are happy?
Answer: Clap
DO: Clap with the class
ASK: Is clapping an appropriate reaction when we are
happy?
Example Answer: yes
ASK: In the song we just sang, can you all show me what do
we do when we are angry?
Answer: stomp your feet
DO: Stomp your feet with the class
ASK: Is stomping an appropriate reaction when we are
angry?
Answer: no
SAY: As you can see, sometimes we have to control our
feelings. Even when we have good feelings, sometimes we
have to control them.
ASK: What are some things that are not okay to do when we
are feeling very happy?
Example answer: hit someone, jump up and down in a quiet
place, and scream for joy.
ASK: When do we need to control our feelings?
Answer: When they will hurt someone else, when it is too
strong, when it is bad
7 minutes SAY: For homework, I asked you to come prepared to class
with one situation where you know your feeling and can
identify it as comfortable or uncomfortable. We will now
use those situations.
SAY: You will share the situation you thought of, and
identify the feeling as comfortable or uncomfortable in small
groups. In your groups you will select one scenario that you
discussed where your feelings need to be controlled. You
will have 4 minutes in your groups to decide on your
scenario.
Education Crisis Response - Facilitator’s Guide
313 | Part 3 – Social and Emotional Learning lessons
Step &
Icons
Time Description
DO: Break the class into four (4) groups. Walk around
during their discussions to make sure they are all
participating and they understand the instructions.
SAY: Now that you have selected that scenario, you will
have 2 minutes to prepare to present that scenario back to
the class.
DO: Allow two (2) minutes before calling the class back
together.
9 minutes Assessment
SAY: Each group will have 2 minutes to present their
scenario back to the class.
DO: Call on each group to present. Ask the children
presenting:
o What feeling did you have to control?
o Why did you have to control your feeling?
SAY: Great job, you truly understand why it is important to
control our feelings.
1 minute Conclusions/Review
SAY: Today we learned why it is important to control our
emotions. Next session we will learn some useful tricks to
help us control our emotions. Before next time, I would leave
each of you to think of something that you do or can do to
control your own feelings.
Reflection:
Are all children able to follow the class? Are some children struggling to regulate their
emotions during this session?
Education Crisis Response - Facilitator’s Guide
314 | Part 3 – Social and Emotional Learning lessons
Module 2: Week 8: Lesson 2 - Using Belly-Breathing
Skills: Managing your emotions
Time: 30 minutes
Learning Objective: By the end of the lesson, learners should be able to:
1. Identify ways of controlling emotions
2. Demonstrate the various ways of controlling impulsive behavior
3. Identify and demonstrate belly-breathing as a calming down technique
Materials: paper, markers/crayons, flipchart that says “Controlling Feelings Toolkit”, picture
of belly-breathing (prepare this in advance)
Previous Knowledge: Learners are aware that it is important to control their feelings.
Facilitator’s Tips:
If bubbles are available, blowing bubbles is a fun activity and great way to
teach belly breathing.
This is the second lesson of week 8. Do Lesson 1 before this lesson.
Important Ideas: Learners should understand how and why belly-breathing can help them to control
their emotions
On -going Assessment: Are children able to adequately breathe into their bellies?
Step &
Icons
Time Description
1 minute Introduction
SAY: Last session we talked about why it is important to
control our emotions. Today we will learn how to breathe
into our bellies.
3 minutes SAY: Sometimes, when we feel emotions like anger,
frustration, scared, or even sad, it is very uncomfortable
in our bodies.
ASK: Who remembers what happens to your body when
you feel angry?
DO: Call on learners to answer.
SAY: Yes, our heart pounds, we may feel sweaty, we
may start to start to feel like our face is getting hot. It’s
not good for us to frequently feel this way.
SAY: We can help ourselves to calm down and to focus
by learning different tricks. One of those tricks is do
breathe into our bellies”
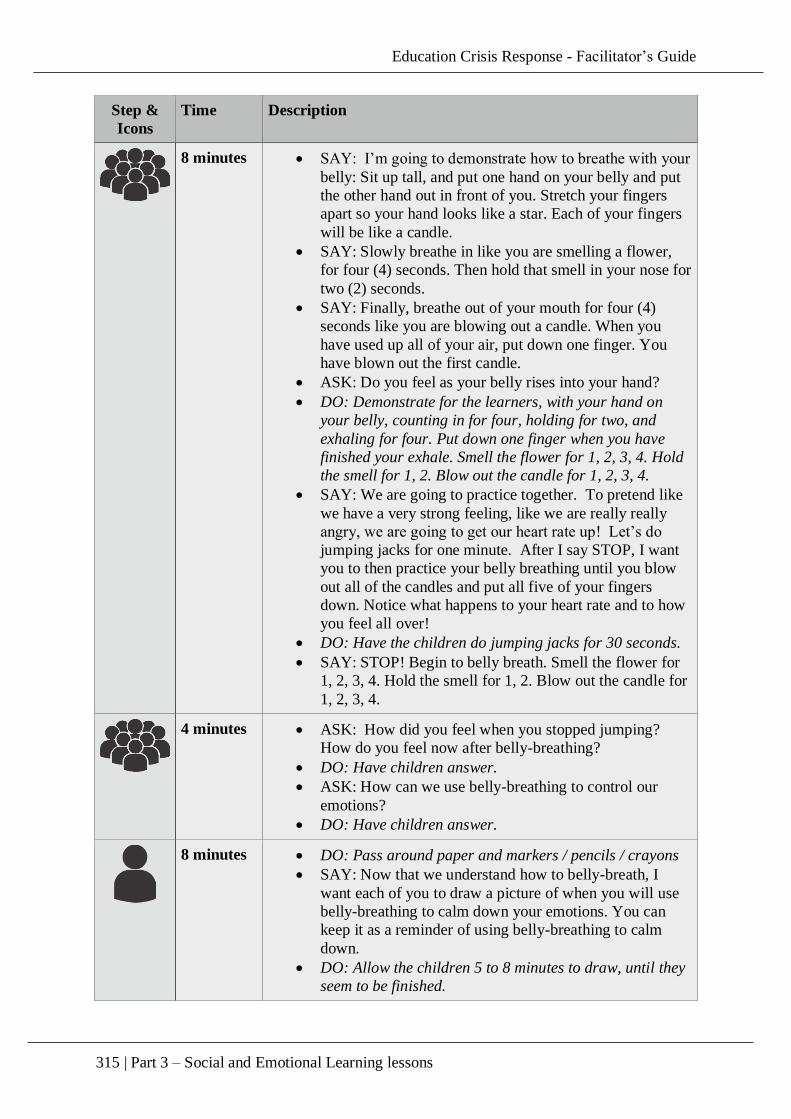
Education Crisis Response - Facilitator’s Guide
315 | Part 3 – Social and Emotional Learning lessons
Step &
Icons
Time Description
8 minutes SAY: I’m going to demonstrate how to breathe with your
belly: Sit up tall, and put one hand on your belly and put
the other hand out in front of you. Stretch your fingers
apart so your hand looks like a star. Each of your fingers
will be like a candle.
SAY: Slowly breathe in like you are smelling a flower,
for four (4) seconds. Then hold that smell in your nose for
two (2) seconds.
SAY: Finally, breathe out of your mouth for four (4)
seconds like you are blowing out a candle. When you
have used up all of your air, put down one finger. You
have blown out the first candle.
ASK: Do you feel as your belly rises into your hand?
DO: Demonstrate for the learners, with your hand on
your belly, counting in for four, holding for two, and
exhaling for four. Put down one finger when you have
finished your exhale. Smell the flower for 1, 2, 3, 4. Hold
the smell for 1, 2. Blow out the candle for 1, 2, 3, 4.
SAY: We are going to practice together. To pretend like
we have a very strong feeling, like we are really really
angry, we are going to get our heart rate up! Let’s do
jumping jacks for one minute. After I say STOP, I want
you to then practice your belly breathing until you blow
out all of the candles and put all five of your fingers
down. Notice what happens to your heart rate and to how
you feel all over!
DO: Have the children do jumping jacks for 30 seconds.
SAY: STOP! Begin to belly breath. Smell the flower for
1, 2, 3, 4. Hold the smell for 1, 2. Blow out the candle for
1, 2, 3, 4.
4 minutes ASK: How did you feel when you stopped jumping?
How do you feel now after belly-breathing?
DO: Have children answer.
ASK: How can we use belly-breathing to control our
emotions?
DO: Have children answer.
8 minutes DO: Pass around paper and markers / pencils / crayons
SAY: Now that we understand how to belly-breath, I
want each of you to draw a picture of when you will use
belly-breathing to calm down your emotions. You can
keep it as a reminder of using belly-breathing to calm
down.
DO: Allow the children 5 to 8 minutes to draw, until they
seem to be finished.

Education Crisis Response - Facilitator’s Guide
316 | Part 3 – Social and Emotional Learning lessons
Step &
Icons
Time Description
4 minutes Assessment
SAY: We have all drawn a situation where we will use
belly-breathing. Find a partner, and share your picture
with your partner. Tell your partner when you will use
belly breathing and why you will use belly breathing.
Make sure you both have time to share! Next class we will
come back to our partners and tell them if we were able to
use belly-breathing.
DO: Split the students into pairs. Walk around while they
are sharing and make sure they understand how and when
to use belly-breathing.
2 minutes Conclusions/Review
SAY: Thank you all for sharing your drawing with your
partners. Your homework is to use belly-breathing at least
once before our next session. We will go back to our same
partners and share a time when we used belly-breathing.
SAY: We are going to learn more methods to control our
emotions, so let’s keep a toolbox that we can refer back to
that will help us control our emotions. Today we learned
belly-breathing. Can I have a volunteer come up to put
this picture of belly-breathing in the toolbox?
DO: Assist a student to put the picture of belly-breathing
on the flipchart that says “Controlling Feelings Toolkit”
Reflection: Children should be excited to use belly-breathing in real life. Are their
situations realistic?
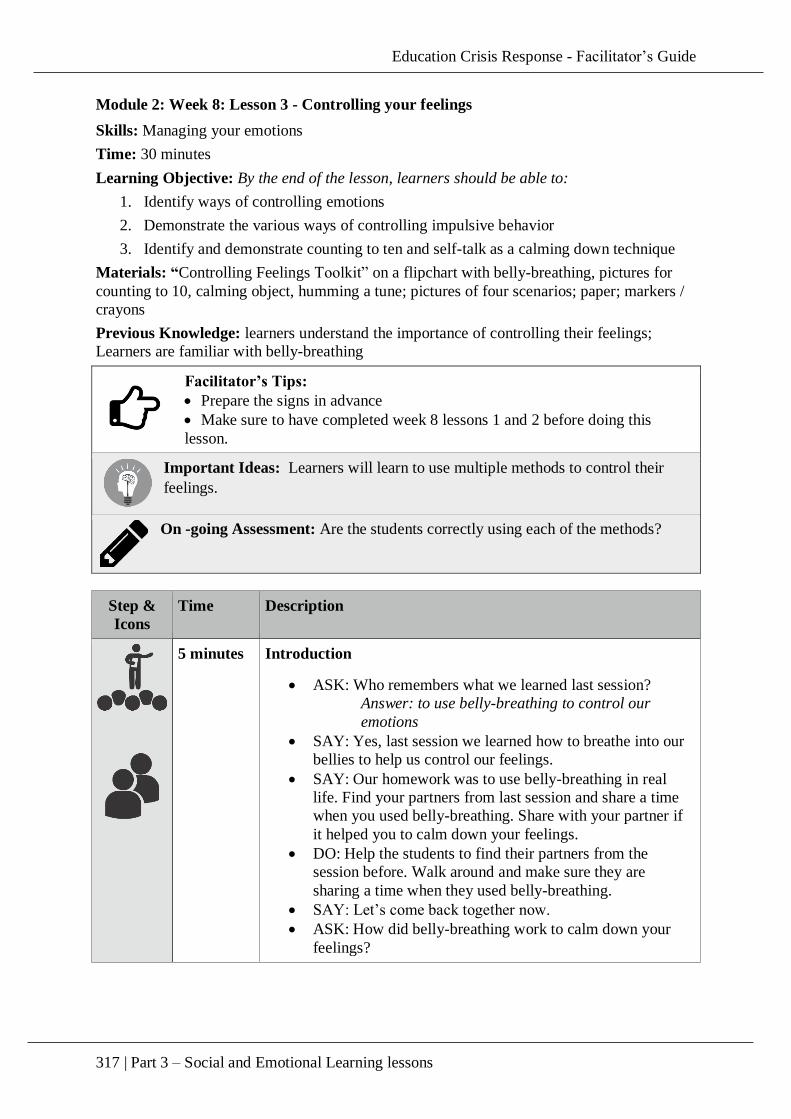
Education Crisis Response - Facilitator’s Guide
317 | Part 3 – Social and Emotional Learning lessons
Module 2: Week 8: Lesson 3 - Controlling your feelings
Skills: Managing your emotions
Time: 30 minutes
Learning Objective: By the end of the lesson, learners should be able to:
1. Identify ways of controlling emotions
2. Demonstrate the various ways of controlling impulsive behavior
3. Identify and demonstrate counting to ten and self-talk as a calming down technique
Materials: “Controlling Feelings Toolkit” on a flipchart with belly-breathing, pictures for
counting to 10, calming object, humming a tune; pictures of four scenarios; paper; markers /
crayons
Previous Knowledge: learners understand the importance of controlling their feelings;
Learners are familiar with belly-breathing
Facilitator’s Tips:
Prepare the signs in advance
Make sure to have completed week 8 lessons 1 and 2 before doing this
lesson.
Important Ideas: Learners will learn to use multiple methods to control their
feelings.
On -going Assessment: Are the students correctly using each of the methods?
Step &
Icons
Time Description
5 minutes Introduction
ASK: Who remembers what we learned last session?
Answer: to use belly-breathing to control our
emotions
SAY: Yes, last session we learned how to breathe into our
bellies to help us control our feelings.
SAY: Our homework was to use belly-breathing in real
life. Find your partners from last session and share a time
when you used belly-breathing. Share with your partner if
it helped you to calm down your feelings.
DO: Help the students to find their partners from the
session before. Walk around and make sure they are
sharing a time when they used belly-breathing.
SAY: Let’s come back together now.
ASK: How did belly-breathing work to calm down your
feelings?
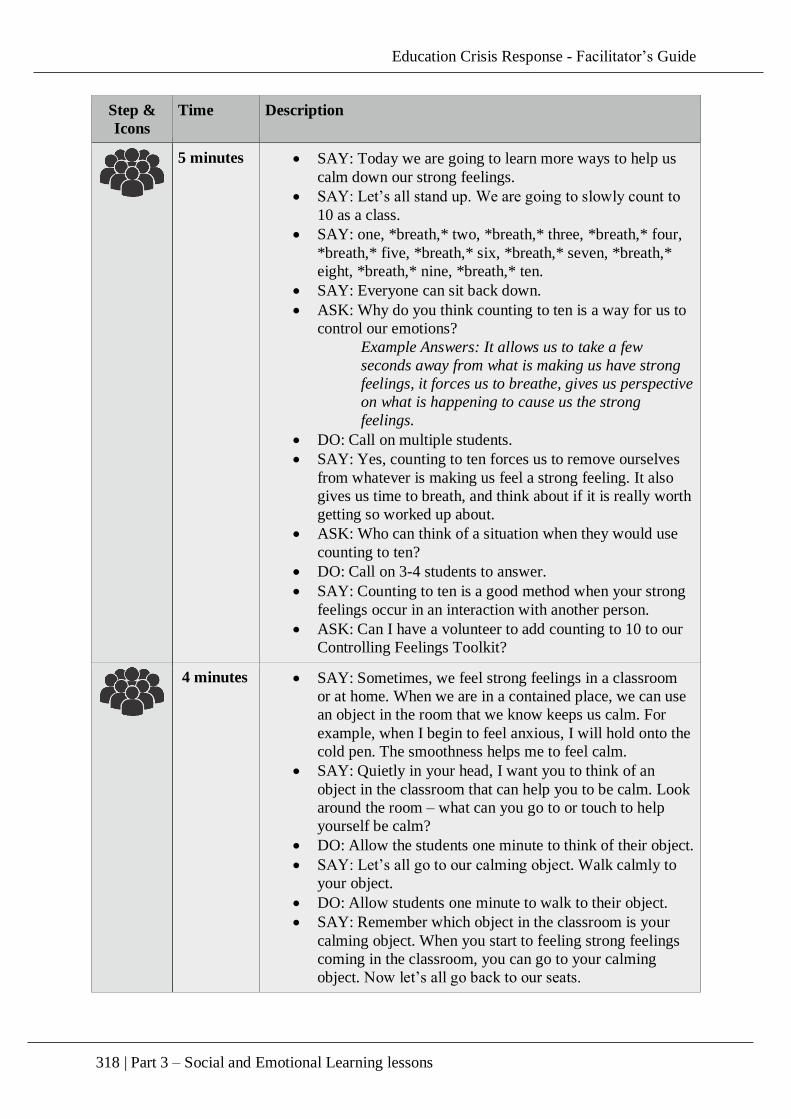
Education Crisis Response - Facilitator’s Guide
318 | Part 3 – Social and Emotional Learning lessons
Step &
Icons
Time Description
5 minutes SAY: Today we are going to learn more ways to help us
calm down our strong feelings.
SAY: Let’s all stand up. We are going to slowly count to
10 as a class.
SAY: one, *breath,* two, *breath,* three, *breath,* four,
*breath,* five, *breath,* six, *breath,* seven, *breath,*
eight, *breath,* nine, *breath,* ten.
SAY: Everyone can sit back down.
ASK: Why do you think counting to ten is a way for us to
control our emotions?
Example Answers: It allows us to take a few
seconds away from what is making us have strong
feelings, it forces us to breathe, gives us perspective
on what is happening to cause us the strong
feelings.
DO: Call on multiple students.
SAY: Yes, counting to ten forces us to remove ourselves
from whatever is making us feel a strong feeling. It also
gives us time to breath, and think about if it is really worth
getting so worked up about.
ASK: Who can think of a situation when they would use
counting to ten?
DO: Call on 3-4 students to answer.
SAY: Counting to ten is a good method when your strong
feelings occur in an interaction with another person.
ASK: Can I have a volunteer to add counting to 10 to our
Controlling Feelings Toolkit?
4 minutes SAY: Sometimes, we feel strong feelings in a classroom
or at home. When we are in a contained place, we can use
an object in the room that we know keeps us calm. For
example, when I begin to feel anxious, I will hold onto the
cold pen. The smoothness helps me to feel calm.
SAY: Quietly in your head, I want you to think of an
object in the classroom that can help you to be calm. Look
around the room – what can you go to or touch to help
yourself be calm?
DO: Allow the students one minute to think of their object.
SAY: Let’s all go to our calming object. Walk calmly to
your object.
DO: Allow students one minute to walk to their object.
SAY: Remember which object in the classroom is your
calming object. When you start to feeling strong feelings
coming in the classroom, you can go to your calming
object. Now let’s all go back to our seats.

Education Crisis Response - Facilitator’s Guide
319 | Part 3 – Social and Emotional Learning lessons
Step &
Icons
Time Description
*If your class is too large to do this, have them sit and
think about their object and then share with a partner.
ASK: Can I have a volunteer to add calming object to our
Controlling Feelings Toolkit?
4 minutes SAY: Sometimes we feel strong feelings when we are by
ourselves. When we are by ourselves and will not distract
other people, we can keep ourselves calm by quietly
singing or humming a song to ourselves.
ASK: What songs do you think can help you keep calm?
DO: call on 3 – 4 students to share the song they would
sing or hum to keep calm.
SAY: Everyone should think of a song that they can sing
or hum to themselves if they start having strong feelings.
ASK: Can I have a volunteer to add humming a tune to
our Controlling Feelings Toolkit?
6 minutes DO: Tear up pieces of paper into 4. Give each student 4
small pieces of paper and a marker or crayon.
SAY: On each piece of paper, draw one of the emotion
calming strategies. You have 4 pieces of paper, one for
belly-breathing, one for counting to 10, one for a calming
object, and one for humming quietly. Take 5 minutes to
draw a picture of each of the calming strategies.
5 minutes Assessment
DO: Put up four pictures of different scenarios. These
scenarios can be based on what would be commonly
stressful circumstances for your students. Examples are:
Fighting with siblings; having a lot of homework; feeling
lonely; seeing something scary.
SAY: You have each created a small picture with the four
different methods we learned to control our feelings.
Around the class, I have put up four different scenarios
where you might need to use your feeling control
strategies. The four scenarios are:
o Fighting with your siblings;
o Having a lot of homework;
o Feeling lonely;
o Seeing something scary
SAY: You can walk around to each of the scenarios and
stick which feeling control strategy you would use in that
situation. Once you have placed all four of your strategy
pictures, you can sit back down.
ASK: Do you have any questions?
Education Crisis Response - Facilitator’s Guide
320 | Part 3 – Social and Emotional Learning lessons
Step &
Icons
Time Description
DO: Allow the students to walk around and place their
pictures. Answer any questions they have as they walk
around.
1 minute Conclusions/Review
SAY: Let’s all sit back down. This week, we have learned
four different strategies we can use to calm down strong
feelings.
ASK: Can anyone remind me of these four strategies?
DO: Call on four different students to share each of the
strategies: belly-breathing; count to ten; calming object;
humming a tune.
SAY: We always have our Controlling Feelings Toolkit
with us, and we can use these four strategies and others
when we need them.
Reflection: Which strategies do the students choose for each scenario? Is there a trend?
Education Crisis Response - Facilitator’s Guide
321 | Part 3 – Social and Emotional Learning lessons
Module 2: Week 9: Lesson 1 - How are they feeling?
Skills: Identifying feelings of others
Time: 30 minutes
Learning Objective: By the end of the lesson, learners should be able to:
1. Name and identify feelings of others
2. Use physical, verbal and situation clues to determine what others are feeling
Materials: none
Previous Knowledge: Learners understand the concept of feelings
Facilitator’s Tips:
Encourage learners to identify others’ feelings based on how they perceive
feelings and how they are displayed physically.
This is the first lesson out of 3 for week 9
Important Ideas: Learners should be able to identify other people’s feelings
On -going Assessment: Are students able to correctly identify feelings?
Step &
Icons
Time Description
6 minutes Introduction
SAY: Two weeks ago, we learned how to identify feelings
in ourselves.
ASK: Who can remind me how it feels to be happy?
o Answer: feel light, smiling, open to others.
ASK: Who can remind me how it feels to be sad?
o Answer: tears, trembling lip, tired, frowning, feels
like heart drops
ASK: Who can remind me how it feels to be scared?
o Answer: sweating, heart racing, tight muscles,
moving backwards or desire to retreat
ASK: Who can remind me how it feels to be surprised?
o Answer: heart racing, lost breath, open eyes /
mouth
ASK: Who can remind me how it feels to be angry?
o Answer: heart racing, clenched jaw / muscles, heat
goes to head
ASK: Who can remind me how it feels to be proud?
o Answer: feels like heart is swelling, calm, standing
tall

Education Crisis Response - Facilitator’s Guide
322 | Part 3 – Social and Emotional Learning lessons
Step &
Icons
Time Description
5 minutes ASK: If we know it feels for us to have certain feelings,
how can we tell if someone else is having those feelings?
o Example Answer: they might have the same
physical responses; we can look for cues in their
bodies, faces, tone of their voice, language.
SAY: You can often guess how someone else is feeling
from the physical clues in their bodies. Everyone feels
things a little bit differently, but there are some things we
can look out for. We can look for cues in their bodies,
faces, tone of their voice, language.
SAY: We will have a volunteer come up and show us a
feeling. Then, as a class, we will identify what the
volunteer is feeling.
ASK: Can I have a volunteer come up to show us a
feeling?
SAY: Do not tell us what feeling you are going to show,
just show us with your face, your body and your actions.
DO: Call on a volunteer to demonstrate a feeling.
ASK: Who in the class knows what the volunteer was
feeling? How could you tell?
DO: Repeat with 3 - 4 volunteers.
7 minutes SAY: There are three different clues we can use to
understand what someone else is feeling.
o First, we need to understand the situation. Ask
yourself: What is happening and how could it
make the person feel?
o Next, you can understand how someone is feeling
based on their body positioning and facial
expressions. Ask yourself: What does their body
positioning represent? Are they smiling?
Frowning?
o Finally, listen to what the person is saying and
how. Ask yourself: What tone are they using?
What about what words?
ASK: Who can tell me what three clues we can use to
understand someone else’s feelings?
DO: Call on students and make sure the three answers you
receive are: situation, body, word.
SAY: We can remember to look around at the situation.
DO: Mime looking around from left to right and back.
SAY: Then we look at the person.
DO: Mime looking a person up and down.
Education Crisis Response - Facilitator’s Guide
323 | Part 3 – Social and Emotional Learning lessons
Step &
Icons
Time Description
SAY: And last we listen to their words and tone.
DO: Mime listening with your hand to your ear.
SAY: Situational, Body, and Words.
DO: Mime each of the three.
SAY: Let’s all act out the three clues we can use to
identify someone else’s feelings.
SAY: Situational, Body, and Words.
DO: Mime each of the three.
SAY: Great job. Remember these three clues for
identifying someone else’s feelings: Situational, Body, and
Words.
11 minutes Assessment
SAY: I will divide you into two teams. Each member of
each team will have 30 seconds to act out as many feelings
as he or she can think of. His or her teammates must guess
what feeling is being acted out. I will keep track of the
number of right feelings you guess. We will alternate
teams, so one person from each team will get to go one
after another.
DO: Divide the class into 2 teams. Give instructions again
as needed, and answer questions. Play the game for as
long as you have.
1 minute Conclusions/Review
SAY: Great job. I hope you enjoyed guessing what your
classmates were feeling. Next session we will learn how
different people might have different feelings. Remember
how to identify their feelings: Situational, Body, and
Words.
Reflection: Are students able to identify one another’s feelings? How do they respond to the
feelings?
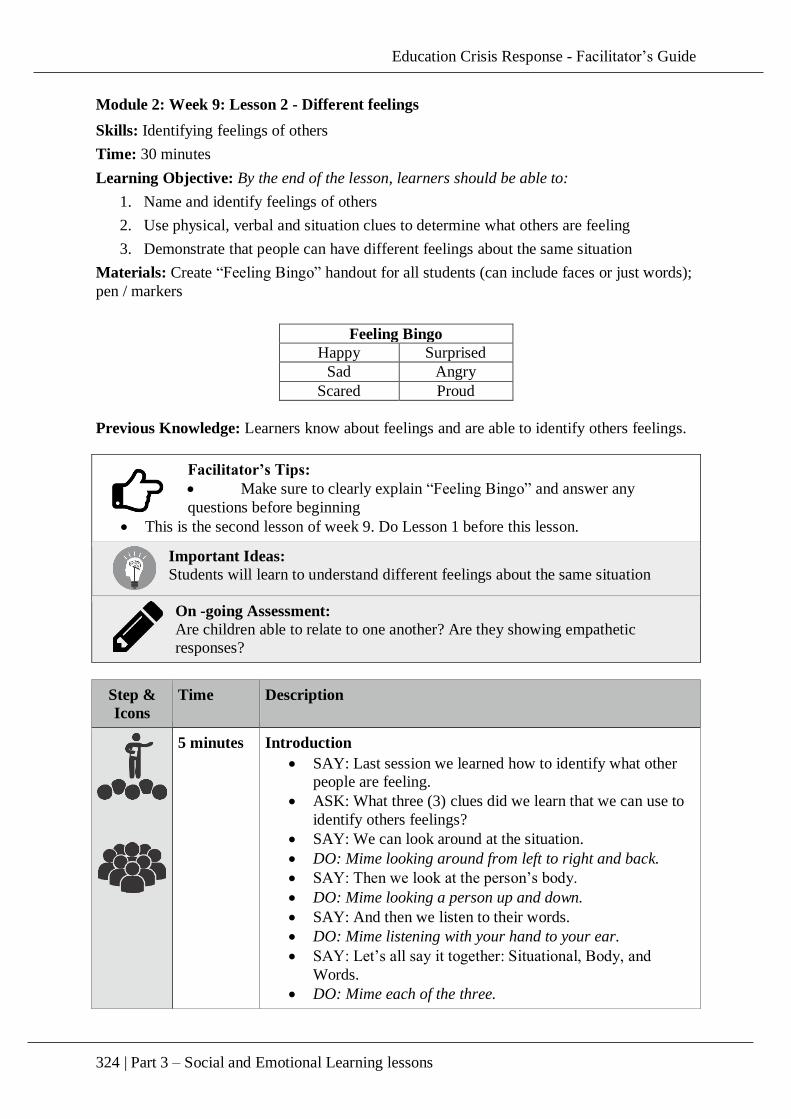
Education Crisis Response - Facilitator’s Guide
324 | Part 3 – Social and Emotional Learning lessons
Module 2: Week 9: Lesson 2 - Different feelings
Skills: Identifying feelings of others
Time: 30 minutes
Learning Objective: By the end of the lesson, learners should be able to:
1. Name and identify feelings of others
2. Use physical, verbal and situation clues to determine what others are feeling
3. Demonstrate that people can have different feelings about the same situation
Materials: Create “Feeling Bingo” handout for all students (can include faces or just words);
pen / markers
Feeling Bingo
Happy Surprised
Sad Angry
Scared Proud
Previous Knowledge: Learners know about feelings and are able to identify others feelings.
Facilitator’s Tips:
Make sure to clearly explain “Feeling Bingo” and answer any
questions before beginning
This is the second lesson of week 9. Do Lesson 1 before this lesson.
Important Ideas:
Students will learn to understand different feelings about the same situation
On -going Assessment:
Are children able to relate to one another? Are they showing empathetic
responses?
Step &
Icons
Time Description
5 minutes Introduction
SAY: Last session we learned how to identify what other
people are feeling.
ASK: What three (3) clues did we learn that we can use to
identify others feelings?
SAY: We can look around at the situation.
DO: Mime looking around from left to right and back.
SAY: Then we look at the person’s body.
DO: Mime looking a person up and down.
SAY: And then we listen to their words.
DO: Mime listening with your hand to your ear.
SAY: Let’s all say it together: Situational, Body, and
Words.
DO: Mime each of the three.
Education Crisis Response - Facilitator’s Guide
325 | Part 3 – Social and Emotional Learning lessons
Step &
Icons
Time Description
SAY: Today we will learn that not everyone has the same
emotional response to the same situation. We can still use
the three clues to identify people’s feelings, but there can
be multiple responses to one situation.
18 minutes DO: pass out “Feeling Bingo” cards to students and a
pen/marker
SAY: We are going to play “Feeling Bingo.” Each of you
has a “Feeling Bingo” card that you need to fill out.
I will say a situation that might happen to you in real life.
You will have 30 seconds to think of how you would feel
in that situation.
You will need to find a partner who has a different feeling
than you in the situation. That person will write their name
on your Feeling Bingo card under the feeling that they
would have in that situation.
After writing their name on the card, each person will
explain to the other why they felt that way. Your goal is to
try and understand why your partner would feel differently
than you in the situation.
The first person to fill out their entire Bingo card wins. If
you fill out your entire card, say “BINGO” so I can hear
you and walk up to me.
*You can adapt these scenarios to fit the community you
are working with*
AFTER EACH SCENARIO SAY: How do you feel? Find
someone that feels differently than you do, and try to
understand why he or she feels that way in the situation.
Mark their name on your Feeling Bingo sheet.
*note: wait two minutes after each scenario to allow the
participants to discuss why they had the feeling they had*
SCENARIO 1
You are late for school one morning, and the teacher says
that you cannot attend today and you must go back home.
SCENARIO 2
Your big brother works in the market during the day
instead of going to school. One day he comes home with a
big profit, but he will not tell you how he got it.
SCENARIO 3
You and your best friend go out to play one day and find a
really interesting object you have never seen before.
SCENARIO 4
You and your family have to leave your home and travel a
far distance to a new home.

Education Crisis Response - Facilitator’s Guide
326 | Part 3 – Social and Emotional Learning lessons
Step &
Icons
Time Description
SCENARIO 5
It is dark and you have to walk alone from the market back
to your home.
SCENARIO 6
You have just performed top in your class.
SCENARIO 7
When you get home from school, your mother has
prepared your favorite food for you.
SCENARIO 8
On your way to the market, you are running and skipping
and playing. And then you see a big snake in your path.
SCENARIO 9
You get to spend all day playing with your friends and
your brothers and sisters.
Once someone has won, check his or her card. Invite the
entire class to clap for themselves and sit back in their
seats.
5 minutes Assessment
Lead a discussion based on the following questions:
o Were you surprised to learn that different people
had different feelings in response to the same
scenario?
o How did you understand how the other person felt?
o Was it difficult for you to relate to the other
person’s feelings?
SAY: Even in the same situations, different people have
different feelings. This can be because of different things
that have happened to them or just because of how they
feel. It is okay to have different feelings.
2 minutes Conclusions/Review
SAY: Today we have begun to understand how people can
have different feelings in the same scenario. Next session
we will begin to learn how to respond to other people’s
feelings.
Reflection: Are children able to understand how others have different feelings than them?

Education Crisis Response - Facilitator’s Guide
327 | Part 3 – Social and Emotional Learning lessons
Module 2: Week 9: Lesson 3 - Responding to Others’ Feelings
Skills: Understanding and respecting the feelings of others
Time: 30 minutes
Learning Objective: By the end of the lesson, learners should be able to:
1. Name and identify feelings of others
2. Use physical, verbal and situation clues to determine what others are feeling
3. Demonstrate that people can have different feelings about the same situation
4. Respect the feelings of others
Materials: “The 5 Senses of Empathy” handout with pictures of eyes, nose, ears, hand,
mouth or write it on a flipchart / blackboard
Previous Knowledge: Learners are aware that others have feelings and that those feelings
might be different
Facilitator’s Tips:
Prepare the 5 Senses of Empathy handout before the class
This is the third lesson of the week. Do Lesson 1 and 2 before this
lesson.
Important Ideas: Learners should be able to respond to the feelings of others using the 5 Senses of
Empathy.
On -going Assessment: Do learners adequately understand and respect others
feelings?
Step &
Icons
Time Description
2 minutes Introduction
SAY: Last session we began to understand how different
people have different feelings in the same scenario.
SAY: Today we will begin to learn how to respond to those
feelings that people have.
ASK: Who can name the five senses?
Answer: sight, smell, hearing, touch, taste
SAY: We can use our five senses to tell what another
person is feeling.
5 minutes DO: Draw pictures of eyes, nose, ears, hand, mouth or
pass out handout.
ASK: How can we use our eyes in understanding and
responding to another person’s feelings?
Example answer: To see what they are doing, how they
are physically responding to the situation
Education Crisis Response - Facilitator’s Guide
328 | Part 3 – Social and Emotional Learning lessons
Step &
Icons
Time Description
ASK: How can we use our ears in understanding and
responding to another person’s feelings?
Example answer: To hear what they are saying, which will
help us to understand their feelings.
ASK: How can we use our nose in understanding and
responding to another person’s feelings?
Example answer: Sensing or smelling what is happening
ASK: How can we use our touch, our hand, in
understanding and responding to another person’s
feelings?
Example answer: If someone is feeling bad feelings, we
can hug them or pat them on the back to make them feel
better. Sometimes it is not appropriate to touch someone
and we should keep our hands to ourselves.
ASK: How can we use our mouth in understanding and
responding to another person’s feelings?
Example answer: We can say kind words, or encouraging
words based on what the person is feeling. Sometimes the
other person wants us to stay quiet.
8 minutes SAY: We will each use our 5 senses handout to
individually write down a situation where we responded to
someone else’ feelings. Think about how you did or could
have used your 5 senses of empathy.
DO: hand out 5 sense of empathy handout or blank paper
and pens / markers
5 minutes SAY: Now that we have all finished writing out 5 senses
of empathy, we will turn to a partner and share how we
either used or could have used our five senses to help
respond to someone else’s feelings.
DO: Divide the class into pairs. Walk around and make
sure each student is sharing their 5 Senses of Empathy
situation.
7 minutes Assessment
SAY: Let’s come back together as a class to discuss our 5
Senses of Empathy.
ASK: Who would like to share the situation when they
used the 5 senses of empathy?
DO: Call on multiple students to share their 5 Senses of
Empathy. Ask a follow up question to the class:

Education Crisis Response - Facilitator’s Guide
329 | Part 3 – Social and Emotional Learning lessons
Step &
Icons
Time Description
o How does using the 5 Senses help our classmate to
respond with understanding?
SAY: We have all described how we could use our 5
Senses of Empathy to respond to others’ feelings.
3 minutes Conclusions/Review
SAY: Now we will take 3 minutes to quietly think about
one situation that we think will happen in the next week
where we can use the 5 Senses of Empathy.
SAY: Your homework is to use the 5 Senses of Empathy at
home.
Reflection: Are children able to understand and use the 5 Senses of Empathy?
Education Crisis Response - Facilitator’s Guide
330 | Part 3 – Social and Emotional Learning lessons
Module 2: Week 10: Lesson 1 - What is Empathy?
Skills: Empathy
Time: 30 minutes
Learning Objective: By the end of the lesson, learners should be able to:
1. Define empathy
2. Identify and demonstrate ways to show empathy for others
Materials: blackboard or flipchart and marker or chalk; ball
Previous Knowledge: Learners are familiar with the concept of empathy, though possibly
not the word.
Facilitator’s Tips:
This is the first of three lessons for Week 10. Make sure to do the lessons in
order
Important Ideas: Learners should understand that it is important to be able to put themselves in
someone else’s shoes.
On -going Assessment:
Do students properly understand empathy?
Step &
Icons
Time Description
4 minutes Introduction
DO: Write the word “empathy” on the board.
ASK: Who has some idea what the word “empathy”
means?
DO: Call on a few students to ask them what “empathy”
means to them.
SAY: I am going to tell you a short story that will help you
to understand the meaning of “empathy” a little better.
SAY:
Last night my sister was very upset because she just had a
fight with her best friend. Her friend said she no longer
wanted to be friends with my sister. My sister was crying
because her feelings were hurt. I tried to help by telling
her a story about when my best friend and I had a fight and
didn’t talk for months. I was able to give my sister advice
because I had been through the same experience. I knew
how she was feeling because I had felt the same way.
5 minutes ASK: Have you ever been in a situation where you knew
exactly how someone was feeling because you had been in
a similar situation?
SAY: Empathy is the ability to “put yourself in someone
else’s shoes.”
Education Crisis Response - Facilitator’s Guide
331 | Part 3 – Social and Emotional Learning lessons
Step &
Icons
Time Description
DO: Mime walking into a pair of shoes.
SAY: Being able to empathize can make us kinder and
make us treat others more respectfully.
ASK: If you know how it feels to be made fun of, do you
think you will be more or less likely to tease
someone? Why?
ASK: When would empathy be a useful skill?
DO: Call on students to respond
5 minutes SAY: When we are being empathetic, we need to make
sure that we are helping our friends to feel better. In order
to make people feel better, we need to make sure not to put
them down.
ASK: What do you think is a “putdown”?
DO: Call on 2-3 students to respond of put-downs. Do
NOT write them down.
SAY: A putdown is a hurtful thing people sometimes say
to one another that makes them feel not good, or less than
someone else.
ASK: When do people use put downs? How do put-downs
make people feel?
ASK: What is the opposite of a put down?
SAY: Put ups are kind and friendly things to say to each
other.
ASK: What are some examples of put-ups?
DO: Write the answers on the blackboard or flipchart
paper
ASK: How would these words make someone feel?
ASK: What would be the effect on the class if we used
these phrases instead of put-downs?
10 minutes SAY: Everyone come up to the center and stand in a circle
as quickly and quietly as you can. We are going to practice
our put-ups.
DO: Encourage silence and politeness as the students
move to the center.
SAY: We are going to play a game called “Toss the Put
Up.” I will start with the ball and toss it to someone else in
the circle. As I toss them the ball, I have to say something
nice about them, a put-up. The person I toss the ball to has
to remember who tossed the ball to them. Then he or she
will toss the ball to someone else in the circle who has not
yet received the ball and say a put-up. After everyone has
received the ball, we will toss the ball in the reverse
direction. Everyone will give the person who originally
Education Crisis Response - Facilitator’s Guide
332 | Part 3 – Social and Emotional Learning lessons
Step &
Icons
Time Description
tossed to them a put-up and toss them the ball. Eventually,
the ball should come back to me.
DO: Play the game until everyone has received and given
two put-ups.
4 minutes Assessment
While students are still standing in a circle ASK: How did
it feel to give someone else a put-up?
ASK: How did it feel to receive a put-up?
2 minutes Conclusions/Review
SAY: Everyday, we have the choice to be nice to others,
and to show empathy. When anyone else around us is
having a feeling, we can respond by trying to put ourselves
in their shoes. It is important that we try to respond with
put-ups instead of put-downs to make the people around us
feel better.
Reflection: Are students able to say put-ups about their classmates? Do they understand
what it means to put themselves in someone else’s shoes?
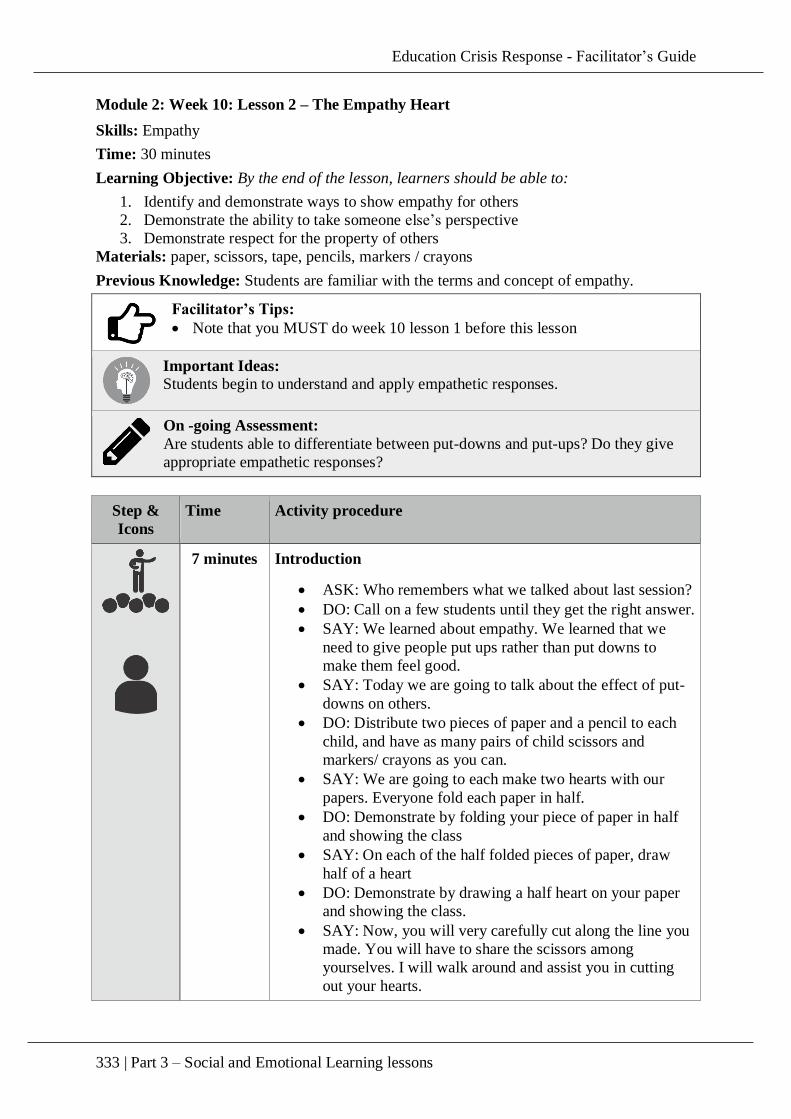
Education Crisis Response - Facilitator’s Guide
333 | Part 3 – Social and Emotional Learning lessons
Module 2: Week 10: Lesson 2 – The Empathy Heart
Skills: Empathy
Time: 30 minutes
Learning Objective: By the end of the lesson, learners should be able to:
1. Identify and demonstrate ways to show empathy for others
2. Demonstrate the ability to take someone else’s perspective
3. Demonstrate respect for the property of others
Materials: paper, scissors, tape, pencils, markers / crayons
Previous Knowledge: Students are familiar with the terms and concept of empathy.
Facilitator’s Tips:
Note that you MUST do week 10 lesson 1 before this lesson
Important Ideas: Students begin to understand and apply empathetic responses.
On -going Assessment:
Are students able to differentiate between put-downs and put-ups? Do they give
appropriate empathetic responses?
Step &
Icons
Time Activity procedure
7 minutes Introduction
ASK: Who remembers what we talked about last session?
DO: Call on a few students until they get the right answer.
SAY: We learned about empathy. We learned that we
need to give people put ups rather than put downs to
make them feel good.
SAY: Today we are going to talk about the effect of put-
downs on others.
DO: Distribute two pieces of paper and a pencil to each
child, and have as many pairs of child scissors and
markers/ crayons as you can.
SAY: We are going to each make two hearts with our
papers. Everyone fold each paper in half.
DO: Demonstrate by folding your piece of paper in half
and showing the class
SAY: On each of the half folded pieces of paper, draw
half of a heart
DO: Demonstrate by drawing a half heart on your paper
and showing the class.
SAY: Now, you will very carefully cut along the line you
made. You will have to share the scissors among
yourselves. I will walk around and assist you in cutting
out your hearts.
Education Crisis Response - Facilitator’s Guide
334 | Part 3 – Social and Emotional Learning lessons
Step &
Icons
Time Activity procedure
DO: Demonstrate by cutting along the line and showing
the class. Open up the heart to show them how it becomes
a heart. Walk around and assist children in cutting out
their hearts.
7 minutes SAY: I am now going to tell you a story about a girl your
age named Sarah. Every time Sarah receives a put-down,
rip a piece of the heart you made.
*Change the name if someone in your class is named
Sarah.*
SAY: One day, Sarah slept in a little bit late because she
was tired. Her father called for her to wake up, but she
did not hear. A few minutes later, he shouted, "Get up,
lazybones!”
*Do: Tear your heart*
SAY: When Sarah went out for breakfast, her brother
was taking the last of the food. "That's what you get for
oversleeping," he teased.
*Do: Tear your heart*
SAY: Sarah had wrapped her scarf in a new way that she
thought looked very good. Her sister said, “You look
stupid like that.”
*Do: Tear your heart*
SAY: After changing her scarf, Sarah knew she was
running late, so she ran to school. On her way, she ran
past some of the village boys who called out to her, “You
look like a cow when you try to run,” and laughed at her.
*Do: Tear your heart*
SAY: Sarah ran into class, out of breath and sweating.
Her classmate next to her said, “You smell bad and you
look gross.”
*Do: Tear your heart*
SAY: It was Sarah’s turn to do math problems on the
board. She got up and did the three problems assigned to
her. She got one wrong, and one of her classmates said,
“what are you, stupid? That question was so easy.”
*Do: Tear your heart*
SAY: Finally, it was the end of the long school day.
Sarah walked home, caught up in her own thoughts. She
didn’t see the branch in front of her, so she fell over and
her dress got caught on the branch and ripped. When she
got home her mother gasped and said, “I can’t give you
anything nice. You always ruin everything.”
Education Crisis Response - Facilitator’s Guide
335 | Part 3 – Social and Emotional Learning lessons
Step &
Icons
Time Activity procedure
10 minutes ASK: How is Sarah feeling? Have you ever had a day
like this?
DO: Call on many students to answer.
SAY: Now we are going to retell the story, except this
time you will think of put-ups in place of all of the put-
downs. Each time someone does something nice for
Sarah and shows her empathy, color in your heart.
SAY: One day, Sarah slept in a little bit late because she
was tired. Her father called for her to wake up, but she
did not hear.
ASK: What should her father say?
Example Answer: Sarah, are you okay? It is time to wake
up for school.
DO: Color in a bit of your heart
SAY: When Sarah went out for breakfast, her brother
was taking the last of the food.
ASK: What should her brother say?
Example Answer: Here, let’s split the last of the food.
DO: Color in a bit of your heart
SAY: Sarah had wrapped her scarf in a new way that she
thought looked very good.
ASK: What should her sister say?
Example Answer: Sarah! You look so nice!
DO: Color in a bit of your heart
SAY: After changing her scarf, Sarah knew she was
running late, so she ran to school. On her way, she ran
past some of the village boys.
ASK: What should the boys say?
Example Answer: Good luck getting to school on time!
DO: Color in a bit of your heart
SAY: Sarah ran into class, out of breath and sweating.
ASK: What should her classmate say?
Example Answer: I hope you are okay! Let me move
over so you can fit in.
DO: Color in a bit of your heart
SAY: It was Sarah’s turn to do math problems on the
board. She got up and did the three problems assigned to
her. She got one wrong.
ASK: What should her classmate say?
Example Answer: That was a hard problem. Maybe we
can figure out how to do the problem together.
DO: Color in a bit of your heart
SAY: Finally, it was the end of the long school day.
Sarah walked home, caught up in her own thoughts. She
Education Crisis Response - Facilitator’s Guide
336 | Part 3 – Social and Emotional Learning lessons
Step &
Icons
Time Activity procedure
didn’t see the branch in front of her, so she fell over and
her dress got caught on the branch and ripped.
ASK: What should her mother say?
Example Answer: Oh no! Are you hurt? It’s okay, we
can fix your dress.
DO: Color in a bit of your heart
4 minutes Assessment
ASK: How is Sarah feeling now?
DO: Call on many students to answer.
SAY: When people show Sarah empathy, she feels much
better then when she receives put-downs.
SAY: Look at the difference between the two hearts. We can
choose to tear up our class with put-downs so we all have broken
hearts, or we can choose to make our class a colorful and happy
place by showing empathy.
1 minute Conclusions/Review
SAY: Today we learned the effect of using put downs
compared to showing empathy and using put-ups. To
remind us to use empathy and put-ups in the classroom,
we are all going to tape our colored in hearts up on the
wall.
DO: Give each student a small piece of tape and show a
section of the wall where they will all place their colorful
hearts.
Reflection:
Are students able to give appropriate empathetic responses in the story?
Education Crisis Response - Facilitator’s Guide
337 | Part 3 – Social and Emotional Learning lessons
Module 2: Week 10: Lesson 3 - Communication Skills
Skills: Empathy
Time: 30 minutes
Learning Objective: By the end of the lesson, learners should be able to:
1. Identify and demonstrate ways to show empathy for others
2. Demonstrate the ability to take someone else’s perspective
3. Demonstrate respect for the property of others
Materials: board and chalk OR flipchart and marker
Previous Knowledge: Learners are familiar with the concept of empathy and are aware of
the benefits of responding to others with empathy.
Facilitator’s Tips:
This is the third lesson for week 10. Be sure to complete lesson 1 and 2 before
starting this lesson.
Important Ideas:
Learners should be able to communicate showing respect and empathy, and be
able to take someone else’s perspective
On -going Assessment:
Are learners able to adequately use the strategies taught in this lesson?
Step &
Icons
Time Description
3 minutes Introduction
SAY: Last session we saw the effects of putdowns
compared to showing empathy on other people.
ASK: Who can remind us how we showed the effects of
putdowns compared to showing empathy?
SAY: We created this wall of colorful hearts to remind us
how great it is when we use empathy and put-ups in the
classroom.
15 minutes SAY: There are certain skills that we can use in
communicating with other people that help them to know
that you are listening and respecting their feelings.
DO: Write on the board or a flipchart “Reflective
Listening” “Showing Empathy” and “Expressing
Understanding” in three columns.
SAY: Today we are going to learn three different ways that
we can communicate with empathy and respect.
ASK: What do you think “Reflective Listening” means?
Example Answer: showing respect by reflecting / repeating
what they have said back to them.
SAY: Reflective Listening is when you reflect on what the
other person is saying, and repeat it back to them to make
sure you understand. Then, you should always ask to make
sure you understand them correctly. This reflection and
repetition makes sure we understand one another.
Education Crisis Response - Facilitator’s Guide
338 | Part 3 – Social and Emotional Learning lessons
Step &
Icons
Time Description
SAY: For example, one evening Zainab’s mother asked
her, “Can you get the water from the bin?” Their family
had a large bin of water they kept, but there was also a
community bin where they could collect more water. In
order to make sure she understood, Zainab used her
reflective listening skills and said, “Mother, What I hear
you saying is that you would like me to get a bucket of
water from our family’s bin. Is that correct?” Zainab’s
mother said that yes that was what she wanted.
ASK: What could have happened if Zainab did not use
reflective listening?
Example answer: Zainab could have gone all the way to
the village bin for more water in the dark.
SAY: Now, turn and talk to the person next to you. I want
you to practice your reflective listening. Talk about your
favorite thing to do out of school. Each student will have
one minute to talk, while the second person responds. Then
we will switch.
DO: Allow the students 1 minute to “turn and talk.” Then
tell them to switch and allow 1 more minute. Walk around
and make sure that the children are modeling reflective
listening.
After two minutes, SAY: Great, let’s all come back
together.
ASK: What do you think “Showing Empathy and
Validation” means?
Example Answer: accept that someone else’s feeling is
okay, regardless of whether you agree with them. Then
help them to validate their feeling.
SAY: Showing Empathy and Validation is when you try to
understand, and always accept the feelings of another
person regardless of if you agree with them. Then you say
something to make them feel validated in their feelings.
SAY: For example, Michael was very proud one day. He
had read his first book. He told Jamila, “Look! I finished
this book! I am so proud! Jamila responded by saying, “
SAY: Jamila showed Michael that she understood his
feeling, and then validated his pride.
SAY: Now, turn and talk to someone new. I want you to
practice Showing Empathy and Validation. Talk about a
time when you were proud. Each student will have one
minute to talk, while the second person responds. Then we
will switch.
DO: Allow the students 1 minute to “turn and talk.” Then
tell them to switch and allow 1 more minute. Walk around
Education Crisis Response - Facilitator’s Guide
339 | Part 3 – Social and Emotional Learning lessons
Step &
Icons
Time Description
and make sure that the children are modeling Showing
Empathy and Validation.
After two minutes, SAY: Great, let’s all come back
together.
ASK: What do you think “Expressing Understanding”
means?
Example Answer: Telling the other person that you
understand their feelings.
SAY: Expressing Understanding is when you make sure
another person knows that you understand their feelings.
SAY: For example, Esther was sad one day because she
lost her favorite rope to jump rope with. She asked
Mohamed if he knew where it was, and told him she was
sad and worried someone had taken it. Mohamed
responded by saying “I understand where you are coming
from. I can see why you are sad.”
SAY: Mohamed showed Esther that he understood her
feeling.
SAY: Now, turn and talk to another person. I want you to
practice Expressing Understanding. Talk about a time
when you were sad. Each student will have one minute to
talk, while the second person responds. Then we will
switch.
DO: Allow the students 1 minute to “turn and talk.” Then
tell them to switch and allow 1 more minute. Walk around
and make sure that the children are modeling expressing
understanding.
SAY: Great job, let’s all come back together now.
ASK: How did it feel to use the three ways that we can
communicate with empathy and respect?
DO: Call on multiple students, and model one of the
methods in your response. For example, say “I see what
you are saying” or repeat back to them by saying “If I
understand correctly you are saying… Is that correct?”
10 minutes SAY: Many times the conflicts that come up are because
we see things in a different way from another person.
SAY: Today we are going to do at least one role-play that
shows us how conflicts can happen because we understand
things differently than someone else.
ASK: Can I have two volunteers to do the first role-play?
DO: Give two volunteers the role-play scene between
Ibrahim and his mother, below. Discuss the scene briefly
with each one to make sure s/he understands the role before
beginning the role-play. Instruct them to begin an argument
in the role-play.
Education Crisis Response - Facilitator’s Guide
340 | Part 3 – Social and Emotional Learning lessons
Step &
Icons
Time Description
Ibrahim
The house is messy. Some of Ibrahim's books are lying around.
He's going through them because he wants to trade some of them
with his friends. He also has a game on the floor that he started to
play with his sister. He wants the game to remain there so he and
his sister can finish it later. He likes being in the house because
there are usually other people around there. All the things that are
scattered about are things he is using. The mess doesn't bother
him.
Ibrahim's Mother
The house is messy. Ibrahim's books and game are lying around.
She wants to keep the house organized because everyone in the
family uses it and it is also the place where guests come. She
thinks Ibrahim's things are in the way. She thinks he should pick
up after himself and keep his things away.
DO: When the argument begins to get heated, stop the role-
play.
ASK (the students, as their character): How are you
feeling?
ASK (the rest of the class):
o What is Ibrahim's point of view? What does he
want?
o What is his mother's point of view? What does she
want?
o Can anybody think of a situation from his or her
own life that is similar? What are the different
points of view in that situation?
SAY: Let’s all clap for our great actors!
DO: Clap for the two actors.
ASK (the students who were acting): How did it feel to
play those roles?
DO: If you have time, ask students to think of another
situation when they had a different perspective than
someone else and act it out.
2 minutes Conclusions/Review
ASK: what did we learn today?
Answers: the three different ways that we can communicate
with empathy and respect: “Reflective Listening”
“Showing Empathy” and “Expressing Understanding”;
and how important it is to take someone else’s perspective
and how it can cause a conflict.
SAY: We can use the three communication methods and
our new ability to take someone else’s perspective to make
the classroom and our homes a happier and more
comfortable place for all of us.
Education Crisis Response - Facilitator’s Guide
341 | Part 3 – Social and Emotional Learning lessons
Step &
Icons
Time Description
Reflection: Are students able to model all three communication methods? Do they
understand the purpose of taking someone else’s perspective?
Education Crisis Response - Facilitator’s Guide
342 | Part 3 – Social and Emotional Learning lessons
Module 2 ASSESSMENT: Week 11
Assessment weeks are different than instruction weeks. Facilitators should select from the
various review and assessment activities below. Each review / assessment activity has a time
and an intended learning outcome.
Create and keep a tracking sheet (sample attached) for each student. For each assessment
activity, score the student’s performance on a scale of 1 to 5.
1 = Unsatisfactory
2 = Needs Improvement
3 = Meets Expectations
4 = Exceeds Expectations
5 = Exceptional
Learning Objective: By the end of the modules, learners should be able to:
1. Explain meanings of feelings and emotions (happy, lonely, scared, bored, angry, sad,
upset, surprised, strong, proud, afraid, glad, shy, worried, tired, love)
2. Identify different types of emotions
3. Express how they think and feel when they are hurt
4. Express how they think and feel when they are happy
5. Express how they feel without hurting others
6. Identify ways of controlling emotions
7. Demonstrate the various ways of controlling impulsive behavior
8. State the advantages of controlling emotions / impulsive behavior
9. Name and identify feelings of others
10. Use physical, verbal and situation clues to determine what others are feeling
11. Demonstrate that people can have different feelings about the same situation
12. Respect the feelings of others
13. Define empathy
14. Identify and demonstrate ways to show empathy for others
15. Demonstrate the ability to take someone else’s perspective
16. Demonstrate respect for the property of others
Step &
Icons
Time Activity procedure
Identifying Emotions: 10 minutes.
Assesses the students’ ability to explain meanings of feelings and emotions and identify
different types of emotions; express how they think and feel when they are hurt or happy
Materials: NONE
5 minutes Say: I will say an emotion, and each of you will show what
that emotion looks like on your faces.
o Happy
o Scared
o Bored
o Angry
o Sad
o Surprised
o Worried
Education Crisis Response - Facilitator’s Guide
343 | Part 3 – Social and Emotional Learning lessons
Step &
Icons
Time Activity procedure
o Tired
o Love
10 minutes Ask the learners to stand up (or form a circle) for a game.
Tell the learners: “I will pass a piece of chalk, stick (or any
other object available) around while everyone is clapping.
The pupil that is holding the object when I shout ‘Stop’ will
repeat what I say and complete the sentence.
Give an example (I feel hurt when people make fun of me)
I feel angry when…
I feel sad when…
I feel happy when…
I feel excited when..
Start the game and let the class continue clapping until
about five learners have formed different sentences.
Explain to the learners: When we do not tell others how we
think and feel, then our thoughts and feelings can continue
to hurt us.
Step &
Icons
Time Activity procedure
Comfortable / Uncomfortable: 10 minutes
Assesses the students’ ability to explain meanings of feelings and emotions and identify
different types of emotions
Materials: none
10 minutes SAY: We are going to play a little game. Everyone will put
down your head and close their eyes. I will say a feeling. If
that feeling is a comfortable feeling, raise your hand. If it is
an uncomfortable feeling, lower your hand.
ASK: Who can remind the class what we are going to do
now?
DO: Call on a student to repeat the instructions.
SAY: Everyone put your heads down.
SAY: The first feeling is anger. If you think it is a
comfortable feeling, raise your hand. If it is an
uncomfortable feeling, lower your hand.
DO: Count the number of hands that go up.
SAY: Everyone put your hands down. The second feeling is
pride.
DO: Count the number of hands that go up.
SAY: Everyone put your hands down. The next feeling is
sadness.
DO: Count the number of hands that go up.
Education Crisis Response - Facilitator’s Guide
344 | Part 3 – Social and Emotional Learning lessons
Step &
Icons
Time Activity procedure
SAY: Everyone put your hands down. The next feeling is
surprise.
DO: Count the number of hands that go up.
SAY: Everyone put your hands down. The next feeling is
scared.
DO: Count the number of hands that go up.
SAY: Everyone put your hands down. The next feeling is
happiness.
DO: Count the number of hands that go up.
SAY: Great job. You can all bring your heads back up.
Step &
Icons
Time Activity procedure
TITLE: 30 minutes
Assesses the students’ ability to state the advantages of controlling emotions / impulsive
behavior, identify ways of controlling emotions and demonstrate the various ways of
controlling impulsive behavior
Materials: NONE
10 minutes ASK: Can anyone remind me of the four strategies we
learned to control our emotions?
DO: Call on four different students to share each of the
strategies: belly-breathing; count to ten; calming object;
humming a tune.
ASK: When would we use each of these strategies?
DO: Call on multiple students to answer when they would
use one or more of the strategies.
10 minutes SAY: In your groups you will select one scenario that you
come up with where your feelings need to be controlled.
You will have 5 minutes in your groups to decide on your
scenario.
DO: Break the class into four (4) groups. Walk around
during their discussions to make sure they are all
participating and they understand the instructions.
SAY: Now that you have selected that scenario, you will
have 2 minutes to prepare to present that scenario back to
the class.
o DO: Allow two (2) minutes before calling the class
back together.
10 minutes SAY: Each group will have 2 minutes to present their
scenario back to the class.
Education Crisis Response - Facilitator’s Guide
345 | Part 3 – Social and Emotional Learning lessons
Step &
Icons
Time Activity procedure
DO: Call on each group to present. Ask the children
presenting:
o What feeling did you have to control?
o Why did you have to control your feeling?
SAY: Great job, you truly understand why it is important to
control our feelings.
Step &
Icons
Time Activity procedure
Feelings Charades: 15 minutes
Assesses the students’ ability to name and identify feelings of others and use physical, verbal
and situation clues to determine what others are feeling
Materials: NONE
15 minutes SAY: I will divide you into two teams. Each member of
each team will have 30 seconds to act out as many feelings
as he or she can think of. His or her teammates must guess
what feeling is being acted out. I will keep track of the
number of right feelings you guess. We will alternate teams,
so one person from each team will get to go one after
another.
o DO: Divide the class into 2 teams. Give instructions
again as needed, and answer questions. Play the
game for as long as you have.
Step &
Icons
Time Activity procedure
5 Senses of Empathy: 15 minutes
Assesses the students’ ability to demonstrate that people can have different feelings about the
same situation and respect the feelings of others
Materials: 5 Senses of Empathy Handout for all students; pen / marker
10 minutes SAY: We will each use our 5 senses handout to individually
write down a situation where we responded to someone else’
feelings. Think about how you did or could have used your 5
senses of empathy.
o DO: hand out 5 sense of empathy handout or blank
paper and pens / markers
5 minutes SAY: Now that we have all finished writing out 5 senses of
empathy, we will turn to a partner and share how we either
used or could have used our five senses to help respond to
someone else’s feelings.
Education Crisis Response - Facilitator’s Guide
346 | Part 3 – Social and Emotional Learning lessons
Step &
Icons
Time Activity procedure
DO: Divide the class into pairs. Walk around and make sure
each student is sharing their 5 Senses of Empathy situation
Step &
Icons
Time Activity procedure
Toss the Put Up: 15 minutes. Assesses the students’ ability to identify and demonstrate ways to show empathy for others
Materials: Ball
5 minutes SAY: Everyone come up to the center and stand in a circle
as quickly and quietly as you can. We are going to practice
our put-ups.
DO: Encourage silence and politeness as the students move
to the center.
SAY: We are going to play a game called “Toss the Put
Up.” I will start with the ball and toss it to someone else in
the circle. As I toss them the ball, I have to say something
nice about them, a put-up. The person I toss the ball to has
to remember who tossed the ball to them. Then he or she
will toss the ball to someone else in the circle who has not
yet received the ball and say a put-up. After everyone has
received the ball, we will toss the ball in the reverse
direction. Everyone will give the person who originally
tossed to them a put-up and toss them the ball. Eventually,
the ball should come back to me.
o DO: Play the game until everyone has received and
given two put-ups.
5 minutes While students are still standing in a circle ASK: How did it
feel to give someone else a put-up?
ASK: How did it feel to receive a put-up?
Step &
Icons
Time Activity procedure
Effective Communication: 15 minutes
Assesses the students’ ability to identify and demonstrate ways to show empathy for others and
demonstrate the ability to take someone else’s perspective
Materials: Nothing
Education Crisis Response - Facilitator’s Guide
347 | Part 3 – Social and Emotional Learning lessons
Step &
Icons
Time Activity procedure
10 minutes SAY: We learned three different ways that we can
communicate with empathy and respect.
ASK: Who remembers the three methods?
Answer: “Reflective Listening” “Showing Empathy” and
“Expressing Understanding”
SAY: Turn and talk to the person next to you. I want you to
practice your reflective listening. Talk about your favorite
thing to do out of school. Each student will have one minute
to talk, while the second person responds. Then we will
switch.
DO: Allow the students 1 minute to “turn and talk.” Then
tell them to switch and allow 1 more minute. Walk around
and make sure that the children are modeling reflective
listening.
After two minutes, SAY: Great, let’s all come back together.
SAY: Now, turn and talk to someone new. I want you to
practice Showing Empathy and Validation. Talk about a
time when you were proud. Each student will have one
minute to talk, while the second person responds. Then we
will switch.
DO: Allow the students 1 minute to “turn and talk.” Then
tell them to switch and allow 1 more minute. Walk around
and make sure that the children are modeling Showing
Empathy and Validation.
After two minutes, SAY: Great, let’s all come back together.
SAY: Now, turn and talk to another person. I want you to
practice Expressing Understanding. Talk about a time when
you were sad. Each student will have one minute to talk,
while the second person responds. Then we will switch.
DO: Allow the students 1 minute to “turn and talk.” Then
tell them to switch and allow 1 more minute. Walk around
and make sure that the children are modeling expressing
understanding.
SAY: Great job, let’s all come back together now.
5 minutes ASK: How did it feel to use the three ways that we can
communicate with empathy and respect?
DO: Call on as many students as possible to answer.
Education Crisis Response - Facilitator’s Guide
348 | Part 3 – Social and Emotional Learning lessons
Module 3: Week 12: Lesson 1 - How my actions affect others
Skills: Understanding consequences as a result of actions; identifying problems
Time: 30 minutes
Learning Objective: By the end of the lesson, learners should be able to:
1. Understand that their actions have reactions
2. Identify actions that can create problems for others
Materials: Papers with “actions” and “reactions” (see end of lesson plan for pairing of
actions and reactions), tape
Previous Knowledge: Students know that other people have feelings
Facilitator’s Tips:
There is a lot of activity in this plan – make sure that you stay on schedule. If
you are unable to, perhaps split the activity into two days. Also be aware of the
literacy level of your class and adapt the lesson accordingly.
Important Ideas: Focus should be on the response to each action that takes place.
On -going Assessment: Check in throughout the class – are students understanding the link between actions
and reactions? Are they associating appropriate reactions with actions? Do they
understand that by changing their actions, they can also change another person’s reactions?
Step &
Icons
Time Activity procedure
5 minutes Introduction
Invite all students to stand in a circle. Explain:
Today we are going to play “Zip, Zap, Zop.” One person
starts with the ball of energy and passes it to someone else
across the circle by holding both hands together and
pointing with a lot of energy in their direction and saying
“zip”. That person then points to a third person and says
“zap” with a lot of energy. The third person says “zop”
when they point to a fourth person. We continue passing
the ball of energy by passing the “zip” “zap” and “zop” in
that order to a new person in the circle each time. When
one of us makes a mistake, we say “I’m sorry, I made a
mistake” and sit down.
Begin the game, or alternatively select a quiet student or
one who is often left out to start the game. Play for 5
minutes, or until there is only one student remaining.
6 minutes Bring the class back to a seated position for a discussion
on actions and reactions.
Say: When we were playing “Zip, Zap, Zop” each of our
actions caused a reaction from our classmates. Everything
Education Crisis Response - Facilitator’s Guide
349 | Part 3 – Social and Emotional Learning lessons
Step &
Icons
Time Activity procedure
we do can cause a reaction in another person. When I ask
you to sit down, usually you react by sitting down. When
you raise your hand, I call on you. These are all actions
and reactions. Can you think of other actions and
reactions?
Allow the class to discuss what other actions and
reactions exist in their lives. Lead them to answer by
asking questions, such as:
o What interactions with your brothers and sisters
are made up of actions and reactions?
o Can reactions be good or bad?
o What leads to good or bad reactions?
o How do you think your actions affect others?
o Can we adjust our actions to get better reactions
out of other people?
13 minutes Tell the class: Now we will use our knowledge that
actions and reactions exist to play a game. Two students
will come to the front (or center, depending on the
classroom setup). Each will get a piece of paper stuck to
their head. They cannot see it, but the rest of us can. The
two will have an “action” and “reaction” pair on their
heads. The only information they will have is if they are
an “action” or a “reaction.” They will alternate taking
turns asking the rest of the class “yes or no” questions
about what they are. The aim is for both students to guess
what they are. All students will have the opportunity to
participate.
Select two students to begin as a demonstration. Call on
pairs of students, paste their “actions” and “reactions”,
then guide them to ask yes and no questions until they
figure out “what they are.”
After all students have gone, conclude this activity by
asking one or two questions and calling on just a few
students:
o What comes from every action?
o Can you predict other people’s reactions?
4 minutes Assessment
Have the learners get into pairs for individual discussions.
Say: In pairs, I would like you to discuss the following two
questions. When we come back together, each pair will
share one thing they discussed.
o How do you think your actions affect others?
o Can we adjust our actions to get better reactions out
of other people?
Education Crisis Response - Facilitator’s Guide
350 | Part 3 – Social and Emotional Learning lessons
Step &
Icons
Time Activity procedure
Repeat the questions twice, or write them on the board, so
that students remember to address both.
2 minutes Conclusions/Review
Bring the class back together and say:
o Can each group share their one sentence they
discussed?
After all groups have shared, say: It is important that we
always consider how our actions affect others. Remember:
every action has a reaction.
Reflection: After this class, are students aware of the possible reactions for their actions? Do
they try to control their behavior in order to have better reactions from their peers, teacher,
parents?
Action > Reaction
*Note that these pairs are just examples. Feel free to include Actions and Reactions that are
more relevant for your students! You can either draw this, or write them if your students are
able to read
1. Giving a hug > Feeling loved
2. Hitting > Getting hurt / feeling hurt
3. Saying “I’m sorry” > Forgiveness
4. Sharing your toys > Friendship
5. Breaking a class rule > Consequences (time out, cleaning, etc. - what is used in your
classroom)
6. Going to school > Job as an adult
7. Taking food from your brother / sister > Brother / sister is sad and hungry
8. Giving a present to your friend > Friend is happy
9. Listening to a friend > Closer friendship
Education Crisis Response - Facilitator’s Guide
351 | Part 3 – Social and Emotional Learning lessons
Module 4 Week 18: Lesson 1 - How to make friends
Skills: Be able to establish and maintain friendships; understand friendly behavior
Time: 30 minutes
Learning Objective: By the end of the lesson, learners should be able to:
1. Identify being friendly as the basic ingredient of making a good friend
2. Appreciate what it means to be friendly
3. Appreciate how it feels not to be friendly
Materials: A poster with the inscription: "To have good friends, you must be a good friend"
boldly written out and displayed in the class.
Previous Knowledge: Learners have previously learnt about who a friend is and that it is good
to have good friends and avoid bad friends.
Facilitator’s Tips:
One thing is to know who a friend is; another is to know how to make friends.
The basic emphasis of this lesson should be the saying: "To have good friends,
you must be a good friend." That is the lesson is to emphasis that the cultivation
of positive social skills by learners is the basic ingredient of making good friends.
Have the phrase: "To have good friends, you must be a good friend" clearly written out
on a cardboard and have it hung where the class can read it.
Important Ideas:
To have good friends, you must be a good friend.
On -going Assessment:
Do the learners take the initiative to be friendly? Are they kind and responsive to
one another?
Step &
Icons
Time Activity procedure
5 minutes Introduction
Start the class by saying last week we discussed about who
a friend is.
Say: Today we will discuss what we need to do to make
friends and to keep friends.
Write on the board: “A friend is…….”
Request the learners to give their opinions by completing
the statement.
o Rephrase the learners’ statements/answers as
appropriate and write the answer on the board.
Say, well done, you have all done well in sharing what a
friend is to you! From what you all are saying, a friend is…
(Go through the learners’ answers as written on the board).
Education Crisis Response - Facilitator’s Guide
352 | Part 3 – Social and Emotional Learning lessons
Step &
Icons
Time Activity procedure
10 minutes Say to the class: in groups, we will act out a scenario. One
group member will play a new class member. The other
group members will play existing members of the class.
The new class member will try to make new friends with
the other members. The rest of the group will be split – half
will be very friendly and the other half will not be friendly
at all.
Divide the class into groups of four or five.
Tell the groups to have one volunteer play the role of new
member of the class. S/he should first greet others, then
mention his name, smile at other members of the group,
ask other members of the group their names, etc.
Let the other members of the group divide themselves as
friendly or not friendly, and respond according to their
roles.
Go round each of the groups to be sure that the role play
does not degenerate into fighting, while commending and
commenting as appropriate.
5 minutes Bring the class back together for a discussion by saying:
Thank you for your great roleplays. Let’s come back
together to discuss how it felt to be the new member, the
friendly classmates and the unfriendly classmates.
Allow enough time for all or almost all members to give
comments. Leading questions and or viewpoint questions
may be used.
Ask questions such as:
o How does it feel to be the new student?
o Possible answer: scary, challenging, lonely
o How do you feel while ignoring the friendly
attempts of the new kid?
o Possible answer: mean, closed off, lonely
o How did it feel to be nice to the new student?
o Possible answer: good, fulfilled, kind,
Listen attentively to each learner’s point of view.
Rephrase the various comments from the perspective of the
“new member of class” and the “existing class”.
5 minutes Summarize by saying:
o The “unfriendly children” missed the opportunity to
be friends with the “new class members” because
they were not friendly
o We all feel bad if we do not cultivate good
friendship.
Say: one basic thing that we have learnt today is that "to
have good friends, you must be a good friend."

Education Crisis Response - Facilitator’s Guide
353 | Part 3 – Social and Emotional Learning lessons
Step &
Icons
Time Activity procedure
Point to the poster posted on the wall with the inscription,
and request the learners to read after you: "To have good
friends, you must be a good friend."
Say: well done kids! The today’s lesson has brought out the
basic ingredients of friendship which is that we first have to
be good friends.
5 minutes Conclusion
Say: let us see if we can remember the basic lesson that we
have learnt today.
Ask:
o What is the basic ingredient of making friends?
o How does it feel when others are not friendly with
you?
o How does it feel when others are friendly with you?
[Use viewpoint and leading questions such as how does
(mention the name of the learner) person feel when others
were not friendly with him/her]
Reflection:
How effective was the role play?
Did it achieve the intended outcome of making the learners “feel” what it is to be
friendly?
What was most useful about it?
What problems and challenges were encountered?

Education Crisis Response - Facilitator’s Guide
354 | Part 3 – Social and Emotional Learning lessons
Module 5: Week 23: Lesson 1 - Making decisions
Skills: Focusing attention; apply decision-making skills to deal responsibly with daily
situations
Time: 30 minutes
Learning Objective: By the end of the lesson, learners should be able to:
1. Identify a range of decisions that are made by students, adults, and communally
2. Show appropriate initiative and independence in actions and decisions
Materials: Storytelling decision prompts (see end of the lesson plan)
Previous Knowledge: Students have learned how to focus their attention.
Facilitator’s Tips:
Throughout the lesson, make sure that students are understanding what a “good
decision” means
Important Ideas:
Students should be focused on learning to make appropriate decisions
On -going Assessment:
Walk around and listen to students discussing making decisions.
Step &
Icons
Time Activity procedure
5 minutes Introduction
Say: Last week we talked about who we are. Part of who we
are is in the decisions we make every day.
Everyone should take a minute and think about a decision
they have already made today.
Give the students an example of a decision you made today,
ie: Today I decided to wear blue shoes; today I decided to
walk by the river on the way to school; today I decided to
eat porridge for breakfast.
After they have come up with their decision, say:
o Find all of the other students in the class who made
the same type of decision as you did this morning.
Give the students a few minutes to find the other students
who made similar decisions as they did. Go around and
encourage them to find people who made similar decisions.
Ask questions like:
o Did you make a decision about what you wore
today? What you ate?
Once they are in their groups, say:
o Each group will share what kind of decision they
made today.

Education Crisis Response - Facilitator’s Guide
355 | Part 3 – Social and Emotional Learning lessons
Step &
Icons
Time Activity procedure
After each group has shared the type of decisions they made
today, say:
o Do you see all of the types of decisions we make
every single day? Decisions are a big, important part
of our lives. It is important that we know when we
are making decisions, what appropriate decisions for
us to make are, and how we can make decisions
individually.
7 minutes Make sure that there are five (5) groups of approximately
the same size. If they are not, you can split a large group or
combine two small groups to make even sized groups.
Say: In our small groups we will develop a story to tell the
class. I will come around to each group and give you a key
decision that you will tell a story about. You will decide
what the “right decision” is for the main character. When
we come back together as a full group, you should be ready
to tell the story to the whole class. Each member of your
group should participate in telling the story. Remember,
you want to show good decision-making in your stories!
Ask: Do you have any questions?
Pass out the storytelling prompt notecards to each group.
As they are working in their groups
14 minutes Bring the whole class back together to sit in a circle for the
story telling. Invite one group at a time to share their story.
At the end of each story ask the full class:
What was the decision that this group told us a story about?
Did they make a good decision?
3 minutes Assessment
Ask a few students to answer the following questions:
How did it feel to make decisions?
How could you tell what were the right decisions?
1 minute Conclusions/Review
Say: Every day we make a lot of decisions. We always have
the option to make a good decision. Over the next week, I
want you to think about all the decisions you make in your
life. We should all try to make good decisions.
Reflection: Were the students able to show good decision-making?
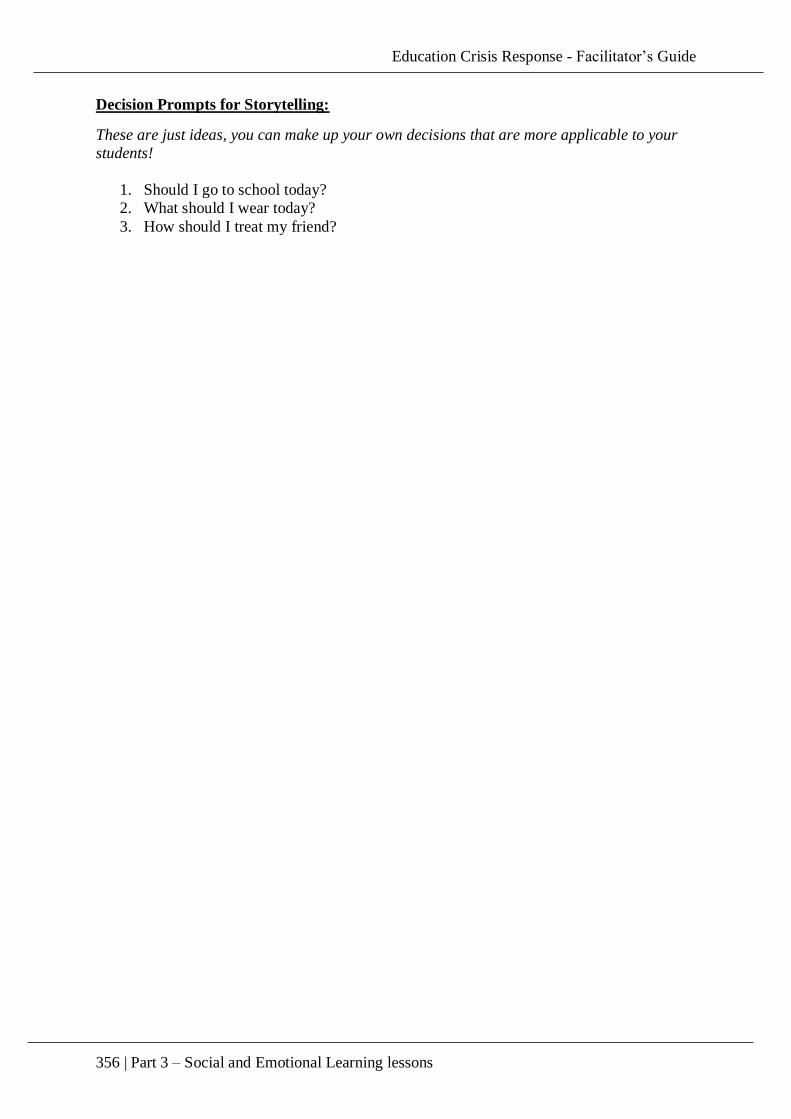
Education Crisis Response - Facilitator’s Guide
356 | Part 3 – Social and Emotional Learning lessons
Decision Prompts for Storytelling:
These are just ideas, you can make up your own decisions that are more applicable to your
students!
1. Should I go to school today?
2. What should I wear today?
3. How should I treat my friend?
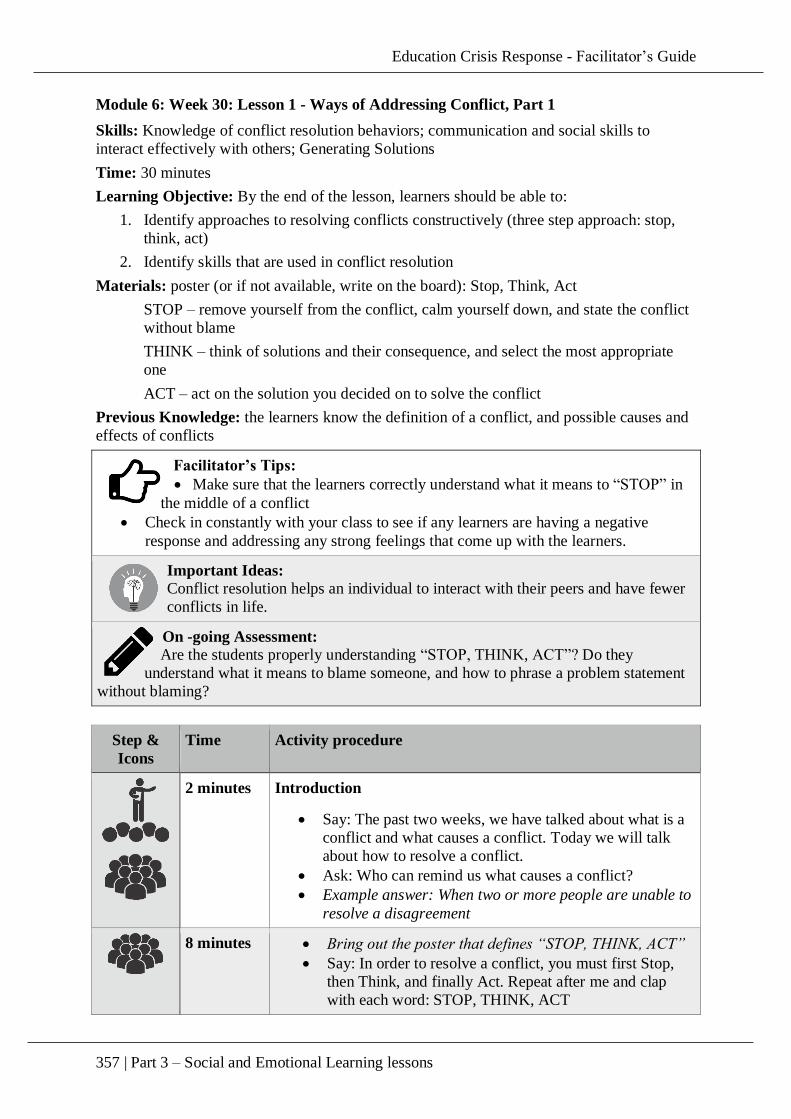
Education Crisis Response - Facilitator’s Guide
357 | Part 3 – Social and Emotional Learning lessons
Module 6: Week 30: Lesson 1 - Ways of Addressing Conflict, Part 1
Skills: Knowledge of conflict resolution behaviors; communication and social skills to
interact effectively with others; Generating Solutions
Time: 30 minutes
Learning Objective: By the end of the lesson, learners should be able to:
1. Identify approaches to resolving conflicts constructively (three step approach: stop,
think, act)
2. Identify skills that are used in conflict resolution
Materials: poster (or if not available, write on the board): Stop, Think, Act
STOP – remove yourself from the conflict, calm yourself down, and state the conflict
without blame
THINK – think of solutions and their consequence, and select the most appropriate
one
ACT – act on the solution you decided on to solve the conflict
Previous Knowledge: the learners know the definition of a conflict, and possible causes and
effects of conflicts
Facilitator’s Tips:
Make sure that the learners correctly understand what it means to “STOP” in
the middle of a conflict
Check in constantly with your class to see if any learners are having a negative
response and addressing any strong feelings that come up with the learners.
Important Ideas: Conflict resolution helps an individual to interact with their peers and have fewer
conflicts in life.
On -going Assessment: Are the students properly understanding “STOP, THINK, ACT”? Do they
understand what it means to blame someone, and how to phrase a problem statement
without blaming?
Step &
Icons
Time Activity procedure
2 minutes Introduction
Say: The past two weeks, we have talked about what is a
conflict and what causes a conflict. Today we will talk
about how to resolve a conflict.
Ask: Who can remind us what causes a conflict?
Example answer: When two or more people are unable to
resolve a disagreement
8 minutes Bring out the poster that defines “STOP, THINK, ACT”
Say: In order to resolve a conflict, you must first Stop,
then Think, and finally Act. Repeat after me and clap
with each word: STOP, THINK, ACT
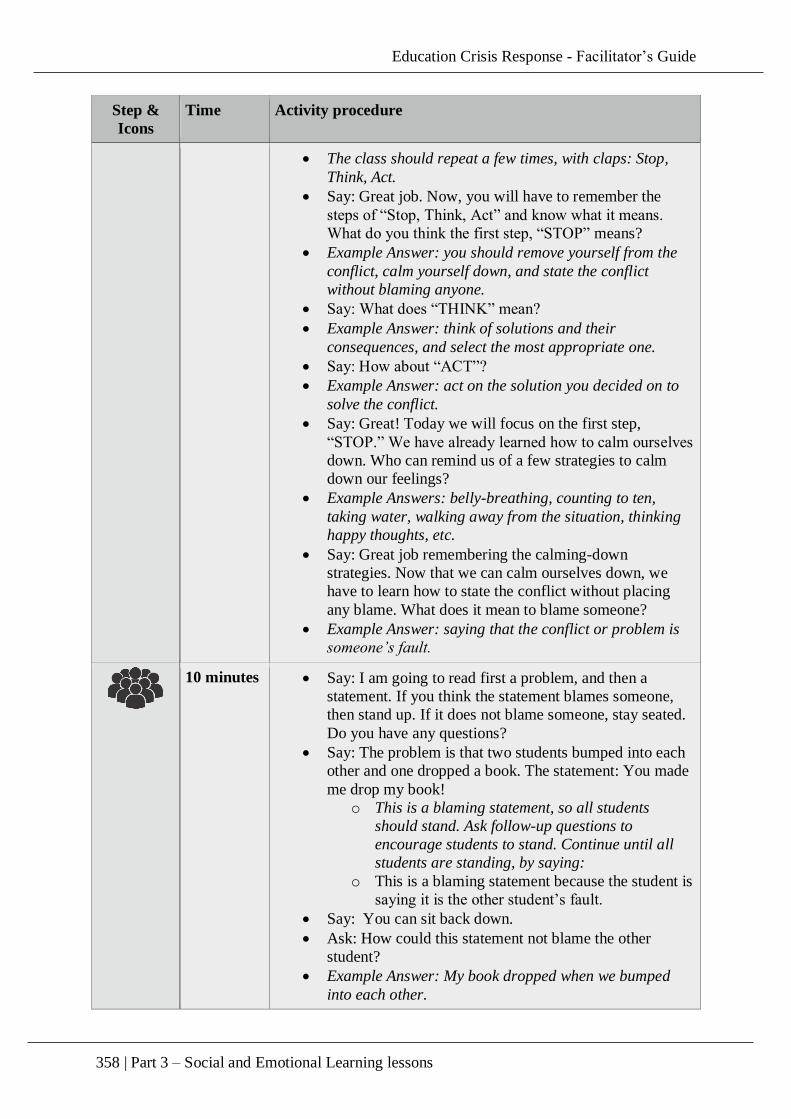
Education Crisis Response - Facilitator’s Guide
358 | Part 3 – Social and Emotional Learning lessons
Step &
Icons
Time Activity procedure
The class should repeat a few times, with claps: Stop,
Think, Act.
Say: Great job. Now, you will have to remember the
steps of “Stop, Think, Act” and know what it means.
What do you think the first step, “STOP” means?
Example Answer: you should remove yourself from the
conflict, calm yourself down, and state the conflict
without blaming anyone.
Say: What does “THINK” mean?
Example Answer: think of solutions and their
consequences, and select the most appropriate one.
Say: How about “ACT”?
Example Answer: act on the solution you decided on to
solve the conflict.
Say: Great! Today we will focus on the first step,
“STOP.” We have already learned how to calm ourselves
down. Who can remind us of a few strategies to calm
down our feelings?
Example Answers: belly-breathing, counting to ten,
taking water, walking away from the situation, thinking
happy thoughts, etc.
Say: Great job remembering the calming-down
strategies. Now that we can calm ourselves down, we
have to learn how to state the conflict without placing
any blame. What does it mean to blame someone?
Example Answer: saying that the conflict or problem is
someone’s fault.
10 minutes Say: I am going to read first a problem, and then a
statement. If you think the statement blames someone,
then stand up. If it does not blame someone, stay seated.
Do you have any questions?
Say: The problem is that two students bumped into each
other and one dropped a book. The statement: You made
me drop my book!
o This is a blaming statement, so all students
should stand. Ask follow-up questions to
encourage students to stand. Continue until all
students are standing, by saying:
o This is a blaming statement because the student is
saying it is the other student’s fault.
Say: You can sit back down.
Ask: How could this statement not blame the other
student?
Example Answer: My book dropped when we bumped
into each other.

Education Crisis Response - Facilitator’s Guide
359 | Part 3 – Social and Emotional Learning lessons
Step &
Icons
Time Activity procedure
Say: Please stand up. I am going to read more statements.
If it is a blaming statement, sit down. If it is not a
blaming problem statement, stay standing. For all of the
blaming statements, we will work together to make it a
non-blaming statement.
Read the following statements for the game. Between
each round, ask the students to stand up. For the blaming
statements, ask a student to rephrase it as a non-blaming
statement. You can add more statements if your students
are enjoying the game.
o You never share the jump rope (blaming – sit
down)
Non-blaming: We need to share the jump
rope
o We lost the football game (not blaming – stay
standing)
o You took my seat (blaming – sit down)
Non-blaming: We want to sit in the same
seat
o It’s her fault we were late (blaming – sit down)
Non-blaming: We were late
o We bumped into each other (not blaming – stay
standing)
o He spilled my drink (blaming – sit down)
Non-blaming: My drink spilled
o They were hogging the ball (blaming – sit down)
Non-blaming: We should all share the
ball
9 minutes Assessment
Ask: Do you remember the steps for resolving a conflict
that we learned today?
All should respond: STOP, THINK, ACT
Say: I would like each of you to think of a conflict that
you have had to address. Think about how you responded.
Then, in pairs, I would like you to come up with how you
could have used “STOP, THINK, ACT” to better resolve
the conflict. After we have all discussed in our pairs, we
will share back to the class what we discussed.
Make sure that all students are paired off. Give them just
a couple of minutes in their pairs before coming back
together to share what they discussed.
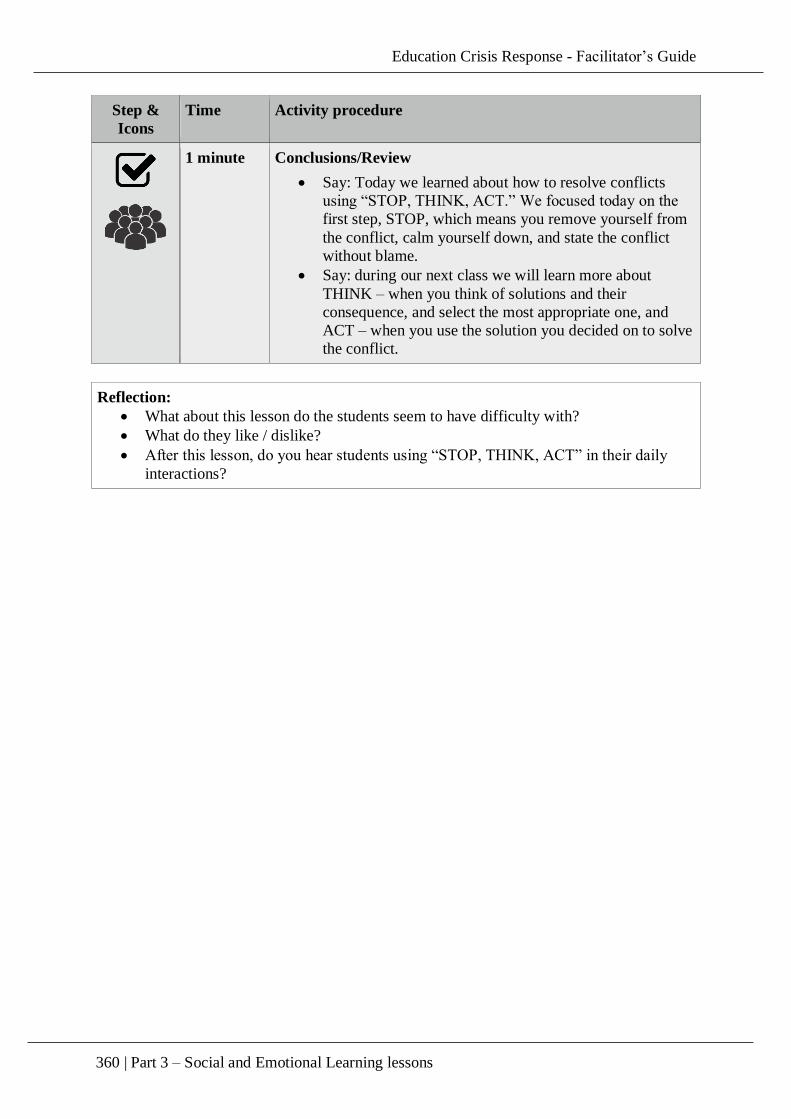
Education Crisis Response - Facilitator’s Guide
360 | Part 3 – Social and Emotional Learning lessons
Step &
Icons
Time Activity procedure
1 minute Conclusions/Review
Say: Today we learned about how to resolve conflicts
using “STOP, THINK, ACT.” We focused today on the
first step, STOP, which means you remove yourself from
the conflict, calm yourself down, and state the conflict
without blame.
Say: during our next class we will learn more about
THINK – when you think of solutions and their
consequence, and select the most appropriate one, and
ACT – when you use the solution you decided on to solve
the conflict.
Reflection:
What about this lesson do the students seem to have difficulty with?
What do they like / dislike?
After this lesson, do you hear students using “STOP, THINK, ACT” in their daily
interactions?