tibco activematrix c++ component development
TRANSCRIPT
TIBCO ActiveMatrix®
C++ Component Development
Software Release 3.2.0
August 2012
Important Information
SOME TIBCO SOFTWARE EMBEDS OR BUNDLES OTHER TIBCO SOFTWARE. USE OF SUCH EMBEDDED OR BUNDLED TIBCO SOFTWARE IS SOLELY TO ENABLE THE FUNCTIONALITY (OR PROVIDE LIMITED ADD-ON FUNCTIONALITY) OF THE LICENSED TIBCO SOFTWARE. THE EMBEDDED OR BUNDLED SOFTWARE IS NOT LICENSED TO BE USED OR ACCESSED BY ANY OTHER TIBCO SOFTWARE OR FOR ANY OTHER PURPOSE.
USE OF TIBCO SOFTWARE AND THIS DOCUMENT IS SUBJECT TO THE TERMS AND CONDITIONS OF A LICENSE AGREEMENT FOUND IN EITHER A SEPARATELY EXECUTED SOFTWARE LICENSE AGREEMENT, OR, IF THERE IS NO SUCH SEPARATE AGREEMENT, THE CLICKWRAP END USER LICENSE AGREEMENT WHICH IS DISPLAYED DURING DOWNLOAD OR INSTALLATION OF THE SOFTWARE (AND WHICH IS DUPLICATED IN LICENSE) OR IF THERE IS NO SUCH SOFTWARE LICENSE AGREEMENT OR CLICKWRAP END USER LICENSE AGREEMENT, THE LICENSE(S) LOCATED IN THE “LICENSE” FILE(S) OF THE SOFTWARE. USE OF THIS DOCUMENT IS SUBJECT TO THOSE TERMS AND CONDITIONS, AND YOUR USE HEREOF SHALL CONSTITUTE ACCEPTANCE OF AND AN AGREEMENT TO BE BOUND BY THE SAME.
This document contains confidential information that is subject to U.S. and international copyright laws and treaties. No part of this document may be reproduced in any form without the written authorization of TIBCO Software Inc.
TIB, TIBCO, TIBCO ActiveMatrix, TIBCO Adapter, TIBCO Administrator, TIBCO AutoMeditate, TIBCO Enterprise Message Service, ActiveMatrix, AutoMediate, Predictive Business, Information Bus, The Power of Now, and TIBCO Rendezvous are either registered trademarks or trademarks of TIBCO Software Inc. in the United States and/or other countries.
EJB, Java EE, J2EE, and all Java-based trademarks and logos are trademarks or registered trademarks of Sun Microsystems, Inc. in the U.S. and other countries.
All other product and company names and marks mentioned in this document are the property of their respective owners and are mentioned for identification purposes only.
THIS SOFTWARE MAY BE AVAILABLE ON MULTIPLE OPERATING SYSTEMS. HOWEVER, NOT
ALL OPERATING SYSTEM PLATFORMS FOR A SPECIFIC SOFTWARE VERSION ARE RELEASED
AT THE SAME TIME. PLEASE SEE THE README FILE FOR THE AVAILABILITY OF THIS
SOFTWARE VERSION ON A SPECIFIC OPERATING SYSTEM PLATFORM.
THIS DOCUMENT IS PROVIDED “AS IS” WITHOUT WARRANTY OF ANY KIND, EITHER EXPRESS OR IMPLIED, INCLUDING, BUT NOT LIMITED TO, THE IMPLIED WARRANTIES OF MERCHANTABILITY, FITNESS FOR A PARTICULAR PURPOSE, OR NON-INFRINGEMENT.
THIS DOCUMENT COULD INCLUDE TECHNICAL INACCURACIES OR TYPOGRAPHICAL ERRORS. CHANGES ARE PERIODICALLY ADDED TO THE INFORMATION HEREIN; THESE CHANGES WILL BE INCORPORATED IN NEW EDITIONS OF THIS DOCUMENT. TIBCO SOFTWARE INC. MAY MAKE IMPROVEMENTS AND/OR CHANGES IN THE PRODUCT(S) AND/OR THE PROGRAM(S) DESCRIBED IN THIS DOCUMENT AT ANY TIME.
THE CONTENTS OF THIS DOCUMENT MAY BE MODIFIED AND/OR QUALIFIED, DIRECTLY OR INDIRECTLY, BY OTHER DOCUMENTATION WHICH ACCOMPANIES THIS SOFTWARE, INCLUDING BUT NOT LIMITED TO ANY RELEASE NOTES AND "READ ME" FILES.
Copyright © 2008-2012 TIBCO Software Inc. ALL RIGHTS RESERVED.
TIBCO Software Inc. Confidential Information
TIBCO ActiveMatrix C++ Component Development
| iii
Contents
Tables . . . . . . . . . . . . . . . . . . . . . . . . . . . . . . . . . . . . . . . . . . . . . . . . . . . . . . . . . . . . . . . . . . . . . . . . .vii
Preface . . . . . . . . . . . . . . . . . . . . . . . . . . . . . . . . . . . . . . . . . . . . . . . . . . . . . . . . . . . . . . . . . . . . . . . . ix
Changes from the Previous Release of this Guide . . . . . . . . . . . . . . . . . . . . . . . . . . . . . . . . . . . . . . . . . . . . . . . . . x
Related Documentation . . . . . . . . . . . . . . . . . . . . . . . . . . . . . . . . . . . . . . . . . . . . . . . . . . . . . . . . . . . . . . . . . . . . . xi
TIBCO ActiveMatrix Implementation Type for C++ Documentation . . . . . . . . . . . . . . . . . . . . . . . . . . . . . . . . xi
Other TIBCO Product Documentation . . . . . . . . . . . . . . . . . . . . . . . . . . . . . . . . . . . . . . . . . . . . . . . . . . . . . . xi
Typographical Conventions . . . . . . . . . . . . . . . . . . . . . . . . . . . . . . . . . . . . . . . . . . . . . . . . . . . . . . . . . . . . . . . . . . xii
Connecting with TIBCO Resources . . . . . . . . . . . . . . . . . . . . . . . . . . . . . . . . . . . . . . . . . . . . . . . . . . . . . . . . . . . . xv
How to Join TIBCOmmunity . . . . . . . . . . . . . . . . . . . . . . . . . . . . . . . . . . . . . . . . . . . . . . . . . . . . . . . . . . . . . . xv
How to Access All TIBCO Documentation . . . . . . . . . . . . . . . . . . . . . . . . . . . . . . . . . . . . . . . . . . . . . . . . . . . xv
How to Contact TIBCO Support . . . . . . . . . . . . . . . . . . . . . . . . . . . . . . . . . . . . . . . . . . . . . . . . . . . . . . . . . . . xv
Chapter 1 Overview . . . . . . . . . . . . . . . . . . . . . . . . . . . . . . . . . . . . . . . . . . . . . . . . . . . . . . . . . . . . . .1
Introduction . . . . . . . . . . . . . . . . . . . . . . . . . . . . . . . . . . . . . . . . . . . . . . . . . . . . . . . . . . . . . . . . . . . . . . . . . . . . . . . 2
Approaches to Component Development. . . . . . . . . . . . . . . . . . . . . . . . . . . . . . . . . . . . . . . . . . . . . . . . . . . . . 2
High-level Architecture. . . . . . . . . . . . . . . . . . . . . . . . . . . . . . . . . . . . . . . . . . . . . . . . . . . . . . . . . . . . . . . . . . . . . . . 3
Chapter 2 Development Tutorials . . . . . . . . . . . . . . . . . . . . . . . . . . . . . . . . . . . . . . . . . . . . . . . . . . .4
Top-Down Approach . . . . . . . . . . . . . . . . . . . . . . . . . . . . . . . . . . . . . . . . . . . . . . . . . . . . . . . . . . . . . . . . . . . . . . . . 5
Top-Down Approach Samples . . . . . . . . . . . . . . . . . . . . . . . . . . . . . . . . . . . . . . . . . . . . . . . . . . . . . . . . . . . . . 6
Bottom-Up Approach . . . . . . . . . . . . . . . . . . . . . . . . . . . . . . . . . . . . . . . . . . . . . . . . . . . . . . . . . . . . . . . . . . . . . . . 20
Bottom-Up Approach Samples . . . . . . . . . . . . . . . . . . . . . . . . . . . . . . . . . . . . . . . . . . . . . . . . . . . . . . . . . . . . 21
Chapter 3 C++ Components . . . . . . . . . . . . . . . . . . . . . . . . . . . . . . . . . . . . . . . . . . . . . . . . . . . . . .23
Creating a C++ Component . . . . . . . . . . . . . . . . . . . . . . . . . . . . . . . . . . . . . . . . . . . . . . . . . . . . . . . . . . . . . . . . . . 24
Configuring a C++ Component . . . . . . . . . . . . . . . . . . . . . . . . . . . . . . . . . . . . . . . . . . . . . . . . . . . . . . . . . . . . . . . 26
Updating a C++ Component . . . . . . . . . . . . . . . . . . . . . . . . . . . . . . . . . . . . . . . . . . . . . . . . . . . . . . . . . . . . . . . . . 27
Updating a C++ Implementation . . . . . . . . . . . . . . . . . . . . . . . . . . . . . . . . . . . . . . . . . . . . . . . . . . . . . . . . . . . . . . 29
Using Services in a C++ Component. . . . . . . . . . . . . . . . . . . . . . . . . . . . . . . . . . . . . . . . . . . . . . . . . . . . . . . . . . . 30
Adding a Service . . . . . . . . . . . . . . . . . . . . . . . . . . . . . . . . . . . . . . . . . . . . . . . . . . . . . . . . . . . . . . . . . . . . . . 30
Removing a Service . . . . . . . . . . . . . . . . . . . . . . . . . . . . . . . . . . . . . . . . . . . . . . . . . . . . . . . . . . . . . . . . . . . . 30
Using References in a C++ Component . . . . . . . . . . . . . . . . . . . . . . . . . . . . . . . . . . . . . . . . . . . . . . . . . . . . . . . . 32
Adding a Reference . . . . . . . . . . . . . . . . . . . . . . . . . . . . . . . . . . . . . . . . . . . . . . . . . . . . . . . . . . . . . . . . . . . . 32
TIBCO ActiveMatrix C++ Component Development
iv | Contents
Removing a Reference . . . . . . . . . . . . . . . . . . . . . . . . . . . . . . . . . . . . . . . . . . . . . . . . . . . . . . . . . . . . . . . . . 33
Using Properties in a C++ Component . . . . . . . . . . . . . . . . . . . . . . . . . . . . . . . . . . . . . . . . . . . . . . . . . . . . . . . . . 34
Adding a Property . . . . . . . . . . . . . . . . . . . . . . . . . . . . . . . . . . . . . . . . . . . . . . . . . . . . . . . . . . . . . . . . . . . . . 34
Removing a Property . . . . . . . . . . . . . . . . . . . . . . . . . . . . . . . . . . . . . . . . . . . . . . . . . . . . . . . . . . . . . . . . . . . 35
C++ Component Reference . . . . . . . . . . . . . . . . . . . . . . . . . . . . . . . . . . . . . . . . . . . . . . . . . . . . . . . . . . . . . . . . . 36
Specifying the Application Library Name and Library Path . . . . . . . . . . . . . . . . . . . . . . . . . . . . . . . . . . . . . . . . . . 37
Using Environment Variables . . . . . . . . . . . . . . . . . . . . . . . . . . . . . . . . . . . . . . . . . . . . . . . . . . . . . . . . . . . . . . . . 39
Packaging C++ Components . . . . . . . . . . . . . . . . . . . . . . . . . . . . . . . . . . . . . . . . . . . . . . . . . . . . . . . . . . . . . . . . 41
Chapter 4 C++ Component Implementations. . . . . . . . . . . . . . . . . . . . . . . . . . . . . . . . . . . . . . . . 42
Opening a C++ Component Implementation. . . . . . . . . . . . . . . . . . . . . . . . . . . . . . . . . . . . . . . . . . . . . . . . . . . . . 43
Generating a C++ Component Implementation . . . . . . . . . . . . . . . . . . . . . . . . . . . . . . . . . . . . . . . . . . . . . . . . . . 44
Abstract Code Generation . . . . . . . . . . . . . . . . . . . . . . . . . . . . . . . . . . . . . . . . . . . . . . . . . . . . . . . . . . . . . . . 45
Code Generation for Service, Reference, and Property . . . . . . . . . . . . . . . . . . . . . . . . . . . . . . . . . . . . . . . . 46
Generate C++ Component Implementation Reference. . . . . . . . . . . . . . . . . . . . . . . . . . . . . . . . . . . . . . . . . . . . . 49
Completing a C++ Component Implementation . . . . . . . . . . . . . . . . . . . . . . . . . . . . . . . . . . . . . . . . . . . . . . . . . . 50
Handling Life Cycle Events . . . . . . . . . . . . . . . . . . . . . . . . . . . . . . . . . . . . . . . . . . . . . . . . . . . . . . . . . . . . . . 50
Invoking a Reference Operation . . . . . . . . . . . . . . . . . . . . . . . . . . . . . . . . . . . . . . . . . . . . . . . . . . . . . . . . . . 50
Accessing a Property . . . . . . . . . . . . . . . . . . . . . . . . . . . . . . . . . . . . . . . . . . . . . . . . . . . . . . . . . . . . . . . . . . . 51
Logging . . . . . . . . . . . . . . . . . . . . . . . . . . . . . . . . . . . . . . . . . . . . . . . . . . . . . . . . . . . . . . . . . . . . . . . . . . . . . 51
Building a C++ Component Implementation . . . . . . . . . . . . . . . . . . . . . . . . . . . . . . . . . . . . . . . . . . . . . . . . . . . . . 53
C++ Component Implementation Options . . . . . . . . . . . . . . . . . . . . . . . . . . . . . . . . . . . . . . . . . . . . . . . . . . . 53
Building a C++ Component Implementation in Microsoft Visual Studio . . . . . . . . . . . . . . . . . . . . . . . . . . . . . 53
Building a C++ Component Implementation Using GNU Make . . . . . . . . . . . . . . . . . . . . . . . . . . . . . . . . . . . 54
Building a C++ Component Implementation Using Ant . . . . . . . . . . . . . . . . . . . . . . . . . . . . . . . . . . . . . . . . . 55
Building a C++ Component Implementation Using Make . . . . . . . . . . . . . . . . . . . . . . . . . . . . . . . . . . . . . . . 55
Set Preferred Build Artifacts and Build Method . . . . . . . . . . . . . . . . . . . . . . . . . . . . . . . . . . . . . . . . . . . . . . . 55
Generate C++ Artifacts . . . . . . . . . . . . . . . . . . . . . . . . . . . . . . . . . . . . . . . . . . . . . . . . . . . . . . . . . . . . . . . . . 56
Reusing a C++ Component Implementation . . . . . . . . . . . . . . . . . . . . . . . . . . . . . . . . . . . . . . . . . . . . . . . . . . . . . 57
Debugging a C++ Component Implementation. . . . . . . . . . . . . . . . . . . . . . . . . . . . . . . . . . . . . . . . . . . . . . . . . . . 58
Debugging in Microsoft Visual Studio . . . . . . . . . . . . . . . . . . . . . . . . . . . . . . . . . . . . . . . . . . . . . . . . . . . . . . 58
Debugging in UNIX Environment . . . . . . . . . . . . . . . . . . . . . . . . . . . . . . . . . . . . . . . . . . . . . . . . . . . . . . . . . . 59
Debugging Init Life Cycle Method of C++ Component. . . . . . . . . . . . . . . . . . . . . . . . . . . . . . . . . . . . . . . . . . 59
Accessing Context Parameters. . . . . . . . . . . . . . . . . . . . . . . . . . . . . . . . . . . . . . . . . . . . . . . . . . . . . . . . . . . . . . . 60
Accessing Basic Context Parameters . . . . . . . . . . . . . . . . . . . . . . . . . . . . . . . . . . . . . . . . . . . . . . . . . . . . . . 61
Accessing Message Context Properties . . . . . . . . . . . . . . . . . . . . . . . . . . . . . . . . . . . . . . . . . . . . . . . . . . . . 63
Accessing Bag Context Properties . . . . . . . . . . . . . . . . . . . . . . . . . . . . . . . . . . . . . . . . . . . . . . . . . . . . . . . . 65
Setting a Bag Context Parameter in a Response . . . . . . . . . . . . . . . . . . . . . . . . . . . . . . . . . . . . . . . . . . . . . 66
Customization of SOAPException. . . . . . . . . . . . . . . . . . . . . . . . . . . . . . . . . . . . . . . . . . . . . . . . . . . . . . . . . . . . . 67
SOAPException Schema. . . . . . . . . . . . . . . . . . . . . . . . . . . . . . . . . . . . . . . . . . . . . . . . . . . . . . . . . . . . . . . . 67
Default SOAPException Received by SOAP Client. . . . . . . . . . . . . . . . . . . . . . . . . . . . . . . . . . . . . . . . . . . . 68
TIBCO ActiveMatrix C++ Component Development
Contents | v
Customized SOAPException Received by SOAP Client . . . . . . . . . . . . . . . . . . . . . . . . . . . . . . . . . . . . . . . . 69
Referencing External Libraries. . . . . . . . . . . . . . . . . . . . . . . . . . . . . . . . . . . . . . . . . . . . . . . . . . . . . . . . . . . . . . . . 70
Mapping . . . . . . . . . . . . . . . . . . . . . . . . . . . . . . . . . . . . . . . . . . . . . . . . . . . . . . . . . . . . . . . . . . . . . . . . . . . . . . . . . 71
WSDL to C++ Mapping. . . . . . . . . . . . . . . . . . . . . . . . . . . . . . . . . . . . . . . . . . . . . . . . . . . . . . . . . . . . . . . . . . 71
C++ to WSDL Mapping. . . . . . . . . . . . . . . . . . . . . . . . . . . . . . . . . . . . . . . . . . . . . . . . . . . . . . . . . . . . . . . . . . 71
Constraints on Header Files . . . . . . . . . . . . . . . . . . . . . . . . . . . . . . . . . . . . . . . . . . . . . . . . . . . . . . . . . . . . . . 72
Constraints on Data Types . . . . . . . . . . . . . . . . . . . . . . . . . . . . . . . . . . . . . . . . . . . . . . . . . . . . . . . . . . . . . . . 73
xsd:Integer usage . . . . . . . . . . . . . . . . . . . . . . . . . . . . . . . . . . . . . . . . . . . . . . . . . . . . . . . . . . . . . . . . . . . . . . 74
Troubleshooting . . . . . . . . . . . . . . . . . . . . . . . . . . . . . . . . . . . . . . . . . . . . . . . . . . . . . . . . . . . . . . . . . . . . . . . . . . . 76
Chapter 5 Deploy and Run C++ Components . . . . . . . . . . . . . . . . . . . . . . . . . . . . . . . . . . . . . . . .77
Deploying DAA Containing C++ Components . . . . . . . . . . . . . . . . . . . . . . . . . . . . . . . . . . . . . . . . . . . . . . . . . . . . 78
Running DAA Containing C++ Components . . . . . . . . . . . . . . . . . . . . . . . . . . . . . . . . . . . . . . . . . . . . . . . . . . . . . 79
Running the Application Using Rapid Application Development (RAD) Feature . . . . . . . . . . . . . . . . . . . . . . 79
Process Naming Conventions . . . . . . . . . . . . . . . . . . . . . . . . . . . . . . . . . . . . . . . . . . . . . . . . . . . . . . . . . . . . 79
Specifying Profilers for Native Processes. . . . . . . . . . . . . . . . . . . . . . . . . . . . . . . . . . . . . . . . . . . . . . . . . . . . 80
Specifying Socket Range . . . . . . . . . . . . . . . . . . . . . . . . . . . . . . . . . . . . . . . . . . . . . . . . . . . . . . . . . . . . . . . . 80
Specifying Custom Temporary Location . . . . . . . . . . . . . . . . . . . . . . . . . . . . . . . . . . . . . . . . . . . . . . . . . . . . . 80
Changing C++ Threadpool Configuration . . . . . . . . . . . . . . . . . . . . . . . . . . . . . . . . . . . . . . . . . . . . . . . . . . . . 80
Specifying At Least Once Policy. . . . . . . . . . . . . . . . . . . . . . . . . . . . . . . . . . . . . . . . . . . . . . . . . . . . . . . . . . . 81
Index . . . . . . . . . . . . . . . . . . . . . . . . . . . . . . . . . . . . . . . . . . . . . . . . . . . . . . . . . . . . . . . . . . . . . . . . . .83
TIBCO ActiveMatrix C++ Component Development
vi | Contents
TIBCO ActiveMatrix C++ Component Development
Tables | vii
Tables
Table 1 General Typographical Conventions . . . . . . . . . . . . . . . . . . . . . . . . . . . . . . . . . . . . . . . . . . . . . . . . xii
Table 2 Syntax Typographical Conventions . . . . . . . . . . . . . . . . . . . . . . . . . . . . . . . . . . . . . . . . . . . . . . . . xiii
Table 3 C++ Integer Type to XSD Type Mapping . . . . . . . . . . . . . . . . . . . . . . . . . . . . . . . . . . . . . . . . . . . . 71
TIBCO ActiveMatrix C++ Component Development
viii | Tables
TIBCO ActiveMatrix C++ Component Development
| ix
Preface
TIBCO ActiveMatrix® is a scalable and extensible platform for developing, deploying,
and managing applications that conform to a service-oriented architecture. TIBCO
ActiveMatrix Implementation Type for C++ conforms to the SCA specifications and
allows you to create C++ applications based on these specifications.
Topics
• Changes from the Previous Release of this Guide, page x
• Related Documentation, page xi
• Typographical Conventions, page xii
• Connecting with TIBCO Resources, page xv

TIBCO ActiveMatrix C++ Component Development
x | Changes from the Previous Release of this Guide
Changes from the Previous Release of this Guide
This section itemizes the major changes from the previous release of this guide.
Third Party Documentation
The Third Party Documentation section has been removed from the Guide.
TIBCO ActiveMatrix C++ Component Development
Preface | xi
Related Documentation
This section lists documentation resources you may find useful.
TIBCO ActiveMatrix Implementation Type for C++ Documentation
The following documents form the TIBCO ActiveMatrix Implementation Type for C++
documentation set:
• TIBCO ActiveMatrix C++ Component Development: Read the component
development to learn how to develop C++ components.
• TIBCO ActiveMatrix Implementation Type for C++ Installation: Read the installation
guide to learn how to install the product.
• TIBCO ActiveMatrix Implementation Type for C++ Release Notes: Read the release
notes for a list of new features. This manual also contains lists of known issues for this
release.
Other TIBCO Product Documentation
You may find it useful to read the documentation for the following TIBCO products:
• TIBCO ActiveMatrix® Service Bus
• TIBCO ActiveMatrix® Service Grid

TIBCO ActiveMatrix C++ Component Development
xii | Typographical Conventions
Typographical Conventions
The following typographical conventions are used in this manual.
Table 1 General Typographical Conventions
Convention Use
TIBCO_HOME
ENV_NAME
Many TIBCO products must be installed within the same home directory. This
directory is referenced in documentation as TIBCO_HOME. The default value of
TIBCO_HOME depends on the operating system. For example, on Windows
systems, the default value is C:\tibco.
Other TIBCO products are installed into an installation environment. Incompatible
products and multiple instances of the same product are installed into different
installation environments. An environment home directory is referenced in
documentation as ENV_HOME. The default value of ENV_HOME depends on the
operating system. For example, on Windows systems the default value is C:\tibco.
code font Code font identifies commands, code examples, filenames, pathnames, and output
displayed in a command window. For example:
Use MyCommand to start the foo process.
bold code font Bold code font is used in the following ways:
• In procedures, to indicate what a user types. For example: Type admin.
• In large code samples, to indicate the parts of the sample that are of particular
interest.
• In command syntax, to indicate the default parameter for a command. For
example, if no parameter is specified, MyCommand is enabled:
MyCommand [enable | disable]
italic font Italic font is used in the following ways:
• To indicate a document title. For example: See TIBCO BusinessWorks
Concepts.
• To introduce new terms For example: A portal page may contain several
portlets. Portlets are mini-applications that run in a portal.
• To indicate a variable in a command or code syntax that you must replace. For
example: MyCommand pathname
TIBCO ActiveMatrix C++ Component Development
Preface | xiii
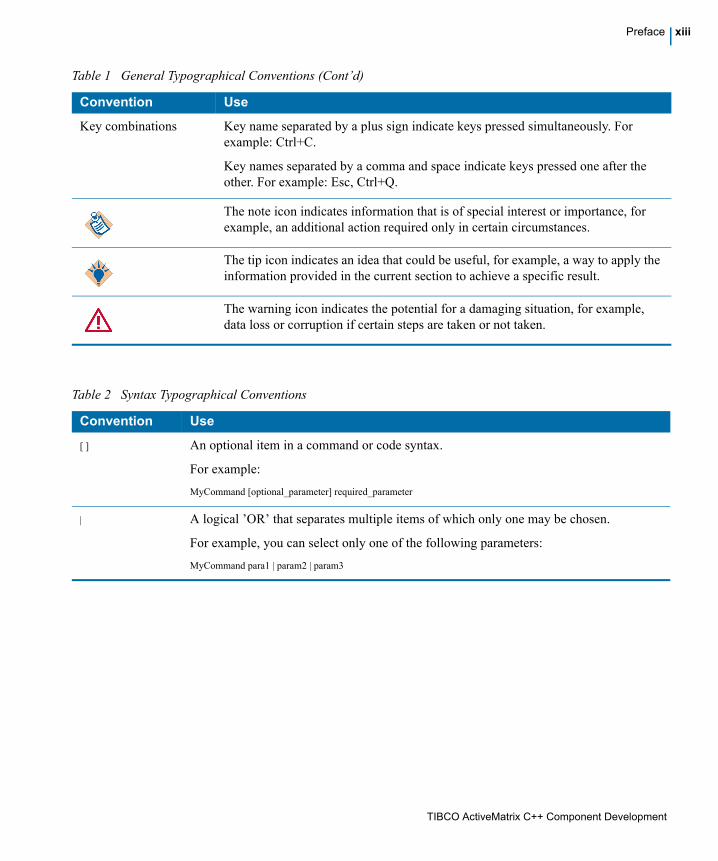
Key combinations Key name separated by a plus sign indicate keys pressed simultaneously. For
example: Ctrl+C.
Key names separated by a comma and space indicate keys pressed one after the
other. For example: Esc, Ctrl+Q.
The note icon indicates information that is of special interest or importance, for
example, an additional action required only in certain circumstances.
The tip icon indicates an idea that could be useful, for example, a way to apply the
information provided in the current section to achieve a specific result.
The warning icon indicates the potential for a damaging situation, for example,
data loss or corruption if certain steps are taken or not taken.
Table 1 General Typographical Conventions (Cont’d)
Convention Use
Table 2 Syntax Typographical Conventions
Convention Use
[ ] An optional item in a command or code syntax.
For example:
MyCommand [optional_parameter] required_parameter
| A logical ’OR’ that separates multiple items of which only one may be chosen.
For example, you can select only one of the following parameters:
MyCommand para1 | param2 | param3
TIBCO ActiveMatrix C++ Component Development
xiv | Typographical Conventions
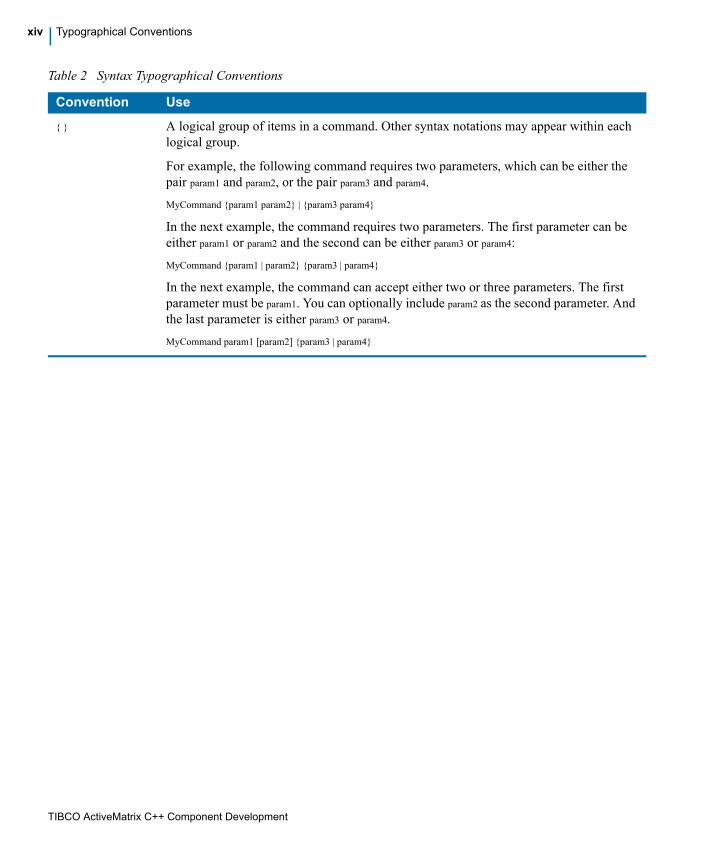
{ } A logical group of items in a command. Other syntax notations may appear within each
logical group.
For example, the following command requires two parameters, which can be either the
pair param1 and param2, or the pair param3 and param4.
MyCommand {param1 param2} | {param3 param4}
In the next example, the command requires two parameters. The first parameter can be
either param1 or param2 and the second can be either param3 or param4:
MyCommand {param1 | param2} {param3 | param4}
In the next example, the command can accept either two or three parameters. The first
parameter must be param1. You can optionally include param2 as the second parameter. And
the last parameter is either param3 or param4.
MyCommand param1 [param2] {param3 | param4}
Table 2 Syntax Typographical Conventions
Convention Use
TIBCO ActiveMatrix C++ Component Development
Preface | xv
Connecting with TIBCO Resources
How to Join TIBCOmmunity
TIBCOmmunity is an online destination for TIBCO customers, partners, and resident
experts, a place to share and access the collective experience of the TIBCO community.
TIBCOmmunity offers forums, blogs, and access to a variety of resources. To register, go
to http://www.tibcommunity.com.
How to Access All TIBCO Documentation
After you join TIBCOmmunity, you can access the documentation for all supported
product versions here:
http://docs.tibco.com
How to Contact TIBCO Support
For comments or problems with this manual or the software it addresses, please contact
TIBCO Support as follows.
• For an overview of TIBCO Support, and information about getting started with
TIBCO Support, visit this site:
http://www.tibco.com/services/support
• If you already have a valid maintenance or support contract, visit this site:
https://support.tibco.com
Entry to this site requires a user name and password. If you do not have a user name, you
can request one.
TIBCO ActiveMatrix C++ Component Development
xvi | Connecting with TIBCO Resources
TIBCO ActiveMatrix C++ Component Development
| 1
Chapter 1 Overview
This chapter provides an overview of TIBCO ActiveMatrix Implementation Type for
C++, and its high-level architecture.
Topics
• Introduction, page 2
• High-level Architecture, page 3
TIBCO ActiveMatrix C++ Component Development
2 | Chapter 1 Overview
Introduction
TIBCO ActiveMatrix Implementation Type for C++ conforms to the SCA specifications
and allows the C++ code to be SCA-enabled.
The product provides two features: designtime and runtime that allow you to build C++
components from scratch. The designtime feature provides functionality to develop C++
components in TIBCO Business Studio. The runtime feature provides an ActiveMatrix
container to deploy and run services developed in C++ using TIBCO ActiveMatrix
Administrator.
Approaches to Component Development
TIBCO ActiveMatrix Implementation Type for C++ supports two approaches for
developing C++ components: WSDL-first (top-down) and code-first (bottom-up).
In top-down (WSDL-first) development, you start with WSDL files that define the
component’s services and references. When you add either a service, reference, or a
property to the component, the header files and an implementation skeleton file containing
fields and methods representing the service, reference, or property and stub code are
generated.
In bottom-up (code-first) development, you start with a C++ header file that defines the
component’s service and a class file that implements the service. When you drag and drop
the header file on to the canvas, a C++ component with a service defined by the header
file, a WSDL file representing the service and stub code is generated.
In bottom-up development, you cannot add a reference or service to the component.
TIBCO ActiveMatrix C++ Component Development
High-level Architecture | 3
High-level Architecture
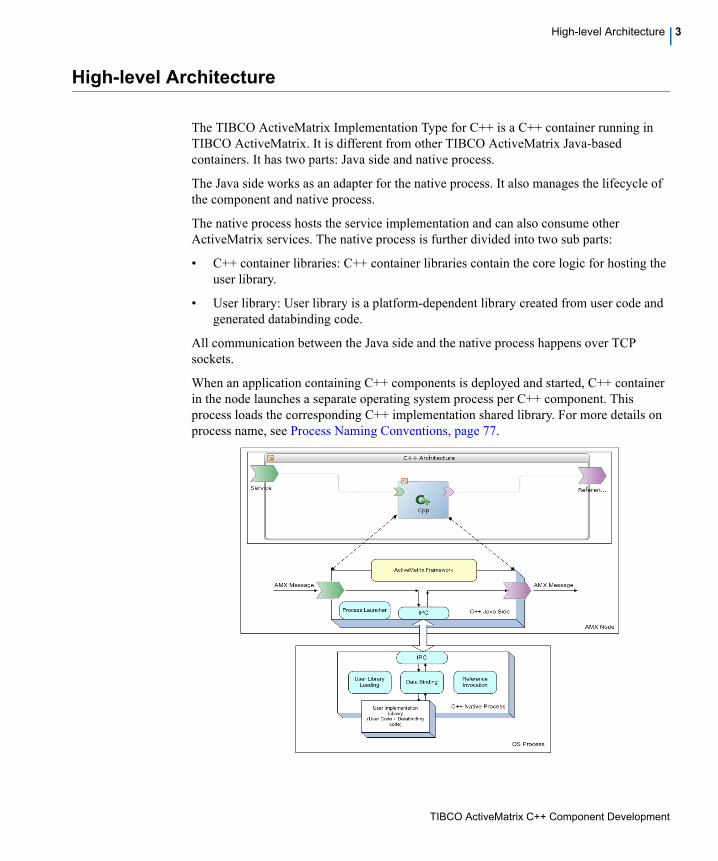
The TIBCO ActiveMatrix Implementation Type for C++ is a C++ container running in
TIBCO ActiveMatrix. It is different from other TIBCO ActiveMatrix Java-based
containers. It has two parts: Java side and native process.
The Java side works as an adapter for the native process. It also manages the lifecycle of
the component and native process.
The native process hosts the service implementation and can also consume other
ActiveMatrix services. The native process is further divided into two sub parts:
• C++ container libraries: C++ container libraries contain the core logic for hosting the
user library.
• User library: User library is a platform-dependent library created from user code and
generated databinding code.
All communication between the Java side and the native process happens over TCP
sockets.
When an application containing C++ components is deployed and started, C++ container
in the node launches a separate operating system process per C++ component. This
process loads the corresponding C++ implementation shared library. For more details on
process name, see Process Naming Conventions, page 77.
TIBCO ActiveMatrix C++ Component Development
4 | Chapter 2 Development Tutorials
Chapter 2 Development Tutorials
This chapter describes the samples distributed with TIBCO ActiveMatrix Implementation
Type for C++. The samples are located in the TIBCO_HOME\amx_it_cpp\3.2\samples\ directory
and the compiled libraries are located in TIBCO_HOME\amx_it_cpp\3.2\samples\libraries.
Topics
• Top-Down Approach, page 5
— Hello World Application, page 6
— Purchase Order Application, page 7
— BasicContext, page 8
— BagContext, page 9
— MessageContext, page 10
— Environment, page 12
— Exception, page 14
— Fault, page 16
— No Message Loss, page 17
• Bottom-Up Approach, page 19
— Purchase Order Application, page 20
TIBCO ActiveMatrix C++ Component Development
Top-Down Approach | 5
Top-Down Approach
To develop a C++ component in the top-down approach:
TIBCO Business
Studio
1. Create an ActiveMatrix SOA project selecting the SOA Project from WSDL project
type.
2. In the Component Details page of the wizard, select Cpp for the component
implementation type.
3. Specify code generation details as described in Generate C++ Component
Implementation Reference on page 48 and click Finish.
An ActiveMatrix SOA and C++ implementation projects are created. This project
contains the C++ component, the services and references defined in the WSDL, and
the binding selected during project creation.
C++ Design Time generates header files, abstract class, and implementation skeleton
classes according to the mapping described in Mapping on page 70 and stub code used
by the ActiveMatrix C++ container to invoke the classes and puts these in a separate
C++ project created during the process.
It also configures the C++ component implementation details such as Configuration
project, Library Name and Library Path.
4. At this point, optionally, add more services, references, and/or properties to the
component.
5. Update the C++ component as described in Updating a C++ Component on page 26.
C++ development
environment
6. Double-click the C++ component, or select Open Implementation in the right-click
menu to open the C++ implementation project in your preferred development
environment (IDE). Set the IDE on Microsoft Windows platform as described in Set
Preferred Build Artifacts and Build Method on page 54.
7. Complete the C++ component implementation by adding user code to the
implementation.
8. Before building the project, ensure that the environment variable
TIBCOAMX_CPP_CONTAINER_HOME is set to the installation location of the C++
container.
TIBCOAMX_CPP_CONTAINER_HOME=TIBCO_HOME\amx_it_cpp\3.2
9. On Windows, in Visual Studio, select Release solution configuration and build a C++
library.
Restart TIBCO Business Studio if you set the value of the environment variable when
TIBCO Business Studio is running.

TIBCO ActiveMatrix C++ Component Development
6 | Chapter 2 Development Tutorials
The platform specific library files are created under the C++ implementation
project\Release folder.
Top-Down Approach Samples
Hello World Application
The Hello World C++ application exposes a service that returns a greeting when it
receives a user name. The Hello World SOAP client sends requests to Hello World SOAP
service, which forwards them to the Hello World C++ component. When the Hello World
component receives the request, it constructs the response string and returns it to Hello
World SOAP service, which then forwards the response to the Hello World SOAP client.
The hello world sample files include an ActiveMatrix composite containing a C++
component and SOAP service, a Distributed Application Archive (DAA) for the
composite application, Eclipse CDT and Visual Studio projects containing the C++
implementation source. The hello world sample is available in the directory
TIBCO_HOME\amx_it_cpp\3.2\samples\cpp-service-helloWorld\.
The Hello World Application is also described in the cheat sheets provided with the
designtime. To access the cheat sheets:
1. Start TIBCO Business Studio.
2. Select Help > Cheat Sheets....
3. Expand the TIBCO SOA Development node and select C++.

TIBCO ActiveMatrix C++ Component Development
Top-Down Approach | 7
Purchase Order Application
The Purchase Order sample includes an ActiveMatrix composite containing Java and C++
components, a SOAP service, a Distributed Application Archive, and Visual Studio
projects containing the C++ implementation source.
The sample is available at TIBCO_HOME\amx_it_cpp\3.2\samples\cpp-reference\.
To run the purchase order service, follow the procedures whose details are available in
TIBCO ActiveMatrix Administration:
1. Upload the DAA.
2. Create and install the HTTP Connector resource instance.
3. In TIBCO ActiveMatrix Administrator enter the composite property for library path.
The library path must point to the location of the library on the file system (or
machine) to which the deployed assembly on the node is pointing.
4. Deploy and start the Process Order service DAA.
5. Open the project in TIBCO Business Studio. Right-click the PurchaseOrder_gen.wsdl from
the Service Descriptors folder and select Web Services > Test with Web Services
Explorer.
6. In the Web Services Explorer Navigator view, select the SOAP binding
soap.bindingBinding1. Click Operation under the WSDL Binding Details > Operations.
7. Enter the parameters of the WSDL operation and click Go to invoke the Purchase
Order service.
TIBCO ActiveMatrix C++ Component Development
8 | Chapter 2 Development Tutorials
BasicContext
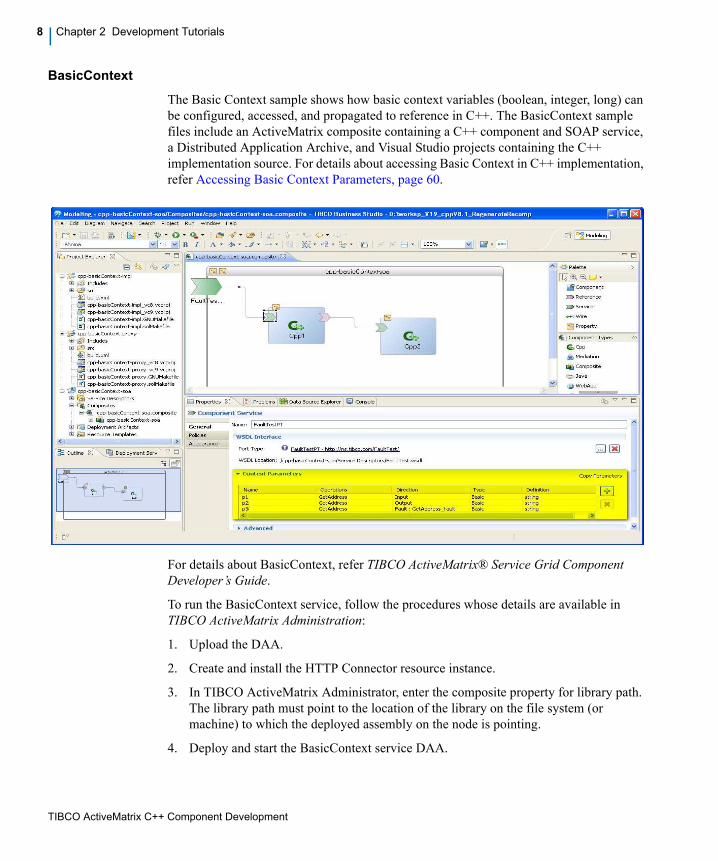
The Basic Context sample shows how basic context variables (boolean, integer, long) can
be configured, accessed, and propagated to reference in C++. The BasicContext sample
files include an ActiveMatrix composite containing a C++ component and SOAP service,
a Distributed Application Archive, and Visual Studio projects containing the C++
implementation source. For details about accessing Basic Context in C++ implementation,
refer Accessing Basic Context Parameters, page 60.
For details about BasicContext, refer TIBCO ActiveMatrix® Service Grid Component
Developer’s Guide.
To run the BasicContext service, follow the procedures whose details are available in
TIBCO ActiveMatrix Administration:
1. Upload the DAA.
2. Create and install the HTTP Connector resource instance.
3. In TIBCO ActiveMatrix Administrator, enter the composite property for library path.
The library path must point to the location of the library on the file system (or
machine) to which the deployed assembly on the node is pointing.
4. Deploy and start the BasicContext service DAA.
TIBCO ActiveMatrix C++ Component Development
Top-Down Approach | 9
5. Open the SOAP UI configuration cpp-basicContext/cpp-basicContext-test-soapui-project.xml in the
SOAP UI client.
6. If there is any change in service endpoint, update the endpoint location as per
deployed service endpoint.
7. Open the SOAP UI editor for sample requests provided in above configuration, and
submit the request to the specified service endpoint.
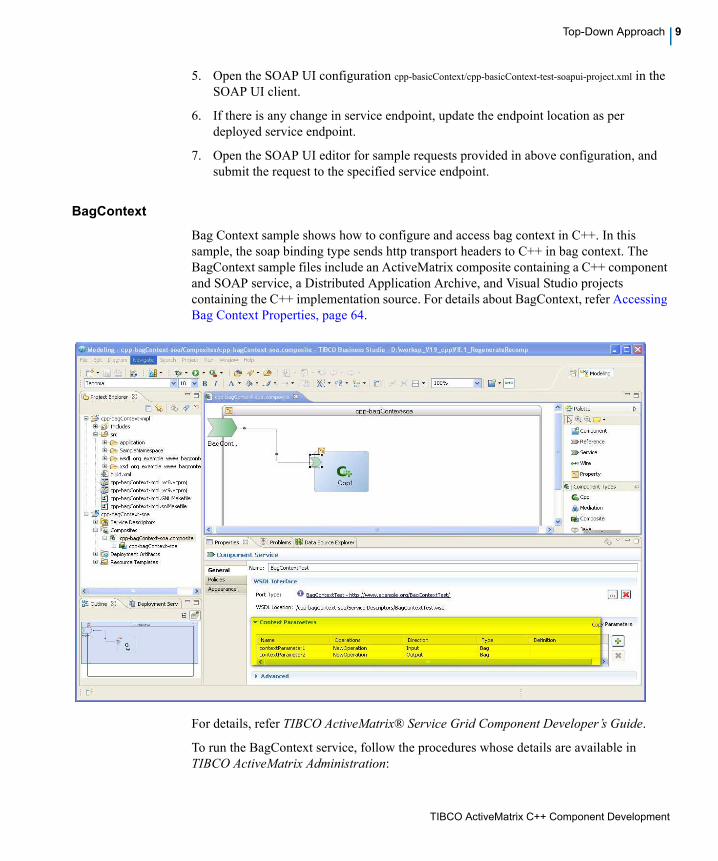
BagContext
Bag Context sample shows how to configure and access bag context in C++. In this
sample, the soap binding type sends http transport headers to C++ in bag context. The
BagContext sample files include an ActiveMatrix composite containing a C++ component
and SOAP service, a Distributed Application Archive, and Visual Studio projects
containing the C++ implementation source. For details about BagContext, refer Accessing
Bag Context Properties, page 64.
For details, refer TIBCO ActiveMatrix® Service Grid Component Developer’s Guide.
To run the BagContext service, follow the procedures whose details are available in
TIBCO ActiveMatrix Administration:
TIBCO ActiveMatrix C++ Component Development
10 | Chapter 2 Development Tutorials
1. Upload the DAA.
2. Create and install the HTTP Connector resource instance.
3. In TIBCO ActiveMatrix Administrator, enter the composite property for library path.
The library path must point to the location of the library on the file system (or
machine) to which the deployed assembly on the node is pointing.
4. Deploy and start the BagContext service DAA.
5. Open the SOAP UI configuration cpp-bagcontext/cpp-bagcontext-test-soapui-project.xml in
the SOAP UI client.
6. If there is any change in service endpoint, update the endpoint location as per
deployed service endpoint.
7. Open the SOAP UI editor for sample requests provided in above configuration, and
submit the request to the specified service endpoint.
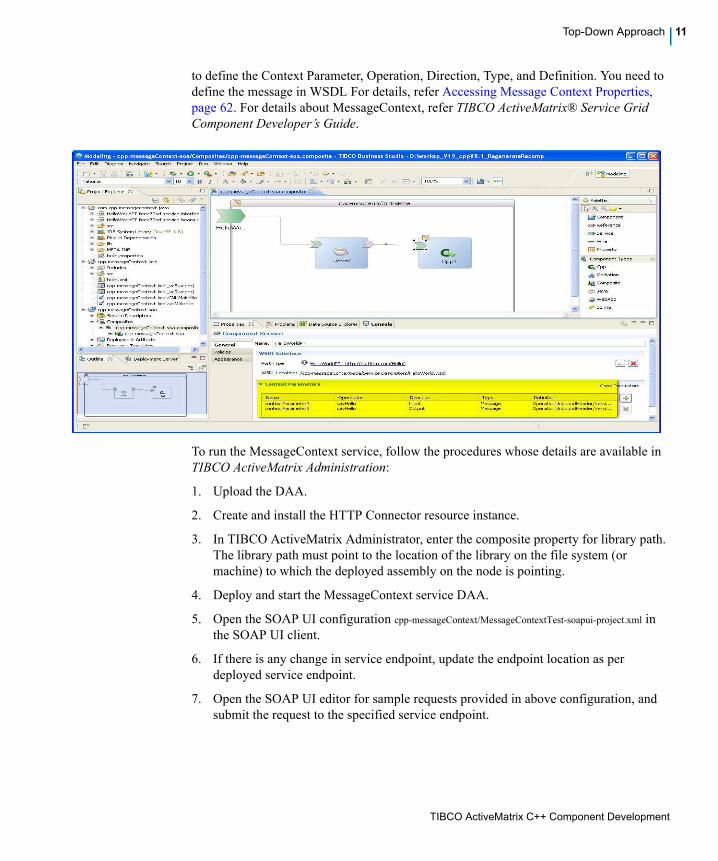
MessageContext
Message Context samples shows how, unbounded headers, and other message context can
be configured, propagated and accessed in C++. The MessageContext sample sends the
message defined in WSDL. The MessageContext sample files include an ActiveMatrix
composite containing a C++ component and SOAP service, a Distributed Application
Archive, and Visual Studio projects containing the C++ implementation source. You need
TIBCO ActiveMatrix C++ Component Development
Top-Down Approach | 11
to define the Context Parameter, Operation, Direction, Type, and Definition. You need to
define the message in WSDL For details, refer Accessing Message Context Properties,
page 62. For details about MessageContext, refer TIBCO ActiveMatrix® Service Grid
Component Developer’s Guide.
To run the MessageContext service, follow the procedures whose details are available in
TIBCO ActiveMatrix Administration:
1. Upload the DAA.
2. Create and install the HTTP Connector resource instance.
3. In TIBCO ActiveMatrix Administrator, enter the composite property for library path.
The library path must point to the location of the library on the file system (or
machine) to which the deployed assembly on the node is pointing.
4. Deploy and start the MessageContext service DAA.
5. Open the SOAP UI configuration cpp-messageContext/MessageContextTest-soapui-project.xml in
the SOAP UI client.
6. If there is any change in service endpoint, update the endpoint location as per
deployed service endpoint.
7. Open the SOAP UI editor for sample requests provided in above configuration, and
submit the request to the specified service endpoint.
TIBCO ActiveMatrix C++ Component Development
12 | Chapter 2 Development Tutorials
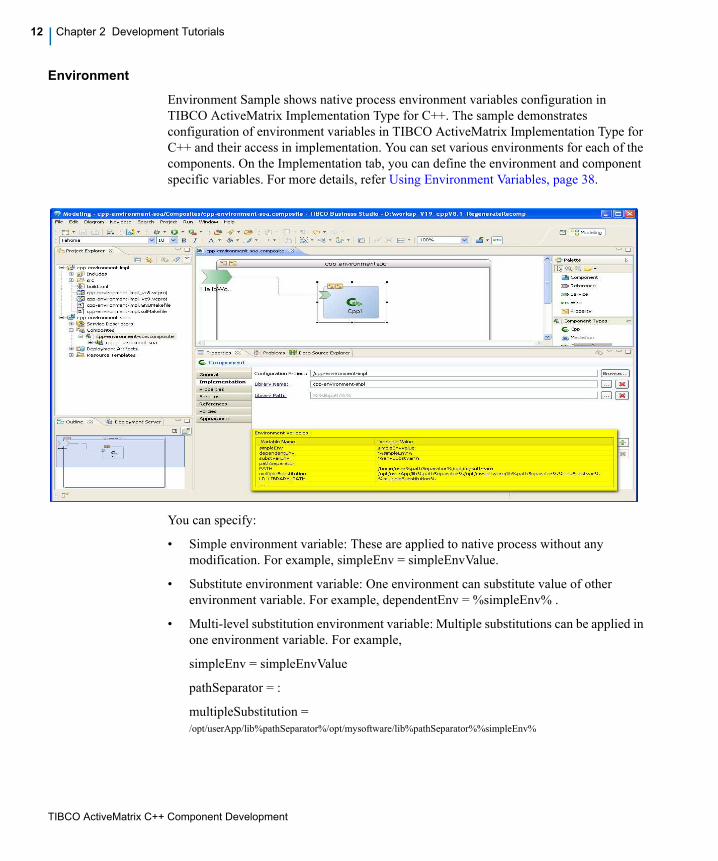
Environment
Environment Sample shows native process environment variables configuration in
TIBCO ActiveMatrix Implementation Type for C++. The sample demonstrates
configuration of environment variables in TIBCO ActiveMatrix Implementation Type for
C++ and their access in implementation. You can set various environments for each of the
components. On the Implementation tab, you can define the environment and component
specific variables. For more details, refer Using Environment Variables, page 38.
You can specify:
• Simple environment variable: These are applied to native process without any
modification. For example, simpleEnv = simpleEnvValue.
• Substitute environment variable: One environment can substitute value of other
environment variable. For example, dependentEnv = %simpleEnv% .
• Multi-level substitution environment variable: Multiple substitutions can be applied in
one environment variable. For example,
simpleEnv = simpleEnvValue
pathSeparator = :
multipleSubstitution =
/opt/userApp/lib%pathSeparator%/opt/mysoftware/lib%pathSeparator%%simpleEnv%
TIBCO ActiveMatrix C++ Component Development
Top-Down Approach | 13
At runtime native process receives multipleSubstitution =
/opt/userApp/lib:/opt/mysoftware/lib:simpleEnvValue (that is, substituted value of substitution
variables)
• Substitute variable are used in environment variables.
To run the Environment service, follow the procedures whose details are available in
TIBCO ActiveMatrix Administration:
1. Upload the DAA.
2. Create and install the HTTP Connector resource instance.
3. In TIBCO ActiveMatrix Administrator enter the composite property for library path.
The library path must point to the location of the library on the file system (or
machine) to which the deployed assembly on the node is pointing.
4. Deploy and start the Environment service DAA.
5. Open the project in TIBCO Business Studio. Right-click the Environment_gen.wsdl from
the Service Descriptors folder and select Web Services > Test with Web Services
Explorer.
6. In the Web Services Explorer Navigator view, select the SOAP binding
soap.bindingBinding1. Click Operation under the WSDL Binding Details > Operations.
7. Enter the parameters of the WSDL operation and click Go to invoke the Environment
service.
TIBCO ActiveMatrix C++ Component Development
14 | Chapter 2 Development Tutorials
Exception
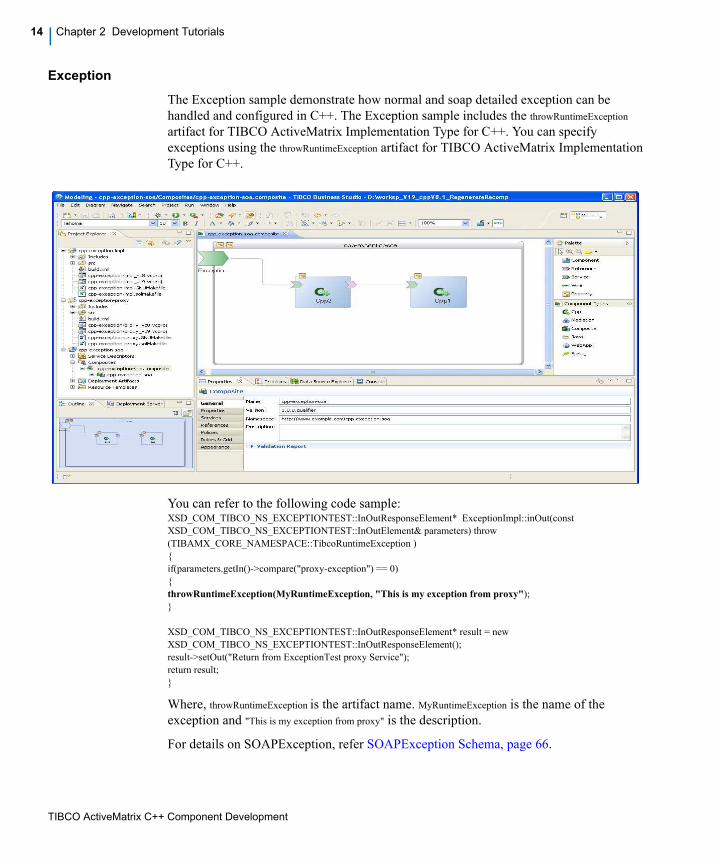
The Exception sample demonstrate how normal and soap detailed exception can be
handled and configured in C++. The Exception sample includes the throwRuntimeException
artifact for TIBCO ActiveMatrix Implementation Type for C++. You can specify
exceptions using the throwRuntimeException artifact for TIBCO ActiveMatrix Implementation
Type for C++.
You can refer to the following code sample:XSD_COM_TIBCO_NS_EXCEPTIONTEST::InOutResponseElement* ExceptionImpl::inOut(const
XSD_COM_TIBCO_NS_EXCEPTIONTEST::InOutElement& parameters) throw
(TIBAMX_CORE_NAMESPACE::TibcoRuntimeException )
{
if(parameters.getIn()->compare("proxy-exception") == 0)
{
throwRuntimeException(MyRuntimeException, "This is my exception from proxy");
}
XSD_COM_TIBCO_NS_EXCEPTIONTEST::InOutResponseElement* result = new
XSD_COM_TIBCO_NS_EXCEPTIONTEST::InOutResponseElement();
result->setOut("Return from ExceptionTest proxy Service");
return result;
}
Where, throwRuntimeException is the artifact name. MyRuntimeException is the name of the
exception and "This is my exception from proxy" is the description.
For details on SOAPException, refer SOAPException Schema, page 66.
TIBCO ActiveMatrix C++ Component Development
Top-Down Approach | 15
To run the Exception service, follow the procedures whose details are available in TIBCO
ActiveMatrix Administration:
1. Upload the DAA.
2. Create and install the HTTP Connector resource instance.
3. In TIBCO ActiveMatrix Administrator, enter the composite property for library path.
The library path must point to the location of the library on the file system (or
machine) to which the deployed assembly on the node is pointing.
4. Deploy and start the Exception service DAA.
5. Open the SOAP UI configuration cpp-exception/cpp-exception-test-soapui-project.xml in the
SOAP UI client.
6. If there is any change in service endpoint, update the endpoint location as per
deployed service endpoint.
7. Open the SOAP UI editor for sample requests provided in above configuration, and
submit the request to the specified service endpoint.
TIBCO ActiveMatrix C++ Component Development
16 | Chapter 2 Development Tutorials
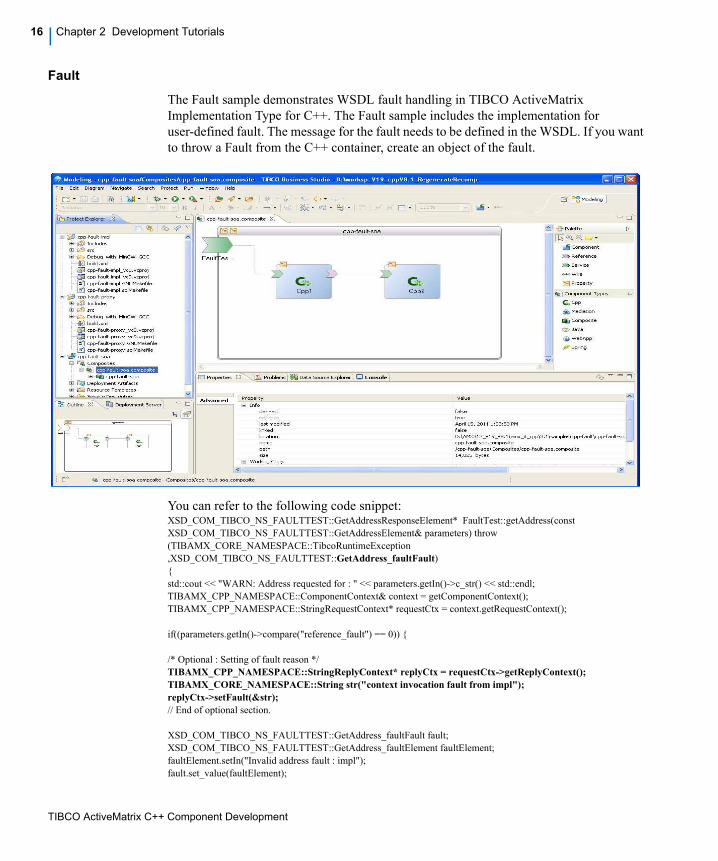
Fault
The Fault sample demonstrates WSDL fault handling in TIBCO ActiveMatrix
Implementation Type for C++. The Fault sample includes the implementation for
user-defined fault. The message for the fault needs to be defined in the WSDL. If you want
to throw a Fault from the C++ container, create an object of the fault.
You can refer to the following code snippet:XSD_COM_TIBCO_NS_FAULTTEST::GetAddressResponseElement* FaultTest::getAddress(const
XSD_COM_TIBCO_NS_FAULTTEST::GetAddressElement& parameters) throw
(TIBAMX_CORE_NAMESPACE::TibcoRuntimeException
,XSD_COM_TIBCO_NS_FAULTTEST::GetAddress_faultFault)
{
std::cout << "WARN: Address requested for : " << parameters.getIn()->c_str() << std::endl;
TIBAMX_CPP_NAMESPACE::ComponentContext& context = getComponentContext();
TIBAMX_CPP_NAMESPACE::StringRequestContext* requestCtx = context.getRequestContext();
if((parameters.getIn()->compare("reference_fault") == 0)) {
/* Optional : Setting of fault reason */
TIBAMX_CPP_NAMESPACE::StringReplyContext* replyCtx = requestCtx->getReplyContext();
TIBAMX_CORE_NAMESPACE::String str("context invocation fault from impl");
replyCtx->setFault(&str);
// End of optional section.
XSD_COM_TIBCO_NS_FAULTTEST::GetAddress_faultFault fault;
XSD_COM_TIBCO_NS_FAULTTEST::GetAddress_faultElement faultElement;
faultElement.setIn("Invalid address fault : impl");
fault.set_value(faultElement);
TIBCO ActiveMatrix C++ Component Development
Top-Down Approach | 17
throw fault;
}
XSD_COM_TIBCO_NS_FAULTTEST::GetAddressResponseElement* result = new
XSD_COM_TIBCO_NS_FAULTTEST::GetAddressResponseElement();
result->setOut("This is normal output from impl");
return result;
Where, GetAddress_faultFault is the fault that is thrown.
To run the Fault service, follow the procedures whose details are available in TIBCO
ActiveMatrix Administration:
1. Upload the DAA.
2. Create and install the HTTP Connector resource instance.
3. In TIBCO ActiveMatrix Administrator, enter the composite property for library path.
The library path must point to the location of the library on the file system (or
machine) to which the deployed assembly on the node is pointing.
4. Deploy and start the Fault service DAA.
5. Open the SOAP UI configuration cpp-fault/cpp-fault-test-soapui-project.xml in the SOAP UI
client.
6. If there is any change in service endpoint, update the endpoint location as per
deployed service endpoint.
7. Open the SOAP UI editor for sample requests provided in above configuration, and
submit the request to the specified service endpoint.
No Message Loss
The No Message Loss sample includes the settings to configure the message redelivery for
exceptions. No Message Loss is achieved using redelivery of message on any exception.
This redelivery can be stopped for specific exceptions, by configuring them in No
Message Loss policy.
If the code throws an exception, then you have to explicitly catch the exception and use
following artifact in the catch block:
throwRuntimeException(ExceptionName,Reason);
For example: throwRuntimeException(DivideByZeroException,"Attemps to divide by zero.");
TIBCO ActiveMatrix C++ Component Development
18 | Chapter 2 Development Tutorials
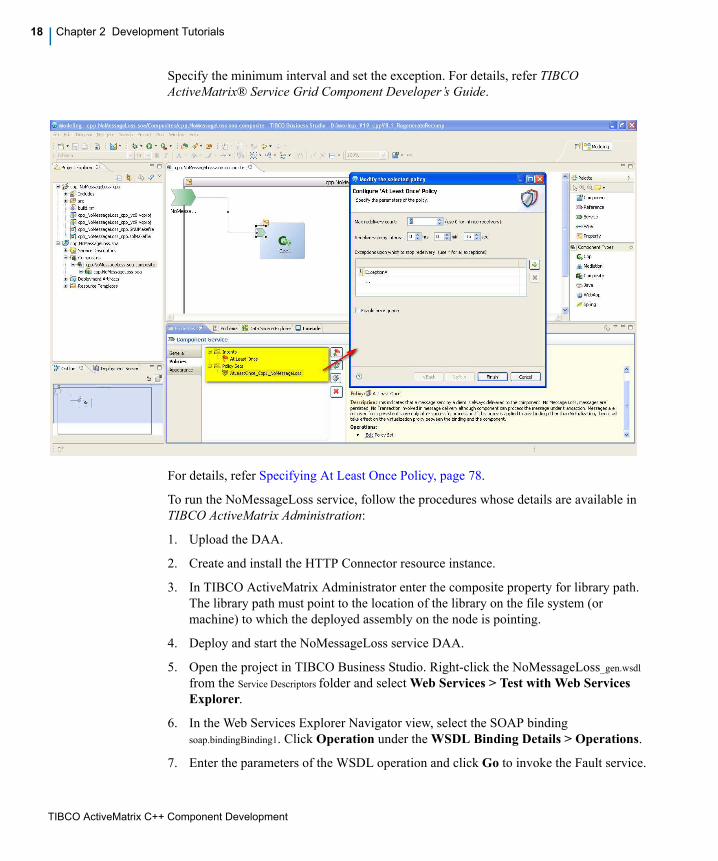
Specify the minimum interval and set the exception. For details, refer TIBCO
ActiveMatrix® Service Grid Component Developer’s Guide.
For details, refer Specifying At Least Once Policy, page 78.
To run the NoMessageLoss service, follow the procedures whose details are available in
TIBCO ActiveMatrix Administration:
1. Upload the DAA.
2. Create and install the HTTP Connector resource instance.
3. In TIBCO ActiveMatrix Administrator enter the composite property for library path.
The library path must point to the location of the library on the file system (or
machine) to which the deployed assembly on the node is pointing.
4. Deploy and start the NoMessageLoss service DAA.
5. Open the project in TIBCO Business Studio. Right-click the NoMessageLoss_gen.wsdl
from the Service Descriptors folder and select Web Services > Test with Web Services
Explorer.
6. In the Web Services Explorer Navigator view, select the SOAP binding
soap.bindingBinding1. Click Operation under the WSDL Binding Details > Operations.
7. Enter the parameters of the WSDL operation and click Go to invoke the Fault service.
TIBCO ActiveMatrix C++ Component Development
Bottom-Up Approach | 19
Bottom-Up Approach
To develop a C++ component in the bottom-up (code-first) approach, follow the
procedure:
C++ development
environment
1. In a supported C++ development environment, create a C++ component
implementation. The implementation includes service class, implementation class,
and dependent header files, and implementation class source files. The header files
and data types must conform to the constraints described in C++ to WSDL Mapping
on page 70.
TIBCO Business
Studio
2. In TIBCO Business Studio, create a project to contain the C++ header and
implementation files.
3. Import the C++ service class and dependent header files created in step 1 into the
project.
4. Create an ActiveMatrix SOA project selecting the SOA Project from
Implementation project type.
In the Component Details page of the wizard, select C++ for the component
implementation type. Select an existing C++ class to use as implementation. The
selected class must be a pure virtual class. See Generate C++ Component
Implementation Reference on page 48 for details.
Click Next and then click Finish.
TIBCO Business Studio generates a WSDL file based on the service classes and C++
stub code used by the ActiveMatrix C++ container, to invoke the service classes.
5. Configure the component to expose the service defined by the C++ service classes.
Add a SOAP Binding to the configured composite service.
C++ development
environment
6. Double-click the C++ component to open the generated C++ implementation project
in your preferred development environment (IDE). Set the IDE preferences on
Microsoft Windows platform as described in Set Preferred Build Artifacts and Build
Method on page 54.
7. Copy the implementation files from the original folder into the src folder of the
generated project.
8. Before building the project, ensure that the environment variable
TIBCOAMX_CPP_CONTAINER_HOME is set to the installation location of the C++
container.
TIBCOAMX_CPP_CONTAINER_HOME=TIBCO_HOME\amx_it_cpp\3.2
9. Build a C++ library containing the generated stub code and implementation class
header and source files.
TIBCO ActiveMatrix C++ Component Development
20 | Chapter 2 Development Tutorials
Bottom-Up Approach Samples
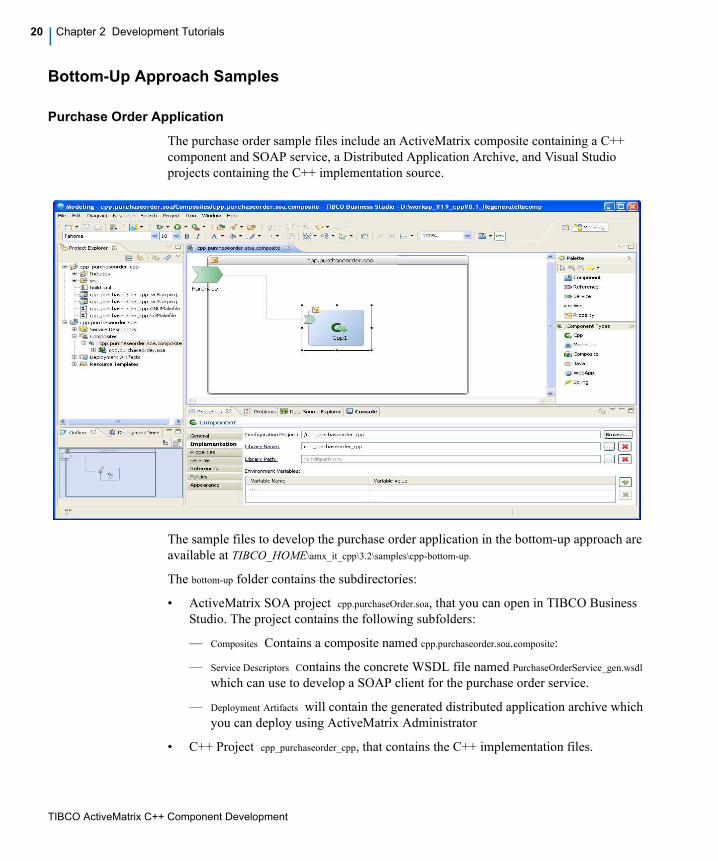
Purchase Order Application
The purchase order sample files include an ActiveMatrix composite containing a C++
component and SOAP service, a Distributed Application Archive, and Visual Studio
projects containing the C++ implementation source.
The sample files to develop the purchase order application in the bottom-up approach are
available at TIBCO_HOME\amx_it_cpp\3.2\samples\cpp-bottom-up.
The bottom-up folder contains the subdirectories:
• ActiveMatrix SOA project cpp.purchaseOrder.soa, that you can open in TIBCO Business
Studio. The project contains the following subfolders:
— Composites Contains a composite named cpp.purchaseorder.soa.composite:
— Service Descriptors Contains the concrete WSDL file named PurchaseOrderService_gen.wsdl
which can use to develop a SOAP client for the purchase order service.
— Deployment Artifacts will contain the generated distributed application archive which
you can deploy using ActiveMatrix Administrator
• C++ Project cpp_purchaseorder_cpp, that contains the C++ implementation files.
TIBCO ActiveMatrix C++ Component Development
Bottom-Up Approach | 21
To run the purchase order service, follow the procedures whose details are available in
TIBCO ActiveMatrix Administration:
1. Upload the DAA.
2. Enter the composite property for library path. The library path must point to the
location of the library on the file system (or machine) to which the deployed assembly
on the node is pointing.
3. Create and install the HTTP Connector resource instance.
4. Deploy and start the Process Order service DAA.
5. Open the project in TIBCO Business Studio. Right-click the PurchaseOrder_gen.wsdl from
the Service Descriptors folder and select Web Services > Test with Web Services
Explorer.
6. In the Web Services Explorer Navigator view, select the SOAP binding
soap.bindingBinding1. Click requestPriceSummary under the WSDL Binding Details >
Operations.
7. Enter the parameters of the WSDL operation and click Go to invoke the Purchase
Order service.
TIBCO ActiveMatrix C++ Component Development
22 | Chapter 3 C++ Components
Chapter 3 C++ Components
This chapter describes how to create and configure a C++ component. See TIBCO
ActiveMatrix Composite Development for information on how to perform the basic tasks
in TIBCO Business Studio.
Topics
• Creating a C++ Component, page 23
• Configuring a C++ Component, page 25
• Updating a C++ Component, page 26
• Updating a C++ Implementation, page 28
• Using Services in a C++ Component, page 29
• Using References in a C++ Component, page 31
• Using Properties in a C++ Component, page 33
• C++ Component Reference, page 35
• Specifying the Application Library Name and Library Path, page 36
• Using Environment Variables, page 38
• Packaging C++ Components, page 40
TIBCO ActiveMatrix C++ Component Development
Creating a C++ Component | 23
Creating a C++ Component
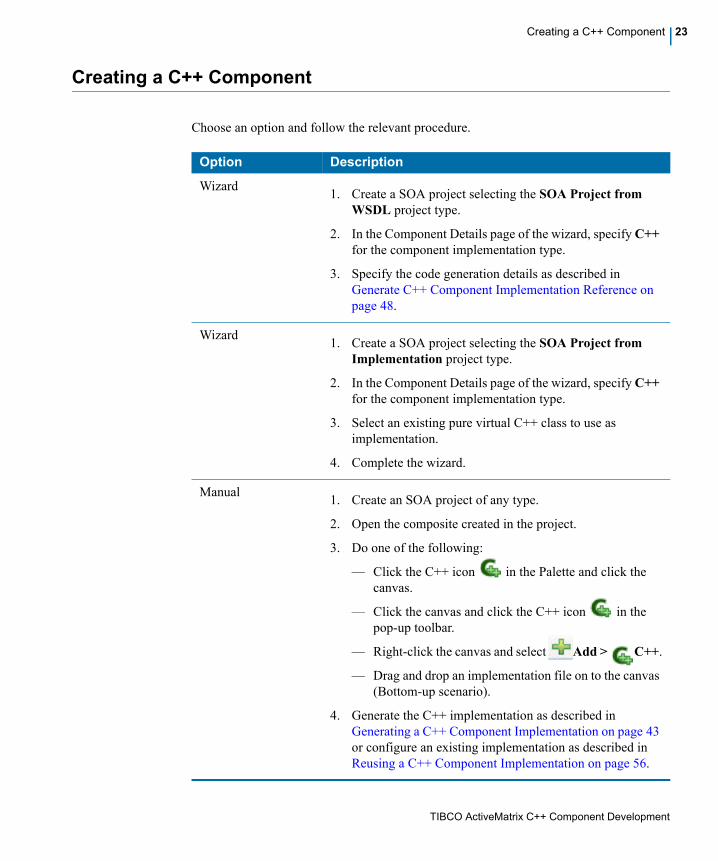
Choose an option and follow the relevant procedure.
Option Description
Wizard1. Create a SOA project selecting the SOA Project from
WSDL project type.
2. In the Component Details page of the wizard, specify C++
for the component implementation type.
3. Specify the code generation details as described in
Generate C++ Component Implementation Reference on
page 48.
Wizard1. Create a SOA project selecting the SOA Project from
Implementation project type.
2. In the Component Details page of the wizard, specify C++
for the component implementation type.
3. Select an existing pure virtual C++ class to use as
implementation.
4. Complete the wizard.
Manual1. Create an SOA project of any type.
2. Open the composite created in the project.
3. Do one of the following:
— Click the C++ icon in the Palette and click the
canvas.
— Click the canvas and click the C++ icon in the
pop-up toolbar.
— Right-click the canvas and select Add > C++.
— Drag and drop an implementation file on to the canvas
(Bottom-up scenario).
4. Generate the C++ implementation as described in
Generating a C++ Component Implementation on page 43
or configure an existing implementation as described in
Reusing a C++ Component Implementation on page 56.
TIBCO ActiveMatrix C++ Component Development
24 | Chapter 3 C++ Components
A C++ component is added to the canvas and its implementation is configured.
TIBCO ActiveMatrix C++ Component Development
Configuring a C++ Component | 25
Configuring a C++ Component
When you generate a C++ component implementation or create a SOA project from a C++
implementation, the component’s Implementation field is configured automatically.
You can reuse an existing C++ implementation generated previously by reconfiguring the
component to use the existing component implementation.
1. Click the C++ component.
2. In the Properties view, click the Implementation tab.
3. Click the Browse... button at the right of the Class field.
The Select C++ Configuration Project dialog displays.
4. Click a configuration project from the list of available C++ CDT projects in the
workspace and click OK.
The component is updated with the details from the newly selected C++ configuration
project.
TIBCO ActiveMatrix C++ Component Development
26 | Chapter 3 C++ Components
Updating a C++ Component
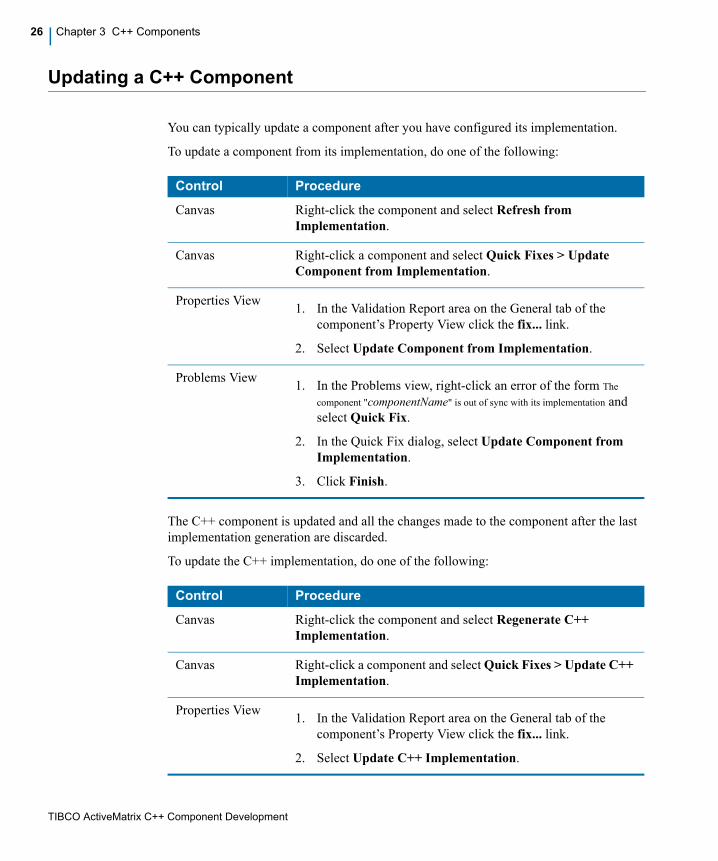
You can typically update a component after you have configured its implementation.
To update a component from its implementation, do one of the following:
The C++ component is updated and all the changes made to the component after the last
implementation generation are discarded.
To update the C++ implementation, do one of the following:
Control Procedure
Canvas Right-click the component and select Refresh from
Implementation.
Canvas Right-click a component and select Quick Fixes > Update
Component from Implementation.
Properties View1. In the Validation Report area on the General tab of the
component’s Property View click the fix... link.
2. Select Update Component from Implementation.
Problems View1. In the Problems view, right-click an error of the form The
component "componentName" is out of sync with its implementation and
select Quick Fix.
2. In the Quick Fix dialog, select Update Component from
Implementation.
3. Click Finish.
Control Procedure
Canvas Right-click the component and select Regenerate C++
Implementation.
Canvas Right-click a component and select Quick Fixes > Update C++
Implementation.
Properties View1. In the Validation Report area on the General tab of the
component’s Property View click the fix... link.
2. Select Update C++ Implementation.
TIBCO ActiveMatrix C++ Component Development
Updating a C++ Component | 27
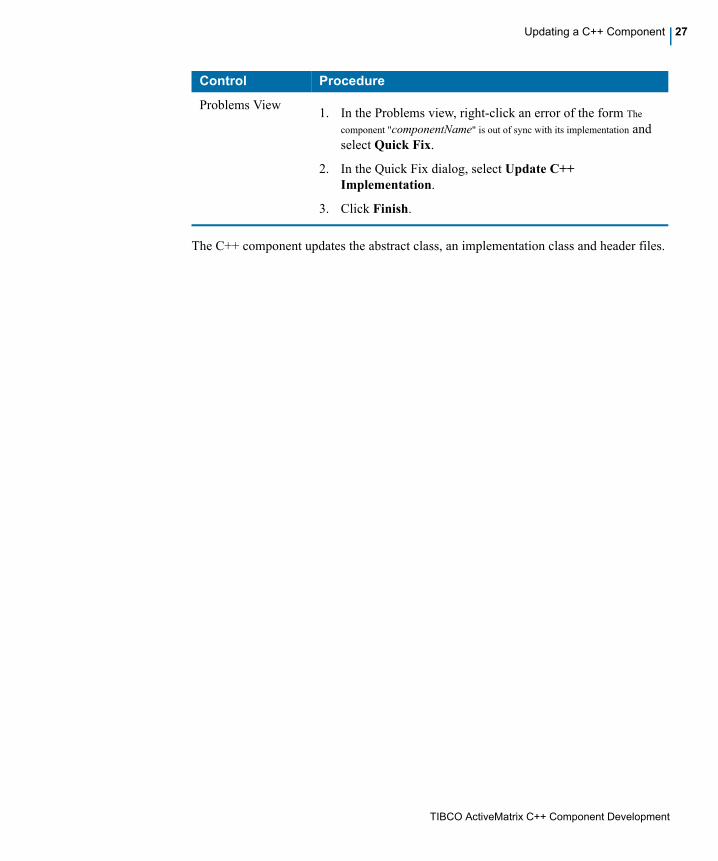
The C++ component updates the abstract class, an implementation class and header files.
Problems View1. In the Problems view, right-click an error of the form The
component "componentName" is out of sync with its implementation and
select Quick Fix.
2. In the Quick Fix dialog, select Update C++
Implementation.
3. Click Finish.
Control Procedure
TIBCO ActiveMatrix C++ Component Development
28 | Chapter 3 C++ Components
Updating a C++ Implementation
Regenerate the component implementation to reflect any updates made to the component
services, references, or properties after the implementation has been generated. To
regenerate the implementation code, right-click the C++ component and click Regenerate
C++ Implementation.
While regeneration, all the files generated by C++ except <UserImplementation>.cpp are
deleted and then regenerated.
TIBCO ActiveMatrix C++ Component Development
Using Services in a C++ Component | 29
Using Services in a C++ Component
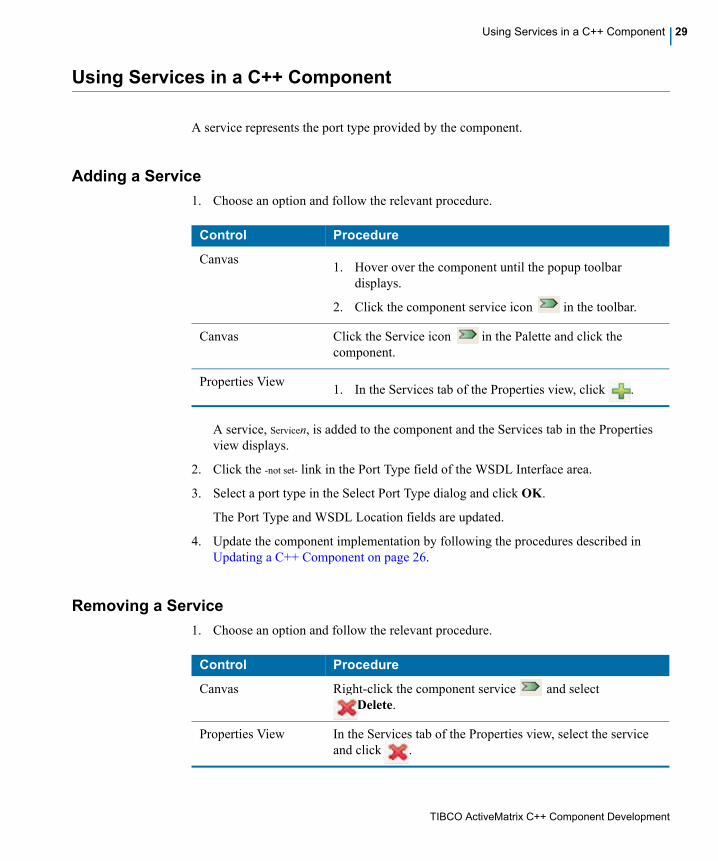
A service represents the port type provided by the component.
Adding a Service
1. Choose an option and follow the relevant procedure.
A service, Servicen, is added to the component and the Services tab in the Properties
view displays.
2. Click the -not set- link in the Port Type field of the WSDL Interface area.
3. Select a port type in the Select Port Type dialog and click OK.
The Port Type and WSDL Location fields are updated.
4. Update the component implementation by following the procedures described in
Updating a C++ Component on page 26.
Removing a Service
1. Choose an option and follow the relevant procedure.
Control Procedure
Canvas1. Hover over the component until the popup toolbar
displays.
2. Click the component service icon in the toolbar.
Canvas Click the Service icon in the Palette and click the
component.
Properties View1. In the Services tab of the Properties view, click .
Control Procedure
Canvas Right-click the component service and select
Delete.
Properties View In the Services tab of the Properties view, select the service
and click .
TIBCO ActiveMatrix C++ Component Development
30 | Chapter 3 C++ Components
2. Right-click the component and select Quick-Fixes >Update Component
Implementation.
The generated import statements, fields, methods, and code you have added to methods
are removed from the implementation source file.
TIBCO ActiveMatrix C++ Component Development
Using References in a C++ Component | 31
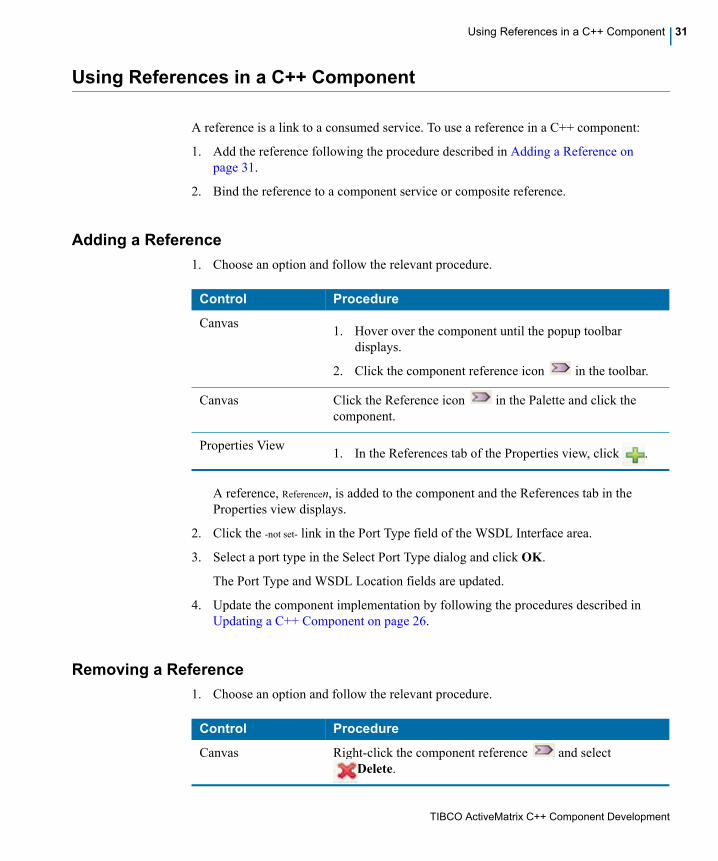
Using References in a C++ Component
A reference is a link to a consumed service. To use a reference in a C++ component:
1. Add the reference following the procedure described in Adding a Reference on
page 31.
2. Bind the reference to a component service or composite reference.
Adding a Reference
1. Choose an option and follow the relevant procedure.
A reference, Referencen, is added to the component and the References tab in the
Properties view displays.
2. Click the -not set- link in the Port Type field of the WSDL Interface area.
3. Select a port type in the Select Port Type dialog and click OK.
The Port Type and WSDL Location fields are updated.
4. Update the component implementation by following the procedures described in
Updating a C++ Component on page 26.
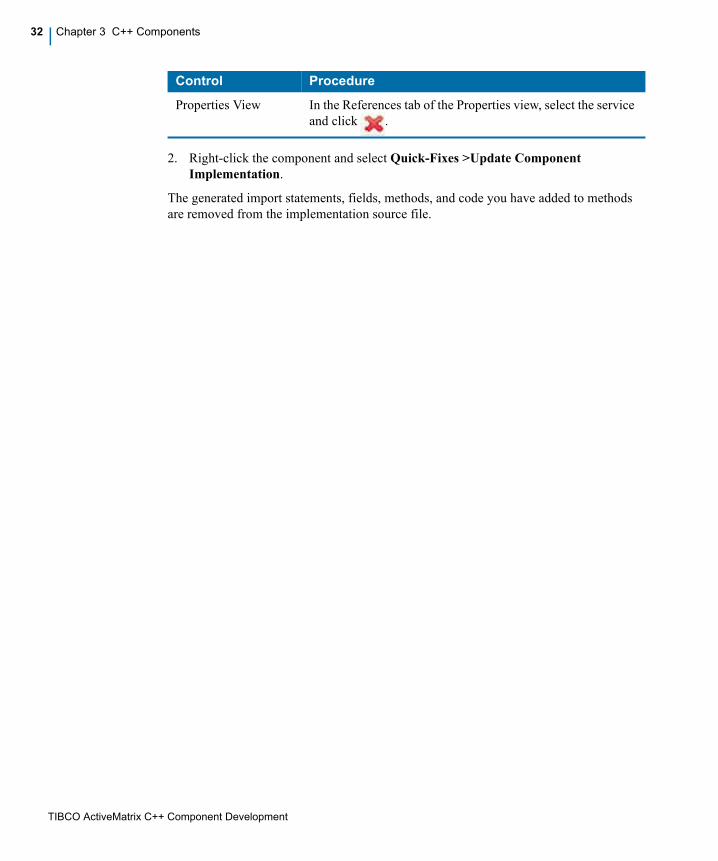
Removing a Reference
1. Choose an option and follow the relevant procedure.
Control Procedure
Canvas1. Hover over the component until the popup toolbar
displays.
2. Click the component reference icon in the toolbar.
Canvas Click the Reference icon in the Palette and click the
component.
Properties View1. In the References tab of the Properties view, click .
Control Procedure
Canvas Right-click the component reference and select
Delete.
TIBCO ActiveMatrix C++ Component Development
32 | Chapter 3 C++ Components
2. Right-click the component and select Quick-Fixes >Update Component
Implementation.
The generated import statements, fields, methods, and code you have added to methods
are removed from the implementation source file.
Properties View In the References tab of the Properties view, select the service
and click .
Control Procedure
TIBCO ActiveMatrix C++ Component Development
Using Properties in a C++ Component | 33
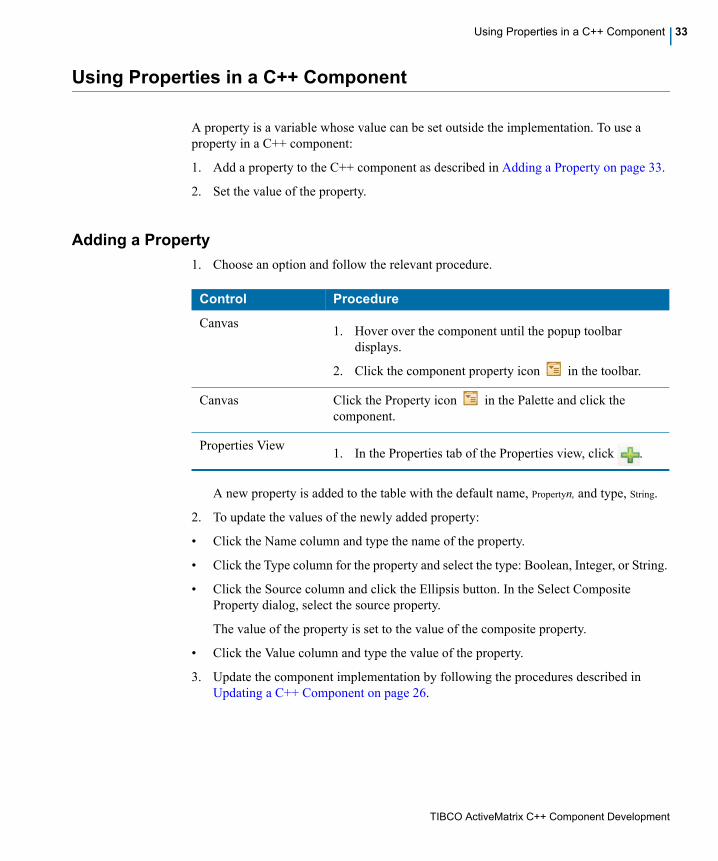
Using Properties in a C++ Component
A property is a variable whose value can be set outside the implementation. To use a
property in a C++ component:
1. Add a property to the C++ component as described in Adding a Property on page 33.
2. Set the value of the property.
Adding a Property
1. Choose an option and follow the relevant procedure.
A new property is added to the table with the default name, Propertyn, and type, String.
2. To update the values of the newly added property:
• Click the Name column and type the name of the property.
• Click the Type column for the property and select the type: Boolean, Integer, or String.
• Click the Source column and click the Ellipsis button. In the Select Composite
Property dialog, select the source property.
The value of the property is set to the value of the composite property.
• Click the Value column and type the value of the property.
3. Update the component implementation by following the procedures described in
Updating a C++ Component on page 26.
Control Procedure
Canvas1. Hover over the component until the popup toolbar
displays.
2. Click the component property icon in the toolbar.
Canvas Click the Property icon in the Palette and click the
component.
Properties View1. In the Properties tab of the Properties view, click .
TIBCO ActiveMatrix C++ Component Development
34 | Chapter 3 C++ Components
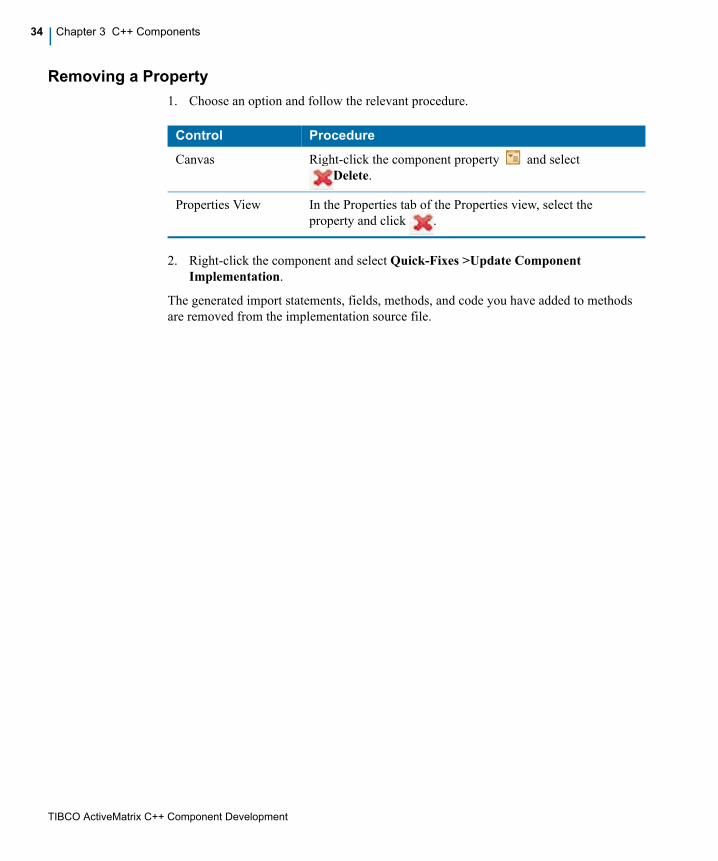
Removing a Property
1. Choose an option and follow the relevant procedure.
2. Right-click the component and select Quick-Fixes >Update Component
Implementation.
The generated import statements, fields, methods, and code you have added to methods
are removed from the implementation source file.
Control Procedure
Canvas Right-click the component property and select
Delete.
Properties View In the Properties tab of the Properties view, select the
property and click .
TIBCO ActiveMatrix C++ Component Development
C++ Component Reference | 35
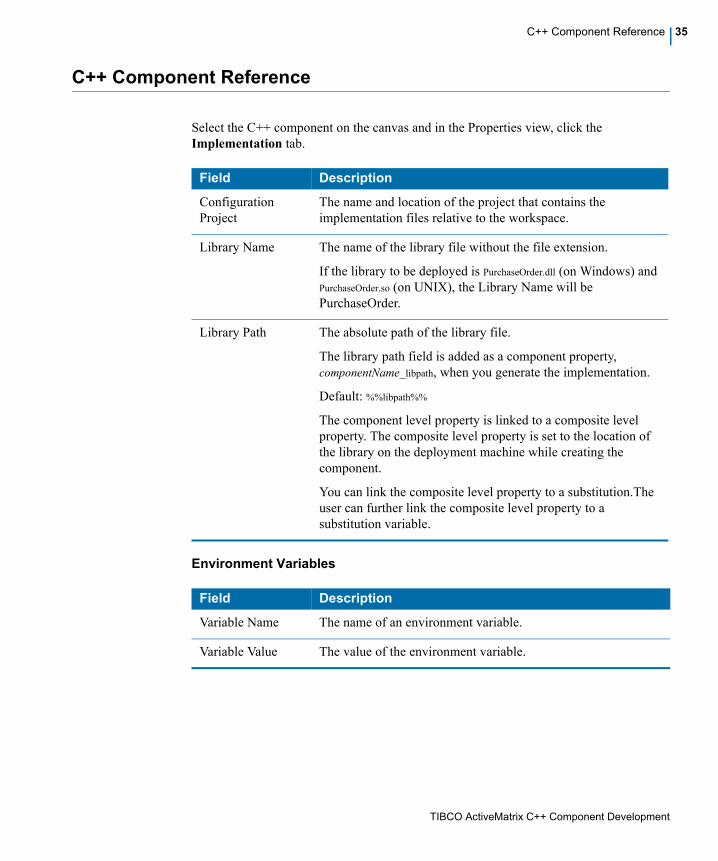
C++ Component Reference
Select the C++ component on the canvas and in the Properties view, click the
Implementation tab.
Environment Variables
Field Description
Configuration
Project
The name and location of the project that contains the
implementation files relative to the workspace.
Library Name The name of the library file without the file extension.
If the library to be deployed is PurchaseOrder.dll (on Windows) and
PurchaseOrder.so (on UNIX), the Library Name will be
PurchaseOrder.
Library Path The absolute path of the library file.
The library path field is added as a component property,
componentName_libpath, when you generate the implementation.
Default: %%libpath%%
The component level property is linked to a composite level
property. The composite level property is set to the location of
the library on the deployment machine while creating the
component.
You can link the composite level property to a substitution.The
user can further link the composite level property to a
substitution variable.
Field Description
Variable Name The name of an environment variable.
Variable Value The value of the environment variable.
TIBCO ActiveMatrix C++ Component Development
36 | Chapter 3 C++ Components
Specifying the Application Library Name and Library Path
The C++ container uses the component’s application library name and path variables to
load the application library that implements the service.
TIBCO Business Studio generates the component property libpath and a composite
property, componentName_libpath, when you generate the component implementation.
To specify the library name:
1. Select the C++ component and go to the General tab of the Properties view.
2. Do one of the following:
— Type the library name in the Library Name field.
— Click the ellipsis button to the right of the Library Name field and select the
composite property for the library name.
A component property, libname, is added on the component if it is not present. The
Library Name field is updated to %%libname%%.
To customize the library name and path on each deployment machine, do the following:
1. Create substitution variables for the library name and path. See TIBCO ActiveMatrix
Composite Development for information on how to create and use substitution
variables.
2. Set their values to the name of and path to the implementation library archive. If the
library to be deployed is PurchaseOrder.dll (on Windows) and PurchaseOrder.so (on UNIX)
the value of Library Name variable will be PurchaseOrder. The Library Path variable
must be set to the location of the library on the deployment machine.
3. Select the Composite property associated with the component. In the General tab of
the Properties view, click the ellipsis button to the right of the Substitution Variable
field.
4. Select the substitution variable in the dialog box and click OK.
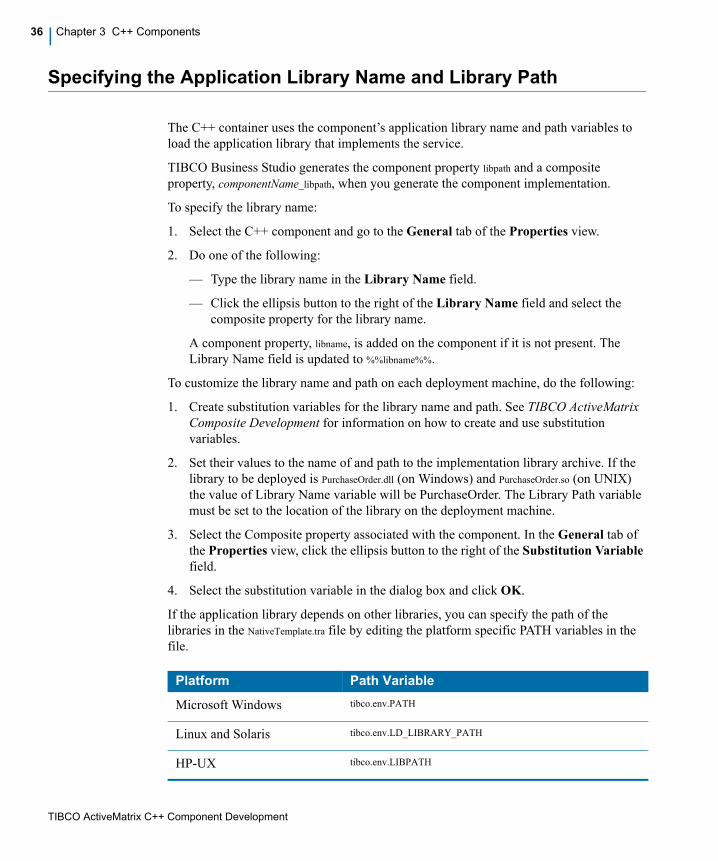
If the application library depends on other libraries, you can specify the path of the
libraries in the NativeTemplate.tra file by editing the platform specific PATH variables in the
file.
Platform Path Variable
Microsoft Windows tibco.env.PATH
Linux and Solaris tibco.env.LD_LIBRARY_PATH
HP-UX tibco.env.LIBPATH
TIBCO ActiveMatrix C++ Component Development
Specifying the Application Library Name and Library Path | 37
If the component or composite property is deleted, an error marker "Default property for library
path not found" displays.
Right-click on the component and select Quick Fix > Create Default Property to
regenerate the missing property. The regenerated component property is not linked to the
composite property. You can manually link the property to the composite property.
TIBCO ActiveMatrix C++ Component Development
38 | Chapter 3 C++ Components
Using Environment Variables
An environment variable is a property of a C++ application’s execution environment that
can affect the application’s behavior. ActiveMatrix C++ Implementation Type allows you
to configure the value of environment variables at the component level and global level.
You can refer to the sample, for details refer Environment on page 12.
The environment variable can be set directly in a composite configuration or it can be
bound to substitution variable. If you bind the property to a substitution variable, you can
rebind the property at deployment time in ActiveMatrix Administrator (see Chapter 8,
Deploying Service Assemblies in TIBCO ActiveMatrix Administration for details).
You can set values for properties at various levels:
• Specifying the parameter values in NativeTemplate.tra file makes the values applicable at
global level. Value set at global level applies to all C++ components.
• Setting environment variable sets the value at component level. Value set at
component level overrides the value defined at global level.
• Setting substitution variables allows you to change the value at runtime.
To add an environment variable:
1. Open the composite containing the C++ component and click the component.
2. In the Implementation tab in the Properties view of the component, click the
button to the right of the Environment Variables table.
A row is created in the table.
3. Click the Variable Name column and type a name for the variable.
4. In the Variable Value column, set the variable value.
You can specify:
• Simple environment variable: These are applied to native process without any
modification. For example, simpleEnv = simpleEnvValue.
• Substitute environment variable: One environment can substitute value of other
environment variable. For example, dependentEnv = %simpleEnv% .
• Multi-level substitution environment variable: Multiple substitutions can be applied in
one environment variable. For example,
simpleEnv = simpleEnvValue
pathSeparator = :
TIBCO ActiveMatrix C++ Component Development
Using Environment Variables | 39
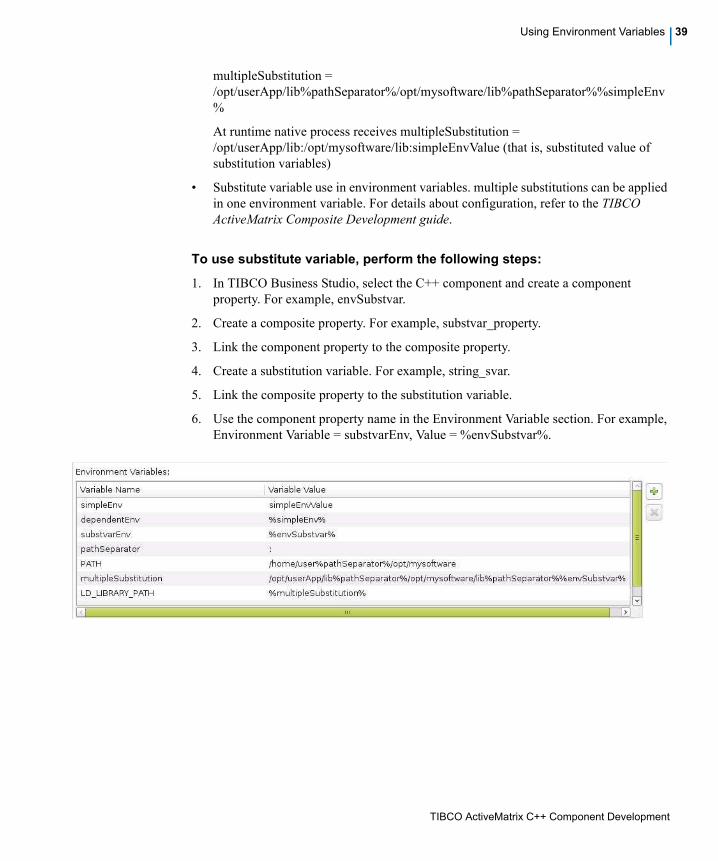
multipleSubstitution =
/opt/userApp/lib%pathSeparator%/opt/mysoftware/lib%pathSeparator%%simpleEnv
%
At runtime native process receives multipleSubstitution =
/opt/userApp/lib:/opt/mysoftware/lib:simpleEnvValue (that is, substituted value of
substitution variables)
• Substitute variable use in environment variables. multiple substitutions can be applied
in one environment variable. For details about configuration, refer to the TIBCO
ActiveMatrix Composite Development guide.
To use substitute variable, perform the following steps:
1. In TIBCO Business Studio, select the C++ component and create a component
property. For example, envSubstvar.
2. Create a composite property. For example, substvar_property.
3. Link the component property to the composite property.
4. Create a substitution variable. For example, string_svar.
5. Link the composite property to the substitution variable.
6. Use the component property name in the Environment Variable section. For example,
Environment Variable = substvarEnv, Value = %envSubstvar%.
TIBCO ActiveMatrix C++ Component Development
40 | Chapter 3 C++ Components
Packaging C++ Components
See TIBCO ActiveMatrix Composite Development for details on how to create a
Distributed Application Archive (DAA) from a composite.
TIBCO ActiveMatrix C++ Component Development
C++ Component Implementations | 41
Chapter 4 C++ Component Implementations
This chapter describes how to generate and work with a C++ component implementation.
Topics
• Opening a C++ Component Implementation, page 42
• Generating a C++ Component Implementation, page 43
• Generate C++ Component Implementation Reference, page 48
• Completing a C++ Component Implementation, page 49
• Building a C++ Component Implementation, page 52
• Reusing a C++ Component Implementation, page 56
• Debugging a C++ Component Implementation, page 57
• Accessing Context Parameters, page 59
• Referencing External Libraries, page 69
• Mapping, page 70
• Troubleshooting, page 74
TIBCO ActiveMatrix C++ Component Development
42 | Chapter 4 C++ Component Implementations
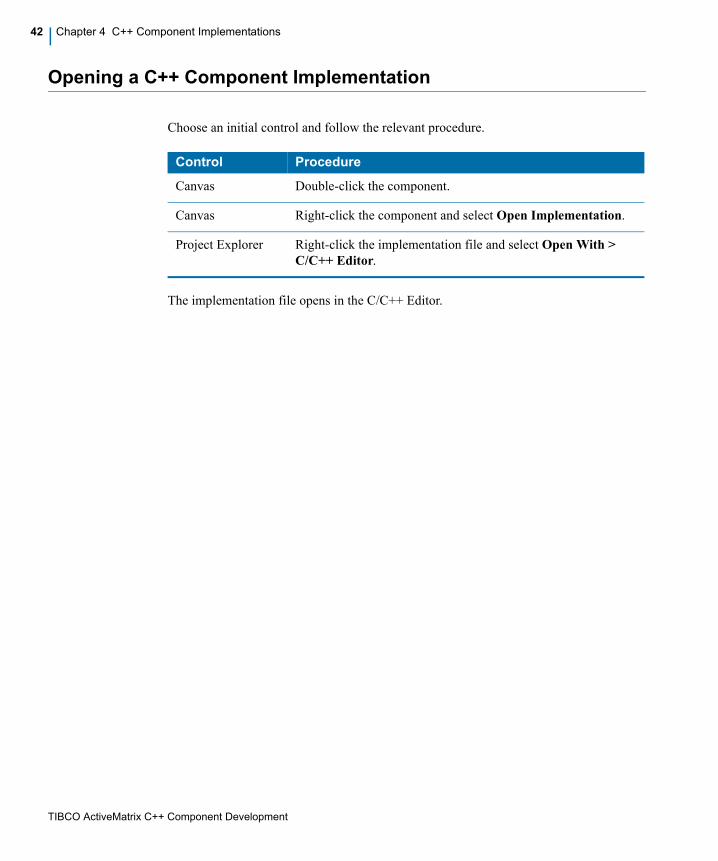
Opening a C++ Component Implementation
Choose an initial control and follow the relevant procedure.
The implementation file opens in the C/C++ Editor.
Control Procedure
Canvas Double-click the component.
Canvas Right-click the component and select Open Implementation.
Project Explorer Right-click the implementation file and select Open With >
C/C++ Editor.
TIBCO ActiveMatrix C++ Component Development
Generating a C++ Component Implementation | 43
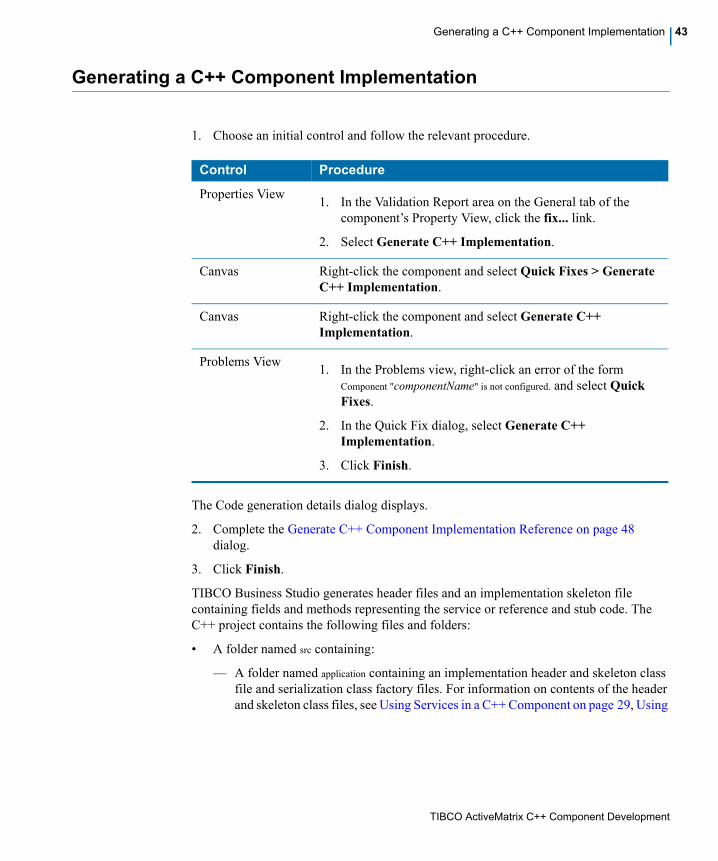
Generating a C++ Component Implementation
1. Choose an initial control and follow the relevant procedure.
The Code generation details dialog displays.
2. Complete the Generate C++ Component Implementation Reference on page 48
dialog.
3. Click Finish.
TIBCO Business Studio generates header files and an implementation skeleton file
containing fields and methods representing the service or reference and stub code. The
C++ project contains the following files and folders:
• A folder named src containing:
— A folder named application containing an implementation header and skeleton class
file and serialization class factory files. For information on contents of the header
and skeleton class files, see Using Services in a C++ Component on page 29, Using
Control Procedure
Properties View1. In the Validation Report area on the General tab of the
component’s Property View, click the fix... link.
2. Select Generate C++ Implementation.
Canvas Right-click the component and select Quick Fixes > Generate
C++ Implementation.
Canvas Right-click the component and select Generate C++
Implementation.
Problems View1. In the Problems view, right-click an error of the form
Component "componentName" is not configured. and select Quick
Fixes.
2. In the Quick Fix dialog, select Generate C++
Implementation.
3. Click Finish.
TIBCO ActiveMatrix C++ Component Development
44 | Chapter 4 C++ Component Implementations
References in a C++ Component on page 31, and Using Properties in a C++
Component on page 33.
— A folder named ProjectNamespace, where ProjectNamespace is the namespace you
specified, containing the data binding classes for converting between C++ and
ActiveMatrix data types.
— A folder named npc1_npc2_npc3...npcn, where NPCi is a namespace path component
for the namespace defined in the WSDL file, containing the interface header file
that represents the service or reference defined in the WSDL file and for references
a proxy implementation class. If namespace comes from xsd, xsd_ is prefixed to
the generated namespace; and if namespace comes from WSDL, wsdl_ is prefixed
to the generated namesapce. For example if the namespace defined in the WSDL
file is ns.tibco.com.Hello, the folder is named wsdl_ns_tibco_com_hello. The folder
names are equivalent to C++ namespaces in the generated code.
• Visual Studio project files named ProjectName_vc8.vcproj or ProjectName_vc9.vcproj and a
GNUMake Makefile named ProjectName.GNUMakefile, where ProjectName is the project
name you specified in. For information on how to build with the files, see Building a
C++ Component Implementation on page 52.
Abstract Code Generation
When you generate the C++ component implementation, the abstract header file
AbstractSampleImpl.h is generated in the src\application folder. This file contains the property get
and set methods, and proxy methods for the references.
Concrete implementation is not regenerated if you change the component configuration.
Only abstract code section is regenerated, without affecting the user code after
regenerating code for any wsdl/xsd contract change.
Once a C++ component implementation has been generated, renaming projects,
namespaces, classes, services, and references is not supported. Changing any names
results in loss of component to implementation class mapping, loss in connections to
other components, and so on.
TIBCO ActiveMatrix C++ Component Development
Generating a C++ Component Implementation | 45
Code Generation for Service, Reference, and Property
Service Code Generation
TIBCO Business Studio generates a folder named npc1_npc2_npc3...npcn, where npci is a
namespace path component for the namespace defined in the WSDL file, containing the
interface header file named ServicePortTypeInterface.h that represents the service defined in
the WSDL file. For example, if the namespace defined in the WSDL file is ns.tibco.com.Hello,
the folder is named wsdl_ns_tibco_com_hello. The folder names are equivalent to C++
namespaces in the generated code.
TIBCO Business Studio creates an implementation header file and a skeleton
implementation class and adds fields or methods or both that represent the operations
defined in the port type. The class declaration and type of the fields and methods depend
on the MEPs of the operations:
In-*
Namespace::responseType* ImplClass::operation(const Namespace::parameterType& parameters) throw
(TIBAMX_CORE_NAMESPACE::TibcoRuntimeException )
{
return null;
}
TIBCO Business Studio also adds life cycle method skeletons. See Handling Life Cycle
Events on page 49.
Reference Code Generation
TIBCO Business Studio generates a folder named npc1_npc2_npc3...npcn, where npci is a
namespace path component for the namespace defined in the WSDL file, containing the
interface header file PortTypeReferenceNameProxy.h that represents the reference defined in
the WSDL file and a proxy implementation class named
ReferencePortTypeReferenceNameProxy.cpp. For example if the namespace defined in the
WSDL file is ns.tibco.com.Hello, the folder is named wsdl_ns_tibco_com_hello. The folder
names are equivalent to C++ namespaces in the generated code.
TIBCO Business Studio creates an implementation header file and skeleton
implementation class and adds fields or methods or both that represent the operations
defined in the port type. The class declaration and type of the fields and methods depend
on the MEPs of the operations.
In-*
<referenceProxyGetterSetter generated="YES" name="ReferenceName_proxy"><!--*/
Namespace::ReferencePortTypeReferenceNameProxy& getReferenceName_proxy(){
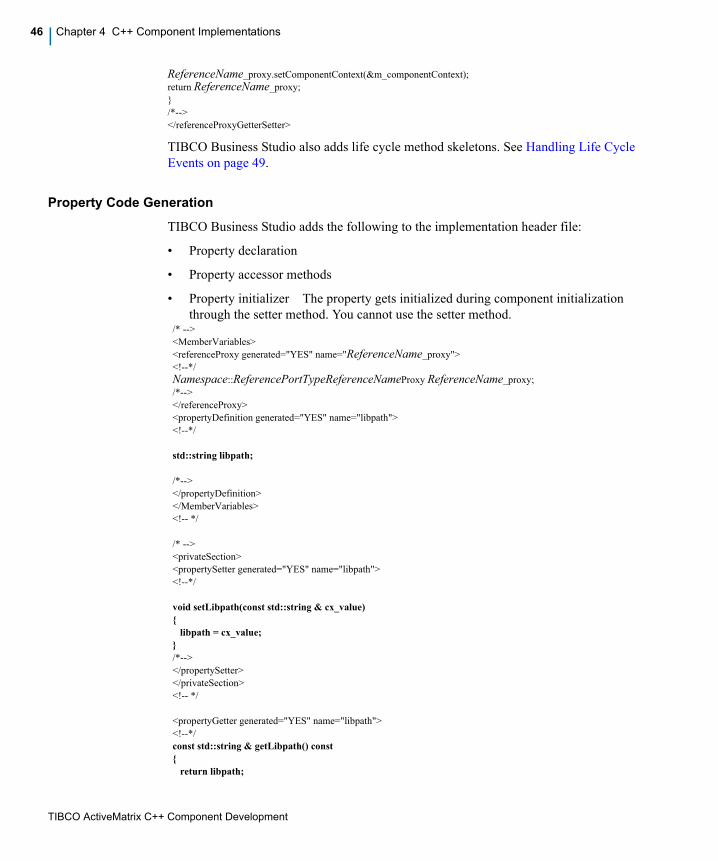
TIBCO ActiveMatrix C++ Component Development
46 | Chapter 4 C++ Component Implementations
ReferenceName_proxy.setComponentContext(&m_componentContext);
return ReferenceName_proxy;}
/*-->
</referenceProxyGetterSetter>
TIBCO Business Studio also adds life cycle method skeletons. See Handling Life Cycle
Events on page 49.
Property Code Generation
TIBCO Business Studio adds the following to the implementation header file:
• Property declaration
• Property accessor methods
• Property initializer The property gets initialized during component initialization
through the setter method. You cannot use the setter method./* -->
<MemberVariables>
<referenceProxy generated="YES" name="ReferenceName_proxy"><!--*/
Namespace::ReferencePortTypeReferenceNameProxy ReferenceName_proxy; /*-->
</referenceProxy>
<propertyDefinition generated="YES" name="libpath">
<!--*/
std::string libpath;
/*-->
</propertyDefinition>
</MemberVariables>
<!-- */
/* -->
<privateSection>
<propertySetter generated="YES" name="libpath">
<!--*/
void setLibpath(const std::string & cx_value)
{
libpath = cx_value;
}
/*-->
</propertySetter>
</privateSection>
<!-- */
<propertyGetter generated="YES" name="libpath">
<!--*/
const std::string & getLibpath() const
{
return libpath;

TIBCO ActiveMatrix C++ Component Development
Generating a C++ Component Implementation | 47
}
/*-->
</propertyGetter>
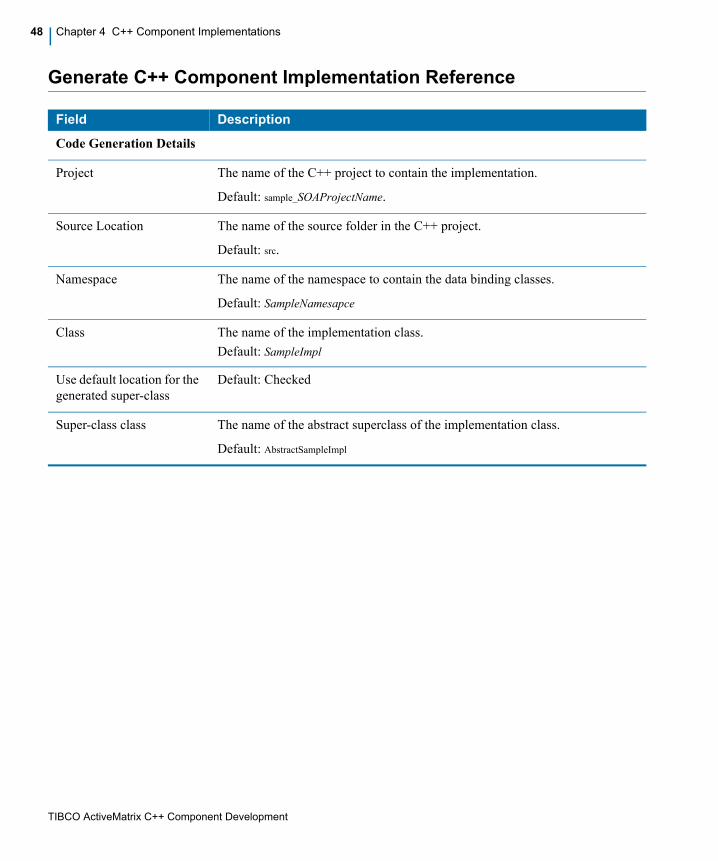
TIBCO ActiveMatrix C++ Component Development
48 | Chapter 4 C++ Component Implementations
Generate C++ Component Implementation Reference
Field Description
Code Generation Details
Project The name of the C++ project to contain the implementation.
Default: sample_SOAProjectName.
Source Location The name of the source folder in the C++ project.
Default: src.
Namespace The name of the namespace to contain the data binding classes.
Default: SampleNamesapce
Class The name of the implementation class.
Default: SampleImpl
Use default location for the
generated super-class
Default: Checked
Super-class class The name of the abstract superclass of the implementation class.
Default: AbstractSampleImpl
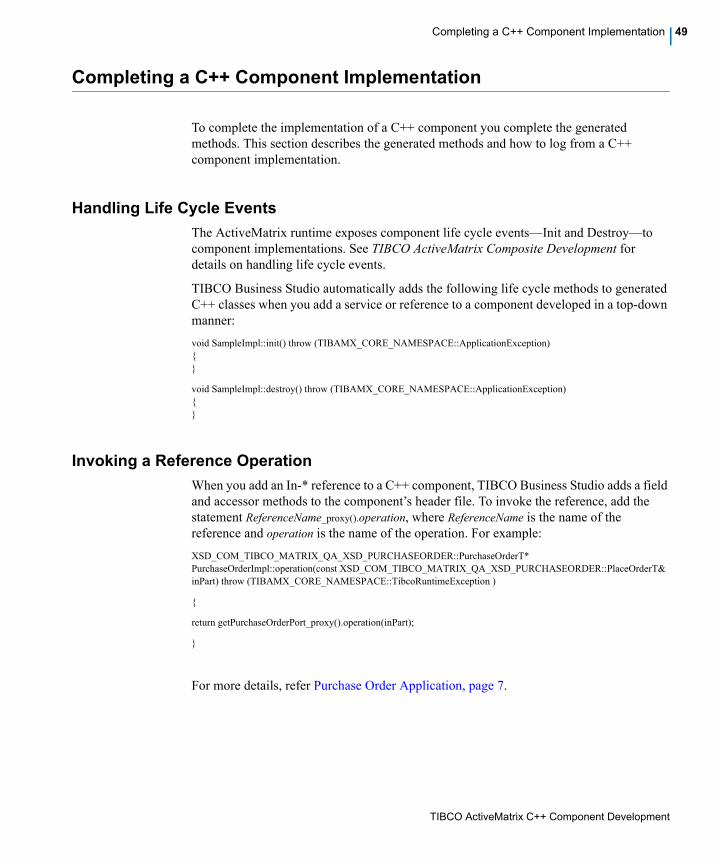
TIBCO ActiveMatrix C++ Component Development
Completing a C++ Component Implementation | 49
Completing a C++ Component Implementation
To complete the implementation of a C++ component you complete the generated
methods. This section describes the generated methods and how to log from a C++
component implementation.
Handling Life Cycle Events
The ActiveMatrix runtime exposes component life cycle events—Init and Destroy—to
component implementations. See TIBCO ActiveMatrix Composite Development for
details on handling life cycle events.
TIBCO Business Studio automatically adds the following life cycle methods to generated
C++ classes when you add a service or reference to a component developed in a top-down
manner:
void SampleImpl::init() throw (TIBAMX_CORE_NAMESPACE::ApplicationException)
{
}
void SampleImpl::destroy() throw (TIBAMX_CORE_NAMESPACE::ApplicationException)
{
}
Invoking a Reference Operation
When you add an In-* reference to a C++ component, TIBCO Business Studio adds a field
and accessor methods to the component’s header file. To invoke the reference, add the
statement ReferenceName_proxy().operation, where ReferenceName is the name of the
reference and operation is the name of the operation. For example:
XSD_COM_TIBCO_MATRIX_QA_XSD_PURCHASEORDER::PurchaseOrderT*
PurchaseOrderImpl::operation(const XSD_COM_TIBCO_MATRIX_QA_XSD_PURCHASEORDER::PlaceOrderT&
inPart) throw (TIBAMX_CORE_NAMESPACE::TibcoRuntimeException )
{
return getPurchaseOrderPort_proxy().operation(inPart);
}
For more details, refer Purchase Order Application, page 7.
TIBCO ActiveMatrix C++ Component Development
50 | Chapter 4 C++ Component Implementations
Accessing a Property
When you add a property to a C++ component TIBCO Business Studio adds a field and
accessor methods to the component’s header file. To access the property in the component
implementation, invoke the accessor methods. For example:
XSD_COM_TIBCO_MATRIX_QA_XSD_PURCHASEORDER::PurchaseOrderT*
PurchaseOrderImpl::operation(const XSD_COM_TIBCO_MATRIX_QA_XSD_PURCHASEORDER::PlaceOrderT&
inPart) throw (TIBAMX_CORE_NAMESPACE::TibcoRuntimeException )
{
std::cout << “Property value = ” << this->getProperty1() << std::endl;
return getPurchaseOrderPort_proxy().operation(inPart);
}
For more details, refer Purchase Order Application, page 7.
Logging
ActiveMatrix C++ Implementation Type supports logging to standard out and using a
logging API. For simple demonstration applications, you can log to standard out.
However, for product applications you should use the logging API.
Standard Output and Error Logging
To log messages from a C++ component implementation to the standard output stream
prepend a string representing the log level—INFO:, DEBUG:, WARN, ERROR:—to the
message. For example, to log a message at the INFO log level, the syntax is:
cout << "INFO: Show this message" << endl;
A message with no log level string is logged at the DEBUG level:
cout << "Show this message" << endl;
To control where log messages are directed, you set the logging configuration for the C++
component that contains the component implementation. For information on logging
configurations, see Logging -> Logging Configurations in TIBCO ActiveMatrix
Administration.
• No space is allowed between double quotes and the logging level. For example, " WARN: is not allowed.
• endl must be the final element in the stream.
After you change the log level for a C++ component you must restart the DAA containing
the component.
TIBCO ActiveMatrix C++ Component Development
Completing a C++ Component Implementation | 51
TIBCO ActiveMatrix Logging
TIBCO ActiveMatrix platform supports logging using the ActiveMatrix C++
Implementation Type logging APIs.
/**********************************
Include section
**********************************/
#include "tibamx/utils/Logger.h"
/**********************************
code section
**********************************/
TIBAMX_CORE_NAMESPACE::Logger m_logger;
if (m_logger.isDebugEnabled())
{
std::string logMessage("This is sample string message");
m_logger.debug(logMessage);
}
You can log messages to ERROR, WARN, INFO, and DEBUG level.
TIBCO ActiveMatrix C++ Component Development
52 | Chapter 4 C++ Component Implementations
Building a C++ Component Implementation
You can build a C++ component implementation in Microsoft Visual Studio or TIBCO
Business Studio. This section describes supported platforms, compilers, and preprocessor
options, how to build projects using the Visual Studio projects and makefile generated by
TIBCO Business Studio, and how to configure an empty Visual Studio project to build
C++ component implementations.
C++ Component Implementation Options
This section describes options for compiling and packaging a C++ component
implementation. For details of the platforms and corresponding compilers that should be
used to build the library, refer TIBCO ActiveMatrix® Implementation Type for C++
Installation guide.
Building a C++ Component Implementation in Microsoft Visual Studio
For C++ components developed in a top-down manner, you use the Visual Studio project
files generated by TIBCO Business Studio to develop and build the component
implementations. TIBCO Business Studio generates project files for Microsoft Visual
Studio 2005 with Visual C++ 8.0 and Microsoft Visual Studio 2008 with Visual C++ 9.0.
Before compiling projects, right-click on the project and select Properties >
Configuration Properties > Linker > Input > Additional Dependencies and add
icuuc.lib.
Visual C++ 8.0 Project
To build a C++ component implementation in Visual Studio 2005 with Visual C++ 8.0:
1. Set TIBCOAMX_CPP_CONTAINER_HOME to AMX_HOME/amx_it_cpp/3.2/ in system
environment variables.
2. If Visual Studio 2005 is the default system editor for vcproj files, double-click the
projectname_vc8.vcproj file. Otherwise, start Visual Studio, select File > Open >
Project/Solution, navigate to the project file, and click Open.
3. Build the project.
For C++ components developed in a bottom-up manner, you must manually configure as
follows:
In Microsoft Visual Studio, you can build C++ component implementations in 32-bit or
64-bit. Select Win32 or X64.
TIBCO ActiveMatrix C++ Component Development
Building a C++ Component Implementation | 53
1. If Visual Studio 2005 is the default system editor for vcproj files, double-click the
projectname_vc8.vcproj file. Otherwise, start Visual Studio, select File > Open >
Project/Solution, navigate to the project file, and click Open.
2. Copy the abstract implementation .h files and implementation files to the generated
C++ project, and include the file in the MSVC++ 8.0 project file.
3. Build the project.
Visual C++ 9.0 Project
To build a C++ component implementation in Visual Studio 2008 with Visual C++ 9.0:
1. Set TIBCOAMX_CPP_CONTAINER_HOME to AMX_HOME/amx_it_cpp/3.2/ in system
environment variables.
2. If Visual Studio 2008 is the default system editor for vcproj files, double-click the
projectname_vc9.vcproj file. Otherwise, start Visual Studio, select File > Open >
Project/Solution, navigate to the project file, and click Open.
3. Build the project.
For C++ components developed in a bottom-up manner, you must manually configure as
follows:
1. If Visual Studio 2008 is the default system editor for vcproj files, double-click the
projectname_vc9.vcproj file. Otherwise, start Visual Studio, select File > Open >
Project/Solution, navigate to the project file, and click Open.
2. Copy the abstract implementation .h files and implementation files to the generated
C++ project, and include the file in the MSVC++ 9.0 project file.
3. Build the project.
Building a C++ Component Implementation Using GNU Make
To build a C++ component implementation using GNU Make:
1. Set CCC to the path to the supported compiler. For example, CCC=g++ on Linux.
2. Set PORT to one of the supported platform types: w32, w64, sol32, sol64, solx86_32,
solx86_64, linux32, linux64, hpuxia64.
On Windows, set environment variable DEBUG to true for building debug libraries.
3. Set TIBCOAMX_CPP_CONTAINER_HOME to AMX_HOME/amx_it_cpp/3.2/ in system
environment variables.
4. Invoke gmake -f projectname.GNUMakefile or make -f projectname.GNUMakefile.
TIBCO ActiveMatrix C++ Component Development
54 | Chapter 4 C++ Component Implementations
Building a C++ Component Implementation Using Ant
To build a C++ component implementation using Ant:
1. Set TIBCOAMX_CPP_CONTAINER_HOME to AMX_HOME/amx_it_cpp/3.2/ in system
environment variables.
2. Run Ant. By default, 32-bit release library are built. For 32-bit debug, use ant
buildWithDebug. For 64-bit release, use ant 64bit. For 64-bit debug, use ant
64bitDebug.
Building a C++ Component Implementation Using Make
To build a C++ component implementation using Solaris Make:
1. Set TIBCOAMX_CPP_CONTAINER_HOME to AMX_HOME/amx_it_cpp/3.2/ in system
environment variables.
2. Invoke make -f projectname.solMakefile.
Set Preferred Build Artifacts and Build Method
The build process generates the artifacts selected in the Windows > Preferences page. To
set the preferred build method and build artifacts:
1. In TIBCO Business Studio, click Window > Preferences.
Building a component implementation using Make is available only on Solaris.
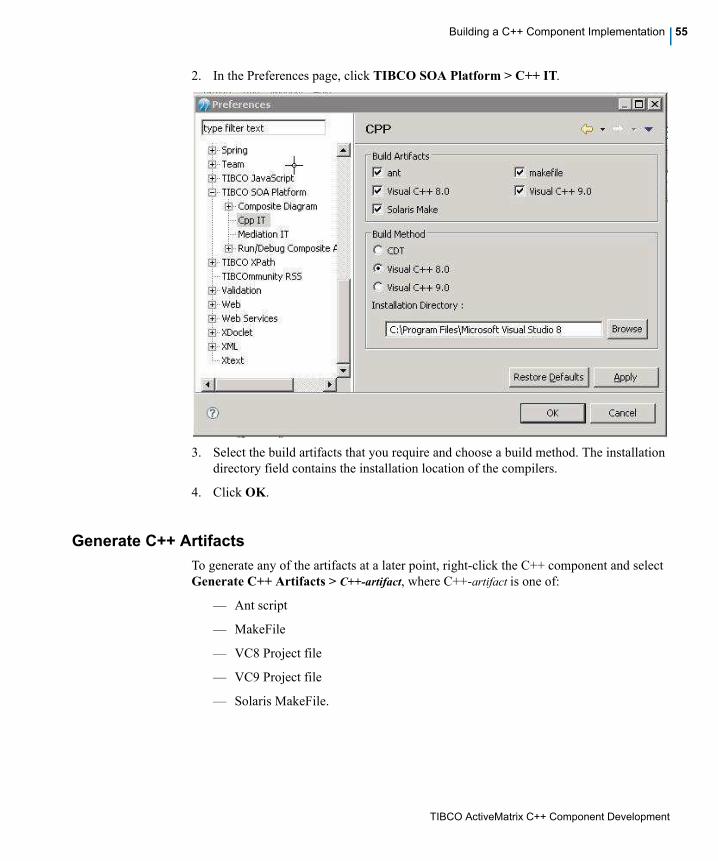
TIBCO ActiveMatrix C++ Component Development
Building a C++ Component Implementation | 55
2. In the Preferences page, click TIBCO SOA Platform > C++ IT.
3. Select the build artifacts that you require and choose a build method. The installation
directory field contains the installation location of the compilers.
4. Click OK.
Generate C++ Artifacts
To generate any of the artifacts at a later point, right-click the C++ component and select
Generate C++ Artifacts > C++-artifact, where C++-artifact is one of:
— Ant script
— MakeFile
— VC8 Project file
— VC9 Project file
— Solaris MakeFile.
TIBCO ActiveMatrix C++ Component Development
56 | Chapter 4 C++ Component Implementations
Reusing a C++ Component Implementation
You can reuse an existing C++ implementation generated previously by reconfiguring the
component to use the existing component implementation. Multiple components can then
be configured to share the same implementation.
See Configuring a C++ Component on page 25 for configuration details.
TIBCO ActiveMatrix C++ Component Development
Debugging a C++ Component Implementation | 57
Debugging a C++ Component Implementation
This section describes the procedures for debugging a C++ component implementations in
Visual Studio.
Debugging in Microsoft Visual Studio
To debug C++ component implementations:
1. Open the project containing the component implementation in Visual Studio.
2. Create a debug application library:
a. In the Active solution configuration drop-down list, select Debug and click Close.
b. Click OK.
c. Rebuild the application shared library.
3. On Microsoft Windows platform, edit the NativeTemplate.tra file located at
TIBCO_HOME\amx_it_cpp\3.2\bin as follows:
a. Comment the following lines in bold:# Windows C++ IT release shared library. Uncomment this and comment upper line for windows release version of
C++ container.
application.library=tibcoamx-native.dll
tibco.env.extensionLibraries=tibcoamx-cppit
b. Uncomment the following lines in bold:
# Windows C++ IT debug shared library. Uncomment this and comment upper line for windows debug version of
C++ container.
#application.library=tibcoamx-nativeD.dll
#tibco.env.extensionLibraries=tibcoamx-cppitD
c. Save and close the file.
4. In ActiveMatrix Administrator, undeploy the application and then redeploy. See
TIBCO ActiveMatrix Administration for details on how to deploy and redeploy
applications.
5. In Visual Studio, attach to the process
tibamx_EnvironmentName_NodeName_C++ImplementaionProjectName_ComponentName.exe
6. Set a breakpoint in the application.
Send a request to the service implemented by the application library. The debugger will
open at the breakpoint.
TIBCO ActiveMatrix C++ Component Development
58 | Chapter 4 C++ Component Implementations
Debugging in UNIX Environmentr
1. Attach to the process
tibamx_EnvironmentName_NodeName_C++ImplementaionProjectName_ComponentName
using preferred debugger.
2. Set a breakpoint in the application.
3. Send a request to the service implemented by the application library. The debugger
will stop at the breakpoint.
Debugging Init Life Cycle Method of C++ Component
To debug the init() method on Windows or UNIX, you can:
1. Open the NativeTemplate.tra file from the TIBCO_HOME/amx_it_cpp/3.2/bin folder.
2. Set the value for the following property in msec:
tibco.env.WAIT_BEFORE_CPP_INIT
For example,
tibco.env.WAIT_BEFORE_CPP_INIT=60000
Setting the above property stops the container for 60 seconds before invoking the init()
method, and allows you to connect debugger to the process
tibamx_EnvironmentName_NodeName_C++ImplementaionProjectName_ComponentName.
Optionally, you can set the value of the WAIT_BEFORE_CPP_INIT property at component level
by setting it as environment variable. See Using Environment Variables on page 38 for
details.

TIBCO ActiveMatrix C++ Component Development
Accessing Context Parameters | 59
Accessing Context Parameters
An abstract WSDL models an operation input, operation's output, operation's fault(s)
messages. It does not model the transport headers, security context, binding headers (for
example, SOAP headers). A component implementation may require access to such
information in addition to the values passed in the abstract WSDL operation messages.
TIBCO ActiveMatrix provides a mechanism for providing access to the information that
does not come from the abstract WSDL called a context parameter. A context parameter
maps information available to a binding to properties in a component implementation.
To access SOAP headers and transport information for a binding, you must configure the
context parameters on the binding and then update the component context.
See TIBCO ActiveMatrix Composite Development for details on working with context
parameters.
To add context parameters to a C++ component:
1. Select the component service and then click the General tab in the Properties view.
2. Click the Add button to the right of the table in the Context Parameters area.
3. Enter the details for the context parameter.
C++ component does not generate any artifacts for the context parameters added to a
binding. You can use the context parameters in the implementation user code at runtime.
Field Description
Name The name of the context parameter
Operations The operations in the port type to which the parameter applies.
Direction The direction of the messages: Input, Output, Fault.
Type The type of the parameter: Basic, Message, Bag.
Definition Basic: String, Int, Double
Message: A message type in the operation.
TIBCO ActiveMatrix Implementation Type for C++ does not
support Date.
SOAPException The FaultCode and FaultMessage in responseContext.
TIBCO ActiveMatrix C++ Component Development
60 | Chapter 4 C++ Component Implementations
Accessing Basic Context Parameters
Includes
Add the following include statements#include "tibamxcpp/core/ComponentContext.h"
Retrieving a Context Parameter from a Request
1. Retrieve the component's request context:
TIBAMX_CPP_NAMESPACE::ComponentContext& componentContext = getComponentContext();
TIBAMX_CPP_NAMESPACE::StringRequestContext* requestContext =componentContext.getRequestContext();
2. Retrieve the parameter from the request context:
std::string parameterName("parameterName");
out_variableType out_variable;
requestContext->getParameter(parameterName, out_variable);
where out_variable can take the values std::string, int, boolean, float, double and so on.
Example:
TIBAMX_CPP_NAMESPACE::ComponentContext& componentContext = getComponentContext();
TIBAMX_CPP_NAMESPACE::StringRequestContext* requestContext= componentContext.getRequestContext();
std::string p1_param("p1");
std::string p1_value;
requestContext->getParameter(p1_param,p1_value);
std::cout << "INFO: Parameter value = " << p1_value << std::endl;
Setting a Context Parameter in a Response
1. Retrieve a replycontext from the original request context:
TIBAMX_CPP_NAMESPACE::StringReplyContext* replyContext = requestContext->getReplyContext();
2. Set a parameter on the reply context:
std::string parameterName("parameterName");
replyContext->setParameter(parameterName, parmeterValue);
Example:
TIBAMX_CPP_NAMESPACE::ComponentContext& componentContext = getComponentContext();
TIBAMX_CPP_NAMESPACE::StringRequestContext* requestContext= componentContext.getRequestContext();
// Set the parameter on the reply context.
TIBAMX_CPP_NAMESPACE::StringReplyContext* replyContext = requestContext->getReplyContext();
std::string p2_param("p2");
replyContext->setParameter(p2_param, "Value for outbound parameter");
Setting a Context Parameter in a Reference Request
1. Create a reference request context:

TIBCO ActiveMatrix C++ Component Development
Accessing Context Parameters | 61
TIBAMX_CPP_NAMESPACE::StringRequestContext* referenceRequestContext =
componentContext.createRequestContext(requestContext);
2. Set a parameter on the reference request context:
std::string parameterName("parameterName");
referenceRequestContext->setParameter(parameterName, parmeterValue);
3. Set the request context on the component's context to the reference request context:
componentContext.setRequestContext(referenceRequestContext);
4. Invoke a reference.
this->getReferenceName_proxy().operationName(parameters);
Example:
TIBAMX_CPP_NAMESPACE::ComponentContext& componentContext = getComponentContext();
TIBAMX_CPP_NAMESPACE::StringRequestContext* requestContext= componentContext.getRequestContext();
// Creating reference request context.
TIBAMX_CPP_NAMESPACE::StringRequestContext* referenceRequestContext=
componentContext.createRequestContext(requestContext);
std::string p4_param("p4");
referenceRequestContext->setParameter(p4_param,"p4 parameter value");
componentContext.setRequestContext(referenceRequestContext);
// Calling the reference.
this->getReferenceName_proxy().operationName(parameters);
Retrieving a Context Parameter from a Reference Response
1. Retrieve a reply context from the reference request context:
TIBAMX_CPP_NAMESPACE::StringReplyContext* referenceReplyContext =
referenceRequestContext->getReplyContext();
2. Retrieve a parameter from the reply context:
std::string parameterName("parameterName");
out_variableType out_variable;
referenceReplyContext->getParameter(parameterName, out_variable);
Example:
TIBAMX_CPP_NAMESPACE::ComponentContext& componentContext = getComponentContext();
TIBAMX_CPP_NAMESPACE::StringRequestContext* requestContext= componentContext.getRequestContext();
// Creating reference request context.
TIBAMX_CPP_NAMESPACE::StringRequestContext* referenceRequestContext=
componentContext.createRequestContext(requestContext);
std::string p4_param("p4");
referenceRequestContext->setParameter(p4_param,"p4 parameter value");
componentContext.setRequestContext(referenceRequestContext);
// Calling the reference.
this->getReferenceName_proxy().operationName(parameters);
TIBCO ActiveMatrix C++ Component Development
62 | Chapter 4 C++ Component Implementations
TIBAMX_CPP_NAMESPACE::StringReplyContext* referenceReplyContext =
referenceRequestContext->getReplyContext();
std::string p4_param("p4");
std::string p4_value;
referenceReplyContext->getParameter(p4_param, p4_value);
Accessing Message Context Properties
Includes
Add the following include statements#include "tibamxcpp/core/ComponentContext.h"
#include "tibamx/databinding/cppdom/xml/XmlAny.h"
Retrieving a Message Context Parameter from a Request
1. Retrieve the component's request context:
TIBAMX_CPP_NAMESPACE::ComponentContext& componentContext = getComponentContext();
TIBAMX_CPP_NAMESPACE::StringRequestContext* requestContext =componentContext.getRequestContext();
2. Retrieve the parameter from the request context:
std::string parameterName("parameterName");
TIBAMX_CORE_NAMESPACE::XmlAny* xmlAny = requestContext->getParameterXml(parameterName);
3. Accessing message Context using Xerces-c DOM APIs
XERCES_CPP_NAMESPACE::DOMNode* node = xmlAny->getDomNode();
Example:
TIBAMX_CPP_NAMESPACE::ComponentContext& componentContext = getComponentContext();
TIBAMX_CPP_NAMESPACE::StringRequestContext* requestContext= componentContext.getRequestContext();
std::string p1_param("p1");
TIBAMX_CORE_NAMESPACE::XmlAny* xmlAny = requestContext->getParameterXml(p1_param);
const XERCES_CPP_NAMESPACE::DOMNode* node = xmlAny->getDomNode();
std::cout << "WARN: Root element = " << XmlUtils::transcode(node->getLocalName()) << std::endl;
DOMElementIterator itr(node->getChildNodes());
while(itr.hasNextElement()) {
std::cout << "WARN: Element = " << itr.getNextElementName() << std::endl;
itr.getNextElement();
}
4. Accessing Message Context through C++ Object serialization. If you know what
XML is in MessageContext, you can use the C++ object serializiation to retrieve the
message in C++ format.
Example:
TIBAMX_CORE_NAMESPACE::DeSerializerPtr deserializer =
ApplicationSerializerFactory::getDeserializerFromQName(const_cast<TIBAMX_CORE_NAMESPACE::QName&>(
XSD_COM_TIBCO_NS_HELLO::HelloHeader::cx_type));
XSD_COM_TIBCO_NS_HELLO::HelloHeader* helloHeader =
(XSD_COM_TIBCO_NS_HELLO::HelloHeader*)requestCtx->getParameter(parameter, deserializer);
TIBCO ActiveMatrix C++ Component Development
Accessing Context Parameters | 63
Setting a Message Context Parameter in a Response
1. Retrieve a replycontext from the original request context:
TIBAMX_CPP_NAMESPACE::StringReplyContext* replyContext = requestContext->getReplyContext();
2. Set a parameter on the reply context:
std::string parameterName("parameterName");
TIBAMX_CORE_NAMESPACE::XmlAny* outMessageContext = new
TIBAMX_CORE_NAMESPACE::XmlAny(xmlMessage,xmlMessageLength);
replyContext->setParameter(parameterName, outMessageContext);
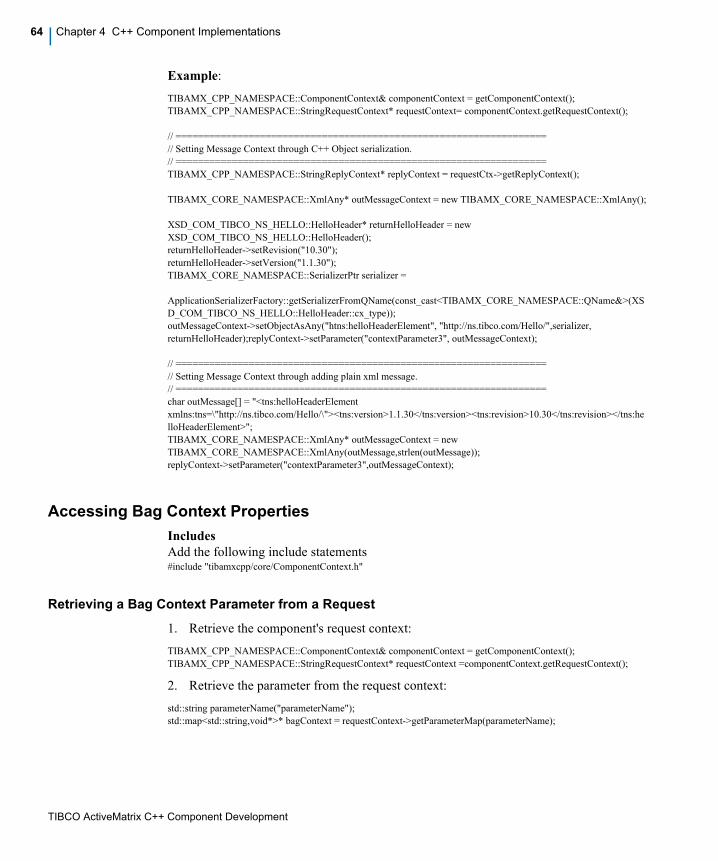
TIBCO ActiveMatrix C++ Component Development
64 | Chapter 4 C++ Component Implementations
Example:
TIBAMX_CPP_NAMESPACE::ComponentContext& componentContext = getComponentContext();
TIBAMX_CPP_NAMESPACE::StringRequestContext* requestContext= componentContext.getRequestContext();
// ==================================================================
// Setting Message Context through C++ Object serialization.
// ==================================================================
TIBAMX_CPP_NAMESPACE::StringReplyContext* replyContext = requestCtx->getReplyContext();
TIBAMX_CORE_NAMESPACE::XmlAny* outMessageContext = new TIBAMX_CORE_NAMESPACE::XmlAny();
XSD_COM_TIBCO_NS_HELLO::HelloHeader* returnHelloHeader = new
XSD_COM_TIBCO_NS_HELLO::HelloHeader();
returnHelloHeader->setRevision("10.30");
returnHelloHeader->setVersion("1.1.30");
TIBAMX_CORE_NAMESPACE::SerializerPtr serializer =
ApplicationSerializerFactory::getSerializerFromQName(const_cast<TIBAMX_CORE_NAMESPACE::QName&>(XS
D_COM_TIBCO_NS_HELLO::HelloHeader::cx_type));
outMessageContext->setObjectAsAny("htns:helloHeaderElement", "http://ns.tibco.com/Hello/",serializer,
returnHelloHeader);replyContext->setParameter("contextParameter3", outMessageContext);
// ==================================================================
// Setting Message Context through adding plain xml message.
// ==================================================================
char outMessage[] = "<tns:helloHeaderElement
xmlns:tns=\"http://ns.tibco.com/Hello/\"><tns:version>1.1.30</tns:version><tns:revision>10.30</tns:revision></tns:he
lloHeaderElement>";
TIBAMX_CORE_NAMESPACE::XmlAny* outMessageContext = new
TIBAMX_CORE_NAMESPACE::XmlAny(outMessage,strlen(outMessage));
replyContext->setParameter("contextParameter3",outMessageContext);
Accessing Bag Context Properties
Includes
Add the following include statements#include "tibamxcpp/core/ComponentContext.h"
Retrieving a Bag Context Parameter from a Request
1. Retrieve the component's request context:
TIBAMX_CPP_NAMESPACE::ComponentContext& componentContext = getComponentContext();
TIBAMX_CPP_NAMESPACE::StringRequestContext* requestContext =componentContext.getRequestContext();
2. Retrieve the parameter from the request context:
std::string parameterName("parameterName");
std::map<std::string,void*>* bagContext = requestContext->getParameterMap(parameterName);
TIBCO ActiveMatrix C++ Component Development
Accessing Context Parameters | 65
Setting a Bag Context Parameter in a Response
1. Retrieve a replycontext from the original request context:
TIBAMX_CPP_NAMESPACE::StringReplyContext* replyContext = requestContext->getReplyContext();
2. Set a parameter on the reply context:
std::string parameterName("parameterName");
TIBAMX_CORE_NAMESPACE::XmlAny* outMessageContext = new
TIBAMX_CORE_NAMESPACE::XmlAny(xmlMessage,xmlMessageLength);
replyContext->setParameter(parameterName, bagContextMap,parameterTypeQName);
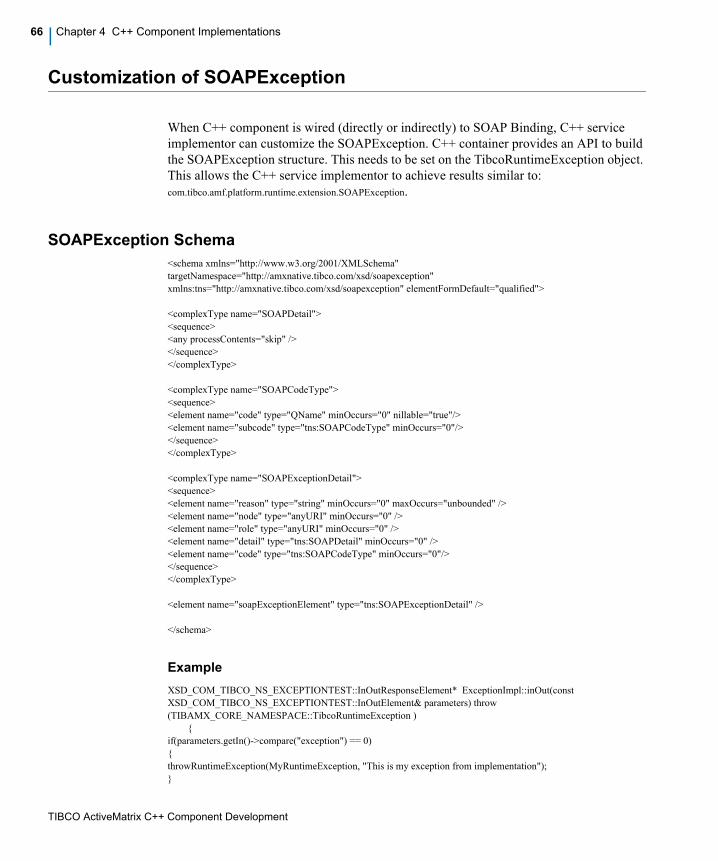
TIBCO ActiveMatrix C++ Component Development
66 | Chapter 4 C++ Component Implementations
Customization of SOAPException
When C++ component is wired (directly or indirectly) to SOAP Binding, C++ service
implementor can customize the SOAPException. C++ container provides an API to build
the SOAPException structure. This needs to be set on the TibcoRuntimeException object.
This allows the C++ service implementor to achieve results similar to:
com.tibco.amf.platform.runtime.extension.SOAPException.
SOAPException Schema
<schema xmlns="http://www.w3.org/2001/XMLSchema"
targetNamespace="http://amxnative.tibco.com/xsd/soapexception"
xmlns:tns="http://amxnative.tibco.com/xsd/soapexception" elementFormDefault="qualified">
<complexType name="SOAPDetail">
<sequence>
<any processContents="skip" />
</sequence>
</complexType>
<complexType name="SOAPCodeType">
<sequence>
<element name="code" type="QName" minOccurs="0" nillable="true"/>
<element name="subcode" type="tns:SOAPCodeType" minOccurs="0"/>
</sequence>
</complexType>
<complexType name="SOAPExceptionDetail">
<sequence>
<element name="reason" type="string" minOccurs="0" maxOccurs="unbounded" />
<element name="node" type="anyURI" minOccurs="0" />
<element name="role" type="anyURI" minOccurs="0" />
<element name="detail" type="tns:SOAPDetail" minOccurs="0" />
<element name="code" type="tns:SOAPCodeType" minOccurs="0"/>
</sequence>
</complexType>
<element name="soapExceptionElement" type="tns:SOAPExceptionDetail" />
</schema>
Example
XSD_COM_TIBCO_NS_EXCEPTIONTEST::InOutResponseElement* ExceptionImpl::inOut(const
XSD_COM_TIBCO_NS_EXCEPTIONTEST::InOutElement& parameters) throw
(TIBAMX_CORE_NAMESPACE::TibcoRuntimeException )
{
if(parameters.getIn()->compare("exception") == 0)
{
throwRuntimeException(MyRuntimeException, "This is my exception from implementation");
}
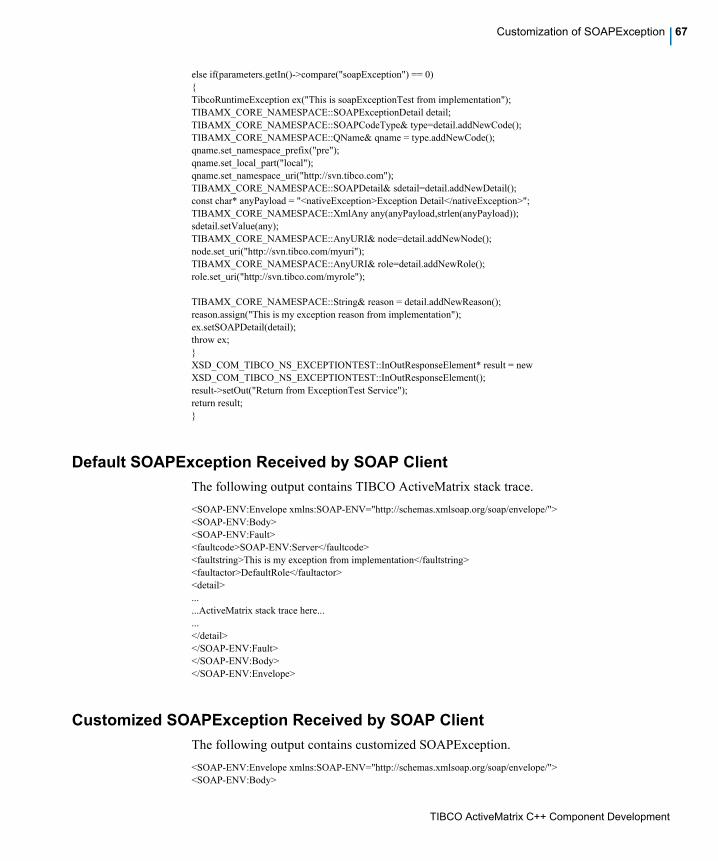
TIBCO ActiveMatrix C++ Component Development
Customization of SOAPException | 67
else if(parameters.getIn()->compare("soapException") == 0)
{
TibcoRuntimeException ex("This is soapExceptionTest from implementation");
TIBAMX_CORE_NAMESPACE::SOAPExceptionDetail detail;
TIBAMX_CORE_NAMESPACE::SOAPCodeType& type=detail.addNewCode();
TIBAMX_CORE_NAMESPACE::QName& qname = type.addNewCode();
qname.set_namespace_prefix("pre");
qname.set_local_part("local");
qname.set_namespace_uri("http://svn.tibco.com");
TIBAMX_CORE_NAMESPACE::SOAPDetail& sdetail=detail.addNewDetail();
const char* anyPayload = "<nativeException>Exception Detail</nativeException>";
TIBAMX_CORE_NAMESPACE::XmlAny any(anyPayload,strlen(anyPayload));
sdetail.setValue(any);
TIBAMX_CORE_NAMESPACE::AnyURI& node=detail.addNewNode();
node.set_uri("http://svn.tibco.com/myuri");
TIBAMX_CORE_NAMESPACE::AnyURI& role=detail.addNewRole();
role.set_uri("http://svn.tibco.com/myrole");
TIBAMX_CORE_NAMESPACE::String& reason = detail.addNewReason();
reason.assign("This is my exception reason from implementation");
ex.setSOAPDetail(detail);
throw ex;
}
XSD_COM_TIBCO_NS_EXCEPTIONTEST::InOutResponseElement* result = new
XSD_COM_TIBCO_NS_EXCEPTIONTEST::InOutResponseElement();
result->setOut("Return from ExceptionTest Service");
return result;
}
Default SOAPException Received by SOAP Client
The following output contains TIBCO ActiveMatrix stack trace.
<SOAP-ENV:Envelope xmlns:SOAP-ENV="http://schemas.xmlsoap.org/soap/envelope/">
<SOAP-ENV:Body>
<SOAP-ENV:Fault>
<faultcode>SOAP-ENV:Server</faultcode>
<faultstring>This is my exception from implementation</faultstring>
<faultactor>DefaultRole</faultactor>
<detail>
...
...ActiveMatrix stack trace here...
...
</detail>
</SOAP-ENV:Fault>
</SOAP-ENV:Body>
</SOAP-ENV:Envelope>
Customized SOAPException Received by SOAP Client
The following output contains customized SOAPException.
<SOAP-ENV:Envelope xmlns:SOAP-ENV="http://schemas.xmlsoap.org/soap/envelope/">
<SOAP-ENV:Body>
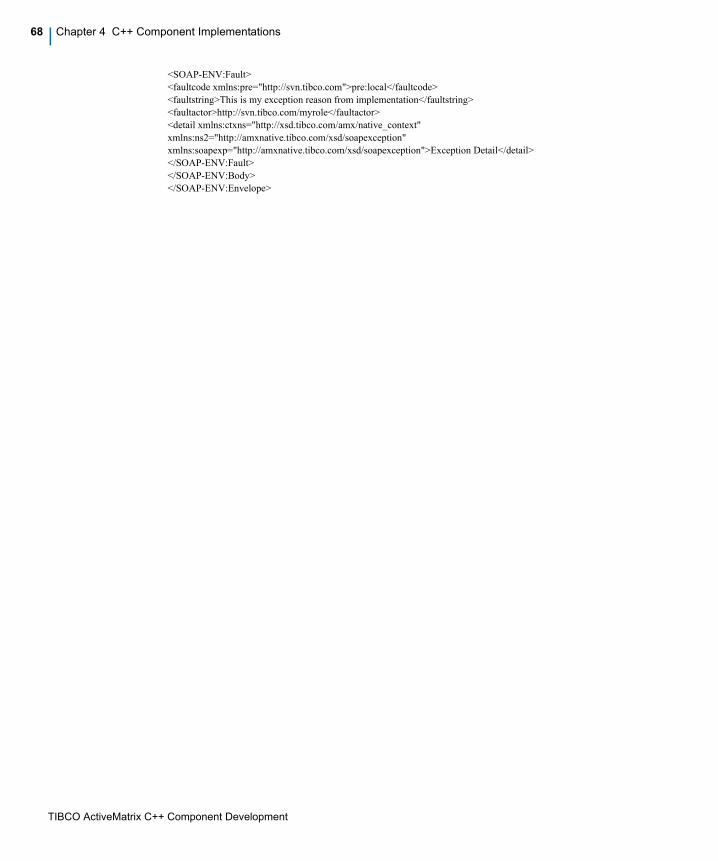
TIBCO ActiveMatrix C++ Component Development
68 | Chapter 4 C++ Component Implementations
<SOAP-ENV:Fault>
<faultcode xmlns:pre="http://svn.tibco.com">pre:local</faultcode>
<faultstring>This is my exception reason from implementation</faultstring>
<faultactor>http://svn.tibco.com/myrole</faultactor>
<detail xmlns:ctxns="http://xsd.tibco.com/amx/native_context"
xmlns:ns2="http://amxnative.tibco.com/xsd/soapexception"
xmlns:soapexp="http://amxnative.tibco.com/xsd/soapexception">Exception Detail</detail>
</SOAP-ENV:Fault>
</SOAP-ENV:Body>
</SOAP-ENV:Envelope>
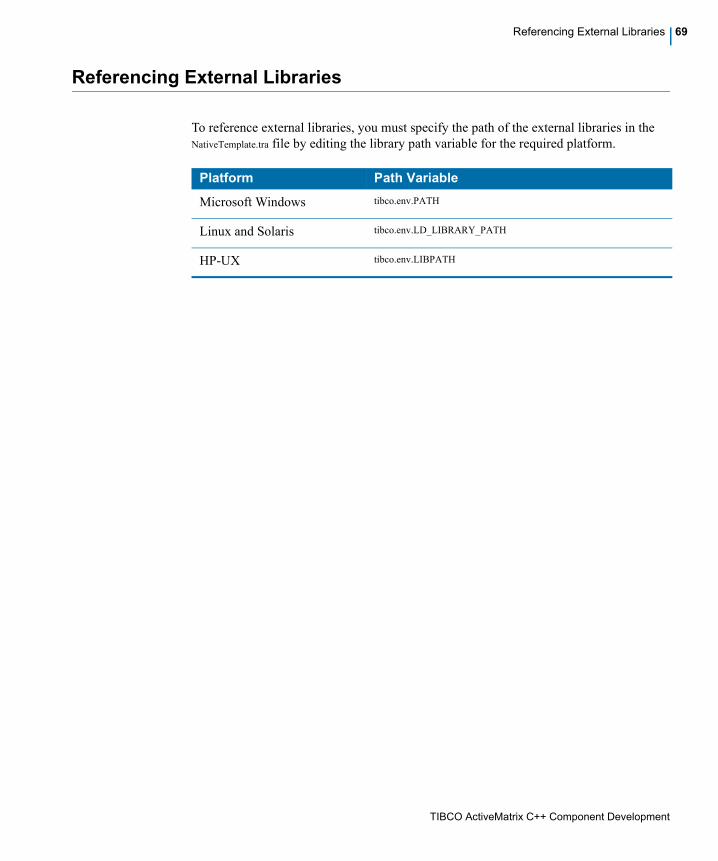
TIBCO ActiveMatrix C++ Component Development
Referencing External Libraries | 69
Referencing External Libraries
To reference external libraries, you must specify the path of the external libraries in the
NativeTemplate.tra file by editing the library path variable for the required platform.
Platform Path Variable
Microsoft Windows tibco.env.PATH
Linux and Solaris tibco.env.LD_LIBRARY_PATH
HP-UX tibco.env.LIBPATH
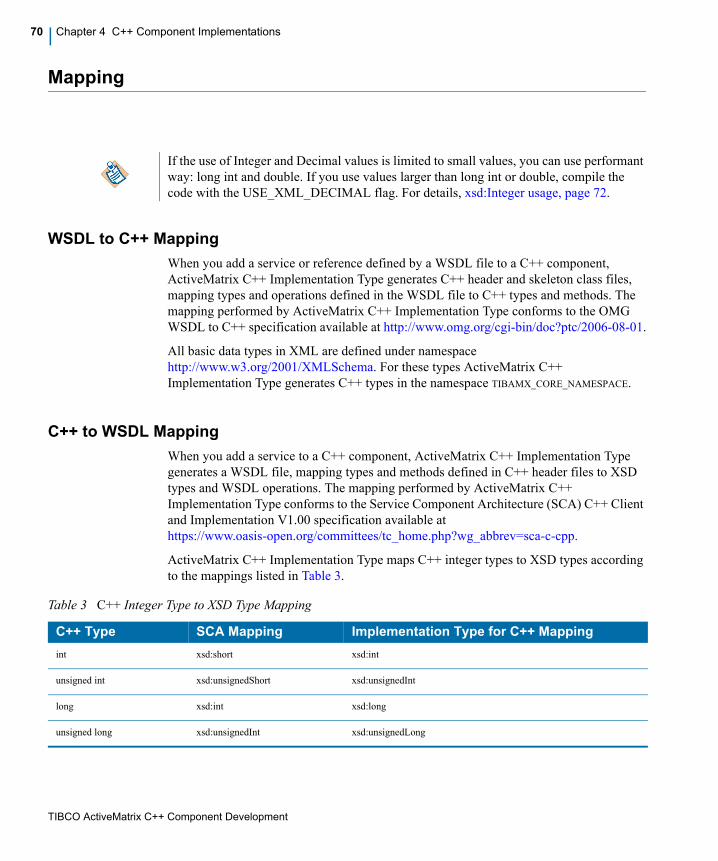
TIBCO ActiveMatrix C++ Component Development
70 | Chapter 4 C++ Component Implementations
Mapping
WSDL to C++ Mapping
When you add a service or reference defined by a WSDL file to a C++ component,
ActiveMatrix C++ Implementation Type generates C++ header and skeleton class files,
mapping types and operations defined in the WSDL file to C++ types and methods. The
mapping performed by ActiveMatrix C++ Implementation Type conforms to the OMG
WSDL to C++ specification available at http://www.omg.org/cgi-bin/doc?ptc/2006-08-01.
All basic data types in XML are defined under namespace
http://www.w3.org/2001/XMLSchema. For these types ActiveMatrix C++
Implementation Type generates C++ types in the namespace TIBAMX_CORE_NAMESPACE.
C++ to WSDL Mapping
When you add a service to a C++ component, ActiveMatrix C++ Implementation Type
generates a WSDL file, mapping types and methods defined in C++ header files to XSD
types and WSDL operations. The mapping performed by ActiveMatrix C++
Implementation Type conforms to the Service Component Architecture (SCA) C++ Client
and Implementation V1.00 specification available at
https://www.oasis-open.org/committees/tc_home.php?wg_abbrev=sca-c-cpp.
ActiveMatrix C++ Implementation Type maps C++ integer types to XSD types according
to the mappings listed in Table 3.
If the use of Integer and Decimal values is limited to small values, you can use performant
way: long int and double. If you use values larger than long int or double, compile the
code with the USE_XML_DECIMAL flag. For details, xsd:Integer usage, page 72.
Table 3 C++ Integer Type to XSD Type Mapping
C++ Type SCA Mapping Implementation Type for C++ Mapping
int xsd:short xsd:int
unsigned int xsd:unsignedShort xsd:unsignedInt
long xsd:int xsd:long
unsigned long xsd:unsignedInt xsd:unsignedLong
TIBCO ActiveMatrix C++ Component Development
Mapping | 71
Constraints on Header Files
In addition to the mapping rules, the SCA specification specifies constraints on the classes
defined in C++ header files used for generating SCA-compliant components. The
following sections describe constraints on classes specified in C++ header files and the
data types you can use in the implementation of those services. Constraints on header files
fall into two groups: primary and secondary.
Primary Constraints
Classes violating any primary constraints cannot be exposed as services.
Header files must declare at least one class with:
• At least one public method
• All public methods must be pure virtual
The following keywords and constructs must not be used:
• Macros
• Inline methods
• Friend classes
• Structs
• Unions
Secondary Constraints
Classes violating secondary constraints can be exposed as services, but the methods that
violate constraints are omitted.
• Public methods inherited by a class are not exposed as service operations. If an
inherited method is required, it must be specified in the inheriting class.
• Protected and private methods are not exposed as service operations.
• Constructors and destructors are not exposed as service operations.
• Unnamed parameters are not supported.
• Unnamed structures are not supported.
• Overloaded methods are not supported.
• Overloaded operators ( ==, >=, new, and so on) are not supported.
TIBCO ActiveMatrix C++ Component Development
72 | Chapter 4 C++ Component Implementations
Constraints on Data Types
ActiveMatrix C++ Implementation Type converts between ActiveMatrix native data
representation and C++ data types when passing method parameters. Due to this
conversion, which inherently requires data mapping, there are constraints on the types of
data you can use in your C++ applications. All C++ classes passed as return values or
parameters of the methods to be exposed as service operations, must satisfy the
constraints. Failure to do so may result in runtime exceptions, errors in generating stub
code, and incorrect reconstruction of the data.
• Binary data Binary data, such as data passed via non-null-terminated char* or char
arrays, is not supported.
• void* The void* type is not supported.
• char* and char array Parameters and return types are always mapped to xsd:string,
and must be null-terminated. wstring_t and wchar_t are not supported.
• Unions Unions allow the same memory location to be used for different variables.
For portability, it is recommended that unions not be used in service interfaces.
• Pre-processor directives C++ allows for the use of pre-processor directives in order
to control how a C++ header is parsed. For portability it is recommended that
pre-processor directives not be used in service interfaces.
• User-defined types (UDT) When used as C++ method return types or parameters,
UDTs must define accessor methods for its member variables. The names of the
methods defined must be of the form set[Name] and get[Name]. A UDT must provide
a default constructor. For example, a C++ method prototype:
long myMethod(AnObject data);
requires the corresponding AnObject class:
class AnObject {
public:AnObject();
std::string getMyString() const;
double getMyDouble() const;
void setMyString(std::string data);
void setMyDouble(double otherData);
};
In addition, arrays within UDTs are not supported. Instead, classes should use STL
containers to represent collections. STL types should be introduced in a typedef statement.
For example, typedef vector<int> MyVector;
xsd:Integer usage
TIBCO ActiveMatrix Implementation Type for C++ supports two ways of xsd:integer
type usages:
TIBCO ActiveMatrix C++ Component Development
Mapping | 73
Performant way:
Integer types are mapped to basic C++ type:
typedef long double Decimal;
typedef long int Integer;
typedef unsigned long int NonNegativeInteger;
typedef ULongHolder NonNegativeIntegerHolder;
typedef LongHolder IntegerHolder;
These XSD data types values are truncated depending on the capacity of C++ datatype.
You can use this mapping, if values greater than these size of mapped C++ data type are
not used.
Support for longer data types: (similar to BigInteger and BigDecimal from
Java)
Integer types are mapped to generated types:
typedef XMLDecimal Decimal;
typedef XMLInteger Integer;
typedef XMLNonNegativeInteger NonNegativeInteger;
typedef XMLNegativeInteger NegativeInteger;
typedef XMLPositiveInteger PositiveInteger;
typedef XMLNonPositiveInteger NonPositiveInteger;
typedef XMLNonNegativeInteger NonNegativeIntegerHolder;
typedef XMLInteger IntegerHolder;
typedef XMLDecimal DecimalHolder;
typedef XMLNegativeInteger NegativeIntegerHolder;
typedef XMLPositiveInteger PositiveIntegerHolder;
typedef XMLNonPositiveInteger NonPositiveIntegerHolder;
This supports for larger values specified in the xsd specifications. There is considerable
degradation of performance. Use this type only if application is using such longer values.
By default, performant way is enabled. You can switch to large values support by
providing USE_XML_DECIMAL preprocessor during code compilation.
TIBCO ActiveMatrix C++ Component Development
74 | Chapter 4 C++ Component Implementations
Troubleshooting
How can I test the libraries in a standalone mode?
To test the library in a standalone mode before deploying the node, do the following:
1. Edit the file NativeTemplate.tra and uncomment the parameters for:
— Container library testing
#tibco.env.AMX_CPP_USER_SHARED_LIBRARY_NAME=sampleCppProject.dll
#tibco.env.AMX_CPP_IMPLEMENTATION_CPP_CLASS=SampleImpl
— Extension ports
#tibco.env.AMX_TCP_CONSUMER_DATA_PORT=12347
#tibco.env.AMX_TCP_PRODUCER_DATA_PORT=12345
2. On UNIX, set the library path variable on the console.
— Solaris and Linux LD_LIBRARY_PATH
— HP-UX LIBPATH
3. Run the NativeTemplate executable.
On success, the following code is displayed:
TIBCO Native Core started successfully.
On failure, error messages depending on the reason for the failure are displayed.
TIBCO ActiveMatrix C++ Component Development
Deploy and Run C++ Components | 75
Chapter 5 Deploy and Run C++ Components
This chapter describes how to develop C++ components in TIBCO Business Studio.
Topics
• Deploying DAA Containing C++ Components, page 76
• Running DAA Containing C++ Components, page 77
TIBCO ActiveMatrix C++ Component Development
76 | Chapter 5 Deploy and Run C++ Components
Deploying DAA Containing C++ Components
Before deploying a DAA containing a C++ component, provision the application template
once on every node on which you want to deploy the DAA.
Provisioning the Application Template
To provision the application template:\
1. Start TIBCO ActiveMatrix Administrator.
2. In the Applications link, click New. The Application Setup dialog appears.
3. Enter the Application Name.
4. Select the option An existing application template and click Next.
5. Select the application template TIBCO ActiveMatrix Cpp Implementation Type Application
Template and click Next.
6. Click Save and Exit.
The application template with its runtime state "Not Deployed" is added to the list of
applications.
7. In the application properties area, click the Distribution tab and select the nodes on
which you want to provision the application template.
Click Save and then click Deploy.
To deploy a DAA containing C++ components:
1. Provision the application template by following the procedure described in
Provisioning the Application Template on page 76.
2. Upload the DAA containing C++ components by following the standard deployment
procedures. See TIBCO ActiveMatrix Administration for details.
3. Start or Stop the deployed application.
TIBCO ActiveMatrix C++ Component Development
Running DAA Containing C++ Components | 77
Running DAA Containing C++ Components
Run the DAA containing C++ components by following the standard procedures. See
TIBCO ActiveMatrix Administration for details.
Running the Application Using Rapid Application Development (RAD) Feature
To run the C++ application using the rapid application development feature in Eclipse:
1. Create a Run configuration.
2. Configure the Run configuration and add a composite or DAA.
3. Save the run configuration.
4. Deploy and run the application.
Process Naming Conventions
When you run a DAA containing C++ components, a new process for every C++
component is spawned. The fully qualified process name has the following default syntax:
%PREFIX%_%CONTAINERNAME%_%ENVIRONMENT%_%NODENAME%_%APPLICATION
NAME%_%COMPONENTNAME%.exe, where PREFIX is set to tibamx.
For example, a project named cpp.helloworld.cpp containing a C++ component named
CppHelloWorldComponent deployed on the Integration Environment and Integration Node will have the
process name:
tibamx_IntegrationEnvironment_IntegrationNode_cpp.helloworld.cpp_CppHelloWorldComponent.exe
To modify the naming convention, edit the following properties in the NativeTemplate.tra file:
tibco.property.amxcpp.process.prefix=tibamx
tibco.property.amxcpp.process.format=%PREFIX%_%ENVIRONMENT%_%NODENAME%_%APPLICATIONNAME%_%COMPONENTNAME%
You can modify the process naming format by adding or removing the keywords.
Specifying Profilers for Native Processes
You can specify any profilers for native processes by editing the NativeTemplate.tra file. The
profiler arguments can be used to create log files with the profiler name.
You need not add the application template before deploying and running the application.

TIBCO ActiveMatrix C++ Component Development
78 | Chapter 5 Deploy and Run C++ Components
For example, if you want to specify Valgrind as a profiler, uncomment and set the
following parameters in NativeTemplate.tra:
#tibco.property.NATIVE_PROFILER=valgrind
#tibco.property.NATIVE_PROFILER_ARGS=--leak-check=yes,--log-file=/tmp/%PROCESS%.log
Specifying Socket Range
You can specify socket range by editing the NativeTemplate.tra file. By default, the C++
container chooses any available socket from system.
If you want the C++ container to choose socket from any specific range, uncomment and
set the following parameters in NativeTemplate.tra:
#tibco.env.amxcpp.socketrange.minlimit=5000
#tibco.env.amxcpp.socketrange.maxlimit=6000
Specifying Custom Temporary Location
The default temporary folder is the system temporary folder. To override temporary folder
for C++, uncomment and set the following parameters in NativeTemplate.tra:
#tibco.property.TEMP_DIRECTORY_LOCATION=/tmp
Changing C++ Threadpool Configuration
The internal threading behavior can be modified by editing properties in the
NativeTemplate.tra file. Or these can be configured for each component in the environment
section of TIBCO ActiveMatrix Implementation Type for C++ .
tibco.env.PRODUCER_POOL_MAX_VALUE=1
tibco.env.THREAD_POOL_MAX_VALUE=1
Condition should be:
tibco.env.THREAD_POOL_MAX_VALUE >= tibco.env.PRODUCER_POOL_MAX_VALUE
Specifying At Least Once Policy
On configuring the At Least Once policy, TIBCO ActiveMatrix redelivers message on any
exception. You can specify the exceptions for which redelivery should be stopped.
For more details about At Least Once policy, refer TIBCO ActiveMatrix® Service Grid
Component Developer’s Guide.
While specifying these properties through environment variables, do not specify tibco.env
prior to these properties.
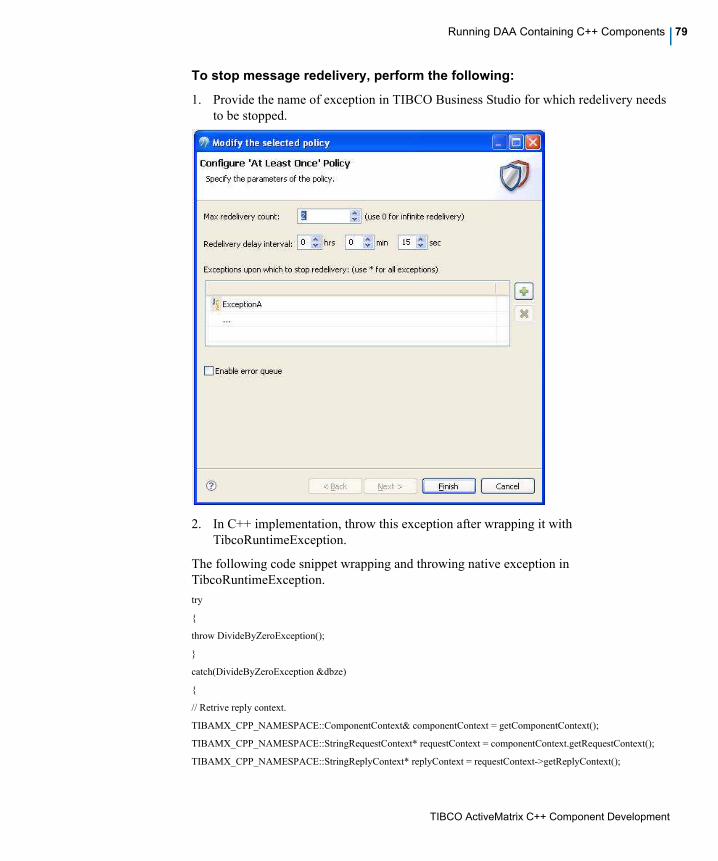
TIBCO ActiveMatrix C++ Component Development
Running DAA Containing C++ Components | 79
To stop message redelivery, perform the following:
1. Provide the name of exception in TIBCO Business Studio for which redelivery needs
to be stopped.
2. In C++ implementation, throw this exception after wrapping it with
TibcoRuntimeException.
The following code snippet wrapping and throwing native exception in
TibcoRuntimeException.
try
{
throw DivideByZeroException();
}
catch(DivideByZeroException &dbze)
{
// Retrive reply context.
TIBAMX_CPP_NAMESPACE::ComponentContext& componentContext = getComponentContext();
TIBAMX_CPP_NAMESPACE::StringRequestContext* requestContext = componentContext.getRequestContext();
TIBAMX_CPP_NAMESPACE::StringReplyContext* replyContext = requestContext->getReplyContext();
TIBCO ActiveMatrix C++ Component Development
80 | Chapter 5 Deploy and Run C++ Components
// Throw exception by wrapping in 'TibcoRuntimeException' exception.
throwRuntimeException(DivideByZeroException,dbze.what());
}
TIBCO ActiveMatrix C++ Component Development
| 83
Index
A
accessing a property 51
approaches 2
bottom-up 20, 21
top-down 5
C
C++ component implementation options 53
C++ to WSDL mapping 71
changes from the previous release x
code generation 46
property 47
reference 46
service 46
component implementations 42
abstract code generation 45
building 53
ant 55
GNU Make 54
make 55
Microsoft Visual Studio 53
completing 50
debugging 58
generate implementation reference 49
generating 44
opening 43
reusing 57
components 23
adding a property 34
adding a reference 32
adding a service 30
component reference 36
configuring 26
creating 24
deploying 78
packaging 41
removing a property 35
removing a reference 33
removing a service 30
running 79
updating 27
using environment variables 39
using properties 34
using references 32
constraints
data types 73
header files 72
context parameters
accessing 60
customer support xv
D
debugging in Microsoft Visual Studio 58, 59, 59
G
generate C++ artifacts 56
TIBCO ActiveMatrix C++ Component Development
84 | Index
H
handling life cycle events 50
I
invoking reference operation 50
L
logging 51
O
overview 1
P
primary constraints 72
process naming conventions 79
provision C++ application template 78
R
referencing external libraries 70
run
C++ application using RAD 79
running DAA containing C++ components 79
S
secondary constraints 72
set build artifacts and build methods 55
specifying application library path 37
specifying profilers for native processes 80
support, contacting xv
T
technical support xv
TIBCO_HOME xii
troubleshooting 76
V
Visual C++ 8.0 project 53
Visual C++ 9.0 project 54
W
WSDL to C++ mapping 71