supplementary teaching materials (senior primary)
TRANSCRIPT

LI Wei-han, RosannaSupplementary Teaching Materials
(Senior Primary)
1

Introduce clay, tools and
ceramic techniques
2

Clay – contains water and bubbles
Water Bubbles• Good for clay
• Water moisturises
the clay and makes it
easier to shape.
VS• Bad for clay
• If there are air
bubbles in the clay, it
may crack when
firing.
3

Kneading clay – soften the clay and get rid of air bubbles
1. Knead the clay to make it soft.
4

Kneading clay
2. Slice the clay with a fishing wire.
5

Kneading clay
3. Put the slices together. Knead the clay until it is evenly mixed.
6

Tools / Materials
7

knife
clay
plastic wraps
wire cutter
slip
wire sculpting tools
wooden board
watercloths
potter’s needlewooden modelling tools
turntable
8

Art-making process
9

1. Pinch the clay to create the upper and lower body of the figurine.
2. Add clay to shape the body.
10
Making the figurine – head, upper and lower body, arms

3. Make the chubby body of the figurine in detail.
4. Create a pair of arms with clay of equal size.
11
Making the figurine

12
Joining clay – score and slip
5. Joints between the arms and the body have to be scored before attaching the arms to the body.
6. Apply slip on the joints.
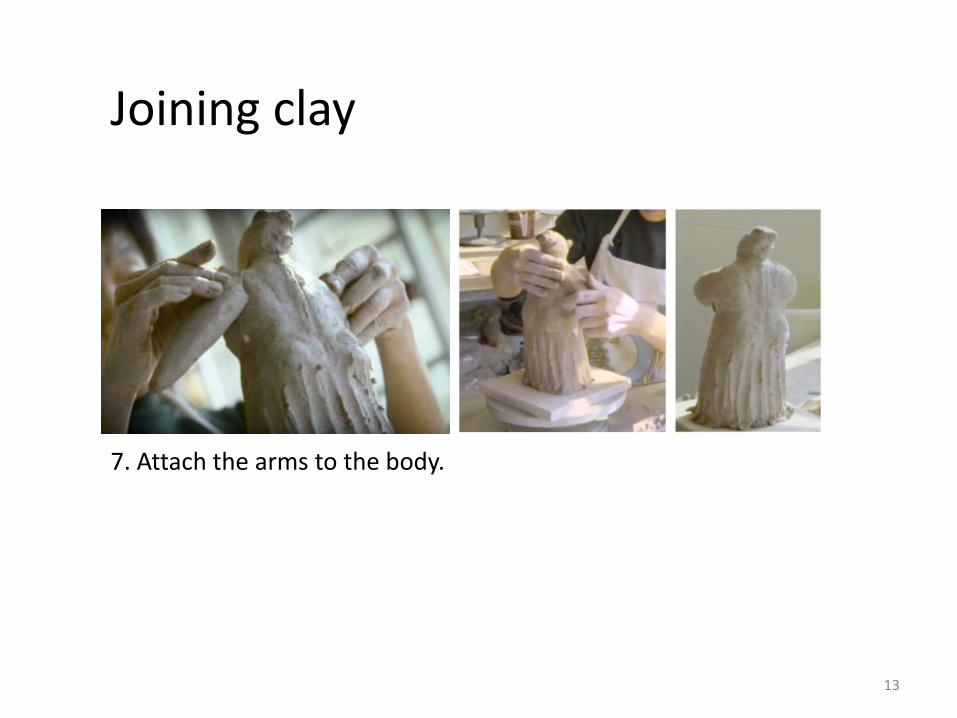
7. Attach the arms to the body.
13
Joining clay

8. Cover the joints with a thin coil of clay and smooth it.
14
Joining clay
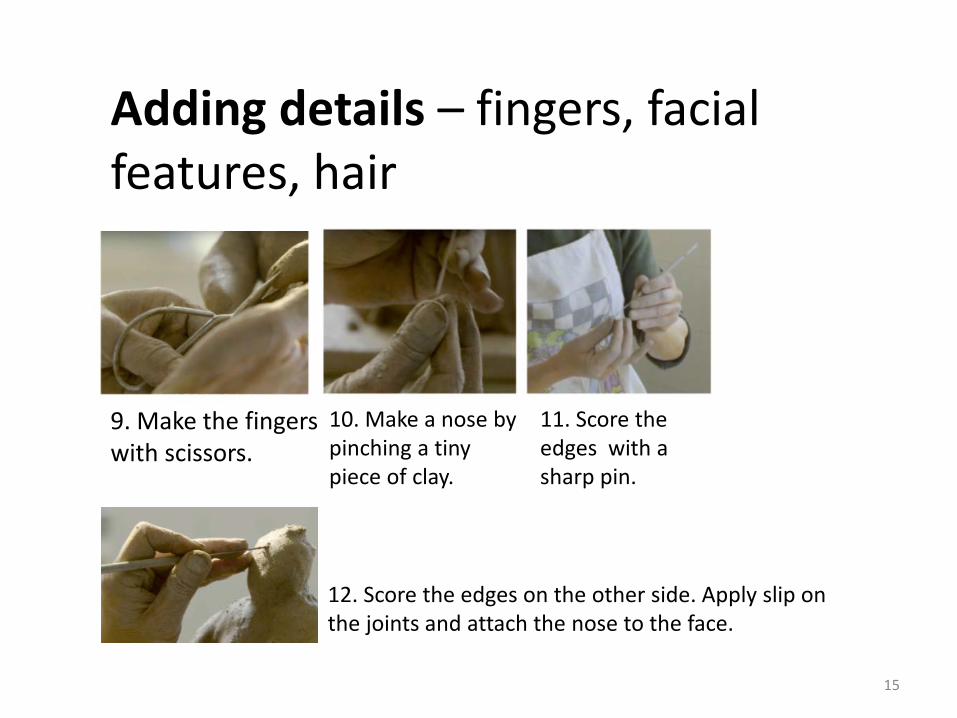
9. Make the fingers with scissors.
10. Make a nose by pinching a tiny piece of clay.
11. Score the edges with a sharp pin.
12. Score the edges on the other side. Apply slip on the joints and attach the nose to the face.
15
Adding details – fingers, facial features, hair

13. Make two small holes on the nose.
14. Pinch two tiny pieces of clay to make the ears. Score the edges to be attached.
15. Add earholes with a modelling tool.
16
Adding details

18. Make the eyes and the mouth with the needle.
16. Attach the ears to the face. Check if they look the same.
17. Insert the needle the ears to fine-tune the ears.
17
Adding details

19. Make the hair with a comb-shaped modelling tool.
18
Adding details

20. Halve the clay with a fishing wire after making the body.
19
Hollowing – to prevent breaking in the kiln

20
Hollowing
21. Carve a circle with a needle about 1 cm beyond the edge.
22. Hollow-out the clay inside the circle with a wire sculpting tool.
23. Same on the other half.

24. Attach the upper body to the lower body after smoothing the walls inside the two parts.
25. Score the joint with a needle.
26. Score the edges to be connected.
21
Re-assembeling – connect the upper and lower part

27. Apply slip on the edges to be connected.
22
Re-assembeling

28. Connect the upper part of the body to the lower part.
23
Re-assembeling
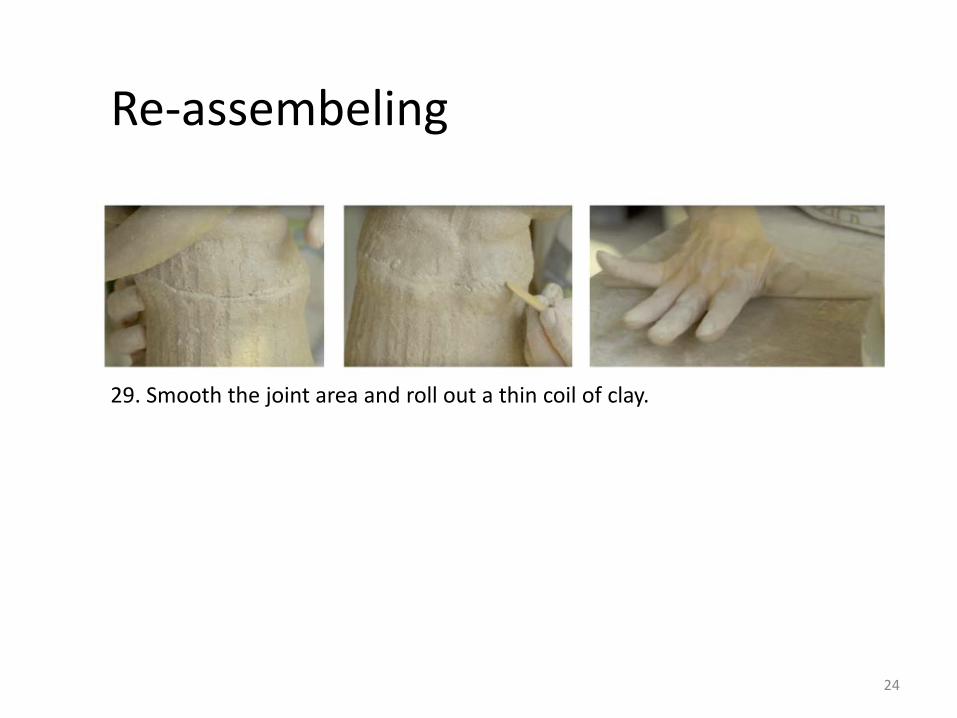
29. Smooth the joint area and roll out a thin coil of clay.
24
Re-assembeling

30. Fill up the gap and strengthen the joint with a thin coil of clay .
31. Smooth the joint area.
25
Re-assembeling

32. Fine-tune the figurine carefully with modelling tools.
26
Fine-tune – making textures

Remark: LI’s figurine was decorated with under-glaze and fired in the kiln for the second time.
27
Biscuit firing – harden the clay1 Biscuit-fire the figurine in a kiln at 900 – 1000 degree Celsius.
2 Apply acrylic paint on the figurine for decoration.