safeti nl - rivm
TRANSCRIPT
SAFETI NL Installation Notes
DNV SOFTWARE
Palace House, 3 Cathedral Street, London SE19DE, UK http://www.dnvsoftware.com
© Copyright Det Norske Veritas. All Rights Reserved.
No reproduction or broadcast of this material is permitted without the express written consent of DNV. Contact [email protected] for more information.
© 2006 DET NORSKE VERITAS All rights reserved. No part of this publication may be reproduced or transmitted in any form or by any means, including photocopying and recording, without the prior consent of DET NORSKE VERITAS
SAFETI NL Installation Notes Contents
What’s in this Shipment and on the CD? 1 Describes the contents of your release package, and gives an overview of the software and documentation supplied on the SAFETI NL Release CD
System Requirements 2 Describes the recommended system specification to run SAFETI NL
Details of the Installation Process for SAFETI NL 3 Describes the stages and options for installing SAFETI NL from the CD
Details of the Installation Process for the License Manager 15 Describes the stages and options for installing the License Manager from the CD. You only need to perform this installation if you need to set up licensing for a DNV Software product, but do not need to install SAFETI NL, e.g. if you are a System Administrator, setting up concurrent licensing for SAFETI NL on a network.
Setting up a License for SAFETI NL 17 Describes the stages in requesting a license file from DNV Software, and of enabling the program with this license file.
SAFETI NL Installation Notes 1 What’s in the Shipment?
© 2006 DET NORSKE VERITAS All rights reserved. No part of this publication may be reproduced or transmitted in any form or by any means, including photocopying and recording, without the prior consent of DET NORSKE VERITAS
What’s in this Shipment and on the CD
In the Shipment Your shipment includes a CD-ROM with the installation files for SAFETI NL, and with other documentation in electronic format on the CD.
If anything is missing from your package please contact your local sales and support office, the contact details of which are shown on the CD.
On the CD-ROM This section gives a brief overview of the contents of the CD for reference. You should read the description of the installation process in these Installation Notes before you start to install the program.
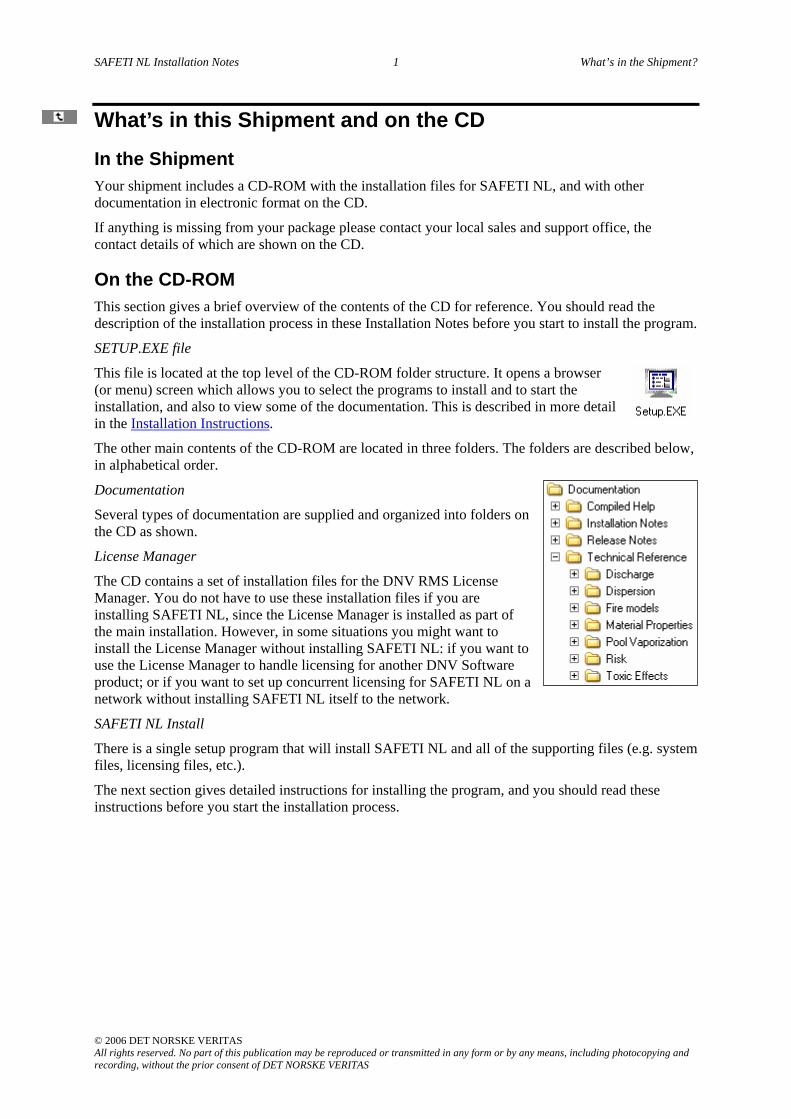
SETUP.EXE file
This file is located at the top level of the CD-ROM folder structure. It opens a browser (or menu) screen which allows you to select the programs to install and to start the installation, and also to view some of the documentation. This is described in more detail in the Installation Instructions.
The other main contents of the CD-ROM are located in three folders. The folders are described below, in alphabetical order.
Documentation
Several types of documentation are supplied and organized into folders on the CD as shown.
License Manager
The CD contains a set of installation files for the DNV RMS License Manager. You do not have to use these installation files if you are installing SAFETI NL, since the License Manager is installed as part of the main installation. However, in some situations you might want to install the License Manager without installing SAFETI NL: if you want to use the License Manager to handle licensing for another DNV Software product; or if you want to set up concurrent licensing for SAFETI NL on a network without installing SAFETI NL itself to the network.
SAFETI NL Install
There is a single setup program that will install SAFETI NL and all of the supporting files (e.g. system files, licensing files, etc.).
The next section gives detailed instructions for installing the program, and you should read these instructions before you start the installation process.
SAFETI NL Installation Notes 2 System Requirements
© 2006 DET NORSKE VERITAS All rights reserved. No part of this publication may be reproduced or transmitted in any form or by any means, including photocopying and recording, without the prior consent of DET NORSKE VERITAS
System Specification The recommended specification for SAFETI NL is as follows:
Operating system Windows 2000, Windows XP, Windows NT 4.0 w/Service Pack 6 or higher.
Internet Browser IE 5.0x. This does not have to be set as your default browser, but you must have it installed.
Display 800x600 resolution Screen color depth 65536 (16-bit) and higher CPU Pentium III Clock speed (MHz) 450 MHz Memory (MB) 512 MB Hard disk space (MB) (user) 200 MB Media CD or DVD-ROM drive Pointing device MS Mouse or compatible
SAFETI NL Installation Notes 3 Installing the License Manager
© 2006 DET NORSKE VERITAS All rights reserved. No part of this publication may be reproduced or transmitted in any form or by any means, including photocopying and recording, without the prior consent of DET NORSKE VERITAS
Details of the Installation Process
Contents Overview of the Three Setup Options ................................................................................................ 4
Using the CD-ROM Browser System to Start the Installation........................................................... 4
The Initial Stages in the Installation: Common to all Setup Options ................................................. 5
The Remaining Stages in the Installation: for the “Typical” Setup Option ....................................... 7
The Remaining Stages in the Installation: for the “Custom” Setup Option ....................................... 9
The Remaining Stages in the Installation: for the “Workstation” Setup Option.............................. 12
SAFETI NL Installation Notes 4 Installing the License Manager
© 2006 DET NORSKE VERITAS All rights reserved. No part of this publication may be reproduced or transmitted in any form or by any means, including photocopying and recording, without the prior consent of DET NORSKE VERITAS
Details of the Installation Process In order to install the program on Windows 2000, Windows XP or Windows NT, you must have administration rights for the machine. Contact your System Administrator to check whether you have administration rights, or to obtain these rights.
Overview of the Three Setup Options Before you start the installation process, you must decide which type of setup you want to perform. The installation offers three setup options, as follows:
Installation Option Choose this if…
Typical Setup
This is the default option. You want to perform the installation quickly, and the default locations for installing the various files are suitable for you.
Note: the default locations for the files are all on the c:\ drive.
Custom Setup You want to have control over the details of the installation, e.g. you want to install files to the network so that they can be shared by several users.
This option is intended principally for a System Administrator.
Workstation Setup The System Administrator has already installed the files to the network, and you want to set up your computer to use those files.
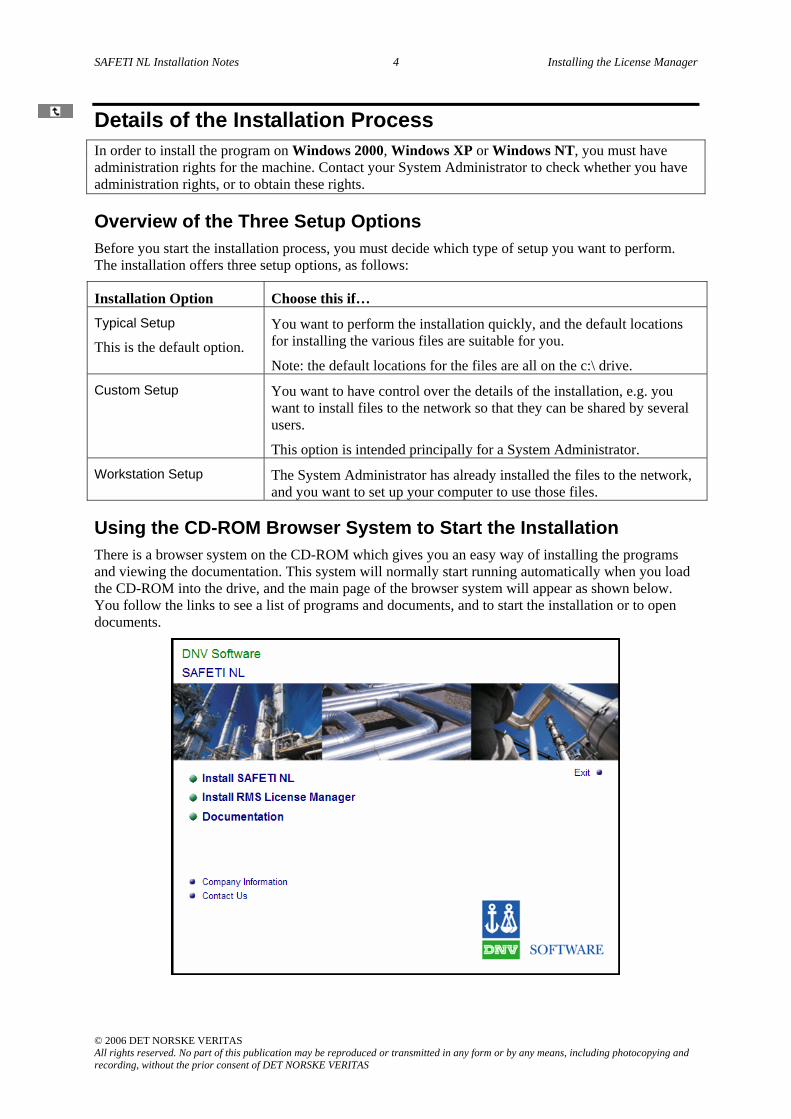
Using the CD-ROM Browser System to Start the Installation There is a browser system on the CD-ROM which gives you an easy way of installing the programs and viewing the documentation. This system will normally start running automatically when you load the CD-ROM into the drive, and the main page of the browser system will appear as shown below. You follow the links to see a list of programs and documents, and to start the installation or to open documents.

SAFETI NL Installation Notes 5 Installing the License Manager
© 2006 DET NORSKE VERITAS All rights reserved. No part of this publication may be reproduced or transmitted in any form or by any means, including photocopying and recording, without the prior consent of DET NORSKE VERITAS
If the main page does not appear when you load the CD-ROM, then use Windows Explorer to view the contents of the CD drive so that you can see the icon for the SETUP.EXE file at the top level of the drive. Double-click on the icon to open the browser system.
To close the browser, click on the Exit link from the main page. You can rerun the browser at any time by re-inserting the CD-ROM, or by running SETUP.EXE.
The Initial Stages in the Installation: Common to all Setup Options This section describes the initial stages in the setup. These stages all occur before you choose the setup option (i.e. before you choose between Typical Setup, Custom Setup and Workstation Setup), and they are the same for all types of setup.
Setup welcome screen
The first screen tells you that this setup program will install SAFETI NL on your computer.
SAFETI NL license agreement screen
The next screen is the SAFETI NL license agreement. You must read this and accept your agreement by clicking on Yes. You can use your mouse and copy the text into a word-processing program or Notepad, and then print it out if you want a hard copy.
DIPPR data license agreement screen
The next screen is the DIPPR Data license agreement, for materials property data.
You must read this and click on Yes to accept it. As with the previous agreement, you can use your mouse and copy the text into a word-processing program or Notepad, and then print it out if you want a hard copy.
Note: if your SAFETI NL license is suspended or canceled, you or your organization are responsible for continuing and maintaining this portion of the software license agreement.
SAFETI NL Installation Notes 6 Installing the License Manager
© 2006 DET NORSKE VERITAS All rights reserved. No part of this publication may be reproduced or transmitted in any form or by any means, including photocopying and recording, without the prior consent of DET NORSKE VERITAS
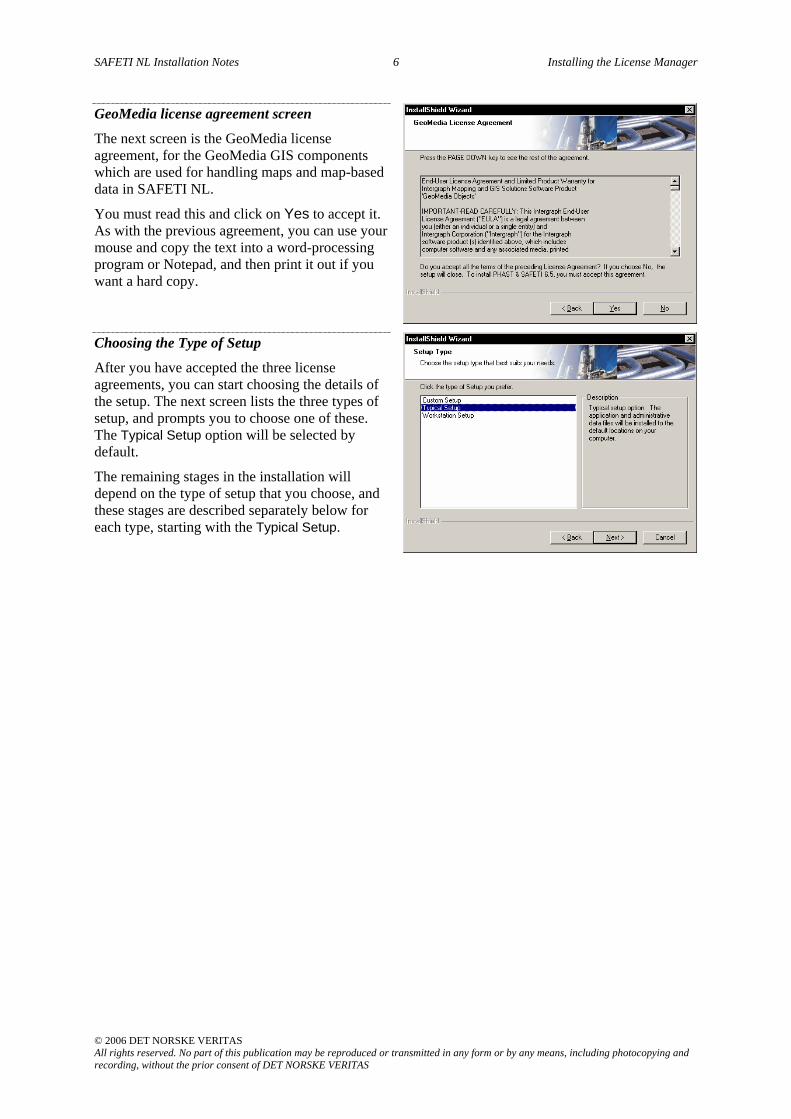
GeoMedia license agreement screen
The next screen is the GeoMedia license agreement, for the GeoMedia GIS components which are used for handling maps and map-based data in SAFETI NL.
You must read this and click on Yes to accept it. As with the previous agreement, you can use your mouse and copy the text into a word-processing program or Notepad, and then print it out if you want a hard copy.
Choosing the Type of Setup
After you have accepted the three license agreements, you can start choosing the details of the setup. The next screen lists the three types of setup, and prompts you to choose one of these. The Typical Setup option will be selected by default.
The remaining stages in the installation will depend on the type of setup that you choose, and these stages are described separately below for each type, starting with the Typical Setup.
SAFETI NL Installation Notes 7 Installing the License Manager
© 2006 DET NORSKE VERITAS All rights reserved. No part of this publication may be reproduced or transmitted in any form or by any means, including photocopying and recording, without the prior consent of DET NORSKE VERITAS
The Remaining Stages in the Installation: for a Typical Setup This section describes the remaining stages in the installation if you select Typical Setup as the type of setup.
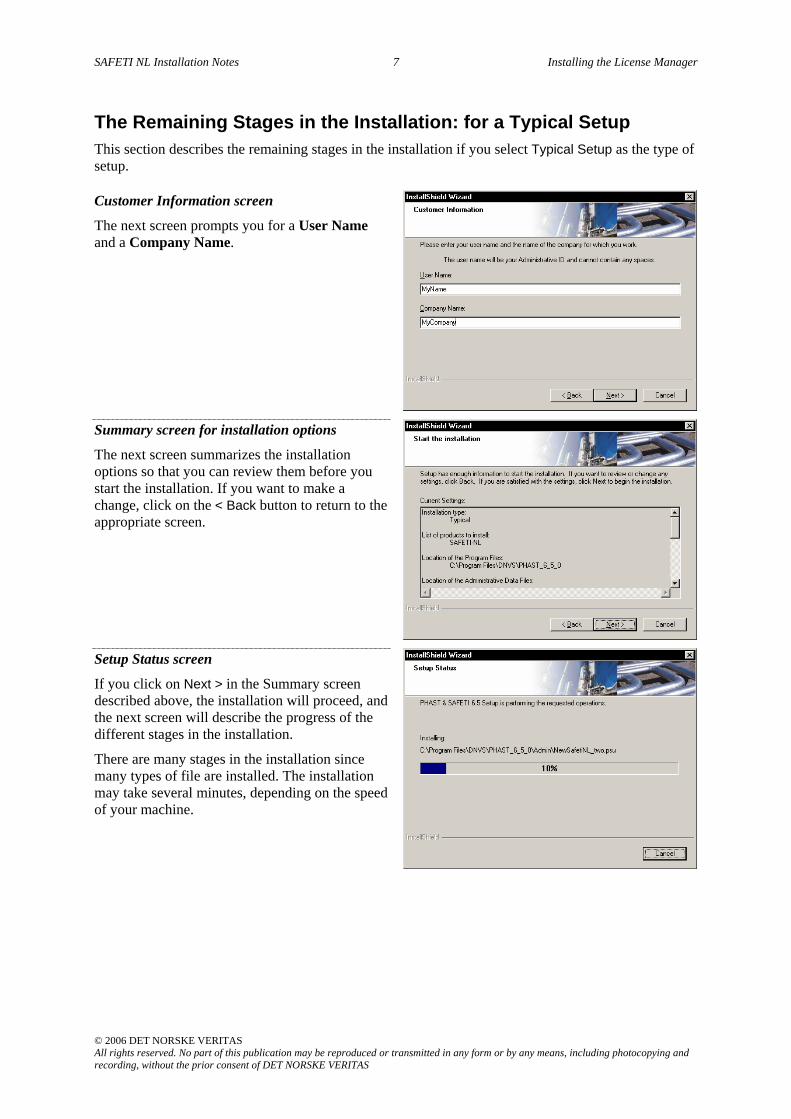
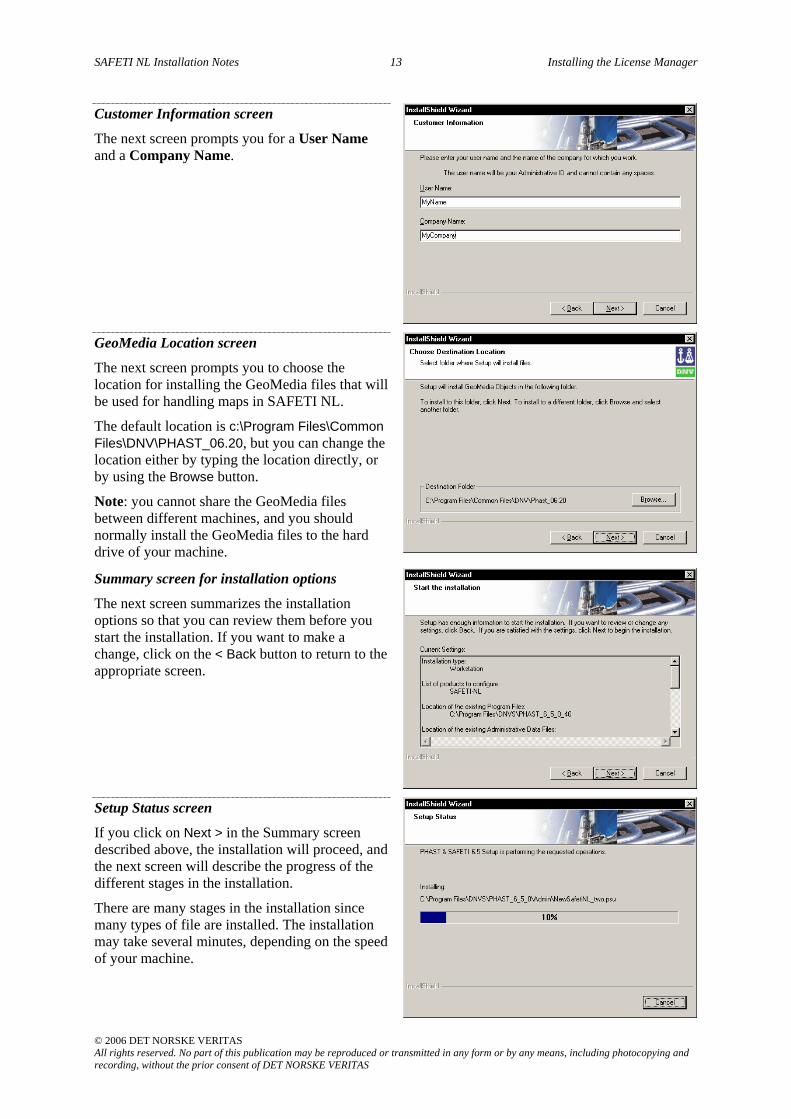
Customer Information screen
The next screen prompts you for a User Name and a Company Name.
Summary screen for installation options
The next screen summarizes the installation options so that you can review them before you start the installation. If you want to make a change, click on the < Back button to return to the appropriate screen.
Setup Status screen
If you click on Next > in the Summary screen described above, the installation will proceed, and the next screen will describe the progress of the different stages in the installation.
There are many stages in the installation since many types of file are installed. The installation may take several minutes, depending on the speed of your machine.

SAFETI NL Installation Notes 8 Installing the License Manager
© 2006 DET NORSKE VERITAS All rights reserved. No part of this publication may be reproduced or transmitted in any form or by any means, including photocopying and recording, without the prior consent of DET NORSKE VERITAS
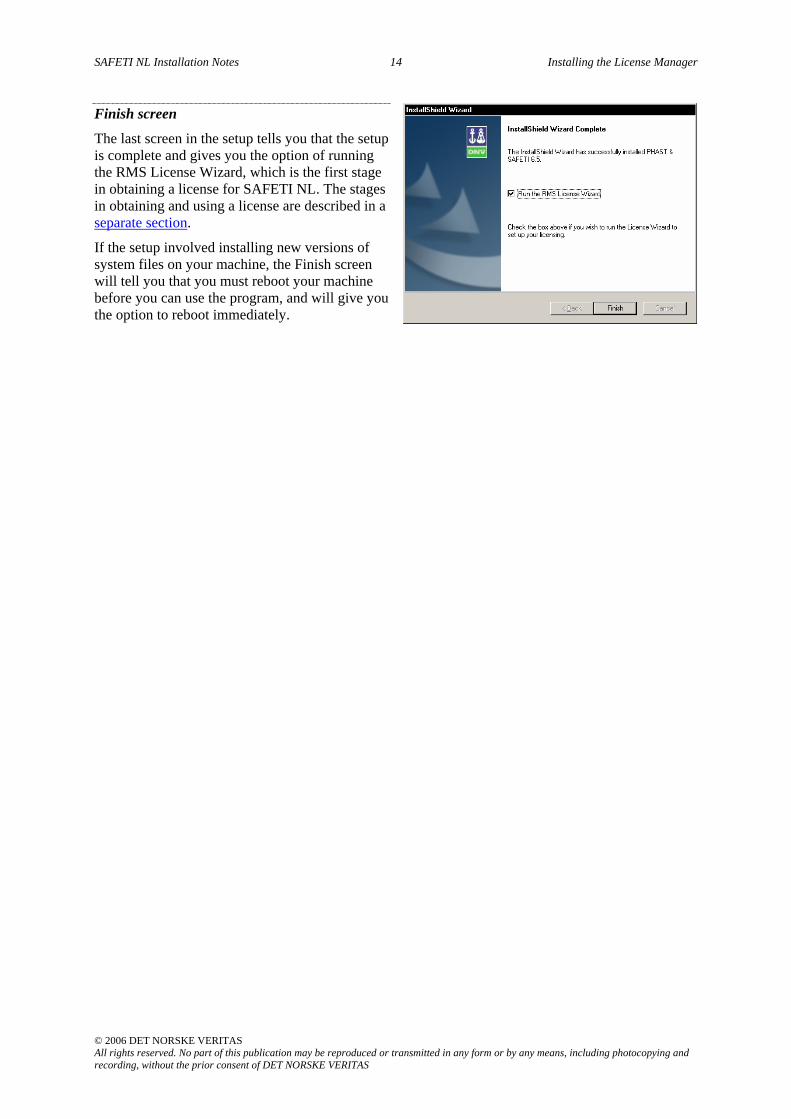
Finish screen
The last screen in the setup tells you that the setup is complete and gives you the option of running the RMS License Wizard, which is the first stage in obtaining a license for SAFETI NL. The stages in obtaining and using a license are described in a separate section.
If the setup involved installing new versions of system files on your machine, the Finish screen will tell you that you must reboot your machine before you can use the program, and will give you the option to reboot immediately.
SAFETI NL Installation Notes 9 Installing the License Manager
© 2006 DET NORSKE VERITAS All rights reserved. No part of this publication may be reproduced or transmitted in any form or by any means, including photocopying and recording, without the prior consent of DET NORSKE VERITAS
The Remaining Stages in the Installation: for a Custom Setup This section describes the remaining stages in the installation if you select Custom Setup as the type of setup.
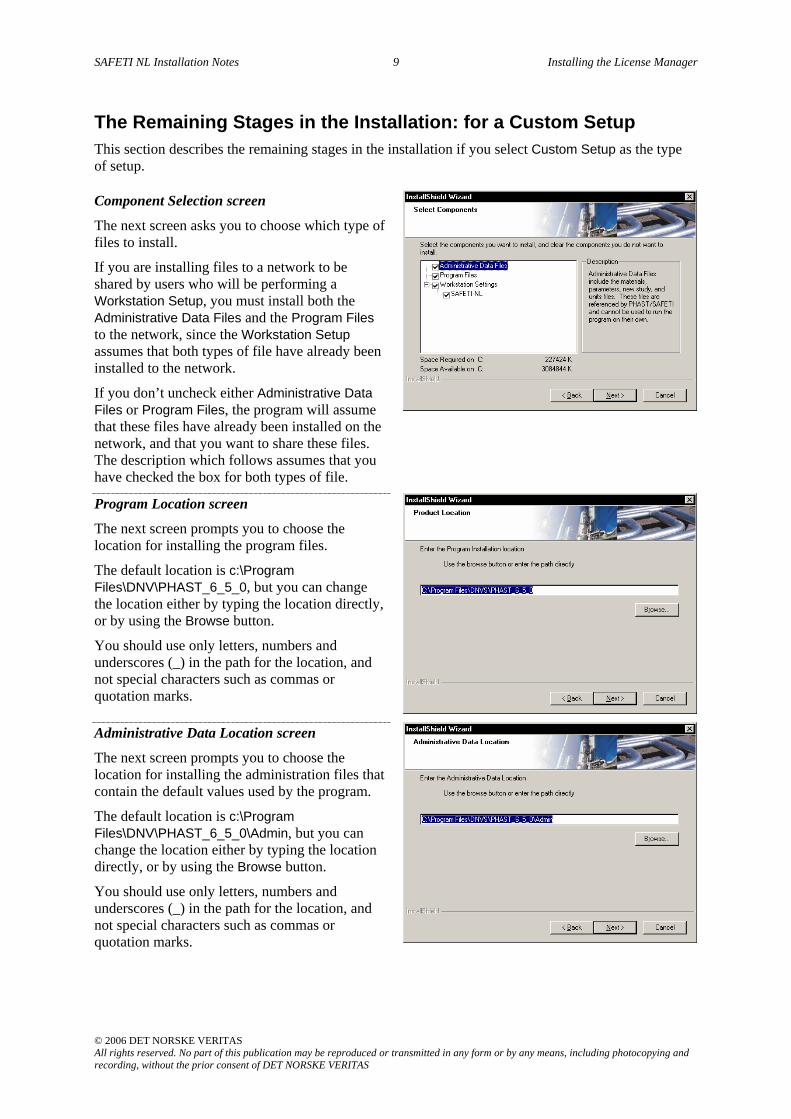
Component Selection screen
The next screen asks you to choose which type of files to install.
If you are installing files to a network to be shared by users who will be performing a Workstation Setup, you must install both the Administrative Data Files and the Program Files to the network, since the Workstation Setup assumes that both types of file have already been installed to the network.
If you don’t uncheck either Administrative Data Files or Program Files, the program will assume that these files have already been installed on the network, and that you want to share these files. The description which follows assumes that you have checked the box for both types of file.
Program Location screen
The next screen prompts you to choose the location for installing the program files.
The default location is c:\Program Files\DNV\PHAST_6_5_0, but you can change the location either by typing the location directly, or by using the Browse button.
You should use only letters, numbers and underscores (_) in the path for the location, and not special characters such as commas or quotation marks.
Administrative Data Location screen
The next screen prompts you to choose the location for installing the administration files that contain the default values used by the program.
The default location is c:\Program Files\DNV\PHAST_6_5_0\Admin, but you can change the location either by typing the location directly, or by using the Browse button.
You should use only letters, numbers and underscores (_) in the path for the location, and not special characters such as commas or quotation marks.
SAFETI NL Installation Notes 10 Installing the License Manager
© 2006 DET NORSKE VERITAS All rights reserved. No part of this publication may be reproduced or transmitted in any form or by any means, including photocopying and recording, without the prior consent of DET NORSKE VERITAS
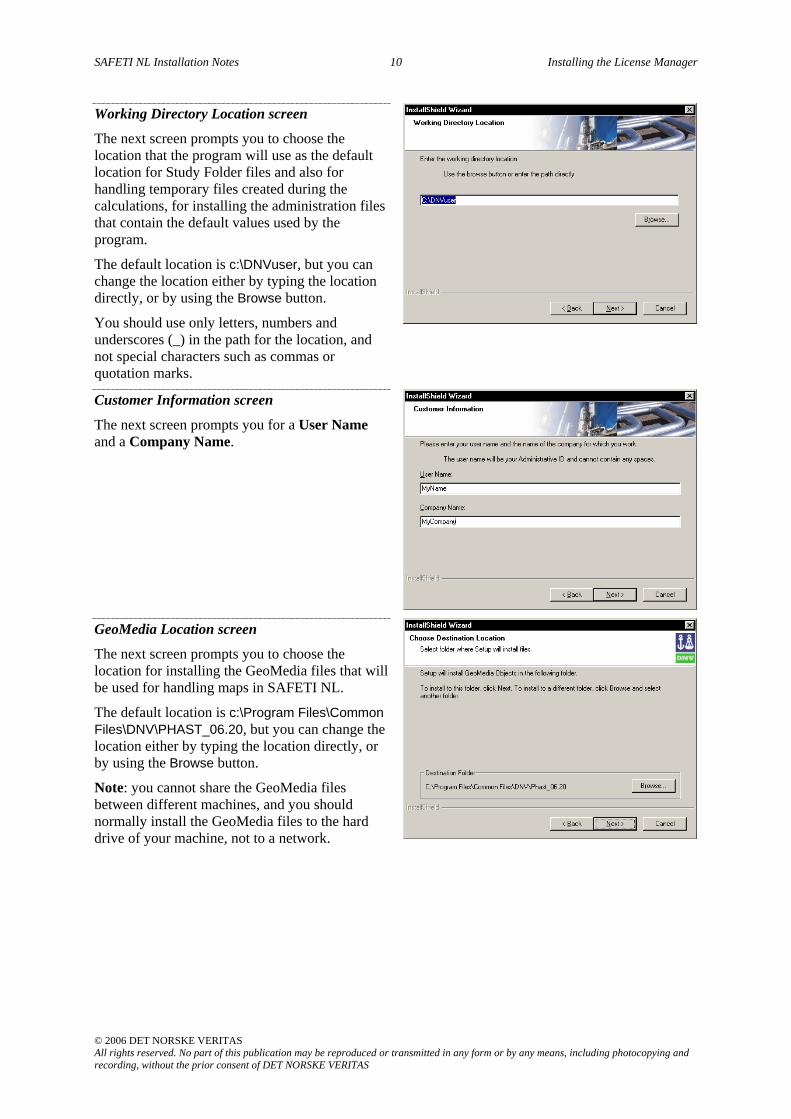
Working Directory Location screen
The next screen prompts you to choose the location that the program will use as the default location for Study Folder files and also for handling temporary files created during the calculations, for installing the administration files that contain the default values used by the program.
The default location is c:\DNVuser, but you can change the location either by typing the location directly, or by using the Browse button.
You should use only letters, numbers and underscores (_) in the path for the location, and not special characters such as commas or quotation marks.
Customer Information screen
The next screen prompts you for a User Name and a Company Name.
GeoMedia Location screen
The next screen prompts you to choose the location for installing the GeoMedia files that will be used for handling maps in SAFETI NL.
The default location is c:\Program Files\Common Files\DNV\PHAST_06.20, but you can change the location either by typing the location directly, or by using the Browse button.
Note: you cannot share the GeoMedia files between different machines, and you should normally install the GeoMedia files to the hard drive of your machine, not to a network.
SAFETI NL Installation Notes 11 Installing the License Manager
© 2006 DET NORSKE VERITAS All rights reserved. No part of this publication may be reproduced or transmitted in any form or by any means, including photocopying and recording, without the prior consent of DET NORSKE VERITAS
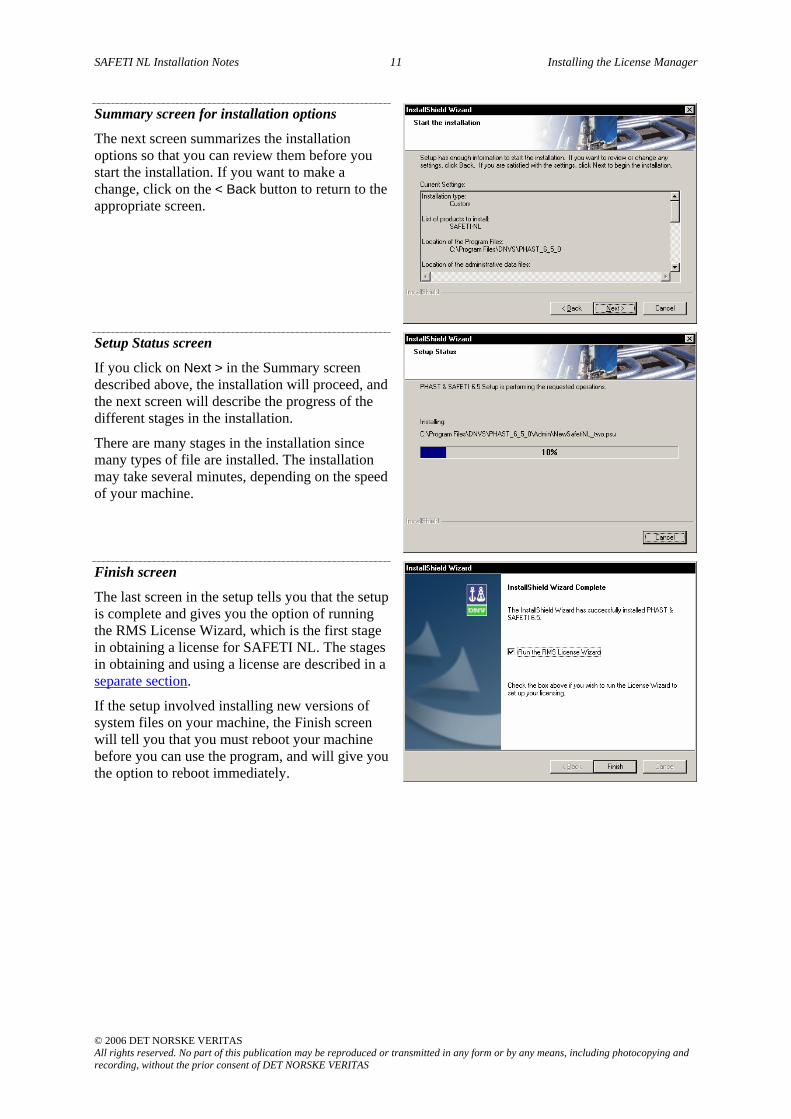
Summary screen for installation options
The next screen summarizes the installation options so that you can review them before you start the installation. If you want to make a change, click on the < Back button to return to the appropriate screen.
Setup Status screen
If you click on Next > in the Summary screen described above, the installation will proceed, and the next screen will describe the progress of the different stages in the installation.
There are many stages in the installation since many types of file are installed. The installation may take several minutes, depending on the speed of your machine.
Finish screen
The last screen in the setup tells you that the setup is complete and gives you the option of running the RMS License Wizard, which is the first stage in obtaining a license for SAFETI NL. The stages in obtaining and using a license are described in a separate section.
If the setup involved installing new versions of system files on your machine, the Finish screen will tell you that you must reboot your machine before you can use the program, and will give you the option to reboot immediately.
SAFETI NL Installation Notes 12 Installing the License Manager
© 2006 DET NORSKE VERITAS All rights reserved. No part of this publication may be reproduced or transmitted in any form or by any means, including photocopying and recording, without the prior consent of DET NORSKE VERITAS
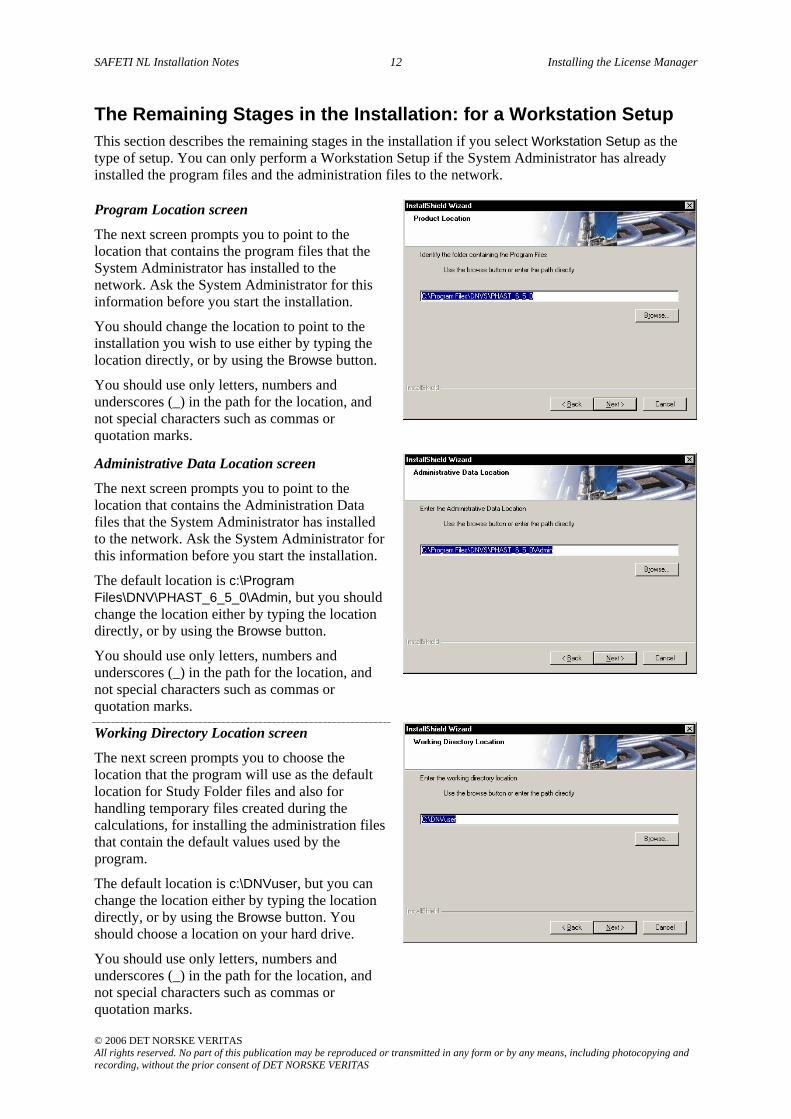
The Remaining Stages in the Installation: for a Workstation Setup This section describes the remaining stages in the installation if you select Workstation Setup as the type of setup. You can only perform a Workstation Setup if the System Administrator has already installed the program files and the administration files to the network.
Program Location screen
The next screen prompts you to point to the location that contains the program files that the System Administrator has installed to the network. Ask the System Administrator for this information before you start the installation.
You should change the location to point to the installation you wish to use either by typing the location directly, or by using the Browse button.
You should use only letters, numbers and underscores (_) in the path for the location, and not special characters such as commas or quotation marks.
Administrative Data Location screen
The next screen prompts you to point to the location that contains the Administration Data files that the System Administrator has installed to the network. Ask the System Administrator for this information before you start the installation.
The default location is c:\Program Files\DNV\PHAST_6_5_0\Admin, but you should change the location either by typing the location directly, or by using the Browse button.
You should use only letters, numbers and underscores (_) in the path for the location, and not special characters such as commas or quotation marks.
Working Directory Location screen
The next screen prompts you to choose the location that the program will use as the default location for Study Folder files and also for handling temporary files created during the calculations, for installing the administration files that contain the default values used by the program.
The default location is c:\DNVuser, but you can change the location either by typing the location directly, or by using the Browse button. You should choose a location on your hard drive.
You should use only letters, numbers and underscores (_) in the path for the location, and not special characters such as commas or quotation marks.
SAFETI NL Installation Notes 13 Installing the License Manager
© 2006 DET NORSKE VERITAS All rights reserved. No part of this publication may be reproduced or transmitted in any form or by any means, including photocopying and recording, without the prior consent of DET NORSKE VERITAS
Customer Information screen
The next screen prompts you for a User Name and a Company Name.
GeoMedia Location screen
The next screen prompts you to choose the location for installing the GeoMedia files that will be used for handling maps in SAFETI NL.
The default location is c:\Program Files\Common Files\DNV\PHAST_06.20, but you can change the location either by typing the location directly, or by using the Browse button.
Note: you cannot share the GeoMedia files between different machines, and you should normally install the GeoMedia files to the hard drive of your machine.
Summary screen for installation options
The next screen summarizes the installation options so that you can review them before you start the installation. If you want to make a change, click on the < Back button to return to the appropriate screen.
Setup Status screen
If you click on Next > in the Summary screen described above, the installation will proceed, and the next screen will describe the progress of the different stages in the installation.
There are many stages in the installation since many types of file are installed. The installation may take several minutes, depending on the speed of your machine.
SAFETI NL Installation Notes 14 Installing the License Manager
© 2006 DET NORSKE VERITAS All rights reserved. No part of this publication may be reproduced or transmitted in any form or by any means, including photocopying and recording, without the prior consent of DET NORSKE VERITAS
Finish screen
The last screen in the setup tells you that the setup is complete and gives you the option of running the RMS License Wizard, which is the first stage in obtaining a license for SAFETI NL. The stages in obtaining and using a license are described in a separate section.
If the setup involved installing new versions of system files on your machine, the Finish screen will tell you that you must reboot your machine before you can use the program, and will give you the option to reboot immediately.
SAFETI NL Installation Notes 15 Installing the License Manager
© 2006 DET NORSKE VERITAS All rights reserved. No part of this publication may be reproduced or transmitted in any form or by any means, including photocopying and recording, without the prior consent of DET NORSKE VERITAS
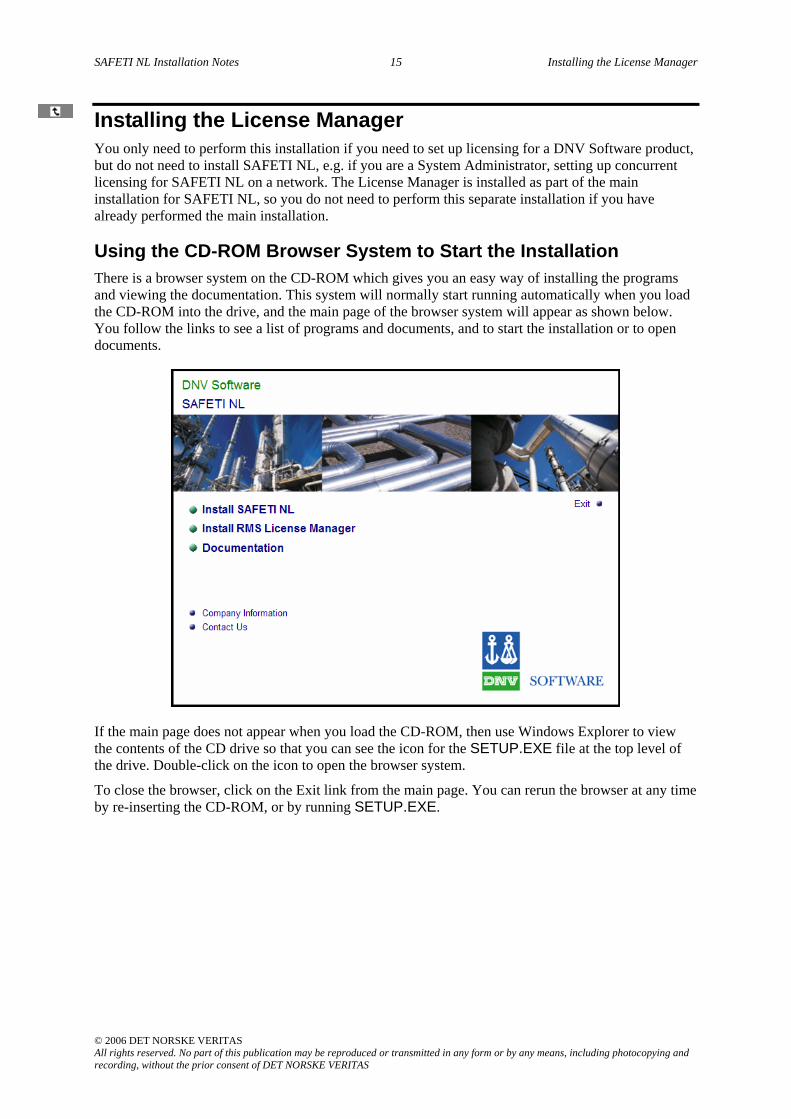
Installing the License Manager You only need to perform this installation if you need to set up licensing for a DNV Software product, but do not need to install SAFETI NL, e.g. if you are a System Administrator, setting up concurrent licensing for SAFETI NL on a network. The License Manager is installed as part of the main installation for SAFETI NL, so you do not need to perform this separate installation if you have already performed the main installation.
Using the CD-ROM Browser System to Start the Installation There is a browser system on the CD-ROM which gives you an easy way of installing the programs and viewing the documentation. This system will normally start running automatically when you load the CD-ROM into the drive, and the main page of the browser system will appear as shown below. You follow the links to see a list of programs and documents, and to start the installation or to open documents.
If the main page does not appear when you load the CD-ROM, then use Windows Explorer to view the contents of the CD drive so that you can see the icon for the SETUP.EXE file at the top level of the drive. Double-click on the icon to open the browser system.
To close the browser, click on the Exit link from the main page. You can rerun the browser at any time by re-inserting the CD-ROM, or by running SETUP.EXE.
SAFETI NL Installation Notes 16 Installing the License Manager
© 2006 DET NORSKE VERITAS All rights reserved. No part of this publication may be reproduced or transmitted in any form or by any means, including photocopying and recording, without the prior consent of DET NORSKE VERITAS
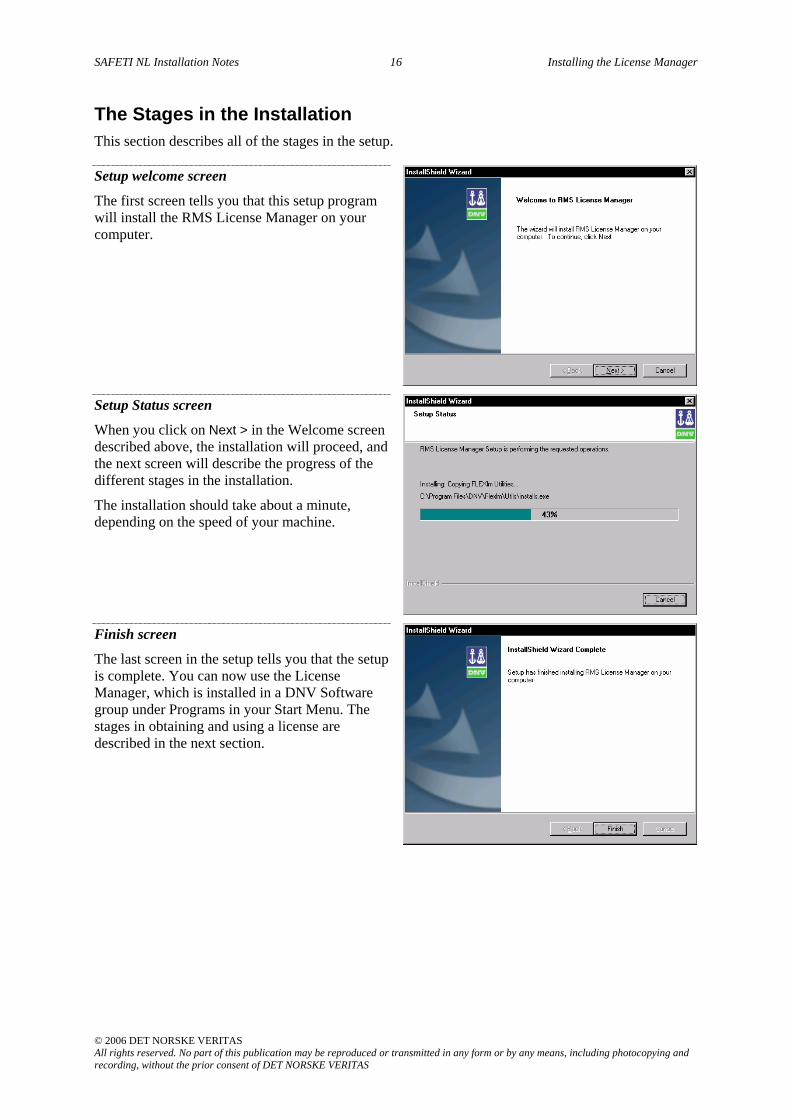
The Stages in the Installation This section describes all of the stages in the setup.
Setup welcome screen
The first screen tells you that this setup program will install the RMS License Manager on your computer.
Setup Status screen
When you click on Next > in the Welcome screen described above, the installation will proceed, and the next screen will describe the progress of the different stages in the installation.
The installation should take about a minute, depending on the speed of your machine.
Finish screen
The last screen in the setup tells you that the setup is complete. You can now use the License Manager, which is installed in a DNV Software group under Programs in your Start Menu. The stages in obtaining and using a license are described in the next section.
SAFETI NL Installation Notes 17 Setting up a License
© 2006 DET NORSKE VERITAS All rights reserved. No part of this publication may be reproduced or transmitted in any form or by any means, including photocopying and recording, without the prior consent of DET NORSKE VERITAS
Setting up a License for SAFETI NL
Contents Do I Need to Request a License File for SAFETI NL?.................................................................... 18
Using the License Wizard to Generate a Request for a License File ............................................... 18
Importing the License File into the License Manager...................................................................... 20
SAFETI NL Installation Notes 18 Setting up a License
© 2006 DET NORSKE VERITAS All rights reserved. No part of this publication may be reproduced or transmitted in any form or by any means, including photocopying and recording, without the prior consent of DET NORSKE VERITAS
Setting up a License for SAFETI NL
Do I Need to Request a License File for SAFETI NL? You might have a license for a PHAST product or a SAFETI product from DNV Software, but this license will not be valid for SAFETI NL. You must request a separate license for SAFETI NL, as described below.
Using the License Wizard to Generate a Request for a License File The first stage in setting up a license file is to run the License Wizard. By default, the Wizard will run automatically at the end of the setup for SAFETI NL, but if you unchecked the option in the setup to run the Wizard, you can run the Wizard yourself as follows:
1. From the Start Menu, select Programs > DNV Software > RMS License Manager > RMS License Manager
2. Move to the License Wizard tab of the License Manager dialog.
3. Click on Run Wizard to start the Wizard running.
The stages in the Wizard are as follows:
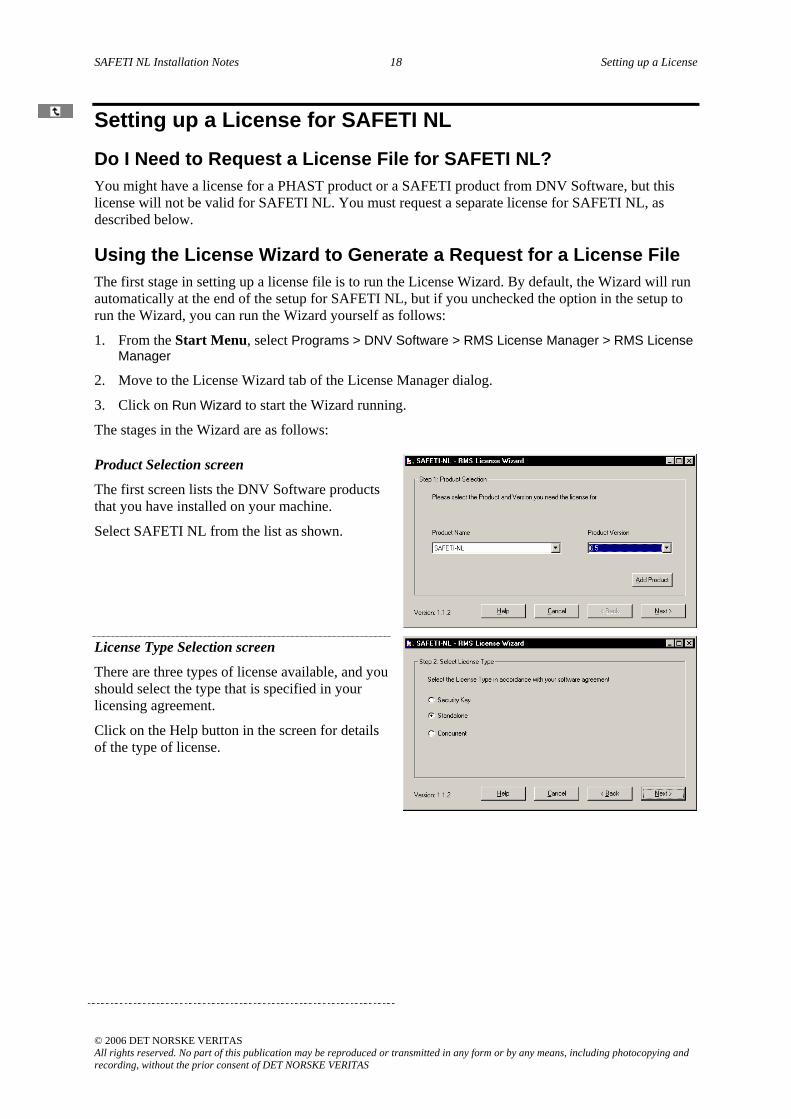
Product Selection screen
The first screen lists the DNV Software products that you have installed on your machine.
Select SAFETI NL from the list as shown.
License Type Selection screen
There are three types of license available, and you should select the type that is specified in your licensing agreement.
Click on the Help button in the screen for details of the type of license.

SAFETI NL Installation Notes 19 Setting up a License
© 2006 DET NORSKE VERITAS All rights reserved. No part of this publication may be reproduced or transmitted in any form or by any means, including photocopying and recording, without the prior consent of DET NORSKE VERITAS
Host ID screen
Each license is specific either to a machine (identified by the ID of the machine’s Ethernet card) or to a security key that is attached to the parallel port or USB port of the machine and that has a unique ID, which is printed on the key.
If you selected Security Key as the license type in the previous stage, you must have a security key attached to the machine, and you must select the ID of the key as the Host ID for the license.
If you selected Standalone or Concurrent as the license type, you can select either a security key ID or an Ethernet card ID as the Host ID, (providing your machine has both a security key attached and an Ethernet card installed). If you select a security key ID, the license will be specific to that security key (and you will be able to move it between machines), and if you select an Ethernet card ID, the license will be specific to the machine that contains that card.
The security key Host ID will start with “FLEXID=”, but the standalone and concurrent IDs will have a different form (i.e. the ID of the Ethernet card).
License details screen
The program generates a text file that contains the license details that you specified in the three Wizard screens, and it displays this file in the final screen, giving the location of the file in the Filename screen.
The screen gives a dnv email for sending the license details, but you should not send the file to this address but instead to the following address:
If the license details that you have specified are correct for your license agreement, RIVM will obtain a license file for the product that you selected, specific to the security key or Ethernet card that you selected in the Wizard, and will send you this file (e.g. by email). You can then import the file into the License Manager to enable the licensing for SAFETI NL, as described below.
SAFETI NL Installation Notes 20 Setting up a License
© 2006 DET NORSKE VERITAS All rights reserved. No part of this publication may be reproduced or transmitted in any form or by any means, including photocopying and recording, without the prior consent of DET NORSKE VERITAS
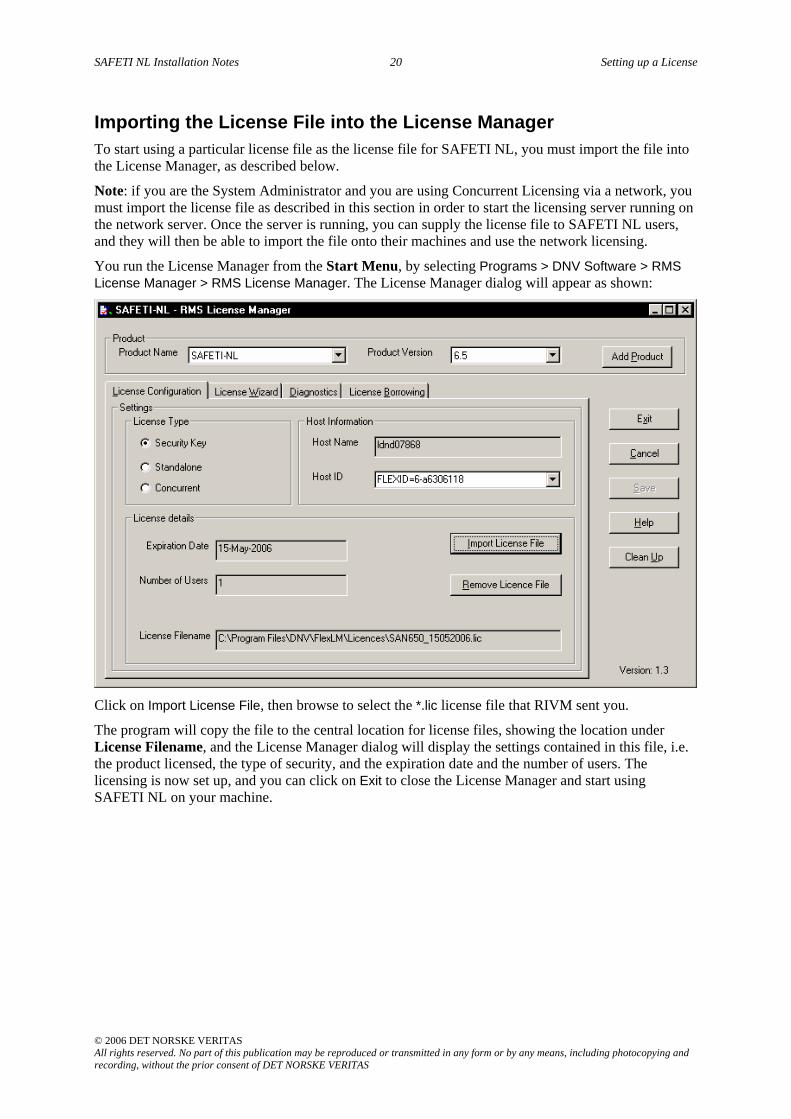
Importing the License File into the License Manager To start using a particular license file as the license file for SAFETI NL, you must import the file into the License Manager, as described below.
Note: if you are the System Administrator and you are using Concurrent Licensing via a network, you must import the license file as described in this section in order to start the licensing server running on the network server. Once the server is running, you can supply the license file to SAFETI NL users, and they will then be able to import the file onto their machines and use the network licensing.
You run the License Manager from the Start Menu, by selecting Programs > DNV Software > RMS License Manager > RMS License Manager. The License Manager dialog will appear as shown:
Click on Import License File, then browse to select the *.lic license file that RIVM sent you.
The program will copy the file to the central location for license files, showing the location under License Filename, and the License Manager dialog will display the settings contained in this file, i.e. the product licensed, the type of security, and the expiration date and the number of users. The licensing is now set up, and you can click on Exit to close the License Manager and start using SAFETI NL on your machine.