pilot pioneer quick start v10.5
TRANSCRIPT
Pilot Pioneer Quick Start
V10.5
Contents
Contents 1 Product Overview .................................................................................................................. 1
1.1 About the Product ...................................................................................................... 1
1.2 About the Document ................................................................................................. 1
2 Preparation .............................................................................................................................. 2
2.1 Software/Hardware Requirements ......................................................................... 2
2.2 Configuration .............................................................................................................. 2
3 Software Installation .............................................................................................................. 3
3.1 Install Drivers and Components .............................................................................. 3
3.2 Install Pilot Pioneer .................................................................................................... 4
4 Basic Operation ....................................................................................................................... 5
4.1 Run Pilot Pioneer ........................................................................................................ 5
4.2 Configuration .............................................................................................................. 5
4.2.1 Install Device Drivers ........................................................................................ 5
4.2.2 Automatic Detection .......................................................................................... 5
4.2.3 Manual Configuration ....................................................................................... 6
4.3 Configure Test Tasks ................................................................................................. 7
4.3.1 Configure Test Plans .......................................................................................... 7
4.3.2 Import Cell Site Database .................................................................................. 8
4.4 Start Test and Collect Data ...................................................................................... 10
4.4.1 Connect Mode ................................................................................................... 10
4.4.2 Recording Mode ............................................................................................... 10
5 Technical Support and Contact Information .................................................................... 11
5.1 Technical Support .................................................................................................... 11
5.2 Link to DingLi ........................................................................................................... 11
Product Overview
1 © DingLi 20-05-2021 DL1105QS
1 Product Overview
1.1 About the Product
Pilot Pioneer is a real-time multi-technology mobile network and services performance test and
measurement solution. Pilot Pioneer runs on MS Windows 10/8/7 operating system, and utilizes
the latest smartphone test devices and frequency scanners for the measurement collection.
1.2 About the Document
This document focuses on the software configuration, installation and basic operation on service
tests.

Preparation
2 © DingLi 20-05-2021 DL1105QS
2 Preparation
2.1 Software/Hardware Requirements
It is recommended to use Windows 7/10 operating system. The following configuration is
recommended:
CPU Intel I5
Memory 8 GB
Hard Disk 500 GB
Operating System Win 7/8/10
Windows Office 2007/2013
2.2 Configuration
Pilot Pioneer V10.5 is compatible with PioneerTools Version: 2021.01.28
Software Installation
3 © DingLi 20-05-2021 DL1105QS
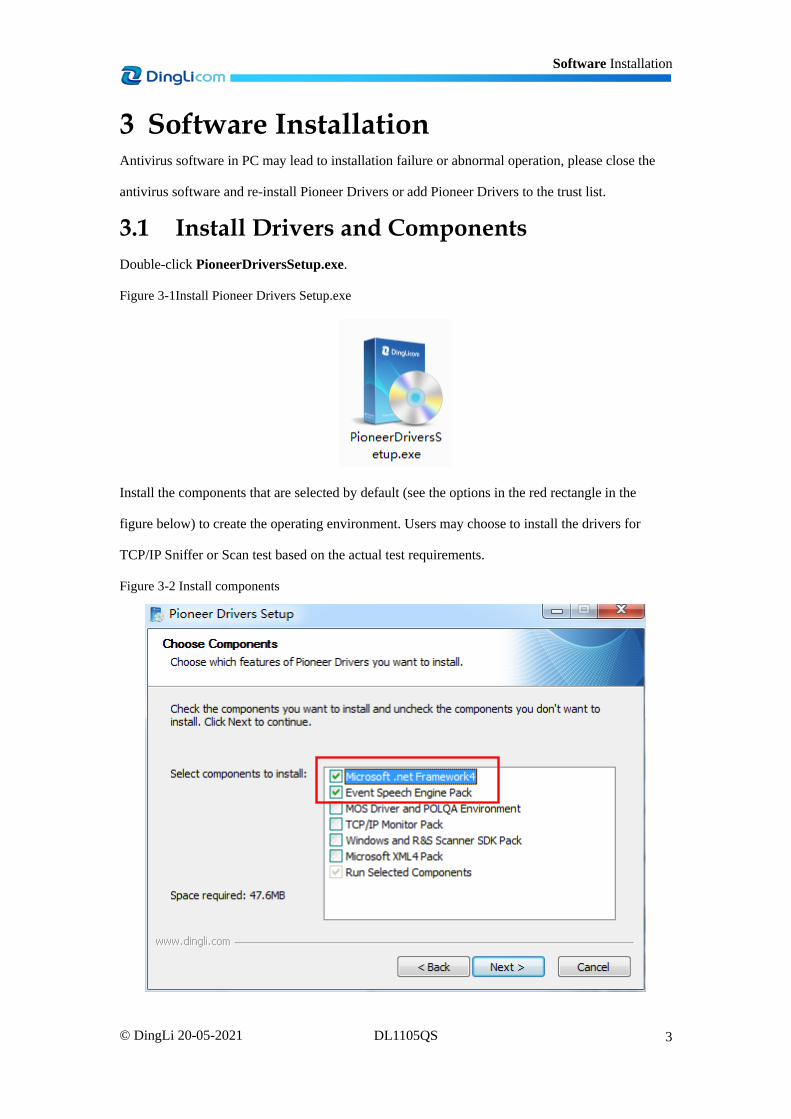
3 Software Installation Antivirus software in PC may lead to installation failure or abnormal operation, please close the
antivirus software and re-install Pioneer Drivers or add Pioneer Drivers to the trust list.
3.1 Install Drivers and Components
Double-click PioneerDriversSetup.exe.
Figure 3-1Install Pioneer Drivers Setup.exe
Install the components that are selected by default (see the options in the red rectangle in the
figure below) to create the operating environment. Users may choose to install the drivers for
TCP/IP Sniffer or Scan test based on the actual test requirements.
Figure 3-2 Install components
Software Installation
4 © DingLi 20-05-2021 DL1105QS
Note: If your PC has already installed the components and drivers, it is unnecessary to re-install
them. You may directly install Pilot Pioneer.
3.2 Install Pilot Pioneer
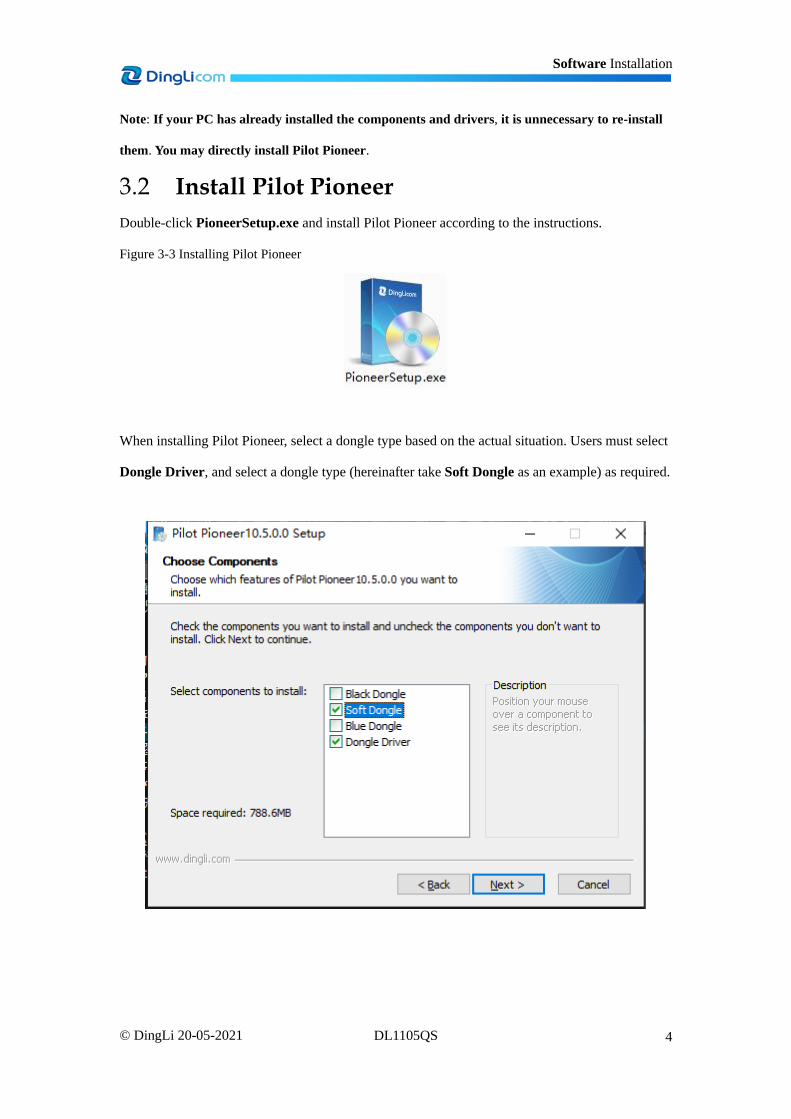
Double-click PioneerSetup.exe and install Pilot Pioneer according to the instructions.
Figure 3-3 Installing Pilot Pioneer
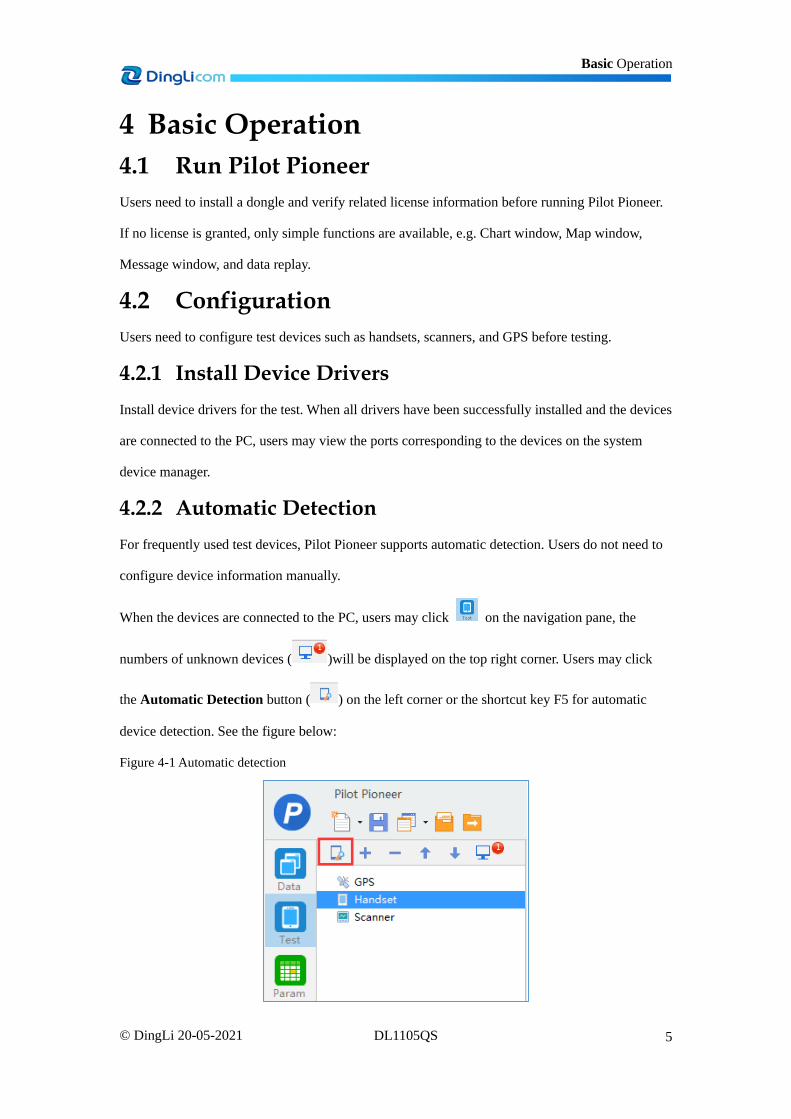
When installing Pilot Pioneer, select a dongle type based on the actual situation. Users must select
Dongle Driver, and select a dongle type (hereinafter take Soft Dongle as an example) as required.
Basic Operation
5 © DingLi 20-05-2021 DL1105QS
4 Basic Operation
4.1 Run Pilot Pioneer
Users need to install a dongle and verify related license information before running Pilot Pioneer.
If no license is granted, only simple functions are available, e.g. Chart window, Map window,
Message window, and data replay.
4.2 Configuration
Users need to configure test devices such as handsets, scanners, and GPS before testing.
4.2.1 Install Device Drivers
Install device drivers for the test. When all drivers have been successfully installed and the devices
are connected to the PC, users may view the ports corresponding to the devices on the system
device manager.
4.2.2 Automatic Detection
For frequently used test devices, Pilot Pioneer supports automatic detection. Users do not need to
configure device information manually.
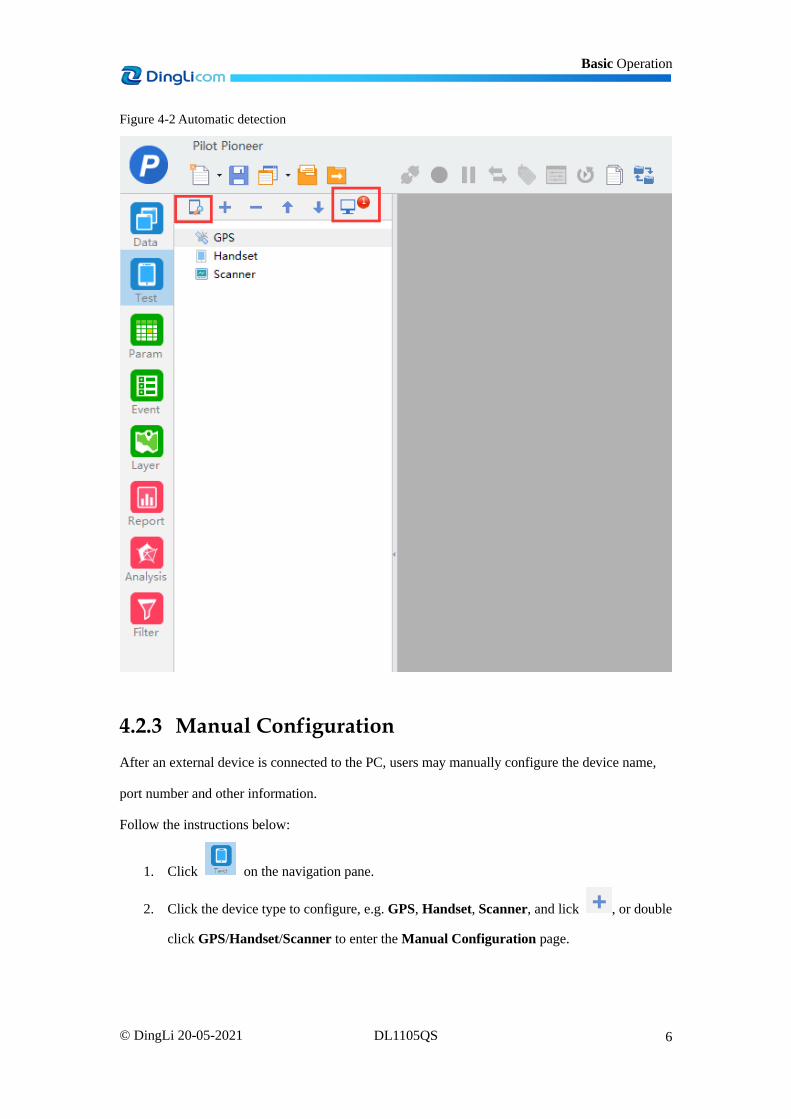
When the devices are connected to the PC, users may click on the navigation pane, the
numbers of unknown devices ( )will be displayed on the top right corner. Users may click
the Automatic Detection button ( ) on the left corner or the shortcut key F5 for automatic
device detection. See the figure below:
Figure 4-1 Automatic detection
Basic Operation
6 © DingLi 20-05-2021 DL1105QS
Figure 4-2 Automatic detection
4.2.3 Manual Configuration
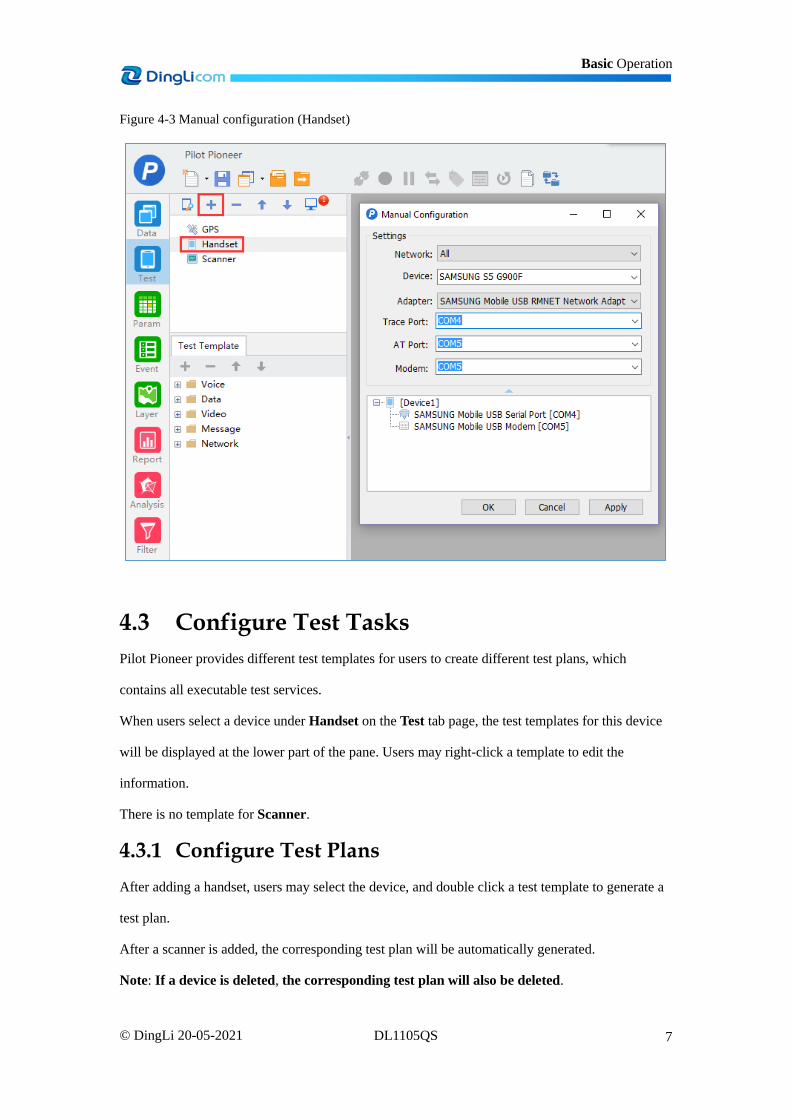
After an external device is connected to the PC, users may manually configure the device name,
port number and other information.
Follow the instructions below:
1. Click on the navigation pane.
2. Click the device type to configure, e.g. GPS, Handset, Scanner, and lick , or double
click GPS/Handset/Scanner to enter the Manual Configuration page.
Basic Operation
7 © DingLi 20-05-2021 DL1105QS
Figure 4-3 Manual configuration (Handset)
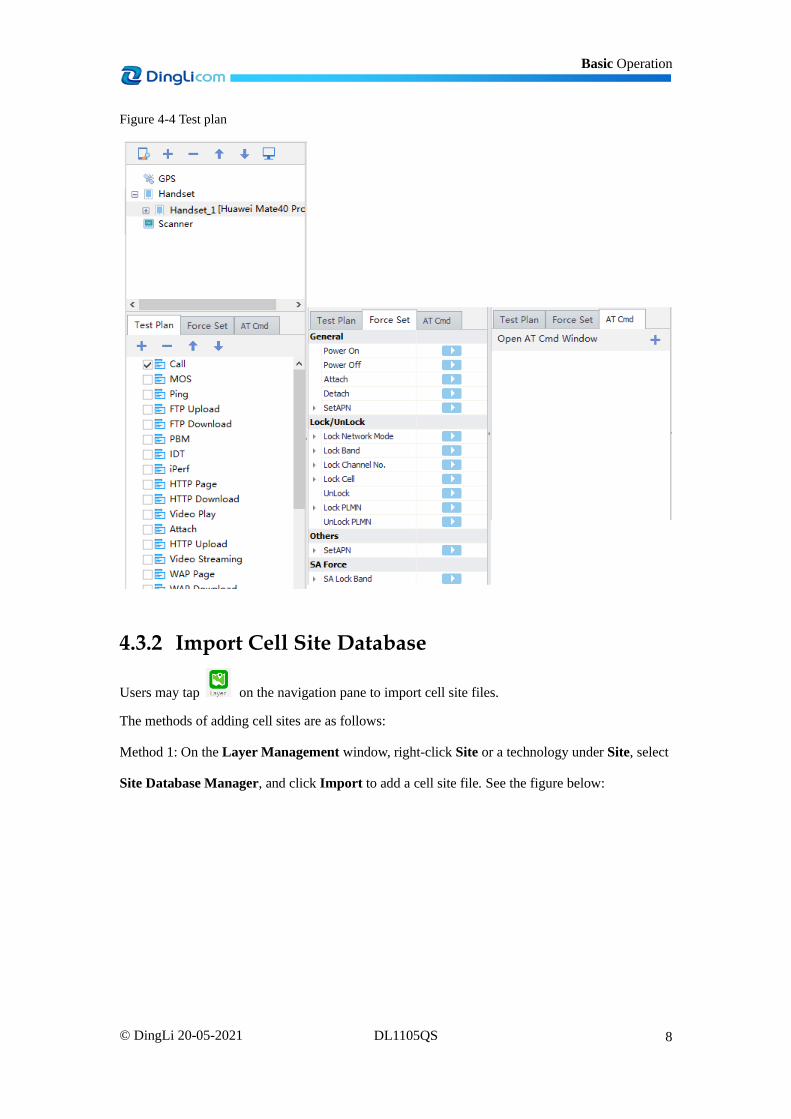
4.3 Configure Test Tasks
Pilot Pioneer provides different test templates for users to create different test plans, which
contains all executable test services.
When users select a device under Handset on the Test tab page, the test templates for this device
will be displayed at the lower part of the pane. Users may right-click a template to edit the
information.
There is no template for Scanner.
4.3.1 Configure Test Plans
After adding a handset, users may select the device, and double click a test template to generate a
test plan.
After a scanner is added, the corresponding test plan will be automatically generated.
Note: If a device is deleted, the corresponding test plan will also be deleted.
Basic Operation
8 © DingLi 20-05-2021 DL1105QS
Figure 4-4 Test plan
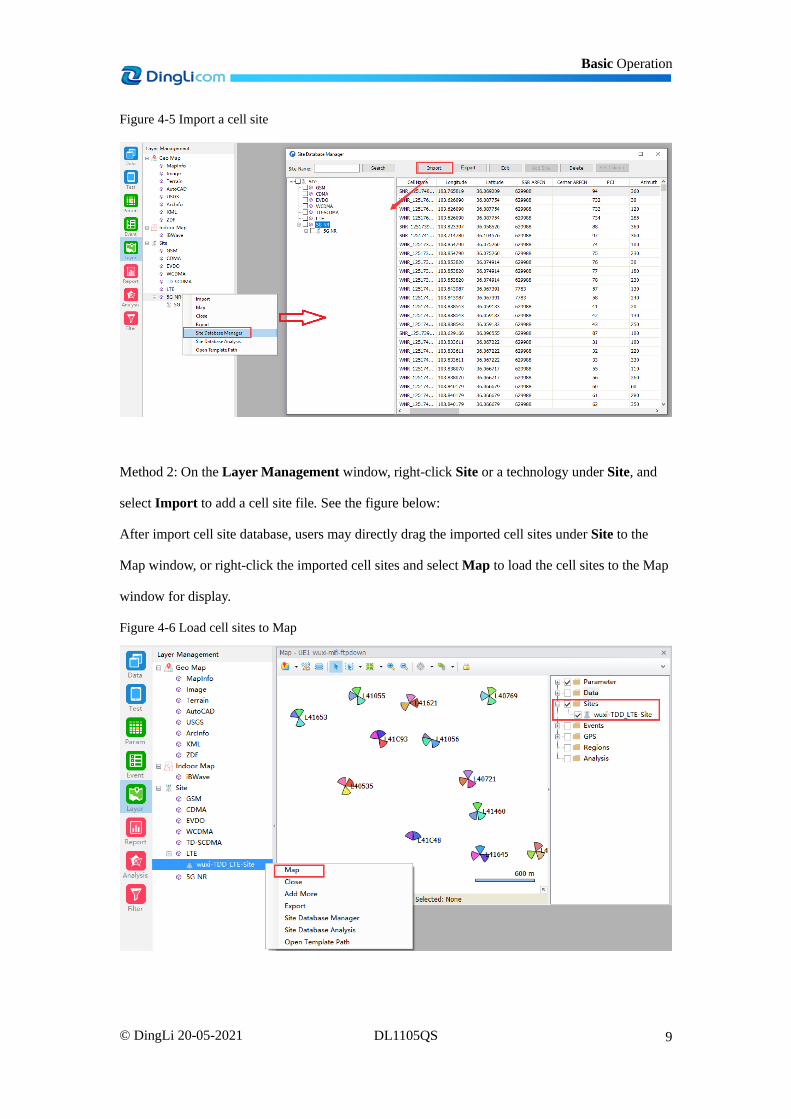
4.3.2 Import Cell Site Database
Users may tap on the navigation pane to import cell site files.
The methods of adding cell sites are as follows:
Method 1: On the Layer Management window, right-click Site or a technology under Site, select
Site Database Manager, and click Import to add a cell site file. See the figure below:
Basic Operation
9 © DingLi 20-05-2021 DL1105QS
Figure 4-5 Import a cell site
Method 2: On the Layer Management window, right-click Site or a technology under Site, and
select Import to add a cell site file. See the figure below:
After import cell site database, users may directly drag the imported cell sites under Site to the
Map window, or right-click the imported cell sites and select Map to load the cell sites to the Map
window for display.
Figure 4-6 Load cell sites to Map

Basic Operation
10 © DingLi 20-05-2021 DL1105QS
4.4 Start Test and Collect Data
After the service test starts, Pilot Pioneer may collect data simultaneously, which includes the
radio and test device information. There are two data collection modes: Connect and Recording.
4.4.1 Connect Mode
In this mode, Pilot Pioneer is able to display the current test information in real time and verify
test information without saving log files. In this mode users may conduct tests and display the
information without saving any test information.
To enter the connect mode, click the Connect icon ( ) on the toolbar, or press the shortcut key
F6.
4.4.2 Recording Mode
In the recording mode, Pilot Pioneer is able to save log files in a specified directory after
decoding.
To enter the recording mode, click the Start Recording icon ( ) on the toolbar, or press the
shortcut key F7.
Users may click the Start icon ( ) or Start All button to start test services on the Device
Control window.
Figure 4-7 Record mode
Technical Support and Contact Information
11 © DingLi 20-05-2021 DL1105QS
5 Technical Support and Contact
Information
5.1 Technical Support
For any product usability issues encountered during operation, please refer to the user manual. If
the issue cannot be solved or information is not available, please contact us via the following
contact information:
Area E-mail
Global [email protected]
5.2 Link to DingLi
For more product information or service and technical support, please visit us at www.dingli.com.

DINGLI CORP., LTD
Address:No.8, 5thTechnology Road, Gangwan Avenue, Zhuhai, 519085, P.R. China
Tel:+86-0756-3626100 Fax:+86-0756-3391900