note taking express user guides for students
TRANSCRIPT

note taking express User guides for Students
Phone image credit: <a href=’https://www.freepik.com/vectors/mock-up’>Mockup vector created by starline - www.freepik.com</a>
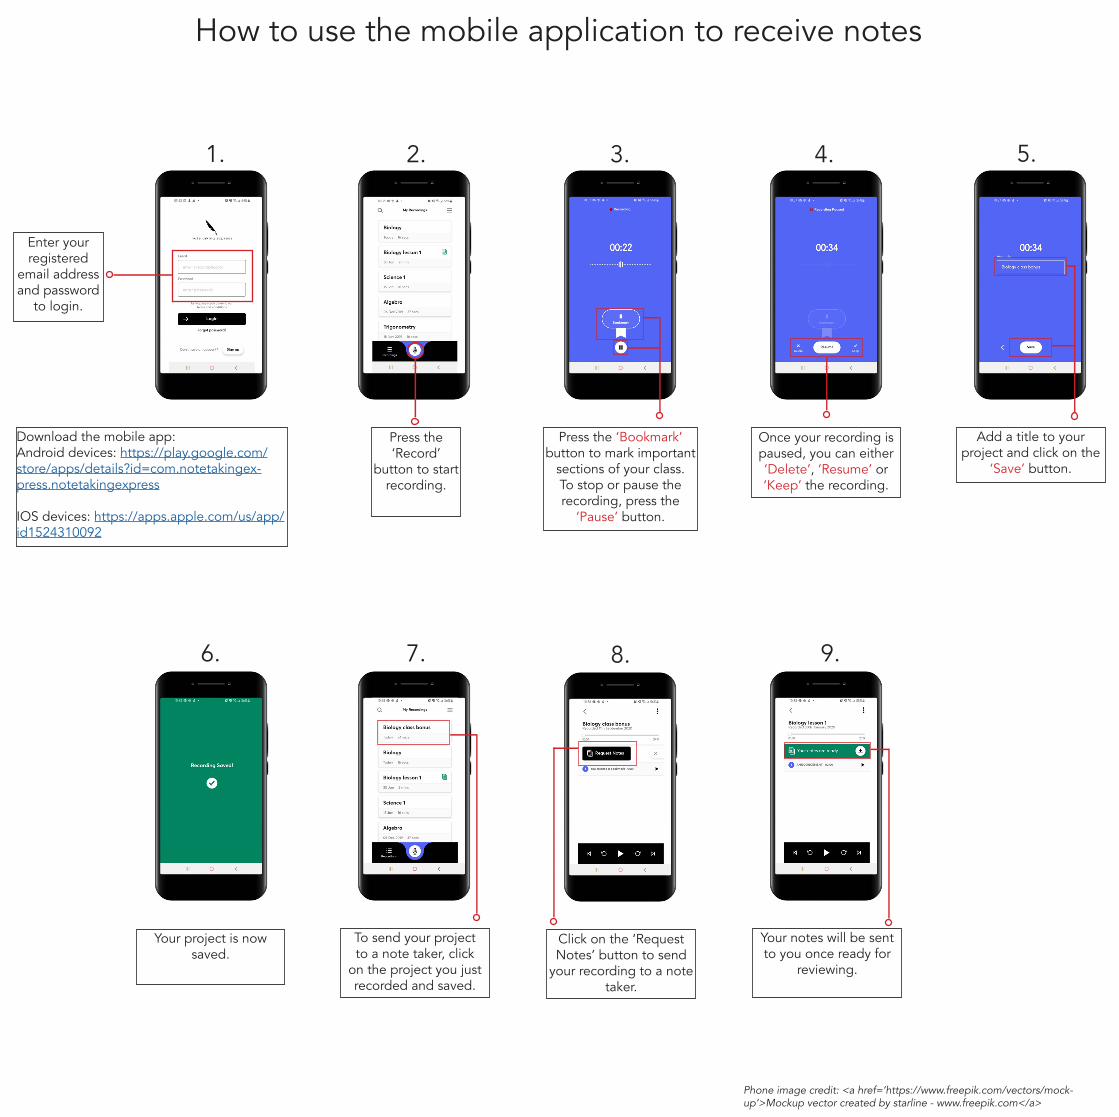
How to use the mobile application to receive notes
1. 2. 3.
Download the mobile app:Android devices: https://play.google.com/store/apps/details?id=com.notetakingex-press.notetakingexpress
IOS devices: https://apps.apple.com/us/app/id1524310092
Enter your registered
email address and password
to login.
Press the ‘Record’
button to start recording.
Press the ‘Bookmark’ button to mark important
sections of your class.To stop or pause the recording, press the
‘Pause’ button.
4.
Once your recording is paused, you can either ‘Delete’, ‘Resume’ or ‘Keep’ the recording.
5.
Add a title to your project and click on the
‘Save’ button.
Your project is now saved.
To send your project to a note taker, click
on the project you just recorded and saved.
Click on the ‘Request Notes’ button to send
your recording to a note taker.
Your notes will be sent to you once ready for
reviewing.
6. 8.7. 9.

How to record an in-person class from the Note Taking Express hub?
1.
2.
3.
4.
5.
After logging in, please click on the ‘Start Recording’ button to record
the in-person class.
Click on the ‘Start Recording Button’ to record lectures.
You can bookmark important sections of the class by clicking on the ‘Create
Bookmarks Button’.Start Recording
Button
Create Bookmarks
button
Click on the ‘Stop Recording Button’ to finish recording class lectures.
Once done, click on the save button.
Start/Stop Recording Button
While saving your class recordings, please ensure to give it a title, assign a subject, assign a category and
tick the ‘Send my recording to a note taker’ box.You can also attach any support material if you want.
Click the ‘Save’ button.
Also, just to be fully sure your notes have been sent to the note taker, please click on the ‘My Projects’ button
to check the status of your recordings.
If you see an orange clock in the status column, that means your notes have been sent and are being
worked on.If the send button is highlighted, it means your
recording has not been sent. If you see this symbol, please click on it to send your file to the note taker.
6.
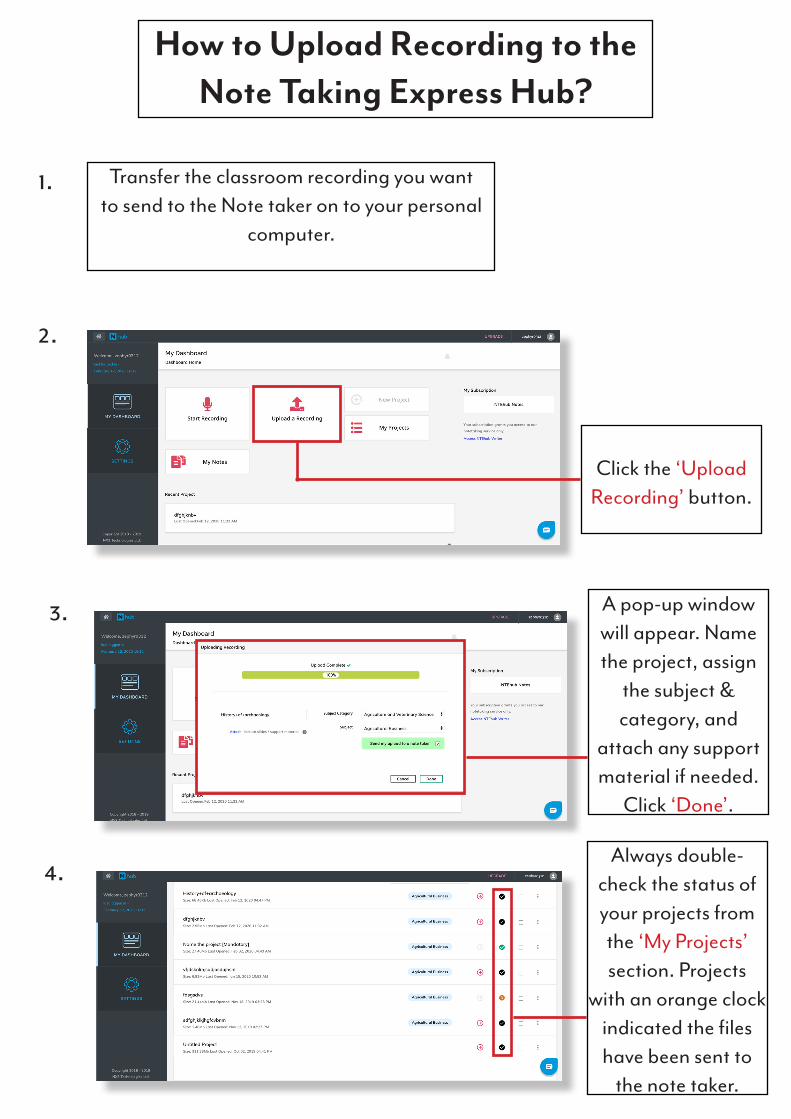
How to Upload Recording to the Note Taking Express Hub?
1. Transfer the classroom recording you want to send to the Note taker on to your personal
computer.
2.
Click the ‘Upload Recording’ button.
3. A pop-up window will appear. Name the project, assign
the subject & category, and
attach any support material if needed.
Click ‘Done’.
4.Always double-
check the status of your projects from the ‘My Projects’ section. Projects
with an orange clock indicated the files have been sent to
the note taker.

How to download notes from the Note Taking Express Hub?
After logging in, please click on the ‘My Notes’ button.
You will receive an email once your notes are ready and have been sent back. However, we encourage students to keep checking their folders to avoid any delays.
Select the circular red icon with a downward-facing arrow to
download the notes.The green tick indicated that your notes are ready and available for
downloading.
It is also possible to download a folder containing multiple note files. The same method of downloading applies. The folder of notes will be
downloaded as ZIP file. The user will need to be able to open a ZIP file to
access their note files.
1.
2.
3.
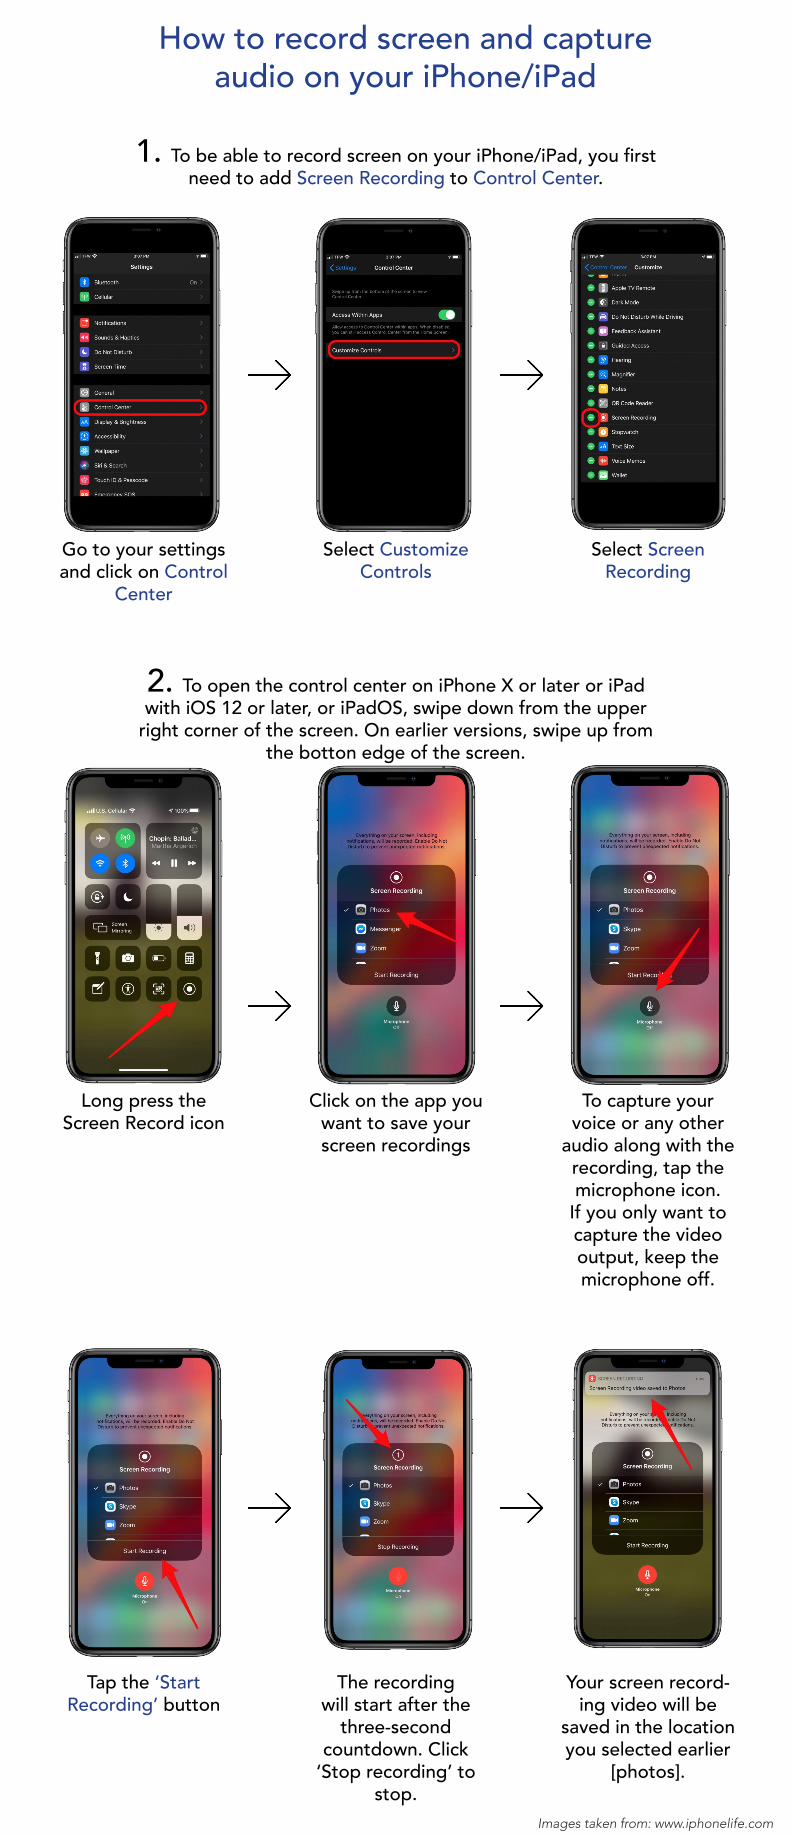
How to record screen and capture audio on your iPhone/iPad
1. To be able to record screen on your iPhone/iPad, you first need to add Screen Recording to Control Center.
Go to your settings and click on Control
Center
Select Customize Controls
Select Screen Recording
2. To open the control center on iPhone X or later or iPad with iOS 12 or later, or iPadOS, swipe down from the upper
right corner of the screen. On earlier versions, swipe up from the botton edge of the screen.
Long press the Screen Record icon
Click on the app you want to save your screen recordings
To capture your voice or any other
audio along with the recording, tap the microphone icon.
If you only want to capture the video output, keep the microphone off.
Tap the ‘Start Recording’ button
The recording will start after the
three-second countdown. Click
‘Stop recording’ to stop.
Your screen record-ing video will be
saved in the location you selected earlier
[photos].
Images taken from: www.iphonelife.com

How to record online classes on your MacBook and send it to a note taker
1. Press Shift - Command - 5 on your keyboard
In order to send your class recording to a note taker, you’ll have to first record the class by
recording your screen.
2. From the onscreen controls menu, select the portion you want to record.
Click this to record the whole screen
Click here to record a selected portion
of the screen
3. Click on ‘options’ to ensure you’ve turned on ‘MacBook Air Microphone’.
4. To stop recording, press Control - Command - Escor click the stop button at the top right corner of the menu bar.
Click ‘Record’ to start recording
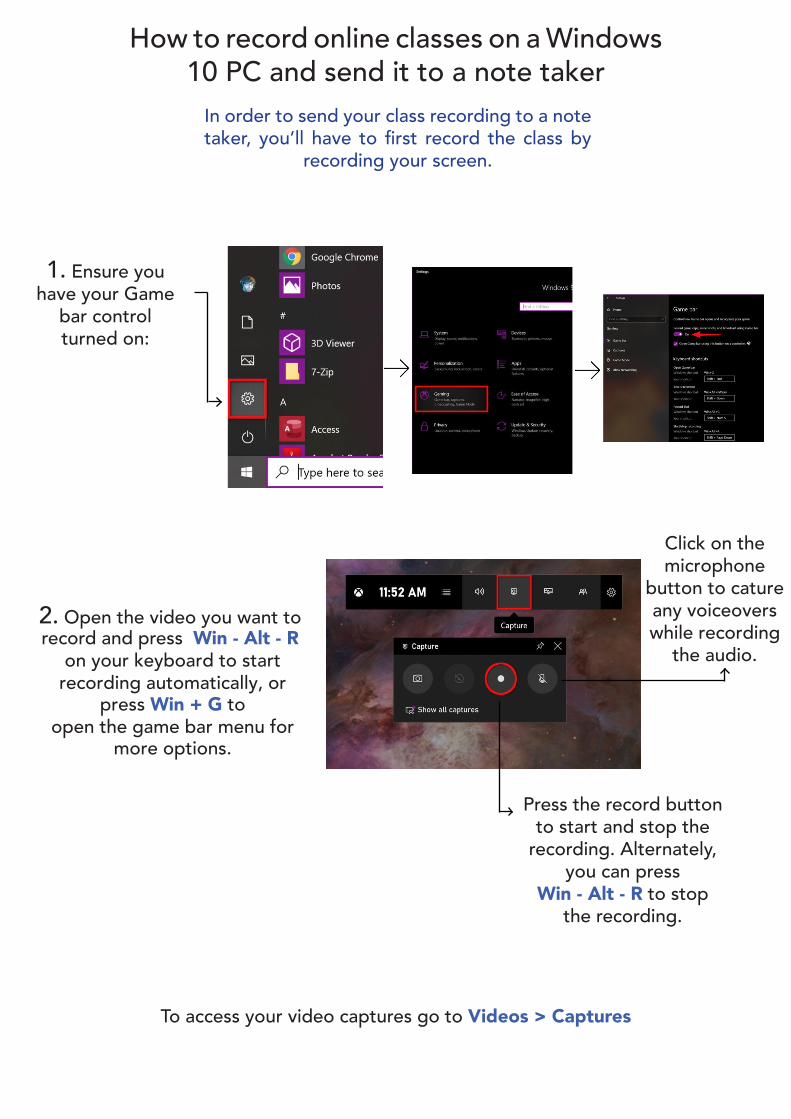
How to record online classes on a Windows 10 PC and send it to a note taker
In order to send your class recording to a note taker, you’ll have to first record the class by
recording your screen.
1. Ensure youhave your Game
bar control turned on:
2. Open the video you want torecord and press Win - Alt - R
on your keyboard to start recording automatically, or
press Win + G to open the game bar menu for
more options.
Press the record button to start and stop the
recording. Alternately, you can press
Win - Alt - R to stop the recording.
To access your video captures go to Videos > Captures
Click on the microphone
button to cature any voiceovers while recording
the audio.

How to attach support material to your projects after saving them
After you log in, click on the ‘My Projects’ button on your
dashboard.
Click the ‘Options Icon’ and then select the ‘Edit’ option from the
pop-up menu box.
A pop-up window will appear. Click the ‘Attach’ button.
A pop-up window will appear. Select the file you want to attach.
You can attach a maximum of three files. Click the ‘Open’
button.
Click on ‘Done’.
Click on the send button to send your projects along with the
attachments to the notetaker.
1.
2.
3.
4.
5.
6.