implementing laravel
TRANSCRIPT

Implementing Laravel
Chris Fidao
This book is for sale at http://leanpub.com/implementinglaravel
This version was published on 2013-09-12
This is a Leanpub book. Leanpub empowers authors and publishers with the Lean Publishingprocess. Lean Publishing is the act of publishing an in-progress ebook using lightweight tools andmany iterations to get reader feedback, pivot until you have the right book and build traction onceyou do.
©2013 Chris Fidao
Contents
Thanks . . . . . . . . . . . . . . . . . . . . . . . . . . . . . . . . . . . . . . . . . . . . . . . i
Introduction . . . . . . . . . . . . . . . . . . . . . . . . . . . . . . . . . . . . . . . . . . . ii
Who Is This For? . . . . . . . . . . . . . . . . . . . . . . . . . . . . . . . . . . . . . . . . . iiiWho Will Get the Most Benefit? . . . . . . . . . . . . . . . . . . . . . . . . . . . . . . . . iiiWhat To Know Ahead of Time . . . . . . . . . . . . . . . . . . . . . . . . . . . . . . . . . iii
A Note on Opinions . . . . . . . . . . . . . . . . . . . . . . . . . . . . . . . . . . . . . . . . iv
SOLID . . . . . . . . . . . . . . . . . . . . . . . . . . . . . . . . . . . . . . . . . . . . . . . . 1
Core Concepts . . . . . . . . . . . . . . . . . . . . . . . . . . . . . . . . . . . . . . . . . 3
The Container . . . . . . . . . . . . . . . . . . . . . . . . . . . . . . . . . . . . . . . . . . . 4Basic Usage . . . . . . . . . . . . . . . . . . . . . . . . . . . . . . . . . . . . . . . . . . . 4Getting More Advanced . . . . . . . . . . . . . . . . . . . . . . . . . . . . . . . . . . . . 5Inversion of Control . . . . . . . . . . . . . . . . . . . . . . . . . . . . . . . . . . . . . . . 5Real-World Usage . . . . . . . . . . . . . . . . . . . . . . . . . . . . . . . . . . . . . . . . 7
Dependency Injection . . . . . . . . . . . . . . . . . . . . . . . . . . . . . . . . . . . . . . . 9What is Dependency Injection? . . . . . . . . . . . . . . . . . . . . . . . . . . . . . . . . 9Adding Controller Dependencies . . . . . . . . . . . . . . . . . . . . . . . . . . . . . . . . 9Interfaces as Dependencies . . . . . . . . . . . . . . . . . . . . . . . . . . . . . . . . . . . 11Why Dependency Injection? . . . . . . . . . . . . . . . . . . . . . . . . . . . . . . . . . . 13Wrapping Up . . . . . . . . . . . . . . . . . . . . . . . . . . . . . . . . . . . . . . . . . . 16
Setting Up Laravel . . . . . . . . . . . . . . . . . . . . . . . . . . . . . . . . . . . . . . 17
The Sample Application . . . . . . . . . . . . . . . . . . . . . . . . . . . . . . . . . . . . . . 18Database . . . . . . . . . . . . . . . . . . . . . . . . . . . . . . . . . . . . . . . . . . . . . 18Models . . . . . . . . . . . . . . . . . . . . . . . . . . . . . . . . . . . . . . . . . . . . . . 18Relationships . . . . . . . . . . . . . . . . . . . . . . . . . . . . . . . . . . . . . . . . . . 19
CONTENTS
Testability and Maintainability . . . . . . . . . . . . . . . . . . . . . . . . . . . . . . . . . 19Architectural Notes . . . . . . . . . . . . . . . . . . . . . . . . . . . . . . . . . . . . . . . 19
Installation . . . . . . . . . . . . . . . . . . . . . . . . . . . . . . . . . . . . . . . . . . . . . 21Install Composer . . . . . . . . . . . . . . . . . . . . . . . . . . . . . . . . . . . . . . . . 21Create a New Project . . . . . . . . . . . . . . . . . . . . . . . . . . . . . . . . . . . . . . 21Config . . . . . . . . . . . . . . . . . . . . . . . . . . . . . . . . . . . . . . . . . . . . . . 22Wrapping Up . . . . . . . . . . . . . . . . . . . . . . . . . . . . . . . . . . . . . . . . . . 25
Application Setup . . . . . . . . . . . . . . . . . . . . . . . . . . . . . . . . . . . . . . . . . 26Setting Up the Application Library . . . . . . . . . . . . . . . . . . . . . . . . . . . . . . . 26Autoloading . . . . . . . . . . . . . . . . . . . . . . . . . . . . . . . . . . . . . . . . . . . 27Wrapping Up . . . . . . . . . . . . . . . . . . . . . . . . . . . . . . . . . . . . . . . . . . 28
Useful Patterns . . . . . . . . . . . . . . . . . . . . . . . . . . . . . . . . . . . . . . . . . 29
The Repository Pattern . . . . . . . . . . . . . . . . . . . . . . . . . . . . . . . . . . . . . . 30What Is It? . . . . . . . . . . . . . . . . . . . . . . . . . . . . . . . . . . . . . . . . . . . . 30Why Do We Use It? . . . . . . . . . . . . . . . . . . . . . . . . . . . . . . . . . . . . . . . 30Example . . . . . . . . . . . . . . . . . . . . . . . . . . . . . . . . . . . . . . . . . . . . . 32
Caching with the Repository Pattern . . . . . . . . . . . . . . . . . . . . . . . . . . . . . . 43What Is It? . . . . . . . . . . . . . . . . . . . . . . . . . . . . . . . . . . . . . . . . . . . . 43Why Do We Use It? . . . . . . . . . . . . . . . . . . . . . . . . . . . . . . . . . . . . . . . 43Example . . . . . . . . . . . . . . . . . . . . . . . . . . . . . . . . . . . . . . . . . . . . . 43
Validation as a Service . . . . . . . . . . . . . . . . . . . . . . . . . . . . . . . . . . . . . . 55What Is It? . . . . . . . . . . . . . . . . . . . . . . . . . . . . . . . . . . . . . . . . . . . . 55Why Do We Use It? . . . . . . . . . . . . . . . . . . . . . . . . . . . . . . . . . . . . . . . 55Example . . . . . . . . . . . . . . . . . . . . . . . . . . . . . . . . . . . . . . . . . . . . . 55Restructuring . . . . . . . . . . . . . . . . . . . . . . . . . . . . . . . . . . . . . . . . . . 57What Did We Gain? . . . . . . . . . . . . . . . . . . . . . . . . . . . . . . . . . . . . . . . 63
Form processing . . . . . . . . . . . . . . . . . . . . . . . . . . . . . . . . . . . . . . . . . . 64What Is It? . . . . . . . . . . . . . . . . . . . . . . . . . . . . . . . . . . . . . . . . . . . . 64Where Do We Use It? . . . . . . . . . . . . . . . . . . . . . . . . . . . . . . . . . . . . . . 64Example . . . . . . . . . . . . . . . . . . . . . . . . . . . . . . . . . . . . . . . . . . . . . 64Restructuring . . . . . . . . . . . . . . . . . . . . . . . . . . . . . . . . . . . . . . . . . . 65Heavy Lifting . . . . . . . . . . . . . . . . . . . . . . . . . . . . . . . . . . . . . . . . . . 69Wrapping Up . . . . . . . . . . . . . . . . . . . . . . . . . . . . . . . . . . . . . . . . . . 72The Final Results . . . . . . . . . . . . . . . . . . . . . . . . . . . . . . . . . . . . . . . . 73What Did We Gain? . . . . . . . . . . . . . . . . . . . . . . . . . . . . . . . . . . . . . . . 76
Error Handling . . . . . . . . . . . . . . . . . . . . . . . . . . . . . . . . . . . . . . . . . . . 77

CONTENTS
Using Packages . . . . . . . . . . . . . . . . . . . . . . . . . . . . . . . . . . . . . . . . . 83
Using a Package: Notifications . . . . . . . . . . . . . . . . . . . . . . . . . . . . . . . . . . 84Setup . . . . . . . . . . . . . . . . . . . . . . . . . . . . . . . . . . . . . . . . . . . . . . . 84Implementation . . . . . . . . . . . . . . . . . . . . . . . . . . . . . . . . . . . . . . . . . 85Tying it Together . . . . . . . . . . . . . . . . . . . . . . . . . . . . . . . . . . . . . . . . 87In Action . . . . . . . . . . . . . . . . . . . . . . . . . . . . . . . . . . . . . . . . . . . . . 89What Did We Gain? . . . . . . . . . . . . . . . . . . . . . . . . . . . . . . . . . . . . . . . 90
Conclusion . . . . . . . . . . . . . . . . . . . . . . . . . . . . . . . . . . . . . . . . . . . . 91
Review . . . . . . . . . . . . . . . . . . . . . . . . . . . . . . . . . . . . . . . . . . . . . . . 92Installation . . . . . . . . . . . . . . . . . . . . . . . . . . . . . . . . . . . . . . . . . . . . 92Application Setup . . . . . . . . . . . . . . . . . . . . . . . . . . . . . . . . . . . . . . . . 92Repository Pattern . . . . . . . . . . . . . . . . . . . . . . . . . . . . . . . . . . . . . . . 92Caching In the Repository . . . . . . . . . . . . . . . . . . . . . . . . . . . . . . . . . . . 92Validation . . . . . . . . . . . . . . . . . . . . . . . . . . . . . . . . . . . . . . . . . . . . 92Form Processing . . . . . . . . . . . . . . . . . . . . . . . . . . . . . . . . . . . . . . . . . 92Error Handling . . . . . . . . . . . . . . . . . . . . . . . . . . . . . . . . . . . . . . . . . 92Third Party Libraries . . . . . . . . . . . . . . . . . . . . . . . . . . . . . . . . . . . . . . 93
What Did You Gain? . . . . . . . . . . . . . . . . . . . . . . . . . . . . . . . . . . . . . . . 94The Future . . . . . . . . . . . . . . . . . . . . . . . . . . . . . . . . . . . . . . . . . . . . 94
ThanksThanks to Natalie for her patience, my reviewers for helping make this so much better and the teamat Digital Surgeons for their support (and Gumby¹)!
¹http://gumbyframework.com

Introduction
Who Is This For?Who Will Get the Most Benefit?
This book is written for those who know the fundamentals of Laravel and are looking to see moreadvanced examples of implementing their knowledge in a testable and maintainable manner.
From the lessons here, you will see how to apply architectural concepts to Laravel in a variety ofways, with the hope that you can use and adapt them for your own needs.
What To Know Ahead of Time
We all have varying levels of knowledge. This book is written for those who are familiar with Laravel4 and its core concepts. It therefore assumes some knowledge of the reader.
Taylor Otwell’s book Laravel: From Apprentice to Artisan² is a great prerequisite. Although I’ll coverthese on a basic level, readers will hopefully already have a basic understanding of the principles ofSOLID and Laravel’s IoC container.
²https://leanpub.com/laravel

A Note on OpinionsKnowing the benefits (and pitfalls!) of Repository, Dependency Injection, Container, Service Locatorpatterns and other tools from our architectural tool set can be both liberating and exciting.
The use of those tools, however, can be plagued with unexpected and often nuanced issues.
As such, there are many opinions about how to go about crafting “good code” with such tools.
As I use many real examples in this book, I have implicitly (and sometimes explicitly!) included myown opinions in this book. Always, however, inform your own opinion with both what you readand your own experience!
“When all you have is a hammer…”Overuse of any of these tools can cause it’s own issues. The chapters here are examples ofhow you can implement the architectural tools available to us. Knowing when not to usethem is also an important decision to keep in mind.
SOLIDSince I’ll mention SOLID principles in passing throughout this book, I’ll include a very briefexplanation of them here, mostly taken from the Wikipedia entry³ with some extra explanationin context of Laravel.
Single Responsibility Principle
A class (or unit of code) should have one responsibility.
Open/Closed Principle
A class should be open for extension but closed for modification.
You can extend a class or implement and interface, but you should not be able to modify a classdirectly. This means you should extend a class and use the new extension rather than change a classdirectly.
Additionally, this means setting class attributes and methods as private or protected properly so theycannot be modified by external code.
Liskov Substitution Principle
Objects in a program should be replaceable with instances of their subtypes without altering thecorrectness of that program.
In PHP, this often means creating interfaces for your code to implement. You can then change(switch-out) implementations of the interfaces, Doing so should be possible without having tochange how your application code interacts with the implementation. The interface serves as acontract, guaranteeing that certain methods will be available.
Interface Segregation Principle
Many client-specific interfaces are better than one general-purpose interface.
In general, it’s preferable to create an interface and implement it many times over than create ageneral-purpose class which attempts to work in all situations.
³http://en.wikipedia.org/wiki/SOLID_(object-oriented_design)
SOLID 2
Dependency Inversion Principle
One should depend upon abstractions rather than concrete classes.
You should define class dependencies as an interface rather than a concrete class. This allows youto switch an implementation of the interface out without having to change the class using thedependency.
Core Concepts
Throughout this book, we’ll be making use of some of Laravel’s more powerful features.
Before jumping in, it’s important to at least know about Laravel’s container and how it allows us tomore easily use Dependency Injection.
This chapter will cover Laravel’s container, its use of Inversion of Control, and DependencyInjection.
The ContainerThe Illuminate\Foundation\Application class ties all of Laravel together. This class is a container- it can “contain” data, objects, classes and even closures.
Basic Usage
To see how the container works, let’s run through an exercise in our routes file.
Laravel’s container implements ArrayAccess, and so we know we can access it like an array. Herewe’ll see how we can access it like an associative array.
File: app/routes.php
1 Route::get('/container', function()2 {3 // Get Application instance4 $app = App::getFacadeRoot();56 $app['some_array'] = array('foo' => 'bar');78 var_dump($app['some_array']);9 });
Going to the /container route, We’ll get this result:
1 array (size=1)2 'foo' => string 'bar' (length=3)
So, we can see that the Application, while still a class with attributes and methods, is also accessiblelike an array!
FacadesConfused as to what App::getFacadeRoot() is doing? The App class is a Facade. This allowsus to use it anywhere, accessing it in a static manner. However, it’s actually not a staticclass. getFacadeRoot will get the real instance of the class, which we needed to do in orderto use it like an array in this example.
See this and other Facades in the Illuminate\Support\Facades namespace.
The Container 5
Getting More Advanced
Now, let’s get a little fancier with the container and assign a closure:
File: app/routes.php
1 Route::get('/container', function()2 {3 // Get Application instance4 $app = App::getFacadeRoot();56 $app['say_hi'] = function()7 {8 return "Hello, World!";9 };1011 return $app['say_hi'];12 });
Once again, run the /container route and we’ll see:
1 Hello, World!
While seemingly simple, this is actually quite powerful. This is, in fact, the basis for how the separateIlluminate packages interact with each other in order to make up the Laravel framework.
Later we’ll see how Service Providers bind items to the container, acting as the glue between thevarious Illuminate packages.
Inversion of Control
Laravel’s Container class has more up its sleeve than simply masquerading as an array. It also canfunction as an Inversion of Control (IoC) container.
Inversion of Control is a technique which let’s us define how our application should implement aclass or interface. For instance, if our application has a dependency FooInterface, and we want touse an implementing class ConcreteFoo, the IoC container is where we define that implementation.
Let’s see a basic example of how that works using our /container route once again.
First, we’ll setup some classes - an interface and an implementing class. For simplicity, these can goright into the app/routes.php file:
The Container 6
File: app/routes.php
1 interface GreetableInterface {23 public function greet();45 }67 class HelloWorld implements GreetableInterface {89 public function greet()10 {11 return 'Hello, World!';12 }13 }
Now, let’s use these classes with our container to see what we can do. First, I’ll introduce the conceptof “binding”.
File: app/routes.php
1 Route::get('/container', function()2 {3 // Get Application instance4 $app = App::getFacadeRoot();56 $app->bind('GreetableInterface', function()7 {8 return new HelloWorld;9 });1011 $greeter = $app->make('GreetableInterface');1213 return $greeter->greet();14 });
Instead of using the array-accessible $app['GreetableInterface'], we used the bind() method.
This is using Laravel’s IoC container to return the class HelloWorld anytime it’s asked forGreetableInterface.
The Container 7
In this way, we can “swap out” implementations! For example, instead of HelloWorld, I couldmake a GoodbyeCruelWorld implementation and decide to have the container return it wheneverGreetableInterface was asked for.
This goes towards maintainability in our applications. Using the container, we can (ideally) swapout implementations in one location without affecting other areas of our application code.
Real-World Usage
Where do you put all these bindings in your applications? If you don’t want to litter your start.php,filters.php, routes.php and other bootstrapping files with bindings, then you can use ServiceProvider classes.
Service Providers are created specifically to register bindings to Laravel’s container. In fact, nearlyall Illuminate packages use a Service Provider to do just that.
Let’s see an example of how Service Providers are used within an Illuminate package. We’ll examinethe Pagination package.
First, here is the Pagination Service Provider’s register() method:
Illuminate\Pagination\PaginationServiceProvider.php
1 public function register()2 {3 $this->app['paginator'] = $this->app->share(function($app)4 {5 $paginator = new Environment(6 $app['request'],7 $app['view'],8 $app['translator']9 );1011 $paginator->setViewName(12 $app['config']['view.pagination']13 );1415 return $paginator;16 });17 }
The register() method is automatically called on each Service Provider specified withinthe app/config/app.php file.
The Container 8
So, what’s going on in this register() method? First and foremost, it registers the “paginator” in-stance to the container. This will make $app['paginator'] and App::make('paginator'] availablefor use by other areas of the application.
Next, it’s defining the ‘paginator’ instance as the returned result of a closure, just as we did in the‘say_hi’ example.
Don’t be confused by the use of $this->app->share(). The Share method sim-ply provides a way for the closure to be used as a singleton, similar to calling$this->app->instance('paginator', new Environment).
This closure creates a new Pagination\Environment object, sets a configuration value on it andreturns it.
You likely noticed that the Service Provider uses other application bindings! The PaginationEnvironmentclass clearly takes some dependencies in its constructor method - a request object $app['request'],a view object $app['view'], and a translator $app['translator']. Luckily, those bindings arecreated in other packages of Illuminate, defined in various Service Providers.
We can see, then, how the various Illuminate packages interact with each other. Because they arebound to the application container, we can use them in other packages (or our own code!), withoutactually tying our code to a specific class.
Dependency InjectionNow that we see how the container works, let’s see how we can use it to implement DependencyInjection in Laravel.
What is Dependency Injection?
Dependency Injection is the act of adding (injecting) any dependencies into a class, rather thaninstantiating them somewhere within the class code itself. Often, dependencies are defined as type-hinted parameters of a constructor method.
Take this constructor method, for example:
1 public function __construct(HelloWorld $greeter)2 {3 $this->greeter = $greeter;4 }
By type-hinting HelloWorld as a parameter, we’re explicitly stating that an instance of HelloWorldis a class dependency.
This is opposite of direct instantiation:
1 public function __construct()2 {3 $this->greeter = new HelloWorld;4 }
If you find yourself asking why Dependency Injection is used, this Stack Overflow answer虚is a great place to start. I’ll cover some benefits of it in the following examples.
Next, we’ll see an example of Dependency Injection in action, using Laravel’s IoC container.
Adding Controller Dependencies
This is a very common use case within Laravel.
Normally, if we set a controller to expect a class in its constructor method, we also need to add thosedependencies when the class is created. However, what happens when you define a dependency ona Laravel controller? We would need to instantiate the controller somewhere ourselves:
虚http://stackoverflow.com/questions/130794/what-is-dependency-injection
Dependency Injection 10
1 $crtl = new ContainerController( new HelloWorld );
That’s great, but we don’t directly instantiate a controller within Laravel - the router handles it forus.
We can still, however, inject controller dependencies with the use of Laravel’s IoC container!
Keeping the same GreetableInterface and HelloWorld classes from before, let’s now imagine webind our /container route to a controller:
File: app/routes.php
1 interface GreetableInterface {23 public function greet();45 }67 class HelloWorld implements GreetableInterface {89 public function greet()10 {11 return 'Hello, World!';12 }13 }1415 Route::get('/container', 'ContainerController@container);
Now in our new controller, we can set HelloWorld as a parameter in the constructor method:
File: app/controllers/ContainerController.php
1 <?php23 class ContainerController extends BaseController {45 protected $greeter;67 // Class dependency: HelloWorld8 public function __construct(HelloWorld $greeter)9 {10 $this->greeter = $greeter;
Dependency Injection 11
11 }1213 public function container()14 {15 return $this->greeter->greet();16 }1718 }
Now head to your /container route and you should, once again, see:
1 Hello, World!
Note, however, that we did NOT bind anything to the container. It simply “just worked” - an instanceof HelloWorld was passed to the controller!
This is because the IoC container will automatically attempt to resolve any dependency set in theconstructor method of a controller. Laravel will inject specified dependencies for us!
Interfaces as Dependencies
We’re not done, however. Here is what we’re building up to!
What if, instead of specifying HelloWorld as the controller’s dependency, we specified the interfaceGreetableInterface?
Let’s see what that would look like:
File: app/controllers/ContainerController.php
1 <?php23 class ContainerController extends BaseController {45 protected $greeter;67 // Class dependency: GreetableInterface8 public function __construct(GreetableInterface $greeter)9 {10 $this->greeter = $greeter;11 }12
Dependency Injection 12
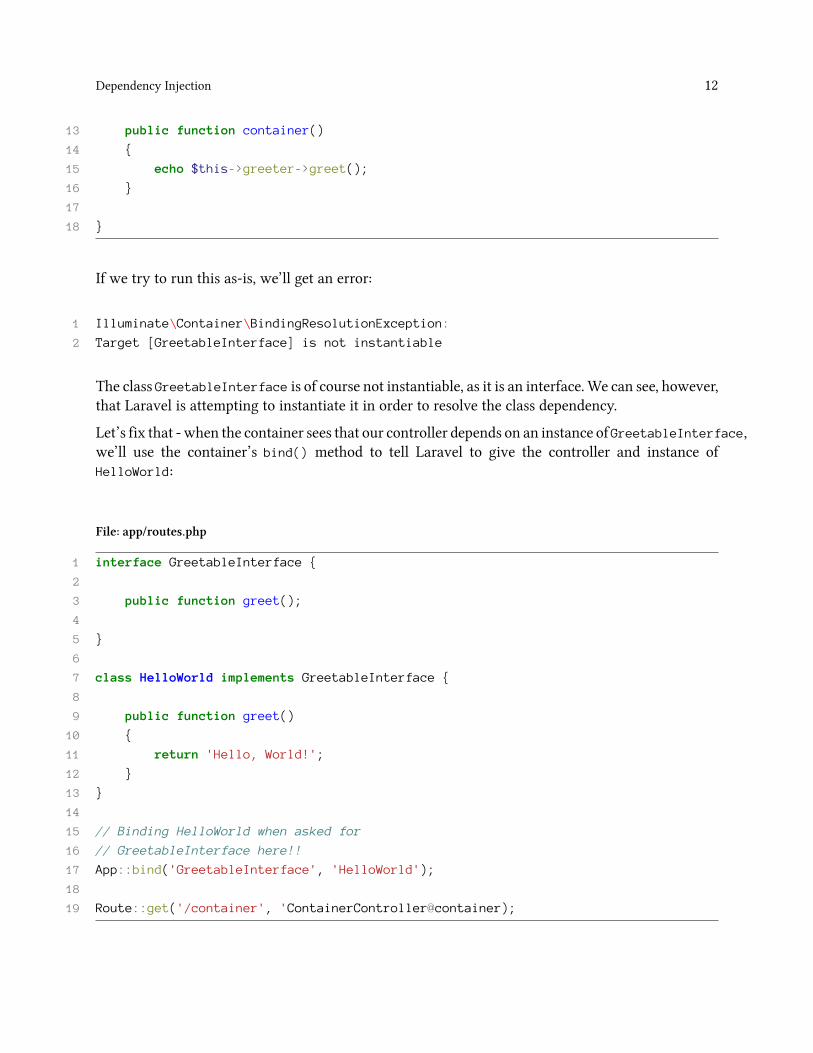
13 public function container()14 {15 echo $this->greeter->greet();16 }1718 }
If we try to run this as-is, we’ll get an error:
1 Illuminate\Container\BindingResolutionException:2 Target [GreetableInterface] is not instantiable
The class GreetableInterface is of course not instantiable, as it is an interface. We can see, however,that Laravel is attempting to instantiate it in order to resolve the class dependency.
Let’s fix that - when the container sees that our controller depends on an instance of GreetableInterface,we’ll use the container’s bind() method to tell Laravel to give the controller and instance ofHelloWorld:
File: app/routes.php
1 interface GreetableInterface {23 public function greet();45 }67 class HelloWorld implements GreetableInterface {89 public function greet()10 {11 return 'Hello, World!';12 }13 }1415 // Binding HelloWorld when asked for16 // GreetableInterface here!!17 App::bind('GreetableInterface', 'HelloWorld');1819 Route::get('/container', 'ContainerController@container);
Dependency Injection 13
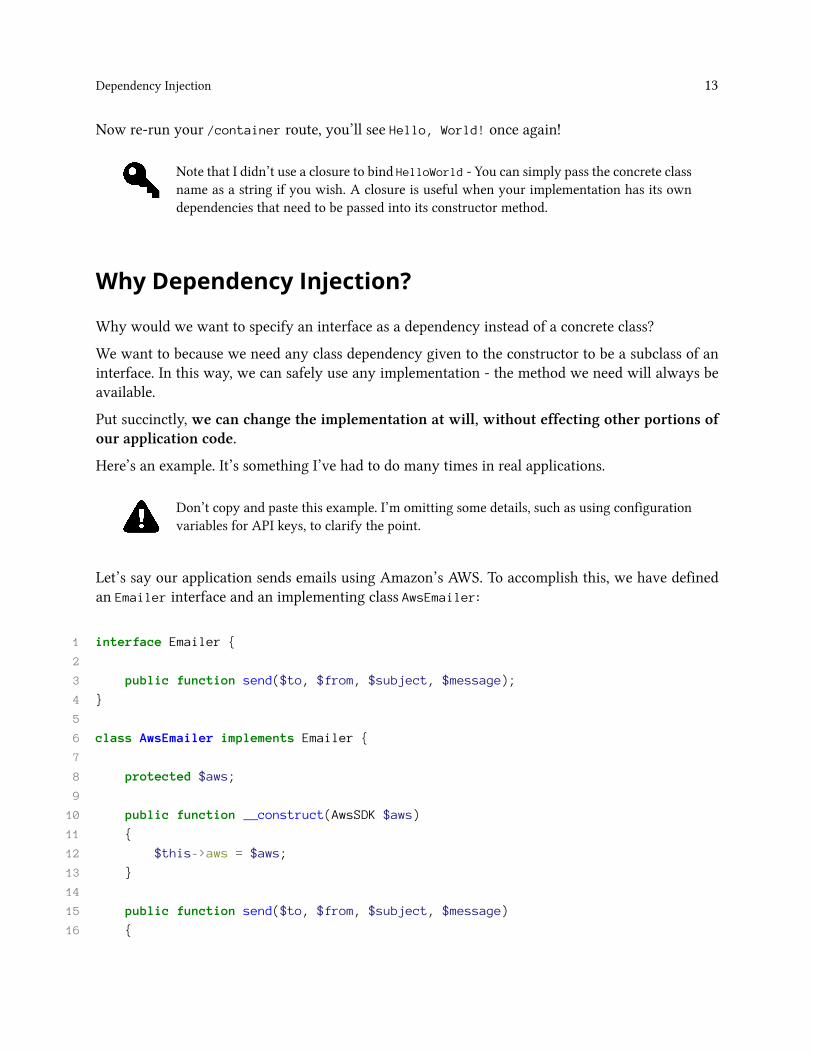
Now re-run your /container route, you’ll see Hello, World! once again!
Note that I didn’t use a closure to bind HelloWorld - You can simply pass the concrete classname as a string if you wish. A closure is useful when your implementation has its owndependencies that need to be passed into its constructor method.
Why Dependency Injection?
Why would we want to specify an interface as a dependency instead of a concrete class?
We want to because we need any class dependency given to the constructor to be a subclass of aninterface. In this way, we can safely use any implementation - the method we need will always beavailable.
Put succinctly, we can change the implementation at will, without effecting other portions ofour application code.
Here’s an example. It’s something I’ve had to do many times in real applications.
Don’t copy and paste this example. I’m omitting some details, such as using configurationvariables for API keys, to clarify the point.
Let’s say our application sends emails using Amazon’s AWS. To accomplish this, we have definedan Emailer interface and an implementing class AwsEmailer:
1 interface Emailer {23 public function send($to, $from, $subject, $message);4 }56 class AwsEmailer implements Emailer {78 protected $aws;910 public function __construct(AwsSDK $aws)11 {12 $this->aws = $aws;13 }1415 public function send($to, $from, $subject, $message)16 {
Dependency Injection 14
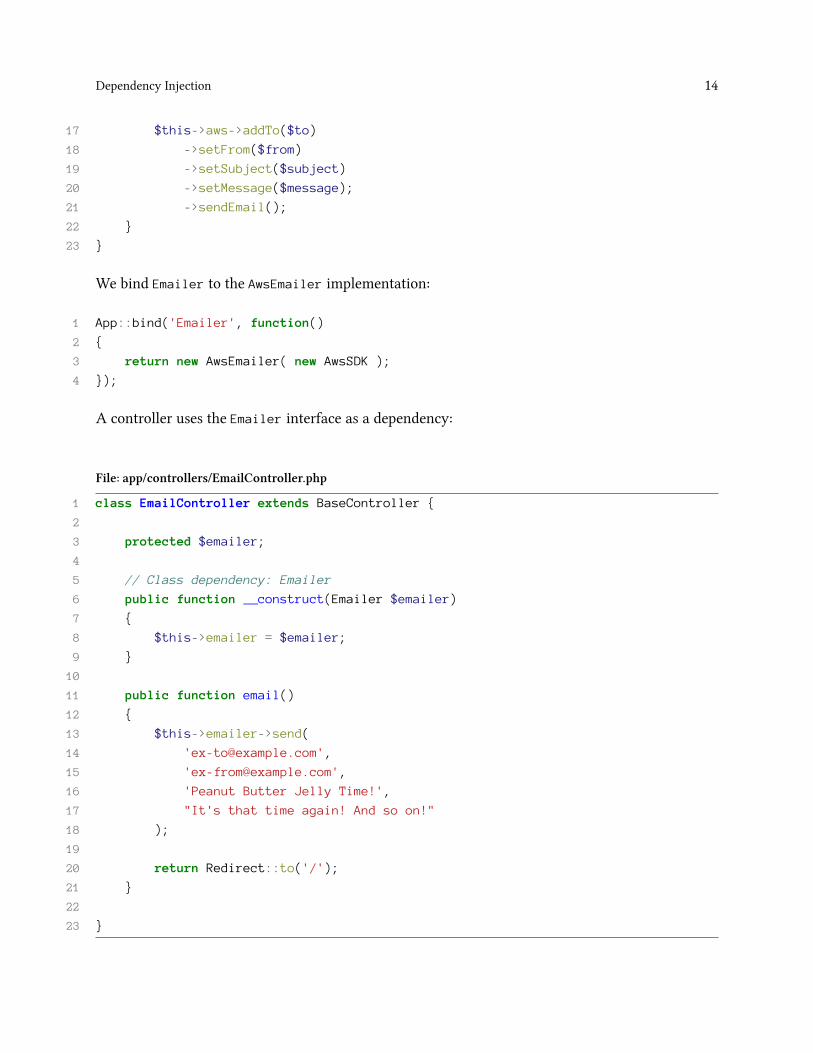
17 $this->aws->addTo($to)18 ->setFrom($from)19 ->setSubject($subject)20 ->setMessage($message);21 ->sendEmail();22 }23 }
We bind Emailer to the AwsEmailer implementation:
1 App::bind('Emailer', function()2 {3 return new AwsEmailer( new AwsSDK );4 });
A controller uses the Emailer interface as a dependency:
File: app/controllers/EmailController.php
1 class EmailController extends BaseController {23 protected $emailer;45 // Class dependency: Emailer6 public function __construct(Emailer $emailer)7 {8 $this->emailer = $emailer;9 }1011 public function email()12 {13 $this->emailer->send(14 '[email protected]',15 '[email protected]',16 'Peanut Butter Jelly Time!',17 "It's that time again! And so on!"18 );1920 return Redirect::to('/');21 }2223 }

Dependency Injection 15
Let’s further pretend that someday down the line, our application grows in scope and needs somemore functionality than AWS provides. After some searching and weighing of options, you decideon SendGrid.
How do you then proceed to change your application over to SendGrid? Because we used interfacesand Laravel’s IoC container, switching to SendGrid is easy!
First, make an implementation of Emailer which uses SendGrid!
1 class SendGridEmailer implements Emailer {23 protected $sendgrid;45 public function __construct(SendGridSDK $sendgrid)6 {7 $this->sendgrid = $sendgrid;8 }910 public function send($to, $from, $subject, $message)11 {12 $mail = $this->sendgrid->mail->instance();1314 $mail->addTo($to)15 ->setFrom($from)16 ->setSubject($subject)17 ->setText( strip_tags($message) )18 ->setHtml($message)19 ->send();2021 $this->sendgrid->web->send($mail);22 }23 }
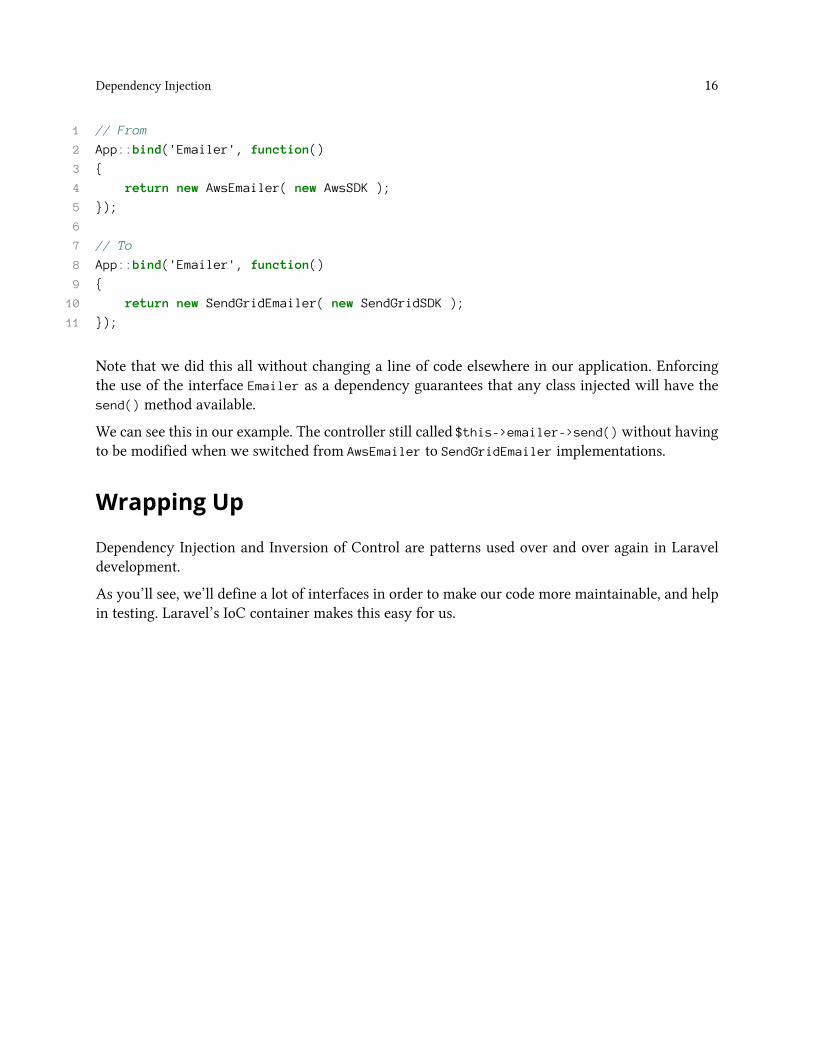
Next, (and lastly!), set the application to use SendGrid rather than Aws. Because we have ourcall to bind() in the IoC container, changing the implementation of Emailer from AwsEmailer toSendGridEmailer is as simple as this one change:
Dependency Injection 16
1 // From2 App::bind('Emailer', function()3 {4 return new AwsEmailer( new AwsSDK );5 });67 // To8 App::bind('Emailer', function()9 {10 return new SendGridEmailer( new SendGridSDK );11 });
Note that we did this all without changing a line of code elsewhere in our application. Enforcingthe use of the interface Emailer as a dependency guarantees that any class injected will have thesend() method available.
We can see this in our example. The controller still called $this->emailer->send() without havingto be modified when we switched from AwsEmailer to SendGridEmailer implementations.
Wrapping Up
Dependency Injection and Inversion of Control are patterns used over and over again in Laraveldevelopment.
As you’ll see, we’ll define a lot of interfaces in order to make our code more maintainable, and helpin testing. Laravel’s IoC container makes this easy for us.

Setting Up Laravel
The Sample ApplicationThis book will use a sample application. We will build upon a simple blog application - everybody’sfavorite weekend learning project.
The application is viewable on Github at fideloper\Implementing-Laravel許. There you can view codeand see working examples from this book.
Here is an overview of some information about the application.
Database
We’ll have a database with the following tables and fields:
• articles - id, user_id, status_id, title, slug, excerpt, content, created_at, updated_at, deleted_at• statuses - id, status, slug, created_at, updated_at• tags - id, tag, slug• articles_tags - article_id, tag_id• users - id, email, password, created_at, updated_at, deleted_at
You’ll find migrations for these tables, as well as some seeds, in the app/database/migrationsdirectory on Github.
Models
Each of the database tables will have a corresponding Eloquent model class, inside of the app/modelsdirectory.
• models/Article.php• models/Status.php• models/Tag.php• models/User.php
許https://github.com/fideloper/implementing-laravel
The Sample Application 19
Relationships
Users can create articles and so there is a “one-to-many” relationship between users and articles;Each user can write multiple articles, but each article only has one user. This relationship is createdwithin both the User and Article models.
Like users, there is a “one to many” relationship between statuses and articles - Each article isassigned a status, and a status can be assigned to many articles.
Finally, the Articles and Tags have a relationship. Each article can have one or many tags. Each tagcan be assigned to one or many articles. Therefore, there is a “many to many” relationship betweenarticles and tags. This relationship is defined within the Article and Tag models, and uses theArticles_Tags pivot table.
Testability and Maintainability
I’ll use the phrase “testable and maintainable” a lot. In most contexts, you can assume:
1. Testable code practices SOLID principles in a way that allows us to unit test - to test onespecific unit of code (or class) without bringing in its dependencies. This is most notable inthe use of Dependency Injection which directly allows the use of mocking to abstract awayclass dependencies.
2. Maintainable code looks to the long-term cost in development time. This means that makingchanges to the code should be easy, event after months or years. Popular examples of achange that should be easy is switching out one email provider for another or one data-storefor another. This is most directly realized through the use of interfaces and making use ofinversion of control.
Architectural Notes
This book will cover creating an application library which contains most application code for thesample blog. The structure of the application library makes some assumptions about how we goabout building the application code.
First, you’ll note that I do not put Controllers into my application code. This is on purpose!
Laravel is a web-framework, designed to handle an HTTP request and route to your applicationcode. The Request, Router and Controller classes are all designed to operate at the HTTP level.
Our application, however, does not need any such requirement. We’re simply writing applicationlogic which revolves around our business goals.

The Sample Application 20
An HTTP request being routed to a controller function can be seen as a convenient way for a requestto reach our application code (we’re all on the internet, after all). However, our application does notnecessarily need to “know” about the code calling our application, or HTTP at all.
This is an extension of the concept “separation of concerns”. While we certainly are unlikely to useour applications out of context of the internet, it is useful to think of your web framework as animplementation detail of your application, rather than the core of it.
Think of it this way: our applications are not an implementation of the Laravel framework. Instead,Laravel is an implementation of our applications.
Taken to an extreme, an application would be able to be implemented by any framework or codecapable of implementing the interfaces we define.
Extremes, however, are not pragmatic, and so we use Laravel to accomplish most of our applicationgoals. Laravel is the means to most of our ends - it does things extremely well!
This also informs the application library structure I build up to in this book. I’ll create a series ofdirectories reflecting application code functions, such as a data repository and cache services. Thesefunctional areas tend to be interfaced, which we implement using various Illuminate packages.
InstallationLet’s start at the beginning.
This chapter will cover how to install Laravel. If you’re reading this, you probably already knowhow to do this! However I feel it’s worth including as I’ll cover some extra steps I take to ward offpotential pitfalls.
Install Composer
Composer is necessary to handle Laravel’s dependencies. I typically install Composer距 globally, soit can be run anywhere on my development machine.
Installing Composer globally in the command line
1 $ curl -sS https://getcomposer.org/installer | php2 // Assumes /usr/local/bin is in your PATH3 $ sudo mv composer.phar /usr/local/bin/composer
Now you can run Composer from anywhere.
Create a New Project
Once installed, we can use Composer to create a new Laravel project. We’ll call our sample project“Implementing Laravel”. Run this command:
Creating a new Laravel project with Composer
1 $ composer create-project laravel/laravel "Implementing Laravel"
This will clone the laravel/laravel project from Github and install its dependencies, as ifyou’ve cloned the git repository and run $ composer install manually. It won’t, however,start a Git repository for you - you’ll have to do that yourself with $ git init.
距http://getcomposer.org/
Installation 22
Config
Next we’ll do some application setup and configuration.
Permissions
Periodically, depending on your development environment, you may find yourself needing to setthe permissions of the app/storage directory. This is where Laravel puts logs, session, caches andother optimizations - php needs to be able to write to this directory.
Making your storage directory world-writable
1 $ chmod -R 0777 app/storage
In production, the web server often runs as user (and group) www-data. Since we don’t necessarilywant to make our files world-writable in production, we can instead make sure they are writable bywww-data specifically.
Making your storage directory production-ready
1 $ chgroup -R www-data app/storage # Change all to group www-data2 $ chmod -R g+w app/storage # Make them group-writable
Environments
Environments can and often should be set differently per server - usually at a minimum you maywant to setup a local development server, a staging server and a production server.
Let’s create a “local” environment. Start by creating a directory app/config/local.
For now, all we need to do is add in our local database connection. Create the file app/config/local/database.php.
Here’s an example of what that might look like. Note that we didn’t copy the complete app/config/database.phpfile, we only defined what values we needed to over-ride for our local environment.

Installation 23
File: app/config/local/database.php
1 <?php23 return array(45 'connections' => array(67 'mysql' => array(8 'driver' => 'mysql',9 'host' => 'localhost',10 'database' => 'implementinglaravel',11 'username' => 'root',12 'password' => 'root',13 'charset' => 'utf8',14 'collation' => 'utf8_unicode_ci',15 'prefix' => '',16 ),1718 )19 );
The next step is to make sure Laravel chooses the “local” environment when we run it from ourdevelopment server. By default, the environment is determined by what URL you use to access theapplication. If your URL is “localhost”, you can set “localhost” as the “machine name” used to specifythe “local” environment:
File: bootstrap/start.php
1 // Assign "local" environment to "localhost"2 $env = $app->detectEnvironment(array(34 'local' => array('localhost'),56 ));78 // Or perhaps any URL ending in .dev:9 $env = $app->detectEnvironment(array(1011 'local' => array('*.dev'),
Installation 24
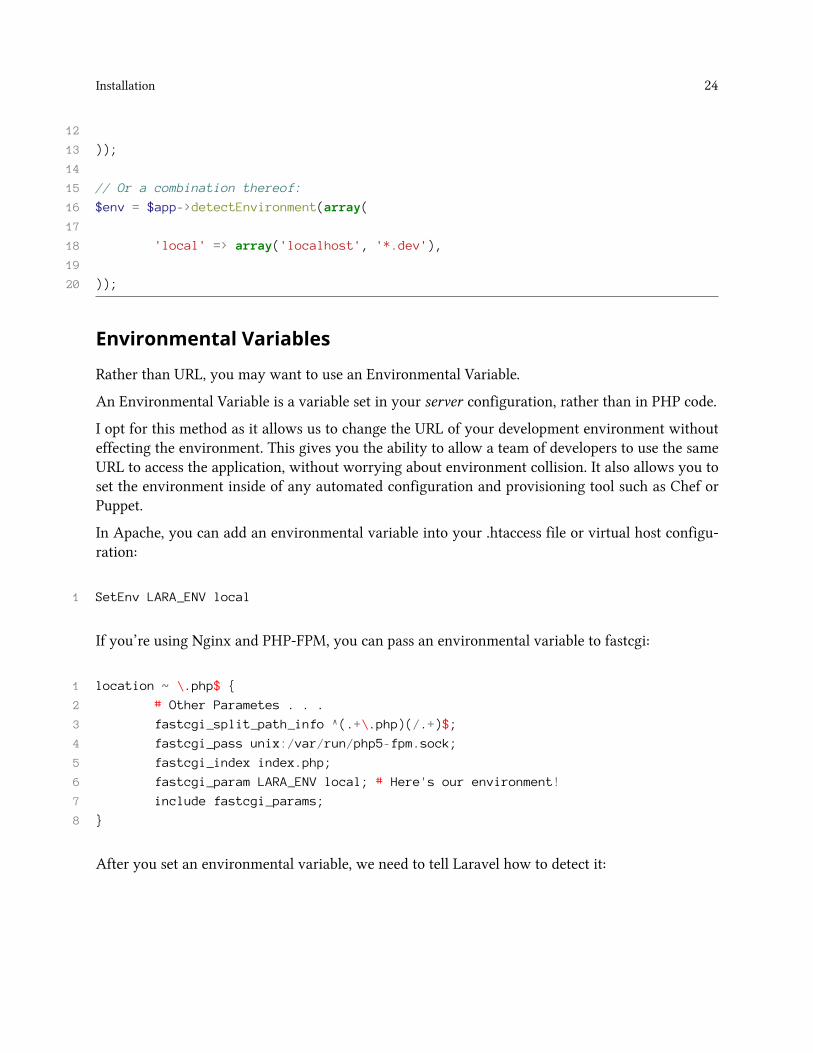
1213 ));1415 // Or a combination thereof:16 $env = $app->detectEnvironment(array(1718 'local' => array('localhost', '*.dev'),1920 ));
Environmental Variables
Rather than URL, you may want to use an Environmental Variable.
An Environmental Variable is a variable set in your server configuration, rather than in PHP code.
I opt for this method as it allows us to change the URL of your development environment withouteffecting the environment. This gives you the ability to allow a team of developers to use the sameURL to access the application, without worrying about environment collision. It also allows you toset the environment inside of any automated configuration and provisioning tool such as Chef orPuppet.
In Apache, you can add an environmental variable into your .htaccess file or virtual host configu-ration:
1 SetEnv LARA_ENV local
If you’re using Nginx and PHP-FPM, you can pass an environmental variable to fastcgi:
1 location ~ \.php$ {2 # Other Parametes . . .3 fastcgi_split_path_info ^(.+\.php)(/.+)$;4 fastcgi_pass unix:/var/run/php5-fpm.sock;5 fastcgi_index index.php;6 fastcgi_param LARA_ENV local; # Here's our environment!7 include fastcgi_params;8 }
After you set an environmental variable, we need to tell Laravel how to detect it:
Installation 25
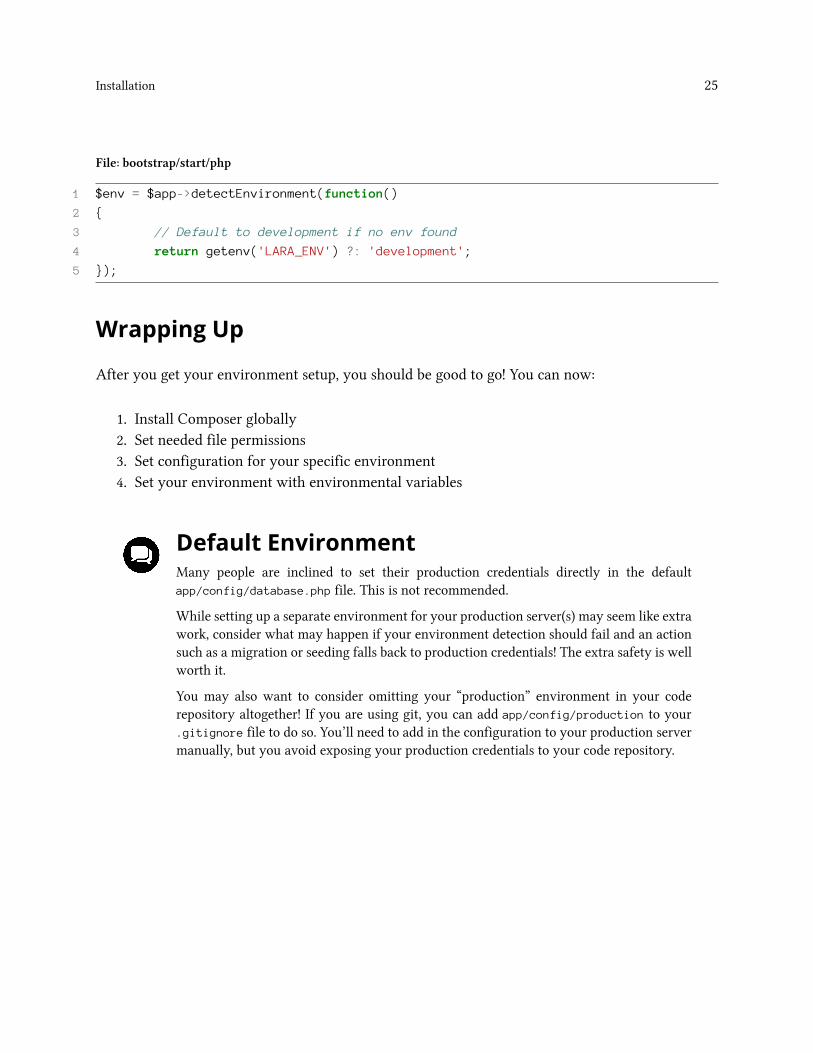
File: bootstrap/start/php
1 $env = $app->detectEnvironment(function()2 {3 // Default to development if no env found4 return getenv('LARA_ENV') ?: 'development';5 });
Wrapping Up
After you get your environment setup, you should be good to go! You can now:
1. Install Composer globally2. Set needed file permissions3. Set configuration for your specific environment4. Set your environment with environmental variables
Default EnvironmentMany people are inclined to set their production credentials directly in the defaultapp/config/database.php file. This is not recommended.
While setting up a separate environment for your production server(s) may seem like extrawork, consider what may happen if your environment detection should fail and an actionsuch as a migration or seeding falls back to production credentials! The extra safety is wellworth it.
You may also want to consider omitting your “production” environment in your coderepository altogether! If you are using git, you can add app/config/production to your.gitignore file to do so. You’ll need to add in the configuration to your production servermanually, but you avoid exposing your production credentials to your code repository.
Application SetupIf you’ve ever asked yourself “Where should I put my code?”, this chapter will answer that question.
Always create an application library.
An application-specific library works well for code which isn’t generic enough to warrant its ownpackage, and also isn’t a direct use of Laravel’s core classes, such as a controller. An example isbusiness logic code or integration of third-party libraries.
Basically, anything that you want to keep out of your controllers (most code!) can belong in yourapplication library.
Setting Up the Application Library
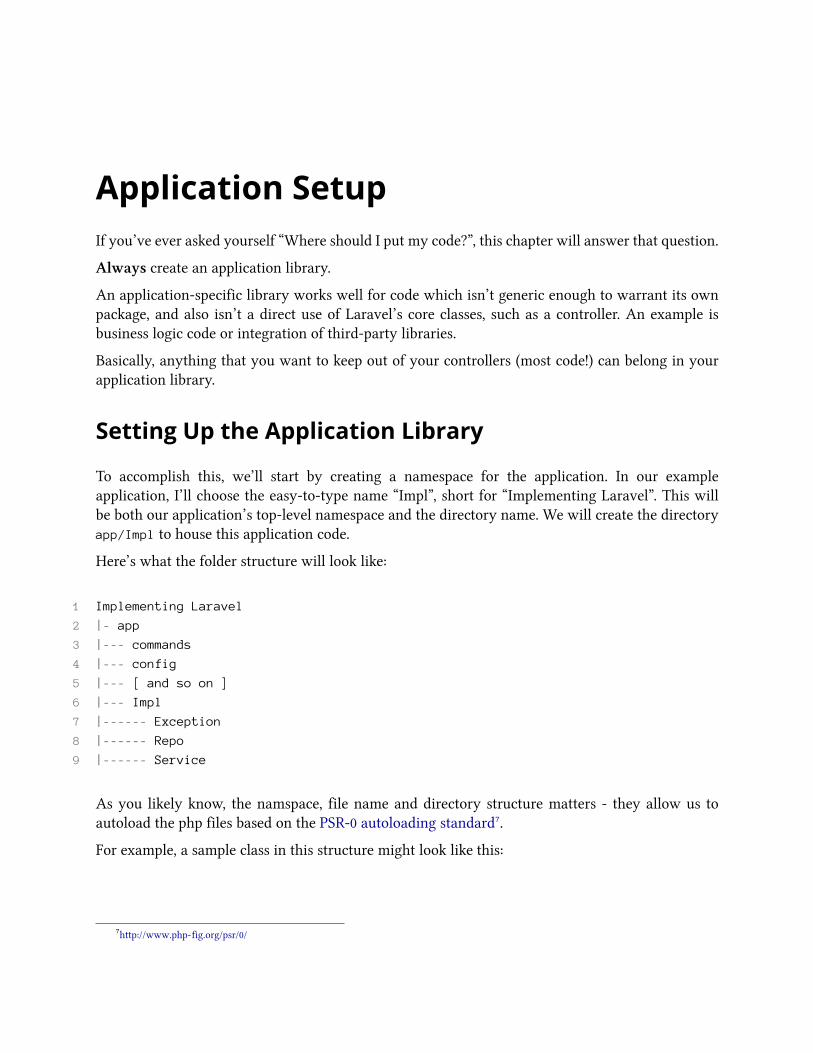
To accomplish this, we’ll start by creating a namespace for the application. In our exampleapplication, I’ll choose the easy-to-type name “Impl”, short for “Implementing Laravel”. This willbe both our application’s top-level namespace and the directory name. We will create the directoryapp/Impl to house this application code.
Here’s what the folder structure will look like:
1 Implementing Laravel2 |- app3 |--- commands4 |--- config5 |--- [ and so on ]6 |--- Impl7 |------ Exception8 |------ Repo9 |------ Service
As you likely know, the namspace, file name and directory structure matters - they allow us toautoload the php files based on the PSR-0 autoloading standard鋸.
For example, a sample class in this structure might look like this:
鋸http://www.php-fig.org/psr/0/
Application Setup 27
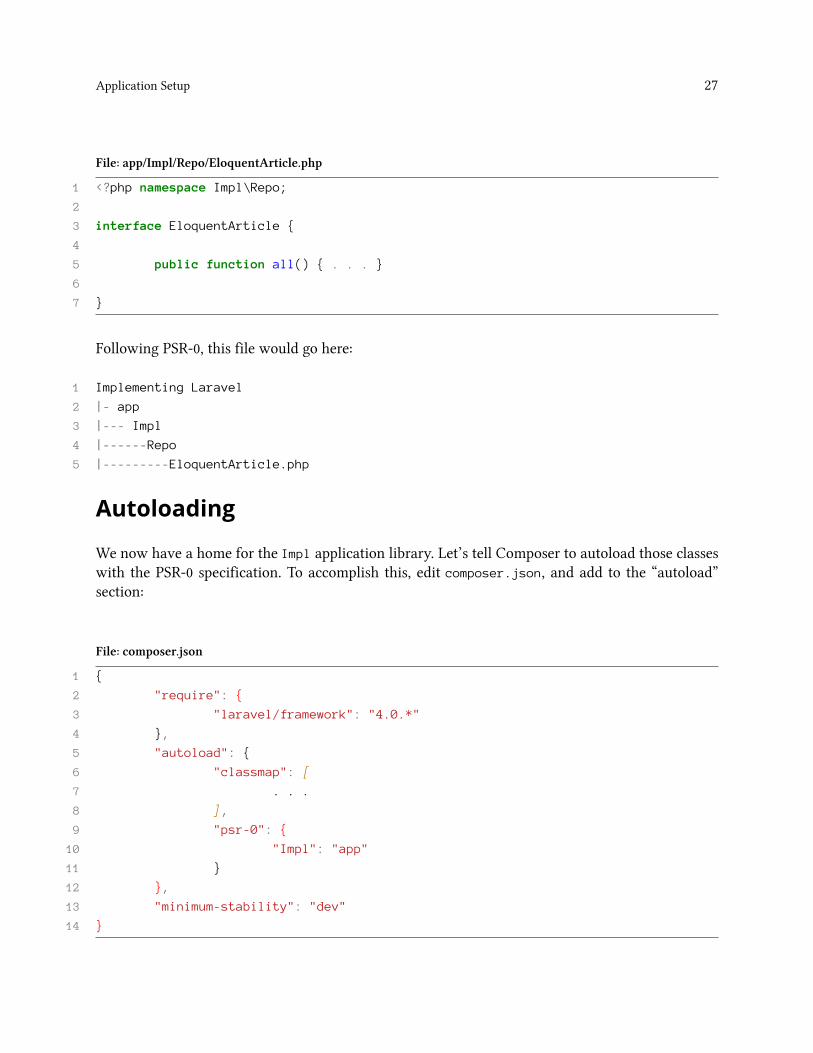
File: app/Impl/Repo/EloquentArticle.php
1 <?php namespace Impl\Repo;23 interface EloquentArticle {45 public function all() { . . . }67 }
Following PSR-0, this file would go here:
1 Implementing Laravel2 |- app3 |--- Impl4 |------Repo5 |---------EloquentArticle.php
Autoloading
We now have a home for the Impl application library. Let’s tell Composer to autoload those classeswith the PSR-0 specification. To accomplish this, edit composer.json, and add to the “autoload”section:
File: composer.json
1 {2 "require": {3 "laravel/framework": "4.0.*"4 },5 "autoload": {6 "classmap": [7 . . .8 ],9 "psr-0": {10 "Impl": "app"11 }12 },13 "minimum-stability": "dev"14 }
Application Setup 28
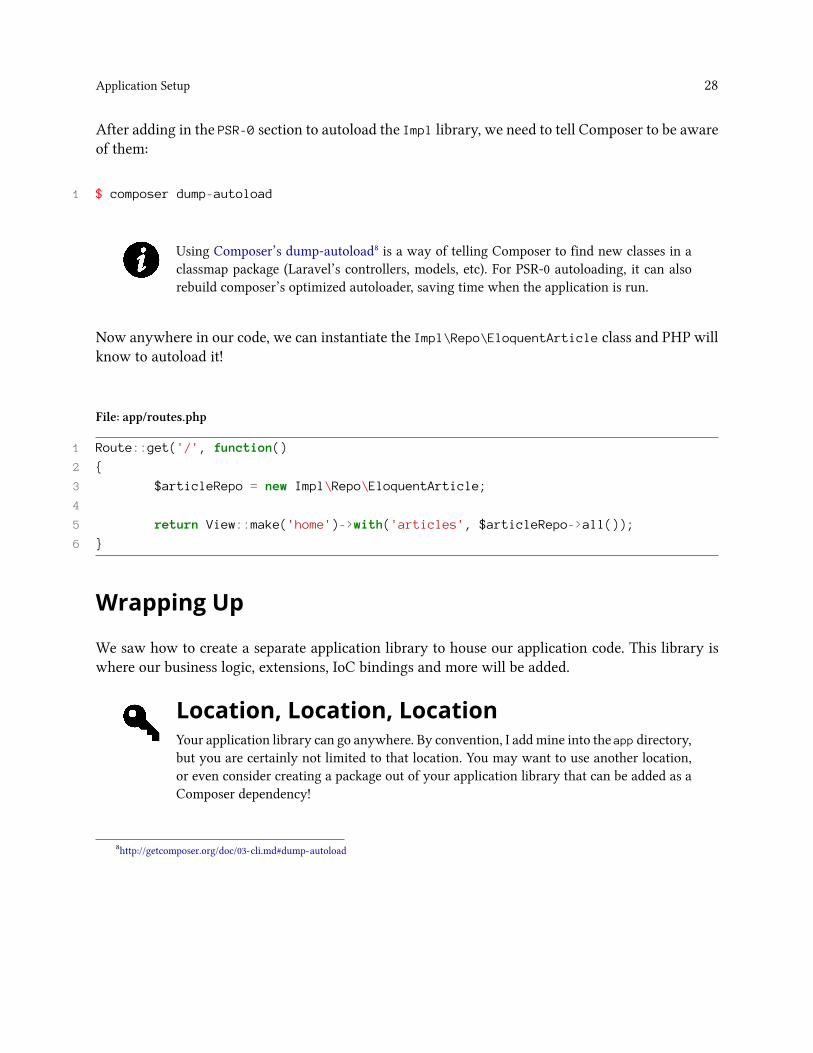
After adding in the PSR-0 section to autoload the Impl library, we need to tell Composer to be awareof them:
1 $ composer dump-autoload
Using Composer’s dump-autoload漁 is a way of telling Composer to find new classes in aclassmap package (Laravel’s controllers, models, etc). For PSR-0 autoloading, it can alsorebuild composer’s optimized autoloader, saving time when the application is run.
Now anywhere in our code, we can instantiate the Impl\Repo\EloquentArticle class and PHP willknow to autoload it!
File: app/routes.php
1 Route::get('/', function()2 {3 $articleRepo = new Impl\Repo\EloquentArticle;45 return View::make('home')->with('articles', $articleRepo->all());6 }
Wrapping Up
We saw how to create a separate application library to house our application code. This library iswhere our business logic, extensions, IoC bindings and more will be added.
Location, Location, LocationYour application library can go anywhere. By convention, I add mine into the app directory,but you are certainly not limited to that location. You may want to use another location,or even consider creating a package out of your application library that can be added as aComposer dependency!
漁http://getcomposer.org/doc/03-cli.md#dump-autoload
Useful Patterns
Getting to the heart of the matter, this chapter will review a few useful architectural patterns inLaravel. We will explore how we can employ the container, interfaces and dependency injection toincrease our codes testability and maintainability.
The Repository PatternWhat Is It?
The repository pattern is a way of abstracting your business logic away from your data source. It’san extra layer on top of your data-retrieval code which can be used in a number of ways.
Why Do We Use It?
The goal of a repository is to increase code maintainability and to form your code around yourapplication’s use cases.
Many developers think of it as a tool for larger-scale applications only, however I often find myselfusing it for most applications. The pros outweigh the cons of writing extra code.
Let’s go over some of the benefits:
Dependency Inversion
This is an expression of the SOLID principles. The repository pattern allows us to create manysubstitutable implementations of an interface who’s purpose is handling our data.
The most-cited use case is to “switch out your data source”. This describes the ability to switch outa data store, such as MySQL, to something else, such as a NoSQL database, without effecting yourapplication code.
This is accomplished by creating an interface for your data-retrieval. You can then create one ormany implementations of that interface.
For instance, for logic around our article repository, we will create an implementation usingEloquent. If we ever needed to switch out our data source to MongoDB, we can create a MongoDBimplementation and switch it out. As our application code expects an interface, rather than aconcrete class, it does not know the difference when you switch out one implementation of theinterface for another.
This becomes very powerful if you use your data repository in many places of your application (youlikely do). You likely interact with your data on almost every call to your application, whether it’sdirectly in a controller, in a command, in a queue job or in form-processing code.
If you can be sure that each area of your application always has the methods it needs, you’re onyour way to a much easier future.
But really, how often do you change data sources? Chances are that you rarely change from yourcore SQL-based data source. There are, however, other reasons for still using the repository pattern.
The Repository Pattern 31
Planning
I mentioned earlier in the book that my point of view of application coding is one centering aroundthe business logic. Creating an interface is useful for planning your code around your business needs(use cases).
When defining the methods each implementation will use, you are planning the use-cases for yourdata. Will users be creating articles? Or will they only be reading articles? How do administratorsinteract differently than regular users?
Defining interfaces gives you a clearer picture of how your application will be used from a domain-perspective rather than a data-perspective.
Business Logic Orientation
Building upon the idea of planning around your business domain is actually expressing your businessdomain in code. Remember that each Eloquent model represents a single database table. Yourbusiness logic does not.
For example, an article in our sample application is more than one row in our articles table. Italso encompasses an author from the users table, a status from the statuses table and a set of tags,represented in the tags and articles_tags table. An article is a composite business entity; It’s abusiness entity which contains other entities, rather than simply containing attributes such as itstitle, content and publication date.
The repository pattern allows us to express an article as more than a single row in a table. We cancombine and mesh together our Eloquent models, relationships and the built-in query builder inwhatever way we need in order to convert the raw data into true representations of our businessentities.
Data-Layer Logic
The data repository becomes a very convenient place to add in other logic around your data retrieval.Rather than add in extra logic to our Eloquent models, we can use our repository to house it.
For instance, you may need to cache your data. The data repository is a great place to add in yourcaching layer. The next chapter will show how to do that in a maintainable way.
Remote Data
It’s important to remember that your data can come from many sources - not necessarily yourdatabases.
In “the modern web”, many applications are mash-ups - They consume multiple API’s and returnuseful data to the end-user. A data repository can be a way to house the logic of retrieving APIinformation and combining it into an entity that your application can easily consume or process.
The Repository Pattern 32
This is also useful in a Service Oriented Architecture (SOA), where we may need to make API callsto service(s) within our own infrastructure but don’t have direct access to a database.
Example
Let’s see what that looks like with a practical example.
In this example, we’ll start with the central portion of any blog, the articles.
The Situation
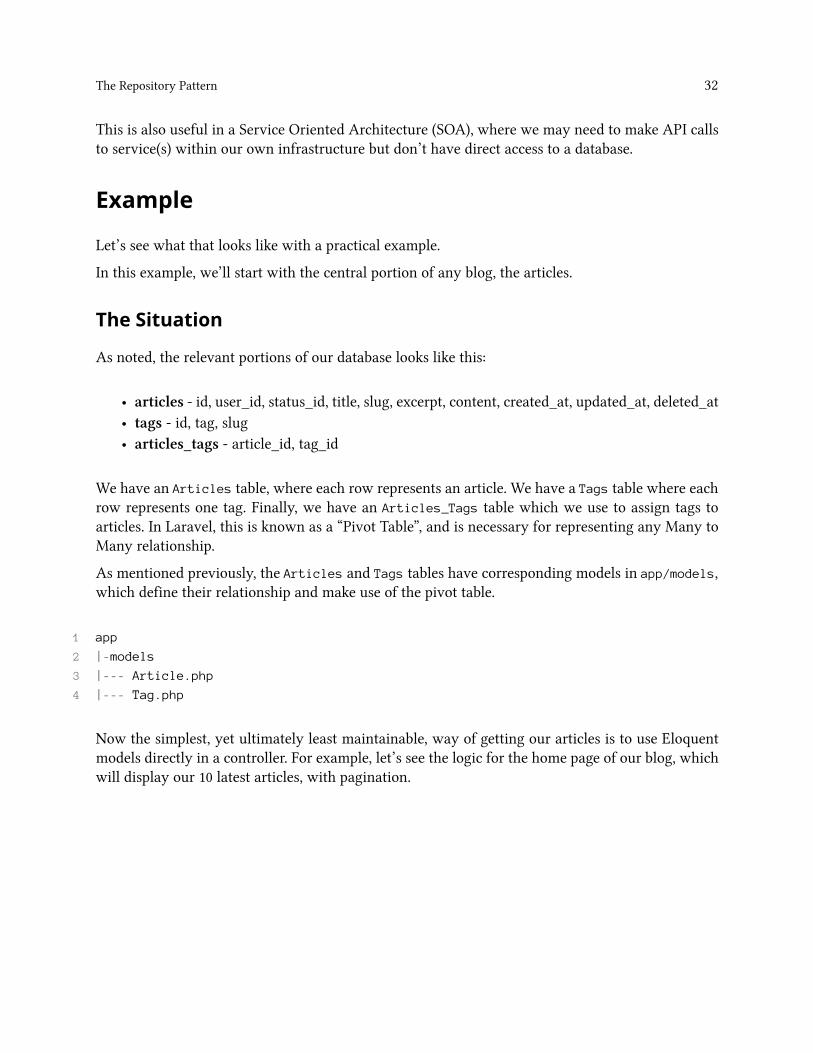
As noted, the relevant portions of our database looks like this:
• articles - id, user_id, status_id, title, slug, excerpt, content, created_at, updated_at, deleted_at• tags - id, tag, slug• articles_tags - article_id, tag_id
We have an Articles table, where each row represents an article. We have a Tags table where eachrow represents one tag. Finally, we have an Articles_Tags table which we use to assign tags toarticles. In Laravel, this is known as a “Pivot Table”, and is necessary for representing any Many toMany relationship.
As mentioned previously, the Articles and Tags tables have corresponding models in app/models,which define their relationship and make use of the pivot table.
1 app2 |-models3 |--- Article.php4 |--- Tag.php
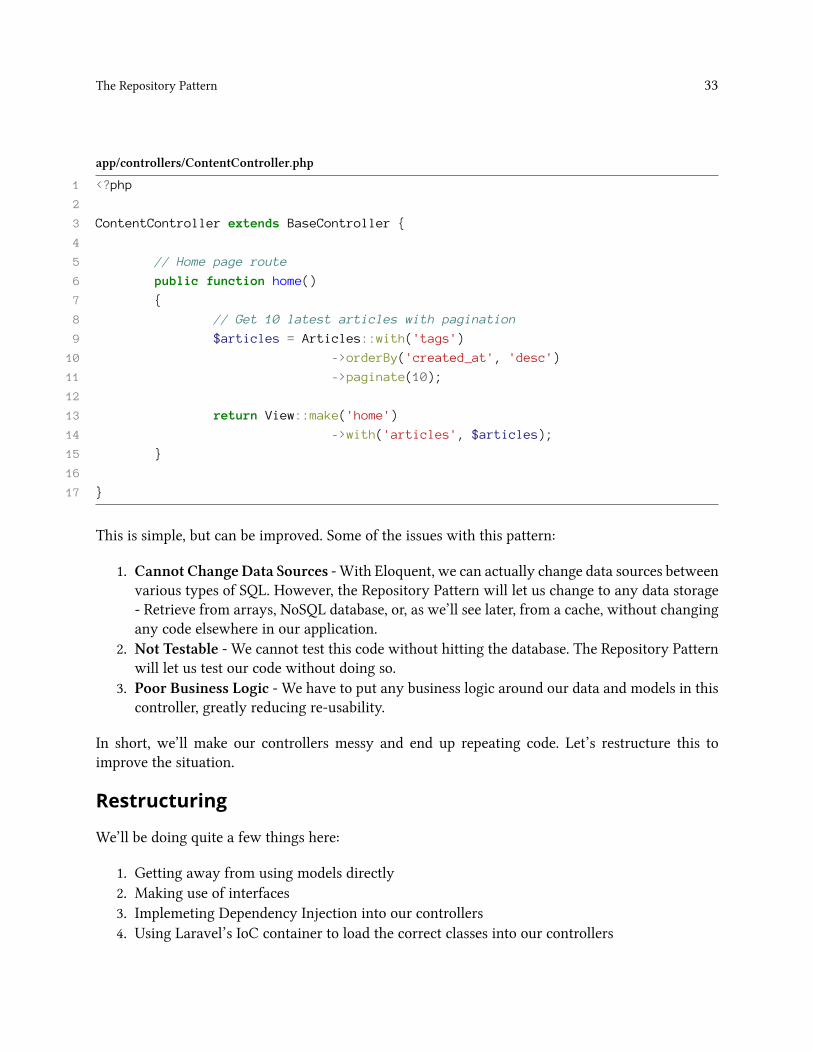
Now the simplest, yet ultimately least maintainable, way of getting our articles is to use Eloquentmodels directly in a controller. For example, let’s see the logic for the home page of our blog, whichwill display our 10 latest articles, with pagination.
The Repository Pattern 33
app/controllers/ContentController.php
1 <?php23 ContentController extends BaseController {45 // Home page route6 public function home()7 {8 // Get 10 latest articles with pagination9 $articles = Articles::with('tags')10 ->orderBy('created_at', 'desc')11 ->paginate(10);1213 return View::make('home')14 ->with('articles', $articles);15 }1617 }
This is simple, but can be improved. Some of the issues with this pattern:
1. Cannot Change Data Sources - With Eloquent, we can actually change data sources betweenvarious types of SQL. However, the Repository Pattern will let us change to any data storage- Retrieve from arrays, NoSQL database, or, as we’ll see later, from a cache, without changingany code elsewhere in our application.
2. Not Testable - We cannot test this code without hitting the database. The Repository Patternwill let us test our code without doing so.
3. Poor Business Logic - We have to put any business logic around our data and models in thiscontroller, greatly reducing re-usability.
In short, we’ll make our controllers messy and end up repeating code. Let’s restructure this toimprove the situation.
Restructuring
We’ll be doing quite a few things here:
1. Getting away from using models directly2. Making use of interfaces3. Implemeting Dependency Injection into our controllers4. Using Laravel’s IoC container to load the correct classes into our controllers
The Repository Pattern 34
The models directory
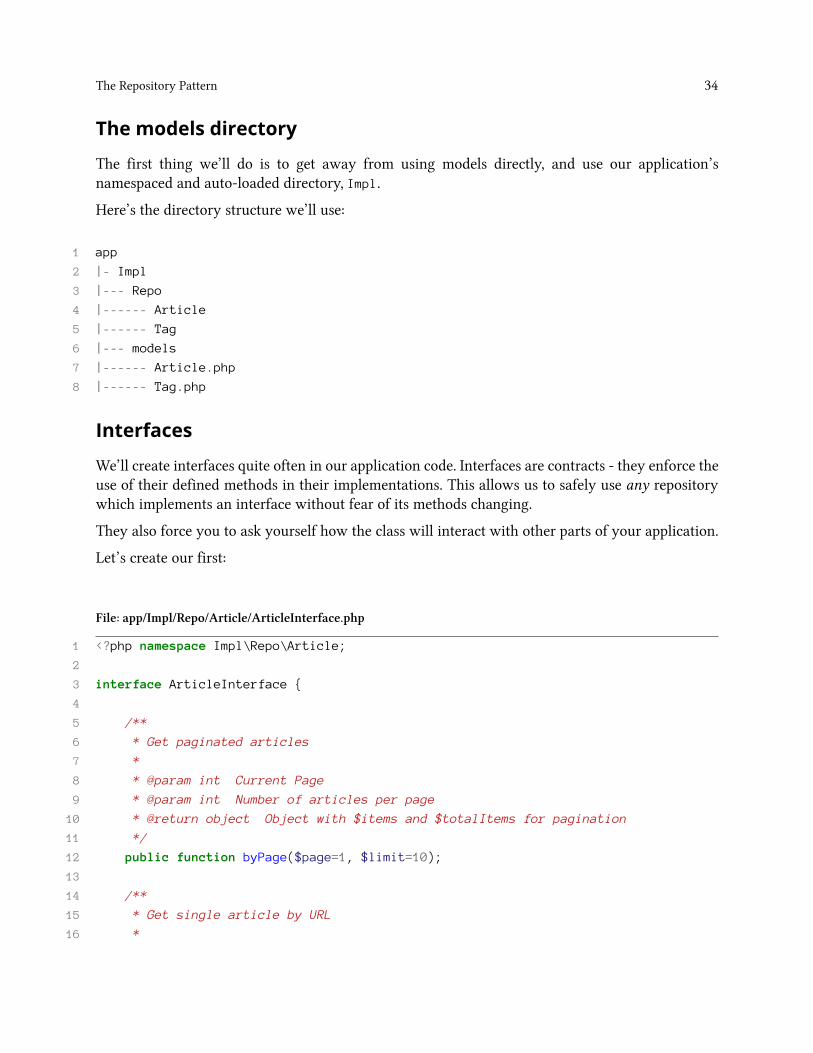
The first thing we’ll do is to get away from using models directly, and use our application’snamespaced and auto-loaded directory, Impl.
Here’s the directory structure we’ll use:
1 app2 |- Impl3 |--- Repo4 |------ Article5 |------ Tag6 |--- models7 |------ Article.php8 |------ Tag.php
Interfaces
We’ll create interfaces quite often in our application code. Interfaces are contracts - they enforce theuse of their defined methods in their implementations. This allows us to safely use any repositorywhich implements an interface without fear of its methods changing.
They also force you to ask yourself how the class will interact with other parts of your application.
Let’s create our first:
File: app/Impl/Repo/Article/ArticleInterface.php
1 <?php namespace Impl\Repo\Article;23 interface ArticleInterface {45 /**6 * Get paginated articles7 *8 * @param int Current Page9 * @param int Number of articles per page10 * @return object Object with $items and $totalItems for pagination11 */12 public function byPage($page=1, $limit=10);1314 /**15 * Get single article by URL16 *
The Repository Pattern 35
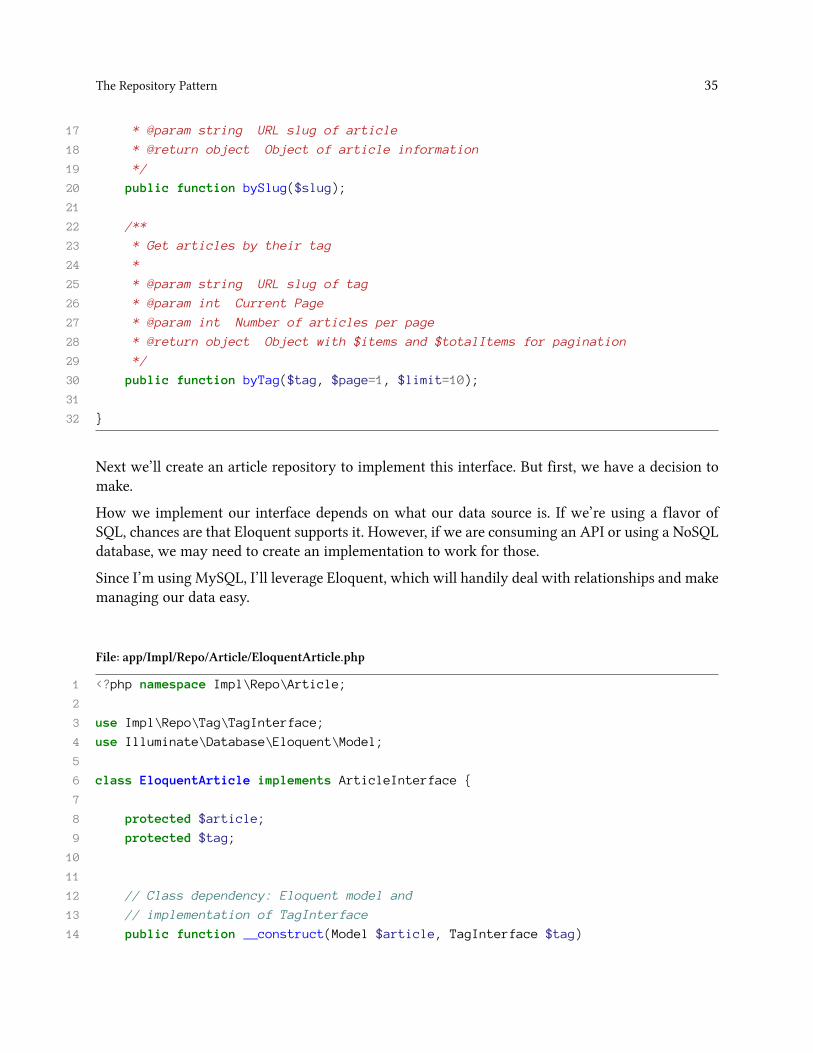
17 * @param string URL slug of article18 * @return object Object of article information19 */20 public function bySlug($slug);2122 /**23 * Get articles by their tag24 *25 * @param string URL slug of tag26 * @param int Current Page27 * @param int Number of articles per page28 * @return object Object with $items and $totalItems for pagination29 */30 public function byTag($tag, $page=1, $limit=10);3132 }
Next we’ll create an article repository to implement this interface. But first, we have a decision tomake.
How we implement our interface depends on what our data source is. If we’re using a flavor ofSQL, chances are that Eloquent supports it. However, if we are consuming an API or using a NoSQLdatabase, we may need to create an implementation to work for those.
Since I’m using MySQL, I’ll leverage Eloquent, which will handily deal with relationships and makemanaging our data easy.
File: app/Impl/Repo/Article/EloquentArticle.php
1 <?php namespace Impl\Repo\Article;23 use Impl\Repo\Tag\TagInterface;4 use Illuminate\Database\Eloquent\Model;56 class EloquentArticle implements ArticleInterface {78 protected $article;9 protected $tag;101112 // Class dependency: Eloquent model and13 // implementation of TagInterface14 public function __construct(Model $article, TagInterface $tag)
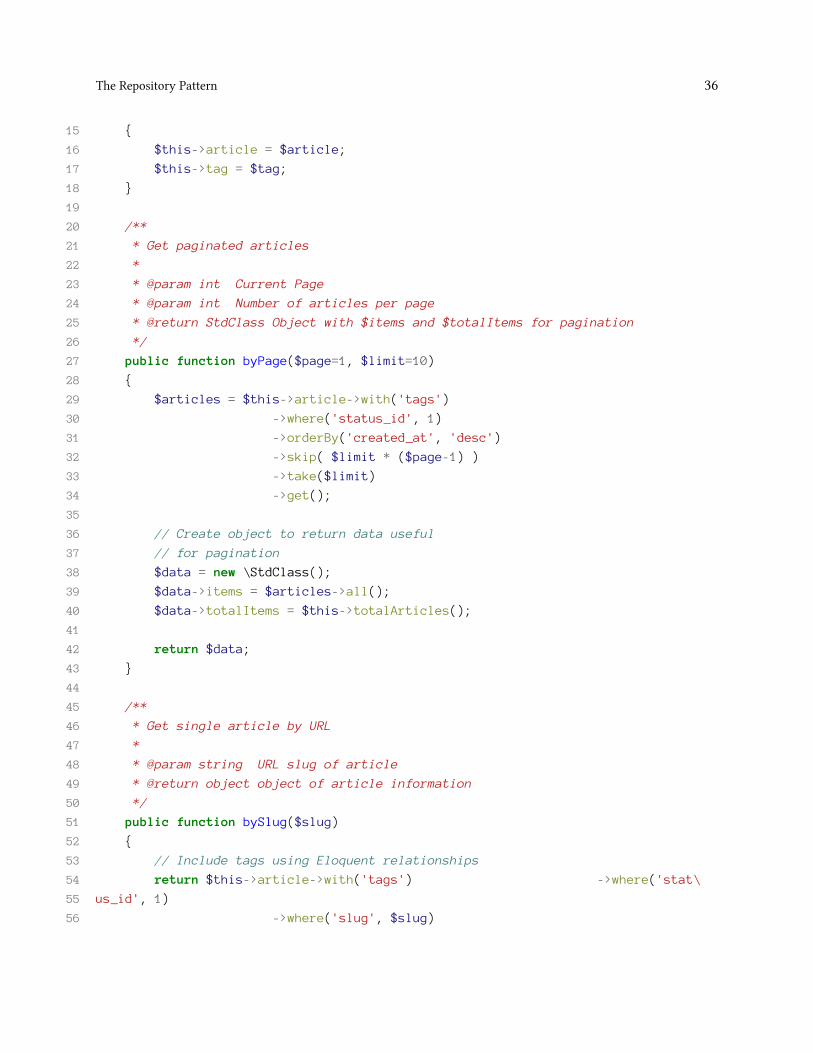
The Repository Pattern 36
15 {16 $this->article = $article;17 $this->tag = $tag;18 }1920 /**21 * Get paginated articles22 *23 * @param int Current Page24 * @param int Number of articles per page25 * @return StdClass Object with $items and $totalItems for pagination26 */27 public function byPage($page=1, $limit=10)28 {29 $articles = $this->article->with('tags')30 ->where('status_id', 1)31 ->orderBy('created_at', 'desc')32 ->skip( $limit * ($page-1) )33 ->take($limit)34 ->get();3536 // Create object to return data useful37 // for pagination38 $data = new \StdClass();39 $data->items = $articles->all();40 $data->totalItems = $this->totalArticles();4142 return $data;43 }4445 /**46 * Get single article by URL47 *48 * @param string URL slug of article49 * @return object object of article information50 */51 public function bySlug($slug)52 {53 // Include tags using Eloquent relationships54 return $this->article->with('tags') ->where('stat\55 us_id', 1)56 ->where('slug', $slug)

The Repository Pattern 37
57 ->first();58 }5960 /**61 * Get articles by their tag62 *63 * @param string URL slug of tag64 * @param int Current Page65 * @param int Number of articles per page66 * @return StdClass Object with $items and $totalItems for pagination67 */68 public function byTag($tag, $page=1, $limit=10)69 {70 $foundTag = $this->tag->bySlug($tag);7172 if( !$foundTag )73 {74 // Empty StdClass to fulfill @return expectations75 // if no tag found76 $data = new \StdClass();77 $data->items = array();78 $data->totalItems = 0;7980 return $data;81 }8283 $articles = $this->tag->articles()84 ->where('articles.status_id', 1)85 ->orderBy('articles.created_at', 'desc')86 ->skip( $limit * ($page-1) )87 ->take($limit)88 ->get();8990 // Create object to return data useful91 // for pagination92 $data = new \StdClass();93 $data->items = articles->all();94 $data->totalItems = $this->totalByTag();9596 return $data;97 }98
The Repository Pattern 38
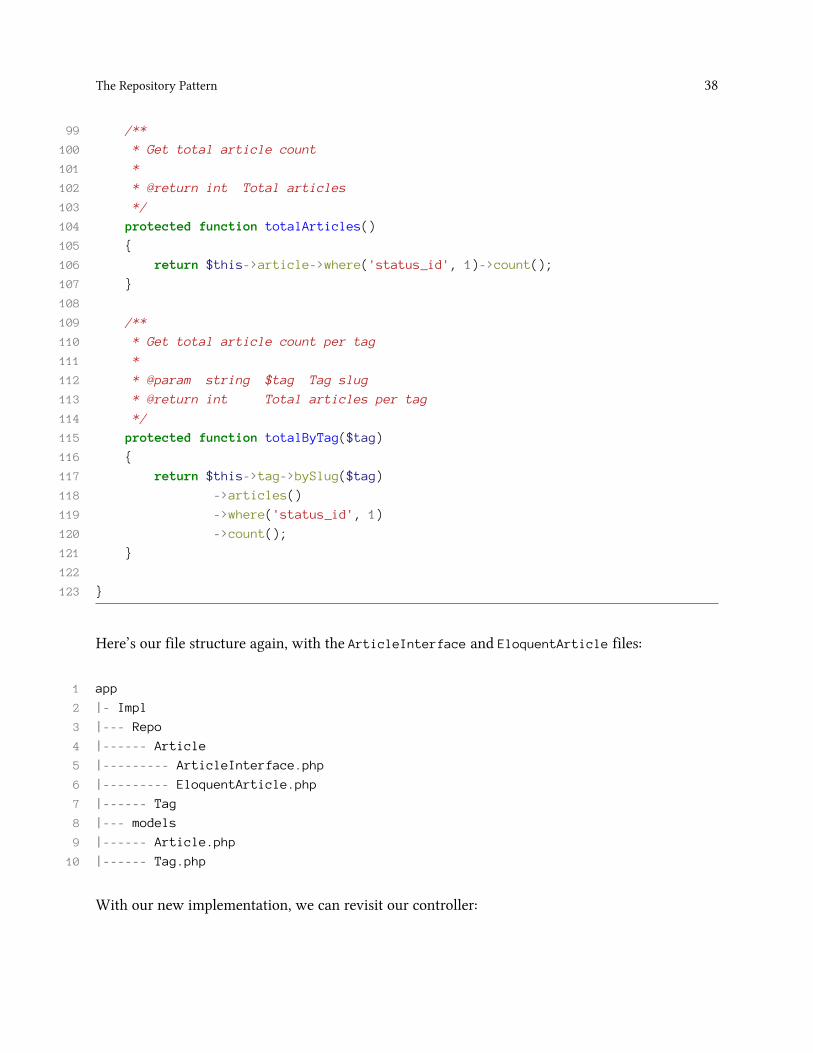
99 /**100 * Get total article count101 *102 * @return int Total articles103 */104 protected function totalArticles()105 {106 return $this->article->where('status_id', 1)->count();107 }108109 /**110 * Get total article count per tag111 *112 * @param string $tag Tag slug113 * @return int Total articles per tag114 */115 protected function totalByTag($tag)116 {117 return $this->tag->bySlug($tag)118 ->articles()119 ->where('status_id', 1)120 ->count();121 }122123 }
Here’s our file structure again, with the ArticleInterface and EloquentArticle files:
1 app2 |- Impl3 |--- Repo4 |------ Article5 |--------- ArticleInterface.php6 |--------- EloquentArticle.php7 |------ Tag8 |--- models9 |------ Article.php10 |------ Tag.php
With our new implementation, we can revisit our controller:
The Repository Pattern 39
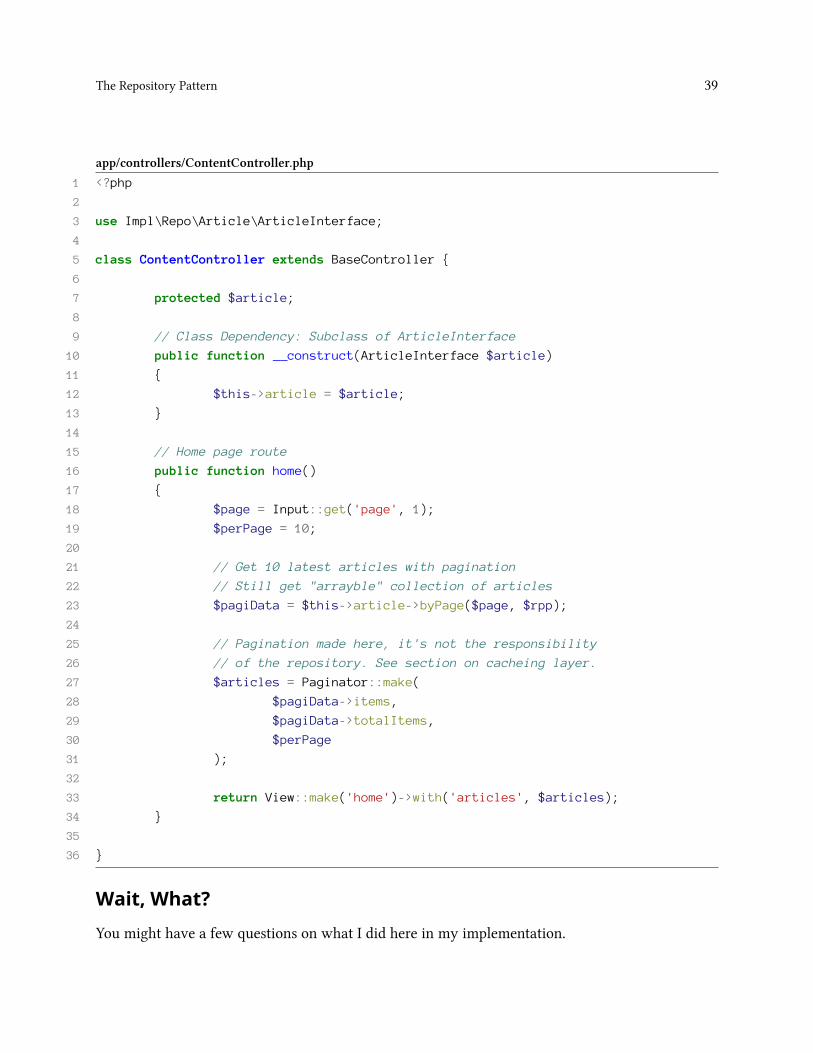
app/controllers/ContentController.php1 <?php23 use Impl\Repo\Article\ArticleInterface;45 class ContentController extends BaseController {67 protected $article;89 // Class Dependency: Subclass of ArticleInterface10 public function __construct(ArticleInterface $article)11 {12 $this->article = $article;13 }1415 // Home page route16 public function home()17 {18 $page = Input::get('page', 1);19 $perPage = 10;2021 // Get 10 latest articles with pagination22 // Still get "arrayble" collection of articles23 $pagiData = $this->article->byPage($page, $rpp);2425 // Pagination made here, it's not the responsibility26 // of the repository. See section on cacheing layer.27 $articles = Paginator::make(28 $pagiData->items,29 $pagiData->totalItems,30 $perPage31 );3233 return View::make('home')->with('articles', $articles);34 }3536 }
Wait, What?
You might have a few questions on what I did here in my implementation.

The Repository Pattern 40
First, we don’t return a Pagination object by way of the query builder’s paginate() method. This ison purpose. Our repository is meant to simply return a set of articles and shouldn’t have knowledgeof the Pagination class nor its generated HTML links.
Instead, we support pagination by using skip and take to make use of MySQL’s “limit” and “offset”directly.
This means we defer the creation of a paginator class instance to our controller. Yes, we actuallyadded more code to our controller!
The reason I choose not to incorporate the paginator class into the any repository is because it usesHTTP input to get the current page number and generates HTML for page links. This implicitly addsthese functionalities as dependencies on our data repository, where they don’t belong. Determiningthe current page number, and generating presentation (HTML) is not logic a data repository shouldbe responsible for.
By keeping the pagination functionality out of our repository, we’re also actually keeping our codemore maintainable. This would becomes clear if we later used an implementation of the repositorythat doesn’t happen to be an Eloquent model. In that case, it likely wouldn’t return an instance of thePaginator class. Our view may look for the paginator’s links() method and find it doesn’t exist!
Tying It Together
We have one step to go before our code works.
As noted, we set up some dependencies in our controllers and repositories. Class EloquentArticleexpects Eloquent\Model and class ContentController expects an implementation of ArticleInterfaceon instantiation.
The last thing we have to do is to use Laravel’s IoC container and Service Providers to pass thesedependencies into the classes when they are created.
To accomplish this in our application library, we’ll create a Service Provider which will tell theapplication to instantiate the correct classes when needed.
File: app/Impl/Repo/RepoServiceProvider.php
1 <?php namespace Impl\Repo;23 use Article; // Eloquent article4 use Impl\Repo\Tag\EloquentTag;5 use Impl\Repo\Article\EloquentArticle;6 use Illuminate\Support\ServiceProvider;78 class RepoServiceProvider extends ServiceProvider {9
The Repository Pattern 41
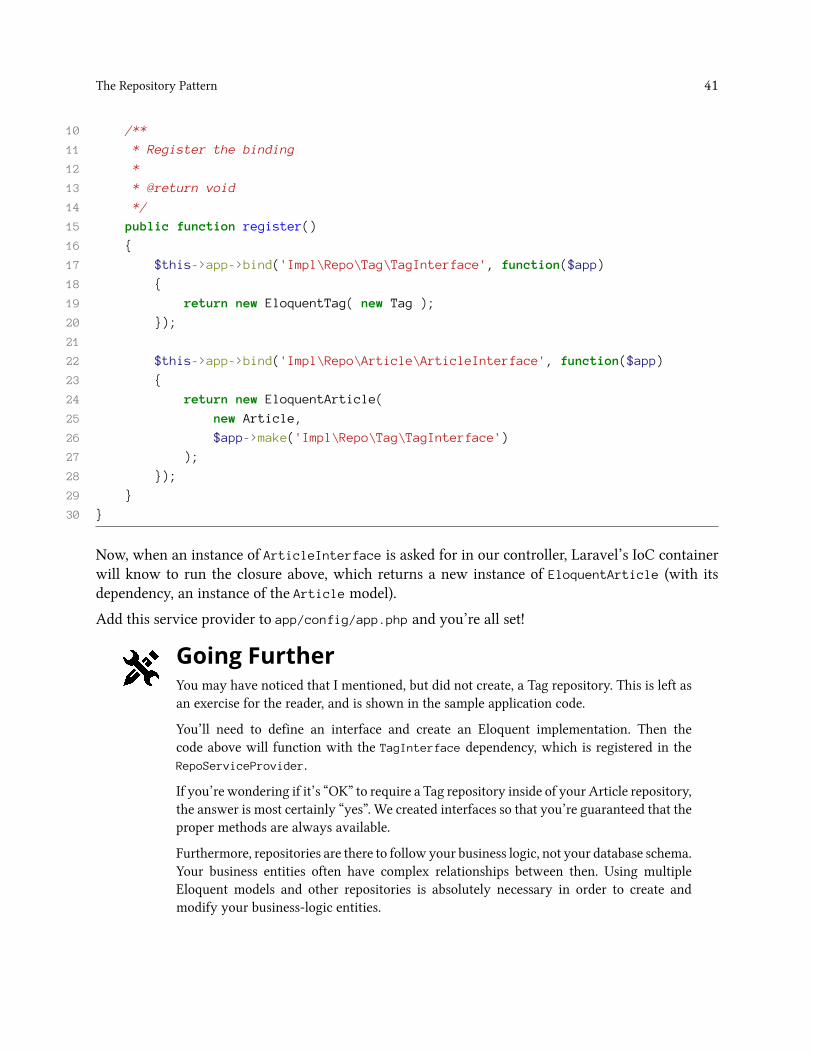
10 /**11 * Register the binding12 *13 * @return void14 */15 public function register()16 {17 $this->app->bind('Impl\Repo\Tag\TagInterface', function($app)18 {19 return new EloquentTag( new Tag );20 });2122 $this->app->bind('Impl\Repo\Article\ArticleInterface', function($app)23 {24 return new EloquentArticle(25 new Article,26 $app->make('Impl\Repo\Tag\TagInterface')27 );28 });29 }30 }
Now, when an instance of ArticleInterface is asked for in our controller, Laravel’s IoC containerwill know to run the closure above, which returns a new instance of EloquentArticle (with itsdependency, an instance of the Article model).
Add this service provider to app/config/app.php and you’re all set!
Going FurtherYou may have noticed that I mentioned, but did not create, a Tag repository. This is left asan exercise for the reader, and is shown in the sample application code.
You’ll need to define an interface and create an Eloquent implementation. Then thecode above will function with the TagInterface dependency, which is registered in theRepoServiceProvider.
If you’re wondering if it’s “OK” to require a Tag repository inside of your Article repository,the answer is most certainly “yes”. We created interfaces so that you’re guaranteed that theproper methods are always available.
Furthermore, repositories are there to follow your business logic, not your database schema.Your business entities often have complex relationships between then. Using multipleEloquent models and other repositories is absolutely necessary in order to create andmodify your business-logic entities.
The Repository Pattern 42
What have we gained?
Well, we gained more code, but we have some great reasons!
Data Sources
We’re now in a position where we can change our data-source. If we need to someday change fromMySQL to another SQL-based server we can likely keep using EloquentArticle and just change ourdatabase connection in app/config/database.php. This is something Eloquent and many ORMsmake easy for us.
However, if we need to change to a NoSQL database or even add in another data source on top ofEloquent (an API call, perhaps), we can create a new implementation without having to change codethroughout our application to support this change.
As an example, if we were to change to MongoDB, we would create an MongoDbArticle implemen-tation and change the class bound in the RepoServiceProvider - similar to how we changed theemail providers in the Container chapter.
Testing
We used dependency injection in two places: Our controller and our EloquentArticle classes.We can now test these implementations without hitting the database by mocking an instance ofArticleInterface in our controller and Eloquent/Model in our repository.
Business Logic
We can truly express the true business-logic between our entities by including other repositories intoour Article repository! For example, an article contains tags, and so it makes sense that our Articlerepository can use Tags as part of its logic.
InterfacesYou may ask yourself if you really need to use interfaces for all of your repositories.Using interfaces does add overhead. Any additions or changes to your repository, suchas new public methods or changes to method parameters, should also be represented inyour interface. You may find yourself editing multiple files for minor changes on the onsetof your project.
This is a decision you may want to consider if you find yourself not needing an interface.Smaller projects are candidates for skipping interfaces. Larger or long-term projects canbenefit greatly.
In any case, there are still many benefits to using a data repository.
Caching with the Repository PatternWhat Is It?
A cache is a place to put data that can be later be retrieved quickly. A typical use case would beto cache the result of a database query and store it in memory (RAM). This allows us to retrievethe result of the query much quicker the next time we need it - we save a trip to the database andthe time it takes for the database to process the query. Because the data is stored in memory, it isextremely fast.
While a database is a persistent data store, a cache is a temporary data storage. By design, cacheddata cannot be counted on to be present.
Why Do We Use It?
Caching is often added to reduce the number of times the database or other services need tobe accessed by your application. If you have an application with large data sources or complexqueries and processing, caching can be an indispensable tool for keeping your application fast andresponsive.
Example
Now that we’ve seen the repository pattern in action, let’s integrate a caching layer into it.
Similar to the Repository pattern, we can use Dependency Injection and leverage Laravel’s IoCContainer to create a testable and maintainable caching layer.
We’ll build off of the Repository Pattern section and use the ArticleRepository.
The Situation
We have an Article repository abstracting the retrieval of data away from the business logic of ourapplication. We can continue to use this pattern and add a service layer into it - the cache.
Caching works by checking if the data we want already exists in the cache. If it does, we return itto the calling code. If it does not exist, or is expired, we retrieve the data from our persistent datasource (often a database), and then store it in the cache for the next request to use. Finally, we returnthe data to the calling code.
Caching with the Repository Pattern 44
One issue that’s common in Laravel is caching paginated results. Closures (anonymousfunctions) aren’t able to be serialized without some mucking about. Luckily this is not anissue since we did not use the Paginator class in our repository!
Let’s see how we can add caching cleanly.
The Structure
As usual, we’ll start by building an interface. This, once again, serves as a contract - our codewill expect classes to implement these interfaces so they know that certain methods will alwaysbe available.
Here’s the directory structure we’ll use:
1 app2 |- Impl3 |--- Service4 |------ Cache5 |--------- CacheInterface.php6 |--------- LaravelCache.php7 |--- Repo
Now we’ll create the interface.
File: app/Impl/Service/Cache/CacheInterface.php
1 <?php namespace Impl\Service\Cache;23 interface CacheInterface {45 /**6 * Retrieve data from cache7 *8 * @param string Cache item key9 * @return mixed PHP data result of cache10 */11 public function get($key);1213 /**14 * Add data to the cache15 *
Caching with the Repository Pattern 45
16 * @param string Cache item key17 * @param mixed The data to store18 * @param integer The number of minutes to store the item19 * @return mixed $value variable returned for convenience20 */21 public function put($key, $value, $minutes=null);2223 /**24 * Add data to the cache25 * taking pagination data into account26 *27 * @param integer Page of the cached items28 * @param integer Number of results per page29 * @param integer Total number of possible items30 * @param mixed The actual items for this page31 * @param string Cache item key32 * @param integer The number of minutes to store the item33 * @return mixed $items variable returned for convenience34 */35 public function putPaginated(36 $currentPage,37 $perPage,38 $totalItems,39 $items,40 $key,41 $minutes=null42 );4344 /**45 * Test if item exists in cache46 * Only returns true if exists && is not expired47 *48 * @param string Cache item key49 * @return bool If cache item exists50 */51 public function has($key);5253 }
Now we have an interface. This mostly mirrors the usual caching mechanisms, except we add aputPaginated method to help us save data per page.
Next let’s create an implementation of this interface. As we’ll be using Laravel’s Cache package,

Caching with the Repository Pattern 46
we’ll create a “Laravel” implementation.
I won’t create a Memcached, File or any other specific cache-storage implementation herebecause Laravel already abstracts away the ability to change the cache driver at will. Ifyou’re asking yourself why I add another layer of abstraction on top of Laravel’s, it’sbecause I’m striving to abstract away any specific implementation from my application!This goes towards maintainability (the ability to switch implementations without effectingother parts of the application) and testability (the ability to unit test with mocking).
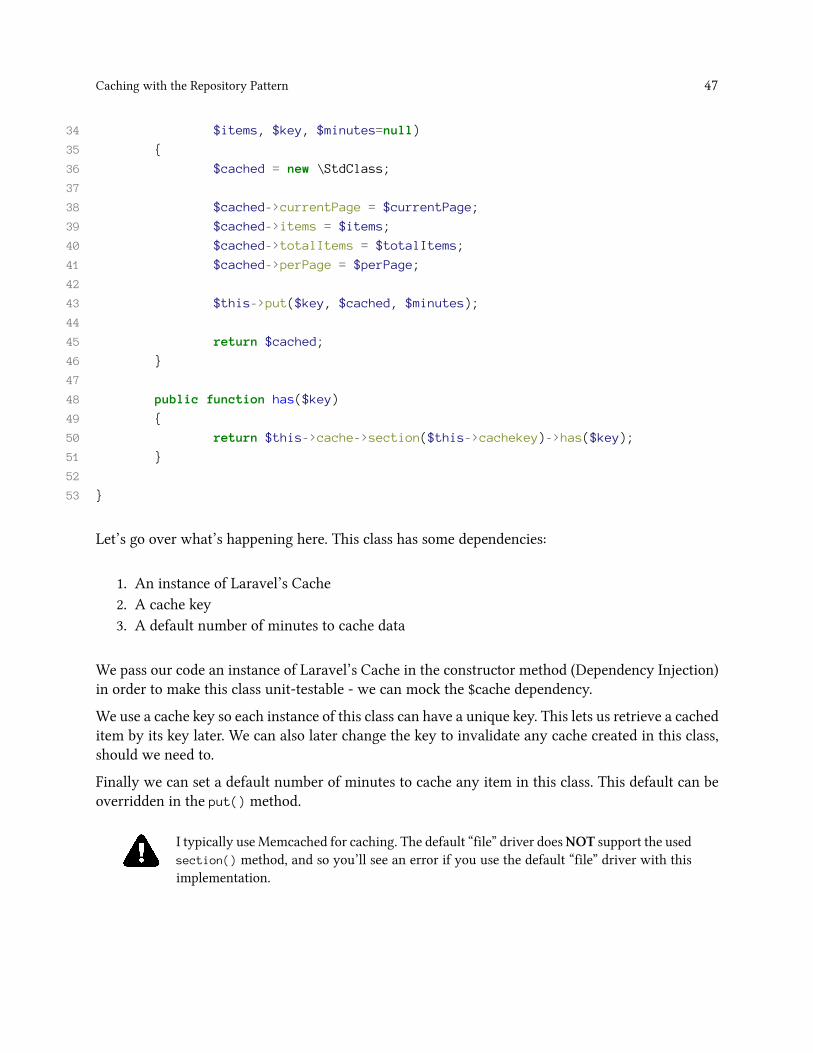
1 <?php namespace Impl\Service\Cache;23 use Illuminate\Cache\CacheManager;45 class LaravelCache implements CacheInterface {67 protected $cache;8 protected $cachekey;9 protected $minutes;1011 public function __construct(CacheManager $cache, $cachekey, $minutes=null)12 {13 $this->cache = $cache;14 $this->cachekey = $cachekey;15 $this->minutes = $minutes;16 }1718 public function get($key)19 {20 return $this->cache->section($this->cachekey)->get($key);21 }2223 public function put($key, $value, $minutes=null)24 {25 if( is_null($minutes) )26 {27 $minutes = $this->minutes;28 }2930 return $this->cache->section($this->cachekey)->put($key, $value, $minutes);31 }3233 public function putPaginated($currentPage, $perPage, $totalItems,
Caching with the Repository Pattern 47
34 $items, $key, $minutes=null)35 {36 $cached = new \StdClass;3738 $cached->currentPage = $currentPage;39 $cached->items = $items;40 $cached->totalItems = $totalItems;41 $cached->perPage = $perPage;4243 $this->put($key, $cached, $minutes);4445 return $cached;46 }4748 public function has($key)49 {50 return $this->cache->section($this->cachekey)->has($key);51 }5253 }
Let’s go over what’s happening here. This class has some dependencies:
1. An instance of Laravel’s Cache2. A cache key3. A default number of minutes to cache data
We pass our code an instance of Laravel’s Cache in the constructor method (Dependency Injection)in order to make this class unit-testable - we can mock the $cache dependency.
We use a cache key so each instance of this class can have a unique key. This lets us retrieve a cacheditem by its key later. We can also later change the key to invalidate any cache created in this class,should we need to.
Finally we can set a default number of minutes to cache any item in this class. This default can beoverridden in the put() method.
I typically use Memcached for caching. The default “file” driver does NOT support the usedsection() method, and so you’ll see an error if you use the default “file” driver with thisimplementation.
Caching with the Repository Pattern 48
A Note on Cache Keys
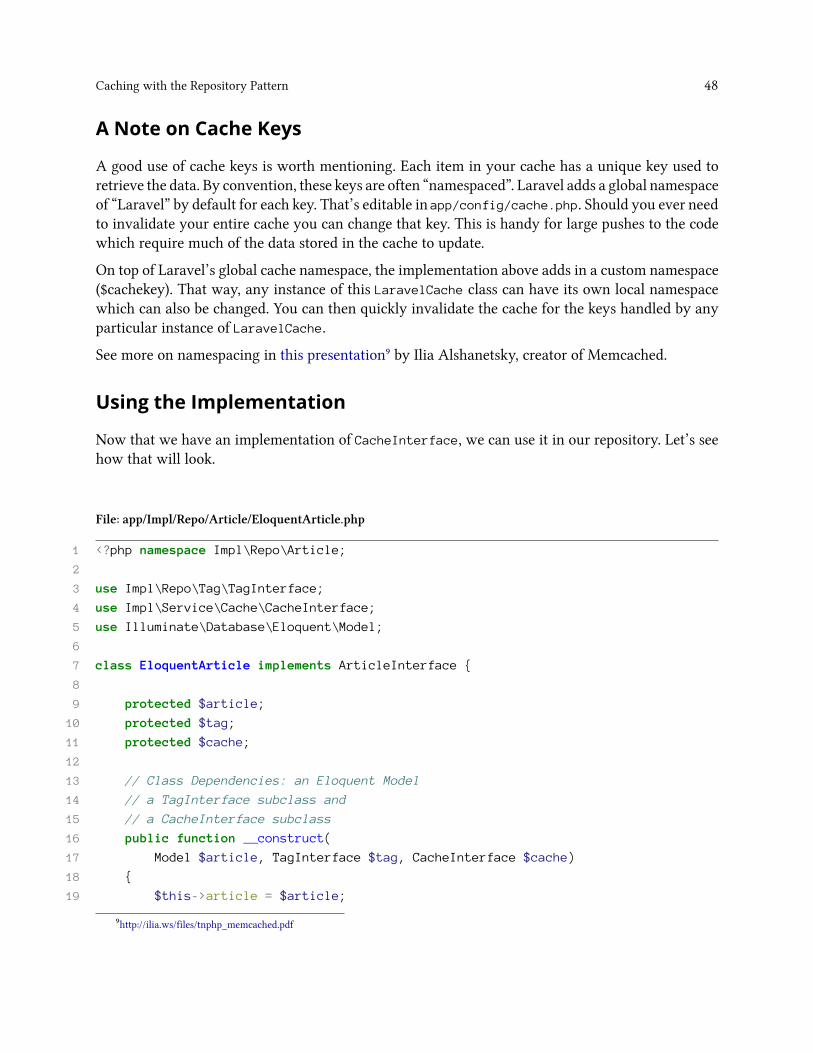
A good use of cache keys is worth mentioning. Each item in your cache has a unique key used toretrieve the data. By convention, these keys are often “namespaced”. Laravel adds a global namespaceof “Laravel” by default for each key. That’s editable in app/config/cache.php. Should you ever needto invalidate your entire cache you can change that key. This is handy for large pushes to the codewhich require much of the data stored in the cache to update.
On top of Laravel’s global cache namespace, the implementation above adds in a custom namespace($cachekey). That way, any instance of this LaravelCache class can have its own local namespacewhich can also be changed. You can then quickly invalidate the cache for the keys handled by anyparticular instance of LaravelCache.
See more on namespacing in this presentation禦 by Ilia Alshanetsky, creator of Memcached.
Using the Implementation
Now that we have an implementation of CacheInterface, we can use it in our repository. Let’s seehow that will look.
File: app/Impl/Repo/Article/EloquentArticle.php
1 <?php namespace Impl\Repo\Article;23 use Impl\Repo\Tag\TagInterface;4 use Impl\Service\Cache\CacheInterface;5 use Illuminate\Database\Eloquent\Model;67 class EloquentArticle implements ArticleInterface {89 protected $article;10 protected $tag;11 protected $cache;1213 // Class Dependencies: an Eloquent Model14 // a TagInterface subclass and15 // a CacheInterface subclass16 public function __construct(17 Model $article, TagInterface $tag, CacheInterface $cache)18 {19 $this->article = $article;
禦http://ilia.ws/files/tnphp_memcached.pdf
Caching with the Repository Pattern 49
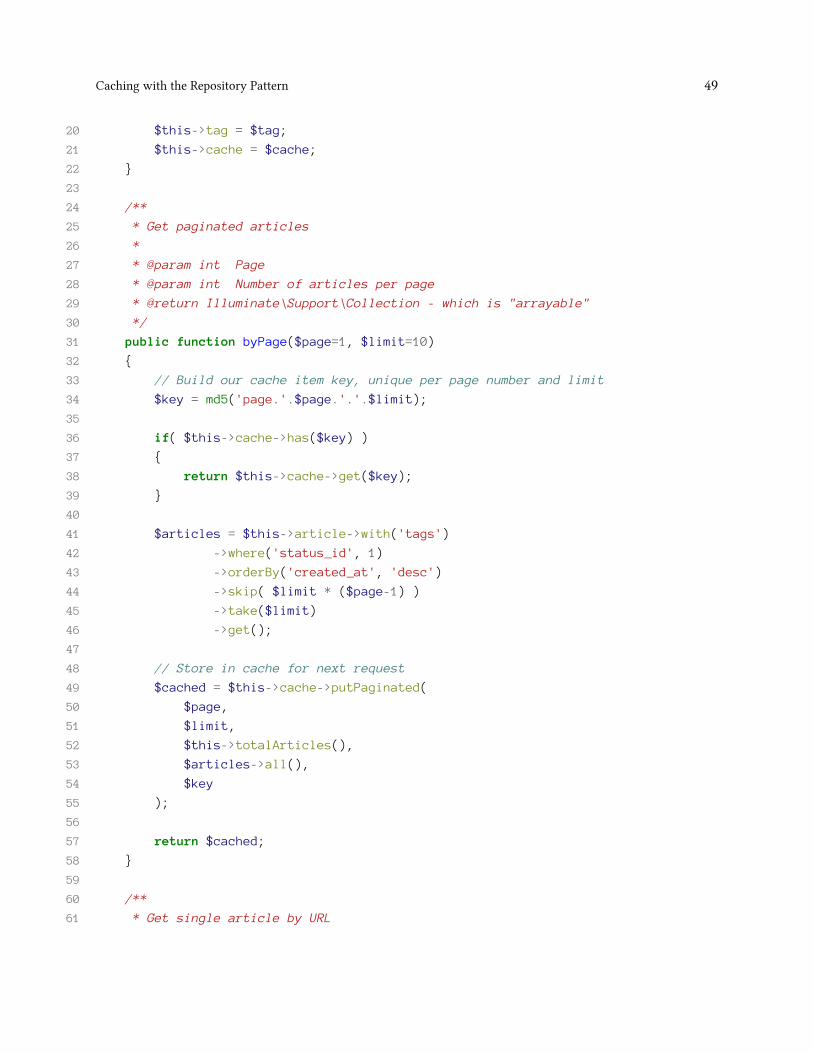
20 $this->tag = $tag;21 $this->cache = $cache;22 }2324 /**25 * Get paginated articles26 *27 * @param int Page28 * @param int Number of articles per page29 * @return Illuminate\Support\Collection - which is "arrayable"30 */31 public function byPage($page=1, $limit=10)32 {33 // Build our cache item key, unique per page number and limit34 $key = md5('page.'.$page.'.'.$limit);3536 if( $this->cache->has($key) )37 {38 return $this->cache->get($key);39 }4041 $articles = $this->article->with('tags')42 ->where('status_id', 1)43 ->orderBy('created_at', 'desc')44 ->skip( $limit * ($page-1) )45 ->take($limit)46 ->get();4748 // Store in cache for next request49 $cached = $this->cache->putPaginated(50 $page,51 $limit,52 $this->totalArticles(),53 $articles->all(),54 $key55 );5657 return $cached;58 }5960 /**61 * Get single article by URL
Caching with the Repository Pattern 50
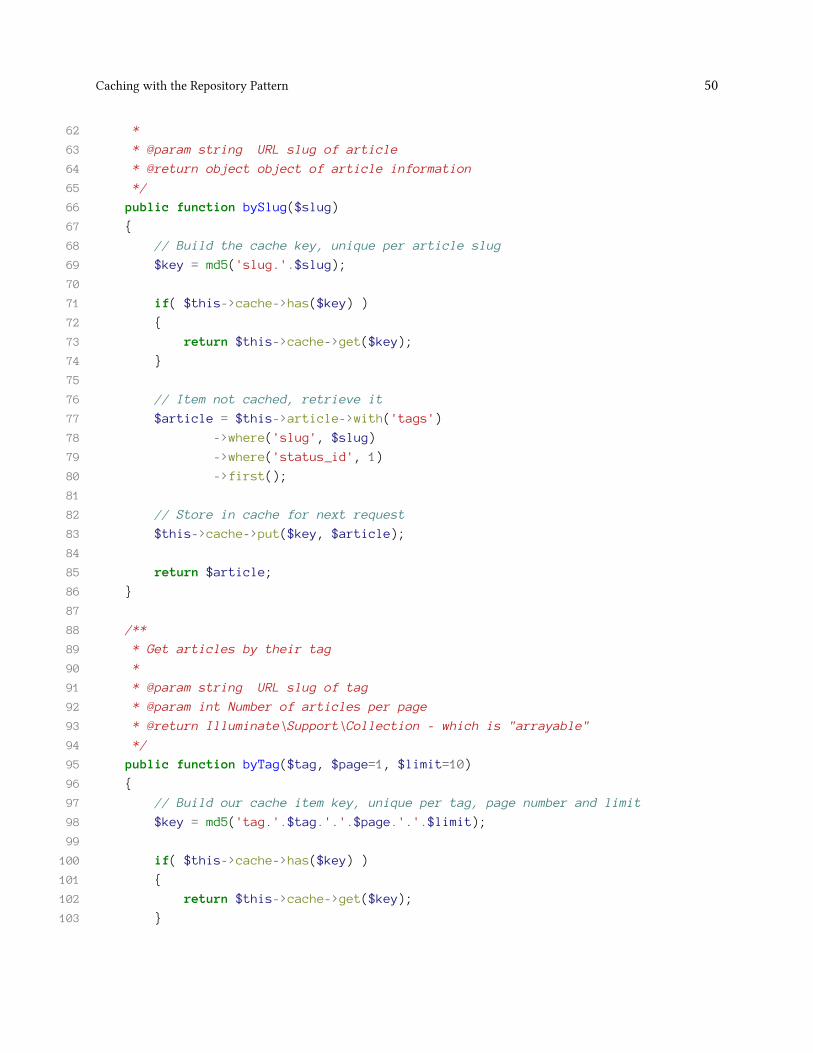
62 *63 * @param string URL slug of article64 * @return object object of article information65 */66 public function bySlug($slug)67 {68 // Build the cache key, unique per article slug69 $key = md5('slug.'.$slug);7071 if( $this->cache->has($key) )72 {73 return $this->cache->get($key);74 }7576 // Item not cached, retrieve it77 $article = $this->article->with('tags')78 ->where('slug', $slug)79 ->where('status_id', 1)80 ->first();8182 // Store in cache for next request83 $this->cache->put($key, $article);8485 return $article;86 }8788 /**89 * Get articles by their tag90 *91 * @param string URL slug of tag92 * @param int Number of articles per page93 * @return Illuminate\Support\Collection - which is "arrayable"94 */95 public function byTag($tag, $page=1, $limit=10)96 {97 // Build our cache item key, unique per tag, page number and limit98 $key = md5('tag.'.$tag.'.'.$page.'.'.$limit);99100 if( $this->cache->has($key) )101 {102 return $this->cache->get($key);103 }
Caching with the Repository Pattern 51
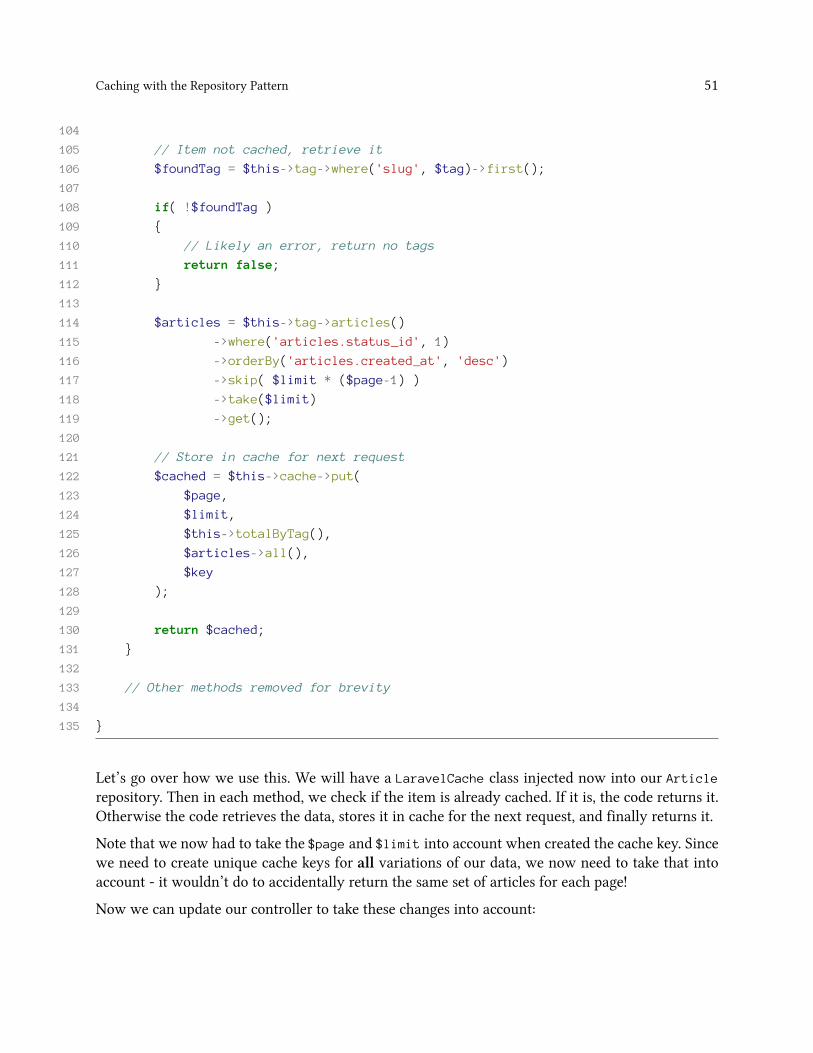
104105 // Item not cached, retrieve it106 $foundTag = $this->tag->where('slug', $tag)->first();107108 if( !$foundTag )109 {110 // Likely an error, return no tags111 return false;112 }113114 $articles = $this->tag->articles()115 ->where('articles.status_id', 1)116 ->orderBy('articles.created_at', 'desc')117 ->skip( $limit * ($page-1) )118 ->take($limit)119 ->get();120121 // Store in cache for next request122 $cached = $this->cache->put(123 $page,124 $limit,125 $this->totalByTag(),126 $articles->all(),127 $key128 );129130 return $cached;131 }132133 // Other methods removed for brevity134135 }
Let’s go over how we use this. We will have a LaravelCache class injected now into our Articlerepository. Then in each method, we check if the item is already cached. If it is, the code returns it.Otherwise the code retrieves the data, stores it in cache for the next request, and finally returns it.
Note that we now had to take the $page and $limit into account when created the cache key. Sincewe need to create unique cache keys for all variations of our data, we now need to take that intoaccount - it wouldn’t do to accidentally return the same set of articles for each page!
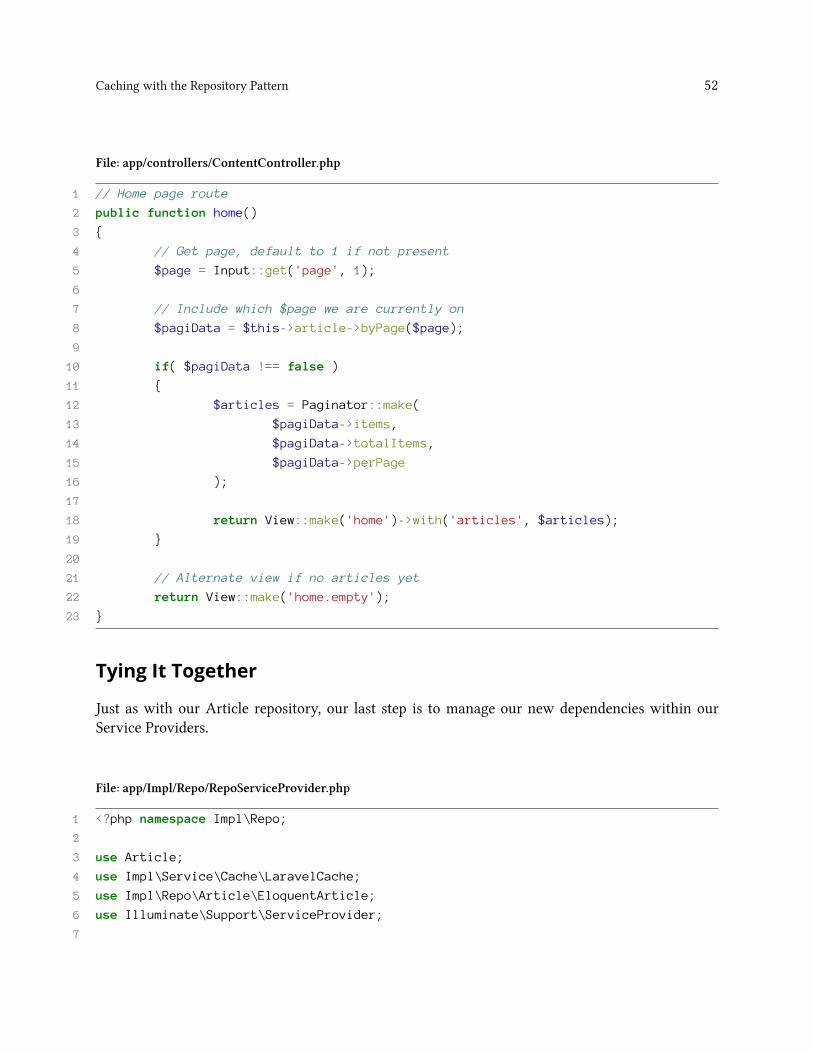
Now we can update our controller to take these changes into account:
Caching with the Repository Pattern 52
File: app/controllers/ContentController.php
1 // Home page route2 public function home()3 {4 // Get page, default to 1 if not present5 $page = Input::get('page', 1);67 // Include which $page we are currently on8 $pagiData = $this->article->byPage($page);910 if( $pagiData !== false )11 {12 $articles = Paginator::make(13 $pagiData->items,14 $pagiData->totalItems,15 $pagiData->perPage16 );1718 return View::make('home')->with('articles', $articles);19 }2021 // Alternate view if no articles yet22 return View::make('home.empty');23 }
Tying It Together
Just as with our Article repository, our last step is to manage our new dependencies within ourService Providers.
File: app/Impl/Repo/RepoServiceProvider.php
1 <?php namespace Impl\Repo;23 use Article;4 use Impl\Service\Cache\LaravelCache;5 use Impl\Repo\Article\EloquentArticle;6 use Illuminate\Support\ServiceProvider;7
Caching with the Repository Pattern 53
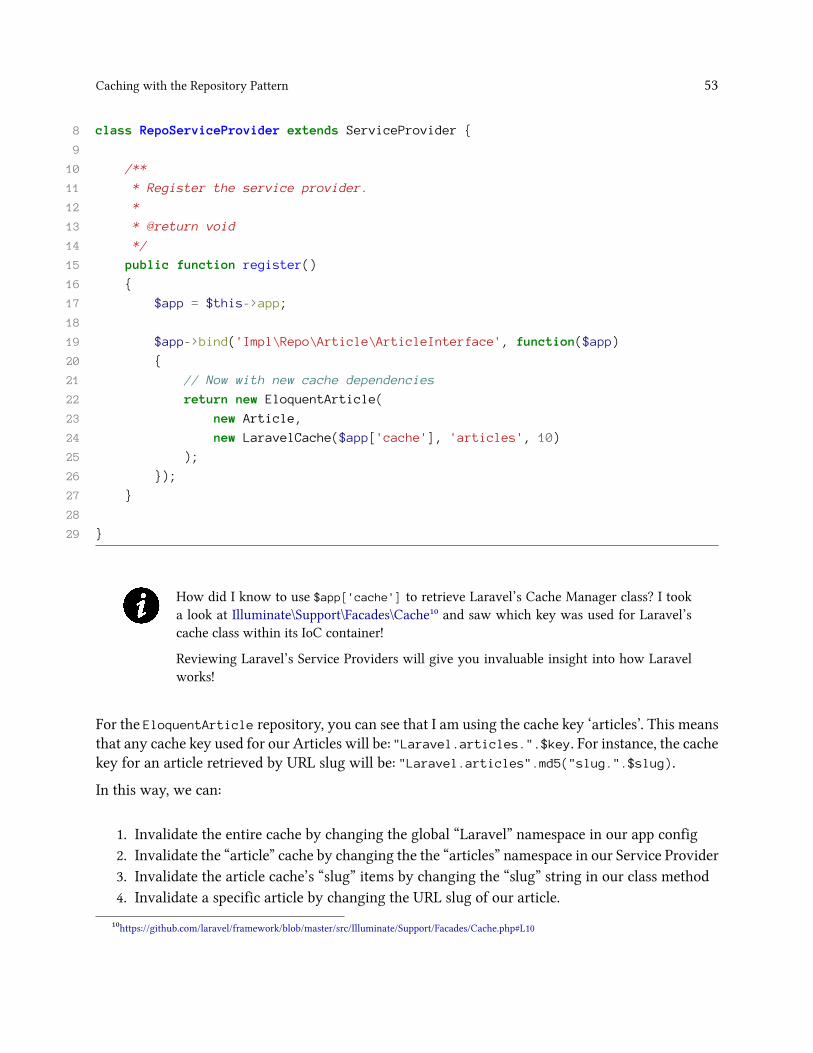
8 class RepoServiceProvider extends ServiceProvider {910 /**11 * Register the service provider.12 *13 * @return void14 */15 public function register()16 {17 $app = $this->app;1819 $app->bind('Impl\Repo\Article\ArticleInterface', function($app)20 {21 // Now with new cache dependencies22 return new EloquentArticle(23 new Article,24 new LaravelCache($app['cache'], 'articles', 10)25 );26 });27 }2829 }
How did I know to use $app['cache'] to retrieve Laravel’s Cache Manager class? I tooka look at Illuminate\Support\Facades\Cache¹⁰ and saw which key was used for Laravel’scache class within its IoC container!
Reviewing Laravel’s Service Providers will give you invaluable insight into how Laravelworks!
For the EloquentArticle repository, you can see that I am using the cache key ‘articles’. This meansthat any cache key used for our Articles will be: "Laravel.articles.".$key. For instance, the cachekey for an article retrieved by URL slug will be: "Laravel.articles".md5("slug.".$slug).
In this way, we can:
1. Invalidate the entire cache by changing the global “Laravel” namespace in our app config2. Invalidate the “article” cache by changing the the “articles” namespace in our Service Provider3. Invalidate the article cache’s “slug” items by changing the “slug” string in our class method4. Invalidate a specific article by changing the URL slug of our article.
¹⁰https://github.com/laravel/framework/blob/master/src/Illuminate/Support/Facades/Cache.php#L10
Caching with the Repository Pattern 54
In this way, we have multiple levels of granularity in what cached items we can manually invalidate,should the need arise!
Consider moving your cache key namespaces to a configuration file so they can be managedin one location.
How many levels of granularity you choose to use is a design decision worth taking sometime to consider.
Similar to our original repository, we cache the information relevant to handle pagination. This hasthe benefit of NOT making the code specific to any one pagination implementation. Instead wejust store what any pagination library is likely going to need (total number of items, the currentpage, how many items per page) and move the responsibility of creating the Paginator object to thecontroller.
What Have We Gained?
We’ve cached database calls in a testable, maintainable way.
Cache Implementations
We can now switch out which cache implementations we use in our application. We can keep all ofour code the same and use Laravel’s config to switch between Redis, Memcached or other cachedrivers. Alternatively, we can create our own implementation and define its use in the ServiceProvider.
Separation of Concerns
We’ve gone through some hurdles to not couple our code to Laravel’s libraries, while still keepingthe ability to leverage them. We can still swap out any cache implementation and use any paginationimplementation, all-the-while still being able to cache the database query results.
Testing
Using the principles of Dependency Injection, we can still unit test each of our new classes bymocking their dependencies.

Validation as a ServiceValidation and form processing is a tedious, constantly re-created wheel. Because forms and userinput are so often at the heart of an application’s business logic, their needs promise to always changefrom project to project.
Here we will discuss an attempt to make validation less painful.
What Is It?
Validation “as a service” describes moving your validation logic into a “service” which yourapplication can use. Similar to how we started with a database repository and added a “cachingservice” onto it, we can start with a form and add a “validation service”.
Why Do We Use It?
The goal of adding validation as a service is simply to keep a separation of concerns, while writingtestable code. Lastly, we also want to make creating form validation super-easy. In this chapter, we’llcreate an extendable validation base class which we can use for each form. Then we’ll see that inuse in a controller.
In the next chapter, we’ll get fancier by taking the validation completely away from the controller,and into a form-processor.
Let’s start simple.
Example
The Situation
Here’s some validation we might find in a controller. Let’s say we need to validate user input whencreating a new article in the admin area of our example blog:
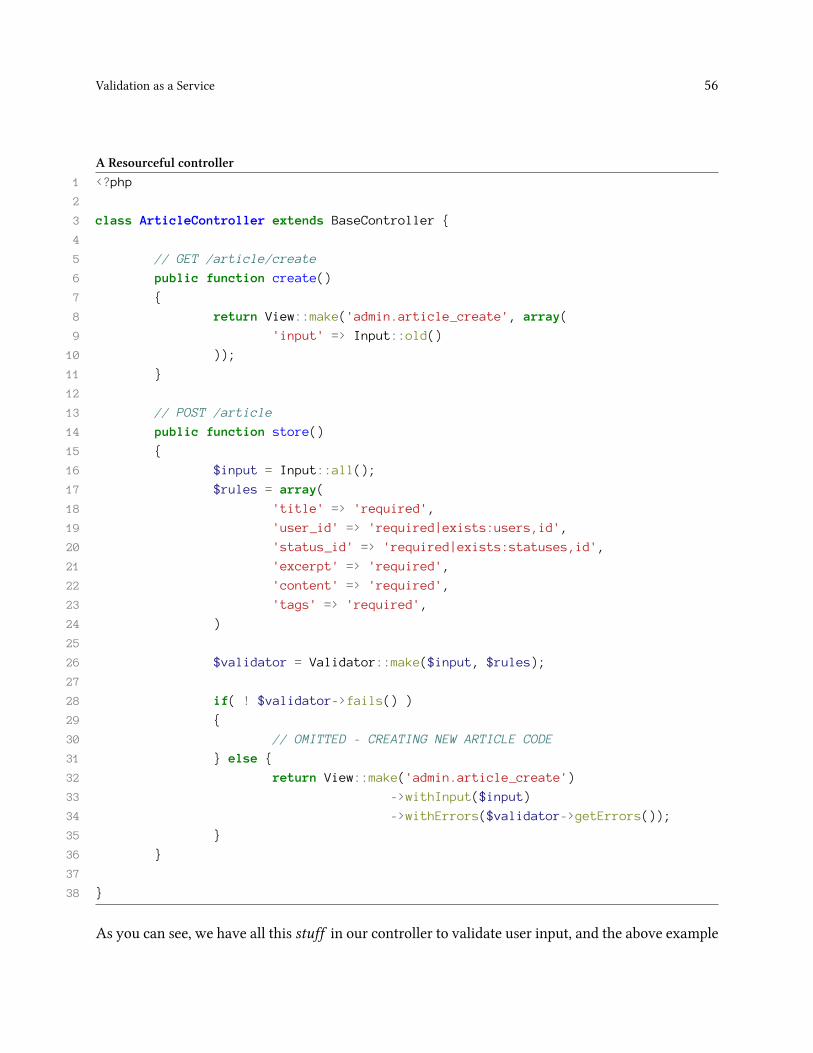
Validation as a Service 56
A Resourceful controller1 <?php23 class ArticleController extends BaseController {45 // GET /article/create6 public function create()7 {8 return View::make('admin.article_create', array(9 'input' => Input::old()10 ));11 }1213 // POST /article14 public function store()15 {16 $input = Input::all();17 $rules = array(18 'title' => 'required',19 'user_id' => 'required|exists:users,id',20 'status_id' => 'required|exists:statuses,id',21 'excerpt' => 'required',22 'content' => 'required',23 'tags' => 'required',24 )2526 $validator = Validator::make($input, $rules);2728 if( ! $validator->fails() )29 {30 // OMITTED - CREATING NEW ARTICLE CODE31 } else {32 return View::make('admin.article_create')33 ->withInput($input)34 ->withErrors($validator->getErrors());35 }36 }3738 }
As you can see, we have all this stuff in our controller to validate user input, and the above example
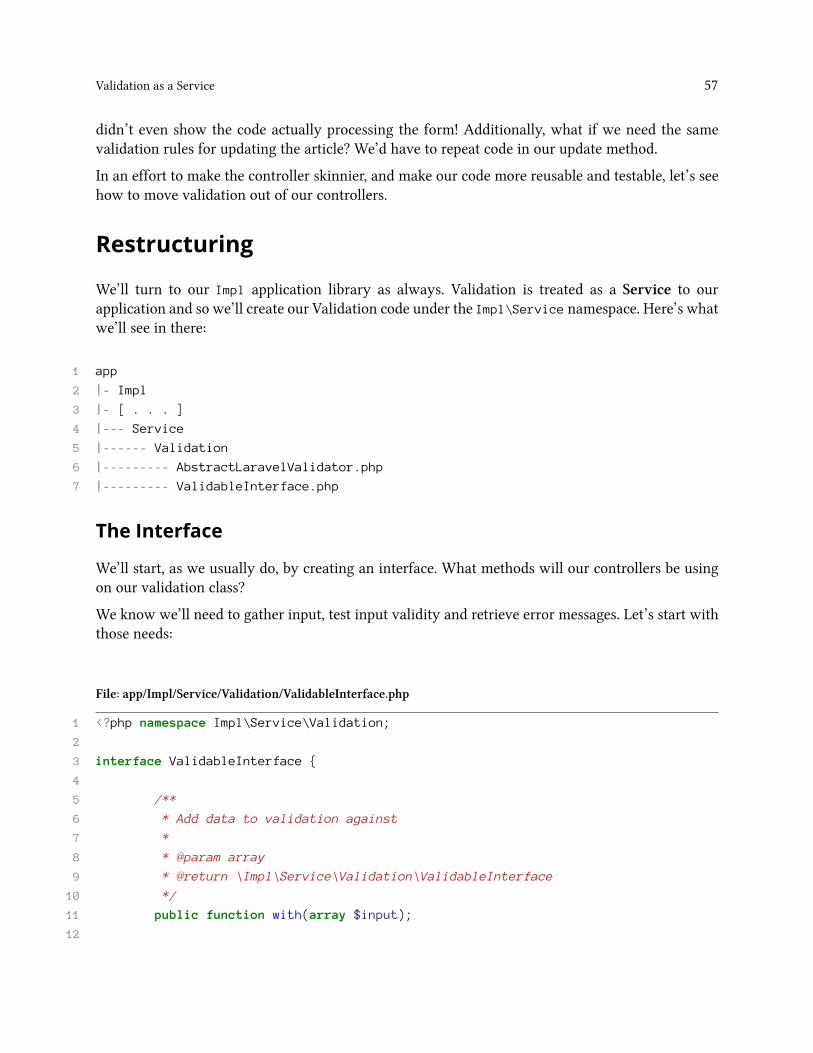
Validation as a Service 57
didn’t even show the code actually processing the form! Additionally, what if we need the samevalidation rules for updating the article? We’d have to repeat code in our update method.
In an effort to make the controller skinnier, and make our code more reusable and testable, let’s seehow to move validation out of our controllers.
Restructuring
We’ll turn to our Impl application library as always. Validation is treated as a Service to ourapplication and so we’ll create our Validation code under the Impl\Service namespace. Here’s whatwe’ll see in there:
1 app2 |- Impl3 |- [ . . . ]4 |--- Service5 |------ Validation6 |--------- AbstractLaravelValidator.php7 |--------- ValidableInterface.php
The Interface
We’ll start, as we usually do, by creating an interface. What methods will our controllers be usingon our validation class?
We know we’ll need to gather input, test input validity and retrieve error messages. Let’s start withthose needs:
File: app/Impl/Service/Validation/ValidableInterface.php
1 <?php namespace Impl\Service\Validation;23 interface ValidableInterface {45 /**6 * Add data to validation against7 *8 * @param array9 * @return \Impl\Service\Validation\ValidableInterface10 */11 public function with(array $input);12
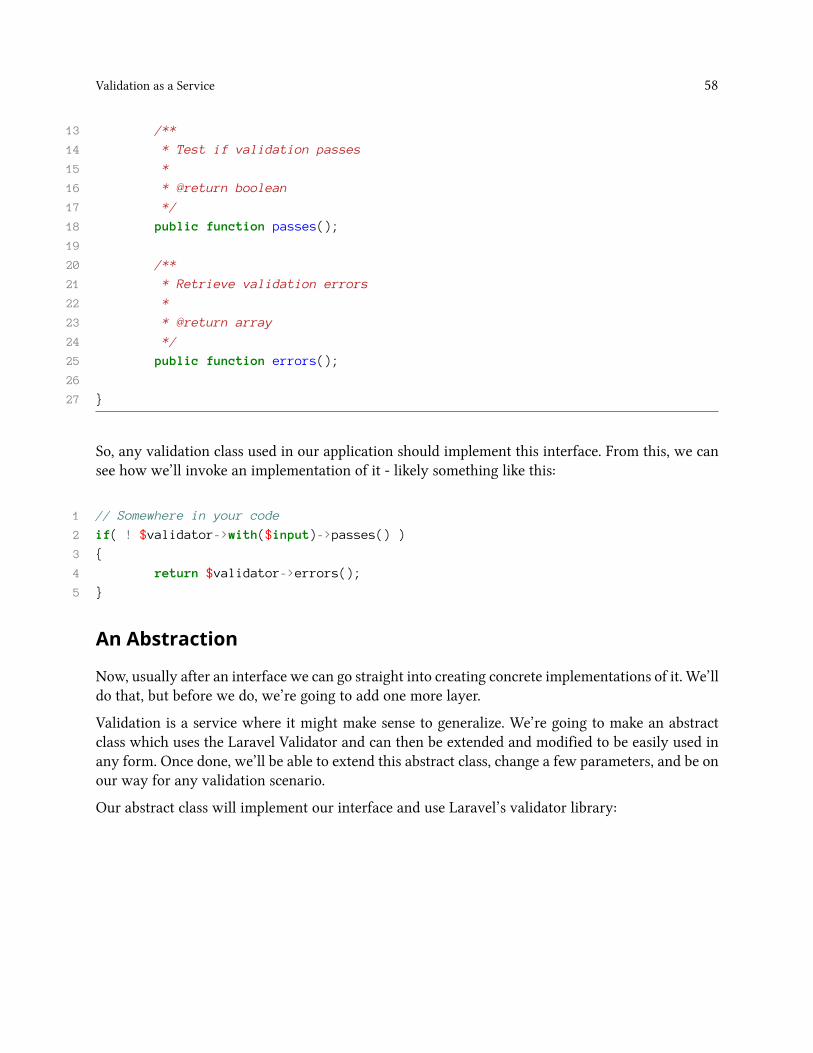
Validation as a Service 58
13 /**14 * Test if validation passes15 *16 * @return boolean17 */18 public function passes();1920 /**21 * Retrieve validation errors22 *23 * @return array24 */25 public function errors();2627 }
So, any validation class used in our application should implement this interface. From this, we cansee how we’ll invoke an implementation of it - likely something like this:
1 // Somewhere in your code2 if( ! $validator->with($input)->passes() )3 {4 return $validator->errors();5 }
An Abstraction
Now, usually after an interface we can go straight into creating concrete implementations of it. We’lldo that, but before we do, we’re going to add one more layer.
Validation is a service where it might make sense to generalize. We’re going to make an abstractclass which uses the Laravel Validator and can then be extended and modified to be easily used inany form. Once done, we’ll be able to extend this abstract class, change a few parameters, and be onour way for any validation scenario.
Our abstract class will implement our interface and use Laravel’s validator library:

Validation as a Service 59
File: app/Imple/Service/Validation/AbstractLaravelValidator.php
1 <?php namespace Impl\Service\Validation;23 use Illuminate\Validation\Factory as Validator;45 abstract class AbstractLaravelValidator implements ValidableInterface {67 /**8 * Validator9 *10 * @var \Illuminate\Validation\Factory11 */12 protected $validator;1314 /**15 * Validation data key => value array16 *17 * @var Array18 */19 protected $data = array();2021 /**22 * Validation errors23 *24 * @var Array25 */26 protected $errors = array();2728 /**29 * Validation rules30 *31 * @var Array32 */33 protected $rules = array();3435 /**36 * Custom validation messages37 *38 * @var Array39 */40 protected $messages = array();
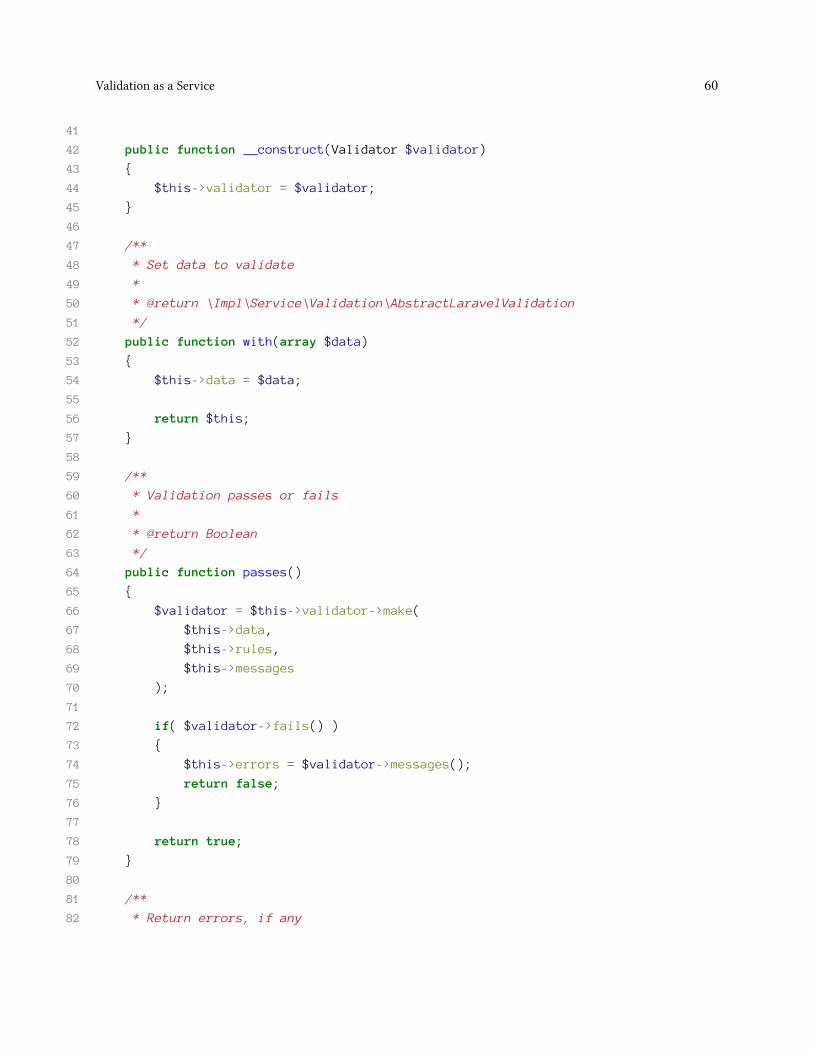
Validation as a Service 60
4142 public function __construct(Validator $validator)43 {44 $this->validator = $validator;45 }4647 /**48 * Set data to validate49 *50 * @return \Impl\Service\Validation\AbstractLaravelValidation51 */52 public function with(array $data)53 {54 $this->data = $data;5556 return $this;57 }5859 /**60 * Validation passes or fails61 *62 * @return Boolean63 */64 public function passes()65 {66 $validator = $this->validator->make(67 $this->data,68 $this->rules,69 $this->messages70 );7172 if( $validator->fails() )73 {74 $this->errors = $validator->messages();75 return false;76 }7778 return true;79 }8081 /**82 * Return errors, if any
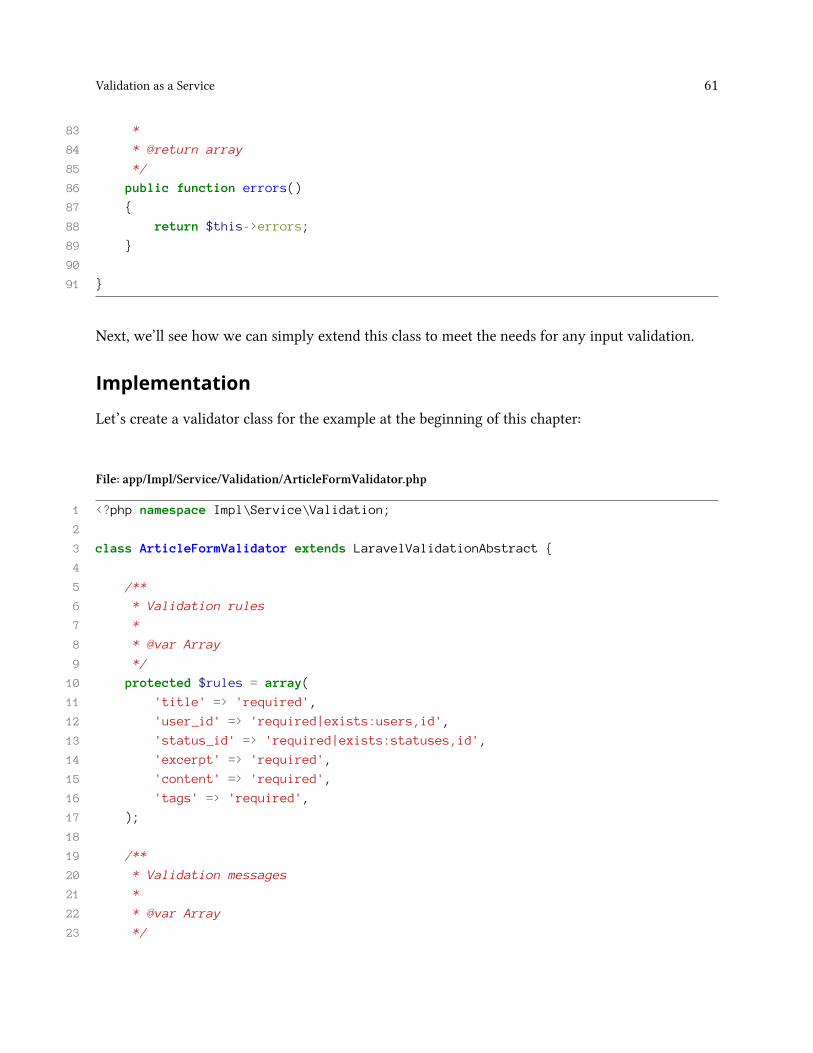
Validation as a Service 61
83 *84 * @return array85 */86 public function errors()87 {88 return $this->errors;89 }9091 }
Next, we’ll see how we can simply extend this class to meet the needs for any input validation.
Implementation
Let’s create a validator class for the example at the beginning of this chapter:
File: app/Impl/Service/Validation/ArticleFormValidator.php
1 <?php namespace Impl\Service\Validation;23 class ArticleFormValidator extends LaravelValidationAbstract {45 /**6 * Validation rules7 *8 * @var Array9 */10 protected $rules = array(11 'title' => 'required',12 'user_id' => 'required|exists:users,id',13 'status_id' => 'required|exists:statuses,id',14 'excerpt' => 'required',15 'content' => 'required',16 'tags' => 'required',17 );1819 /**20 * Validation messages21 *22 * @var Array23 */
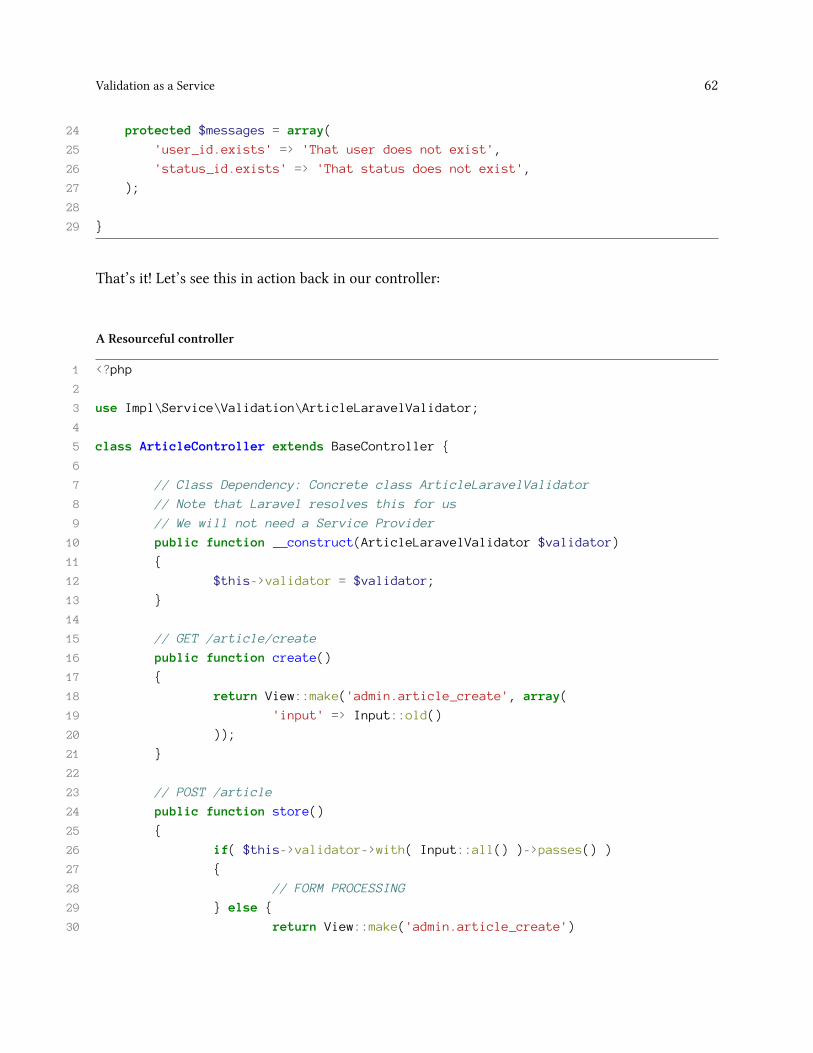
Validation as a Service 62
24 protected $messages = array(25 'user_id.exists' => 'That user does not exist',26 'status_id.exists' => 'That status does not exist',27 );2829 }
That’s it! Let’s see this in action back in our controller:
A Resourceful controller
1 <?php23 use Impl\Service\Validation\ArticleLaravelValidator;45 class ArticleController extends BaseController {67 // Class Dependency: Concrete class ArticleLaravelValidator8 // Note that Laravel resolves this for us9 // We will not need a Service Provider10 public function __construct(ArticleLaravelValidator $validator)11 {12 $this->validator = $validator;13 }1415 // GET /article/create16 public function create()17 {18 return View::make('admin.article_create', array(19 'input' => Input::old()20 ));21 }2223 // POST /article24 public function store()25 {26 if( $this->validator->with( Input::all() )->passes() )27 {28 // FORM PROCESSING29 } else {30 return View::make('admin.article_create')
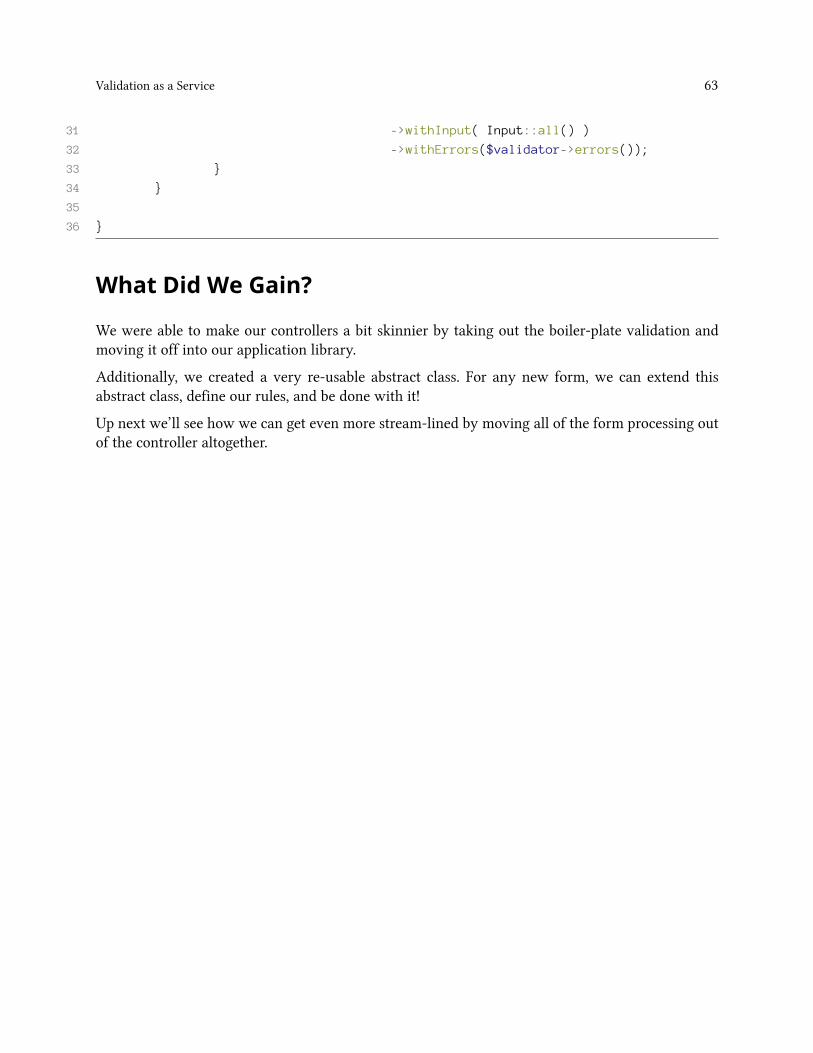
Validation as a Service 63
31 ->withInput( Input::all() )32 ->withErrors($validator->errors());33 }34 }3536 }
What Did We Gain?
We were able to make our controllers a bit skinnier by taking out the boiler-plate validation andmoving it off into our application library.
Additionally, we created a very re-usable abstract class. For any new form, we can extend thisabstract class, define our rules, and be done with it!
Up next we’ll see how we can get even more stream-lined by moving all of the form processing outof the controller altogether.
Form processingOne half of handling user input is Validation. The other half is, of course, Form Processing.
What Is It?
Let’s go over what “form processing” is. If you have a form, and a user submits info, the steps takein code generally are:
1. Gather user input2. Validate user input3. Perform some operation with user input4. Generate a response
Where Do We Use It?
A controller is an excellent place for items 1 and 4 above. We’ve seen how validation (step 2) canbe handled as a service. Processing the form (step 3) can also be handled by a service within ourapplication code!
Moving the form processing out of the controller and into a set of service classes gives us a betteropportunity to unit test it. We can take away the dependency of it having to run in context of anHTTP request, allowing us to mock its dependencies.
In short, moving the form code out of the controller gives us a more re-usable, more testable andfinally more maintainable way to handle our form code.
Example
We have validation in place already from the previous chapter, so let’s see how we can role upValidation and Form processing into a better home.
The Situation
We’ll be creating a Form service, which makes use of our Repository class to handle the CRUD andValidation service to handle user input validation.
From the previous chapter on Validation, we ended up with a controller which has validation setupas a service:
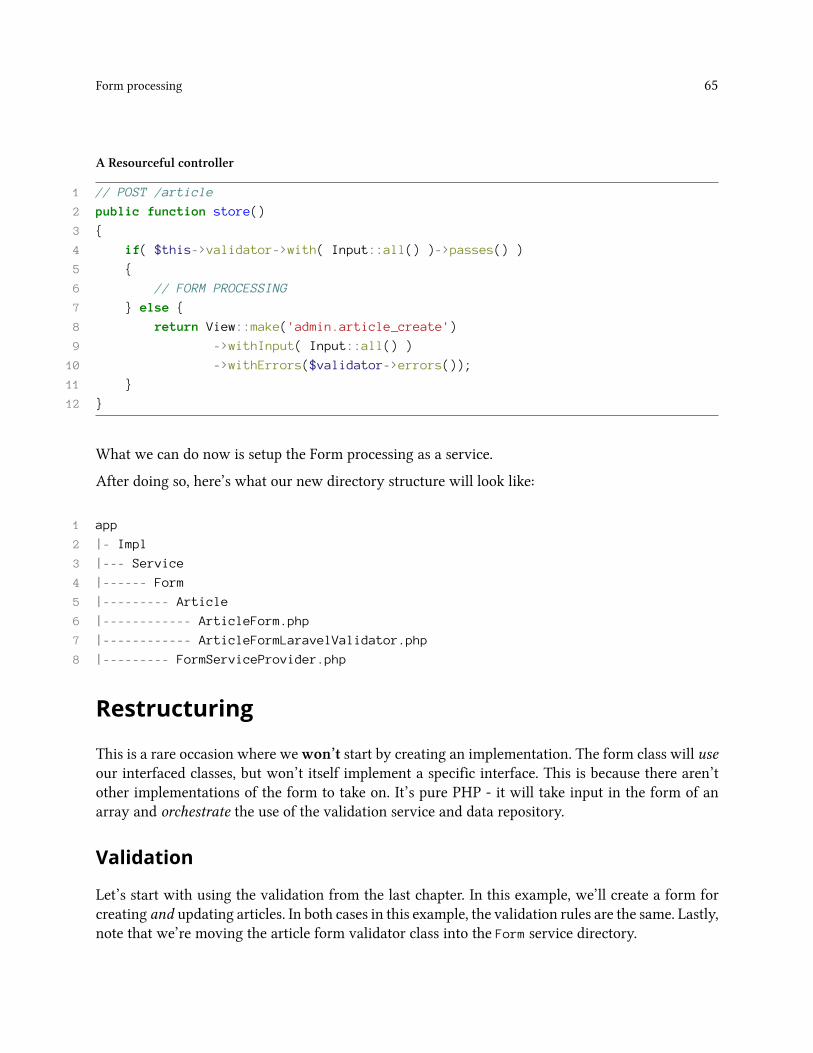
Form processing 65
A Resourceful controller
1 // POST /article2 public function store()3 {4 if( $this->validator->with( Input::all() )->passes() )5 {6 // FORM PROCESSING7 } else {8 return View::make('admin.article_create')9 ->withInput( Input::all() )10 ->withErrors($validator->errors());11 }12 }
What we can do now is setup the Form processing as a service.
After doing so, here’s what our new directory structure will look like:
1 app2 |- Impl3 |--- Service4 |------ Form5 |--------- Article6 |------------ ArticleForm.php7 |------------ ArticleFormLaravelValidator.php8 |--------- FormServiceProvider.php
Restructuring
This is a rare occasion where we won’t start by creating an implementation. The form class will useour interfaced classes, but won’t itself implement a specific interface. This is because there aren’tother implementations of the form to take on. It’s pure PHP - it will take input in the form of anarray and orchestrate the use of the validation service and data repository.
Validation
Let’s start with using the validation from the last chapter. In this example, we’ll create a form forcreating and updating articles. In both cases in this example, the validation rules are the same. Lastly,note that we’re moving the article form validator class into the Form service directory.
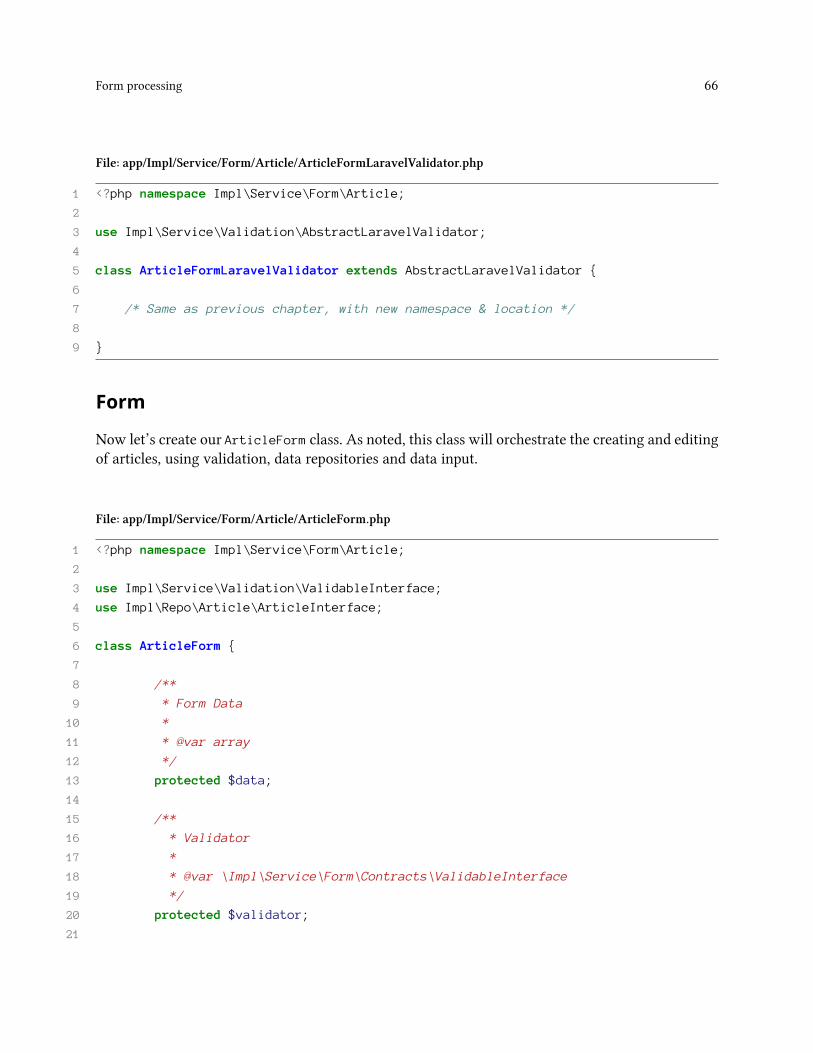
Form processing 66
File: app/Impl/Service/Form/Article/ArticleFormLaravelValidator.php
1 <?php namespace Impl\Service\Form\Article;23 use Impl\Service\Validation\AbstractLaravelValidator;45 class ArticleFormLaravelValidator extends AbstractLaravelValidator {67 /* Same as previous chapter, with new namespace & location */89 }
Form
Now let’s create our ArticleForm class. As noted, this class will orchestrate the creating and editingof articles, using validation, data repositories and data input.
File: app/Impl/Service/Form/Article/ArticleForm.php
1 <?php namespace Impl\Service\Form\Article;23 use Impl\Service\Validation\ValidableInterface;4 use Impl\Repo\Article\ArticleInterface;56 class ArticleForm {78 /**9 * Form Data10 *11 * @var array12 */13 protected $data;1415 /**16 * Validator17 *18 * @var \Impl\Service\Form\Contracts\ValidableInterface19 */20 protected $validator;21
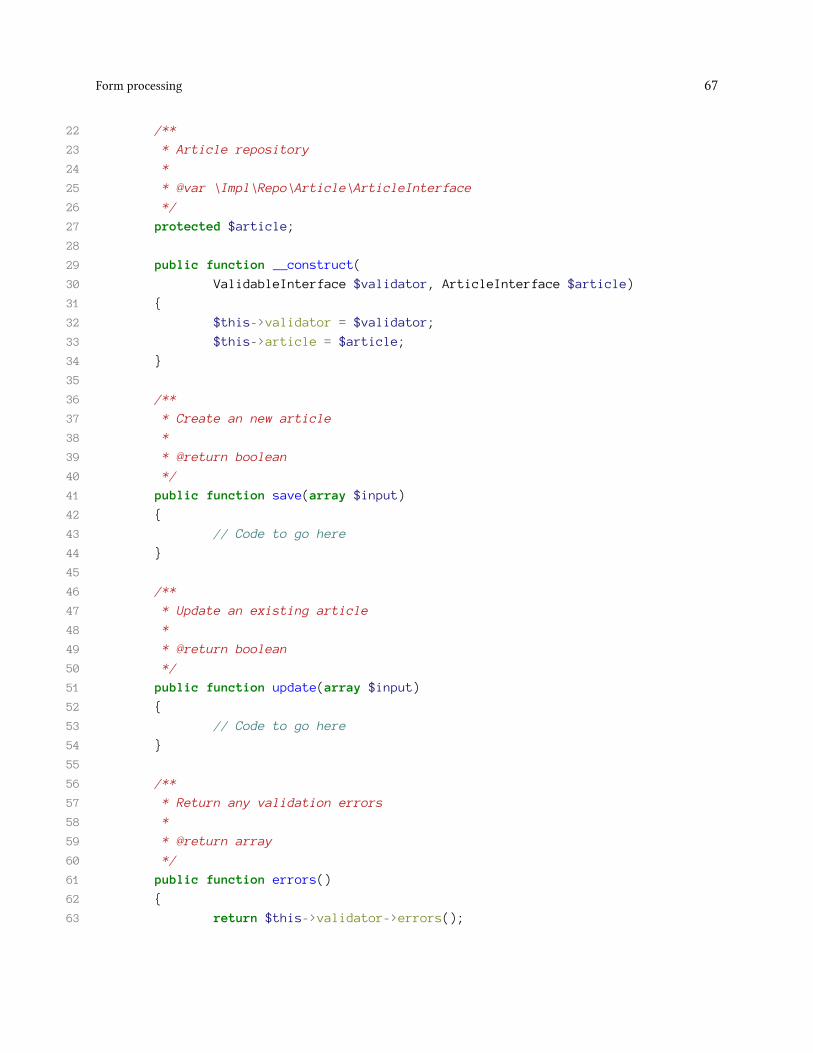
Form processing 67
22 /**23 * Article repository24 *25 * @var \Impl\Repo\Article\ArticleInterface26 */27 protected $article;2829 public function __construct(30 ValidableInterface $validator, ArticleInterface $article)31 {32 $this->validator = $validator;33 $this->article = $article;34 }3536 /**37 * Create an new article38 *39 * @return boolean40 */41 public function save(array $input)42 {43 // Code to go here44 }4546 /**47 * Update an existing article48 *49 * @return boolean50 */51 public function update(array $input)52 {53 // Code to go here54 }5556 /**57 * Return any validation errors58 *59 * @return array60 */61 public function errors()62 {63 return $this->validator->errors();
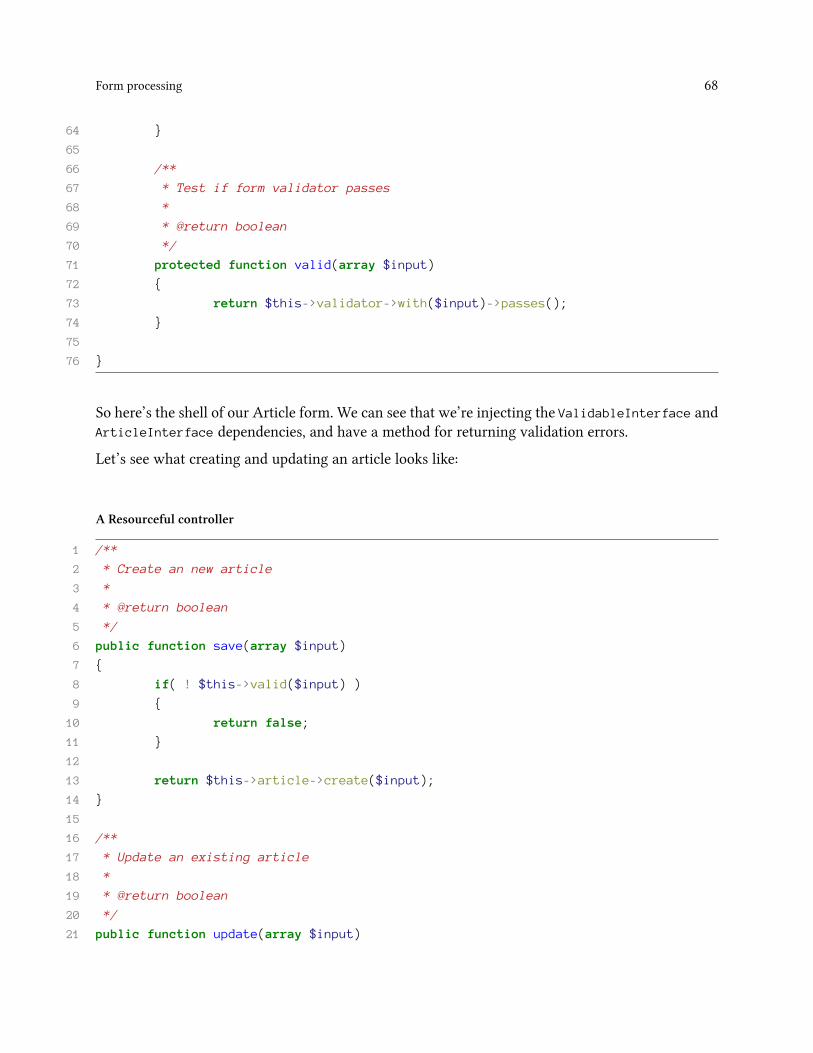
Form processing 68
64 }6566 /**67 * Test if form validator passes68 *69 * @return boolean70 */71 protected function valid(array $input)72 {73 return $this->validator->with($input)->passes();74 }7576 }
So here’s the shell of our Article form. We can see that we’re injecting the ValidableInterface andArticleInterface dependencies, and have a method for returning validation errors.
Let’s see what creating and updating an article looks like:
A Resourceful controller
1 /**2 * Create an new article3 *4 * @return boolean5 */6 public function save(array $input)7 {8 if( ! $this->valid($input) )9 {10 return false;11 }1213 return $this->article->create($input);14 }1516 /**17 * Update an existing article18 *19 * @return boolean20 */21 public function update(array $input)
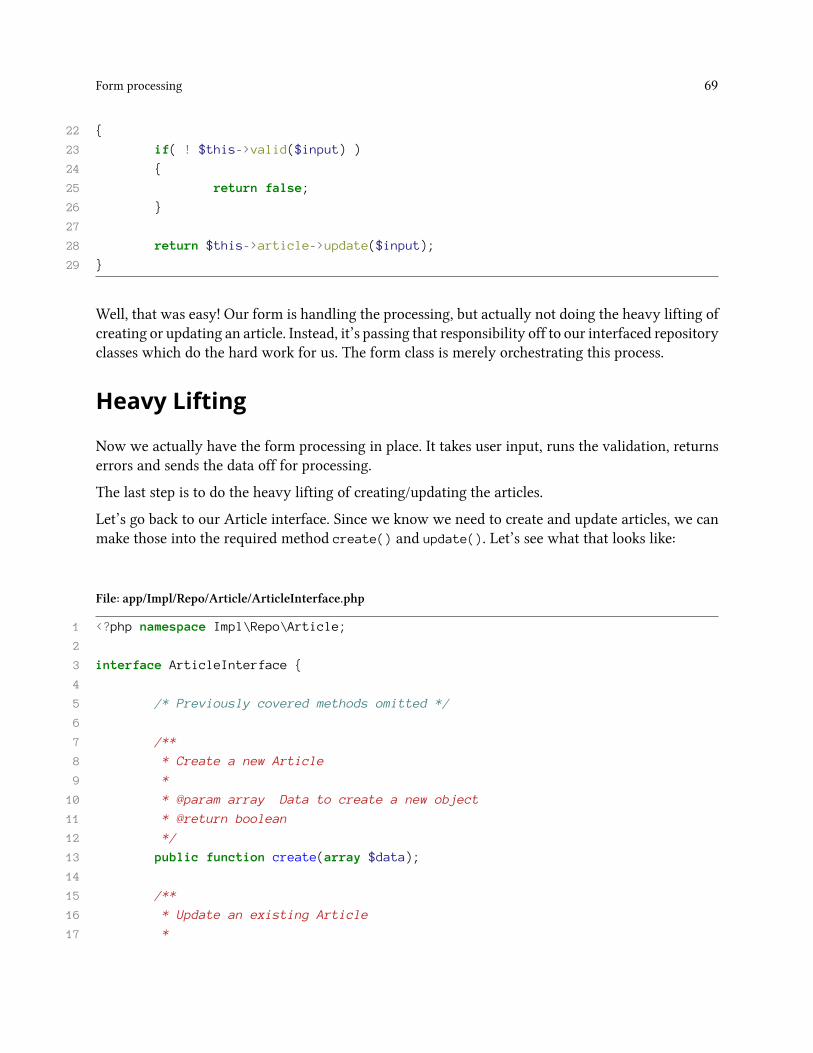
Form processing 69
22 {23 if( ! $this->valid($input) )24 {25 return false;26 }2728 return $this->article->update($input);29 }
Well, that was easy! Our form is handling the processing, but actually not doing the heavy lifting ofcreating or updating an article. Instead, it’s passing that responsibility off to our interfaced repositoryclasses which do the hard work for us. The form class is merely orchestrating this process.
Heavy Lifting
Now we actually have the form processing in place. It takes user input, runs the validation, returnserrors and sends the data off for processing.
The last step is to do the heavy lifting of creating/updating the articles.
Let’s go back to our Article interface. Since we know we need to create and update articles, we canmake those into the required method create() and update(). Let’s see what that looks like:
File: app/Impl/Repo/Article/ArticleInterface.php
1 <?php namespace Impl\Repo\Article;23 interface ArticleInterface {45 /* Previously covered methods omitted */67 /**8 * Create a new Article9 *10 * @param array Data to create a new object11 * @return boolean12 */13 public function create(array $data);1415 /**16 * Update an existing Article17 *
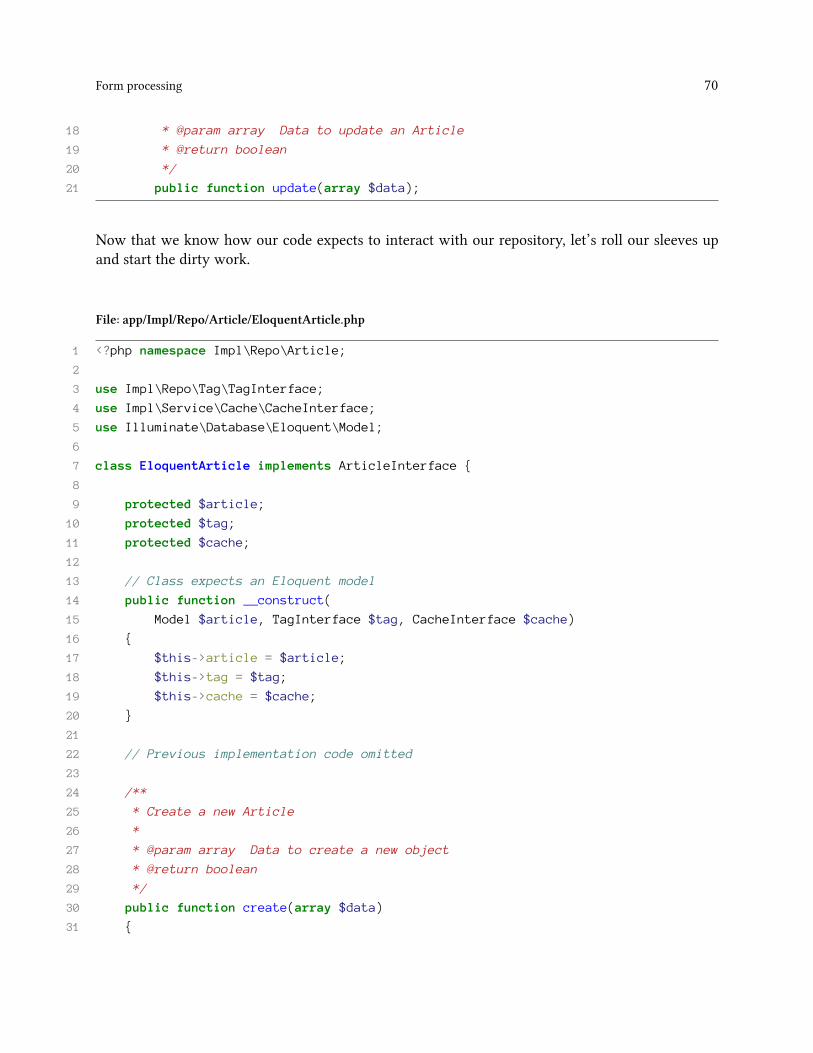
Form processing 70
18 * @param array Data to update an Article19 * @return boolean20 */21 public function update(array $data);
Now that we know how our code expects to interact with our repository, let’s roll our sleeves upand start the dirty work.
File: app/Impl/Repo/Article/EloquentArticle.php
1 <?php namespace Impl\Repo\Article;23 use Impl\Repo\Tag\TagInterface;4 use Impl\Service\Cache\CacheInterface;5 use Illuminate\Database\Eloquent\Model;67 class EloquentArticle implements ArticleInterface {89 protected $article;10 protected $tag;11 protected $cache;1213 // Class expects an Eloquent model14 public function __construct(15 Model $article, TagInterface $tag, CacheInterface $cache)16 {17 $this->article = $article;18 $this->tag = $tag;19 $this->cache = $cache;20 }2122 // Previous implementation code omitted2324 /**25 * Create a new Article26 *27 * @param array Data to create a new object28 * @return boolean29 */30 public function create(array $data)31 {
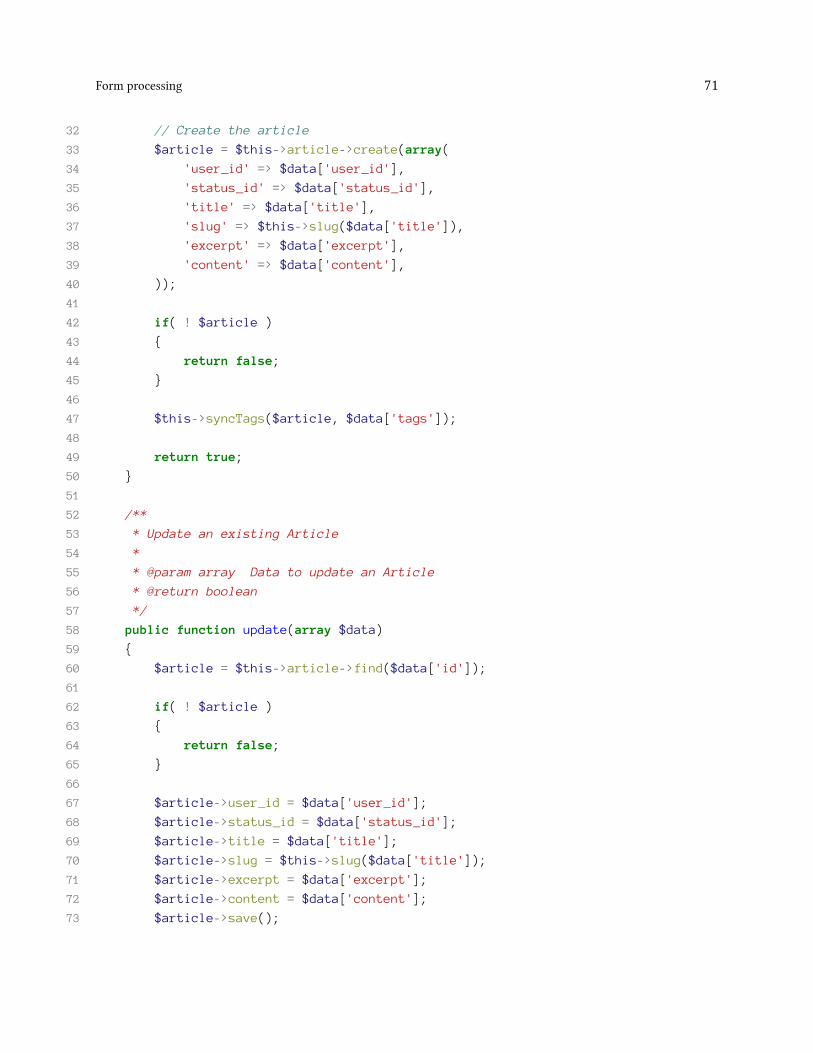
Form processing 71
32 // Create the article33 $article = $this->article->create(array(34 'user_id' => $data['user_id'],35 'status_id' => $data['status_id'],36 'title' => $data['title'],37 'slug' => $this->slug($data['title']),38 'excerpt' => $data['excerpt'],39 'content' => $data['content'],40 ));4142 if( ! $article )43 {44 return false;45 }4647 $this->syncTags($article, $data['tags']);4849 return true;50 }5152 /**53 * Update an existing Article54 *55 * @param array Data to update an Article56 * @return boolean57 */58 public function update(array $data)59 {60 $article = $this->article->find($data['id']);6162 if( ! $article )63 {64 return false;65 }6667 $article->user_id = $data['user_id'];68 $article->status_id = $data['status_id'];69 $article->title = $data['title'];70 $article->slug = $this->slug($data['title']);71 $article->excerpt = $data['excerpt'];72 $article->content = $data['content'];73 $article->save();
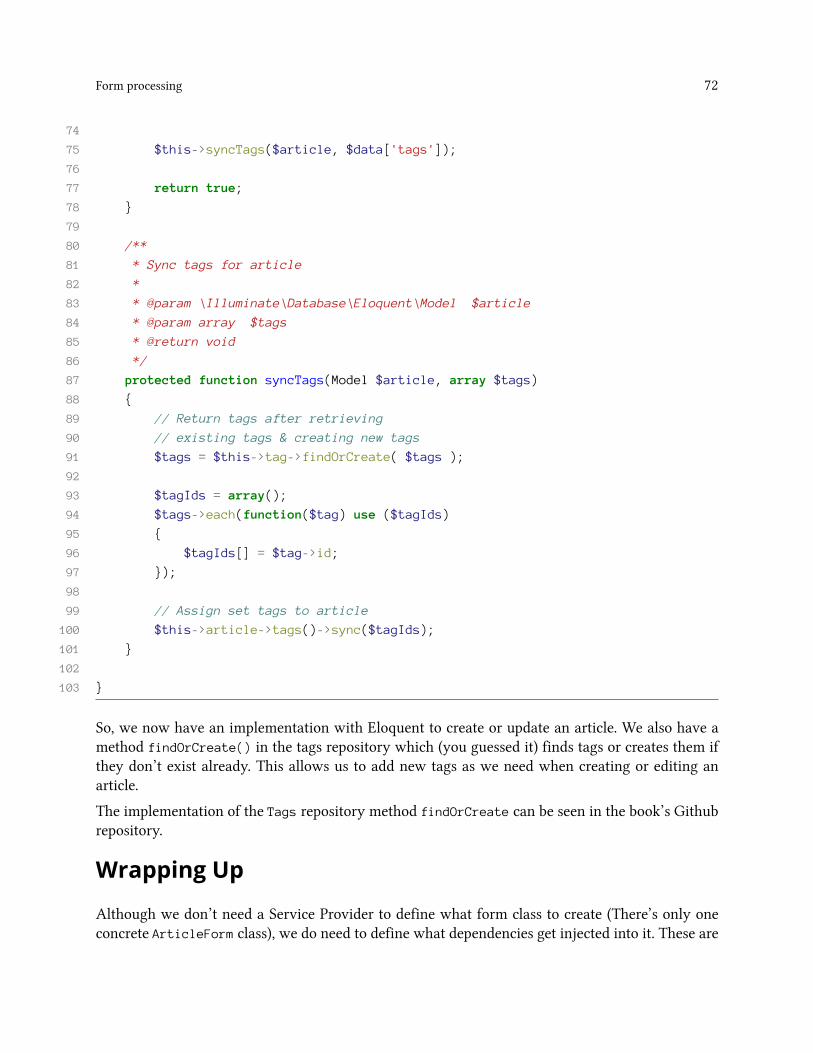
Form processing 72
7475 $this->syncTags($article, $data['tags']);7677 return true;78 }7980 /**81 * Sync tags for article82 *83 * @param \Illuminate\Database\Eloquent\Model $article84 * @param array $tags85 * @return void86 */87 protected function syncTags(Model $article, array $tags)88 {89 // Return tags after retrieving90 // existing tags & creating new tags91 $tags = $this->tag->findOrCreate( $tags );9293 $tagIds = array();94 $tags->each(function($tag) use ($tagIds)95 {96 $tagIds[] = $tag->id;97 });9899 // Assign set tags to article100 $this->article->tags()->sync($tagIds);101 }102103 }
So, we now have an implementation with Eloquent to create or update an article. We also have amethod findOrCreate() in the tags repository which (you guessed it) finds tags or creates them ifthey don’t exist already. This allows us to add new tags as we need when creating or editing anarticle.
The implementation of the Tags repository method findOrCreate can be seen in the book’s Githubrepository.
Wrapping Up
Although we don’t need a Service Provider to define what form class to create (There’s only oneconcrete ArticleForm class), we do need to define what dependencies get injected into it. These are
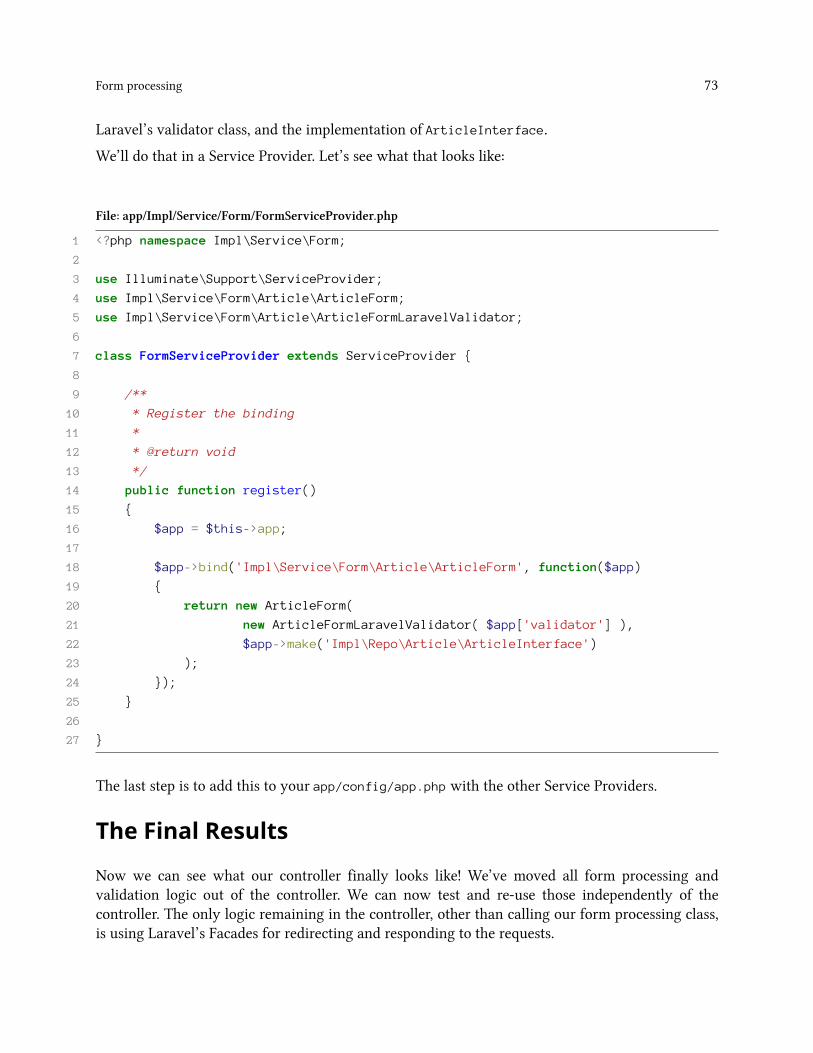
Form processing 73
Laravel’s validator class, and the implementation of ArticleInterface.
We’ll do that in a Service Provider. Let’s see what that looks like:
File: app/Impl/Service/Form/FormServiceProvider.php
1 <?php namespace Impl\Service\Form;23 use Illuminate\Support\ServiceProvider;4 use Impl\Service\Form\Article\ArticleForm;5 use Impl\Service\Form\Article\ArticleFormLaravelValidator;67 class FormServiceProvider extends ServiceProvider {89 /**10 * Register the binding11 *12 * @return void13 */14 public function register()15 {16 $app = $this->app;1718 $app->bind('Impl\Service\Form\Article\ArticleForm', function($app)19 {20 return new ArticleForm(21 new ArticleFormLaravelValidator( $app['validator'] ),22 $app->make('Impl\Repo\Article\ArticleInterface')23 );24 });25 }2627 }
The last step is to add this to your app/config/app.php with the other Service Providers.
The Final Results
Now we can see what our controller finally looks like! We’ve moved all form processing andvalidation logic out of the controller. We can now test and re-use those independently of thecontroller. The only logic remaining in the controller, other than calling our form processing class,is using Laravel’s Facades for redirecting and responding to the requests.
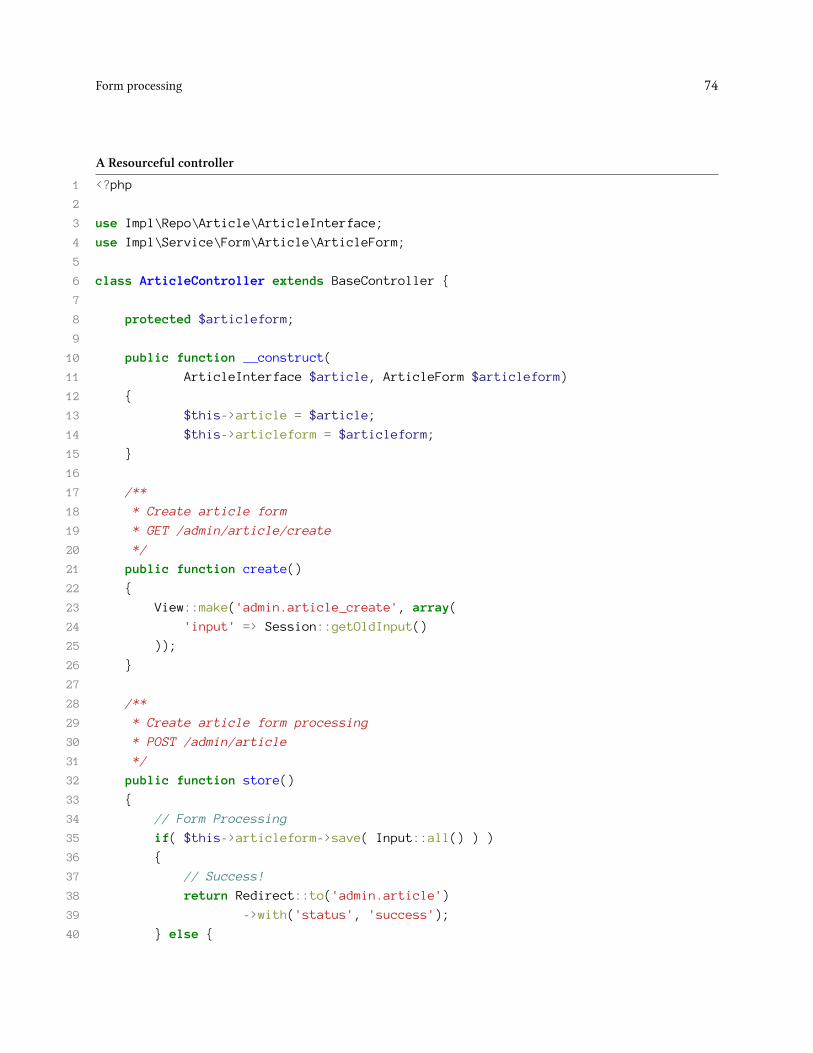
Form processing 74
A Resourceful controller
1 <?php23 use Impl\Repo\Article\ArticleInterface;4 use Impl\Service\Form\Article\ArticleForm;56 class ArticleController extends BaseController {78 protected $articleform;910 public function __construct(11 ArticleInterface $article, ArticleForm $articleform)12 {13 $this->article = $article;14 $this->articleform = $articleform;15 }1617 /**18 * Create article form19 * GET /admin/article/create20 */21 public function create()22 {23 View::make('admin.article_create', array(24 'input' => Session::getOldInput()25 ));26 }2728 /**29 * Create article form processing30 * POST /admin/article31 */32 public function store()33 {34 // Form Processing35 if( $this->articleform->save( Input::all() ) )36 {37 // Success!38 return Redirect::to('admin.article')39 ->with('status', 'success');40 } else {
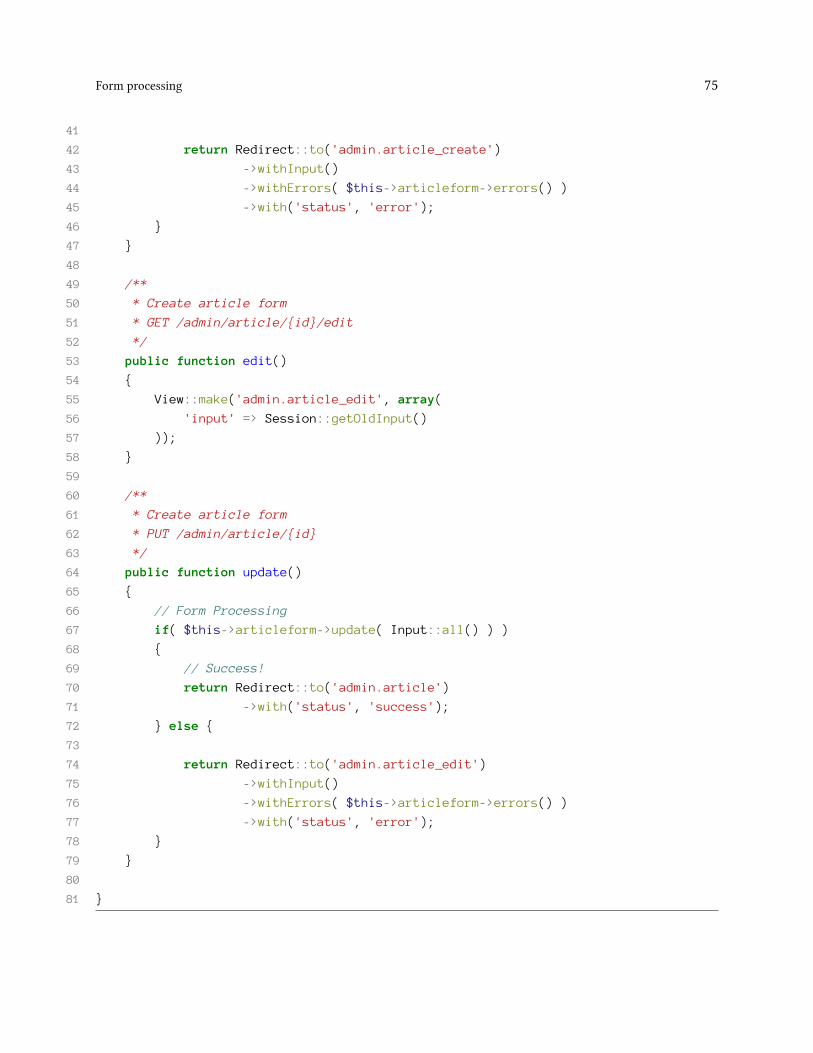
Form processing 75
4142 return Redirect::to('admin.article_create')43 ->withInput()44 ->withErrors( $this->articleform->errors() )45 ->with('status', 'error');46 }47 }4849 /**50 * Create article form51 * GET /admin/article/{id}/edit52 */53 public function edit()54 {55 View::make('admin.article_edit', array(56 'input' => Session::getOldInput()57 ));58 }5960 /**61 * Create article form62 * PUT /admin/article/{id}63 */64 public function update()65 {66 // Form Processing67 if( $this->articleform->update( Input::all() ) )68 {69 // Success!70 return Redirect::to('admin.article')71 ->with('status', 'success');72 } else {7374 return Redirect::to('admin.article_edit')75 ->withInput()76 ->withErrors( $this->articleform->errors() )77 ->with('status', 'error');78 }79 }8081 }
Form processing 76
What Did We Gain?
We now made our form processing more testable and maintainable:
1. We can test the ArticleForm class with a liberal use of mocks.2. We can change the form’s validation rules easily.3. We can swap out data storage implementations without changing the form code.4. We gain code re-usability. We can call the form code outside of the context of an HTTP request.
We can (and do!) re-use the data repository and validation classes!
Building up our application using the repository pattern and utilizing dependency injection andother SOLID practices has, in total, enabled us to make form processing less insufferable!
Error HandlingWhat response a user sees as the result of a request is driven by Laravel. Laravel acts as theintermediary between our application code and an HTTP request, and so has the responsibilityof generating the response to a request. Our application merely supplies Laravel with the data torespond with.
Going further, how Laravel responds to errors depends on the context. Laravel is making requests onour application and returning a representation of the application’s response. In a browser, an HTMLrepresentation is returned. In an API call, a JSON object might be returned. Lastly, in a CLI call, aplain-text response may be most appropriate.
To that end, there isn’t really need to do a lot of extra work for error handling. We can intercepterrors and decide how to show them (or not) to the user using Laravel’s built-in mechanisms.
However, there is the issue of business logic errors. You may need to handle your errors within yourbusiness logic separately from Laravel-specific errors. For example, you may need to be alerted aboutfailures in a process important to your application, while finding it safe to ignore most 404 HTTPerrors.
In this chapter, we’ll see how we can set your application up to throw certain Exceptions and use acustom error handler to perform any needed actions.
Specifically, we’ll cover how to catch business-logic exceptions and send a notification as a result.
What is Error Handling?
Error handling is, rather obviously, how your application responds to an error.
There are two main things to consider when handling an error:
1. Taking action on the error2. Displaying a meaningful response about the error
Taking action on an error usually involves logging and alerting. You want a log of any error so thatthey can be audited and for debugging. You may also need some sort of alert mechanism for severeerrors which stop critical business logic from performing.
Displaying a meaningful response is, as mentioned, all about context. In development, we wanterrors to display to the developer. If they are using a console, a console-readable error is appropriate.If they are using a browser, then a browser-based error response is appropriate. If we are inproduction, then a “friendly” error response is appropriate for our users.
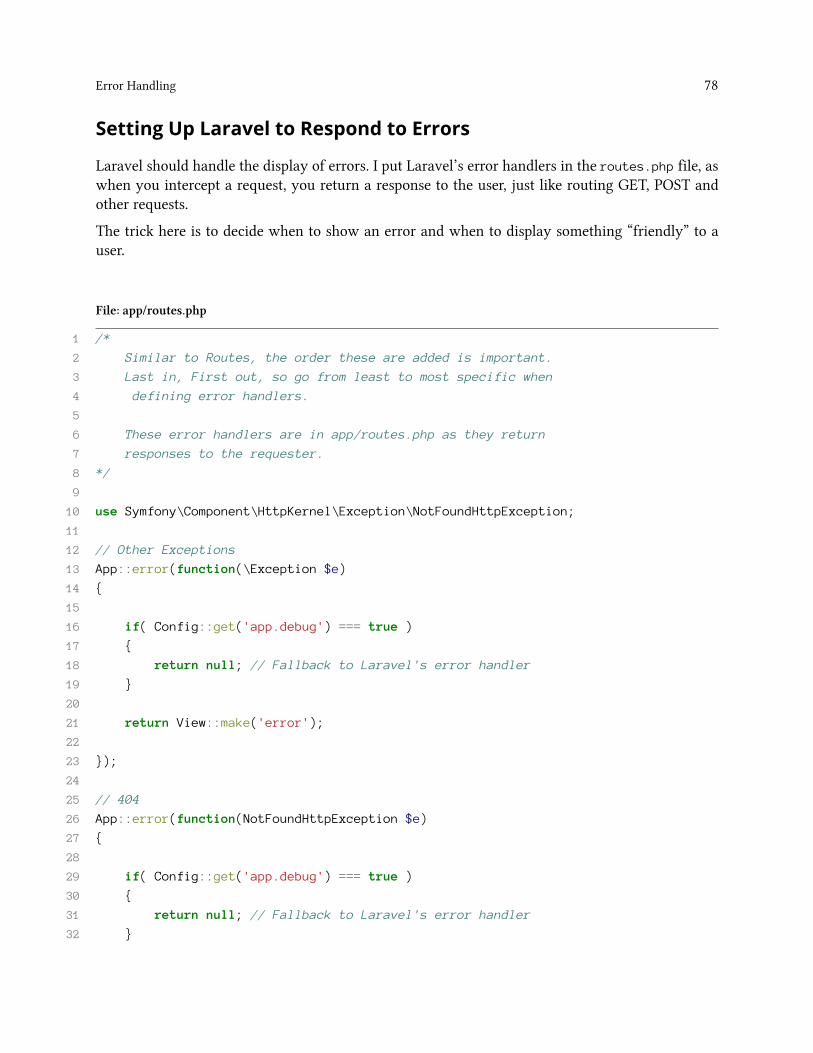
Error Handling 78
Setting Up Laravel to Respond to Errors
Laravel should handle the display of errors. I put Laravel’s error handlers in the routes.php file, aswhen you intercept a request, you return a response to the user, just like routing GET, POST andother requests.
The trick here is to decide when to show an error and when to display something “friendly” to auser.
File: app/routes.php
1 /*2 Similar to Routes, the order these are added is important.3 Last in, First out, so go from least to most specific when4 defining error handlers.56 These error handlers are in app/routes.php as they return7 responses to the requester.8 */910 use Symfony\Component\HttpKernel\Exception\NotFoundHttpException;1112 // Other Exceptions13 App::error(function(\Exception $e)14 {1516 if( Config::get('app.debug') === true )17 {18 return null; // Fallback to Laravel's error handler19 }2021 return View::make('error');2223 });2425 // 40426 App::error(function(NotFoundHttpException $e)27 {2829 if( Config::get('app.debug') === true )30 {31 return null; // Fallback to Laravel's error handler32 }
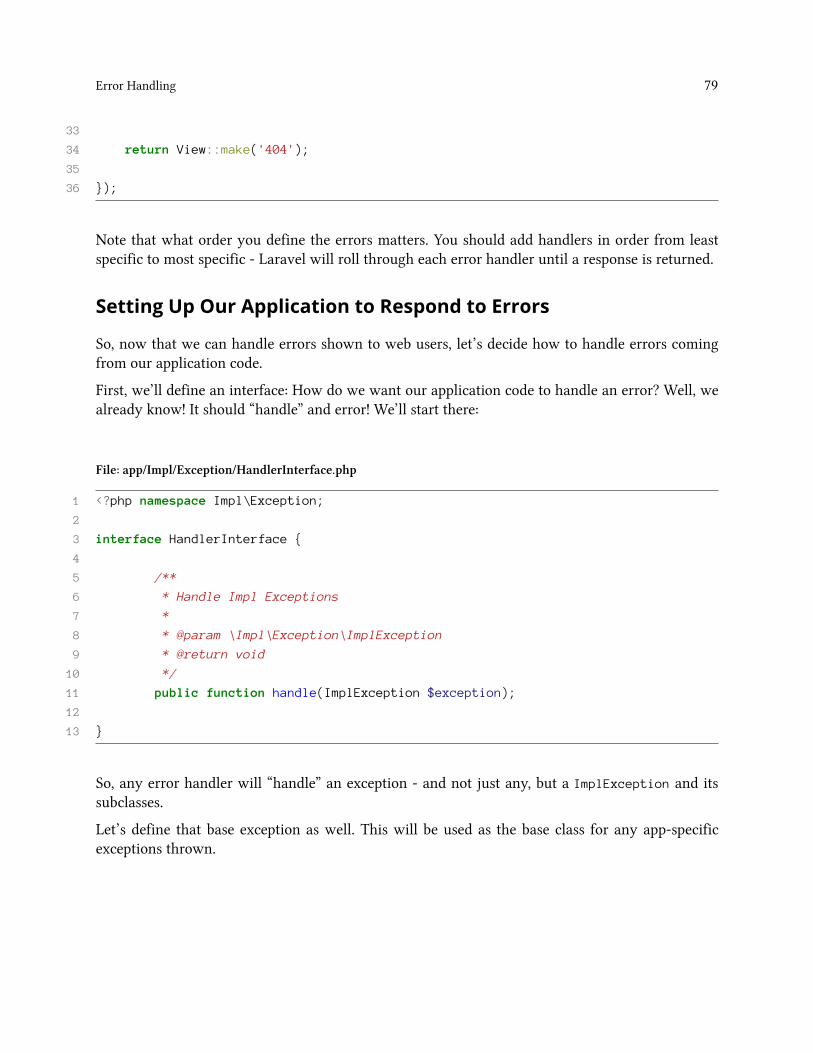
Error Handling 79
3334 return View::make('404');3536 });
Note that what order you define the errors matters. You should add handlers in order from leastspecific to most specific - Laravel will roll through each error handler until a response is returned.
Setting Up Our Application to Respond to Errors
So, now that we can handle errors shown to web users, let’s decide how to handle errors comingfrom our application code.
First, we’ll define an interface: How do we want our application code to handle an error? Well, wealready know! It should “handle” and error! We’ll start there:
File: app/Impl/Exception/HandlerInterface.php
1 <?php namespace Impl\Exception;23 interface HandlerInterface {45 /**6 * Handle Impl Exceptions7 *8 * @param \Impl\Exception\ImplException9 * @return void10 */11 public function handle(ImplException $exception);1213 }
So, any error handler will “handle” an exception - and not just any, but a ImplException and itssubclasses.
Let’s define that base exception as well. This will be used as the base class for any app-specificexceptions thrown.
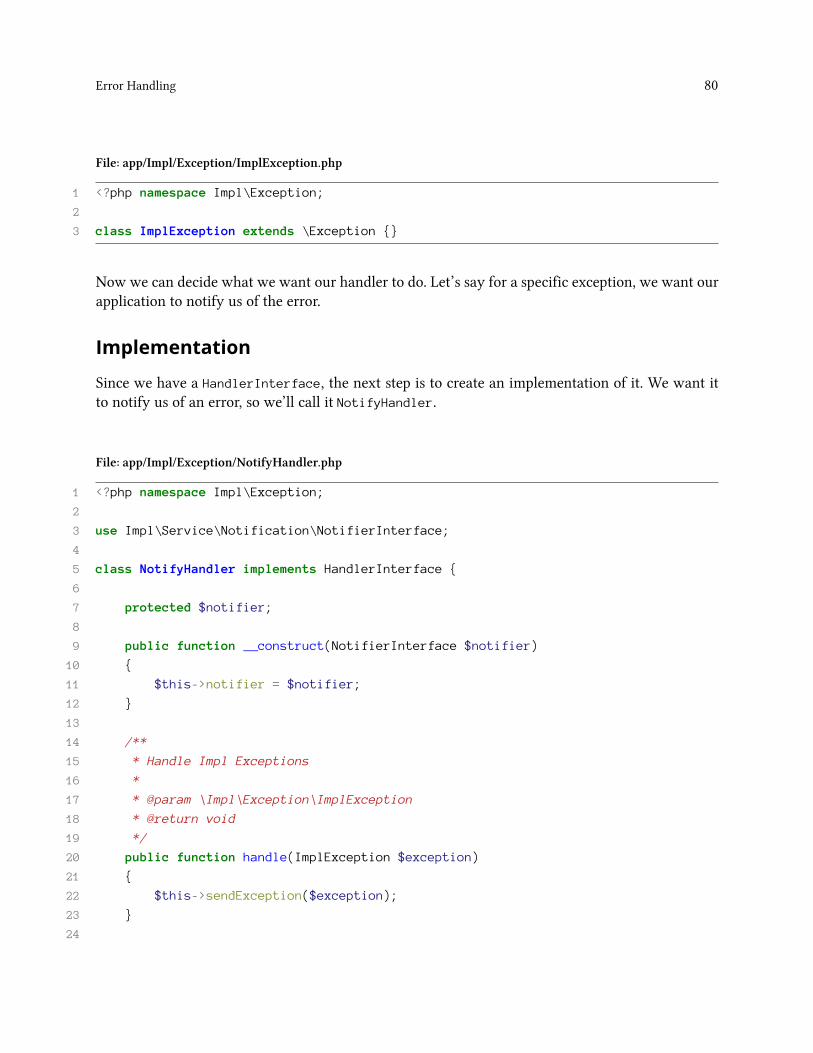
Error Handling 80
File: app/Impl/Exception/ImplException.php
1 <?php namespace Impl\Exception;23 class ImplException extends \Exception {}
Now we can decide what we want our handler to do. Let’s say for a specific exception, we want ourapplication to notify us of the error.
Implementation
Since we have a HandlerInterface, the next step is to create an implementation of it. We want itto notify us of an error, so we’ll call it NotifyHandler.
File: app/Impl/Exception/NotifyHandler.php
1 <?php namespace Impl\Exception;23 use Impl\Service\Notification\NotifierInterface;45 class NotifyHandler implements HandlerInterface {67 protected $notifier;89 public function __construct(NotifierInterface $notifier)10 {11 $this->notifier = $notifier;12 }1314 /**15 * Handle Impl Exceptions16 *17 * @param \Impl\Exception\ImplException18 * @return void19 */20 public function handle(ImplException $exception)21 {22 $this->sendException($exception);23 }24
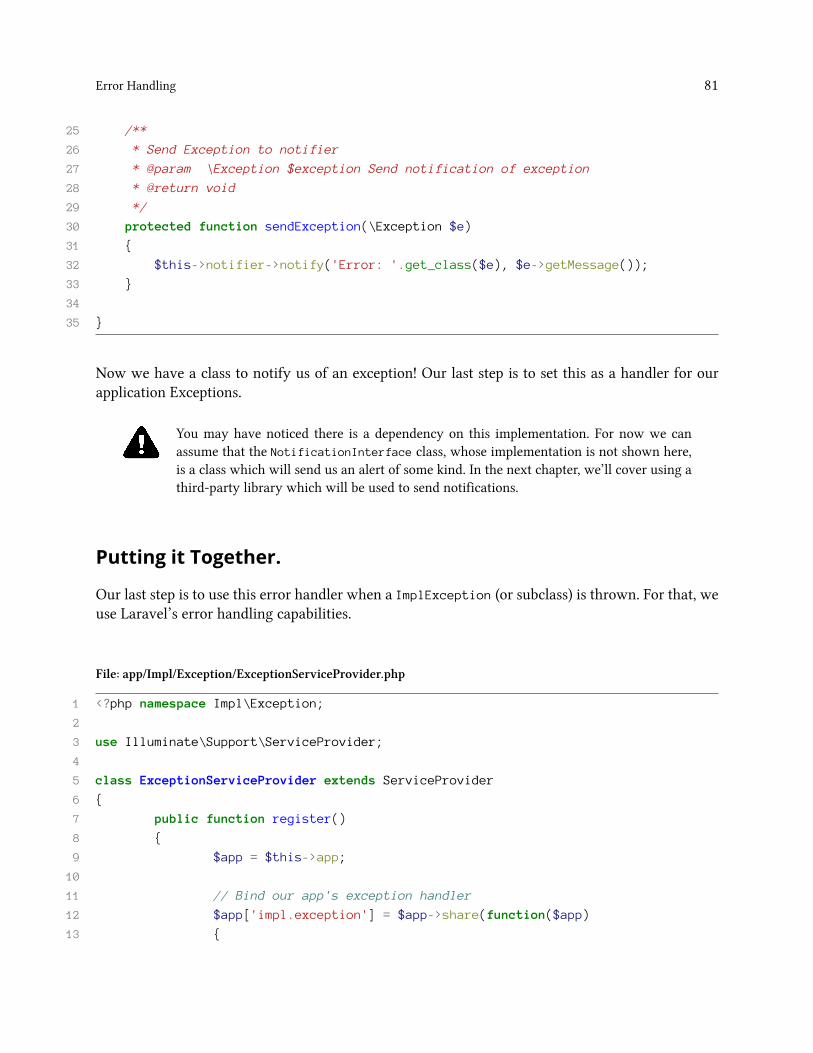
Error Handling 81
25 /**26 * Send Exception to notifier27 * @param \Exception $exception Send notification of exception28 * @return void29 */30 protected function sendException(\Exception $e)31 {32 $this->notifier->notify('Error: '.get_class($e), $e->getMessage());33 }3435 }
Now we have a class to notify us of an exception! Our last step is to set this as a handler for ourapplication Exceptions.
You may have noticed there is a dependency on this implementation. For now we canassume that the NotificationInterface class, whose implementation is not shown here,is a class which will send us an alert of some kind. In the next chapter, we’ll cover using athird-party library which will be used to send notifications.
Putting it Together.
Our last step is to use this error handler when a ImplException (or subclass) is thrown. For that, weuse Laravel’s error handling capabilities.
File: app/Impl/Exception/ExceptionServiceProvider.php
1 <?php namespace Impl\Exception;23 use Illuminate\Support\ServiceProvider;45 class ExceptionServiceProvider extends ServiceProvider6 {7 public function register()8 {9 $app = $this->app;1011 // Bind our app's exception handler12 $app['impl.exception'] = $app->share(function($app)13 {
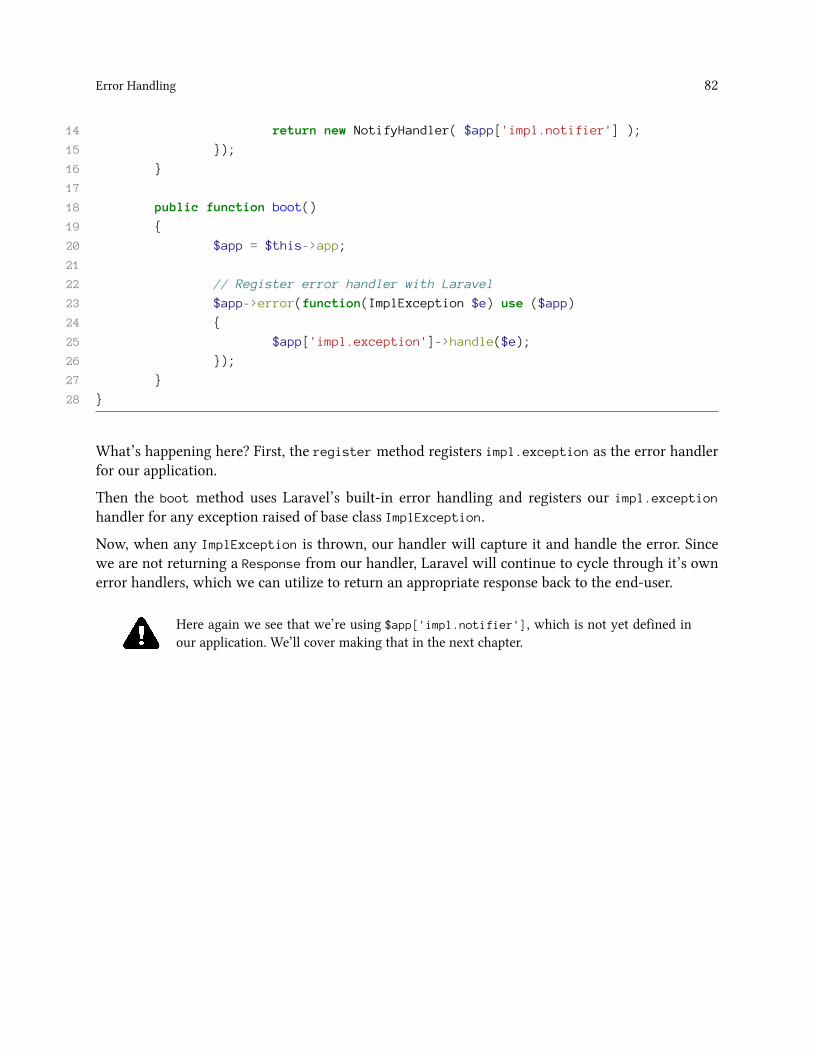
Error Handling 82
14 return new NotifyHandler( $app['impl.notifier'] );15 });16 }1718 public function boot()19 {20 $app = $this->app;2122 // Register error handler with Laravel23 $app->error(function(ImplException $e) use ($app)24 {25 $app['impl.exception']->handle($e);26 });27 }28 }
What’s happening here? First, the register method registers impl.exception as the error handlerfor our application.
Then the boot method uses Laravel’s built-in error handling and registers our impl.exceptionhandler for any exception raised of base class ImplException.
Now, when any ImplException is thrown, our handler will capture it and handle the error. Sincewe are not returning a Response from our handler, Laravel will continue to cycle through it’s ownerror handlers, which we can utilize to return an appropriate response back to the end-user.
Here again we see that we’re using $app['impl.notifier'], which is not yet defined inour application. We’ll cover making that in the next chapter.
Using Packages
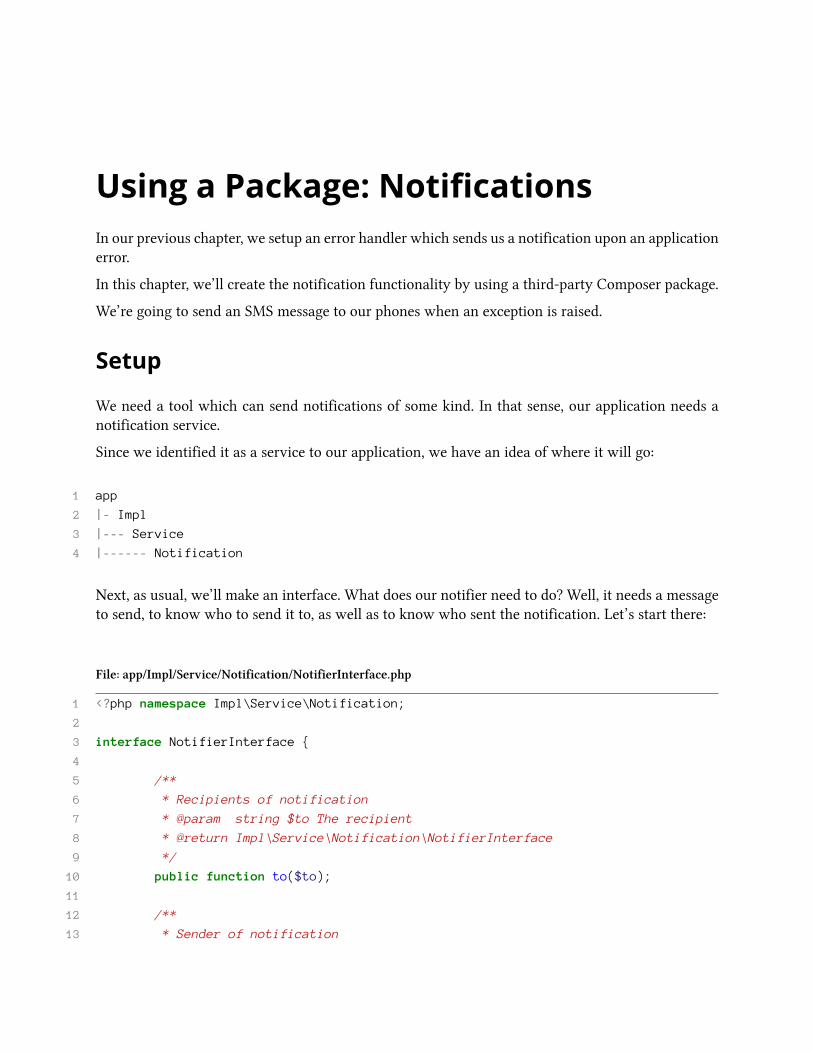
Using a Package: NotificationsIn our previous chapter, we setup an error handler which sends us a notification upon an applicationerror.
In this chapter, we’ll create the notification functionality by using a third-party Composer package.
We’re going to send an SMS message to our phones when an exception is raised.
Setup
We need a tool which can send notifications of some kind. In that sense, our application needs anotification service.
Since we identified it as a service to our application, we have an idea of where it will go:
1 app2 |- Impl3 |--- Service4 |------ Notification
Next, as usual, we’ll make an interface. What does our notifier need to do? Well, it needs a messageto send, to know who to send it to, as well as to know who sent the notification. Let’s start there:
File: app/Impl/Service/Notification/NotifierInterface.php
1 <?php namespace Impl\Service\Notification;23 interface NotifierInterface {45 /**6 * Recipients of notification7 * @param string $to The recipient8 * @return Impl\Service\Notification\NotifierInterface9 */10 public function to($to);1112 /**13 * Sender of notification

Using a Package: Notifications 85
14 * @param string $from The sender15 * @return Impl\Service\Notification\NotifierInterface16 */17 public function from($from);1819 /**20 * Send notification21 * @param string $subject Subject of notification22 * @param string $message Notification content23 * @return void24 */25 public function notify($subject, $message);2627 }
Implementation
Next, we need to implement this interface. We’ve decided to send an SMS to ourselves. To do this,we can use the service Twilio.
Twilio has a PHP SDK available as a Composer package. To add it to our project, we can add it tothe composer.json file:
1 // Add to composer.json as a requirement2 // or run this in our project root:3 $ php composer require twilio/sdk:dev-master
After installing the SDK, we can start using it. Let’s create an SmsNotifier which uses Twilio.
File: app/Impl/Service/Notification/SmsNotifier.php
1 <?php Impl\Service\Notification;23 use Services_Twilio;45 class SmsNotifier implements NotifierInterface {67 /**8 * Recipient of notification9 * @var string10 */
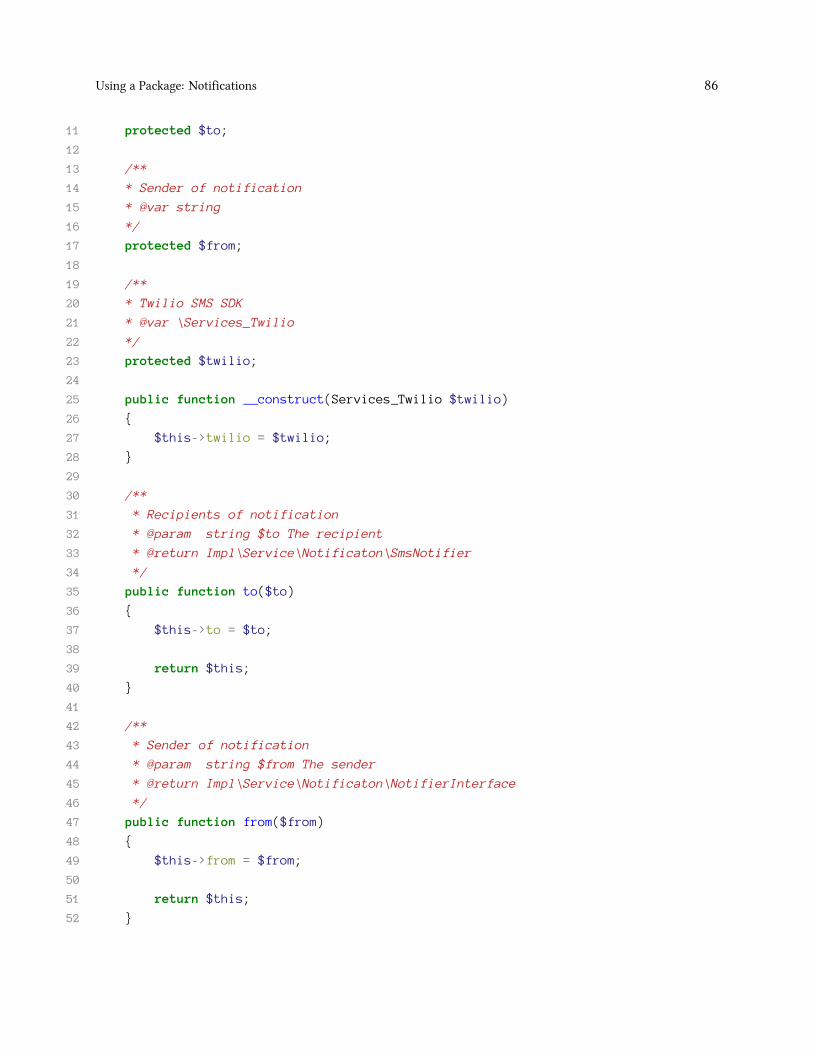
Using a Package: Notifications 86
11 protected $to;1213 /**14 * Sender of notification15 * @var string16 */17 protected $from;1819 /**20 * Twilio SMS SDK21 * @var \Services_Twilio22 */23 protected $twilio;2425 public function __construct(Services_Twilio $twilio)26 {27 $this->twilio = $twilio;28 }2930 /**31 * Recipients of notification32 * @param string $to The recipient33 * @return Impl\Service\Notificaton\SmsNotifier34 */35 public function to($to)36 {37 $this->to = $to;3839 return $this;40 }4142 /**43 * Sender of notification44 * @param string $from The sender45 * @return Impl\Service\Notificaton\NotifierInterface46 */47 public function from($from)48 {49 $this->from = $from;5051 return $this;52 }
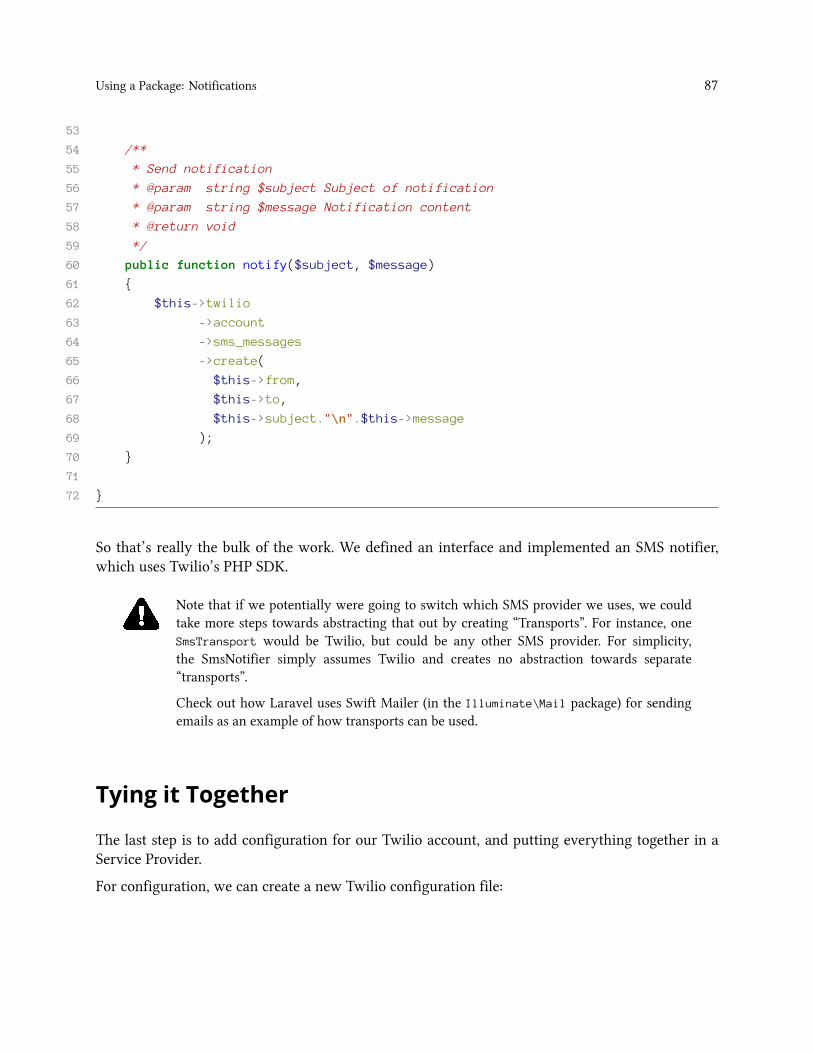
Using a Package: Notifications 87
5354 /**55 * Send notification56 * @param string $subject Subject of notification57 * @param string $message Notification content58 * @return void59 */60 public function notify($subject, $message)61 {62 $this->twilio63 ->account64 ->sms_messages65 ->create(66 $this->from,67 $this->to,68 $this->subject."\n".$this->message69 );70 }7172 }
So that’s really the bulk of the work. We defined an interface and implemented an SMS notifier,which uses Twilio’s PHP SDK.
Note that if we potentially were going to switch which SMS provider we uses, we couldtake more steps towards abstracting that out by creating “Transports”. For instance, oneSmsTransport would be Twilio, but could be any other SMS provider. For simplicity,the SmsNotifier simply assumes Twilio and creates no abstraction towards separate“transports”.
Check out how Laravel uses Swift Mailer (in the Illuminate\Mail package) for sendingemails as an example of how transports can be used.
Tying it Together
The last step is to add configuration for our Twilio account, and putting everything together in aService Provider.
For configuration, we can create a new Twilio configuration file:
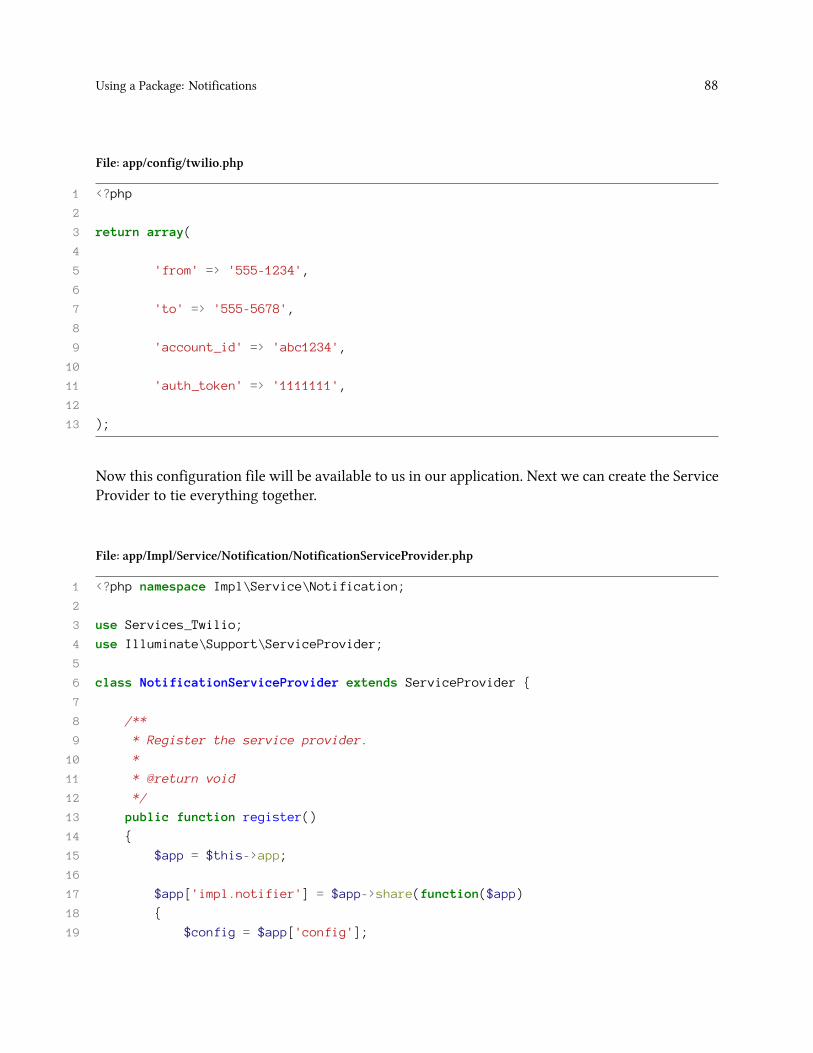
Using a Package: Notifications 88
File: app/config/twilio.php
1 <?php23 return array(45 'from' => '555-1234',67 'to' => '555-5678',89 'account_id' => 'abc1234',1011 'auth_token' => '1111111',1213 );
Now this configuration file will be available to us in our application. Next we can create the ServiceProvider to tie everything together.
File: app/Impl/Service/Notification/NotificationServiceProvider.php
1 <?php namespace Impl\Service\Notification;23 use Services_Twilio;4 use Illuminate\Support\ServiceProvider;56 class NotificationServiceProvider extends ServiceProvider {78 /**9 * Register the service provider.10 *11 * @return void12 */13 public function register()14 {15 $app = $this->app;1617 $app['impl.notifier'] = $app->share(function($app)18 {19 $config = $app['config'];
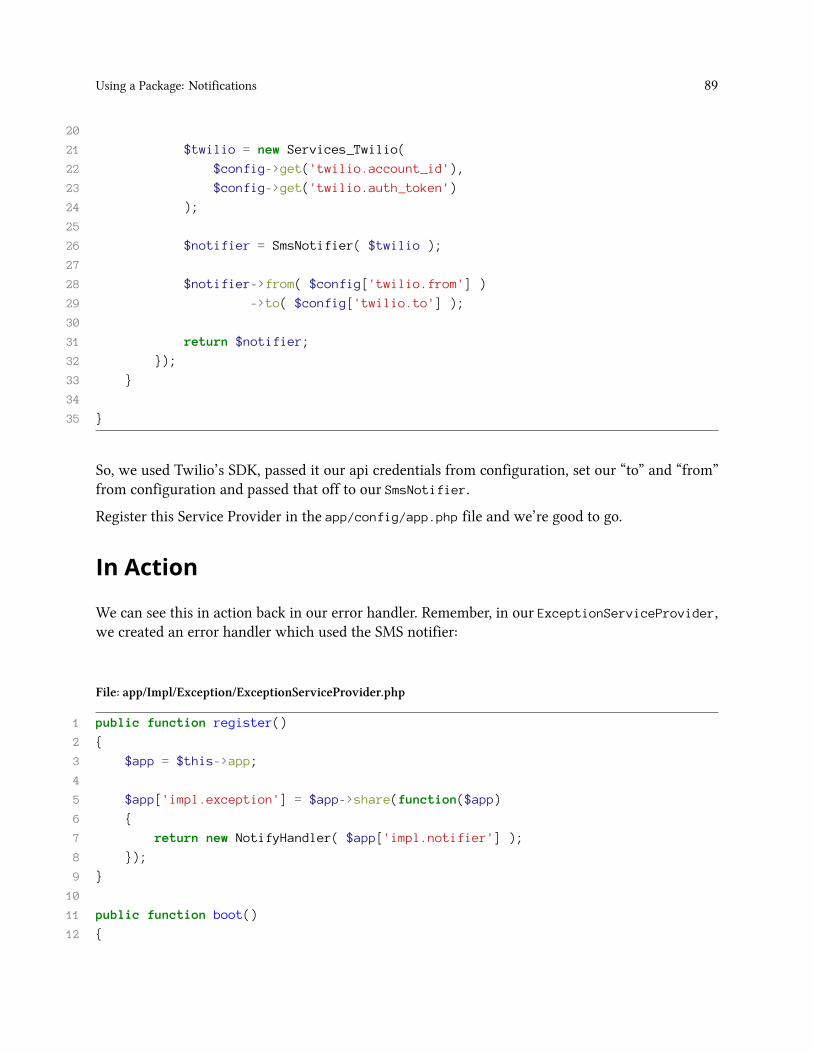
Using a Package: Notifications 89
2021 $twilio = new Services_Twilio(22 $config->get('twilio.account_id'),23 $config->get('twilio.auth_token')24 );2526 $notifier = SmsNotifier( $twilio );2728 $notifier->from( $config['twilio.from'] )29 ->to( $config['twilio.to'] );3031 return $notifier;32 });33 }3435 }
So, we used Twilio’s SDK, passed it our api credentials from configuration, set our “to” and “from”from configuration and passed that off to our SmsNotifier.
Register this Service Provider in the app/config/app.php file and we’re good to go.
In Action
We can see this in action back in our error handler. Remember, in our ExceptionServiceProvider,we created an error handler which used the SMS notifier:
File: app/Impl/Exception/ExceptionServiceProvider.php
1 public function register()2 {3 $app = $this->app;45 $app['impl.exception'] = $app->share(function($app)6 {7 return new NotifyHandler( $app['impl.notifier'] );8 });9 }1011 public function boot()12 {
Using a Package: Notifications 90
13 $app = $this->app;1415 $app->error(function(ImplException $e) use ($app)16 {17 $app['impl.exception']->handle($e);18 });19 }
Now $app['impl.notifier'] exists for our NotifyHandler to use as its notifier implementation!
You can test this by throwing a ImplException in your code and waiting to receive a text message.
1 throw new ImplException('Test message');
Furthermore, if you want to use the SMS notifier anywhere else in your code, you can!
1 $sms = App::make('notification.sms');23 $sms->to('555-5555')4 ->notify($subject, $message);
What Did We Gain?
We saw an example of how to install and use a third-party composer package. In this example weused Twilio’s SMS SDK in an SMS-based implementation of our Notification service.
Packagist¹¹ is a go-to resource for discovering Composer packages. Whenever you find yourself aboutto code any functionality, you should check there first to see if something already exists. Chancesare a well-coded, tested package exists!
¹¹http://packagist.org

Conclusion
ReviewWe covered a lot of ground in this book! Some of the topics included:
Installation
Installing Laravel, including environment setup and production considerations.
Application Setup
Using an application library.
Repository Pattern
The how and why of using repositories as an interface to your data storage.
Caching In the Repository
We added a service layer into our code repository. In this example, we added a layer of caching.
Validation
We created validation as a service, helping us abstract out the work of validation and implementvalidation classes specific to our needed use cases.
Form Processing
We created classes for orchestrating the validation of input and the interaction with our datarepositories. These form classes are decoupled from HTTP requests and able to be used outsideof a controller. This decoupling also makes them easier to test.
Error Handling
We went over some considerations of how and when to use error handling, and saw an example ofhow it might be done to catch application-specific errors.

Review 93
Third Party Libraries
We used Twilio’s SDK to build a notification library. This was used to send SMS notifications withour error handler.
What Did You Gain?Most of this book lays the ground-work for building a fully-featured application.
What I hope you gained from reading this is insight in how SOLID principles can be used in Laravel.The use of interfaces, the IoC container and the Service Providers all provide a powerful way to createa highly testable and maintainable PHP application.
The Future
I’m hoping the early editions of this book serve as a base on which to build.
The answer to many questions such as “How do I use queues effectively?”, “How do I integrate asearch engine?” or “What’s an advanced usage of Service Providers” will rely and expand on thefundamentals covered here.
With any luck, this will be just the beginning.
Happy coding!