game manual & credits - steam
TRANSCRIPT
White Pearl Game Mechanics Manual & Full Credits
© Harry Gill
Game Manual & Credits
White Pearl Game Mechanics Manual & Full Credits
© Harry Gill
Use This manual will explain all the main mechanics of the game. For the
complete official guide, which contains a story and boss
walkthrough (including much more, such as the inclusion of the
game’s entire database); please install the Chronicle Edition DLC.
Important Terminology
Action Button – Refers to the button used to interact with objects and NPCs, as
well as confirm selections. Used by pressing Enter/X/Square.
Cancel Button – Refers to the button used to cancel selections and sometimes
access menus. Used by pressing ESC/B/Circle

White Pearl Game Mechanics Manual & Full Credits
© Harry Gill
Developer Comments It’s been a long time since White Pearl’s launch, after which I have been working tirelessly
to update the game, bug fix it, add additional content, while developing my second game
Fabrication – which is set to release at the end of 2020.
White Pearl is my first ever game project, and admittedly over-ambitious, wouldn’t you
agree? While I think the reviews do a good enough job of explains the positives and
negatives of the game, sometimes I look back on the game and think “I wish I did this!”.
But game development is very difficult. You must work in a certain amount of time and
restrictions to get anything done, which is why this game exists in the first place.
If I kept asking myself questions and trying to change things here and there, this game
would have never been released. And so, I was grateful for the overwhelmingly positive
response at launch, as well as players’ support regarding the constant updates.
It is my hope you will enjoy this game of mine, if you are well-versed in the Final Fantasy
series, well it just so happens this game was designed with those games in mind. laughs
But what RPGMaker game isn’t?
Updates for White Pearl and developer information: https://twitter.com/ottrea

White Pearl Game Mechanics Manual & Full Credits
© Harry Gill
Full Credits for White Pearl
Development Time
November 2014 - December 2017
Releases
GameJolt - 21st October 2017 (discontinuation of page as of November 2017)
Itch.io - 9th November 2017
Steam - 23rd December 2017
Patches 1.0.1 Bug fixes + balance changes - 23rd October 2017
1.0.2 Bug fixes + balance changes - 3rd Nov 2017
1.0.3 New cutscenes - 9th Nov 2017 (itch.io launch)
1.0.4 Bug fixes, balance changes, battle system adjustments - 19th Nov 2017
1.0.5 Bug fixes, balance changes, new cutscenes - 30th Nov 2017
1.0.6 Steam compatibility, bug fixes, quality of life, new content, sound changes - 23rd
December 2017 (steam launch)
1.0.7 New ending, new content, bug fixes, balance changes and quality of life adjustments -
5th February 2018
1.0.8 New content, bug fixes, balance changes and quality of life adjustments - 23rd May
2018
1.0.9 Balance changes – 15th August 2018
2.0.0 Balance overhaul, skippable cutscenes, new crafting systems, performance
improvement – 16th April 2019
Patch Notes
Archive at: https://ottreadev.itch.io/white-pearlrpg/devlog/52479/patch-20-notes

White Pearl Game Mechanics Manual & Full Credits
© Harry Gill
Lead Roles, Engine & Story Lead Designer, Director, Producer & Writer
Harry Gill
Engines
Software: RPGMaker VX Ace
Script Engines: Yanfly Engine, Victor Engine, Yami Engine, Luna Engine
Character Designer
Harry Gill
Story and Characters of White Pearl
Harry Gill
Fabrication Story Concept & Characters
Holly Gill
White Pearl Game Mechanics Manual & Full Credits
© Harry Gill
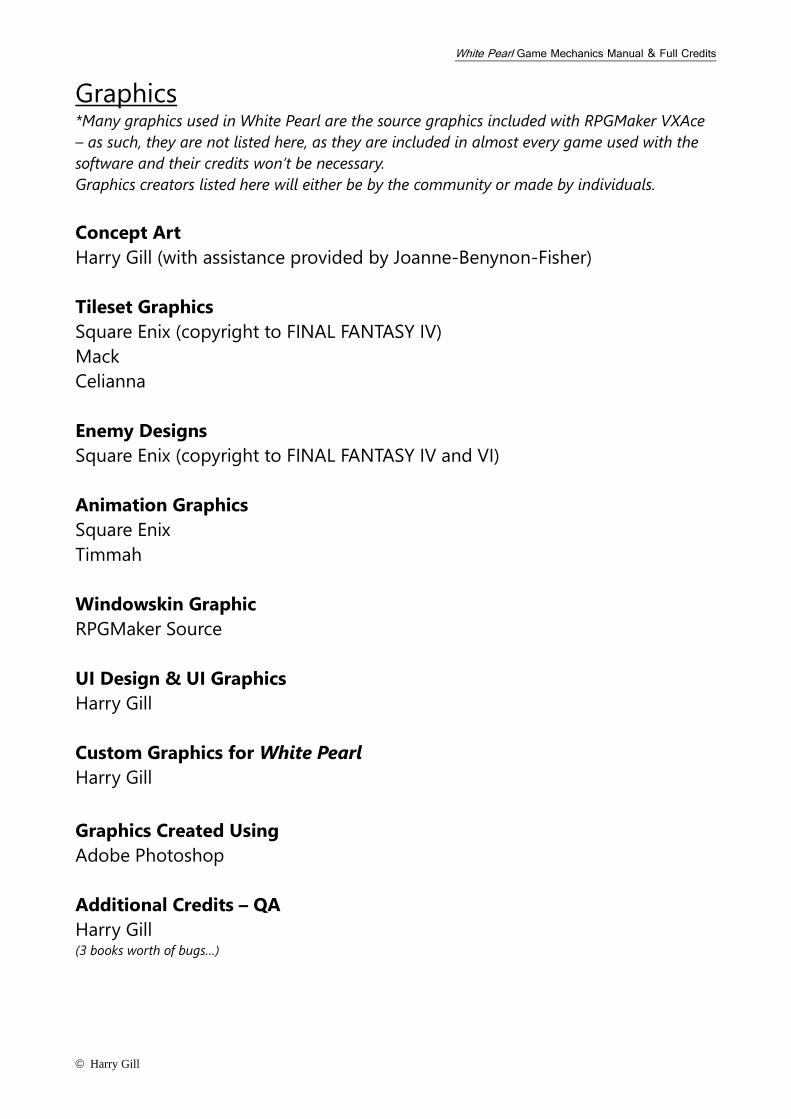
Graphics *Many graphics used in White Pearl are the source graphics included with RPGMaker VXAce
– as such, they are not listed here, as they are included in almost every game used with the
software and their credits won’t be necessary.
Graphics creators listed here will either be by the community or made by individuals.
Concept Art
Harry Gill (with assistance provided by Joanne-Benynon-Fisher)
Tileset Graphics
Square Enix (copyright to FINAL FANTASY IV)
Mack
Celianna
Enemy Designs
Square Enix (copyright to FINAL FANTASY IV and VI)
Animation Graphics
Square Enix
Timmah
Windowskin Graphic
RPGMaker Source
UI Design & UI Graphics
Harry Gill
Custom Graphics for White Pearl
Harry Gill
Graphics Created Using
Adobe Photoshop
Additional Credits – QA
Harry Gill (3 books worth of bugs…)
White Pearl Game Mechanics Manual & Full Credits
© Harry Gill
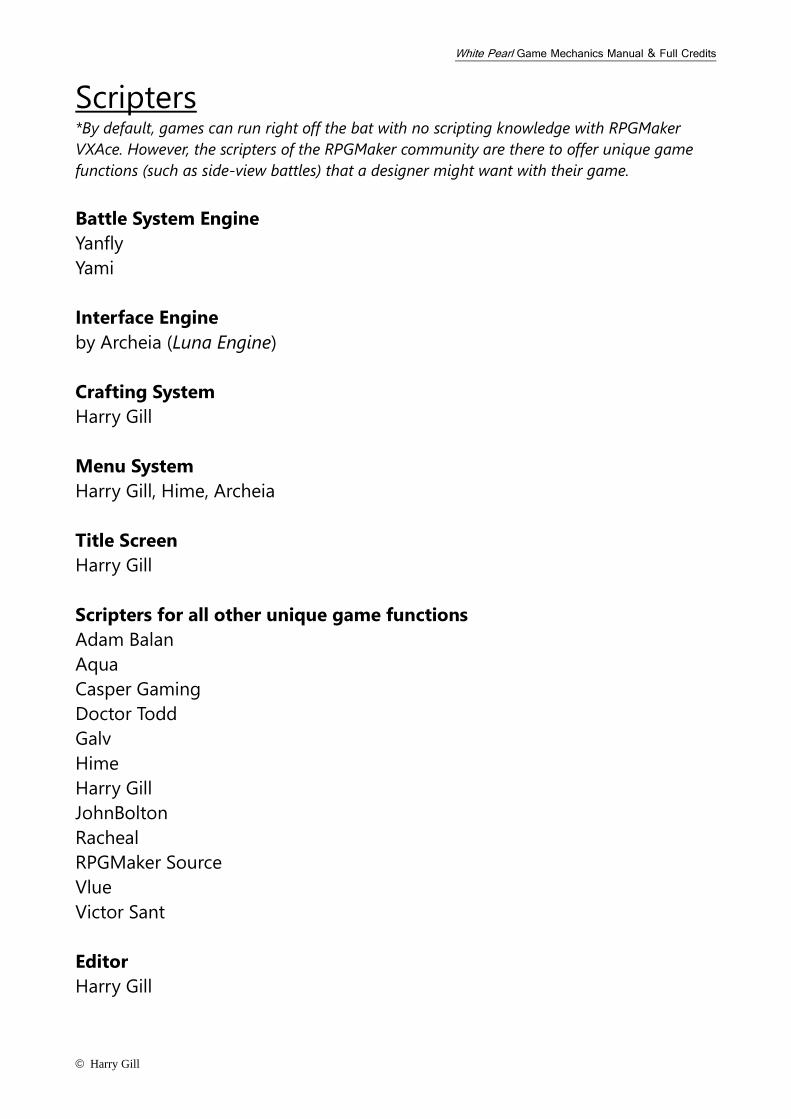
Scripters *By default, games can run right off the bat with no scripting knowledge with RPGMaker
VXAce. However, the scripters of the RPGMaker community are there to offer unique game
functions (such as side-view battles) that a designer might want with their game.
Battle System Engine
Yanfly
Yami
Interface Engine
by Archeia (Luna Engine)
Crafting System
Harry Gill
Menu System
Harry Gill, Hime, Archeia
Title Screen
Harry Gill
Scripters for all other unique game functions
Adam Balan
Aqua
Casper Gaming
Doctor Todd
Galv
Hime
Harry Gill
JohnBolton
Racheal
RPGMaker Source
Vlue
Victor Sant
Editor
Harry Gill

White Pearl Game Mechanics Manual & Full Credits
© Harry Gill
Sound (General Audio) *Some sounds used in White Pearl are the RTP sounds included with RPGMaker VXAce – as
such, they are not listed here, as they are included in almost every game used with the
software and their credits won’t be necessary.
Sound Effects
Square Enix (copyright to FINAL FANTASY VII, XI and XIV)
Background Sound
Soundbible

White Pearl Game Mechanics Manual & Full Credits
© Harry Gill
Sound (Music) *Music not property of White Pearl. No copyright infringement intended, and no profit will be
made.
Composers
Masashi Hamauzu
Hitoshi Sakimoto
Yoko Shimomura
Mitsuto Suzuki
Tsuyoshi Sekito
Nobuo Uematsu
Naoshi Mizuta
Mitsuhiro Kaneda
Kimihiro Abe
Masaharu Iwata
Yoshimi Kudo
Performances
gaQdan
Eminence
Masatsugu Shinozaki Strings
Benyamin Nuss
Joelle Strother
Mina Sakai
Sound Engineer & Direction
Harry Gill
Sound Engineered Using
Audacity

White Pearl Game Mechanics Manual & Full Credits
© Harry Gill
Copyright to Sound/Music
Monomusik
Square Enix
Basiscape
Level 5
Mistwalker
Capcom
Cygames
White Pearl Game Mechanics Manual & Full Credits
© Harry Gill
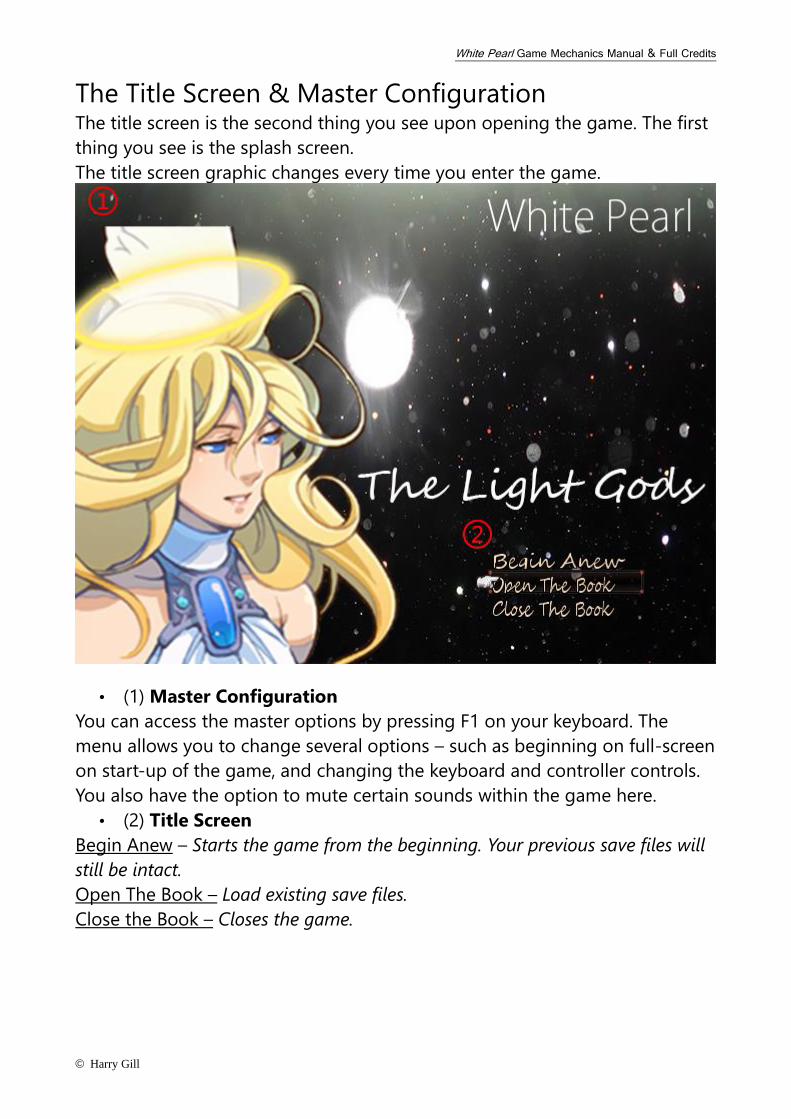
The Title Screen & Master Configuration The title screen is the second thing you see upon opening the game. The first
thing you see is the splash screen.
The title screen graphic changes every time you enter the game.
• (1) Master Configuration
You can access the master options by pressing F1 on your keyboard. The
menu allows you to change several options – such as beginning on full-screen
on start-up of the game, and changing the keyboard and controller controls.
You also have the option to mute certain sounds within the game here.
• (2) Title Screen
Begin Anew – Starts the game from the beginning. Your previous save files will
still be intact.
Open The Book – Load existing save files.
Close the Book – Closes the game.
White Pearl Game Mechanics Manual & Full Credits
© Harry Gill
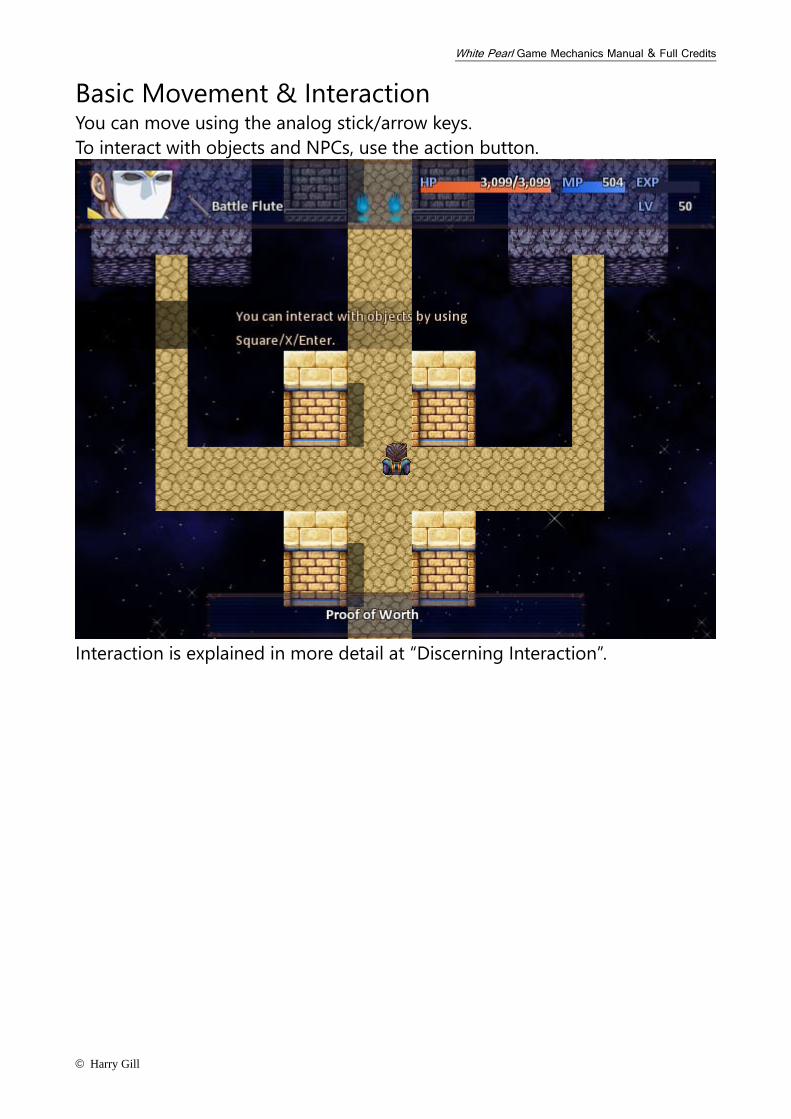
Basic Movement & Interaction You can move using the analog stick/arrow keys.
To interact with objects and NPCs, use the action button.
Interaction is explained in more detail at “Discerning Interaction”.
White Pearl Game Mechanics Manual & Full Credits
© Harry Gill
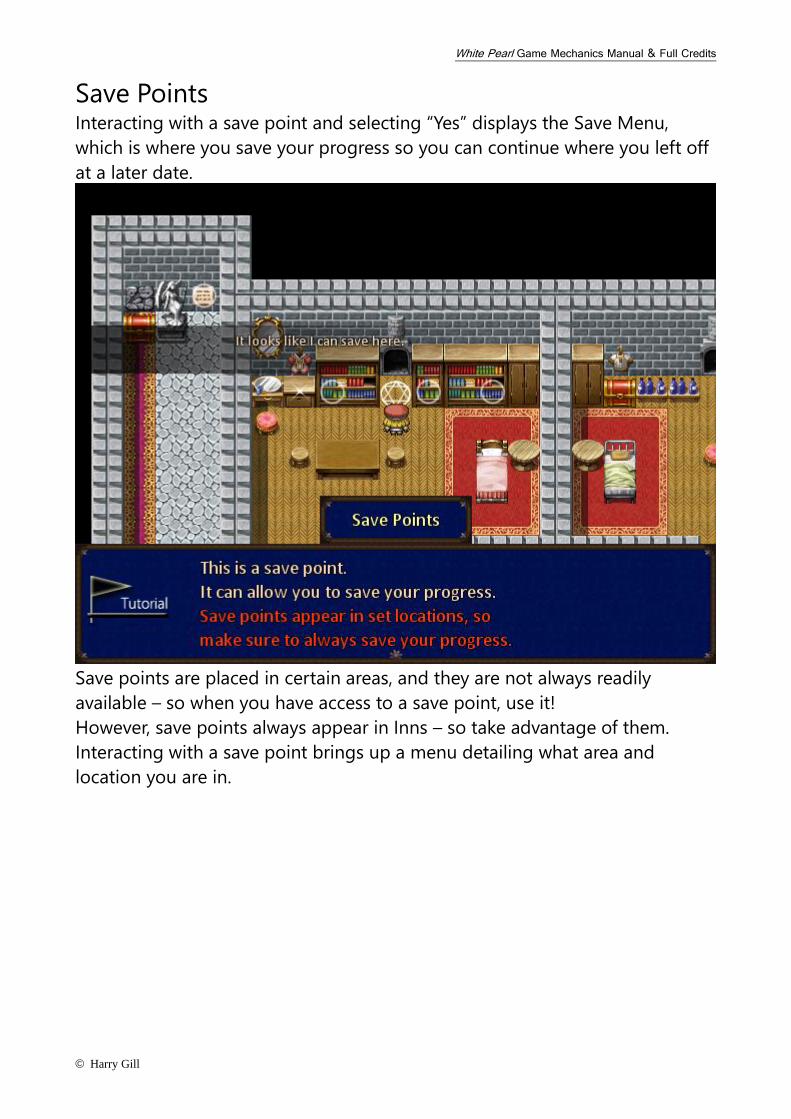
Save Points Interacting with a save point and selecting “Yes” displays the Save Menu,
which is where you save your progress so you can continue where you left off
at a later date.
Save points are placed in certain areas, and they are not always readily
available – so when you have access to a save point, use it!
However, save points always appear in Inns – so take advantage of them.
Interacting with a save point brings up a menu detailing what area and
location you are in.
White Pearl Game Mechanics Manual & Full Credits
© Harry Gill
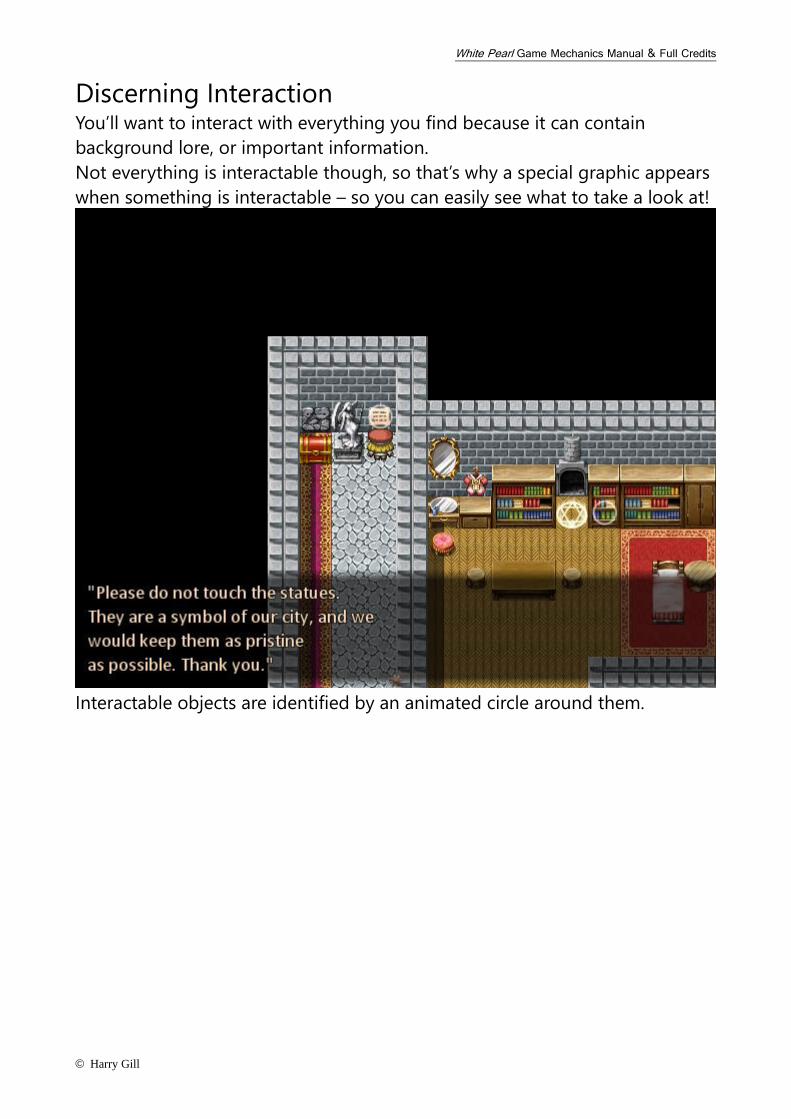
Discerning Interaction You’ll want to interact with everything you find because it can contain
background lore, or important information.
Not everything is interactable though, so that’s why a special graphic appears
when something is interactable – so you can easily see what to take a look at!
Interactable objects are identified by an animated circle around them.
White Pearl Game Mechanics Manual & Full Credits
© Harry Gill
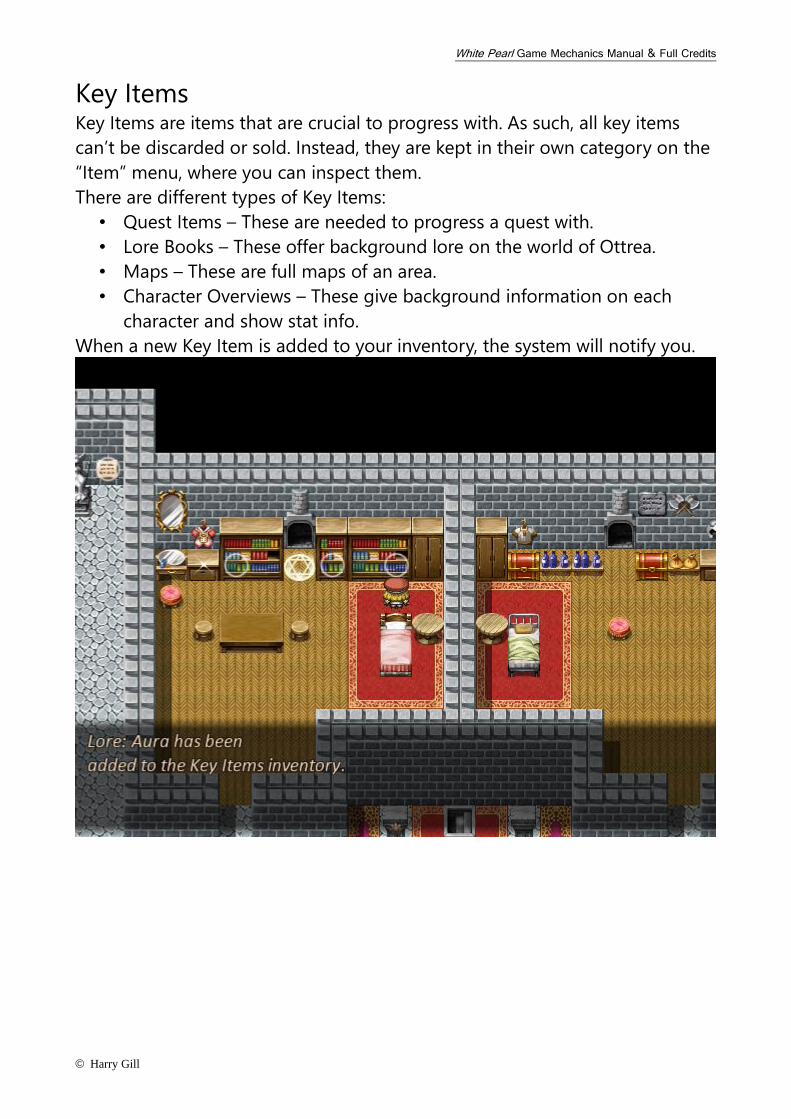
Key Items Key Items are items that are crucial to progress with. As such, all key items
can’t be discarded or sold. Instead, they are kept in their own category on the
“Item” menu, where you can inspect them.
There are different types of Key Items:
• Quest Items – These are needed to progress a quest with.
• Lore Books – These offer background lore on the world of Ottrea.
• Maps – These are full maps of an area.
• Character Overviews – These give background information on each
character and show stat info.
When a new Key Item is added to your inventory, the system will notify you.
White Pearl Game Mechanics Manual & Full Credits
© Harry Gill
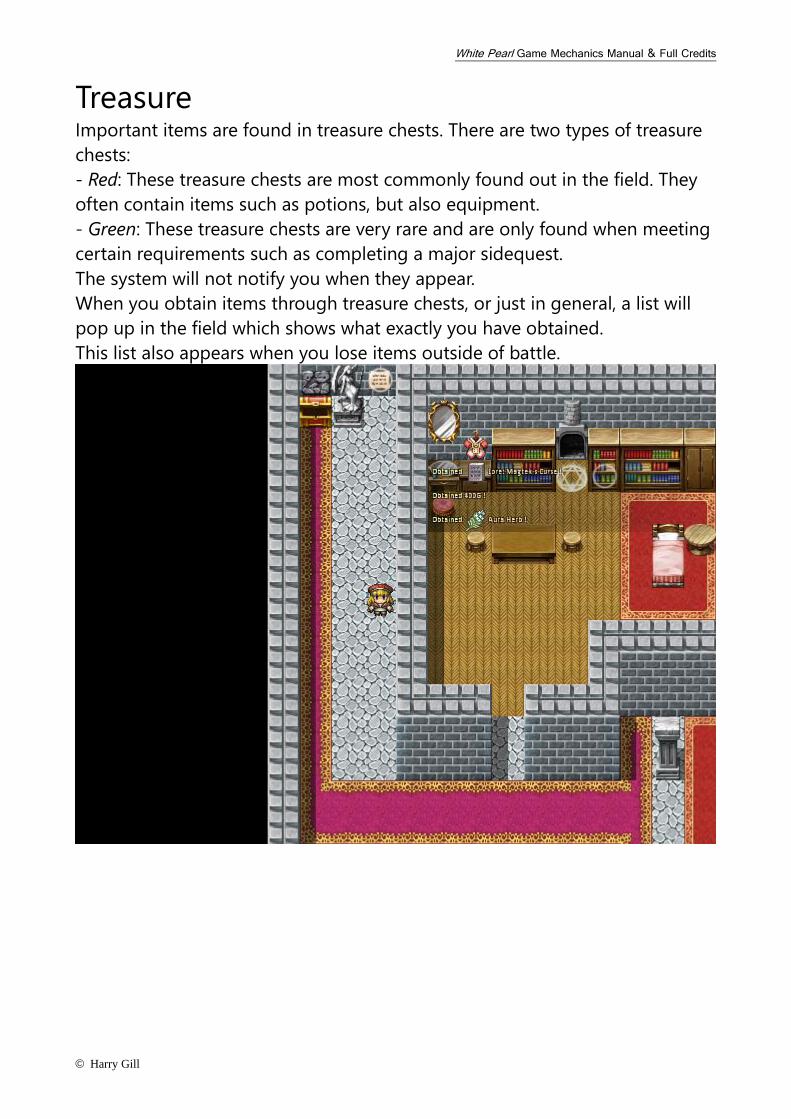
Treasure Important items are found in treasure chests. There are two types of treasure
chests:
- Red: These treasure chests are most commonly found out in the field. They
often contain items such as potions, but also equipment.
- Green: These treasure chests are very rare and are only found when meeting
certain requirements such as completing a major sidequest.
The system will not notify you when they appear.
When you obtain items through treasure chests, or just in general, a list will
pop up in the field which shows what exactly you have obtained.
This list also appears when you lose items outside of battle.
White Pearl Game Mechanics Manual & Full Credits
© Harry Gill
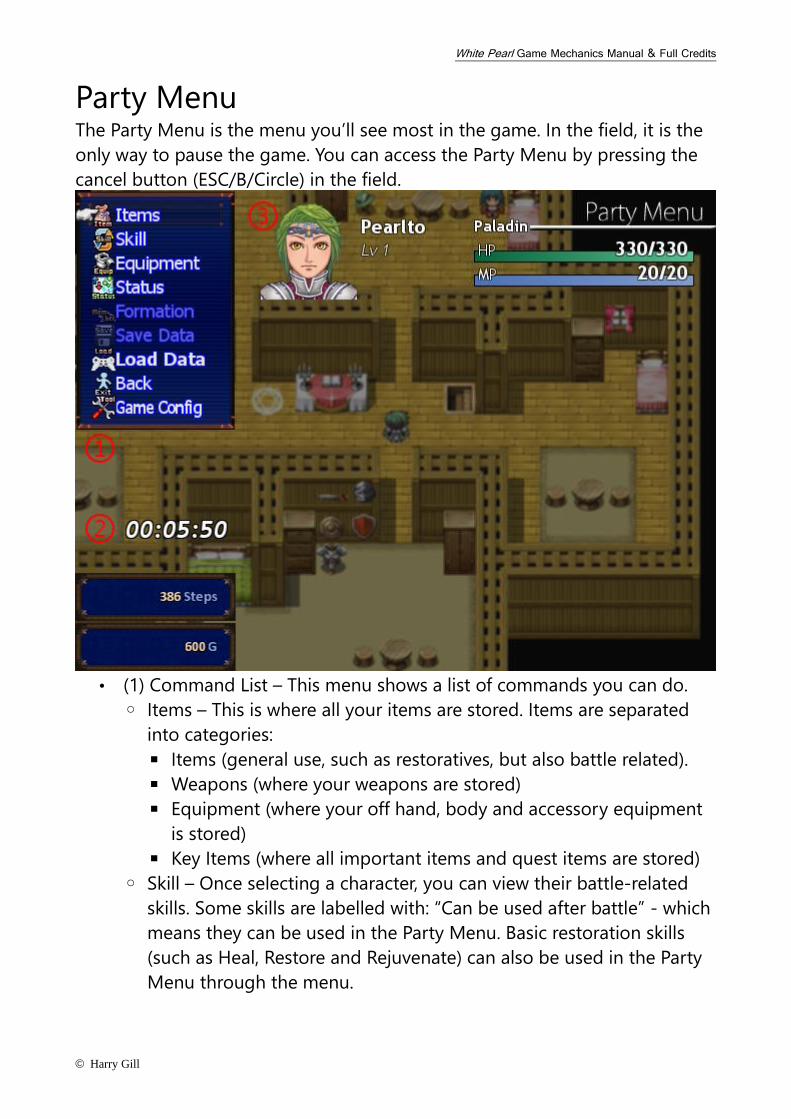
Party Menu The Party Menu is the menu you’ll see most in the game. In the field, it is the
only way to pause the game. You can access the Party Menu by pressing the
cancel button (ESC/B/Circle) in the field.
• (1) Command List – This menu shows a list of commands you can do.
◦ Items – This is where all your items are stored. Items are separated
into categories:
▪ Items (general use, such as restoratives, but also battle related).
▪ Weapons (where your weapons are stored)
▪ Equipment (where your off hand, body and accessory equipment
is stored)
▪ Key Items (where all important items and quest items are stored)
◦ Skill – Once selecting a character, you can view their battle-related
skills. Some skills are labelled with: “Can be used after battle” - which
means they can be used in the Party Menu. Basic restoration skills
(such as Heal, Restore and Rejuvenate) can also be used in the Party
Menu through the menu.
White Pearl Game Mechanics Manual & Full Credits
© Harry Gill
◦ Equipment – This is where you equip characters with gear stored in
the “Weapons and Equipment” section of the item category.
◦ Status – You can view a character’s whole statistics in this menu, with
equipment and a small biography. Here you can also check up on
known buffs and debuffs you have encountered – and view what
they do.
◦ Formation – When unlocked, this menu you will allow you to manage
your party composition, and decide what 4 people to enter battle
with.
◦ Save/Load Data – “Load Data” is where you manage your save files
and choose where to load data. Because saving is done through
savepoints, access to the “Save Data” command is almost always
disabled throughout the game.
◦ Back – This command closes the Party Menu. Alternatively, you can
close the Party Menu by using the cancel button once again.
◦ Game Config – This command brings up the settings menu. The
settings menu will be explained further on in the manual.
• (2) Miscellaneous Info – This sections contains other information which
is not relevant to the rest.
◦ Play Time – This clock displays your current running time within the
game. It is saved as long as you save your progress. The time format
is: hours : minutes : seconds.
◦ Steps Taken – This variable tracks the number of steps you have
taken throughout the world of Ottrea.
◦ Gold – This window displays how much G (Gold) you have.
White Pearl Game Mechanics Manual & Full Credits
© Harry Gill
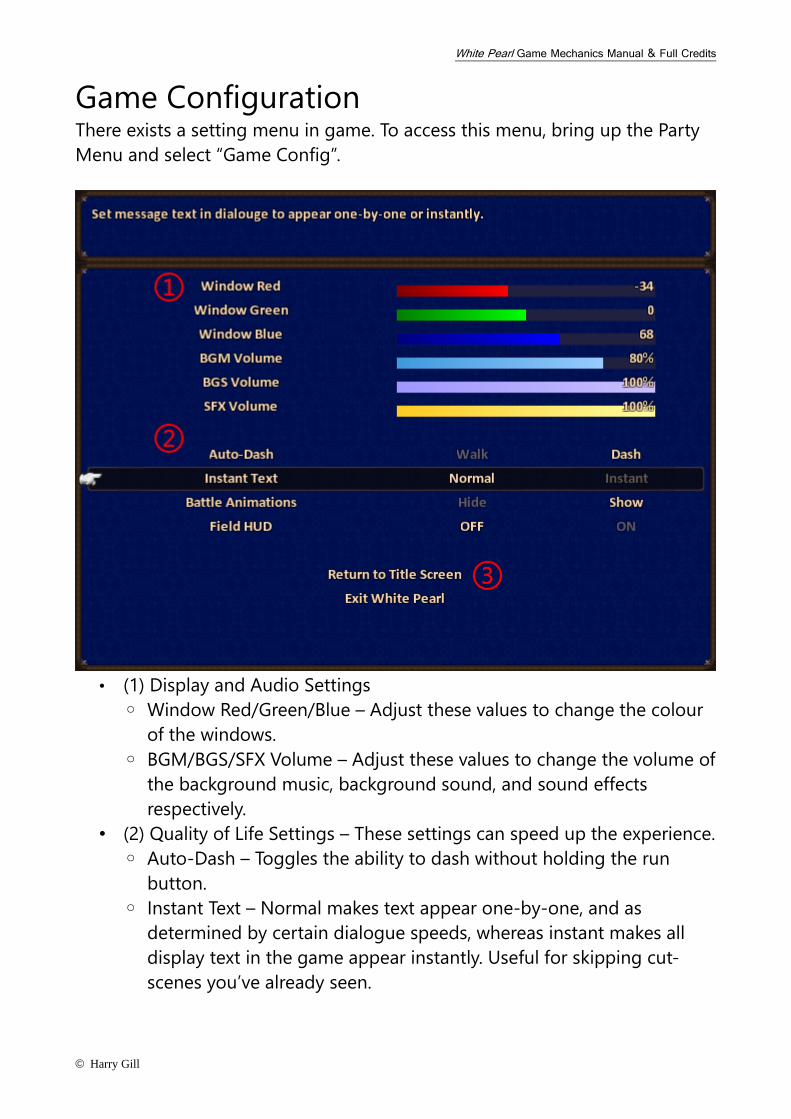
Game Configuration There exists a setting menu in game. To access this menu, bring up the Party
Menu and select “Game Config”.
• (1) Display and Audio Settings
◦ Window Red/Green/Blue – Adjust these values to change the colour
of the windows.
◦ BGM/BGS/SFX Volume – Adjust these values to change the volume of
the background music, background sound, and sound effects
respectively.
• (2) Quality of Life Settings – These settings can speed up the experience.
◦ Auto-Dash – Toggles the ability to dash without holding the run
button.
◦ Instant Text – Normal makes text appear one-by-one, and as
determined by certain dialogue speeds, whereas instant makes all
display text in the game appear instantly. Useful for skipping cut-
scenes you’ve already seen.
White Pearl Game Mechanics Manual & Full Credits
© Harry Gill
◦ Battle Animations – You’ll want this setting always on “Show” to see
the pretty effects! If not, “Hide” will not display animations that occur
during battle (except the ones shown in cut-scenes). Toggling this
option on makes grinding faster, although battles will be less
interesting visually.
• (3) System Settings – These commands control the system.
◦ Return to Title Screen – Returns you to the title screen, where you
can load data, start a new game, or close the game.
◦ Exit White Pearl – This shuts down the game safely in full-screen and
windowed mode.

White Pearl Game Mechanics Manual & Full Credits
© Harry Gill
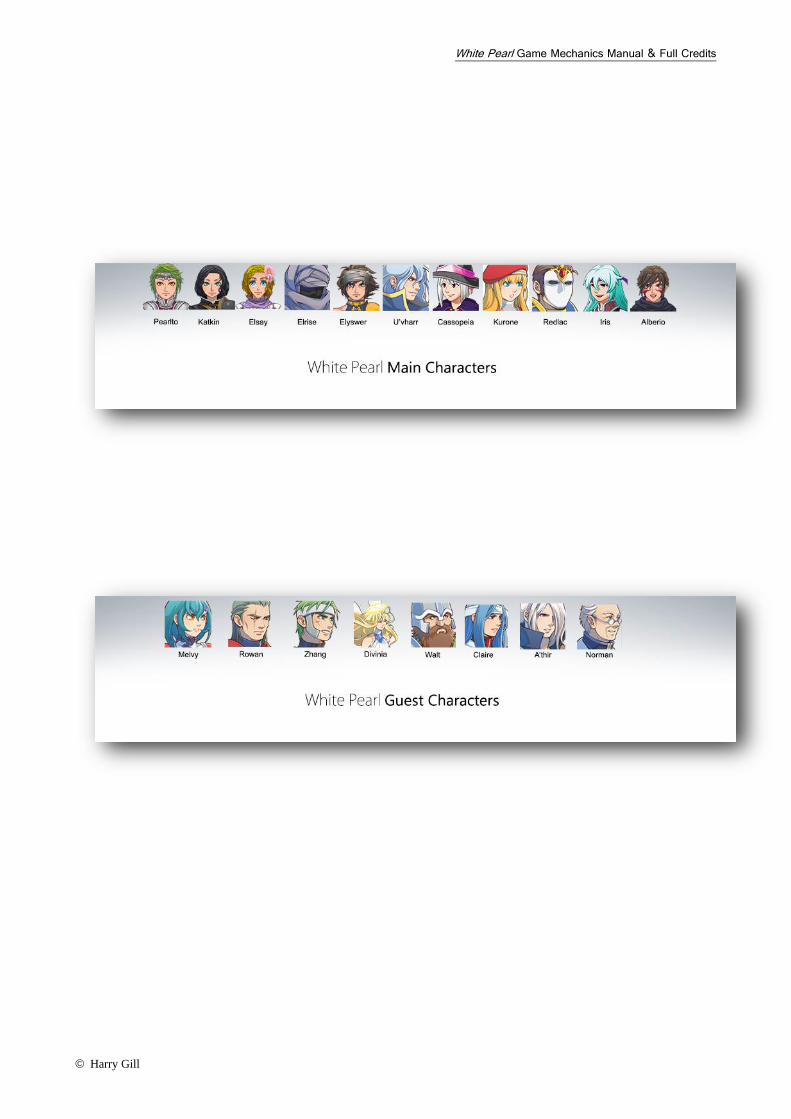
Guest Characters
Throughout your adventure in White Pearl, there exists party members who
come and go as they please. These as known as “guest characters”. Guest
characters often bring special characteristics to the party, such as unique skills
and lines of dialogue.
There exists some disadvantages of guest characters: you cannot edit their
equipment and most guest characters don’t learn new skills, or gain levels as
this is due to their temporary nature.
You can still decide whether to bring these guest characters in the fray of
battle in the formation menu.
White Pearl Game Mechanics Manual & Full Credits
© Harry Gill
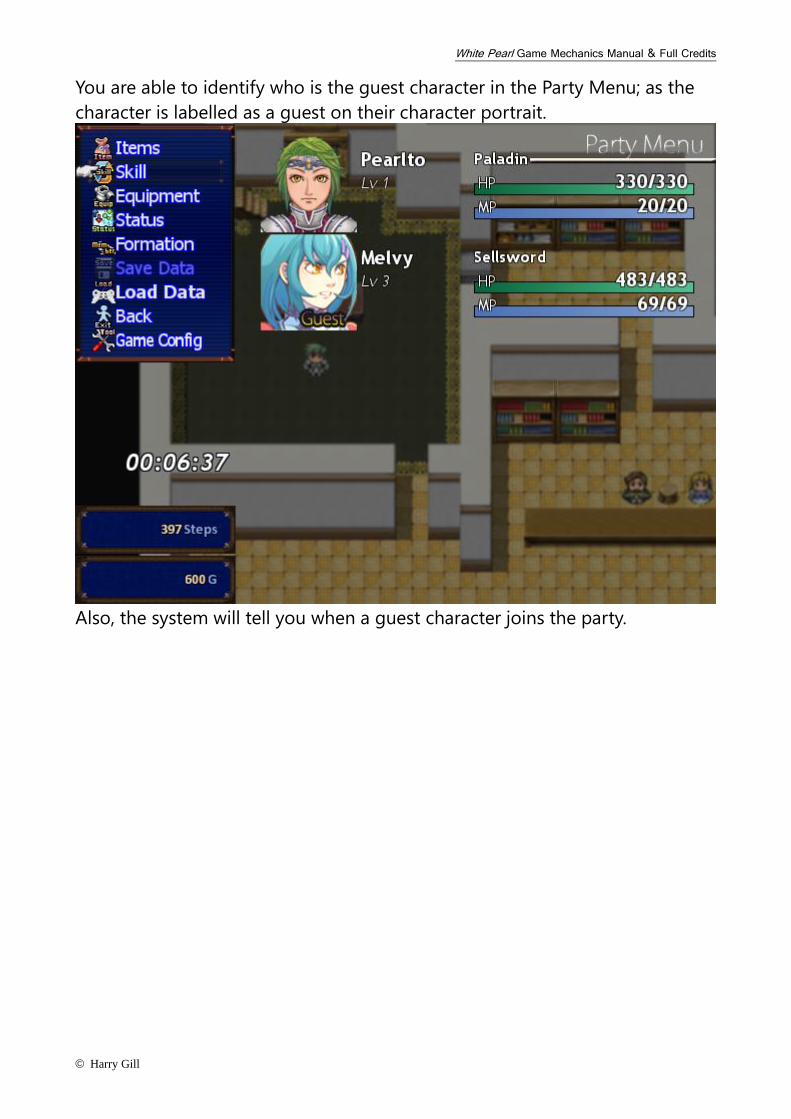
You are able to identify who is the guest character in the Party Menu; as the
character is labelled as a guest on their character portrait.
Also, the system will tell you when a guest character joins the party.
White Pearl Game Mechanics Manual & Full Credits
© Harry Gill
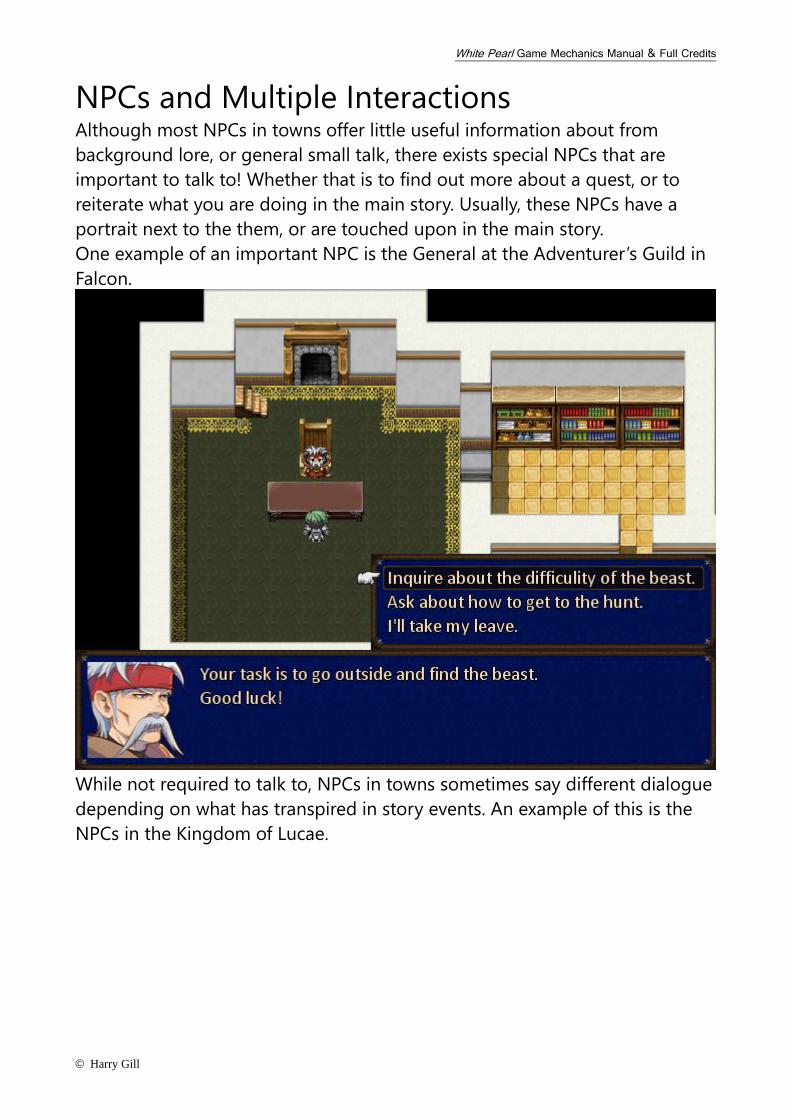
NPCs and Multiple Interactions Although most NPCs in towns offer little useful information about from
background lore, or general small talk, there exists special NPCs that are
important to talk to! Whether that is to find out more about a quest, or to
reiterate what you are doing in the main story. Usually, these NPCs have a
portrait next to the them, or are touched upon in the main story.
One example of an important NPC is the General at the Adventurer’s Guild in
Falcon.
While not required to talk to, NPCs in towns sometimes say different dialogue
depending on what has transpired in story events. An example of this is the
NPCs in the Kingdom of Lucae.
White Pearl Game Mechanics Manual & Full Credits
© Harry Gill
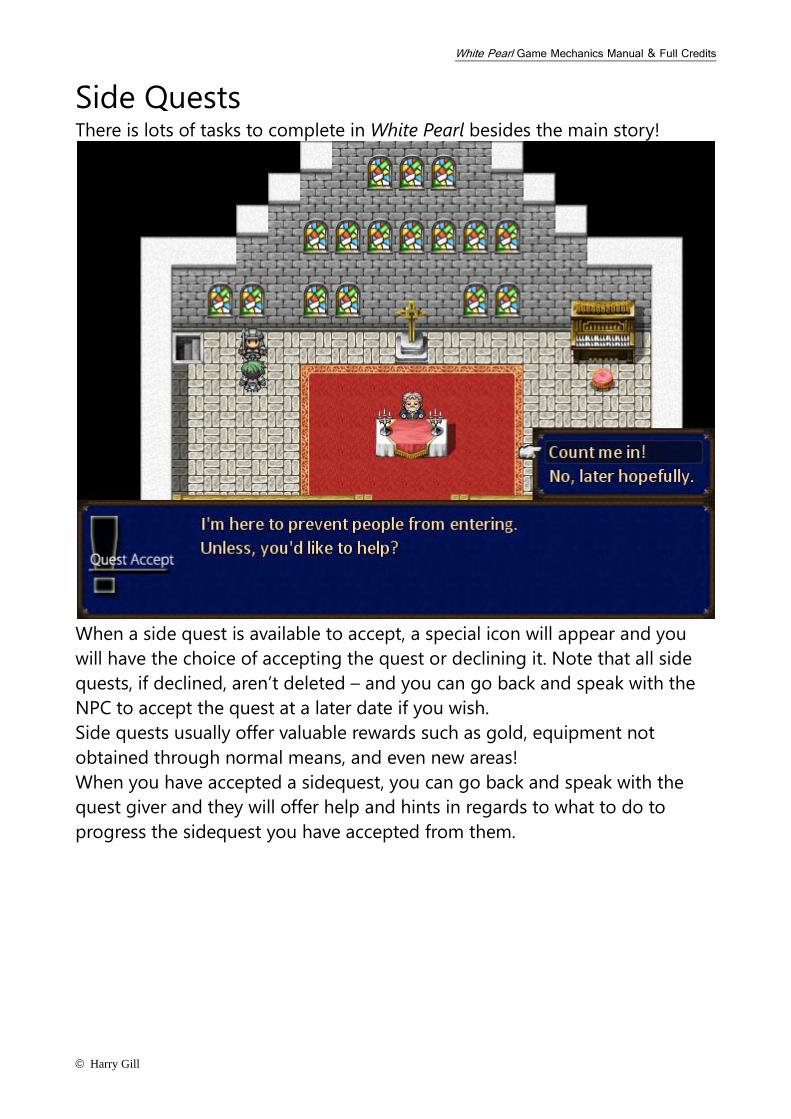
Side Quests There is lots of tasks to complete in White Pearl besides the main story!
When a side quest is available to accept, a special icon will appear and you
will have the choice of accepting the quest or declining it. Note that all side
quests, if declined, aren’t deleted – and you can go back and speak with the
NPC to accept the quest at a later date if you wish.
Side quests usually offer valuable rewards such as gold, equipment not
obtained through normal means, and even new areas!
When you have accepted a sidequest, you can go back and speak with the
quest giver and they will offer help and hints in regards to what to do to
progress the sidequest you have accepted from them.
White Pearl Game Mechanics Manual & Full Credits
© Harry Gill
Shops Apart from the treasure you’ll receive around the world and in battle, there is
a reliable source of items that you can buy using G you’ve earned, they’re
called vendors!
Vendors are usually placed in towns, in special shop houses, which can be
identified by:
• A sword sign = weapon vendor inside
• A shield sign = armor vendor inside
• A rune sign = spell vendor inside
• A bag sign = item vendor inside
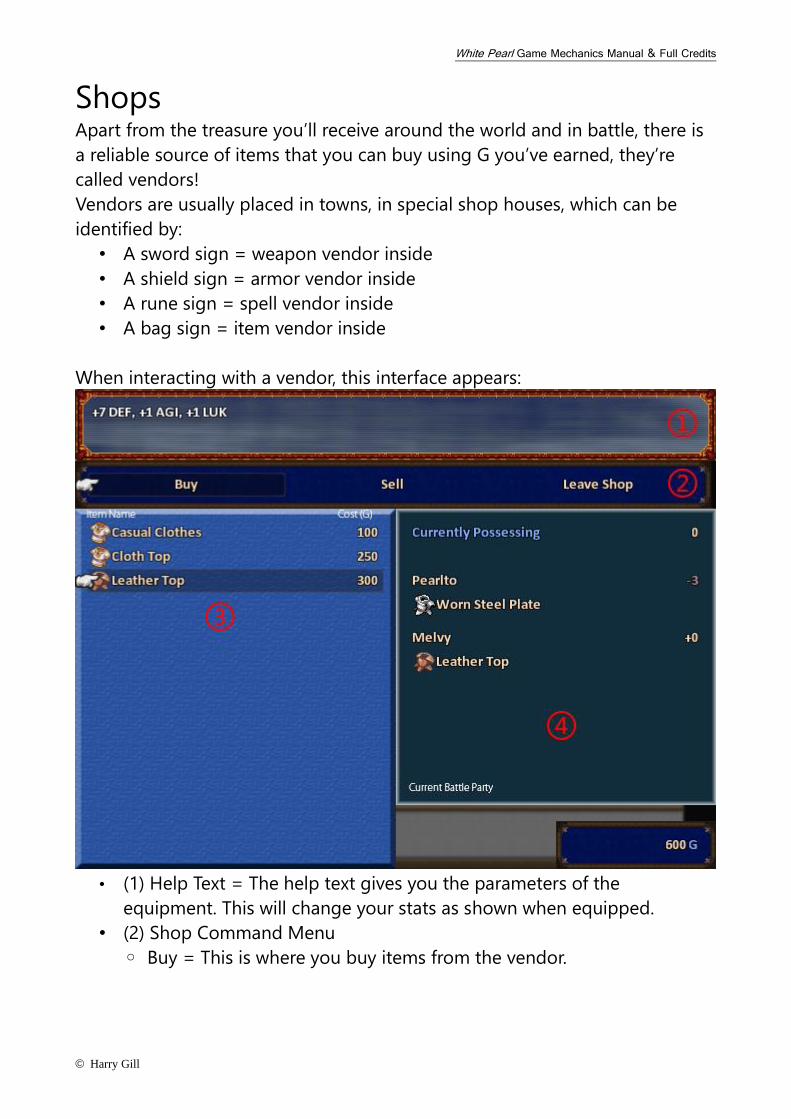
When interacting with a vendor, this interface appears:
• (1) Help Text = The help text gives you the parameters of the
equipment. This will change your stats as shown when equipped.
• (2) Shop Command Menu
◦ Buy = This is where you buy items from the vendor.

White Pearl Game Mechanics Manual & Full Credits
© Harry Gill
◦ Sell = This is where you can sell items from your inventory. Once
sold, the items are gone from your inventory and cannot be bought
back.
• (3) Item List = The list shows what items you can buy at the shop and
how much G it will cost. When selecting to buy an item, you can choose
what quantity of the item you want to buy.
• (4) Party List = This list shows the current four people in your battle
team. This would be the four people shown first on the Party Menu.
When a character’s name is greyed out, this means that the character
cannot equip that certain type of equipment. You can also see how
much of the current item you have in your inventory/equipped.
White Pearl Game Mechanics Manual & Full Credits
© Harry Gill
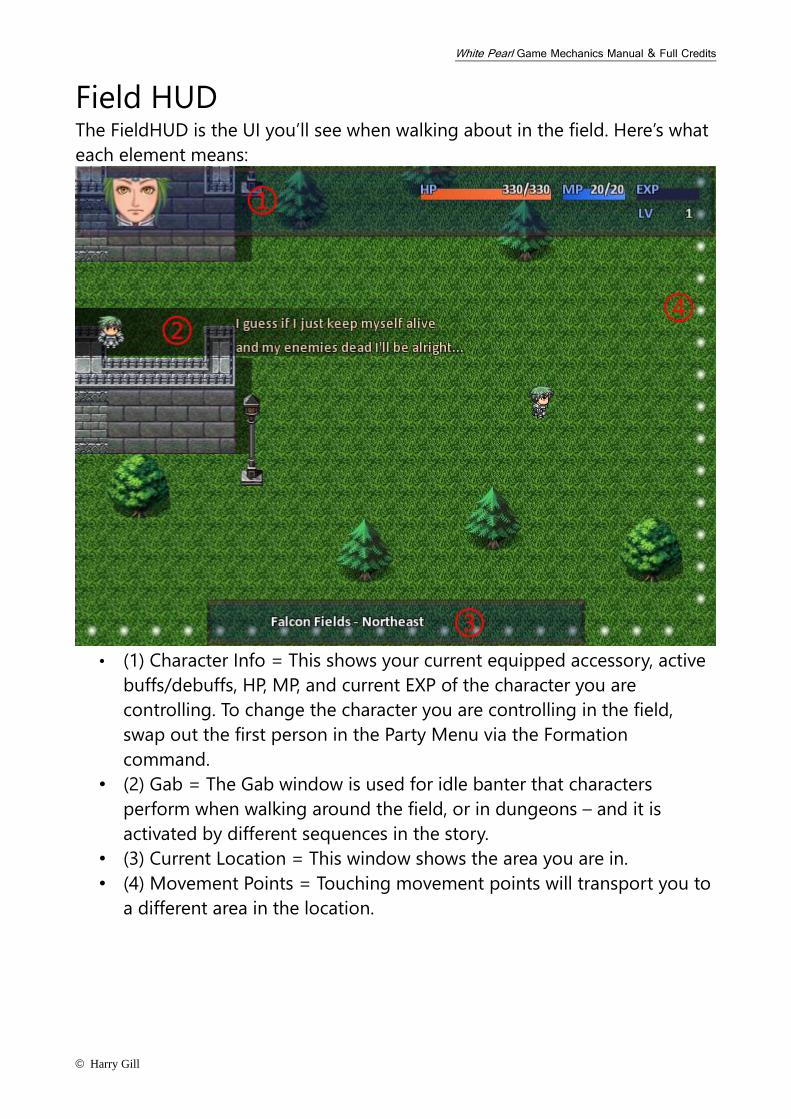
Field HUD The FieldHUD is the UI you’ll see when walking about in the field. Here’s what
each element means:
• (1) Character Info = This shows your current equipped accessory, active
buffs/debuffs, HP, MP, and current EXP of the character you are
controlling. To change the character you are controlling in the field,
swap out the first person in the Party Menu via the Formation
command.
• (2) Gab = The Gab window is used for idle banter that characters
perform when walking around the field, or in dungeons – and it is
activated by different sequences in the story.
• (3) Current Location = This window shows the area you are in.
• (4) Movement Points = Touching movement points will transport you to
a different area in the location.
White Pearl Game Mechanics Manual & Full Credits
© Harry Gill
Battle System Battles in White Pearl are turn-based.
Battles begin at Command Phase – when you issue all your allies a command.
Once are commands are set to allies at Command Phase, the battle transitions
into “Action Phase”, where the actions that you commanded your allies will
execute.
Encountering Enemies
White Pearl’s encounters largely depend on a random encounter system. However,
depending on the size of the area, the frequency of random encounters will be adjusted
accordingly. There are also some cases where random encounters are disabled in an area
(even for a limited time) and/or you encounter enemies by colliding with them on the field
instead. Whatever the case, be sure to get to grips with White Pearl’s battle system and
their characters by participating in battle encounters as often as possible.
When you have progressed a little more than halfway in the game’s scenario, a special
vendor will sell two separate items that can prevent random encounters and boost EXP
that characters gain from battle at a set percentage.
Drops
In addition to all enemies yielding gold and EXP upon defeat, most enemies drop an
aspect of a special material known as “Aura Essence”. This material in used to infuse
materials and create craftable gear – so please hold onto it until you unlock crafting a
few hours into the game. You will also get some drops which have “sell for money” on their
tooltip – do not worry, you can sell them if they are labelled as such; they have no use
elsewhere. The second most common drop from enemies is items and equipment – with
the latter being a more common drop from bosses in the scenario and side quests of the
game.
White Pearl Game Mechanics Manual & Full Credits
© Harry Gill
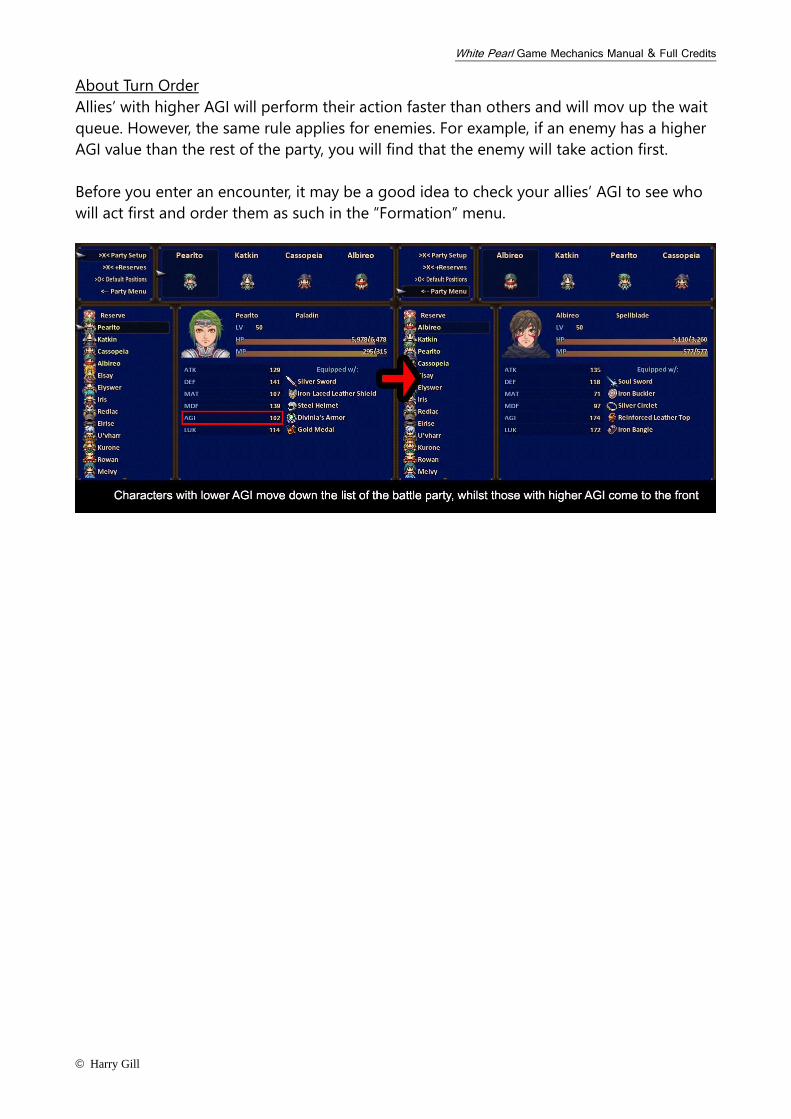
About Turn Order
Allies’ with higher AGI will perform their action faster than others and will mov up the wait
queue. However, the same rule applies for enemies. For example, if an enemy has a higher
AGI value than the rest of the party, you will find that the enemy will take action first.
Before you enter an encounter, it may be a good idea to check your allies’ AGI to see who
will act first and order them as such in the “Formation” menu.
White Pearl Game Mechanics Manual & Full Credits
© Harry Gill
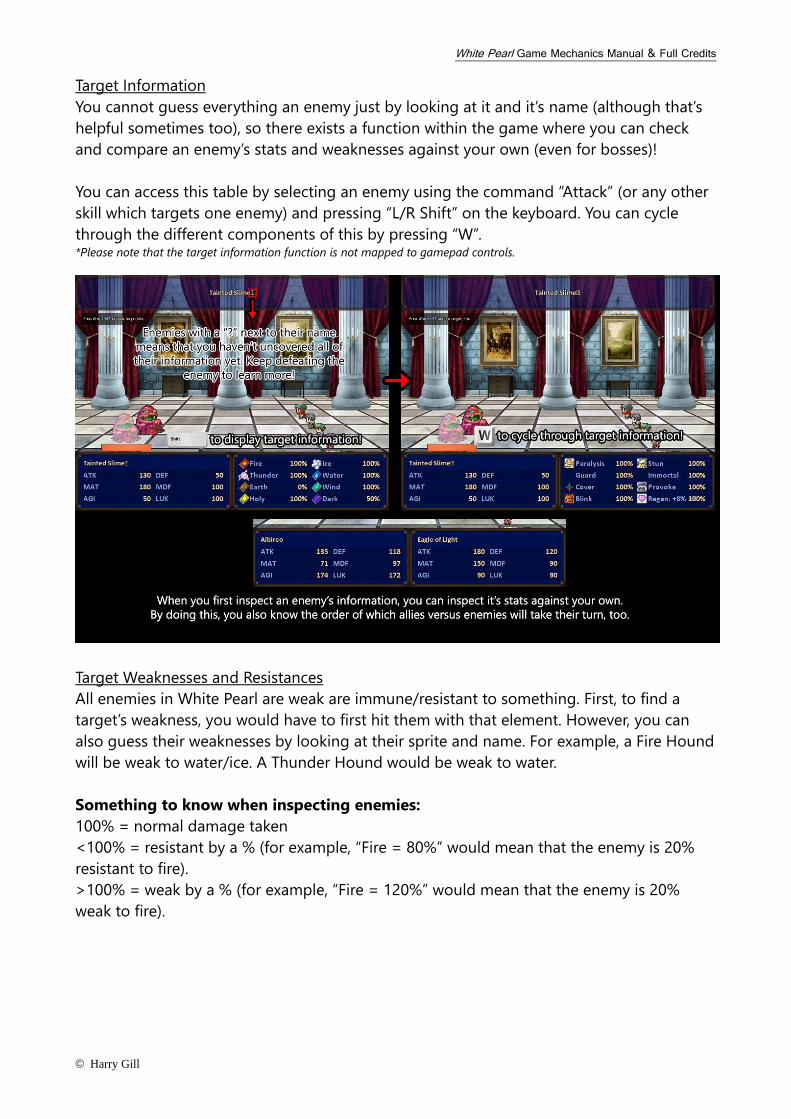
Target Information
You cannot guess everything an enemy just by looking at it and it’s name (although that’s
helpful sometimes too), so there exists a function within the game where you can check
and compare an enemy’s stats and weaknesses against your own (even for bosses)!
You can access this table by selecting an enemy using the command “Attack” (or any other
skill which targets one enemy) and pressing “L/R Shift” on the keyboard. You can cycle
through the different components of this by pressing “W”. *Please note that the target information function is not mapped to gamepad controls.
Target Weaknesses and Resistances
All enemies in White Pearl are weak are immune/resistant to something. First, to find a
target’s weakness, you would have to first hit them with that element. However, you can
also guess their weaknesses by looking at their sprite and name. For example, a Fire Hound
will be weak to water/ice. A Thunder Hound would be weak to water.
Something to know when inspecting enemies:
100% = normal damage taken
<100% = resistant by a % (for example, “Fire = 80%” would mean that the enemy is 20%
resistant to fire).
>100% = weak by a % (for example, “Fire = 120%” would mean that the enemy is 20%
weak to fire).
White Pearl Game Mechanics Manual & Full Credits
© Harry Gill
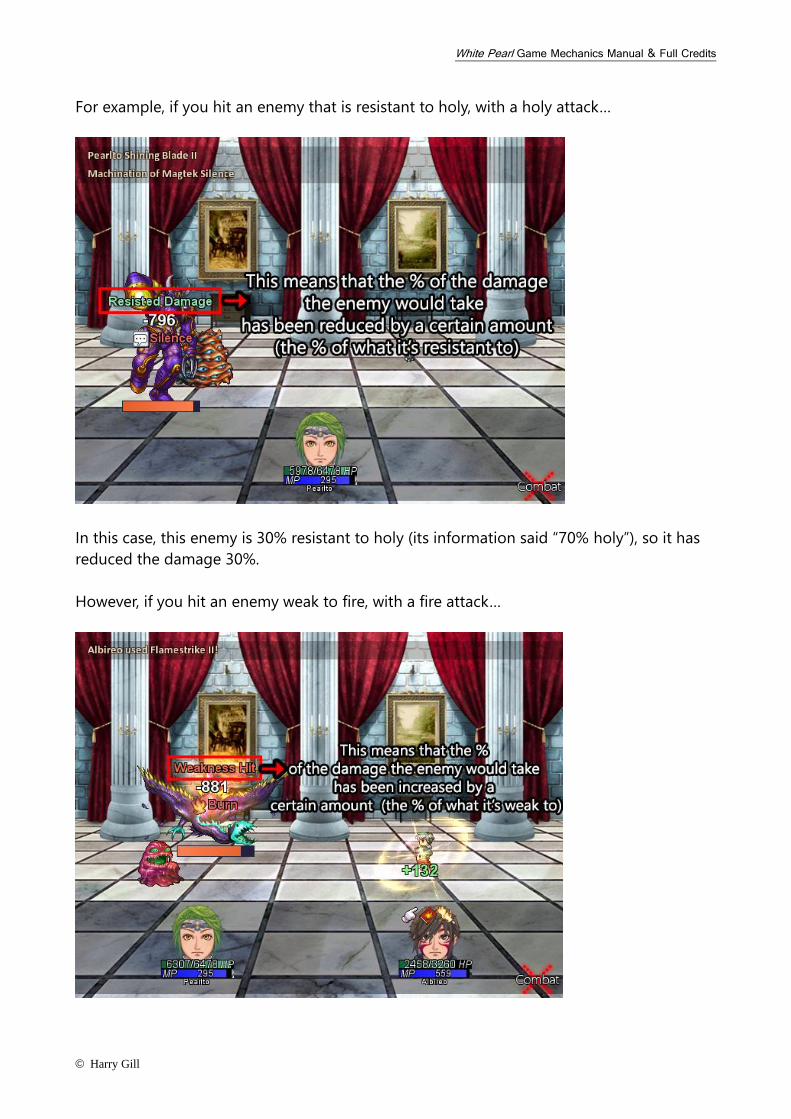
For example, if you hit an enemy that is resistant to holy, with a holy attack…
In this case, this enemy is 30% resistant to holy (its information said “70% holy”), so it has
reduced the damage 30%.
However, if you hit an enemy weak to fire, with a fire attack…

White Pearl Game Mechanics Manual & Full Credits
© Harry Gill
This enemy is weak to fire (its information said “150% fire”), so it has increased the damage
by 50%.
UI in Battle
Now let’s go through what all the different UI elements in battle mean.
• (1) Command List = When you first enter a battle, you will have to assign commands
to your party. There may be an instance where enemies ambush you (causing them
to use their turn first), but such cases are extremely rare. The position of the menu
corresponds to which character you’re assigning an action to.
• (2) Character Status = This is where you track your character’s HP and MP. When a
character is inflicted with a buff/debuff, this will be visible here.
• (3) Action Select = Either selecting “Skill” or any type of magic, will bring up the
skills that character has for that category.
• (4) Action Tooltip = To know what each action does, read the tooltip. Usually, actions
cost MP to use, but there be other costs instead: such as HP, or a cooldown. Actions
can be reviewed before a battle, and certain actions can even be executed outside
of battle, too. When this is the case, the action will have: “Can be used after battle”
on the tooltip. It is important to note that all offensive magic can deal critical
damage by default, and all offensive actions can deal critical damage by de-
fault – unless otherwise specified in the tooltip as: “Cannot deal critical dam-
age/cannot result in a critical hit”. There are some healing abilities that are labelled
with: “Can allow critical HP restore”. This is the same as critical strikes; the final value
is multiplied by 1.5. The chance of this happening is affected by the user's LUK stat.
o CH = Charge Time: This means that the action takes a set amount of turns to
charge before it is executed, the progress of which is shown in (5).
o CL = Cooldown: This means that the action, once executed, cannot be used
again for a set amount of turns.
o P = Potency: This value used in the method of calculating the action’s result;
it is a base damage number. Use Potency to measure the damage impact of a
skill.
White Pearl Game Mechanics Manual & Full Credits
© Harry Gill
• (5) Action Record = This text at the top of the battle screen shows what is
happening in battle. Because it proceeds very quickly, the player can use a special
feature known as the “Combat Log” in battle – which is explained later in this
manual.
• (6) State Changes = When an ally/enemy receives a buff/debuff, it was be visually
explained in battle. Numbers that are green means HP has been restored. Numbers
that are white means it is damage taken to HP. Numbers that are glowing and
rainbow coloured, means that it is a critical strike.
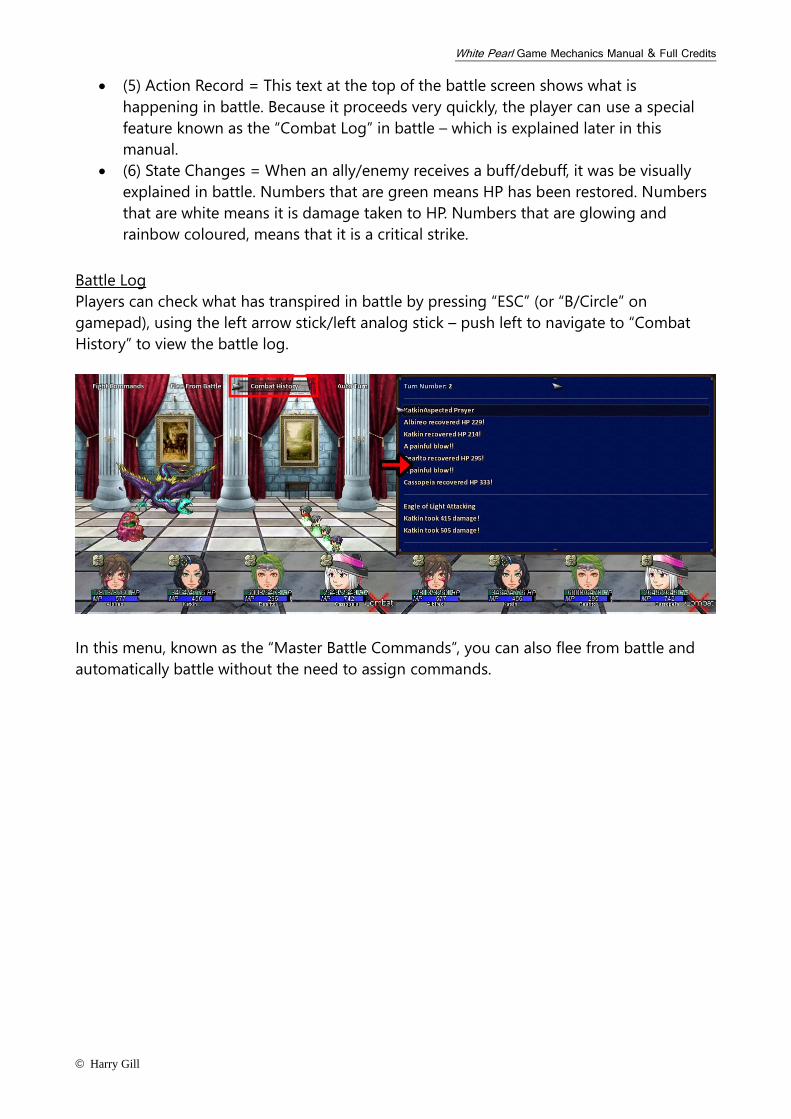
Battle Log
Players can check what has transpired in battle by pressing “ESC” (or “B/Circle” on
gamepad), using the left arrow stick/left analog stick – push left to navigate to “Combat
History” to view the battle log.
In this menu, known as the “Master Battle Commands”, you can also flee from battle and
automatically battle without the need to assign commands.
White Pearl Game Mechanics Manual & Full Credits
© Harry Gill
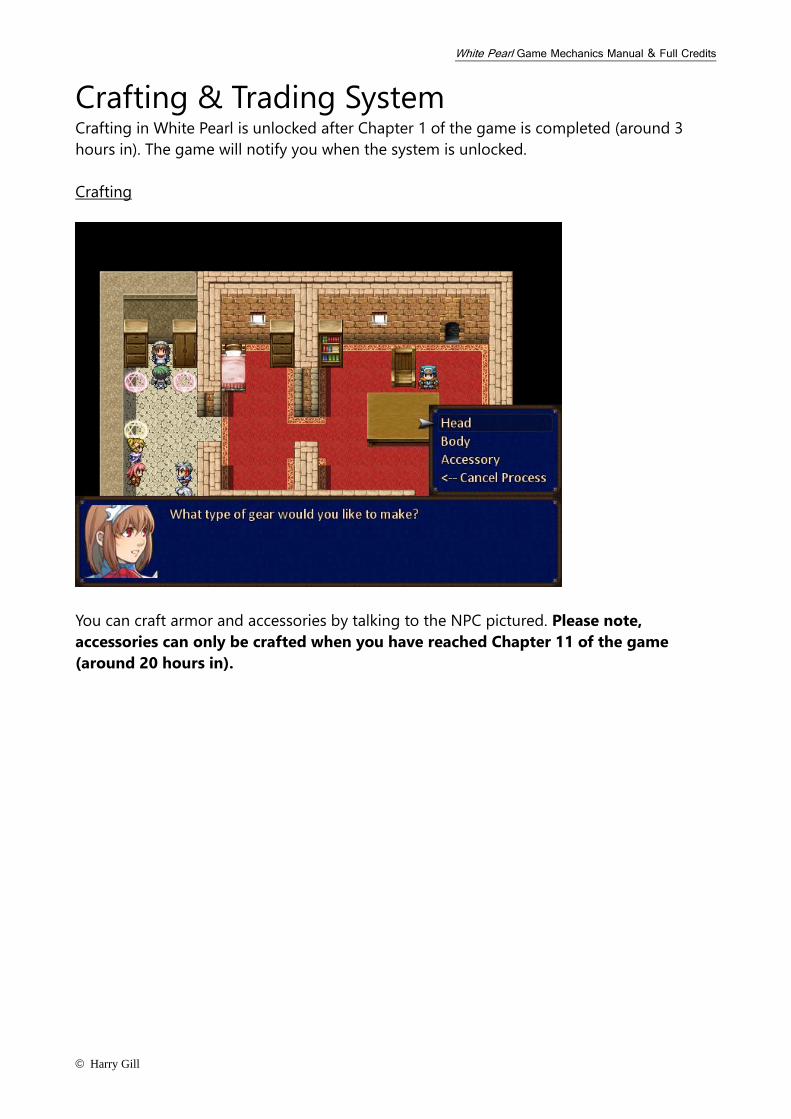
Crafting & Trading System Crafting in White Pearl is unlocked after Chapter 1 of the game is completed (around 3
hours in). The game will notify you when the system is unlocked.
Crafting
You can craft armor and accessories by talking to the NPC pictured. Please note,
accessories can only be crafted when you have reached Chapter 11 of the game
(around 20 hours in).
White Pearl Game Mechanics Manual & Full Credits
© Harry Gill
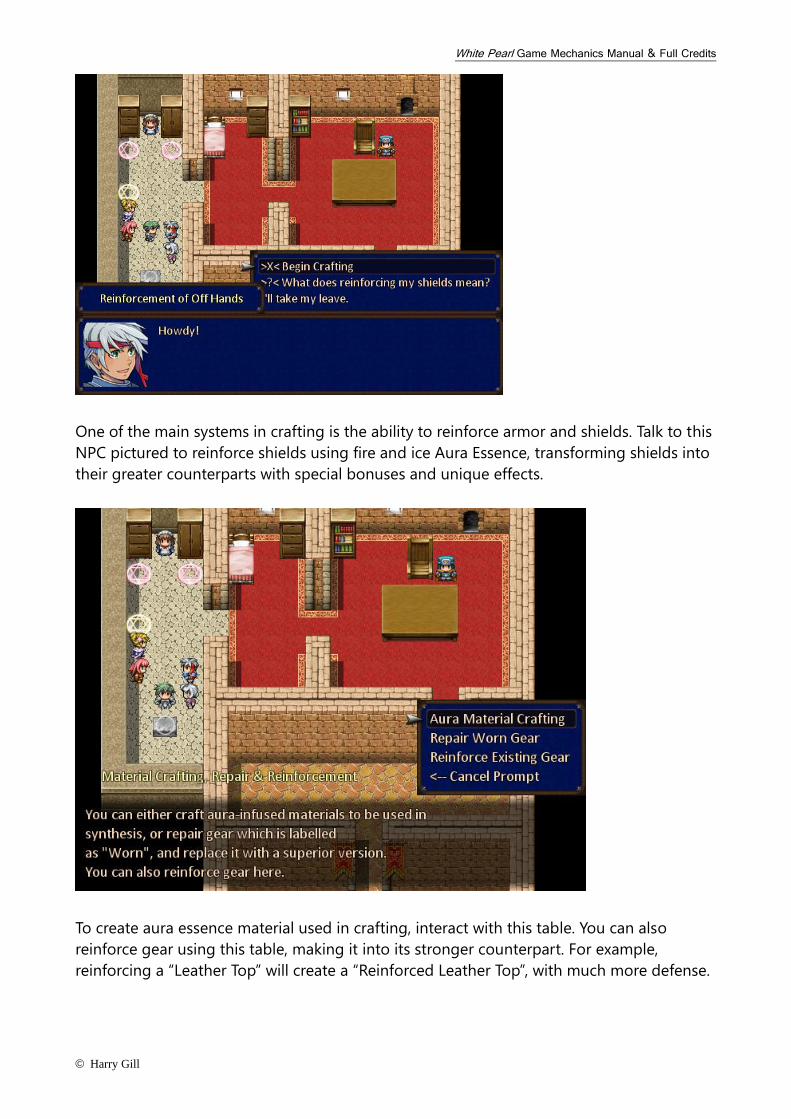
One of the main systems in crafting is the ability to reinforce armor and shields. Talk to this
NPC pictured to reinforce shields using fire and ice Aura Essence, transforming shields into
their greater counterparts with special bonuses and unique effects.
To create aura essence material used in crafting, interact with this table. You can also
reinforce gear using this table, making it into its stronger counterpart. For example,
reinforcing a “Leather Top” will create a “Reinforced Leather Top”, with much more defense.
White Pearl Game Mechanics Manual & Full Credits
© Harry Gill
To do all this: leather, cloth and aura essence is required; all obtained from enemies and
bosses that you fight in the game.
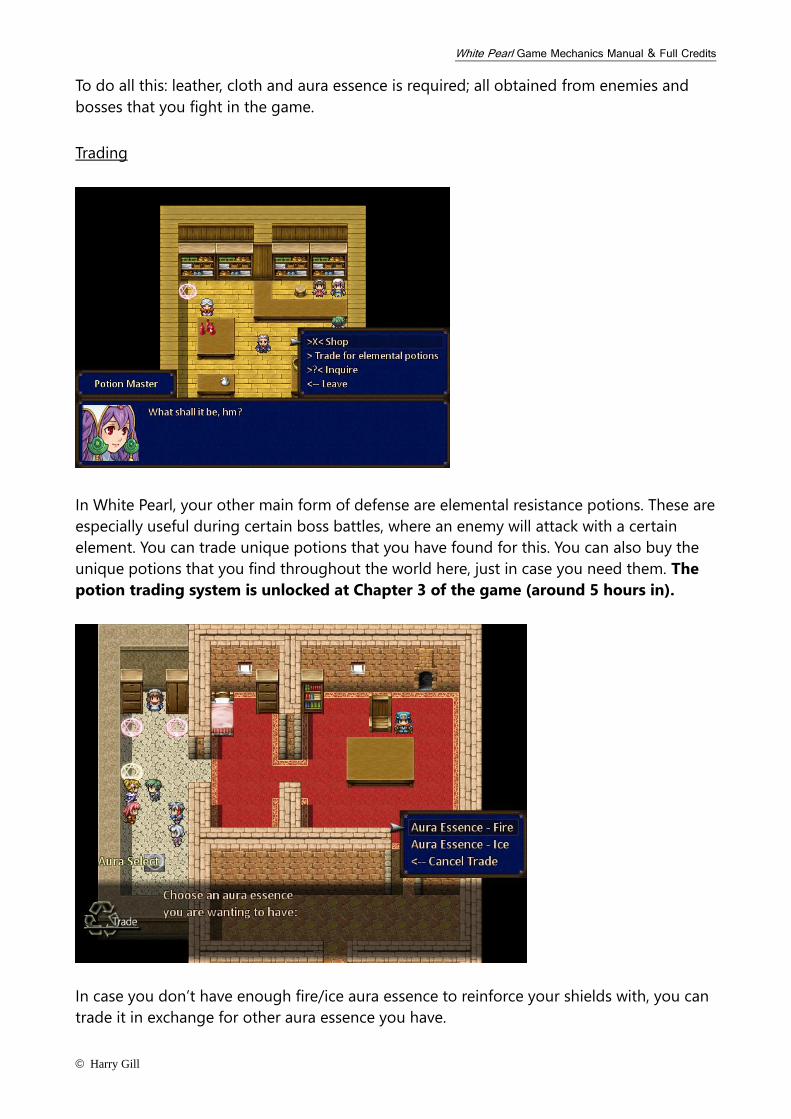
Trading
In White Pearl, your other main form of defense are elemental resistance potions. These are
especially useful during certain boss battles, where an enemy will attack with a certain
element. You can trade unique potions that you have found for this. You can also buy the
unique potions that you find throughout the world here, just in case you need them. The
potion trading system is unlocked at Chapter 3 of the game (around 5 hours in).
In case you don’t have enough fire/ice aura essence to reinforce your shields with, you can
trade it in exchange for other aura essence you have.
White Pearl Game Mechanics Manual & Full Credits
© Harry Gill
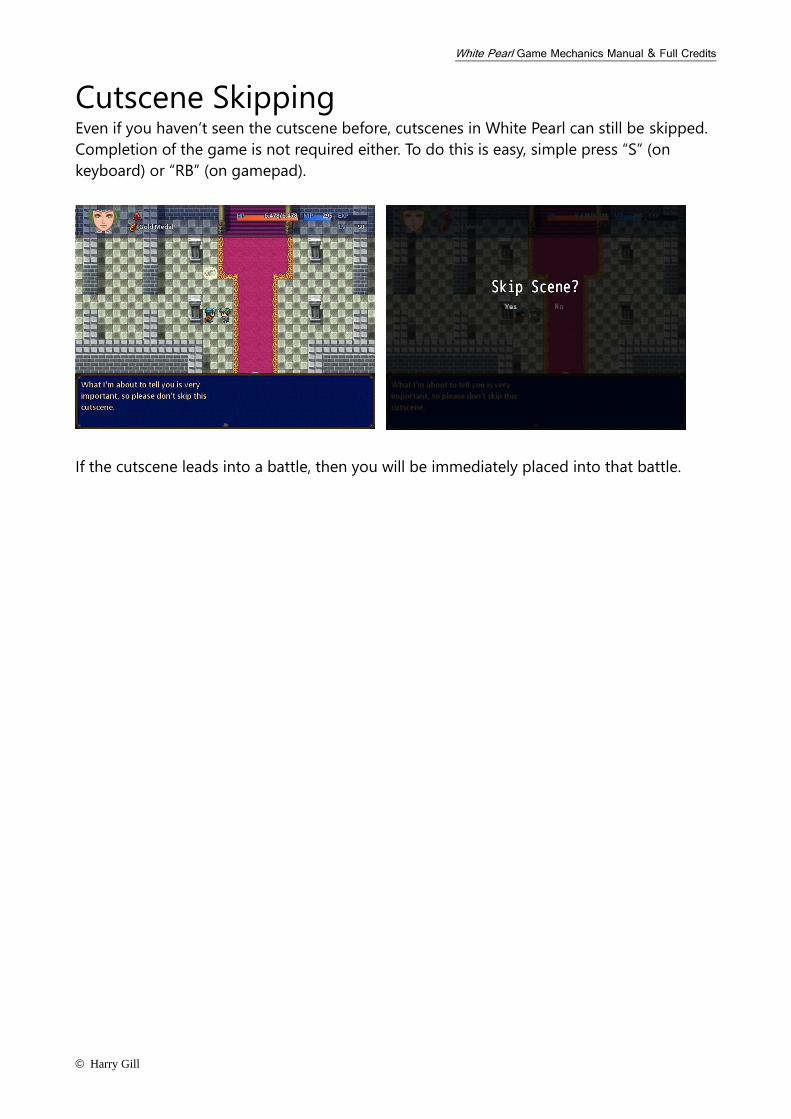
Cutscene Skipping Even if you haven’t seen the cutscene before, cutscenes in White Pearl can still be skipped.
Completion of the game is not required either. To do this is easy, simple press “S” (on
keyboard) or “RB” (on gamepad).
If the cutscene leads into a battle, then you will be immediately placed into that battle.

White Pearl Game Mechanics Manual & Full Credits
© Harry Gill
Character Progression Characters in White Pearl progress on a linear scale – even guest characters – all gain a set
amount of boost in their stats each level. Characters accumulate exp at the end of every
battle. Please note, that members who are not in battle gain 70% of the total exp
earned from battle. In their character overview, you can see what number of stats a
character excels in compared to others. Characters also gain new abilities at a certain level,
although some abilities between characters are shared. Each main character of White Pearl
has a unique playstyle in battle, so please try everyone out.
As you progress through the story, characters main gain unique abilities too.
Here you can see at the end of battle: characters gain exp, you can review new abilities and
stats learnt/gained, then review your drops (all of them are automatically placed in your
inventory).
White Pearl Game Mechanics Manual & Full Credits
© Harry Gill
White Pearl Game Mechanics Manual & Full Credits
© Harry Gill
Equipment Guide Many characters in White Pearl equip different types of equipment. Here’s
what they can equip:
===WHO USES WHAT? (WEAPON)===
Staffs are one handed magical weapons.
Staves are two handed magical weapons.
U'vharr: Axe
Elrise: Fisticuffs
Pearlto: Sword
Alberio: Sword, Dagger
Elyswer: Bow
Iris: Dagger
Elsay: Staff, Club
Cass: Staff, Stave
Kurone: Staff, Stave
Katkin: Spear
Redlac: Staff, Stave*
*Redlac can also conjure swords during battle. The stat of the conjured
weapon is shown in the tooltip.
Everybody can equip their own type of special armor. In-game, this is shown
in the item's tooltip.
For example, for armor that is only equippable by U'vharr; this would be
shown on the
tooltip as: >U'vharr Only.
This also applies to accessories.
General Armor = Made using leather. Gives a balance of DEF and MDEF and
some AGI/LUK.
Heavy Armor = Made using ingots. Gives lots of DEF (sometimes MDEF), at
the cost of some AGI/LUK.
Light Armor = Made using cloth. Gives small DEF and MDEF, and focuses
more on AGI/LUK and additional effects.
White Pearl Game Mechanics Manual & Full Credits
© Harry Gill
Magic Armor = Made using cloth and aura. Gives small, if any, DEF, and
focuses more on MAT and augmenting certain magic.
Join the community of White Pearl on Steam!
http://steamcommunity.com/app/761280/
Thank you for taking an interest and supporting my creation!